


Daewoo 21U1T, KR14V4, KR2131NT, KR20D3TS, KR15U5T User Manual [nl]
...INSTRUCTION MANUAL
COLOR TELEVISION
MODEL NO.
14D4M/20D4M/ 21D4M/14P2M |
KR14E5 / KR20E5 / KR21E5 |
20P2M/21P2M/14Q2M/20Q2M |
KR14E5M / KR20E5M / KR21E5M |
21Q2M/14S2M/20S2M/21S2M |
KR14U1T / KR20U1T / KR21U1T |
14T2M/20T2M/21T2M/14U1M |
KR14U2T / KR20U2T / KR21U2T |
20U1M/21U1M/14V1M/20V1M |
KR14U3T / KR20U3T / KR21U3T |
21V1M/14K8MT/20K8MT/21K8MT |
KR14V1T / KR20V1T / KR21V1T |
14V4M/20V4M/21V4M/14V4T |
KR14V4T / KR20V4T / KR21V4T |
20V4T/21V4T/14U1T/20U1T/21U1T |
KR14V4 / KR20V4 / KR21V4 |
14V1T/20V1T/21V1T/14D4T |
KR14D7T / KR20D7T / KR21D7T |
20D4T/21D4T/14D3T/20D3T |
KR14D7 / KR20D7 / KR21D7 |
21D3T/14D7T/20D7T/21D7T |
KR14U1TS/KR20U1TS/KR21U1TS |
14E5M/20E5M/21E5M/14S2T |
KR14V1TS/KR20V1TS/KR21V1TS |
20S2T/21S2T/21U3MTS/20T1TS |
KR14V4TS/KR20V4TS/KR21V4TS |
20T1ZS/20Q1TS/21T5TS/21U3T |
KR14V5TB/KR14V5TS/KR14V5TW |
2131N/2132N/2134N/2130N |
KR21FL6M/KR2131FL/KR2132FL |
21FL6N/2131NT/2132NT/2134NT |
KR2134FL/KR2132NT/KR2134NT |
2130NT/21FL6NT/14D7N/20D7N |
KR2130N/KR2131N/KR2132N |
21D7N/14K8M/20K8M/21K8M |
KR2134N/KR2130NT/KR2131NT |
14S2/20S2/21S2/14D4/20D4 |
KR21FL6N/KR15U7FL/KR15U7T |
21D4/14V5TB/14V5TS/14V5TW |
KR15U5FL/KR15U5T/KR14V5T |
14Q1N/20Q1N/21Q1N |
KR20V5T/KR21V5T/KR14D4TS |
|
KR14D3TS/KR20D3TS/KR21D3TS |
|
KR14D4TS/KR20D4TS/KR21D4TS |
|
KR14D4Z/KR20D4Z/KR21D4Z |
|
KR1420Z/KR2020Z/KR2120Z |
|
KR21FL6/KR15A1FL/KR15U7FL |
|
KR15U5FL-2T/KR15U7FL-2T |
Contents
Important safeguards |
1 |
Before Operation |
2 |
Connecting external equipment |
3 |
Identification of Controls |
5 |
Daily use |
6 |
Menus |
8 |
Teletext (Option) |
14 |
The othello game |
16 |
Specifications |
18 |
Troubleshooting |
19 |
This information is placed by The law of RF on Protechion of the Consumer Rights and the Governmental Resolution of RF No.720.
The working life of this set is 7 years since its production date. After the working life, this set may be not work properly and cause damage to the life of the customer or his property.
Important safeguards
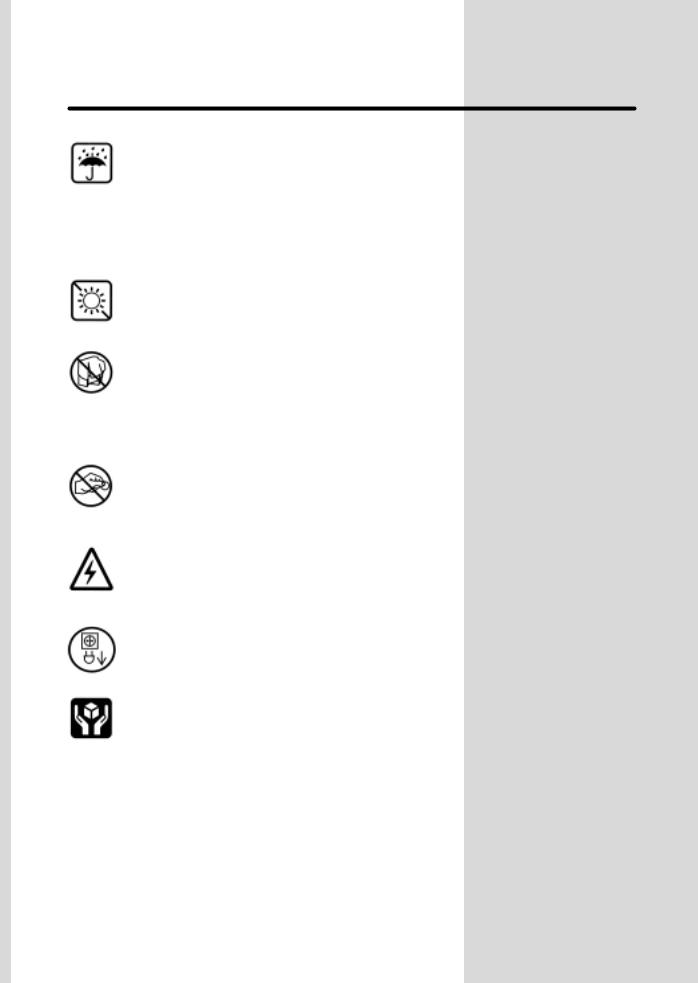
WATER AND MOISTURE
Never install the set in the following places : In a wet basement, bathroom. Do not place any container with liquid on the set.
The apparatus shall not be exposed to dripping or splashing water and that no objects filled with liquids, such as vases, shall be placed on the apparatus.
HEAT
Never place the set near heat sources.
VENTILATION
Do not cover the ventilation openings in the cabinet and never place the set in a confined space such as a bookcase or built-in unless proper ventilation is provided. Leave a minimum 10cm gap all around the unit.
OBJECT ENTRY
Do not insert foreign objects, such as needles and coins, in the ventilation openings.
LIGHTNING STRIKING
You should disconnect the set from the mains and the aerial system during thunderstorms.
CLEANING
Unplug the set from the mains during cleaning.
AFTER MOVING THE SET
If the set is moved in a different direction, the MAIN POWER button must be switched off for at least 15 minutes in order to take out a colour strain on the screen.
1
Before Operation
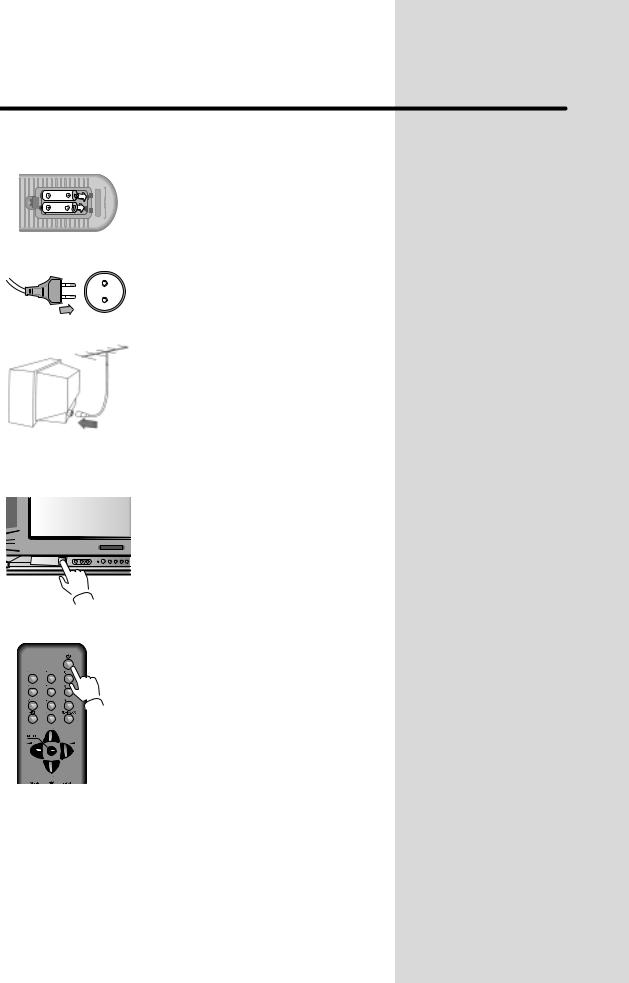
Battery options
INSERTING BATTERIES INTO THE REMOTE CONTROL UNIT.(OPTION)
Insert the batteries (two 1.5V, type AAA)
MAINS CONNECTION
Plug the mains cable into the power socket with 110V-250V, 50/60Hz AC.
AERIAL CONNECTION
When using an outdoor aerial, it is usually connected to the set by means of 75 ohm.
SWITCHING ON AND OFF
on with the MAIN POWER button(ON/OFF), and then PR UP front of the set.
 or the PR UP button or one of the NUMBER buttons on the remote control.
Switching off
Press  button, on the remote control to return the set to its stand by mode.
If you don't use the set for an extended period of time, turn it off with MAIN POWER button on the set.
2
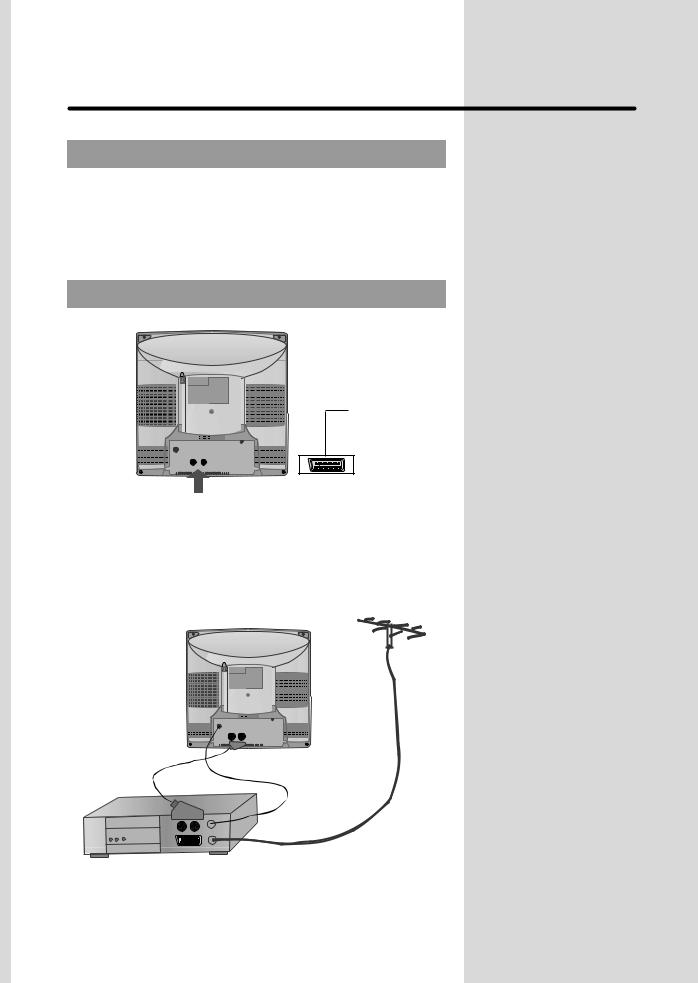
Connecting external equipment
TV AND AV
Use the TV/AV(
 ) button on the remote control or on the front of the set to select one of the three options. Whenever the TV/AV (
 ) button is pressed, the on-screen display will be changed as shown: AV( S-VHS is Russia only )
  GAME
GAME  TV
TV
If you push the PR UP/DOWN buttons in AV mode, the on-screen display will be changed TV mode.
RCA JACK AV (BACK)
SCART (OPTION)
This is used to connect a VCR, a Camcorder, a S-VHS VCR, a PERI-TV decoder or a video game console.
In most cases, the set changes automatically to AV when the VCR connected is in display mode. If not, press the TV/AV(
 ) button on the remote control unit or on the front of the set.
You must turn the external equipment off or press the TV/AV button to return to the TV mode.
3

RCA JACK AV (FRONT)
Connect the AV (Audio/Video) socket with an appropriate cable to the corresponding socket of the external equipment. Select AV mode by
pressing the TV/AV( 
 ) button.
Press the TV/AV( 
 ) or PR UP/DOWN buttons to return to the TV mode.
NOTE: If two apparatus are connected, one to the front AV Jack and the other to the rear SCART Jack, you can play only one apparatus.
one of the them must be switched off.
OR |
VIDEO GAME |
|
CAMCORDER
HEADPHONE JACK
Insert the headphone plug(3,5mm) into the headphone socket.
The sound from the speaker will be cut off.
LOCAL CONTROL
Front
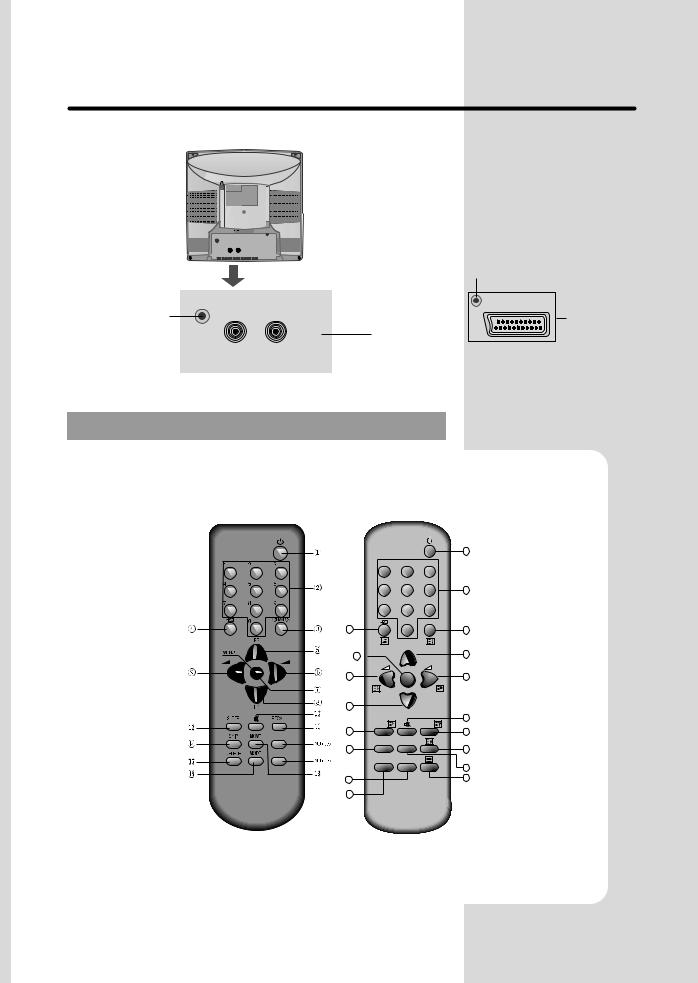
Identification of Controls
Back
|
Aerial terminal |
VIDEO |
AUDIO |
Aerial Terminal |
SCART (OPTION) |
|
RCA Jack |
REMOTE CONTROL
TV mode
POWER |
|
|
NUMBER 0-9 |
|
|
NORMAL/OK |
|
|
AV |
|
|
PR (CURSOR) UP |
|
|
VOLUME UP |
4 |
|
(CURSOR RIGHT) |
7 |
|
MENU |
||
9 |
||
PR (CURSOR) DOWN |
||
|
||
VOLUME DOWN |
8 |
|
(CURSOR LEFT) |
12 |
|
MUTE |
||
15 |
||
RECALL |
||
|
||
SLEEP |
18 |
|
MOVE |
17 |
SKIP
DELETE
Not used
1
1 |
2 |
3 |
4 |
5 |
6 |
|
|
2 |
7 |
8 |
9 |
|
0 |
NORMAL/OK |
|
|
3 |
|
PR |
|
MENU |
|
5 |
|
|
6 |
|
PR |
10 |
|
|
|
SLEEP |
|
RECALL |
|
|
11 |
SKIP |
MOVE |
|
|
|
13 |
DELETE |
MODE |
|
14
16
TELETEXT mode (Option)
ON/OFF
NUMBER 0-9
INDEX
MIX
PAGE UP
SUBPAGE
MENU
PAGE DOWN
HOLD
MUTE
REVEAL
SIZE
CANCEL
Green Key
Red Key
TV/TEXT
Yellow Key
Cyan Key

DAILY USE
PROGRAMME SELECTION
Direct selection
Use remote control NUMBER 0…9 buttons.
For two or three digits programme numbers, press the button for the next digit within 2.5 seconds.
Up/Down moves
Use PR UP/DOWN buttons of the remote control unit or on the front of the set.
SOUND CONTROL
Volume adjustment
Use VOLUME UP/DOWN buttons of the remote control unit or on the front of the set.
Mute
Get sound off by pressing the remote control
MUTE (  ) button. Then, logo (
  ) is displayed.
Sound returns by pressing the same button again.
PICTURE CONTROL
You can choose between three picture settings, using repeatedly remote control NORMAL/OK button :
Normal I (standard hard picture) Normal II (standard soft picture)
Favourite (you can adjust picture setting as you want, using Picture menu).
For other adjustments : Brightness, contrast, colour, sharpness, see Picture menu. (page 9)
6
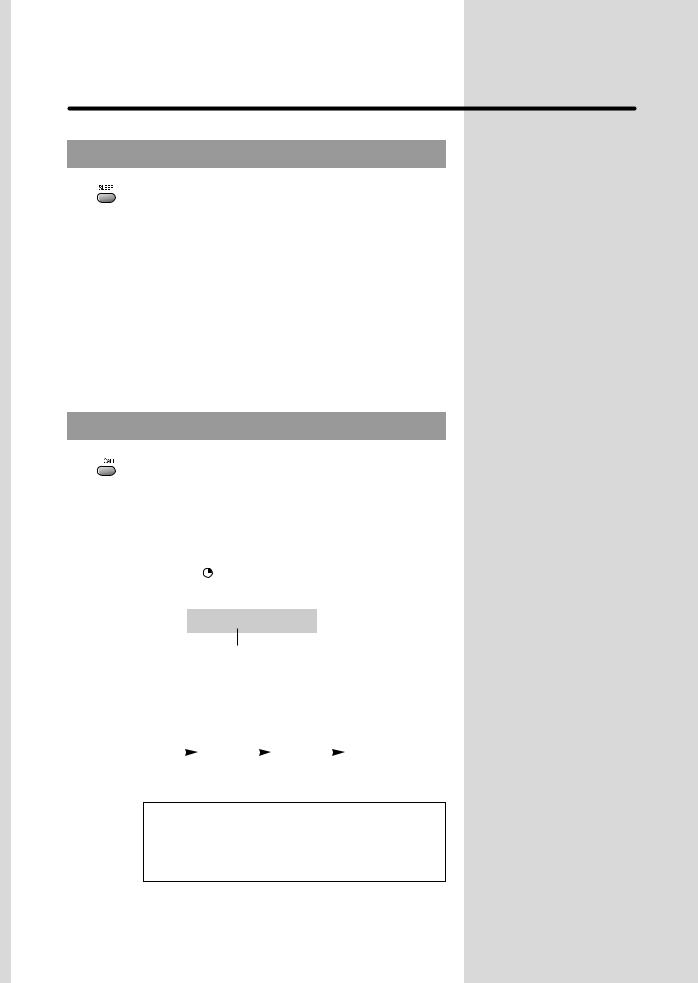
SLEEP FUNCTION
Pressing repetitively the remote control SLEEP button, you can enter one of the following settings :
OFF > 30 min > 60 min > 90 min > 120 min > OFF The set will be turned off after the time you set.
The remaining time before TV turn-off is displayed on programme status.
PROGRAMME STATUS DISPLAY
Accessed by the Remote Control RECALL button.
Programme number |
|
|
|
|
||
|
|
|
|
|
|
|
|
|
|
|
|
|
|
|
---199 |
BBC1 |
|
|
Channel name |
|
|
|
|
||||
|
11 : 11 |
|
|
|
Clock |
|
|
|
|
|
|||
|
|
|
|
|
|
|
SLEEP 60
Remaining time (minutes) before
TV set turns off only when sleep function is activated.
Pressing repetitively the RECALL button, you can change channel digit as follow.
- |
|
-- |
|
--- |
|
- |
|
|
|
*NOTE
Language selection
Child lock, Clock setting and wake time setting are available in features menu.
7
 Loading...