


INSTRUCTION BOOKLET
Coffee On Demand™ 12-Cup Programmable Coffeemaker DCC-3000
For your safety and continued enjoyment of this product, always read the instruction book carefully before using.

IMPORTANT SAFEGUARDS
When using electrical appliances, basic safety precautions should always be followed to reduce the risk of fire, electric shock and/or injury to persons, including the following:
1.READ ALL INSTRUCTIONS.
2.Always unplug from outlet when not in use and before cleaning. Allow to cool before putting on or taking off parts and before cleaning the appliance.
3.Do not touch hot surfaces. Use handles and knobs.
4.To protect against electric shock, do not place cord, plug, or base unit in water or other liquids.
5.This appliance should not be used by children or individuals with certain disabilities.
6.Do not operate any appliance with a damaged cord or plug or after the appliance malfunctions or has been dropped or damaged in any manner. Return appliance to the nearest Cuisinart Repair Center for examination, repair,
or electrical or mechanical adjustment.
7.The use of accessory attachments not recommended by Cuisinart may cause injuries.
8.Do not use outdoors.
9.Do not let cord hang over edge of table or counter, or touch hot surfaces.
10. Do not place on or near a hot gas or electric burner, or in a heated oven.
11. Always fill water reservoir first, then plug cord into the wall outlet. To disconnect, turn controls to OFF, then remove plug from wall outlet.
12. Do not use appliance for other than intended use.
13. Do not clean drip tray with cleansers, steel wool pads, or other abrasive
materials.
14. WARNING: TO REDUCE THE RISK OF FIRE OR ELECTRIC SHOCK, DO NOT REMOVE THE BASE PANEL. NO USERSERVICEABLE PARTS ARE INSIDE. REPAIR SHOULD BE DONE ONLY BY AUTHORIZED PERSONNEL.
15. Scalding may occur if the lid is removed during the brewing cycle.
16. Avoid contact with moving parts.
17. Do not operate your appliance in an appliance garage or under a wall cabinet.
When storing in an appliance garage, always unplug the unit from the electrical outlet. Not doing so could create a risk of fire, especially if the appliance touches the walls of the garage or the door touches the unit as it closes.
SAVE THESE
INSTRUCTIONS
FOR HOUSEHOLD
USE ONLY
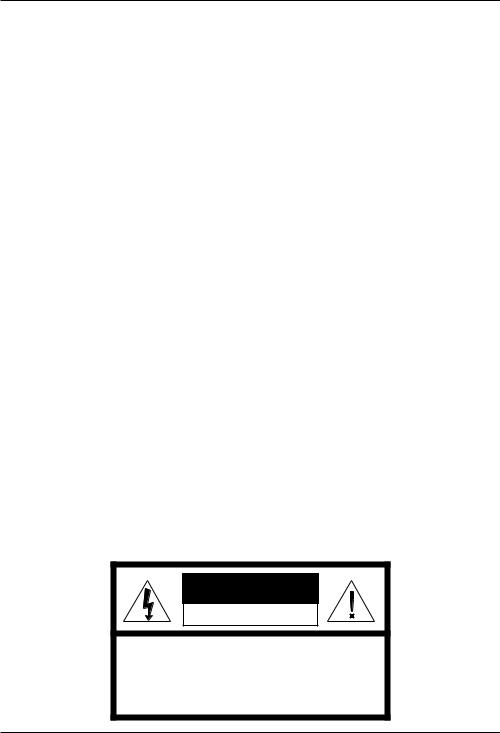
WARNING: RISK OF FIRE OR ELECTRIC SHOCK
The lightning flash with arrowhead symbol within an equilateral triangle is intended to alert the user to the presence of uninsulated dangerous voltage within the product’s enclosure that may be of sufficient magnitude to constitute a risk of fire or electric shock to persons.
The exclamation point within an equilateral triangle is intended to alert the user to the presence of important operating and maintenance (servicing) instructions in the literature accompanying the appliance.
2
SPECIAL CORD SET INSTRUCTIONS
A short power-supply cord is provided to reduce the risks resulting from becoming entangled in or tripping over a longer cord.
Extension cords may be used if care is exercised in their use.
If an extension cord is used, the marked electrical rating of the extension cord must be at least as great as the electrical rating of the appliance, and the longer cord should be arranged so that it will not drape over the countertop or tabletop where it can be pulled on by children or tripped over.
NOTICE
This appliance has a polarized plug (one blade is wider than the other). To reduce the risk of electric shock, this plug will fit in a polarized outlet only one way. If the plug does not fit fully in the outlet, reverse the plug. If it still does not fit, contact a qualified electrician.
Do not modify the plug in any way.
OPERATING NOTICE
Clogging and backing up of water and/or coffee in the filter basket can occur under any or a combination of any of the following
conditions: The use of too finely ground coffee, using two or more paper filters, using the goldtone filter in conjunction with a paper filter or not properly cleaning coffee grounds from the gold-tone filter, or allowing coffee grounds to spill over the filter.
Caution: Never open the top cover during the brewing cycle, even if no water is draining from the filter basket, since extremely hot water/coffee can spill out from the filter basket and cause injury. If water/coffee is not draining from the filter basket during the brewing cycle, unplug the unit and wait 10 minutes before opening the top cover and checking the filter basket.
IMPORTANT UNPACKING INSTRUCTIONS
1.Place the box on a large, sturdy, flat surface.
2.Remove the instruction book and any other literature.
3.Turn the box so that the back side of the coffeemaker is down and slide the coffeemaker from the box.
4.After the coffeemaker has been removed, place the box out of the way and take the packing material away.
5.Remove the polybag covering the coffeemaker.
We suggest you save all packing materials in the event that future shipping of the machine is needed. Keep all plastic bags away from children.
CONTENTS |
|
Important Safeguards . . . . . . . . . . . . . . . . . . . . . |
. 2 |
Unpacking Instructions . . . . . . . . . . . . . . . . . . . . |
. 3 |
Features and Benefits . . . . . . . . . . . . . . . . . . . . |
4-5 |
Control Panel . . . . . . . . . . . . . . . . . . . . . . . . . . . . . 6 The Quest for the Perfect Cup of Coffee. . . . . . . . . 7 Setting Up Your Coffeemaker . . . . . . . . . . . . . . . . . 7 The Charcoal Water Filter. . . . . . . . . . . . . . . . . . . . 7 Programming Your Coffeemaker . . . . . . . . . . . . . . 8 Making Coffee . . . . . . . . . . . . . . . . . . . . . . . . . . . . 8 Cleaning and Maintenance . . . . . . . . . . . . . . . . . . 9 Warranty . . . . . . . . . . . . . . . . . . . . . . . . . . . . . . . 10
WARNING |
RISK OF FIRE OR ELECTRIC SHOCK |
DO NOT OPEN |
WARNING: TO REDUCE THE RISK OF FIRE OR ELECTRIC SHOCK, |
DO NOT REMOVE COVER (OR BACK) |
NO USER-SERVICEABLE PARTS INSIDE |
REPAIR SHOULD BE DONE BY AUTHORIZED SERVICE PERSONNEL ONLY |
3 |

FEATURES
AND BENEFITS
1.Water Reservoir Lid
2.Removable Water Reservoir
Detaches from unit for easy filling.
3.Drip Tray Grate
Holds cup in place.
4.Drip Tray
Removable tray to catch any excess coffee that does not dispense into mug and residual condensation from the brewing process.
5.Gold-Tone Cuisinart Commercial-Style Filter
6.Filter Basket
Holds our commercial-style permanent filter or a paper filter. NOTE: FILTER BASKET HOLDER MUST BE IN PLACE FOR UNIT TO OPERATE CORRECTLY. Removable for easy cleaning.
7.Coffee Reservoir
Removable double-wall reservoir keeps up to 12 cups of coffee hot for hours.
8.Charcoal Water Filter Holder
8A. Charcoal Water Filter
Charcoal water filter eliminates chlorine, bad tastes and odors from tap water.
9.Coffee Scoop
10.Coffee Gauge™
See detailed drawing, page 5. Displays amount of brewed coffee remaining in reservoir.
11.Clock Display
Displays time of day and set time for automatic functions.
12.Hour and Minute Buttons
Used to set time of day and set time for automatic functions.
13.Function Knob
Used to initiate programming of automatic functions
– Auto On, Auto Off, Program, Clock, and Brew.
14.Clean Setting
Tells you when it's time to clean your coffeemaker. Remove built-up calcification from the water reservoir to help extend the life of your coffeemaker.
15.1–4 Cup Setting
Improves extraction, flavor and temperature when brewing fewer than 5 cups.
16.ON/OFF Button
Used to turn your coffeemaker on and off and set your delayed brew.
17.Dispenser Lever
For dispensing coffee into mug or travel cup.
18.Showerhead (not shown)
Distributes water evenly over coffee, reducing temperature loss as water passes through grounds.
19.Dispenser Light (not shown)
Light comes on when dispensing lever is pressed and coffee pours into cup.
20.Power Loss Back-up System (not shown)
One-minute protection against losing your programmed settings in case power fails, breaker trips or unit is unplugged.
21.Ready Tone (not shown)
Signals the end of the brew cycle with five beeps.
22.BPA Free (not shown)
All materials that come in contact with liquid are BPA free.
1
2
3
4
4

5
6
7 |
10 |
11 |
|
|
|
|
|
12 |
|
13 |
14 |
15 |
16 |
|
17
8
18 19
8A
9
5
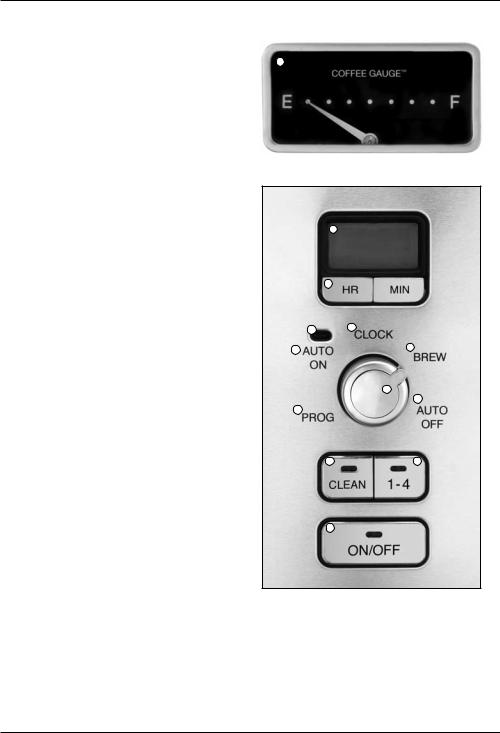
CONTROL PANEL
1.Coffee Gauge™
Displays amount of brewed coffee remaining in unit.
2.Clock Display
Displays time of day and Auto On and Off times.
3.Hour and Minute Buttons
For use in setting hour and minute for time of day, Auto On time, and Auto Off time.
4.Function Knob
a.Auto On
The Auto On setting programs the coffeemaker to turn on at the time selected, up to 24 hours in advance. See “Program” below for instructions on setting time.
b.Auto Off
The Auto Off setting lets you program coffeemaker to shut off 0 to 4 hours after brew cycle ends. Holds selected time until you change it.
c.Program
The Program function is used to set the Auto On time. Select brew start time with hour and minute buttons – LCD displays “PM” for afternoon and nighttime brew starts. Holds selected time until you change it.
d.Brew
The Brew function is used to start the brew cycle directly.
e.Clock
Used to program the time of day.
5.Audible Tone (not shown)
An audible tone sounds 5 times when the coffee has completed brewing.
6.Auto On Indicator Light
7.Clean Setting
Indicates time to clean coffeemaker to remove calcium buildup.
8.1–4 Cup Setting
Improves extraction, flavor and temperature when brewing fewer than 5 cups.
9.ON/OFF Button
Used to turn your coffeemaker on and off. Unit must be on to program functions.
1
2
3
6 4e
4a |
4d |
|
4
4b
4c
7 |
8 |
9
6
 Loading...