


cumplimientodelanorma,puedenanularlaautorización malfuncionamientoenel.equipo
condicionessiguientes;
Remoto
www.compustar.com
Applicable to the following remote(s)
2W902R-SP 2 Way 5 Button LED Remote
com.compustar.www
@r@RwYPRrMsp@R@v@led Aplicablealosremoto(ssiguientes); ManualdeUsuario
Remote |
FCC ID Number (US Only) |
IC ID Number (International Only) |
2W902R-SP |
VA5REC500-2WSP |
7087A-2WREC500SP |
@c @ @ @ @ N
@ @ @ @ @ N@
@ @ @ @ @ @ @ @ @ @ @ N@@
@ @ @
@ N@
 t @o @c
i |
|
w @c |
T |
q @r |
U |
b @l |
U |
f @ @h @p @m |
U |
v @m |
U |
r @m @M@b @r |
V |
R@w @r @b @f |
W |
f @b @m |
Y |
r @o @m @t |
Y |
|
QP |
Qw @r @b @f |
QR |
s @c |
QT |
r @c |
QT |
a @l @O@a @ @u @O@d |
QT |
p @l @O@a |
QU |
a @t @r @s @f |
QU |
m @t @r @s @f @Hr @m I |
QV |
t @r |
QW |
aux @o @O@w @r Md @O@s @d |
QX |
s @a @O@d |
QX |
r @m |
QY |
s @s @o Oo |
QY |
a @b @l |
RP |
a @s @f |
RQ |
d @l @O@ @c @d @l |
RQ |
t @t @m |
RQ |
R c @m @Hm @v @c I |
RR |
rps@t @ @rps@Hr @p @s I |
RS |
s @v @s |
RV |
c @O@h @s @m |
RW |
a @j @m |
RW |
m @o @s |
RW |
r @c @O@p @r H I |
RX |
|
RX |
t @o @c 
r @s @e @d |
RY |
a @d |
SP |
|
SQ |
|
SS |
ByFirstech,LLC 2 |
3 ByFirstech,LLC |

Introduction
Thank you for purchasing a Firstech system for your vehicle. In order to truly enjoy the benefits of this system, we recommend that you thoroughly review the following manual. Please note that this manual applies to the 2 Way 5 Button LED Remote (2W902R-SP) Regardless of whether you purchased the ALARM IT, START IT, or MAX IT system. This manual also supports the 1WG7R-SP that is included in your new RF Kit. Please note that there are certain features listed in this manual that may not be available for your system. There may also be features listed in this manual that require additional installation or programming before they become active. If you have any questions or concerns please contact the original place of purchase. For further information you may also contact our customer support center at 888-820-3690.
Warranty Coverage
Caution: The Manufacturer’s warranty will be voided if this product is installed by anyone other than an Authorized Firstech dealer. For complete
!warranty details visit www.compustar.com or the last page of this manual. Firstech remotes carry a 1 year warranty from original date of purchase. CompuStar Pro remotes carry a 2 year warranty.
Warranty registration can be completed online by visiting www.compustar.com. Please complete the registration form within 10 days of purchase. We do not include a mail in warranty registration card with each unit - registration must be done online. To verify that an authorized dealer installed your system, we highly recommend that you keep a copy of the original proof of purchase, such as the dealer invoice in a safe place.
Quick Reference
b @l
The 2W902R-SP comes equipped with automatic button lock. This requires you to tap any button to wake your remote up then tap the button for the function you are trying to activate. Button lock can be turned off in your remote’s option menu.
f @ @h @p @m
The 2W902R-SP is shipped in Half Paging Mode. This means that the remote will only receive 2 Way LED confirmations for remote start and lock and unlock. It will not receive 2 Way LED confirmations when the alarm is triggered. To turn this feature on hold the 
 buttons for 2.5 seconds to enter the Remote Programming Menu. Tap the Lock
  button to turn Full Paging on. The remote will beep twice and LED flash red. You are now in Full Alarm and Starter Mode.
v @m
When servicing or loaning your vehicle to others, the system should be placed in Valet Mode. Valet Mode prevents the system from remote starting and disables all alarm functions.
IMPORTANT: While in Valet mode the remote will still control power lock and unlock systems. The parking lights will not flash.
The system can be put into valet one of three ways:
1. Turn the vehicle’s key to the ignition “on” position, tap the Function and Trunk buttons 

 at the same time for a half second. The parking lights will flash once and/or siren chirp once to confirm the system is in valet mode. Repeat this process to take the system out of valet mode. The parking lights will flash twice and/or siren chirp once to confirm the system is out of valet mode. Please note the confirmation chirps from the 2 Way remote will be quieter in Valet Mode.
ByFirstech,LLC |
4 |
5 ByFirstech,LLC |
Quick Reference
2. If you do not have your remote control, you can put the system into valet by turning the ignition key on and then off five times within 7 seconds. The parking lights will flash once to confirm the system is in valet mode. Shortly after the first flash, the parking lights will flash twice. A remote control is required to take the system out of valet mode.
3. If your system is set up for a secure valet option (optional), you will not be able to put the system into valet until the proper code has been entered using the secure valet switch. The secure valet switch is the small button with bright blue LED on the front and if installed is the only way to override the alarm and/or remote start. Until programmed, the default code is (3, 3).
Removing System Out of Valet:
Tap the  for a half second to remove the system out of Valet. On starter and alarm/starter systems, you can turn the key to the Ignition On position and tap the foot brake 10 times. This will take your system out of Valet Mode. If this does not work you can also repr ogram your remote(s). See Remote Coding/Programming Routine section for details.
r @m Mb @r
The only regular maintenance this system requires is remote control battery replacement. No programming is required when replacing the battery.
2W902R-SP:
Turn the remote over and unlock the battery cover by sliding the clear tab up. Slide the battery cover off, revealing the AAA battery. IMPORTANT: Be sure to observe correct polarity when installing the battery.
1WG7R-SP:
Use a quarter or flat head screwdriver to pry the back cover off of the remote. You can insert the quarter or flat head in the small slot at the bottom of the remote by the keychain loop. Carefully pry off the back cover using caution that you do not damage the circuit board. Your battery size should be listed on the battery. Battery size: Two (2) CR2016) Replacements can be purchased from your local Firstech dealer or an electronics store.
Quick Reference
R@w @r @b @f
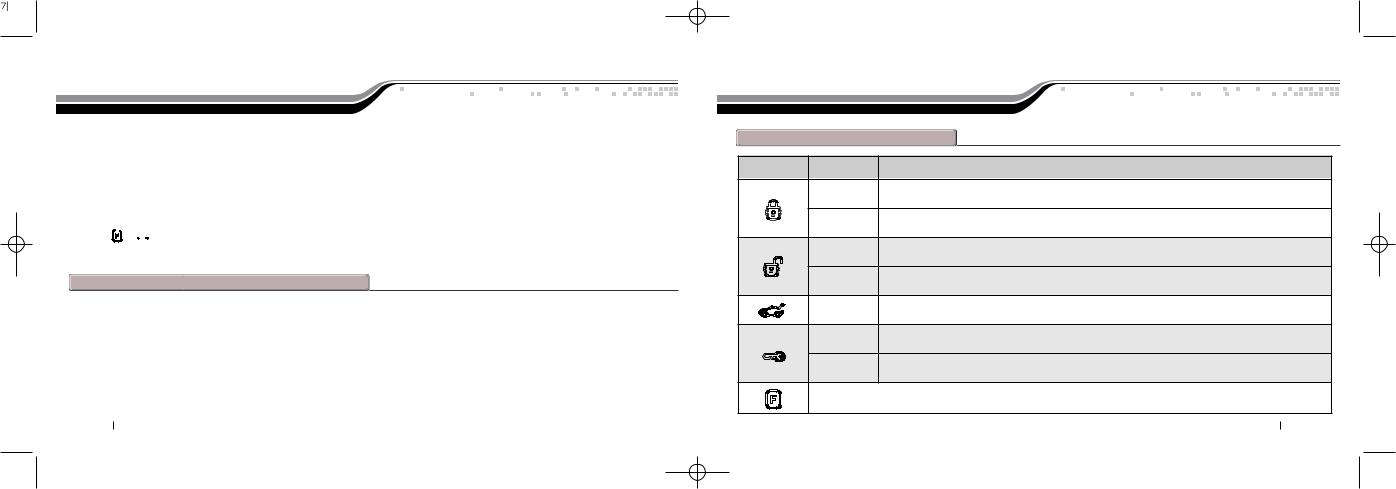
Button(s) |
Duration |
Function |
|
Half second |
Locks doors and if equipped, arms the alarm. |
|
4 seconds |
Panic/vehicle locater (flashes vehicle’s parking lights and sounds siren and horn). |
|
Half second |
Unlocks doors and if equipped, disarms the alarm. |
|
2.5 seconds |
Run time extender. Resets the run time for Turbo Timer or Remote Start. |
|
2.5 seconds |
Trunk release. Triggers the trunk release output and opens the vehicle’s trunk. |
|
Half second |
Car Check (updates vehicle status on remote) / Secure Auxiliary |
|
2.5 seconds |
Holding this button will start your vehicle. Repeat and this will shut your vehicle down. |
This button activates and deactivates multiple features. See the Function Button Menu table below for complete details.
ByFirstech,LLC |
6 |
7 ByFirstech,LLC |

Quick Reference
R@w @r @b @f
Button(s) |
Duration |
Function |
|
Half second |
Turns siren chirps on/off (Note: With the siren chirps off, it will still sound in the event the alarm is triggered). |
|
2.5 seconds |
Turns the shock sensor on/off. (ALARM IT or MAX IT systems only) |
|
Half second |
Valet mode (see Valet Mode Section for details) |
|
2.5 seconds |
Option programming menu 1. For use during installation. |
|
Half second |
Activates timer start mode. Timer start mode has multiple programmable settings: duration settings, |
|
temperature settings and self start settings. |
|
|
|
|
|
2.5 seconds |
Option programming menu 2. For use during installation. |
|
Half second |
Activates passive arming (vehicle will arm/lock 30 seconds after the vehicle is disarmed) |
|
2.5 seconds |
Accesses Remote Option Menu. See Remote Option Menu Table for details. |
Quick Reference
f @b @m
Button |
Duration |
|
|
|
|
|
One Tap |
Drive Lock On/Off |
Turbo Timer On/Off |
Auxiliary 1 |
Auxiliary 2 |
r @o @m @t
Feature |
TurnsFeature |
Button |
Remote |
Function/Description |
|
OnorOff |
Duration |
Chirp(s) |
|
Enter and Exit |
|
2.5 |
Three On | |
Enters and Exits Remote Option Menu. The LED will flash purple. |
Remote Menu |
|
Seconds |
Three Off |
|
|
|
|||
|
|
|
|
Determines whether your remote is used for Alarm or Start Only system. Set it to FULL |
2 Way Paging |
|
Half |
One-Half |
for ALARM IT and MAX IT features. Set to HALF for START IT ONLY systems. If on, |
|
Paging | Two- |
LED will flash blue. When turned off, the LED will flash red twice. |
||
Display |
|
second |
||
|
Full Paging |
Important: The 2W902R-SP is defaulted in HALF for START IT systems. It must be |
||
|
|
|
||
|
|
|
|
changed to FULL for alarm systems. |
Silent |
|
Half |
One On | |
Turns the silent mode on or off. If on, LED will flash blue. When turned off, the LED will |
|
second |
Two Off |
flash red twice. |
|
|
|
|||
2nd Car Mode |
|
Half |
One On | |
Puts your remote into 2nd Car Mode. You can control another vehicle with the same remote as long as |
|
second |
Two Off |
it has the same RF Kit installed. If on, LED will flash blue. When turned off, the LED will flash red twice. |
|
|
|
|||
Automatic |
|
Half |
One On | |
Locks all buttons on the remote automatically after one minute. Tap any button then the |
|
Two Off |
button(s) you would like to use to send a command from the remote to your vehicle. If on, |
||
Button Lock |
|
second |
||
|
LED will flash blue. When turned off, the LED will flash red twice. |
|||
|
|
ByFirstech,LLC 8 |
9 ByFirstech,LLC |
|
Remote LED Functions and Descriptions
Your remote will communicate to and from your vehicle while in range. The LED will change colors indicating transmission, confirmation, remote start run time and error confirmations.
Event |
LED Color |
LED Duration |
Chirp(s) |
|
|
|
|
|
|
Runtime Remaining: 100 Percent |
Blue |
Once every 5 seconds |
Six times |
|
|
|
|
|
|
Runtime Remaining: 66 Percent |
Blue |
Once every 5 seconds |
N/A |
|
|
|
|
|
|
Runtime Remaining: 33 Percent |
Blue |
Once every 5 seconds |
N/A |
|
|
|
|
|
|
All command confirmations |
Blue |
Once or Twice depending on function |
Once or Twice depending on |
|
function |
||||
|
|
|
||
All error confirmations |
Blue |
Three LED flashes |
Three chirps |
|
|
|
|
|
Alarm LED Notifications
In the event that your alarm has been triggered, your remote will receive notifications based on what zone has been violated. Please see the following table for details and a short description of each notification. Please note that these notifications are only available with MAX IT and ALARM IT systems.
Zone |
LED Color |
Chirp(s) |
Description |
|
|
|
|
|
|
Door Trigger(s) |
Purple and Red |
Chirps for 30 seconds or until |
One of more of your door trigger zones have been violated. |
|
button tapped on remote |
||||
|
|
|
||
|
|
|
|
|
Trunk Trigger |
Purple and Red |
Chirps for 30 seconds or until |
Your trunk trigger zone has been violated. |
|
button tapped on remote |
||||
|
|
|
||
|
|
|
|
|
Hood Trigger |
Purple and Red |
Chirps for 30 seconds or unti |
Your hood trigger zone has been violated. |
|
button tapped on remote |
||||
|
|
|
||
|
|
|
|
|
Ignition On Trigger |
Purple and Red |
Chirps for 30 seconds or unti |
Your alarm is triggered when your |
|
button tapped on remote |
vehicle’s ignition is turned on. |
|||
|
|
|||
|
|
|
|
|
DAS Tilt Trigger |
Purple and Red |
Chirps for 30 seconds or unti |
Your alarm is triggered when your |
|
button tapped on remote |
DAS detects tilt motion. |
|||
|
|
|||
|
|
|
|
|
Prewarn Shock Sensor |
Blue and Red |
8 Chirps |
Your prewarn shock sensor zone has been violated. |
|
|
|
|
|
|
Full Shock Sensor |
Purple and Red |
Chirps for 30 seconds or until |
Your full trigger shock sensor zone has been violated. |
|
button tapped on remote. |
||||
|
|
|
||
|
|
|
|
ByFirstech,LLC 10 |
11 ByFirstech,LLC |
 Loading...