

Page 1

Command Reference
MODEL : PD-22
Revison 1.00 2007/12/5
Citizen Systems Japan Co., Ltd
1
Page 2

Revision list
REV Date Details
1.0 10/12/2004 Original version (tentative version)
1.1 5/24/2005
- ESC~SI: Low baud rate support for serial interface
- ESC~SI: Added the ‘Image generation speed’ setting.
2
Page 3

Contents
Revision list..................................................................................................................................................... 2
Contents...........................................................................................................................................................3
Setting the top of form (TOF) /ESC~B ...........................................................................................................7
Setting power OFF time/ESC~O..................................................................................................................... 8
Registering the bit map data/ESC~b ...............................................................................................................9
Printing the bit map data /ESC~b.................................................................................................................. 10
Setting in PAGE MODE/ESC~L................................................................................................................... 11
Page feed (only for PAGE MODE marker detection) /ESC FF .................................................................... 14
Setting printing paper/FS H...........................................................................................................................15
Setting print density/ FS I..............................................................................................................................16
Printer operating status report command / FS G ...........................................................................................17
Printing the compressed bit image/ ESC~G.................................................................................................. 18
Specifying the coordinate of printing position/ESC~X................................................................................. 21
Setting the printing position of barcode character/GS H............................................................................... 22
Setting/Cancelling the turning of barcode/GS r ............................................................................................22
Setting the height of barcode/GS h................................................................................................................23
Setting the width of barcode/ GS w...............................................................................................................23
Selecting the type of l barcode/ GS k............................................................................................................24
Selecting printing mode/ ESC~U.................................................................................................................. 27
Printer power OFF/ ESC~p ...........................................................................................................................28
Selecting the code page/ ESC~P ...................................................................................................................29
Selecting Windows character/ ESC~s ........................................................................................................... 30
Printing the sequential character/ ESC~¥...................................................................................................... 31
Printing the character/ESC~^........................................................................................................................ 32
Enabling/disabling the black mark function/ ESC~E....................................................................................33
Setting the marker detection level/ESC~e.....................................................................................................34
Printer operating status report command 2/ ESC~Y..................................................................................... 36
Starting registering the printer command and flash memory/ ESC~CS........................................................ 37
Calling from printer command and flash memory/ ESC~CL........................................................................ 38
Reading the factory setting/ ESC~SF............................................................................................................ 39
Reading the default setting value/ ESC~SL .................................................................................................. 40
Writing the printer’s internal setting to flash memory / ESC~SS ................................................................. 41
Setting the inside of printer/ESC~SI............................................................................................................. 42
Returning to printing/ CR..............................................................................................................................48
Line feed/LF.................................................................................................................................................. 49
Page feed/FF.................................................................................................................................................. 50
Forward paper feeding/ ESC J ......................................................................................................................51
Setting page length by line/ ESC C............................................................................................................... 52
Setting page length by inch unit/ESC C NUL............................................................................................... 52
Setting perforated line skip/ESC N ............................................................................................................... 53
Cancelling perforated line skip/ESC O ......................................................................................................... 53
Setting the right margin/ESC Q..................................................................................................................... 54
Setting the left margin/ ESC I .......................................................................................................................55
Setting the 1/8-inch line feed rate/ESC 0...................................................................................................... 56
Setting the 1/6-inch line feed rate/ESC 2...................................................................................................... 56
Setting the n/60-inch line feed rate/ESC A ...................................................................................................57
Setting the n/180-inch line feed rate/ESC 3.................................................................................................. 57
Setting the n/360-inch line feed rate/ESC +.................................................................................................. 57
Specifying horizontal tab positions/ESC D................................................................................................... 58
3
Page 4

Execution of horizontal tab/HT..................................................................................................................... 59
Setting vertical tab positions/ESC B .............................................................................................................60
Execution of vertical tab/VT......................................................................................................................... 60
Specifying the absolute position/ESC $........................................................................................................ 61
Specifying the relative position/ESC ¥ ......................................................................................................... 62
Setting the VFU tab /ESC b ..........................................................................................................................63
Specifying the VFU channel/ESC /............................................................................................................... 63
Back space/BS............................................................................................................................................... 64
Selecting the character code table/ESC t....................................................................................................... 65
Selecting the international character set/ESC R............................................................................................ 66
Specifying/Cancelling proportional font/ESC p............................................................................................ 67
Specifying the character equivalent to 10CPI/ESC P....................................................................................68
Specifying the character equivalent to 12CPI/ ESC M ................................................................................. 68
Specifying the character equivalent to 15CPI/ESC g.................................................................................... 68
Specifying super/subscript/ESC S................................................................................................................. 69
Cancelling super/subscript/ESC T.................................................................................................................69
Specifying italic/ESC 4 ................................................................................................................................. 70
Cancelling italic/ESC 5................................................................................................................................. 70
Specifying reduced printing/SI......................................................................................................................71
Specifying reduced printing/ESC SI ............................................................................................................. 71
Cancelling reduced printing/DC 2.................................................................................................................71
Specifying double-width expansion with automatic cancel/SO.................................................................... 72
Specifying double-width expansion with automatic cancel/ESC SO............................................................ 72
Cancelling double-width expansion with automatic cancel/DC4..................................................................72
Specifying/cancelling double width large characters/ESC W ....................................................................... 73
Specifying/cancelling double height large characters/ESC w ....................................................................... 73
Specifying emphasis printing/ESC E ............................................................................................................74
Cancelling emphasis printing/ESC F ............................................................................................................ 74
Specifying double strike printing/ESC G......................................................................................................75
Cancelling double strike printing/ESC H...................................................................................................... 75
Specifying/Cancelling underline/ESC − ....................................................................................................... 76
Collectively specifying a printing mode/ ESC!............................................................................................. 77
Selecting the font style/ESC k....................................................................................................................... 78
Selecting character style/ ESC q ................................................................................................................... 79
Setting the spacing of characters/ESC SP..................................................................................................... 80
Aligning the characters/ESC a ......................................................................................................................81
Specifying the download character set/ESC % .............................................................................................82
Copying character set/ESC : .........................................................................................................................83
Defining the download characters/ESC & ....................................................................................................84
Selecting the bit image mode/ESC *............................................................................................................. 86
Setting bit image repeat/ESC * ..................................................................................................................... 88
8-dot single density bit image/ESC K........................................................................................................... 89
8-dot double density bit image/ESC L.......................................................................................................... 89
8-dot double speed/density bit image/ESC Y................................................................................................ 90
8-dot quadruple density bit image/ESC Z..................................................................................................... 90
Changing the bit image mode/ESC ? ............................................................................................................91
Initializing the printer/ESC @....................................................................................................................... 92
Cancelling high order side control code/ESC 6 ............................................................................................93
Setting high order side control code/ESC 7 .................................................................................................. 94
Cancelling data/CAN .................................................................................................................................... 95
4
Page 5

Deleting one character/DEL.......................................................................................................................... 95
Appendix b: Black Mark Specification......................................................................................................... 96
5
Page 6

Citizen original command
6
Page 7

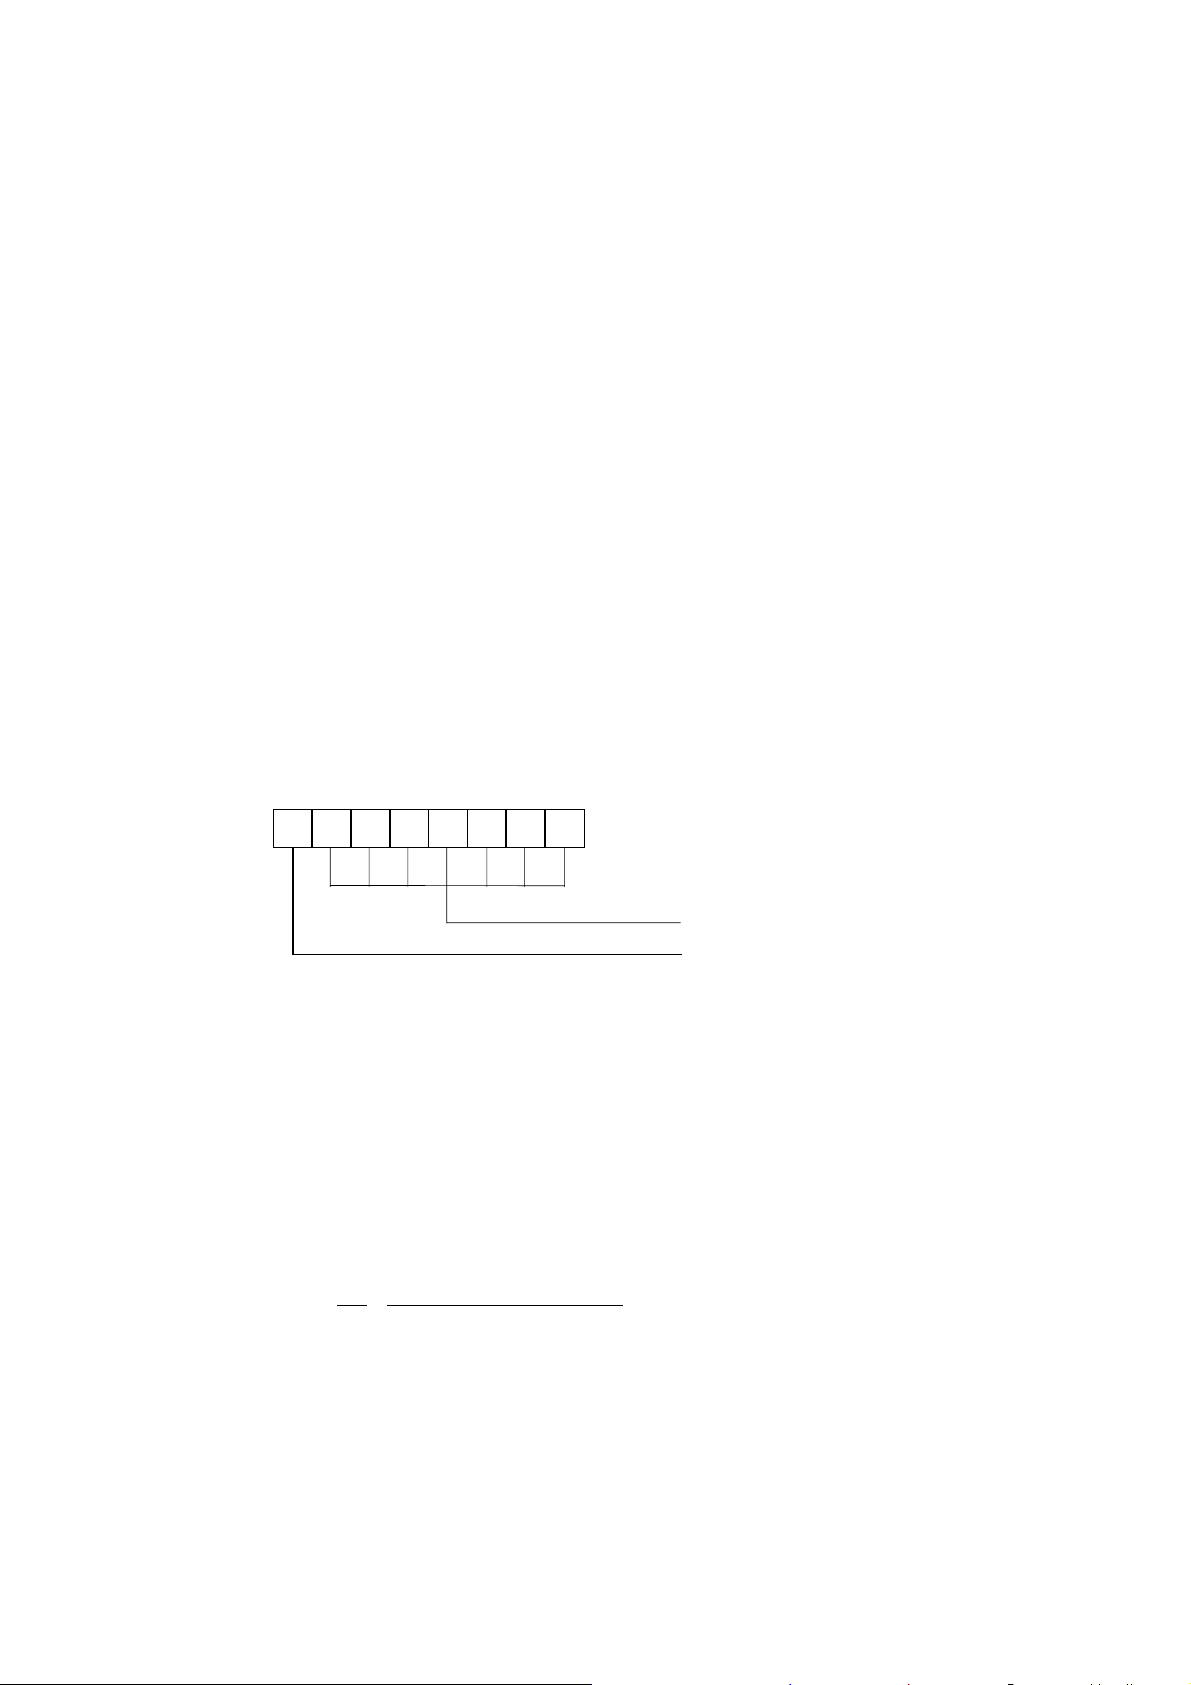
Setting the top of form (TOF) /ESC~B[ASCII] ESC ~ B m n1
n2
[Decimal] 27 7E 66 m n1 n2
[Hexadecimal] 1B 126 42 m n1 n2
[Parameter] m = 1, 3
m = 255: Checking the setting rate
[Description]
● For setting, only binary data are acceptable.
m = 1: Setting the normal form feed
3. Setting the form feed at marker detection
● Sets the feed rate for auto feeding. The feed rate for normal operation and marker detection can be set.
● Calculation unit for n1, n2 is dot (1 dot=1/8mm). Setting value: “n1+(n2×256)dot”.
● The set values are stored in the flash memory and remain effective even after the power is off.
● Do not use this command together with other print commands because it writes data into the flash memory.
● When setting a feed rate for marker detection, be sure to set a value greater than the mark width (ESC~e).
● After data are stored in the flash memory, the printer power is automatically turned OFF. The set values become
effective when the power is turned ON again.
● Default value for form feed is set at 95 in normal operation and 194 in black mark detection.
● Setting check
Setting can be checked by specifying m=255.
ESC ~ 255 0: Prints the setting
ESC ~ 255 1: Returns the setting (only when the cable interface is used).
(Print result)
VTOP : 95
VTOP (EYEMARK): 194
(Return result)
[Hexadecimal packet]
FB ?? ?? ?? ??
*1 *2 *3
*1: Return start code
*2: Form feed setting rate in normal operation (word length)
*3: Form feed setting in black mark detection (word length)
* The form feed setting for normal operation is used when auto feed operation is set to enable in the internal
setting of the printer. The form feed setting for marker detection is used when black mark operation is set
to enable in the internal setting of the printer. Refer to the section on internal settings of printer.
7
Page 8

Setting power OFF time/ESC~O
[ASCII] ESC ~ O n
[Decimal] 27 126 79 n
[Hexadecimal] 1B 7E 4F n
[Parameter] n=0, 1, 3, 5, 10, 15 (the setting is available for binary only)
[Description]
● Specifies the auto power OFF time. If no data is received or operated during a set period of time after the last receive of
data or the last operation of the FEED button, the printer power will be automatically turned off.
●For the setting, 1 to 15 minutes can be set. If you wish to set Power OFF setting as invalid, set the time to 0
minute.
● Default setting is the time set as low power time in the internal setting of the printer.
● The set values are stored and kept in the flash memory.
● Do not use this command together with other print commands because it writes data into the flash memory.
● After data are stored in the flash memory, the printer power is automatically turned OFF. The set values
become effective when the power is turned ON again.
Setting value Time
0 Power supply is not turned OFF
1 1 minute
3 3 minutes
5 5 minutes
10 10 minutes
15 15 minutes
●The setting value other than above is ignored.
● During a print wait state (ie. when unprinted data are remaining in the printer due to an error, etc.), the printer power will
not be automatically turned OFF.
8
Page 9

Registering the bit map data/ESC~b
[ASCII] ESC ~ b FFh n1 n2 d1 d2 d3 … dn 0 0
[Decimal] 27 126 98 255 n1 n2 d1 d2 d3 … dn 0 0
[Hexadecimal] 1B 7E 62 FF n1 n2 d1 d2 d3 … dn 0 0
[Description]
● Stores Windows bitmap data into the flash memory. The structure of bitmap data is the same as that of BMP file data.
Refer to Windows-related references for more details about BMP files.
● The structure of parameters is as follows.
{n1, n2, d1, d2, d3 … dn} ……… (1)
‘d1, d2 … dn’ is the same as the data structure of BMP files.
n1, n2 specify the BMP file size.
n1 specifies the remainder of BMP file size divided by 256.
n2 specifies the quotient of BMP file size divided by 256.
Sends the BMP file data after sending n1, n2.
Several BMP file data can be written at a time into the flash memory by repeating the parameter sequence (1). BMP file
data are assigned with a number accordingly in sequence from 0, based on which printing of BMP data is executed.
This sequence is completed by specifying 0 in n1 and n2 (no BMP file data).
● A registration area up to 64KB (64 × 1024 = 65536 bytes) is available.
● BMP file data registered in the flash memory before this command is sent will be all deleted.
● Data writing to the flash memory is available only a limited number of times. Avoid registering BMP files on a regular
basis.
● Do not use this command together with other print commands because it writes data into the flash memory.
【Restriction in BMP file】
● BMP files support only two-color materials.
● It does not support color pallets.
9
Page 10

Printing the bit map data /ESC~b
[ASCII] ESC ~ b n
[Decimal] 27 126 98 n
[Hexadecimal] 1B 7E 62 n
[Parameter] 0 ≤ n ≤ 254 (the setting is available for binary only)
[Description]
● Prints out BMP file data registered in the flash memory.
● Specify the number of the BMP data to be printed in the parameter ‘n’.
● When an unregistered number is specified, the command will be ignored.
● BMP images are printed in a printable area. When an image lies across right side areas, the image will not
be fully printed.
10
Page 11

Setting in PAGE MODE/ESC~L
[ASCII] ESC ~ L n1 n2 d1 d2 d3
[Decimal] 27 126 76 n1 n2 d1 d2 d3
[Hexadecimal] 1B 7E 4C n1 n2 d1 d2 d3
[Parameter] (Parameter is available for binary only)
n1: Specify 1 for line printing mode (normal mode). Specify 3 for page printing mode or line print page-length setting
mode.
n2: Specify 0.
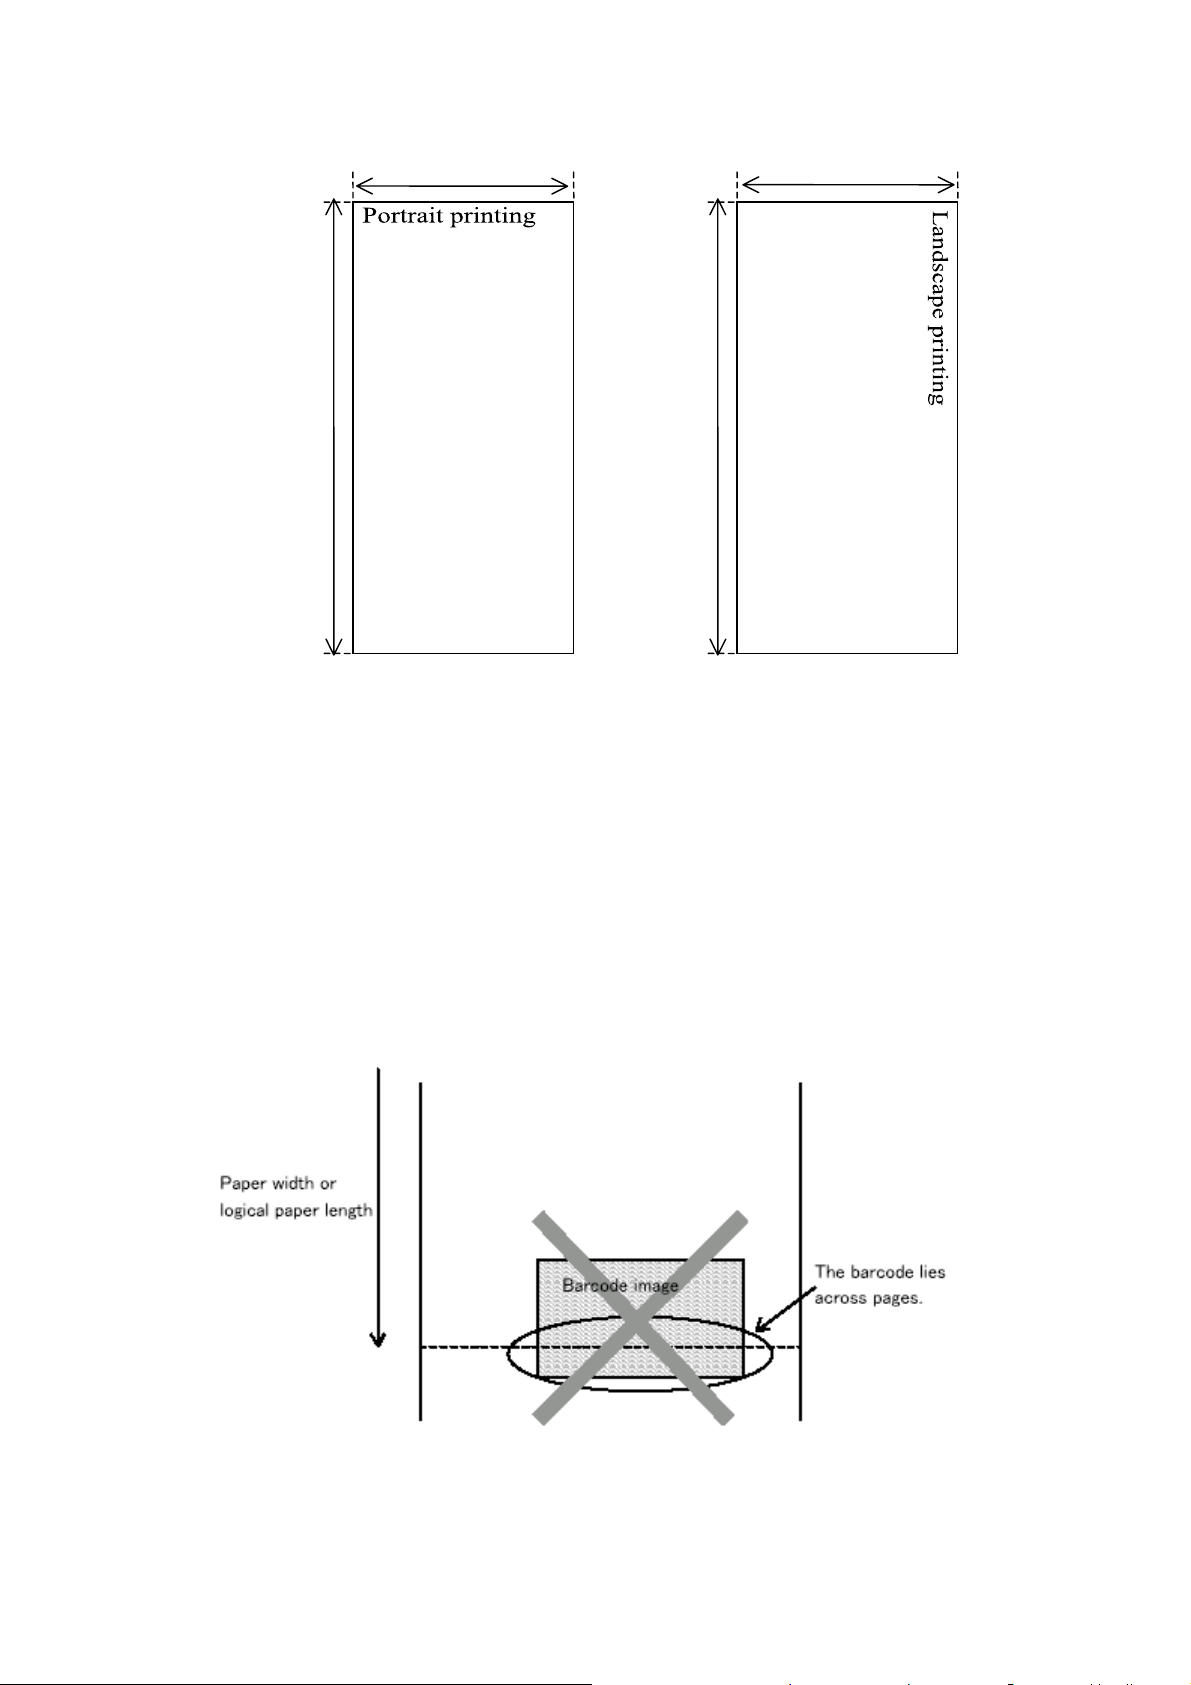
d1: Specify 0 for portrait line printing mode (normal mode). Specify 1 for landscape page printing mode. Specify 2 for
portrait page printing mode. Page length can be set with d2 and d3 parameters after specifying 3 (specifying n1 = 3) to
call up line printing mode.
d2, d3: Specify this parameter for switching to page printing mode or when 3 is specified in d1. Specify print width (actual
paper length) in dots. One dot is 1/203 inch. Divide the value by 256, and specify the remainder in d2 and the
quotation in d3. Up to 2374 dots can be specified. When d1 = 3, up to 4466 dots can be specified.
[Description]
● Portrait line printing mode (normal print mode - The printer is in this mode at power-ON.)
Data are printed horizontally with the paper feed direction pointing upwards. A Feed command actually feeds a paper.
Upon receiving of a Terminate command (such as CR, LF), the printer starts printing immediately.
● Landscape page printing mode
Data are printed vertically with the paper feed direction pointing upwards. A Feed command does not actually feed a
paper, but moves the printing position horizontally. Actual printing starts when page feed (FF, ESC FF) is selected. The
page format is maintained even after form feed.
● Portrait page printing mode
Data are printed horizontally with the paper feed direction pointing upwards. A Feed command does not actually feed a
paper, but moves the printing position vertically. Actual printing starts when page feed (FF, ESC FF) is selected. The page
format is maintained even after form feed.
● Specifying the page length in line printing mode
Page length can be specified with line printing mode. Normally page length is specified with ESC C
command in ESC/P mode. With this command, however, page length can be set in dots.
● When page printing mode is specified, previous line print data that remain unprinted will be all printed. On the other hand,
when line printing mode is specified, previous page print data that remain unprinted will be all deleted.
● We recommend initializing the printer with ESC @ when switching to page printing mode or line printing
mode.
<Restriction in page printing mode>
The maximum logical paper length is 384 dots in landscape page printing mode. Maximum printing width is 8
inches (1624 dots/203 dpi).
● The maximum logical paper length in portrait page printing mode is the value specified in d2 and d3
parameters. Printing width is 384 dots.
11
Page 12
r
Logical pape
length: 1624
dots max
Print width: 384 dots
Print width:
1624 dots max
Logical paper length: 384 dots
● The CE-PR emulation has FF n instruction, however, the page feed operation is definitely implemented
regardless of n parameter in page print mode.
● In the page mode, the vertical reversing print (ESC T) of CE-PR emulation cannot be used.
● At power-ON, page printing mode is canceled and the printer is switched to line printing mode.
● Printing density cannot be set by line in page printing mode. Sets the printing density for the entire page.
● In page mode, decoded data and the page format are maintained until a Form Feed command (FF, ESC FF)
is received. However, if page printing mode setting is executed again before a form feed, all previous data
will be lost.
● ESC @ Initialize command clears data decoded internally on the memory. Page printing mode itself cannot be
initialized.
● In page printing mode, barcodes that lie across logical papers lengths are not printed.
12
Page 13

● In page printing mode, when a print data is specified at a position that exceeds a logical paper length, the
data is decoded after automatic form feed.
● In page printing mode, when ANK double-height character printing (ESC w) is executed at the head of a page, the
double height characters cannot be fully printed, with their top area missed. In such a case, leave a one-line space before
printing double height characters.
● To return from page printing mode to line printing mode, turn off the power and then turn it on again, or specify line
printing mode separately.
<Restriction on page length in line printing mode>
● Page length can be specified up to 22 inch (22×203=4466 dots)
<Setting the Line Printing Mode>
Default is line printing mode. The following shows an example of program (BASIC) for switching from page printing
mode to line printing mode.
LPRINT CHR$(&H1B); “~L”; CHR$(1); CHR$(0); CHR$(0);
Line printing: dl = 0
Fixed at 0
Line printing mode: n1 = 1
<Setting the Page Printing Mode>
The following shows a program for setting paper length to 8 inches in landscape mode.
LPRINT CHR$(&H1B); “~L”; CHR$(3); CHR$(0); CHR$(1); CHR$(88); CHR$(6);
Landscape printing: dl = 1
Fixed at 0
Page printing mode: n1 = 3
Next, convert the paper length to be set into dots.
In this case, the paper length is set to 8 inches. Therefore:
8 inches × 203 dpi = 1624 dots
Next, obtain parameters d2 and d3 from the number of dots.
Divide 1624 dots, the number of dots of paper length, by 256.
1624 / 256 = 6 …… 88
Specify 88, the remainder of 1624 dots divided by 256, in d2.
Specify 6, the quotient of 1624 dots divided by 256, in d3.
13
Page 14

Page feed (only for PAGE MODE marker detection) /ESC FF
[ASCII] ESC FF
[Decimal] 27 12
[Hexadecimal] 1B OC
[Description]
● Executes page feed while in page printing mode.
● The difference with FF page feed in ESC/P Emulation command is that, in ESC FF, form feed will not be
executed when print data is unavailable in the printer.
● When the black mark operation is set to enable, this command starts marker detection along with page feed.
14
Page 15

Setting printing paper/FS H
[ASCII] FS H n
[Decimal] 28 72 n
[Hexadecimal] 1C 48 n
[Parameter] n=1, 2, 3 or “1”, “2”, “3”
[Description]
Switches the paper type.
n = 1: Regular paper (the setting value at power-on)
n = 2: 2 sheets of carbon paper
● Printing paper can be set by line unit.
● Setting besides the parameter range will be ignored.
● The initial value (regular paper, 2 sheets of carbon paper) at power-on (default) represents the paper that is
set as the print paper type in the internal setting of the printer.
● Setting values in the paper setting return to default when an Initialize command is executed or printing mode is changed.
15
Page 16

Setting print density/ FS I
[ASCII] FS I n
[Decimal] 28 73 n
[Hexadecimal] 1C 49 n
[Parameter] n = 0, 1, 2, 3, 4 or “1”, “2”, “3”, “4”
[Description]
Specifying the printing density.
●
n=30h -2 (light)
n=31h -1 ↑
n=32h 0 (Normal)
n=33h +1 ↓
n=34h +2 (dark)
● Settings other than the above will be ignored.
● Can be set by line unit (except in page printing mode).
● The initial value at power-on (default) is the value that is set as print density in the internal setting of the printer.
● Print density setting values return to default when an Initialize command is executed or print mode is changed.
16
Page 17
Printer operating status report command / FS G
[ASCII] FS G
[Decimal] 28 71
[Hexadecimal] 1C 47
[Description]
● When using the command, set the printer operating status return control to enable in the internal setting of
the printer.
● This command prints the printer operation status.
● Data to be returned are 2 bytes and are FBh + content (30h to 3Fh).
Settings
Paper-in 0
Paper-out 1 9
Battery normal 0
Battery needs recharging 1
printer head temperature
normal
printer head temperature
abnormal
Bit 7 Bit 6 Bit 5 Bit 4 Bit 3 Bit 2 Bit 1 Bit 0
0 0 1 1
0
O
1
● Printing cannot be continued when printer head temperature becomes abnormal. Stop printing and leave
the printer for a while, or turn off the power and turn it on again after a while.
● When the data in the receiving buffer becomes full, communication will be temporarily halted. In case of an error such
as paper-out, no printing will be executed. Therefore, the receiving buffer of the printer becomes full in a short time,
which may lead to a temporary communication halt. In such case, the printer may not be able to receive this command
from the host and the return function may not work properly.
● When using this command, do not send the command and print data at the same time. Whenever possible, execute each
command separately.
*
● In PD22 since received data in the buffer will not be processed under offline status such as paper out, the printer
monitors and returns the printer operating status report command at data receive level. Therefore, when the printer
status return control is set to enable in the internal setting of the printer, and if data, such as a bit image, contains a
character sequence which is the same as the printer operating status report command, the printer may identify the data
as this command and return the data. Since character sequences identified as the printer operating status report
command are directly sent to the receive data analysis part, these data will not be lost.
● During infrared communication, printer status is returned within the infrared connection at the time of
receive of the printer operating status report command. When the connection with the other station is
disconnected, printer status return data will be cleared.
17
Page 18
Printing the compressed bit image/ ESC~G
[ASCII] ESC ~ G data
[Decimal] 27 126 71 data
[Hexadecimal] 1B 7E 47 data
[Data format]
There are following 4 types of data.
● String image data
● Repeat image data
● EOL (End Of Line)
● EOD (End Of Data)
(1) String image data
String image data prints the desired bit map data.
Format: c, d1, d2, d3, d4 … dn
‘c’ indicates data length and that the data in the following format is string data. Specify an image data with subsequent ‘dn’.
Data length can be specified from 1 to 127.
7 6 5 4 3 2 1 0
C
Data length
O: String image
‘dn’ is 1-byte bitmap data and specifies a bitmap image in the raster direction.
□ □ □ □ □ □ □ □
Left← →Right
An example is shown below.
Data
05h 12h 34h 56h 78h 9Ah
Print result
□□□■□□■□□□■■□■□□□■□■□■■□□■■■■□□□■□□■■□■□
dn 7 6 5 4 3 2 1 0
18
Page 19
(2) Repeat image data
Repeat image data repeats printing of the same bitmap data on a 1-byte basis.
Format
c d
‘c’ indicates that the data in the following data format is repeat data and specifies the number of repetition of the data.
Specify an image data with the following ‘d’ value.
7 6 5 4 3 2 1 0
Number of repetition
1: Repeat image
The number of repetition can be specified from 1 to 127. ‘d’ is 1-byte bitmap data and specifies a bitmap
image in the raster direction.
□ □ □ □ □ □ □ □
Left← →Right
An example is shown below.
Data
Print result
□□□■□□■□□□□■□□■□□□□■□□■□□□□■□□■□□□□■□□■□
1 2 1 2 1 2 1 2 1 2
(3) EOL
EOL terminates a 1-dot sequence and executes printing and feeding of the 1-dot sequence. Data are 00h.
(4) EOD
EOD terminates printing of a compressed bit image. Data are 80h.
Compressed bit image sample program (BASIC)
A sample of printing program is shown below.
WIDTH LPRINT 255
W = 48
85h 12h
dn 7 6 5 4 3 2 1 0
19
Page 20

LPRINT CHR$(27); "~G";
LPRINT CHR$(&H80 + W); CHR$(&HFF); CHR$(0);
'
FOR L = 1 TO 100
LPRINT CHR$(1); CHR$(&H80);
LPRINT CHR$(W - 2 + &H80); CHR$(0);
LPRINT CHR$(1); CHR$(&H1);
LPRINT CHR$(0); 'EOL
NEXT L
'
LPRINT CHR$(&H80 + W); CHR$(&HFF); CHR$(0);
LPRINT CHR$(&H80); 'EOD
END
20
Page 21
Specifying the coordinate of printing position/ESC~X
[ASCII] ESC ~ X y1 y2 x1 x2
[Decimal] 27 126 88 y1 y2 x1 x2
[Hexadecimal] 1B 7E 58 y1 y2 x1 x2
[Parameter]
Specifies the y1, y2Y coordinates.
Specifies in y1 the remainder of Y-coordinate value divided by 256.
Specifies in y2 the quotient of Y-coordinate value divided by 256.
Specifies the x1, x2X coordinates.
Specifies in x1 the remainder of X-coordinate value divided by 256.
Specifies in x2 the quotient of X-coordinate value divided by 256.
[Description]
● Specifies the printing position with X, Y coordinates in landscape printing and portrait page printing mode.
● Unit for coordinate is 1/203.
● Cannot be used in normal printing mode (portrait line printing)
● With ESC~X, printing data can be overlapped.
● Position exceeding the right-left margin cannot be specified.
Y
X
X
Y
21
Page 22
Setting the printing position of barcode character/GS H
[ASCII] GS H n
[Decimal] 29 72 n
[Hexadecimal] 1 48 n
[Parameter] n = 0, 1, 2, 3 or “0”, “1”, “2”, “3”
[Description]
● Selects the printing position of barcode character when printing the barcode
● “n” means as follows:
n printing position
0, 30h Cannot print
1, 31h Upper area of barcode
2, 32h Lower area of barcode
3, 33h Upper and lower area of barcode
● The initial value is n=0
● Changing the font size will not change the size of barcode character
● Returns to default value with initializing command.
Setting/Cancelling the turning of barcode/GS r
[ASCII] GS r n
[Decimal] 29 114 n
[Hexadecimal] 1D 72 n
[Parameter] n = 0, 1
[Description]
● When n = 0, barcodes are positioned horizontally.
When n = 1, barcodes are positioned vertically.
● Default at power-ON is n = 0.
● When vertical positioning of barcodes is specified, barcode symbols turn around 90 degrees counterclockwise.
● Returns to default value with initializing command.
22
Page 23

Setting the height of barcode/GS h
[ASCII] GS h n
[Decimal] 29 104 n
[Hexadecimal] 1D 68 n
[Parameter] 1 ≤ n ≤ FFh
[Description]
● Selects the height of barcode.
● “n” indicates the number of dots in vertical direction.
The initial value is n=A2h (162 dots)
● Returns to default value with initializing command.
Setting the width of barcode/ GS w
[ASCII] GS w n
[Decimal] 29 119 n
[Hexadecimal] 1D 77 n
[Parameter] n = 2, 3, 4
[Description]
● Selects the width of barcode
● “n” indicates the number of dots for narrow barcode in horizontal direction.
The initial value is n=3
● Returns to default value with initializing command.
23
Page 24
Selecting the type of l barcode/ GS k
[ASCII] GS k n Dn NUL
[Decimal] 29 107 n Dn NUL
[Hexadecimal] 1D 6B n Dn NUL
[Parameter] 1 ≤ n ≤ FFh
[Description]
● Code: [1D] h + [6B] h + n + Ds + [00] h ..........1
0 ≤ n ≤ 6
● Code: [1D] h + [6B] h + n + s + Ds
41h ≤ n ≤ 49h
Selects a barcode system and prints out the barcode.
● The beginning of line becomes the next print start position.
● “n” means as follows:
In case of 1:
n Barcode system Definition area of s Definition area of D
0 UPC - A Bh ≤ s ≤ Ch 30h ≤ D ≤ 39h
1 UPC – E Bh ≤ s ≤ Ch 30h ≤ D ≤ 39h
2 JAN13 (EAN13) Ch ≤ s ≤ Dh 30h ≤ D ≤ 39h
3 JAN8 (EAN8) 7h ≤ s ≤ 8h 30h ≤ D ≤ 39h
4 CODE39 1 ≤ s
5 ITF
6 CODEBAR 1 ≤ s
● This command is terminated by a NULL code. For UPC-A and UPC-E, upon input of 12-byte barcode data, the
barcode is printed out and subsequent data are processed as normal data.
● For JAN13, upon input of 13-byte barcode, the barcode is printed out and subsequent data are processed as normal data.
For JAN8, upon input of 8-byte barcode, the barcode is printed out and subsequent data are processed as normal data.
Be sure that the number of data of ITF barcode is always an even number. When the number of data is an odd number,
the last data will be ignored.
...........................2
1 ≤ s (even
number)
30h ≤ D ≤ 39h, 41h ≤ D ≤ 5Ah, 20h
24h, 25h, 2Bh, 2Dh, 2Eh, 2Fh
30h ≤ D ≤ 39h
30h ≤ D ≤ 39h, 41h ≤ D ≤ 44h, 24h
2Bh, 2Dh, 2Eh, 2Fh, 3Ah
24
Page 25

In case of 2:
n
Barcode system Definition area of s Definition area of D
41h UPC - A Bh ≤ s ≤ Ch 30h ≤ D ≤ 39h
42h
43h
44h
45h CODE39
46h ITF
47h CODEBAR
48h CODE93 1 ≤ s ≤ FFH
49h CODE128 2 ≤ s ≤ FFh 0h ≤ D ≤ 7Fh
UPC - C Bh
JAN13 (EAN13) Ch
JAN8 (EAN8) 7h
≤ s ≤ Ch 30h ≤ D ≤ 39h
≤ s ≤ Dh 30h ≤ D ≤ 39h
≤ s ≤ 8h
1
≤ s ≤ FFH 30h ≤ D ≤ 39h
1
≤ s ≤ FFH (even
number)
1
≤ s ≤ FFH
30h ≤ D ≤ 39h, 41h ≤ D ≤ 5Ah, 24h
25h, 2Bh, 2Dh, 2Eh, 2Fh
30h
≤ D ≤ 39h
30h ≤ D ≤ 39h, 41h ≤ D ≤ 44h, 24h
2Bh, 2Dh, 2Eh, 2Fh, 3Ah
0h
≤ D ≤ 7Fh
● ‘s’ indicates the number of data and processes ‘s’ bytes from the next data as barcode data.
● If ‘s’ is beyond the definition area, the command processing will be canceled and subsequent data will be processed as
normal data.
● If ‘D’ is beyond the definition area, only paper feed will be executed and subsequent data will be processed as normal
data.
● If a character code ‘Dn’ is an unprintable character, subsequent data will be treated as normal characters.
<Caution>
●The command is ignored when data exist in the printer buffer.
● If the width of a barcode is beyond the printing area of the line, the barcode will not be printed and only paper feed will
be executed. Regardless of the line-feed rate set in ESC 3, ESC 2, etc., paper feed will be executed for the barcode
height (including characters when barcode characters are specified).
● After the printing of barcode, beginning of line becomes the next print start position.
● Barcode characters are not affected by emphasized printing, overlapped printing, underline, character size,
character decoration, etc.
● In page printing mode, barcodes positioned across logical paper lengths are not printed.
* CODE-128 supplementary explanation
● The head of barcode data must be a code set select character (one of CODE-A, CODE-B, or CODE-C). Select the first
code set from them.
● Specify special characters with ‘{’ and the subsequent 1 character, 2 characters in total. Specify the ASCII
character ‘{’ itself by sending ‘{’ twice consecutively.
(Special character) (Send data)
<ASCII> [Hexadecimal] [Decimal]
SHIFT {S 7B,53 123,83
CODE A {A 7B,41 123,65
CODE B {B 7B,42 123,66
25
Page 26

CODE C {C 7B,43 123,67
FNC1 {1 7B,31 123,49
FNC2 {2 7B,32 123,50
FNC3 {3 7B,33 123,51
FNC4 {4 7B,34 123,52
{ {{ 7B,7B 123,123
● Refer to barcode-related books, etc. for the code set character structure of CODE-A, CODE-B, and CODEC.
● As an example, a case for printing 10-digit data in CODE 128 is shown.
When CODE A is specified and the barcode data is 1234567890, to send data to the printer:
[1D] [6B] [49] ---------- GS k n
[0C] ---------- s
[7B] [41] ---------- CODE A
[31] [32] [33] [34] [35] ---------- '12345'
[36] [37] [38] [39] [40] ---------- '67890'
[0D] [0A] ---------- CR LF
In this case, the parameter ‘s’ (data length) consists of 2 bytes indicating CODE A and 10 bytes indicating
the data ‘1234567890’, 12 bytes in total.
26
Page 27

Selecting printing mode/ ESC~U
[ASCII] ESC ~ U n
[Decimal] 27 126 85 n
[Hexadecimal] 1B 7E 55 n
[Parameter] n=0, 1, 2 or “0”, “1”, “2”
[Description]
Selects the printing mode depending on the value of “n”.
●n = 0: 2-step feed mode
1: 1-step feed mode
2: Phase lock mode
● In 1- and 2-step feed modes, data are printed while the motor is in motion. The printing speed increases in
order of (phase lock) <(1-step feed) < (2-step feed).
● In phase lock mode, data are printed with the motor fixed. Print quality is higher than that in 1- and 2-step
feed mode.
● For barcode printing and bitmap image printing, data are printed forcibly in phase lock mode.
● The printer is in phase lock mode at power-on.
27
Page 28

Printer power OFF/ ESC~p
[ASCII] ESC ~ p
[Decimal] 27 126 112
[Hexadecimal] 1B 7E 70
[Parameter] None
[Description]
● Turns OFF the power of the printer.
● When already edited but not printed image data exist, the data are printed and then the power is turned OFF.
[Caution]
● After turning the power OFF, infrared communication with the host and Bluetooth communication will be
terminated.
28
Page 29

Selecting the code page/ ESC~P
[ASCII] ESC ~ P n
[Decimal] 27 7E 80 n
[Hexadecimal] 1B 7E 50 n
[Parameter] 0 ≤ n ≤ 255
[Description]
●Selects the code page.
n = 0: PC437 (U.S.A.)
1: PC850 (MULTILINGUAL)
2: PC860 (PORTUGAL)
3: PC863 (FRENCH - CANADA)
4: PC865 (NORWAY)
5: SCANDINAVIA
6: YUASCII
7: PC852 (LATIN 2)
8: PC855 (CYRILLIC)
9: PC866 (RUSSIAN)
10: HUNGARIAN
11: KAMENICKY
12: TURKEY
13: PC861 (ICELANDIC)
14: WELSH
15: MAZOVIA
16: UKRAINIAN
40: NEW HEBREW
41: OLD HEBREW
42: DEC HEBREW
50: 437 GREEK
51: GREEK 851
52: GREEK ABC
53: GREEK ELOT 928
54: CYPRUS
55: MALTA
60: ARABIC NLS
61: ARABIC EXT
62: UNISYS CODEPAGE
100: BRAZIL ABICOMP
101: BRAZIL ASCII
108: LATIN 1
109: PC858
110: ISO LATIN 9
29
Page 30

Selecting Windows character/ ESC~s
[ASCII] ESC ~ s n
[Decimal] 27 7E 115 n
[Hexadecimal] 1B 7E 73 n
[Parameter] 0 ≤ n ≤ 255
[Description]
●Selects the Windows 3.1 character set
n = 0: US ANSI
1: CYRILLIC ANSI
2: EASTERN EUROPE ANSI
30
Page 31

Printing the sequential character/ ESC~¥
[ASCII] ESC ~ ¥ n1 n2
[Decimal] 27 7E 92 n1 n2
[Hexadecimal] 1B 7E 5C n1 n2
[Parameter] 0 ≤ n1, n2 ≤ 255
[Description]
● The number of data specified in n1, n2 will be processed as character code and not as control code
● n1, n2: Indicates the number of data specified as character
Assign the remainder of the number of data divided by 256 in n1.
Assign the quotient of the number of data divided by 256 in n2 .
● Unlike ESC 6, the lower control code domain can be printed as character data.
31
Page 32

Printing the character/ESC~^
[ASCII] ESC ~ ^
[Decimal] 27 7E 94
[Hexadecimal] 1B 7E 5E
[Description]
● 1 byte data following this command is processed as character data.
32
Page 33

Enabling/disabling the black mark function/ ESC~E
[ASCII] ESC ~ E n
[Decimal] 27 126 69 n
[Hexadecimal] 1B 7E 45 n
[Parameter] n = 0: Mark function disabled (the setting saved)
1: Mark function enabled (the setting saved)
3: Mark function disabled (temporary setting)
4: Mark function enabled (temporary setting)
[Description]
● Selects the enabling/disabling of the black mark function.
● By the setting memory with parameter ‘n’ = 1 or 0, the enabled/disabled state of the mark function setting is saved in the
flash memory storage area in the printer. After data are written into the flash memory, the printer power is automatically
turned OFF. The set values are reflected at the next power ON.
● By the temporary setting with parameter ‘n’ = 4 or 3, the mark function setting is enabled/disabled when
ESC~E command is received. This content remains effective until it is newly switched to enabled/disabled
by setting the parameter ‘n’ to 4 or 3, or the printer is powered OFF.
33
Page 34

Setting the marker detection level/ESC~e
[ASCII] ESC ~ e n m
[Decimal] 27 126 101 n m
[Hexadecimal] 1B 7E 65 n m
[Parameter] n=0, 1: Sets the detection level.
128: Sets the mark width
255: Checks the internal setting.
[Description]
● Sets the detection level.
n = 0: Setting the upper sensor detection level
1: Setting the lower sensor detection level
[Sensor Output]
Marker center position
Paper-out reference value
Upward
sensor-detection level
Marker width
Downward
sensor-detection level
m: Setting value (1 to 255)
m = (V × 255) / 4.75
V: Sensor detection level [V]
Default value ‘m’ = 100
Default sensor detection level V = Approx. 1.8 [V]
● Normally, set the same value for the upper and lower sensor detection levels.
●Mark width
Mark width can be set with ‘n’ = 128. Specify the setting value ‘m’ in dots. 1mm = 8 dots. Specify a value smaller than
the form feed setting value for marker detection (ESC~B).
Print direction
Mark width
34
Page 35

● Do not use this command together with other print commands because it writes data into the flash memory.
● After data is stored in the flash memory, the printer is automatically powered OFF. The setting becomes
effective when the power is turned ON again.
● Setting check
Settings can be checked by specifying ‘n’ = 255.
ESC~e 255 0 : Prints out the setting.
1: Returns the setting.
(Return result)
[Hexadecimal packet]
FB ** ** ** 01
*1 *2 *3 *4 *5
*1: Return start code
*2: Sensor detection level (up) value
*3: Sensor detection level (down) value
*4: Mark width
*5: Enabling/disabling (= 1/0) the marker detection function
35
Page 36

Printer operating status report command 2/ ESC~Y
[ASCII] ESC ~ Y
[Decimal] 27 126 89
[Hexadecimal] 1B 7E 59
[Description]
● When using this command, set the printer operating status return control to enable in the internal setting of
the printer.
● On receiving this command, the printer prints out the data in the buffer and outputs its operation status.
● Data to be returned are 2 bytes and are FBh + content (30h to 3Fh).
Setting
Paper-in 0
Paper-out 1
Printing 0
Printing complete 1
Printer head temperature
normal
Printer head temperature
abnormal
Bit 7 Bit 6 Bit 5 Bit 4 Bit 3 Bit 2 Bit 1 Bit 0
0 0 1 1
0
0
1
● When the receiving buffer of the printer becomes full, communication will be temporary halted. Since printing will not
be executed in case of an error such as paper-out, the receive buffer becomes full in a short time, which may lead to a
temporary communication halt. In such a case, the host may not be able to send this command to the printer.*
● Printing operation indicates the printer is in either state where unprinted data exist in the buffer, data are being decoded
in the page memory, or data are being actually printed on a paper.
● Completion of printing indicates that any unprinted data does not exist and data are not being printed on a paper.
● When using this command, do not send the command and printing data at the same time. Whenever
possible, execute each command separately.
*
● In PD22, since receive data are not analyzed under offline status such as paper-out, the printer monitors and returns the
printer operating status report command at data receive level. Therefore, when the printer status return control is set to
enable in the internal setting of the printer, and if data, such as a bit image, contains a character sequence which is the
same as the printer operating status report command, the printer may identify the data as this command and return the
data. Since character sequences identified as the printer operating status report command are directly sent to the receive
data analysis part, these data will not be lost.
● During infrared communication, printer status is returned within the infrared connection at the time of
receive of the printer operating status report command. When the connection with the other station is
disconnected, printer status return data are cleared.
● During printing operation, receive contents may not be completely real time. Make judgments from several
ESC~Y return contents.
36
Page 37

Starting registering the printer command and flash memory/ ESC~CS
[ASCII] ESC ~ C S n1 n2 d1 d2 … dn
[Decimal] 27 126 67 83 n1 n2 d1 d2 … dn
[Hexadecimal] 1B 7E 43 53 n1 n2 d1 d2 … dn
[Description]
● Registers a series of printer commands in the flash memory.
● {d1 d2 ... dn} is a data string to be registered.
● n1 and n2 indicate the number of data to be registered. Divide the number of data to be registered by 256
and specify its remainder in n1, its quotient in n2.
● For registering several command groups, send the command groups consecutively. Registration is
completed upon receive of the command group with the number of data = 0.
ESC~CS n1 n2 d1 d2 … dn ←Command group 1
n1 n2 d1 d2 … dn ← Command group 2
00 ← ‘Number of data = 0’ command group
● Command groups are assigned with a number in sending order from 0 before registered. Up to No. 255 can be
registered (total number of registration: 256). Specify this number to call out a given command.
● When a new registration begins, data that have been previously registered in the flash memory will be all deleted.
● A registration area up to 64KB (64 × 1024 = 65536 bytes) is available.
[Caution]
● Do not register ESC~CS command in the registration command group.
● When calling out another command group with ESC~CL from the registration command group, be sure to
register ESC~CL command at the end of the command group. Otherwise, print result cannot be assured.
Registration area = (Management domain) + (Raw-data domain)
Management domain: 4 × 256
Raw-data domain: 65536 – (Management domain) – 1 = 64511
37
Page 38

Calling from printer command and flash memory/ ESC~CL
[ASCII] ESC ~ C L n
[Decimal] 27 126 67 76 n
[Hexadecimal] 1B 7E 43 4C n
[Parameter] 0 ≤ n ≤ 255
[Description]
● Calls out a printer command group registered in the flash memory.
● ‘n’ specifies the number of the command group to be called out.
● When an unregistered number is specified, the command will be ignored.
38
Page 39

Reading the factory setting/ ESC~SF
[ASCII] ESC ~ S F
[Decimal] 27 126 83 70
[Hexadecimal] 1B 7E 53 46
[Description]
● Reads the factory setting of the printer’s internal setting
● The command is used in conjunction with Flash memory writing command (ESC~SS)
ESC~SF ←Reads the factory setting
ESC~SS ←Writes the setting for flash memory
Printer can be restored to factory setting with the above command.
39
Page 40

Reading the default setting value/ ESC~SL
[ASCII] ESC ~ S L
[Decimal] 27 126 83 76
[Hexadecimal] 1B 7E 53 4C
[Description]
● Reads the default value of printer’s internal setting. The difference between factory setting values and
default setting values is that while factory setting values are set during manufacturing, default setting
values are set when the user changes the internal setting of the printer and settings are stored in the internal
setting user area of the flash memory.
● This command is used in conjunction with the flash memory writing command (ESC~SS) and the internal setting
command (ESC~SI).
ESC~SL←Reads the default value
ESC~SI···←Sets the internal setting of the printer.
ESC~SI···←Sets the internal setting of the printer.
ESC~SI···←Sets the internal setting of the printer.
ESC~SS←Writes the setting for flash memory.
40
Page 41

Writing the printer’s internal setting to flash memory / ESC~SS
[ASCII] ESC ~ S S
[Decimal] 27 126 83 83
[Hexadecimal] 1B 7E 53 53
[Description]
● Writes the internal setting of the printer to flash memory.
● Do not use this command together with other print commands because it writes data into the flash memory.
● After data are stored in the flash memory, the printer power is automatically turned OFF. The set values
become effective when the power is turned ON again.
● Be sure to use this command in conjunction with factory setting (ESC~SF) or default value (ESC~SL). If
this command is used separately, unexpected values may be set.
41
Page 42

Setting the inside of printer/ESC~SI
[ASCII] ESC ~ S I n m
[Decimal] 27 126 83 73 n m
[Hexadecimal] 1B 7E 53 49 n m
[Parameter] n: Setting category
m: Setting value by category
[Description]
● Sets the internal setting of the printer.
● Set the factory setting (ESC~SF), and default value (ESC~SL) before using the command.
ESC~SL ←Reads the default setting value
ESC~SI ←Sets the internal setting of the printer
ESC~SI ←Sets the internal setting of the printer
ESC~SI ←Sets the internal setting of the printer
ESC~SS ←Writes the setting for flash memory
● n=0 : Sets the serial interface communication speed.
1: Sets the serial interface data length.
2: Sets the serial interface stop bit length.
3: Sets the serial interface parity bit.
4: Sets the serial interface flow control.
5: Sets the printing density
6: Sets the type of printing paper
7: Sets the operation for automatic feed
8: Sets the black mark detection
9: Sets the character set.
10: Sets the international character set.
12: Sets the character pitch.
13: Sets the auto power OFF time.
14: Setting the return control of printer status.
15: Offline operation when canceling paper out.
16: Selects the font style.
17: Sets the code page.
255: Sets the printing of printer’s internal setting
Sets the serial interface communication speed: n=0
● Sets the communication speed of the cable interface connection
m = 0: 4800 bps
1: 9600 bps
2: 19200 bps
3: 38400 bps
4: 57600 bps
5: 115200 bps
42
Page 43

Sets the serial data length: n=1
● Sets the data length in cable interface connection.
m=0 : 8 bit data length
1 : 7 bit data length
Sets the serial stop bit length: n=2
● Sets the serial stop bit length. in cable interface connection.
m=0 : 1 stop bit
m=1 : 2 stop bit
Sets the serial parity bit: n=3
● Sets the parity bit in cable interface connection.
m=0 : parity bit unavailable
1: Even Parity
2 Odd Parity
Serial interface flow control: n=4
● Sets the flow control in cable interface connection.
m=0 : XON/XOFF control
m=1 : DTR/DSR control
Sets the printing density: n=5
● Sets the default value of printing density.
m=0: Density 0
m=1: Density −1
m=2: Density −2
m=3: Density +1
m=4: Density +2
Sets the type of printing paper: n=6
● Sets the default setting for the type of printing paper.
m=0: Specifies normal paper
m=1: Specifies 2 pieces of carbon paper
m=2: Specify the label paper
Setting the operation for automatic feed: n=7
● Sets the enabling/disabling of automatic feed.
m=0: disabled
m=1: enabled
Setting the black mark detection:n=8
●
Sets the enabling/disabling of Marker detection. If auto feed setting is set to enable at the same time, mark
detection will be executed during auto feeding as well.
m=0: disabled
m=1: enabled
Setting the character set: n=9
● Sets the default character set.
43
Page 44

m=1: Graphic character code
m=2: Italic code
Setting the international characters: n=10
● Sets the default setting of international character
m=0: Japan
1: USA
2: France
3: Germany
4: England
5: Denmark
6: Sweden
7: Italy
8: Spain
9: Norway
10: Denmark2
11: Spain2
12: LatinAmerica
13: Korea
14: Legal
Setting the character pitch: n=12
● Sets the default setting of character pitch.
m= 0: 10 cpi or equivalent
1: 12 CPI equivalent
2: 15 CPI equivalent
3:
Proportional
Setting the auto power OFF time: n=13
● Sets the auto power OFF time. Command content identical to ESC~O.
m=0 : auto power OFF disabled
m=1 : 1 minute.
m=3 : 3 minutes.
m=5 : 5 minutes.
m=10 : 10 minutes.
m=15 : 15 minutes.
Setting the return control of printer status: n=14
● Sets the enabling/disabling of the return control of printer status. Sends the return control of printer
status to FS G, ESC~Y when it is enabled.
m=0: disabled
1: enabled
Offline operation when canceling paper out: n=15
44
Page 45

● Sets the operation of either the offline state is maintained and the state is manually changed to online
when canceling paper out error, or the state is automatically changed to online when canceling paper out
error.
m=0: disabled
1: enabled
Selecting the Font style: n=16
● Selects the default setting of Font style.
m=0: Roman
1: Sans serif
2: Courier
3: Prestige
4: Script
Selecting the Code page: n=17
● Selects the default setting of code page.
m = 0: PC437 (U.S.A.)
1: PC850 (MULTILINGUAL)
2: PC860 (PORTUGAL)
3: PC863 (FRENCH - CANADA)
4: PC865 (NORWAY)
5: SCANDINAVIA
6: YUASCII
7: PC852 (LATIN 2)
8: PC855 (CYRILLIC)
9: PC866 (RUSSIAN)
10: HUNGARIAN
11: KAMENICKY
12: TURKEY
13: PC861 (ICELANDIC)
14: WELSH
15: MAZOVIA
16: UKRAINIAN
40: NEW HEBREW
41: OLD HEBREW
42: DEC HEBREW
50: 437 GREEK
51: GREEK 851
52: GREEK ABC
53: GREEK ELOT 928
54: CYPRUS
55: MALTA
60: ARABIC NLS
61: ARABIC EXT
62: UNISYS CODEPAGE
100: BRAZIL ABICOMP
101: BRAZIL ASCII
108: LATIN 1
109: PC858
45
Page 46

110: ISO LATIN 9
120: US ANSI
121: CYRILLIC ANSI
122: EASTERN EUROPE ANSI
Setting the printing of printer’s internal setting: n=255
● Prints out the current state of internal setting values of the printer. After printing out, the printer is automatically
turned OFF. However, this internal setting value print is printed only when the emulation is set to ESC/P, so use
this print after setting the emulation to ESC/P mode by ESC~A command.
m=0: Prints the printer’s internal setting
● Be sure to write the setting value in the flash memory with ESC~SS after setting categories using this
command. The set values become effective at the next power-ON.
46
Page 47

ESC/P Emulation Command
47
Page 48

Returning to printing/ CR
[ASCII] CR
[Decimal] 13
[Hexadecimal] OD
[Description]
● Data in the receiving buffer will not be printed.
● Moves the print start position immediately after this code to the head of the same line (left margin).
* Caution With the use of CR, print data in the same line can be overlapped. Since printing is executed by LF code in
PD Series, CR operation includes decoding print data before CR in the printer memory and moving the next print start
position (memory decoding position) to the head of the line.
48
Page 49

Line feed/LF
[ASCII] LF
[Decimal] 10
[Hexadecimal] 0A
[Description]
● Prints the data in the receiving buffer and performs line feed.
● After setting the LF code, the head of line (left margin) becomes the next printing start position.
● Line feed rate can be set with ESC 0, ESC 2, ESC 3, ESC A.
● Initial value is 30/203 inch.
● When print data, CR code, and LF code are entered in this order, data are printed by CR code and then line
feed is executed by LF code.
● Cancels the double-width expansion with automatic cancel (SO, ESC SO).
* CautionWhen data without [CR], such as [print data] + [LF], are received, an operation equivalent to CR is
executed within LF processing before line feed is executed.
As a result of line feed, if the next print position falls within the perforation skip (bottom margin) area, the printer feeds
paper until the position comes to the top of the next page.
49
Page 50

Page feed/FF
[ASCII] FF
[Decimal] 12
[Hexadecimal] 0C
[Description]
● Prints out data in the print buffer and feeds paper to the top of the next page according to the page length
set in advance.
●The beginning of page is set to the print head position when the ESC @ code is input or the page length is set at the
power activation.
● The head of line (left margin) becomes the next printing start position.
● Cancels the double-width expansion with automatic cancel (SO, ESC SO).
50
Page 51

Forward paper feeding/ ESC J
[ASCII] ESC J n
[Decimal] 27 74 n
[Hexadecimal] 1B 4A n
[Parameter] 0 ≤ n ≤ 255
[Description]
● Prints data stored in the print buffer and feeds paper by [n /203] inches.
● The specified value of paper feed (n/203) is valid only when using this command. It does not affect the line
feed rate setting.
● After the execution of the command, printing end position becomes the next printing start position. It does
not return to the left margin.
● As a result of line feed, if the next printing position falls within the perforated line skip (bottom margin) area, the printer
feeds paper until the position comes to the top of the next page. The print start position does not return to the left edge.
51
Page 52

Setting page length by line/ ESC C
[ASCII] ESC C n
[Decimal] 27 67 n
[Hexadecimal] 1B 43 n
[Parameter] 1 ≤ n ≤ 127
[Description]
● Sets the page length by n lines.
● Page length is set as an absolute length of (Line feed rate) × (Number of lines). Once this command is set, even when
the line feed rate is changed, the page length does not change. When the line feed rate is set to 0, this code is ignored.
● The paper position at the time of execution of the command becomes the head of line.
● Cancels the perforated line skip (bottom margin) setting by ESC N.
● Default is set to approx. 8 inch. (A4 paper size).
Setting page length by inch unit/ESC C NUL
[ASCII] ESC C NUL n
[Decimal] 27 67 0 n
[Hexadecimal] 1B 43 00 n
[Parameter] 1 ≤ n ≤ 15
[Description]
● Paper position at the time of execution of the command becomes the head of line.
● Page length is set as an absolute length. Therefore, once this command is set, even when the line feed rate is changed,
the page length does not change.
● Cancels the perforated line skip (bottom margin) setting by ESC N.
● Default is set to approx. 8 inch. (A4 paper size).
● While page length is set to ‘n’ inch, due to the difference in vertical top of form between EPSON and PD22, 1 inch is
calculated as approximately 180/203 for PD22. In such case, differences will occur between EPSON and PD22 as
follows.
Unit: inch EPSON PD22
1 180/180 180/203
・ ・ ・
5 900/180 900/203
・ ・ ・
10 1800/180 1800/203
・ ・ ・
15 2700/180 2700/203
- 52 -
Page 53

Setting perforated line skip/ESC N
[ASCII] ESC N n
[Decimal] 27 78 n
[Hexadecimal] 18 4E n
[Parameter] 1 ≤ n ≤ 127
[Description]
● Sets the perforated line skip by n lines.
● After this setting, n lines from the end of a page are not printed and the paper is automatically fed for this
range.
● Once this command is set, even when the line feed rate is changed, the skip rate does not change.
● Perforated line skip is canceled when page length is newly set.
Cancelling perforated line skip/ESC O
[ASCII] ESC O
[Decimal] 27 79
[Hexadecimal] 18 4F
[Description]
● Cancels the perforated line skip setting.
● In addition to this code, perforated line skip is cancelled when a page length is newly set by ESC C or ESC
C NUL code.
● At default setting, perforated line skip is disabled.
- 53 -
Page 54

Setting the right margin/ESC Q
[ASCII] ESC Q n
[Decimal] 27 81 n
[Hexadecimal] 1B 51 n
[Parameter] 1 ≤ n ≤ 42
[Description]
● Sets the right margin by n columns.
● ‘n’ indicates the number of columns when taking the left end, the printers’ physical starting position of printing, as 0. ‘n
– 1’ columns from the left margin shall be the print area.
● Specify ‘n’ based on the character width currently set. Therefore, the maximum value of ‘n’ changes depending on the
character width. The character width at the time of setting includes the value of character-to-character space rate. When
10CPI, 12CPI, 15CPI, reduced printing, or double-wide enlarged printing is specified, data are processed in units of the
character width specified.
● Even when the pitch between the command position and the left margin is one character or less, at least one character is
printed.
● Upon this setting, data in the print buffer will be cleared. Be sure to set this command at the head of a line.
● For proportional printing, set the value taking character pitch as 10CPI.
●Values less than the left margin will be ignored.
●Once the right margin is set, even when character width is changed, the right margin position does not change.
●Default is 384-dot position.
Left end
Left margin
Left margin
Right margin
Right end
Right margin
Printable area
Value ‘n’ of right margin
Value ‘n’ of left margin
- 54 -
Page 55

Setting the left margin/ ESC I
[ASCII] ESC I n
[Decimal] 27 108 n
[Hexadecimal] 1B 6C n
[Parameter] 1 ≤ n ≤ 42
[Description]
● Sets the left margin by n columns.
● ‘n' indicates the number of columns from the physical printing start position of the printer.
● Specify ‘n’ based on the character width currently set. Therefore, the maximum value of ‘n’ changes depending on the
character width. The character width at the time of setting includes the value of character-to-character space rate. When
10CPI, 12CPI, 15CPI, reduced printing, or double-wide enlarged printing is specified, data are processed in units of the
character width specified.
● For proportional printing, set the value taking character pitch as 10CPI.
● Even when the interval with the right margin is one character or less, at least one character is printed.
● Upon this setting, data in the print buffer will be cleared. Be sure to set this command at the head of a line.
● Once the left margin is set, even when character width is changed, the right margin position does not change.
● Default is 0-dot position.
- 55 -
Page 56

Setting the 1/8-inch line feed rate/ESC 0
[ASCII] ESC 0
[Decimal] 27 48
[Hexadecimal] 1B 30
[Description]
● Sets the line feed rate to EPSON: 1/8-inch (Approx. 0.32cm) 22/203inch (Approx. 0.27cm).
Setting the 1/6-inch line feed rate/ESC 2
[ASCII] ESC 2
[Decimal] 27 50
[Hexadecimal] 1B 32
[Description]
● Initial power-on status.
● Sets the line feed rate to EPSON: 1/6-inch (Approx. 0.42cm) 30/203inch (Approx. 0.37cm)
- 56 -
Page 57

Setting the n/60-inch line feed rate/ESC A
[ASCII] ESC A n
[Decimal] 27 65 n
[Hexadecimal] 1B 41 n
[Parameter] 0 ≤ n ≤ 85
[Description]
● Sets the line feed rate to approx. n/67.6
● Sets the line feed rate to 3/203 dot unit.
Setting the n/180-inch line feed rate/ESC 3
[ASCII] ESC 3 n
[Decimal] 27 51 n
[Hexadecimal] 18 33 n
[Parameter] 0 ≤ n ≤ 255
[Description]
● Sets the line feed rate to n/203.
● Sets the line feed rate to 1 dot unit.
Setting the n/360-inch line feed rate/ESC +
[ASCII] ESC + n
[Decimal] 27 43 n
[Hexadecimal] 1B 2B n
[Parameter] 0 ≤ n ≤ 255
[Description]
● Sets the line feed rate to n/406
● Sets the line feed rate to 1/406 dot unit.
- 57 -
Page 58

Specifying horizontal tab positions/ESC D
[ASCII] ESC D n1 n2 … nk NUL
[Decimal] 27 68 n1 n2 … nk 0
[Hexadecimal] 1B 44 n1 n2 … nk 00
[Parameter] 1 ≤ n ≤ 255, 0 ≤ k ≤ 32
[Description]
● Sets horizontal tab positions.
● ‘n’ indicates the number of columns from the left margin. ‘k’ indicates the number of horizontal tab positions. Up to 32
positions can be set.
● Horizontal tabs are set as an absolute position of (Current character width) × (Number of columns). Therefore, even
when the character width is changed, the horizontal tab position does not change. The character width at the time of
setting includes the value of character-to-character space rate. When 10CPI, 12CPI, 15CPI, reduced printing, or doublewide enlarged printing is specified, data are processed in units of the character width specified.
● NUL code indicates the termination of setting.
● Set horizontal tab positions in ascending order. When a smaller value is set after a larger value, the setting
is terminated at that point.
● Immediately after power-ON, horizontal tab positions of a size equivalent to 10CPI are set every 8
columns. All horizontal tab positions are canceled by ESC D NUL code without a parameter.
●The tab position that exceeds right margin is not available. The disabled tab position is enabled when the tab position is
set within the print area by resetting the margin.
● The setting is initialized by ESC @ Initialize command.
- 58 -
Page 59

Execution of horizontal tab/HT
[ASCII] HT
[Decimal] 9
[Hexadecimal] 09
[Description]
● Shifts the print position to the next horizontal tab position.
● When HT code is set in an unspecified area (when it is set beyond the last tab position in a line), the input
will be ignored.
● Immediately after power-ON, horizontal tab positions of a size of 10CPI are set every 8 columns.
● Given horizontal tab positions can be set by ESC D code.
● When underline is specified, the underline will not be drawn at a moving area of HT.
- 59 -
Page 60

Setting vertical tab positions/ESC B
[ASCII] ESC B n1 n2 … nk NUL
[Decimal] 27 66 n1 n2 … nk 0
[Hexadecimal] 1B 42 n1 n2 … nk 00
[Parameter] 1 ≤ n ≤ 255, 0 ≤ k ≤ 16
[Description]
● Sets the vertical tab position.
● n indicates the line number from the head of line and k indicates the number of vertical tab position.
Settable tab positions are maximum 16.
● Vertical tabs are set as an absolute position of (Line feed rate) × (Number of lines). Therefore, even when the line feed
rate is changed after setting, the horizontal tab position does not change.
● NUL code indicates the termination of setting.
● Set vertical tab positions in ascending order. When a smaller value is set after a value larger than that, the
setting is terminated at that point. All vertical tab positions can be canceled with ESC B NULL code
without a parameter.
● The tab position that exceeds the page length and the tab position within the roulette skip (bottom margin)
area are not available.
The disabled tab position is enabled when the tab position is set within the print area by resetting the page length and
releasing the roulette skip.
● At the initial state, no vertical tab position is set. When VT is executed in this state, the printer performs in
the same manner as in LF.
● When VT is executed after tab positions are cleared by ESC B NUL, the printer performs in the same manner as in CR.
Execution of vertical tab/VT
[ASCII] VT
[Decimal] 11
[Hexadecimal] 0B
[Description]
● Prints data in the print buffer and feeds paper to the vertical tab position set by ESC B code.
● When no vertical tab position is set, the printer performs in the same manner as in LF code.
● When VT code is entered beyond the last vertical tab position, the printer performs in the same manner as in FF code.
● When VT is executed after tab positions are cleared by ESC B NUL, the printer performs in the same manner as in CR.
● Cancels double-width enlarged printing specified by SO code or ESC SO code.
- 60 -
Page 61

Specifying the absolute position/ESC $
[ASCII] ESC $ n1 n2
[Decimal] 27 36 n1 n2
[Hexadecimal] 1B 24 n1 n2
[Parameter] 0 ≤ n1 ≤ 255, 0 ≤ n2 ≤ 255
[Description]
● Specifies the print start position of the next data as an absolute position in dots.
● ‘Specifying an absolute position’ means to specify the next print start position by the number of dots from the left
margin.
● ‘n1’and ‘n2’ indicate the number of dots from the left margin.
Number of dots = n1 + 256 × n2
● The number of dots is calculated on a 2/203 inch basis. And the maximum value of dot number that can be specified by
n1 and n2 is 192 dots.
● Values specified beyond the right margin will be ignored.
● When an underline is specified, the underline will not be drawn at a moving area.
Left end
Left margin position
Left margin
Current print position
ABCDEFG HIJ
Absolute position specification
Next print start position
- 61 -
Page 62

N
p
n
N
p
n
p
n
N
Specifying the relative position/ESC ¥
[ASCII] ESC ¥ n1 n2
[Decimal] 27 92 n1 n2
[Hexadecimal] 1B 5C n1 n2
[Parameter] 0 ≤ n1 ≤ 255, 0 ≤ n2 ≤ 255
[Description]
● Specifies the print start position of the next data as a relative position in dots.
● ‘To specify by a relative position’ means to specify the next print start position by the number of given rightward or
leftward dots, based on the print position immediately before this code.
● The number of dots is calculated on a 1/203 inch basis. ‘n1’ and ‘n2’ indicate the number of dots from a print position
used as the reference. Specify leftward moving with two’s complement.
Number of dots = n1 + 256 × n2
−1440 ≤ (n1 + 256 × n2) ≤ 1440
● The number of dots and the values of ‘n1’ and ‘n2’ correspond as follows. (The values of ‘n1’ and ‘n2’ in the table are in
hexadecimal.))
umber of dots
1140
・・・
200
100
0
-1
2-
3-
・・・
FA 60
-1440
n1 n2
05
A0
02
01
00 00
FF FF
FF FF
FF FD
● Values beyond the left margin or right margin will be ignored.
● Underline Specification (ESC-, FS-) by the moving area of ESC ¥ is processed as follows.
Type of underline
specification
Moving direction of ESC¥
Leftward Rightward
ESC- Not drawn Lines are drawn.
FS-
Not drawn Not drawn
Left edge
ositio
Left margin
argin Left m
ext pprinting
osition
start
DEF
Negative d ction
Current printing
ositio
ABC
ire
Reference p
osition
Positive direction
ext printing start
ositio
DEF
- 62 -
Page 63

Setting the VFU tab /ESC b
[ASCII] ESC b n m1 m2…mk NUL
[Decimal] 27 98 n m1 m2…mk 0
[Hexadecimal] 1B 62 n m1 m2…mk 00
_
[Parameter] 0 ≤ n ≤ 7, 1 ≤ m ≤ 255, 0 ≤ k ≤ 16
[Description]
● Sets the vertical tab position specified by ‘m’ in the channel specified by ‘n’.
● ‘n’ indicates the channel number and ‘m’ indicates the vertical tab position (number of lines).
● Up to 8 channels are available. Specify with the number from 0 to 7.
th
● Specify ‘m’ with the number of lines from the first line of the page (0
line) in the current line feed rate.
● Once the vertical tab position is set, even when the line feed rate is changed, the tab position does not change.
● If ESC b n NUL code is entered without ‘m’ specified, vertical tabs specified in channel ‘n’ will be all deleted.
● Immediately after power-ON, no vertical tab is set in any channel.
●Specify tab positions in ascending order of the line. When a value smaller than previous ‘m’ is specified, the setting is
completed at that point. The setting is completed also when a position is specified beyond the print area.
●Use ESC / code to specify the channel for executing a tab.
●It is set to channel 0 in Vertical Tab Position (ESC B code).
●VFU: VerticaI Format Unit.
Specifying the VFU channel/ESC /
[ASCII] ESC / n
[Decimal] 27 47 n
[Hexadecimal] 1B 2F n
[Parameter] 0 ≤ n ≤ 255
[Description]
● Specifies a VFU channel by ‘n’ to change the vertical tab position in the page to the setting specified in the
channel.
● ‘n’ indicates the channel number.
● In the initial setting at power-on, channel 0 is specified.
● This code is used for setting a vertical tab position in that page by channel specification; vertical tabs are not executed (ie.
the print position does not move).
● Use VT code to execute vertical tabs.
- 63 -
Page 64

Back space/BS
[ASCII] BS
[Hexadecimal] 8
[Decimal] 08
[Description]
● Moves back the print position leftward for a character in the current character width.
● When no print data exists before BS code in the same line, or when previous data is a bitmap image, HT code, or
absolute/relative position specification, the print position does not change.
● Cannot move back beyond the left margin.
- 64 -
Page 65

Selecting the character code table/ESC t
[ASCII] ESC t n
[Decimal] 27 116 n
[Hexadecimal] 1B 74 n
[Parameter] n = 0, 1, 2, 3 or "0", "1", "2", "3"
[Description]
●Select one of the character code .
When n = 0, Italic code is selected. (default)
When n=1, specified code page is selected.
When n=2, the user definition (download) code is selected.
When n=3, specified code page is selected.
● With the use of ESC 6 or ESC 7 code, you can switch either to use upper 32 codes as a control code or to use them as a
character code.
●The switching of code page can be set by ESC~P command.
- 65 -
Page 66

Selecting the international character set/ESC R
[ASCII] ESC R n
[Decimal] 27 82 n
[Hexadecimal] 1B 52 n
[Parameter] 0 ≤ n ≤ 13, 64
[Description]
● Selects the character set suitable for each country.
● Default is n=0 (U.S.A.) (Factory default setting)
- 66 -
Page 67

Specifying/Cancelling proportional font/ESC p
[ASCII] ESC p n
[Decimal] 27 112 n
[Hexadecimal] 1B 70 n
[Parameter] n=0, 1 or “0”, “1”
[Description]
● Specifies/Cancels the proportional font.
● Selects the proportional font when n=1 or “1”
● Cancels the proportional font when n=0 or “0”
● The command has priority over other specified character pitch.
● Character width when proportional font is specified varies depending on the proportional spacing.
- 67 -
Page 68

Specifying the character equivalent to 10CPI/ESC P
[ASCII] ESC P
[Decimal] 27 80
[Hexadecimal] 1B 50
[Description]
● Specifies 10CPI-equivalent characters (18/203 dots) for printing after this code.
● To cancel this code, specify another pitch.
● This is the default setting at power-ON.
Specifying the character equivalent to 12CPI/ ESC M
[ASCII] ESC M
[Decimal] 27 77
[Hexadecimal] 1B 4D
[Description]
● Specifies 12CPI-equivalent characters (15/203 dots) for printing after this code.
● To cancel this code, specify another character pitch.
Specifying the character equivalent to 15CPI/ESC g
[ASCII] ESC g
[Decimal] 27 103
[Hexadecimal] 1B 67
[Description]
● Specifies 15CPI-equivalent characters (12/203 dots) for printing after this code.
● To cancel this code, specify another pitch.
● This code is disabled when Proportional is specified.
- 68 -
Page 69

Specifying super/subscript/ESC S
[ASCII] ESC S n
[Decimal] 27 83 n
[Hexadecimal] 1B 53 n
[Parameter] n=0, 1 or “0”, “1”
[Description]
● Prints out subsequent print data in superscript or subscript.
Specifies superscript (printing on upper half of normal characters) when ‘n’ = 0 or “0”.
Specifies subscript (printing on the lower half of normal characters) when ‘n’ = 1 or “1”.
● Character codes can be set within the following range.
32 to 126 (20h to 7Eh)
128 to 175 (80h to AFh) … For Extended Graphic
224 to 239 (E0h to EFh) …… For Extended Graphic
Cancelling super/subscript/ESC T
[ASCII] ESC T
[Decimal] 27 84
[Hexadecimal] 1B 54
[Description]
● Cancels the super/subscript
- 69 -
Page 70

Specifying italic/ESC 4
[ASCII] ESC 4
[Decimal] 27 52
[Hexadecimal] 1B 34
[Description]
● Prints out print data in Italic.
● Extended graphics, excluding a part of international character, cannot be italicized.
● For some characters, the left or right edge of characters may be missed at either or both ends of the paper.
● Extended graphic codes B0h to DFh, F4h, and F5h cannot be printed in Italic; they are printed in normal
characters.
Cancelling italic/ESC 5
[ASCII] ESC 5
[Decimal] 27 53
[Hexadecimal] 1B 35
[Description]
● Cancels the italic character.
- 70 -
Page 71

Specifying reduced printing/SI
[ASCII] SI
[Decimal] 15
[Hexadecimal] 0F
[Description]
● Prints out subsequent data in reduced size.
● The character width is reduced to approximately 60% when printed.
● This code cannot be combined with 15CPI specification.
Specifying reduced printing/ESC SI
[ASCII] ESC SI
[Decimal] 27 15
[Hexadecimal] 1B 0F
[Description]
● It executes the same command as SI code.
Cancelling reduced printing/DC 2
[ASCII] DC2
[Decimal] 18
[Hexadecimal] 12
[Description]
● Cancels the reduced printing.
- 71 -
Page 72

Specifying double-width expansion with automatic cancel/SO
[ASCII] SO
[Decimal] 14
[Hexadecimal] 0E
[Description]
● Executes the double-width expansion printing.
● SO code cancels the double-width expansion with DC4 code or line feed. It can also be cancelled with ESC
W, ESC ! codes.
Specifying double-width expansion with automatic cancel/ESC SO
[ASCII] ESC SO
[Decimal] 27 14
[Hexadecimal] 1B 0E
[Description]
● It executes the same command as SO code.
Cancelling double-width expansion with automatic cancel/DC4
[ASCII] DC4
[Decimal] 20
[Hexadecimal] 14
[Description]
● Cancels the double-width expansion with SO code, ESC SO code.
●The double wide expansion is not released by ESC W 1.
- 72 -
Page 73

Specifying/cancelling double width large characters/ESC W
[ASCII] ESC W n
[Decimal] 27 87 n
[Hexadecimal] 1B 57 n
[Parameter] n = 1, 0 or “1”, “0”
[Description]
● Specifies the double width large characters.
● Specifies the double width large characters when n=1 or “1”.
● Cancels the double width large characters when n=0 or “0”
● The double width large characters specified by this code cannot be cancelled with DC4 code or line feed.
● The double width large characters specified by SO, ESC SO can be cancelled with ESC W 0.
Specifying/cancelling double height large characters/ESC w
[ASCII] ESC w n
[Decimal] 27 119 n
[Hexadecimal] 1B 77 n
[Parameter] n = 1, 0 or “1”, “0”
[Description]
● Specifies the double height large characters.
● Specifies the double height large characters when n=1 or “1”.
● Cancels the double height large characters when n=0 or “0”.
- 73 -
Page 74

Specifying emphasis printing/ESC E
[ASCII] ESC E
[Decimal] 27 69
[Hexadecimal] 1B 45
[Description]
● Prints out print data in emphasized characters.
● Prints out data in slightly wider characters.
Cancelling emphasis printing/ESC F
[ASCII] ESC F
[Decimal] 27 70
[Hexadecimal] 1B 46
[Description]
● Cancels the emphasis printing.
- 74 -
Page 75

Specifying double strike printing/ESC G
[ASCII] ESC G
[Decimal] 27 71
[Hexadecimal] 1B 47
[Description]
● Specifies the double strike printing of a data.
Cancelling double strike printing/ESC H
[ASCII] ESC H
[Decimal] 27 72
[Hexadecimal] 1B 48
[Description]
● Cancels the double strike printing.
- 75 -
Page 76

Specifying/Cancelling underline/ESC −
[ASCII] ESC - n
[Decimal] 27 45 n
[Hexadecimal] 1B 2D n
[Parameter] n=0, 1 or “0”, “1”
[Description]
● Specify/cancels an underline.
● Specifies underline at time of n=1, “1”
● Cancels underline at time of n=0, “0”
● Underlines are not drawn on the following areas.
Moving area by Horizontal Tab (HT) or Absolute Position (ESC $)
Leftward moving area by Relative Position (ESC ¥)
Characters of B0h to DFh, F4h, and F5h of Extended Graphic code
- 76 -
Page 77

Collectively specifying a printing mode/ ESC!
[ASCII] ESC ! n
[Decimal] 27 33 n
[Hexadecimal] 1B 21 n
[Parameter] 0 ≤ n ≤ 255
[Description]
● Printing mode is specified with each bit by combination.
● Printing mode is specified with each bit under n.
●The specified content has priority over other code of same function.
Bit 7 6 5 4 3 2 1 0
At 1
At 0
Combination of printing mode
With ESC ! code, a combination of several printing modes can be specified at one time.
A combination with other codes (such as SO and SI) is also available, but in such case, a code needs to be
specified for each specification. By specifying 0 in ‘n’ with ESC ! code, you can cancel the specification of
all printing modes and return the setting to default.
Proportional
“
Underline Italic
Cancel Cancel
Double
width
10CPI
12CPI
15CPI
○ ○ ○ ○ ○ ○
○ ○ ○ ○ ○ ○
○ ○ ○ × ○ ○
○ ○ ○ ○ ○ ○
×” mark cannot be combined because of character size.
Bit Corresponding code
0 ESC M, ESC P
1 ESC p
2 SI, DC2
3 ESC E, ESC F
4 ESC G, ESC H
5 ESC W
6 ESC 4, ESC 5
7 ESC -
Double
width
Cancel
Emphasis Super/Sub Reduction Double
Double
strike
printing
Emphasis
Reduction Proportional 12CPI
Cancel Cancel Cancel Cancel
strike
printing
10CPI
Underline
- 77 -
Page 78

Selecting the font style/ESC k
[ASCII] ESC k n
[Decimal] 27 107 n
[Hexadecimal] 1B 6B n
[Parameter] n = 0, 1, 2, 3, 4 or “0”, “1”, “2”, “3”, “4”
[Description]
Selects the font style.
●
n = 0: Roman
n = 1: Sanserif
n = 2: Courier
n = 3: Prestige
n = 4: Script
78
Page 79

Selecting character style/ ESC q
[ASCII] ESC q n
[Decimal] 27 113 n
[Hexadecimal] 1B 71 n
[Parameter] n = 0, 1, 2, 3
[Description]
● Selects the character style.
● When ‘n’ = 1, outline characters are selected.
● When ‘n’ = 2, shadowed characters are selected.
● When ‘n’ = 3, shadowed outline characters are selected.
● When n=0, it cancels the character style.
● Extended graphic codes B0h to DFh, F4h, and F5h are printed in normal characters.
79
Page 80

Setting the spacing of characters/ESC SP
[ASCII] ESC SP n
[Decimal] 27 32 n
[Hexadecimal] 1B 20 n
[Parameter] 0 ≤ n ≤ 127
[Description]
● Sets the spacing of characters.
● “n” indicates the number of dots. Calculation unit is 1/203 inch.
● Default is n=0
● Sets the right spacing of characters to [n × basic calculation unit] inches. Spacing of characters will be
indicated as follows.
Number of dots of each character
A A A
Left space of each
character
● If the horizontal magnification of character is 2 or more, the spacing increases with the magnification.
● Character width used during horizontal tab position, left margin, right margin setting includes space
between characters.
each character
Right space of
Space secured by ESC SP
80
Page 81

t
Aligning the characters/ESC a
[ASCII] ESC a n
[Decimal] 27 97 n
[Hexadecimal] 1B 61 n
[Parameter] n = 0, 1, 2, 3
[Description]
● Selects the aligning of characters.
● Performs the aligning of characters by “n” value.
When n=0, left end alignment is performed (default).
When n=1, centering is performed.
When n=2, right end alignment is performed.
When n=3, even alignment is performed.
Left end alignment
Centering
Right end alignmen
Even alignment
● Default is n=0
● Position alignment is executed between right and left margins when CR, LF, or FF code is entered or buffer-full printing
is executed.
● Specifies position alignment at the head of a line.
● BS and DEL codes will be ignored.
● When ‘n’ = 1 or 2, HT, ESC $ and ESC ¥ codes will be ignored. When ‘n’ = 3, character data after these
codes will be full-justified.
● The range of printing length to which full justification can be applied (in one line) is 75 to 125% of the
length between the right and left margins. Print position is determined by adjustment of space width.
81
Page 82

Specifying the download character set/ESC %
[ASCII] ESC % n
[Decimal] 27 37 n
[Hexadecimal] 1B 25 n
[Parameter] n = 0, 1 or 30h, 31h
[Description]
● Specifies/cancels the download characters set.
● When n=1, 31h, it specifies the download characters set. However, if no character is defined for download
character set, the specification will be ignored.
● When ‘n’ = 0 or 30h, the download character set is canceled and the setting returns to the internal character set.
● Before specifying a download character set, be sure to specify the same character type.
82
Page 83

Copying character set/ESC:
[ASCII] ESC : NUL n s
[Decimal] 27 53 0 n s
[Hexadecimal] 1B 3A 00 n s
[Parameter] n = 0, 1,2, 3, 4. s = 0
[Description]
● ‘s’ is a font number of embedded character set.
● Copies the currently selected character set to a download character set.
● Specify a character attribute (high-quality character, proportional character, 15CPI, super/subscript character) to be
copied before entering this code. Defined characters are printed in this pitch. Note, however, that characters are printed
in the character width pitch defined when ‘proportional’ is specified.
● Clear download characters already defined before copying a character set. Copying range is characters
from 20h to 7Eh.
83
Page 84

Defining the download characters/ESC &
[ASCII] ESC & s n m a0 a1 a2 p1 … pk
[Decimal] 27 38 s n m a0 a1 a2 p1 … pk
[Hexadecimal] 1B 26 s n m a0 a1 a2 p1 … pk
[Parameter] S = 0, 32 ≤ n ≤ m ≤ 127 (20h ≤ n ≤ m ≤ 7Fh)
[Description]
● Defines the download characters.
● ‘S’ is always 0.
● ‘n’ specifies a character code that starts defining. ‘m’ specifies a character code that completes defining. To
define only one character, specify ‘n’ = ‘m’.
● a0’, ‘a1’, and ‘a2’ specify character width.
MSB
MSB
p
1
LSB
MSB
p
2
LSB
MSB
p
3
LSB
p
4
LSB
MSB
p
5
LSB
MSB
p
6
LSB
……
……
……
MSB
p
LSB
MSB
p
LSB
MSB
p
LSB
MSB
p
LSB
MSB
p
LSB
MSB
p
LSB
MSB
p
LSB
……
3
……
4
1
2
k-2
k-1
k
K=3 × a1: High-quality characters, Proportional characters
K=2 × a1: 15CPI characters, Super-/Sub-script characters
● (Character: Height×width(a0+a1+a2))
10CPI-equivalent character: 24 × 18, 12CPI-equivalent character: 24 × 15
15CPI-equivalent character: 16 × 12, Proportional: 24 × 21*
Super-/sub-script: 16 × 12
* is the maximum character width. The maximum value of ‘a1’ is 19.
84
MSB
p
k-1
LSB
MSB
p
LSB
k
Page 85

●To define several download characters, send ‘a0 … pk’ the number of times equal to the number of characters to be
defined (m – n + 1).
85
Page 86

Selecting the bit image mode/ESC *
[ASCII] ESC * m n1 n2 data
[Decimal] 27 42 m n1 n2 data
[Hexadecimal] 1B 2A m n1 n2 data
[Parameter] m = 0, 1, 2, 3, 4, 6, 32, 33, 38, 39
0 ≤ n1 ≤ 255, 0 ≤ n2 ≤ 11
[Description]
● Selecting the bit image mode depending on the “m” value. (See chart below)
● n1, n2 indicates the number of dots in horizontal direction.
n1: Remainder of the number of dots divided by 256.
n2: Quotient of the number of dots divided by 256.
●The bit image of 48-bit is not supported.
● The maximum number of dots in horizontal direction is as follows.
m
(decimal)
0 60DPI 101DPI 192
1 120DPI 203DPI 384
8 dots
24 dots
● The number of dots is defined by (n1 + n2 × 256). Therefore, the number of data that needs to be sent is
defined as follows.
When ‘m’ = 0, 1, 2, 3, 4, or 6: n1 + n2 × 256
When ‘m’ = 32, 33, 38, or 39: (n1 + n2 × 256) × 3
2 120DPI 203DPI 384
3 240DPI 203DPI 384
4 80DPI 101DPI 192
6 90DPI 101DPI 192
32 60DPI 101DPI 192
33 120DPI 203DPI 384
38 90DPI 101DPI 192
39 180DPI 203DPI 384
Dot density in horizontal
direction
EPSON PD22
Maximum value for
n1+256×n2
86
Page 87

Correspondence between data and dots
8-dot bit image
2
●
●
●
●
●
●
●
●
24-dot bit image
2
●
●
●
●
●
●
●
●
●
●
●
●
●
●
●
●
●
●
●
●
●
●
●
●
726 25 24
7
26 25 2
3
2
2221 2
4
23 2221 20 27 26 25 24 2322 2120 27 2625 24 2322 21 2
0
0
87
Page 88

Setting bit image repeat/ESC *
[ASCII] ESC * m r1 r2 n1 n2 data
[Decimal] 27 42 m r1 r2 n1 n2 data
[Hexadecimal] 1B 2A m r1 r2 n1 n2 data
[Parameter] ‘m’ = 167
When ‘m’ = 167: 0 ≤ n1 ≤ 180, n2 = 0
[Description]
● Selects a bit image according to the value of ‘m’ and repeats printing the number of times specified.
● ‘r1’ and ‘r2’ indicate the number of times the bit image is to be printed.
r1: Remainder of the number of times divided by 256
r2: Quotient of the number of times divided by 256
● ‘n1’ and ‘n2’ indicate the number of dots in horizontal direction of the bit image to be repeated.
n1: Remainder of the horizontal number of dots of the bit image to be printed divided by 256.
n2: Quotient of the horizontal number of dots of the bit image to be printed divided by 256.
m = 167, 0 ≤ n ≤ 180, n2 = 0
m Vertical dot density Horizontal dot density Adjacent dot specification
24 dots 167 203DPI 203DPI Available
88
Page 89

8-dot single density bit image/ESC K
[ASCII] ESC K n1 n2 data
[Decimal] 27 75 n1 n2 data
[Hexadecimal] 1B 4B n1 n2 data
[Parameter] 0 ≤ n1 ≤ 255, 0 ≤ n2 ≤ 1
[Description]
● This command executes the printing of 8 dot single density bit image for the number of data specified by
n1, n2.
● n1, n2 indicates the dot position. Set the values as follows.
n1: Remainder of the number of dot positions divided by 256.
n2: Quotient of the number of dot positions divided by 256
● When ESC K is specified, the printer prints out data in the following resolution: Vertical dot 3/203 in.
Horizontal dot 2/203 in.
● The maximum number of dot positions is 192.
8-dot double density bit image/ESC L
[ASCII] ESC L n1 n2 data
[Decimal] 27 76 n1 n2 data
[Hexadecimal] 1B 4C n1 n2 data
[Parameter] 0 ≤ n1 ≤ 255, 0 ≤ n2 ≤ 3
[Description]
● This command executes the printing of 8 dot double density bit image for the number of data specified by
n1, n2.
● ‘n1’ and ‘n2’ can be specified in the same manner as ESC K.
● When ESC L is specified, the printer prints out data in the following resolution: Vertical dot 3/203 in.
Horizontal dot 1/203 in.
● The maximum number of dot positions is 384.
89
Page 90

8-dot double speed/density bit image/ESC Y
[ASCII] ESC Y n1 n2 data
[Decimal] 27 89 n1 n2 data
[Hexadecimal] 1B 59 n1 n2 data
[Parameter] 0 ≤ n1 ≤ 255, 0 ≤ n2 ≤ 3
[Description]
● This command executes the printing of 8 dot double speed/density bit image for the number of data
specified by n1, n2.
● ‘n1’ and ‘n2’ can be specified in the same manner as ESC K.
● When ESC L is specified, the printer prints out data in the following resolution: Vertical dot 3/203 in.
Horizontal dot 1/203 inch.
● The maximum number of dot positions is 384. However, horizontally adjacent dots are omitted in printing.
8-dot quadruple density bit image/ESC Z
[ASCII] ESC Z n1 n2 data
[Decimal] 27 90 n1 n2 data
[Hexadecimal] 1B 5A n1 n2 data
[Parameter] 0 ≤ n1 ≤ 255, 0 ≤ n2 ≤ 3
[Description]
●This command executes the printing of 8 dot quadruple density bit image for the number of data specified
by n1, n2.
●‘n1’ and ‘n2’ can be specified in the same manner as ESC K.
●When ESC L is specified, the printer prints out data in the following resolution: Vertical dot 3/203 inch.
Horizontal dot 1/203 inch.
●The maximum number of dot positions is 832. However, horizontally adjacent dots are omitted in printing.
90
Page 91

Changing the bit image mode/ESC ?
[ASCII] ESC ? c m
[Decimal] 27 63 c m
[Hexadecimal] 1B 3F c m
[Parameter] c = “K”, “L”, “Y”, “Z” (4Bh, 4Ch, 59h, 5Ah)
m = 0, 1, 2, 3, 4, 6, 32, 33, 38, 39
[Description]
● Converts the bit image mode of ESC K, ESC L, ESC Y, and ESC Z into the mode of ESC *.
● Specifies the value of ‘m’ in the same manner as parameter ‘m’ to be specified in ESC * modes.
● ‘c’ indicates the type of bit image (ESC K, ESC L, ESC Y, ESC Z) to be converted.
● Specifies ‘c’ as follows.
ESC K → ESC ? K m
ESC L → ESC ? L m
ESC Y → ESC ? Y m
ESC Z →ESC ? Z m
●The power-ON default setting of each code is as follows.
ESC K → ESC * 0
ESC L → ESC * 1
ESC Y → ESC * 2
ESC Z → ESC * 3
91
Page 92

Initializing the printer/ESC @
[ASCII] ESC @
[Decimal] 27 64
[Hexadecimal] 1B 40
[Description]
● Changes the software setting of the printer to the same one as power-ON setting.
● Data in the print buffer will be cleared.
●Even if this command is received, the mode is not shifted to emulation mode.
●It is also possible to fix the mode to EPSON emulation by sending this command at the beginning of program.
● User definition area (download character) will not be cleared.
92
Page 93

Cancelling high order side control code/ESC 6
[ASCII] ESC 6
[Decimal] 27 54
[Hexadecimal] 1B 36
[Description]
● Eliminates a function that works as a control code from upper 32 codes in the character code table so that it can be used
as a character code.
● Relevant character codes are from 128 to 159 (80h to 9Fh).
● This is the power-ON setting.
93
Page 94

Setting high order side control code/ESC 7
[ASCII] ESC 7
[Decimal] 27 55
[Hexadecimal] 1B 37
[Description]
● Adds a function as a control code to upper 32 codes in the character code table so that it cannot be used as
a character code.
● Relevant character codes are from 128 to 159 (80h to 9Fh).
● The content of the code to be controlled corresponds to 0 to 31 (00h to 1Fh) of lower character codes.
94
Page 95

Cancelling data/CAN
[ASCII] CAN
[Decimal] 24
[Hexadecimal] 18
[Description]
● Clears data in the print buffer that have been entered before CAN code in a line.
Deleting one character/DEL
[ASCII] DEL
[Decimal] 127
[Hexadecimal] 7F
[Description]
● Deletes one character data having been last entered in a line.
● In the following cases, this code will be ignored.
(1) When being at a left margin position
(2) Immediately after ESC ¥, ESC $, or HT
(3) Immediately after a bit image
95
Page 96

p
p
Appendix b: Black Mark Specification
Detects the paper position using a maker printed on a paper to feed the paper accurately.
To detect the paper position with marker, set “marker detection function” to enable in the internal
setting of the printer. The marker function is disabled during self printing, HEX print mode, test
print, and internal setting list printing regardless of respective settings.
Detects the marker position and feeds paper to the head of a page under the following conditions:
During auto feed
After receiving ESC FF command during printing
When FEED key is pressed at a detection error
If papers are set at power-on, data are printed from the position at that point. The paper position at
power-on is not detected.
(1) Position dimensions
Paper width 58mm
0
−1
10
5
Page head
osition
Marker
Surface
rinting
825mm
Black mark
length
Paper length
Paper surface
(printing side)
Paper length=Black mark
length
8 inch. max
Marker color: Black, OD value: 1.5 or higher, carbon ink
96
Page 97

(2) Detection accuracy
●The detection accuracy of marker position is +/-0.75mm.
(3) Setting
(4) Error
● If no marker is detected, the printer will stop feeding and show an error display. At this
time, if the FEED switch is pressed, marker detection will be executed again.
(5) Note
● If the marker is right below the sensor at power-on, the printer will identify that no
paper is set.
Pull out papers once and set the papers again.
● If the marker is right below the sensor at paper set, the printer will identify that no
paper is set and will not execute auto feeding. Cut or fold the edge of the paper and
insert the paper again.
● Marker detection is not executed in paper feeding by pressing of FEED switch.
Therefore in such a case, if the marker is right below the sensor, the printer will
identify that no paper is set (except detection by pressing of FEED switch at a marker
detection error).
When a mark paper is used while the black mark operation setting is disabled, and if
●
the sensor detects the marker, the printer will identify that no paper is set.
● When the mark position is detected properly, unprinted data, if any, will be deleted.
● If the mark position is not detected properly and a marker detection error is indicated,
unprinted data will not be deleted. Note that unprinted data will be printed when the
mark position is detected next time.
(6) Command
● Can specify the marker detection level of the sensor using a command (ESC~e).
● Can specify the mark width of the mark paper to be used using a command (ESC~e).
● Can adjust the top of form from the point of marker detection using a command
(ESC~B). Default is set to the rate from the end of black mark to the cut position.
● Be sure to set the values in a manner that “top of form from the point of marker
detection” is greater than “mark width”.
● Use it in page mode printing (ESC~L).
● Set the paper length (= black mark length) for page length.
● Make sure that print data fall within a printable area.
● Add ESC FF command at the end of print data.
97
Page 98

Index
・・・・・・・・・・・・・・・・・・・・・・・・・・・・・・・・・・・・・・・・・・・・・・・・・・・・・・・・・・・・・・・・・・・・・・・・・・・・・・・・・
BS 66
・・・・・・・・・・・・・・・・・・・・・・・・・・・・・・・・・・・・・・・・・・・・・・・・・・・・・・・・・・・・・・・・・・・・・・・・・・・・・・・
CAN
・・・・・・・・・・・・・・・・・・・・・・・・・・・・・・・・・・・・・・・・・・・・・・・・・・・・・・・・・・・・・・・・・・・・・・・・・・・・・・・・
CR
・・・・・・・・・・・・・・・・・・・・・・・・・・・・・・・・・・・・・・・・・・・・・・・・・・・・・・・・・・・・・・・・・・・・・・・・・・・・・・・
DC 2
・・・・・・・・・・・・・・・・・・・・・・・・・・・・・・・・・・・・・・・・・・・・・・・・・・・・・・・・・・・・・・・・・・・・・・・・・・・・・・・
DC4
・・・・・・・・・・・・・・・・・・・・・・・・・・・・・・・・・・・・・・・・・・・・・・・・・・・・・・・・・・・・・・・・・・・・・・・・・・・・・・・
DEL
・・・・・・・・・・・・・・・・・・・・・・・・・・・・・・・・・・・・・・・・・・・・・・・・・・・・・・・・・・・・・・・・・・・・・・・・・・・・・・
ESC "
・・・・・・・・・・・・・・・・・・・・・・・・・・・・・・・・・・・・・・・・・・・・・・・・・・・・・・・・・・・・・・・・・・・・・・・・・・・・・・
ESC $
ESC %
ESC &
ESC *
ESC /
ESC ?
ESC @
ESC +
ESC −
ESC 0
ESC 2
ESC 3
ESC 4
ESC 5
ESC 6
ESC 7
ESC a
ESC A
ESC b
ESC B
ESC C
ESC C NUL
ESC D
ESC E
ESC F
ESC FF
ESC g
ESC G
ESC H
ESC I
ESC J
ESC k
ESC K
ESC L
ESC M
ESC N
ESC O
ESC p
ESC P
・・・・・・・・・・・・・・・・・・・・・・・・・・・・・・・・・・・・・・・・・・・・・・・・・・・・・・・・・・・・・・・・・・・・・・・・・・・・・
・・・・・・・・・・・・・・・・・・・・・・・・・・・・・・・・・・・・・・・・・・・・・・・・・・・・・・・・・・・・・・・・・・・・・・・・・・・・・
・・・・・・・・・・・・・・・・・・・・・・・・・・・・・・・・・・・・・・・・・・・・・・・・・・・・・・・・・・・・・・・・・・・・・・・・・・・
・・・・・・・・・・・・・・・・・・・・・・・・・・・・・・・・・・・・・・・・・・・・・・・・・・・・・・・・・・・・・・・・・・・・・・・・・・・・・・
・・・・・・・・・・・・・・・・・・・・・・・・・・・・・・・・・・・・・・・・・・・・・・・・・・・・・・・・・・・・・・・・・・・・・・・・・・・・・・
・・・・・・・・・・・・・・・・・・・・・・・・・・・・・・・・・・・・・・・・・・・・・・・・・・・・・・・・・・・・・・・・・・・・・・・・・・・・・
・・・・・・・・・・・・・・・・・・・・・・・・・・・・・・・・・・・・・・・・・・・・・・・・・・・・・・・・・・・・・・・・・・・・・・・・・・・・・・
・・・・・・・・・・・・・・・・・・・・・・・・・・・・・・・・・・・・・・・・・・・・・・・・・・・・・・・・・・・・・・・・・・・・・・・・・・・・・・
・・・・・・・・・・・・・・・・・・・・・・・・・・・・・・・・・・・・・・・・・・・・・・・・・・・・・・・・・・・・・・・・・・・・・・・・・・・・・・
・・・・・・・・・・・・・・・・・・・・・・・・・・・・・・・・・・・・・・・・・・・・・・・・・・・・・・・・・・・・・・・・・・・・・・・・・・・・・・
・・・・・・・・・・・・・・・・・・・・・・・・・・・・・・・・・・・・・・・・・・・・・・・・・・・・・・・・・・・・・・・・・・・・・・・・・・・・・・
・・・・・・・・・・・・・・・・・・・・・・・・・・・・・・・・・・・・・・・・・・・・・・・・・・・・・・・・・・・・・・・・・・・・・・・・・・・・・・
・・・・・・・・・・・・・・・・・・・・・・・・・・・・・・・・・・・・・・・・・・・・・・・・・・・・・・・・・・・・・・・・・・・・・・・・・・・・・・
・・・・・・・・・・・・・・・・・・・・・・・・・・・・・・・・・・・・・・・・・・・・・・・・・・・・・・・・・・・・・・・・・・・・・・・・・・・・・・
・・・・・・・・・・・・・・・・・・・・・・・・・・・・・・・・・・・・・・・・・・・・・・・・・・・・・・・・・・・・・・・・・・・・・・・・・・・・・・
・・・・・・・・・・・・・・・・・・・・・・・・・・・・・・・・・・・・・・・・・・・・・・・・・・・・・・・・・・・・・・・・・・・・・・・・・・・・・・
・・・・・・・・・・・・・・・・・・・・・・・・・・・・・・・・・・・・・・・・・・・・・・・・・・・・・・・・・・・・・・・・・・・・・・・・・・・・・・
・・・・・・・・・・・・・・・・・・・・・・・・・・・・・・・・・・・・・・・・・・・・・・・・・・・・・・・・・・・・・・・・・・・・・・・・・・・・・・
・・・・・・・・・・・・・・・・・・・・・・・・・・・・・・・・・・・・・・・・・・・・・・・・・・・・・・・・・・・・・・・・・・・・・・・・・・・・・・
・・・・・・・・・・・・・・・・・・・・・・・・・・・・・・・・・・・・・・・・・・・・・・・・・・・・・・・・・・・・・・・・・・・・・・・・・・・・・・
・・・・・・・・・・・・・・・・・・・・・・・・・・・・・・・・・・・・・・・・・・・・・・・・・・・・・・・・・・・・・・・・・・・・・・・・・
・・・・・・・・・・・・・・・・・・・・・・・・・・・・・・・・・・・・・・・・・・・・・・・・・・・・・・・・・・・・・・・・・・・・・・・・・・・・・
・・・・・・・・・・・・・・・・・・・・・・・・・・・・・・・・・・・・・・・・・・・・・・・・・・・・・・・・・・・・・・・・・・・・・・・・・・・・・・
・・・・・・・・・・・・・・・・・・・・・・・・・・・・・・・・・・・・・・・・・・・・・・・・・・・・・・・・・・・・・・・・・・・・・・・・・・・・・・
・・・・・・・・・・・・・・・・・・・・・・・・・・・・・・・・・・・・・・・・・・・・・・・・・・・・・・・・・・・・・・・・・・・・・・・・・・・・・
・・・・・・・・・・・・・・・・・・・・・・・・・・・・・・・・・・・・・・・・・・・・・・・・・・・・・・・・・・・・・・・・・・・・・・・・・・・・・・
・・・・・・・・・・・・・・・・・・・・・・・・・・・・・・・・・・・・・・・・・・・・・・・・・・・・・・・・・・・・・・・・・・・・・・・・・・・・・
・・・・・・・・・・・・・・・・・・・・・・・・・・・・・・・・・・・・・・・・・・・・・・・・・・・・・・・・・・・・・・・・・・・・・・・・・・・・・
・・・・・・・・・・・・・・・・・・・・・・・・・・・・・・・・・・・・・・・・・・・・・・・・・・・・・・・・・・・・・・・・・・・・・・・・・・・・・・
・・・・・・・・・・・・・・・・・・・・・・・・・・・・・・・・・・・・・・・・・・・・・・・・・・・・・・・・・・・・・・・・・・・・・・・・・・・・・・
・・・・・・・・・・・・・・・・・・・・・・・・・・・・・・・・・・・・・・・・・・・・・・・・・・・・・・・・・・・・・・・・・・・・・・・・・・・・・・
・・・・・・・・・・・・・・・・・・・・・・・・・・・・・・・・・・・・・・・・・・・・・・・・・・・・・・・・・・・・・・・・・・・・・・・・・・・・・
・・・・・・・・・・・・・・・・・・・・・・・・・・・・・・・・・・・・・・・・・・・・・・・・・・・・・・・・・・・・・・・・・・・・・・・・・・・・・・
・・・・・・・・・・・・・・・・・・・・・・・・・・・・・・・・・・・・・・・・・・・・・・・・・・・・・・・・・・・・・・・・・・・・・・・・・・・・・
・・・・・・・・・・・・・・・・・・・・・・・・・・・・・・・・・・・・・・・・・・・・・・・・・・・・・・・・・・・・・・・・・・・・・・・・・・・・・
・・・・・・・・・・・・・・・・・・・・・・・・・・・・・・・・・・・・・・・・・・・・・・・・・・・・・・・・・・・・・・・・・・・・・・・・・・・・・
・・・・・・・・・・・・・・・・・・・・・・・・・・・・・・・・・・・・・・・・・・・・・・・・・・・・・・・・・・・・・・・・・・・・・・・・・・・・・・
・・・・・・・・・・・・・・・・・・・・・・・・・・・・・・・・・・・・・・・・・・・・・・・・・・・・・・・・・・・・・・・・・・・・・・・・・・・・・・
97
49
73
74
97
64
63
84
86
88, 90
65
93
94
59
78
58
58
59
72
72
95
96
83
59
65
62
54
54
60
76
76
15
70
77
77
57
52
80
91
91
70
55
55
69
70
98
Page 99

・・・・・・・・・・・・・・・・・・・・・・・・・・・・・・・・・・・・・・・・・・・・・・・・・・・・・・・・・・・・・・・・・・・・・・・・・・・・・・
ESC q
ESC Q
ESC R
ESC S
ESC SI
ESC SO
ESC SP
ESC t
ESC T
ESC w
ESC W
ESC Y
ESC Z
ESC!
ESC:
ESC~"
ESC~^
ESC~b
ESC~B
ESC~CL
ESC~CS
ESC~e
ESC~E
ESC~G
ESC~L
ESC~O
ESC~p
ESC~P
ESC~s
ESC~SF
ESC~SI
ESC~SL
ESC~SS
ESC~U
ESC~X
ESC~Y
FF
FS G
FS H
FS I
GS h
GS H
GS k
GS r
GS w
HT
LF 50
・・・・・・・・・・・・・・・・・・・・・・・・・・・・・・・・・・・・・・・・・・・・・・・・・・・・・・・・・・・・・・・・・・・・・・・・・・・・・
・・・・・・・・・・・・・・・・・・・・・・・・・・・・・・・・・・・・・・・・・・・・・・・・・・・・・・・・・・・・・・・・・・・・・・・・・・・・・・
・・・・・・・・・・・・・・・・・・・・・・・・・・・・・・・・・・・・・・・・・・・・・・・・・・・・・・・・・・・・・・・・・・・・・・・・・・・・・・
・・・・・・・・・・・・・・・・・・・・・・・・・・・・・・・・・・・・・・・・・・・・・・・・・・・・・・・・・・・・・・・・・・・・・・・・・・・・・
・・・・・・・・・・・・・・・・・・・・・・・・・・・・・・・・・・・・・・・・・・・・・・・・・・・・・・・・・・・・・・・・・・・・・・・・・・・・
・・・・・・・・・・・・・・・・・・・・・・・・・・・・・・・・・・・・・・・・・・・・・・・・・・・・・・・・・・・・・・・・・・・・・・・・・・・・・
・・・・・・・・・・・・・・・・・・・・・・・・・・・・・・・・・・・・・・・・・・・・・・・・・・・・・・・・・・・・・・・・・・・・・・・・・・・・・・
・・・・・・・・・・・・・・・・・・・・・・・・・・・・・・・・・・・・・・・・・・・・・・・・・・・・・・・・・・・・・・・・・・・・・・・・・・・・・・
・・・・・・・・・・・・・・・・・・・・・・・・・・・・・・・・・・・・・・・・・・・・・・・・・・・・・・・・・・・・・・・・・・・・・・・・・・・・・
・・・・・・・・・・・・・・・・・・・・・・・・・・・・・・・・・・・・・・・・・・・・・・・・・・・・・・・・・・・・・・・・・・・・・・・・・・・・・
・・・・・・・・・・・・・・・・・・・・・・・・・・・・・・・・・・・・・・・・・・・・・・・・・・・・・・・・・・・・・・・・・・・・・・・・・・・・・・
・・・・・・・・・・・・・・・・・・・・・・・・・・・・・・・・・・・・・・・・・・・・・・・・・・・・・・・・・・・・・・・・・・・・・・・・・・・・・・
・・・・・・・・・・・・・・・・・・・・・・・・・・・・・・・・・・・・・・・・・・・・・・・・・・・・・・・・・・・・・・・・・・・・・・・・・・・・・・・
・・・・・・・・・・・・・・・・・・・・・・・・・・・・・・・・・・・・・・・・・・・・・・・・・・・・・・・・・・・・・・・・・・・・・・・・・・・・・・・
・・・・・・・・・・・・・・・・・・・・・・・・・・・・・・・・・・・・・・・・・・・・・・・・・・・・・・・・・・・・・・・・・・・・・・・・・・・・・・
・・・・・・・・・・・・・・・・・・・・・・・・・・・・・・・・・・・・・・・・・・・・・・・・・・・・・・・・・・・・・・・・・・・・・・・・・・・・・
・・・・・・・・・・・・・・・・・・・・・・・・・・・・・・・・・・・・・・・・・・・・・・・・・・・・・・・・・・・・・・・・・・・・・・・・・・
・・・・・・・・・・・・・・・・・・・・・・・・・・・・・・・・・・・・・・・・・・・・・・・・・・・・・・・・・・・・・・・・・・・・・・・・・・・・・・
・・・・・・・・・・・・・・・・・・・・・・・・・・・・・・・・・・・・・・・・・・・・・・・・・・・・・・・・・・・・・・・・・・・・・・・・・・・・
・・・・・・・・・・・・・・・・・・・・・・・・・・・・・・・・・・・・・・・・・・・・・・・・・・・・・・・・・・・・・・・・・・・・・・・・・・・・
・・・・・・・・・・・・・・・・・・・・・・・・・・・・・・・・・・・・・・・・・・・・・・・・・・・・・・・・・・・・・・・・・・・・・・・・・・・・・
・・・・・・・・・・・・・・・・・・・・・・・・・・・・・・・・・・・・・・・・・・・・・・・・・・・・・・・・・・・・・・・・・・・・・・・・・・・・・
・・・・・・・・・・・・・・・・・・・・・・・・・・・・・・・・・・・・・・・・・・・・・・・・・・・・・・・・・・・・・・・・・・・・・・・・・・・・・
・・・・・・・・・・・・・・・・・・・・・・・・・・・・・・・・・・・・・・・・・・・・・・・・・・・・・・・・・・・・・・・・・・・・・・・・・・・・・
・・・・・・・・・・・・・・・・・・・・・・・・・・・・・・・・・・・・・・・・・・・・・・・・・・・・・・・・・・・・・・・・・・・・・・・・・・・・・・
・・・・・・・・・・・・・・・・・・・・・・・・・・・・・・・・・・・・・・・・・・・・・・・・・・・・・・・・・・・・・・・・・・・・・・・・・・・・・
・・・・・・・・・・・・・・・・・・・・・・・・・・・・・・・・・・・・・・・・・・・・・・・・・・・・・・・・・・・・・・・・・・・・・・・・・・・・・
・・・・・・・・・・・・・・・・・・・・・・・・・・・・・・・・・・・・・・・・・・・・・・・・・・・・・・・・・・・・・・・・・・・・・・・・・・・・・・
・・・・・・・・・・・・・・・・・・・・・・・・・・・・・・・・・・・・・・・・・・・・・・・・・・・・・・・・・・・・・・・・・・・・・・・・・・・・
・・・・・・・・・・・・・・・・・・・・・・・・・・・・・・・・・・・・・・・・・・・・・・・・・・・・・・・・・・・・・・・・・・・・・・・・・・・・・
・・・・・・・・・・・・・・・・・・・・・・・・・・・・・・・・・・・・・・・・・・・・・・・・・・・・・・・・・・・・・・・・・・・・・・・・・・・・
・・・・・・・・・・・・・・・・・・・・・・・・・・・・・・・・・・・・・・・・・・・・・・・・・・・・・・・・・・・・・・・・・・・・・・・・・・・・
・・・・・・・・・・・・・・・・・・・・・・・・・・・・・・・・・・・・・・・・・・・・・・・・・・・・・・・・・・・・・・・・・・・・・・・・・・・・・
・・・・・・・・・・・・・・・・・・・・・・・・・・・・・・・・・・・・・・・・・・・・・・・・・・・・・・・・・・・・・・・・・・・・・・・・・・・・・
・・・・・・・・・・・・・・・・・・・・・・・・・・・・・・・・・・・・・・・・・・・・・・・・・・・・・・・・・・・・・・・・・・・・・・・・・・・・・
・・・・・・・・・・・・・・・・・・・・・・・・・・・・・・・・・・・・・・・・・・・・・・・・・・・・・・・・・・・・・・・・・・・・・・・・・・・・・・・・・
・・・・・・・・・・・・・・・・・・・・・・・・・・・・・・・・・・・・・・・・・・・・・・・・・・・・・・・・・・・・・・・・・・・・・・・・・・・・・・・
・・・・・・・・・・・・・・・・・・・・・・・・・・・・・・・・・・・・・・・・・・・・・・・・・・・・・・・・・・・・・・・・・・・・・・・・・・・・・・・
・・・・・・・・・・・・・・・・・・・・・・・・・・・・・・・・・・・・・・・・・・・・・・・・・・・・・・・・・・・・・・・・・・・・・・・・・・・・・・・・
・・・・・・・・・・・・・・・・・・・・・・・・・・・・・・・・・・・・・・・・・・・・・・・・・・・・・・・・・・・・・・・・・・・・・・・・・・・・・・・
・・・・・・・・・・・・・・・・・・・・・・・・・・・・・・・・・・・・・・・・・・・・・・・・・・・・・・・・・・・・・・・・・・・・・・・・・・・・・・・
・・・・・・・・・・・・・・・・・・・・・・・・・・・・・・・・・・・・・・・・・・・・・・・・・・・・・・・・・・・・・・・・・・・・・・・・・・・・・・・
・・・・・・・・・・・・・・・・・・・・・・・・・・・・・・・・・・・・・・・・・・・・・・・・・・・・・・・・・・・・・・・・・・・・・・・・・・・・・・・
・・・・・・・・・・・・・・・・・・・・・・・・・・・・・・・・・・・・・・・・・・・・・・・・・・・・・・・・・・・・・・・・・・・・・・・・・・・・・・・
・・・・・・・・・・・・・・・・・・・・・・・・・・・・・・・・・・・・・・・・・・・・・・・・・・・・・・・・・・・・・・・・・・・・・・・・・・・・・・・・
・・・・・・・・・・・・・・・・・・・・・・・・・・・・・・・・・・・・・・・・・・・・・・・・・・・・・・・・・・・・・・・・・・・・・・・・・・・・・・・・・
81
56
68
71
73
74
82
67
71
75
75
92
92
79
85
32
33
10, 11
39
38
35
34
19
12
29
30
31
40
43
41
42
28
22
37
51
18
16
17
24
23
25
23
24
61
SI 73
・・・・・・・・・・・・・・・・・・・・・・・・・・・・・・・・・・・・・・・・・・・・・・・・・・・・・・・・・・・・・・・・・・・・・・・・・・・・・・・・・
SO
・・・・・・・・・・・・・・・・・・・・・・・・・・・・・・・・・・・・・・・・・・・・・・・・・・・・・・・・・・・・・・・・・・・・・・・・・・・・・・・・
VT
74
62
7
9
99
Page 100

100
 Loading...