


D700/D706
INSTRUCTION MANUAL

2
Unauthorized reproduction of any or all of this manual is strictly prohibited.
The contents of this manual are subject to change without notice.
The manufacturer is not responsible for any or all damages, lost profits or demands from a third party
resulting from use of this manual or products described therein.
• Windows 98, Windows Me and Windows 2000 are the registered trademarks of the Microsoft
Corporation, USA.
• The algorithm of this dive computer is licenced from the Defence and Civil Institute of
Environmental Medicine (DCIEM) of Canada.

English
English
English
English
English
English
3
English
First, cancel the low power mode.
This watch is initially in the low power mode (time display
or calendar display). Before using the watch, cancel the
low power mode using the procedure described below.
If the display is out, this indicates that the watch is
insufficiently charged. In this case, perform the following
procedure after sufficiently recharging the watch by
referring to the section on " Before Use" in this manual.
<Procedure>
When the low power mode is
canceled by simultaneously
pressing button (A) and button (D)
for at least two seconds, the
watch returns to the normal
display.
* Refer to the section on " Low
power mode (Temporally
function)" in this manual for
further information on the low
power mode.
(C)(
(
)(
D
)
B
A
)

4
Introduction
Thank you for your purchase of the Citizen CYBER AQUALAND. Please read this manual
carefully before using your watch to ensure that it is used properly. Furthermore, make
sure to store this manual in a safe place for future reference as necessary.
CYBER AQUALAND is a diver's watch containing a built-in dive computer and provided
with its own depth gauge. The watch is able to automatically store various data (maximum
depth, dive time, etc.) generated during diving as well as diving profile data, and display
that data in the form of log data.
By installing AQUALAND GRAPH 2001 in your personal computer from the CD-ROM
provided with the watch, you can incorporate data stored in the watch in your PC using the
communication unit and infrared communication interface provided. You can enter text
into diving data that has been incorporated into your PC, generate graphs of diving data or
attach still pictures or animated image data all with a simple procedure, and then manage
this data collectively in the form of diving logs. Since these logs can be printed out or
converted into HTML documents, storage of diving records is both simple and convenient.
In addition, the use of CAPgm, which is installed simultaneous to installation of
AQUALAND GRAPH 2001, makes it possible to make various watch settings (including
travel time, alarm and timer settings) while also allowing different graphics to be displayed
on the watch for different days.
We hope that the use of CYBER AQUALAND will allow you to get even more enjoyment
out of your recreational diving activities.
* To users using a previous HYPER AQUALAND product (Model No. D20*):
• If you are using the DOS version or WINDOWS Ver. 1/Ver. 2 of AQUALAND GRAPH
(HYPER AQUALAND dedicated software), you can use existing diving data managed
with each version of AQUALAND GRAPH by importing that data to AQUALAND GRAPH
2001.
• HYPER AQUALAND data can also be received using AQUALAND GRAPH 2001
software. Please note, however, that the type of communication unit and connection
cable differ between CYBER AQUALAND and HYPER AQUALAND.
(Please refer to the AQUALAND GRAPH 2001 instruction manual contained on the CDROM provided for further information regarding the procedures for importing and
receiving data.)

5
Safety Precautions: Observe at All Times
The following provides an explanation of those matters that should be observed at all
times to prevent injury to the wearer or other persons as well as damage to property
before they occur.
The degree of injury or damage resulting from incorrect use while ignoring
the indicated matters is classified and explained using the following
markings.
WARNING
This marking indicates matters for which there is the
risk of death or serious injury.
CAUTION
This marking indicates matters for which there is the
risk of injury or property damage only.
The types of matters to be observed are classified and explained using the
following mark (the following indicates two examples of icons).
This mark indicates that caution or attention is required.
This mark indicates prohibited matters.
WARNING
Read this manual carefully and pay attention to all warnings. Make sure you fully
understand the use, displays and limitations of the watch. Neglecting to understand
and follow the instruction manual may cause errors to be made during diving that may
lead to serious injury or death.

6
WARNING
• Diving is a potentially dangerous sport. When using this watch for diving,
make sure to have a correct understanding of this watch as described in
this manual and strictly adhere to the procedures for its operation. The
watch may not function properly if handled in a manner not described in
this manual.
• This watch should not be used as a primary instrument for diving.
• Diving while using this watch is limited to recreational diving (no
decompression diving) in salt water at a water temperature of +10°C to
+40°C (50°F to 104°F). This watch cannot be used for decompression
diving, saturation diving using helium gas, diving at high altitudes (300 m
(1000 ft) or more above sea level) or diving outside the above temperature
range. In addition, this watch can not be used for nitrox diving (diving using
a mixed gas of oxygen and nitrogen in which the oxygen concentration is
richer than air tanks used for ordinary diving).
• Although this watch provides data for decompression diving in cases of
emergency, never attempt to use this watch for decompression diving since
this is potentially dangerous.
In addition, the watch does not display depth correctly when used in water
other than salt water (specific gravity: 1.025).
• Even recreational diving can be dangerous. Users are requested to obtain
the proper scuba diving training from a qualified instructor, acquire the
necessary experience and skills for safe diving and completely master the
handling and operation of this watch before using this watch as an auxiliary
instrument for diving. Insufficient or improper training may cause errors to
be made during diving that may lead to serious injury or death.
• Sudden atmospheric fluctuations and changes in water temperature may
have an effect on the display and performance of the watch. Since this
watch is not intended to be used as a specialized instrument, and is only
intended to display information to serve as a reference for minimizing
decompression sickness and other dangers, it is not designed to guarantee
the safety of the user. Always make sure to use this watch in combination
with other instruments (such as a diving table, residual pressure gauge and
water depth gauge). Never use it as a primary instrument for diving.
• This watch is designed on the premise of being used only by one person.
Never lend to or share this watch with another person while resting on the
surface (while the surface mode is activated). In addition, do not use the
data displayed by the watch as diver data for persons other than the user.
WARNING
In order to ensure safe diving, dive while allowing an adequate margin of safety
relative to the displayed no-decompression limit time.
WARNING
Never dive in a manner that requires a decompression stop (decompression diving).
If decompression diving should happen to occur, immediately start to ascend while
observing an ascent rate of no more than 18 m (60 ft)/min. Make a decompression
stop while ascending in accordance with decompression stop instructions.
When making a decompression stop, never ascend to a depth less than the instructed
depth. In addition, since it is difficult to maintain a constant depth when there are high
waves and so forth, make decompression stops at depths a little deeper than the
instructed depth to prevent decompression sickness.
* A permanent error (ERROR) occurs when continuing to dive while ignoring decompression
stop instructions during the course of decompression diving, and the watch will not switch to
the dive mode for 24 hours after that time.
WARNING
Avoid traveling in an aircraft while the surface mode is activated. Traveling in an
aircraft without allowing sufficient time to rest after diving results in the risk of
decompression sickness. It is recommended to avoid traveling in an aircraft for at
least 24 hours after diving whenever possible even if the surface mode is no longer
displayed. There are no rules for completely preventing decompression sickness
caused by flying in an aircraft after diving.
CAUTION
Skin diving after scuba diving is not recommended. It is recommended to avoid skin
diving for at least two hours after scuba diving and not to exceed a depth of 5 m (15 ft).
Data Storage
• The various data recorded in the watch may be lost when subjected to incorrect use
or the effects of strong electricity and electrical noise as well as during a malfunction
and repair. Always make sure to keep a separate record of important data recorded
in the watch. Diving data in particular should be transferred to your PC or recorded
in a log book as quickly as possible.
7

8
CONTENTS
Introduction
............................................................................................................. 4
Checking Accessories
...................................................................................... 10
Before Use
.......................................................................................................... 11
1. Installing Batteries in Communication Unit
..................................................... 12
2. Charging the Watch
........................................................................................ 12
Cautions Regarding Use During Diving
.......................................................... 14
Features
.............................................................................................................. 16
Names of Components
..................................................................................... 17
Display Mode (Functions)
................................................................................. 18
Battery Charge Indicator and Continuous Usage Time
................................. 20
1. How to Read the Battery Charge Indicator
..................................................... 20
2. Continuous Usage Time
................................................................................. 20
Switching the Mode
........................................................................................... 21
Using the EL Light
............................................................................................. 22
Using the Standard Mode
................................................................................. 23
1. Time Mode
...................................................................................................... 23
A. Switching the Display
................................................................................. 23
B. Setting the Time and Date
......................................................................... 23
C. Daily Graphic
............................................................................................. 24
2. Travel Time Mode
........................................................................................... 25
A. Switching the Display
................................................................................. 25
B. Setting the Travel Time
.............................................................................. 25
C. Intercharging Locations Between Travel Time Mode and Time Mode
....... 26
3. Destination Timer Mode
.................................................................................. 26
A. Setting the Destination Timer
..................................................................... 27
B. Destination Timer Measuring Procedure
.................................................... 28
4. Alarm Mode
.................................................................................................... 29
A. Alarm ON/OFF and Alarm Monitor
............................................................. 29
B. Setting the Alarm
........................................................................................ 29
5. Chronograph Mode
......................................................................................... 30
A. Reading the Display
................................................................................... 30
B. Chronograph Timing Procedure
................................................................. 30
6. Timer Mode
..................................................................................................... 31
A. Setting the Timer
........................................................................................ 31
B. Timer Measuring Procedure
....................................................................... 32
7. System Monitor Mode
..................................................................................... 33
A. Switching the Display
................................................................................. 33
B. Battery Charge Indicator
............................................................................ 33
C. Flash Memory Status Display
.................................................................... 34
D. Garbage Collection Operating Procedure
.................................................. 34
Locations Displayed by this Watch
................................................................. 35
Warning Functions
............................................................................................ 36
Diving Terms Used by this Watch
.................................................................... 39

Using the Dive Plan Mode
................................................................................. 41
1. Switching the Display
...................................................................................... 41
2. Calling Up No-Decompression Limit Time
...................................................... 41
3. Dive Alarm
...................................................................................................... 42
4. Setting the Dive Alarm
.................................................................................... 42
5. Dive Alarm Monitor
......................................................................................... 42
Using the Scuba Log Mode and Skin Log Mode
............................................ 43
1. Calling Up Scuba Diving Log Data
................................................................. 43
2. Calling Up Skin Diving Log Data
..................................................................... 44
3. Deleting Log Data
........................................................................................... 44
Using the Dive Mode
......................................................................................... 45
1. Reading the Display during Depth Measurement
........................................... 45
2. Depth Measurement
....................................................................................... 47
3. Dive Time Measurement
................................................................................. 47
4. Water Temperature Measurement
.................................................................. 47
5. No. of Dives Per Day and Recording Log Data
.............................................. 47
6. Ending the Dive Mode
.................................................................................... 48
Using the Surface Mode
.................................................................................... 48
Low power mode (Temporally function)
......................................................... 49
1. Switching the Display
...................................................................................... 49
2. Setting the Time and Date
.............................................................................. 50
Data Communication Functions
...................................................................... 51
1. Communication Unit
....................................................................................... 51
2. Infrared Communication
................................................................................. 52
A. Communication Range
............................................................................... 52
B. Infrared Communication Mode Operating Procedure
................................ 53
3. Data Communication with PC
......................................................................... 54
4. Data Communication between Watches
......................................................... 56
Accessory Software
.......................................................................................... 57
1. Operating Environment
................................................................................... 57
2. Installation
....................................................................................................... 58
A. Installing the USB Driver
............................................................................ 58
B. Installing AQUALAND GRAPH 2001 (accessory software)
....................... 62
C. Startup and Ending AQUALAND GRAPH 2001 and CAPgm
.................... 63
All Reset and Formatting Flash Memory
......................................................... 64
1. All Reset
......................................................................................................... 64
2. Formatting Flash Memory
............................................................................... 64
Troubleshooting
................................................................................................ 66
Handling Precautions (For the watch)
............................................................. 68
Specifications
.................................................................................................... 70
9
10
Checking Accessories
After opening the package, first check that all of the following products and accessories
are present.
Size AA alkaline batteries - 4
Communication unit - 1
USB cable (1.5 m) - 1
(with ferrite core - 1)
User's Manual (this manual)
Carrying case
(For the communication unit)
* Please make sure to attach the enclosed
ferrite core to the USB cable before use.
ferrite core
CD-ROM - 1
Watch body - 1

11
✩Attachment of Ferrite Core
Attach the ferrite core to the USB cable provided by referring to the illustration below.
Loop the USB cable
once at the base of
the B type connector
(side that is connected
to the communication
unit), insert the overlapping portion of the
cable into the groove
inside the ferrite core
and securely close the
ferrite core.
CAUTION
Always make sure to attach the enclosed ferrite core to the USB cable prior to use.
Failure to properly attach the ferrite core may cause electromagnetic interference to
affect offect other eguipment.
Before Use
Always make sure to fully charge the watch prior to use using the
communication unit provided.
The battery (secondary battery) used by the watch is of the rechargeable type. Charging
is performed using the communication unit after installing four size AA alkaline batteries
(battery no. LR-6).
* It is not necessary to connect the watch to a PC during charging.
Charging is performed using only the batteries in the communication unit.
CAUTION
• The communication unit is not waterproof. Do not allow it to come in contact with
water or become wet. In addition, sand or dust inside the communication unit can
cause a malfunction. Use caution when using the communication unit outdoors.
• Since improper use of the batteries can result in the risk of leakage of battery fluid or
rupture, use particular caution with respect to the following items.
• Install the batteries with the polarity (+,-) correctly aligned.
• Do not mix different types of batteries installed in the communication unit.
• Do not use fresh batteries with old ones. When replacing the batteries, replace all
of the batteries with four fresh batteries of the same type.
Move to this
position
12
1. Installing Batteries in Communication Unit
(1) Remove the battery cover on the bottom of the
communication unit. The battery cover is
removed by lifting up the tab while pushing in the
direction of the arrow (OPEN).
(2) Install two size AA alkaline batteries each (total
of four batteries) in the communication unit and
battery cover while properly aligning their
polarity.
(3) Attach the battery cover.
* Securely attach the battery cover. If not attached securely, there may be defective contact
with the batteries.
* When removing the battery cover, be careful not to damage your nail.
* When charging the watch using the communication unit for the first time, the USB driver
Installation Wizard is displayed on the PC if the communication unit is connected to a PC.
Refer to the section on " Accessory Software" for information regarding installation of the
USB driver.
* The batteries in the communication unit will gradually become worn down even when not
charging. It is recommended to remove the batteries from the communication unit when not
charging the watch for a long period of time.
2. Charging the Watch
(1) Sufficiently open up the locking tab on the left side of the communication unit.
(2) Attach the watch to the communication unit so that the two center connection pins of
the four connection pins on the communication unit make contact with the two
terminals (gold) at the 3:00 position on the watch.
* In cases when a watch having a metal band cannot be connected to the communication unit
due to the band being too short, remove the leg of the communication unit (removable). Slide
the watch through the location where the leg was removed to attach to the communication unit.
WARNING
When removing the leg from the communication unit, keep the removed leg out of the
reach of children to prevent accidental swallowing.

13
(3) Charging will begin if the watch is properly connected to the communication unit. The
LED on the right side of the communication unit lights when charging begins, and goes
out when charging is completed (when the watch is fully charged).
(4) Sufficiently open the locking tab of the communication unit and remove the watch from
the communication unit.
* Approximately 5-6 hours is required for charging when the secondary battery is completely
drained.
* Try to recharge the watch before the secondary battery becomes completely drained. There is
no risk of overcharging no matter how long the watch is connected to the communication unit.
* When the LED does not light and the battery charge indicator of the watch does not indicate
that the watch is fully charged even if the watch has been attached to the communication unit,
the batteries of the communication unit are worn out. Replace all four of the batteries with
fresh batteries and repeat charging.
* Attempting to attach or remove the watch without opening the locking tab sufficiently may
cause the connection pins to become worn or damaged resulting in malfunction of the
communication unit.
Watch Display During Charging
Once charging begins, the watch automatically switches to
the system monitor mode (battery charge indicator) after the
diver mark in the lower left section of the watch display
flashes. ("CHRG" is displayed in the lower left section of
the display.)
* When the communication unit is connected to a PC with the USB cable, the watch displays
the USB communication display (data transfer standby display). Charging is performed while
the LED on the communication unit is lit even during data transfer with the PC using the USB
communication interface.
* When the watch has been charged to a certain extent (when all the sections of the battery
charge indicator are lit), although the diver mark remains flashing without the watch switching
to the system monitor mode, charging is still performed correctly even in this state.
* Although "CHK" may flash in the lower left section of the display during charging, charging is
performed correctly in this case as well. "CHK" is no longer displayed and the display returns
to normal when the watch is removed from the communication unit after charging is
completed.
* If the watch display is not showing before charging, simultaneously press buttons (A), (B), (C)
and (D) with the watch attached to the communication unit to perform the all reset procedure.
(Refer to the section on " All Reset and Formatting Flash Memory" for information on the all
reset procedure.)
(C)(
(
)(
D
B
A
)
)

14
Cautions Regarding Use During Diving
WARNING
This watch cannot be used as a primary instrument for diving.
When using the watch during diving, always make sure to receive the proper
diving instruction and training and use the watch while obeying all rules.
• Inspect the watch to make sure that all functions operate properly before diving.
• It is recommended to only use this watch for recreational diving down to a depth of about
18 m (60 ft). Do not attempt to dive below the limit depth of 40 m (131 ft) during
recreational diving.
• Always make sure to allow an ample margin for no-decompression time.
• Perform adequate safety stops and decompression stops. Even in the case of no-
decompression diving, always make a safety stop at 5 m (15 ft) to ensure safety. In
addition, in the case the decompression stop display appears, try to stop for a period
longer than that indicated on the display.
• Allow for a sufficient rest period after diving in accordance with safety rules. Boarding an
airplane or moving to a high altitude without allowing for a sufficient rest period after
diving results in the risk of decompression sickness.
PROHIBITED Prohibited Use During Diving
Never attempt to use this watch for diving under the following circumstances.
• When diving is prohibited in the system monitor mode:
··· The watch will not switch to the dive mode when [ ] has changed to NG.
• When the watch has stopped running or an error has occurred (be careful not to bump
the watch against hard objects such as equipment or rocks when diving).
• When measuring depth outside the guaranteed water temperature range or at high
altitudes:
··· The temperature range in which the water depth measurement accuracy of this watch
is guaranteed is +10 to +40°C (50°F to 104°F).
··· This watch is not compatible with diving at high altitudes. Never use this watch when
diving at high altitudes (300 m (1000 ft) or more above sea level).
• When engaged in dangerous behavior or when a situation is judged to be dangerous:
··· This watch is not built to function as a preventive or emergency instrument such as for
use during marine accidents.
• When using in a helium gas atmosphere (saturation diving, etc.):
··· Use under these conditions can cause a malfunction or damage to the watch.
• Use for nitrox diving:
··· This watch cannot be used for diving using a mixed gas other than that of air tanks for
ordinary air diving.
WARNING Cautions Regarding Use During Diving
<Cautions Before Diving>
• Sufficiently charge the watch and confirm that the watch is reliably charged and that the
watch can be used for diving by referring to the system monitor mode. If the watch is not
sufficiently charged, the watch will not switch to the dive mode even if diving is started.
In addition, try to start a dive after first sufficiently charging the watch before diving to
avoid having the watch become insufficiently charged while diving.

15
• Confirm that "ERR" (error) or "CHK" (check) is not displayed on the display.
• Confirm that the band is securely attached to the watch body.
• Confirm that the band and glass are free of cracks, scratches, chips and other
abnormalities.
• Confirm that the time and date are set correctly.
• Confirm that the depth alarm and dive time alarm are set correctly.
• If there is a considerable difference between the watch temperature and the water
temperature (such as in cases of entering water after having the left the watch in bright
sunlight), water depth cannot be measured accurately. In such cases, immerse the
watch in the water for at least 5 minutes and then dive after the watch temperature has
become acclimated to the water temperature.
<Cautions During Diving>
• Avoid ascending too rapidly. Rapid ascending can cause decompression sickness and
have other detrimental effects on the body. Observe the safe ascent rate at all times.
• Please note that when underwater, it may be difficult to hear the sound of the dive alarm
or other alarms depending on surrounding conditions (such as breathing noise and air
bubble noise) and the manner in which the watch is worn.
• Be careful not to run out of air. This watch does not manage the amount of air remaining
in the air tank. The diver is responsible for managing the amount of air remaining.
• In the event the watch should happen not to operate properly while underwater, either
ascend immediately while following the instructions of the instructor or begin ascending
immediately at an ascent rate of no more than 18 m (60 ft) per minute and make a safety
stop at 5 m (15 ft) as long as your air lasts.
<Cautions After Diving>
• Make sure to rest sufficiently after diving by checking the surface mode (which measures
the amount of time elapsed after diving and no fly time).
• After removing any moisture, mud, sand or other foreign matter adhered to the watch by
thoroughly rinsing with fresh water, completely wipe off the watch with a dry cloth.
• Do not attempt to remove the sensor cover or poke at it with a sharp object to attempt to
remove any dirt or debris trapped in the pressure sensor. In addition, do not spray the
pressure sensor with air under high pressure such as that from an air gun. In the case
that debris has become trapped in the pressure sensor, rinse it out with fresh water. If it
is still unable to be removed, consult your nearest Citizen Service Center.
CAUTION Fresh Water Diving
• This watch is designed on the premise of diving in salt water. It will not display water
depth accurately in water other than salt water.
• Only use the watch after receiving special safety training when using the watch for diving
in fresh water.
• Since this watch displays water depth as converted based on salt water (specific gravity:
1.025), the true water depth in fresh water is actually 2.5% deeper than the displayed
water depth.
• Example: Water depth displayed as 20 m x 1.025 = 20.5 m (actual water depth)
(40 ft x 1.025 =41 ft)

Features
This watch is provided with numerous convenient
functions used during diving.
•
Various information is displayed to serve as a reference for safe diving by calculating
residual body nitrogen based on depth during diving, dive time and previous dive
history, etc. (Dive Computer Function).
* Decompression Calculation Algorithm
This watch employs the calculation formula of the Canadian Defense and Civil Institute of
Environmental Medicine (DCIEM).
•
Measurement of water depth begins automatically simply by placing the watch on your
wrist and entering the water, and various data (depth, elapsed time, etc.) are measured
automatically while diving.
•
This watch distinguishes between skin diving and scuba diving according to diving
conditions (depth and dive time), and a maximum of 100 sets of log data are
automatically recorded for both types of diving.
•
This watch is also provided with various warning functions necessary for safe diving.
•
Log data and profile data (up to 2 hours) automatically recorded in the watch can be
transferred to a PC by using the communication unit and infrared communication
function provided, making it possible to easily manage and generate graphic
representations of transferred data on your PC.
Various watch functions can be set on your PC.
•
The following watch settings can be transferred to and edited on your PC using the
communication unit and infrared communication function provided.
• Addition, deletion and alteration of locations displayed in each mode by the watch
• Various travel time, alarm and destination timer settings
• Setting of dive alarm used during diving and entry of the number of previous dives.
• Setting of daily graphics and graphics displayed on anniversaries (graphic display)
This watch is also equipped with an infrared
communication function.
•
The wrist watch infrared communication standard (IrWW) is used for infrared
communication. This enables the time and alarm time to be set between watches using
this standard.
•
If a friend or acquaintance has the same watch, data can be transferred between those
watches (including time, date, alarm and dive alarm settings). In addition,
communication with a PC can also be performed using infrared communication.
No need to change the battery.
•
The secondary battery used for the power source is completely free of mercury and
other hazardous substances making it environmentally friendly.
•
The secondary battery is charged using the communication unit provided. Once fully
charged, the watch can be used continuously for about one month under standard
operating conditions. (Continuous usage time varies according to the use of additional
functions and other conditions of use. For further details, refer to the section on " Battery
Charge Indicator and Continuous Usage Time".)
•
This watch is also equipped with a battery charge indicator that provides a general
indication of the charge level of the secondary battery, as well as an insufficient charge
warning function that informs the wearer that the secondary battery is insufficiently
charged on the display.
16

Other Convenient Functions
•
This watch is also equipped with a travel time function that enables you to easily display
local time when traveling or on business overseas, as well as a destination timer
function that displays the amount of time remaining until you reach your destination.
•
You can select from 15 types of preset sounds that are heard in each of the alarm,
destination timer and timer modes.
•
An EL illumination function is provided that makes it possible to confirm display contents
even in dark locations.
•
Other convenient functions offered by this watch include a 24 hour format alarm,
chronograph capable of timing up to 99 hours 59 minutes 59.99 seconds in 1/100
second increments, and a timer function that can be set up to 99 minutes.
Since this product requires special techniques and equipment for final adjustment and
confirmation following completion of repairs, all repairs (excluding the watch band)
must be performed at a Citizen Service Center. Please contact your nearest Citizen
Service Center when requesting repairs or inspections.
Names of Components
Display screen (full dot display)
Button (C)
Pressure sensor
Button (D)
EL light button
Infrared transmitter/receiver
Button (B)
Water sensor
(data transfer
terminal pin)
Charging
terminal pin
Button (A)
17
CITY
SET/RES
FWD
STA/STP
TIME
REV
TRANS
DIVERS 200M
Display Mode (Functions)
Standard Mode
The watch is usually used in this mode. The standard mode consists of the following
seven sub-modes.
1. Time Mode
In this mode, the watch is used to display and correct the time and date (main time)
that are the basic parameters of this watch. This mode is normally displayed when
wearing the watch.
2. Travel Time Mode
In this mode, the watch displays the time and date for a different location from the time
mode.
3. Destination Timer Mode
In this mode, the watch displays the time remaining until a preset arrival time in 1
second units after a destination and arrival time have been preset. This convenient
function can be used when traveling or on business overseas.
* Maximum measuring range: 99 hours 59 minutes 59 seconds
4. Alarm Mode
In this mode, the watch can be used to switch the alarm on and off and correct the
alarm time.
5. Chronograph Mode
In this mode, the watch measures time with a chronograph up to 99 hours, 59 minutes
59.99 seconds.
6. Timer Mode
In this mode, the watch measures time with a count down timer in 1 second units (and
can be set up to 99 minutes in 1 minute units).
7. System Monitor Mode /
In this mode, the watch displays the charge level of the secondary battery along with a
general indication of the usage status of flash memory.
Dive Plan Mode
This mode is used to prepare a plan for the next dive. In this mode, the watch displays the
no-decompression limit time during the next dive and is used to set the dive alarms to be
used during the next dive.
Scuba Log Mode - SCUBA
This mode is used to confirm the logs of previous scuba diving. In this mode, the watch
displays various data (logs) for scuba diving automatically recorded while diving.
Skin Log Mode - SKIN
This mode is used to confirm the logs of previous skin diving. In this mode, the watch
displays various data (logs) for skin diving automatically recorded while diving.
18
Dive Mode
This mode is used for diving. The watch automatically switches to the dive mode when a
dive is started, and displays current water depth, dive time and other data required while
diving during the course of a dive.
Surface Mode
In this mode, the watch displays the elapsed time since completion of the most recent
scuba dive and the amount of time flying in an aircraft is prohibited (maximum 24 hours)
(no fly time). The surface mode is no longer displayed once the no fly time has elapsed.
Infrared Communication Mode
This mode is for communicating with a PC or communicating between watches using the
infrared communication function.
Low power mode (Temporally function)
The low power mode is a temporally function for powering the watch with the minimum
amount of current consumption. The watch automatically switches to the low power mode
when it has become insufficiently charged.
Do not wear the watch in the low power mode under normal circumstances.
Although the watch can be manually switched to this mode by operating the
buttons, all functions except for time and date display and correction do not
operate. In addition, the watch cannot be switched from the low power mode
to the dive mode.
19

20
About 60% charged to fully charged
Nearly insufficiently charged. Charge
the watch promptly. Since the watch
may become insufficiently charged
during diving, charge the watch
sufficiently before diving.
About 10-20% charged
Insufficiently charged. The watch cannot
be used for diving. Charge the watch
immediately.
* The above illustration provides a
graphic representation of the
amount of residual charge in the
secondary battery and the changes
in the battery charge indicator.
Battery Charge Indicator and Continuous
Usage Time
An approximate indication of the amount of charge remaining in the secondary battery can
be confirmed on the display. The battery charge indicator can be displayed in either the
time mode of the standard mode (location display) or the system monitor mode.
1. How to Read the Battey Charge Indicator
The battery charge indicator changes in the manner shown below according to the amount
of elapsed time the watch has been used.
2. Continuous Usage Time
This watch will continue to run for about 1 month (until the insufficient charge warning
function is activated) once it has been fully charged.
This is roughly based on the conditions of use indicated below.
• Diving (water depth measurement): Twice/week (30 min./dive)
• Alarm: 30 seconds/day
• Chronograph measurement: 1 hour/week
• EL light: 4 seconds/day
* The continuous usage time of the watch becomes shorter the more often the alarm,
chronograph and other functions are used. In addition, the continuous usage time is further
reduced by infrared communication.
* Since the water sensor is activated when the watch gets wet even when not diving, the
continuous usage time becomes correspondingly shorter.
All watch
functions stop.
The "Insufficient Charge Warning Function (BATT
displayed)" is activated at about this time. Charge
the watch immediately. (Refer to the section on
" Warning Functions" for further details.)
Usage
time
Amount of Battery Charge
The watch switches to the "Low
power mode" at about this time.
21
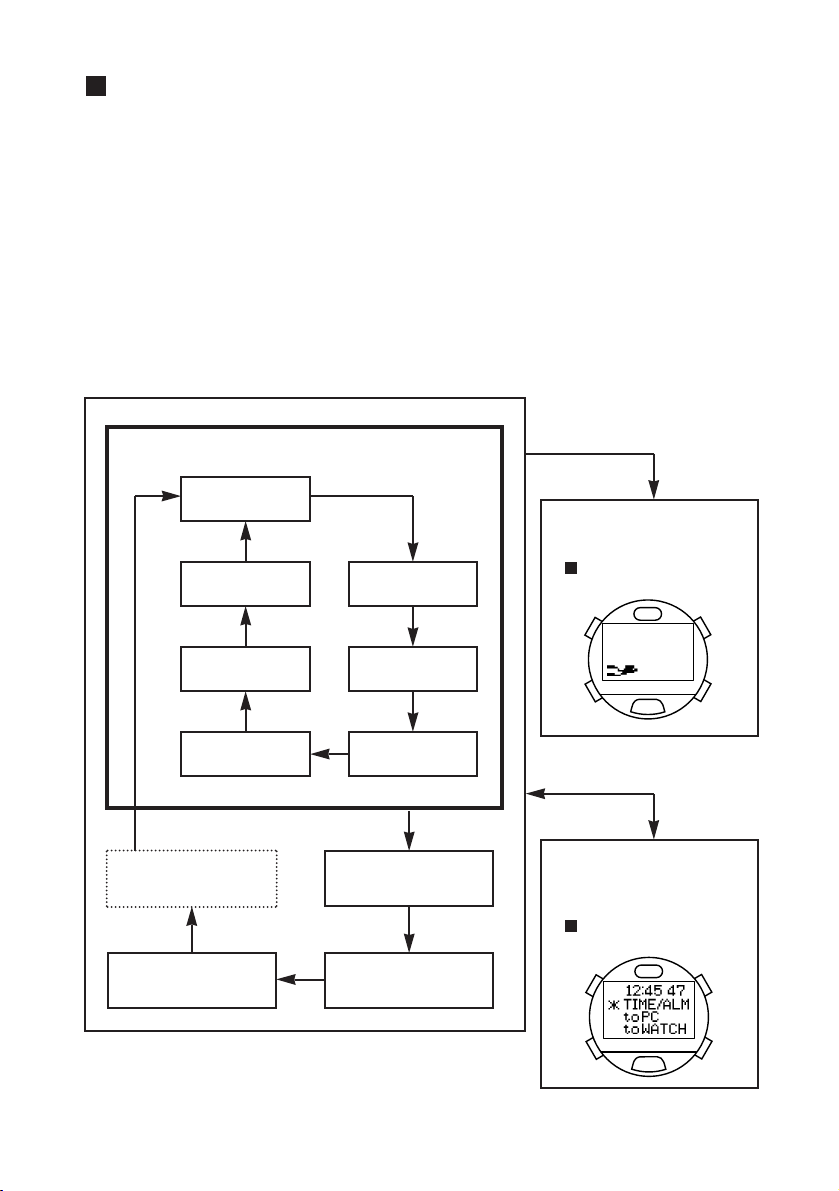
Switching the Mode
• The mode changes in the order of standard mode, dive plan mode, scuba log mode, skin
log mode and surface mode each time button (D) is pressed.
• The sub-mode of the standard mode changes in the order of time, travel time, destination
timer, alarm, chronograph, timer and system monitor each time button (A) is pressed in
the standard mode.
• The watch automatically switches to the dive mode (preliminary dive display) when the
water sensor gets wet in any mode (excluding the infrared communication mode and low
power mode).
• The watch switches to the infrared communication mode (initial display) when button (D)
is pressed for at least 2 seconds in any mode (excluding the dive mode and low power
mode).
[Dive Mode
(preliminary dive display)]
* Refer to the section on
" Using the Dive Mode" for
further details.
If the water sensor
gets wet
(A)
(A)
(A)
(A)
(A)
(A)
Button (D) pressed for at
least 2 seconds
[Infrared
Communication Mode
(initial display)]
* Refer to the section on
" Data Communication
Functions" for further details.
Time
Travel time
Destination timer
Alarm
[Standard Mode]
System monitor
Timer
Chronograph
Surface
(only when activated)
Dive Plan
Scuba LogSkin Log
(A)
(D)
(D)
(D)
(D)
(D)
(C)(
)(
(
D
)
B
)
A
(C)(
(
)(
D
)
B
)
A
* The surface mode is no longer displayed once measurement of no fly time (timer) is completed
after scuba diving. The watch switches to the time mode of the standard mode when button
(D) is pressed in the skin log mode when the surface mode is not activated.
* When none of the buttons are pressed for about 3 minutes in any of the modes of the
standard mode, dive plan mode, scuba log mode or skin log mode, the watch automatically
returns to the time mode of the standard mode (except that it returns to the surface mode
when the surface mode has been activated).
* The watch switches to the low power mode when buttons (A) and (D) are pressed for at least
2 seconds in the time mode of the standard mode.
* If "BATT", "ERR" or "CHK" is flashing in the lower left section of the display in any of the modes
(indicating that a warning function has been activated), and during correction in any mode, the
watch does not switch to the dive mode even if the water sensor gets wet.
* The hourglass mark and "LOADING" are displayed when switching to the dive mode, infrared
communication mode or low power mode. The water sensor along with all button operations
do not function while these are displayed.
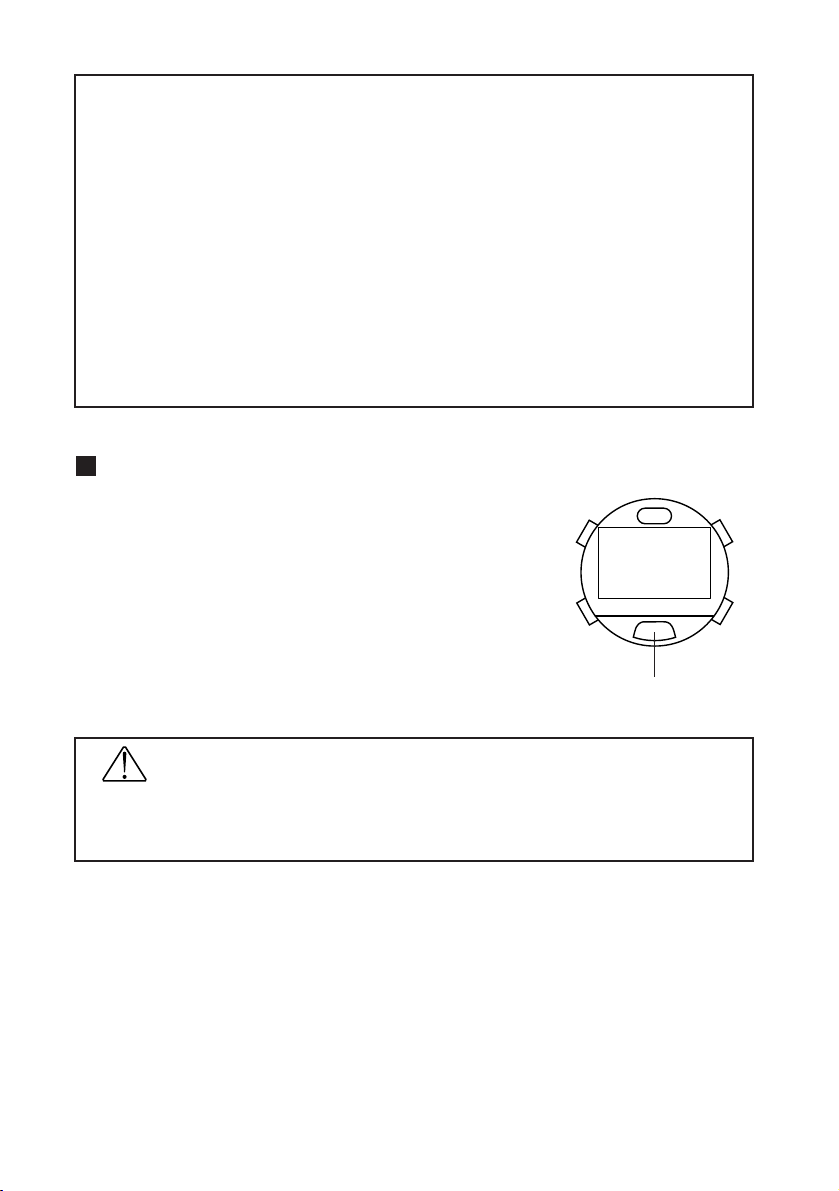
Using the EL Light
The EL light is illuminated for about 1 second when the EL
light button on the front of the watch is pressed in any of the
modes except for the infrared communication mode. The
EL light is illuminated for about 5 seconds when the EL light
button is pressed continuously.
CAUTION
Since the display may be difficult to see when confirming the display during night
diving, confirm the contents of the display with external lighting such as an
underwater light.
22
(C)(
B
)
(
D
)(
A
)
EL light button

Using the Standard Mode
1. Time Mode
This mode is the basic mode of this watch and is used to correct and display the time and
date.
A. Switching the Display
• The display switches between the Day Display and Location Display each time button
(C) is pressed.
• When button (B) is pressed when either the Day Display or Location Display is displayed,
the display changes to the Enlarged Display. Pressing button (B) again returns it to the
original display.
B. Setting the Time and Date
(1) The watch enters the correction state (display is flashing) when
button (C) is pressed for at least 2 seconds during any display of
the time mode.
(2) The location on the display that is flashing changes in the order
shown below each time button (C) is pressed.
23
[Day Display]
Month, date
Day
Alarm ON
mark
Location
Battery Charge
indicator
Time
Flashing
Time
(B)
(C)
(C) (C) (C) (C)
(C) (C) (C) (C)
(C)
Daily graphic
[Location Display]
(C)(
B
)
(
D
)(
A
)
[Enlarged Display]
(C)(
B
)
(
D
)(
A
)
Location
Contrast
(CONT)
12H/24H format
switching
Date Month Year
Daylight savings
time switching
Seconds Minutes Hours

(3) Correct the flashing item by pressing either button (B) or button (A).
• Pressing button (B) advances the display by one step at a time, while pressing button (A)
moves the display back by one step at a time. (Pressing either button continuously causes the
display to change rapidly.)
• Refer to the section on " Locations Displayed by this Watch" for information on displayed
locations.
• The watch returns to 00 seconds simultaneous to pressing button (B) or button (A) when
correcing seconds. (If the seconds are between 30 and 59 seconds at that time the minutes
advance by 1.)
• When the display is set to switching daylight savings time (ON or OFF is flashing) or switching
the 12H/24H format, the display switches back and forth between the settings each time
button (A) or button (B) is pressed.
(4) Pressing button (D) returns the watch to the normal display.
* The year can be set from 2000 to 2099. However, January 1, 2000 is designated as a special
date for use by the hardware system of this watch. If the watch is attempted to be used for
infrared or USB communication or is switched to the low power mode while set to this date,
all the display elements on the watch are displayed and the watch returns to the initial setting.
Please do not set your watch to January 1, 2000.
* Once the date has been set, it is not necessary to correct for leap years or the end of the
month. (Dates such as February 30 that do not actually exist are not displayed even during
correction.)
* Pay attention to AM (A) and PM (P) when using the 12 hour format.
* When daylight savings time has been set (ON), the time advances by 1 hour from the current
time and "ST" appears on the display. Daylight savings time cannot be set for Coordinated
Universal Time (UTC).
* The day is corrected automatically by correcting the year, month and date.
* The watch automatically returns to the normal display when none of the buttons are pressed
for about 3 minutes in the correction state (display flashing).
* The watch can be immediately returned to the normal display by pressing button (D) in the
correction state (display flashing).
C. Daily Graphic
The daily graph is set with the "CAPgm" PC software. The graphic registered for daily
graphic is displayed each day in the lower right section of the Day Display. In addition,
daily graphics registered for anniversaries are preferentially displayed on days on which
anniversaries have been set. Refer to the "CAPgm" user’s manual provided with the
accessory software contained on the CD-ROM for further details on setting and displaying
daily graphics.
24
2. Travel Time Mode
The travel time mode is used to display the date and time of another location separate
from the Main Time of the time mode (Main time). Simply select a location desired to be
displayed in the travel time mode from the pre-registered locations to automatically display
the time and date for that location as determined by converting the time difference. In
addition, the location displayed in the travel time mode and the location displayed in the
time mode can be easily interchanged.
A. Switching the Display
The time difference from the Coordinated Universal Time (UTC) along with the time
difference from the time in the time mode are displayed for as long as button (B) is
pressed in the travel time mode.
B. Setting the Travel Time
(1) The location flashes when button (C) is pressed for at least
2 seconds in the travel time mode.
(2) The location is changed by pressing button (B) or button (A).
• Pressing button (B) calls up the next location each time it is
pressed, while pressing button (A) calls up the next location in
the reverse order each time it is pressed. (Pressing either button
continuously enables the location to be changed rapidly.)
• Refer to the section on " Locations Displayed by this Watch" for information on displayed
locations.
(3) The setting for daylight savings time (ON (set) or OFF (canceled)) flashes when button
(C) is pressed.
(4) Daylight savings time is corrected by pressing button (B) or button (A).
• The display switches back and forth between the settings each time button (A) or button (B) is
pressed.
(5) Pressing button (D) returns the watch to the normal display.
* The 12 hour or 24 hour format is used in accordance with the setting in the time mode.
* Daylight savings time cannot be set for Coordinated Universal Time (UTC).
* In the case the setting for daylight savings time is changed when the location in the travel time
mode is the same as the location in the time mode, the setting for daylight savings time is
applied to the time mode as well.
* The watch automatically returns to the normal display of the travel time mode when none of
the buttons are pressed for about 3 minutes in the correction state (display flashing).
* The watch can be immediately returned to the normal display of the travel location mode by
pressing button (D) in the correction state (display flashing).
* The watch automatically returns to the time mode when none of the buttons are pressed for
about 3 minutes in the travel time mode.
25
(C)(
B
)
(
D
)(
A
)
(C)(
B
)
(
D
)(
A
)
[Normal Display]
Location
Time
(B)
Month, date
Flashing
Time difference from
UTC
Time difference from
time in time mode
[Time Difference Display]
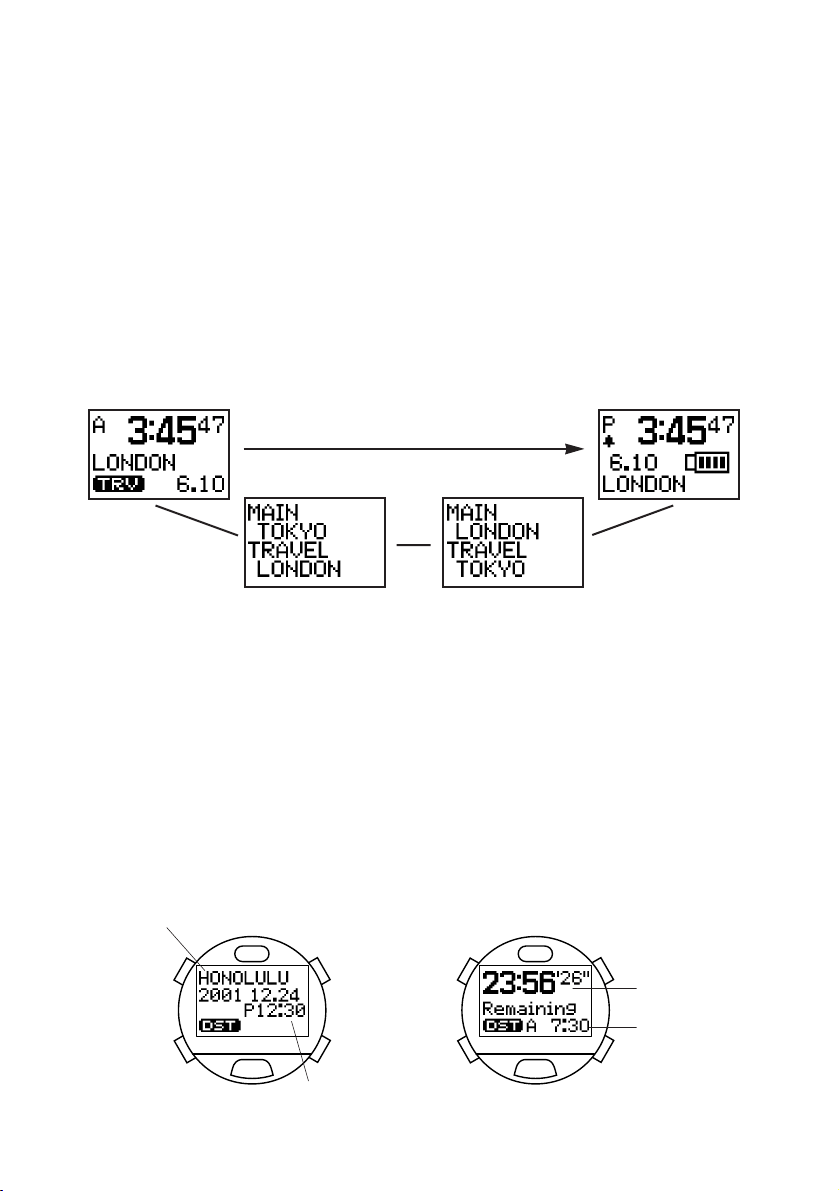
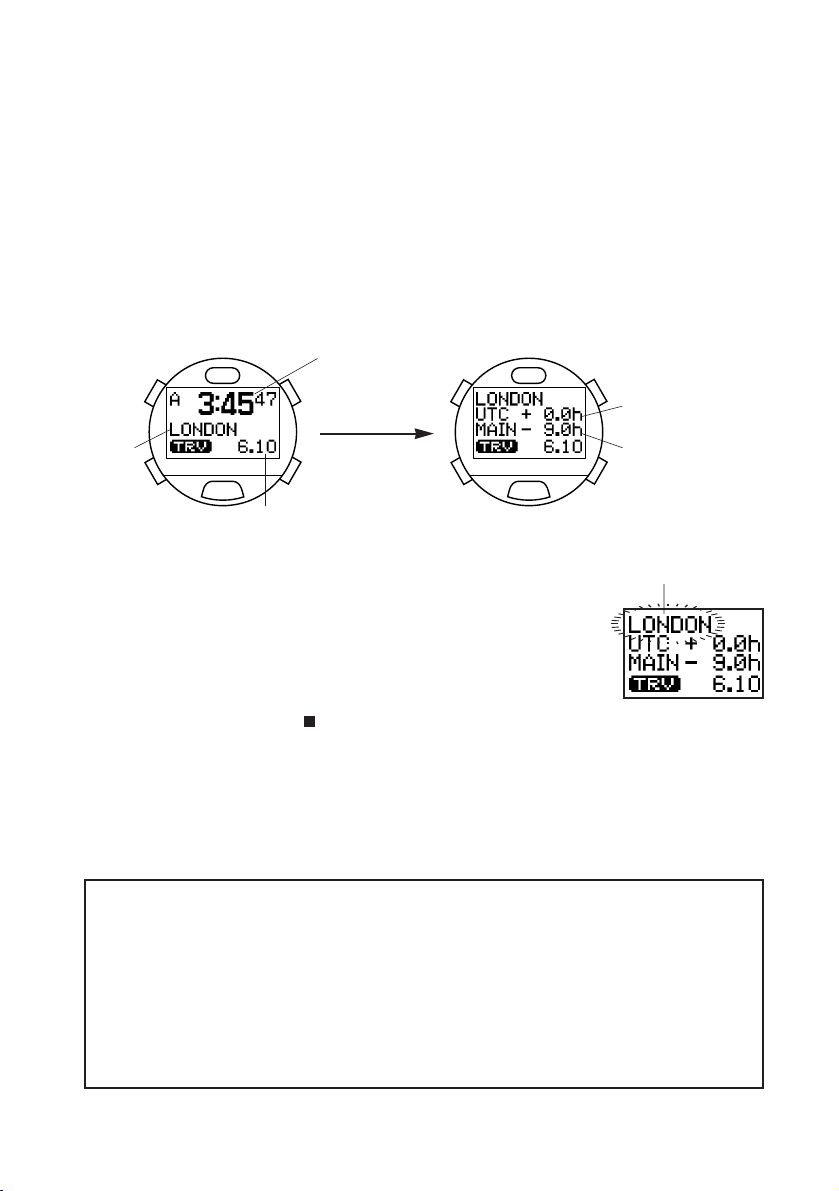
C. Interchanging Locations Between Travel Time Mode and Time Mode
When a location in a time zone that is frequently used is set in the travel time mode, and
this interchanging procedure is performed after having arrived at that location, the time
and date of the location displayed in the travel time mode can be displayed in the time
mode. As a result, the time and date of the location that had been displayed in the time
mode is now displayed in the travel time mode.
<Procedure>
Press buttons (B) and (C) simultaneously for at least 2 seconds in the travel time mode.
The location in the time mode and location in the travel time mode are interchanged and
the watch displays the time mode.
Example: Location set in time mode (main time): TOKYO
Location set in travel time mode: LONDON
3. Destination Timer Mode
The destination timer measures and displays the amount of time remaining until arriving at
a destination up to a maximum of 99 hours, 59 minutes and 59 seconds after having set
the destination and arrival time when traveling or on business overseas. Once the arrival
time is reached, an alarm informing you of arrival sounds for about 30 seconds and "Dest"
is displayed on the display. After arrival, elapsed time from the time of arrival is measured
for up to 99 hours, 59 minutes and 59 seconds.
In addition, the alarm informing you of arrival at your destination can be selected from 15
types of alarm sounds.
26
[Before
interchanging]
[Arrival Time
Display]
Destination
Arrival time
Remaining time
Current time in
time mode
Display of location
before interchanging
Display of location
after interchanging
[During interchanging]
Buttons (B) and (C) for at least 2 seconds
[After interchanging]
(C)(
B
)
(
D
)(
A
)
(C)(
B
)
(
D
)(
A
)
[Remaining Time Display
(during measurement)]

A. Setting the Destination Timer
(1) The watch switches to the correction state (display flashes)
when button (C) is pressed for at least 2 seconds in the
destination timer mode.
(2) The flashing item changes in the order shown below each time
button (C) is pressed.
(3) The flashing item can be corrected by pressing either button (B) or button (A).
• Pressing button (B) advances the display by one step at a time, while pressing button (A)
moves the display back by one step at a time. (Pressing either button continuously causes the
display to change rapidly.)
• Refer to the section on " Locations Displayed by this Watch" for information on displayed
locations.
• When switching daylight savings time (ON or OFF is flashing), the display switches back and
forth between the settings each time button (A) or button (B) is pressed.
• When button (B) is pressed while in the alarm number selection state (an alarm number is
flashing), the next alarm number is called up each time it is pressed. When button (A) is
pressed in the alarm number selection state, the next alarm number is called up in the reverse
order each time it is pressed. Select "Silent" when you do not want the alarm to sound.
• You can monitor the alarm corresponding to the flashing alarm number by pressing button (B)
or button (A) in the alarm number selection state for as long as the button is pressed. (The next
or previous alarm number is momentarily displayed the instant the button is pressed, while
pressing either button continuously causes the set alarm to sound.)
(4) Pressing button (D) finalizes the setting after which the destination timer starts to run
and the remaining time until the arrival time is displayed.
* The 12 hour or 24 hour format setting is in accordance with the setting in the time mode.
* In the case the remaining time until the set arrival time exceeds 100 hours, the destination
timer stops at the arrival time display and then starts running automatically when the remaining
time until the arrival time is within 99 hours, 59 minutes and 59 seconds.
* When the arrival time has been set going back more than 100 hours, the destination timer
stops at the arrival time display.
* In the case of correcting the arrival time while the destination timer is running, the destination
timer starts running according to the newly set arrival time.
* The remaining time is recalculated in the case the time or daylight savings time setting is
corrected for the location set with the destination timer in the time mode or travel time mode
while the destination timer is running.
* The watch automatically returns to the arrival time display or remaining time display when
none of the buttons are pressed for about 3 minutes in the correction state (display flashing).
* The watch can be immediately returned to the arrival time display or remaining time display by
pressing button (D) in the correction state (display flashing).
27
Alarm
number
Minutes Hours Date
Location
Daylight savings
time switching
Year Month
Flashing
(C) (C) (C)
(C)
(C) (C) (C)

B. Destination Timer Measuring Procedure
Once the destination timer has been set, measurement begins automatically. Once the
timer reaches the arrival time, an alarm sounds for about 30 seconds informing you that
the time is up. After the time on the destination timer is up, elapsed time from the arrival
time flashes on the display for up to 99 hours, 59 minutes and 59 seconds. After this time
has elapsed, the watch returns to the arrival time display.
* The alarm that sounds when the arrival time is reached can be turned off by pressing any
button.
* If the alarm to inform of arrival is set to "Silent", arrival time is notified only with the "Dest"
display on the display.
<Displaying Arrival Time Set during Measurement>
(1) When button (B) is pressed while the destination timer is running, the set arrival time
(destination location and time) is displayed.
(2) When button (B) is pressed again while the arrival time is displayed, the time and
location of the time mode relative to the set arrival time are displayed.
(3) Pressing button (B) again returns the watch to the remaining time display.
* The watch automatically returns to the remaining time display when none of the buttons are
pressed for about 3 minutes during the arrival time confirmation displays described in steps (1)
and (2) above.
* The watch automatically returns to the time mode when none of the buttons are pressed for
about 3 minutes in the destination timer mode (including when the destination timer is
running).
28
[Remaining
Time Display]
Remaining
time
Flashing
Location
(B)
(B)
(B)
Arrival time
Location in time mode
Time in time mode relative to
arrival time
Time up
[Elapsed Time
Display]

4. Alarm Mode
Once this alarm is set (ON), the alarm sounds for approximetely 30 seconds at the same
time every day and "Alarm" is displayed on the display. The alarm can be turned off by
pressing any button when it is sounding. In addition, the alarm tone can be selected from
15 types of alarm sounds when setting the alarm.
A. Alarm ON/OFF and Alarm Monitor
The alarm is switched between ON (set) and OFF (canceled) each time button (B) is
pressed in the alarm mode. Once the alarm has been set, the alarm ON mark is
displayed in the time mode. When button (B) is pressed continuously in the alarm mode,
you can monitor the selected alarm tone for as long as button (B) is pressed.
B. Setting the Alarm
(1) The watch switches to the correction state (display flashes) when button (C) is pressed
for at least 2 seconds during then the normal display in the alarm mode. The flashing
item can be corrected.
(2) The flashing item changes in the order shown below each time
button (C) is pressed.
(3) The flashing item can be corrected by pressing either button (B)
or button (A).
• Pressing button (B) advances the display by one step at a time, while pressing button (A) moves the
display back by one step at a time. (Pressing either button continuously causes the display to change
rapidly.)
• When button (B) is pressed while in the alarm number selection state (an alarm number is flashing), the
next alarm number is called up each time it is pressed. When button (A) is pressed in the alarm number
selection state, the next alarm number is called up in the reverse order each time it is pressed. Select
"Silent" when you do not want the alarm to sound. In this case, the alarm time is notified only with
"Alarm" on the display.
• You can monitor the alarm corresponding to the flashing alarm number by pressing button (B) or button
(A) in the alarm number selection state for as long as the button is pressed. (The next or previous alarm
number is momentarily displayed the instant the button is pressed, while pressing either button
continuously causes the set alarm to sound.)
(4) Pressing button (D) finalizes the alarm setting.
* The 12 hour or 24 hour format setting is in accordance with the setting in the time mode.
* The watch automatically returns to the normal alarm display when none of the buttons are
pressed for about 3 minutes in the correction state (display flashing).
* The watch can be immediately returned to the normal alarm display by pressing button (D) in
the correction state (display flashing).
* The watch automatically returns to the time mode when none of the buttons are pressed for
about 3 minutes during the normal alarm display.
29
[Alarm ON]
Alarm time
Flashing
Current time
(B)
(C) (C)
(C)(
B
)
(
D
)(
A
)
(C)(
B
)
(
D
)(
A
)
[Alarm OFF]
Hours Minutes
Alarm
number
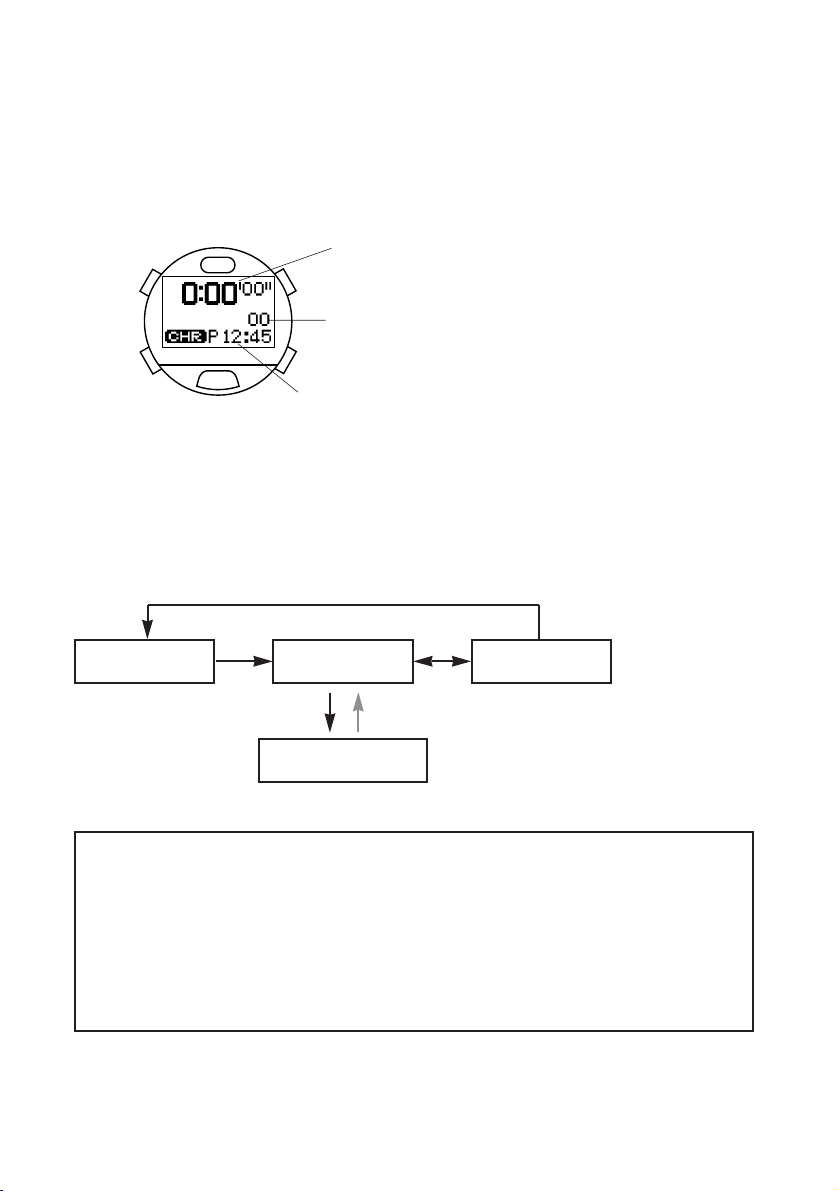
5. Chronograph Mode
The chronograph function of this watch is able to measure time in 1/100 units for up to 99
hours, 59 minutes and 59.99 seconds. The chronograph returns to the reset display
(0:00'00"00) and stops after 100 hours have elapsed.
A. Reading the Display
<1/100 Second Display>
The digits for 1/100 seconds of the
chronograph are only displayed for 1
minute when the chronograph is started
and after returning to the measurement
display from the split time display, after
which they are no longer displayed.
However, the 1/100 second digits are also
displayed when the chronograph is
stopped and during the split time display.
B. Chronograph Timing Procedure
(1) The chronograph is repeatedly started and stopped each time button (B) is pressed.
(2) The split time is displayed for about 10 seconds when button (C) is pressed during
measurement. The most recent split time is measured and displayed each time button
(C) is pressed. ("SPL" flashes while split time is displayed.)
(3) Pressing button (C) while the chronograph is stopped returns the watch to the reset
display.
* Split time refers to the amount of time that has elapsed from the starting line to some
intermediate point.
* The watch automatically returns to the time mode when none of the buttons are pressed for
about 3 minutes during the chronograph reset display.
* The watch automatically returns to the surface mode when none of the buttons are pressed
for about 3 minutes in the chronograph mode (including during timing) when the surface mode
has been activated (while resting on the surface).
* If the mode is switched to the low power mode during chronograph timing, chronograph
timing is interrupted and the watch returns to the reset display.
30
(C)(
B
)
(
D
)(
A
)
[Chronograph Reset Display]
Hours, minutes,
seconds
1/100 seconds
Current time
After 10 seconds
(B) (B)
(C)
(C)
Reset Timing
Split time
Stop

6. Timer Mode
The timer of this watch can be set up to 99 minutes in 1 minute units. An alarm sound
indicating that the time is up sounds for about 30 seconds and "Timer" is displayed on the
display when the time on the timer is up. The timer then returns to the initial set time and
stops.
In addition, the alarm sound indicating that time is up following completion of timing can be
selected from 15 types of alarm sounds.
A. Setting the Timer
(1) The minutes flash when button (C) is pressed for at least 2
seconds in the timer mode.
(2) Set the minutes by pressing button (B) or button (A).
• Pressing button (B) advances the display by one minute at a time
while pressing button (A) moves back the display by one minute at a
time. (Pressing either button continuously causes the display to
change rapidly.)
(3) The time up alarm number flashes when button (C) is pressed.
(4) Set the time up alarm number by pressing button (B) or button (A).
• Pressing button (B) calls up the next time up alarm number each time it is pressed, while
pressing button (A) calls up the next time up alarm number in the reverse order each time it is
pressed. Select "Silent" when you do not want the time up alarm to sound.
• You can monitor the time up alarm of the number that is flashing by pressing button (B) or
button (A) for as long as the button is pressed. (The next or previous time up alarm number. is
momentarily displayed the instant the button is pressed, while pressing either button
continuously causes the set time up alarm to sound.)
(5) Pressing button (D) returns the watch to the timer setting display.
* The watch automatically returns to the timer setting display when none of the buttons are
pressed for about 3 minutes in the correction state (display flashing).
* The watch can be immediately returned to the timer setting display by pressing button (D) in
the correction state (display flashing).
31
[Timer Setting Display]
Current time
Minutes,
seconds
Flashing
(C)(
(
)(
D
)
B
)
A
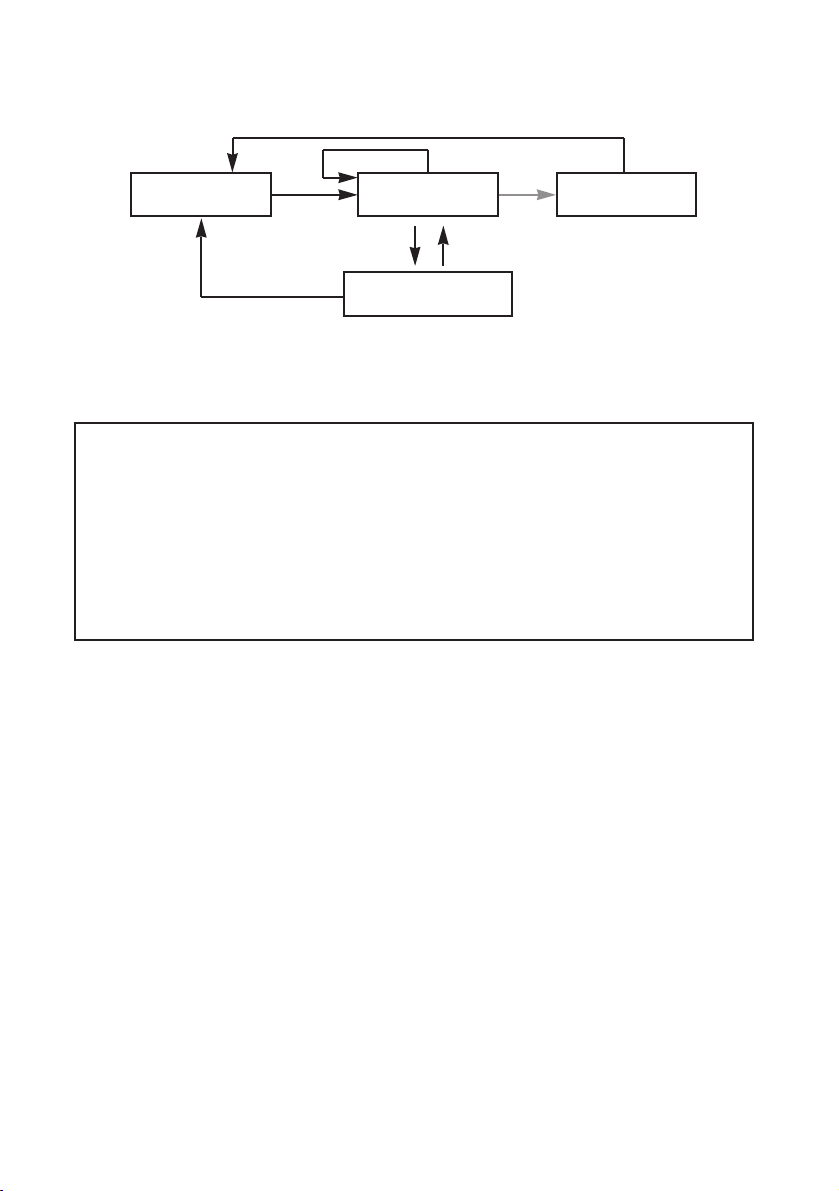
B. Timer Measuring Procedure
(1) The timer is repeatedly started and stopped each time button (B) is pressed.
(2) The watch returns to the setting display when button (C) is pressed while the timer is
stopped.
* The alarm that sounds when the time is up can be turned off by pressing any button.
* Only "Timer" appears on the display to indicate that the time is up when the time up alarm has
been set to "Silent".
* The watch automatically returns to the time mode after about 3 minutes have passed during
the timer setting display.
* The watch returns to the surface mode when none of the buttons have been pressed for about
3 minutes in the timer mode (including during timing) when the surface mode has been
activated (while resting on the surface).
* If the mode is switched to the dive mode, infrared communication mode or low power mode
during timing, timing is interrupted and the watch returns to the setting display.
<Repeating Measurement>
The timer is instantly returned to the setting display and resumes timing when button (C) is
pressed during timer measurement.
32
(B)
(B)
(C)
(C)
(B)
Setting display Timing
Stop
Time up

7. System Monitor Mode
This mode provides a general indication of the amount of charge remaining in the
secondary battery along with the usage status of flash memory.
A. Switching the Display
• The display switches back and forth each time button (B) is pressed in the system
monitor mode.
• The watch's identification number is displayed when button (C) is pressed during the
flash memory status display.
* The watch automatically returns to the time mode when none of the buttons are pressed for
about 3 minutes in the system monitor mode.
B. Battery Charge Indicator
The battery charge indicator provides a general reference
for determining the amount of charge remaining in the
secondary battery. In addition, it also indicates whether or
not each function can be operated ("OK" or "NG") at the
current battery charge level. When the watch is sufficiently
charged in the case "NG" is indicated for each function, the
display changes to "OK" and each of the functions can be
operated.
G.C.: Garbage Collection
This indicates whether or not the garbage collection operation can be performed.
* This watch uses flash memory to store the various setting and diving data of the watch edited
with a personal computer. Whenever new data is recorded in flash memory, areas of memory
that are no longer used as well as areas of memory in the gaps between files are generated in
the flash memory. Garbage collection refers to an operation that creates continuous areas of
available memory so that these areas can be reused automatically.
: Diving Function
This indicates whether or not the watch can be used for diving.
* When "NG" is displayed, the watch will not switch to the dive mode. The watch can therefore
not be used for diving in this state.
Ir: Infrared Communication Function
This indicates whether or not the infrared communication function can be used for data transfer
with a personal computer or between watches.
33
[Battery Charge
Indicator Display]
Current time
(B)
ID number
Current time
Battery charge
indicator
[Flash Memory Status
Display]
(C)(
(
)(
D
)
B
)
A
(C)(
(C)(
(
)(
(
)(
D
D
)
)
B
B
)
)
A
A

C. Flash Memory Status Display
This display provides a general indication of the amount of flash memory available. In
addition, garbage collection can also be performed during this display by pressing one of
the buttons.
<Reading the Bar Graph>
a: Black segment: Area in which data has been written
and then deleted.
/The area corresponding to this segment is transformed
into available memory by performing garbage collection.
b: Gray segment: Area currently used by files.
/This segment becomes larger the greater the amount of
diving data, daily graphic data and so forth.
c: White segment: Area of available memory.
D. Garbage Collection Operating Procedure
Garbage collection begins when button (C) is pressed for at least 2 seconds during the
flash memory status display.
• During the garbage collection operation, an alarm sounds and "G.C." is displayed on the
display. When garbage collection is completed, "Done" is displayed on the display.
• Garbage collection cannot be performed when "G.C." has changed to "NG" on the
battery charge indicator or when the water sensor has been activated. "Fail" is displayed
on the display at this time.
<General Reference for Performing Garbage Collection>
Try to perform garbage collection when the black segment on the flash memory status display is
larger than the white segment (available memory). Garbage collection consumes considerable
power. For this reason as well, in order to ensure that flash memory is used efficiently, it is
recommended to perform garbage collection whenever the watch is charged (fully charged).
* In the case "Error" is displayed during the garbage collection operation, there may be an error in
the flash memory. After formatting flash memory by referring to the section on " All Reset
and Formatting Flash Memory", try repeating the garbage collection operation. If "Error" is still
displayed, this indicates that the watch has malfunctioned. Please contact a Citizen Service
Center to request repairs.
* Garbage collection is only performed to organize the contents of flash memory. There is no
risk of deleting watch settings or diving logs as a result of performing garbage collection.
34
a
b
c
Locations Displayed by this Watch
The locations displayed in the time, travel time and destination timer sub-modes of the
standard mode can be edited with a personal computer (including changing, adding and
deleting locations as well as changing the order in which they are called up).
* Refer to the section on " Data Communication Functions" in this manual along with the "CAPgm"
instruction manual contained on the CD-ROM provided for further details.
Locations Pre-registered in this Watch
The following locations are registered in the watch when using the watch for the first time
(default status) or after having performed the all reset procedure. The following locations
are displayed in alphabetical order (except for UTC which is the first location shown) in the
correction state of each mode.
Location "IrWW"
In the case the time difference (time difference from UTC) of a location of the time mode of
the transmitting watch is not present in the receiving watch during transfer of time setting
data between watches using the infrared communication function, "IrWW" is temporarily
displayed in the location display of the receiving watch.
* Refer to section "4. Data Communication Between Watches" of " Data Communication Functions"
in this manual.
35
16 KUWAIT +3
17 LONDON
±
0
18 LA
-
8
19 MEXICO
-
6
20 MONTREAL
-
5
21 MOSCOW +3
22 NEW DELHI +5.5
23 NEW YORK
-
5
24 NOUMEA +11
25 PARIS +1
26 RIO
-
3
27 ROME +1
28 SINGAPORE +8
29 SYDNEY +10
30 TOKYO +9
-
UTC
±
0
1 ANCHORAGE
-
9
2 AUCKLAND +12
3 BANGKOK +7
4 BEIJING +8
5 BUENOS
-
3
6 CAIRO +2
7 CARACAS
-
4
8 CHICAGO
-
6
9 DENVER
-
7
10 DHAKA +6
11 DUBAI +4
12 HONG KONG +8
13 HONOLULU
-
10
14 ISTANBUL +2
15 KARACHI +5
No.
Watch display
Location
Time
difference
No.
Watch display
Location
Time
difference
Coordinated Universal Time
Anchorage
Auckland
Bangkok
Beijing
Buenos Aires
Cairo
Caracas
Chicago
Denver
Dhaka
Dubai
Hong Kong
Honolulu
Istanbul
Karachi
Kuwait
London
Los Angeles
Mexico City
Montreal
Moscow
New Delhi
New York
Noumea
Paris
Rio de Janeiro
Rome
Singapore
Sydney
Tokyo

Warning Functions
This watch is equipped with various warning functions for the purpose of avoiding risks and
problems when diving as much as possible.
WARNING
* Do not dive in a manner that activates any of the warning functions. Since the degree of
risk varies according to experience, physical condition and diving conditions, do not
assume that diving is completely safe just because none of the warning functions are
activated. Please use the warning functions as a general indicator of diving safety.
Insufficient Charge Warning
When the watch becomes insufficiently charged, "BATT" flashes in the
lower left corner of the display in all of the sub-modes of the standard
mode. Operation of the following functions is limited while this warning
function is activated.
• The watch does not switch to the dive mode even if the water sensor
gets wet. (The watch automatically switches to the battery charge
indicator display of the system monitor mode when the water sensor
gets wet.)
• None of the alarms sound.
• Data cannot be transferred by infrared communication. (However, data can be transmitted to
a personal computer by USB communication.)
• The EL light is not illuminated.
When this warning function is activated, charge the watch by attaching to the communication
unit as soon as possible. The display will return to normal once the watch is sufficiently
charged.
* None of the dive alarms sound when the insufficient charge warning function is activated during
diving. Although the dive computer will function normally for about 30 minutes after "BATT" starts to
flash, the log data for that dive is not recorded. Promptly begin to ascend it this warning function is
activated during diving.
* If the watch remains insufficiently charged after the insufficient charge warning function has been
activated, it switches to the low power mode after about 2 days. Please note that if the watch
continues to be left uncharged in the low power mode, all functions stop and all watch settings return
to the initial (default) settings.
File Error Warning
When the amount of available memory in flash memory becomes low,
"FILE" flashes in the lower left corner of the display in all of the submodes of the standard mode as well as in the dive mode. The watch
automatically switches to the flash memory status display of the system
monitor mode when the water sensor gets wet while this warning function
is activated. Please note that although it is possible to use the watch for
diving in this state, log data may not be recorded in flash memory during
diving.
The file error warning function is also activated and additional log data is not recorded if the
duration of a single dive exceeds 2 hours or if more than 15 dives are made in a single day. The
file error warning function may also be activated when the water temperature during diving is low.
It may not be possible to receive watch settings by data communication while the file error warning
function is activated.
36
Flashing
Flashing

When the watch has switched to the file error warning display, perform the garbage collection
procedure in the system monitor mode of the standard mode. The display returns to normal
following completion of garbage collection.
Abnormal Pressure Detection Error Warning
When abnormal atmosphere pressure is detected during use on land, or
when ascending to high locations more than 4000 m (13000 ft) above
sea level, "ERR" (Error) flashes in the lower left corner of the display.
The watch does not switch to the dive mode even if the water sensor
gets wet while this warning function is activated.
If "ERR" does not disappear from the display even after a long period of time, there may be a
problem with the pressure sensor. When this happens, discontinue using the watch and consult
a Citizen Service Center.
Water Sensor Check Warning
If the preliminary dive display continues to be displayed for more than 1
hour after the water sensor has gotten wet and the watch has switched
to the preliminary dive display in the dive mode, "CHK" (Check) flashes
in the lower left corner of the display to inform the wearer that the water
sensor should be checked.
* "CHK" also flashes when the watch returns to the normal display from any of
the correction states, when the watch is returned to the time mode of the
standard mode from the infrared communication mode, and when the water
sensor is operating during the all reset procedure.
The watch does not switch to the dive mode (water depth measurement display) when "CHK" is
flashing.
To check the sensor, remove any debris or moisture from the water sensor with a dry cloth. The
display returns to normal when the water sensor is canceled.
Ascent Rate Warning
When the ascent rate during scuba diving exceeds 18 m (60 ft)/min, the
ascent rate warning alarm sounds for 5 seconds and "SLOW" and an
illustration of a turtle are displayed at the bottom of the display.
The ascent rate warning alarm stops sounding when a proper ascent
rate is resumed.
* The ascent rate warning alarm does not sound during skin diving (continuous
diving for less than 3 minutes at a depth of 1 m or more).
Abnormal Depth Warning
When a sudden change in depth of more than 4 m (13 ft)/sec is
detected during diving, the watch assumes that the watch has reached
an abnormal depth. At this time, "ERR" and the diver mark are
alternately displayed in the lower left corner of the display.
Once "ERR" has been displayed during diving, it continues to be
displayed until the dive mode is terminated.
CAUTION
Avoid using the watch in environments where sea bottom drilling equipment or similar
machinery is in use. The vibrations from such equipment may cause a change in water
pressure of "4 m (13 ft) or more per second" to be locally and momentarily applied to the
pressure sensor of the watch, causing "ERR" to be displayed and preventing water depth
from being displayed correctly.
37
Flashing
Flashing
Flashing

Decompression Diving Warning
This alarm sounds for 3 seconds and the decompression stop
indicator (STOP) is displayed on the display when the nodecompression limit time has been exceeded resulting in
decompression diving during the course of diving.
The display returns to the no-decompression diving display when
decompression stop is performed in accordance the decompression
stop instructions.
Exceed Maxmum Depth Warning
When the limit depth of 40 m (131 ft) for recreational diving is
surpassed during the course of diving, an exceed maximum depth
error occurs, the current depth flashes and the alarm sounds for 15
seconds. During diving at a depth greater than 40 m (131 ft), the
warning alarm sounds for 15 seconds every minute.
This warning function is canceled when the depth returns to 40 m
(131 ft) or less.
Permanent Error Warning
The instructed depth flashes and an alarm sounds continuously
when either of conditions 1 or 2 below are met. If hazardous diving
or ascending is continued while ignoring this warning, a permanent
error (ERROR) occurs:
1. When not ascending to the instructed depth and continuing to
dive at an excessively low depth (diving at which the instructed
decompression stop depth exceeds 9 m (30 ft).) even though
having been instructed to make a decompression stop
(Permanent Error Warning 1).
The warning stops when the diver begins to ascend immediately and the
decompression stop instructed depth reaches 9 m or less.
2. When having ascended to a depth 1 m (4 ft) or more less than the instructed depth after
having been instructed to make a decompression stop (Permanent Error Warning 2).
In this case, the warning is canceled when the diver returns to the instructed depth.
<Permanent Error>
If hazardous diving or ascending is continued even after the
permanent error warning function has been activated, a permanent
error results, "ERROR" appears on the display and the entire
display flashes.
When a permanent error has occurred, the next dive cannot be
made for 24 hours. (The water depth measurement function does
not operate for 24 hours. In addition, "ERROR" is displayed when
the watch is switched to the dive plan mode, and the nodecompression limit time is not displayed.)
38
Flashing
Flashing
Flashing

Diving Terms Used by this Watch
The following provides an explanation of the diving terms displayed by this watch along
with their basic meanings.
<Algorithm>
This watch employs the calculation formula of the Canadian Defense and Civil Institute of
Environmental Medicine (DCIEM).
<Scuba Diving and Skin Diving>
This watch automatically distinguishes between skin diving and scuba diving according to
the following conditions, and records log data separately for each type of diving.
• Scuba diving: Continuously diving for 3 minutes or more to a depth of 1 m (4 ft) or more
• Skin diving: Continuously diving for less than 3 minutes to a depth of 1 m (4 ft) or more
<One Dive>
In this watch, one dive constitutes the time from initially diving to a depth of 1 m (4 ft) (start
of dive) from the preliminary dive mode state to the time the dive mode is terminated (end
of dive).
<No-Decompression Diving and No-Decompression Limit (NDL) Time>
No-decompression diving refers to diving that allows the diver to ascend to the surface
without stopping for decompression during the course of ascending following completion
of a dive. The limit time during which this no-decompression diving is allowed is referred
to as the no-decompression limit time. No-decompression limit time varies according to
the diving depth and diving time of the previous dives.
<Safety Stop>
Safety stop refers to a temporary stop made during ascending for safety reasons in order
to promote expulsion of nitrogen in the body, and is performed even if the nodecompression limit time has not been exceeded. In the case of having dove to a depth of
18 m (60 ft) or more, a safety stop should always be made at 5 m (15 ft) of depth to
ensure safety.
<Decompression Diving>
This refers to diving beyond the no-decompression limit time. Decompression diving is
extremely dangerous since nitrogen accumulates in the body beyond allowable levels.
Never dive in this manner.
<Decompression Stop>
This refers to a stop that must be made to ensure the necessary decompression in the
case of having performed decompression diving. It is necessary to make a
decompression stop at a predetermined depth (decompression stop instructed depth) and
predetermined time (decompression stop instructed time) when ascending.
<Total Ascending Time>
This refers to the minimum time required to ascend to the surface from the current depth in
the case of ascending at the rate of 18 m (60 ft)/min or less while making a decompression
stop in accordance with the decompression stop instructions during decompression diving.
39

<Body Nitrogen Level>
This refers to the amount of nitrogen dissolved in the body as a result of diving. This
watch displays a general indicator of the amount of nitrogen dissolved in the body in the
form of a bar graph. The higher the level of the black portion of the graph, the greater the
body nitrogen level.
<Total number of Dives (Log Count)>
This indicates the total number of dives for scuba diving.
* Arbitrarily setting the total number of past dives in a personal computer enables this to display the
total number of scuba dives made throughout your life.
<Dive Date>
This is the date (year, month and date) on which a dive was made.
<Dive Number>
This is the number of dives made in one day. A maximum of 15 dives are counted per day
for skin diving and scuba diving, respectively.
* This indicates the number of a dive for a particular dive date.
The counter is reset to 1 when the day changes.
<Surface Interval Time (S.I. Time)>
This refers to the elapsed time following completion of scuba diving (surface interval time
(S.I. Time)). This watch measures surface interval time up to a maximum of 24 hours.
* S.I. Time as referred to in the scuba log mode represents the elapsed time from completion of the
dive of the previous log until the start of the dive of the current log.
<Dive Time>
This is the total time at a depth of 1 m (4 ft) or more during a single dive.
* Measurement of dive time starts when first going below a depth of 1 m (4 ft), and stops when
depth reaches less than 1 m (4 ft). However, if a dive is resumed to a depth of more than 1 m (4 ft)
within 10 minutes from the time measurement of dive time stopped, dive time is continued to be
measured from the time measurement stopped.
<Time In>
This is the time when the depth exceeds 1 m (4 ft) for the first time during the dive.
<Minimum Water Temperature (Min.w.temp)>
This is the minimum water temperature encountered during the course of a single dive.
<Maximum Depth (Max. Depth)>
This is the depth when having dove the deepest during the course of a single dive.
<Average Depth (Ave. Depth)>
This is the average depth during the course of a single dive.
* This refers to the average value of depth measured for every 5 seconds of dive time.
<Profile Log>
The watch displays a simple graph of the changes in depth during a dive.
* Data relating to depths measured every 5 seconds and water temperature measured every 5
minutes can be confirmed on a personal computer.
40

Using the Dive Plan Mode
This mode is used to plan the next dive. In this mode, the no-decompression limit time
according to the first dive and repetitive dives can be displayed, and dive alarms can be
set.
1. Switching the Display
The display switches between the "Dive Plan Display" and "Dive Alarm Display" each time
button (A) is pressed in the dive plan mode.
* The watch automatically returns to the time mode of the standard mode when none of the
buttons are pressed for about 3 minutes in the dive plan mode.
2. Calling Up No-Decompression Limit Time
(1) The no-decompression limit time corresponding to a depth of 12
m (40 ft) is displayed when button (B) is pressed during the dive
plan display.
(2) No-decompression limit times can be called up in order for every
3 m (10 ft) of depth each time button (B) is pressed. Repeatedly
press button (B) until the depth corresponding to the depth you
plan on diving at is displayed.
* No-decompression limit time varies according to the dive depth, dive
time of the previous dive and surface interval time from previons
dives.
Indicated Depth
This watch displays no-decompression limit time for the following 12 depths:
12 m, 15 m, 18 m, 21 m, 24 m, 27 m, 30 m, 33 m, 36 m, 39 m, 42 m, 45 m
(40 ft, 50 ft, 60 ft, 70 ft, 80 ft, 90 ft, 100 ft, 110 ft, 120 ft, 130 ft, 140 ft, 150 ft)
WARNING
In order to ensure safe diving, dive while allowing an adequate margin of safety
relative to the displayed no-decompression limit time.
41
(C)(
B
)
(
D
)(
A
)
(C)(
B
)
(
D
)(
A
)
[Dive Alarm Display]
Dive time alarm
Depth alarm
(A)
No-decompression
limit time
Depth
Body nitrogen level graph
Number of next dive
during repetitive
dives
[Dive Plan Display]
(C)(
(C)(
(
)(
(
)(
D
D
B
B
A
A
)
)
)
)

3. Dive Alarm
<Depth Alarm>
The depth display flashes and an alarm sounds for 15 seconds at 1 minute intervals (for
the set number of times) to warn the diver when the diver remains at a depth deeper than
the set depth while diving. The alarm stops sounding when the diver ascends to a depth
less than the set depth, and sounds again if the diver descends deeper than the set depth.
• Setting range: 10 m (30 ft) to 39 m (130 ft) (1 m (5 ft) units), OFF
• No. of times alarm sounds: 1 to 5 times, ON (no limit)
<Dive Time Alarm>
The dive time display flashes and an alarm sounds for 15 seconds when the set time
elapses from the start of the dive. This alarm sounds only once.
• Setting range: 5 min to 90 min (5 min intervals), OFF
4. Setting the Dive Alarm
(1) The watch enters the correction state (display is flashing) when
button (C) is pressed for at least 2 seconds during the dive
alarm display. The flashing item on the display can be
corrected.
(2) The flashing item changes in the order shown below each time
button (C) is pressed.
(3) Correct the flashing item by pressing either button (B) or button (A).
• Pressing button (B) advances the display by one step at a time, while pressing button (A)
moves the display back by one step at a time. (Pressing either button continuously causes the
display to change rapidly.)
• Correction of the number of times the alarm sounds is skipped when the depth alarm is set to
OFF.
(4) Pressing button (D) finalizes the settings.
* Set each parameter to OFF when you do not want the depth alarm and dive time alarm to
sound.
* The watch automatically returns to the normal dive alarm display when none of the buttons are
pressed for about 3 minutes in the correction state (display flashing).
* The watch can be immediately returned to the normal dive alarm display by pressing button (D)
in the correction state (display flashing).
5. Dive Alarm Monitor
Each alarm sound repeatedly sounds for 4 seconds each in the order of the depth alarm,
dive time alarm and ascent rate alarm for as long as button (B) is pressed during the dive
alarm display.
* Refer to the section on " Warning Functions" for information on the ascent rate warning alarm.
42
Depth
No. of times
alarm sounds
Dive time
Flashing
(C) (C)

Using the Scuba Log Mode and Skin Log
Mode
The scuba log mode is used to display the scuba diving log automatically recorded by the
watch during scuba diving. The skin log mode is used to display the skin diving log
automatically recorded by the watch during skin diving. A maximum of 100 sets of log
data can be recorded for both scuba diving and skin diving (provided that the dive time of
a single dive is within 2 hours and no more than 15 dives are made in a single day). The
contents of log data for a single dive are displayed using three displays for both the scuba
log and skin log modes.
1. Calling Up Scuba Diving Log Data
(1) The most recent scuba diving log data is displayed when the watch is switched to the
scuba log mode by pressing button (D).
(2) The log data that you want to view can be selected by pressing either button (A) or
button (B). Logs are identified according to the number of the dive (No.) among the
total number of dives.
* Old log data is called up each time button (A) is pressed, while new log data is called up each
time button (B) is pressed. (Pressing either button continuously causes the log data to change
rapidly.)
(3) The display of the selected log data changes each time button (C) is pressed.
* "DECO" is displayed on the 2nd display when decompression diving has resulted during the
course of scuba diving.
* "NO LOG" is displayed when there is no scuba diving log data recorded.
* Maximum depth (max. depth) is displayed as "- -.- m" when the maximum depth has exceeded
80.0 m (266 ft) while diving.
* The average depth (ave. depth) flashes if an abnormality has occurred in water depth
measurement while diving.
* The minimum water temperature (min.w. temp) flashes when the water temperature while
diving has exceeded the water temperature measuring range.
* Calling up log data may take some time when there is a large amount of log data recorded. In
such cases, "WAIT" is displayed while log data is being called up. The water sensor and none
of the button operations function while "WAIT" is displayed.
43
No.: Total number of
dives and date
-1- : No. of dive (1st
dive)
1st Display 2nd Display 3rd Display
(C)
(C) (C)
Surf: Surface interval
(S.I.) time
In: Time in
D.Time: Dive time
Min. w. temp
Profile log
Avg: Ave. depth
Max: Max. depth

2. Calling Up Skin Diving Log Data
(1) The most recent skin diving log data is displayed when the watch is switched to the
skin log mode by pressing button (D).
(2) The log data that you want to view can be selected by pressing either button (A) or
button (B). Logs are identified according to the date and dive number.
• Old log data is called up each time button (A) is pressed, while new log data is called up each
time button (B) is pressed. (Pressing either button continuously causes the log data to change
rapidly.)
(3) The display of the selected log data changes each time button (C) is pressed.
* "NO LOG" is displayed when there is no skin diving log data recorded.
* Maximum depth (max. depth) is displayed as "--.- m" when the maximum depth has exceeded
80.0 m (266 ft) while diving.
* Calling up log data may take some time when there is a large amount of log data recorded. In
such cases, "WAIT" is displayed while log data is being called up. The water sensor and none
of the button operations function while "WAIT" is displayed.
3. Deleting Log Data
Individual sets of log data cannot be deleted. When a new dive is made when there are
already 100 sets of dive data recorded for the total dive data of scuba diving log data and
skin diving log data, the oldest log data is automatically deleted.
CAUTION
It is strongly recommended to promptly record important log data in another storage
medium. When a new dive is made and there are already 100 sets of dive data
recorded for the total dive data of scuba diving log data and skin diving log data, the
oldest log data is automatically deleted. In addition, since there is also the possibility
of data being lost due to a malfunction in the watch or during repairs or inspections, it
is recommended to promptly transfer data to a personal computer following
completion of diving. Please note that the manufacturer cannot be responsible for
data that is lost due to a malfunction.
44
Date
Dive number
1st Display 2nd Display 3rd Display
(C)
(C) (C)
Max: Max. depth
In: Time in
D.Time: Dive time
(Champion) Max:
Deepest depth ever recorded
during skin diving
Date on which deepest depth
ever recorded was recorded
(date and dive number on that
day)

45
Using the Dive Mode
This mode is used to measure depth underwater. When the water sensor detects water in
any mode other than the transfer mode and low power mode, the watch automatically
switches to the dive mode. When the depth exceeds 1 m (4 ft) during the preliminary dive
display, measurement of depth begins enabling the watch to display necessary
information including current depth, dive time and max. depth for the diver.
• During the preliminary dive display, the diver mark flashes in the lower left corner of the
display and the display of each mode prior to switching to the preliminary dive display is
maintained.
• Once measurement of water depth begins, if diving continues for more than 3 minutes at
a depth of more than 1 m (4 ft), the watch switches to the scuba diving display and
displays no-decompression limit time.
• The diver mark flashes in the lower left corner of the display while diving.
WARNING
Always make sure to confirm that the "diver mark" is flashing in the lower left corner of
the display during the preliminary dive display before beginning a dive. The water
depth measurement function does not operate if "BATT", "ERR", "CHK" or other error
messages (indicating that a warning function has been activated) are flashing in the
lower left corner of the preliminary dive display. In addition, it is recommended to
sufficiently charge the watch prior to starting a dive to avoid the watch becoming
insufficiently charged while diving even if the insufficient charge warning function
("BATT" display) has not been activated.
* For further details, refer to the section on " Warning Functions".
1. Reading the Display during Depth Measurement
During skin diving:
Current time
Dive time
Max. depth
Current
depth
Diver mark
[Preliminary Dive
Display]
[Water Depth
Measurement
Display]
Skin diving
Scuba diving
Diver mark
flashing
Display before
switching to
preliminary dive
display
When
depth
exceeds
1 m (4 ft)
When depth
is less than
1 m (4 ft)
When
depth is
more than
1 m (4 ft)
When more
than 3 minutes
elapse
continuously at
a depth of more
than 1 m (4 ft)
(C)(
B
)
(
D
)(
A
)
(C)(
B
)
(
D
)(
A
)
(C)(
B
)
(
D
)(
A
)
(C)(
B
)
(
D
)(
A
)
[0 m (0 ft) Display after
Completion of Water
Depth Measurement]
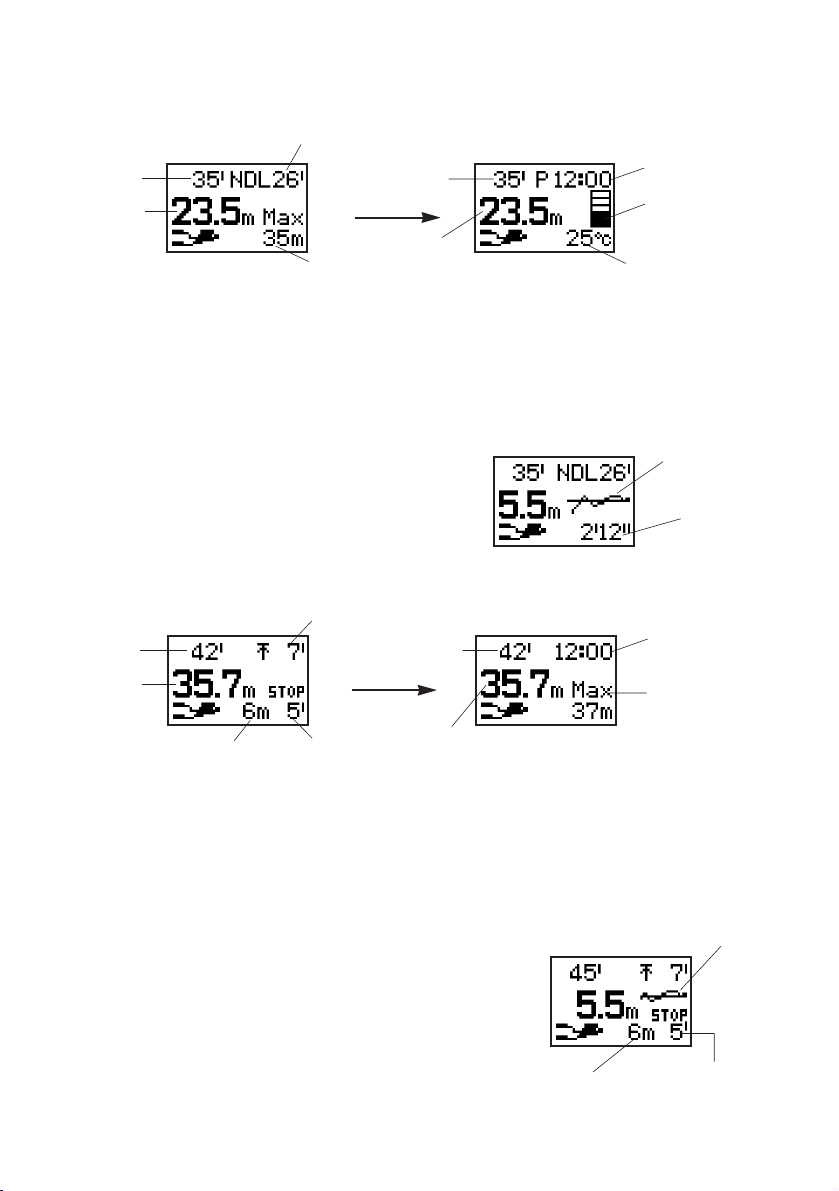
During scuba diving:
<Case of No-Decompression Diving>
• The current time, water temperature and current body nitrogen level graph are displayed
during the time button (A) is pressed during no-decompression diving (except while the safety
stop graph is displayed).
<Safety Stop Graph Display>
A graph serving as a general reference for changes in depth during safety stop and the elapsed
time during a safety stop are displayed after having descended to a depth of more than 5 m (15 ft)
and then ascended to a depth of 5 m (15 ft) during scuba diving (no-decompression diving).
Reading the Safety Stop Graph
The horizontal axis of the graph represents elapsed time, while
the vertical axis represents changes in depth over a range of 3
m (10 ft) to 7 m (23 ft) centering around a depth of 5 m (15 ft).
<Case of Decompression Dive Display when No-Decompression Limit Time has
been Exceeded>
• When diving beyond the no-decompression limit time, an alarm sounds and an instruction to
make a decompression stop (STOP) is displayed on the display, indicating that
decompression diving has resulted.
• The current time and maximum depth are called up during the time button (A) is pressed
during the decompression dive display (except during display of the decompression stop
graph).
• The watch returns to the no-decompression dive display when the instruction to make a
decompression stop is followed.
<Decompression Stop Graph Display>
A graph serving as a general reference for changes in depth is
displayed during a decompression stop at a depth of ±1 m (4 ft)
of the decompression stop instructed depth.
Reading the Decompression Stop Graph
The horizontal axis of the graph represents elapsed time, while the
vertical axis represents changes in depth over a range of ±1 m (4 ft)
from the decompression stop instructed depth.
46
Dive time
Max. depth
No-decompression limit
(NDL) time
Current
depth
Dive time
Current time
Body nitrogen
level graph
While button (A) is pressed
Current
depth
Current water
temp.
Dive time
Instructed time
Instructed depth
Total
ascent time
Current
depth
Dive time
(A)
(A)
Current time
Max. depth
While button (A) is pressed
Current depth
Safety stop
graph
Safety
stop time
Decompression stop graph
Instructed
time
Instructed depth

WARNING
Never dive in a manner that requires a decompression stop (decompression diving). If
decompression diving should happen to occur, immediately start to ascend while observing
an ascent rate of no more than 18 m (60 ft)/min. Make a decompression stop while
ascending in accordance with decompression stop instructions.
When making a decompression stop, never ascend to a depth less than the instructed
depth. In addition, since it is difficult to maintain a constant depth when there are high
waves and so forth, make decompression stops at depths a little deeper than the instructed
depth to prevent decompression sickness.
* A permanent error (ERROR) occurs when continuing to dive while ignoring decompression stop
instructions during the course of decompression diving, and the watch will not switch to the dive
mode for 24 hours after that time.
2. Depth Measurement
This watch measures depth every second, and continuously displays the current depth in 0.1 m
(1 ft) units during the course of diving.
• Measuring range: 1 m to 80 m (4 ft to 266 ft)
* 0 m (0 ft) is displayed at depths of less than 1 m (4 ft), while - -.- m is displayed at depths greater than 80 m
(266 ft).
* When an error has occurred in depth measurement during the course of diving, "ERR" and the diver mark
are alternately displayed until that dive is completed.
3. Dive Time Measurement
The elapsed time of dives made to a depth of more than 1 m (4 ft) is displayed. Measurement
of dive time starts automatically when the depth exceeds 1 m (4 ft) for the first time, and stops
when the depth again is less than 1 m (4 ft). However, if a dive is resumed to a depth of more
than 1 m (4 ft) within 10 minutes from the time measurement of dive time stopped, dive time is
continued to be measured from the time measurement stopped. Dive time is displayed for up to
9 minutes 59 seconds from the start of measurement in 1 second units. Beyond that time, dive
time is displayed in 1 minute units.
• Measuring range: 0 minutes 00 seconds to 999 minutes 59 seconds
4. Water Temperature Measurement
The watch starts to measure water temperature beginning 1 minute after the depth exceeds 1.0 m,
and measures at 1 minute intervals during the course of diving. The most recently measured
water temperature is displayed in 1°C (1°F) units during the time button (A) is pressed during the
scuba diving display. (The water temperature measured in 0.1°C (0.18°F) units is displayed after
rounding to the nearest 1°C (1°F) unit.)
• Measuring range: -9.4°C to +40.0°C (15°F to 104°F)
5. No. of Dives Per Day and Recording Log Data
A maximum of 15 sets of log data can be recorded in a single day for both skin diving and scuba
diving. When the number of sets of log data exceeds 15, log data is no longer recorded during
diving. Even though log data is not recorded, the watch will continue to measure depth and
perform its various other functions during diving.
When the number of dives in one day is such that the number of skin dives is 15 or more and
the number of scuba dives is 14 or less, although the watch displays "FILE" when the dive is
started based on the judgment of the watch being used for skin diving, it judges that the watch is
being used for scuba diving 3 minutes later at which time "FILE" disappears from the display
and the dive is recorded as log data.
47

6. Ending the Dive Mode
• The watch returns to the surface mode or the time mode of the
standard mode when button (D) is pressed for at least 2 seconds
when 0 m (0 ft) is displayed after completion of water depth
measurement.
• The watch automatically returns to the surface mode or time mode
of the standard mode after roughly 10 minutes have elapsed since
0 m (0 ft) is displayed following water depth measurement.
Using the Surface Mode
The surface mode is used to display elapsed time from the end of the most recent scuba
dive (S.I. time) and the amount of time remaining until boarding an aircraft is permitted (no
fly time).
WARNING
Avoid traveling in an aircraft while the surface mode is activated. Traveling in an
aircraft without allowing sufficient time to rest after diving results in the risk of
decompression sickness. It is recommended to avoid traveling in an aircraft for at
least 24 hours after diving whenever possible even if the surface mode is no longer
displayed. There are no rules for completely preventing decompression sickness
caused by flying in an aircraft after diving.
* This mode is preferentially displayed at all times after scuba diving.
* When the no fly time reaches 0 hours 00 minutes, the watch returns to the time mode of the
standard mode from the surface mode. The surface mode is not displayed after that time until
completion of the next scuba dive.
48
Surface interval time
No fly mark
Current time
No fly taime
(C)(
B
)
(
D
)(
A
)
(C)(
B
)
(
D
)(
A
)
0 m (0 ft) display after
completion of water
depth measurement

Low power mode (Temporally function)
The low power mode is a special mode for allowing the watch to run while using the
minimum amount of current consumption. When the watch becomes insufficiently
charged, it automatically switches to this mode to conserve current consumption by the
watch. In addition, the watch can be manually switched to the low power mode by
pressing buttons (A) and (D) simultaneously for at least 2 seconds in the time mode of the
standard mode.
* Since all functions except for the time/date display and correction functions do not operate in the
low power mode, do not use this mode when using (wearing) the watch under normal
circumstances.
1. Switching the Display
• The time and date displays switch back and forth each time button (A) is pressed.
• The entire display goes out (no display) when button (D) is pressed for at least 2
seconds during the time display or date display. Pressing button (D) again for at least 2
seconds returns the watch to the time display.
• The watch returns to the time mode of the standard mode (or to the surface mode when
the surface mode has been activated) when buttons (A) and (D) are pressed
simultaneously for at least 2 seconds during the time display or date display.
* When the watch has switched to the low power mode as a result of being insufficiently
charged, the watch does not return to the time mode of the standard mode even if buttons (A)
and (D) are pressed simultaneously for at least 2 seconds. In this case, the watch will only
return to the time mode of the standard mode when the watch has been sufficiently charged
and buttons (A) and (D) are again pressed simultaneously for at least 2 seconds. If the watch
has been left not recharged in the low power mode, it will become completely discharged and
all the fanctions will stop.
* When there is no display, the amount of current consumed is even less than during the time
display or date display.
49
[Time Display]
[No Display]
(D) for at least 2 seconds
(A)
(C)(
B
)
(
D
)(
A
)
[Date Display]
(C)(
(C)(
(
)(
(
)(
D
D
)
)
B
B
)
)
A
A
(C)(
(C)(
(
)(
(
)(
D
D
)
)
B
B
)
)
A
A
2. Setting the Time and Date
(1) The watch enters the correction state (display is flashing) when
button (C) is pressed for at least 2 seconds during the time
display or date display.
(2) The flashing item changes in the order shown below each time
button (C) is pressed.
(3) Correct the flashing item by pressing button (B).
• Pressing button (B) advances the display by one step at a time. (Pressing button (B)
continuously causes the display to change rapidly.)
• The watch returns to 00 seconds simultaneous to pressing button (B) while
correcting seconds. (The minutes advance by 1 minute if the seconds are between
30 and 59 seconds at that time.)
• When switching the 12H/24H format, the display switches back and forth between
the 12 hour and 24 hour format each time button (B) is pressed.
(4) Pressing button (D) returns the watch to the normal display.
* The time and date of the main location in the time mode of the standard mode can be
displayed and corrected in the low power mode. Changes made to the time and date in the
low power mode are retained even after returning to the time mode of the standard mode.
* The year can be set from 2000 to 2099.
* Dates such as February 30 that do not actually exist are not displayed even during correction.
* Pay attention to AM (A) and PM (P) when using the 12 hour format.
* The day is corrected automatically by correcting the year, month and date.
* The watch automatically returns to the normal display (time display or date display) when none
of the buttons are pressed for about 3 minutes in the correction state (display flashing).
* The watch can be immediately returned to the normal display by pressing button (D) in the
correction state (display flashing).
50
Contrast
(CONT)
12H/24H format
switching
Date Month
Seconds Minutes Hours Year
Flashing
(C)
(C) (C) (C)
(C)
(C) (C)

Data Communication Functions
Data is transferred between watches or between the watch and personal computer using
the data communication functions. There are two ways for transferring data: the first
involves using the communication unit and USB cable provided with the watch, and the
second involves using the infrared communication function.
1. Communication Unit
The communication unit is used when transferring data between the watch and a personal
computer and when charging the watch.
* When transferring data between the watch and a personal computer using the communication unit, the
USB driver software must be installed in the personal computer. (Refer to the section on " Accessory
Software" for information on the procedure for installing the software.)
CAUTION
The communication unit is composed of precision electronic components. Handle with care.
• Store and use the communication unit at a temperature of +10°C to +40°C (50°F to
104°F) and humidity of 20% to 80% (with no condensation of moisture). In addition,
avoid storing and using the communication unit in environments subjected to sudden
changes in temperature.
• Avoid storing and using the communication unit in locations subjected to direct sunlight
and high levels of dust. Do not store or use inside an automobile in particular.
• Do not attempt to disassemble or modify the communication unit. This can cause a
malfunction.
• The communication unit does not employ waterproof construction. Do not allow water
to splash on it or allow it to become wet. Make sure the watch is not wet when
attaching to the communication unit.
• Do not use the communication unit in close proximity to a television set or radio. These
can cause problems during data transfer.
• The communication unit is to be used exclusively with CYBER AQUALAND (Movement
No. D700 / D706). Do not connect it to the watches of other manufacturers or other
models of Citizen watches.
• Only use the USB cable provided. The use of other cables can result in the occurrence
of electromagnetic interference or other detrimental effects.
• Do not drop the communication unit or subject it to strong impacts. This can cause it to
crack and malfunction.
• Please be aware that the manufacturer is in no way responsible for damages, lost profit
or any other demands from a third party incurred as a result of use of this unit.
• Also be aware that the manufacturer is in no way responsible for damages, lost profit or
any other demands from a third party incurred as a result of repairs or malfunction of
this unit.
Names and Functions of Components
LED (Light Emitting Diode)
This indicates that the communication unit is in the charging state. When the watch is
attached to the communication unit, the LED lights and charging begins. The LED
remains lit during charging and goes out when charging is completed.
USB Cable Connector
This connector is for connecting the communication unit and a personal computer with
the USB cable.
51

Connection Pins
These pins are for connecting with the charging or data transfer pins of the watch.
There are four connections pins. The two center pins are connected to the charging
or data transfer pins of the watch, while the two outside pins are connected to the
watch case.
Locking Tab
This tab is for holding and locking the watch to the connection pins.
Battery Cover
The battery cover is opened to install the batteries. Two batteries are installed in the
communication unit body and two batteries are installed inside the battery cover.
Leg (Removable)
The leg can be removed when attaching watch models having a metal band to the
communication unit.
2. Infrared Communication
The infrared communication function of this watch uses an infrared (Ir) beam for
communication in the same manner as the remote controllers of television sets and VCRs.
Communication is performed between watches or between the watch and a personal
computer by transmission and reception of this infrared beam by their respective infrared
transmission/reception units.
* The infrared communication function of this watch complies with the international standard IrWW
(IrDA for Wrist Watches).
A. Communication Range
The maximum distance infrared communication can be performed with this watch is 15 cm
(5.9 inch) in the vertical direction to the infrared transmission/reception unit. Although
directivity has a margin of about ±15°, the communication distance becomes shorter as
the angle becomes wider.
* Remove any obstacles between the watches or between the watch and the personal
computer during infrared communication.
* Data may not be able to be transferred or an error may occur if other infrared communication
devices are nearby during infrared communication.
* Avoid moving the watch as much as possible during infrared communication.
* Perform infrared communication within a temperature range of +10°C to +35°C (50°F to 95°F).
Data may not be able to be transferred if outside this range.
* Data may not be able to be transferred or an error may occur if infrared communication is
performed directly beneath a fluorescent lamp or in direct sunlight.
* When transferring data between the watch and a personal computer using infrared
communication, the personal computer also must be set to be able to use infrared
communication. Refer to the instruction manual of the personal computer for information on
setting the personal computer for infrared communication.
52
Locking tab
Leg
(removable)
Connection
pins
LED
USB cable connector
Battery cover

B. Infrared Communication Mode Operating Procedure
The procedure for data transfer by infrared communication is performed with the watch.
(1) The watch enters the infrared communication mode initial display when button (D) is
pressed for at least 2 seconds in any mode.
(2) The menu changes each time button (C) is pressed, and
the sub-menu of the selected menu is displayed when
either button (B) or the EL light button is pressed. (The
menu indicated with an the
*
mark is the selected
menu.)
(3) The selected communication menu is activated when
button (B) or the EL light button is pressed when the
lowermost sub-menu is displayed.
* Pressing button (A) when any menu is displayed returns the display to the previous menu.
* The watch returns to the time mode of the standard mode when button (A) is pressed during
the initial infrared communication display.
* The watch can be immediately returned to the time mode of the standard mode by pressing
button (D) for at least 2 seconds when any menu is displayed.
* The display automatically returns to the previous menu when none of the buttons are pressed
for about 1 minute during the display of any menu (or for about 3 minutes during transfer of
time data).
* The watch automatically returns to the time mode of the standard mode when none of the
buttons are pressed for about 1 minute during the initial infrared communication display.
Infrared Communication Menus
TIME/ALM (transfer of time or alarm data between watches)
Receive (data reception) DATA WAITING (data reception
standby display)
SendTIME (transmission of time data)
SendALM (transmission of alarm data)
toPC (data transfer between the watch and a PC)
Data transfer standby display
toWATCH (transfer of dive alarm settings and anniversary data between watches)
DiveALM (transmission of dive alarms) Transmission display
Annivers (transmission of anniversary data) Transmission display
WaitDATA (data reception from watch) Data reception standby display
53
EL light button
(C)(
(C)(
(
)(
(
)(
D
D
)
)
B
B
)
)
A
A

3. Data Communication with PC
There are two ways for transferring data between the watch and a personal computer.
The first involves using the communication unit and USB cable provided with the watch,
and the second involves using the infrared communication function. Data can be edited
on the PC using the software provided (contained on the accessory CD-ROM) after
transferring data to the PC. The following indicates data that can be transferred to the PC.
a. Diving Log and Profile Data
/Diving data that has been transferred to the PC can be edited and managed using the
AQUALAND GRAPH 2001 software provided. For further details, refer to the section on
" Accessory Software" in this manual and the "AQUALAND GRAPH 2001" manual contained
in the accessory CD-ROM.
b. Watch Settings
/Watch settings that can be transferred to the PC include location information (name and time
difference from UTC), alarm, timer, travel time, daily graphic and dive alarm settings. Setting
data incorporated using the "CAPgm" software provided can be edited on the PC, and edited
settings can be sent back to the watch. For further details, refer to the section on
" Accessory Software" of this manual and the "CAPgm" manual contained in the accessory
CD-ROM.
* The accessory software contained in the accessory CD-ROM must be installed prior to
transferring data between the watch and PC.
* Perform communication using the USB interface as well as infrared communication within a
temperature range of +10°C to +35°C (50°F to 95°F). Data may not be able to be transferred if
outside this range.
Preparations for Communication
USB Communication
(1) Connect the personal computer and communication unit with the USB cable by
referring to the illustration below.
* Always make sure to attach the enclosed ferrite core to the USB cable before use.
* Connect the USB cable directly to the PC and communication unit. Operation is not
guaranteed when connecting through a USB hub.
54

(2) Attach the watch to the communication unit.
Sufficiently open up the locking tab on the left side of the communication unit, and connect
the watch to the communication unit so that the two center connection pins on the
communication unit make contact with the two terminals (gold) at the 3:00 position on the
watch.
(3) The watch will enter the communication mode (USB
communication state) if the watch body is properly
connected to the communication unit.
Infrared Communication
The watch is switched to the data transfer standby
display of the infrared communication mode.
(1) The watch enters the infrared communication mode
(initial display) when button (D) is pressed for at least
2 seconds in any mode.
(2) Select "toPC" by pressing button (C) once. (The "
*
"
mark moves to the left of "toPC".)
(3) The watch is switched to the data transfer standby
display by pressing button (B).
* Refer to part "B. Infrared Communication Mode Operating Procedure" of the previous section "2.
Infrared Communication" for a detailed explanation of the procedure for using the infrared
communication mode.
55
USB Communication Display
(Transfer Standby Display)
Infrared Communication Mode
(Transfer Standby Display)

4. Data Communication Between Watches
If your friend or acquaintance has the same type of watch, data can be transferred
between watches by using the infrared communication function. Data that can be
transferred between watches is indicated below.
• Time settings (time, date, time difference from UTC, daylight savings time)
• Alarm settings
• Dive alarm (depth alarm, dive time alarm) settings
• Anniversary data (graphic)
Following data transfer, the watch settings of the receiving watch change according to the
watch settings of the sending watch.
* Time and alarm settings can also be transferred between other watches equipped with an infrared
communication function that complies with IrWW standards.
Procedure
Refer to part "B. Infrared Communication Mode Operating Procedure" of the previous
section "2. Infrared Communication" for an explanation of the procedure for calling up
each display.
(1) Switch the watch that is to receive data to the reception standby display of the data you
want to receive.
* In the case of time or alarm data,
select the "TIME/ALM / Receive"
menu, and in the case of dive alarm or
anniversary data, select the "toWATCH
/ WaitDATA" menu.
(2) Switch the watch that is to send data
to the transmission display of the
data you want to send (last display of
the menu).
(3) Press button (B) or the EL light
button of the sending watch after
aligning the respective infrared
transmission/reception units of the
sending and receiving watches. A
sound is made by both the sending and receiving watches once data transfer begins.
There is no sound made by the receiving watch if data transfer has failed (in the case
of transferring data between two CYBER AQUALAND watches).
(4) Pressing button (D) for at least 2 seconds on both the sending and receiving watches
returns the watches to the time mode of the standard mode.
* One set of anniversary data (graphic) is sent per transmission. The anniversary graphic that
will be sent changes each time button (C) is pressed during the Annivers (Anniversary Data
Transmission) display.
* When sending time setting data, if the time difference zone (time difference from UTC) of the
sending watch is not present in the receiving watch, a temporary location named "IrWW" is
created in the receiving watch, and that location is corrected to the same time as the time of
the sending watch.
The location "IrWW" cannot be displayed with the "CAPgm" software. After setting the various
watch settings on "CAPgm" and sending those settings to the watch, the location "IrWW" is
deleted automatically.
56
[Receiving
watch]
[Sending
watch]
(B)

57
Accessory Software
The CD-ROM provided with the watch contains two application software programs
entitled, "AQUALAND GRAPH 2001" and "CAPgm".
AQUALAND GRAPH 2001
This application software is used for editing and managing diving log and profile data.
CAPgm
This application is for making various watch settings on a personal computer.
* Refer to the respective manuals contained on the CD-ROM for further details on how to use
AQUALAND GRAPH 2001 and CAPgm.
* Acrobat Reader is required to view the above two manuals and other information. If Acrobat
Reader is not installed in the PC you are using, install Acrobat Reader from the CD-ROM
provided.
1. Operating Environment
The PC operating environment described below is required for using AQUALAND GRAPH
2001 and CAPgm.
1) PC
PC capable of operating with Windows98, Windows Me or Windows2000 (Pentium 200 MHz
and above recommended)
2) Operating System (compatible OS)
Windows98, Windows Me, Windows2000
3) Minimum available memory
32 MB (64 MB or more recommended)
4) Hard disk
Available hard disk space of a minimum of 15 MB in the Windows directory and a minimum of 10
MB in the install directory are required during installation
5) Display
Color SVGA display having a minimum resolution of 800 x 600 (256 colors) compatible with
Windows98, Windows Me or Windows2000
6) Disk Drive
CD-ROM drive (required during installation)
7) USB port or infrared communication port
8) Printer
A printer that can be printed with your PC and a printer driver for the OS compatible with that
printer are required to print out graphs and other data.
9) Web Browser
A web browser is required in the case of sending HTML documents of logs and other data.
* The web browser must be correlated with "HTML" files by file correlation.
CAUTION
Please be aware that the manufacturer is in no way responsible for loss or damage of
program data, lost profit or any other demands from a third party incurred as a result
of using the accessory software.

2. Installation
A. Installing the USB Driver
Install the USB driver from the CD-ROM provided by following the procedure described
below. The procedure differs slightly depending on the compatible OS.
* The displays used in the explanation differ depending on the OS language and version.
The explanation here uses the example of an English language OS.
Windows98 or Windows98 SE:
(1) Turn on the power of the PC and confirm that Windows98 or Windows98 Second Edition
has started up.
(2) End any applications that are currently running on the PC.
(3) Place the CD-ROM provided in the CD-ROM drive of the PC. If the AQUALAND GRAPH
2001 installation menu is displayed at this time, click on the "EXIT" button to close this
menu.
(4) If the communication unit is connected to
the USB port of the PC, a message is
displayed on the PC indicating that new
hardware has been detected and that the
PC is searching for the required application
software. Once this check of new
hardware is completed, the "Add New
Hardware Wizard" is displayed.
(5) After confirming the contents, click on
"NEXT" to display the screen shown at
right.
(6) Check that "Search for the best driver for
your device" has been selected and then
click on "NEXT". The display changes to
the screen shown at right.
58

(7) Select "CD-ROM drive" and click on
"NEXT". The display changes to the
screen shown at right.
(8) Click on "NEXT" to begin installing the
driver. When installation is completed, the
display changes to the screen shown at
right.
(9) Click on "Finish" to display the screen
shown at right.
(10) Click on "YES". Windows is restarted and data can now be transferred using the USB
interface.
Windows Me:
(1) Turn on the power of the PC and confirm that Windows Me has started up.
(2) End any applications that are currently running on the PC.
(3) Place the CD-ROM provided in the CD-ROM drive of the PC. If the AQUALAND GRAPH
2001 installation menu is displayed at this time, click on the "EXIT" button to close this
menu.
(4) If the communication unit is connected to
the USB port of the PC, a message is
displayed on the PC indicating that new
hardware has been detected and that the
PC is searching for the required application
software. Once this check of new
hardware is completed, the "Add New
Hardware Wizard" is displayed.
59
(5) After confirming the contents, click on
"NEXT" to install the suitable driver from
the CD-ROM and display the screen shown
at right.
(6) Click on "Finish". Data can now be
transferred using the USB interface.
Windows2000:
(1) Turn on the power of the PC and confirm that Windows2000 has started up.
(2) End any applications that are currently running on the PC.
(3) Place the CD-ROM provided in the CD-ROM drive of the PC. If the AQUALAND GRAPH
2001 installation menu is displayed at this time, click on the "EXIT" button to close this
menu.
(4) If the communication unit is connected to
the USB port of the PC, the screen at right
is displayed.
Once the check for detecting new hardware
has been completed, the "Found New
Hardware Wizard" is displayed.
(5) After confirming the contents, click on
"NEXT" to display the screen shown at
right.
60
(6) Check that "Search for a suitable driver for
my device" has been selected and then
click on "NEXT". The display changes to
the screen shown at right.
(7) Confirm that "CD-ROM drives" is selected
and then click on "NEXT". The display
changes to the screen shown at right.
(8) Confirm the contents and then click on
"NEXT". The display changes to the
screen shown at right.
(9) Click on "Finish". Data can now be transferred using the USB interface.
* After installing the USB driver, remove the CD-ROM from the CD-ROM drive and keep it in a
safe place.
* Installation of the USB driver is only performed once before transferring data using the
communication unit for the first time. It is no longer required to be installed prior to
subsequent data transfer. However, when transferring data using the communication unit for
the first time with a different PC, the driver must again be installed in that PC.
61

B. Installing AQUALAND GRAPH 2001 (accessory software)
When AQUALAND GRAPH 2001 is installed from the CD-ROM provided by following the
procedure described below, both AQUALAND GRAPH 2001 and CAPgm are installed
simultaneously.
(1) Turn on the power of the PC and confirm that operating system (OS) has started up.
(2) Place the CD-ROM provided in the CD-ROM drive of the PC. The AQUALAND GRAPH
2001 installation menu is displayed automatically.
If the installation menu is not displayed, double-click on "install.exe" contained on the CD-
ROM inserted into the CD-ROM drive to display the installation menu.
(3) Click on "Install AQUALAND GRAPH
2001". Installation begins and the screen
shown at right is displayed.
(4) Confirm the contents and then click on
"NEXT" to display the screen shown at
right.
62

(5) If you want to change the directory where
the applications are installed, click on
"Browse" and change to the desired
directory. Confirm the contents and click
on "NEXT" to install the applications. The
screen shown at right is then displayed.
(6) Click on "Finish" to complete the installation procedure.
C. Startup and Ending AQUALAND GRAPH 2001 and CAPgm
1. Startup of AQUALAND GRAPH 2001 and CAPgm
Click on the Start button in the task bar and then select Program, Aqualand Graph 2001
and then Aqualand Graph 2001 or CAPgm in that order to start up the respective
application.
2. Ending AQUALAND GRAPH 2001 and CAPgm
Either click on the [X] button in the upper right corner of the main window or select [EXIT
(X)] from the pull-down menu after selecting the [File (F)] menu (or the [CAPgm (C)] menu
in the case of CAPgm), to end the respective application.
63

All Reset and Formatting Flash Memory
1. All Reset
This function is used to return the time, date and all other watch settings to their initial
(default) settings. Perform this all reset procedure in the following cases.
• There is an error in the watch display
• When charging the watch after it has stopped completely as a result of being
insufficiently charged
Even if the all reset procedure is performed, location settings (displayed locations, names
of locations), diving logs, daily graphics and anniversary graphics that have been set by
the user in the PC remain without being deleted. However, it should be noted that only
diving data acquired prior to performing the all reset procedure on the day the all reset
procedure is performed may be deleted.
Procedure
(1) Simultaneously press and then simultaneously release
buttons (A), (B), (C) and (D).
• All of the display elements on the watch are displayed after
an alarm sounds and "INITIALIZE" is displayed.
(2) Press any of the buttons while all the display elements
are displayed.
• The watch displays the time mode of the standard mode
after "LOADING" is displayed.
This completes the all reset procedure. Correctly reset the time and date as well as other
modes after performing the all reset procedure.
* When the All-Reset procedure is performed, <Current Log Counter in watch (Total number of
Dives)> is reset to zero. If you want to continue counting from the previous log number, re-enter
the previous log number for <Your Current Log Number> with the CAPgm software provided.
* Although an alarm sounds every second while all of the display elements of the watch are
displayed, this is not a malfunction.
* If all of the display elements are not displayed after performing step (1) of the procedure (such as
when the alarm continues to sound without the display changing), repeat step (1) of the procedure.
* The watch automatically returns to the time mode of the standard mode if none of the buttons are
pressed for about 2 minutes while all of the display elements are displayed after performing step (1)
of the procedure. The all reset procedure is completed in this case as well.
2. Formatting Flash Memory
The following data recorded in the watch's flash memory is deleted when the flash
memory is formatted.
• Location settings made on the PC (displayed locations, names of locations)
• Scuba diving and skin diving logs
• Daily and anniversary graphics
64
(C)(
B
)
(
D
)(
A
)
(C)(
B
)
(
D
)(
A
)

CAUTION
Formatting flash memory is performed when the flash memory has happened to become
damaged. Please note that incorrect use of this function can cause important diving and
other data to be lost. Formatting flash memory is not required during the course of
normal use of this watch. Please be aware that the manufacturer is not responsible for
log data or other data having been lost as a result of a malfunction or other reasons.
Procedure
(1) Press button (B) in the system monitor mode of the
standard mode to switch the watch to the Flash Memory
Status Display.
(2) Formatting of flash memory begins when button (B) is
pressed while pressing button (C) simultaneously for at
least 2 seconds.
• "Format" is displayed while formatting is in progress, after
which "Done" is displayed when formatting is completed.
* Although daily graphic data may be displayed immediately after formatting flash memory, this
is only the result of the watch displaying data it has temporarily stored in memory. In actuality,
graphic data is deleted from flash memory. Temporarily displayed graphic data is not displayed
after switching to the communication mode or dive mode (after additional data has been
reincorporated into flash memory).
65
(C)(
B
)
(
D
)(
A
)
(C)(
B
)
(
D
)(
A
)

Troubleshooting
Problem Possible Cause Solution
Entire display is blank
Watch does not switch to dive
mode
Unable to end dive mode
Alarm does not sound
EL light is not illuminated
The insufficient charge warning
function ("BATT" display) has
been activated as a result of
the watch having become
insufficiently charged (watch
functions are limited when the
watch has become
insufficiently charged).
* The alarm also does not sound
if the alarm sound has been set
to "Silent".
The watch is in the low power
mode with the display off.
Sufficiently charge the watch
using the communication unit.
The watch has stopped due to
being insufficiently charged.
The insufficient charge warning
function ("BATT" display) has
been activated as a result of
the watch being insufficiently
charged. (The watch cannot be
switched to the dive mode if it
is insufficiently charged.)
A permanent error occurred
during the previous dive
(decompression diving).
* If a permanent error occurs
during diving, the watch cannot
be switched to the dive mode
for 24 hours after completion of
that dive.
The water sensor check
warning ("CHK" display) has
been activated.
If the water sensor remains
activated by perspiration or
other moisture in a high altitude
environment subject to rapid
changes in air pressure in a
short period of time (such as
when traveling in an aircraft),
when there is a change in air
pressure of 1000 hpa or more,
the depth display may not
return to 0 m (0 ft) preventing
the dive mode from being
canceled even after returning to
a low altitude (on the ground).
The watch returns to the time
mode of the standard mode
when button (D) is pressed for
at least 10 seconds.
* However, the diving data for
that dive is not recorded when
the dive mode is ended with this
procedure.
Attach the watch to the
communication unit and
sufficiently charge.
The permanent error will be
reset after 24 hours have
elapsed.
After rinsing off any debris
around the water sensor with
water, completely wipe off the
water with a dry cloth.
The display will return when
button (D) is pressed for at
least 2 seconds.
66
Attach the watch to the
communication unit and
sufficiently charge.

67
Problem Possible Cause Solution
Low display contrast
Excessive time required for
switching modes
The "CHK" (Check) display
remains displayed for a long
time.
The "ERR" (Error) display
remains displayed for a long
time.
• "ERR" is displayed during use
on land (except for at high
altitudes of 4000 m (13000 ft)
or more above sea level)
• "ERR" remains displayed for
a long time after completion
of diving
This indicates a problem with
the pressure sensor ("ERR"
may be displayed at high
altitudes of 4000 m (13000 ft)
or more above sea level).
The ambient temperature may
be too low. The display
contrast may decrease in lowtemperature environments.
If the amount of flash memory
being used becomes
excessively large, the amount
of time required to switch
modes and call up log data
may become slightly longer.
The water sensor continues to
remain activated due to the
presence of sand, debris or
perspiration and so forth
adhering to the water sensor.
After rinsing off any debris
around the water sensor with
water, completely wipe off the
water with a dry cloth.
Perform the garbage collection
procedure in the system
monitor mode of the standard
mode. If a large amount of
diving log data is recorded,
however, slightly more time
may still be required to call up
the display as compared with
the initial state. This is not a
malfunction.
The display returns to normal
when the watch is returned to a
normal temperature. When
desiring to temporarily increase
the contrast in low-temperature
environments, you can correct
the contrast in the correction
state of the time mode of the
standard mode.
Discontinue using the watch
and consult with a Citizen
Service Center. (Refer to the
section on " Warning
Functions" for further details.)
Abnormal display or operation
(such as the digital display
being incorrect or the alarm
sounding continuously)
If the watch is inadvertently
subjected to a strong impact or
intense static electricity, the
display or operation of the
watch may rarely become
abnormal.
Perform the all reset
procedure. If the problem is
not solved, try formatting flash
memory after performing the all
reset procedure. If the problem
is still not solved, consult with a
Citizen Service Center.

Handling Precautions (for the watch)
WARNING Water Resistance Performance
This watch is water resistant to 200 meters. Although it can be used for air diving using an air
tank (scuba diving), it cannot be used for saturation diving involving the use of helium gas.
CAUTION
• In order to maintain water resistance performance, having your watch inspected at a Citizen
Service Center once every one to two years, and have the gaskets, crystal or other
components replaced as necessary.
• If moisture has entered the watch, or if the inside of the glass is fogged up and does not
become clear for an extended period of time, do not leave the watch in that state, but rather
immediately take the watch to a Citizen Service Center for inspection and repair.
• If sea water enters the watch, place the watch in a box or plastic bag, and immediately take it
in for repair. Otherwise, pressure inside the watch will increase and parts (such as the glass
and buttons) may come off.
WARNING Handling of Secondary Battery
• Do not attempt to remove the secondary battery from the watch. If the secondary battery must
be unavoidably removed, place it in a location out of the reach of children to prevent accidental
swallowing.
• If the secondary battery is accidentally swallowed, contact a physician immediately and seek
medical attention.
WARNING Only Use Specified Secondary Battery
• Never attempt to use a secondary battery other than the secondary battery used by this watch.
Although the structure of the watch prevents the watch from operating if another battery is
installed, if a silver battery or other type of battery is forcibly installed in the watch and the
watch is attempted to be charged with that battery installed, the battery may rupture resulting
in possible damage to the watch and physical injury. Always make sure to use the specified
secondary battery when replacing.
CAUTION Repairs
All parts of this watch, excluding the band, are to be repaired only at a Citizen Service Center.
Please have all inspections and repairs performed at a Citizen Service Center.
68
Minor exposure to
water (washing
face, rain, etc.)
Moderate
exposure to water
(washing, kitchen
work, swimming,
etc.)
Skin diving,
marine sports
Scuba diving
using an air tank
Saturation diving
using helium gas
Case (case back)
Indication
Examples of Use
AIR DIVER'S 200m
NOOKOKOKOK

69
CAUTION Keep your watch clean
• The case and band of the watch come in direct contact with the skin in the same manner as
clothing. Metal corrosion as well as perspiration, dirt, dust and other unnoticed debris may soil
the cuffs and other parts of your clothing. Try to keep the watch clean at all times.
• Wearing of this watch may cause a rash or itching of the skin in people with sensitive skin or
depending on the wearer’s physical condition. If you notice that you skin is affected by the
watch, immediately stop wearing it and consult a physician.
<Cleaning the Watch>
• Use a soft cloth to wipe off dirt, perspiration and moisture from the case and crystal.
• Rinse off dirt from metal bands, plastic bands or rubber bands with water. Use a soft brush to
remove any dirt or debris stuck between the gaps in metal bands.
• Avoid the use of solvents (such as thinner or benzine) as they may damage the finish.
CAUTION Precautions When Wearing the Watch
• Be careful while wearing the watch while holding an infant or child, by taking the watch off
beforehand, to prevent injury or other accident.
• Be careful when engaged in vigorous exercise or work to prevent injury and accidents to
yourself and others.
• Never wear the watch in a sauna or other locations where the watch can reach high
temperatures since this can cause burns.
CAUTION
Handling of the Band (Cautions when Putting
on and Taking Off the Watch)
Depending on the structure of the band buckle, be careful not to injure your fingernails when
putting on and taking off the watch.
<Temperatures>
The watch may not function or stop running if exposed to temperatures outside the range of 0°C
to 50°C (32°F to 122°F). In addition, although the liquid crystal display may also become
illegible outside this temperature range, it will return to normal when the watch is returned to
normal temperatures.
• Correct water depth measurement values are not displayed at temperatures outside the range
of +10°C to +40°C (50°F to 104°F).
• Data cannot be transferred outside the range of +10°C to +35°C (50°F to 95°F).
<Static Electricity>
Since the IC used in quartz watches is susceptible to static electricity, the display may become
incorrect if the watch is subjected to intense static electricity like that generated by a television
screen.
<Shocks>
Do not subject the watch to violent shocks such as that resulting from being dropped on the floor.
<Chemical Agents, Gases and Mercury>
Avoid using the watch in environments containing chemical agents and gases. If solvents such
as thinner or benzine, as well as articles containing such substances (including gasoline,
fingernail polish, cresol, bathroom cleaners and adhesives) become adhered to the watch, they
can cause discoloration, deterioration and cracking. Use ample caution when handling
chemicals. In addition, contact with mercury used in thermometers and so forth can cause the
case and band to become discolored.
<Storage>
• When not using the watch for an extended period of time, carefully wipe off any perspiration,
dirt or moisture from the watch and store in a location preferably free of high and low
temperatures, high humidity.

Specifications
<Watch Body>
1. Movement No. : D700 (meeter) / D706 (feet)
2. Crystal oscillation frequency: 32,768 Hz (Hz = no. of oscillations per second)
3. Operating temperature range: 0°C to +50°C (32°F to 122°F)
4. Accuracy: ±20 seconds per month on average (when worn at a normal temperature of
+5°C to +35°C (41°F to 95°F))
5. Water depth gauge accuracy: Within ±(3% of displayed value + 0.3 m (1 ft)) (when
using at a constant temperature)
* Guaranteed accuracy temperature range: +10°C to +40°C (50°F to 104°F) (accuracy of water
depth measurement is subjected to the effects of changes in the temperature at which the
watch is worn)
6. Water temperature measurement accuracy: Displayed value±3°C (6°F)
7. Modes and Main Functions
• Time: Hours, minutes, seconds, location, Battery charge indicator, daily graphic
(must be set with PC)
• Date: Month, date, day, year (during correction only)
• Travel Time: Month, date, hours, minutes, seconds, location, time difference from
UTC and time of time mode
• Destination Timer: Time remaining until arrival at destination, arrival time (location,
month, date, day, hours, minutes)
• Alarm: Alarm time (hours, minutes)
• Chronograph: Hours, minutes, seconds, 1/100 seconds, split time (time measured
for 100 hours)
• Timer: Minutes, seconds (can be set up to 99 minutes in 1 minute units)
• System Monitor: Battery charge indicator, flash memory status display
• Dive Plan: Dive number, body nitrogen level graph, no-decompression limit time,
depth alarm (setting of depth and number of times alarm sounds), dive
time alarm (setting of dive time)
• Scuba Diving Log: Total number of dives, dive date, dive number, S.I. time, time in,
dive time, min. water temperature, record of decompression
diving, max. depth, average depth, profile log
• Skin Diving Log: Dive date, dive number, max. depth, time in, dive time, deepest
depth ever recorded and date recorded
• Dive: Current time, current depth, dive time, max. depth, no-decompression limit
time, water temperature, body nitrogen level graph, safety stop graph, safety
stop time, decompression stop indicator, decompression stop graph
• Surface mode: Elapsed time after diving (max. 24 hours), no fly time
• Infrared communication mode
• Low power mode: Time display, date display, no display
70

8. Other Additional Functions
• EL light
• Water sensor
• Various warning functions (insufficient charge warning, file error warning, abnormal
pressure detection error warning, water sensor check warning, ascent rate warning,
abnormal depth warning, decompression diving warning, limit depth warning,
permanent error warning)
• Data communication functions: Data communication using infrared and USB
interfaces (for data transfer between watch and a personal computer or between two
watches)
* Data communication operating temperature range: +10°C to +35°C (50°F to 95°F)
9. Battery: Secondary battery, 1 pc. (charged by communication unit)
10. Continuous Usage Times:
• From fully charged to insufficient charge warning: Approx. 1 month
• From insufficient charge warning to low power mode: Approx. 2 days
• From low power mode to watch stopping: Approx. 3 days
* Refer to the section on " Battery charge Indicator and Continuous Usage Time" for information
on the operating conditions for continuous usage times.
<Communication Unit>
1. Model: CMUT-02 (used exclusively with watch movement no. D700 / D706)
2. Applications: Charging and data communication using USB cable
3. Operating and storage conditions: temperature +10°C to +40°C (50°F to 104°F),
humidity 20% to 80% (no condensation of moisture)
4. Power Source:
• During data communication: Uses power supplied by USB cable
• During charging: 4 size AA alkaline batteries
5. Current Consumption:
• During data communication: Max. 30 mA
• During charging: 20 mA
6. Dimensions: 10.2(W) x 9.1(D) x 6.9(H) cm (4.0(W) x 3.6(D) x 2.7(H) inch)
7. Weight: 125 g (excluding batteries)
* Specifications are subject to change without notice.
71

AQUALAND GRAPH 2001
INSTRUCTION MANUAL

Introduction
AQUALAND GRAPH 2001 enables diving data stored in memory with CYBER AQUALAND
to be transferred to a personal computer using a communication unit and infrared
communication interface provided. Letters and numbers can be entered by the user into the
diving data, diving data can be represented in graphical form and both still pictures and
animated images can also be added using a simple procedure. This data is then compiled and
managed in the form of a log. What is more, multiple logs can be managed in the form of a trip
summary. In addition, since logs can be printed out as well as converted into HTML documents,
diving records can be retained with considerable ease.
* The copyrights for this instruction manual and software are retained by the manufacturer.
* Unauthorized reproduction of any or all of this instruction manual or software is strictly
prohibited.
* This instruction manual and software are subject to change without notice.
*
The company names and product names, etc. contained in this instruction manual are
generally the registered trade names or trademarks of those respective companies.
2

Introduction .......................................................... 2
1. Startup and Ending .......................................... 4
1.1. Startup ...................................................... 4
1.2. Ending
...................................................... 4
2. Main Window
.................................................... 5
2.1. Change Log Display Data
......................... 8
2.2. Menus
....................................................... 9
2.3. Tool Bar
.................................................. 10
3. Settings .......................................................... 11
3.1. General ................................................... 11
3.1.1. File Locations
................................... 11
3.1.2. Units ................................................. 12
3.1.3. Dive Type ......................................... 12
3.1.4. Units when Creating a New Log
(Unit : Depth) ..................................... 12
3.1.5. Album Thumbnails ............................ 12
3.1.6. Interface
........................................... 12
3.1.7. Serial Port ......................................... 12
3.1.8. Select Folder .................................... 13
3.2. Customized Items
................................... 14
3.2.1. Items
................................................. 15
3.2.2. Contents ........................................... 15
3.2.3. Initial definition .................................. 15
3.3. Fixed Items
............................................. 16
3.3.1. Diver ................................................. 16
3.3.2. Weather ............................................ 17
3.3.3. Tank Material .................................... 18
3.3.4. Diving Service (D. Service)
.............. 19
3.3.5. Dive Style ......................................... 20
3.3.6. Water Conditions (Water Cond.) ...... 21
3.3.7. Diving Suit / Inner Wear ................... 22
3.3.8. Equipment ........................................ 23
3.4. Dive Locations
........................................ 24
3.4.1. Location ............................................ 25
3.4.2. Dive Site ........................................... 25
4. Transfer .......................................................... 26
4.1. IrDA ........................................................ 27
4.2. USB
........................................................ 27
4.3. Hyper Aqualand ...................................... 27
5. Register CYBER AQUALAND
........................ 29
5.1. Change User Name ................................ 30
5.2. Delete User Name .................................. 30
6. Add Log Data ................................................. 31
6.1. Create New Log ...................................... 34
6.2. Edit ......................................................... 35
6.3. Delete
..................................................... 35
6.4. Edit Album
.............................................. 36
6.4.1. Add Image
........................................ 37
6.4.2. Delete Image
.................................... 37
6.4.3. Change Thumbnails
......................... 37
6.4.4. Import Log
........................................ 38
6.4.5. Export Log ........................................ 38
7. Diving List ....................................................... 39
7.1. Sort
......................................................... 39
7.2. Select Log Item ....................................... 39
7.3. Search .................................................... 40
7.4. Print Log List
........................................... 41
8. Display Graph ................................................ 42
8.1. Panel Settings
........................................ 43
8.2. Set Line Type ......................................... 44
8.3. Print Graph ............................................. 45
9. Print Log
......................................................... 46
9.1. Print ........................................................ 46
9.2. Print Preview .......................................... 47
10. Create HTML Document .............................. 48
10.1. Set Background .................................... 49
10.2. Save HTML File .................................... 49
11. Trip Summary ............................................... 50
11.1. Register Trip Summary ......................... 50
11.2. Customize ............................................. 52
11.3. Trip Summary Display .......................... 53
11.4. Edit Trip Summary
................................ 54
11.5. Delete Log ............................................ 55
11.6. List of Trip Summaries .......................... 55
12. Limiting Values ............................................. 56
12.1. No.of Registrations ............................... 56
12.2. No. of Entered Characters
.................... 57
12.3. Entered Values ..................................... 58
AQUALAND GRAPH 2001
CONTENTS
3

1. Startup and Ending
1.1. Startup
Select Program followed by [Aqualand Graph 2001] after clicking the START button of the task bar.
The <Transfer General Preferences from "AQUALAND GRAPH 2"> dialogue box is displayed if [AQUALAND GRAPH 2] is
installed.
If you want to copy the contents of user general settings registered in [AQUALAND GRAPH 2], click on the
button with the mouse.
If conversion is successful, the <Transfer General Preferences from "AQUALAND GRAPH 2"> dialogue box will no longer
be displayed the next time the program is started up.
4
1.2. Ending
Either click on the button in the upper right corner of the <Main Window> with the mouse, or select the [Files (F)] menu
and then [Exit (X
)].

2. Main Window
This is the window that is displayed first when [AQUALAND GRAPH 2001] is started up.
The <Main Window> is composed of the following three areas.
You can move to another window by either clicking a button in the tool bar of this menu with the mouse or selecting a menu.
A help message is displayed when the mouse cursor is positioned at any of the buttons in the tool bar.
Scuba Diving Log Display Area
5
Log Display Area
This area displays log data on the left side of the main window.
The display differs between Scuba Diving and Skin Diving.
Logs cannot be edited in this area.
This area displays images on the right side of the window.
This is displayed by switching from the diving list.
This area displays diving data in line units on the right side of the window.
This is displayed by switching from the album display.
Album Display Area
Diving List
* Data in the log display area is shown in red when the average depth (Ave. Depth) and maximum depth (Max. Depth) are
reference values.
Reference values are shown when, for example, dive time (Dive Time) exceeds 999 min. or the maximum depth exceeds 80 m
(266ft).

*Data in the log display area is shown in red when the average depth (Ave. Depth) and maximum depth (Max. Depth) are
reference values.
6
Skin Diving Log Display Area

7
Main Window in Album Display Mode
When the main window is displayed in the diving list display mode, either click the button with the mouse or select
[Switch to Album (A
)] of the [Display (L)] menu to switch to the album display mode.
When an album image is clicked with the mouse, an original size dialogue box is displayed in the case of a still picture. In the
case of an animated image, the related application in the AVI file is started up and the animated image is played back.
Album registration is performed from the <Edit> dialogue box (Displayed by selecting the [Log Edit (E
)] of the [Files (F)]
menu). (Refer to sections “6. Add Log Data” and “6.4. Edit Album” for further details.)

Attribute Icons
Icons indicating attributes are displayed on the left side of the diving list.
8
2.1. Change Log Display Data
When the line in the <Diving List> for which a log is desired to be displayed is clicked with the mouse, the selected log is
displayed in the <Log Display Area>.
In addition, the displayed log data can be changed by clicking on the MOVE button on the tool bar with the mouse.
Album Data is registered.
Registered in Trip Summary.
Main Window in Diving List Display Mode
When the main window is displayed in the album display mode, either click the button with the mouse or select
[Switch to Log List (L
)] of the [Display (L)] menu to switch to the diving list display mode.

2.2. Menus
Files (F)
9
Create New Log (N) Creates a new log without transferring data from the watch.
Edit (E) Edits the log that is currently displayed.
Delete (D
) Deletes data selected in the <Diving List>.
Create HTML Document (H) Creates a web page of data selected in the <Diving List>.
Print (P) Prints data selected in the <Diving List>.
Print Log List (L) Prints the entire <Diving List>.
Trip Summary (T)
This function is enabled in the Album Display Mode.
Data selected in the <Diving List> is registered in the <Trip Summary>.
List of Trip Summaries (S)
This function is enabled in the Album Display Mode.
A list of registered <Trip Summaries> is displayed.
Exit (X
) Ends AQUALAND GRAPH 2001.
Display (L)
Search (S) Extracts data desired to be displayed from the <Diving List>.
Select Log Item (I) Selects a log item desired to be displayed from the <Diving List>.
Graph (G) Displays a graph of data selected in the <Diving List>.
Switch to Album (A)
Window is displayed in the Diving List Display Mode.
Switches window to the Album Display Mode.
Switch to Log List (L)
Window is displayed in the Album Display Mode.
Switches window to the Diving List Display Mode.
Album Thumbnails (T
) Selects whether thumbnail images are to be displayed in the <Album Display Area>.
Dive Errors (E) Dive errors detected by the watch are displayed.
Preferences (P)
General (G
) Registers information required for operating AQUALAND GRAPH 2001.
Customized Items (C)
Registers customized user settings that are written into a log.
Fixed Items (F) Registers the diver, weather and other fixed items that are written into a log.
Dive Locations (L) Registers locations that are written into a log.
10
Option (O)
Transfer (T
) Transfers data from the watch.
Export Log (E) Exports all or a portion of diving data.
Import Log (I)
Loads exported data.
DOS, Ver. 1 and Ver. 2 log data are also imported.
Change User Name (C) Changes the name of the user assigned to CYBER AQUALAND.
Delete User Name (D) Deletes the name of the user assigned to CYBER AQUALAND.
Help (H
)
Help Topics (H) Displays help topics.
About Aqualand Graph (A) Displays the version of AQUALAND GRAPH 2001.
2.3. Tool Bar
Album Display Button
Displayed in the Diving List Display Mode.
[Switch to Album (A
)] of the [Display (L)] menu.
Diving List Display Button
Displayed in the Album Display Mode.
[Switch to Log List (L
)] of the [Display (L
)] menu.
Graph Button [Graph (G)] of the [Display (L)] menu.
Print Button [Print (P)] of the [Files (F)] menu.
Create HTML Document Button [Create HTML Document (H)] of the [Files (F)] menu.
Create New Log Button [Create New Log (N)] of the [Files (F)] menu.
Edit Button [Edit (E)] of the [Files (F)] menu.
Dive Errors Button [Dive Errors (E)] of the [Display (L)] menu.
Search Button [Search (S)] of the [Display (L)] menu.
Back Button
Moves back to the previous data of the <Diving List> displaying the current
log and displays the log.
Next Button
Moves ahead to the next data of the <Diving List> displaying the current
log and displays the log.
Transfer Button [Transfer (T)] of the [Option (O)] menu.
Export Log Button [Export Log (E
)] of the [Option (O)] menu.
Trip Summary Button
This function is enabled in the Album Display Mode.
[Trip Summary (T
)] of the [Files (F)] menu.
List of Trip Summaries Button
This function is enabled in the Album Display Mode.
[List of Trip Summary (S
)] of the [Files (F)] menu.

3. Settings
3.1. General
Settings for information required for operating AQUALAND GRAPH 2001 are registered.
The <General> dialogue box is displayed when [General (G)]is selected from the [Preferences (P)]menu of the <Main Window>.
11
Registration is finalized when the button is clicked with the mouse, after which the program returns to the
<Main Window>. Since finalized registration contents are stored in memory by AQUALAND GRAPH 2001, it is not necessary
to register them each time it is started up.
Changes are canceled by either clicking the button or clicking the button in the upper right corner of the
dialogue box with the mouse, after which the program returns to the <Main Window>.
3.1.1. File Locations
Designate a folder for saving transferred data. A maximum of 9999 sets of data can be stored in a single data save folder. In the
case of storing 9999 sets of data consisting of a single dive having a duration of 1 hour, roughly 400 MB of disc space are required.
During installation, a data save folder named "LOG" is created below the folder in which AQUALAND GRAPH 2001 is installed.
When the button is clicked with the mouse, the <Select Folder> dialogue box is displayed. Specify a save folder
in this dialogue box when desiring to change the data save folder. (refer to section “3.1.8. Select Folder” for further details).

12
3.1.3. Dive Type
Specify a dive type initially displayed when creating a new log with Create New Log.
3.1.4. Units when Creating a New Log (Unit : Depth)
Specify the units for depth to be used when creating a new log with Create New Log.
Meter Meters are used for the units of depth, and °C are used for the units of temperature.
Feet Feet are used for the units of depth and °F are used for the units of temperature.
3.1.2. Units
Set the units to be used in the logs. Units can be entered using up to 10 letters or numbers. Registered data is not changed
even if the units are changed.
Weight Enter the units to be displayed for weight.
Capacity Enter the units to be displayed for tank size.
Pressure Enter the units to be displayed for Pres. In and for Pres. Out of the tank.
Air Consum. Enter the units to be displayed for consumption by the tank.
3.1.5. Album Thumbnails
Set the album display mode of the <Album Display Area> of the <Main Window>.
If <Album Thumbnails> is checked, images and comments are displayed. If the check is removed, only comments are
displayed without displaying images.
3.1.6.Interface
Specify the interface to be used when transferring data from the watch.
IrDA Data is transferred from CYBER AQUALAND by IrDA.
USB Data is transferred from CYBER AQUALAND by USB.
Hyper Aqualand
Data is transferred from Hyper Aqualand.
Designate the serial port to be used.
3.1.7. Serial Port
Select the serial port to be used when transferring data from Hyper Aqualand.

3.1.8. Select Folder
You can select a folder.
In the case of starting up from Import Log the button is not displayed.
13
When the button is clicked with the mouse, the <Create Folder> dialogue box is displayed.
A folder can be created at this point.

3.2. Customized Items
Customized user settings and their contents to be saved in a log are registered.
The <User customized items> dialogue box is displayed when [Customized Items (C
)] is selected from the [Preferences (P)]
menu of the <Main Window>.
Contents can be registered while classifying for each item. When an item is selected from the list of items in the upper left
part of the dialogue box, the contents registered for each item are displayed in the list of contents in the upper right part of the
dialogue box. Register contents that do not require classification for individual items as "Common" items.
14
Registration is finalized when the button is clicked with the mouse, after which the program returns to the
<Main Window>. Since finalized registration contents are stored in memory by AQUALAND GRAPH 2001, it is not necessary
to register them each time it is started up.
Changes are canceled by either clicking the button or clicking the button in the upper right corner of the
dialogue box with the mouse, after which the program returns to the<Main Window>.
Addition or changes to data are made in the <Add> or <Modify> dialogue box.
When data is entered followed by clicking the button with the mouse, the program returns to the <User
customized items> dialogue box, and the edited data is shown in the list.

3.2.1. Items
Items can be entered using up to 12 letters or numbers. A maximum of 1000 contents can be registered.
15
Displays the <Add> dialogue box and adds new items. A check for duplicated data is not performed.
Although items can be added in the form of "Common" items, they are distinguished from the "Common"
items provided by AQUALAND GRAPH 2001.
Displays the <Modify> dialogue box and changes the names of selected items. A check for duplicated data
is not performed. Information relating to the contents is retained even if the name of an item is changed.
"Common" items cannot be changed.
Deletes a selected item. The contents registered for that item are also deleted. "Common" items cannot be
deleted.
Moves the display position of a selected item up by one. "Common" items cannot be moved.
Moves the display position of a selected item down by one. "Common" items cannot be moved.
Displays the <Add> dialogue box and adds contents. A check for duplicated data is not performed.
Displays the <Modify> dialogue box and changes selected contents. A check for duplicated data is not
performed.
Deletes selected contents.
Moves selected contents to a different item.
Moves the display position of selected contents up by one.
Moves the display position of selected contents down by one.
* "Common" items save item contents in the case of loading a user environment from a DOS version or Ver. 1. In addition,
contents registered for "Common" can be referred to regardless of the item selected during log entry.
3.2.2. Contents
Contents can be entered using up to 20 letters or numbers. A maximum of 1000 contens can be registered.
3.2.3. Initial definition
Data that is initially displayed for Customized Items during log editing is registered. Items and contents can be selected from
a list by clicking on the button with the mouse. They can also be entered from the keyboard.

16
3.3. Fixed Items
The following items that are saved in a log are registered.
*Diver
*Weather
*Tank Material
*D.Service (Diving Service)
*Dive Style
*Water Cond. (Water Condition)
*Diving Suit / Inner Wear
*Equipment
The <Fixed Items> dialogue box is displayed when [Fixed Items (F
)] is selected from the [Preferences (P)] menu of the <Main
Window>.
Registration is finalized when the button is clicked with the mouse, after which the program returns to the
<Main Window>. Since finalized registration contents are stored in memory by AQUALAND GRAPH 2001, it is not necessary
to register them each time it is started up.
Changes are canceled by either clicking the button or clicking the button in the upper right corner of the
dialogue box with the mouse, after which the program returns to the<Main Window>.
Addition or changes to data are made in the <Add> or <Modify> dialogue box.
When data is entered followed by clicking the button with the mouse, the program returns to the <Fixed
Items> dialogue box, and the edited data is shown in the list.
3.3.1. Diver
The name of the diver can be entered using up to 20 letters or numbers. A maximum of 1000 divers can be registered.

17
Displays the <Add> dialogue box and adds new items. A check for duplicated data is not performed.
Displays the <Modify> dialogue box and changes selected items. A check for duplicated data is not
performed.
Deletes a selected item.
Moves the display position of a selected item up by one.
Moves the display position of a selected item down by one.
Default diver
Registers the data to be initially displayed for "Diver" in the <Edit> dialogue box.
A diver can be selected from the diver list by clicking the button with the mouse. A diver name
can also be entered from the keyboard.
Default buddy
Registers the data to be initially displayed for "Buddy" in the <Edit> dialogue box.
A buddy can be selected from the diver list by clicking the button with the mouse. A buddy name
can also be entered from the keyboard.
Default dive master
Registers the data to be initially displayed for "Dive Master" in the <Edit> dialogue box.
A dive master can be selected from the diver list by clicking the button with the mouse.
A dive maste can also be entered from the keyboard.
3.3.2. Weather
The weather can be entered using up to 12 letters or numbers. A maximum of 100 weather conditions can be registered.
Displays the <Add> dialogue box and adds new items. A check for duplicated data is not performed.
Displays the <Modify> dialogue box and changes selected items. A check for duplicated data is not
performed.
Deletes a selected item.
Moves the display position of a selected item up by one.
Moves the display position of a selected item down by one.
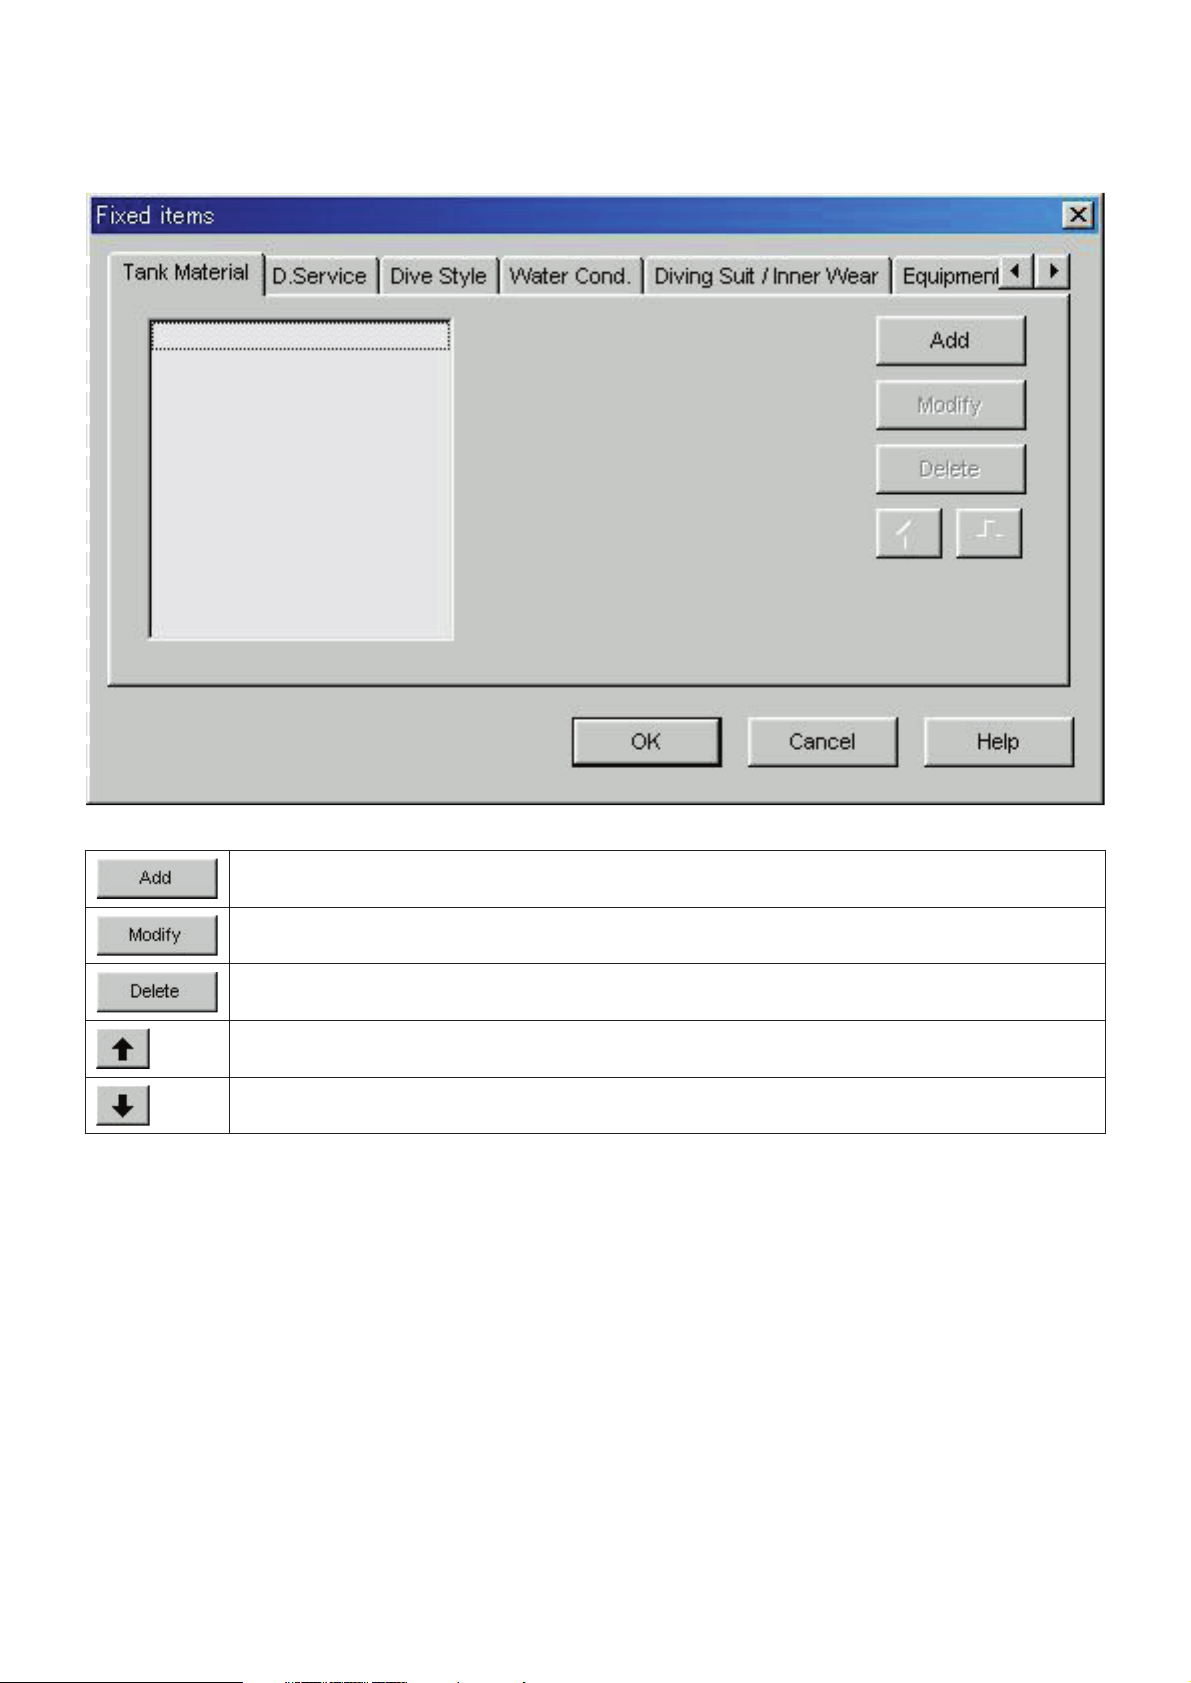
18
3.3.3. Tank Material
The tank material can be entered using up to 10 letters or numbers. A maximum of 100 tank materials can be registered.
Displays the <Add> dialogue box and adds new items. A check for duplicated data is not performed.
Displays the <Modify> dialogue box and changes selected items. A check for duplicated data is not
performed.
Deletes a selected item.
Moves the display position of a selected item up by one.
Moves the display position of a selected item down by one.

19
3.3.4. Diving Service (D.Service)
The diving service (D.Service) can be entered using up to 20 letters or numbers. A maximum of 100 diving services can be
registered.
Displays the <Add> dialogue box and adds new items. A check for duplicated data is not performed.
Displays the <Modify> dialogue box and changes selected items. A check for duplicated data is not
performed.
Deletes a selected item.
Moves the display position of a selected item up by one.
Moves the display position of a selected item down by one.

20
3.3.5. Dive Style
Dive style can be entered using up to 10 letters or numbers. A maximum of 100 dive styles can be registered.
The following operations are available for both <Access> and <Water Body>.
Displays the <Add> dialogue box and adds new items. A check for duplicated data is not performed.
Displays the <Modify> dialogue box and changes selected items. A check for duplicated data is not
performed.
Deletes a selected item.
Moves the display position of a selected item up by one.
Moves the display position of a selected item down by one.
Registers the data to be initially displayed for "Dive Style" in the <Edit> dialogue box. A dive style can be
selected from the dive style list by clicking the button with the mouse. A dive style can also be entered
from the keyboard.
Initial definition
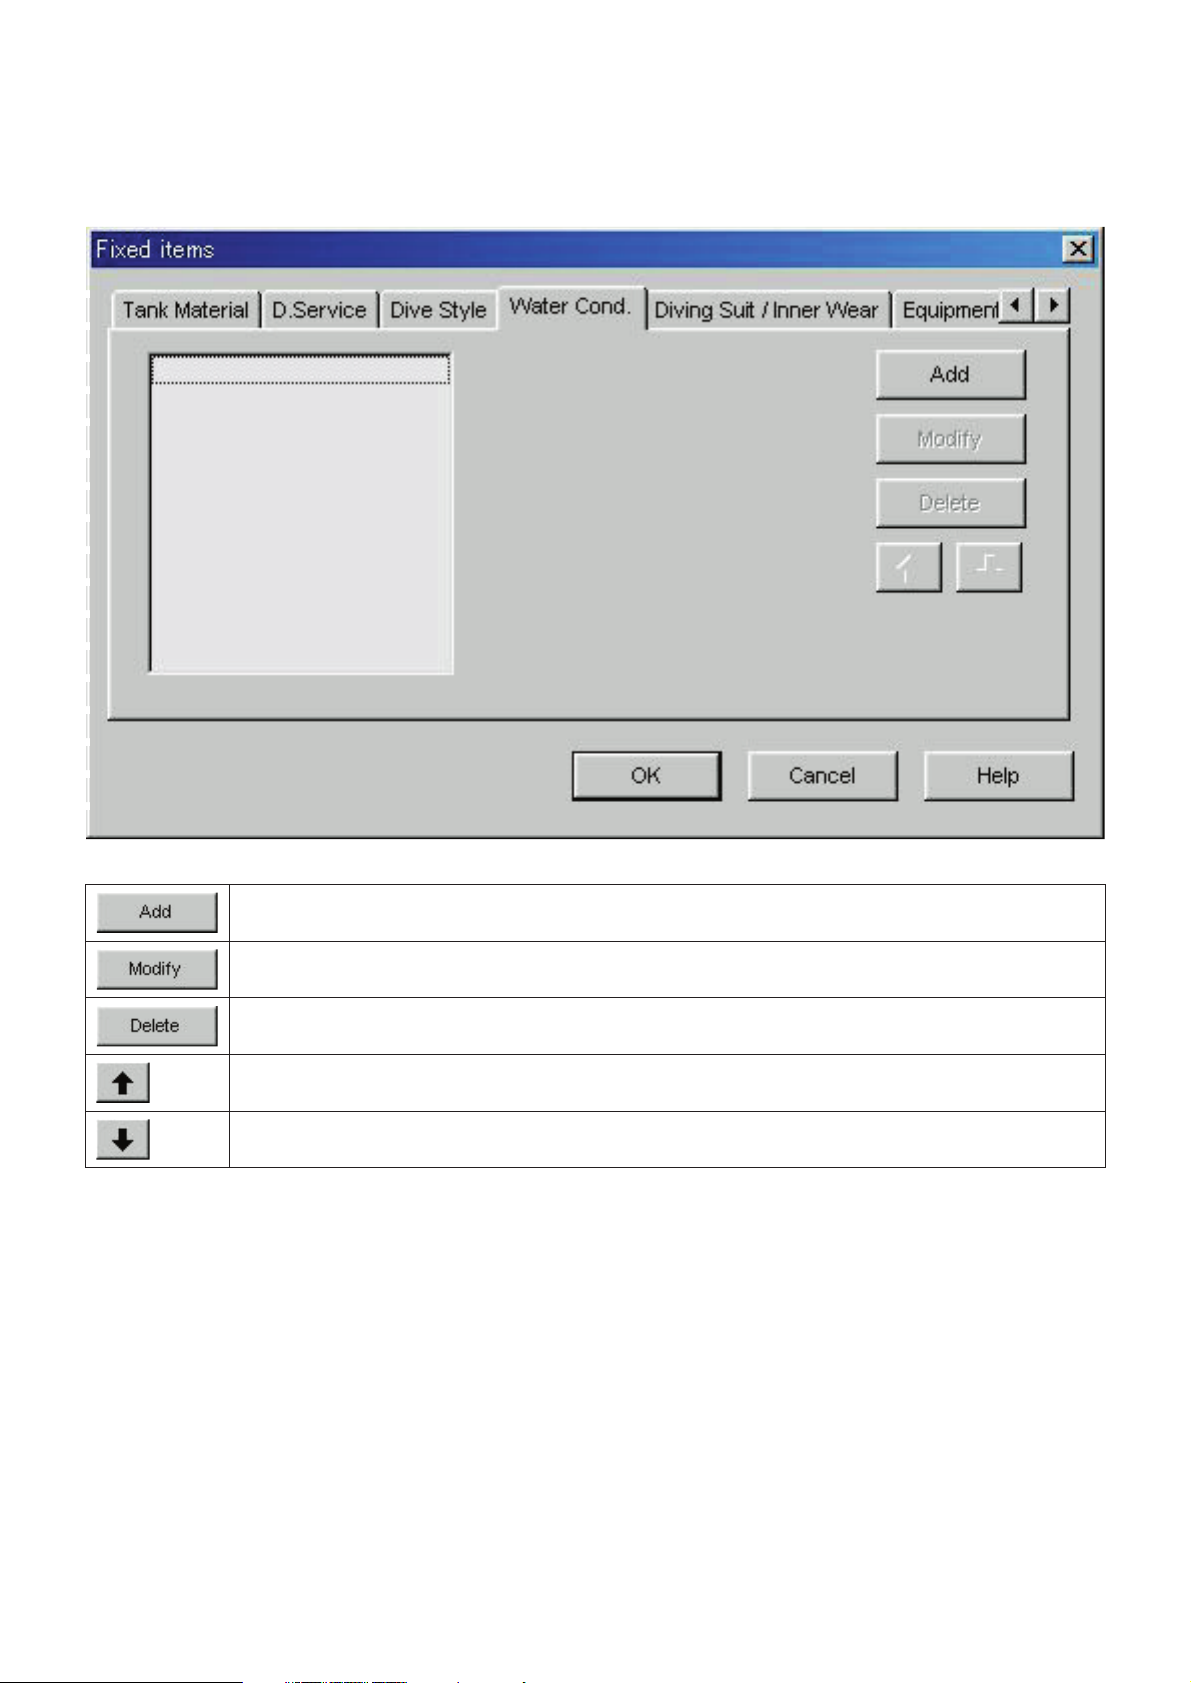
21
3.3.6. Water Conditions (Water Cond.)
Water conditions (Water Cond.) can be entered using up to 10 letters or numbers. A maximum of 100 water conditions can
be registered.
Displays the <Add> dialogue box and adds new items. A check for duplicated data is not performed.
Displays the <Modify> dialogue box and changes selected items. A check for duplicated data is not
performed.
Deletes a selected item.
Moves the display position of a selected item up by one.
Moves the display position of a selected item down by one.
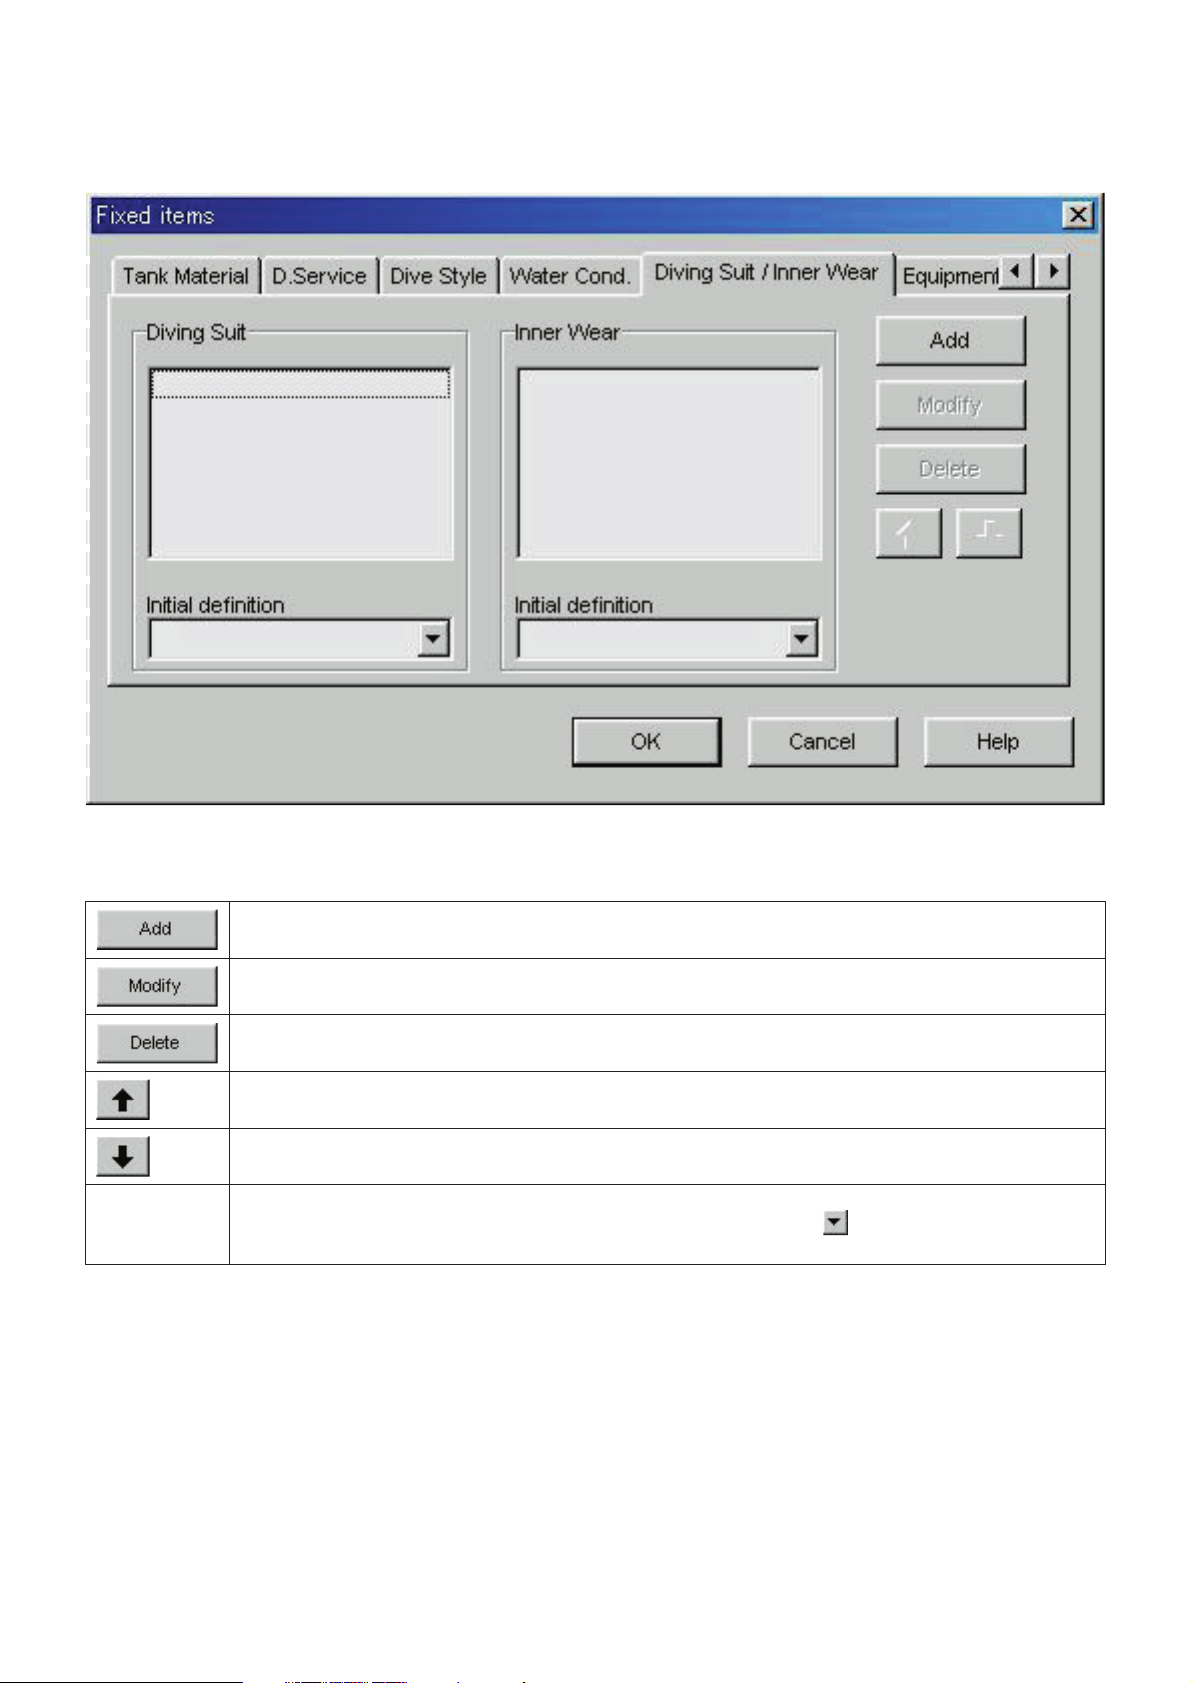
22
3.3.7. Diving Suit / Inner Wear
Diving Suit / Inner Wear can be entered using up to 20 letters or numbers. A maximum of 100 items can be registered.
Displays the <Add> dialogue box and adds new items. A check for duplicated data is not performed.
Displays the <Modify> dialogue box and changes selected items. A check for duplicated data is not
performed.
Deletes a selected item.
Moves the display position of a selected item up by one.
Moves the display position of a selected item down by one.
Registers the data to be initially displayed for "Diving Suit" and "Inner Wear" in the <Edit> dialogue box. A
Diving Suit and Inner Wear can be selected from the list by clicking the button with the mouse. Diving
Suit and Inner Wear can also be entered from the keyboard.
Initial definition
The following operations are available for both Diving Suit and Inner Wear.

23
3.3.8. Equipment
Equipment can be entered using up to 10 letters or numbers. A maximum of 100 equipment items can be registered.
Displays the <Add> dialogue box and adds new items. A check for duplicated data is not performed.
Displays the <Modify> dialogue box and changes selected items. A check for duplicated data is not
performed.
Deletes a selected item.
Moves the display position of a selected item up by one.
Moves the display position of a selected item down by one.

24
3.4. Dive Locations
Locations and dive sites to be saved in a log are registered.
The <Dive Locations> dialogue box is displayed when [Dive Locations (L
)] is selected from the [Preferences (P)] menu of the
<Main Window>.
Dive sites can be registered while classifying for each location. When a location is selected from the list of locations in the
upper left part of the dialogue box, the dive sites registered for each location are displayed in the list of dive sites in the upper
right part of the dialogue box.
Registration is finalized when the button is clicked with the mouse, after which the program returns to the
<Main Window>. Since finalized registration contents are stored in memory by AQUALAND GRAPH 2001, it is not necessary
to register them each time it is started up.
Changes are canceled by either clicking the button or clicking the button in the upper right corner of the
dialogue box with the mouse, after which the program returns to the <Main Window>.
Addition or changes to data are made in the <Add> or <Modify> dialogue box.
When data is entered followed by clicking the button with the mouse, the program returns to the <Dive
Locations> dialogue box, and the edited data is shown in the list.

3.4.2. Dive Site
Dive sites can be entered using up to 20 letters or numbers. A maximum of 100 dive sites can be registered.
25
3.4.1. Location
Locations can be entered using up to 20 letters or numbers. A maximum of 1000 locations can be registered.
Displays the <Add> dialogue box and adds new items. A check for duplicated data is not performed.
Displays the <Modify> dialogue box and changes selected items. A check for duplicated data is not
performed.
Deletes a selected item. All dive sites registered for the location are also deleted.
Moves the display position of a selected item up by one.
Moves the display position of a selected item down by one.
Registers the data to be initially displayed for "Location" in the <Edit> dialogue box. A location can be
selected from the location list by clicking the button with the mouse. A location can also be entered
from the keyboard.
Initial definition
Displays the <Add> dialogue box and adds new items. A check for duplicated data is not performed.
Displays the <Modify> dialogue box and changes selected items. A check for duplicated data is not
performed.
Deletes a selected item. The contents registered for that item are also deleted.
Moves the display position of a selected item up by one.
Moves the display position of a selected item down by one.
Registers the data to be initially displayed for "Dive Site"in the <Edit> dialogue box. A dive site can be
selected from the dive site list by clicking the button with the mouse. A dive site can also be entered
from the keyboard.
Initial definition
Moves a selected dive site to a different location.

4. Transfer
Data is transferred from the watch to a personal computer.
The <Transfer> dialogue box is displayed either by clicking the button from the <Main Window>, or by selecting
[Transfer (T
)] from the [Option (O)] menu.
Clicking the button returns the program to the <Main Window>.
A maximum of 9999 data sets can be stored in a single data save folder. Additional data cannot be stored.
26
The <Interface> dialogue box is displayed when the button is clicked with the mouse.
This lets you change the interface used for transferring data from the watch.
IrDA Data is transferred from CYBER AQUALAND by IrDA.
USB Data is transferred from CYBER AQUALAND by USB.
Hyper Aqualand
Data is transferred from Hyper Aqualand.
Designate the serial port to be used.
All CYBER AQUALAND products have information for identifying their respective watches. AQUALAND GRAPH 2001
recognizes CYBER AQUALAND on the basis of this identification information.
When transferring data from a new CYBER AQUALAND for the first time, the <Add new user name> dialogue box is
displayed in order to identify the watch. When a user name has been registered, the user name corresponding to the watch is
displayed in the "Diver" items of log data. Data registered with "Default diver" of <Fixed Items> is displayed for "Diver" items
of data transferred from CYBER AQUALAND for which a user name has not been registered or from Hyper Aqualand. (refer
to section “5. Register CYBER AQUALAND” for further details).

4.1. IrDA
Data is transferred from CYBER AQUALAND by IrDA.
* The display changes to the Infrared Communication Menu when the [MODE] button near the lower left corner of the
Time Display of CYBER AQUALAND is pressed for at least 2 seconds.
* When "to PC" is selected with the upper left [SEL] button and the upper right [SET] button is pressed, the watch is ready
to be connected with a personal computer.
* When the infrared communication unit of the personal computer is in contact with the watch in this state, CYBER
AQUALAND is able to communicate with the personal computer. The infrared communication icon in the task tray of the
personal computer changes as shown below.
27
* When the button is clicked with the mouse at this time, data is sent from CYBER AQUALAND and
transfer to the personal computer begins. When transfer is completed, a dialogue box is displayed informing the user of
completion.
* When an infrared communication icon does not appear in the task tray, it means that the infrared communication
function has not been set. Set communications to infrared communication by referring to the user's manual of your
personal computer.
* Since the infrared communication function of CYBER AQUALAND is automatically canceled after one minute elapses,
set this function immediately before the start of communication.
4.2. USB
Data is transferred from CYBER AQUALAND by USB.
* The communication unit (CMUT-02) and personal computer are connected with the USB cable provided, and CYBER
AQUALAND is connected to the communication unit (CMUT-02).
* CYBER AQUALAND automatically displays the USB communication menu, after which it is able to communicate with
the personal computer.
* At this point, when the button is clicked with the mouse, data begins to be sent from CYBER
AQUALAND and received by the personal computer. Once transfer is completed, a dialogue box is displayed informing
the user of completion.
* If CYBER AQUALAND does not display the USB communication menu, after temporarily removing CYBER
AQUALAND, disconnect the USB cable of the communication unit (CMUT-02), and repeat the procedure from the
beginning.
4.3. Hyper Aqualand
Data is transferred from Hyper Aqualand.
Connecting the Communication Unit
First connect the communication unit (CMUT-01) to the serial port of the personal computer in order to transfer data from
Hyper Aqualand.Refer to the Hyper Aqualand user's manual for information on using Hyper Aqualand.
Since the communication unit (CMUT-01) for use with Hyper Aqualand is different from that (CMUT-02) for use with CYBER
AQUALAND, make sure to use the proper communication unit for each product.

Transfer
AQUALAND GRAPH 2001 transfers data with Hyper Aqualand attached to the communication unit. Refer to the Hyper
Aqualand user's manual for information on using Hyper Aqualand.
1. Switch Hyper Aqualand to the transfer mode.
2. Operate Hyper Aqualand to call up the data to be transferred.
3. Insert the Hyper Aqualand transfer pin into the center connection pin of the three connection pins.
4. Data is sent from Hyper Aqualand when the button is clicked with the mouse, after which the personal
computer begins to receive that data. When transfer is completed, a dialogue box is displayed informing the user of
completion. If transfer has not been performed properly, a communication error warning message is displayed. If this
happens, check the connection of the RS-232C connector and the connection between Hyper Aqualand and the
communication unit. Then click the button again with the mouse.
5.When transferring different data, repeat the above procedure starting from step 2. If Hyper Aqualand is not in the
transfer mode, repeat the procedure starting from step 1.
28
29
5. Register CYBER AQUALAND
All CYBER AQUALAND products have information for identifying their respective watches. AQUALAND GRAPH 2001
recognizes CYBER AQUALAND on the basis of this identification information.
When transferring data from a new CYBER AQUALAND for the first time, the <Add new user name> dialogue box is
displayed in order to identify the watch. When a user name has been registered, the user name corresponding to the watch is
displayed in the "Diver" items of log data.
A user name can be selected from the diver list registered with "Diver" of <Fixed Items>. In addition, diver names can also be
registered by entering from the keyboard.
In the case of not registering a user name, data is displayed that was registered with "Default diver" of <Fixed Items>.
The <Add new user name> dialogue box is not displayed when the number of registered items able to be managed by
AQUALAND GRAPH 2001 is exceeded. In this case, transferred data is treated in the same way as data that has been
transferred from an unregistered watch.
 Loading...