

Page 1
English
INSTRUCTION MANUAL
FOR
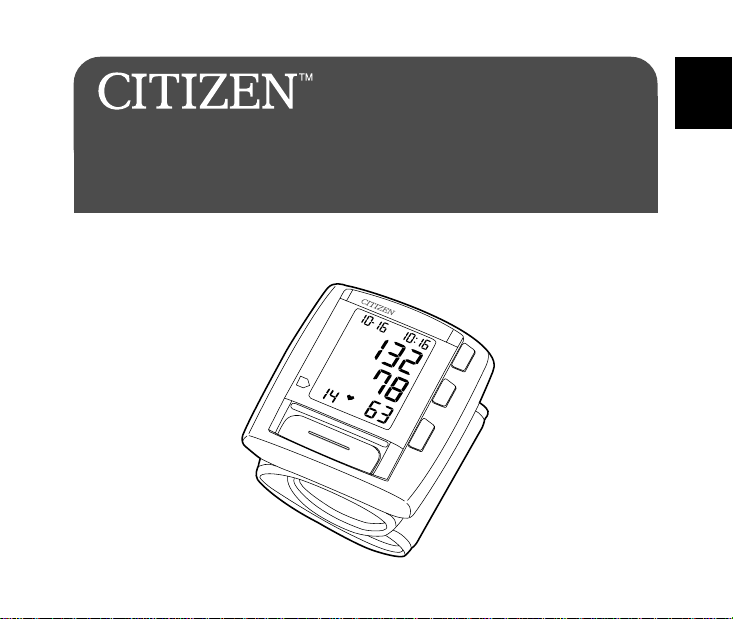
DIGITAL BLOOD PRESSURE MONIT OR
MODEL CH607
M
DATE
m
m
Hg
S
T
A
R
T
/S
T
O
P
- Eng 1 -
CH607
P
TIME
T
E
S
SYS.
m
m
H
g
E
D
DIA.
O
m
M
m
Hg
PULSE
/M
Y
IN
R
O
M
E
M
English
Español
Português
Deutsch
Español
Português
Italiano
Deutch
Français
Page 2
GENERAL REMARKS
General remarks on blood pressure and blood pressure measurement
• If the cuff is to be deflated quickly, depress “Start/
Stop” switch.
• The attached cuff is suited for a wrist circumference of 13.5 cm to 19.5 cm.
• When attaching the cuff, the body of the blood
pressure monitor should be placed on the inside of your wrist.
• Self-measurement is no therapy! In no case
should the dosage of medication ordered by the
doctor be changed.
• In preparation for blood pressure measurement, you should urinate and should remain
relatively still for 10 to 15 minutes prior to measurement.
• Exercise, eating and drinking, smoking, etc.,
prior to measurement may affect the results.
• The blood pressure varies constantly throughout the day. Measurement should be made
regularly at the same time each day.
• Do not be too impressed by the results of one
measurement. Keep a record of blood pressure
variations. Many readings tell a story.
• Emotional stress may tend to cause blood pressure to rise.
• This product should not be used to monitor
cardiac arrhythmia.
For proper measurement of blood
pressure
• Take a deep breath five or six times and then
relax before measuring blood pressure. If you
are tense when taking the measurement, you
will not get a valid reading
• Blood pressure will be elevated when you are
in a worrisome or irritated state, suffering from
lack of sleep or constipation, or after exercise
or a meal.
• Putting on the cuff is one of the most important tasks for ensuring proper measurement of
blood pressure.
and tighten it so that one finger may be inserted
between the cuff and wrist.
• Do NOT measure blood pressure after bathing
or drinking.
• When you feel like relieving yourself, you
should do so before measuring blood pressure.
Wind the cuff around the wrist
- Eng 2 -
Page 3
• Measure blood pressure where the room tem-
perature is about 20°C. DO NOT measure blood
pressure when it is too cold (below 10°C)or too
hot (above 40°C) in the room .
• DO NOT try to measure blood pressure immediately after drinking coffee or tea or smoking.
• Measure blood pressure with a relaxed and
quiet posture. Keep the center of the cuff at the
level of your heart, and do NOT move your arm
or talk.
• DO NOT measure blood pressure after the cuff
has been on for a few minutes, as your arm
will have built up higher blood pressure, and
you will not get a valid reading.
English
Español
Português
PRECAUTION FOR USE
Precaution for use
• If you suffer form heart disease, high blood
pressure or other circulatory disease, please
consult your doctor first.
• If you feel abnormal pressure of the cuff during use or any other irregularity, reduce the
pressure by immediately switching off the
power or removing the batteries and consult
the sale outlet where you purchased.
• If you think the measured value is abnormal or
if measuring makes you fell unwell, discontinue
use and consult your doctor.
• Measurement of blood pressure may not be
possible for someone with a weak pulse or arrhythmia.
• Congestion, swelling, etc. may occur in some
people.
• If blood pressure is measured repeatedly, an
accurate result will not be achieved. An interval of about 10 minutes should be allowed.
• The memory is erased if the batteries are removed for replacement, etc. and a record
should be kept of any necessary data.
- Eng 3 -
Italiano
Deutch
Français
Page 4

Precaution for maintenance
• Do NOT store the blood pressure meter where
it will be exposed to direct sunlight, high temperature (over 60°C), low temperature (below
- 20°C), high relative humidity (over 95%) or
in a dusty place .
• Do NOT expose the blood pressure meter to
undue force or vibration, or drop it.
• Remove the batteries when not use for a long
time period.
• Do NOT disassemble the apparatus.
• Do NOT bend the cuff or Air hose unnecessarily.
• Never wipe the blood pressure monitor with
thinner or benzene, as they may damage it.
• When the monitor is very dirty, wipe it clean
with a cloth moistened with Sterilizing alcohol
or a neutral detergent, and then wipe it with a
dry cloth. Do NOT use thinner or benzene.
Nature and frequency of maintenance
This product is designed for use over an extended
period of time; however it is generally recommended that it be inspected every two years to
ensure proper function and performance.
Cleaning method of Cuff
After cleaning the cuff with a neutral detergent,
lightly rinse it with water and let it air dry. Hard
rubbing or washing in a washing machine will
cause air leakage. Also, be careful not to get
water into the air hose.
Protect the natural environment
Please help protect the natural environment by
respecting national and/or local recycling regulations when disposing of the batteries and the
products at the end of their useful lives.
- Eng 4 -
Page 5
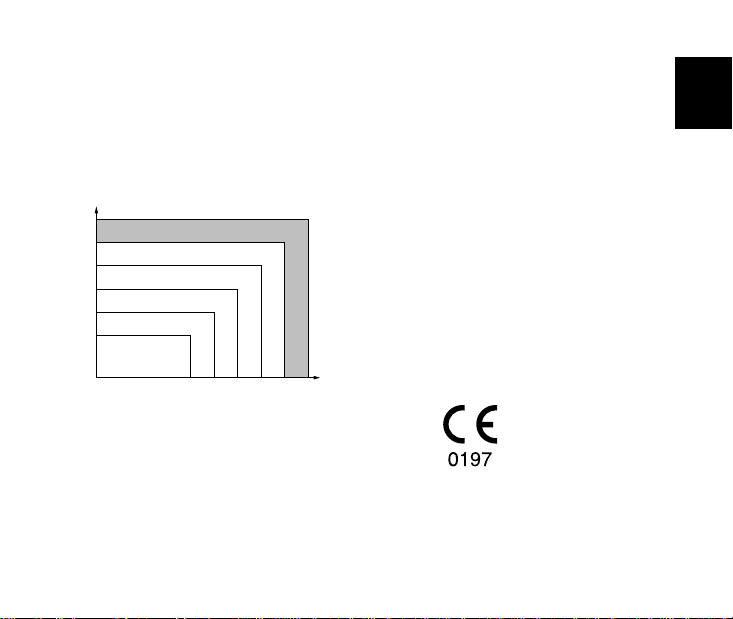
WHO blood pressure classifications
Standard for assessment of high or low blood pressure without regard to age, have been established
by the World Health Organization (WHO), as shown
in the chart.
SYSTOLIC
(mmHg)
180
160
140
130
120
Note: When a patient’s systolic and diastolic blood
Hypertension (severe)
Hypertension (moderate)
Grade 1 Hypertension (mild)
High-Normal
Normal
Optimal
80 85 90 100 110
Definition and Classification of
DIASTOLIC
(mmHg)
Blood Pressure Lebels
pressure fall into different categories, the
higher category should apply.
Reference European standard:
This products complies with EN instructions 93/
42/EEC (Medical Device Directive) and with the
following standards: EN 1060:1995 “Noninvasive
Sphygmomanometers, Part 1 General Requirements” and EN 1060: 1997 “Noninvasive Sphygmomanometers, Part 3 Supplementary Requirements
for Electromechanical Blood Pressure Measuring
Systems”.
Manufacturer:
Name: Living Science (Shenzhen) Co., Ltd.
Address: Shun Mu Ku Road, Ping Hu County,
Shenzhen, Long-Kang Town, China
European Representative:
Name: Innovative business promotion GmbH.
Address: Huttenstraße 4 D-07743 Jena
- Eng 5 -
English
Español
Português
Italiano
Deutch
Français
Page 6

1. Name of the parts
Wrist cuff
Start/Stop button
DEVICE DESCRIPTION
LCD display
Setting button
Mode button
Recall memory button
M
START/STOP
DATE
m
m
H
g
CH607
P
TIME
SYS.
mmHg
SET
DIA.
E
mmHg
D
O
M
PULSE
/M
IN
Y
R
O
M
E
M
Batteries
“AAA” 1.5V×2
Carrying case
- Eng 6 -
Page 7

English
2. Description of display symbols
Month Date Hour Minute
Measuring pressure
Blood pressure unit
Battery weak display
symbol
Error symbol
Memory record
- Eng 7 -
Afternoon time
Systolic rate
Diastolic rate
Pulse rate
Pulse symbol
Español
Português
Italiano
Deutch
Français
Page 8

BA TTERY REPLACEMENT
1. To use this unit, you must install batteries, If
the battery mark “
must change both batteries.
2. Open battery cover as illustrated. Replace the
two batteries, matching the (+) and (–) polarities on each battery with the polarity marks
on the case.
• To take the batteries out easily, pull the trans-
parent ribbon.
” is displayed, you
CLOCK MODE
1. Default time indicating state and
selection of each mode
When the battery is installed, the time and date
are set as follows.
January 1 , 12:00:00 AM
3. “LR03” batteries or equivalent are suitable for
this blood pressure monitor. All batteries used
must be same type. Do not mix alkaline, standard (carbon-Zinc) or rechargeable (cadmium)
batteries. Also, do not mix old and new batteries.
2. Setting Date and Time
1) Press the “Mode” switch then “Month” starts
flashing and press “SET” button to set the correct month. (Each time the “Set” switch is
pressed, the value of the month is increased
- Eng 8 -
Page 9

by one. The value of minute can be corrected
in only the forward direction.)
2) Press the “Mode” switch then “Date” starts
flashing. Press “SET” button to set the correct date. (Each time the “Set” switch is
pressed, the value of the date is increased by
one. The value of hour can be corrected in
only the forward direction.)
3) Press the “Mode” switch then “Hour” starts
flashing. Press “SET” button to set the correct date. (Each time the “Set” switch is
pressed, the value of the Hour is increased by
one. The value of hour can be corrected in
only the forward direction.)
4) Press the “Mode” switch then “Minute” starts
flashing. Press “SET” button to set the correct Minute. (Each time the “Set” switch is
pressed, the value of the minute is increased
by one. The value of Minute can be corrected
in 12-hour format in only the forward direction.)
5) Press the mode switch to finish correction.
English
Español
Português
Italiano
MEASUREMENT PROCEDURES
1. Attaching of wrist cuff
The blood pressure is measured at the wrist.
Therefore, rolling up the sleeve is no longer
necessary. The pressure cuff has integrated into
the wristlet. Wind the wristlet around your left
wrist. The wrist should be free. The display is
at the inner of the wrist.
Deutch
Français
- Eng 9 -
Page 10

• Apply the wrist cuff to the wrist and make sure
it is not too loose or too tight. If the wrist cuff
is applied inappropriately, it may display an error or abnormal values. Pull the wristlet tight
and close the “Burr closure”. Wrist circumference: 13.5-19.5 cm.
Measurement Procedures for
People With a Weak Pulse
• Apply the middle part of the wrist cuff to the
artery in the wrist to measure blood pressure.
2. To start the Measurement
CAUTION
Do not grasp the unit too tightly. Keep your left
wrist relaxed during measurement period. Do
not apply physical pressure against unit with
wrist before or during measurement. All measurements must be performed while you are
seated and with your left hand on a table held a
level with your heart. Keep your body still and
relaxed during measurement.
1) Press the “Start/Stop” switch. All display marks
appear for approx. 1 second. All displays disappear and the time is updated.
2) The blood pressure measuring symbol will ap-
pear on the display and then the air pressure
will automatically pump up to 195mmHg.
3) If blood pressure tends to be on the high level,
the air pressure will automatically increase
again to the required level for measurement.
- Eng 10 -
Page 11

Do not move or talk while taking the blood pressure measurement.
4) When pressurization is completed, the automatic air release system will gradually reduce
cuff pressure, and measuring mark “Heartmark” will flash on the display indication that
measuring is in progress.
5) After taking blood pressure measurement, the
systolic and diastolic pressure with pulse rate
is displayed on the display for 1 minute.
6) Unless an error is generated, the measurement
results are automatically stored in memory. Up
to 99 sets of results can be stored in memory.
* When there are already 99 sets of results in
memory, the oldest one is automatically erased
and overwritten with the newest. Display of the
measurement result will continue until power is
turned off.
3. Turn Power off
When the Start/Stop switch is pressed, the display will be changed over to the date/watch only
indication and the power will be totally turned
off approximately one minute later.
English
Español
Português
Italiano
Deutch
CAUTION
To discontinue a measurement for any reason,
press the “START/STOP” switch. This causes
the “wrist cuff” to deflate rapidly.
4. Automatic power-off function
If the unit is left on after measurement, an automatic power-off function turns the power off after approximately 1 minute. To continue measurement, press the “START/STOP” switch turning the unit on. After, wind the wristlet around
your left wrist.
- Eng 11 -
Français
Page 12

5. Memory recall
You can recall stored data by pressing the
“Memory” switch, except when performing a
measurement.
• Up to 99 sets of measurement results are auto-
matically stored in memory, and memory cell
No. 1 is always used to store the oldest set of
results.
• Press “Memory” switch, the memory cell num-
ber with the stored measurement results (Systolic / Diastolic and Pulse with Date/Time) are
displayed for 1 minute.
* Pressing “Memory” button, nothing will appear
on the display if there is no data in the memory.
• If the “Memory” switch is pressed further, the
old date are indicated in the order of the time
series.
• Press “Start/Stop” switch to turn off the unit.
6. Memory clear function
To clear memory data, take out the two batteries
at same time and then press the “START/STOP”
switch for a while. All memory is erased.
Press the “POWER/START” switch to turn off.
CAUTION
To discontinue a measurement for any reason,
press the “POWER/START” switch. This causes
the “wrist cuff” to deflate rapidly.
- Eng 12 -
Page 13

ERROR DESCRIPTION OF DISPLAY MARKS
English
DISPLAY MARK CONDITION / CAUSE CORRECTIVE ACTION
Mark appears in the measurement
condition and flashes when pulse is
detected.
Measuring Error Appears when the accurate blood
Replace batteries Appears when the battery voltage is
Measuring blood
pressure
symbol
pressure could not be obtained accurately.
excessively low or the positions of
batteries are incorrect.
Appears all the time until the measurement is completed.
Measurement in progress. Remain
still.
Press “Start/Stop” switch again and
re-measure.
Or check cuff if wrapped at the wrist
or according to instructions.
Check palm if exerting effort.
Check if talking or moving during
measurement.
Check if posture is incorrect.
Replace all batteries with new ones.
Insert the batteries at paying close
attention to the +/– directions.
- Eng 13 -
Español
Português
Italiano
Deutch
Français
Page 14

SPECIFICATIONS
Model Number CH607
Measuring Principle Oscillometric System
Measurement Localization Left Wrist Arm
Cuff Preformed cuff
Arm Circumference Range 13.5 to 19.5 cm
Measurement Range
Accuracy
LCD Indication Measuring
LCD
Switch 4-switches (Start/Stop, Memory, Set, Mode)
Inflation Automatic Inflation by Air Pump
Deflation Automatic Air release control valve
Exhaust Quick Exhaust Valve
Rated Voltage 3 V DC
Power Source 2 “AAA” Size Batteries
Power Consumption 0.1 W
Battery Life Approx. 250 times measurement
Automatic Power Off Function Approx. 3 min. (after activated)
Clock Function ±20 Seconds a month, Full Automatic Calendar, Alarm
Memory Function 99 Memory (Date, Time, Blood pressure value, Pulse)
Dimensions 72(W) × 70(D) × 29(H)mm
Weight Approx. 140g including batteries.
Operating Environment
Storage Environment
Accessories 2 “AAA” batteries, Instruction manual and Carrying case
* Specifications and design may be changed without any notice in the event of improvementsbeing made.
Pressure 0 - 300 mmHg
Pulse 40 - 199 Pulse / Min.
Pressure ±3mmHg
Pulse ±5% of reading
Pressure
Pulse Pulse Rate: 3 digits
Marks
Viewing Size 38.0(H) × 32.0(W) mm
Digit Size 9.5(H) × 5.0(W) mm
Temperature 10 to 40°C
Humidity 30 to 85%RH
Temperature –20 to 50°C
Humidity 10 to 95%RH
Systolic Blood Pressure: 3 digits
Diastolic Blood Pressure: 3 digits
Exhaust
Re-Measure
Battery
- Eng 14 -
Alternatively
 Loading...