

Page 1
Page 2

Contents
Main Features
Operation Summary
Preliminary Preparations
......................
...............
..........
6
li
19
1. Attaching the Lens.20
2. Setting the Lens for AE Photography ,. 22
3. Loading the Batteries
4. Turning on the Camera . 24
5. Checking the Batteries
6. Loading the Film
< Automatic Setting of the Film
Speed >............................................31
Shooting with the Lens Set on “A”
Mark (Basic Operation)
1 .Setting the Film Winding Mode
1 Single frame shooting
2 Continuous shooting...................34
< Automatic Film Winding Speed
Changeover Function >
2.Setting the Shooting Mode
< Shooting Modes of the T90> ............36
1 Shutter-priority AE......................36
...........................
...........................
.........
28
.........................
...................
.....................
.............
.................
22
24
33
34
34
35
36
Page 3

2 Aperture-priority AE
............
37
3 Standard program AE
4 Variable-shift program AE
< Setting Each Mode >
S.Setting the Metering Mode
< Metering Modes of the T90> 47
1 Center-weighted average
metering 47
2 Partial metering
3 Spot metering
< Setting Each Mode >
4. How to Use the Metering Modes . 50
5. Focusing - -
6,Shooting .................................................54
< Exposure Preview Button > ., . 56
< Remaining Frame Counter >. . ..56
< Viewfinder Display Selector >
Automatic Film Rewind
< Manual Film Rewind > . 61
.............................
.........................................
........
......
............
...
47
..........................
.......................
..........
..........................
38
39
41
48
48
49
52
58
59
Page 4

INTRODUCTION
Thank you for purchasing the Canon T90 This
camera is designed as a comprehensive package
of the most advanced and innovative technologies
available in the world today, balancing your pho
tographic desires with automatic features — a stateof-the-art camera.
Your photographic range is heightened by 1) the
built-in motor drive capable of winding film at a
maximum of 4.5 frames per second with merely four
size-AA batteries, 2) the high-speed PMS shutter
permitting 1/4000 sec shutter speed and 1/250 sec
flash synchronization, 3) the three switchable meter
ing distribution patterns, and 4) a wide range of AE
shooting modes responding to your photographic
While reading these instructions unfold the front
and back flaps of this booklet for easy reference to
the camera's parts.
needs. Meanwhile, complete automation in areas
such as film transportation and film speei setting
makes "multiple functions and simple operation”
finally and fully compatible.
Your shooting options are further expanded by op
tional accessories like the Speedlite 300TL, the
Macro Ring Lite ML-2, the Data Memory Back 90
and the Command Back 90
For a full understanding of the T90, please read this
instruction booklet carefully before using the
camera.
Page 5

Nomenclature
Accessory Shoe
LQO Display Panel
Spot Metering Button
Electronic Input Dial
Shutter Button
Self-timer Operation
Indicator (LED)
Remote Control
Socket Cover
AE Lock Pin
Distance Index
Bayonet for Hood
Lens Release Button
Inside the Palm Wing
Battery Check Button
Film Winding Mode/
Self-timer Button
-------
__
Illumination Window
Film Plane Indicator
Metering Mode Selector
Shooting Mode Selector
Neckstrap Ring
Back Cover Lock Button
Back Cover Latch
Mount Positioning Point
Focusing Ring
Stop-down Lever
tntfAH
- Viewfinder Display
Selector
- Manual Rewind
Button
%
- Film Winding Mode/
Self-timer Selector
Page 6

Nomenclature
Viewfinder Eyepiece
Eyecup
Eyepiece Shutter Lever —
Film-load Check Window
Main Switch-—
Film Speed button
Tripod Socket
Exposure Compensation
Button
Page 7

Shadow Control Button
Highlight Control Button
Exposure Preview Button
Back Cover
Palm Wing
Battery Chamber
Battery Magazine
Latch
126
Page 8

Carrying the Camera
1) Thread the ends of the neckstrap through the
rings on the camera as shown.
127
2) Put the camera in the case as shown above.
* Canon offers two types of soft case in addition to the
standard semi hard case.
• Canon Snap Case T90 SA-3 can store the T90 with
the FD 35—70 mm f/3.5—4.5 lens
• Canon Snap Case T90 SB-3 can store the T90 with
the FD 35— 105 mm f/3.5—4.5 lens
(These products will be available soon.)
Page 9

Main Features
1. BUILT-IN MOTOR DRIVE
A high film winding speed requires a high powersource voltage, which in the past has meant a lot
Df batteries. Unfortunately a lot of batteries make
a camera heavy and very inconvenient to carry.
The “realization of both low voltage and high film
winding speed" has therefore long been a
jream of camera makers. But Canon challenged
he inconsistency of a low voltage (i.e., a few bateries), high film winding speed camera, and
:ame up with the *3-motor system of the T90.
This camera has a built-in motor drive capable
)f a maximum of 4.5 frames/sec, using only 4
;ize-AA batteries.
There are three possible film winding speeds;
,HIGH (4.5 f.p.s.), LOW (2 f.p.s.), and SINGLE,
‘ilso, the automatic film winding speed change-
ver function will change the film winding speed
om HIGH to LOW mode when battery power
rops below a prescribed voltage, so more pic-
res can be taken with the same batteries.
* There are three motors, for mechanism
charge, film transport system and film
rewind, respectively, inside the camera.
Each motor is designed to best serve its
specific function, and the overall efficien
cy of carnera operation has thus been im
proved.
1
Page 10

2. COMPLETE AUTOMATION OF FILM
TRANSPORT SYSTEM
An efficient film transport system (film load, wind
and rewind) is indispensable, but has little to do
with the photographer’s final purpose. With the
T90, the complete automation of the film trans
port system is based on the concept: “the opera
tion which does not relate to the photographer’s
objectives should be automated completely".
a. Autoload
As soon as the back cover is closed after
the film has been loaded, the camera ad
vances the film to the first usable frame
(approx. 2 secs).
b. Auto Wind
The film is advanced to the next frame
after exposure so you can always be look
ing through the viewfinder and never miss
a shot.
c. Auto rewind
At the end of the roll, the camera rewinds
the film and then stops (approx. 8 secs
using 24-exp. film).
Page 11

r
Shooting with the Lens Set on “A”
Mark (Intermediate Operation)
1. Spot Metering......................................64
1. One-point spot metering
< Exposure Level Difference
Comparison >
2. Multi-spot metering.....................67
3. H/S Control.................................69
< Highlight control >.............................70
< Shadow control >
...................................
.............................
Shooting with the Lens off “A” Mark 73
1. Manual Override
2. Stopped-down AE..................................75
<Checking-Depth-of-field>
< Error Display >................................. 77
3. Stopped-down (Fixed Index) Metering.. 78
< Manual Diaphragm Control >
< Film Plane Indicator >
4. Bulb........................................................80
....................................
Other Shooting/
Exposure Compensation......................83
1. Self-timer Photography
.........................
...........
.............
...................
...........
.......................
63
64
66
71
74
76
79
80
84
Page 12

2. Exposure Compensation
< Exposure Compensation Index > ... 86
3. Multiple Exposures.................................88
<Clearing the Preset Exposures > .... 89
<Changing the Preset Exposures>... 90
<Exposure Compensation in Multiple
Exposures > .....................................90
4. Shooting with Infrared Film
5. Flash Photography.................................92
< Canon Speedlite 300TL>..................92
<Other Canon Speedlites>
< Other Makers’Flashes >
.......................
...................
..................
...................
86
91
96
97
Accessories...............................................97
Caring for Your Camera
......................
107
Other Notes..............................................108
Exposure Warning Displays
...........
111
Display Panel..........................................117
Viewfinder Information
....................
118
Specifications.........................................119
Index...........................................................122
Carrying the Camera
............................
127
Page 13

3. AUTOMATIC FILM SPEED SETTING
(DX CODE)
When using a film with a DX code, the film
speed is automatically set according to the DX
code standard determined (ISO 25—5000).
When using a film without a DX code, a manual
film speed setting is also possible, from a winder
range of ISO 6—6400.
4. VERSATILE SHOOTING MODES
The T90 has various shooting modes to meet
the photographer's needs. The shooting modes
of the T90 are 1) shutter-priority AE, 2) aperturepriority AE, 3) standard program AE, 4) variableshift program AE (select from seven kinds), 5)
manual override, 6) stopped-down AE and 7)
stopped-down fixed index metering.
Page 14

5. VERSATILE METERING MODES
The T90 is the world’s first camera to have all
three metering distribution patterns, i.e. centerweighted average metering, partial metering,
and spot metering, built into one camera and
used by switching among the three patterns.
Multi-spot metering is also possible with a spe
cial button. In addition, the spot metering mode
has a memory function (approx. 30 secs) and
the AE lock mechanism comes on in both the
partial and spot metering modes when the shut
ter button is pressed down halfway. Exposure
compensation includes two methods: the expo
sure compensation index, which increments by
1 /3-steps, and the H/S control by 1 /2-step incre
ments. H/S control helps reproduce black and
white faithfully.
Page 15

6. PMS SHUTTER
Canon developed the PMS (permanent magnet
shutter), permitting complete electronic control
between 1/4000 and 30 secs, effective for fill-in
flash photography This shutter is more stable
and durable thanks to four front shutter blades,
and four in the back, made of specially-coated
superduralmin. Another feature of this shutter is
that 1/2-step shutter speed settings such as
1 /3000 or 1 /750 are possible for the fastest shut
ter speed which applies to any situation.
7. LARGE LCD PANEL AND
VIEWFINDER INFORMATION
A lot of shooting information: film transport,
shooting mode, metering mode, shutter speed
and aperture value, is displayed on the large
liquid crystal display panel and in the viewfinder.
Reading the information, however, is fuss-free
because only the information required at the
time will be displayed. In addition, an illumination
function for the LCD panel is provided and the
viewfinder information can be completely turned
off, if unnecessary.
Page 16

8. SUPERB BALANCE AND HANDLING
Based on in-depth studies, the shutter button is
at the position where your finger naturally rests.
The smooth and concentrated camera operation
can be performed by the pushbuttons and the
electronic input dial which can be handled while
holding the camera grip. The big grip is one of
the user-friendly designs of the T90 and its mate
rial was carefully chosen to prevent your hand
from slipping. Switches such as the self-timer
and the battery check, which are indispensable
for the camera but not used so often, are put
inside the palm wing on the side of the camera
to assure you of handling-ease.
Page 17

9. ELECTRONIC CIRCUITRY AND
ENERGY-SAVING DESIGN
The backbone of the T90’s micro-circuitry is the
dual CPU composed of the main CPU and the
sub-CPU. It operates the camera’s whole se
quence. Its circuitry scale is approx. 7.5 times
larger than that of the T70, and approx. 30 times
larger than that of the A-1. The shooting capacity,
"lowever, suffices using only four size-AA batter-
es, because of the high efficiency of the film
[ransport mechanism and the energy-saving
design of the circuitry.
10. TRENDSETTING ELEGANT
APPEARANCE
anon’s philosophy underlying the elegant curviinear appearance of the T90 is “a camera is a
)hotographic tool, so it must fit the natural shape
if the hand during holding and operation.” The
amera has been formed curved following er-
jonomic design, and so the appearance results
n improved operation-ease. Previously it was
relieved that mass production of a product with
I round keynote shape is difficult, but the highly
idvanced production technology Canon has aclumulated from years of experience makes it
jossible
Page 18

11. COMPLETE COMPATIBILITY WITH
THE FD LENS
An SLR camera must not be limited by which
lenses it can use. The Canon T90 can make the
most of all the FD series lenses (more than 50,
ranging from a 7.5 mm fish-eye to a 800 mm
super telephoto lens) all renown for their out
standing color balance and high resolution.
12. SPECIAL ACCESSORIES
The complete range of special accessories
such as 1) the advanced Speedlite 300TL which
has solved the problem both with TTL and exter
nal flash systems, 2) the Macro Ring Lite ML-2
using TTL control system which is most effective
for close-up shooting, 3) the Data Memory Back
90 which can store shooting data, 4) the Com
mand Back 90 which can automatically imprint
several data and command camera operation,
5) the Wireless Controller LC-2 making remote
control photography possible with near-infrared
rays, and 6) interchangeable focusing screens,
are all optionally available.
Page 19

10
Page 20

Operation Summary
Here is the operation summary of the camera
explained. We hope you will get used to the
general use of the T90 before you go into
details on the camera.
In this instruction booklet, the LCD panel
display is simplified for your easy reference.
11
Page 21

Canon
« ' • * j » ■ u - ^ I
¥ 1* ij- V ^
1. Set the lens to the “A” mark.
While pressing In the AE lock pin,
turn the aperture ring until the "A"
mark click-stops at the distance
index.
12
S»
Page 22
2. Load the batteries.
1) Pull the battery magazine latch
out and turn it in the direction of
"OPEN" to pull the battery maga
zine out of the camera
2) Load the batteries so that their
terminals face in the directions in
dicated on the battery magazine.
Page 23

3. Turn on the camera.
Slide the main switch to “A” to acti
vate the camera. The display will
come on at this time.
Page 24
4. Check the batteries.
1) Open the palm wing and press
the battery check button (<=■) in it.
2) If two or more battery check
marks appear on the display
panel, battery power is sufficient.
13
Page 25

SINGLE
''CO NT.
5. Load the film. “
1) Push the back cover latch down,
while pressing.the back cover
lock button.
2) Place the film cartridge in the film
chambeiS!^’'he■film-load check
mark ( ) will then appear on the
display panel.
3) Pull the film leader across the
back of the camera until its tip is
aligned with the orange index.
14
Page 26

OK
y ' ■
X
6. The camera sets the first
usable frame automatically.
1) As soon as the back cover is
closed, the camera will advance
the film automatically until the
frame counter on the display
panel indicates “1”. (If the film has
not been correctly advanced, the
whole film transport bars blink to
warn you.)
2) When using DX-coded film, the
film speed is automatically set
and it appears on the display
panel while the camera is advanc
ing the film.
Page 27

7. Set the film wiMing mode.
1) Open the palm wing and set the
film winding mode/self-timer
selector to “S-C"
2) Press and release the film winding
mode select button to set the
single-frame mode on the display
panel.
Page 28

8. Set the shooting mode.
While pressing the shooting mode
selector, turn the electronic input
dial until “Program” is indicated on
the display panel.
15
Page 29

Set the metering mode.
While pressing the metering
mode seleGtor, turn the electronic
input dial until “CH” (center-
weighted average metering) is in
dicated on the display panel
16
Page 30

(Out of focus)
10. Focus the subject.
Turn the focusing ring until the
main subject looks sharp.
(In focus)
Page 31

11. Confimi the viewfinder
information and shoot.
1 ) Press the shutter button halfway
to check the exposure. Exposure
wilt be correct unless the shutter
speed display and/or the aper
ture value display start blinking
in the viewfinder
2) Press the shutter button all the
way to take the picture The film
is automatically advanced to the
next frame.
Page 32

12. The camera rewinds the
film automatically.ji ^
1) When the film reaches its end,
the camera will start rewinding
the film automatically?^ ®
2) When the roll is completely
rewound, film rewind stops auto
matically.
3) When the film-load check mark
( @t) starts blinking on the dis
play panel, open the back cover
to remove the film cartridge.
17
Page 33

18
Page 34

Preliminary
Preparations
19
Page 35

1. Attaching the Lens
1) Turn the rear lens cap in the
direction of the arrow until it
stops, and pull it off the lens.
• To attach the rear lens
cap, align its arrow with
the red dot on the lens.
Then lightly push it in and
turn it clockwise until it
stops.
20
2) Turn the body cap counter
clockwise and pull it off.
• To attach the body cap,
first align its red position
ing point with the red dot
above the camera mount,
then turn the cap clock
wise.
3) To mount the lens, first align
the lens’ mount positioning
point with the camera’s red
dot.
Do not mount the lens if the red
dot inside the oamera mount is
showing; correct exposure is im
possible if you do In this case,
push in the stop-down lever so
that it locks in the normal position
and this warning mark can no
longer be seen.
Page 36

f '
/
0 Then turn the lens clockwise
until it stops and the lens
release button pops out with
a click.
• To remove the lens, turn it
counterclockwise while
pressing the lens release
button.
5) Remove the front lens cap.
Lenses which cannot be mounted FL 50mmf/1.8-l
on the T90:
FL 19mmf/3.5
FL 58mmf/1 2
Lenses which cannot be used with
the T90’s meter for mechanical
reasons:
FL 19 mm f/3 5 Retro-focus
FL 35 mm f/2.5
Be sure to place the lens with its
front end down to avoid damaging
the protruding pins.
FL58mmf/1 2-11
(Use of an independent exposure
meter is recommended.)
21
Page 37

2. Setting the Lens for AE Photography 3. Loading the
While pressing in the AE lock
pin, turn the aperture ring in
the direction of the arrow
until the “A" mark click-stops
at the distance index.
22
1) As shown in photo, pull the
battery magazine latch out
first and then turn it in the di
rection of the arrow (OPEN).
Pull the battery magazine out
of the camera.
Page 38

Batteries
Load four new size-AA
alkaline-manganese batter
ies (LR6) so that their termi
nals face in the directions in
dicated on the battery maga
zine. The camera will not
function if the batteries are
loaded incorrectly.
3) Insert the loaded battery
magazine back in the
camera. While pressing the
latch firmly, turn it in the
reverse direction to lock it.
When you replace the batteries
with the camera mounted on a
tripod, loosen the tripod screw
slightly before replacing the batter
ies.
23
Page 39

4. Turning on the Camera
5*. .1*. .fl -2 4
Slide the main switch to "A".
The dispiay will come on at
this time. If the display does
not appear, confirm fhaf the
batteries are loaded correctly.
24
(example)
Page 40

5. Checking the
1) Open the palm wing on the
side of the camera and press
the battery check button
(cm). Battery voltage is then
shown on the display panel.
Page 41

I Batteries
Replace the batteries with new ones,
• Even if one blinking bar mark or no bar mark appears on the display panel while checking
the batteries, exposure will be correct as long as the shutter releases. (— p. 109)
25
Page 42

< Batteries >
This camera will not operate
without batteries. Try to make a
habit of checking the batteries
at the following times.
• After loading new batteries.
• After storing the camera for a
long time.
• If the shutter does not
release.
• When you are using the
camera in low temperatures.
• Before shooting important
events.
Use a new set of batteries as specified
below or equivalent batteries of another
brand
1 Four AA size 1.5 V alkaline batteries
LR6 (AM-3)
2. Four AA size 1 5 V carbon-zinc batter
ies R6 (SUM-3)
3 Four AA size 1 2 V Ni-Cd batteries
26
Page 43

Notes
• Always use four new batteries
of the same brand and re
place them both at the same
time.
• Wipe the battery terminals
and the camera contacts
with a clean, dry cloth before
loading, to ensure proper con
tact.
• Remove the batteries if you
do not expect to use the
camera for about three
weeks or longer.
• When shooting in tempera
tures below 0°C (32°F), keep
your camera and spare bat
teries close to your body or in
a pocket to keep them warm
until you are ready to take a
picture. You can also use a
set of Ni-Cd batteries which
function well in low tempera
tures — approx. 15 rolls in
the HIGH mode and 45 rolls
in the LOW mode at —20°C
(—4°F) with 24-exp. film. (-^
p34)
Page 44

1
When using Ni-Cd batteries,
please note that different
brands have different types
of terminals. Be sure to use a
type which is suitable for the
camera.
Refer to the manufacturer's
instructions for recharging
Ni-Cd batteries.
Three bars ( —) may not
appear on the display panel
during the battery check,
even if using fully charged
Ni-Cd batteries, because of
their low nominal voltage.
The battery naturally dis
charges even when not in
use, so try to check the bat
teries regularly.
Page 45

27
Page 46

6 Loading the Film
1) To open the back cover, push
the back cover latch down,
while pressing the back
cover lock button.
28
2) Insert the upper flat end of
the film cartridge into the film
chamber first, then lower the
other end. The film-load
check mark ( ) will then
appear on the display to indi
cate that film is loaded.
CAUTION
• Before loading the first film cartridge, remove the plastic insert and throw
it away.
• NEVER touch the shutter curtain. It is sensitive to pressure due to its high
precision design.
• Be careful that the film leader does not touch the shutter curtain, either.
3) Pull the film leader across the
back of the camera until its
tip is aligned with the orange
index.
Page 47

OK
4) Make sure that the film has
no slack and that its perfora
tions are properly engaged
ll with the sprocket teeth.
If trie film leader extends past
trie orange index, take out ttie
film cartridge and manually wind
trie excess film back into ttie car
tridge.
5) Close the back cover. The
camera will advance the film
automatically and stop when
"1” appears in the frame
counter brackets on the dis
play panel.
Wtien the humidity is high, film
becomes soft and is easily torn.
Keep the film stored in its canis
ter until just before you load it to
keep it from tearing.
29
Page 48

ISO
in n
iu u
While the camera is ad
vancing the film, the film
transport bars (also serve
as the battery check
marks) \a/III appear at the
bottom of the display
panel moving in sequence
from left to right. If the film
has not been correctly ad
vanced, however, the bars
blink after the camera has
stopped. In that case,
reload the film.
30
SIKOUE
[^CONT
tnn
lU U
Pr
ISO
ogran
Page 49

(Correct film
transport
display)
Page 50

<Automatic Setting of the Film Speed >
A -so 7 "
The T90 is designed to automati
cally set film speed by sensing
he DX code marked on the film
bassette.
DX code will appear on
the display panel while
the camera is advancing
the film toward the first
usable frame. (Refer to
1 When using a film with DX
the left page.)
code, you do not have to
set the film speed. (ISO
25-5000)
• The film speed automati
cally set according to the
Film passing through X-ray examinations at airports,
even when loaded In a camera, may be exposed
and ruined. To avoid accidental exposure, tell the
inspector you want your camera and film hand
l^hecked
When using a film without
DX code, set the film
speed manually.
1) While pressing the film
speed button, turn the
electronic input dial until
the film speed (indicated
by ISO) of your film ap
pears on the display
panel, (ISO 6-6400)
2) Remove your finger from
the film speed button.
• The preset film speed
will appear and blink
on the display panel to
warn you if the film
speed is not set.
Always be sure to set
the film speed correct
ly. (Once the film
speed is set, the warn
ing stops.)
31
Page 51

Page 52

Shooting with the Lens
Set on *‘A” Mark
(Basic Opeiation)
33
Page 53

1. Setting the Film Winding Mode
Shooting Capacity (with 24-exp. film)
Battery
Temperatufs'^—
Normal
(20°C/68°F)
Low
(-10”C/14”F)
Low
(-20°C/-4°F)
C (CONTINUOUS) •
Film winding
mode
HIGH
LOW
HIGH
LOW 7
HIGH
LOW 1 -
(based on Canon's standard test method)
Alkaline
(LR6/AM-3)
75
150 30
H (HIGH): max, 4.5 frames per second
L (LOW): max. 2 frames per second
Carbon-zinc
- -
-
(R6/SUM-3)
10
3
-
S (SINGLE): single frame
f
-------------------------
<a
____
34
Page 54

1) Open the palm wing and set the film winding
mode/self-timer selector to “S-C”.
S-C : film winding mode setting
1$) : self-timer setting p.84)
2) Press and release the film winding mode
button (also serves as the self-timer button)
to set the desired film winding mode on the
display panel
Page 55

Automatic Film Winding Speed Changeover Function
The Canon T90 has an automatic film winding
speed changeover function which will change the
film winding speed from HIGH to LOW mode when
battery power drops below a prescribed voltage.
This saves battery energy and extends battery life,
so more pictures can be taken with the same batter
ies.
When the winding speed is automatically switched
to the LOW from HIGH, the mark pointing at the
HIGH on the display panel starts blinking to warn
you.
In this case:
1 It you wish to drive the camera in the HIGH
mode, replace the batteries with new ones
2 It you want to make the blinking stop,
though you continue to shoot in the LOW mode,
press the film winding mode button to set the
"►" mark to LOW mode on the display panel.
35
Page 56

2. Setting the Shooting Mode
< Shooting Modes of the T90 >
The Canon T90 has various shooting modes to
meet your needs and what you want your pic
ture to portray. The following is an explanation
of the shooting modes in which the FD lens
must be set to the “A” mark. (AE photogaphy Is
possible only with FD lenses.)
1. Shutter-priority AE (with safety
shift function)
You set the shutter speed and the camera au
tomatically chooses the correct aperture for
the lighting conditions. This mode is useful
for taking pictures of moving subjects and for
normal snap shots. By controlling the shutter
speed, you can also control the subject’s
movement. Faster shutter speeds freeze sub
ject motion while slower shutter speeds can
provide artistic blur effects.
<Shutter-priority safety shift
function (ON/OFF possibie) >
If the selected shutter speed is too slow or
too fast for the light conditions, the T90 auto
matically switches the shutter speed to a
higher or a lower one to avoid under- or
overexposure.
36
Page 57

Shutter-priority AE with safety shift functioh
(when the shutter speed is set to 1 /125 sec and the FD 50
mm f/1 4 lens is used)
Aperture
-------
«-SHUTTW SPCO
Shutter Speed
Page 58

2. Aperture-priority AE (with safety
shift function)
You set the aperture and the camera auto
matically chooses the correct shutter speed
for the lighting conditions. This mode is
useful for portraits, landscapes and still life
photography in which depth of field, i.e. the
range of in-focus images is an important
factor.
< Aperture-priority safety shift
function (ON/OFF possibie)>
If the selected aperture is too large or too
small for the lighting conditions, the T90 auto
matically switches the aperture to a smaller
or larger one to avoid incorrect exposure
Page 59

Aperture-priority AE with safety shift function
(when the aperture is set to f/5.6 and the FD 50 mm f/1 4
lens is used)
5. i. J. e, 9, 11, n 11 11 15 11 n II It M 11 n _j..
__
j
1
I
Aperture
30 1 s
t
S 1 9 «Ò S 2^ io 5 D IE
Shutter Speed
Is 20
D
37
Page 60

3. standard program AE (Program)
Both the shutter speed and the aperture are
automatically set according to the brightness
of the subject and a programmed shutter
speed/aperture combination. The standard
program AE is the most popular programmed
AE because it emphasizes neither the shutter
38
speed nor the aperture size. The program AE
mode is convenient for those who are taking
pictures with an SLR for the first time, those
who do not like to worry about complicated
operation, those who would simply like to
concentrate on picture composition, or daily
snap shots.
Page 61

4. Variable-shift program AE
This is also the program AE mode as men
tioned above, but there are 7 types of pro
grammed characteristics in this mode
Choose any one of them according to your
shooting objectives and the focal lengh of
your lens
Standard program AE (P)
This has all the same programmed charac
teristics as No. 3, but is displayed in “P” on
the display panel while the No. 3 is displayed
in “Program". This mode is basically oriented
toward the tele programs and the wide pro
grams when using the electronic input dial.
39
Page 62

Tele Program AE (TELE 1 -TELE 3)
Tele program’s shutter speed/aperture com
bination is programmed so that the camera
chooses the fastest possible shutter speed. It
is effective for emphasizing the main subject
by making the depth-of-fieid shallower. It is
aiso weli suited to stopping action in, for
example, sports photography. When using a
telephoto lens, a small amount of blur due to
camera shake, becomes accentuated be
cause of its iong focal length. This program's
fast shutter speeds reduce the risk of blur.
Wide Program AE (WIDE 1 -WIDE 3)
The wide program chooses the smaiiest
possible aperture, thus allowing a deep
depth-of-field. It is suitable for bringing not
oniy the main subject but also the back
ground and foreground into sharp focus and
so is appropriate for landscapes or large
group shots.
There are four other shooting modes, though the
FD lens must be removed from the “A" mark.
Manual Override (—* p.74)
Stopped-down AE p.75)
Stopped-down (Fixed Index) Metering (—* p.78)
Bulb (—" p.80)
40
Page 63

WIDE P-3
STANDARD
TELE P-3
Page 64

<Setting Each Mode >
MULTI
EXP
HETEftlftC
s
To select a mode, while pressing the shooting
mode selector, turn the electronic input dial
until the desired shooting mode appears on
the display panel. (The display moves in the
following cycle.)
Page 65

1. Setting the shutter-priority AE
1) While pressing the shooting mode selector,
turn the electronic input diai untii the “Tv” in
dicating the shutter-priority AE appears on
the display panel,
2) Remove your finger from the shooting mode
selector. At this point, the initial shutter speed
setting is always 125. (1 /125 sec)
3) Turn the electronic input dial until the desired
shutter speed is displayed on the display
panel
Shutter speed display
4000 3000
2000 1500
180 125 90 60 45 30
0"7 1 " 1"5
2" 3" 4" " 8" 10" 15" 20" 30"
1000 750 500 360 250
20 15 10 8 6
4 3 2
Note
The shutter speed is automatically set to 1/125
sec when switching to the shutter-priority AE
mode from other modes
42
Page 66

---------------
►
SINGLE
^
1г5
_____________
г~
^ CONT.
Ti
L_
_и
L
ю С 0
Page 67

2. Setting the aperture-priority AE
1) While pressing the shooting mode selector,
turn the electronic input dial until the "Av" in
dicating the aperture-priority AE appears on
the display panel.
2) Remove your finger from the shooting mode
selector. At this point, the initial aperture set
ting is always 5.6. (f/5.6)
3) Turn the electronic input dial until the desired
aperture value is displayed on the display
panel.
Aperture value display
1.2 1.4 1.8 2.0 2.5 2.8 3.5 4 45 5.6 67 8 95
11 13 16 19 22 27 32
Notes
The aperture is automatically set to f/5.6
when switching to the aperture-priority AE
mode from other modes.
Be sure that the aperture value set on the dis
play panel is between the maximum and
minimum aperture of your lens. Otherwise
exposure will be incorrect, (e g. when using
the FD 50 mm f/1.4 lens, set the aperture be
tween f/1.4and f/22.)
Page 68

SINGLE
(a
5,5
___
( p
I
___
D
” CONT.
43
Page 69

< Setting the Safety Shift Function >
1) Set the T90 to the shutter-priority AE (Tv) or
the aperture-priority AE (Av).
2) Press both the film speed button and the
exposure compensation button at the same
time for approx. 1 sec
3) The “ E ’’ mark indicating the safety shift
will then appear on the display panel and the
safety shift function will be activated.
4) To clear the safety shift function, press both
the film speed button and the exposure com
pensation button again until the “ E ”
disappears.
Note
Setting the safety shift function is possible in any
mode, but is effective oniy in the shutter-priority AE
and the aperture-priority AE modes.
44
Page 70

Page 71

3. Setting the standard program AE
1) While pressing the shooting mode selector,
turn the electronic input dial until “Program"
appears on the display panel.
2) Remove your finger from the shooting mode
selector.
Page 72

(§1.
Pr
од ram
SINGLE
V CONT.
Ti
45
Page 73

4. Setting the variable-shift program
AE
46
Page 74

3 Setting the Metering Mode
< Metering Modes of the T90 >
With the T90, the metering mode, i.e, the
metering sensitivity pattern, can be changed
regardless of which lens you use or the sub
ject you are shooting.
Do not use a linear polarization filter
Page 75

Center-weighted average metering
This is a convenient metering system for
general photography under normal shooting
conditions. The meter measures the entire
viewing area, emphasizing the central portion
where the subject is most iikeiy to be and di
minishing toward the edges.
(Metering sensitivity distribution pattern)
(When using FD 50 mm f/1 4 lens)
47
Page 76

2 Partial metering
This system, with its 13% coverage of the
field of view, allows you to meter only the cen
tral portion of the image in the viewfinder. It is
particularly effective for metering backlit sub
jects, such as a person in front of a bright
window.
(Metering sensitivity distribution pattern)
(When using FD 50 mm 1/1 4 lens)
48
Page 77

3 Spot metering
Spot metering is ideal for subjects which re
quire precise measurement. Since the meter
ing area is 2.7% of the field of view, you can
select a small, exact area from the overall
scene. It is especially advantageous for
stage photography, photomacrography and
photomicrography.
(Metering sensitivity distribution pattern)
(When using FD 50 mm f/1 4 iens)
Page 78

< Setting Each Mode >
While pressing the metering mode selector,
turn the electronic input dial until the desired
metering mode appears on the display panel.
(The display moves cyclically.)
Page 79

□
j Center-weighted average
metering display
Partial metering display
Spot metering display
49
Page 80

4. Mow to Use the Metering Modes
1 Center-weighted average metering
This is the normai setting position used for
generai photography, and is recommended
especialiy for AE photography.
50
2 Partiai metering
With this metering system, the AE lock
mechanism is on as long as the shutter
button is being pressed haifway down.
1 ) Put the main subject in the center of the view-
finder so that the partiai metering mark
covers it.
2) Press the shutter button halfway and com
pose the picture. A red mark (AE iock
LED) wiii then appear in the viewfinder.
• If desired, whiie continuing to hold down
the shutter button, recompose the picture
so that the subject is not in the center. The
same exposure vaiue is kept locked in the
camera’s memory by the AE lock function
even when the picture is recomposed.
Partial metering mark
Page 81

Page 82

< Sequential AE lock photography >
When shooting continuously using the AE
lock mechanism in the same lighting con
ditions (e.g. backlit subjects), it is not
necessary to meter the subject for each
shot as long as you keep the shutter
button pressed halfway down between
exposures.
Please see p.64 on how to use the spot
metering mode.
51
Page 83

5. Focusing
1) While looking into the viewfinder, turn the
focusing ring until the main subject Is sharp.
52
Page 84

Out of focus
2) The subject is in focus when the upper and
lower halves of the central split rangefinder
merge to become one unbroken image
Page 85

In focus
New split rangefinder
This divides the subject in haif horizontaiiy. The
subject is in focus when the two haives merge to
become one unbroken image.
Microprism rangefinder
This breaks the subject into tiny fragments, caus
ing a shimmering effect when out of focus. The
subject is in focus when the image in the mi
croprism ring is ciear and not shimmering.
Page 86

Laser-matte screen
This screen can be used on all surfaces. The
subject is in focus when the image is not fuгzy.
The T90's focusing screen can be changed accord
ing to the subject you are shooting and the lens In
use, (— p-104)
53
Page 87

6. Shooting
SB
1 ) Gently press the shutter button halfway down
to check the exposure. Exposure will be cor
rect unless the aperture value and/or the
shutter speed blink in the viewfinder.
2) Compose the picture and gently press the
shutter button all the way to take the picture.
The film will be automatically advanced to
the next frame.
• If the correct exposure is not possible, the
aperture value and/or the shutter speed
will blink in the viewfinder to warn you of
incorrect exposure
• Please see p.111 on the exposure warning
displays and how to correct each case.
54
Page 88

f il
L f A ISO
3) Slide the main switch to “L" to turn off the
camera when shooting is finished.
• Press the shutter button GENTLY for the
least camera shake.
• When shooting continuously, the viewfin
der information will not be displayed. Your
picture, however, will be correctly exposed
since exposure will not be affected.
• The film will be automatically advanced to
the next frame after exposure and the
frame counter on the display panel also in
dicates the next frame to be exposed.
Page 89

<Viewfinder Information Examples >
Correct exposure (solid)
■ IBS 5 . 5
1
Shutter speed
Incorrect exposure (blinking)
_______________1_t__
m 1^5
Shutter speed Aperture
1
Aperture
A.
1 . H
i ' r '
r ' '
Shutter speed Aperture
Page 90

55
Page 91

<Exposure Preview Button >
Exposure preview button
When you only want to check the exposure,
press the exposure preview button instead of
the shutter button. When the exposure pre
view button is pressed, the viewfinder infor
mation is turned on just as when the shutter
button is pressed halfway.
• The exposure preview button is arranged
so that you can press it while turning the
electronic input dial.
56
Page 92

<Remaining Frame Counter >
You can check how many frames remain any
time, even during shooting, as displayed on
the right of the viewfinder
Page 93

—a —7
-4 -3 -2 -T
When using a film with DX code
The remaining frames are displayed on the
right of the viewfinder by the “ m ” mark, “F”
(Film) and the figure.
• The figure display appears only when the
remaining frames has become less than 9.
When the T90 is used in the spot metering mode,
the stopped-down (fixed index) metering mode or
the FE lock mode together with the Speedlite 300TL,
" • ” mark is not displayed. (Only “F” and the fig
ures from 1 to 9 are displayed.)
Page 94

2 When using a film without DX code
The display is only "F”,
57
Page 95

< Viewfinder Display Selector >
FfNDEfl
lo
All the viewfinder information (both the right
and the bottom of the viewfinder) can be
turned off to save battery consumption. The
whole display panel and the viewfinder infor
mation on the right can be illuminated to
make shooting in the dark easier. Use the
viewfinder display selector inside the palm
wing.
58
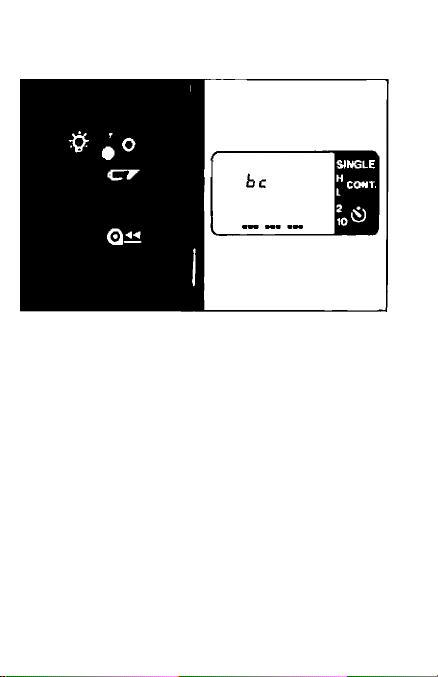
Page 96

• : The entire viewfinder information can be
turned ON.
O : The entire viewfinder information can be
turned OFF.
Tqc : The display panel and the viewfinder in
formation on the right are illuminated
when the shutter button is pressed half
way.
Page 97

7. Automatic Film Rewind
(Si...
@1...
At the end ot the roll, the camera rewinds the film
automatically
1) While the camera is rewinding the film, the
film transport bars will move in sequence
from right to left to indicate that the film is
being rewound At this time, the frame count
er will count down.
Page 98

2) Film rewind stops automatically when the roll
is completely rewound.
59
Page 99

3) Open the back cover when the film-load
check mark ( @ ) starts blinking
60
Page 100

4) Remove the film cartridge.
5) Slide the main switch to “L" to turn off the
camera.
 Loading...