

Page 1
ENGLISH
Windows/Macintosh
Software Starter Guide For Version 30
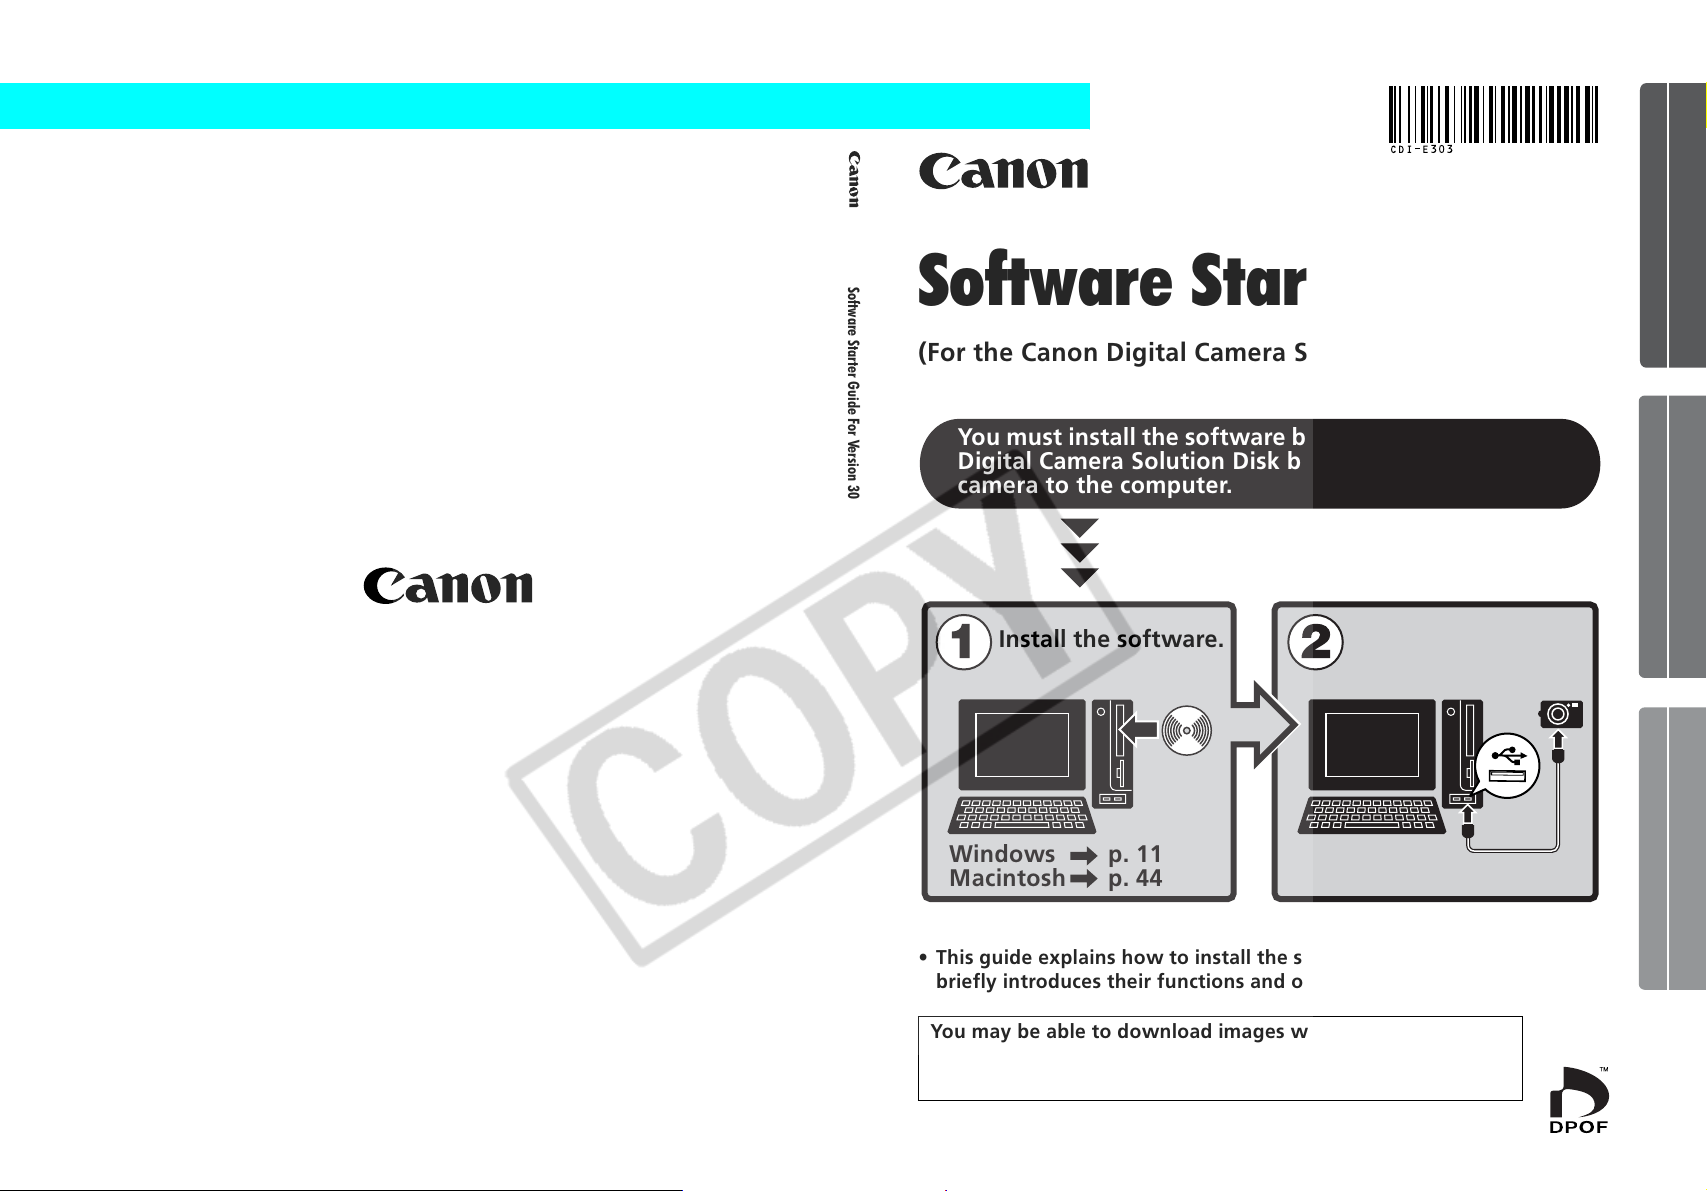
Software Starter Guide
(For the Canon Digital Camera Solution Disk Version 30)
You must install the software bundled on the Canon
Digital Camera Solution Disk before connecting the
camera to the computer.
Install the software.
Windows
Macintosh
p. 11
p. 44
Connect the camera
to the computer.
Windows Macintosh
CDI-E303-010 xx04xxxx ©Å2007ÅCANONÅINC. PRINTEDÅINÅJAPAN
• This guide explains how to install the software programs and
briefly introduces their functions and operating procedures.
You may be able to download images without installing the
software programs if you use certain operating system
software (p. 82). (Excludes Windows 2000)
Page 2
SAFETY PRECAUTIONS
TheÅprecautionsÅnotedÅwithinÅthisÅguideÅareÅintendedÅtoÅinstructÅyouÅinÅtheÅsafeÅandÅcorrectÅuseÅofÅ
theÅproductsÅandÅtoÅpreventÅinjuriesÅorÅdamageÅtoÅyourself,ÅotherÅpersonsÅandÅproperty.ÅPleaseÅ
readÅandÅensureÅthatÅyouÅunderstandÅthemÅbeforeÅproceedingÅtoÅotherÅsectionsÅofÅtheÅguide.Å
Warnings
ThisÅsymbolÅindicatesÅtopicsÅthatÅcouldÅleadÅtoÅdeathÅorÅseriousÅinjuryÅifÅ
ignoredÅorÅhandledÅincorrectly.
Warnings
•DoÅnotÅplayÅtheÅsuppliedÅCD-ROM(s)ÅinÅanyÅCDÅplayerÅthatÅdoesÅnotÅsupportÅdataÅCD-
ROMs.ÅPlayingÅtheÅCD-ROM(s)ÅinÅanÅaudioÅCDÅplayerÅ(musicÅplayer)ÅcouldÅdamageÅtheÅ
speakers.ÅItÅisÅalsoÅpossibleÅtoÅsufferÅfromÅhearingÅlossÅfromÅlisteningÅwithÅheadphonesÅtoÅ
theÅloudÅsoundsÅofÅaÅCD-ROMÅ
playedÅonÅaÅmusicÅCDÅplayer.
Disclaimer
•WhileÅeveryÅeffortÅhasÅbeenÅmadeÅtoÅensureÅthatÅtheÅinformationÅcontainedÅinÅthisÅguideÅisÅ
accurateÅandÅcomplete,ÅnoÅliabilityÅcanÅbeÅacceptedÅforÅanyÅerrorsÅorÅomissions.ÅCanonÅ
reservesÅtheÅrightÅtoÅchangeÅtheÅspecificationsÅofÅtheÅhardwareÅandÅsoftwareÅdescribedÅ
hereinÅatÅanyÅtimeÅwithoutÅpriorÅnotice.
partÅofÅthisÅguideÅmayÅbeÅreproduced,Åtransmitted,Åtranscribed,ÅstoredÅinÅaÅretrievalÅ
•NoÅ
system,ÅorÅtranslatedÅintoÅanyÅlanguageÅinÅanyÅform,ÅbyÅanyÅmeans,ÅwithoutÅtheÅpriorÅ
writtenÅpermissionÅofÅCanon.
•CanonÅmakesÅnoÅwarrantiesÅforÅdamagesÅresultingÅfromÅcorruptedÅorÅlostÅdataÅdueÅtoÅaÅ
mistakenÅoperationÅorÅmalfunctionÅ
personalÅcomputers,ÅperipheralÅdevices,ÅorÅuseÅofÅnon-CanonÅmemoryÅcards.
ofÅtheÅcamera,ÅtheÅsoftware,ÅtheÅmemoryÅcards,Å
Trademark Acknowledgments
•Windows,ÅWindowsÅVistaÅandÅtheÅWindowsÅVistaÅlogoÅareÅtrademarksÅofÅMicrosoftÅCorporation,Å
registeredÅinÅtheÅU.S.ÅandÅotherÅcountries.
• Macintosh,ÅtheÅMacÅlogo,ÅQuicktimeÅandÅtheÅQuicktimeÅlogoÅareÅtrademarksÅofÅAppleÅComputerÅ
Inc.,ÅregisteredÅinÅtheÅU.S.ÅandÅotherÅcountries.
Canon Customer Support
ForÅCanonÅCustomerÅSupportÅcontacts,ÅpleaseÅseeÅtheÅcustomerÅsupportÅlistÅsuppliedÅwithÅyourÅ
camera.
CopyrightÅ©Å2007ÅCanonÅInc.ÅAllÅrightsÅreserved.
Page 3
Table of contents
Read This First 3
It’s so Simple! Make Prints Right at Home Like a Pro ...................... 4
Unbounded Possibilities with Entertaining Software .....................6
System Requirements ........................................................................8
Programs and Compatible Operating Systems ................................9
Before You Connect the Camera to the Computer ....................... 10
Using the Software on the Windows Platform
– Preparations 11
Installing the Software and USB Driver .......................................... 11
Using the Software on the Windows Platform
– The Basics 16
1
Downloading Images to the Computer .......................................... 16
Printing Images ................................................................................ 21
Using the Software on the Windows Platform
– Advanced Techniques 24
The ZoomBrowser EX Windows ...................................................... 24
ZoomBrowser EX Features .............................................................. 30
Replaying Movies .............................................................................33
Editing Movies ................................................................................. 34
Operating the Shutter Remotely (Remote Shooting) ....................35
Merging Panoramic Images - PhotoStitch ...................................... 38
Enjoy Customizing Your Camera with the My Camera Settings ...39
Using the Software on the Macintosh Platform
– Preparations 44
Installing the Software .................................................................... 44
Using the Software on the Macintosh Platform
– The Basics 46
Downloading Images to the Computer .......................................... 46
Printing Images ................................................................................ 50
Page 4
Table of contents
2
Using the Software on the Macintosh Platform
– Advanced Techniques 52
The ImageBrowser Windows .......................................................... 52
ImageBrowser Features ...................................................................58
Replaying Movies .............................................................................61
Editing Movies ................................................................................. 62
Operating the Shutter Remotely (Remote Shooting) ....................63
Merging Panoramic Images - PhotoStitch ...................................... 66
Enjoy Customizing Your Camera with the My Camera Settings ...67
Appendices 72
Uninstalling the Software ............................................................... 72
Memory Card Folder Structure ....................................................... 75
Troubleshooting .............................................................................. 76
Downloading Images without Installing the Software ................. 82
Index ................................................................................................. 83
Using the PDF Manuals
TheÅfollowingÅPDF-formatÅmanualsÅ(hereafterÅPDFÅmanuals)ÅareÅprovidedÅtoÅ
explainÅtheÅfeaturesÅandÅproceduresÅforÅusingÅZoomBrowserÅEXÅandÅ
ImageBrowser.
•ZoomBrowserÅEXÅSoftwareÅUserÅGuideÅ(Windows)
• ImageBrowserÅSoftwareÅUserÅGuideÅ(Macintosh)
Adobe Reader must be installed to read the aforementioned PDF
manuals.ÅIf one of these applications is not already installed on
your computer, download it from the following website.
http://www.adobe.com/
Viewing PDF Manuals
Viewing Manuals Downloaded from a Website
TheseÅPDF-formatÅmanualsÅareÅavailableÅonÅtheÅCanonÅwebsite.ÅUseÅyourÅ
browserÅprogramÅtoÅdownloadÅtheseÅmanualsÅfromÅtheÅfollowingÅURL:
http://web.canon.jp/Imaging/information-e.html
Page 5
Read This First
ThisÅchapterÅexplainsÅwhatÅyouÅcanÅaccomplishÅusingÅtheÅcameraÅwithÅtheÅsoftwareÅcontainedÅ
onÅtheÅCanonÅDigitalÅCameraÅSolutionÅDisk.Å
ItÅalsoÅlistsÅtheÅcomputerÅsystemÅconfigurationsÅrequiredÅtoÅuseÅtheÅsoftware.
About this Guide
•TheÅexplanationsÅinÅthisÅguideÅareÅbasedÅonÅWindowsÅXPÅandÅMacÅOSÅXÅv10.3.ÅIfÅyouÅareÅ
usingÅanotherÅversionÅofÅtheseÅoperatingÅsystems,ÅtheÅactualÅscreenÅcontentsÅandÅ
proceduresÅmayÅvaryÅslightlyÅfromÅthoseÅshown.
•TheÅfollowingÅtermsÅareÅusedÅinÅthisÅguide.
MacÅOSÅXÅisÅusedÅforÅMac
ÅOSÅXÅ(v10.3-v10.4)Å
3
Page 6
Read This First
4
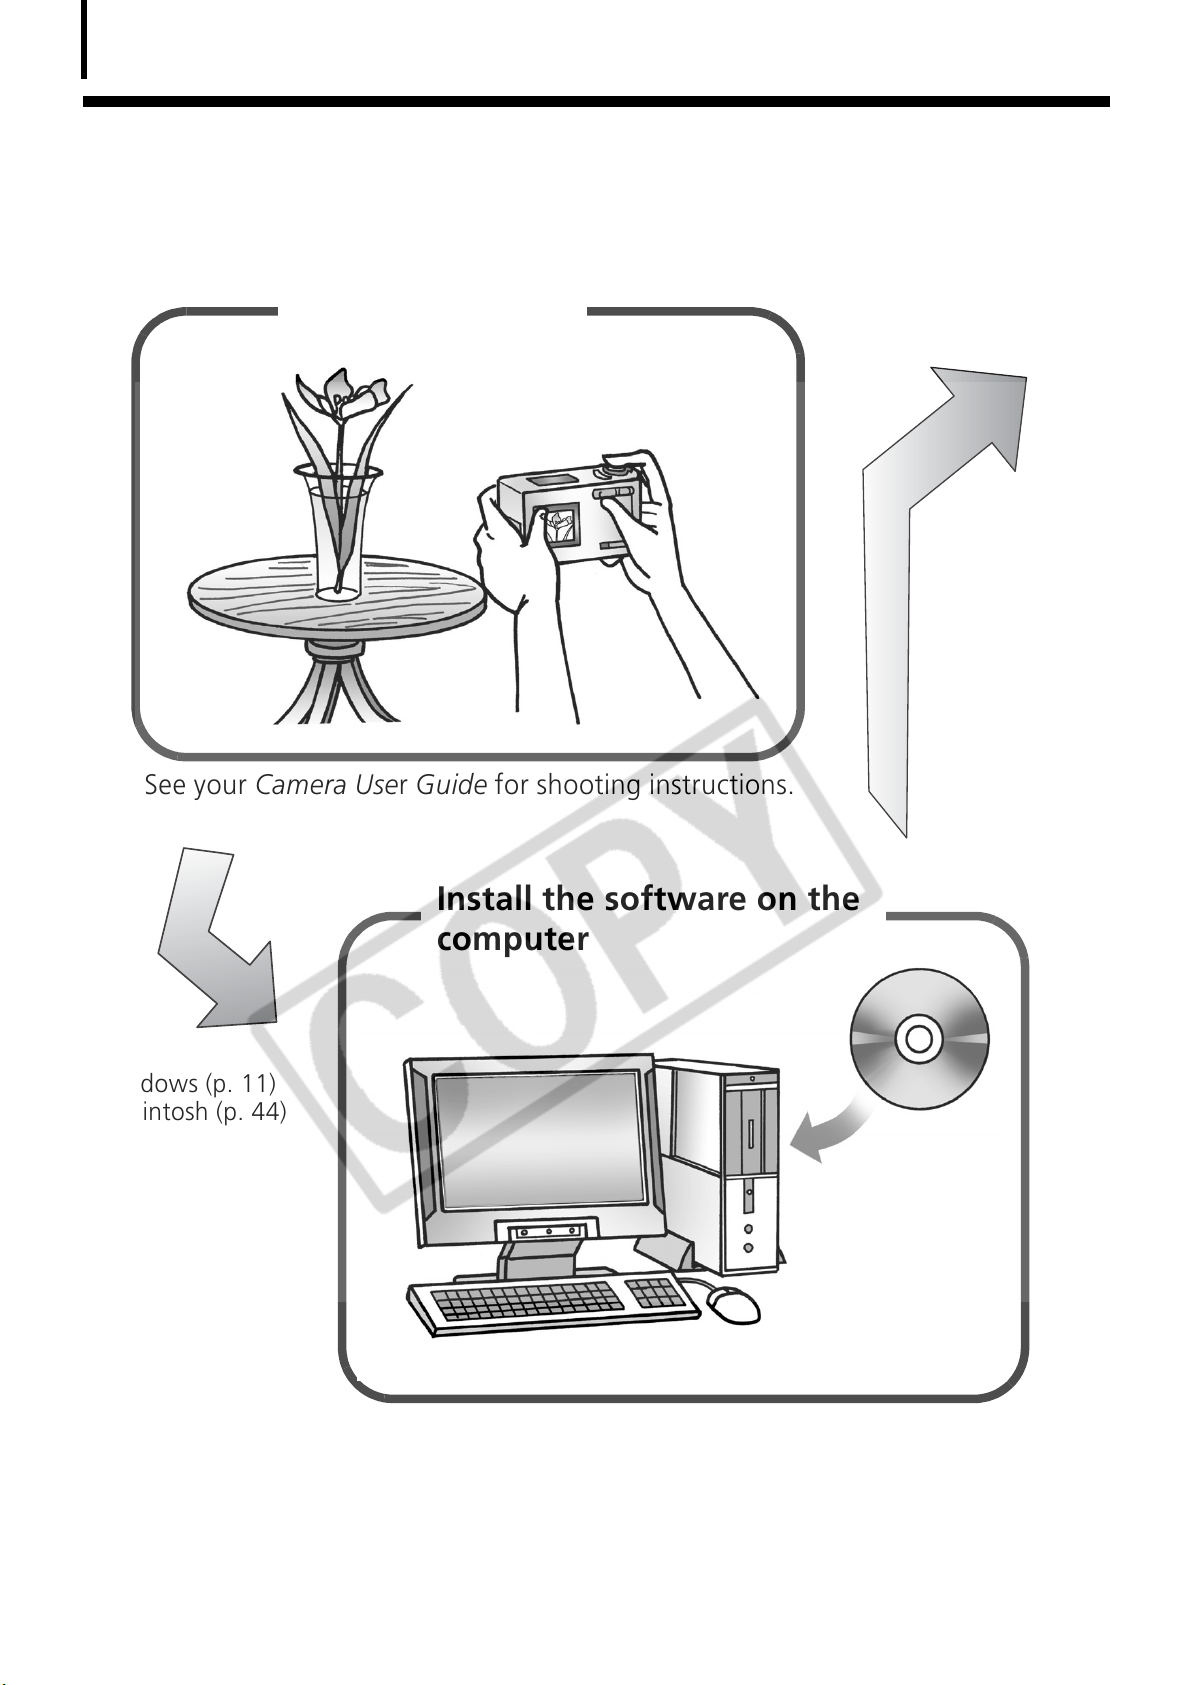
It’s so Simple! Make Prints Right at Home
Like a Pro
Shoot the images
SeeÅyourÅCamera UserÅGuideÅforÅshootingÅinstructions.
Install the software on the
computer
WindowsÅ(p. 11)
MacintoshÅ(p. 44)
JustÅinstallÅtheÅsoftwareÅonceÅatÅtheÅbeginning.
Page 7
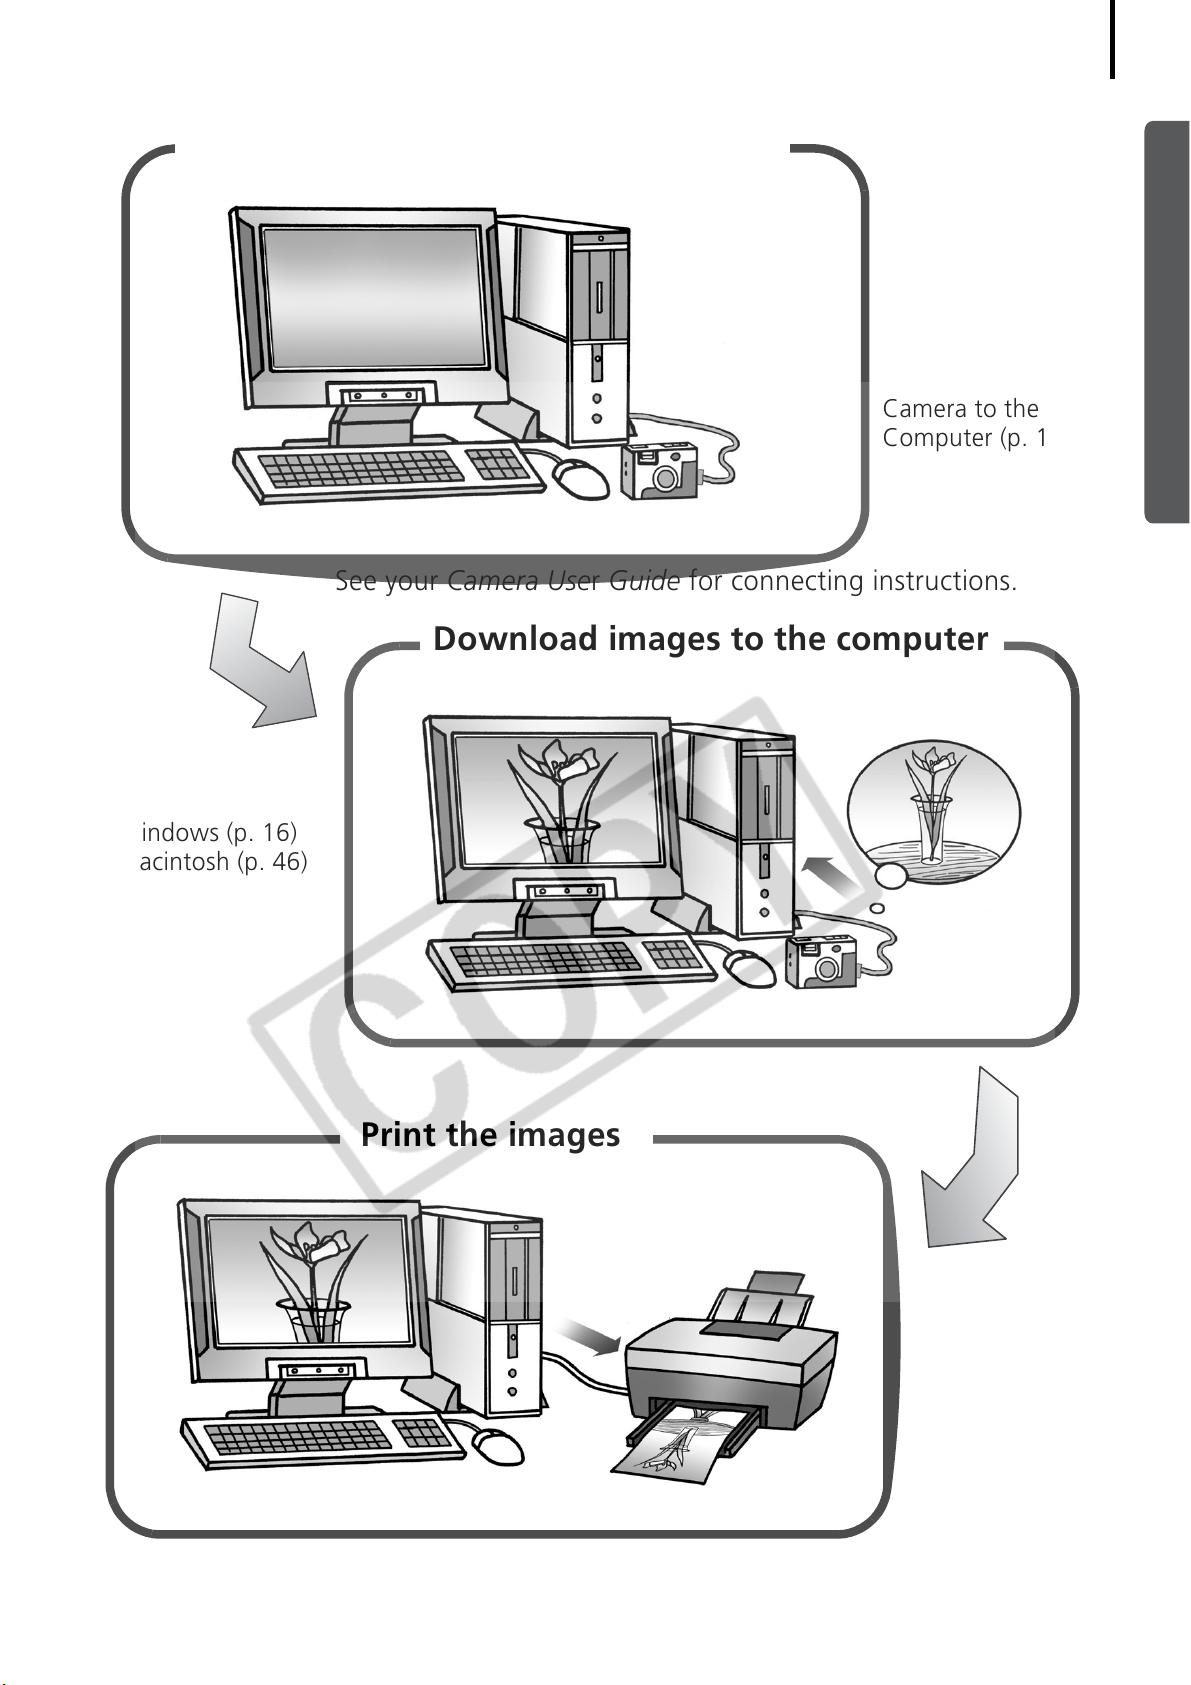
Connect the camera to the computer
SeeÅyourÅCamera UserÅGuideÅforÅconnectingÅinstructions.
5
PrecautionsÅforÅ
ConnectingÅtheÅ
CameraÅtoÅtheÅ
ComputerÅ(p. 10)
WindowsÅ(p. 16)
MacintoshÅ(p. 46)
Download images to the computer
Print the images
WindowsÅ(p. 21)
MacintoshÅ(p. 50)
Page 8
Read This First
6
Unbounded Possibilities with Entertaining
Software
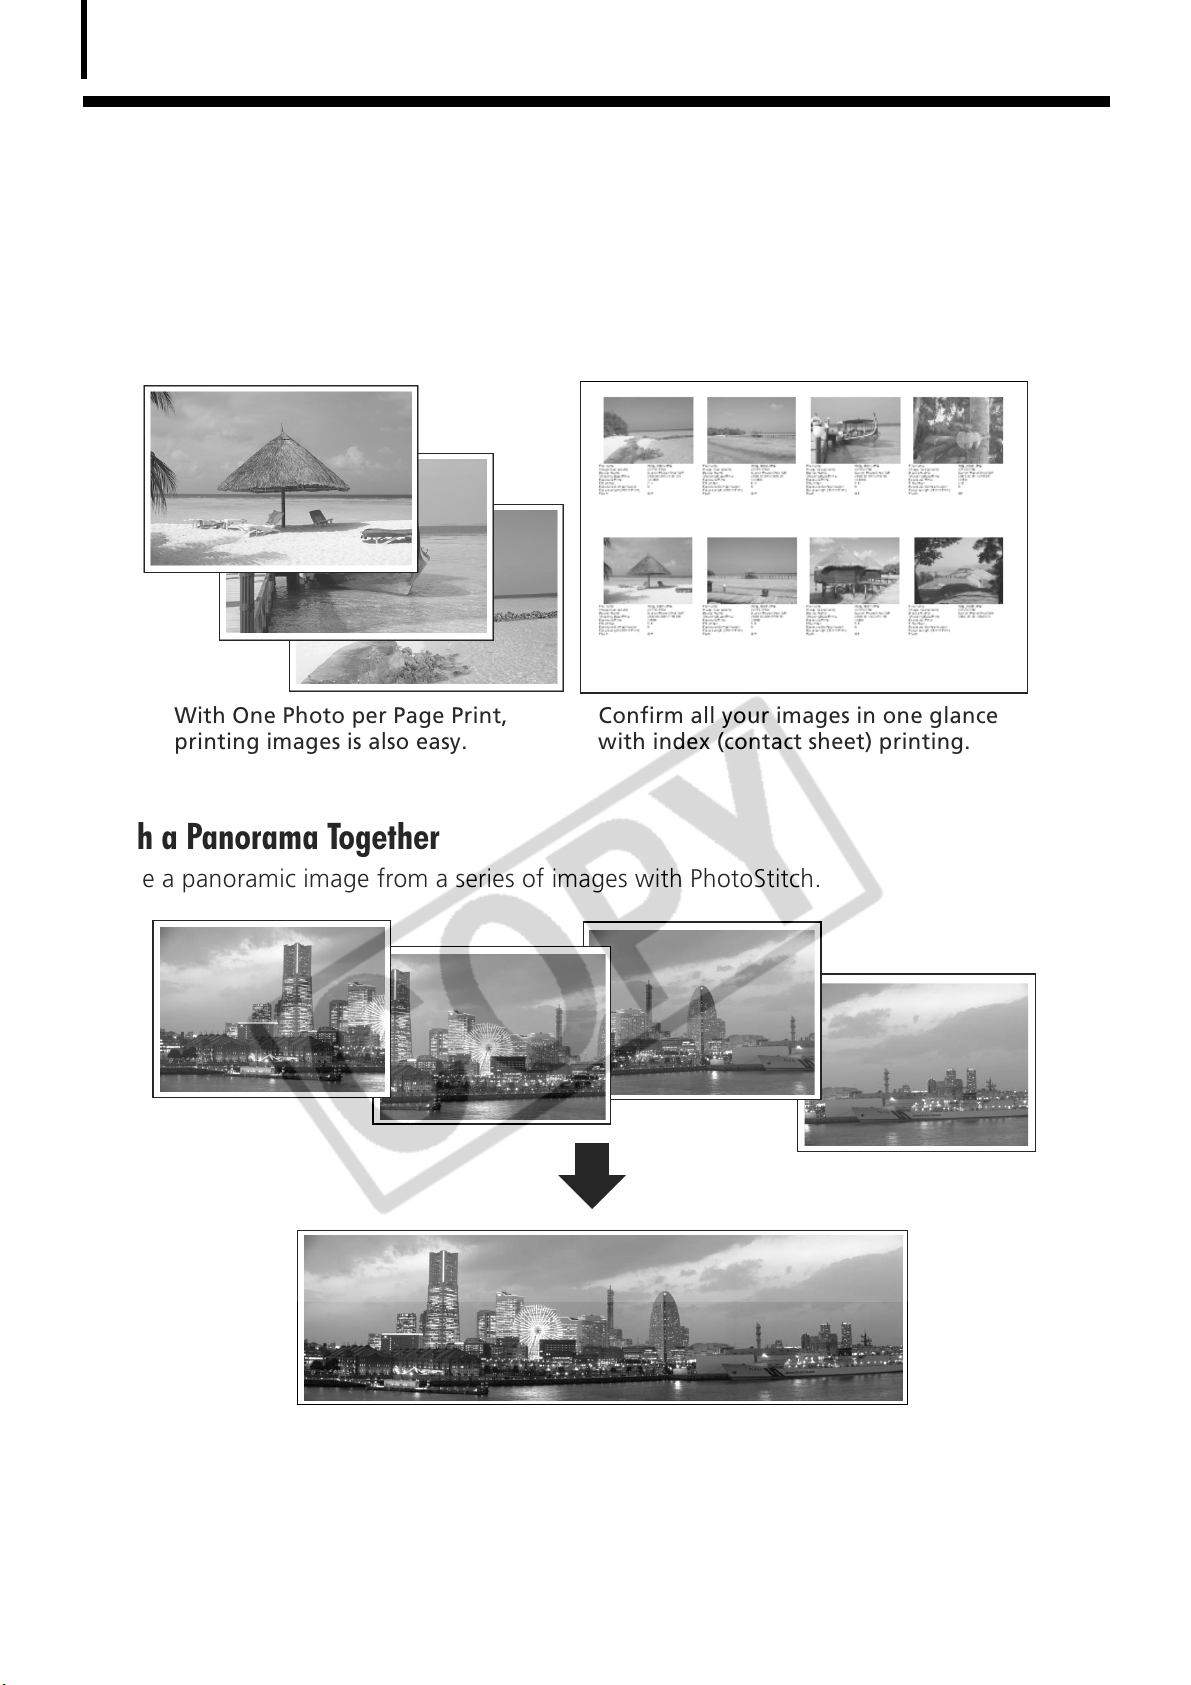
Print a Variety of Layouts
PrintÅwithÅtheÅdiverseÅlayoutsÅavailableÅinÅZoomBrowserÅEXÅ(Windows)ÅandÅImageBrowserÅ
(Macintosh).ÅTheÅexamplesÅshownÅareÅfromÅZoomBrowserÅEXÅ(Windows).
With One Photo per Page Print,
printing images is also easy.
Confirm all your images in one glance
with index (contact sheet) printing.
Stitch a Panorama Together
CreateÅaÅpanoramicÅimageÅfromÅaÅseriesÅofÅimagesÅwithÅPhotoStitch.Å
Page 9
Send an Image as an E-mail Attachment
AttachÅanÅimageÅtoÅanÅe-mailÅmessageÅbyÅstartingÅyourÅmailÅsoftwareÅfromÅwithinÅ
ZoomBrowserÅEXÅ(Windows)ÅorÅImageBrowserÅ(Macintosh).
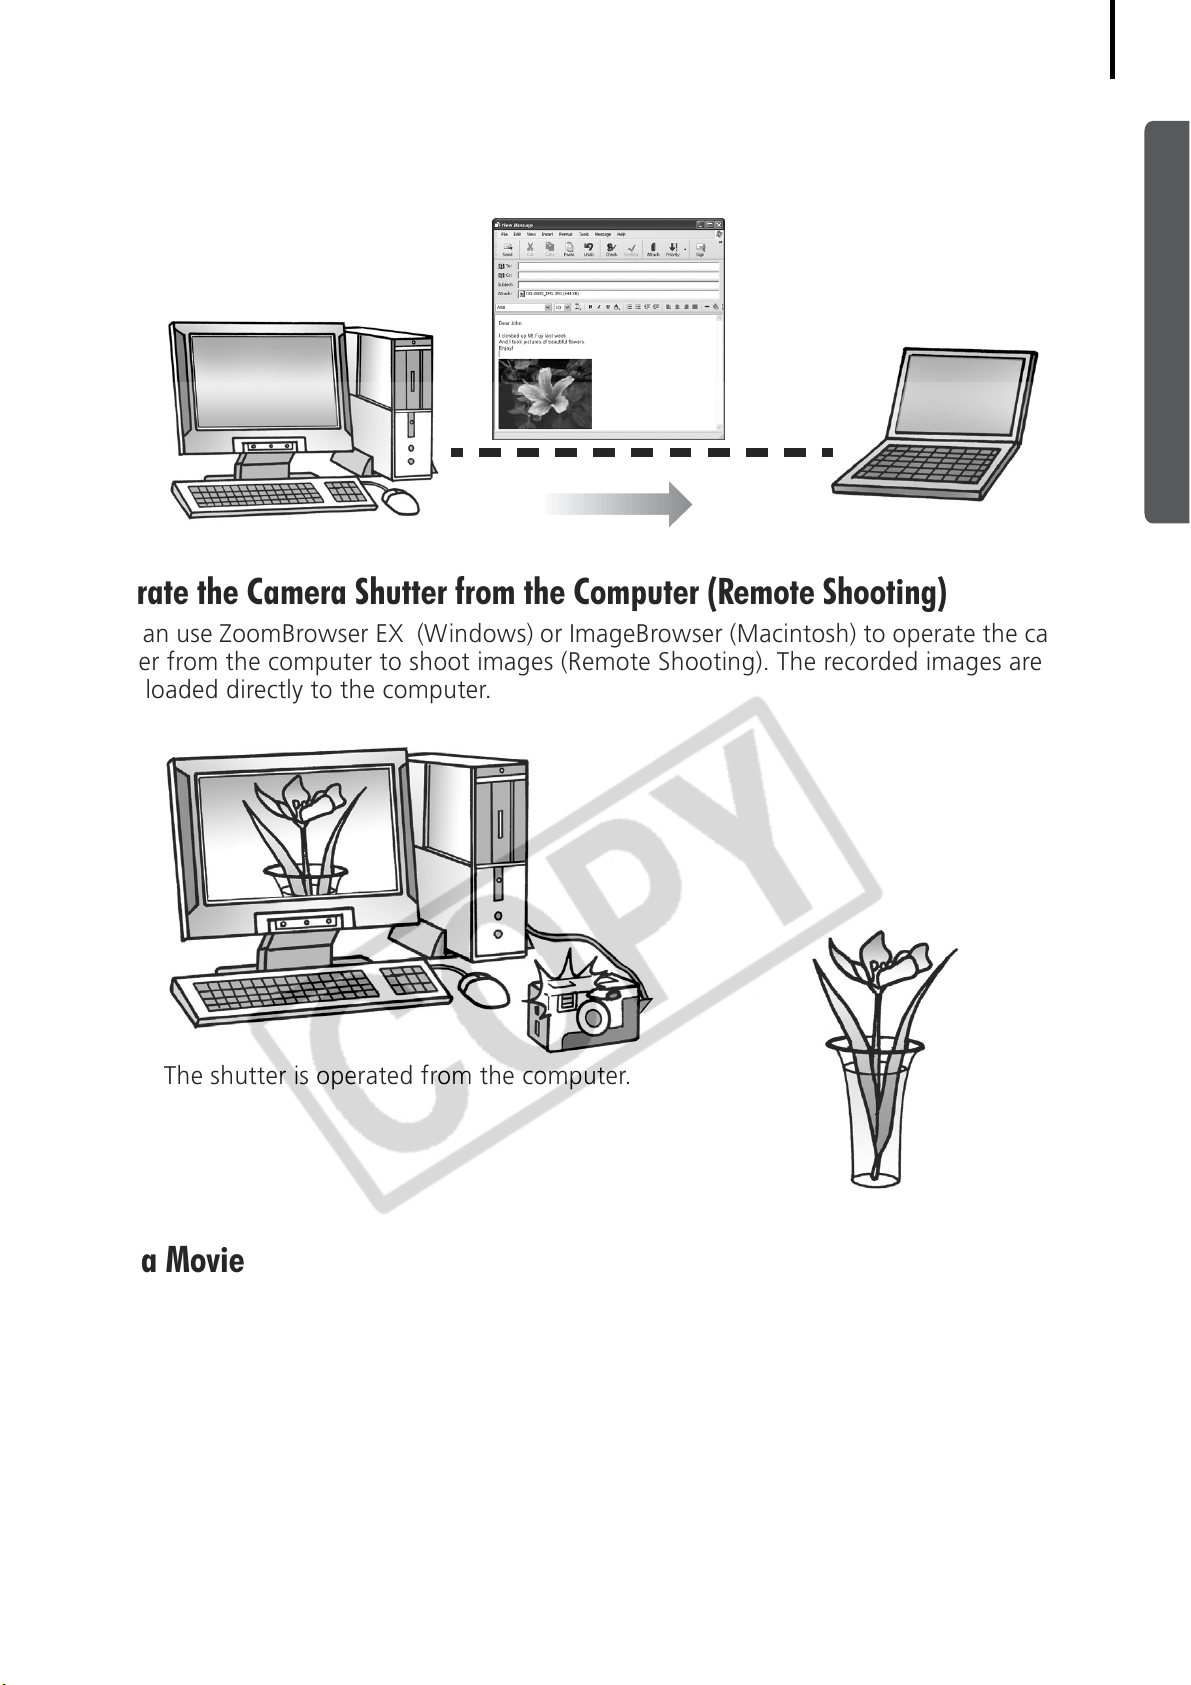
Operate the Camera Shutter from the Computer (Remote Shooting)
You ÅcanÅuseÅZoomBrowserÅEXÅÅ(Windows)ÅorÅImageBrowserÅ(Macintosh)ÅtoÅoperateÅtheÅcameraÅ
shutterÅfromÅtheÅcomputerÅtoÅshootÅimagesÅ(RemoteÅShooting).ÅTheÅrecordedÅimagesÅareÅ
downloadedÅdirectlyÅtoÅtheÅcomputer.Å
7
TheÅshutterÅisÅoperatedÅfromÅtheÅcomputer.
Edit a Movie
You ÅcanÅeditÅmovies,ÅlinkingÅmoviesÅandÅstillsÅthatÅhaveÅbeenÅdownloadedÅtoÅtheÅcomputer,Å
addingÅtext,ÅsuchÅasÅtitles,ÅaddingÅbackgroundÅmusicÅorÅapplyingÅvariousÅspecialÅeffects.Å
Extract Stills from Movies
You ÅcanÅextractÅaÅstillÅfromÅtheÅdisplayedÅmovieÅandÅsaveÅitÅasÅaÅnewÅimageÅfile.ÅYou ÅcanÅalsoÅ
specifyÅaÅrangeÅofÅframesÅandÅextractÅmultipleÅstills.ÅÅ
Page 10
Read This First
Windows
Macintosh
8
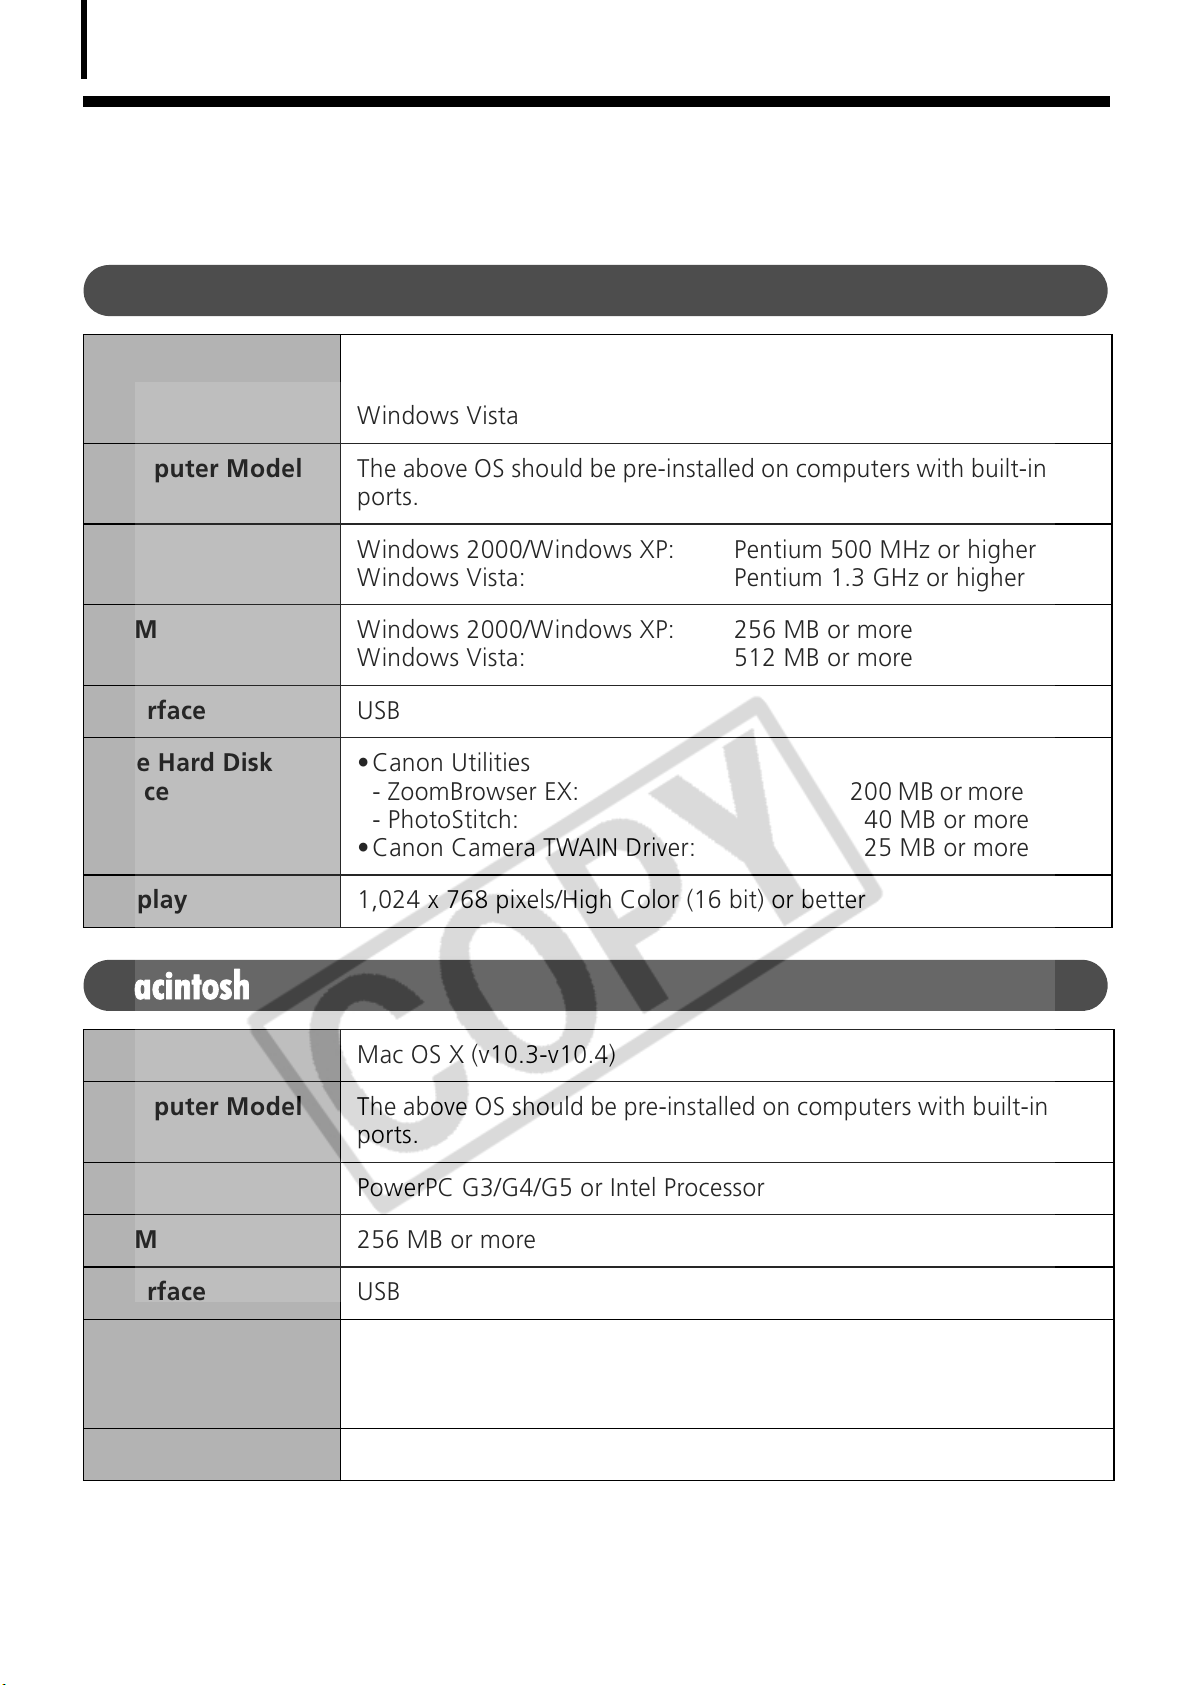
System Requirements
PleaseÅinstallÅtheÅsoftwareÅonÅaÅcomputerÅmeetingÅtheÅfollowingÅminimumÅrequirements.
OS WindowsÅ2000ÅServiceÅPackÅ4
WindowsÅXPÅ(includingÅServiceÅPackÅ1ÅandÅServiceÅPackÅ2)
WindowsÅVista
Computer Model TheÅaboveÅOSÅshouldÅbeÅpre-installedÅonÅcomputersÅwithÅbuilt-inÅUSBÅ
ports.
CPU WindowsÅ2000/WindowsÅXP: PentiumÅ500ÅMHzÅorÅhigher
WindowsÅVista: PentiumÅ1.3ÅGHzÅorÅhigher
RAM WindowsÅ2000/WindowsÅXP: 256ÅMBÅorÅmore
WindowsÅVista: 512ÅMBÅorÅmore
Interface USB
Free Hard Disk
Space
Display 1,024ÅxÅ768Åpixels/HighÅColorÅ(16Åbit)ÅorÅbetter
•CanonÅUtilities
-ÅZoomBrowserÅEX:Å 200ÅMBÅorÅmoreÅ
-ÅPhotoStitch:Å 40ÅMBÅorÅmore
•CanonÅCameraÅTWAINÅDriver:Å 25ÅMBÅorÅmore
OS MacÅOSÅXÅ(v10.3-v10.4)
Computer Model TheÅaboveÅOSÅshouldÅbeÅpre-installedÅonÅcomputersÅwithÅbuilt-inÅUSBÅ
ports.
CPU PowerPCÅG3/G4/G5ÅorÅIntelÅProcessor
RAM 256ÅMBÅorÅmore
Interface USB
Free Hard Disk
Space
Display 1,024ÅxÅ768Åpixels/32,000ÅColorsÅorÅbetter
•CanonÅUtilities
-ÅImageBrowser:Å 200ÅMBÅorÅmoreÅ
-ÅPhotoStitch:Å 40ÅMBÅorÅmore
Page 11

Windows Programs
Macintosh Programs
• A CD-ROM drive is required to install the software.
• Even when system requirements are met, not all computer functions can be
guaranteed.
• A sound card is required to play movie file audio tracks under Windows.
• With Windows, QuickTime is required to save images merged with
PhotoStitch as QuickTime VR images. It is also required to play and edit
movies on the Windows 2000 platform.
• Macintosh software cannot be used on disks formatted in the UFS (Unix File
System) format.
Programs and Compatible Operating Systems
TheÅCD-ROMÅlabeledÅ“CanonÅDigitalÅCameraÅSolutionÅDisk”ÅisÅprovidedÅwithÅallÅmodels.ÅItÅ
containsÅtheÅfollowingÅprograms.
9
Compatible OS
Program
ZoomBrowser EX
TWAIN Driver
PhotoStitch
EOS Utility ÅÅ
*1 CanÅbeÅstartedÅfromÅwithinÅZoomBrowserÅEX.
*2 InstallationÅofÅtheÅdriverÅisÅnotÅrequired.
*3 ImagesÅareÅdownloadedÅusingÅZoomBrowserÅEX.
*1
Windows
2000
Windows
*2
XP
Windows
*2
Vista
*3
Major Functions
Downloading,Ådisplaying,Å
organizingÅandÅeditingÅ
imagesÅ
DriverÅforÅCanonÅbrandÅcamerasÅ
(WindowsÅ2000)
MergingÅimagesÅtoÅmakeÅ
panoramasÅ
DownloadingÅimagesÅandÅ
otherÅfunctionsÅforÅEOSÅ
DIGITALÅseriesÅcameras
Compatible OS
Program
ImageBrowser
PhotoStitch
EOS Utility
*1 CanÅbeÅstartedÅfromÅwithinÅImageBrowser.Å
*1
Mac OS X Major Functions
Downloading,Ådisplaying,ÅorganizingÅandÅeditingÅimagesÅ
MergingÅimagesÅtoÅmakeÅpanoramasÅ
DownloadingÅimagesÅandÅotherÅfunctionsÅ
forÅEOSÅDIGITALÅseriesÅcameras
Page 12
Read This First
10
Before You Connect the Camera to the Computer
Ensure that you have installed the software from the supplied Canon Digital
Camera Solution Disk before you connect the camera to the computer.
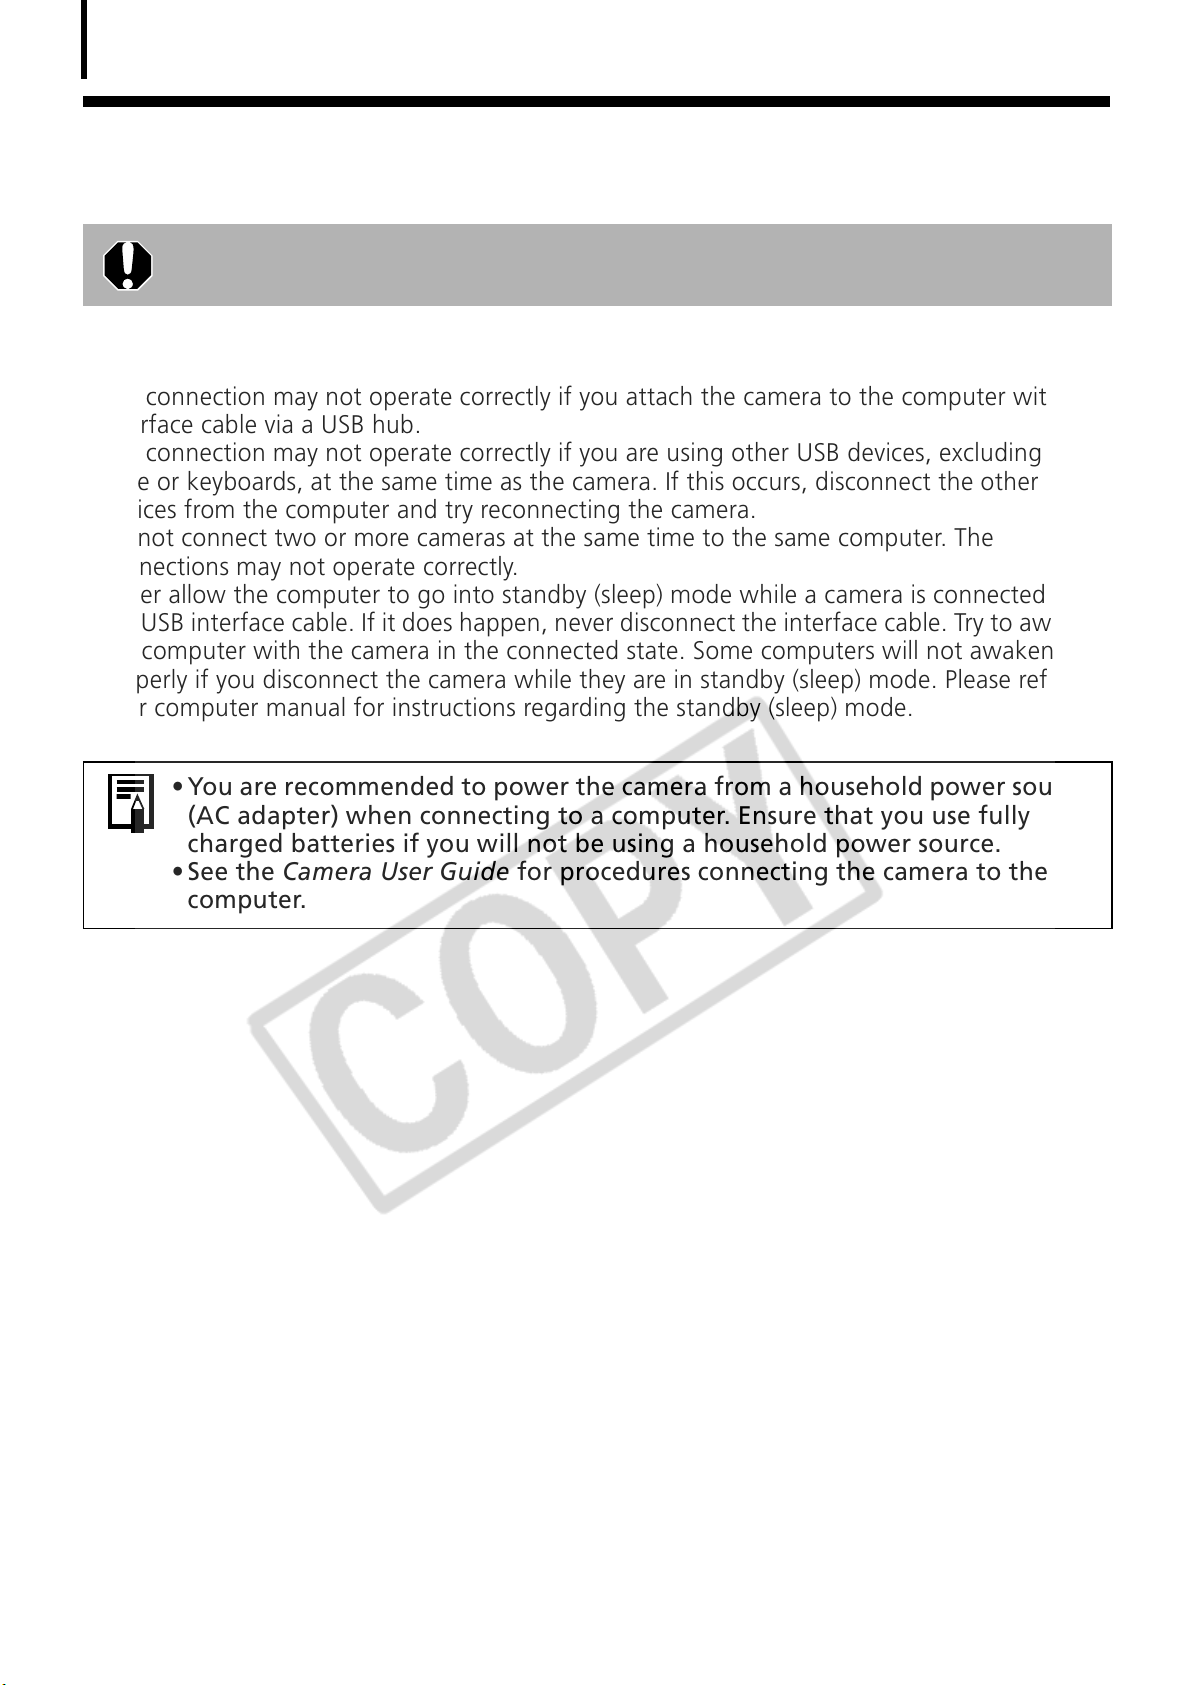
Precautions for Connecting the Camera to the Computer
•TheÅconnectionÅmayÅnotÅoperateÅcorrectlyÅifÅyouÅattachÅtheÅcameraÅtoÅtheÅcomputerÅwithÅanÅ
interfaceÅcableÅviaÅaÅUSBÅhub.
•TheÅconnectionÅmayÅnotÅoperateÅcorrectlyÅifÅyouÅareÅusingÅotherÅUSBÅdevices,ÅexcludingÅUSBÅ
miceÅorÅkeyboards,ÅatÅtheÅsameÅtimeÅasÅtheÅcamera.ÅIfÅthisÅoccurs,ÅdisconnectÅ
devicesÅfromÅtheÅcomputerÅandÅtryÅreconnectingÅtheÅcamera.
•DoÅnotÅconnectÅtwoÅorÅmoreÅcamerasÅatÅtheÅsameÅtimeÅtoÅtheÅsameÅcomputer.ÅTheÅ
connectionsÅmayÅnotÅoperateÅcorrectly.
• NeverÅallowÅtheÅcomputerÅtoÅgoÅintoÅstandbyÅ(sleep)ÅmodeÅwhileÅaÅcameraÅisÅconnectedÅviaÅ
theÅUSBÅinterfaceÅcable.
theÅcomputerÅwithÅtheÅcameraÅinÅtheÅconnectedÅstate.ÅSomeÅcomputersÅwillÅnotÅawakenÅ
properlyÅifÅyouÅdisconnectÅtheÅcameraÅwhileÅtheyÅareÅinÅstandbyÅ(sleep)Åmode.ÅPleaseÅreferÅtoÅ
yourÅcomputerÅmanualÅforÅinstructionsÅregardingÅtheÅstandbyÅ
ÅIfÅitÅdoesÅhappen,ÅneverÅdisconnectÅtheÅinterfaceÅcable.ÅTr yÅtoÅawakenÅ
(sleep)Åmode.
theÅotherÅ
• You are recommended to power the camera from a household power source
(AC adapter) when connecting to a computer. Ensure that you use fully
charged batteries if you will not be using a household power source.
• See the Camera User Guide for procedures connecting the camera to the
computer.
Page 13
Using the Software on the Windows
Items to Prepare
Installation Procedures
Platform – Preparations
ThisÅchapterÅexplainsÅtheÅbasicÅproceduresÅforÅinstallingÅtheÅsoftwareÅandÅconnectingÅtheÅ
cameraÅtoÅaÅcomputer.ÅReadÅthisÅmaterialÅbeforeÅyouÅconnectÅtheÅcameraÅtoÅtheÅcomputer.
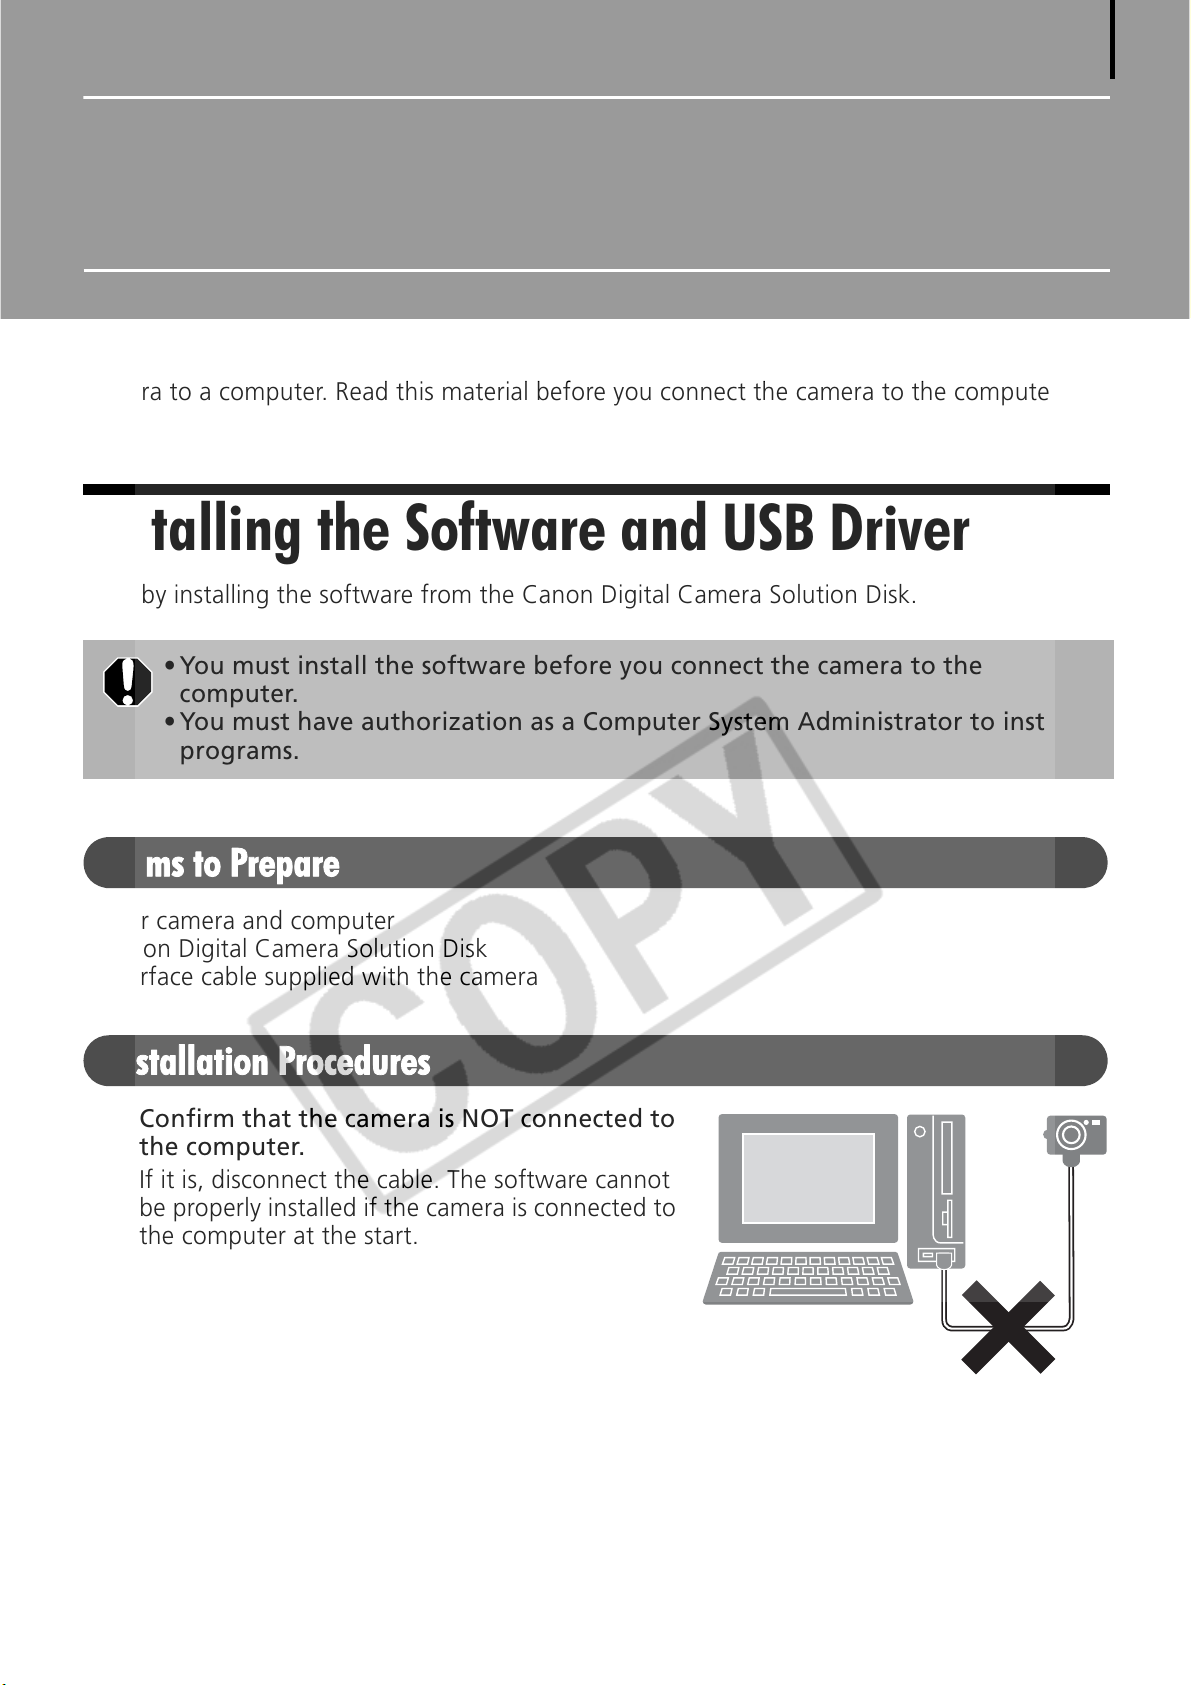
Installing the Software and USB Driver
StartÅbyÅinstallingÅtheÅsoftwareÅfromÅtheÅCanonÅDigitalÅCameraÅSolutionÅDisk.
11
• You must install the software before you connect the camera to the
computer.
• You must have authorization as a Computer System Administrator to install
programs.
•YourÅcameraÅandÅcomputer
• CanonÅDigitalÅCameraÅSolutionÅDisk
• InterfaceÅcableÅsuppliedÅwithÅtheÅcamera
Confirm that the camera is NOT connected to
1
the computer.
IfÅitÅis,ÅdisconnectÅtheÅcable.ÅTheÅsoftwareÅcannotÅ
beÅproperlyÅinstalledÅifÅtheÅcameraÅisÅconnectedÅtoÅ
theÅcomputerÅatÅtheÅstart.
2 Close any programs that are running.
Page 14
Using the Software on the Windows Platform – Preparations
12
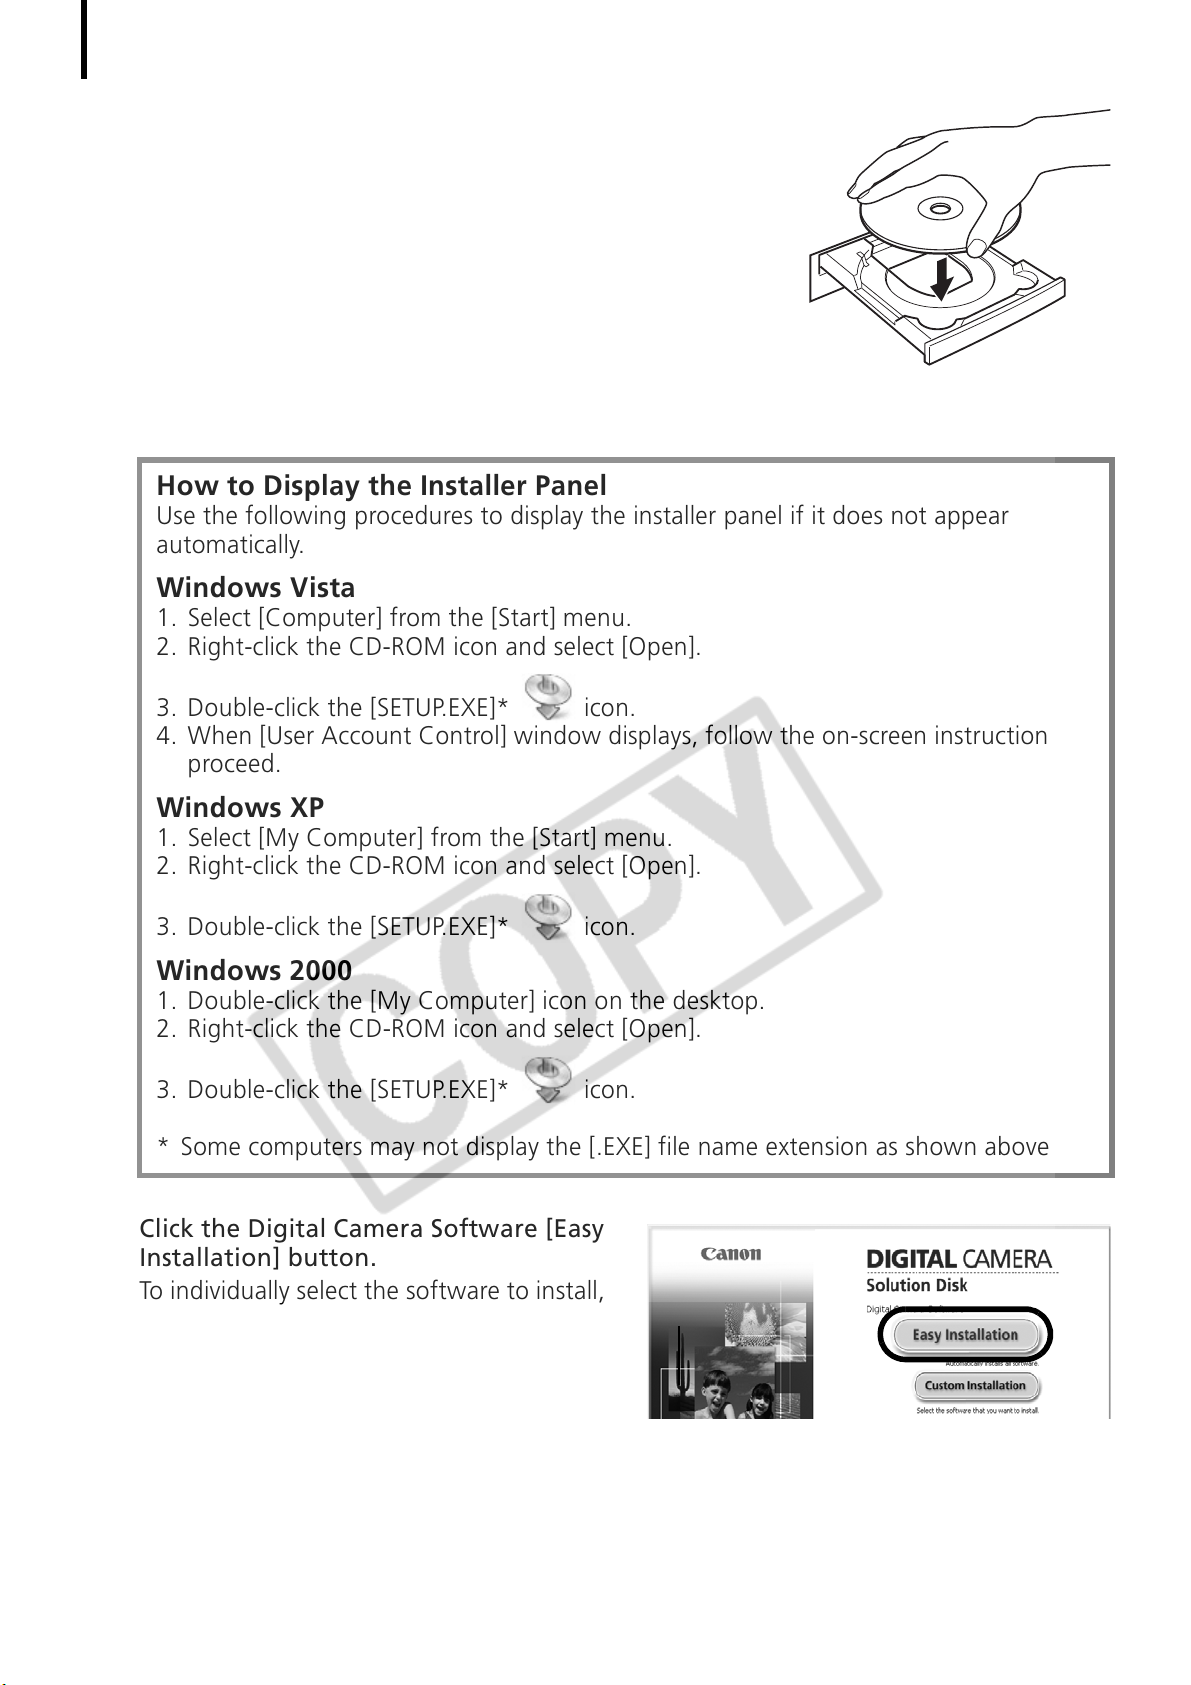
3 Place the Canon Digital Camera Solution Disk in the
computer’s CD-ROM drive.
IfÅtheÅ[UserÅAccountÅControl]ÅwindowÅappears,ÅfollowÅtheÅ
on-screenÅinstructionsÅtoÅproceed.
IfÅtheÅinstallerÅpanelÅdoesÅnotÅappearÅautomatically,ÅuseÅtheÅ
followingÅprocedures.Å
How to Display the Installer Panel
UseÅtheÅfollowingÅproceduresÅtoÅdisplayÅtheÅinstallerÅpanelÅifÅitÅdoesÅnotÅappearÅ
automatically.
Windows Vista
1. SelectÅ[Computer]ÅfromÅtheÅ[Start]Åmenu.
2. Right-clickÅtheÅCD-ROMÅiconÅandÅselectÅ[Open].
3. Double-clickÅtheÅ[SETUP.EXE]*ÅÅicon.
4. WhenÅ[UserÅAccountÅControl]ÅwindowÅdisplays,ÅfollowÅtheÅon-screenÅinstructionsÅtoÅ
proceed.
Windows XP
1. SelectÅ[MyÅComputer]ÅfromÅtheÅ[Start]Åmenu.
2. Right-clickÅtheÅCD-ROMÅiconÅandÅselectÅ[Open].
3. Double-clickÅtheÅ[SETUP.EXE]*ÅÅicon.
Windows 2000
1. Double-clickÅtheÅ[MyÅComputer]ÅiconÅonÅtheÅdesktop.
2. Right-clickÅtheÅCD-ROMÅiconÅandÅselectÅ[Open].
3. Double-clickÅtheÅ[SETUP.EXE]*ÅÅicon.Å
*SomeÅcomputersÅmayÅnotÅdisplayÅtheÅ[.EXE]ÅfileÅnameÅextensionÅasÅshownÅabove.
4 Click the Digital Camera Software [Easy
Installation] button.
ToÅindividuallyÅselectÅtheÅsoftwareÅtoÅinstall,Å
clickÅ[CustomÅInstallation].Å
Installer Panel
Page 15
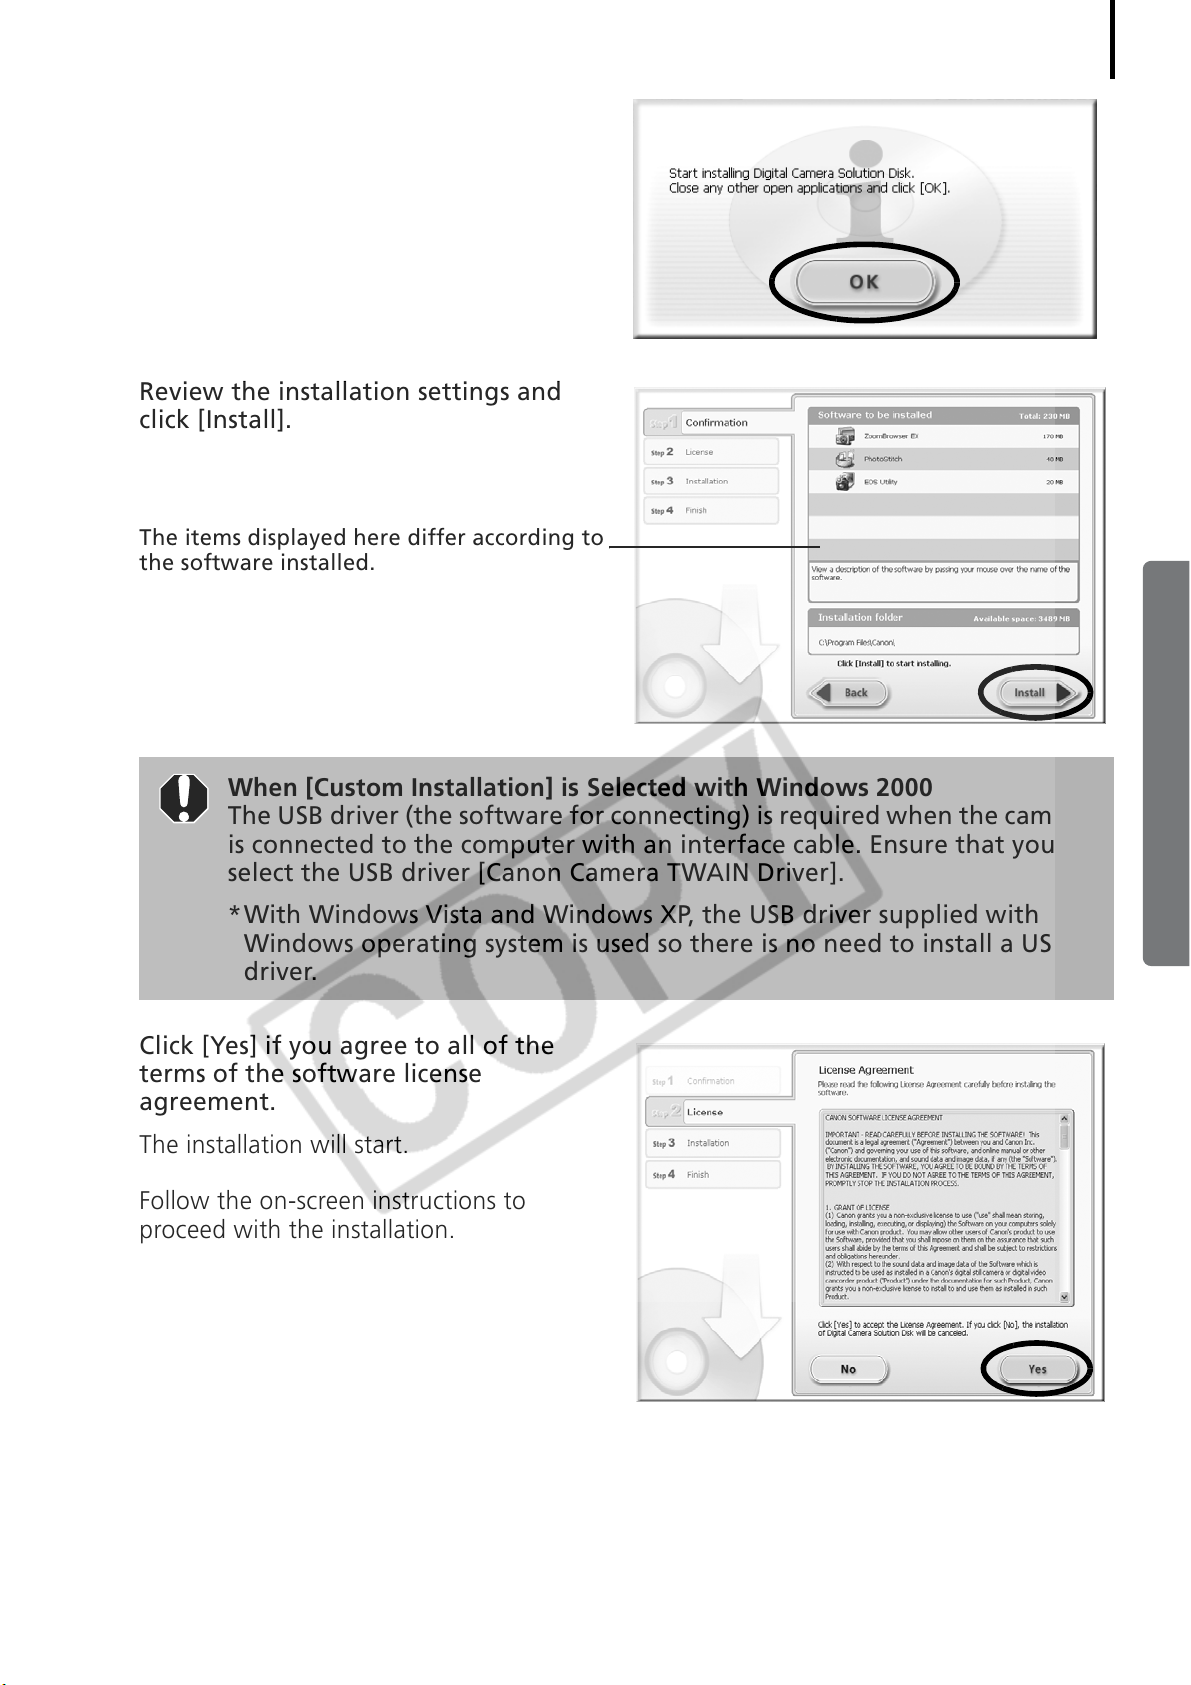
5 If other software is running, close each
program before clicking [OK].
6 Review the installation settings and
click [Install].
The items displayed here differ according to
the software installed.
13
When [Custom Installation] is Selected with Windows 2000
The USB driver (the software for connecting) is required when the camera
is connected to the computer with an interface cable. Ensure that you
select the USB driver [Canon Camera TWAIN Driver].
*With Windows Vista and Windows XP, the USB driver supplied with the
Windows operating system is used so there is no need to install a USB
driver.
7 Click [Yes] if you agree to all of the
terms of the software license
agreement.
TheÅinstallationÅwillÅstart.
FollowÅtheÅon-screenÅinstructionsÅtoÅ
proceedÅwithÅtheÅinstallation.
Page 16
Using the Software on the Windows Platform – Preparations
14
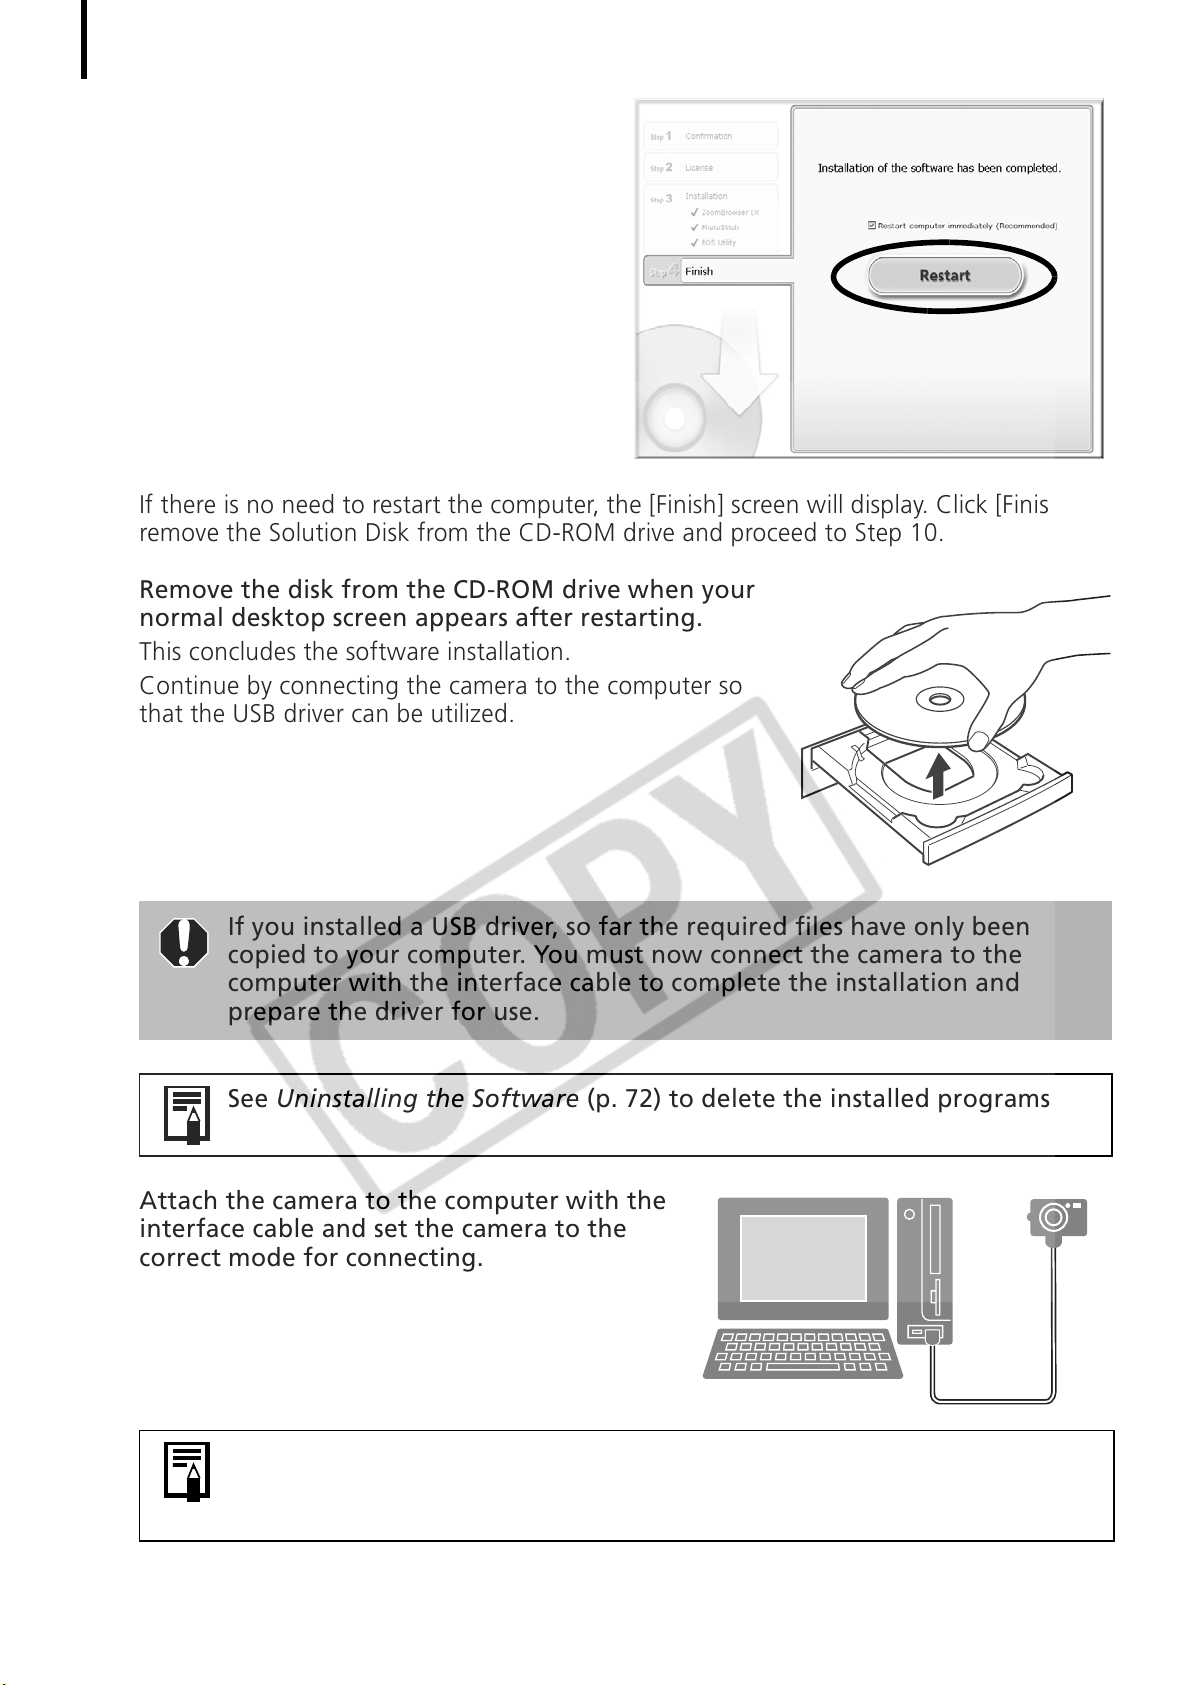
8 When the installation is over, select
[Restart computer immediately
(Recommended)] and click [Restart].
AtÅthisÅstage,ÅdoÅNOTÅremoveÅtheÅSolutionÅ
DiskÅfromÅtheÅCD-ROMÅdriveÅyet.
IfÅthereÅisÅnoÅneedÅtoÅrestartÅtheÅcomputer,ÅtheÅ[Finish]ÅscreenÅwillÅdisplay.ÅClickÅ[Finish],Å
removeÅtheÅSolutionÅDiskÅfromÅtheÅCD-ROMÅdriveÅandÅproceedÅtoÅStepÅ10.
9 Remove the disk from the CD-ROM drive when your
normal desktop screen appears after restarting.
ThisÅconcludesÅtheÅsoftwareÅinstallation.Å
ContinueÅbyÅconnectingÅtheÅcameraÅtoÅtheÅcomputerÅsoÅ
thatÅtheÅUSBÅdriverÅcanÅbeÅutilized.Å
If you installed a USB driver, so far the required files have only been
copied to your computer. You must now connect the camera to the
computer with the interface cable to complete the installation and
prepare the driver for use.
See Uninstalling the Software (p. 72) to delete the installed programs.
10 Attach the camera to the computer with the
interface cable and set the camera to the
correct mode for connecting.
Procedures for attaching the camera to the computer and placing the
camera in the correct mode for connecting vary between camera models.
See the Camera User Guide.
Page 17
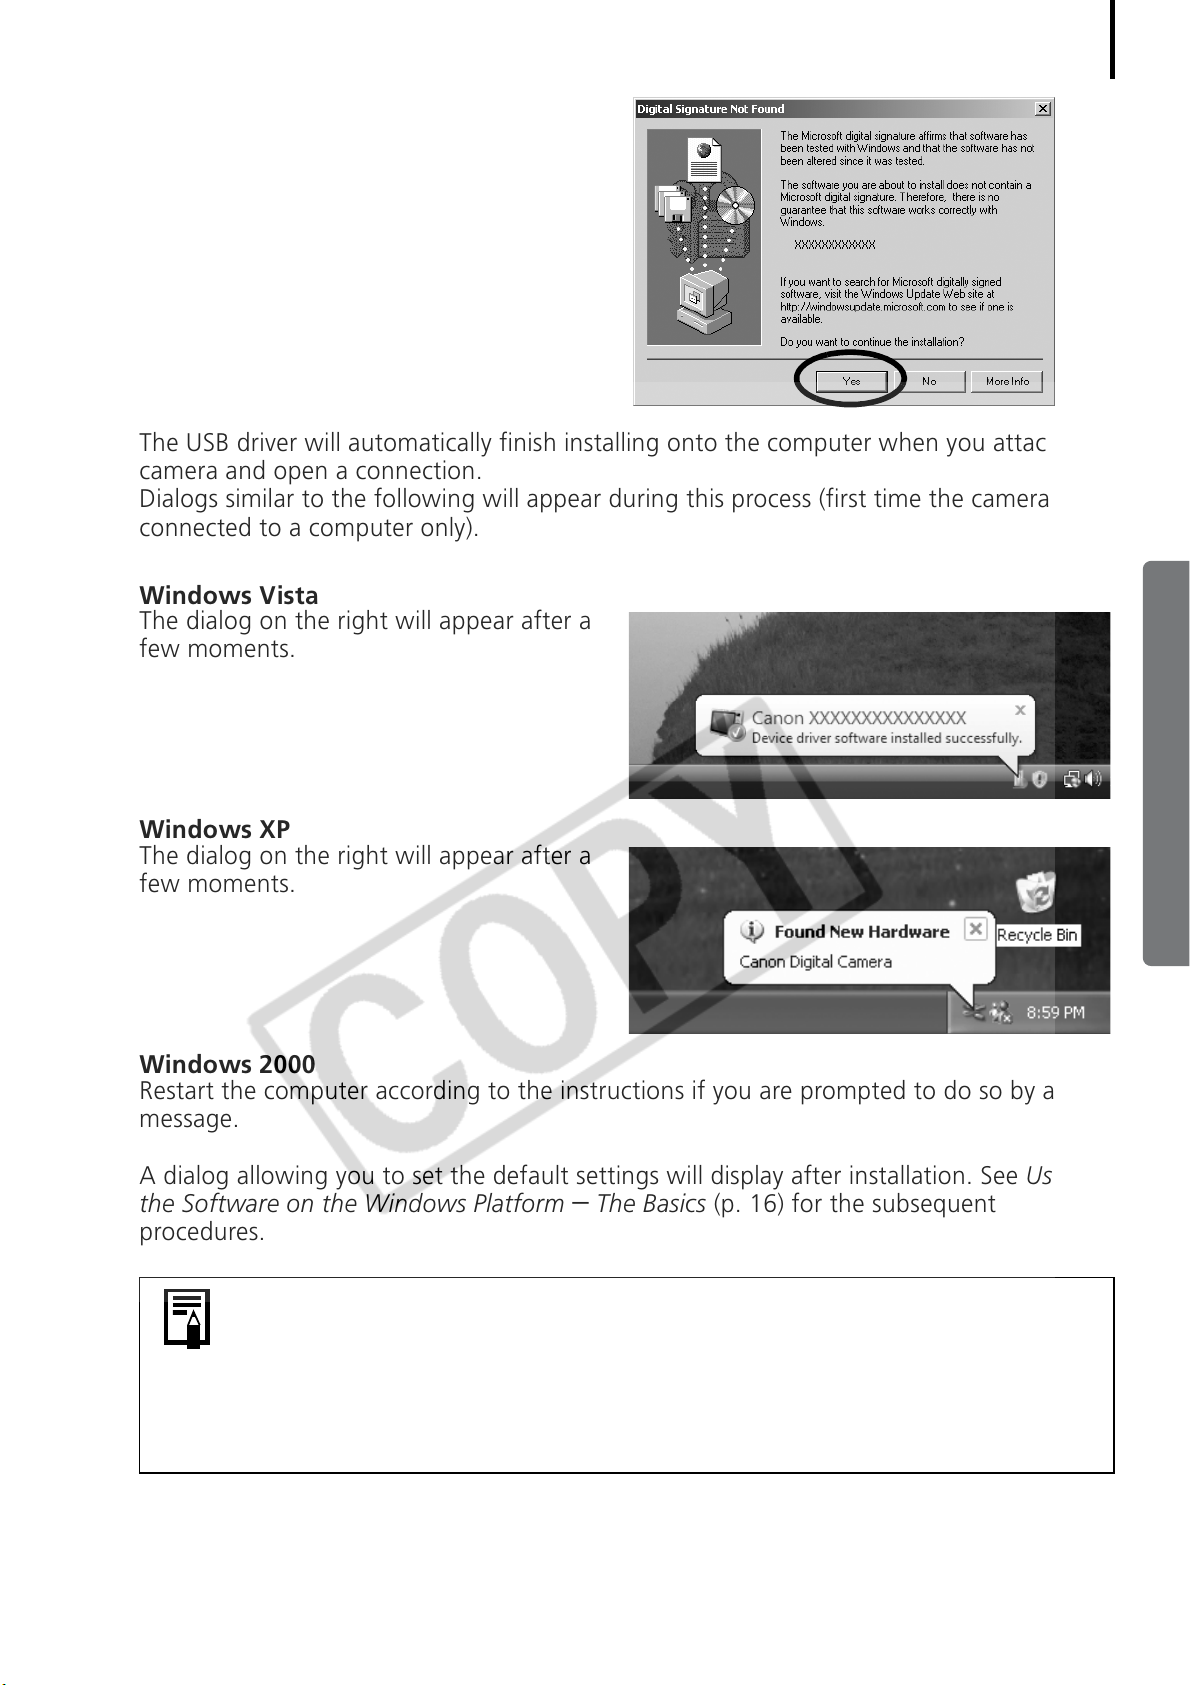
IfÅtheÅDigitalÅSignatureÅNotÅFoundÅwindowÅ
appears,ÅclickÅ[Yes].
TheÅUSBÅdriverÅwillÅautomaticallyÅfinishÅinstallingÅontoÅtheÅcomputerÅwhenÅyouÅattachÅtheÅ
cameraÅandÅopenÅaÅconnection.Å
DialogsÅsimilarÅtoÅtheÅfollowingÅwillÅappearÅduringÅthisÅprocessÅ(firstÅtimeÅtheÅcameraÅisÅ
connectedÅtoÅaÅcomputerÅonly).
Windows Vista
TheÅdialogÅ
fewÅmoments.
onÅtheÅrightÅwillÅappearÅafterÅaÅ
15
Windows XP
TheÅdialogÅonÅtheÅrightÅwillÅappearÅafterÅaÅ
fewÅmoments.
Windows 2000
RestartÅtheÅcomputerÅaccordingÅtoÅtheÅinstructionsÅifÅyouÅareÅpromptedÅtoÅdoÅsoÅbyÅaÅ
message.
AÅdialogÅallowingÅyouÅtoÅsetÅtheÅdefaultÅsettingsÅwillÅdisplayÅafterÅinstallation.ÅSeeÅ
the Software on the Windows Platform
procedures.
• If you experience problems installing the USB Driver, first uninstall it
(p. 77) and then reinstall it. (Windows 2000)
•See Uninstalling the USB Driver (p. 73) to delete the USB driver installed
with these procedures. (Windows 2000)
•See If You Were Using ZoomBrowser EX Version 2 or 3 (p. 81) if you
were previously using either version.
– The BasicsÅ(p. 16)ÅforÅtheÅsubsequentÅ
Using
ThisÅconcludesÅtheÅsoftwareÅandÅUSBÅdriverÅinstallationÅandÅtheÅproceduresÅforÅconnectingÅtheÅ
cameraÅtoÅtheÅcomputer.
You ÅmayÅnowÅdownloadÅcameraÅimagesÅtoÅtheÅcomputerÅ(p. 16).Å
Page 18
16
Camera to Computer Connection
Using the Software on the Windows
Platform – The Basics
ThisÅchapterÅexplainsÅtheÅproceduresÅforÅusingÅZoomBrowserÅEXÅtoÅdownloadÅtheÅcamera'sÅ
imagesÅtoÅtheÅcomputerÅandÅprintÅthem.
ReadÅthisÅchapterÅafterÅcompletingÅtheÅpreparationsÅinÅtheÅUsing the Software on the Windows
Platform
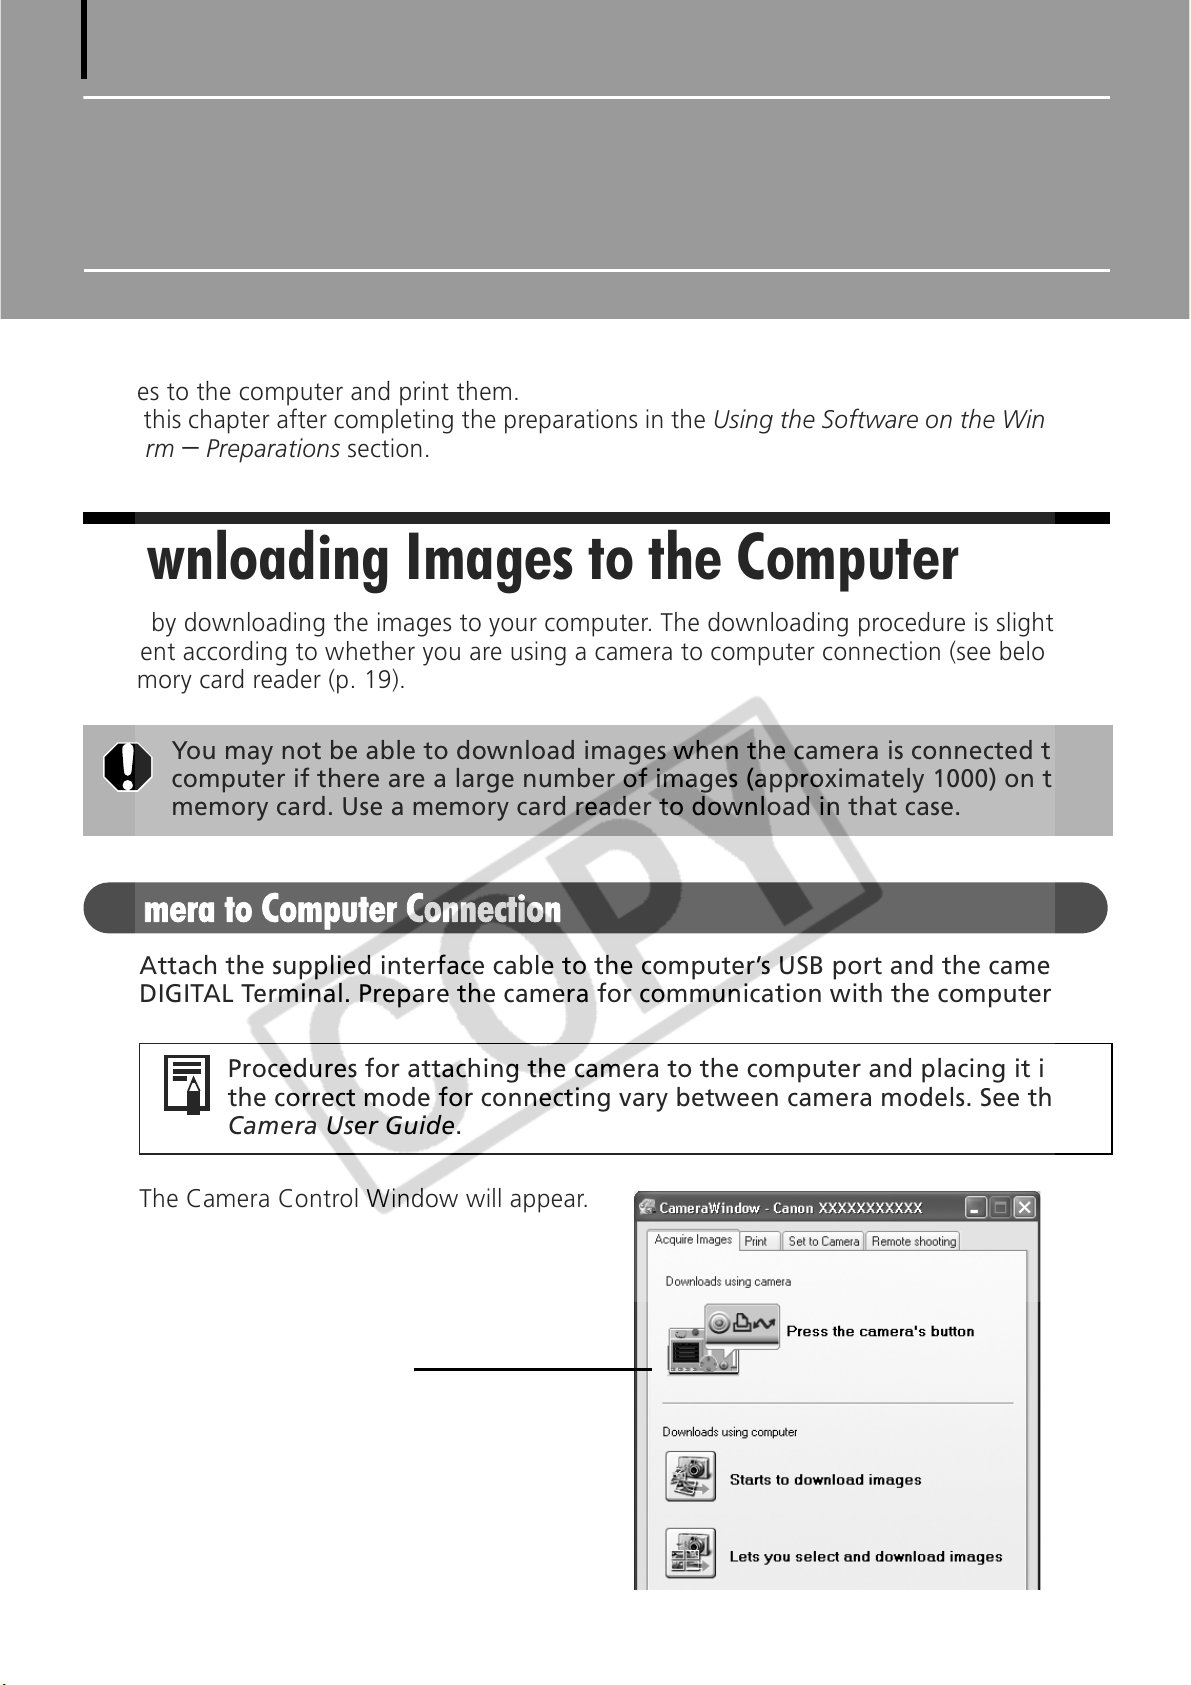
Downloading Images to the Computer
BeginÅbyÅdownloadingÅtheÅimagesÅtoÅyourÅcomputer.ÅTheÅdownloadingÅprocedureÅisÅslightlyÅ
differentÅaccordingÅtoÅwhetherÅyouÅareÅusingÅaÅcameraÅtoÅcomputerÅconnectionÅ(seeÅbelow)ÅorÅ
aÅmemoryÅcardÅreaderÅ(p. 19).Å
– PreparationsÅsection.Å
You may not be able to download images when the camera is connected to a
computer if there are a large number of images (approximately 1000) on the
memory card. Use a memory card reader to download in that case.
Attach the supplied interface cable to the computer’s USB port and the camera’s
1
DIGITAL Terminal. Prepare the camera for communication with the computer.
Procedures for attaching the camera to the computer and placing it in
the correct mode for connecting vary between camera models. See the
Camera User Guide.
TheÅCameraÅControlÅWindowÅwillÅappear.
Camera Control Window
Page 19
First Time Camera is Connected to a Computer
SetÅtheÅfollowingÅsettingsÅtheÅfirstÅtimeÅyouÅconnectÅtheÅcameraÅtoÅtheÅcomputer.ÅTheseÅ
proceduresÅareÅnotÅrequiredÅfromÅtheÅsecondÅconnectionÅonward.
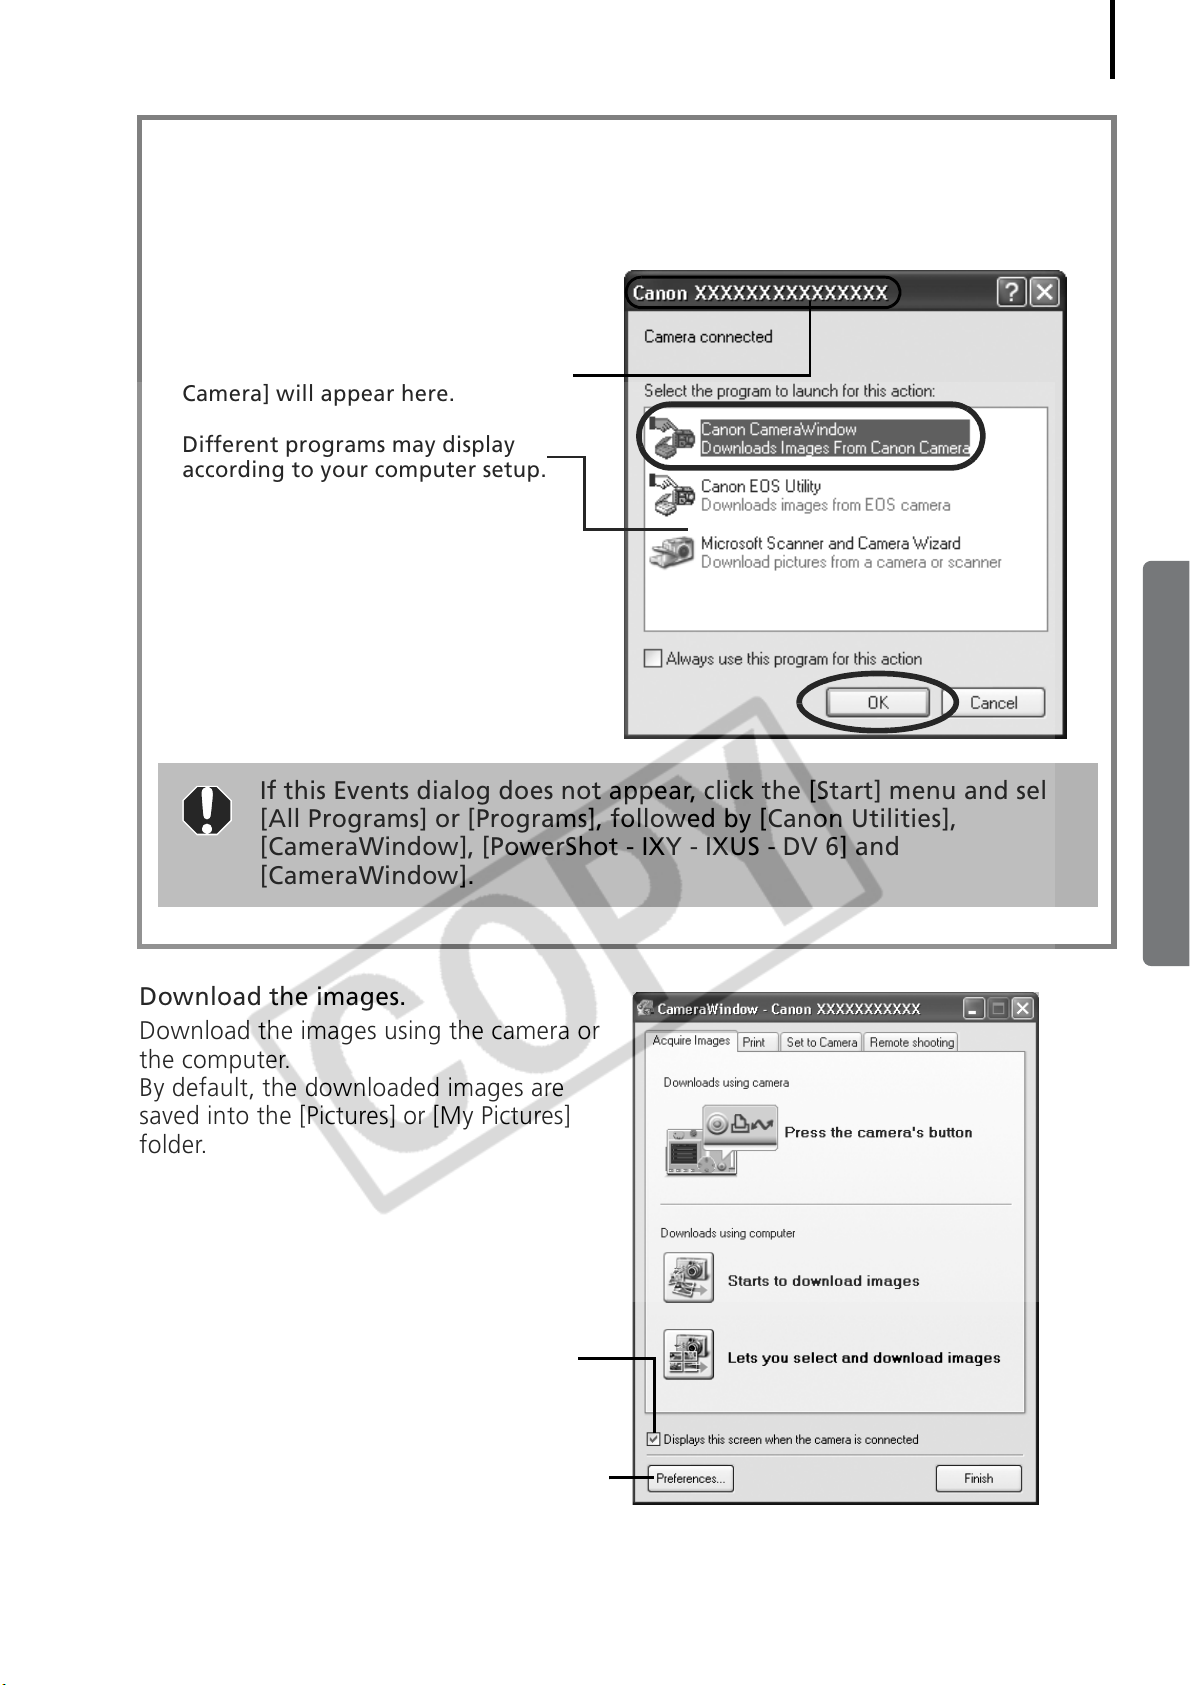
SelectÅ[CanonÅCameraWindow]ÅwhenÅaÅ
dialogÅ(EventsÅdialog)ÅsimilarÅtoÅthatÅonÅ
theÅrightÅdisplaysÅandÅclickÅ[OK].
Your camera model name or [Canon
Camera] will appear here.
Different programs may display
according to your computer setup.
17
If this Events dialog does not appear, click the [Start] menu and select
[All Programs] or [Programs], followed by [Canon Utilities],
[CameraWindow], [PowerShot - IXY - IXUS - DV 6] and
[CameraWindow].
2 Download the images.
DownloadÅtheÅimagesÅusingÅtheÅcameraÅorÅ
theÅcomputer.
ByÅdefault,ÅtheÅdownloadedÅimagesÅareÅ
savedÅintoÅtheÅ[Pictures]ÅorÅ[MyÅPictures]Å
folder.
Placing a check mark here causes this
window to automatically open when the
camera and computer are connected.
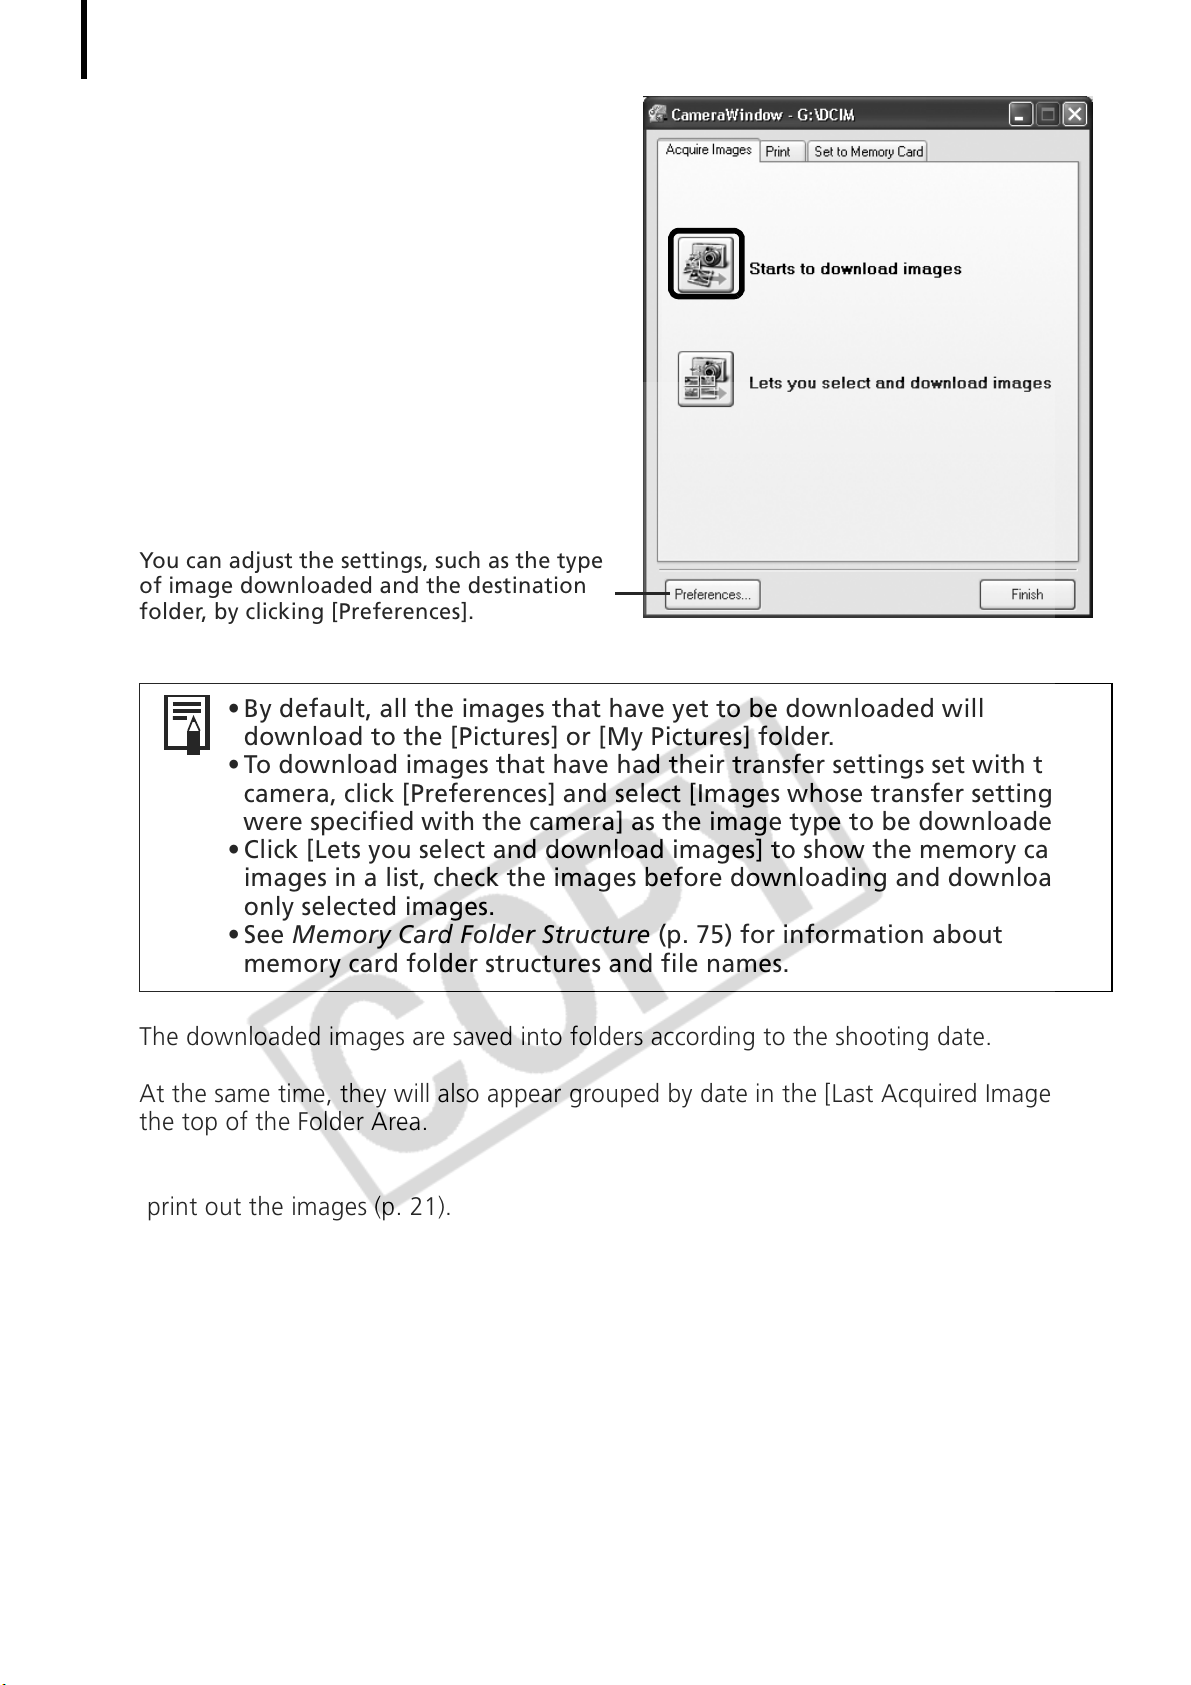
You can adjust the settings, such as the type
of image downloaded and the destination
folder, by clicking [Preferences].
Page 20
Using the Software on the Windows Platform – The Basics
18
Using the Camera to Download Images (Direct Transfer Function)
• If the conditions are right for the Direct Transfer function, the Direct
Transfer settings menu will appear in the LCD monitor. In addition, the
(Print/Share) button will light if your camera is equipped with one.
• See the Camera User Guide for instructions regarding Direct Transfer
settings and procedures.
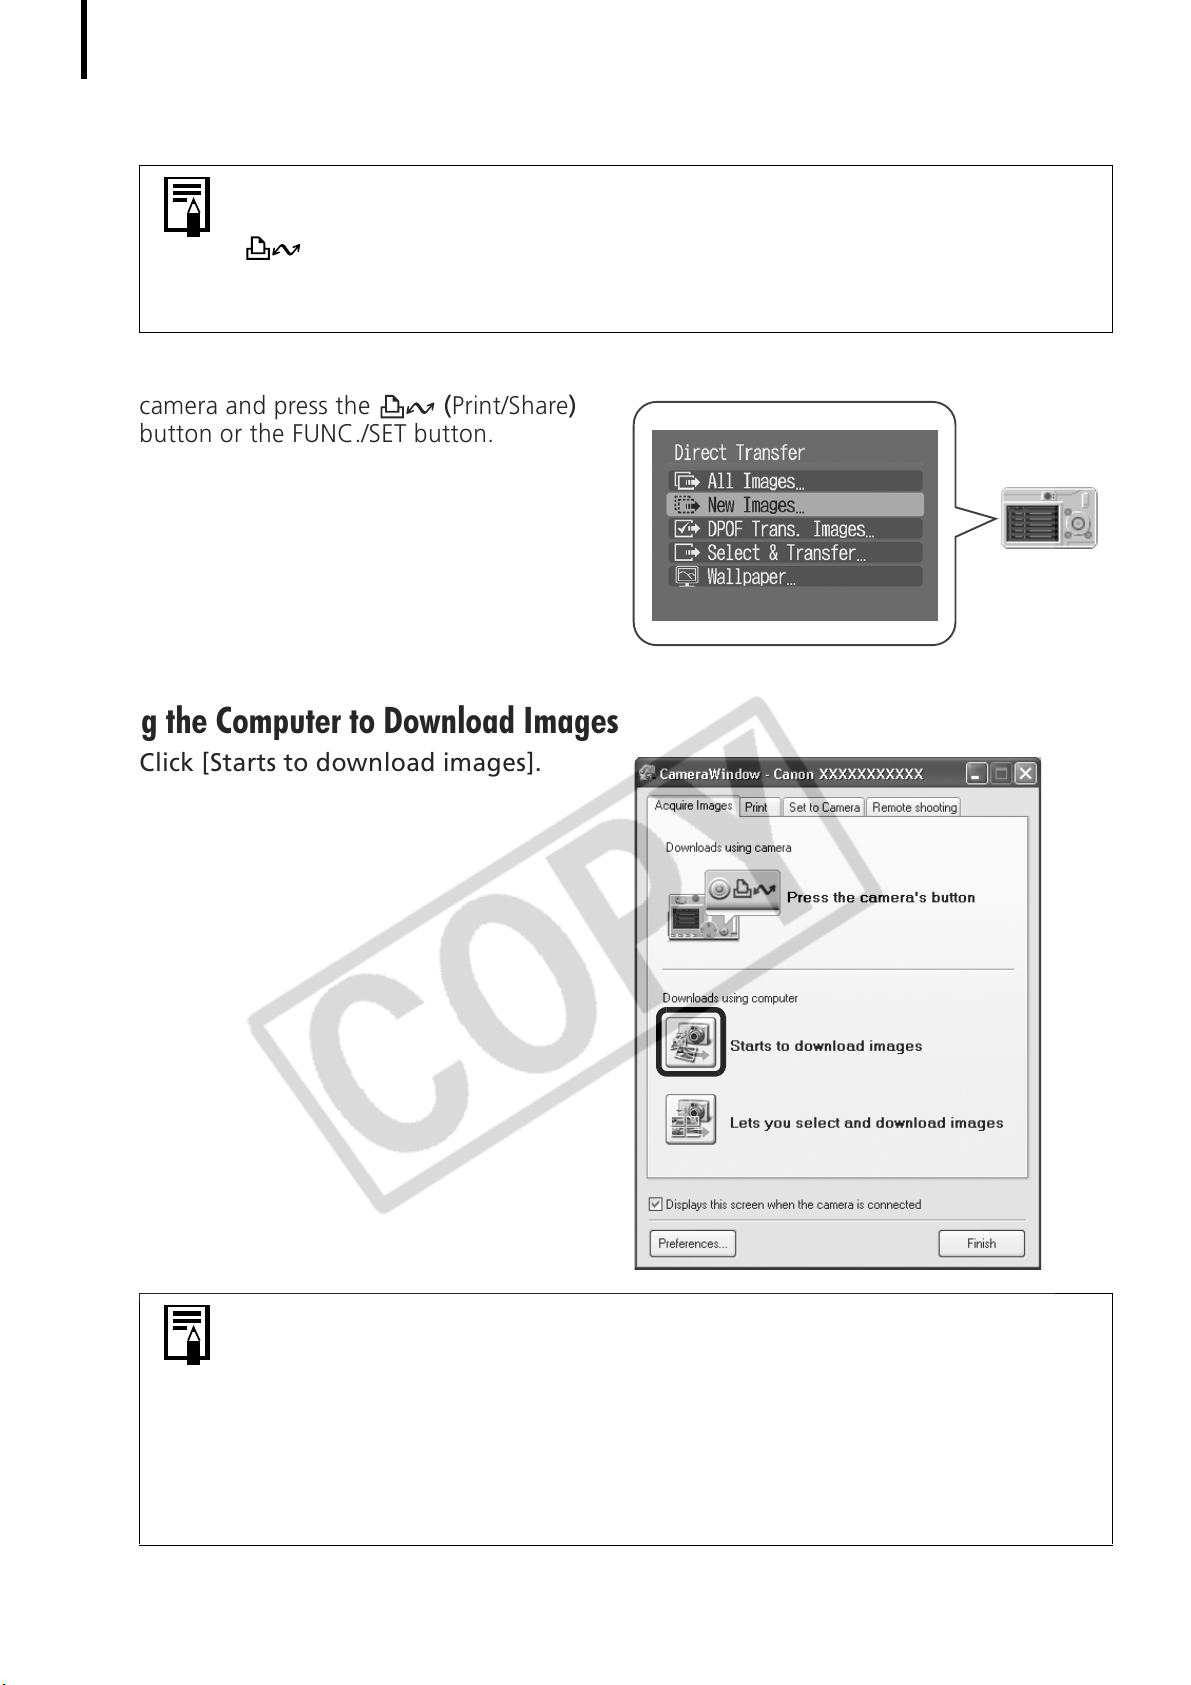
SetÅtheÅDirectÅTran s fe rÅsettingsÅonÅtheÅ
cameraÅandÅpressÅtheÅ (Print/Share)
buttonÅorÅtheÅFUNC./SETÅbutton.
Using the Computer to Download Images
Click [Starts to download images].
• By default, all the images that have yet to be downloaded will download
to the [Pictures] or [My Pictures] folder.
•To download images that have had their transfer settings set with the
camera, click [Preferences] and select [Images whose transfer settings
were specified with the camera] as the image type to be downloaded.
• Click [Lets you select and download images] to show the camera images
in a list, check the images before downloading and download only
selected images.
Page 21
TheÅdownloadedÅimagesÅareÅsavedÅintoÅ
Memory Card Reader Connection
foldersÅaccordingÅtoÅtheÅshootingÅdate.
AtÅtheÅsameÅtime,ÅtheyÅwillÅalsoÅappearÅ
groupedÅbyÅdateÅinÅtheÅ[LastÅAcquiredÅ
Images]ÅatÅtheÅtopÅofÅtheÅFolderÅArea.ÅÅ
[Last Acquired Images]
The last downloaded images will display according
to their shooting dates.
Destination for the downloaded images
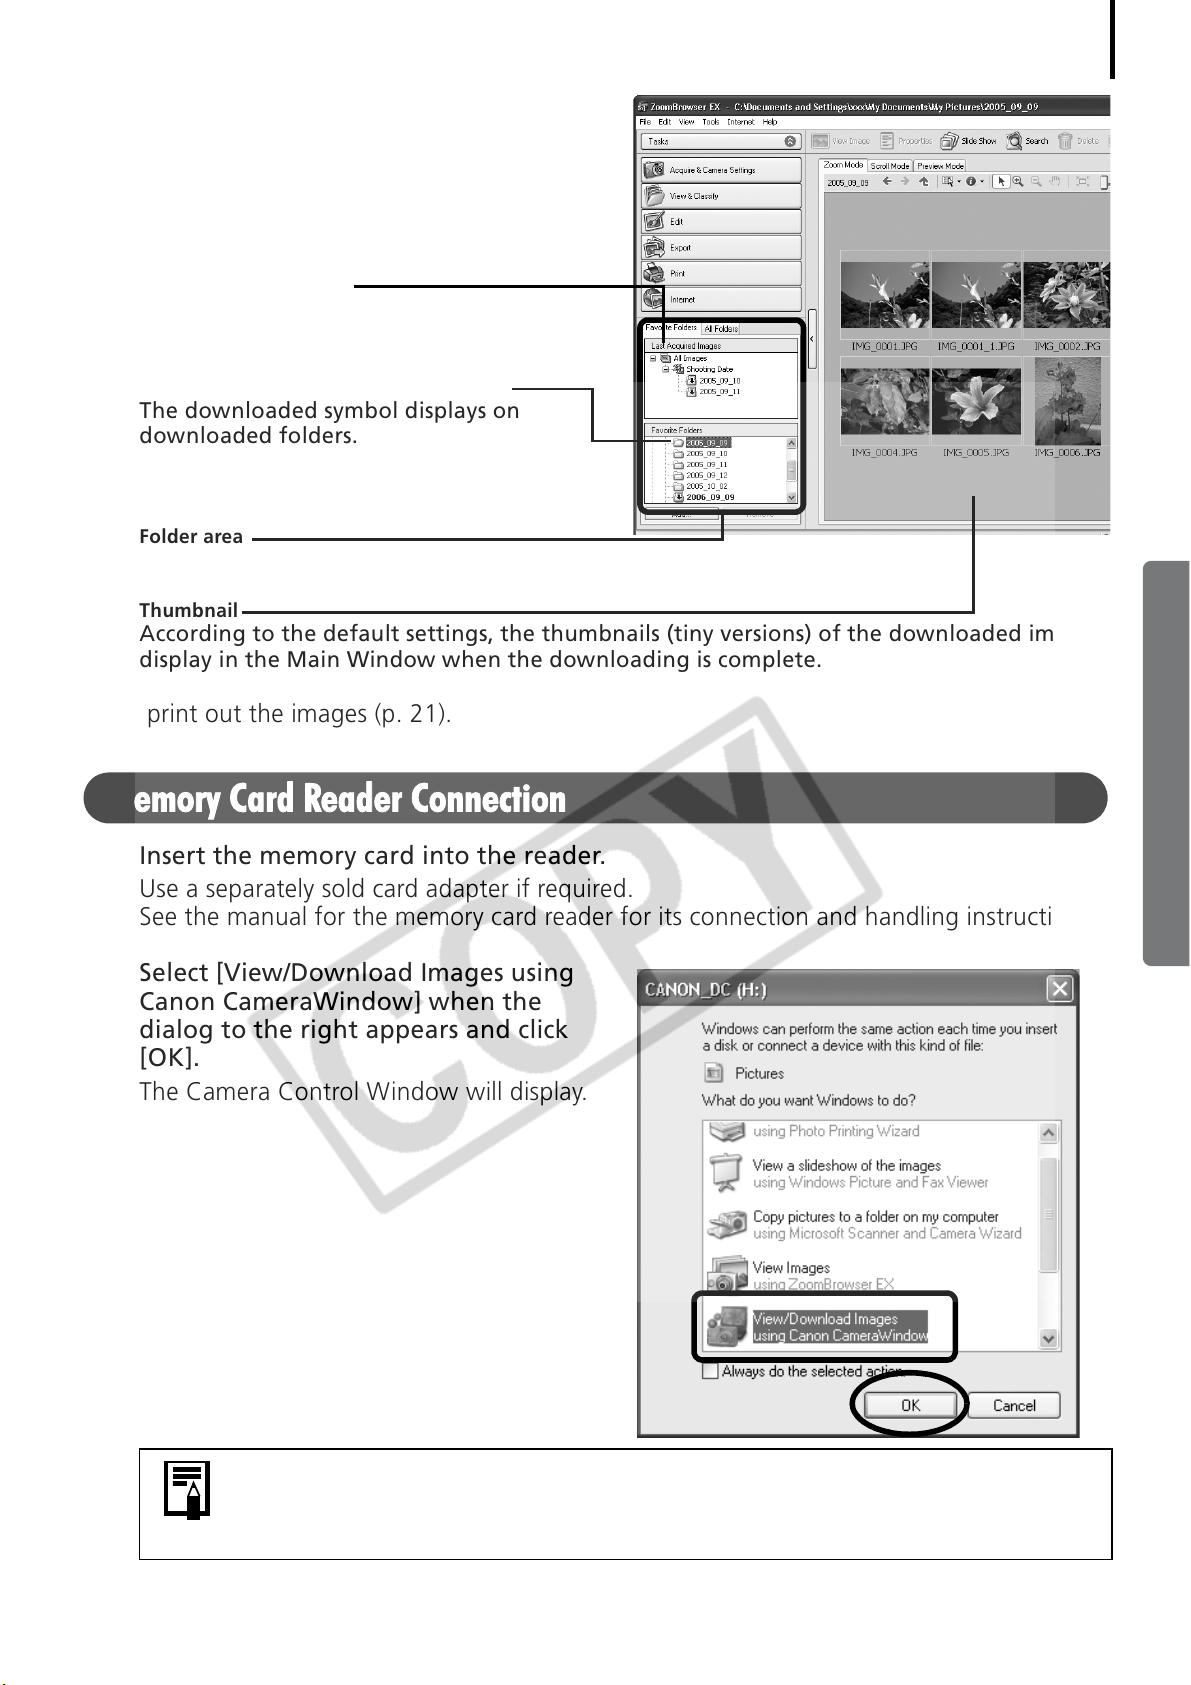
The downloaded symbol displays on
downloaded folders.
Folder area
Thumbnail
According to the default settings, the thumbnails (tiny versions) of the downloaded images
display in the Main Window when the downloading is complete.
19
Next,ÅprintÅoutÅtheÅimagesÅ(p. 21).Å
Insert the memory card into the reader.
1
UseÅaÅseparatelyÅsoldÅcardÅadapterÅifÅrequired.
SeeÅtheÅmanualÅforÅtheÅmemoryÅcardÅreaderÅforÅitsÅconnectionÅandÅhandlingÅinstructions.
2 Select [View/Download Images using
Canon CameraWindow] when the
dialog to the right appears and click
[OK].
TheÅCameraÅControlÅWindowÅwillÅdisplay.
If the dialog above fails to appear, click the [Start] menu and select [All
Programs] or [Programs], followed by [Canon Utilities], [CameraWindow],
[CameraWindowMC] and [CameraWindow], and proceed to Step 3.
Page 22
Using the Software on the Windows Platform – The Basics
20
3 Click [Starts to download images].
You can adjust the settings, such as the type
of image downloaded and the destination
folder, by clicking [Preferences].
• By default, all the images that have yet to be downloaded will
download to the [Pictures] or [My Pictures] folder.
• To download images that have had their transfer settings set with the
camera, click [Preferences] and select [Images whose transfer settings
were specified with the camera] as the image type to be downloaded.
• Click [Lets you select and download images] to show the memory card
images in a list, check the images before downloading and download
only selected images.
•See Memory Card Folder Structure (p. 75) for information about
memory card folder structures and file names.
TheÅdownloadedÅimagesÅareÅsavedÅintoÅfoldersÅaccordingÅtoÅtheÅshootingÅdate.
AtÅtheÅsameÅtime,ÅtheyÅwillÅalsoÅappearÅgroupedÅbyÅdateÅinÅtheÅ[LastÅAcquiredÅImages]ÅatÅ
theÅtopÅofÅtheÅFolderÅArea.Å
Next,ÅprintÅoutÅtheÅimagesÅ(p. 21).Å
Page 23
Printing Images
One Photo per Page Print
ThereÅareÅtwoÅwaysÅinÅwhichÅimagesÅmayÅbeÅprinted:ÅOneÅPhotoÅperÅPageÅPrintÅandÅIndexÅPrint.Å
ThisÅsectionÅexplainsÅtheÅOneÅPhotoÅperÅPageÅPrintÅmethod.Å
• Movies cannot be printed, but with Windows Vista and Windows XP you can
print stills after they have been extracted from movies and saved to files.
• To use the Index Print option, click [Print] in the Main Window, followed by
[Index Print].
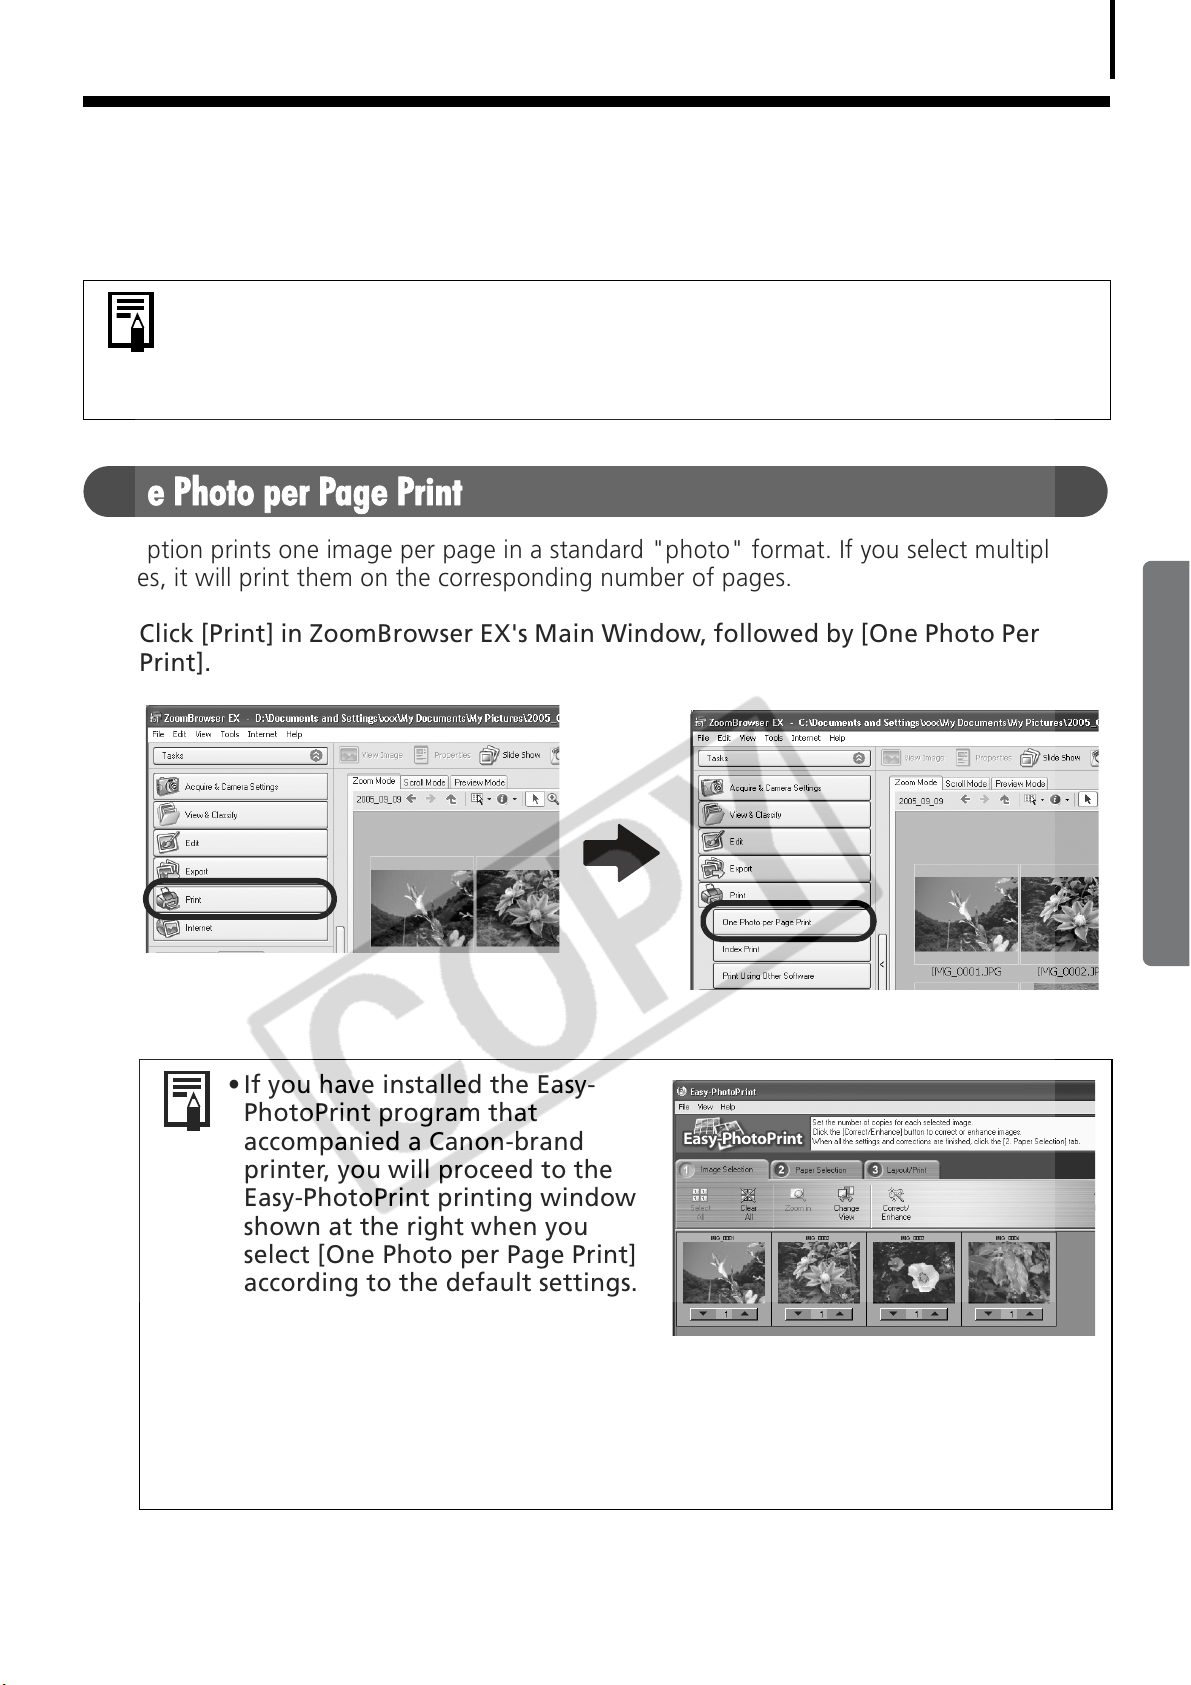
ThisÅoptionÅprintsÅoneÅimageÅperÅpageÅinÅaÅstandardÅ"photo"Åformat.ÅIfÅyouÅselectÅmultipleÅ
images,ÅitÅwillÅprintÅthemÅonÅtheÅcorrespondingÅnumberÅofÅpages.Å
1 Click [Print] in ZoomBrowser EX's Main Window, followed by [One Photo Per Page
Print].
21
• If you have installed the Easy-
PhotoPrint program that
accompanied a Canon-brand
printer, you will proceed to the
Easy-PhotoPrint printing window
shown at the right when you
select [One Photo per Page Print]
according to the default settings.
If a window similar to it opens,
read the Help menu for EasyPhotoPrint for instructions to proceed.
• To proceed to the ZoomBrowser EX printing window as shown in Step 2
when you select [One Photo per Page Print], click the [Tools] menu and
select [Preferences], followed by the [Printing] tab. Select [Use the Print
Function in ZoomBrowser EX].
Page 24
Using the Software on the Windows Platform – The Basics
22
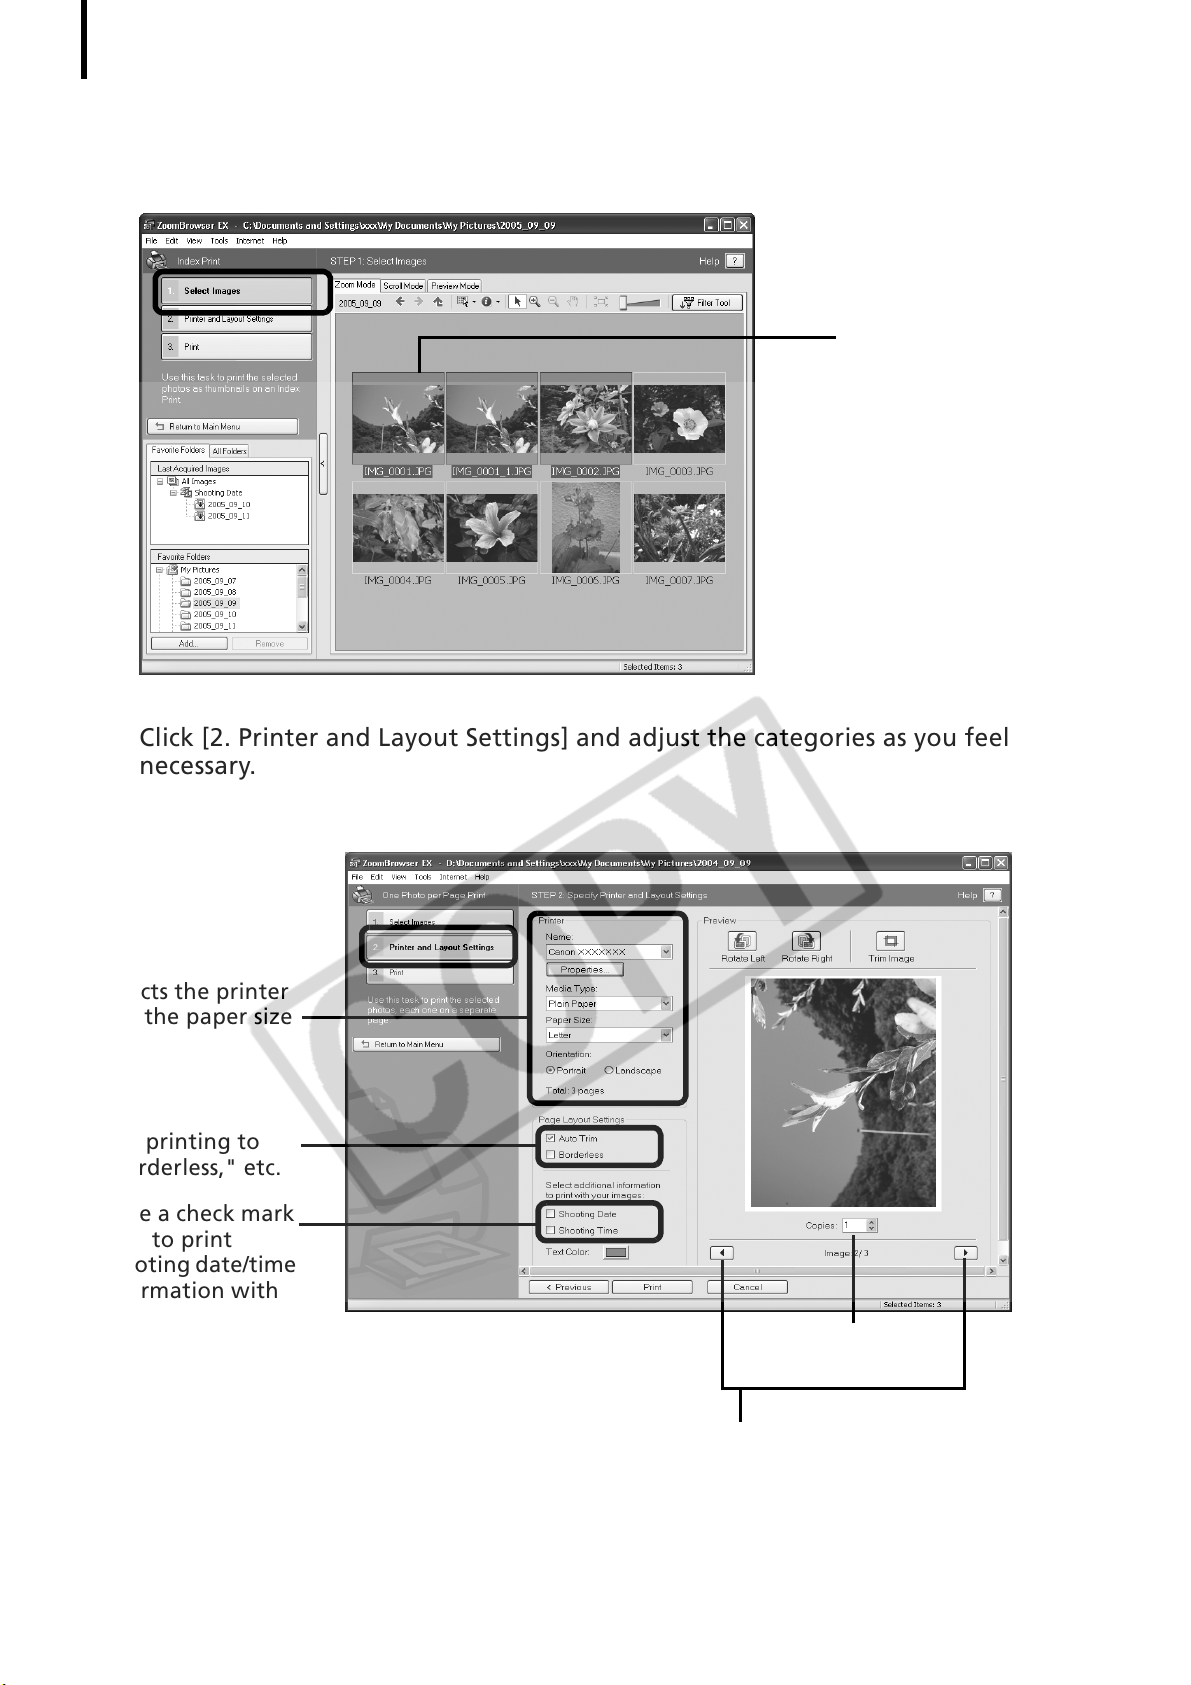
2 After confirming that [1. Select Images] is selected, select images.
YouÅcanÅselectÅmultipleÅimagesÅbyÅholdingÅtheÅ[Ctrl]ÅdownÅwhileÅclickingÅonÅsuccessiveÅ
images.
The background of
selected images
changes to blue.
3 Click [2. Printer and Layout Settings] and adjust the categories as you feel
necessary.
Selects the printer
and the paper size
etc.
Sets printing to
"borderless," etc.
Place a check mark
here to print
shooting date/time
information with
images.
Sets the number
of print copies
4 Click [3. Print].
PrintingÅwillÅstart.
This button switches between images if
multiple images were selected.
Page 25

ThisÅchapterÅexplainedÅtheÅZoomBrowserÅEXÅbasics.Å
OnceÅyouÅhaveÅmasteredÅthem,ÅtryÅtheÅadvancedÅtechniques.
Using the Software on the Windows Platform
• A PDF-format manual for ZoomBrowser EX is also available. It provides
further information about the program's features and procedures. See Using
the PDF Manuals (p. 2).
– Advanced TechniquesÅ(p. 24).Å
23
Page 26
24
Main Window
Using the Software on the Windows
Platform – Advanced Techniques
ThisÅchapterÅexplainsÅvariousÅZoomBrowserÅEXÅfeatures.Å
ProceedÅtoÅthisÅchapterÅonceÅyouÅhaveÅmasteredÅtheÅbasicÅZoomBrowserÅEXÅproceduresÅinÅtheÅ
Using the Software on the Windows Platform
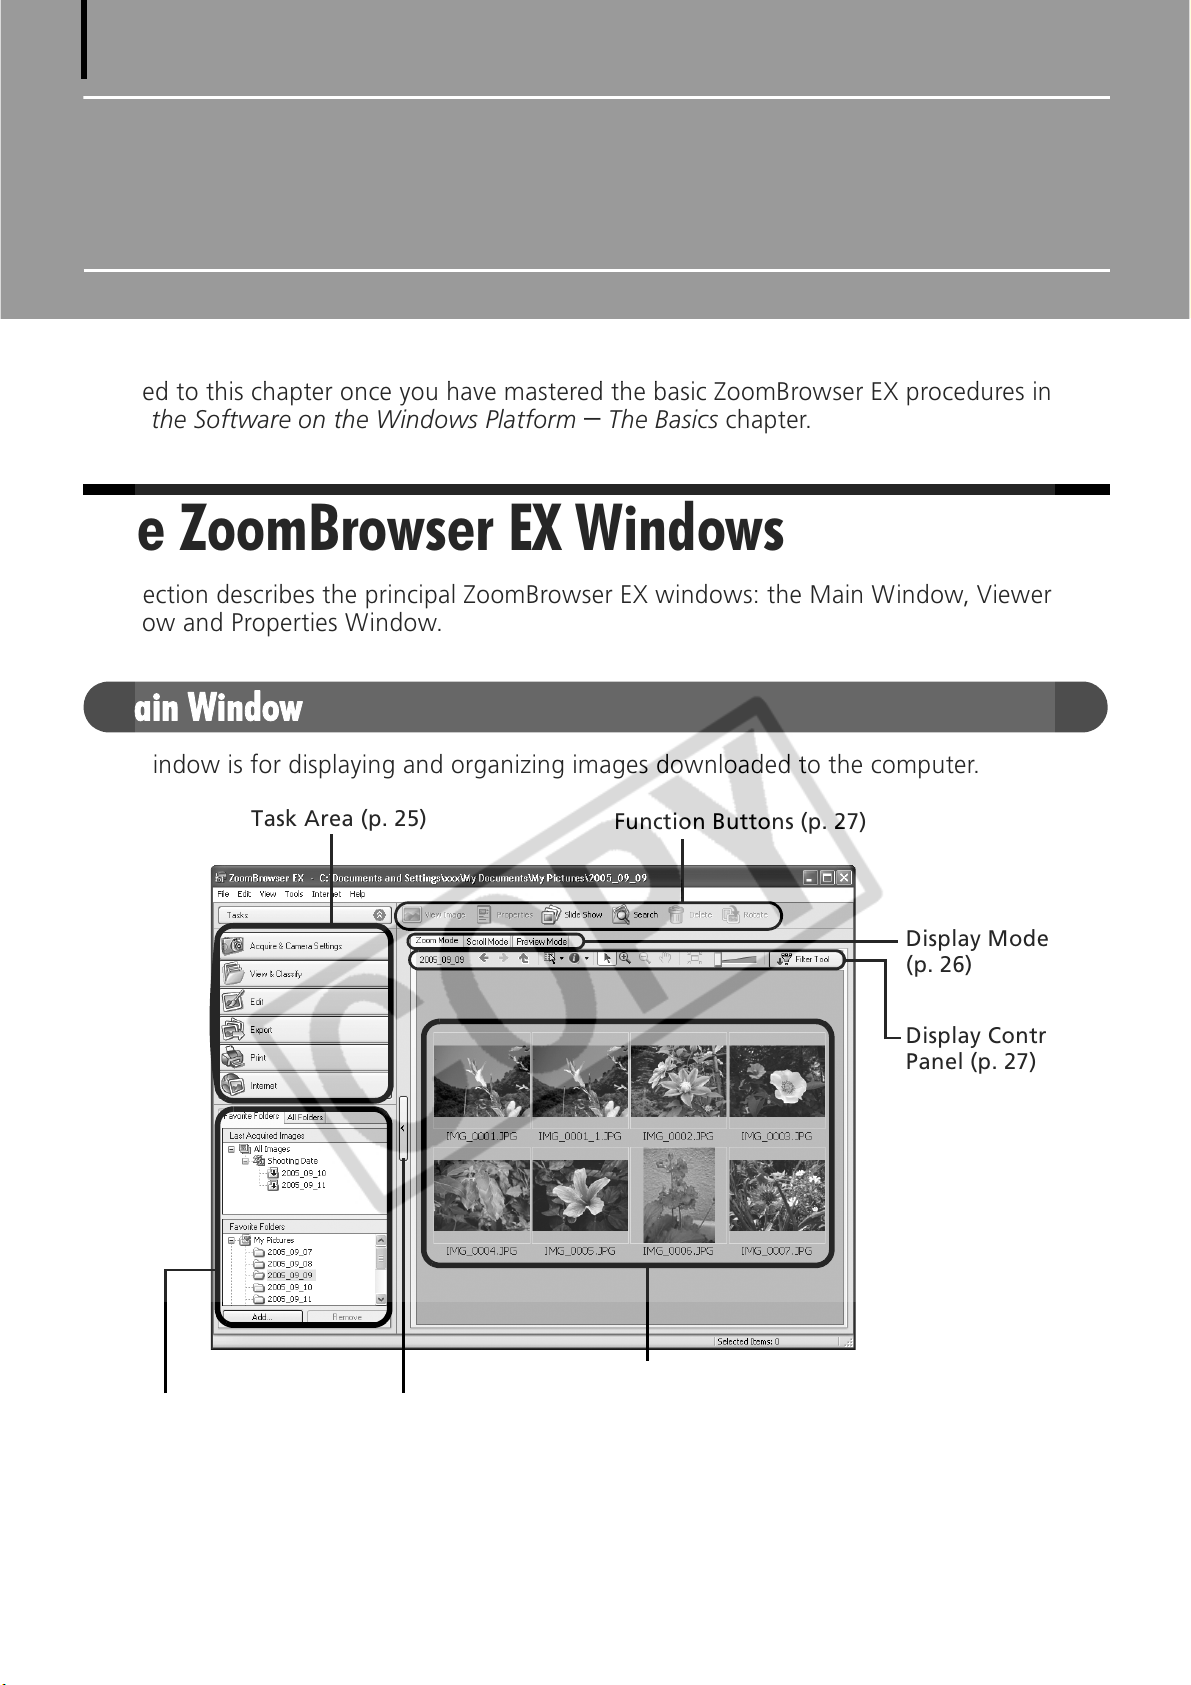
The ZoomBrowser EX Windows
ThisÅsectionÅdescribesÅtheÅprincipalÅZoomBrowserÅEXÅwindows:ÅtheÅMainÅWindow,ÅViewerÅ
WindowÅandÅPropertiesÅWindow.
– The BasicsÅchapter.
ThisÅwindowÅisÅforÅdisplayingÅandÅorganizingÅimagesÅdownloadedÅtoÅtheÅcomputer.
Task Area (p. 25)
Function Buttons (p. 27)
Display Mode
(p. 26)
Display Control
Panel (p. 27)
Folders Area (p. 25)
Browser Area (p. 25)
Switches between showing and hiding
the Task Area and Folders Area.
Page 27
Task Area
• ZoomBrowserÅEX'sÅtasksÅareÅarrangedÅhereÅlikeÅ
anÅindex.
• ClickÅaÅTas k ÅbuttonÅtoÅcarryÅoutÅtheÅdesiredÅtask.
TheseÅfeaturesÅareÅdescribedÅinÅZoomBrowser
EX FeaturesÅ(p. 30)
Folders Area
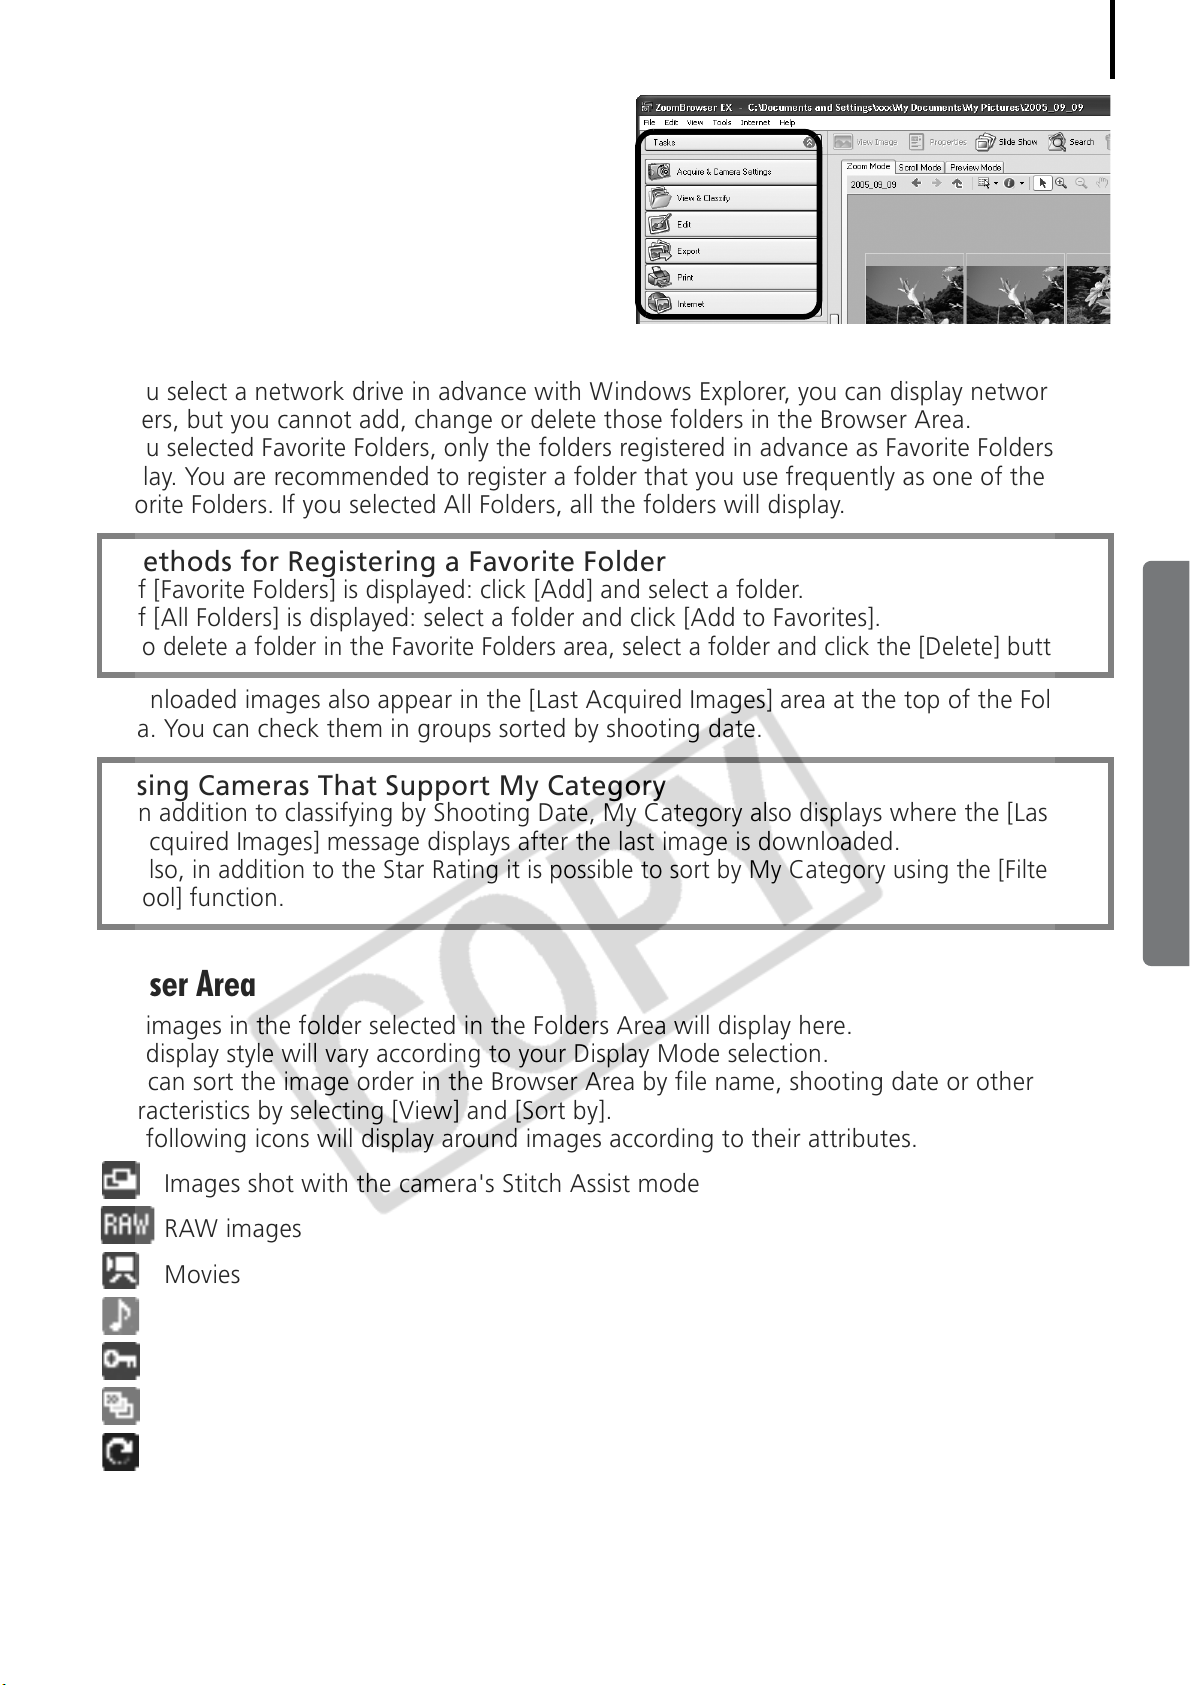
•UseÅthisÅareaÅtoÅselectÅfolders.ÅTheÅimagesÅinÅtheÅselectedÅfolderÅdisplayÅinÅtheÅBrowserÅArea.
IfÅyouÅselectÅaÅnetworkÅdriveÅinÅadvanceÅwithÅWindowsÅExplorer,ÅyouÅcanÅdisplayÅnetworkÅ
folders,ÅbutÅyouÅcannotÅadd,ÅchangeÅorÅdeleteÅthoseÅfoldersÅinÅtheÅBrowserÅArea.
•IfÅyouÅselectedÅFavoriteÅFolders,Åonly
display.ÅYo uÅareÅrecommendedÅtoÅregisterÅaÅfolderÅthatÅyouÅuseÅfrequentlyÅasÅoneÅofÅtheÅ
FavoriteÅFolders.ÅIfÅyouÅselectedÅAllÅFolders,ÅallÅtheÅfoldersÅwillÅdisplay.Å
Methods for Registering a Favorite Folder
•IfÅ[FavoriteÅFolders]ÅisÅdisplayed:ÅclickÅ[Add]ÅandÅselectÅaÅfolder.Å
•IfÅ[AllÅFolders]ÅisÅdisplayed:ÅselectÅaÅfolderÅandÅclickÅ[AddÅtoÅFavorites].
•
ToÅdeleteÅaÅfolderÅinÅtheÅFavoriteÅFoldersÅarea,ÅselectÅaÅfolderÅandÅclickÅtheÅ[Delete]Åbutton.
ÅtheÅfoldersÅregisteredÅinÅadvanceÅasÅFavoriteÅFoldersÅwillÅ
25
• DownloadedÅimagesÅalsoÅappearÅinÅtheÅ[LastÅAcquiredÅImages]ÅareaÅatÅtheÅtopÅ
Area.ÅYouÅcanÅcheckÅthemÅinÅgroupsÅsortedÅbyÅshootingÅdate.
ofÅtheÅFolderÅ
Using Cameras That Support My Category
•InÅadditionÅtoÅclassifyingÅbyÅShootingÅDate,ÅMyÅCategoryÅalsoÅdisplaysÅwhereÅtheÅ[LastÅ
AcquiredÅImages]ÅmessageÅdisplaysÅafterÅtheÅlastÅimageÅisÅdownloaded.
•
Also,ÅinÅadditionÅtoÅtheÅStarÅRatingÅitÅisÅpossibleÅtoÅsortÅbyÅMyÅCategoryÅusingÅtheÅ[FilterÅ
Tool]Åfunction.
Browser Area
•TheÅimagesÅinÅtheÅfolderÅselectedÅinÅtheÅFoldersÅAreaÅwillÅdisplayÅhere.
TheÅdisplayÅstyleÅwillÅvaryÅaccordingÅtoÅyourÅDisplayÅModeÅselection.
•YouÅcanÅsortÅtheÅimageÅorderÅinÅtheÅBrowserÅAreaÅbyÅfileÅname,ÅshootingÅdateÅorÅotherÅ
characteristicsÅbyÅselectingÅ[View]ÅandÅ[SortÅby].
•TheÅfollowingÅiconsÅwillÅ
ImagesÅshotÅwithÅtheÅcamera'sÅStitchÅAssistÅmodeÅ
RAWÅimages
Movies
displayÅaroundÅimagesÅaccordingÅtoÅtheirÅattributes.
ImagesÅwithÅsoundÅmemoÅattachments
ProtectedÅimages
ImagesÅshotÅwithÅtheÅcamera'sÅAEBÅfunction
RotatedÅImagesÅ(InÅdisplayÅonly)
Page 28

Using the Software on the Windows Platform – Advanced Techniques
26
Display Mode
•SelectsÅtheÅdisplayÅstyleÅforÅtheÅBrowserÅArea.
Zoom Mode
DisplaysÅallÅtheÅimagesÅinÅaÅfolderÅasÅthumbnailÅ
images.ÅThisÅmodeÅisÅconvenientÅforÅsearchingÅ
forÅimagesÅsinceÅmanyÅcanÅbeÅdisplayedÅatÅ
once.Å
If additional folders are nested within a
folder, their images are displayed as
thumbnails as well.
If you move the mouse cursor over a folder,
will display on the upper right. Clicking
here displays that folder zoomed in.
Scroll Mode
TheÅimagesÅwithinÅtheÅselectedÅfolderÅandÅ
subfoldersÅwillÅdisplay.ÅIfÅyouÅsetÅtheÅdisplayÅ
folderÅdepthÅ(level)ÅtoÅ[1]ÅorÅgreater,ÅtheÅ
thumbnailsÅofÅtheÅimagesÅinÅtheÅfolderÅwillÅalsoÅ
display.ÅYo uÅcanÅchangeÅtheÅfolderÅdepthÅinÅtheÅ
[Tools]ÅmenuÅunderÅtheÅ[Preferences]Åoption.
Preview Mode
ThisÅmodeÅdisplaysÅtheÅimageÅatÅaÅlargerÅsizeÅasÅ
wellÅasÅtheÅimageÅinformation.Å
Positioning the mouse pointer over a thumbnail causes the image to appear
at a higher magnification in a Mouse Over Window. You can turn off this
function by clicking the [Show Information], and removing the check
mark from the [Show Mouse Over Windows] option.
Page 29

Display Control Panel
•ThisÅpanelÅadjustsÅtheÅdisplayÅsettingsÅforÅtheÅBrowserÅArea.
27
Selection Menu
Click this to select/deselect all
images in the Browser Area.
Show/Hide Image Information Menu
Select here to show/hide such image
information as the file name or
shooting date or rating beneath the
thumbnail.
Fit to Window
Changes the thumbnail size to
fit them into the window.
Select Button
Use this to select images
in Zoom mode.
Function Buttons
•TheseÅbuttonsÅareÅavailableÅforÅexecutingÅvariousÅfunctions.
View Image Button
Displays the selected image
or movie in the Viewer
Window.
Slide Show Button
Starts a slide show of the
selected images.
Display Size
Changes the size of the
thumbnail in the Browser Area.
Filter Tool Menu
Displays only images that
correspond to the specific
conditions.
Rotate Button
Rotates the selected
image.
Properties Button
Displays information about
the selected image in the
Properties Window.
Search Button
Searches for images
using such criteria as the
Star Rating,
modification date,
shooting date,
comments or keywords.
Delete Button
Deletes selected
images or folders.
Page 30

Using the Software on the Windows Platform – Advanced Techniques
Viewer Window
28
Double-click an image in the Browser Area to display it in the Viewer Window.
Edit Menu
You can edit, eliminating red eyes,
adjusting colors and brightness,
cropping and inputting titles. You can
also use it to start up other programs
for editing.
Print Button
Prints the displayed image.
Shooting
Information
Display Button
Displays image
shooting
information.
Synchronize Button
Synchronizes the
display settings when
multiple images are
displayed.
Image Selector
Button
Switches between
images.
Sets the image
display size to the
size in the Viewer
Window.
Displays images in
the Viewer
Window at their
actual size.
Zoom
Changes the image
zoom setting.
Number of
Displays
Button
Displays
multiple
images at
once. This is
handy for
comparing
images.
Star Rating
Sets the Star Rating for an image.
Full Screen Button
Displays the image in the full screen mode. Click the
image or press any key on the keyboard to restore the
normal display mode.
• If a RAW image is displayed, the [Display Original Image] button displays
beneath it. Clicking this button displays the converted image in the Viewer
Window.
• With Windows Vista and Windows XP, when a movie file is displayed, the
(Capture Still Frame) button will display beside the Star Ratings. Clicking
this button extracts still images from movies.
Page 31

Properties Window
TheÅPropertiesÅWindowÅdisplaysÅwhenÅyouÅselectÅanÅimageÅinÅtheÅBrowserÅAreaÅandÅclickÅtheÅ
PropertiesÅbutton.ÅTheÅPropertiesÅWindowÅdoesÅnotÅdisplayÅinÅtheÅPreviewÅMode.
Shows or hides
categories.
Plays a sound memo attached
to an image.
Protect
File Name
The file name
can be changed.
Prevents an image from being
overwritten or deleted.
29
Star Rating
Sets the rating
for an image.
Shooting Information
Displays detailed
information, such as the
shutter speed and
exposure compensation
setting. The camera model
will determine what
information is displayed.
Comment
You can type a comment here.
Keywords
Sets the keywords used in
searches.
Brightness Histogram
A graph of the highlights and
shadows distribution in an
image.
Image Selector Buttons
Switches between images.
Page 32

Using the Software on the Windows Platform – Advanced Techniques
30
ZoomBrowser EX Features
ThisÅsectionÅbrieflyÅintroducesÅtheÅTaskÅAreaÅfunctions.
Some functions may not be available with certain camera models. Check your
Camera User Guide to see if your model supports them.
Acquire & Camera Settings
OpensÅtheÅCameraÅControlÅWindow,ÅwhichÅletsÅ
youÅperformÅtheÅfollowingÅoperations.
Connect to Camera
ConnectsÅtoÅyourÅcameraÅandÅletsÅyouÅperformÅtheÅfollowingÅoperations.
•Acquire Images
DownloadsÅimagesÅandÅsoundÅfilesÅfromÅtheÅcameraÅ(p. 16).
•Print Images
SelectsÅandÅprintsÅtheÅimagesÅinÅaÅcamera.ÅYou ÅcanÅprintÅnumerousÅways,ÅusingÅDPOFÅ
settings,ÅprintÅallÅimages,ÅtheÅIndexÅPrintÅoption,ÅOneÅPhotoÅperÅPageÅPrintÅoption,ÅorÅbyÅ
selectingÅimagesÅbeforeÅprinting.ÅÅ
•Set to Camera
SetsÅcameraÅsettings,ÅsuchÅasÅtheÅMyÅCameraÅsettingsÅ(p. 39).ÅItÅalsoÅuploadsÅimagesÅfromÅ
theÅcomputerÅtoÅtheÅcamera.
•Remote Shooting
AllowsÅyouÅtoÅoperateÅtheÅcameraÅshutterÅfromÅtheÅcomputerÅ(p. 35).
Connect to EOS Camera
ThisÅcanÅonlyÅbeÅusedÅwithÅEOSÅseriesÅcameras.ÅForÅdetailsÅonÅthisÅfunction,ÅseeÅtheÅuserÅguideÅ
forÅyourÅcamera.Å(WindowsÅVistaÅandÅWindowsÅXPÅonly)
Acquire Images from Memory Card
DownloadÅimagesÅandÅsoundÅfilesÅfromÅaÅmemoryÅcardÅ(p. 19).
You ÅcanÅalsoÅselectÅimagesÅonÅtheÅmemoryÅcardÅandÅprintÅthem.
View & Classify
View as a Slide Show
StartsÅaÅslideÅshowÅofÅtheÅimagesÅselectedÅinÅtheÅ
BrowserÅArea.
Rename Multiple Files
ChangesÅtheÅfileÅnamesÅofÅtheÅselectedÅimagesÅinÅaÅsingleÅpass.
Classify into Folder
ClassifiesÅimagesÅandÅsavesÅthemÅintoÅaÅspecifiedÅfolder.Å
Search
PerformsÅimageÅsearchesÅusingÅcriteriaÅsuchÅasÅtheÅStarÅRating,ÅmodificationÅdate,ÅshootingÅ
date,ÅcommentsÅorÅkeywords.ÅStarÅRatings,ÅcommentsÅandÅkeywordsÅcanÅbeÅsetÅinÅtheÅimageÅ
informationÅcolumnÅinÅtheÅPreviewÅModeÅorÅinÅtheÅPropertiesÅWindow.Å
Page 33

Edit
Edit Image
AllowsÅyouÅtoÅperformÅimageÅediting,ÅsuchÅasÅ
cropping,ÅimageÅcorrectionÅandÅred-eyeÅ
correction.ÅYouÅcanÅalsoÅuseÅitÅtoÅstartÅotherÅimageÅeditingÅprograms.Å
Stitch Photos
MergesÅmultipleÅimagesÅandÅcreatesÅaÅsingleÅlargeÅpanoramicÅimageÅ(p. 38).
Edit Movie
EditsÅmoviesÅorÅstillÅimagesÅstrungÅtogether.ÅYo uÅcanÅaddÅtextÅasÅtitles,ÅorÅbackgroundÅmusic,Å
andÅapplyÅvariousÅeffectsÅ(p. 34).
Process RAW Images
ConvertsÅRAWÅimagesÅintoÅstandardÅimages.ÅYou ÅcanÅadjustÅtheÅimageÅbrightness,ÅcontrastÅ
andÅcolorÅbalanceÅamongÅotherÅattributesÅduringÅconversion.
Export
31
Export Still Images
AllowsÅyouÅtoÅchangeÅtheÅimageÅsizeÅorÅtype,Å
andÅexportÅitÅasÅaÅnewÅimage.Å
Export Movies
AllowsÅyouÅtoÅchangeÅtheÅmovieÅsizeÅorÅtype,ÅandÅexportÅitÅasÅaÅnewÅmovie.
Extract frames from a movie
ExtractsÅstillÅimagesÅfromÅmoviesÅoverÅaÅspecifiedÅintervalÅandÅsavesÅthemÅasÅimageÅfiles.
Å(WindowsÅVistaÅandÅWindowsÅXPÅonly)
Export Shooting Properties
AllowsÅyouÅtoÅselectÅtheÅnecessaryÅdataÅfromÅtheÅshootingÅinformationÅandÅexportÅitÅasÅaÅtextÅ
file.Å
Export as a Screen Saver
ExportsÅtheÅimageÅasÅaÅscreenÅsaverÅfile.
Export as a Wallpaper
ExportsÅtheÅimageÅasÅaÅwallpaperÅfile.
Backup to CD
CopiesÅimagesÅtoÅaÅCD-R/RWÅdiskÅforÅbackup.
(WindowsÅVistaÅandÅWindowsÅXPÅonly)
The Backup to CD function can only be used on computers satisfying the
following requirements.
• A CD-R/RW drive is included as standard equipment
• The write to CD-R/RW Driver function operates correctly on the Windows
Vista and Windows XP platforms
Page 34

Using the Software on the Windows Platform – Advanced Techniques
32
Print
One Photo per Page Print
PrintsÅoneÅimageÅperÅpageÅ(p. 21).
You ÅcanÅprintÅ"photo"ÅprintsÅeasily.
Index Print
LinesÅupÅsmallÅversionsÅofÅtheÅimagesÅinÅrowsÅandÅprints.
Print Using Other Software
SelectÅtheÅsoftwareÅtoÅuseÅandÅthenÅprint.
Internet
Email Images
ConvertsÅtheÅselectedÅimagesÅtoÅtheÅappropriateÅ
sizeÅforÅtransmissionÅbyÅe-mail.ÅYouÅcanÅalsoÅuseÅ
itÅtoÅautomaticallyÅstartÅanÅe-mailÅprogramÅafterÅconversion.
• To return to the previous screen after selecting a task, click [Return to Main
Menu] at the bottom of the task screen.
• Various Help functions are available in ZoomBrowser EX. Click the [Help]
menu, [?] button or [Help] button to display topics about operational
procedures or the functions available.
Page 35

Replaying Movies
QuickTime is required to play and edit movies on the Windows 2000 platform.
1 Double-click a thumbnail image with a movie icon in ZoomBrowser EX’s Browser
Area.
TheÅViewerÅWindowÅwillÅopenÅandÅplayÅtheÅmovie.Å
You can save the displayed
scene as a still image by
clicking here.
33
You can control the
movie's playback and
sound volume.
Page 36

Using the Software on the Windows Platform – Advanced Techniques
34
Editing Movies
You ÅcanÅcreateÅandÅeditÅmovies:ÅlinkÅmoviesÅandÅstillsÅthatÅhaveÅbeenÅdownloadedÅtoÅyourÅ
computer,ÅaddÅbackgroundÅmusic,ÅsuperimposeÅtitlesÅandÅotherÅtext,ÅandÅapplyÅvariousÅeffectsÅ
toÅtheÅmovies.Å
• QuickTime is required to play and edit movies on the Windows 2000
platform.
• Movies are saved as Motion JPEG AVI movies.
1 Click [Edit] in ZoomBrowser EX’s Main Window, followed by [Edit Movie].
2 Click [1. Add Images] and select the image (movie or still) you wish to edit.
YouÅcanÅselectÅmultipleÅmoviesÅorÅstills.
3 Follow the steps at the left of the window to edit the movie and save it.
Follow these steps
to proceed.
Instructions
Click this button for detailed
operational instructions.
Click this button to
play the movie
being edited.
Storyboard Area
Displays thumbnails of the selected
images.
Links images in order from left to right.
Transition Effects Box
Appears between adjacent images
and displays the symbols of the
transition effects linking images.
Page 37

Operating the Shutter Remotely (Remote
Preparing for Remote Shooting
Shooting)
You ÅcanÅrecordÅstillÅimagesÅbyÅusingÅaÅcomputerÅtoÅcontrolÅtheÅshutterÅofÅaÅconnectedÅcamera.Å
ThisÅisÅparticularlyÅusefulÅforÅcheckingÅimagesÅonÅtheÅlargerÅdisplayÅofÅtheÅcomputerÅasÅyouÅ
recordÅthemÅandÅforÅhighÅvolumeÅphotographyÅwithoutÅworryingÅaboutÅfillingÅtheÅcamera’sÅ
memoryÅcard.
This function may not be available with certain camera models. Check your
Camera User Guide to see if your model supports it.
Attach the supplied interface cable to the computer's USB port and the camera's
1
DIGITAL terminal and place the camera in the correct mode for connecting.
35
• Methods for connecting the camera to the computer and placing it in
the correct mode for connecting vary between camera models. Please
refer to the Camera User Guide.
• Perform the settings described in First Time Camera is Connected to a
Computer (p. 17) the first time you connect the camera to the
computer.
TheÅCameraÅControlÅWindowÅwillÅdisplay.
2 Open the lens cover or remove the lens cap on models equipped with them.
ÅProceedÅtoÅtheÅnextÅstepÅifÅyourÅmodelÅdoesÅnotÅhaveÅone.Å
3 Click the [Remote shooting] tab.
4 Click [Starts Remote Shooting].
5 Select a destination for the captured images and click [OK].
Page 38

Using the Software on the Windows Platform – Advanced Techniques
RemoteCapture Task Window
36
TheÅRemoteCaptureÅTas k ÅwindowÅhasÅtheÅfollowingÅfeatures.
Shows/Hides the
viewfinder or detailed
settings area.
You can add
comments to images
by placing a check
mark here and
typing text in the
boxes below.
Viewfinder Display
Click the [Start/Stop
Viewfinder] button
while a connection to
the camera is open to
display the image
appearing in the
camera’s viewfinder.
Size and Resolution Selector
Selects the size and resolution at which images are captured.
Rotation Settings
Sets the rotation
parameters for
images after they are
captured.
Release Button
Releases the
shutter.
Slide this to zoom
the camera in or out.
Start/Stop Viewfinder
Button
Starts or stops the
viewfinder display.
Refresh Button
Resets the exposure,
focus and white
balance.
Set the basic camera settings here.
The settings available in the RemoteCapture Task window vary between
camera models.
Page 39

Remote Shooting
Ensure that you turn off your computer’s standby mode before you begin
remote shooting. The device performance cannot be guaranteed if the
computer enters the standby mode.
Click and check the subject in the viewfinder.
1
2 Change the image size or resolution, the rotation settings and the settings at the
bottom of the window as required.
IfÅyouÅintendÅtoÅholdÅtheÅcameraÅverticallyÅtoÅphotographÅaÅsubject,ÅyouÅcanÅsaveÅtheÅ
imageÅtoÅtheÅcomputerÅwithÅtheÅcorrectÅorientationÅifÅyouÅsetÅtheÅrotationÅsettingsÅinÅ
advance.Å
If your camera is equipped with the Auto Rotate function and you set it
to On, the image will automatically be rotated and appear in the correct
viewing orientation in the RemoteCapture Task window when holding
the camera vertically.
37
3 Click the [Release] button.
• You can release the shutter by pressing the camera’s shutter button or
the keyboard’s space key.
• Other than the shutter button, the camera's buttons and switches,
including the zoom, cannot be operated while the camera is being
controlled with the Remote Shooting function.
• You may notice that the interval between the shutter release and
activation is slightly longer for remote shooting than when the camera
is used independently.
Page 40

Using the Software on the Windows Platform – Advanced Techniques
38
Merging Panoramic Images - PhotoStitch
You ÅcanÅcreateÅaÅwideÅpanoramicÅimageÅbyÅmergingÅimagesÅofÅaÅsceneÅshotÅseparately.Å
PhotoStitchÅautomaticallyÅdetectsÅtheÅoverlappingÅareasÅofÅadjacentÅimagesÅandÅcorrectsÅforÅtheÅ
sizeÅandÅorientation.ÅYouÅcanÅalsoÅmanuallyÅspecifyÅtheÅoverlappingÅareas.Å
1
Click [Edit] in the ZoomBrowser EX’s Main Window and click [Stitch Photos].
2 Click [1. Select Images] and select several images in the Browser Area.
3 Click [2. Open PhotoStitch].Å
Instructions
4 Merge the images following the instructions in the guidance panel at the top of
the PhotoStitch window.
Images Shot in Stitch Assist Mode
It is easy to merge images if they are shot with the camera's Stitch Assist
mode because PhotoStitch can automatically detect the image order and
orientation. The series of images are saved together in a single folder
when they are downloaded from the camera.
Symbol displayed by images
shot in Stitch Assist mode.
•SomeÅcameraÅmodelsÅmayÅnotÅsupportÅStitchÅAssistÅmode.Å
• SeeÅtheÅCamera User GuideÅforÅinformationÅaboutÅshootingÅinÅStitchÅAssistÅmode.
•ImagesÅshotÅinÅStitchÅAssistÅmodeÅwithÅaÅwideÅconverter,ÅteleconverterÅorÅclose-upÅlensÅ
cannotÅbeÅmergedÅaccurately.Å
Page 41

Enjoy Customizing Your Camera with the My
Displaying the My Camera Window
Camera Settings
This function may not be available with certain camera models. Check your
Camera User Guide to see if your model supports it.
TheÅstart-upÅimage,Åstart-upÅsound,ÅshutterÅsound,ÅoperationÅsound,ÅandÅself-timerÅsoundÅareÅ
calledÅtheÅMyÅCameraÅsettings.ÅYou ÅcanÅaddÅyourÅfavoriteÅimagesÅandÅsoundsÅfromÅyourÅ
computerÅtoÅtheÅMyÅCameraÅsettings.ÅThisÅtopicÅexplainsÅhowÅtoÅuploadÅtheÅMyÅCameraÅ
settingsÅsavedÅontoÅyourÅcomputerÅtoÅtheÅcamera
To register the My Camera settings with the camera, ensure that you install
the software that came with the camera.
ÅandÅviceÅversa.
39
Attach the supplied interface cable to the computer's USB port and the camera's
1
DIGITAL terminal and place the camera in the correct mode for connecting.
• Methods for connecting the camera to the computer and placing it in
the correct mode for connecting vary between camera models. Please
refer to the Camera User Guide.
• Perform the settings described in First Time Camera is Connected to a
Computer (p. 17) the first time you connect the camera to the computer.
TheÅCameraÅControlÅWindowÅwillÅdisplay.Å
2 Click the [Set to Camera] tab.
3 Click [Set My Camera].
TheÅMyÅCameraÅwindowÅwillÅdisplay.Å
Page 42

Using the Software on the Windows Platform – Advanced Techniques
The My Camera Window Features
40
ZoomBrowserÅEXÅalreadyÅcontainsÅseveralÅpre-recordedÅMyÅCameraÅsettings.ÅYouÅcanÅcheckÅ
theseÅitemsÅwithÅtheÅMyÅCameraÅwindow.
Tabs
Click here to switch between adjusting the settings individually or in themed sets.
Play Button
Plays the audio from the
settings file in the
Computer
Displays the list of
settings files saved
onto the computer.
camera.
Camera
Displays the settings in
the camera.
Delete Button
Deletes a settings file
from the camera.
Play Button
Plays the audio from
the selected settings
file.
Delete Button
Deletes a settings file from
the computer.
The pre-recorded My Camera
settings in ZoomBrowser EX
cannot be deleted (Windows
Vista only).
Depending on the camera, the [Return to
factory default settings] button will display.
Clicking this button will return the My Camera
setting to the factory default setting.
Save to Camera Button
Saves a computer
settings file onto the
camera.
Save to PC Button
Saves a camera settings
file onto the computer.
Page 43

Saving the My Camera Settings to the Camera
Saving the Camera’s My Camera Settings to the Computer
• My Camera settings can be selected and saved in either of two ways to the
camera: individually or in theme sets.
•The “Animal” theme, for example, features an animal in the start-up image
and animal calls in each of the sound files. The names of the prepared files
for the various My Camera settings themes all begin with the same root
name. The start-up image and sound files in the "Animal" theme, for
example, all begin with "Animal~".
Do not detach the interface cable, turn the camera power off or do anything
else that could disconnect the camera from the computer while the My
Camera settings are being saved to the camera or the settings from the
camera are being saved to the computer.
41
1 Select the [Setup as a theme] tab in the My Camera window.
ToÅsetÅtheÅstart-upÅimageÅorÅsoundÅindividually,ÅclickÅtheÅ[SetÅindividually]ÅtabÅandÅselectÅit.
2 Select the settings file you wish to save to the camera from the My Computer list.
3 Select the setting from the Camera list that you would like to change and click
[Save to Camera].
ThisÅconcludesÅtheÅprocessÅofÅsavingÅtheÅMyÅCameraÅsettingsÅtoÅtheÅcamera.
TheÅCameraÅlistÅsettingÅwillÅchangeÅtoÅtheÅselectedÅfile.ÅIfÅaÅsettingÅforÅthisÅcategoryÅhasÅ
previouslyÅbeenÅsavedÅtoÅtheÅcamera,ÅitÅwillÅbeÅoverwritten.Å
RepeatÅstepsÅ1-3ÅasÅrequired.
ToÅuseÅthisÅdataÅon
cameraÅitself.ÅPleaseÅseeÅtheÅCamera User GuideÅforÅtheseÅinstructions.
Å
ÅtheÅcamera,ÅchangeÅtheÅstart-upÅimageÅandÅsoundÅsettingsÅonÅtheÅ
1 Select the [Setup as a theme] tab in the My Camera window.
ToÅsetÅtheÅstart-upÅimageÅorÅsoundÅindividually,ÅclickÅtheÅ[SetÅindividually]ÅtabÅandÅselectÅit.
2 Select the settings files from the Camera list that you wish to save to the
computer.
3 Click [Save to PC].
4 Add a name to the settings file you are saving and click [OK].
ThisÅconcludesÅtheÅprocessÅofÅsavingÅtheÅMyÅCameraÅsettingsÅtoÅtheÅcomputer.
RepeatÅstepsÅ1-4ÅasÅrequired.
Page 44

Using the Software on the Windows Platform – Advanced Techniques
Adding New Data to the My Camera Window
42
CreateÅaÅnewÅimageÅorÅsoundÅfileÅandÅaddÅitÅtoÅtheÅMyÅCameraÅwindow.
• AddingÅImageÅandÅSoundÅFilesÅAfterÅCreatingÅThem
Adding Original Start-up Images and Sounds After Creating Them
You ÅcanÅeffortlesslyÅcreateÅstart-upÅimageÅandÅsoundÅfilesÅusingÅtheÅ"MyÅCameraÅMaker"Å
program.Å
1 Click the [Edit] menu in the ZoomBrowser EX Main Window and select [Manage
My Camera].
TheÅMyÅCameraÅwindowÅwillÅdisplay.
2 Click the [Set individually] tab in the My Camera window, followed by the [Create
My Camera Data] button.
MyÅCameraÅMakerÅwillÅstart.
Add File Button
Adds images and sound files for use
as settings files. Added files display
in the list.
Connect to camera Button
Connects to the camera.
3 Follow the instructions at the top part
of the My Camera Maker window and
create image or sound files.
Instructions
Page 45

4 Once you have saved the file, click and close the My Camera Maker window.
YouÅhaveÅnowÅsucceededÅinÅaddingÅtheÅfileÅasÅaÅsettingsÅfileÅtoÅtheÅcomputer.
5 To connect to the camera, click
[Connect to Camera].
YouÅcanÅaddÅtheÅsettingsÅfilesÅyouÅjustÅ
addedÅtoÅtheÅcomputerÅtoÅtheÅcameraÅusingÅ
theÅsameÅproceduresÅasÅinÅSaving the My
Camera Settings to the CameraÅ(p. 41).
• Use settings like those below when creating an image file for the startup image using an image editing program other than "My Camera
Maker."
Compression Method : JPEG (Baseline JPEG)
Data Sampling : 4:2:0 or 4:2:2
Pixels (w x h) : 320 x 240 pixels
43
•Use settings like those below when creating a sound file using a sound
recording program other than "My Camera Maker."
Compression Method : WAV (Monaural)
Quantifying Bits : 8 bit
Sampling Frequency : 11.025 kHz or 8.000 kHz
Use the following lengths as guidelines for the length of sound file that
can be saved to the camera.
Duration in Seconds
Type
11.025 kHz 8.000 kHz
Start-Up Sound 1.0Åsec.ÅorÅless 1.3Åsec.ÅorÅless
Shutter Sound 0.3Åsec.ÅorÅless 0.4Åsec.ÅorÅless
Operation Sound 0.3Åsec.Å
Self-Timer Sound 2.0Åsec.ÅorÅless 2.0Åsec.ÅorÅless
orÅless 0.4Åsec.ÅorÅless
Page 46

44
Items to Prepare
Installation Procedures
Using the Software on the Macintosh
Platform – Preparations
ThisÅchapterÅexplainsÅtheÅbasicÅproceduresÅforÅinstallingÅtheÅsoftware.ÅReadÅthisÅmaterialÅbeforeÅ
youÅconnectÅtheÅcameraÅtoÅtheÅcomputerÅforÅtheÅfirstÅtime.
Installing the Software
StartÅbyÅinstallingÅtheÅsoftwareÅfromÅtheÅCanonÅDigitalÅCameraÅSolutionÅDisk.
•YourÅcameraÅandÅcomputer
• CanonÅDigitalÅCameraÅSolutionÅDisk
• InterfaceÅcableÅsuppliedÅwithÅtheÅcamera
Close any programs that are running.
1
2 Place the Canon Digital Camera Solution Disk in the
computer’s CD-ROM drive.
3 Double-click the [Canon Digital Camera Installer] icon
in the CD-ROM window.
4 Click the Digital Camera Software
[Install] button.
Installer Panel
Page 47

5 Select [Easy Installation] and click
[Next].
SelectÅ[CustomÅInstallation]ÅtoÅselectÅ
programsÅindividuallyÅforÅinstallation.Å
6 Click [Agree] if you agree to all of the
terms of the software license
agreement.
7 Review the installation settings and
click [Next].
FollowÅtheÅon-screenÅinstructionsÅtoÅ
proceedÅwithÅtheÅinstallation.
45
8 When the installation is over, click [OK].
9 Click [Exit] in the installer panel and
remove the disk from the CD-ROM drive.Å
ThisÅconcludesÅtheÅsoftwareÅinstallation.Å
See Uninstalling the Software (p. 72) to delete the software installed
with these procedures.
ContinueÅbyÅdownloadingÅimagesÅtoÅtheÅcomputerÅ(p. 46).Å
Page 48

46
Camera to Computer Connection
Using the Software on the Macintosh
Platform – The Basics
ThisÅchapterÅexplainsÅtheÅproceduresÅforÅusingÅImageBrowserÅtoÅdownloadÅtheÅcamera'sÅimagesÅ
toÅtheÅcomputerÅandÅprintÅthem.
ReadÅthisÅchapterÅafterÅcompletingÅtheÅpreparationsÅinÅtheÅUsing the Software on the
Macintosh Platform
Downloading Images to the Computer
BeginÅbyÅdownloadingÅtheÅimagesÅtoÅyourÅcomputer.ÅTheÅdownloadingÅprocedureÅisÅslightlyÅ
differentÅaccordingÅtoÅwhetherÅyouÅareÅusingÅaÅcameraÅtoÅcomputerÅconnectionÅ(seeÅbelow)ÅorÅ
aÅmemoryÅcardÅreaderÅ(p. 48).
– PreparationsÅsection.Å
You may not be able to download images when the camera is connected to a
computer if there are a large number of images (approximately 1000) on the
memory card. Use a memory card reader to download in that case.
1 Attach the supplied interface cable to the computer’s USB port and the camera’s
DIGITAL Terminal. Prepare the camera for communication with the computer.
Procedures for attaching the camera to the computer and placing it in
the correct mode for connecting vary between camera models. See the
Camera User Guide.
TheÅCameraÅControlÅWindowÅwillÅappear.
IfÅitÅdoesÅnotÅopen,ÅclickÅtheÅ[CameraWindow]ÅiconÅinÅtheÅDockÅ(theÅbarÅatÅtheÅbottomÅofÅ
theÅdesktop).ÅToÅsetÅthisÅwindowÅsoÅitÅdoesÅnotÅautomaticallyÅopenÅwhenÅyouÅconnectÅtheÅ
cameraÅtoÅtheÅcomputer,ÅremoveÅtheÅcheckÅmarkÅfromÅtheÅ
connected]ÅinÅtheÅ[File]ÅmenuÅinÅtheÅCameraÅControlÅwindow.
[StartÅwhenÅaÅcameraÅisÅ
Page 49

2 Download images.
DownloadÅtheÅimagesÅusingÅtheÅcameraÅorÅ
theÅcomputer.ÅByÅdefault,ÅtheÅdownloadedÅ
imagesÅareÅsavedÅintoÅtheÅ[Pictures]Åfolder.
Camera Control Window
You can adjust the settings, such as the type
of image downloaded and the destination
folder, by clicking [Preferences].
Using the Camera to Download Images (Direct Transfer Function)
47
• If the conditions are right for the Direct Transfer function, the Direct
Transfer settings menu will appear in the LCD monitor. In addition, the
(Print/Share) button will light if your camera is equipped with one.
• See the Camera User Guide for instructions regarding Direct Transfer
settings and procedures.
SetÅtheÅDirectÅTran s fe rÅsettingsÅonÅtheÅ
cameraÅandÅpressÅtheÅ (Print/Share)
buttonÅorÅtheÅFUNC./SETÅbutton.
Using the Computer to Download Images
Click [Starts to download images].
Page 50

Using the Software on the Macintosh Platform – The Basics
Memory Card Reader Connection
48
• By default, all the images that have yet to be downloaded will download.
• To download images that have had their transfer settings set with the
camera, click [Preferences] and select [Images whose transfer settings
were specified with the camera] as the image type to be downloaded.
• Click [Lets you select and download images] to show the camera images
in a list, check the images before downloading and download only
selected images.
TheÅdownloadedÅimagesÅareÅsavedÅintoÅfoldersÅaccordingÅtoÅtheÅshootingÅdate.
At the same time, they will also appear grouped by date in the [Last Acquired
Images] at the top of the Explorer Panel.
[Last Acquired Images]
Clicking the shooting date
displays the images last
downloaded.
Explorer Panel
Destination for the
downloaded images
The downloaded symbol
displays on downloaded
folders.
Thumbnail
According to the default settings, the thumbnails
(tiny versions) of the downloaded images display in
the Browser Window when the downloading is
complete.
Next,ÅprintÅoutÅtheÅimagesÅ(p. 50).
1 Insert the memory card into the reader.
UseÅaÅseparatelyÅsoldÅcardÅadapterÅifÅrequired.
SeeÅtheÅmanualÅforÅtheÅmemoryÅcardÅreaderÅforÅdetailsÅonÅhowÅtoÅconnectÅandÅuseÅtheÅ
reader.
TheÅCameraÅControlÅWindowÅwillÅappear.
IfÅitÅdoesÅnotÅopen,ÅclickÅtheÅ[CameraWindow]ÅiconÅinÅtheÅDockÅ(theÅbarÅatÅtheÅbottomÅofÅ
theÅdesktop).
ÅToÅsetÅthisÅwindowÅsoÅitÅdoesÅnotÅautomaticallyÅopenÅwhenÅyouÅconnectÅtheÅ
cameraÅtoÅtheÅcomputer,ÅremoveÅtheÅcheckÅmarkÅfromÅtheÅ[StartÅwhenÅaÅcameraÅisÅ
connected]ÅinÅtheÅ[File]ÅmenuÅinÅtheÅCameraÅControlÅwindow.
Page 51

2 Click [Starts to download images].
You can adjust the settings, such as the type
of image downloaded and the destination
folder, by clicking [Preferences].
• By the default settings, all images are downloaded to the [Pictures]
folder.
• To download images that have had their transfer settings set with the
camera, click [Preferences] and select [Images whose transfer settings
were specified with the camera] as the image type to be downloaded.
•Click [Lets you select and download images] to show the memory card
images in a list, check the images before downloading and download
only selected images.
•See Memory Card Folder Structure (p. 75) for information about
memory card folder structures and file names.
49
TheÅdownloadedÅimagesÅareÅsavedÅintoÅfoldersÅaccordingÅtoÅtheÅshootingÅdate.
AtÅtheÅsameÅtime,ÅtheyÅwillÅalsoÅappearÅgroupedÅbyÅdateÅinÅtheÅ[LastÅAcquiredÅImages]ÅatÅ
theÅtopÅofÅtheÅExplorerÅPanel.
Next,ÅprintÅoutÅtheÅimagesÅ(p. 50).
Page 52

Using the Software on the Macintosh Platform – The Basics
One Photo per page Print
50
Printing Images
ThereÅareÅthreeÅwaysÅinÅwhichÅimagesÅmayÅbeÅprinted:ÅOneÅPhotoÅperÅpageÅPrint,ÅIndexÅPrintÅ
andÅLayoutÅPrint.ÅThisÅsectionÅexplainsÅtheÅOneÅPhotoÅperÅpageÅPrintÅmethod.
Movies cannot be printed, but you can print stills after they have been
extracted from movies and saved to files.
ThisÅoptionÅprintsÅoneÅimageÅperÅpageÅinÅaÅstandardÅ"photo"Åformat.ÅIfÅyouÅselectÅmultipleÅ
images,ÅitÅwillÅprintÅthemÅonÅtheÅcorrespondingÅnumberÅofÅpages.
1 Select the images to print.
ClickingÅonÅanÅimageÅselectsÅitÅandÅdisplaysÅaÅblueÅframeÅaroundÅit.ÅToÅselectÅmultipleÅ
images,ÅholdÅdownÅtheÅ[shift]ÅorÅ[]Å(command)ÅkeyÅwhileÅclickingÅonÅimages.
A blue frame
displays around
selected images.
2 Click [Print] and select [One Photo per
page Print].
Selecting [Index Print] allows you to print the thumbnails and shooting
information in a chart.
Selecting [Layout Print] allows you to layout and print multiple images on
a single sheet of paper.
Page 53

3 Set the categories as you feel necessary.
Selects a printer.
Selects options such as the paper size
and orientation when you click
[Page Setup].
Configures the auto trimming
function.
Place a check mark here to print the
shooting dates/times with the
images.
Sets the number of copies printed.
51
Click this button to switch between
images if you selected multiple
images.
4 Click [Print].
TheÅPrintÅwindowÅwillÅnowÅopen.
5 After setting the number of copies, and other settings, click [Print].
6 After the printing finishes, click to close the window.
ThisÅchapterÅexplainedÅtheÅImageBrowserÅbasics.Å
OnceÅyouÅhaveÅmasteredÅthem,ÅtryÅtheÅadvancedÅtechniques.
Using the Software on the Macintosh Platform
A PDF-format manual for ImageBrowser is also available. It provides further
information about the program's features and procedures. See Using the PDF
Manuals (p. 2).
– Advanced TechniquesÅ(p. 52).Å
Page 54

52
Browser Window
Using the Software on the Macintosh
Platform – Advanced Techniques
ThisÅchapterÅexplainsÅvariousÅImageBrowserÅfeatures.Å
ProceedÅtoÅthisÅchapterÅonceÅyouÅhaveÅmasteredÅtheÅbasicÅImageBrowserÅproceduresÅinÅtheÅ
Using the Software on the Macintosh Platform
The ImageBrowser Windows
ThisÅsectionÅdescribesÅtheÅprincipalÅImageBrowserÅwindows:ÅtheÅBrowserÅWindow,ÅViewerÅ
WindowÅandÅFileÅInformationÅWindow.
– The BasicsÅchapter.
ThisÅwindowÅisÅforÅdisplayingÅandÅorganizingÅimagesÅdownloadedÅtoÅtheÅcomputer.
Browser Area (p. 53)
Display Mode (p. 54)
Explorer Panel (p. 53)
Display Control Panel (p. 55)
Control Panel (p. 55)
Page 55

Explorer Panel
•UseÅthisÅareaÅtoÅselectÅfolders.ÅTheÅimagesÅinÅtheÅselectedÅfolderÅdisplayÅinÅtheÅBrowserÅArea.
•IfÅyouÅselectedÅFavoriteÅFolders,ÅonlyÅtheÅfoldersÅregisteredÅinÅadvanceÅasÅFavoriteÅFoldersÅwillÅ
display.ÅYo uÅareÅrecommendedÅtoÅregisterÅaÅfolderÅthatÅyouÅuseÅfrequentlyÅasÅoneÅofÅtheÅ
FavoriteÅFolders.ÅIfÅ
Methods for Registering a Favorite Folder
•IfÅ[FavoriteÅFolders]ÅisÅdisplayed:ÅclickÅ[Add]ÅandÅselectÅaÅfolder.Å
•IfÅ[AllÅFolders]ÅisÅdisplayed:ÅselectÅaÅfolderÅandÅclickÅ[AddÅtoÅFavorites].
• DownloadedÅimagesÅalsoÅappearÅinÅtheÅ[LastÅAcquiredÅImages]ÅareaÅatÅtheÅtopÅofÅtheÅExplorerÅ
Panel.ÅYouÅcanÅcheckÅthemÅinÅgroupsÅsortedÅbyÅshootingÅdate.Å
Using Cameras That Support My Category
•InÅadditionÅtoÅclassifyingÅbyÅShootingÅDate,ÅMyÅCategoryÅalsoÅdisplaysÅatÅtheÅtopÅofÅtheÅ
areaÅwhereÅtheÅ[LastÅAcquiredÅImages]ÅmessageÅdisplaysÅafterÅtheÅlastÅimageÅisÅ
downloaded.
•Also,ÅinÅadditionÅtoÅtheÅStarÅRatingÅitÅisÅpossibleÅtoÅsortÅbyÅMyÅCategoryÅusingÅtheÅ[FilterÅ
Tool] Åfunction.
youÅselectedÅAllÅFolders,ÅallÅtheÅfoldersÅwillÅdisplay.Å
53
Browser Area
•TheÅimagesÅinÅtheÅfolderÅselectedÅinÅtheÅExplorerÅPanelÅwillÅdisplayÅhere.
TheÅdisplayÅstyleÅwillÅvaryÅaccordingÅtoÅyourÅDisplayÅModeÅselection.Å
•TheÅfollowingÅtypesÅofÅiconÅwillÅdisplayÅaroundÅimagesÅaccordingÅtoÅtheirÅattributes.
ImagesÅshotÅwithÅtheÅcamera'sÅStitchÅAssistÅmodeÅ
RAWÅimages
Movies
ImagesÅwithÅsoundÅmemoÅattachments
ProtectedÅimages
ImagesÅshotÅwithÅtheÅcamera'sÅAEBÅfunction
RotatedÅImagesÅ(InÅdisplayÅonly)
Page 56

Using the Software on the Macintosh Platform – Advanced Techniques
54
Display Mode
•SelectsÅtheÅdisplayÅstyleÅforÅtheÅBrowserÅArea.
Preview
ThisÅmodeÅdisplaysÅtheÅimageÅatÅaÅlargerÅsizeÅasÅ
wellÅasÅtheÅimageÅinformation.Å
List
DisplaysÅtheÅimagesÅinÅtheÅfolderÅselectedÅinÅtheÅ
ExplorerÅPanelÅsectionÅinÅrowsÅandÅcolumns.
TimeTunnel
DisplaysÅimagesÅinÅchronologicalÅorderÅinÅaÅ
simulatedÅtimeÅtunnel.ÅYou ÅcanÅmoveÅalongÅaÅ
timelineÅfromÅtheÅpastÅtoÅtheÅpresentÅusingÅtheÅ
sliderÅthatÅappearsÅatÅtheÅwindow'sÅright.
Page 57

Display Control Panel
•ThisÅpanelÅadjustsÅtheÅdisplayÅsettingsÅforÅtheÅBrowserÅArea.
55
Display Size
Changes the size of the thumbnail in
the Browser Area.
Filter Tool Menu
Use the Star Rating option in the Show menu
to limit the scope of images displayed.
Selection Menu
Click this to select/deselect all
images in the Browser Area.
Hide Buttons
Left: Hides the Explorer Panel.
Middle: Hides the control panel.
Right: Hides the image
information in the Preview
display mode.
Control Panel
•TheÅcontrolÅpanelÅcontainsÅbuttonsÅforÅexecutingÅvariousÅfunctions.Å
TheÅfunctionsÅdisplayedÅhereÅareÅexplainedÅinÅtheÅControl Panel FeaturesÅsectionÅ(p. 58).
Page 58

Using the Software on the Macintosh Platform – Advanced Techniques
Viewer Window
56
Double-clickÅanÅimageÅinÅtheÅBrowserÅAreaÅtoÅdisplayÅitÅinÅtheÅViewerÅWindow.
Image Selector Button
Switches between
images.
Save Button
Saves the edited image.
Show Information Menu
Displays shooting
information.
Zoom
Changes the
image zoom
setting.
Star Ratings
Menu
Sets the Star
Rating for an
image.
Edit Menu
You can edit, eliminating red eyes,
adjusting colors and brightness, cropping
and inputting titles.
You can also use it to start up other
programs for editing.
Number of Displays Menu
Displays multiple images at
once. This is handy for
comparing images.
• If a RAW image is displayed, the [Show Original Image] button displays
beneath it. Clicking this button displays the converted image in the Viewer
Window.
• If a movie file is displayed, the [Save as Still Image] button will display
beneath movie images. Click this button to extract a still image from the
movie.
Print Button
Prints the displayed image.
Full Screen Button
Displays the image in the full screen
mode. (You can also double-click an
image to display it in full screen mode).
Click the image or press any key on the
keyboard to restore the normal display
mode.
Synchronize Button
Synchronizes the display
settings when multiple
images are displayed.
Page 59

File Information Window
TheÅFileÅInformationÅWindowÅdisplaysÅwhenÅyouÅselectÅanÅimageÅinÅtheÅBrowserÅArea,ÅclickÅtheÅ
[File]ÅmenuÅandÅselectÅ[GetÅInfo].ÅTheÅFileÅInformationÅWindowÅdoesÅnotÅdisplayÅinÅtheÅPreviewÅ
displayÅmode.
Star Rating
Sets the rating for an image.
Shows or hides
categories.
Comment
You can type a comment
here.
Plays a sound
memo attached
to an image.
Keyword
Sets the keywords used in
searches.
57
Lock
Prevents an image
from being
overwritten or
deleted.
Image Selector Buttons
Switches between images.
Brightness Histogram
A graph of the highlights
and shadows distribution
in an image.
Shooting Information
Displays detailed information, such
as the shutter speed and exposure
compensation setting. The camera
model will determine what
information is displayed.
File Name
You can change
file names.
Page 60

Using the Software on the Macintosh Platform – Advanced Techniques
Control Panel Features
58
ImageBrowser Features
ThisÅsectionÅprovidesÅaÅbriefÅintroductionÅtoÅImageBrowserÅfeatures.
SomeÅfunctionsÅmayÅnotÅbeÅavailableÅwithÅcertainÅcameraÅmodels.ÅCheckÅyourÅ
Camera User GuideÅtoÅseeÅifÅyourÅmodelÅsupportsÅthem.Å
Canon Camera
OpensÅtheÅCameraÅControlÅWindow,ÅwhichÅletsÅyouÅperformÅtheÅfollowingÅoperations.
Acquire Images
DownloadsÅimagesÅandÅsoundÅfileÅfromÅtheÅcamera/memoryÅcardÅ(p. 46, 48).
Print
SelectsÅandÅprintsÅtheÅimagesÅinÅaÅcameraÅorÅmemoryÅcard.ÅYou ÅcanÅprintÅnumerousÅways:Å
printÅallÅimages,ÅprintÅaÅcontactÅsheetÅ(index)ÅofÅallÅimages,ÅprintÅusingÅDPOFÅsettings,ÅorÅbyÅ
selectingÅimagesÅbeforeÅprinting.Å
Set to Camera
SetsÅcameraÅsettings,ÅsuchÅasÅtheÅMyÅCameraÅsettingsÅ(p. 67).ÅItÅalsoÅuploadsÅimagesÅfromÅtheÅ
computerÅtoÅtheÅcamera.Å
Remote Shooting
AllowsÅyouÅtoÅoperateÅtheÅcameraÅshutterÅfromÅtheÅcomputerÅ(p. 63).
View Image
DisplaysÅtheÅselectedÅimageÅorÅmovieÅinÅtheÅViewerÅWindow.
SlideShow
StartsÅaÅslideÅshowÅofÅtheÅselectedÅimages.ÅClickÅtheÅ[View]ÅmenuÅandÅselectÅ[SlideÅShowÅ
Options]ÅtoÅsetÅtheÅslideÅshowÅsettings.
Internet
Create Images for Email
ConvertsÅtheÅselectedÅimagesÅtoÅtheÅappropriateÅsizeÅforÅtransmissionÅbyÅe-mail.ÅYouÅcanÅalsoÅ
useÅitÅtoÅautomaticallyÅstartÅanÅe-mailÅprogramÅafterÅconversion.Å
Page 61

Print
Functions Selected from Menus
One Photo per page Print
PrintsÅoneÅimageÅperÅpageÅ(p. 50).
You ÅcanÅprintÅ"photo"ÅprintsÅeasily.
Index Print
LinesÅupÅsmallÅversionsÅofÅtheÅimagesÅinÅrowsÅandÅprints.
Layout Print
AllowsÅyouÅtoÅfreelyÅarrangeÅmultipleÅimagesÅonÅaÅsingleÅpageÅandÅprint.ÅYo uÅcanÅalsoÅinsertÅ
captionsÅandÅtitles.Å
Send to Trash
SendsÅtheÅselectedÅimagesÅorÅfoldersÅtoÅtheÅTras h.
Search Images: [File] menu, [Search]
59
SearchesÅforÅimagesÅbasedÅonÅsuchÅcriteriaÅasÅStarÅRatings,Ådates,ÅkeywordsÅorÅcaptions.Å
Export Images: [File] menu, [Export Images]
•EditÅandÅSave:ÅallowsÅyouÅtoÅchangeÅtheÅfileÅtypeÅorÅsizeÅandÅexportÅtheÅfile.
•ExportÅShootingÅProperties:ÅallowsÅyouÅtoÅexportÅtheÅshootingÅpropertiesÅasÅaÅtextÅfile.
•ExportÅasÅaÅScreensaver:ÅExportsÅtheÅimageÅasÅaÅscreenÅsaverÅfile.
•ExportÅanÅImageÅasÅWallpaper:ÅExportsÅtheÅimageÅasÅaÅ
wallpaperÅfile.
Organize Images: [File] menu, [Organize Image]
•SortÅImages:ÅsortsÅimagesÅaccordingÅtoÅcriteriaÅsuchÅasÅtheÅshootingÅdateÅorÅStarÅRatingÅandÅ
savesÅthemÅintoÅaÅspecifiedÅfolder.
•Rename:ÅchangesÅtheÅfilesÅnamesÅofÅmultipleÅimagesÅinÅaÅsingleÅpass.
Convert RAW Images: [File] menu, [RAW image processing]
ConvertsÅRAWÅimages.ÅYouÅcanÅadjustÅtheÅimageÅbrightness,ÅcontrastÅandÅcolorÅbalanceÅ
amongÅotherÅattributesÅduringÅconversion.
Merge Panoramas: [Edit] menu, [PhotoStitch]
MergesÅmultipleÅimagesÅandÅcreatesÅaÅsingleÅlargeÅpanoramicÅimageÅ(p. 66).
Edit Movies: [Edit] menu, [Movie Edit]
EditsÅmoviesÅorÅstillÅimagesÅstrungÅtogether.ÅYou ÅcanÅaddÅtitlesÅorÅbackgroundÅmusicÅandÅapplyÅ
variousÅeffectsÅ(p. 62).
Extracting Stills from Movies: [Edit] menu, [Extract frames from a movie]
ExtractsÅstillÅimagesÅfromÅmoviesÅoverÅaÅspecifiedÅintervalÅandÅsavesÅthemÅasÅimageÅfiles.Å
Page 62

Using the Software on the Macintosh Platform – Advanced Techniques
60
Display Settings: [View] menu, [View Settings]
HidesÅorÅshowsÅimageÅinformationÅbeneathÅtheÅthumbnail,ÅsuchÅasÅtheÅfileÅnameÅorÅtheÅ
shootingÅdateÅandÅtime.
Sort Images: [View] menu, [Sort]
ArrangesÅimageÅorderÅinÅtheÅBrowserÅAreaÅaccordingÅtoÅcriteriaÅsuchÅasÅtheÅfilename,ÅfileÅ
modificationÅdate,ÅfileÅsizeÅorÅshootingÅdate.
Page 63

Replaying Movies
1 Double-click an image with a movie icon in ImageBrowser’s Browser Area.
TheÅmovieÅwillÅappearÅinÅtheÅViewerÅ
Window.Å
Movie icon
2 Click the button.
61
You can control the
movie's playback and
sound volume.
You can save the displayed scene
as a still image by clicking here.
Page 64

Using the Software on the Macintosh Platform – Advanced Techniques
62
Editing Movies
You ÅcanÅcreateÅandÅeditÅmovies:ÅlinkÅmoviesÅandÅstillsÅthatÅhaveÅbeenÅdownloadedÅtoÅyourÅ
computer,ÅaddÅbackgroundÅmusic,ÅsuperimposeÅtitlesÅandÅotherÅtext,ÅandÅapplyÅvariousÅeffectsÅ
toÅtheÅmovies.Å
1 Select the image(s) to edit in ImageBrowser’s Browser Area (movies or stills).
YouÅcanÅselectÅmultipleÅmoviesÅorÅstills.
2 Click the [Edit] menu and select [Movie Edit].
3 Follow the steps displayed in the middle of the window to edit the movie and save
it.
Follow these steps
to proceed.
Click this button
to play the movie
being edited.
Storyboard Area
Displays thumbnails of the
selected images.
Links images in order from
left to right.
Instructions
Click this button
for detailed
operational
instructions.
Transition Effect Box
Appears between adjacent
images and displays the
symbols of the transition
effects linking images.
Page 65

Operating the Shutter Remotely (Remote
Preparing for Remote Shooting
Shooting)
You ÅcanÅrecordÅstillÅimagesÅbyÅusingÅaÅcomputerÅtoÅcontrolÅtheÅshutterÅofÅaÅconnectedÅcamera.Å
ThisÅisÅparticularlyÅusefulÅforÅcheckingÅimagesÅonÅtheÅlargerÅdisplayÅofÅtheÅcomputerÅasÅyouÅ
recordÅthemÅandÅforÅhighÅvolumeÅphotographyÅwithoutÅworryingÅaboutÅfillingÅtheÅcamera’sÅ
memoryÅcard.
This function may not be available with certain camera models. Check your
Camera User Guide to see if your model supports it.
Attach the supplied interface cable to the computer's USB port and the camera's
1
DIGITAL terminal and place the camera in the correct mode for connecting.
63
• Methods for connecting the camera to the computer and placing it in
the correct mode for connecting vary between camera models. Please
refer to the Camera User Guide.
• If the Camera Control Window does not automatically appear, click the
[CameraWindow] icon in the Dock (the bar at the bottom of the
desktop).
TheÅCameraÅControlÅWindowÅwillÅdisplay.Å
2 Open the lens cover or remove the lens cap on models equipped with them.
ProceedÅtoÅtheÅnextÅstepÅifÅyourÅmodelÅdoesÅnotÅhaveÅone.Å
3 Click the [Remote shooting] tab.
4 Click [Starts Remote Shooting].
5 Select a destination for the captured images and click [Choose].
Page 66

Using the Software on the Macintosh Platform – Advanced Techniques
RemoteCapture Task Window
64
TheÅRemoteCaptureÅTas k ÅwindowÅhasÅtheÅfollowingÅfeatures.
Shows/Hides the
viewfinder or
detailed settings
area.
You can add
comments to images
by placing a check
mark here and
typing text in the
boxes below.
Viewfinder Display
Click the [Start/Stop
Viewfinder] button
while a connection to
the camera is open to
display the image
appearing in the
camera’s viewfinder.
Size and Resolution Selector
Selects the size and resolution at which
images are captured.
Rotation Settings
Sets the rotation
parameters for
images after they are
captured.
Release Button
Releases the
shutter.
Slide this to zoom
the camera in or out.
Start/Stop Viewfinder
Button
Starts or stops the
viewfinder display.
Refresh Button
Resets the exposure,
focus and white
balance.
Set the camera shooting settings here.
The settings available in the RemoteCapture Task window vary between
camera models.
Page 67

Remote Shooting
Ensure that you turn off your computer’s sleep mode before you begin remote
shooting. The device performance cannot be guaranteed if the computer
enters the sleep mode.
Click and check the subject in the viewfinder.
1
2 Change the image size or resolution, the rotation settings and the settings at the
bottom of the window as required.
IfÅyouÅintendÅtoÅholdÅtheÅcameraÅverticallyÅtoÅphotographÅaÅsubject,ÅyouÅcanÅsaveÅtheÅ
imageÅtoÅtheÅcomputerÅwithÅtheÅcorrectÅorientationÅifÅyouÅsetÅtheÅrotationÅsettingsÅinÅ
advance.Å
If your camera is equipped with the Auto Rotate function and you set it
to On, the image will automatically be rotated and appear in the correct
viewing orientation in the RemoteCapture Task window when holding
the cameras vertically.
65
3 Click the [Release] button.
• You can also release the shutter by pressing the camera’s shutter button
or the keyboard’s space key.
• Other than the shutter button, the camera's buttons and switches,
including the zoom, cannot be operated while the camera is being
controlled with the Remote Shooting function.
• You may notice that the interval between the shutter release and
activation is slightly longer for remote shooting than when the camera
is used independently.
Page 68

Using the Software on the Macintosh Platform – Advanced Techniques
66
Merging Panoramic Images - PhotoStitch
You ÅcanÅcreateÅaÅwideÅpanoramicÅimageÅbyÅmergingÅimagesÅofÅaÅsceneÅshotÅseparately.Å
PhotoStitchÅautomaticallyÅdetectsÅtheÅoverlappingÅareasÅofÅadjacentÅimagesÅandÅcorrectsÅforÅtheÅ
sizeÅandÅorientation.ÅYouÅcanÅalsoÅmanuallyÅspecifyÅtheÅoverlappingÅareas.ÅÅ
1 Select a series of images in the ImageBrowser’s Browser Area.
2 Click the [Edit] menu and select
[PhotoStitch].
Instructions
3 Merge the images following the instructions in the guidance panel at the top of
the PhotoStitch window.
Images Shot in Stitch Assist Mode
It is easy to merge images if they are shot with the camera's Stitch Assist
mode because PhotoStitch can automatically detect the image order and
orientation. The series of images are saved together in a single folder
when they are downloaded from the camera.
Symbol displayed by images
shot in Stitch Assist mode.
•SomeÅcameraÅmodelsÅmayÅnotÅsupportÅStitchÅAssistÅmode.Å
• SeeÅtheÅCamera User GuideÅforÅinformationÅaboutÅshootingÅinÅStitchÅAssistÅmode.
•ImagesÅshotÅinÅStitchÅAssistÅmodeÅwithÅaÅwideÅconverter,ÅteleconverterÅorÅclose-upÅlensÅ
cannotÅbeÅmergedÅaccurately.Å
Page 69

Enjoy Customizing Your Camera with the My
Displaying the My Camera Window
Camera Settings
This function may not be available with certain camera models. Check your
Camera User Guide to see if your model supports it.
TheÅstart-upÅimage,Åstart-upÅsound,ÅshutterÅsound,ÅoperationÅsound,ÅandÅself-timerÅsoundÅareÅ
calledÅtheÅMyÅCameraÅsettings.ÅYou ÅcanÅaddÅyourÅfavoriteÅimagesÅandÅsoundsÅfromÅyourÅ
computerÅtoÅtheÅMyÅCameraÅsettings.ÅThisÅtopicÅexplainsÅhowÅtoÅuploadÅtheÅMyÅCameraÅ
settingsÅsavedÅontoÅyourÅcomputerÅtoÅtheÅcamera
To register the My Camera settings with the camera, ensure that you install
the software that came with the camera.
ÅandÅviceÅversa.
67
Attach the supplied interface cable to the computer's USB port and the camera's
1
DIGITAL terminal and place the camera in the correct mode for connecting.
• Procedures for attaching the camera to the computer and placing it in
the correct mode for connecting vary between camera models. See the
Camera User Guide.
• If the Camera Control Window does not automatically appear, click the
[CameraWindow] icon in the Dock (the bar at the bottom of the
desktop).
TheÅCameraÅControlÅWindowÅwillÅdisplay.Å
2 Click the [Set to Camera] tab.
3 Click [Set My Camera].
TheÅMyÅCameraÅwindowÅwillÅdisplay.Å
Page 70

Using the Software on the Macintosh Platform – Advanced Techniques
The My Camera Window
68
ImageBrowserÅalreadyÅcontainsÅseveralÅpre-recordedÅMyÅCameraÅsettings.ÅYou ÅcanÅcheckÅtheseÅ
itemsÅwithÅtheÅMyÅCameraÅwindow.
Type
Select the settings type.
Computer
Displays the list
of settings files
saved onto the
computer.
Play Button
Plays the audio from the
selected settings file.
Save to Camera
Save to Computer
Send to Trash Button
Deletes a settings file
from the computer.
Play Button
Plays the audio from
the settings file in the
camera.
Camera
Displays the settings
in the camera.
Delete Button
Deletes a settings
file from the
camera.
Save to Camera Button
Click here to save the
settings onto the
camera.
Depending on the camera, the [Return
to factory default settings] button will
display. Clicking this button will return
the My Camera setting to the factory
default setting.
Page 71

Saving the My Camera Settings to the Camera
Saving the Camera’s My Camera Settings to the Computer
• My Camera settings can be selected and saved in either of two ways to the
camera: individually or in theme sets.
•The “Animal” theme, for example, features an animal in the start-up image
and animal calls in each of the sound files. The names of the prepared files
for the various My Camera settings themes all begin with the same root
name. The start-up image and sound files in the "Animal" theme, for
example, all begin with “Animal~”.
Do not detach the interface cable, turn the camera power off or do anything
else that could disconnect the camera from the computer while the My
Camera settings are being saved to the camera or the settings from the
camera are being saved to the computer.
69
1 Select the type of setting in the Type list box that you wish to save to the camera.
2 Select the setting from the Computer list that you would like to add.
3 Select the setting in the Camera list that you would like to change and click the
button.
TheÅCameraÅlistÅsettingÅwillÅchangeÅtoÅtheÅselectedÅfile.ÅIfÅaÅsettingÅforÅthisÅcategoryÅhasÅ
previouslyÅbeenÅsavedÅtoÅtheÅcamera,ÅitÅwillÅbeÅoverwritten.
RepeatÅstepsÅ1-3ÅasÅrequired.
4 Click the [Save to Camera] button.
ThisÅconcludesÅtheÅprocessÅofÅsavingÅtheÅMyÅCameraÅsettingsÅtoÅtheÅcamera.Å
ToÅuseÅthisÅdataÅonÅtheÅcamera,ÅchangeÅtheÅstart-upÅimageÅandÅsoundÅsettingsÅonÅtheÅ
cameraÅitself.ÅPleaseÅseeÅtheÅCamera User GuideÅforÅtheseÅinstructions.Å
Select the type of setting you wish to save to the computer from the Type list box.
1
2 Select the setting in the Camera list that you wish to save to the computer.
3 Click the button.
4 Input a file name to the selected setting and click the [OK] button.
ThisÅconcludesÅtheÅprocessÅofÅsavingÅtheÅMyÅCameraÅsettingsÅtoÅtheÅcomputer.Å
RepeatÅstepsÅ1-4ÅasÅrequired.
Page 72

Using the Software on the Macintosh Platform – Advanced Techniques
Adding New Data to the My Camera Window
70
CreateÅaÅnewÅimageÅorÅsoundÅfileÅandÅaddÅitÅtoÅtheÅMyÅCameraÅwindow.
• AddingÅImageÅandÅSoundÅFilesÅAfterÅCreatingÅThem
Create an Original Start-up Image File and then Add It
StartÅbyÅusingÅanÅimageÅeditingÅprogramÅtoÅcreateÅtheÅimageÅfileÅthatÅwillÅbecomeÅtheÅstart-upÅ
imageÅandÅsaveÅitÅtoÅtheÅcomputer.Å
1 Click the [File] menu in the ImageBrowser Main Window and select [Canon
Camera] and [My camera].ÅÅ
TheÅMyÅCameraÅwindowÅwillÅdisplay.
2 Select the [Start-up Image] in Type.
3 Click [Add].
Add Button
Adds images and
sound files for use as
settings files. Added
files display in the list.
Connect to Camera Button
Connects to the camera.
4 Select the file you created and click [Open].
ThisÅconcludesÅtheÅprocessÅforÅaddingÅnewÅdata.
5 To connect to the camera, click [Connect to Camera].
YouÅcanÅaddÅtheÅsettingsÅfilesÅyouÅjustÅaddedÅtoÅtheÅcomputerÅtoÅtheÅcameraÅusingÅtheÅ
sameÅproceduresÅasÅinÅSaving the My Camera Settings to the CameraÅ(p. 69).
Page 73

Add an Original Sound File
ChangeÅtheÅfileÅtoÅaÅWAVÅsoundÅfileÅafterÅyouÅhaveÅcopiedÅtheÅsoundÅfileÅtoÅtheÅcomputer.ÅThenÅ
proceedÅwithÅtheÅstepsÅasÅdescribedÅinÅCreate an Original Start-up Image File and then Add It.
• Use settings like those below when creating an image file for the startup image with an image editing program.
Compression Method : JPEG (Baseline JPEG)
Data Sampling : 4:2:0 or 4:2:2
Pixels (w x h) : 320 x 240 pixels
• Use settings like those below when creating a sound file with a sound
recording program.
Compression Method : WAV (Monaural)
Quantifying Bits : 8 bit
Sampling Frequency : 11.025 kHz or 8.000 kHz
Use the following lengths as guidelines for the length of sound file that
can be saved to the camera.
Duration in Seconds
Type
11.025 kHz 8.000 kHz
71
Start-Up Sound 1.0Åsec.ÅorÅless 1.3Åsec.ÅorÅless
Shutter Sound 0.3Åsec.ÅorÅless 0.4Åsec.ÅorÅless
Operation Sound
Self-Timer Sound 2.0Åsec.ÅorÅless 2.0Åsec.ÅorÅless
0.3Åsec.ÅorÅless 0.4Åsec.ÅorÅless
Page 74

72
Uninstalling the Software (Windows)
Appendices
ThisÅchapterÅexplainsÅhowÅtoÅuninstallÅtheÅprograms.
ReadÅtheÅTroubleshootingÅsectionÅinÅthisÅchapterÅifÅyouÅexperienceÅaÅpr oblemÅusingÅtheÅ
programs.
Uninstalling the Software
TheÅproceduresÅforÅuninstallingÅtheÅsoftwareÅareÅonlyÅrequiredÅwhenÅyouÅwishÅtoÅdeleteÅtheÅ
programsÅfromÅyourÅcomputerÅorÅwhenÅreinstallationÅisÅrequiredÅtoÅfixÅcorruptedÅfiles.
Authorization as a computer Administrator is required to uninstall software.
ThisÅexplanationÅusesÅZoomBrowserÅEXÅtoÅdemonstrateÅhowÅtoÅuninstallÅaÅprogram.ÅYou ÅcanÅ
removeÅotherÅprogramsÅwithÅtheÅsameÅprocedures.Å
1 Click the Windows [Start] menu and
select [All Programs] or [Programs],
followed by [Canon Utilities],
[ZoomBrowser EX] and [ZoomBrowser
EX Uninstall].
TheÅuninstallÅutilityÅwillÅstartÅandÅremoveÅ
ZoomBrowserÅEX.
Page 75

Uninstalling the USB Driver (Windows)
It is essential to note that you will not be able to download images if you
uninstall the USB driver.
Windows Vista, Windows XP
You ÅdoÅnotÅneedÅtoÅuninstallÅtheÅUSBÅdriver.
Windows 2000
UninstallÅtheÅUSBÅDriverÅusingÅtheÅfollowingÅprocedures.
1 Attach the supplied interface cable to the computer’s USB port and the camera’s
DIGITAL Terminal. Prepare the camera for communication with the computer.
ForÅinterfaceÅcableÅconnectionÅinstructions,ÅseeÅtheÅCamera User Guide.Å
2 Click the [Finish] button if the Camera Control Window displays.
73
3 Click the [Start] menu and select
[Settings], followed by [Control Panel].
4 Double-click the [Scanners and
Cameras] icon.
Page 76

Appendices
Uninstalling the Software (Macintosh)
74
5 Select your camera model name or
[Canon Camera] in the [Scanners and
Cameras Properties] dialog, and click
[Remove].
If your camera model name does not appear here, see the Camera not
detected, Events dialog won’t display or images will not download to the
computer (p. 77) of the Troubleshooting section.
6 Click the Windows [Start] menu and select [Programs], followed by [Canon
Utilities], [Camera TWAIN Driver x.x] and [Uninstall TWAIN Driver]. A version
number appears in place of the “x.x”.
TheÅuninstallÅprocessÅwillÅstart.
ToÅconnectÅtheÅcameraÅtoÅtheÅcomputerÅandÅdownloadÅafterÅthisÅpoint,ÅuseÅtheÅfollowingÅ
procedures.
1. ReinstallÅtheÅdriver.
2. ConnectÅtheÅcameraÅtoÅtheÅcomputerÅwithÅtheÅinterfaceÅcable.Å
UninstallÅtheÅprogramsÅbyÅdraggingÅtheÅapplication’sÅfolderÅ(theÅfolderÅinÅwhichÅitÅwasÅinstalled)Å
intoÅtheÅTra s h,ÅandÅthenÅemptyÅtheÅTr ash .
Please be careful not to accidentally delete any folders with downloaded
images that may be contained within the application folder.
Page 77

Memory Card Folder Structure
TheÅimagesÅonÅaÅmemoryÅcardÅareÅplacedÅinÅsubflodersÅofÅtheÅ[DCIM]ÅfolderÅlabeledÅ
[xxxCANON],ÅwhereÅtheÅ“xxx”ÅrepresentsÅaÅnumberÅinÅtheÅrangeÅ100Å-Å999.Å
IMG_xxxx.JPG (JPEG images)
_MG_xxxx.JPG (JPEG images recorded in the
DCIM
xxxCANON
The folder that holds the settings files for
images in the DCIM folder.
Adobe RGB color space)
CRW_xxxx.CRW (RAW images)
_RW_xxxx.CRW (RAW images recorded in the
Adobe RGB color space)
CRW_xxxx.THM*
STx_xxxx.JPG** (Stitch Assist mode images)
MVI_xxxx.AVI (Movies)
MVI_xxxx.THM*
SND_xxxx.WAV (Sound annotation)
75
CANONMSC
The folder created when DPOF settings are set.
It holds the DPOF settings files.
MISC
SDR_xxxx.WAV (Files recorded with Sound Recorder)
SNDR xxxCANON
•*FilesÅwithÅtheÅTHMÅextensionÅareÅtheÅthumbnailÅimageÅfilesÅforÅtheÅcamera’sÅindexÅreplayÅ
mode.
•TheÅ“xxxx”ÅinÅfileÅnamesÅrepresentÅfour-digitÅ
numbers.
• **EachÅsuccessiveÅfileÅshotÅinÅStitchÅAssistÅmodeÅisÅassignedÅaÅletterÅstartingÅfromÅ“A,”ÅwhichÅ
isÅinsertedÅasÅtheÅthirdÅdigitÅinÅtheÅname.Åi.e.Å[STA_0001.JPG],Å[STB_0002.JPG],Å
[STC_0003.JPG]...
•AllÅfoldersÅexceptÅtheÅ“xxxCANON”ÅfoldersÅcontainÅimageÅsettingsÅfiles.ÅDoÅnotÅopenÅorÅdeleteÅ
them.Å
Page 78

Appendices
Start by Checking This
76
Troubleshooting
PleaseÅreadÅthisÅsectionÅifÅyouÅencounterÅaÅproblemÅusingÅtheÅsoftware.
InvestigateÅtheÅfollowingÅpointsÅfirstÅifÅyouÅencounterÅaÅproblem.
Does your computer satisfy the requirements listed in the System
Requirements section (p. 8)?
Is the camera correctly connected to the computer?
See the Camera User Guide for the correct connection procedures. Also
check to ensure that you are using the correct cable and that it is securely
attached at both ends.
Are the camera and computer in the correct modes to transfer data?
Some models require the camera to be set to the playback mode to
transfer data. See the Camera User Guide for details.
Is the battery sufficiently charged?
Check the battery charge if you are powering the camera with a battery.
You are recommended to use a household power source (AC adapter) to
power the camera when it is connected to a computer.
Page 79

Problems
Try ÅtheÅsuggestedÅsolutionsÅtoÅtheÅcommonÅproblemsÅlistedÅbelow.
USB driver installation not proceeding well (Windows 2000).
UninstallÅtheÅdriverÅ(p. 73)ÅbeforeÅreinstallingÅitÅwithÅtheÅproceduresÅinÅInstalling
the Software and USB DriverÅ(p. 11).Å
Add New Hardware Wizard or New Hardware Found (Windows 2000)
Wizard displays when the camera is connected to the computer with an
interface cable (Windows).
ClickÅ[Cancel]ÅtoÅcloseÅtheÅwindow.ÅTemporarilyÅdisconnectÅtheÅcameraÅfr omÅtheÅ
computer.ÅNext,ÅreadÅStart by Checking ThisÅonÅtheÅpreviousÅpageÅandÅresolveÅ
theÅproblem.
77
Cannot download images or shoot remotely. (For cameras connected to
the computer via an interface cable: only cameras supporting Hi-Speed
USB 2.0).
TheÅproblemÅmayÅbeÅresolvedÅbyÅloweringÅtheÅtransmissionÅspeedÅforÅdataÅbyÅ
followingÅtheÅproceduresÅbelow.
Solution:
HoldÅtheÅMENUÅbuttonÅonÅtheÅcameraÅdownÅandÅpressÅtheÅ (Print/Share)Å
buttonÅandÅFUNC./SETÅbuttonÅsimultaneously.ÅInÅtheÅdisplayedÅscreen,ÅselectÅ[B]Å
andÅpressÅtheÅFUNC./SETÅbutton.
Images won’t download into a TWAIN-compliant program (Camera and
computer connected via interface cable (Windows 2000)).
ClickÅtheÅ[Finish]ÅbuttonÅinÅtheÅCameraÅControlÅWindowÅtoÅcloseÅit.
Camera not detected, Events dialog won’t display or images will not
download to the computer (when camera is connected to the computer
via an interface cable (Windows)).
Cause 1:
The USB Driver may not be correctly installed (Windows 2000).
Solution:
InstallÅtheÅUSBÅdriverÅwithÅtheÅproceduresÅinÅInstalling the Software and USB
DriverÅ(p. 11).ÅThenÅconnectÅtheÅcameraÅtoÅtheÅcomputerÅwithÅtheÅinterfaceÅ
cableÅandÅprepareÅitÅtoÅtransferÅdata.ÅIfÅtheÅUSBÅdriverÅisÅalreadyÅinstalled,Å
uninstallÅ(p. 74)ÅitÅfirstÅandÅthenÅreinstallÅit.
Page 80

78
Appendices
Cause 2:
The camera may have been recognized as another device under the
following circumstances (Windows only).
•TheÅcameraÅwasÅconnectedÅtoÅtheÅcomputerÅbeforeÅtheÅUSBÅdriverÅwasÅ
•TheÅ[ScannersÅandÅCameras]ÅiconÅorÅtheÅ[ScannersÅandÅCameras]ÅfolderÅcannotÅ
• YourÅcameraÅmodelÅname,Å[CanonÅCamera]ÅorÅaÅcameraÅiconÅdoesÅnot
Solution:
DeleteÅtheÅdeviceÅwithÅtheÅfollowingÅprocedures.Å
Å
installed.
beÅfoundÅinÅtheÅ[ControlÅPanel]ÅorÅtheÅ[PrintersÅandÅOtherÅHardware]Åwindow.
ÅdisplayÅ
inÅtheÅ[ScannersÅandÅCamerasÅProperties]ÅdialogÅorÅtheÅ[ScannersÅandÅ
Cameras]Åfolder.
You must be authorized as a Computer System Administrator to delete
devices.
1. DisplayÅtheÅ[DeviceÅManager]Ådialog.
Windows Vista: ClickÅtheÅ[Start]Åmenu,Å[ControlÅPanel],Å[SystemÅandÅ
Maintenance],Å[System],ÅandÅTask ÅlistÅ[DeviceÅManager].
Windows XP: ClickÅtheÅ[Start]Åmenu,Å[ControlÅPanel],Å[PerformanceÅandÅ
Maintenance],Å[System],Å[Hardware]Åtab,ÅandÅtheÅ[DeviceÅManager]Åbutton.
Windows 2000: ClickÅtheÅ[Start]Åmenu,Å[Settings],Å[ControlÅPanel],Å[System],Å
[Hardware]Åtab,ÅandÅtheÅ[DeviceÅManager]
Åbutton.
2. ClickÅtheÅÅsymbolÅbesideÅtheÅ[OtherÅdevices],Å[PortableÅDevices]Åand/orÅ
[ImagingÅdevices]Åcategory.
You rÅcameraÅmodelÅnameÅorÅ[CanonÅCamera]ÅwillÅdisplayÅinÅtheseÅcategoriesÅ
ifÅitÅisÅbeingÅrecognizedÅasÅanÅ“other”Ådevice.
There are other potential reasons for the problem if the “Other
devices”, “Portable Devices” or “Imaging devices” categories do not
appear or your camera model name or [Canon Camera] does not appear.
Proceed to Step 5, and temporarily quit the procedures.
3. SelectÅyourÅcameraÅmodelÅnameÅorÅ[CanonÅCamera],Åright-clickÅandÅselectÅ
[Delete].
Page 81

4. ClickÅ[OK]ÅinÅtheÅconfirmationÅdialog.
DeleteÅallÅinstancesÅofÅyourÅcameraÅmodelÅnameÅorÅ[CanonÅCamera]ÅifÅitÅ
appearsÅinÅoneÅorÅmoreÅplacesÅinÅtheÅ[OtherÅdevices]ÅorÅ[ImagingÅdevices]Å
categories.Å
5. CloseÅ[DeviceÅManager]ÅorÅ[SystemÅProperties].
WithÅWindowsÅ2000,ÅcontinueÅbyÅdeletingÅtheÅsetupÅinformationÅfile.Å
Step 6 and above are not required for Windows Vista and Windows XP.
79
6. Double-clickÅtheÅ[My
ÅComputer]ÅiconÅonÅtheÅdesktop,ÅfollowedÅbyÅtheÅ[C:]Å
drive,Å[WINNT]ÅfolderÅandÅ[inf]Åfolder.
If the [inf] Folder Is Not Visible in the [WINNT] Folder
UseÅtheÅfollowingÅproceduresÅtoÅshowÅallÅfilesÅandÅfolders.
1. OpenÅtheÅ[
2. ClickÅtheÅ[Tools]ÅmenuÅandÅselectÅ[FolderÅOptions].
3. ClickÅtheÅ[View]Åtab.
4. InÅtheÅ[FilesÅandÅFolders]ÅcategoryÅinÅtheÅAdvancedÅSettingsÅsection,ÅsetÅ[HiddenÅfilesÅ
andÅfolders]ÅtoÅ[ShowÅhiddenÅfilesÅandÅfolders].ÅRemoveÅtheÅcheckÅmarksÅfromÅ[HideÅ
fileÅextensionsÅforÅknownÅfileÅtypes]ÅifÅitÅisÅpresent.
5. Click
ThisÅwillÅmakeÅtheÅhiddenÅfilesÅandÅfoldersÅvisible.
Å[OK]ÅtoÅcloseÅtheÅdialog.
WINNT]Åfolder.
7. LookÅforÅfilesÅforÅCanonÅdigitalÅcamerasÅthatÅstartÅwithÅ[CAP*].Å
TheÅ“*”ÅrepresentsÅaÅnumber,ÅsuchÅasÅ0ÅorÅ1.Å
[CAP*]ÅfilesÅcomeÅinÅpairsÅofÅ[CAP*.inf]ÅandÅ[CAP*.pnf]Åfiles,Å“*“ÅrepresentsÅ
theÅsameÅnumber
Å(ForÅexample,Å[CAP0.inf]ÅandÅ[CAP0.pnf]).Å
Page 82

80
Zooming Images in ZoomBrowser EX is Slow or Not Working
Appendices
8. Double-clickÅtheÅ[CAP*]Åfiles ÅtoÅcheckÅtheirÅcontents.Å
Double-clickingÅaÅ[CAP*.inf]ÅfileÅwillÅopenÅitÅinÅtheÅWindowsÅNotepadÅ
program.ÅCheckÅallÅfiles,ÅandÅlookÅforÅ[;****CanonÅCameraÅDriverÅSetupÅ
File****]ÅinÅtheÅfirstÅline.ÅNoteÅdownÅtheÅnamesÅofÅtheseÅfiles.
Several sets of [CAP*] files may be present in the [inf] folder. Open up
each file to confirm that it is an [CAP*] file for Canon digital cameras
before you do anything with the file.
9. DeleteÅtheÅ[CAP*]ÅfileÅset.
DeleteÅtheÅ[CAP*.inf]ÅandÅ[CAP*.pnf]
ÅfileÅforÅCanonÅdigitalÅcamerasÅthatÅyouÅ
notedÅdownÅinÅStepÅ8.
The [inf] folder contains numerous files critical to the computer’s
operation. Be extremely careful to delete the correct files. If you delete
the wrong files, you may be unable to restart Windows.
10.ReinstallÅtheÅdriverÅwithÅtheÅproceduresÅinÅInstalling the Software and USB
DriverÅ(p. 11).
SomeÅgraphicsÅcardsÅorÅsettingsÅmayÅcauseÅtheÅdisplayÅofÅzoomedÅimagesÅinÅZoomBrowserÅEXÅ
toÅslowÅdownÅorÅmalfunction.ÅIfÅthisÅoccurs,ÅsetÅyourÅcomputerÅdisplay'sÅHardwareÅaccelerationÅ
settingÅtoÅaÅlowerÅsetting.Å
1.ÅClickÅtheÅWindowsÅ[Start]Åmenu,ÅfollowedÅbyÅ[ControlÅPanel].
WithÅWindowsÅ2000,ÅclickÅtheÅ[Start]ÅmenuÅandÅselectÅ[Settings],ÅfollowedÅbyÅ
[ControlÅPanel].Å
2. DisplayÅtheÅ[HardwareÅacceleration]ÅsettingÅwindow.
Windows Vista: ClickÅ[AppearanceÅandÅPersonalization],ÅfollowedÅbyÅ[AdjustÅ
screenÅResolution],Å[AdvancedÅSettings]ÅbuttonÅandÅ[Troubleshoot]Åtab.
Windows XP: ClickÅtheÅ[AppearanceÅandÅTheme]Åicon,Å
[Display]Åicon,Å[Settings]Åtab,Å[Advanced]ÅbuttonÅandÅ[Troubleshoot]Åtab.
followedÅbyÅtheÅ
Windows 2000: ClickÅtheÅ[Display]Åicon,ÅfollowedÅbyÅtheÅ[Settings]Åtab,Å
[Advanced]ÅbuttonÅandÅ[Troubleshoot]Åtab.
3. SetÅtheÅ[HardwareÅacceleration]ÅtoÅaÅsettingÅbelowÅ[Full]ÅandÅclickÅ[OK].
4. RestartÅtheÅcomputerÅifÅprompted.
Page 83

An error message "Insufficient free memory" displays when
using PhotoStitch
If You Were Using ZoomBrowser EX Version 2 or 3
PleaseÅtryÅoneÅofÅtheÅfollowingÅmethods.
•CloseÅallÅotherÅapplicationsÅotherÅthanÅPhotoStitch.
• ReduceÅtheÅsizeÅorÅnumberÅofÅimagesÅtoÅcombine.
•InÅtheÅ[Save]Åtab,ÅselectÅ[AdjustÅimage...],ÅthenÅinÅ“SavedÅImageÅSize“ÅreduceÅtheÅsize.
TakeÅtheÅfollowingÅstepsÅifÅyouÅwereÅusingÅZoomBrowserÅEXÅversionÅ2ÅorÅ3ÅwithÅWindows.
If Titles and Comments Were Attached to Your Images.
Take ÅtheÅfollowingÅstepsÅtoÅdisplayÅinÅversionÅ5ÅtheÅtitlesÅandÅcommentsÅyouÅ
inputÅinÅversionÅ2/3.
81
1. UseÅWindowsÅExplorerÅtoÅopenÅtheÅ[Program]ÅfolderÅwithinÅtheÅfolderÅinÅ
whichÅyouÅinstalledÅZoomBrowserÅEXÅ5.Å
(e.g.ÅC:\ProgramÅFiles\Canon\ZoomBrowserÅEX\Program)
2. Double-clickÅ[dbconverter.exe]ÅfoundÅinÅthisÅfolderÅtoÅstartÅthisÅutility.Å
WithÅ
administrator]ÅtoÅproceedÅwithÅauthorizationÅasÅaÅcomputerÅAdministrator.Å
3. SelectÅtheÅdatabaseÅfileÅyouÅwereÅusingÅupÅtoÅthisÅpointÅandÅclickÅtheÅ[Start]Å
button.Å
(e.g.ÅC:\ProgramÅFiles\Canon\ZoomBrowserÅEX\Database\MyÅDatabase.zbd)
ThisÅwillÅdisplayÅtheÅtitlesÅandÅcommentsÅinputÅinÅtheÅearlie rÅ
commentsÅsectionÅofÅZoomBrowserÅEXÅ5.
If You Had Images in a Folder Below the Program Files Folder
ImageÅfilesÅinÅtheÅ[ProgramÅFiles]ÅfolderÅorÅaÅsubfolderÅcannotÅbeÅdisplayedÅinÅ
ZoomBrowserÅEXÅ5ÅfromÅthatÅlocation.ÅToÅdisplayÅtheseÅfiles,ÅfirstÅperformÅstepsÅ
1-3ÅaboveÅandÅthenÅcarryÅonÅwithÅStepÅ4.
WindowsÅVista,Åright-clickÅtheÅ[dbconverter.exe]ÅfileÅandÅselectÅ[RunÅasÅ
versionsÅinÅtheÅ
4. UseÅWindowsÅExplorerÅtoÅcopyÅtheÅ
[ProgramÅFiles]ÅfolderÅtoÅanotherÅfolder.
(e.g.ÅCopyÅtheÅimageÅfoldersÅinÅC:\ProgramÅFiles\Canon\ZoomBrowserÅ
EX\LibraryÅOneÅtoÅanotherÅlocation.)
TheÅmovedÅfolderÅimagesÅcanÅnowÅbeÅselectedÅandÅdisplayedÅwithÅ
ZoomBrowserÅEXÅ5.
folderÅandÅtheÅimagesÅitÅcontainsÅfromÅtheÅ
Page 84

Appendices
82
Downloading Images without Installing the
Software
IfÅyouÅareÅrunningÅWindowsÅVista,ÅWindowsÅXPÅorÅMacÅOSÅXÅ(v10.3/v10.4),ÅdownloadÅimagesÅ
byÅsimplyÅconnectingÅtheÅcameraÅtoÅaÅcomputer,ÅwithoutÅinstallingÅtheÅsoftwareÅbundledÅonÅtheÅ
CanonÅDigitalÅCameraÅSolutionÅDisk.
However,ÅpleaseÅnoteÅthatÅthereÅareÅseveralÅlimitations.
This function cannot be used on the Windows 2000 platform. You must install
the bundled software for downloading with this platform.
If you use the bundled software, the following limitations do not apply.
•ItÅmayÅtakeÅaÅfewÅminutes,ÅafterÅconnectingÅto
•TheÅcameraÅinformationÅ(firmwareÅversion,Åetc.)ÅmayÅnotÅdisplayÅcorrectly.ÅInÅthisÅcase,ÅuseÅtheÅ
softwareÅfromÅtheÅCanonÅDigitalÅCameraÅSolutionÅDisk.
• SoundÅfilesÅattachedÅtoÅstillÅimagesÅasÅsoundÅmemosÅandÅsoundÅfilesÅrecordedÅwithÅtheÅSoundÅ
RecorderÅfunctionÅmayÅnotÅdownloadÅ
•RAWÅimagesÅmayÅnotÅbeÅdownloadableÅwithÅsomeÅsoftwareÅprogramsÅorÅoperatingÅsystems.Å
•MoviesÅmayÅnotÅdownloadÅcorrectlyÅifÅtheÅfileÅsizeÅorÅsoftwareÅprogramÅisÅincompatible.Å
•ImagesÅshotÅinÅtheÅverticalÅorientationÅmayÅbeÅdownloadedÅinÅtheÅhorizontalÅposition.
•TheÅprotectionÅsettingÅforÅimages
theÅcomputer.Å
•ThereÅmayÅbeÅotherÅproblemsÅwithÅimageÅdownloadsÅdependingÅuponÅtheÅoperatingÅsystemÅ
inÅuse,ÅtheÅfileÅsizeÅorÅtheÅsoftwareÅinÅuse.
dependingÅonÅfileÅsizeÅandÅsoftwareÅused.
ÅprotectedÅinÅtheÅcameraÅmayÅbeÅlostÅwhenÅtransferredÅtoÅ
ÅtheÅcamera,ÅuntilÅyouÅcanÅdownloadÅimages.
Page 85

F
83
Index
A
AdobeÅReader........................................ 2
B
BrowserÅArea
Macintosh
Windows .......................... ....... 24, 25
BrowserÅWindow.................................. 52
CameraÅControlÅWindow
Macintosh
Windows .......................... ....... 16, 19
CanonÅDigitalÅCameraÅSolutionÅDisk .......... 9
Macintosh...................................... 44
Windows .......................... ............. 11
Comment
Macintosh
Windows .......................... ............. 29
Computer ............................................. 8
ConnectingÅtoÅaÅcomputer..................... 10
Macintosh...................................... 46
Windows .......................... ....... 14, 16
ControlÅPanel........................... 52, 55, 58
................................ 52, 53
C
................................ 46, 48
...................................... 57
FavoriteÅFolder
Macintosh
Windows ....................................... 25
FileÅInformationÅWindow ....................... 57
FileÅName
Windows
FilterÅTool
Macintosh
Windows ....................................... 27
FoldersÅArea .................................. 24, 25
FunctionÅButtons ............................ 24, 27
...................................... 53
....................................... 29
...................................... 55
I
ImageÅIconÅAttribute
Macintosh
Windows ....................................... 25
ImageBrowser................................ 6, 7, 9
IndexÅPrint
Windows
InstallerÅPanel
Macintosh
Windows ....................................... 12
InstallingÅSoftware
Macintosh
USBÅDriver...................................... 11
Windows ....................................... 11
...................................... 53
....................................... 21
...................................... 44
...................................... 44
K
D
DirectÅTransferÅFunction .................. 18, 47
DisplayÅControlÅPanel
Macintosh
Windows .......................... ....... 24, 27
DisplayÅMode
Macintosh
Windows .......................... ....... 24, 26
DownloadingÅImages
Macintosh
Windows .......................... ............. 16
................................ 52, 55
................................ 52, 54
...................................... 46
E
Easy-PhotoPrint.................................... 21
E-mail................................................... 7
EOSÅUtility ............................................. 9
EventsÅDialog................................. 17, 77
ExtractÅStillsÅfromÅMovies......................... 7
Keyword
Macintosh
Windows ....................................... 29
...................................... 57
L
LastÅAcquiredÅImages
Macintosh
Windows ................................. 19, 25
LayoutÅPrint
Macintosh
................................ 48, 53
...................................... 50
M
MainÅWindow ...................................... 24
MemoryÅCardÅFolderÅStructure................ 75
MemoryÅCardÅReader
Macintosh
Windows ....................................... 19
MergingÅPanoramicÅImages ...................... 6
Macintosh ............................... ....... 66
Windows ....................................... 38
MyÅCameraÅMaker................................ 42
...................................... 48
Page 86

84
Index
MyÅCameraÅSettings
Macintosh
Windows .......................... ............. 39
MyÅCategory
Macintosh
Windows .......................... ............. 25
...................................... 67
...................................... 53
O
OneÅPhotoÅperÅPageÅPrint
Macintosh
Windows .......................... ............. 21
OperatingÅtheÅShutterÅRemotely ............... 7
Macintosh...................................... 63
Windows .......................... ............. 35
...................................... 50
P
PDFÅManuals.......................................... 2
PhotoStitch ........................................... 6
Macintosh...................................... 66
Windows .......................... ............. 38
Print/ShareÅbutton .......................... 18, 47
PrintingÅImages
Macintosh
Windows .......................... ............. 21
ProgramsÅandÅCompatibleÅOperatingÅ
Systems
PropertiesÅWindow ............................... 29
................................................ 9
...................................... 50
Q
StitchÅAssistÅMode
Macintosh
Windows ....................................... 38
SystemÅRequirements .............................. 8
...................................... 66
T
TaskÅArea ........ ........................ 24, 25, 30
Troubleshooting ................................... 76
Problems....................................... . 77
StartÅbyÅCheckingÅThis...................... 76
U
UninstallingÅSoftware
Macintosh
Windows ....................................... 72
UninstallingÅtheÅUSBÅDriver
Windows
USBÅDriverÅ(TWAIN/WIAÅDriver)........... 9, 13
...................................... 74
....................................... 73
V
ViewerÅWindow
Macintosh
Windows ....................................... 28
................................ 56, 61
Z
ZoomBrowserÅEX................................ 7, 9
VersionÅ2/3 ..................................... 81
QuickTime
Windows
............................. 9, 33, 34
R
RemoteÅShooting
Macintosh
Windows .......................... ............. 35
ReplayingÅMovies
Macintosh
Windows .......................... ............. 33
...................................... 63
...................................... 61
S
SearchingÅImages
Macintosh
Windows .......................... ............. 30
ShootingÅInformation
Macintosh
Windows .......................... ............. 29
StarÅRating
Macintosh
Windows .......................... ....... 28, 29
...................................... 59
...................................... 57
................................ 56, 57
Page 87

MEMO
85
Page 88

86
MEMO
Page 89

MEMO
87
Page 90

88
MEMO
 Loading...