

ENGLISH
Pending
Basic
The Components Guide
Preparations
Shooting
Playback/Erasing
Menus and Settings
Printing
Downloading Images
to a Computer
CDI-E274-010 © 2007 CANON INC. PRINTED IN JAPAN
xxxxxxx
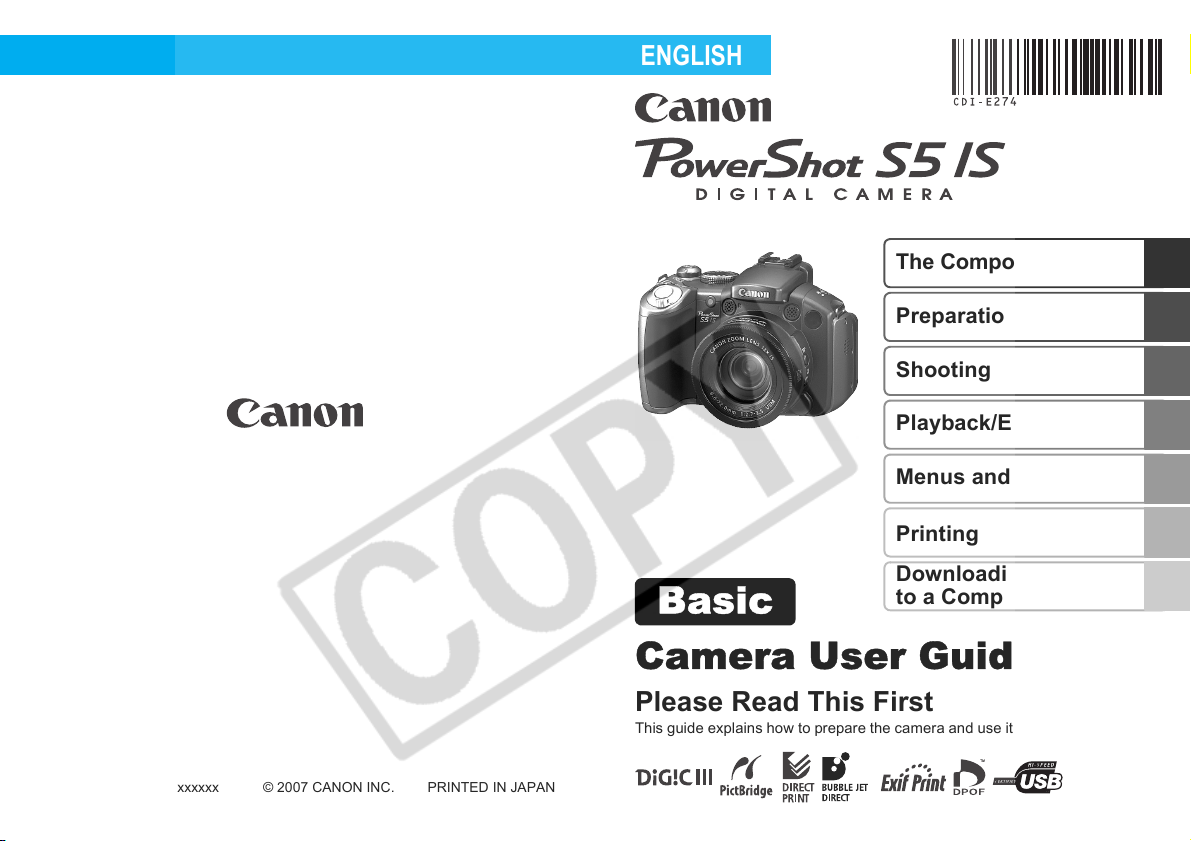
Camera User Guide
Please Read This First
This guide explains how to prepare the camera and use its basic features.
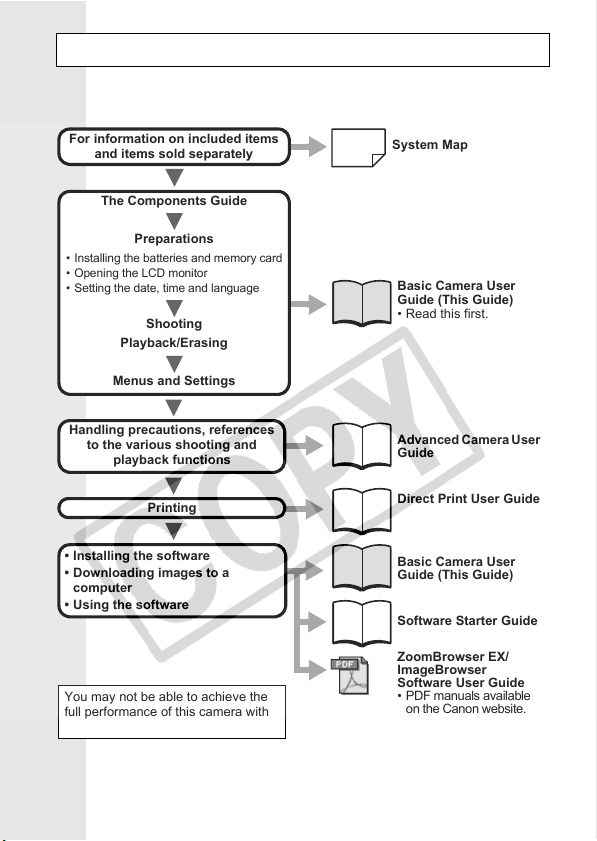
Flowchart and Reference Guides
The following guides are available. Refer to them as necessary
according to the flowchart below.
For information on included items
and items sold separately
The Components Guide
System Map
• Ins talling the batteries and memory card
• Openi ng the LCD monitor
• Setting the date, time and language
Handling precautions, references
• Installing the software
• Downloading images to a
computer
• Using the software
You may not be able to achieve the
full performance of this camera with
the included memory card.
Preparations
Shooting
Playback/Erasing
Menus and Settings
to the various shooting and
playback functions
Printing
Basic Camera User
Guide (This Guide)
• Read this first.
Advanced Camera User
Guide
Direct Print User Guide
Basic Camera User
Guide (This Guide)
Software Starter Guide
ZoomBrowser EX/
ImageBrowser
Software User Guide
• PDF manuals available
on the Canon website.
http://web.canon.jp/
Imaging/information-e.html
In this guide, the Basic Camera User Guide is called the Basic Guide,
and the Advanced Camera User Guide is called the Advanced Guide.

The Components Guide
Front View
a Zoom Lever (p. 14, Advanced Guide pp. 104, 105)
Shooting: (Telephoto) / (Wide Angle)
Playback: (Magnify) / (Index)
b Shutter Button (p. 9)
c (Continuous) / (Self-Timer) Button
(Advanced Guide p. 46, Basic Guide p. 18)
d Neck Strap Mount
e Power/Mode Indicator (p. 4)
f Self-Timer Lamp/Red-Eye Reduction Lamp/Tally Lamp
(p. 18, Advanced Guide pp. 42, 51)
g Flash (p. 14)
h Microphone (Advanced Guide pp. 119, 121)
i AF-assist Beam (Advanced Guide pp. 29, 148)
j Speaker
k MF (Manual Focus) Button (Advanced Guide p. 75)
l (Macro) Button (p. 16)
m Lens
n Ring Release Button (Advanced Guide p. 169)
The Components Guide
1

Back View
a LCD Monitor (Advanced Guide p. 13)
b Viewfinder (Advanced Guide p. 13)
c DC IN (Power input) Terminal (Advanced Guide p. 166)
d Terminal Cover
e A/V OUT (Audio/Video output) Terminal (Advanced Guide p. 130)
f DIGITAL Terminal (p. 28)
g Memory Card Slot/Battery Cover (p. 5)
h Memory Card Slot/Battery Cover Lock (p. 5)
i Tripod Socket
Attaching the Neck Strap
Attach the strap as illustrated.
Check that the strap does not
come loose from the strap mount
when pulled. Perform the same
steps on the other side of the
camera.
In order to avoid dropping the camera, we recommend
attaching the neck strap before using the camera.
2
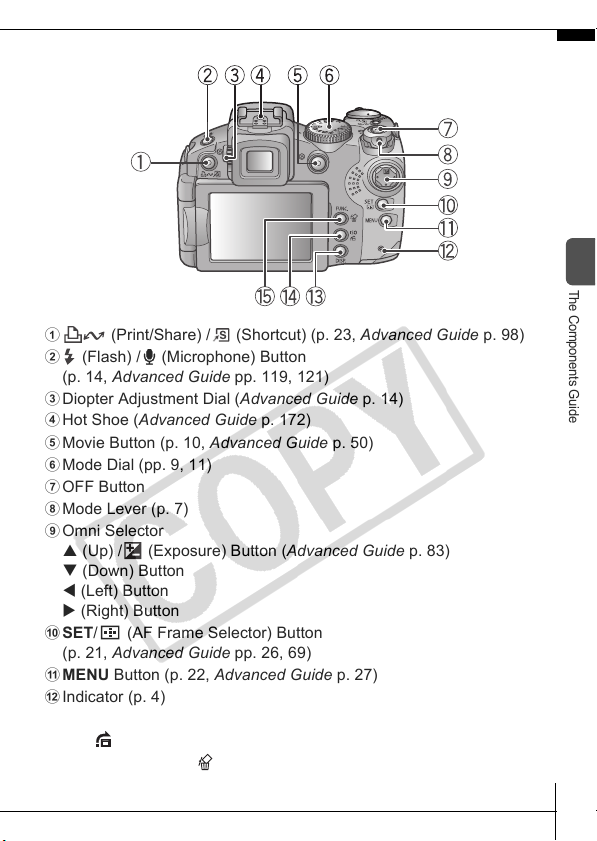
Controls
a (Print/Share) / (Shortcut) (p. 23, Advanced Guide p. 98)
b (Flash) / (Microphone) Button
(p. 14, Advanced Guide pp. 119, 121)
c Diopter Adjustment Dial (Advanced Guide p. 14)
d Hot Shoe (Advanced Guide p. 172)
e Movie Button (p. 10, Advanced Guide p. 50)
f Mode Dial (pp. 9, 11)
g OFF Button
h Mode Lever (p. 7)
i Omni Selector
S (Up) / (Exposure) Button (Advanced Guide p. 83)
T (Down) Button
W (Left) Button
X (Right) Button
j SET/ (AF Frame Selector) Button
(p. 21, Advanced Guide pp. 26, 69)
k MENU Button (p. 22, Advanced Guide p. 27)
l Indicator (p. 4)
m DISP. (Display) Button (Advanced Guide p. 13)
n ISO/ (Jump) Button (Advanced Guide pp. 80, 107)
o FUNC. (Function) / (Single Image Erase) Button
(p. 21, Advanced Guide p. 26)
The Components Guide
3
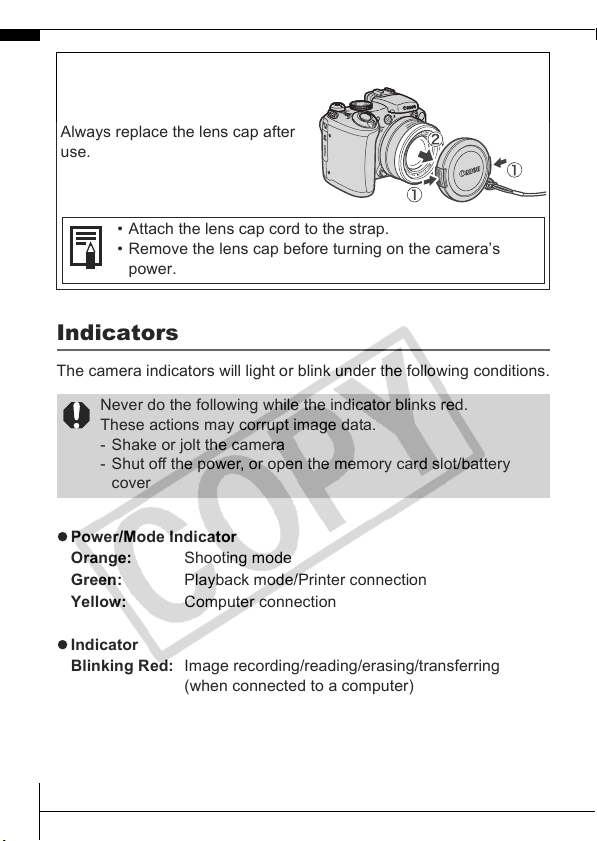
Attaching/Removing the Lens Cap
Squeeze both sides of the lens cap
(a), and remove (b).
Always replace the lens cap after
use.
• Attach the lens cap cord to the strap.
• Remove the lens cap before turning on the camera’s
power.
Indicators
The camera indicators will light or blink under the following conditions.
Never do the following while the indicator blinks red.
These actions may corrupt image data.
- Shake or jolt the camera
- Shut off the power, or open the memory card slot/battery
cover
z Power/Mode Indicator
Orange: Shooting mode
Green: Playback mode/Printer connection
Yellow: Computer connection
z Indicator
Blinking Red: Image recording/reading/erasing/transferring
(when connected to a computer)
4
Preparations
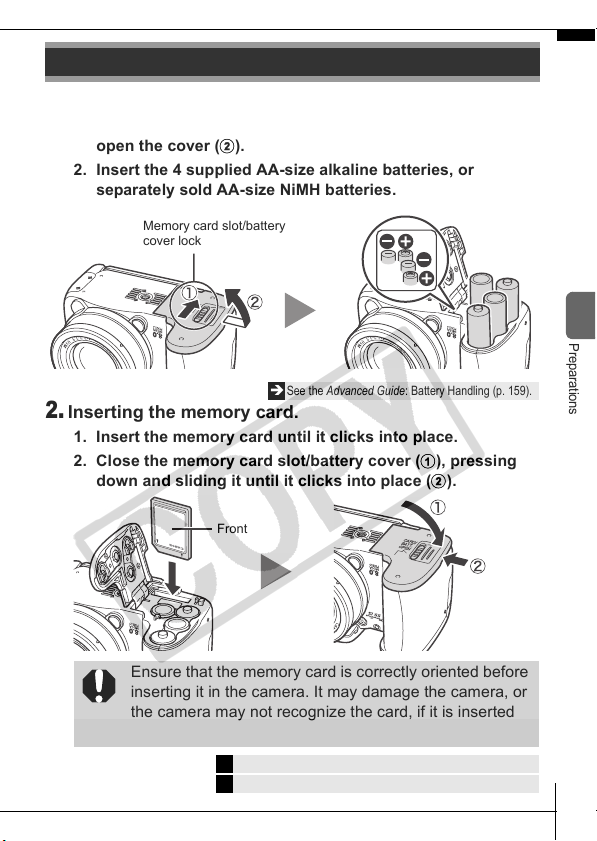
1.
Installing the batteries.
1. Slide the memory card slot/battery cover lock (a) and
open the cover (b).
2. Insert the 4 supplied AA-size alkaline batteries, or
separately sold AA-size NiMH batteries.
Memory card slot/battery
cover lock
Î
See the Advanced Guide: Battery Handling (p. 159).
2.
Inserting the memory card.
1. Insert the memory card until it clicks into place.
2. Close the memory card slot/battery cover (a), pressing
down and sliding it until it clicks into place (b).
Front
Preparations
Ensure that the memory card is correctly oriented before
inserting it in the camera. It may damage the camera, or
the camera may not recognize the card, if it is inserted
incorrectly.
Î
See the Advanced Guide: Handling the Memory Card (p. 161).
Î
See the Advanced Guide: Formatting Memory Cards (p. 37).
5

To Remove the Memory Card
Push the memory card with your finger until the memory card clicks
and then release it.
You can use SD memory cards, SDHC memory cards and
MultiMediaCards with this camera. These cards are
collectively called memory cards in this guide.
Opening the LCD Monitor
You can position the LCD monitor in the following ways.
1. Move it right or left 180 degrees.
2. Tilt it forward 180 degrees
toward the lens or backward
90 degrees.
When the LCD monitor is tilted
180 degrees toward the lens,
the displayed image is
automatically flipped and
reversed (the Reverse Display
function).
*
The Reverse Display function can be set to off.
Î
See the Advanced Guide: Rec. Menu (p. 29).
6
3. Fold the LCD monitor back against the
camera body until it clicks into place.
When the LCD monitor clicks into
place, the image will display normally
(not reversed).
See the Advanced Guide: Using the LCD Monitor and the
Î
Viewfinder (p. 13).
Always keep the LCD monitor closed with the display facing
the camera body when the camera is not in use. When you
push the LCD monitor until you hear the clicking sound, the
LCD monitor will automatically turn off, and the image will
display in the viewfinder.
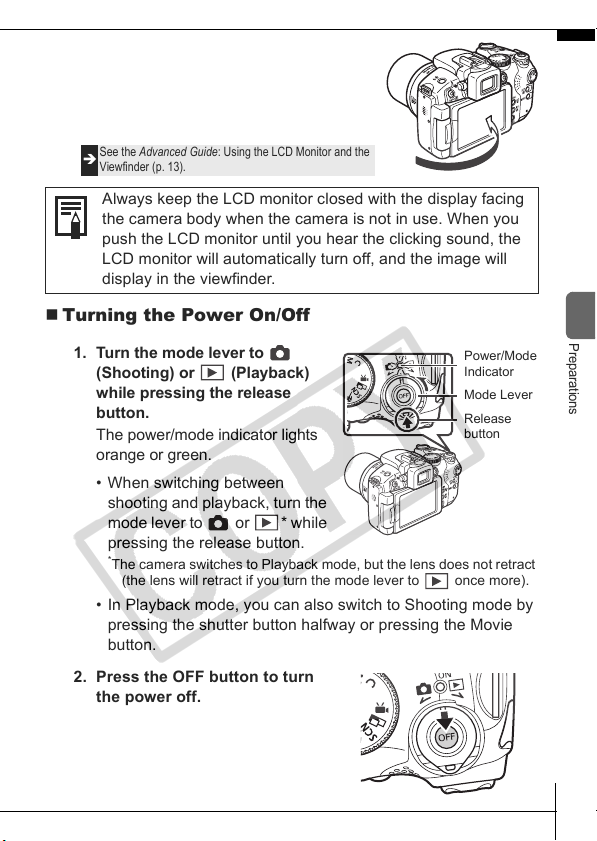
Turning the Power On/Off
1. Turn the mode lever to
(Shooting) or (Playback)
while pressing the release
button.
The power/mode indicator lights
orange or green.
• When switching between
shooting and playback, turn the
mode lever to or * while
pressing the release button.
*
The camera switches to Playback mode, but the lens does not retract
(the lens will retract if you turn the mode lever to once more).
• In Playback mode, you can also switch to Shooting mode by
pressing the shutter button halfway or pressing the Movie
button.
2. Press the OFF button to turn
the power off.
Power/Mode
Indicator
Mode Lever
Release
button
Preparations
7
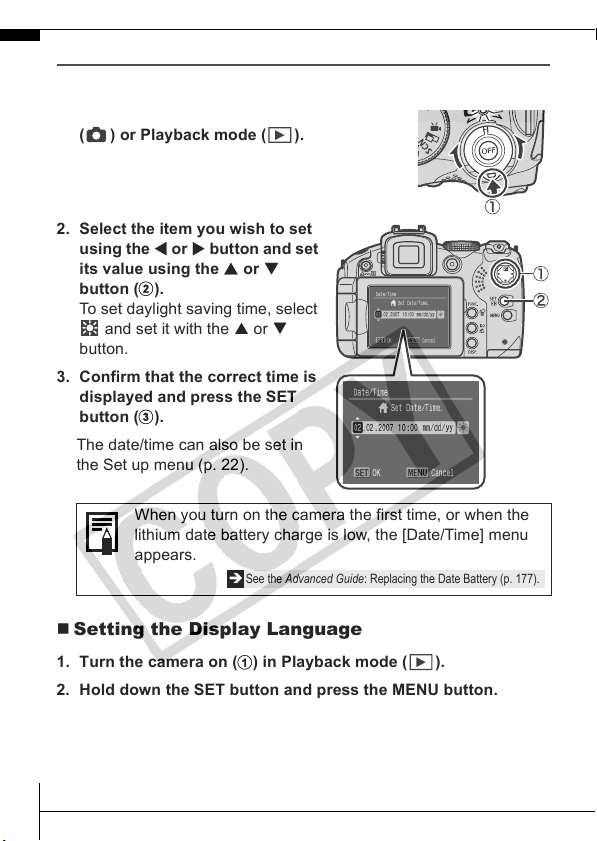
First Time Settings
Setting the Date/Time
1. Turn the camera on (a) in Shooting mode
( ) or Playback mode ( ).
2. Select the item you wish to set
using the W or X button and set
its value using the S or T
button (b).
To set daylight saving time, select
and set it with the S or T
button.
3. Confirm that the correct time is
displayed and press the SET
button (c).
The date/time can also be set in
the Set up menu (p. 22).
When you turn on the camera the first time, or when the
lithium date battery charge is low, the [Date/Time] menu
appears.
Î
See the Advanced Guide: Replacing the Date Battery (p. 177).
Setting the Display Language
1. Turn the camera on (a) in Playback mode ( ).
2. Hold down the SET button and press the MENU button.
3. Use the S, T, W or X button to select a language, then press
the SET button.
The display language can also be set in the Set up menu (p. 22).
8
Shooting
Shooting (Still Images)
1.
Turn the camera on in Shooting mode ( ) (p. 7).
The start-up sound will play and the start-up image will display on
the LCD monitor.
However, when starting with the viewfinder display, the start-up
image is not displayed and there is no start-up sound.
• When you hold down the button while turning on the camera,
the mute setting is [On]. All sounds except for warning sounds
will be disabled.
Î
See the Advanced Guide: Using the LCD Monitor and the Viewfinder (p. 13).
Î
See the Advanced Guide: Power Saving Function (p. 22).
Î
See the Advanced Guide: Set up Menu (p. 32).
2.
Set the mode dial to .
3.
Aim the camera at the subject.
4.
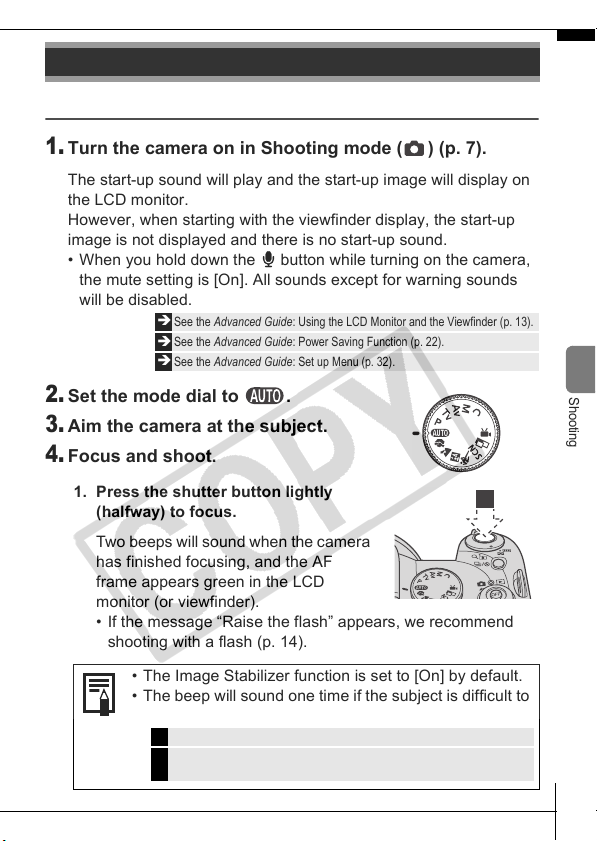
Focus and shoot.
1. Press the shutter button lightly
(halfway) to focus.
Two beeps will sound when the camera
has finished focusing, and the AF
frame appears green in the LCD
monitor (or viewfinder).
• If the message “Raise the flash” appears, we recommend
shooting with a flash (p. 14).
Shooting
• The Image Stabilizer function is set to [On] by default.
• The beep will sound one time if the subject is difficult to
focus on.
Î
See the Advanced Guide: Setting the Image Stabilizer Function (p. 44).
See the Advanced Guide: Shooting Hard-to-Focus Subjects (Focus Lock, AF
Î
Lock, Manual Focus) (p. 73).
9
 Loading...