

Canon MLT (S), MLT User Manual

CXDI Image Processing Software
MLT (S)
User’s Manual
Before using the instrument, be sure to read this manual thoroughly.
Also, read the manuals of other instruments in this system.
Keep the manual where it is easily accessible.

Please Note
1. In no event will Canon be liable for direct or indirect consequential damage arising out of the use of this
product. Canon will not be liable for loss of image data due to any reason.
2. Please have this product installed by Canon representative or distributor.
3. Canon reserves the right to change the specifications of the product without prior notice.
© CANON INC. 2009
All rights reserved.
Under copyright laws, this manual may not be copied, in whole or in part, without the written consent of
Canon.

Contents
1. Overview .....................................................................................................1
1.1 About MLT (S) ........................................................................................................... 1
1.2 Available Functions of MLT (S) ................................................................................. 2
2. Edit Exposure Mode Settings ......................................................................3
2.1 Procedures to Set Exposure Mode ........................................................................... 3
2.2 Setting Enhancement ................................................................................................ 7
2.3 Setting Noise Reduction ............................................................................................ 8
2.4 Setting Dynamic Range Adjustment ......................................................................... 9
2.4.1 Setting high-density sections ............................................................................. 9
2.4.2 Setting low-density sections ............................................................................. 10
3. QA Mode Settings .....................................................................................11
3.1 Procedures to Change Parameters ......................................................................... 11
3.2 Changing Enhancement .......................................................................................... 14
3.3 Changing Noise Reduction .....................................................................................15
3.4 Changing Dynamic Range Adjustment ................................................................... 16
3.4.1 Changing high-density sections ....................................................................... 16
3.4.2 Changing low-density sections ........................................................................ 17
4. QA Parameters .........................................................................................18


Notation Conventions
Notation 1
In this manual, the name of button is enclosed with a pair of brackets [ ], and the buttons that are selected in succession
are connected with > to indicate the order.
Example: On the Exposure screen, touch the followings:
[SYSTEM] > [EDIT EXPOSURE MODE]
Notation 2
If any detailed explanation for the operation or setting is available on other page in this manual, the page to refer is indicated with (→ page number).
Example: Please set the parameters by referring to 2.2 Setting Enhancement (→ P. 7 ) .
Notation 3
When description of the procedure or setting continues from an odd-numbered page (right page) to the subsequent evennumbered page (left page), a small note, [Continued on the following page »] appears at the bottom-right of the oddnumbered page to draw your attention.

1. Overview
1.1 About MLT (S)
NOTE: This user’s manual is for version 7.1 and later of the CXDI System Software.
The CXDI Image Processing Software MLT (S) (called “MLT (S)” in this manual) is
designed to extend the image processing functions provided with the CXDI series of Canon digital radiography system (called “CXDI” in this manual).
By installing MLT (S) on the Control PC, the advanced image processing features of MLT (S)
are brought into full scope both in the Edit Exposure Mode and QA Mode.
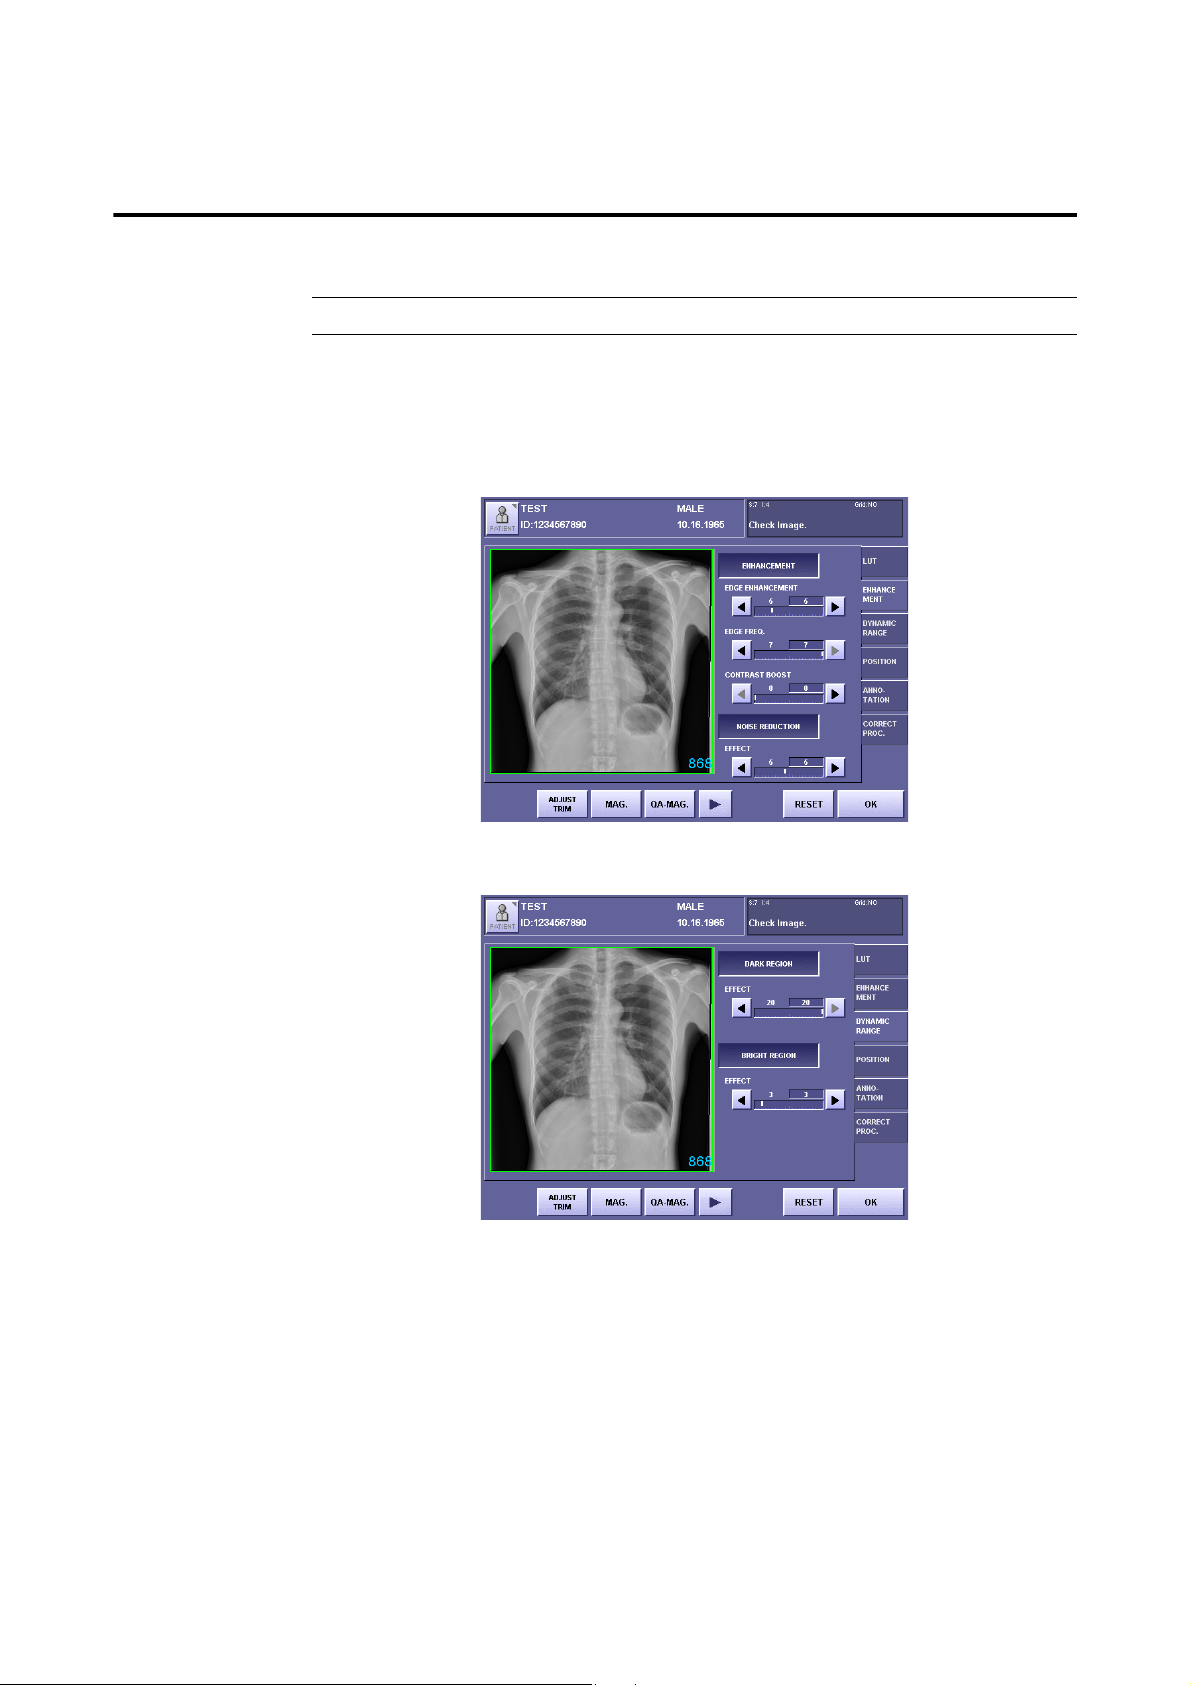
QA Mode Screen Extended by MLT (S) (ENHANCEMENT Tab)
QA Mode Screen Extended by MLT (S) (DYNAMIC RANGE Tab)
– 1 –

1.Overview
1.2 Available Functions of MLT (S)
This manual describes the operating procedures of the following image processing function that
is available with MLT (S). For details and information on other image processing functions,
please refer to Operation Manual and Setup Guide.
Enhancement
This accentuates edge details and local contrast of the exposure image for improving
sharpness.
The degree of enhancement can be adjusted by setting the edge enhancement parameters.
The frequency band for edge enhancement can also be modified by setting the edge
frequency parameters.
The degree of enhancement of the local contrast can be adjusted by setting the contrast
boost parameters.
Noise Reduction
This reduces noise in the exposure image for improving granularity.
The EFFECT parameter setting can be used to adjust the degree of noise reduction.
Dynamic Range Adjustment
This improves the detectability of high-density and low-density areas in the exposure
image.
The settings for the maximum density parameter and minimum density parameters can
be used to adjust the dynamic range.
NOTE: The effects resulting from changes to the parameters may be difficult to check
in the exposure image of the QA mode screen.
In these cases, check by touching [MAG.] or [QA-MAG.] to display the
enlarged screen.
– 2 –
Continued on the following page >>
2. Edit Exposure Mode Settings
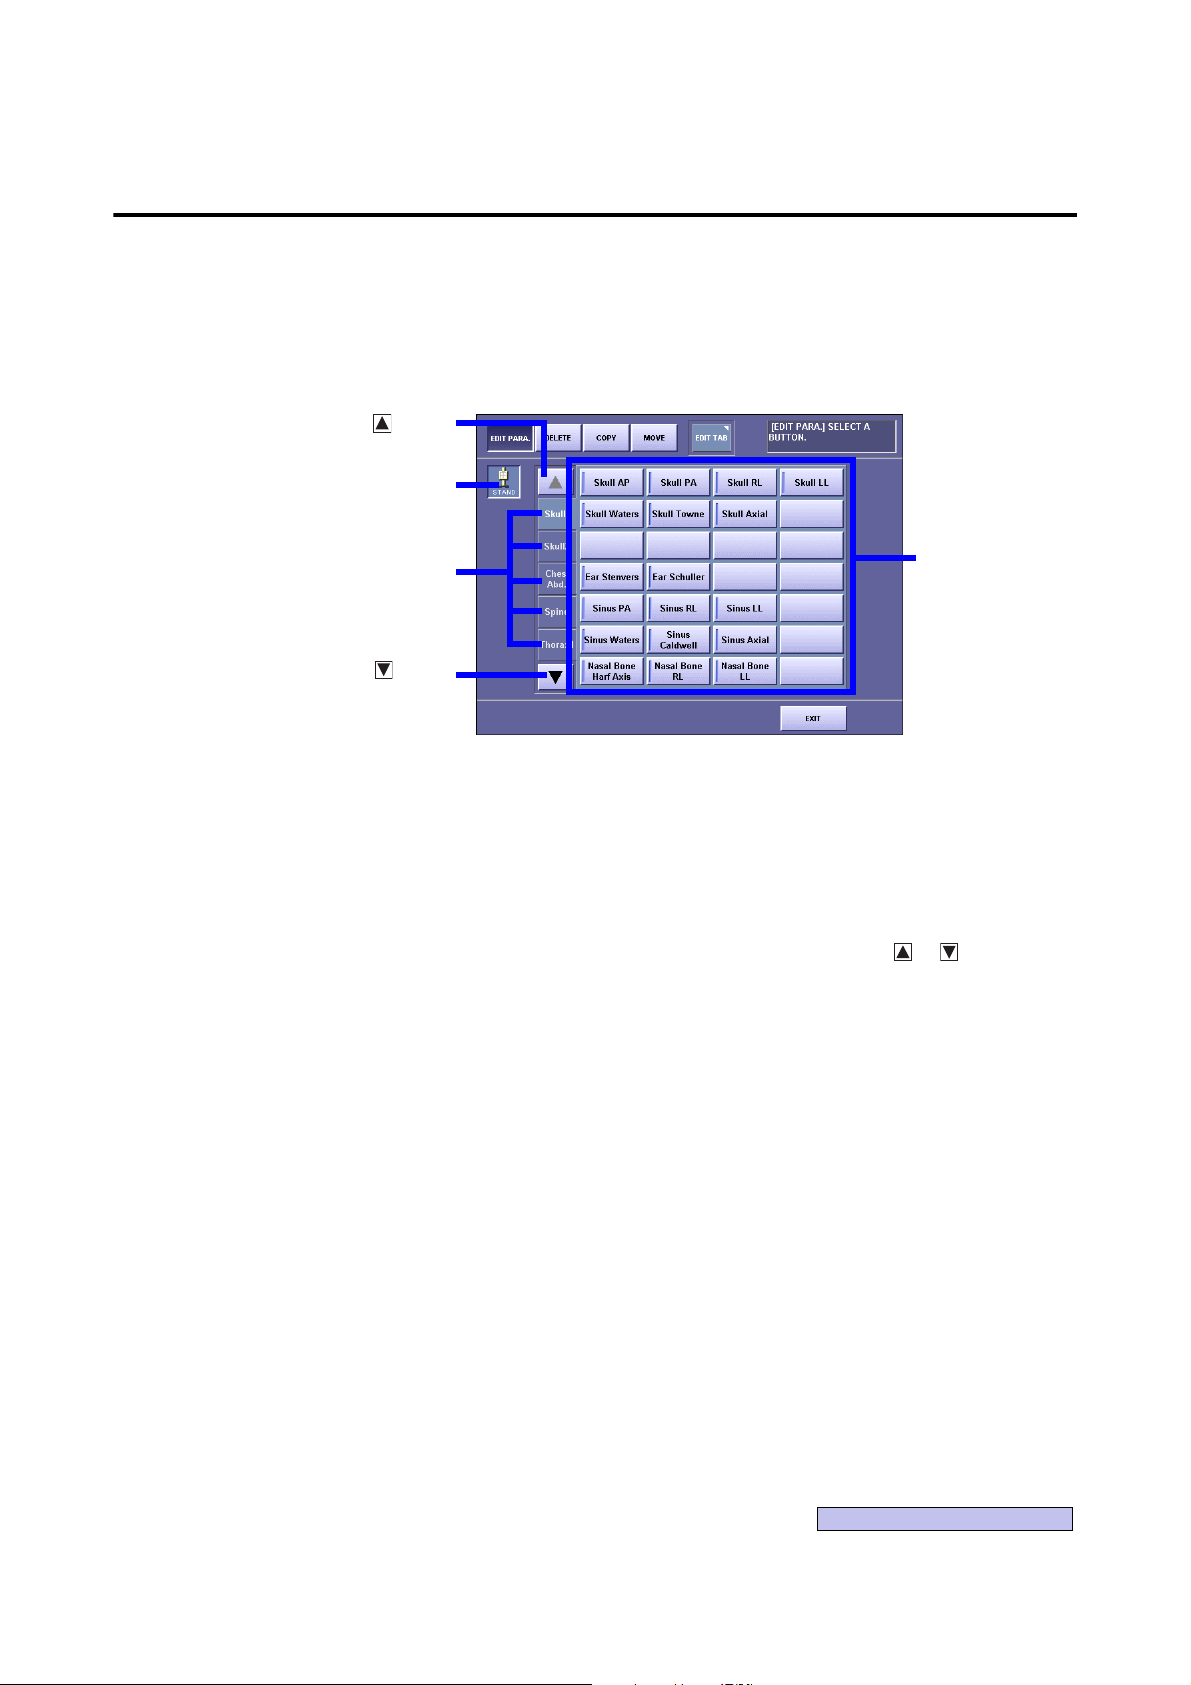
Sensor Unit
Button
Button
Button
Category Tab
Exposure Mode
2.1 Procedures to Set Exposure Mode
Display the Edit Exposure Mode screen
1
On the Exposure screen, touch the followings:
[SYSTEM] > [EDIT EXPOSURE MODE]
Edit Exposure Mode Screen
Select the Sensor Unit
2
If two or more sensor units are being used in the system, touch the Sensor Unit button,
then select the Sensor Unit.
Select the Category tab
3
If eight or more categories are registered in the system, touch the or button to display the Category tabs that are not currently visible.
– 3 –
 Loading...