

PUB. DIM-1065-000
Wi-Fi Basic Setup Guide
Wi-Fi基本设置指南
EN
TC
ZH
Wi-Fi基本設定指南

2
Table of Contents
03 Getting Started
03 Introduction to Wi-Fi
06 Recording Movies Using a Smartphone as a Remote Control
08 Remote Browse: Viewing Recordings Using a Web Browser on Your
iOS Device or Android Smartphone
09 Uploading Videos Using an iOS Device
11 Connecting Directly to a Smartphone or Similar Device
11 Sharing Recordings with CANON iMAGE GATEWAY
12 Playback on a Computer
14 Troubleshooting
Trademark Acknowledgements
• Microsoft and Windows are trademarks or registered trademarks of Microsoft Corporation in the United States
and/or other countries.
• App Store, iPad, iPhone, iTunes and Mac OS are trademarks of Apple Inc., registered in the U.S. and other
countries.
• Google, Android, Google Play, YouTube are trademarks of Google Inc.
• Facebook is a registered trademark of Facebook, Inc.
• IOS is a trademark or registered trademark of Cisco in the U.S. and other countries and is used under license.
• The Twitter name and marks are trademarks of Twitter, Inc.
• Wi-Fi is a registered trademark of the Wi-Fi Alliance.
• Wi-Fi Certified, WPA, WPA2, and the Wi-Fi Certified logo are trademarks of the Wi-Fi Alliance.
• Other names and products not mentioned above may be trademarks or registered trademarks of their
respective companies.

3
Getting Started
This manual will get you started on using your camcorder’s Wi-Fi functions. To learn more about Wi-Fi functions after you establish a Wi-Fi
connection and to see more detailed procedures, refer to the full-version Instruction Manual (PDF file on the supplied CD-ROM). When this
manual refers you to a section in the camcorder’s Instruction Manual,
use the table of contents or the PDF’s search feature to help find the
section. To install the full-version Instruction Manual, see
Installing the
Camcorder’s Instruction Manual (PDF file)
in the supplied Quick Guide.
The following are basic terms used frequently in this text.
Access point
A wireless access point (WAP) is a device that allows wireless devices,
like your camcorder, to connect to a wired network (including to the
Internet) using the Wi-Fi standard. In most cases, this will be your wireless router.
SSID
Service Set Identifier. This is simply the public name of a Wi-Fi network.
Wi-Fi network
A group of computers and/or other devices in your home, office, or
other location connected wirelessly using Wi-Fi.
6/4
VIXIA HF R42 / VIXIA HF R40 (NTSC)
:/9/8
LEGRIA HF R48 / LEGRIA HF R47 / LEGRIA HF R46 (PAL)
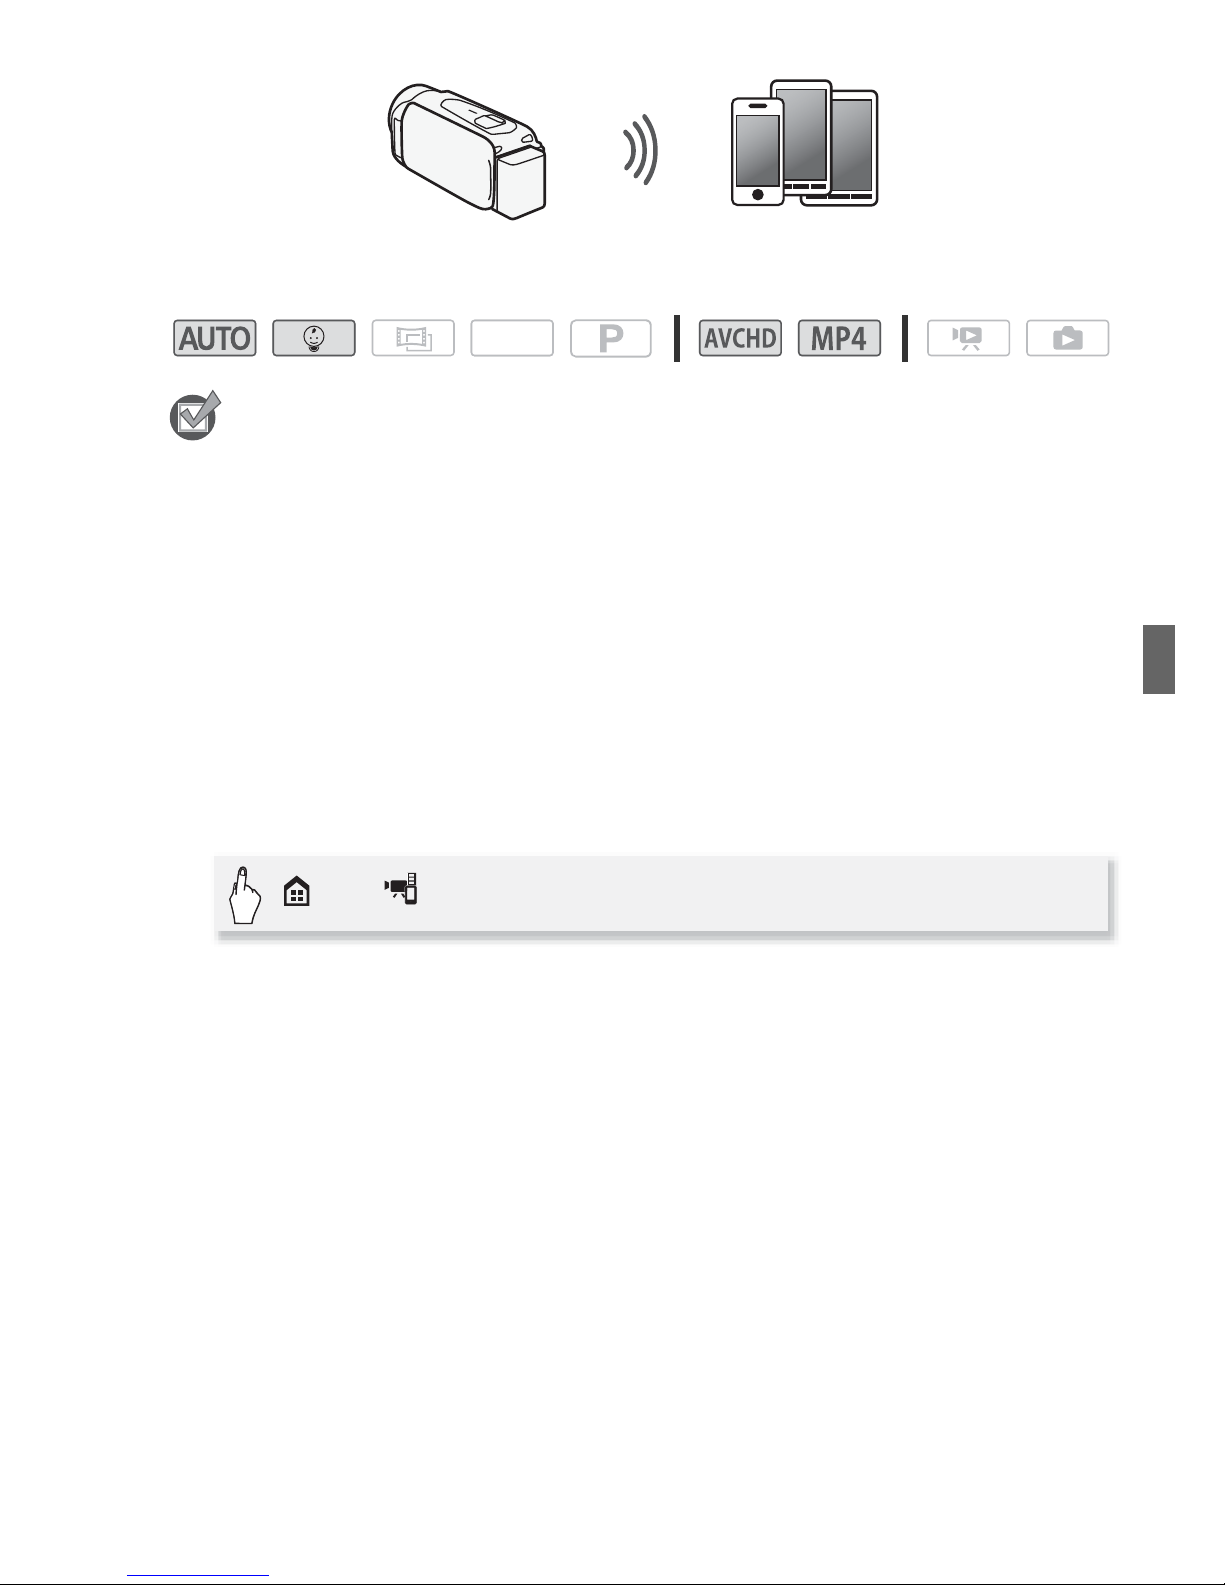
Introduction to Wi-Fi
When you use the camcorder’s Wi-Fi function to connect to a
smartphone
1
, you can wirelessly save, play back and upload your
4
recordings. You can even use a smartphone as a remote control and
record using the device’s screen.
1
For brevity’s sake, “smartphone” is used in this text to refer to Wi-Fi-enabled
smartphones and tablets while “iOS device” refers to Wi-Fi-enabled iPhones and
iPads.
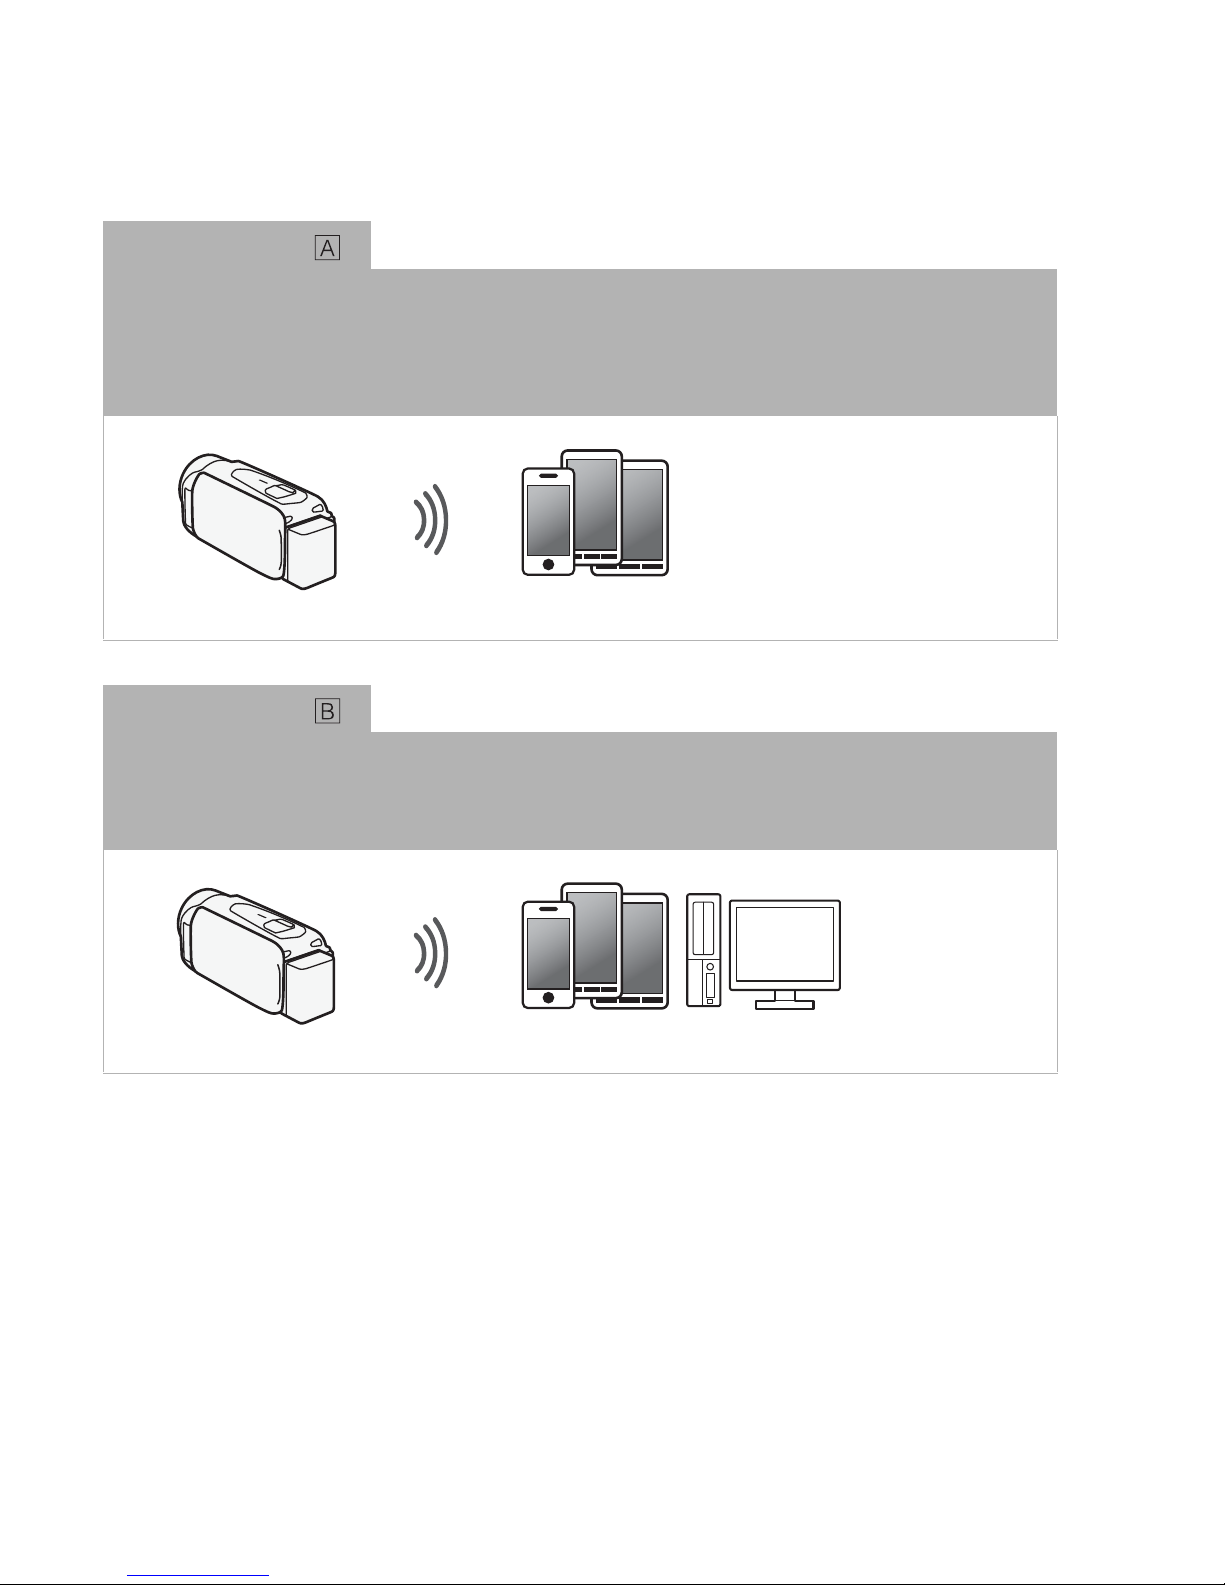
Wi-Fi connection
After you download the CameraAccess app2, use your iOS device or Android smartphone
to remotely control the camcorder and make recordings (A 6)
2
The CameraAccess app, provided by PIXELA, is available for free from the App
Store (for iOS devices) and Google Play™ (for Android smartphones).
Wi-Fi connection
Wirelessly connect the camcorder to your iOS or Android smartphone or computer3 and
use the device’s Web browser to view recordings in the camcorder (A 8).
3
You can also use a computer connected via an access point.
Smartphone
Smartphone or similar device
5
IMPORTANT
• Using an unprotected Wi-Fi network can expose your files and data to
monitoring by unauthorized third parties. Be aware of the risks involved.
NOTES
• Do not open the memory card slot cover during the wireless connection.
• While using Wi-Fi functions, the camcorder’s automatic power off function will be disabled.
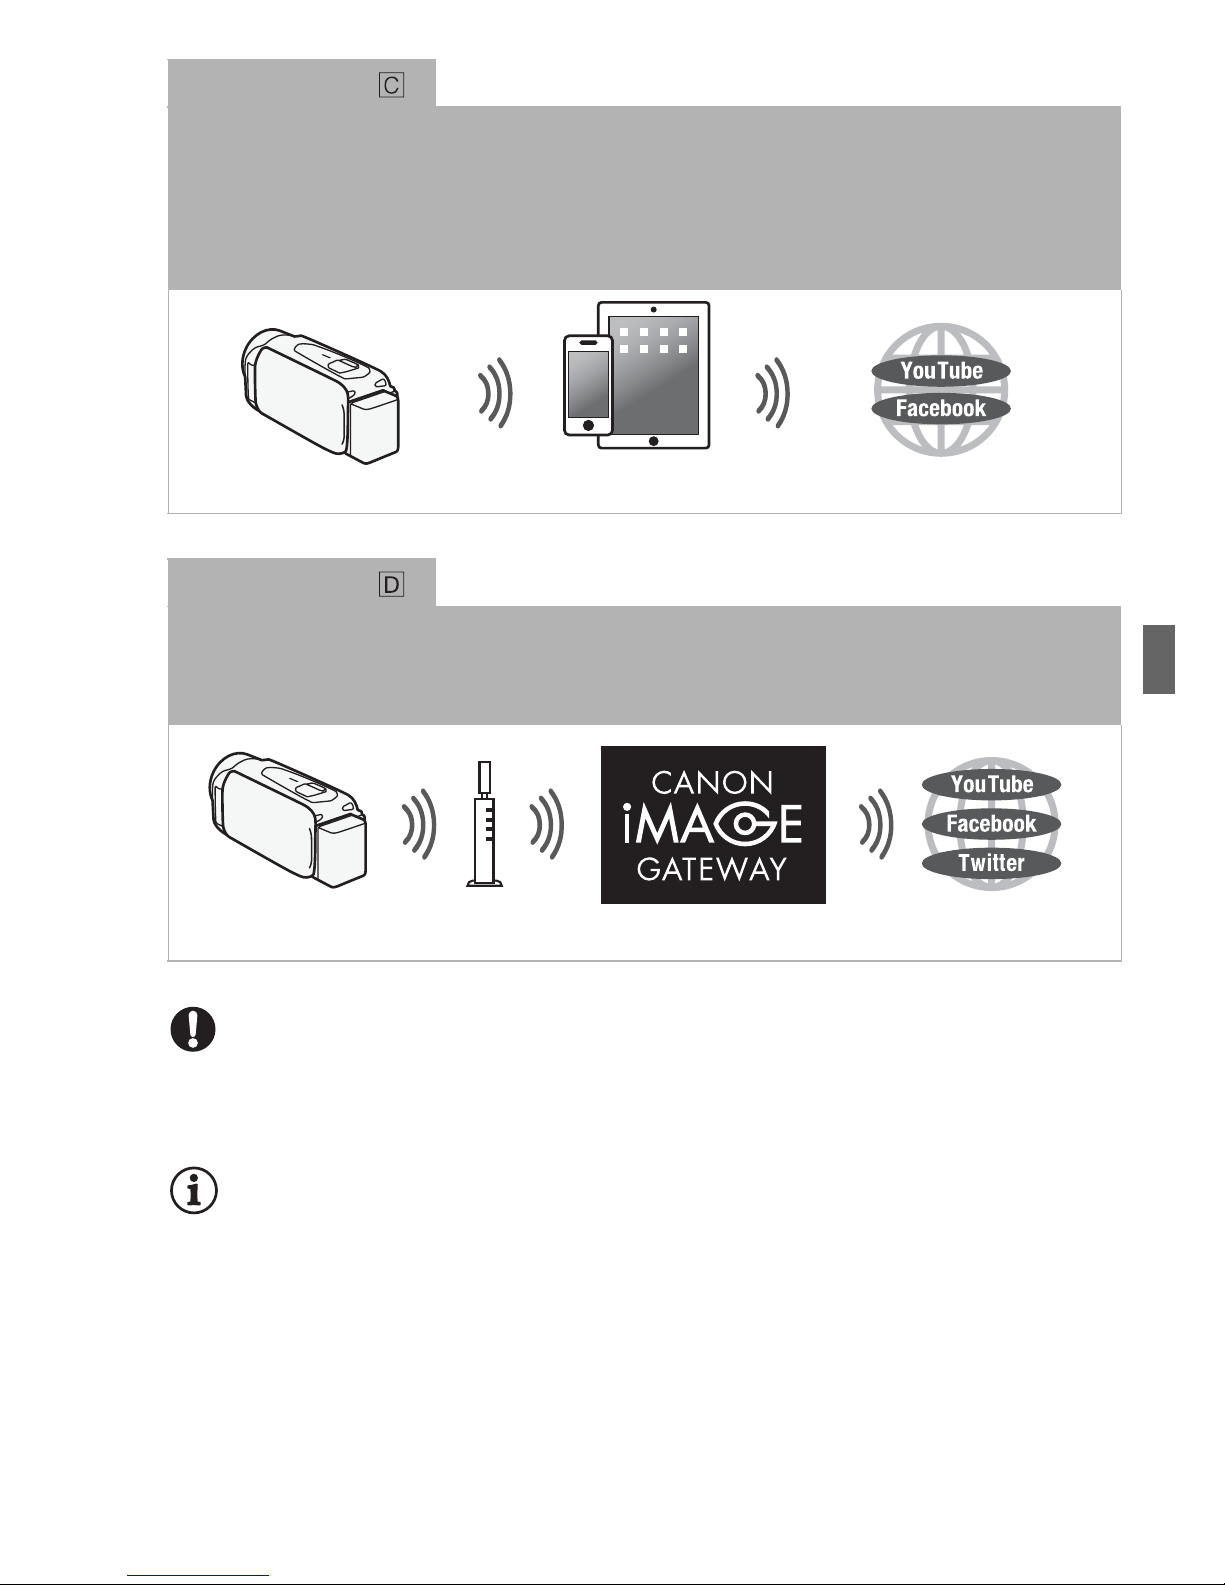
Wi-Fi connection
After you download the Movie Uploader app4, wirelessly connect the camcorder to an iOS
device (A 9) to save, play back and upload your recordings. You can even use this
connection type if you plan to share videos on YouTube and Facebook on the go.
4
The Movie Uploader app, provided by PIXELA, is available for free from the App
Store.
Wi-Fi connection
Wirelessly connect the camcorder to a wireless router (access point) on your home
network. Use this connection if you plan to connect to CANON iMAGE GATEWAY (A 11).
After doing so, you can even share videos on YouTube and Facebook.
iOS device
Wireless router
(Access point)
6
Recording Movies Using a Smartphone as a Remote Control
Using the CameraAccess app* for iOS devices and Android™ smartphones, you can control the camcorder from a distance while you view
the camcorder’s image on the smartphone’s screen. Not only can you
control the camcorder to start and stop recording, you can also record
the camcorder’s image directly onto your smartphone.
* The CameraAccess app, provided by PIXELA, is available for free from the App
Store (for iOS devices) and Google Play™ (for Android smartphones).
Before Using Wi-Fi Functions
Based on the function, the camcorder will wirelessly connect to a
Wi-Fi-enabled device, such as a smartphone, directly or to a Wi-Fi network via an access point (wireless router)*. After selecting the function
you want to use, follow the onscreen directions to connect the camcorder.
* Depending on the manufacturer, the access point may be referred to using a
different name, such as wireless LAN router or wireless network router.
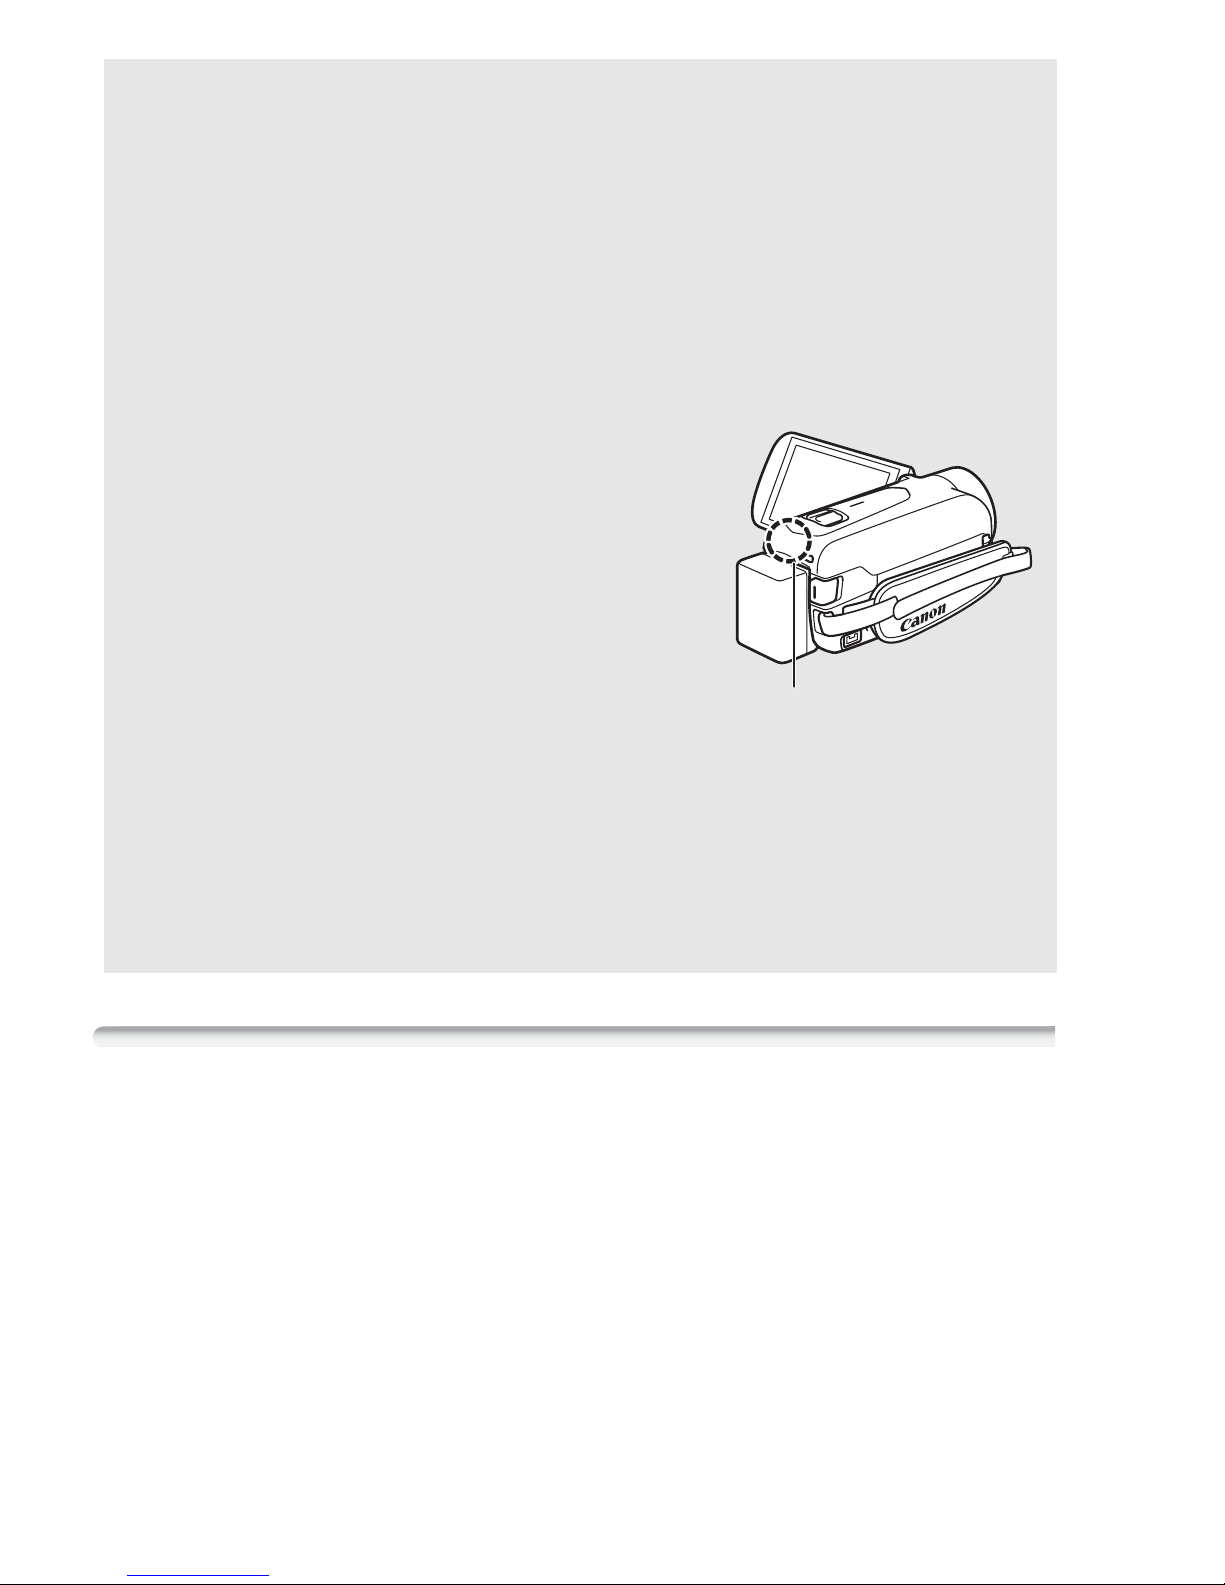
About the Wi-Fi antenna
When using the camcorder’s Wi-Fi functions, do not cover the back portion of the
camcorder with your hand or other object.
The Wi-Fi antenna is located in the back
portion and covering it may interfere with
wireless signals.
About the camcorder’s Wi-Fi standard
The camcorder’s Wi-Fi standard complies with the IEEE 802.11
b/g/n protocol and operates in the 2.4 GHz band. As such, the maximum data transfer rate is 11 Mbps for IEEE 802.11b, 54 Mbps for
IEEE 802.11g, and 150 Mbps for IEEE 802.11n. Note that these are
theoretical values and actual data transfer rates may differ.
Wi-Fi antenna
7
Operating modes:
POINTS TO CHECK
• Before you perform this procedure for the first time, download and
install the CameraAccess app on your smartphone. The app can be
downloaded for free from the following sites (English only).
App Store:
http://itunes.com/apps/cameraaccess
Google Play™:
http://play.google.com/store/apps/details?id=jp.co.pixela.cameraaccess
1 Camcorder: Set the camcorder to receive remote control
commands.
• The camcorder’s SSID (network name) and password will appear.
• The camcorder will be ready to connect with the smartphone.
2 Smartphone: Activate Wi-Fi in the settings screen (A 11).
The network names of detected access points will appear.
3 Smartphone: Touch the access point with the same SSID as that
of the one from step 1.
4 Smartphone: Enter the password.
5 Smartphone: Start the CameraAccess app.
For details about this function, refer to Recording Movies Using a
Smartphone as a Remote Control in the camcorder’s Instruction
Manual (PDF file).
Smartphone
SCN
> [ Remote Control+Streaming]
8
NOTES
• For details about the CameraAccess app, visit PIXELA’s Web site.
http://pixela.jp/ceca (English only)
• This function is not available in the following cases.
- When the video quality is 60P (6/4) or 50P (:/9/
8).
- When the frame rate is 24P for an MP4 movie (6/4).
- When dual recording is activated.
Remote Browse: Viewing Recordings Using a Web Browser on
Your iOS Device or Android Smartphone
With the Remote Browse function, you can use the Web browser on
your iOS device, Android smartphone, computer or similar device to
show a list of recordings in the camcorder, play them back and even
download them.* This conveniently allows you to view your recordings
while you are out.
* Depending on the device, OS browser, movie format and video quality, you may
not be able to play back or download recordings. For details, visit your local Canon
Web site.
Operating modes:
1 Camcorder: From any movie index screen, set the camcorder to
connect with the smartphone.
• The camcorder’s SSID (network name) and password will appear.
• The camcorder will be ready to connect with the smartphone.
Smartphone or similar device
SCN
> [ Wi-Fi] > [ Playback via Browser] > [OK]

9
2 Smartphone: Activate Wi-Fi in the settings screen (A 11).
The network names of detected access points will appear.
3 Smartphone: Touch the access point with the same SSID as that
of the one from step 1.
4 Smartphone: Enter the password (first time only).
5 Smartphone: Start the Web browser.
6 Smartphone: Enter the URL that appears on the camcorder’s
screen into the Web browser’s address bar.
• For details about using the Web browser, refer to the instruction
manual of the device.
• The URL is always the same so you may find it convenient to
bookmark the URL.
7 Smartphone: Touch [&·] on the upper left of the screen and
open the desired index screen. Next, touch the desired recording
from the list.
8 Smartphone: Touch when finished.
For details about this function, refer to Remote Browse: Viewing
Recordings Using a Web Browser on Your iOS Device or Android
Smartphone in the camcorder’s Instruction Manual (PDF file).
NOTES
• The following types of MP4 scenes will be recognized as multiple files
on other devices.
- Scenes exceeding 4 GB
- Scenes recorded at 35 Mbps exceeding 30 minutes
- Scenes recorded at a video quality other than 35 Mbps exceeding
1hour
Uploading Videos Using an iOS Device
Using the Movie Uploader app* for iOS devices, you can connect the
camcorder to the device to upload your movies to YouTube and Face-
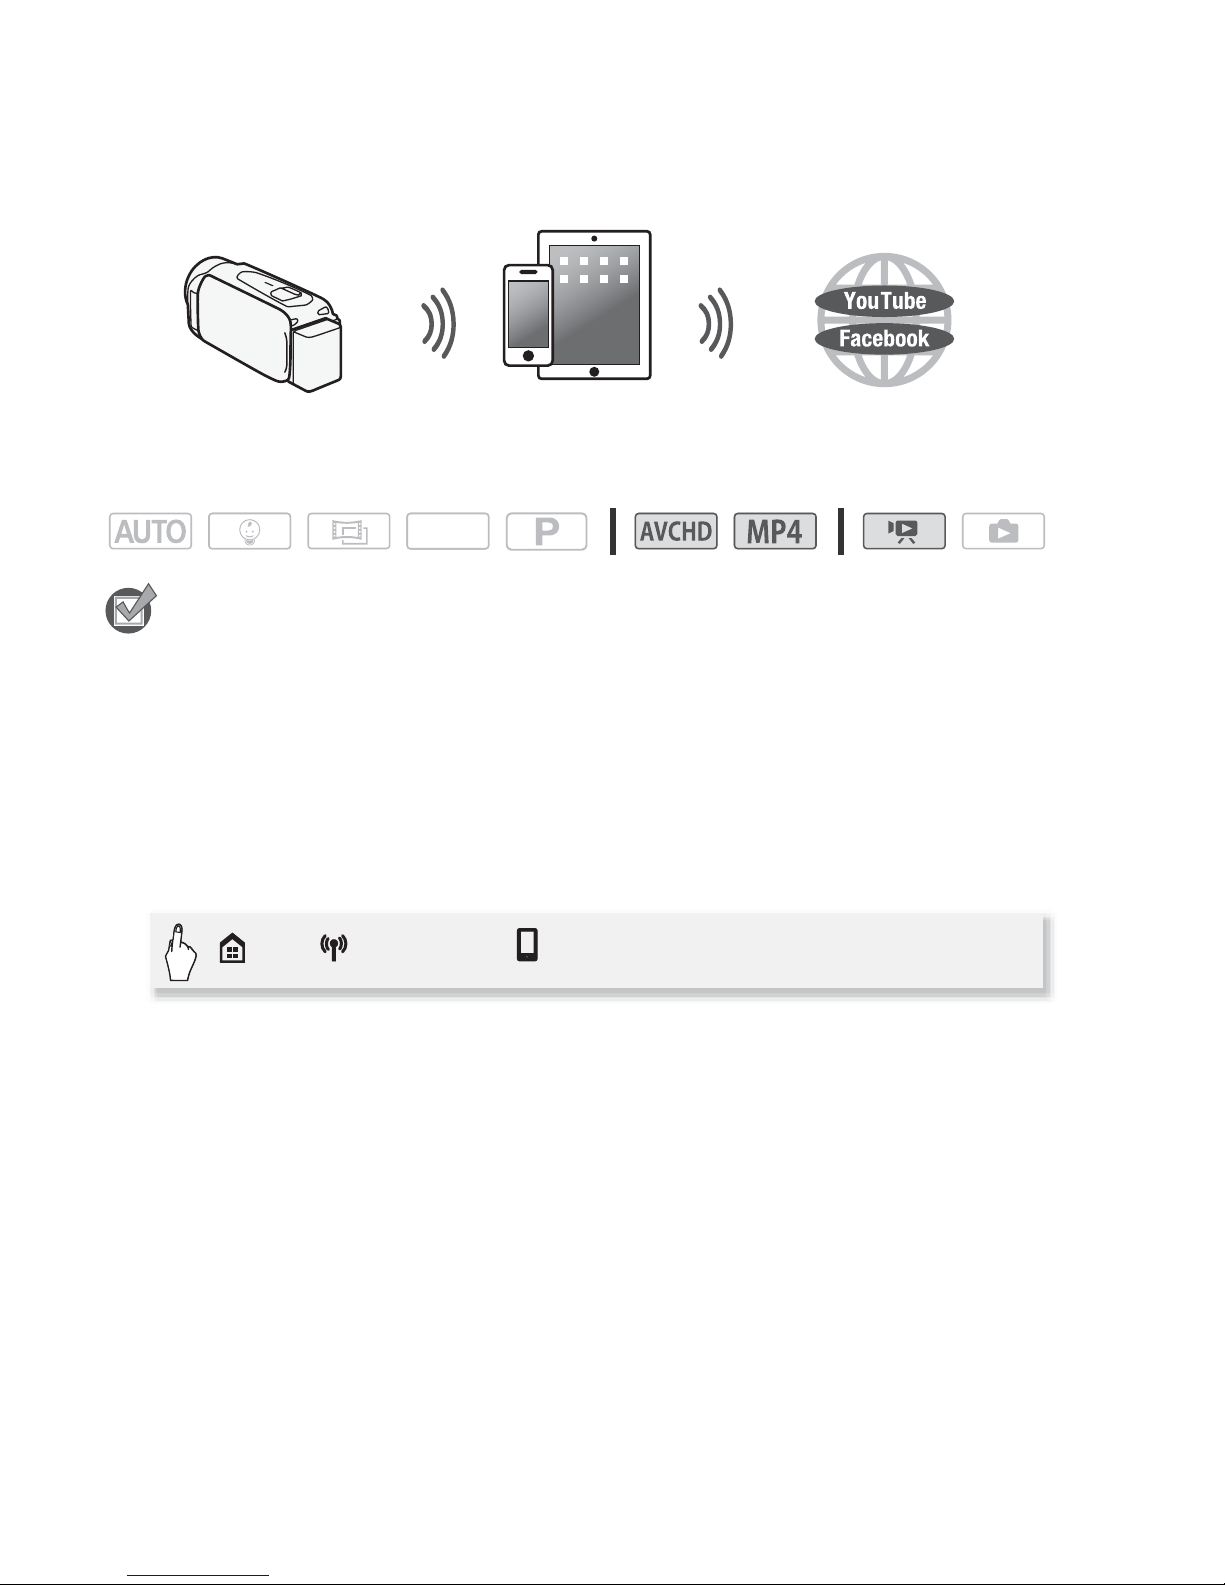
10
book even when you are away from your home network. You can
save** and play back MP4 movies and photos on an iOS device.
* The Movie Uploader app, provided by PIXELA, is available for free from the App
Store.
**Not available for MP4 movies recorded at a video quality of 35 Mbps.
Operating modes:
POINTS TO CHECK
• Before you perform this procedure for the first time, install the Movie
Uploader app on your iOS device. The app can be downloaded for free
from the following site.
http://itunes.com/apps/movieuploader
1 Camcorder: From any movie index screen, set the camcorder to
connect with the iOS device.
• The camcorder’s SSID (network name) and password will appear.
• The camcorder will be ready to connect with the iOS device.
2 iOS device: Touch Settings > Wi-Fi and then turn Wi-Fi on (A 11).
The network names of detected access points will appear.
3 iOS device: Touch the access point with the same SSID as that of
the one from step 1.
4 iOS device: Enter the password.
5 iOS device: Use the Movie Uploader app to transfer the
camcorder’s movies.
• For details about the Movie Uploader app, visit
http://www.pixela.co.jp/oem/canon/e/movieuploader/ (English only)
iOS device
SCN
> [ Wi-Fi] > [ Movie Uploader] > [OK]

11
• For details about this function, refer to Uploading Videos Using an
iOS Device in the camcorder's Instruction Manual (PDF file).
NOTES
• The following types of MP4 scenes will be recognized as multiple files
on other devices.
- Scenes exceeding 4 GB
- Scenes recorded at 35 Mbps exceeding 30 minutes
- Scenes recorded at a video quality other than 35 Mbps exceeding
1hour
Connecting Directly to a Smartphone or Similar Device
You can connect the camcorder directly to a smartphone or similar
device using a Wi-Fi connection. Use this connection method if the
camcorder’s SSID and password appear on the screen after you select
a Wi-Fi function.
Operating modes:
1 Smartphone: Activate Wi-Fi in the settings screen.
The network names of detected access points will appear.
2 Smartphone: Touch the access point with the same SSID as that
of the one that appears on the camcorder’s screen.
• The camcorder’s screen will display a message indicating that the
connection has been established.
• This operation is necessary only the first time you establish the
connection.
3 Continue with the function you were previously using.
Sharing Recordings with CANON iMAGE GATEWAY
After you register for CANON iMAGE GATEWAY*, you will be able to
access various Web services**. You will be able to upload movies and
photos to online albums, share the albums on Twitter, upload movies to
Facebook and YouTube, send links to your online albums by e-mail to
SCN
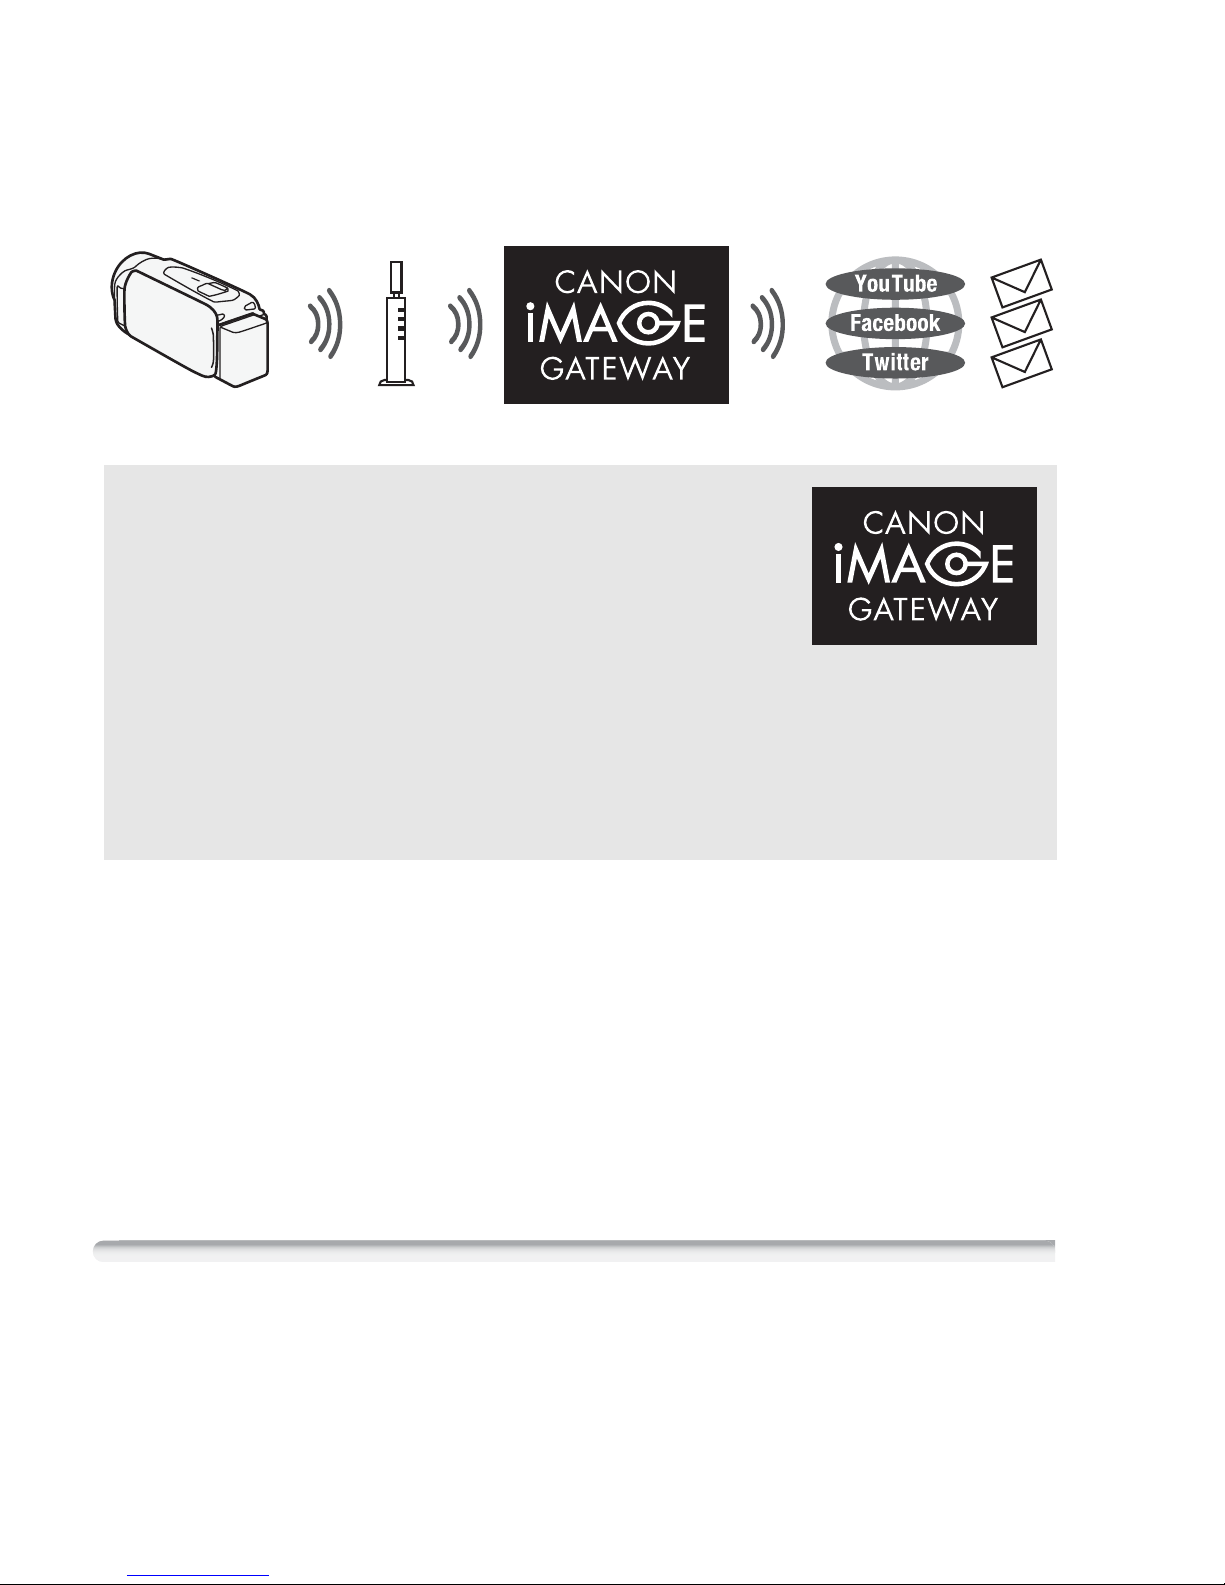
12
friends and family, and more! To use this function, you will need an
access point connected to the Internet.
* Availability differs from area to area.
** “Web services” is used in this text to refer to various Internet services supported
by CANON iMAGE GATEWAY.
General requirements
• Computer with the supplied software ImageBrowser EX and
CameraWindow correctly installed. For details on installing the soft-
ware, refer to Saving MP4 Movies and Photos (Windows/Mac OS) (PDF
file).
• Completed free registration online for CANON iMAGE GATEWAY.
• Account settings for YouTube, Facebook and Twitter (depending on the
services you plan to use).
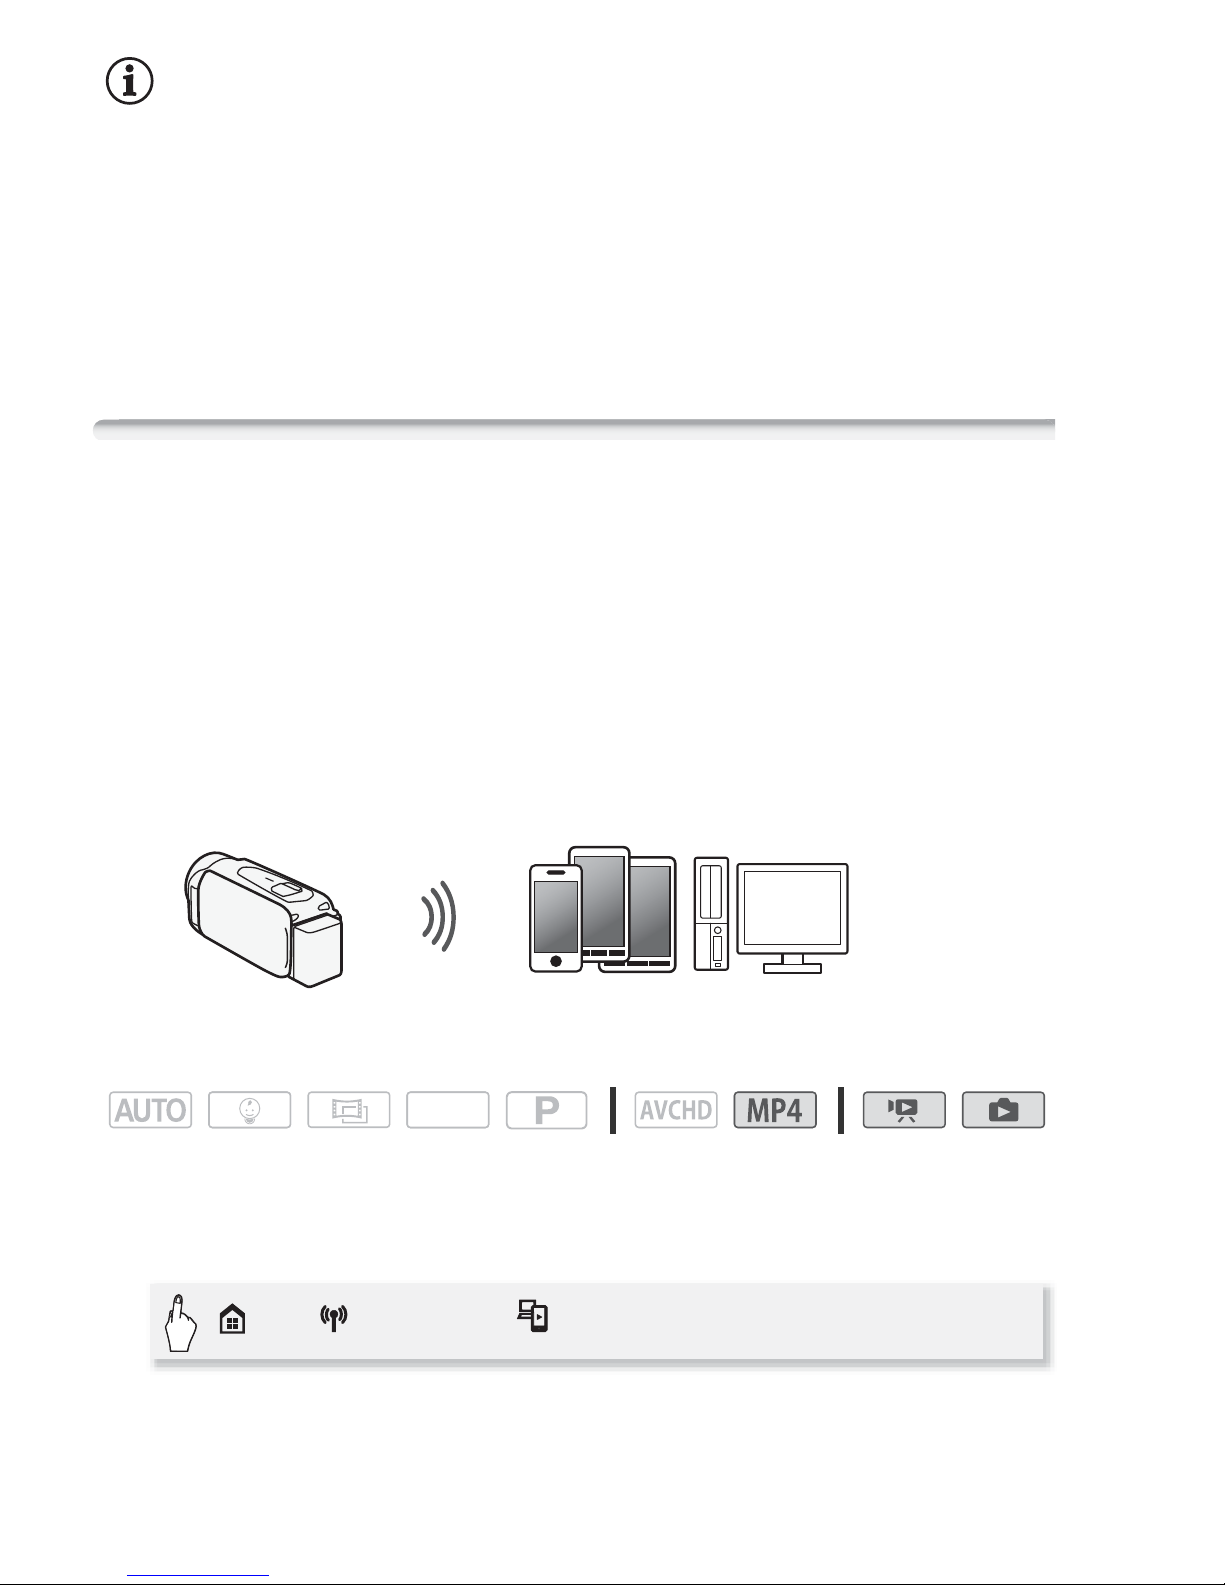
Playback on a Computer
Using the Media Server function, you can remotely play back movies
and photos in the camcorder’s memory on your computer or other
compatible device. To use this function, you need an access point connected to your home network and software to play back the Media
Wireless router
(Access point)
CANON iMAGE GATEWAY
CANON iMAGE GATEWAY is a site that provides
various photo-related services for owners of
qualified Canon products. After you complete the
free registration online, you can use the Web services, create online photo albums, and more.
Visit Canon’s Web site for information on registration and countries/regions where you can use
this service.
http://canon.com/cig
 Loading...