

Page 1

PUB. DIE-0497-000
S
C
HD Camcorder
Instruction Manual
b
NT
Page 2

Important Usage Instructions
WARNING
TO REDUCE THE RISK OF ELECTRIC SHOCK AND TO REDUCE ANNOYING INTERFERENCE, USE THE RECOMMENDED ACCESSORIES ONLY.
COPYRIGHT WARNING:
Unauthorized recording of copyrighted materials may infringe on the rights of copyright owners and be contrary to copyright laws.
Trademark Acknowledgements
• SD, SDHC and SDXC Logos are trademarks of SD-3C, LLC.
•Microsoft and Windows are trademarks or registered trademarks of Microsoft Corporation in the United
States and/or other co untries.
• App Store, iPad, iPhone, iTunes and Mac OS are trademarks of Apple Inc., registered in the U.S. and
other countries.
• HDMI, the HDMI logo and High-Definition Multimedia Interface are trademarks or registered trademarks of HDMI Licensing LLC in the United States
and other countries.
• Google, Android, Google Play, YouTube are trademarks of Google Inc.
•IOS is a trademark or registered trademark of Cisco in the U.S. and other countries and is used under
license.
•Wi-Fi is a registered trademark of the Wi-Fi Alliance.
• Wi-Fi Certified, WPA, WPA2, and the Wi-Fi Certified logo are trademarks of the W i-Fi Alliance.
•WPS as used on the camcorder’s settings, onscreen displays and in this manual signifies Wi-Fi Pro-
tected Setup.
• The Wi-Fi Protected Setup Identifier Mark is a mark of the Wi-Fi Alliance.
•The N-Mark is a trademark or registered trademark of NFC Forum, Inc. in the United States and in other
countries.
•FlashAir is a trademark of Toshiba Corporation.
•Other names and products not mentioned above may be trademarks or registered trademarks of their
respective companies.
•This device incorporates exFAT technology licensed from Microsoft.
• “Full HD 1080” refers to Canon camcorders compliant with high-definition video composed of 1,080 vertical pixels (scanning lines).
2
Page 3

•This product is licensed under AT&T patents for the MPEG-4 standard and may be used for encoding
MPEG-4 compliant video and/or decoding MPEG-4 compliant video that was encoded only (1) for a
personal and non-commercial purpose or (2) by a video provider licensed under the AT&T patents to
provide MPEG-4 compliant video. No license is granted or implied for any other use for MPEG-4 stan-
dard.
3
Page 4
About this Manual and Camcorder
Thank you for purchasing the Canon VIXIA HF R82 / VIXIA HF R80 /
VIXIA HF R800. Please read this manual carefully before you use the
camcorder and retain it for future reference. Should your camcorder fail to
operate correctly, refer to Tr ou bl eshooting (A 226).
Conventions Used in this Manual
Important precautions related to the camcorder’s opera-
tion.
Additional notes and topics that complement the basic
operating procedures.
Restrictions, requirements or preconditions regarding the
function described.
A
b Text that applies only to the model(s) shown in the icon.
>
• The following terms are used in this manual:
b When not specified as “memory card” or “built-in mem-
ory”, the term “memory” by itself refers to both.
“Scene” refers to one movie unit recorded with a single recording
operation.
Reference page number within this manual.
This arrow is used to abbreviate menu selections. For a
detailed explanation on how to use the menus, refer to
Using the Menus (A 41).
4
Page 5

•Brackets [ ] are used to refer to onscreen controls you need to touch
(menus, buttons, etc.) and to messages as they are displayed on the
screen.
•The photos included in this manual are simulated pictures taken with
a still camera. Unless indicated otherwise, illustrations and menu
icons refer to the ^.
•Illustrations of the camcorder’s screen or a computer’s screen
included in this manual may show only relevant parts of the screen.
• Navigation buttons: The navigation bar at the bottom of the page
offers up to four buttons to let you get quickly to the information you
want to find.
Jump to the general table of contents.
Go to a list of select functions grouped by their uses in r
ations. This alternative index can be very useful for
life situ
beginners who encounter a particular challenge but are not
sure of what function to use.
Jump to the alphabetical index.
The button with a number in it will take you to the beginning
of the current chapter, where you will find an overview of the
information and related functions covered in that chapter.
Note that the icon itself will change depending on the chapter
you are currently reading.
eal-
5
Page 6

•Observe the following precautions while the camcorder’s
ACCESS indicator is on or flashing. Failing to do so may result
in permanent data loss or damage to the memory.
- Do not open the memory card slot cover.
-Do not disconnect the power source or turn off the cam-
corder.
- Do not change the camcorder’s shooting mode.
-Do not press the ^ button.
-When a USB cable is connected to the camcorder, do not
disconnect the USB cable.
6
Page 7

Table of Contents
Important Usage Instructions ................................................2
About this Manual and Camcorder .......................................4
The Camcorder’s Functions in Real-Life Situations ............12
Unique functions for special cases......................................12
Getting the look you want...................................................13
Challenging subjects and shooting conditions.....................14
Playback, editing and others...............................................15
b Wireless functions ..............................................16
Getting to Know the Camcorder..........................................18
Supplied Accessories .........................................................18
Names of Parts...................................................................19
Preparations ................................................................ 24
Charging the Battery Pack...................................................25
Using a Memory Card..........................................................30
Memory Cards Compatible for Use with the Camcorder .....30
Inserting and Removing a Memory Card .............................31
First Time Settings ...............................................................34
Basic Setup........................................................................34
Changing the Time Zone.....................................................37
Initializing the Memory.........................................................38
7
Page 8

Basic Operation of the Camcorder......................................40
Using the Touch Screen .....................................................40
Using the Menus.................................................................41
Operating Modes................................................................46
Basic Recording and Playback .................................. 47
Basic Recording ..................................................................48
Recording Video .................................................................48
Taking Photos ....................................................................52
AUTO Mode .......................................................................54
Zooming.............................................................................57
Basic Playback ....................................................................62
Playing Back Video.............................................................62
Viewing Photos...................................................................67
Deleting Scenes and Photos...............................................69
Advanced Recording Functions ................................. 73
Recording Settings and Shooting Modes............................74
Selecting the Video Quality .................................................74
b Selecting the Memory
(Built-in Memory/Memory Card) for Recordings ..................75
b Dual Recording and Relay Recording.................76
Selecting the Shooting Mode..............................................77
Highlight Priority Mode........................................................79
Cinema Mode and Cinema-Look Filters ..............................80
Special Scene Modes .........................................................82
Programmed AE Mode: Adjusting Settings to
Match Your Needs..............................................................85
8
Page 9

Convenient Functions ..........................................................86
Slow & Fast Motion Recording............................................86
Decoration: Adding a Personal Touch.................................92
Video Snapshot ..................................................................99
Face Detection and Tracking ............................................100
Faders ..............................................................................103
When You Want More Control...........................................105
Exposure ..........................................................................105
Focus ...............................................................................107
White Balance ..................................................................109
Frame Rate.......................................................................111
Tele Macro .......................................................................112
Recording Audio ................................................................113
Audio Scenes ...................................................................113
Using Headphones ...........................................................114
Using an External Microphone ..........................................117
Advanced Playback and Editing Functions ............. 118
Advanced Playback Functions ..........................................119
Grabbing Still Frames from a Movie ..................................119
b Playback with Background Music ....................120
Photo Slideshow ..............................................................122
Editing Functions ...............................................................124
Trimming Scenes..............................................................124
b Copying Recordings to a Memory Card ...........125
Converting Movies to MP4 Format (Resizing Scenes) .......128
b Converting Movies into Fast Motion Scenes .....131
9
Page 10

External Connections................................................ 134
Terminals on the Camcorder .............................................135
Connection Diagrams .......................................................136
Playback on a TV Screen...................................................139
Saving and Sharing Your Recordings................................141
Saving Recordings on a Computer ...................................142
Saving Recordings on the Optional CS100 Connect
Station (USB)....................................................................146
b Memory Save: Saving an Entire
Memory onto an External Hard Drive ................................147
b Wi-Fi Functions......................................... 152
Overview of the Camcorder’s Wi-Fi Functions..................153
The Camcorder’s Wi-Fi Functions.....................................157
Using an iOS or Android Device as a Remote Control.......157
Saving Recordings Using an iOS/Android Device..............169
Saving Recordings on the Optional CS100 Connect
Station (NFC+Wi-Fi)..........................................................172
Sharing Recordings with CANON iMAGE GATEWAY........174
Wi-Fi Connection and Settings..........................................180
Wi-Fi Connection Using an Access Point..........................180
Viewing and Changing Wi-Fi Settings................................186
Additional Information............................................... 190
Appendix: Menu Options Lists ..........................................191
Appendix: Onscreen Icons and Displays...........................216
10
Page 11

Trouble?.............................................................................226
Troubleshooting................................................................226
List of Messages...............................................................237
Do’s and Don’ts .................................................................255
Safety Instructions and Handling Precautions ...................255
Maintenance/Others ..........................................................263
Cleaning ...........................................................................263
Condensation ...................................................................263
Using the Camcorder Abroad ...........................................264
General Information ...........................................................266
Optional Accessories ........................................................266
Specifications ...................................................................270
Reference Tables ...............................................................275
Index ..................................................................................279
11
Page 12

The Camcorder’s Functions in
Real-Life Situations
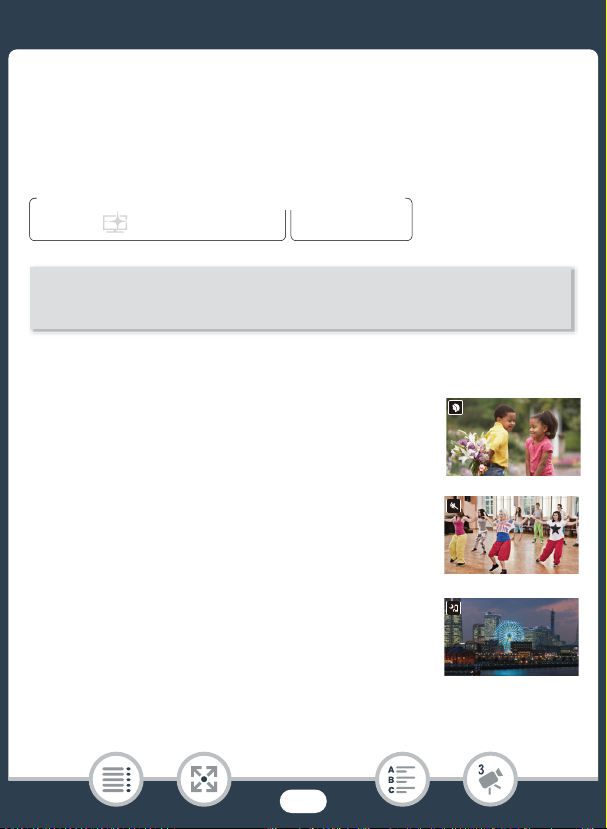
Unique functions for special cases
Shoot a cool time-lapse video or use slow motion to check your
golf swing.
Slow & Fast Motion Recording (A 86)
Decorate movies with graphics and stamps.
Decoration (A 92)
Create a dynamic montage sequence with short cuts.
Video Snapshot (A 99)
Record the best sound possible according to your
shooting situation, such as when attending a speech or
musical performance.
Audio Scenes (A 113)
12
Page 13

Getting the look you want
[ Highlight Priority]
shooting mode
Let the camcorder select the best
settings according to the shooting
scene to get beautiful video and photos.
N mode (A 54)
Make the image brighter or darker
than the exposure set by the
camcorder.
Exposure (A 105)
Get more life-like detail when shooting a
scene with very bright areas.
Highlight Priority Mode (A 79)
13
Page 14

Change how smooth or natural
Cinema-look filter
[FILTER 2] (Vivid)
movement looks in your videos.
Frame Rate (A 111)
Give your recordings a professional
cinematic look.
Cinema Mode and Cinema-Look Filters
(A 80)
Challenging subjects and shooting conditions
Shoot great video of special scene situations with minimal
settings.
Shooting Modes (A 77)
Obtain natural-looking colors even under special lighting
conditions.
White Balance (A 109)
Optimize the exposure for the desired subject just by touching the
screen.
Tou c h AE (A 106)
Keep the subject in focus and the exposure optimized while shooting
a moving subject.
Face Detection and Tracking (A 100)
14
Page 15

Playback, editing and others
Save parts of your video as image files.
Grabbing Still Frames (A 119)
Convert scenes into a smaller file size to upload to the Web.
Converting Movies to MP4 Format (A 128)
b Convert scenes into interesting time-lapse scenes.
Converting Movies into Fast Motion Scenes (A 131)
b Save all the recordings in a memory directly onto an
external hard disk, even without a computer.
Memory Save (A 147)
Lock your files to avoid inadvertently deleting or changing them.
Locking Files from Editing (A 65)
b Play back scenes or a slideshow of photos with
background music.
Pl
ayback with Background Mus
Enjoy your recordings on a TV.
HDMI Connection (A 136)
Playback (A 139)
Save recordings on your computer.
Saving Recordings (A 142)
ic (A 120)
15
Page 16

Save your recordings effortlessly on the optional CS100 Connect
Station.
CS100 Connect Station (A 146, 172)
b Wireless functions
Use your smartphone or tablet as a remote control while
recording.
CameraAccess plus (A 157)
16
Page 17

Use an app to wirelessly save recordings to your smartphone/
tablet and upload them to the Web.
Camera Connect (A 169)
Share your recordings with Web albums using CANON iMAGE
GATEWAY.
CANON iMAGE GATEWAY (A 174)
Use the NFC function to effortlessly connect your camcorder to
your NFC-enabled Android device.
NFC (A 158, 163)
Connect the camcorder to your home network and wirelessly
stream your recordings.
Wi-Fi Connection to an Access Point (A 180)
Review and change Wi-Fi settings (for advanced users).
Wi-Fi Settings (A 186)
17
Page 18

Getting to Know the Camcorder
Supplied Accessories
The following accessories are supplied with the camcorder:
CA-110 Compact Power
Adapter*
BP-727 Battery Pack
IFC-300PCU/S USB Cable
HTC-100/SS High Speed
HDMI Cable
Quick Guide
* CA-110E, including power cord, in Asia.
• The camcorder may make a rattling sound if it is shaken
(A 231).
18
Page 19

Names of Parts
12
56 7 8
34
Left side view
1 ^ (playback mode) button (A 46)
2 ON/OFF button
3 Memory card slot cover (A 31)
4 Memory card slot (A 31)
5 MIC (microphone) terminal (A 117)
6 AV OUT ter min al (A 135, 137)/× (headphones) terminal (A 114)
7 HDMI OUT terminal (A 135, 136)
8 USB terminal (A 135, 138)
19
Page 20

Right side view
12 3 4
1 STAR T/S TOP button (A 48)
2 DC IN terminal (A 25)
3 Grip belt
Adjust the grip belt so that you can reach the zoom
lever with your index finger, and the Y
button with your thumb.
4 Lens cover switch
Move the lens cover switch down to to open the
lens cover.
20
Page 21

Front view Top view
1
23 4
1 Stereo microphone (A 113, 213)
2 b NFC (near field communication) touchpoint (A 160,
172)
3 Speaker (A 64)
4 Zoom lever (A 57)
21
Page 22

Back view Bottom view
1234
5
67 8
1 LCD touch screen (A 23, 40)
2 ACCESS indicator (A 6, 48, 52)
3 b Wi-Fi antenna (A 156)
4 POWER/CHG (charge) indicator:
Green - On; Red - Charging (A 25)
5 Battery attachment unit (A 25)
6 Serial number
7 Trip od socket (A 259)
8 BATTERY RELEASE switch (A 26)
22
Page 23

LCD touch screen
Open the LCD panel 90 degrees. By
default, this will turn on the camcorder.
The first time you open the LCD panel,
the initial setup screens will appear and
guide you through the basic settings
(A 34).
Adjust the position of the LCD panel
according to the recording conditions.
•The screen is produced using extremely high-precision manufac-
turing techniques, with more than 99.99% of the pixels operating
to specification. Less than 0.01% of the pixels may occasionally
misfire or appear as black, red, blue or green dots. This has no
effect on the recorded image and does not constitute a malfunction.
• For details about how to take care of the touch screen, refer to
Handling Precautions (A 255), Cleaning (A 263).
180°
approx. 90°
23
Page 24

Preparations
25
303440
Charging the Battery Pack
The first step for using your camcorder is to prepare the power
supply. This section explains how to charge a battery pack.
Using a Memory Card
This section explains the types of memory cards that can be
used and how to insert one into the camcorder.
First Time Settings
When you turn on the camcorder for the first time, you will need
to complete the basic setup and set the camcorder’s language,
date and time, and recording memory (b only).
Basic Operation of the Camcorder
In this section you can learn more about basic operations, such
as using the touch screen, changing operating modes and using
the menus.
24
Page 25

Charging the Battery Pack
1
2
1
Charging the Battery Pack
The camcorder can be powered with a battery pack or directly using
the compact power adapter.
2
1
1 Plug the compact power adapter into a power outlet.
•For Asia only: Connect the power cord to the compact power
adapter before plugging the power cord into the power outlet.
2 Connect the compact power adapter to the camcorder’s
DC IN terminal.
25
Page 26

Charging the Battery Pack
4
3
34
3 Attach the battery pack to the camcorder.
•Press the battery pack softly into the battery attachment unit and
slide it up until it clicks in place.
4 Charging will start when the camcorder is turned off.
• If the camcorder was on, the green POWER/CHG indicator will
go out when you turn off the camcorder. After a moment, the
POWER/CHG indicator will turn on in red (battery pack charging).
The red POWER/CHG indicator will go out when the battery
pack is fully charged.
• If the indicator flashes, refer to Tr ou bl eshooting (A 230).
• Fully charging the supplied battery pack will take approximately
7hours and 45 minutes.
To remove the battery pack
1 S lide d in the direction of the arrow and hold
it pressed down.
2 S lide the battery pack and then pull it out.
26
Page 27

Charging the Battery Pack
12
12
• Turn off the camcorder before connecting or disconnecting
the compact power adapter. After turning off the camcorder,
important data is updated in the memory. Be sure to wait until
the green POWER/CHG indicator goes out.
• Do not connect to the camcorder’s DC IN terminal or to the
compact power adapter any electrical equipment that is not
expressly recommended for use with this camcorder.
• To prevent equipment breakdowns and excessive heating, do
not connect the supplied compact power adapter to voltage
converters for overseas travels or special power sources such
as those on aircraft and ships, DC-AC inverters, etc.
• We recommend charging the battery pack in temperatures
between 10 °C and 30 °C (50 °F and 86 °F). If either the
ambient temperature or the battery pack’s temperature is out-
side the range of approx. 0 °C to 40 °C (32 °F to 104 °F),
charging will not start.
27
Page 28

Charging the Battery Pack
• If the ambient temperature or the battery pack’s temperature
is low, charging may take longer than usual.
• The battery pack will be charged only when the camcorder is
off.
•If the power supply was disconnected while charging a bat-
tery pack, make sure the POWER/CHG indicator has gone
out before restoring the power supply.
• When the POWER/CHG indicator goes out, the approximate
battery charge shown in 1 > q > [Battery Info] may
not be at 100%. In such case, turn off the camcorder again to
charge further.
• If remaining battery time is an issue, you can power the cam-
corder using the compact power adapter so the battery pack
will not be consumed.
• Charged battery packs continue to discharge naturally. There-
fore, charge them on the day of use, or the day before, to
ensure a full charge.
•Battery packs for this camcorder can display the remaining
battery time. The first time you use a battery pack, fully charge
it and then use the camcorder until the battery pack is completely exhausted. Doing so will ensure that the remaining
recording time will be displayed accurately.
• For details about how to take care of the battery pack, refer to
Battery Pack (A 260). For charging times and approximate
usage times, refer to the Reference Tables (A 275).
28
Page 29

Charging the Battery Pack
• You can verify the battery charge status of the battery pack
with the 1 > q > [Battery Info] setting.
• We recommend that you prepare battery packs to last 2 to 3
times longer than you think you might need.
29
Page 30

Using a Memory Card
Using a Memory Card
Memory Cards Compatible for Use with the Camcorder
You can use the following types of commercially available Secure Digital
(SD) cards with this camcorder. We recommend using memory cards
rated CLASS 4, 6 or 10*.
As of December 2016, the movie recording function has been tested
using SD/SDHC/SDXC cards made by Panasonic, Toshiba and
SanDisk.
Memory card type:
. SD card
/ SDHC card
0 SDXC card
* To record movies with a video quality of 35 Mbps, or to use slow & fast motion
recording, we recommend using memory cards rated CLASS 6 or 10.
** When using an SD memory card without a Speed Class rating or one rated
CLASS 2, you may not be able to record movies.
• After repeatedly recording and deleting scenes (fragmented
memory), it will take longer to write data on the memory card
and recording may stop. Back up your recordings and initialize the memory card using the [Complete Initialization] option
(A 38).
SD Speed Class**:
30
Page 31

Using a Memory Card
• About the Speed Class: Speed Class is a standard that indi-
cates the minimum guaranteed data transfer speed of memory cards. When you buy a new memory card, look for the
Speed Class logo on the package.
■ SDXC Cards
You can use SDXC cards with this camcorder. When using SDXC cards
with other devices, such as digital recorders, computers and card readers, make sure that the external device is compatible with SDXC
cards. For more information on compatibility, contact the computer,
operating system or memory card manufacturer.
•If you use an SDXC card with a computer OS that is not
SDXC-compatible, you may be prompted to format the memory card. In such case, cancel the operation to prevent
data loss.
Inserting and Removing a Memory Card
When you turn on the camcorder for the first time, the first screen of the
basic setup will appear. To use a memory card for recording, turn off the
camcorder and insert the memory card before performing the basic
setup. After completing the basic setup (A 34), be sure to initialize
the memory card with the camcorder before using it for the first
time (A 38).
31
Page 32

Using a Memory Card
123
23
4
Top v i e w
SD card
(lens)
1 Open the LCD panel.
• The camcorder will turn on automatically. If this is the first time
you turn on the camcorder, the language selection screen of the
basic setup will appear.
2 Press [ to turn off the camcorder.
•Make sure the POWER/CHG indicator is off.
3 Open the memory card slot cover.
4 Insert the memory card at a slight angle, with the label facing
toward the lens, all the way into the memory card slot until it
clicks.
• The memory card slot is at a slight angle toward the lens so be
careful not to damage the memory card when inserting it.
5 Close the memory card slot cover.
• Do not force the cover closed if the memory card is not correctly
inserted.
32
Page 33

Using a Memory Card
To remove the memory card
Push the memory card once to release it. When the memory card
springs out, pull it all the way out.
• SD cards have front and back sides that are not interchange-
able. Inserting an SD card facing the wrong direction can
cause a malfunction of the camcorder. Be sure to insert the
memory card as described in step 4.
• SD cards have a physical switch to prevent writing on the
card so as to avoid the accidental erasure of the card’s content. To write-protect the memory card set the switch to the
LOCK position.
33
Page 34

First Time Settings
Touch [æ] after selecting a
language
First Time Settings
Basic Setup
The first time you turn on the camcorder, you will be guided by the camcorder’s basic setup screens to select the camcorder’s language, set
the date and time, and select the recording memory (b only).
For details on how to use the touch screen, refer to Using the Touch
Screen (A 40).
1 Open the LCD panel.
•If this is the first time you turn on the camcorder, the language
selection screen will appear.
• You can also press [ to turn on the camcorder.
2 Touch the language that you want to be used for onscreen
displays and then touch [æ].
• You can select one of 27 languages. You may need to scroll
down to find your language.
• After you select a language, the [Date Format] screen will appear.
3 Touch [Y.M.D], [M.D,Y] or [D.M.Y] to select the date format
you prefer and then touch [æ].
34
Page 35

First Time Settings
• After you select the date format, the [Date/Time] screen will
appear with the first field selected.
4 Touch a field you want to change (year, month, day, hours or
minutes).
5 Touch [Í] or [Î] to change the field as necessary.
6 S et the correct date and time by changing all the fields in the
same way.
• Touch [24H] to use 24-hour clock or leave it unselected to use
12-hour clock (AM/PM).
7 Touch [OK] and then touch [æ].
• b After you set the date and time, the [v Rec Media for
Movies] screen will appear, where you can select the memory
where movies will be recorded.
• `Skip to step 10.
8 Touch [&] (built-in memory) or [8] (memory card) and then
touch [æ].
•When selecting the memory, you can check the available record-
ing time based on the default video quality setting.
35
Page 36
First Time Settings
• After you select the memory where you want to record movies,
the [{ Rec Media for Photos] screen will appear.
9 Touch [&] (built-in memory) or [8] (memory card) and then
touch [æ].
•When selecting the memory, you can check the number of pho-
tos that can be recorded, based on a photo size of 1920x1080.
10 Touch [OK].
•The basic setup is complete. The settings you selected will
appear briefly and then the camcorder will be ready to record.
• After completing the basic setup, you can close the LCD panel or
press [ to turn off the camcorder.
• Some buttons, such as [ON] or [OFF] in some screens, will
appear in English regardless of the language selected.
• You can change the basic setup settings also later on, using
the camcorder’s menus.
- Language: 1 > q > [Language H]
- Date and time: 1 > q > [Date/Time]
- b Memory used for recording: 3 > [Recording
Media] > [Rec Media for Movies] or [Rec Media for Photos]
• When you do not use the camcorder for about 3 months, the
built-in rechargeable lithium battery may discharge completely
and the date and time setting may be lost. In such case,
recharge the built-in lithium battery (A 262). The next time
you turn on the camcorder, you will have to perform the basic
setup again.
36
Page 37
First Time Settings
N
†
ƒ ’
y }
PlaybackShooting mode
0 > [1 Other Settings] > q > [Time Zone/DST]
• You can change the 1 > q > [Power On Using LCD
Panel] setting so that you can turn the camcorder on and off
only by pressing [.
Changing the Time Zone
Change the time zone to match your location. The default setting is
New York. In addition, the camcorder is able to retain the date and time
of another location. This is convenient when you travel so that you can
set the camcorder to match the time of your home location or that of
your destination.
This section requires using the camcorder’s menus. For details about
how to use the menus, refer to Using the Menus (A 41).
1 Open the [Time Zone/DST] screen.
2 Touch ["] to set the home time zone, or [#] to set the time
zone of your destination when you are traveling.
3 Touch [Í] or [Î] to set the desired time zone. If necessary,
touch [$] to adjust for daylight saving time.
4 Touch [X] to close the menu.
37
Page 38
First Time Settings
N
†
ƒ ’
y }
PlaybackShooting mode
0 > [1 Other Settings] > q > [Initialize &/8] >
[& Built-in Mem.] or [8 Mem. Card] > [Initialize] >
[Complete Initialization]1 > [Yes]2 > [OK] > [X]
0 > [1 Other Settings] > q > [Initialize 8] >
[Initialize] > [Complete Initialization]1 > [Yes]2 > [OK] > [X]
Initializing the Memory
Initialize memory cards when you use them with this camcorder for the
first time. You can also initialize a memory card or the built-in memory
(b only) to permanently delete all the recordings it contains.
b At the time of purchase, the built-in memory comes pre-ini-
tialized and contains music files for use as background music and
image files for use with the image mix function (image mix frames).
1 Power the camcorder using the compact power adapter.
•Do not disconnect the power source or turn off the camcorder
until the initialization is completed.
2 Initialize the memory.
b
`
1
To u c h t hi s option if you want to physically erase all the data rather than
just clear the file allocation table of the memory.
38
Page 39

First Time Settings
2
If you selected the [Complete Initialization] option, you can touch [Cancel]
to cancel the initialization while it is in progress. All recordings will be
erased and the memory can be used without any problem.
• Initializing a memory will permanently erase all recordings.
Lost original recordings cannot be recovered. Save important
recordings in advance using an external device (A 141).
• Initializing a memory card will permanently erase any images
you may have transferred to the memory card. (b The
music files and image mix frames that come pre-installed in
the built-in memory will be restored after it is initialized.)
• ` About FlashAir cards: Initializing a FlashAir card
with this camcorder will reset the card’s wireless settings (net-
work names, SSID, passwords, etc.) to factory settings. We
recommend formatting FlashAir cards on a computer, using
the FlashAir configuration tools.
39
Page 40

Basic Operation of the Camcorder
12
Basic Operation of the Camcorder
Using the Touch Screen
The buttons and menu items that appear on the touch screen change
dynamically depending on the operating mode and the task you are
performing. With the intuitive touch screen interface you have all the
controls at your fingertips.
1 Touch
Touch on an element displayed on the touch screen.
Used to start playing back a scene in an index screen, to select a setting from the menus, etc.
2 Swipe
While touching the screen, swipe your finger up and down or left and
right across the screen.
Used to scroll menus, to browse through index screen pages or to
adjust slider controls like the volume.
40
Page 41

Basic Operation of the Camcorder
N
†
ƒ ’
y }
PlaybackShooting mode
• In the following cases, you may not be able to perform touch
operations correctly.
-Using your fingernails or hard-tipped objects, such as ball-
point pens.
- Operating the touch screen with wet or gloved hands.
- Applying excessive force with your finger.
Using the Menus
The 0 (Home) menu is the gateway to most of the camcorder’s func-
tions and settings. In recording mode, the 0 (Home) menu offers
immediate access to some frequently used functions. In playback
mode, it is from the 0 (Home) menu that you will switch between the
movies’ and photos’ index screens. In both modes, from the 0 (Home)
menu you can open the [1Other Settings] menus for more detailed
settings, and also to access the camcorder’s various Wi-Fi functions
(b only).
41
Page 42

Basic Operation of the Camcorder
Recording mode Playback mode
■ 0 (Home) Menu
1 Touch [0] to open the 0 (Home) menu.
2 S wipe left/right to bring the desired menu to the center.
• You can also touch [Ï] or [Ð] to bring the icon of the desired
menu to the center.
3 Touch the icon of the desired menu to open it.
• See the following table for a description of each menu.
Menu item
Description
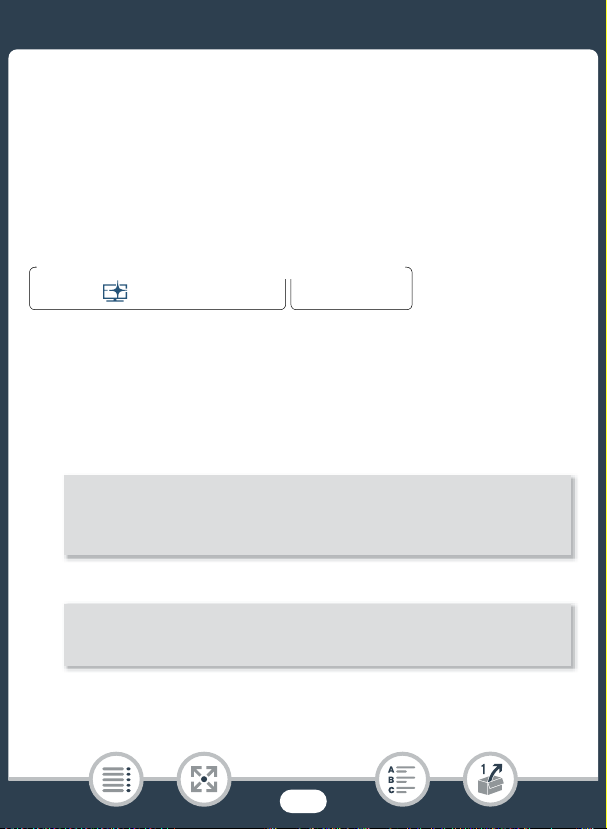
[1 Other Settings] (A 44, 192)
Opens the [1 Other Settings] menus, which give you access to
various camcorder settings.
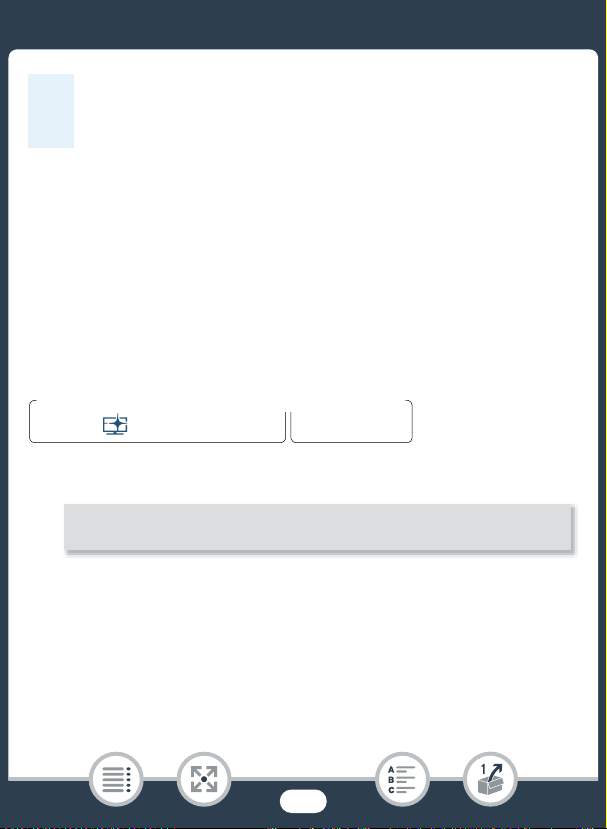
b [3 Recording Setup] (recording mode only) (A 74 - 77)
` [3 Video Quality] (recording mode only)
In this menu you can select, among others, the video quality or
memory used for recording*.
42
Page 43

Basic Operation of the Camcorder
Menu item
Description
[Shooting Mode]** (recording mode only) (A 77)
The camcorder features a number of shooting modes that offer
the most appropriate settings for a variety of special scenes.
[2 Main Functions] (recording mode only) (A 210)
This menu contains functions commonly used while recording,
such as focus and exposure. The [2] button on the right side of
the recording mode screen allows you to open this menu directly,
without going through the 0 (Home) menu.
[ Remote Control+Streaming]* (recording mode only) (A 157)
Use your smartphone or tablet as a remote control to record with
the camcorder. You can also stream video from the camcorder
and record it on the smartphone or tablet.
[} Photo Playback] (playback mode only) (A 67)
Opens the [}] (photo playback) index screen.
[y Movie Playback] (playback mode only) (A 62)
Opens the [y] (all scenes) index screen.
[— Wi-Fi]* (playback mode only) (A 152)
Allows you to access the various Wi-Fi functions, such as uploading recordings to the Web or saving recordings to a smartphone.
* b only.
**The icon shown in the 0 (Home) menu indicates the shooting mode cur-
rently selected.
43
Page 44

Basic Operation of the Camcorder
Some screens provide additional information about the options. In that case,
simply swipe up and down along the
column of icons.
■ Using the Menus
Changing the camcorder’s various settings using the menus is very
easy. Yo u m ake your selection simply by touching the button of the
desired option. When they appear on the screen, you can touch [K] to
return to the previous screen or [X] to close the menu.
In some screens, you will need to scroll to find the desired option.
The [1 Other Settings] Menu
The [1 Other Settings] menus offer many options to control various
aspects of the camcorder’s operation. For details, refer to the complete
list of settings in the appendix [1 Other Settings] Menus (A 192).
In the [1 Other
menus (tabs). For brevity’s sake, these settings are referenced through-
out the manual like this: “1 > q > [Language H]”. In this
example (to change the language), you will need to do the following:
Settings] m
enus, settings are organized under sub-
1 Touch [0] to open the 0 (Home) menu.
2 S wipe left/right to bring [1 Other Settings] to the center.
Then, touch the icon to open the [1 Other Settings] menus.
44
Page 45

Basic Operation of the Camcorder
2
34
5
• You can also touch [Ï] or [Ð] to bring the icon of the desired
menu to the center.
3 Touch the tab of the desired menu.
4 S wipe up/down to bring the setting you want to change into
the orange selection bar.
• You can also touch [Í] or [Î] to scroll up/down the menu.
• Menu items not available appear grayed out.
• You can touch any menu item on the screen to bring it directly
into the selection bar.
5 When the desired menu item is inside the selection bar, touch
[æ].
6 Touch the desired option and touch [X].
• You can touch [X] to close the menu at any time.
45
Page 46

Basic Operation of the Camcorder
N
†
ƒ ’
y }
PlaybackShooting mode
Operating Modes
In this manual, the camcorder’s operating modes are indicated with a
bar of icons. A full icon in blue (N) indicates that the function
described can be used in that particular operating mode; a grayed-out
icon (}) indicates the function is not available in that operating mode.
Icons are divided into shooting modes and playback modes.
Recording
When you open the LCD panel or press [, the camcorder will
turn on in recording mode. The shooting mode icons in the operating
modes bar are the same icons used in the shooting mode selection
screen (A 77).
Playback
Press ] to switch the camcorder between recording mode and
playback mode.
In the Playback area of the operating modes bar, the y icon refers to
playing back movies (A 62). The } icon refers to viewing photos
from the [}] index scr
• b When switching to a playback mode, the memory
selected for playback will be the same one currently used for
recording.
een (A 67).
46
Page 47

Basic Recording and Playback
48
62
Basic Recording
This section covers how to easily record video and photos and
explains the convenient N mode. To record using other
shooting modes, use more advanced functions and enjoy full
access to all menu settings, refer to Advanced Recording
Functions (A 73).
Basic Playback
This section covers how to play back and delete movies and
photos. For more advanced options, such as playback with
background music (b only), trimming scenes and more,
refer to Advanced Playback and Editing Functions (A 118).
47
Page 48

Basic Recording
N
†
ƒ ’
y }
PlaybackShooting mode
12
33
Basic Recording
Recording Video
You are now ready to record movies.
• Before you begin recording, make a test recording first to
check that the camcorder is operating correctly.
11
233
1 Open the LCD panel to turn on the camcorder.
• You can also press [.
• b By default, movies are recorded in the built-in memory. You can select the memory that will be used to record movies (A 75).
48
Page 49

Basic Recording
• By default, the camcorder’s shooting mode is set to N
(A 54). You can select a different shooting mode according to
the shooting conditions (A 77).
2 S lide the lens cover switch down.
3 Press Y to begin recording.
•Press Y again to stop recording. The scene will be
recorded to the memory.
•The ACCESS indicator will flash from time to time while the
scene is being recorded.
When you have finished recording
1 Make sure that the ACCESS indicator is off.
2 Close the LCD panel or press [ to turn off the cam-
corder.
3 S lide the lens cover switch up.
• To protect the lens, keep the lens cover closed when you are
not recording.
•Be sure to save your recordings regularly (A 141), especially
after making important recordings. Canon shall not be liable
for any loss or corruption of data.
49
Page 50

Basic Recording
•If 1 > q > [Auto Power Off] is set to [i On], the
camcorder will shut off automatically to save power when it is
powered by a battery pack and is left without any operation
for 3 minutes. Should this happen, turn the camcorder off and
then on again.
• When recording in bright places, it may be difficult to use the
LCD screen. In such cases, you can adjust the LCD backlight
with the 1 > t > [LCD Backlight] setting or adjust the
brightness of the LCD screen with the 1 > t > [LCD
Brightness] setting.
•If you plan on making a long recording while the camcorder is
in a fixed position, such as mounted on a tripod, you can
record with the LCD panel closed in order to conserve the
battery’s power. To use this function, set 1 > q >
[Power On Using LCD Panel] to [Off].
50
Page 51
Basic Recording
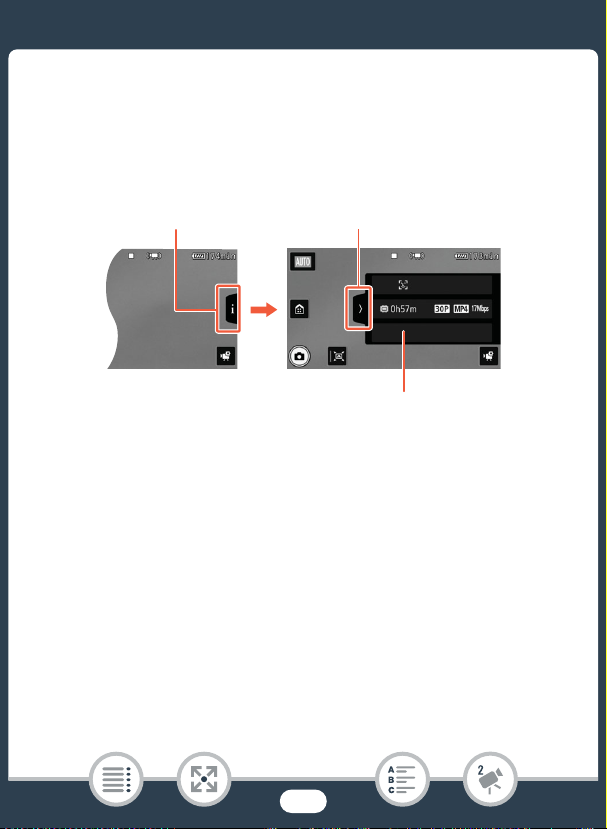
Touch [I] (in record standby mode or
while recording) to open the info panel
For details about the onscreen icons, refer to the
appendix Onscreen Icons and Displays (A 219)
Tou c h t o cl o se the info panel
■ The Info Panel
In the info panel you can check some recording settings, such as the
memory used for recording (b only) or the remaining recording
time available on the memory.
51
Page 52

Basic Recording
N
†
ƒ ’
y }
PlaybackShooting mode
112
3
1
3
2
Taking Photos
You can easily take photos with the camcorder. You can even take photos simultaneously while recording movies.
1 Open the LCD panel to turn on the camcorder.
• You can also press [.
• b By default, photos are recorded in the built-in memory.
You can select the memory that will be used to record photos
(A 75).
• By default, the camcorder’s shooting mode is set to N
(A 54). You can select a different shooting mode according to
the shooting conditions (A 77).
52
Page 53
Basic Recording
2 S lide the lens cover switch down.
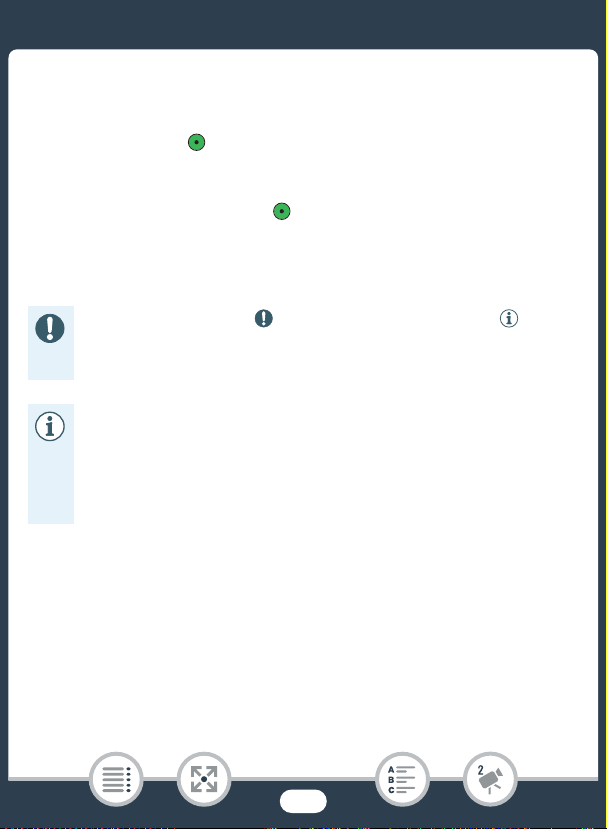
3 Touch [{] to take a photo.
• A green icon ( ) and { Ð & (b only) or { Ð 8
will appear momentarily on the screen and the ACCESS indicator
will flash as the photo is recorded. However, if you record a photo
while recording a movie,
When you have finished taking photos
Turn off the camcorder and close the lens cover (A 49).
The information in the (important precautions) and (additional notes) sections in the previous pages (A 49 - 50) apply
also to photo shooting.
• For details about the approximate number of photos that can
be recorded on a memory card, refer to Reference Tables
(A 276).
•Photos cannot be recorded while fading in or fading out a
scene.
will not appear.
53
Page 54
Basic Recording
N
†
ƒ ’
y }
PlaybackShooting mode
AUTO Mode
When the shooting mode is set to N, the following automatic functions will be activated so you can enjoy shooting video and photos letting the camcorder take care of choosing the optimal settings.
• Smart AUTO (A 54): The camcorder will automatically detect the
scene and subject and apply the most appropriate settings.
• Intelligent IS (A 56): The camcorder will select the best image sta-
bilization (IS) mode for the shooting conditions.
• Face detection (A 100): The camcorder will keep the subject in
focus and correctly exposed and track it as it moves.
• Automatic tele macro (A 112): Just bring the camcorder close to a
small subject at full telephoto and you will be able to focus a subj
as close as 50 cm (1.
6 ft.).
■ Smart AUTO
In N mode, the camcorder will automatically detect certain characteristics of the subject, background, lighting conditions, etc. It will then
adjust various settings (focus, exposure, color, image stabilization,
image quality, among others), selecting the best settings for the scene
you want to shoot. The icon in the shooting mode button will automatically change to one of the following Smart AUTO icons.
ect
54
Page 55

Basic Recording
• Under certain conditions, the Smart AUTO icon that appears
on the screen may not match the actual scene. Especially
when shooting against orange or blue backgrounds, the Sunset or one of the Blue Skies icons may appear and the colors
may not look natural. In such case, we recommend recording
in ’ mode (A 85).
•There are times when the Smart AUTO function cannot detect
the scene, for example when you touch a subject on the
screen (tracking). In such case, N will be displayed as the
Smart AUTO icon.
Smart AUTO icons
Background
( )
( )
/
( / )
Subject
People (stationary)
People (moving)
Subjects other than people,
such as landscapes
Close objects
* The icon in parentheses appears under backlight conditions.
Bright* Blue skies* Vivid colors*
( )
( )
( ) ( ) ( )
/
( / )
55
( )
( )
/
( / )
Page 56

Basic Recording
Background
Subject
People (stationary) — —
People (moving)
Subjects other than people,
such as landscapes
Close objects
Sunset Dark
—
— / — —
Dark +
Spotlight
—
Dark +
Night
Scene
■ Intelligent IS
Intelligent IS allows the camcorder to select the best image stabilization
option based on your shooting method. When the shooting mode is set
to N, the Intelligent IS icon will change to one of the following icons.
In other shooting modes, you can set the image stabilization manually
(A 196).
Icon Shooting conditions
Most general situations / When the zoom is
Ä (Dynamic IS)
È (Powered IS)*
closer to the T end / While following subjects
at a distance moving left or right
When zooming in on subjects at a distance (zoom
S
closer to the
end), while remaining stationary
56
Page 57
Basic Recording
N
†
ƒ ’
y }
PlaybackShooting mode
T Zoom out
S Zoom in
Icon Shooting conditions
 (Macro IS) Close-up of a subject
à (tripod mode) When using a tripod
* You can use the 1 > p > [Intelligent IS] setting to change whether
Powered IS is available when Intelligent IS is activated.
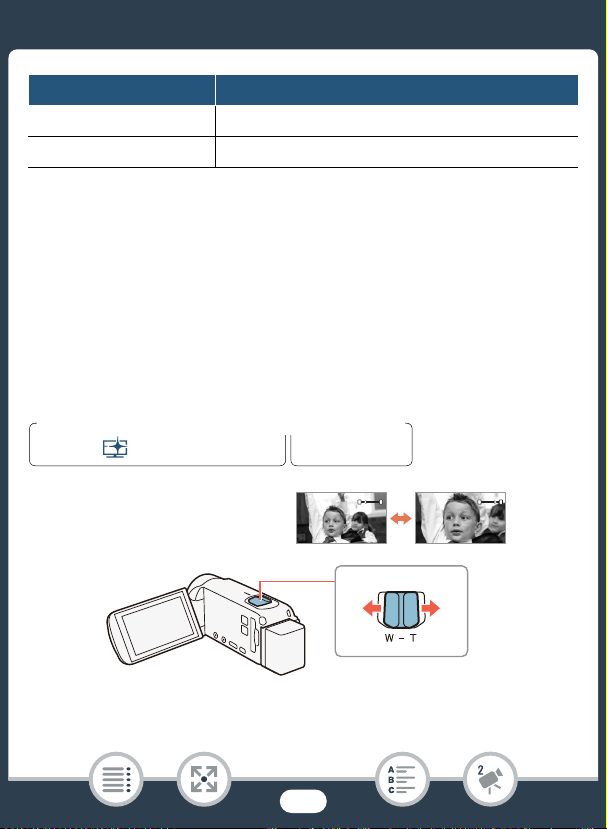
Zooming
Use the zoom lever on the camcorder to zoom in and out. You can
change the zoom speed with the 1 > p > [Zoom Speed] set-
ting (A 194). Additionally, when the shooting mode is set to a mode
other than N, you can select the zoom type (optical, advanced or
digital) with the 2 > [Zoom Type] setting (A 212).
W
W
T
Move the zoom lever toward T (wide angle) to zoom out. Move it
toward S (telephoto) to zoom in.
57
T
Page 58

Basic Recording
• Keep at least 1 m (3.3 ft.) away from the subject. At full wide
angle, you can focus on a subject as close as 1cm (0.39in.).
Using tele macro (A 112), you can focus on a subject as
close as 50 cm (1.6 ft.) at full telephoto.
• When 1 > p > [Zoom Speed] is set to [Y Variable],
the zoom speed will be faster in recording standby mode than
when actually recording, except when pre-recording (A 213)
is activated.
•With the 1 > p > [Zoom Position at Startup] setting,
you can have the camcorder save the zoom position before it
turns off, so the zoom position will be the same the next time
you turn on the camcorder.
58
Page 59

Basic Recording
0 > [1 Other Settings] > p > [Framing Assistance]
> [k Automatic] > [X]
■ Framing Assistance
Sometimes, while zooming in on a very far subject (large zoom ratio),
you might momentarily “lose” the subject as it moves out of the frame.
In this case, you can use the framing assistance function to temporarily
zoom out a little and make it easier to find the subject.
You can select either automatic or manual framing assistance.
Automatic Framing Assistance
1 S elect the automatic mode in advance.
2 Zoom in on the desired subject and touch [ ].
• The orange bar in the button indicates that automatic framing
assistance is active. Touch the button again to turn off the function.
3 If you lose the subject, move the camcorder to reframe the
shot.
• The camcorder will zoom out temporarily. The original zoom
position is indicated by a white frame.
• If the camcorder does not zoom out automatically, try moving the
camcorder faster.
4 When the desired subject is correctly framed, keep the cam-
corder still.
59
Page 60

Basic Recording
123
0 > [1 Other Settings] > p > [Framing Assistance]
> [l Manual] > [X]
• When you stop moving the camcorder, it will zoom in on the area
indicated by the white frame.
Manual Framing Assistance
1 S elect the manual mode in advance.
2 Zoom in on the desired subject.
3 If you lose the subject, touch and hold [ ] to zoom out
momentarily.
• The original zoom position is indicated by a white frame.
4 Reframe the shot so the desired subject is within the white
frame.
• You can use the zoom lever to change the size of the frame.
60
Page 61

Basic Recording
123
5 When the desired subject is correctly framed, release [ ].
• The camcorder will zoom in on the area indicated by the white
frame.
• You can select the initial size of the framing assistance white
frame with the 1 > p > [Framing Assistance Area]
setting.
• Operating the zoom lever while the camcorder is zooming in
or out during automatic framing assistance will stop the auto-
matic zoom operation.
•Framing assistance is not available when using slow & fast
motion recording mode for part of a scene (flexible slow & fast
motion recording).
61
Page 62

Basic Playback
N
†
ƒ ’
y }
PlaybackShooting mode
1
Index screen button (A 63)
Basic Playback
Playing Back Video
1 Press ] to display the playback index screen.
• You can press ] repeatedly to switch back and forth
between recording mode and playback mode.
• You can press ] when the camcorder is off to turn it on
directly in playback mode.
2 In the index screen, look for the scene you want to play back.
•When the index screen button appears on the screen, you can
select the memory selected for playback (b only).
• Swipe left/right (2a) or touch [Ï] or [Ð] (2b) to display the previous/next index screen.
62
Page 63

Basic Playback
2a 2a
2b
2b
Visual bar shows the relative location of the current
index screen.
Scene information
(A 66)
Folder name. The last 4 digits represent
the recording date (1103 = November 3)
Scene recorded in mode (A 79)
[Edit] button (A 214): To
delete recordings, copy
scenes, etc. You can also
lock it (A 65) to protect
your recordings.
3 Touch the desired scene to play it back.
• The camcorder will play back the scene selected and continue
until the end of the last scene in the index screen.
• Touch the screen to display the playback controls. During playback, the playback controls will disappear automatically after a
few seconds without operation.
b To change the memory to play back
With the index screen button (A 62), you can select the memory
selected for playback of the scenes displayed.
63
Page 64

Basic Playback
Touch the index screen button > Memory to play back (& or 8)
> [OK]
6578
1
2
3
4
Playback Playback pause
To a d ju st the volume
1 During playback, touch the screen to display the playback
controls.
2 Touch [Ý], touch [Ø] or [Ù] to adjust the volume, and
touch [K].
Playback controls
9
10
11
1 Stop the playback.
2 Jump to the beginning of the scene. Double-tap to jump to the
3 Pause the playback.
previousscene.
64
Page 65

Basic Playback
4 Display the volume (A 64) and background music mix balance
(A 120) controls (b only).
5 Decoration (A 92).
6 Fast playback* backward/forward.
7 Recording date.
8 Jump to the beginning of the next scene.
9 Resume the playback.
10 Grab the displayed frame and save it as an image file (A 119).
11 Slow playback** backward/forward.
* Touch several times to increase the playback speed to 5x 15x 60x nor-
mal speed.
** Touch several times to increase the playback speed to 1/8x 1/4x normal
speed.
Locking files
In playback mode, you can use the lock files function to disable
the [Edit] button and prevent inadvertently deleting or changing
your recordings.
Set 0 > [1 Other Settings] > q > [Lock Files] to
[C On].
• The [Edit] button will change to [C] and will be grayed out.
• You can use the 1 > t > [Display Date/Time] setting
to choose whether to display the recording date (scenes) or
date and time (photos) during playback.
65
Page 66

Basic Playback
•In the [y] index screen, you can touch [I] and then touch a
scene to display details about the scene, such as the scene’s
video quality, length and recording date and time. Touch [K]
twice to return to the index screen.
• Depending on the recording conditions, you may notice brief
stops in video or sound playback between scenes.
• Sound will not be output from the built-in speaker while head-
phones or the supplied High Speed HDMI cable is connected
to the camcorder.
• You may not be able to play back with this camcorder movies
recorded on or copied onto a memory card using another
device.
•About fast/slow playback:
- You may notice some anomalies (blocky video artifacts,
banding, etc.) in the playback picture. Also, sound will not
be output.
-The speed indicated on the screen is approximate.
- Slow reverse playback will look the same as continuous
frame reverse.
• When playing back scenes recorded in mode on the cam-
corder, we recommend setting 1 > q > [ View
Assistance] to [i On].
66
Page 67

Basic Playback
N
†
ƒ ’
y }
PlaybackShooting mode
1
Index screen button (A 63)
0 > [} Photo Playback]
Viewing Photos
1 Press ].
2 Open the [}] index screen.
• b If necessary, change the memory selected for play-
back (A 63).
67
Page 68

Basic Playback
3b
3a
3b
3a
Folder name. The last four digits
represent the recording date
(1103 = November 3).
Visual bar shows the
relative location of the
current index screen.
[Edit] button (A 214): To
delete photos, etc. You
can also lock it (A 65) to
protect your recordings.
3 Look for the photo you want to view.
• Swipe left/right (3a) or touch [Ï] or [Ð] (3b) to display the previ-
ous/next index screen.
4 Touch the photo you want to view.
• The photo is displayed in single photo view.
• Swipe left/right to browse through the photos one by one.
68
Page 69

Basic Playback
2
13
Playback controls
1 Slideshow (A 122).
2 Return to the [}] index screen.
3 Photo jump
Tou c h [ Ï] or [Ð], or swipe left/right along the scroll bar to find the
desired photo. Touch [K] to return to single photo view.
• The following image files may not be displayed correctly.
-Images not recorded with this camcorder.
-Images edited on a computer.
-Images whose file names have been changed.
Deleting Scenes and Photos
You can delete recordings that you are not interested in keeping. Deleting recordings allows you also to free up space on the memory.
You can use the lock files function to disable the editing functions and
prevent inadvertently deleting your recordings (A 65).
69
Page 70

Basic Playback
N
†
ƒ ’
y }
PlaybackShooting mode
[Edit] > [Delete] > Desired option* > [Yes]** > [OK]
■ Deleting Scenes or Photos from the Index Screen
1 Open the index screen that contains the scene or photo you
want to delete (A 62, 67).
• To delete all the scenes or photos recorded on the same date
(saved in the same folder), swipe left/right until a scene or photo
you want to delete appears.
2 Delete the recordings.
* When you select [Select], perform the following procedure to select the
individual recordings you want to delete before touching [Yes].
** Touch [Stop] to interrupt the operation while it is in progress. Some
recordings may be deleted nevertheless.
To select individual scenes or photos
1 Touch on the individual scenes or photos you want to delete.
• A checkmark ! will appear on the scenes or photos you touch.
The total number of selected scenes or photos will appear next
to the " icon.
•Touch a selected scene or photo to remove the checkmark. To
remove all checkmarks at once, touch [Remove All] > [Yes].
2 After selecting all the desired recordings, touch [OK].
70
Page 71

Basic Playback
N
†
ƒ ’
y }
PlaybackShooting mode
Touch the screen to display the playback controls > [Ý] >
[Edit] > [Delete] > [Yes] > [OK]
N
†
ƒ ’
y }
PlaybackShooting mode
Options
[<folder name>]
Delete all the scenes/photos recorded on a particular date. A folder
name will appear in the button. The last 4 digits of the folder name indicate the date of the recordings (ex. 1103 = November 3).
[Select]:
Select individual scenes or photos to delete.
[All Scenes] or [All Photos]:
Delete all the scenes or photos.
■ Deleting a Single Scene
1 Play back the scene you want to delete (A 62).
2 Delete the scene.
■ Deleting a Single Photo
71
Page 72

Basic Playback
Touch the screen to display the playback controls > [Edit] >
[Delete] > [¸ Proceed] > [Yes]
1 In single photo view, select the photo you want to delete
(A 67).
2 Delete the photo.
3 S wipe left/right to select another photo to delete or touch
[X].
• Be careful when deleting recordings. Once deleted, they can-
not be recovered.
• Save copies of important recordings before deleting them
(A 141).
•Photos that were protected with other devices cannot be
deleted with this camcorder.
• To delete all recordings and make all recordable space avail-
able again you may prefer to initialize the memory (A 38).
72
Page 73

Advanced Recording Functions
74
86
105
113
Recording Settings and Shooting Modes
This section explains how to change the camcorder’s recording
settings and how to use the various shooting modes to obtain
great looking recordings.
Convenient Functions
This section introduces some of the camcorder’s functions that
you may find convenient in special situations. For example, slow
& fast motion recording, fun decorations and faders for your
scenes, and more.
When You Want More Control
This section explains functions you can use when you want more
control over how your recordings look. It is more oriented for
advanced users and covers functions such as white balance,
exposure compensation and frame rate.
Recording Audio
This section explains various functions related to recording audio,
such as audio scene selection, and using headphones or an
external microphone.
73
Page 74

Recording Settings and Shooting Modes
N
†
ƒ ’
y }
PlaybackShooting mode
0 > [3 Recording Setup] > [Video Quality] > Desired video
quality* > [K] > [X]
0 > [3 Video Quality] > Desired video quality* > [K] > [X]
Recording Settings and Shooting Modes
Selecting the Video Quality
The camcorder offers several video quality options (bit rates) for recording movies. Select 35 Mbps or 24 Mbps for higher quality or 4 Mbps for
longer recording times.
b
`
* You can view details about the video quality with the following procedure.
To view information on the video quality
1 Touch [I].
•A screen with the resolution, bit rate and frame rate will appear.
2 Touch [K].
• For details on approximate recording times, refer to the Ref-
erence Tables (A 275).
74
Page 75

Recording Settings and Shooting Modes
• If you select 35 Mbps, movies will be recorded at 60 frames
per second, progressive.
• Bit rate (measured in Mbps) indicates how much video data is
recorded in 1 second.
• Depending on the video quality used, you may not be able to
use the iOS/Android device to check movies before saving
them or to play back movies after saving them.
• The camcorder uses a variable bit rate (VBR) to encode video
so the actual recording times will vary depending on the content of the scenes.
• The following types of scenes will be recognized as multiple
files on other devices.
- Scenes exceeding 4 GB.
- Scenes recorded at 35 Mbps exceeding 30 minutes.
- Scenes recorded at a video quality other than 35 Mbps
exceeding 1 hour.
• Depending on the TV, you may not be able to play back movies recorded at 35 Mbps.
• When the shooting mode is set to †, recording in 35 Mbps
is not available.
b Selecting the Memory (Built-in Memory/
Memory Card) for Recordings
You can select to record your movies and photos in the built-in memory or on
a memory card. The default memory for recording both is the built-in memory.
75
Page 76

Recording Settings and Shooting Modes
N
†
ƒ ’
y }
PlaybackShooting mode
0 > [3 Recording Setup] > [Recording Media] > [Rec Media
for Movies] or [Rec Media for Photos] > Desired memory > [K]
> [K] > [X]
N
†
*
ƒ ’
y }
PlaybackShooting mode
0 > [3
Recording Setup] > [Dual/Relay Recording] >
Desired function > [K] > [X]
b Dual Recording and Relay Recording
When you record movies, you can use dual recording to simultaneously
record one more scene (at 4 Mbps video quality) in addition to the main
scene being recorded. This additional scene is saved on the memory
not currently selected for recording. Due to its smaller file size, it is ideal
for transferring to another device or uploading to the Web.
Alternatively, you can activate relay recording so if the assigned memory
becomes full while recording movies, recording will continue automatically on the other memory.
* Only relay recording.
Activate the desired function
76
Page 77

Recording Settings and Shooting Modes
N
†
ƒ ’
y }
PlaybackShooting mode
Shooting mode button
• Dual recording is not available in the following cases.
- When the video quality is set to 35 Mbps.
-During slow & fast motion recording.
Selecting the Shooting Mode
In addition to N mode, the camcorder features a number of shoot-
ing modes that offer the most appropriate settings for a variety of special scenes. You can also use the ’ shooting mode when you want the
camcorder to set the exposure automatically but control manually some
advanced settings.
1 Touch the shooting mode button on the top left corner of the
screen.
• The button will show the icon of the shooting mode currently
selected. If the camcorder is set to N mode, the button will
show one of the Smart AUTO icons (A 55).
77
Page 78

Recording Settings and Shooting Modes
• Alternatively, you can open the shooting mode selection screen
from the 0 (Home) menu: 0> [Shooting Mode].
2 S wipe up/down to bring the desired shooting mode to the
center and then touch [OK].
•If you selected [† Cinema] or [ƒ Scene], continue the pro-
cedure to select the cinema-look filter (A 80) or Special Scene
mode (A 82).
Options ( Default value)
[N Auto]
Let the camcorder take care of most of the settings while you concentrate on recording. Great for beginners or if you just prefer not to bother
with detailed camcorder settings.
[ Highlight Priority]
Record bright scenes with a more natural gradation and more life-like
detail in the brightest areas of the picture (A 79).
[† Cinema]
Give your recordings a cinematic look and use cinema-look filters to
create unique movies (A 80).
[ƒ Scene]
From nightscapes to beaches, have the camcorder select the best set-
tings that match the situation you are in (A 82).
[’ Programmed AE]
Enjoy full access to menus, settings and advanced functions (A 85).
78
Page 79

Recording Settings and Shooting Modes
N
†
ƒ ’
y }
PlaybackShooting mode
Touch the shooting mode button (A 77) > [ Highlight Priority]
>
[OK]
0 > [1 Other Settings] > q > [ View Assistance]
> [i On] > [X]
Highlight Priority Mode
You c a n u se mode to capture the colors and gradation in the brightest areas of the picture in more detail, closely approximating what you
remember seeing with your own eyes. This is particularly effective when
recording bright blue skies, skin tones, shimmering water surfaces,
shiny metal or glass structures and similar bright scenes.
Using brighter settings on a connected TV during playback of scenes
recorded in mode, you will be able to enjoy a smoother gradation
and more life-like, detailed picture.
1 S et the shooting mode to .
2 Turn on the view assistance function.
79
Page 80
Recording Settings and Shooting Modes
N
†
ƒ ’
y }
PlaybackShooting mode
Touch the shooting mode button (A 77) > [† Cinema] > [OK]
> Desired cinema-look filter > [OK]
• When playing back scenes recorded in mode, the follow-
ing adjustments are recommended.
-Playback on the camcorder: Set 1 > q > [View
Assistance] to [i On].
-Playback on a TV or external monitor: Increase the bright-
ness of the TV, computer monitor, etc.
Cinema Mode and Cinema-Look Filters
In † mode, the camcorder will adjust the frame rate and several other
picture-related settings to give your recordings a cinematic look. In this
mode you can also use a variety of professional cinema-look filters to
create unique movies with a distinctive appearance.
b You can also add cinema-look filters when you convert mov-
ies to MP4 (resize movies to smaller MP4 files) (A 128).
•The selected cinema-look filter will be applied and its number will
appear in the [FILTER] button.
80
Page 81

Recording Settings and Shooting Modes
Filter number
(will appear in the
[FILTER] button)
Brief description
(onscreen guidance)
Preview the effect on
the screen
Filter name
To change the cinema-look filter
1 Touch the [FILTER] button on the bottom left corner of the
screen.
2 S elect the desired cinema-look filter and then touch [OK].
Options ( Default value)
The camcorder offers 5 cinema-look filters. Select the desired filter while
previewing the effect on the screen.
[1. Cinema Standard]
[2. Vivid] [5. Old Movies]
[3. Cool]
[4. Sepia]
81
Page 82
Recording Settings and Shooting Modes
N
†
ƒ ’
y }
PlaybackShooting mode
Touch the shooting mode button (A 77) > [ƒ Scene] > [OK]
> Desired Special Scene mode > [OK]
Special Scene Modes
Recording in a very bright ski resort or capturing the full colors of a sun-
set or a fireworks display becomes as easy as selecting a Special
Scene mode.
Options ( Default value)
[H Portrait]
The camcorder uses a large aperture to achieve a
sharp focus on the subject while blurring the back-
ground.
[I Sports]
To record scenes with lots of movement, such as
sport events and dance scenes.
[J Night Scene]
To record nightscapes with lower noise.
82
Page 83

Recording Settings and Shooting Modes
[K Snow]
To record in bright ski resorts without the subject
being underexposed.
[L Beach]
To record on a sunny beach without the subject
being underexposed.
[M Sunset]
To record sunsets in vibrant colors.
[N Low Light]
To record in low-light situations.
[O Spotlight]
To record spotlit scenes.
[P Fireworks]
To record fireworks.
83
Page 84

Recording Settings and Shooting Modes
•[H Portrait]/[I Sports]/[K Snow]/[L Beach]: The picture
may not appear smooth during playback.
•[H Portrait]: The blur effect of the background increases the
more you zoom in (S).
•[K Snow]/[L Beach]: The subject may become overex-
posed on cloudy days or in shaded places. Check the image
on the screen.
•[N Low Light]:
- Moving subjects may leave a trailing afterimage.
- Picture quality may not be as good as in other modes.
-White points may appear on the screen.
- Autofocus may not work as well as in other modes. In such
case, adjust the focus manually.
•[P Fireworks]: To avoid camcorder blur (blur due to the cam-
corder moving) we recommend using a tripod.
84
Page 85

Recording Settings and Shooting Modes
N
†
ƒ ’
y }
PlaybackShooting mode
Touch the shooting mode button (A 77) > [’ Programmed AE]
> [OK]
Programmed AE Mode: Adjusting Settings to Match Your Needs
Give yourself the most control while shooting by using the Programmed
AE (AE: auto exposure) shooting mode. As with other shooting modes,
the camcorder automatically adjusts the shutter speed and aperture.
However, this mode offers you the most versatility by allowing you to
adjust other settings to achieve the results you are looking for.
85
Page 86

Convenient Functions
N
†*ƒ ’
y }
PlaybackShooting mode
Convenient Functions
Slow & Fast Motion Recording
You can use slow motion to capture scenes with a lot of movement so
they are played back at half the normal speed, or fast motion to compress the passage of time into time-lapse scenes. You can choose
between using slow & fast motion recording for the entire scene or for
parts of the scene that you specify. Depending on which method you
use, the available slow & fast motion rates will differ. Sound is not
recorded during slow & fast motion recording.
b You can also convert previously recorded scenes into fast
motion (time-lapse) scenes (A 131).
■ Using Slow & Fast Motion Recording for an Entire Scene
You can select an available slow/fast motion rate between 1/2x and
1200x the normal playback speed to record movies with a unique look.
Additionally, for some fast motion rates you can choose to record a sin-
gle frame or a short bit of video (about 0.5 seconds) at every interval.
*In † mode, slow motion recording is not available.
1 Make sure the camcorder has sufficient power to complete
the operation.
•Insert a fully charged battery pack or use the supplied compact
power adapter.
86
Page 87
Convenient Functions
0 > [3 Recording Setup] > [Video Quality] > Desired
video quality > [K] > [X]
0 > [3 Video Quality] > Desired video quality > [K] >
[X]
[2] > [ Slow & Fast Motion] > [Entire Scene] > Desired
slow/fast motion rate* > [X]
2 S et the video quality.
b
`
• The video quality must be set to 24 Mbps or 17 Mbps for fast
motion recording, or 17 Mbps for slow motion recording.
3 S elect the slow/fast motion rate.
* When you select a fast motion rate between [x10] and [x1200], you can
select the desired recording time with the following procedure before
touching [X].
• and the selected slow/fast motion rate will appear on the
screen.
• To turn off the slow & fast motion recording mode, repeat the
procedure selecting [Off] instead.
87
Page 88
Convenient Functions
[w] > Select [1 Frame] or [0.5 sec] > [K]
4 Press Y to start recording.
• While recording, a scene counter will appear and its dividers ( : )
will flash. Note that the higher the fast motion rate used, the more
slowly the scene counter will advance.
5 Press Y again to stop recording the time-lapse or
slow motion scene.
To set the recording time
Recording one frame at each interval results in a smoother time-lapse
video. Recording about 0.5 seconds of video at each interval may be
better for recording fast-moving subjects.
Options
Slow/fast
motion rate
Slow motion:
[x1/2]
Fast motion:
[x2]
[x4]
[x10]
Recording time and interval*
[1 Frame] [0.5 sec]
Every 0.02 (1/60) sec. —
Every 0.07 (1/15) sec. —
Every 0.13 sec. —
Every 0.33 sec. Every 5 sec.
88
Real time
elapsed in a
1-minute scene
30 sec.
2 min.
4 min.
10 min.
Page 89

Convenient Functions
N
† ƒ ’
y }
PlaybackShooting mode
Slow/fast
motion rate
[x20]
[x60]
[x120]
[x300] Every 10 sec. Every 2 min. 30 sec.
[x600]
[x1200]
* Some of the times given are approximate rounded values.
Recording time and interval*
[1 Frame] [0.5 sec]
Every 0.67 sec. Every 10 sec.
Every 2 sec. Every 30 sec.
Every 4 sec. Every 1 min.
Every 20 sec. Every 5 min. 10 hr.
Every 40 sec. Every 10 min.
Real time
elapsed in a
1-minute scene
20 min.
1 hr.
2 hr.
5 hr.
20 hr.
■ Using Slow & Fast Motion Recording for Part of a Scene
You can select which parts of a scene to record in slow & fast motion
(flexible slow & fast motion recording). At a touch, you can switch
between 1/2x slow motion, normal speed and 2x fast motion.
1 Make sure the camcorder has sufficient power to complete
the operation.
•Insert a fully charged battery pack or use the supplied compact
power adapter.
89
Page 90

Convenient Functions
0 > [3 Recording Setup] > [Video Quality] > [17 Mbps
Standard (Full HD)] > [K] > [X]
0 > [3 Video Quality] > [17 Mbps Standard (Full HD)] >
[K] > [X]
[2] > [ Slow & Fast Motion] > [Flexible]
2x fast motion
1x normal speed
1/2x slow motion
2 S et the video quality.
b
`
3 S elect flexible slow & fast motion recording.
• and the selected slow/fast motion rate will appear on the
screen. Also, a scene counter will appear.
4 S elect the desired slow/fast motion rate.
90
Page 91

Convenient Functions
5 Press Y to start recording.
•During fast motion recording, the camcorder will record one
frame at every interval.
6 While recording, touch one of the other two buttons to
change the slow/fast motion rate.
• Note that the scene counter will advance more quickly with
[ x1/2 Slow] and more slowly with [ x2 Fast].
•Touch [v x1 Normal] to return to the camcorder to normal
speed. Sound is not recorded even when the camcorder is
recording at normal speed.
7 Press Y again to stop recording and then touch
[X].
• appears on the screen to indicate that sound is not
recording during slow & fast motion recording mode.
• During flexible slow & fast motion recording, the slow/fast
motion rate may not change. In such case, touch the desired
slow/fast motion rate again.
• Slow & fast motion recording cannot be used in the following
cases.
- When the frame rate is set to 24P.
- b While the camcorder is controlled remotely from
an iOS/Android device.
• When the shooting mode is set to †, 1/2x slow motion
recording of an entire scene is not available; only fast motion
recording of an entire scene is available.
91
Page 92

Convenient Functions
N
†
ƒ ’
y }
PlaybackShooting mode
[2] > [Ò Decoration]
Decoration: Adding a Personal Touch
Add a new level of enjoyment to your
scenes by decorating them. You can
add animated graphics, stamps and
even your own freehand drawings
easily just by simply using your fingertip.
You can also add decorations when
you convert movies to MP4 (resize
movies to smaller MP4 files) (
A
128).
■ Decorating Scenes while Recording
1 Open the decoration screen.
2 Use a tool from the toolbar as explained in the following pro-
cedures.
3 Press Y to record movies with your decorations.
• You can add decorations even while recording a scene.
4 Touch [X] to exit the decoration screen.
92
Page 93

Convenient Functions
3 4 5 6 7 8
1
2
•[Animated Stamps] and the [Date/Time] stamps cannot be
used at the same time.
• Decoration is not available when dual recording is activated
(b only) or the video quality is set to 35 Mbps.
1 Canvas - The area where you will draw and see your decorations in
action.
2 To ol b ar.
3 [Ó Pens and Stamps] Select the type of pen or stamp and its
color.
4 [× Animated Stamps] Select animated stamps to add to your
decoration.
5 [& Date/Time] Add the date and/or time as a caption that will be
included in the recording.
6 [Ü] (Image Mix) Choose one of 26 different frames to add onto
the canvas.
93
Page 94

Convenient Functions
7 [Ý] In recording mode: Pause the live video. Touch [Þ] again to
restore the live video. You can add decorations to the frozen image
and even record it.
In playback mode: Pause the playback. Touch [Ð] to resume playing back the scene.
8 [ß] Minimize the toolbar to the top of the screen to view almost all
of the canvas. Touch [à] to restore the toolbar.
■ To U se [Pens and Stamps]
1 Touch [Ó].
•The [Pens and Stamps] screen will appear.
2 Touch the desired pen or stamp from the 6 icons on the left
and then touch [OK].
• The main decoration screen will appear again.
3 Draw freely on the canvas with your fingertip.
•To select a different pen or stamp: Repeat steps 1 and 2.
• To change color: Touch [Ó] > [Ö] > select a color from the
color palette > [OK].
• To clear your freehand drawings and stamps: Touch [Ó] >
[Clear] > [Yes] > [OK].
•To save your freehand drawings and stamps on the memory:
Touch [Ó] > [& Save]* or [8 Save]* > [Yes] > [OK].
• To load a previously saved canvas (freehand drawings and
stamps only) from the memory: Touch [Ó] > [& Load]** or
[8 Load]** > [Yes] > [OK].
94
Page 95

Convenient Functions
N
†
ƒ ’
y }
PlaybackShooting mode
• A canvas can only be saved or loaded in recording standby
mode or during playback pause.
* b The canvas file will be saved in the built-in memory.
` The canvas file will be saved on the memory card.
** The camcorder will apply the freehand drawings and stamps that
were most recently saved in the built-in memory (b only)
or on the memory card (` only).
• Initializing a memory will erase any [Pens and Stamps] canvas
files and image files you may have saved. (b The
image mix frames that come pre-installed in the built-in memory will be restored after it is initialized.)
■ To U se [Animated Stamps]
1 Touch [×].
•The [Animated Stamps] screen will appear.
2 Touch one of the buttons and then touch [OK].
3 Touch anywhere on the canvas to place the selected ani-
mated stamp.
• You can also drag some animated stamps to a different location.
■ To u se [Date/Time]
95
Page 96
Convenient Functions
N
†
ƒ ’
y }
PlaybackShooting mode
1 Touch [&].
• The [Date/Time] screen will appear.
2 Touch [Date] or [Time].
•To remove a selected stamp, touch it again.
3 Touch [OK].
•The selected stamp(s) will appear.
4 You can touch any stamp and drag it to the desired location.
■ To u se image mix
Image mix frames can be combined with the live video for fun special
effects. You can use the image mix function along with additional [Pens
and Stamps] or [Animated Stamps] decorations.
The image mix frames are stored in the built-in memory (b
only). To use the image mix function while recording on a memory card,
you will need to download the image mix files in advance and use, for
example, a card reader to copy them to the memory card (A 277).
• b Before performing this procedure, make sure that
the memory selected for recording (A 75) or playback
(A 63) contains the image mix frames.
1 Touch [Ü] to open the [Select Image] screen.
96
Page 97
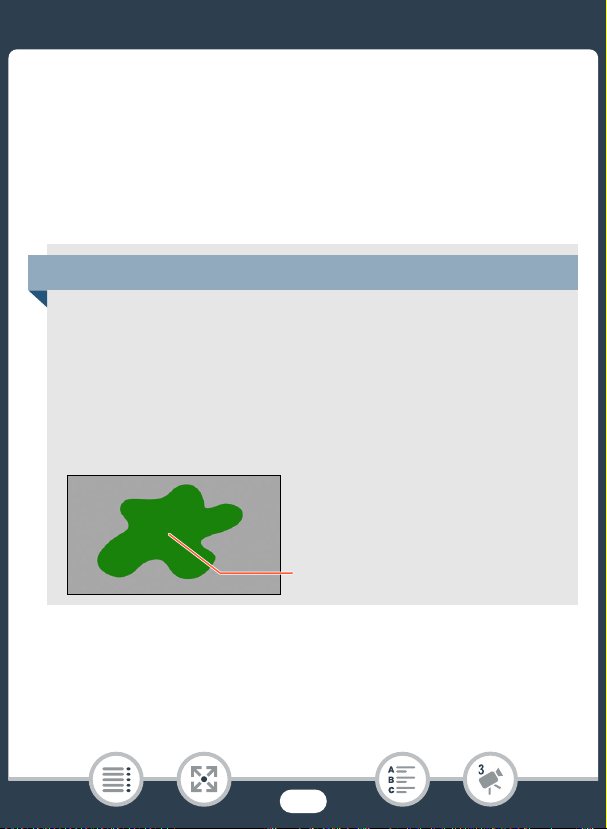
Convenient Functions
Green area that will be replaced by
the live video
Example of an image used for Chroma Key
2 Touch [+] or [-] to select a different image mix frame.
• You can select from 26 image mix frames.
• b Only when recording on or playing back scenes from
a memory card: You can also touch [&] to read image mix
frames saved in the built-in memory.
3 Touch [OK] to mix the selected frame with the live video.
Mixing Your Own Images with Live Video
When recording on a memory card, you can use image files you
create on your computer for the image mix (Chroma Key) function.
Make sure that the image you want to use has a blue or green
area, which will be replaced by the live video using Chroma Key
mixing. For details, refer to About the image files for the Image
Mix function (A 277).
■ To u se the Chroma Key function
1 Touch [Ü] to open the [Select Image] screen.
97
Page 98

Convenient Functions
N
†
ƒ ’
y }
PlaybackShooting mode
2 Touch [8] and then touch [+] or [-] to select the image you
created.
3 Touch [Ð] to open the [Chroma Key] screen.
4 Touch [Green] or [Blue] depending on the characteristics of
the image you want to use and touch [Ï] or [Ð] or swipe
left/right along the bottom bar to adjust the chroma key set-
ting as necessary.
5 Touch [OK] to mix your image with live video.
• The image mix frame cannot be selected while recording or
during playback.
■ Decorating Scenes during Playback
You can decorate scenes while playing them back. Decorations added
during playback are not recorded with the scene. You can also load and
apply a canvas with previously saved decorations.
1 Play back the scene you want to decorate (A 62).
2 Touch the screen to display the playback controls.
3 Touch [Ò] to display the decoration toolbar.
98
Page 99
Convenient Functions
N
†
ƒ ’
y }
PlaybackShooting mode
[2] > [¦ Video Snapshot] > [ON] > [X]
4 Decorate the scene using the tools from the toolbar as
explained in the previous sections.
5 Touch [X] to exit the decoration screen.
Video Snapshot
You can record a series of short scenes, each a few seconds long.
When you play the video snapshot scenes one after the other, this will
result in fast-paced, dynamic video.
b You can even play back the video snapshot scenes set to
background music (A 120).
1 Activate video snapshot.
• Touch [OFF] instead to deactivate video snapshot.
• A blue border appears on the screen.
2 Press Y.
• The camcorder records for about 4 seconds (the blue frame
serves as a visual progress bar) and then automatically returns to
record standby mode.
99
Page 100

Convenient Functions
N
*
†
ƒ ’
y }
PlaybackShooting mode
0 > [1 Other Settings] > p > [Face Detection &
Tr ac king] > [i On }] > [X]
• You can change the length of the video snapshot scenes
recorded with the 1 > p > [Video Snapshot Length]
setting.
• Any of the following actions will deactivate the video snapshot
function.
- Turning off the camcorder, pressing ], changing the
shooting mode, etc.
- Changing the video quality or frame rate.
- Activating the slow & fast recording mode.
Face Detection and Tracking
The camcorder automatically detects people’s faces and keeps the
subject in focus and correctly exposed. To focus on a person other than
the one the camcorder selected, touch the desired face on the screen
(tracking). You can also use tracking to always keep in focus other moving subjects, such as pets or moving vehicles.
* Face detection is always activated in N mode.
1 Activate face detection.
100
 Loading...