

Page 1
Digital Video Software
Instruction Manual
E
Version 19
Page 2
Contents
Read This First ........................................................................................................... 3
Checking Supplied Accessories ............................................................................ 3
System Requirements ............................................................................................... 4
What is Digital Video Software.................................................................................. 5
Installing the Digital Video Software ........................................................................ 6
Before Downloading Still Images ............................................................................. 9
Connecting the Camcorder to a Computer ............................................................ 9
CameraWindow Automatic Launch Setting ......................................................... 10
Mac OS 10.2 - 10.3 ......................................................................................... 10
Mac OS 10.1.5 ................................................................................................ 10
Downloading Still Images (ImageBrowser) ............................................................11
Using the Computer to Download Still Images .....................................................11
Auto-downloading ............................................................................................11
Applying Auto-downloading Settings .............................................................. 12
Downloading the Selected Still Images from the CameraWindow .................. 15
Using a Card Reader/Writer ............................................................................ 17
Using the Camcorder to Download Still Images (Direct Transfer Function) ........ 17
Setting the Direct Transfer Download Destination Folder ............................... 18
ImageBrowser Windows.......................................................................................... 20
Browser Window.................................................................................................. 20
[Image Viewer] Window ....................................................................................... 24
[Trimming Dialog Box] Window ....................................................................... 25
[Color Adjustment Dialog] Window ................................................................. 25
Organizing Still Images ........................................................................................... 26
Applying Star Rating ............................................................................................ 26
Specifying the Keywords...................................................................................... 26
Classifying the Still Images.................................................................................. 27
Sort by the Shooting Date ............................................................................... 27
Sort by the Star Rating .................................................................................... 29
Renaming Multiple Files ...................................................................................... 30
Searching for Still Images.................................................................................... 31
Exporting Still Images ............................................................................................. 34
Changing the File Type and Save........................................................................ 34
Adding Still Images from Your Computer to the Memory Card ............................ 37
Adding Still Images to the Memory Card ......................................................... 37
Adding Sample Images to the Memory Card .................................................. 38
Using Various Functions......................................................................................... 41
Attaching Still Images to E-mail Messages.......................................................... 41
Running a Slide Show ......................................................................................... 44
Merging Panoramic Images (PhotoStitch) ........................................................... 45
Printing Still Images (ImageBrowser)................................................................... 47
Adjusting Image Quality and Printing (Exif 2.2 Compliant) ............................. 50
Adding Sound to a Still Image.............................................................................. 51
Applying DPOF Settings ...................................................................................... 52
Reviewing and Changing the Settings of the Camcorder .................................... 54
Uninstalling the Software ........................................................................................ 56
Uninstalling ImageBrowser and PhotoStitch........................................................ 56
Troubleshooting....................................................................................................... 57
2
Contents
Page 3
Read This First
Disclaimer
• While every effort has been made to ensure that the information contained in
this guide is accurate and complete, no liability can be accepted for any
errors or omissions. Canon reserves the right to change the specifications of
the hardware and software described herein at any time without prior notice.
• No part of this guide may be reproduced, transmitted, transcribed, stored in a
retrieval system, or translated into any language in any form, by any means,
without the prior written permission of Canon.
• Canon makes no warranties for damages resulting from corrupted or lost
data due to mistaken operation or malfunction of the camcorder, the
software, memory cards (miniSD Cards), personal computers, or peripheral
devices, or due to use of a memory card not formatted by a Canon
camcorder.
Trademark Acknowledgments
• Macintosh and Mac OS are trademarks of Apple Computer, Inc., registered in
the United States and other countries.
• iPhoto and QuickTime are trademarks of Apple Computer, Inc.
• miniSD is a trademark of SD Card Association.
• Other names and products not mentioned above may be registered
trademarks or trademarks of their respective companies.
© Canon Inc. 2005 All rights reserved.
Safety Precautions
Do not play the supplied CD-ROM(s) in any CD player that does not support
data CD-ROMs. Playing the CD-ROM(s) in an audio CD player (music player)
could damage the speakers. It is also possible to suffer from hearing loss from
listening with headphones to the loud sounds of a CD-ROM played on a music
CD player.
Checking Supplied Accessories
Use the following accessories to download recorded still images from a disc or a
memory card to your computer.
• IFC-300PCU USB Cable • DIGITAL VIDEO SOLUTION DISK
E
The explanations in this manual use mainly Mac OS X version 10.3 screen
shots. The steps and windows may vary depending on your computer.
Read This First
Macintosh
3
Page 4
System Requirements
OS: Mac OS X (version 10.1.5/10.2/10.3)
Computer Model: Computers that come with above OS preinstalled
CPU: PowerPC G3/G4/G5
RAM: 256 MB or more
Free Hard Disk Space: Canon Utilities
Display: 1024
Proper operation is not guaranteed on a user-built PC.
Proper operation is not guaranteed on any particular system, even if it meets
the requirements outlined above.
ImageBrowser and PhotoStitch do not operate on disks formatted with the
Unix File System (UFS).
A CD-ROM drive is required to install the software.
- ImageBrowser 200 MB or more
- PhotoStitch 40 MB or more
× 768 pixels/32,000 colors or better
4
System Requirements
Page 5
What is Digital Video Software
The following software will be installed by installing the Digital Video Software.
ImageBrowser
• Viewing downloaded still images
• Categorizing, organizing, and searching large volumes of still images
• Editing still images
• Changing the data for still images and save them as new files
• Attaching still images to E-mail
• Viewing still images in a slide show
• Adding sound to a still image
• Printing still images with titles and comments
• Printing indexes
CameraWindow
• Downloading still images from a disc or a memory card to your computer
• Viewing still images recorded in a disc or a memory card
• Applying DPOF (Digital Print Order Format) settings to the still images
recorded on a memory card
PhotoStitch
Merging a series of overlapping still images into a single, seamless panorama
This instruction manual explains how to install the software, what you can do
with the main features and how to operate them. For more detailed operational
instructions, refer to the Help menu of each software program.
E
What is Digital Video Software
Macintosh
5
Page 6
Installing the Digital Video Software
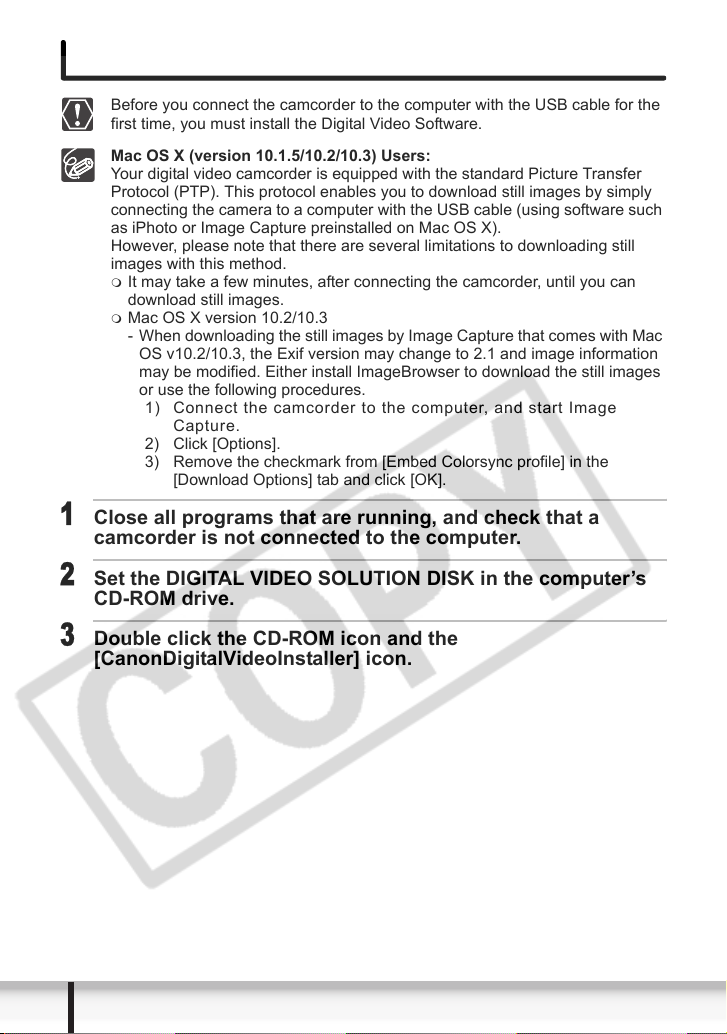
Before you connect the camcorder to the computer with the USB cable for the
first time, you must install the Digital Video Software.
Mac OS X (version 10.1.5/10.2/10.3) Users:
Your digital video camcorder is equipped with the standard Picture Transfer
Protocol (PTP). This protocol enables you to download still images by simply
connecting the camera to a computer with the USB cable (using software such
as iPhoto or Image Capture preinstalled on Mac OS X).
However, please note that there are several limitations to downloading still
images with this method.
It may take a few minutes, after connecting the camcorder, until you can
download still images.
Mac OS X version 10.2/10.3
- When downloading the still images by Image Capture that comes with Mac
OS v10.2/10.3, the Exif version may change to 2.1 and image information
may be modified. Either install ImageBrowser to download the still images
or use the following procedures.
1) Connect the camcorder to the computer, and start Image
Capture.
2) Click [Options].
3) Remove the checkmark from [Embed Colorsync profile] in the
[Download Options] tab and click [OK].
1
Close all programs that are running, and check that a
camcorder is not connected to the computer.
2
Set the DIGITAL VIDEO SOLUTION DISK in the computer’s
CD-ROM drive.
3
Double click the CD-ROM icon and the
[CanonDigitalVideoInstaller] icon.
6
Installing the Digital Video Software
Page 7
4
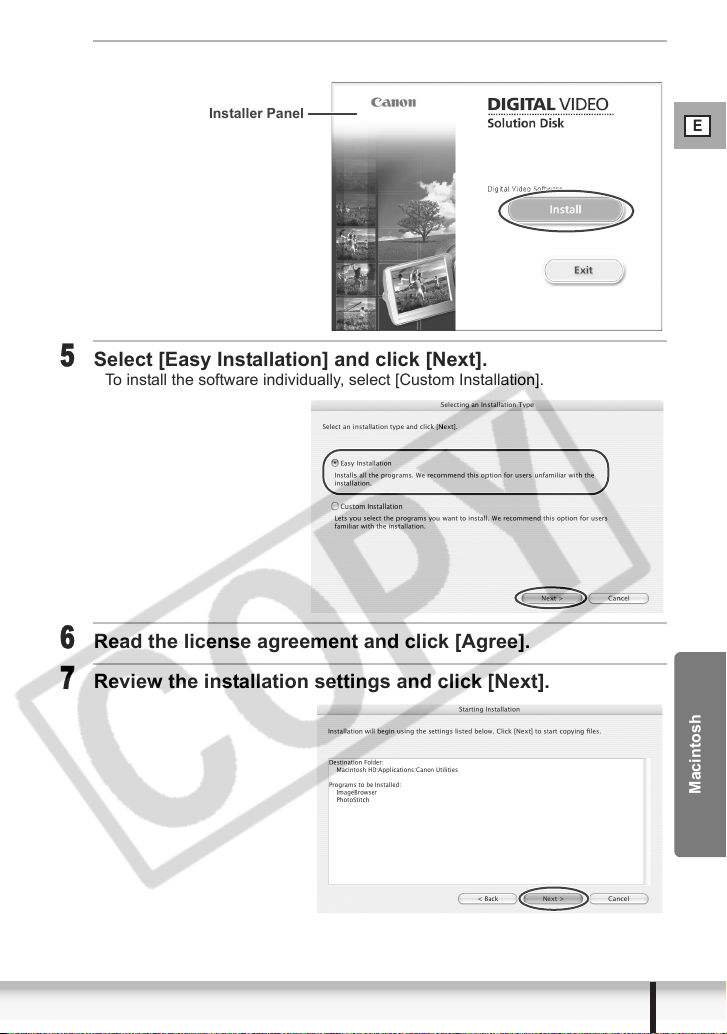
Click Digital Video Software [Install].
Installer Panel
5
Select [Easy Installation] and click [Next].
To install the software individually, select [Custom Installation].
6
Read the license agreement and click [Agree].
7
Review the installation settings and click [Next].
E
Installing the Digital Video Software
Macintosh
7
Page 8

8
When the “Installation has finished.” message appears,
click [OK].
After the installation is complete, restart the computer as prompted.
8
Installing the Digital Video Software
Page 9
Before Downloading Still Images
Connecting the Camcorder to a Computer
Be sure to install the Digital Video Software before you connect the
camcorder to the computer.
Make sure the camcorder is being powered using the power adapter before
connecting it to a computer.
Connect the USB cable directly to one of the computer’s main USB ports.
The interface may not function correctly if the camcorder is connected via a
USB hub.
The connection may not operate correctly if you are using other USB
devices, excluding USB mice or keyboards, at the same time. If this occurs,
disconnect the other devices from the computer and try reconnecting the
camcorder.
Do not connect two or more camcorders to the same computer via the USB
interface. The connections may not operate correctly.
Never allow the computer to go into standby (sleep) mode while a
camcorder is connected via the USB interface.
Refer to your computer manual for the location of the computer’s USB ports.
See your camcorder instruction manual for how to connect the camcorder to
the computer and how to change the media setting (MEDIA SEL. ) in the
SYSTEM SETUP menu.
1
Insert a disc or a memory card containing images into the
camcorder.
2
Connect the power adapter to the camcorder.
3
Turn the power switch to PLAY and move the / switch
to .
Wait until the camcorder’s access indicator stops flashing.
E
4
To download still images on the disc, select [DISC] in the
SYSTEM SETUP menu.
To download still images on the card, select [CARD] in the
SYSTEM SETUP menu.
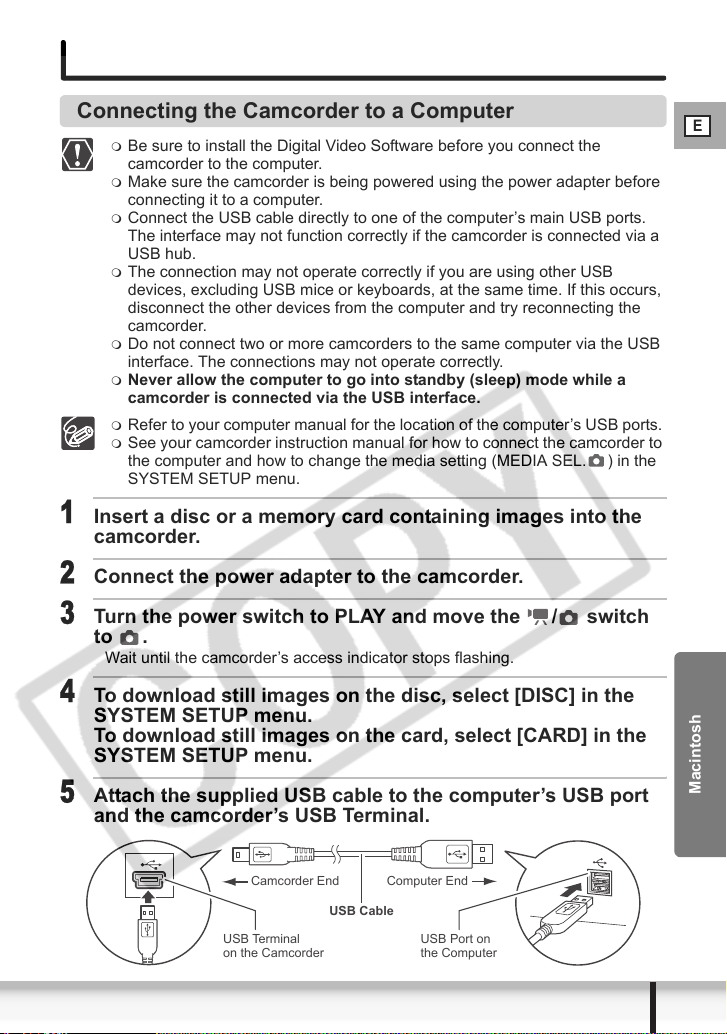
5
Attach the supplied USB cable to the computer’s USB port
and the camcorder’s USB Terminal.
Camcorder End Computer End
USB Cable
USB Terminal
on the Camcorder
USB Port on
the Computer
Before Downloading Still Images
Macintosh
9
Page 10
CameraWindow Automatic Launch Setting
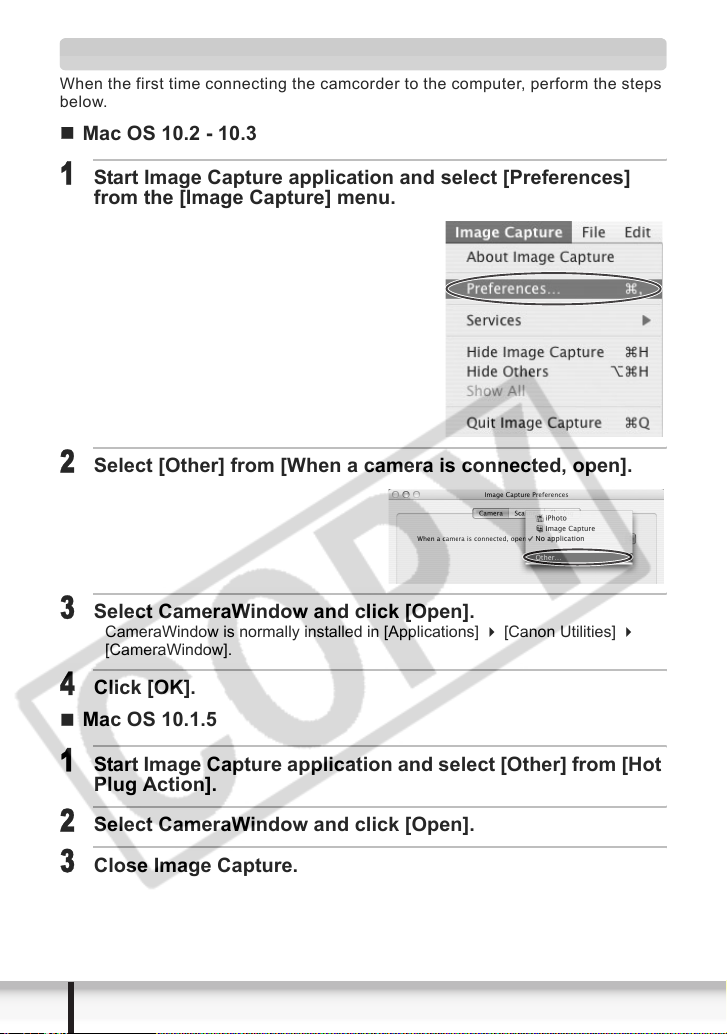
When the first time connecting the camcorder to the computer, perform the steps
below.
Mac OS 10.2 - 10.3
1
Start Image Capture application and select [Preferences]
from the [Image Capture] menu.
2
Select [Other] from [When a camera is connected, open].
3
Select CameraWindow and click [Open].
CameraWindow is normally installed in [Applications] [Canon Utilities]
[CameraWindow].
4
Click [OK].
Mac OS 10.1.5
1
Start Image Capture application and select [Other] from [Hot
Plug Action].
2
Select CameraWindow and click [Open].
3
Close Image Capture.
10
Before Downloading Still Images
Page 11
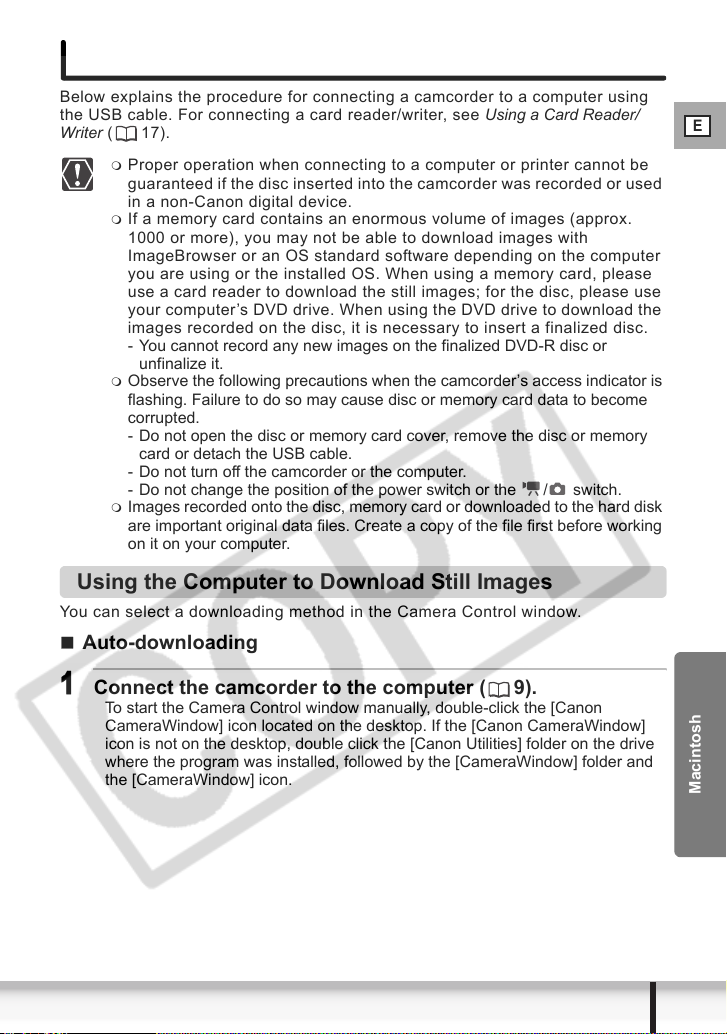
Downloading Still Images (ImageBrowser)
Below explains the procedure for connecting a camcorder to a computer using
the USB cable. For connecting a card reader/writer, see Using a Card Reader/
Writer ( 17).
Proper operation when connecting to a computer or printer cannot be
guaranteed if the disc inserted into the camcorder was recorded or used
in a non-Canon digital device.
If a memory card contains an enormous volume of images (approx.
1000 or more), you may not be able to download images with
ImageBrowser or an OS standard software depending on the computer
you are using or the installed OS. When using a memory card, please
use a card reader to download the still images; for the disc, please use
your computer’s DVD drive. When using the DVD drive to download the
images recorded on the disc, it is necessary to insert a finalized disc.
- You cannot record any new images on the finalized DVD-R disc or
unfinalize it.
Observe the following precautions when the camcorder’s access indicator is
flashing. Failure to do so may cause disc or memory card data to become
corrupted.
- Do not open the disc or memory card cover, remove the disc or memory
card or detach the USB cable.
- Do not turn off the camcorder or the computer.
- Do not change the position of the power switch or the / switch.
Images recorded onto the disc, memory card or downloaded to the hard disk
are important original data files. Create a copy of the file first before working
on it on your computer.
Using the Computer to Download Still Images
You can select a downloading method in the Camera Control window.
Auto-downloading
E
1
Connect the camcorder to the computer ( 9).
To start the Camera Control window manually, double-click the [Canon
CameraWindow] icon located on the desktop. If the [Canon CameraWindow]
icon is not on the desktop, double click the [Canon Utilities] folder on the drive
where the program was installed, followed by the [CameraWindow] folder and
the [CameraWindow] icon.
Downloading Still Images (ImageBrowser)
Macintosh
11
Page 12
2
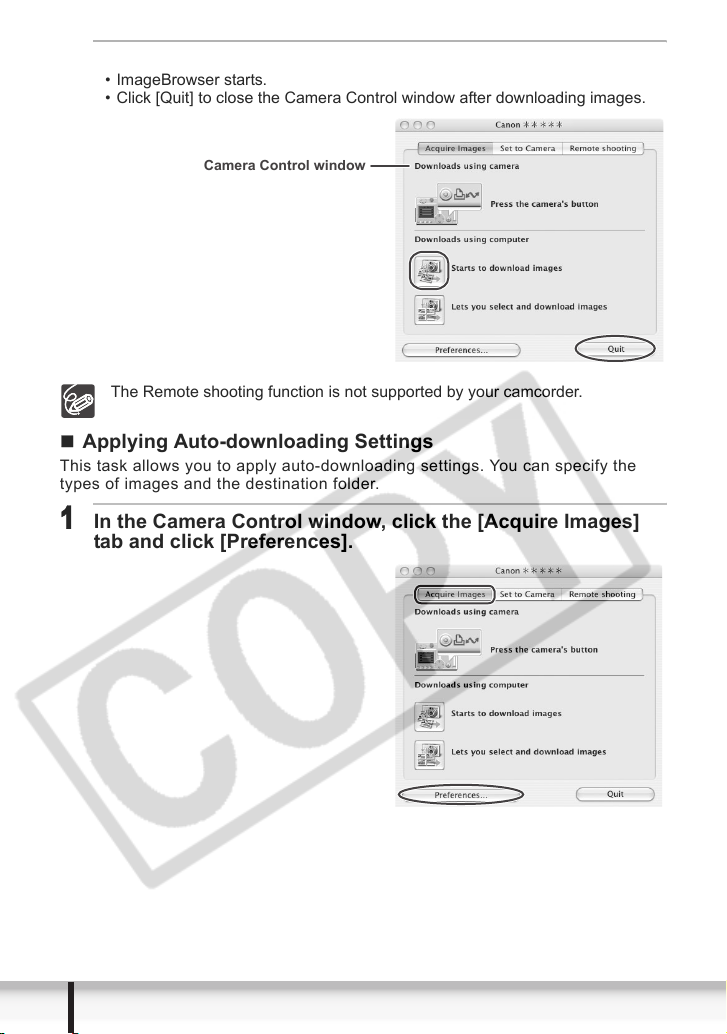
Click [Starts to download images].
• ImageBrowser starts.
• Click [Quit] to close the Camera Control window after downloading images.
Camera Control window
The Remote shooting function is not supported by your camcorder.
Applying Auto-downloading Settings
This task allows you to apply auto-downloading settings. You can specify the
types of images and the destination folder.
1
In the Camera Control window, click the [Acquire Images]
tab and click [Preferences].
12
Downloading Still Images (ImageBrowser)
Page 13
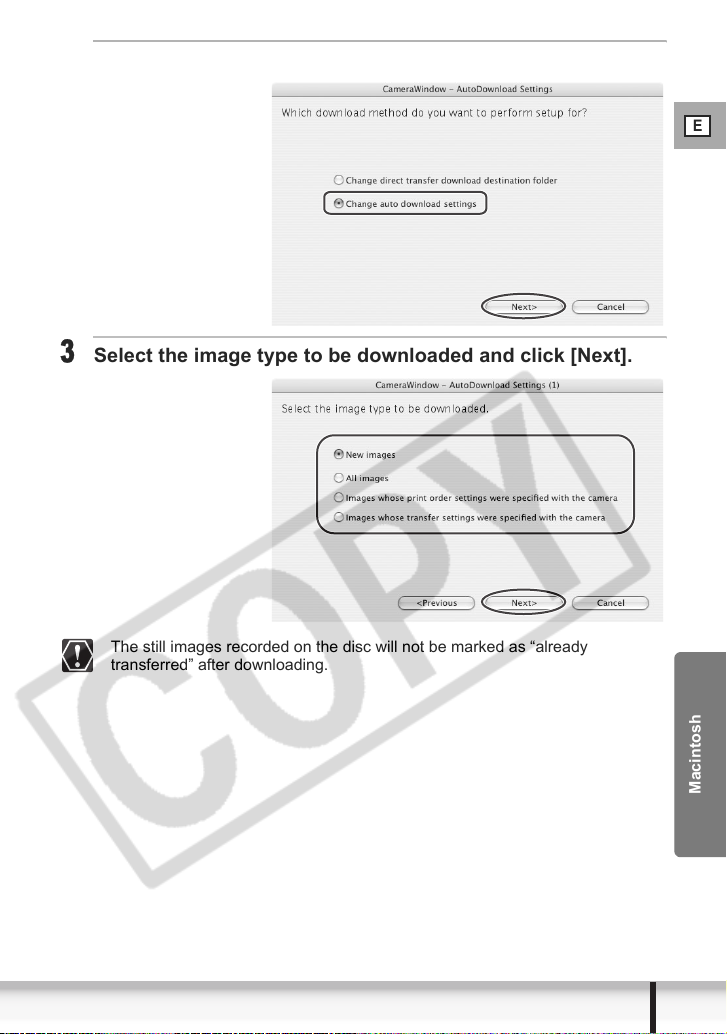
2
Select [Change auto download settings] and click [Next].
3
Select the image type to be downloaded and click [Next].
E
The still images recorded on the disc will not be marked as “already
transferred” after downloading.
Downloading Still Images (ImageBrowser)
Macintosh
13
Page 14
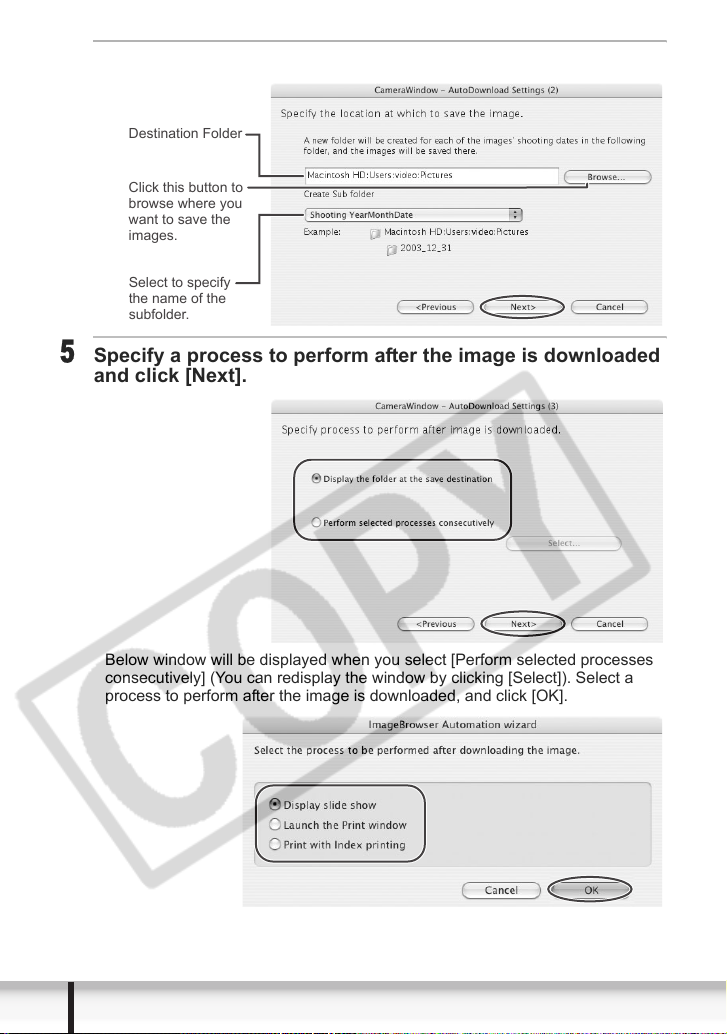
4
Specify the destination folder settings and click [Next].
Destination Folder
Click this button to
browse where you
want to save the
images.
Select to specify
the name of the
subfolder.
5
Specify a process to perform after the image is downloaded
and click [Next].
14
Below window will be displayed when you select [Perform selected processes
consecutively] (You can redisplay the window by clicking [Select]). Select a
process to perform after the image is downloaded, and click [OK].
Downloading Still Images (ImageBrowser)
Page 15
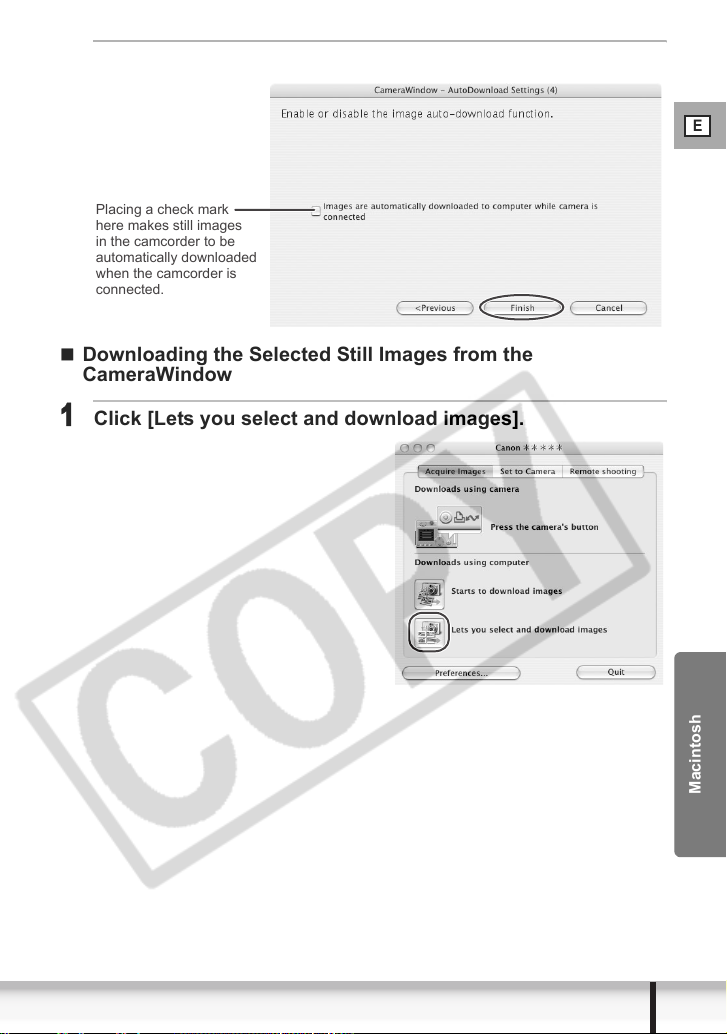
6
Click [Finish].
Placing a check mark
here makes still images
in the camcorder to be
automatically downloaded
when the camcorder is
connected.
Downloading the Selected Still Images from the
CameraWindow
1
Click [Lets you select and download images].
E
Downloading Still Images (ImageBrowser)
Macintosh
15
Page 16
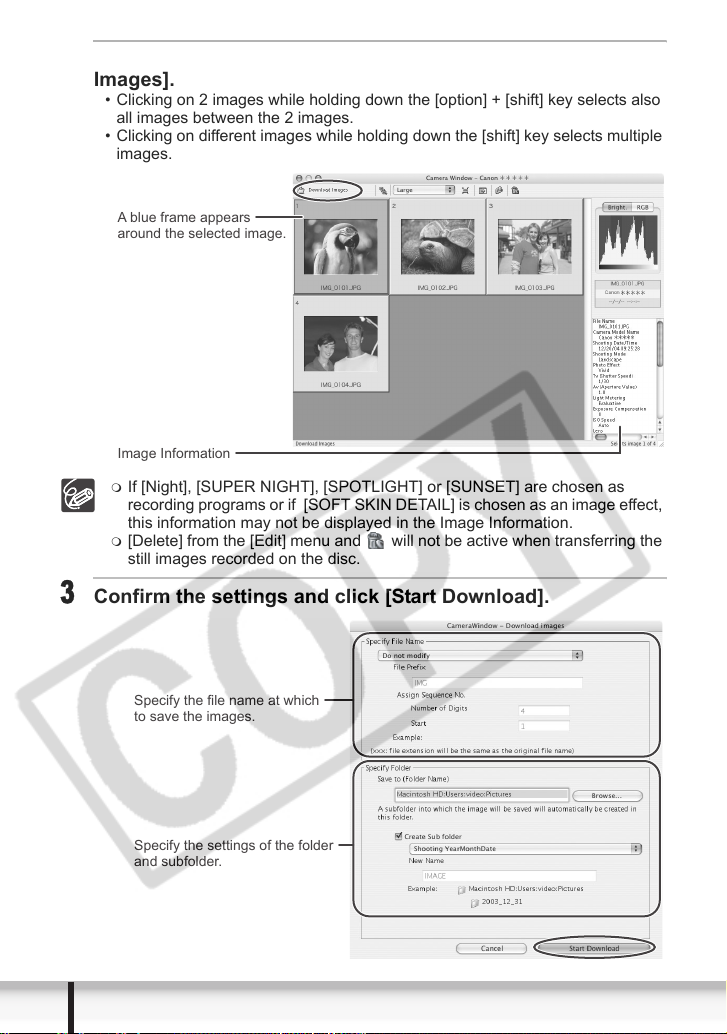
2
Select images you wish to download and click [Download
Images].
• Clicking on 2 images while holding down the [option] + [shift] key selects also
all images between the 2 images.
• Clicking on different images while holding down the [shift] key selects multiple
images.
A blue frame appears
around the selected image.
Image Information
If [Night], [SUPER NIGHT], [SPOTLIGHT] or [SUNSET] are chosen as
recording programs or if [SOFT SKIN DETAIL] is chosen as an image effect,
this information may not be displayed in the Image Information.
[Delete] from the [Edit] menu and will not be active when transferring the
still images recorded on the disc.
3
Confirm the settings and click [Start Download].
16
Specify the file name at which
to save the images.
Specify the settings of the folder
and subfolder.
Downloading Still Images (ImageBrowser)
Page 17
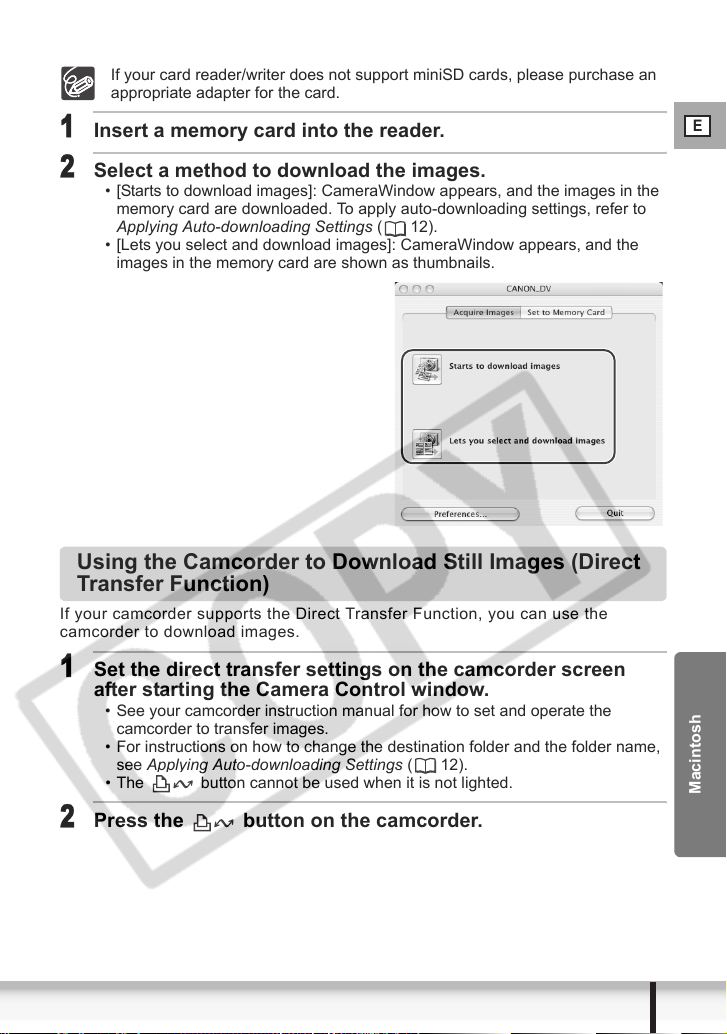
Using a Card Reader/Writer
If your card reader/writer does not support miniSD cards, please purchase an
appropriate adapter for the card.
1
Insert a memory card into the reader.
2
Select a method to download the images.
• [Starts to download images]: CameraWindow appears, and the images in the
memory card are downloaded. To apply auto-downloading settings, refer to
Applying Auto-downloading Settings (12).
• [Lets you select and download images]: CameraWindow appears, and the
images in the memory card are shown as thumbnails.
Using the Camcorder to Download Still Images (Direct
Transfer Function)
If your camcorder supports the Direct Transfer Function, you can use the
camcorder to download images.
E
1
Set the direct transfer settings on the camcorder screen
after starting the Camera Control window.
• See your camcorder instruction manual for how to set and operate the
camcorder to transfer images.
• For instructions on how to change the destination folder and the folder name,
see Applying Auto-downloading Settings ( 12).
• The button cannot be used when it is not lighted.
2
Press the button on the camcorder.
Downloading Still Images (ImageBrowser)
Macintosh
17
Page 18
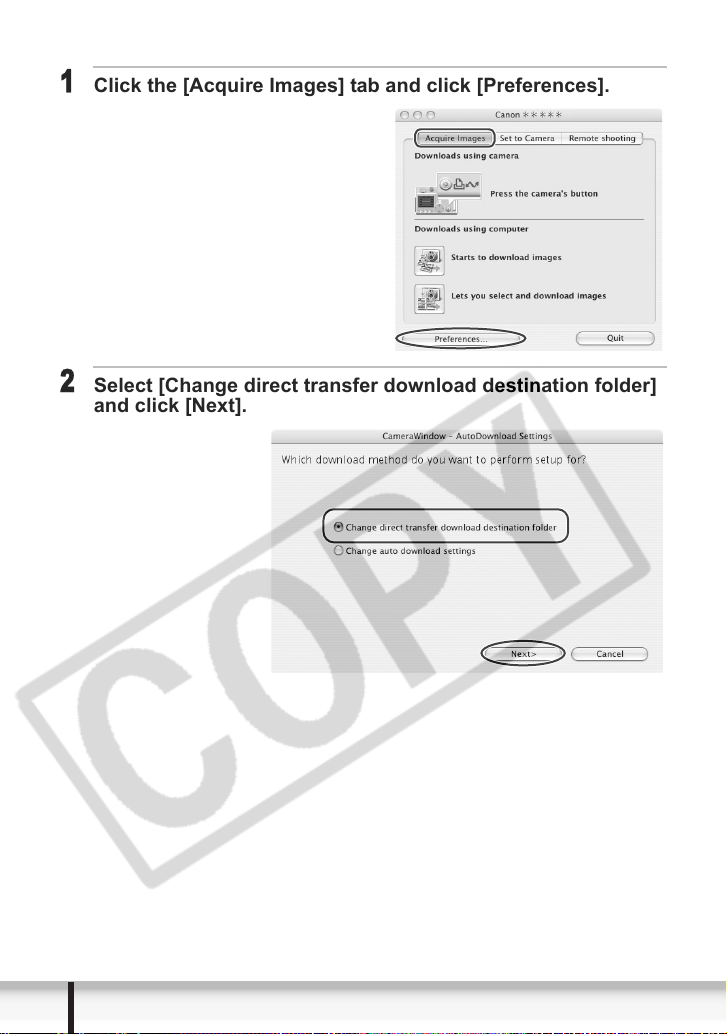
Setting the Direct Transfer Download Destination Folder
1
Click the [Acquire Images] tab and click [Preferences].
2
Select [Change direct transfer download destination folder]
and click [Next].
18
Downloading Still Images (ImageBrowser)
Page 19

3
Specify the destination folder settings and click [Finish].
Click [Quit] to close the Camera Control window.
Destination Folder
Click this button
to specify the
destination folder.
Select to specify
the name of the
subfolder.
E
Downloading Still Images (ImageBrowser)
Macintosh
19
Page 20

ImageBrowser Windows
This section explains the windows of ImageBrowser.
To start ImageBrowser, double-click the icon located on the desktop.
If the ImageBrowser icon is not on the desktop, double-click the [Canon
Utilities] folder on the drive on which the program was installed, followed by the
[ImageBrowser] folder and the [ImageBrowser] icon.
Browser Window
This is the ImageBrowser’s Main Window. You can view and manage the
downloaded still images.
1
1 Explorer View
Displays the disks and folders that you can use on your computer. If you click
the disclosure triangle on the left edge of the display, you can switch between
collapsing and expanding the contents of that folder.
Selecting the [Favorite] tab shows only the folders that are registered as
Favorites. To register a folder as Favorites, follow the instructions below.
When you have selected the [All] tab:
Select a folder and click [Add to Favorites].
When you have selected the [Favorite] tab:
Click [Add] and specify a folder.
To remove the registered folder, select the folder, and click [Remove].
2 Browser Area
This area displays the still images contained in the selected folder.
2 3
4
5
20
ImageBrowser Windows
Page 21

3 View Mode
You can select a view mode of still images in the Browser Area.
[Preview]: The thumbnail still images are displayed at the bottom of the
Browser Area, and the Information Panel is displayed in the upper part.
Preview Image
Information Panel
Selected Thumbnail
[List]: The still images are displayed as thumbnails. The thumbnails can be
enlarged/reduced by selecting [Enlarge] or [Reduce] from the [View] menu.
Context Menu
When the view mode is set to [Preview] or [List], click on a thumbnail
image while pressing the [control] key on the keyboard, a context menu
will appear. The context menu allows you to select several functions
directly without using the menu bar located on top of the window.
E
Context menu
ImageBrowser Windows
Macintosh
21
Page 22

[TimeTunnel]: The still images are displayed in the chronological order.
The date/time at which the
images were shot appears on
the red line. You can change
this date/time by double-clicking
it on the display. A window similar
to the one below appears. Specify
the new date/time.
Makes the TimeTunnel rings octagonal.
Tool Panel
Allows you to specify the date for the images displayed.
Changes the number of TimeTunnel rings.
Makes the TimeTunnel look curved.
Move the slider
up or down to
move backward
or forward in time.
Click to display
the control panel.
[Display Tool Panel]:
Select to display or
hide the tool panel.
[Auto Cruise]:
Enables or disables
[Auto Cruise]. When
[Auto Cruise] is active,
the time movement
continues even after
you have moved and
released the bar.
[Play Sound]:
Plays back
the added sound.
22
ImageBrowser Windows
Page 23

4 Browser Area Tool Bar
The tool bar does not appear in the [TimeTunnel] mode.
1
32
4
E
1View Allows you to select displayed still images according to
the star rating.
2
Enlarge/Reduce Enlarges/reduces the thumbnails in the Browser Window.
3
Selecting Images Allows to select all still images and deselects still images.
4
Display Pattern Allows to change the appearances of the Browser
Window.
5 Application Tool Bar
1
2
3 4 5
1Canon Camera Opens CameraWindow.
2
View Image Displays a selected still image in the [Image Viewer]
window.
3
SlideShow Displays still images in a slide show.
4
Internet Allows attaching the selected still images to E-mail
messages.
5
Print Prints the selected still images.
6
Send to Trash Deletes the selected still images.
6
ImageBrowser Windows
Macintosh
23
Page 24

[Image Viewer] Window
The [Image Viewer] window appears when you select a still image and click
[View Image] or double click a still image.
Changes
the zoom
ratio of the
still image.
1 2 3 4 5 6
Changes
the star
rate.
7
1 Back/Next Displays the previous/next still image in the current folder.
2
Save Allows saving the edited still image.
3
Edit Allows adjusting colors and trimming the still image or
registering other image editing applications. Unable to
use when the multiple still images are selected.
4
Number of
Displays
5
Synchronize Synchronizes View functions across all displayed still
Allows you to display multiple still images at the same
time.
images.
6
Full Screen Displays a still image in full screen size. To return to
Browser Window, click the full screen sized image or
press any key.
7
Show AF Frame This function cannot be used for the still images recorded
by the camcorder.
24
ImageBrowser Windows
Page 25

[Trimming Dialog Box] Window
Select [Trimming] from the icon located at the bottom of the [Image Viewer]
window. Either drag the mouse on the still image or specify the cropping area,
and click [Trimming].
[Color Adjustment Dialog] Window
Select [Adjust Color] from the icon located at the bottom of the [Image
Viewer] window. [Color Adjustment Dialog] allows you to change the brightness,
saturation, contrast, and RGB of the still image.
E
ImageBrowser Windows
Macintosh
25
Page 26

Organizing Still Images
Applying Star Rating
• This task allows you to apply ratings to your images from one star to three
stars. The Star Rating can be used as one of the search conditions, or for the
selection of images to be displayed in the Browser Window.
• The default setting of the Star Rating is two stars.
1
Select the image to which you wish to apply the Star Rating.
2
Select [Change Star Rating] from the [Edit] menu.
You can display images according to Star Rating by selecting from the [View]
drop down list.
Specifying the Keywords
Keyword is used for searching images.
1
Select an image you wish to apply the keyword.
2
Select [Keyword] [Settings] from the [Edit] menu.
26
Organizing Still Images
Page 27

3
Place a check mark next to the keyword you wish to apply
and click [OK].
You can add and delete keywords, or change the keyword list in the [Manage
Keywords] window by selecting [Keyword] [Manage] from the [Edit] menu.
Classifying the Still Images
This task allows you to sort images into a folder according to the shooting date or
Star Rating.
Sort by the Shooting Date
1
Select the images you wish to classify and select [Organize
Image] [Sort Images] from the [File] menu.
E
Organizing Still Images
Macintosh
27
Page 28

2
Select [The files will be separated into folders for each
shooting date.] and click [Next].
3
Specify the sort settings and click [OK].
The selected images are classified into the specific folder.
28
Organizing Still Images
Page 29

Sort by the Star Rating
1
Select the images you wish to classify and select [Organize
Image] [Sort Images] from the [File] menu.
2
Select [The files will be organized by Star Rating.] and click
[Next].
E
Organizing Still Images
Macintosh
29
Page 30

3
Specify the sort settings and click [OK].
Renaming Multiple Files
This task allows you to rename multiple files at the same time, or to rename and
copy multiple files.
30
1
Select the still images you wish to rename and select
[Organize Image] [Rename] from the [File] menu.
Organizing Still Images
Page 31

2
Specify the settings and click [OK].
The still images are renamed according to the settings specified.
Placing a check mark
here makes copies of still
images with new names.
The name of the original
images will not be changed.
Searching for Still Images
This task allows you to search for images by Star Rating, Modification Date,
Shooting Date, Comment or Keywords.
E
1
Select a folder in the explorer view.
2
Select [Search] from the [File] menu.
Organizing Still Images
Macintosh
31
Page 32

3
Specify the search conditions and click [Search Now].
• The search results are displayed as thumbnails.
• Select at least one search condition.
• Clicking the icon discloses the parameters of settings.
Clicking this button allows
you to specify a folder.
4
Click [Finish].
• To change the search parameters and perform another search, click [Back]
and repeat steps 3-4.
32
Organizing Still Images
Page 33

• The images of the search result are displayed in the [Search Results] folder.
You can print or copy these images to another folder. The images will remain
in this folder until ImageBrowser is closed or another search is performed.
E
Organizing Still Images
Macintosh
33
Page 34

Exporting Still Images
Changing the File Type and Save
This task allows you to change the size, resolution or data for of selected still
images and save them as new files and allows saving the shooting properties of
the still image to a text file or copying the still images with new names.
Furthermore, you can export still images for use as a screen saver or a
wallpaper.
1
Select an image you wish to export and [Export Images]
from the [File] menu.
2
Select exporting type and click [Next].
34
Exporting Still Images
Page 35

3
Specify the export settings and click [Finish].
The window varies depending on the selected export type in step 2.
When you have selected [Edit and Save Image]:
You can convert still images to another file type, resize and save them as new
files. You can select the file type from BMP, PICT, JPEG and TIFF. You can also
specify a prefix to be added to the exported still images.
When you have selected [Export Shooting Properties]:
You can select information you wish to export and save as a text file.
E
Exporting Still Images
Macintosh
35
Page 36

When you have selected [Export as a Screensaver]:
You can export and save the image as a screen saver.
When you have selected [Export an Image as Wallpaper]:
You can export and save the image as a desktop wallpaper. This task cannot be
performed if you have selected multiple images.
36
Exporting Still Images
Page 37

Adding Still Images from Your Computer to the Memory
Card
You can save still images from the computer to a memory card. You can also
save sample images for card mix from the DIGITAL VIDEO SOLUTION DISK.
Only still images with JPEG compression can be saved to the memory card.
TIFF, PICT, Windows bitmap will be converted to JPEG compression and
saved to the memory card.
Unable to upload the still images to the disc.
Adding Still Images to the Memory Card
1
Connect the camcorder to the computer ( 9).
2
Click the [Set to Camera] tab in the Camera Control window,
and [Uploads images to the camera].
E
Exporting Still Images
Macintosh
37
Page 38

3
Select the still image you wish to add and click [Open].
You can check the selected image by clicking the file name.
4
In the Add image window, select the image size and click
[Add].
• The selected images will be recorded to the memory card.
• When recording is complete, the images will appear in the CameraWindow.
Adding Sample Images to the Memory Card
You can save sample images for card mix to the memory card. CARD CHROMA,
CARD ANIMATION, CARD LUMINANCE and CAMERA CHROMA are provided
on the DIGITAL VIDEO SOLUTION DISK.
The Sample images provided on the supplied DIGITAL VIDEO SOLUTION
DISK are intended only for personal use with this camcorder. Do not use
these sample images for other purposes.
Unable to upload the sample images to the disc.
1
Insert the DIGITAL VIDEO SOLUTION DISK to the
computer’s CD-ROM drive.
2
Connect the camcorder to the computer ( 9).
38
Exporting Still Images
Page 39

3
Click the [Set to Camera] tab in the Camera Control window,
and [Uploads images to the camera].
4
Double-click the CD-ROM icon, followed by the [DVC CARD
IMAGE] folder.
The folders [CAMERA CHROMA], [CARD ANIMATION], [CARD CHROMA] and
[CARD LUMINANCE] appear.
E
Exporting Still Images
Macintosh
39
Page 40

5
Open the [CAMERA CHROMA], [CARD ANIMATION], [CARD
CHROMA] or [CARD LUMINANCE] folder, select the image
you wish to copy to the camcorder and click [Open].
6
In the Add image window, click [Add].
40
Exporting Still Images
Page 41

Using Various Functions
Attaching Still Images to E-mail Messages
You can attach selected images to an E-mail message.
1
Select the images you wish to send in the Browser Area.
2
From the [Internet] menu, select [Create Image for Email].
3
Specify the image size and click [Next].
When you select [Send without changing the file size], move on to step 5.
Select this if you do not wish
to reduce the size of the still
image.
Normally, select this option.
E
Using Various Functions
Macintosh
41
Page 42

4
Specify the reduction ratio and image quality and click
[Next].
• [Resize(%)]: Select the reduction ratio relative to the original size of the image.
• [Quality]: Select the image quality. The lower the quality, the rougher the
image becomes, but the size of the file also becomes smaller.
• [Compress]: Use it to check the file size when you actually compress the
image. The file size appears next to “Total Size After Compression”.
42
Using Various Functions
Page 43

5
Select whether you wish to start your e-mail software and
click [Finish].
• If you have selected [Start email application after closing], your e-mail
software starts automatically. Open a new e-mail message and attach the
image. With some types of e-mail software, you can attach images to
e-mail messages simply by dragging them from the Browser Area to the new
message window.
• Click [Preview] to check the changed image.
• The image will be saved to the [Email Images] folder in the explorer view
section.
E
Explorer View Section
You can set the e-mail software to start automatically in step 5. Note that
some e-mail software may not start automatically. For details, please refer to
the Help menu of the OS you are using.
The images in the [Email Images] folder are saved in the following location:
Open the [Users] folder, followed by [User login name], [Library],
[Preferences], [ImageBrowserUserData], and [Mail].
Using Various Functions
Macintosh
43
Page 44

Running a Slide Show
1
From the [View] menu, select [Slide Show Options].
2
Select the slide show settings and click [OK].
• [Auto Play]: Select the interval by sliding the control under [Play Interval] (from
1 to 30 seconds).
• [Control with Mouse or Keypad]: Advances the slide show manually with the
mouse or keyboard.
• [Repeat Continuously]: Runs the slide show in a loop.
• [Hides buttons]: Hides the buttons during the slide show.
• [Transition Effect]: Select the transition effect to be used when moving from
one slide to another. When you select an effect, you can check the effect in
the preview window.
44
3
Select the still images and select [Slide Show] from the
[View] menu.
Click on the lower right of the screen to end the slide show.
Using Various Functions
Page 45

Merging Panoramic Images (PhotoStitch)
You can merge a series of overlapping images into a single, seamless
panorama. PhotoStitch automatically arranges still images recorded with the
camcorder’s Stitch Assist mode in their correct order and orientation, making it
easy to merge them. Please refer to the Camcorder Instruction Manual to learn
how to record in Stitch Assist mode.
The following instruction explains how to merge still images recorded in Stitch
Assist mode with the camcorder.
Still images recorded in Stitch Assist mode with Wide-converter or Tele-
converter attached cannot be merged correctly.
1
Select still images shot in Stitch Assist mode.
To use PhotoStitch, images need to be shot in Stitch Assist mode. To download
images, please refer to Downloading Still Images (ImageBrowser) (11).
E
2
Select [PhotoStitch] from the [Edit] menu.
Using Various Functions
Macintosh
45
Page 46

3
Arrange the order of the still images and click [2.Merge].
Operational instructions are displayed in the upper section of the window.
4
Click [Start].
46
Using Various Functions
Page 47

5
Select [3.Save] and then click [Save].
• Select the destination folder, input the file name and click [Save].
• In the View the Saved Image? window, click [Yes]. The Viewer window opens
and displays the merged image.
• To exit PhotoStitch, from the [PhotoStitch] menu, select [Quit PhotoStitch].
You can record the surroundings in 360 degrees, and stitch them together
later to form a 360-degrees cylinder. (In [1. Selection and Arrangement],
select [Arrange] and [360 Degrees].) By saving this stitched image in
QuickTime VR type, you can then get a virtual view of the surroundings by
manipulating the mouse.
For more details, please refer to the PhotoStitch Help menu.
Printing Still Images (ImageBrowser)
You can select the layout when printing still images.
1
Select the still image(s) you wish to print in the Browser
Window.
E
2
Click [Print] and select [Layout printing] from the displayed
menu.
• The Layout Options window and Print window appear.
• If the Layout Options window does not appear, display it by clicking [LAYOUT
OPTIONS] in the Print window.
Using Various Functions
Macintosh
47
Page 48

Edit the Page Title
Open the [Edit] menu and select
[Edit Header].
Change the Image Size
Drag the border to resize the still
image.
Change the Layout
Drag the still image to change
the layout.
Add Captions to Still Images
Click the still image and then
the [Edit] menu and select
[Edit Caption].
Add Text
Open the [Edit] menu and select
[Add Text].
Click this to rotate the selected
still image.
Click this to reset the layout.
Change the default number of
still images printed per page.
Click this to select a layout type.
48
Click this to display the Print
dialog.
Using Various Functions
Page 49

3
In the Layout Options window, select a layout and click
[Next].
Shows the preview of
the printing images
4
Select a paper size and click [OK].
• The Print window opens, allowing you to change the layout and printing
settings.
• The settings available will vary according to the type of layout selected in step 3.
E
5
Click [PRINT] in the Print window.
The Print dialog appears.
6
Click [Print].
Printing starts.
Using Various Functions
Macintosh
49
Page 50

Adjusting Image Quality and Printing (Exif 2.2 Compliant)
ImageBrowser allows you to print still images with image quality adjustments.
ImageBrowser also supports the Exif 2.2 standard (or Exif Print).
Still images shot with camcorders complying with the Exif 2.2 standard
incorporate shooting settings information, such as the shooting conditions
and scene mode, along with the image data. The Exif Print adjustment
protocol uses this information to correct the image quality more accurately to
reflect the shooting settings.
When printing from ImageBrowser, the image quality adjustment settings are
active for all still images.
1
Click the [ImageBrowser] menu in ImageBrowser and select
[Preferences].
2
In the [Preferences] window, select [Print], set the image
quality settings and click [OK].
See Printing Still Images (ImageBrowser) ( 47) for the next steps.
A check mark must be placed here to
automatically correct the image quality.
Select this option to
automatically correct
images shot with Exif
2.2 compliant
camcorders and
other images.
50
Select this option to
automatically correct
only images shot with
Exif 2.2 compliant
camcorders.
Using Various Functions
Page 51

Adding Sound to a Still Image
To add sound to still images, use the MAC OS recording function. Depending on
the computer, you may need to connect peripherals such as microphones. Check
if your computer settings allow recording.
The sound cannot be played back on the camcorder.
1
In the Browser Area, select a still image and select [Sound]
[Record] from the [File] menu.
The recording window appears.
2
Click and start recording when the [Save] button is
enabled.
E
3
Click [Save] to stop recording.
• appears on the still image.
• The sound file will be copied in AIFF format (extension “.AIF”) to the same
folder as the still image.
• To play back the sound, select an image with a sound icon and select [Sound]
[Play] from the [File] menu.
To remove sound from a still image, select [Sound] [Send to Trash] from
the [File] menu. disappears and the copied sound file will be deleted.
While playing back the sound, select [Sound] [Pause] or [Stop] to control
the status.
Using Various Functions
Macintosh
51
Page 52

Applying DPOF Settings
You can select still images and the number of prints for automatic printing on a
DPOF (Digital Print Order Format)-compliant printer. You can set the DPOF print
settings for the still images on the card also on the camcorder.
DPOF print settings cannot be applied to still images recorded on the disc.
The [Edit Slide/DPOF] window allows print settings on up to 998 still images.
With some camcorders, DPOF print settings are limited to a maximum of 200
still images. In that case, all DPOF print settings on the 201st still image and
onward will be erased.
If 999 or more still images are recorded on a memory card, the [Edit Slide/
DPOF] window may not operate properly. To set the number of prints, reduce
the number of images on a memory card to 998 or less.
1
Click the [Set to Camera] tab and click [Set Slide Show/
DPOF] in the Camera Control window
• When connecting a card reader/writer, click the [Set to Memory Card] tab and
click [Set Slide Show/DPOF].
• The slide show function of the camcorder cannot be used.
52
Using Various Functions
Page 53

2
Click [Print Order(DPOF)] and select a print type from the
drop-down list.
• [Standard Print]: Prints selected still images in the specified number of copies.
Use the arrows next to the boxes to select the number of copies.
• [Index Print], [Both(Standard/Index)] and the option [Titles] of the [Edit] menu
(printing of date and file number) are not supported by the camcorder.
3
Select the still images you wish to print and the number of
copies.
E
Using Various Functions
Macintosh
53
Page 54

4
Click [Save to Camera].
Reviewing and Changing the Settings of the Camcorder
You can adjust the date, time and owner settings of the camcorder. You can also
check the remaining memory card capacity or format the memory card.
1
Click the [Set to Camera] tab and click [Confirms/changes
camera settings] in the Camera Control window.
54
Using Various Functions
Page 55

2
Change the settings of the camcorder and click [OK].
Input a camcorder owner name
here (up to 31 characters).
Set the date and time here.
Check this box to synchronize
the camcorder to the computer’s
date and time settings.
Check the power status here.
Click this to format the memory
card in the camcorder.
Check the remaining disc or
memory card capacity here.
The disc in the camcorder cannot be formatted.
E
Using Various Functions
Macintosh
55
Page 56

Uninstalling the Software
Uninstall the software when you wish to delete it from your computer or when
reinstallation is required to fix corrupted files.
Uninstalling ImageBrowser and PhotoStitch
Move the program’s folder into the Trash to uninstall programs such as
ImageBrowser and PhotoStitch.
If the program folders contain subfolders into which images have been
saved, be careful not to accidentally delete those subfolders.
For more details on how to uninstall ImageBrowser, refer to Read Me.
56
Uninstalling the Software
Page 57

Troubleshooting
Connection
Camcorder is not recognized when connected to the computer.
Î There is no disc or memory card in the camcorder.
Insert a disc or a memory card into the camcorder.
Î The camcorder is not set to the correct mode.
Turn the power switch to PLAY and move the / switch to . Next,
select [DISC] or [CARD] in the SYSTEM SETUP menu.
Î Camcorder is not correctly connected to the computer.
Read Connecting the Camcorder to a Computer ( 9) and check the
connection.
Ensure that you are using the correct cable and that its connectors are in
good shape.
Î If you are experiencing operational problems, detach the USB cable from
the camcorder and computer and terminate the connection. Restart the
computer and the camcorder, and then reconnect the camcorder.
ImageBrowser Operation
Cannot download still images
Î The camcorder is not set to the correct mode.
Turn the power switch to PLAY and move the / switch to . Next,
select [DISC] or [CARD] in the SYSTEM SETUP menu.
Still image files or folders do not appear in ImageBrowser.
Î Still images of folders shown in ImageBrowser and the actual file contents
may be different.
Click the [View] menu and select [Refresh].
E
Troubleshooting
Macintosh
57
Page 58

CANON INC.
U.S.A. –––––––––– Canon U.S.A., Inc.
CANADA
ASIA
–––––––– Canon CANADA Inc.
––––––––––– Canon Hongkong Co., Ltd.
Canon Customer Care Center
Tel (US): 1-800-828-4040
(Mon.-Fri., 9 AM to 8 PM Eastern Time)
Tel (Canada): 1-800-OK-CANON (1-800-652-2666)
19/F., The Metropolis Tower, 10 Metropolis Drive,
Hunghom, Kowloon, Hong Kong
Phone: 852-2170-2828
Fax: 852-2723-9684
The information on this manual is verified as of August 1st, 2005.
DIE-246M © CANON INC. 2005
 Loading...