


 Loading...
PROGRAMMER
INSTRUCTION MANUAL
Please read this manual before using the machine.
Please keep this manual within easy reach for quick reference.
BAS-761
Thank you very much for purchasing the Brother Industrial Sewing Machine.
Please read this "Programmer Instruction Manual" and the separate volume "Automatic Pocket Setter Instruction Manual" carefully before using the machine.
Operation of this industrial sewing machine is usually carried out in front of moving parts such as the needle and the needle thread take-up. These parts may cause personal injury. Please follow the operational and safety instructions by the experts/instructors and use this machine correctly.
Programmer |
1 |

Contents |
|
Contents |
|
Chapter 1 Initial Setup |
|
Connection .............................................................................................................................. |
6 |
Handling the programmer ..................................................................................................... |
7 |
After use ............................................................................................................................................. |
7 |
Turning power ON/OFF .......................................................................................................... |
8 |
Turning power ON .............................................................................................................................. |
8 |
Turning power OFF ............................................................................................................................ |
9 |
Handling of floppy disk ........................................................................................................ |
10 |
Protecting data in floppy disks ......................................................................................................... |
11 |
Setting a Floppy Disk to the Floppy Disk Drive ................................................................................ |
11 |
Contents ................................................................................................................................ |
12 |
Notes for programming ....................................................................................................... |
13 |
Chapter 2 Programming with Help Function |
|
Please read before programming ....................................................................................... |
16 |
Panel description and usage ............................................................................................................ |
16 |
Display screen .................................................................................................................................. |
17 |
Programming flowchart .................................................................................................................... |
18 |
Description of icons ............................................................................................................. |
20 |
Programming ............................................................................................................................. |
20 |
Displaying a pattern image ........................................................................................................ |
20 |
Checking the program setting and setting attribute ................................................................... |
20 |
Editing data ................................................................................................................................ |
21 |
Deleting data .............................................................................................................................. |
21 |
Programming example ......................................................................................................... |
22 |
Programming for each stitch ...................................................................................................... |
22 |
Lines .......................................................................................................................................... |
24 |
Curve ......................................................................................................................................... |
26 |
Double stitch .............................................................................................................................. |
29 |
Feed ........................................................................................................................................... |
31 |
Needle racking ........................................................................................................................... |
34 |
Example of modified program ............................................................................................. |
35 |
Resizing pattern ......................................................................................................................... |
35 |
Changing partially ...................................................................................................................... |
37 |
Deleting the first stitch ................................................................................................................ |
40 |
Changing the first stitch position ................................................................................................ |
42 |
Adding sewing point before the first stitch ................................................................................. |
45 |
Adding shunting point before the first stitch ............................................................................... |
48 |
Moving the shunting point .......................................................................................................... |
51 |
Deleting the shunting point ........................................................................................................ |
53 |
Moving the entire pattern in parallel ........................................................................................... |
55 |
Deleting a part of the program during programming .................................................................. |
57 |
Programming .................................................................................................................. |
58 |
Creating a line ............................................................................................................................ |
58 |
Creating tacking data ................................................................................................................. |
58 |
Creating a curve ........................................................................................................................ |
59 |
Carrying out double stitch .......................................................................................................... |
60 |
Creating needle drop data ......................................................................................................... |
62 |
Creating feed data ..................................................................................................................... |
62 |
2 |
Programmer |

|
|
Contents |
Editing the current data .............................................................................................................. |
|
63 |
Ending programming .................................................................................................................. |
|
65 |
Displaying the data image during programming ........................................................................ |
66 |
|
Checking the program setting and setting attribute ................................................................... |
66 |
|
Deleting a part of data ................................................................................................................ |
|
67 |
Displaying a pattern image ............................................................................................ |
|
68 |
Checking the program setting and |
setting attribute ............................................. |
69 |
Checking each stitch ........................................................................................................................ |
|
70 |
Checking a series of stitches automatically ..................................................................................... |
|
70 |
Editing program .............................................................................................................. |
|
72 |
Deleting data ................................................................................................................... |
|
76 |
Chapter 3 Programming with Command Function |
|
|
Please read before programming ....................................................................................... |
|
78 |
Panel description and usage ............................................................................................................ |
|
78 |
Display screen .................................................................................................................................. |
|
79 |
Programming flowchart .................................................................................................................... |
|
79 |
Description of commands ................................................................................................... |
|
81 |
Moving needle point ......................................................................................................................... |
|
81 |
Deleting data .................................................................................................................................... |
|
81 |
Ending programming ........................................................................................................................ |
|
81 |
Creating program ............................................................................................................................. |
|
81 |
Editing data ...................................................................................................................................... |
|
82 |
Setting attribute ................................................................................................................................ |
|
82 |
Other operations .............................................................................................................................. |
|
83 |
Programming example ......................................................................................................... |
|
84 |
Programming for each stitch ............................................................................................................ |
|
84 |
Lines ................................................................................................................................................. |
|
85 |
Curve ................................................................................................................................................ |
|
86 |
Double stitch .................................................................................................................................... |
|
88 |
Feed ................................................................................................................................................. |
|
89 |
Needle racking ................................................................................................................................. |
|
91 |
Example of modified program ............................................................................................. |
|
92 |
Resizing pattern ............................................................................................................................... |
|
92 |
Changing partially ............................................................................................................................ |
|
93 |
Deleting the first stitch ...................................................................................................................... |
|
95 |
Changing the first stitch position ...................................................................................................... |
|
96 |
Adding sewing point before the first stitch ........................................................................................ |
|
97 |
Adding shunting point before the first stitch ..................................................................................... |
|
99 |
Moving the shunting point .............................................................................................................. |
|
101 |
Deleting the shunting point ............................................................................................................. |
|
102 |
Moving the entire pattern in parallel ............................................................................................... |
|
103 |
Deleting a part of the program during programming ...................................................................... |
104 |
|
Programming ...................................................................................................................... |
|
105 |
Creating a line ................................................................................................................................ |
|
105 |
Creating a curve ............................................................................................................................. |
|
106 |
Creating double stitch .................................................................................................................... |
|
107 |
Creating feed data .......................................................................................................................... |
|
108 |
Creating tacking data ..................................................................................................................... |
|
109 |
Ending programming ...................................................................................................................... |
|
110 |
Checking the program setting and |
setting attribute ........................................... |
111 |
Checking attributes ........................................................................................................................ |
|
112 |
Setting neddle tacking in a unit of one stitch .................................................................................. |
|
113 |
Setting two step tension output ...................................................................................................... |
|
113 |
Setting the option output ................................................................................................................ |
|
114 |
Programmer |
3 |

Contents
Setting two row switch .................................................................................................................... |
114 |
Low-speed sewing ......................................................................................................................... |
115 |
Editing data ......................................................................................................................... |
116 |
Changing stitch length of the program ........................................................................................... |
116 |
Offset .............................................................................................................................................. |
117 |
Rotating a pattern clockwise (counterclockwise) ........................................................................... |
118 |
Resizing ......................................................................................................................................... |
119 |
Moving in parallel ........................................................................................................................... |
120 |
Displaying image ................................................................................................................ |
122 |
Deleting a data .................................................................................................................... |
123 |
Deleting a part of data .................................................................................................................... |
123 |
Deleting program data .................................................................................................................... |
123 |
Chaper 4 Reading / Writing Data |
|
Reading data ................................................................................................................. |
126 |
Using the operation panel of the main body ................................................................................... |
128 |
Writing data ................................................................................................................... |
129 |
Using the operation panel of the main body ................................................................................... |
131 |
Deleting data in a floppy disk ...................................................................................... |
132 |
Formatting a floppy disk .............................................................................................. |
134 |
Chapter 5 Practical Programming Examples |
|
Programming examples ..................................................................................................... |
136 |
Example 1 (Help function) ................................................................................................. |
137 |
Programming procedure ................................................................................................................ |
137 |
Operating procedure ...................................................................................................................... |
138 |
Example 1 (Command function) ....................................................................................... |
141 |
Programming procedure ................................................................................................................ |
141 |
Operating procedure ...................................................................................................................... |
142 |
Example 2 (Help function) ................................................................................................. |
144 |
Programming procedure ................................................................................................................ |
144 |
Operating procedure ...................................................................................................................... |
145 |
Example 2 (Command function) ....................................................................................... |
150 |
Programming procedure ................................................................................................................ |
150 |
Operating procedure ...................................................................................................................... |
151 |
4 |
Programmer |
Chapter 1
Initial Setup

Chapter 1 Initial Setup
Connection
Connection of the programmer cable to the machine is described here.
Check that the machine power is OFF before connecting the cable.
1.Connect the cable to the connector on the right side of the floppy disk drive.
6 |
Programmer |
Chapter 1 Initial Setup
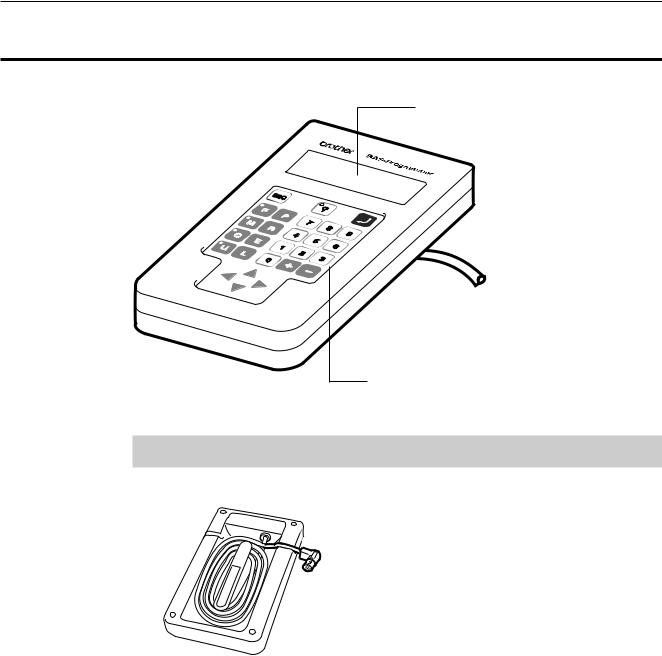
Handling the programmer
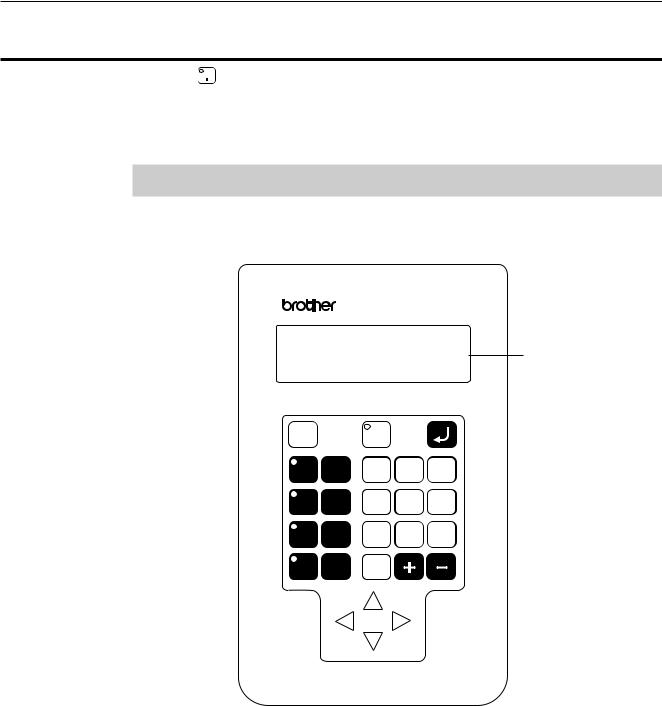
Display panel
Displays messages during programming.
Operation panel
Press here for operation.
After use
Wind the cable for storage as shown in the figure.
Programmer |
7 |
Chapter 1 Initial Setup
Turning power ON/OFF
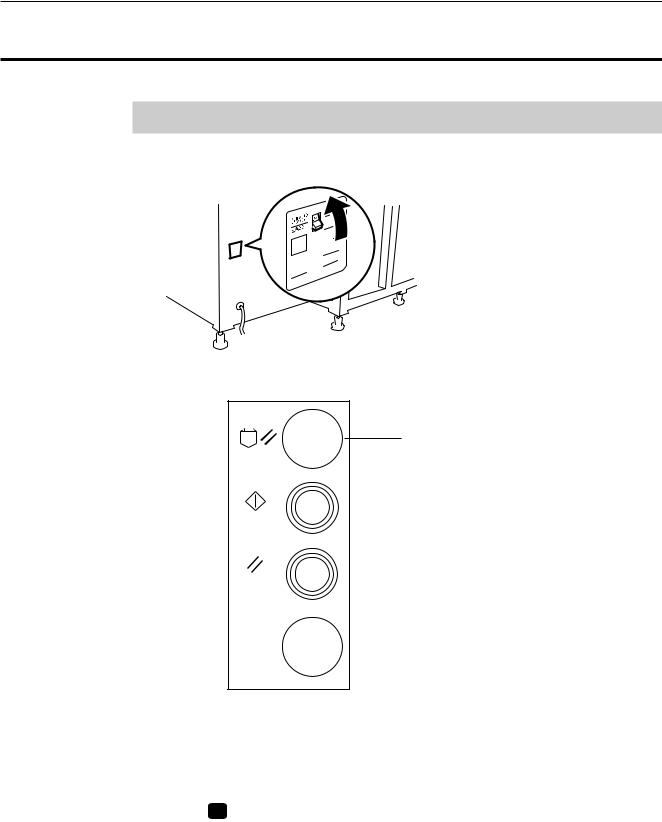
Turning power ON
1.Switch ON the machine.
2.Press the reset switch of the folding machine and conduct positioning.
Reset switch
FOLDER RESET
S T A R T
R E S E T
EMERGENCY
STOP
3.Set the pattern if it is prepared.
Fix the pattern sheet with adhesive tape on the feed plate to prevent displacement.
Put cloth below the work clamp if there is no pattern.
4.Press P on the programmer.
The work clamp comes down.
8 |
Programmer |
Chapter 1 Initial Setup
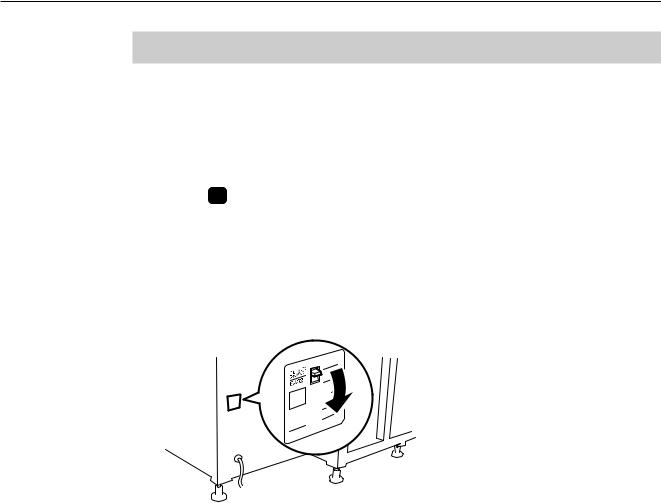
Turning power OFF
1.Write the programmer data into a floppy disk.
Refer to "Writing data" (page 129.).
If the data is not need to be saved, delete it.
Refer to "Deleting program data" (page 123.).
2.Press P on the programmer.
The panel turns off.
3.Remove the pattern sheet.
4.Switch OFF the machine.
Programmer |
9 |

Chapter 1 Initial Setup
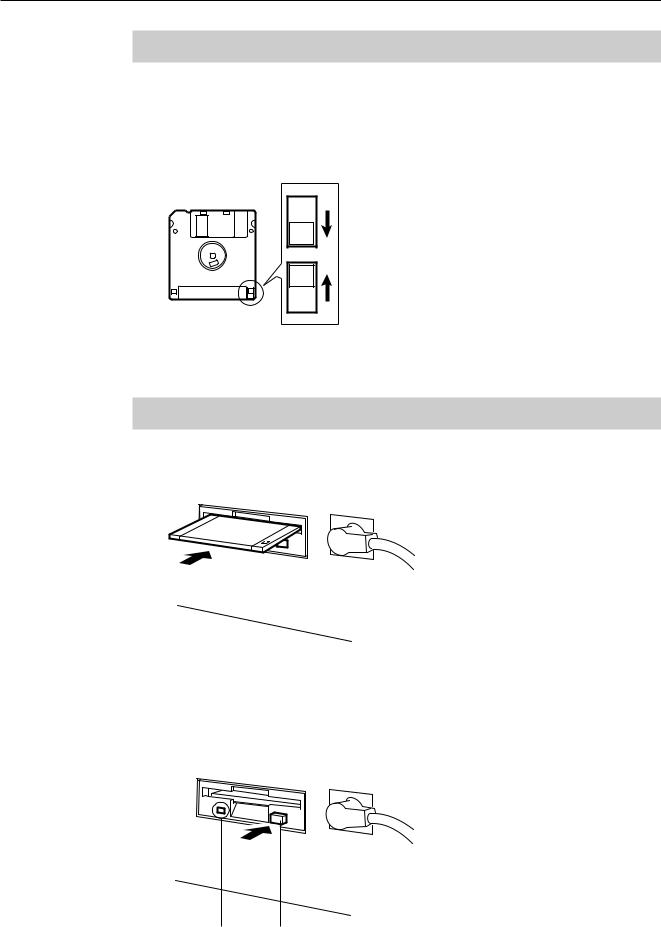
Handling of floppy disk
Do not force open the shutter for direct contact with the magnetic area.
Do not bring disks near magnetic matters such as magnetic screwdriver or the back side of the programmer.
Do not store floppy disks in an extremely high or low ambient temperature.
Do not use floppy disks under high humidity.
Do not use or store floppy disks in a dusty place.
Do not store floppy disks under direct sunlight.
Do not bend the disk. Do not put things on the disk.
Avoid contact with solvent or drink.
Do not remove the disk out of the drive during the access lamp is lit.
10 |
Programmer |
Chapter 1 Initial Setup
Protecting data in floppy disks
Write-protection is available for a floppy disk to prevent undesired data deletion.
A write-protected disk is read-only. It is recommended to provide write-protection for disks which contain important data.
To do so, slide the write-protect notch to open the slot as shown below.
Slide the notch in this direction to prevent data loss or overwriting.
Slide the notch in this direction to write data.
Setting a Floppy Disk to the Floppy Disk Drive
Insert a floppy disk straight into the slot. The label side of the disk must face the front.
Press the eject switch to remove the disk out of the drive.
Do not press the eject switch during the access lamp is lit. This may lead to data corruption.
Access lamp Eject switch
Programmer |
11 |

Chapter 1 Initial Setup
Contents
This manual consists of the following chapters.
Chapter 1 Preparations of operation
Describes the basic precautions.
Chapter 2 Programming with Help Function
Describes the procedure to create programs using icons.
It is recommended for persons
who are used to icon input.
who use this machine for the first time. who sometimes create programs.
Chapter 3 Programming with Command Function
Describes the procedure to create programs using command functions.
It is recommended for persons
who is specially responsible for program creation. who have created programs for BAS-760 series.
Chapter 4 Reading/Writing Data
Describes the procedure to read from/write into floppy disks.
Chapter 5 Practical programming examples
Two examples of frequently created programs are described.
12 |
Programmer |

Chapter 1 Initial Setup
Notes for programming
Pattern sheet
Use thin plotting paper or prepare copies of pattern sheet.
The pattern sheet is designed in the original scale.
Stitch length
Setting range between 0.3 and 6.0 mm is available.
As for the needle tacking data, values 0.1 to 1.0 mm are available.
Stitch count
Maximum available count is 1,000.
Selectable program numbers
Selectable program numbers vary depending on the clamps used when writing data.
When using a retractable clamp |
00 ~ 31 |
|
|
When using other clamps |
32 ~ 63 |
|
|
Attributes of data when reading the data of BAS760
Attributes of data are as follows when reading the data of BAS760.
Needle tacking |
Reflected |
|
|
Two step tension |
Reflected |
|
|
Two row switch |
Reflected(*) |
|
|
Slow conversion |
Ignored |
|
|
(*)Two step switch data is reflected in the normal position when reading the data complying with the specifications for BAS760 retractable clamp.
As for other clamps, slow conversion instructions to 2500 rpm or 3000 rpm are reflected as the two row switch data. Turn the setting of two row switch to off.
Available types of floppy disk
Data type |
Stitch count for memory |
Data resolution |
Disk |
Format |
Read |
Write |
|
|
|
|
|
|
|
|
|
BAS761 Data |
1000 stitches/pattern |
0.05 mm/pulse |
2HD |
DOS/V |
Available |
Available |
|
1.44 MB |
|||||||
|
|
|
|
|
|
||
|
|
|
|
|
|
|
|
BAS760 Data |
1000 stitches/pattern |
0.1 mm/pulse |
2DD |
Formatted |
Available |
Not |
|
automatically. |
available |
||||||
|
|
|
|
|
|||
|
|
|
|
|
|
|
Programmer |
13 |
Chapter 1 Initial Setup
Location to input the end code
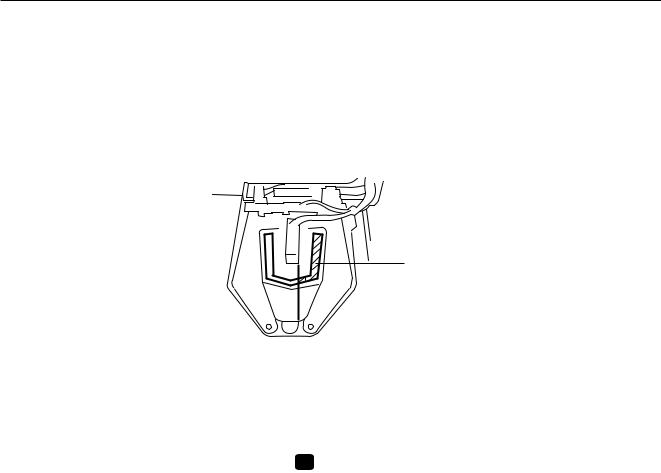
Input the end code in the shaded area in the drawing because there is an air cylinder in the center when using the retractable clamp. Inputting the code in other locations will damage the machine because the top part and the cylinder come into contact with each other.
Input the end code in this area.
Inputting numerical values
Input numerical values such as commands or the number of stitch from the programming instrument so that the numerical values become 3 digits. The values can be input
again before pressing  .
.
14 |
Programmer |
Chapter 2 Programming with Help Function
Chapter 2 Programming with Help Function
Please read before programming
When the lamp on the button ? is lit, small pictures appear on the display. These pictures represent different functions. They are called 'icons'. This chapter describes the method of programming with icons.
Panel description and usage
The following panel keys are used in Help mode.
BAS-Programmer
Press this key to start/end a program.
Refer to "Turning power OFF" (Page 9).
Press this key to return to the previous step or when a setting is canceled.
Press this key to return to the corresponding submenu.
This key may be used similarly as  .
.
|
|
|
|
|
|
|
|
|
|
|
|
ESC |
|
|
? |
|
|
|
|
|
|
|
|
|
|
|
|
|
|
|||
|
|
|
|
|
|
|
|
|
|
|
|
F |
P |
7 |
8 |
9 |
|
|
|
||
|
M |
R |
4 |
5 |
6 |
|
|
|
||
|
|
|||||||||
|
C |
E |
1 |
2 |
3 |
|
|
|
||
|
|
|
|
|||||||
|
LI |
L |
0 |
|
|
|
|
|
||
|
|
|
|
|
|
|||||
|
|
|
|
|
||||||
|
|
|
|
|
|
|
|
|
|
|
|
|
|
|
|
|
|
|
|
|
|
|
|
|
|
|
|
|
|
|
|
|
|
|
|
|
|
|
|
|
|
|
|
|
|
|
|
|
|
|
|
|
|
|
Messages and program description are displayed here.
Press this key and turn on the key lamp for programming with the help function.
Press this key to check setting.
Press these keys to input numerical values.
Press these keys to go to the following steps or to select ON/OFFF setting.
Press these keys to go to the following steps or to move the needle.
16 |
Programmer |
Chapter 2 Programming with Help Function
Display screen
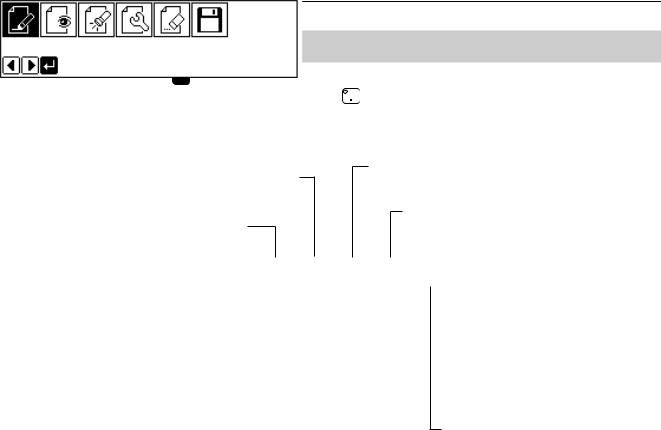
When P is pressed, the following screen is displayed.
If the screen is not displayed, press ? .
Displays the image of program data. (Refer to page 68.)
Creates program data. (Refer to page 58.)
Checks the program data or changes the setting.
(Refer to page 69.)
Edits the program data. (Refer to page 72.)
|
|
|
|
Reads/writes data in a floppy disk. |
|
|
|
|
|
||
|
|
|
|
||
Displays the available keys. |
|||||
|
(Refer to page 125.) |
||||
|
|
|
|
||
Deletes the created/edited program data.
Programmer |
17 |
Chapter 2 Programming with Help Function
Programming flowchart
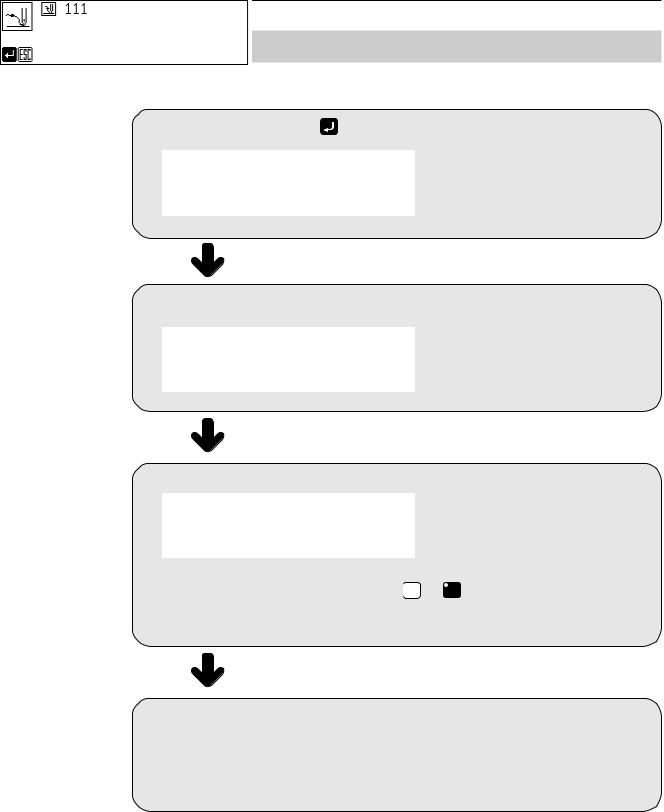
Programming
Select  , then press .
Position the sewing start position, then press  .
.
Select an icon for programming. (Refer to page 58.)
Combine straight lines, curves and other figures to make patterns on the pattern sheet. After completing each pattern, press ESC or C key to return to the submenu. The data is available until deletion.
The program outline may be checked or corrected during editing.
Input end code. (Refer to page 65.)
18 |
|
Programmer |

Chapter 2 Programming with Help Function
Editing program (Refer to page 72.)
Select  , then press
  .
.
Select an icon for editing.
Press  after editing.
Checking and setting (Refer to page 69.)
Select  , then press
  .
.
Move to the needle position for setting.
Press  and carry out setting.
Programmer |
19 |
Chapter 2 Programming with Help Function
Description of icons
Programming
Creating a line
Creating needle tacking data
Creating a curve
Carrying out double stitch
Creating double stitch data in the reverse direction to the right side of the sewing path
Creating needle drop data
Creating feed data
Editing the current data
Moving a pattern in parallel by feeding
Moving a pattern in parallel by sewing with the specified pitch
Moving a pattern in parallel
Offsetting double stitch data to the left side of the sewing path
Offsetting double stitch data to the right side of the sewing path
Ending programming
Displaying the data image during editing
Checking the program setting and setting attribute
Deleting a part of the program
Displaying a pattern image
Checking the program setting and setting attribute
20 |
Programmer |
Chapter 2 Programming with Help Function
Editing data
Moving a pattern in parallel
Changing a pitch
Resizing a pattern
Rotating a pattern clockwise
Rotating a pattern counterclockwise
Changing the X origin
Deleting data
Programmer |
21 |
Chapter 2 Programming with Help Function
Programming example
Frequently used programming method is explained here. Refer to "Programming" (page 58) for function
and operation of each icon.
Programming for each stitch
Program each stitch according to the pattern. The example in the left is used for explanation.
1 Programming
1. Press P .
The work clamp comes down and the programmer screen is
displayed. |
|
|
|
2. Select |
with |
, then press |
. |
3. Move the needle with . Press  when the needle point is at point A of the pattern.
The first stitch (point A) is programmed.
4. Select |
with |
, then press |
. |
5. Move the needle with . Press when the needle point is at point B of the pattern.
6.Repeat step 5 and create the program to point C.
22 |
Programmer |
Chapter 2 Programming with Help Function
7. When point C is programmed, press ESC .
2 Inputting the end code
1. Select |
with |
, then press |
. |
2. Press  .
.
The needle returns to the first stitch(point A).
3. Press ESC .
Theneedlereturnstothestandbyposition.
3 Saving
Refer to "Writing data"(page 129) for detailed operation.
1. Select |
with |
, then press |
. |
2. Select |
with |
, then press |
. |
3.Input the program number, then press  .
.
4.Press ESC .
4 Ending program
1. Press P .
Programmer |
23 |

Chapter 2 Programming with Help Function
Lines
The pattern with lines is programmed.
The example in the left is used for explanation of programming.
1 Programming
1. Press P .
The work clamp comes down and the programmer screen is displayed.
2. Select  with , then press
  .
.
3. Move the needle with . Press when the needle point is at point A of the pattern.
The first stitch (point A) is programmed.
4. Select |
with |
, then press |
. |
5. Input the stitch length, then press  .
.
3.0 mm is input in the example.
Input 030 to make the stitch length to 3.0 mm.
6. Move the needle with . Press when the needle point is at point B of the pattern.
7.Repeat step 6 and create the program to point E.
8.When point E is programmed, press ESC twice.
24 |
Programmer |
Chapter 2 Programming with Help Function
2 Inputting the end code
1. Select |
with |
, then press |
. |
2. Press  .
.
The needle returns to the first stitch(point A).
3. Press ESC .
Theneedlereturnstothestandbyposition.
3 Saving
Refer to "Writing data"(page 129) for detailed operation.
1. Select |
with |
, then press |
. |
2. Select |
with |
, then press |
. |
3.Input the program number, then press  .
.
4.Press ESC .
4 Ending program
1. Press P .
Programmer |
25 |
Chapter 2 Programming with Help Function
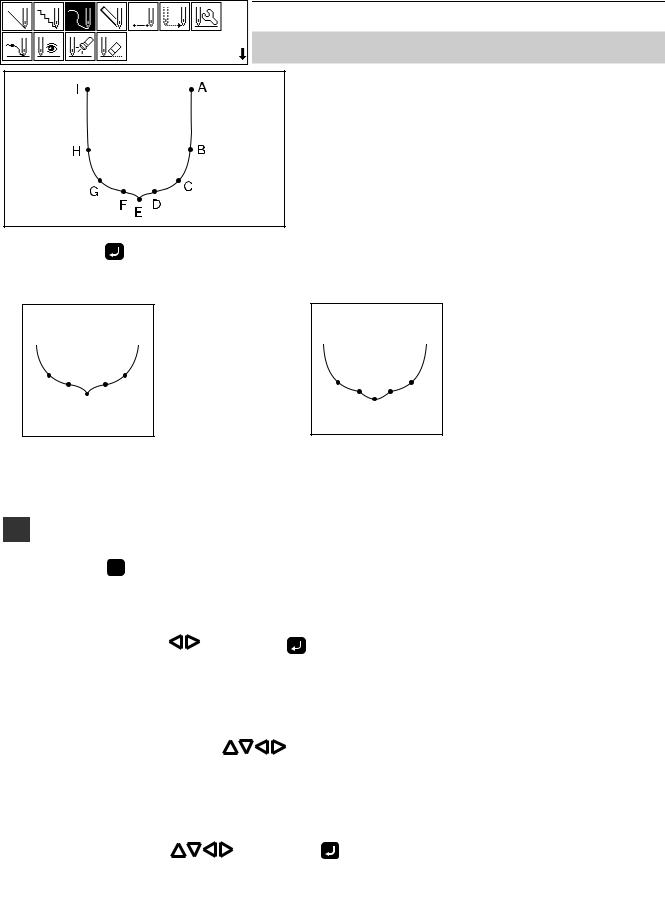
Curve
The pattern with curves is programmed.
The example in the left is used for explanation of programming at the curve and the corner.
Be sure to press twice for a split at corner point E. If a split is not made, the corner will be round.
When a split is made When a split is not made
More intermediate points such as points B, C, D, F, G or H will create smooth curves.
1 Programming
1. Press P .
The work clamp comes down and the programmer screen is
displayed. |
|
|
|
2. Select |
with |
, then press |
. |
3. Move the needle with . Press when the needle point is at point A of the pattern.
The first stitch (point A) is programmed.
4. Select |
with |
, then press |
. |
26 |
Programmer |
Chapter 2 Programming with Help Function
5. Input the stitch length, then press  .
.
3.0 mm is input in the example.
Input 030 to make the stitch length to 3.0 mm.
6. Move the needle with . Press  when the needle point is at point B of the pattern.
7.Repeat step 6 and create the program to point E.
8.When point E is programmed, press 
again.
Point E becomes a corner and is programmed. To change the stitch length, press ESC for resetting.
9.Create the program to point I.
10.When point I is programmed, press again.
11.Press ESC twice.
2 Inputting the end code
1. Select |
with |
, then press |
. |
2. Press  .
.
Press and the needle returns to the first stitch(point A).
3. Press ESC .
Theneedlereturnstothestandbyposition.
Programmer |
27 |
Chapter 2 Programming with Help Function
3 Saving
Refer to "Writing data"(page 129) for detailed operation.
1. Select |
with |
, then press |
. |
2. Select |
with |
, then press |
. |
3.Input the program number, then press  .
.
4.Press ESC .
4 Ending program
1. Press P .
28 |
Programmer |
Chapter 2 Programming with Help Function
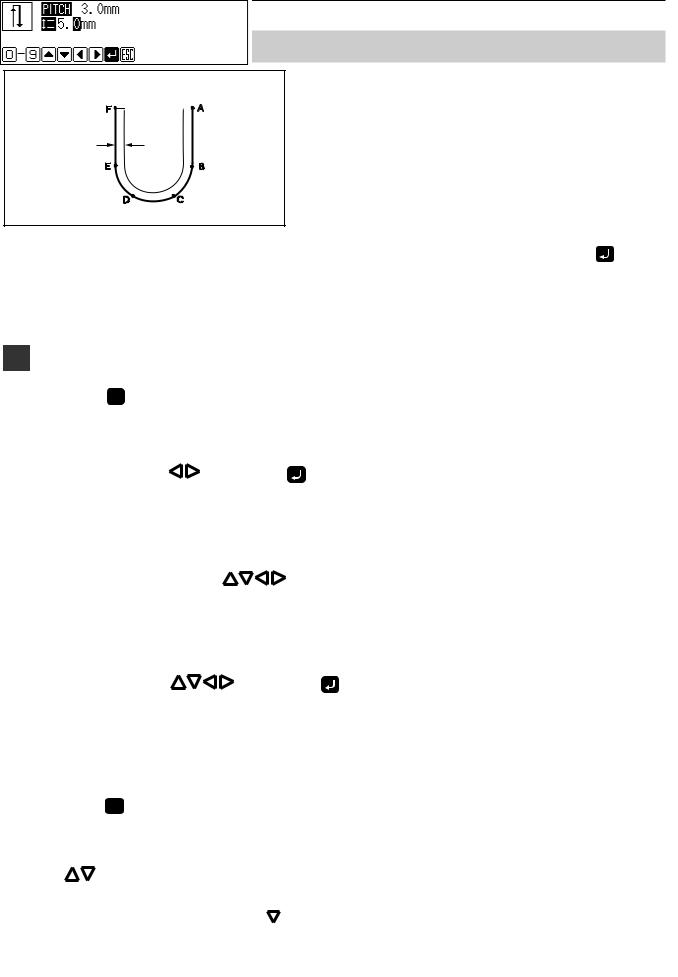
Double stitch
Sewing
width
A double stitch is programmed to make two lines with a constant width.
The example in the left is used for explanation of a double stitch to the right of sewing direction.
When the line changes from straight to curve or curve to straight as in points B or E, be sure to press |
twice to |
make a split.
More intermediate points such as points C or D will create smooth curves.
1 Programming
1. Press P .
The work clamp comes down and the programmer screen is
displayed. |
|
|
|
2. Select |
with |
, then press |
. |
3. Move the needle with . Press  when the needle point is at point A of the pattern.
The first stitch (point A) is programmed.
4. Select |
with |
, then press |
. |
5.Input the stitch length of the double stitch. Press  .
.
3.0 mm is input in the example.
Input 030 to make the stitch length to 3.0 mm.
To switch input between the stitch length and the width, use
.
6. Select the stitch length with |
, then input |
it. |
|
5.0 mm is input in the example.
Input 050 to make the stitch length to 5.0 mm.
Programmer |
29 |
Loading...