

Page 1
Basic User’s Guide
DCP-9020CDW
Version 0
UK/IRE
Page 2

If you need to contact customer service
Complete the following information for future
reference:
Model Number:
Serial Number:
DCP-9020CDW
1
Date of Purchase:
Place of Pur chase:
1
The serial number is on the back of the unit. Retain
this User’s Guide with your sales receipt as a
permanent record of your purchase, in the event of
theft, fire or warranty service.
Register your product online at
http://www.brother.com/registration/
© 2012 Brother Industries, Ltd. All rights reserved.
Page 3

User’s Guides and where do I find them?
Which Gui de? What’s in it? Where is it?
Product Safety
Guide
Quick Setup Guide Follow the instructions for setting up your
Basic User's Guide Learn the basic Copy and Scan operations
Advanced User's
Guide
Software User's
Guide
Network User's
Guide
Read this Guid e fir st . R e ad th e Sa fety
Instruct ions before you set up you r machine.
See this Guide for trademarks and legal
limitations.
machine and installing the drivers and
software for the operating system and
connection ty pe you are using.
and how to replace consu ma bles. See
troubleshooting tips.
Learn more advanced operations: Copy,
security features, printing rep ort s and
performing r outine maintenance.
Follow these instructions for Printi ng,
Scanning, Network Scanning, Remote
Setup and using the Brother ControlCenter
utility.
This Guide provi des useful information
about wired and wireless network settings
and security settings using the Brother
machine. You can also find supported
protocol in for m ation for your machine and
detailed troubleshooting tips.
Printed / In thebox
Printed / In the box
PDF fil e / CD-RO M / In the box
PDF fil e / CD-RO M / In the box
HTML file / CD-ROM / In the box
PDF fil e / CD-RO M / In the box
Wi-Fi Direct™ Guide This Guide provides details on how to
configure and use your Brother m achine for
wireless printing directly from a mobile
device supporting the Wi-Fi Direct™
standard.
Google Cloud Print
Guide
Mobile Print/Scan
Guide for Brother
iPrint&Scan
Web Connect Guide This Guide provides details about how to
This Guide provides details on how to
configure your Bro ther mach ine to a Googl e
account and use Goog le Cl oud Pri nt
services for pri nting over the Internet .
This Guide provi des useful information
about printing from your mobile device and
scanning f rom y our Br other machi ne to your
mobile device when connected on a Wi-Fi
network.
configure and use your Br other machine to
scan, load and view images and files on
certain web sites that provi de thes e se rvices .
PDF fil e / Broth e r Solu tions
1
Center
PDF fil e / Broth e r Solu tions
1
Center
PDF fil e / Broth e r Solu tions
1
Center
PDF fil e / Broth e r Solu tions
1
Center
i
Page 4

Which Guide? What’s in it? Where is it?
AirPrint Guide This Guide provides information for using
AirPrint to print from OS X v10.7.x, 10. 8.x
and your iPhone, iPod touch, iPad, or other
iOS device to y our Brother machine without
installing a pri nter driver.
1
Visit us at http://solutions.brother.com/.
PDF file / Brother Solutions
1
Center
ii
Page 5

Table of Contents
(Basic User’s Guide)
1 General information 1
Using the documenta tion..... .................................................. ......... .......... ......... ....1
Symbols and conventions used in the documentation ....................................1
Accessing Brother Utilities (Windows
Accessing the Advanced User’s Guide, Software User’s Guide and
Network User’s Guide .........................................................................................3
Viewing Documentation........... ......... ................................. .......... ......... .......... .3
How to access the User’s Guides for Advanced Feat ures ......... ......... .......... ........5
Accessing Brother Support (Windows
Accessing Brother Support (Macintosh)................................................................6
Control panel overview..........................................................................................8
Touchscre en LCD............................................................................. ......... ....10
Setting the Ready screen ..............................................................................13
Basic Operati o n s........... .......... ......... ................. ......... .......... ......... ................14
Shortcut Settings.................................................................................................15
Adding Copy Shortcuts....... ................................. .......... ......... .......... .............15
Adding Scan Shortcuts............................ .......... ......... .......... .........................15
Adding Web Connect Shortcuts ....................................................................16
Changing Shortcuts....................................................................................... 17
Editing Shortcut Names.................................................................................18
Deleting Sho r tcu ts ........................................................... ......... .......... ......... ..18
Recalling Shortcuts........................................................................................18
Volume settings...................................................................................................19
Beeper volume .............................................................................................. 19
®
8)...... .......... ..............................................2
®
)................................................................6
2 Loading paper 20
Loading paper and print media............................................................................20
Loading paper in the paper tray.....................................................................20
Loading paper in the manual feed slot ..........................................................22
Unscannable and unprintable areas..............................................................26
Paper settings......................................................................................................27
Paper Size.....................................................................................................27
Paper Type....................................................................................................27
Acceptable paper and other print media ..............................................................28
Recommended paper and print media ..........................................................28
Type and size of paper................ ..................................................................28
Handling and using special paper .................................................................30
3 Loading documents 33
How to load documents.......................................................................................33
Using the automatic document feeder (ADF) ................................................33
Using the scanner g lass............ ................. ......... .......... ......... .......................34
iii
Page 6

4 Making copies 35
How to copy......................................................................................................... 35
Stop copying..................................................................................................35
Copy preset settings......................................................................................35
Copy Options.................................................................................................36
5 How to print fro m a comp ute r 37
Printing a document.............................................................................................37
6 How to scan to a computer 38
Before scanning...................................................................................................38
Scanning a document as a PDF file using ControlCenter4 (Windows
How to scan a document as a PDF file usi n g the Tou ch scr e e n............ ......... .....41
®
) .............39
A Routine maintenance 43
Replacing th e cons u mab le items................ ................. ......... .......... ......... ............43
Replacing the toner cartridges. ......................................................................47
Replacing the drum units...............................................................................54
Replacing the belt unit...................................................................................60
Replacing the waste toner box ......................................................................64
Cleaning and Checking the machine...................................................................69
Cleaning the outside of the machine.............................................................70
Cleaning the LED heads . ...............................................................................71
Cleaning the scanner glass ...........................................................................72
Cleaning th e cor o n a wi re s........ ................. ......... .......... ......... ........................73
Cleaning the drum unit .................................................................................. 76
Cleaning th e pape r p ick-up rollers........... ......................................................82
Calibration .....................................................................................................83
Auto Registration...........................................................................................84
Frequency (Co l ourCorrection)........ .......... ................. ......... ......... .......... .......84
iv
Page 7

B Troubleshooting 85
Identifying your problem ......................................................................................85
Error and maintenance messages........................................... ....... ............ ....... ..86
Document Jams................................................................................................... 92
Document is jammed in th e top of the ADF uni t....... ......... .......... ......... .........92
Document is jammed under the document cover..........................................92
Removing small documents jammed in the ADF...........................................93
Document is jammed at the output tray ......................................................... 93
Paper Jams.......................................................................................................... 94
Paper is jammed in the manual feed slot ......................................................94
Paper is jammed in the paper tray.................................................................94
Paper is jammed at the output paper tray .....................................................95
Paper is jammed at the back of the machine ................................................96
Paper is jammed inside the machine.............................................................98
Paper is jammed underneath the paper tray ...............................................101
If you are having difficulty with your machine....................................................103
Improving the print quality..................................................................................108
Machine Information............ .......... ......... .......... ................ .......... ......... .......... ....118
Checking the Serial Number........................................................................118
Checking the Firmware Version ..................................................................118
Reset functio n s.......... ......... ......... .......... ................................. .......... ......... ..119
How to reset the machin e........ ......... .......... ......... ................. ......... .......... ....119
C Settings and features tables 120
Using the Settings Tables..................................................................................120
Settings Tables......................................................................................... .........121
Features Tabl e s............... ................................. ......... .......... ......... .....................136
Entering text ......................................................................................................148
D Specifications 149
General..............................................................................................................149
Document Size..................................................................................................151
Print media ................................................. ......... .......... ......... ............................152
Copy..................................................................................................................153
Scanner .............................................................................................................154
Printer................................................................................................................ 155
Interfaces...........................................................................................................156
Network..............................................................................................................157
Computer requirements.....................................................................................158
Consumable items .............................................................................................159
E Index 160
v
Page 8

Table of Contents
(Advanced User's Guide)
You can view the Advanced User's Guide on the CD-ROM.
The Advanced User's Gui de explains the following feat ures and operations.
1 General Setup
Memory storage
Automatic Daylight Saving Time
Ecology features
Touchscreen
2 Security features
Secure Function Lock 2.0
Setting Lock
3 Printing reports
Reports
4 Making copies
Copy settings
A Routine maintenance
Checking the machine
Replacing periodic maintenance
parts
Packing and shipping the machine
B Glossary
CIndex
vi
Page 9

1
1
General informati on 1
Using the documentation
Thank you for buying a Brother machine!
Reading the documentation will help you
make the most of your machine.
Symbo ls an d con v en tio ns used in the do cu men tat io n 1
The following symbols and conventions are
used throughout the documentation.
WARNING
WARNING indicates a potentially hazardous
situation which, if not avoided, could result in
death or serious injuries.
IMPORTANT
IMPORTANT indicates a potentially
hazardous situation which, if not avoided,
may result in damage to property or loss of
product functionality.
Bold Bold style identifies the
1
Italics Italicized style emphasizes an
Courier
New
Follow all warnings and instructions marked
on the product.
numerical pad numbers of the
Touchpanel or on the computer
screen.
important point or refers you to
a related topic.
Courier New font identifies the
messages shown on the
Touchscreen of the machine.
NOTE
Notes tell you how you should respond to a
situation that may arise or give tips about how
the current operation works with other
features.
Electrical Hazard icons alert you to a
possible electrical shock.
Fire Hazard icons alert you to the
possibility of fire.
Hot Surface icons warn you not to
touch machine parts that are hot.
Prohibition icons indicate actions
that must not be performed.
1
Page 10
Chapter 1
Accessing Brother Utilities (Windows® 8) 1
If you are using a computer and tablet running Windows® 8, you can make your selections either
by tapping the screen or by clicking with your mouse.
After the printer driver is installed, appears on both the Start screen and the desktop.
a Tap or click Brother Utilities either on the Start screen or the desktop.
b Select your machine from the drop down list.
c Choose the function you want to use.
2
Page 11

General information
1
NOTE
Accessing the Advanced User’s Guide, Softwa re User’s Guide and Network User’s Guide
This Basic User's Guide does not contain all
the information about the machine such as
how to use the advanced features for Copy,
Printer, Scanner and Network. When you are
ready to learn detailed information about
these operations, read the Advanced User's
Guide, Software User's Guide in HTML
format and Network User's Guide that are
on the CD-ROM.
Viewing Documentation 1
Viewing Documentation (Windows®) 1
a Turn on your computer. Insert the
CD-ROM into your CD-ROM drive.
If the Brother screen does not appear, go
to Computer (My Computer). (For
1
Windows
the taskbar, and then go to Computer.)
Double-click the CD-ROM icon, and then
double-click start.exe.
®
8: Click (File Explorer) on
b If the language screen appears, click
your language. The CD-ROM Top Menu
appears.
(Windows® 7 / Windows Vista® /
®
Windows
Windows Server
2003)
To view the documentation, from the
(Start) menu, select All programs > Brother
> DCP-XXXX (where XXXX is your model
name) from the programs list, and then
choose User’s Guides.
(Windows
Click (Brother Utilities), and then click
the drop-down list and select your model
name (if not already selected). Click Support
in the left navigation bar, and then click
User's Guides.
If you have not installed the software, you can
find the documentation on the CD-ROM by
following these instructions:
XP / Windows Server ® 2008 R2 /
®
2008 / Windows Server®
®
8 / Windows Server® 2012)
c Click User's Guides.
d Click PDF/HTML documents. If the
country screen appears, select your
country. After the list of User’s Guides
appears, choose the Guide you want.
3
Page 12

Chapter 1
NOTE
Viewing Documentation (Macintosh) 1
a Turn on your Macintosh. Insert the
CD-ROM into your CD-ROM drive.
Double-click the BROTHER icon. The
following window will appear.
b Double-click the User’s Guides icon.
c Select your language.
d Click User’s Guides.
e After the list of User’s Guides appears,
select the Guide you want.
How to find Scanning instructions 1
There are several ways you can scan
documents. You can find the instructions as
follows:
Software User's Guide
Scanning
ControlCenter
Network Scanning
Nuance™ PaperPort™ 12S E
How-to-Guides
(Windows
The complete Nuance™ PaperPort™
12SE How-to-Guides can be viewed from
the Help section in the Nuance™
PaperPort™ 12SE application.
Presto! PageManager User’s Guide
(Macintosh users)
Presto! PageManager must be
downloaded and installed before use (for
further instructions, see Accessing
Brother Support (Macintosh) on page 6.
The complete Presto! PageManager
User’s Guide can be viewed from the Help
section in the Presto! PageManager
application.
®
users)
4
Page 13

General information
1
How to find Network setup instructions
Your machine can be connected to a wireless
or wired network.
Basic setup instructions:
(see Quick Setup Guide.)
Connection to a wireless access point or
router supports Wi-Fi Protected Setup or
AOSS™:
(see Quick Setup Guide.)
More information about network setup:
(see Network User's Guide.)
How to access the User’s Guides for Advanced Featur es
You can view and download these Guides
from the Brother Solutions Center at:
http://solutions.brother.com/
Click Manuals on your model’s page to
download the documentation.
Wi-Fi Di re ct™ Guide 1
This Guide provides information about how to
configure and use your Brother machine for
wireless printing directly from a mobile device
supporting the Wi-Fi Direct™ standard.
Google Cloud Print Guide 1
This Guide provides information about how to
configure your Brother machine to a Google
account and use Google Cloud Print services
for printing over the Internet.
1
Mobile Print/Scan Guide for Brother
iPrint&Scan 1
This Guide provides useful information about
printing from your mobile device and
scanning from your Brother machine to your
mobile device when connected on a Wi-Fi
network.
Web Connect Guide 1
This Guide provides information about how to
configure and use your Brother machine to
scan, load and view images and files on
certain websites that provide these services.
AirPrint Guide 1
This Guide provides information for using
AirPrint to print from OS X v10.7.x, 10.8.x
and your iPhone, iPod touch, iPad, or other
iOS device to your Brother machine without
installing a printer driver.
5
Page 14

Chapter 1
Accessing Brother Support (Windows®) 1
You can find all the contacts you will need,
such as web support (Brother Solutions
Center) on the CD-ROM.
Click Brother Support on the Top Menu.
The following screen appears:
To access our website
(http://www.brother.com/
Brother Home Page.
For the latest news and product support
information
(http://solutions.brother.com/
Brother Solutions Center.
To visit our website for original Brother
Supplies
(http://www.brother.com/original/
Supplies Information.
To access the Brother CreativeCenter
(http://www.brother.com/creativecenter/
for FREE photo projects and printable
downloads, click
Brother CreativeCenter.
To return to the Top Menu, click Back or
if you have finished, click Exit.
), click
), click
), click
)
Accessing Brother Support (Macintosh) 1
You can find all the contacts you will need,
such as web support (Brother Solutions
Center) on the CD-ROM.
Double-click the Brother Support icon.
Choose your model if needed. The
following screen will appear:
To download and install Presto!
PageManager, click
Presto! PageManager.
To access the Brother Web Connect
application web page, click
Brother Web Connect.
To register your machine from the Brother
Product Registration Page
(http://www.brother.com/registration/
click On-Line Registration.
For the latest news and product support
information
(http://solutions.brother.com/
click Brother Solutions Center.
To visit our website for original Brother
Supplies
(http://www.brother.com/original/
click Supplies Information.
),
),
),
6
Page 15

General information
1
7
Page 16
Chapter 1
1
'800<
䣕䣧䣥䣷䣴䣧
䢢䢢䣒䣴䣫䣰䣶
䢢
䢢䢢䣙䣧䣤
䣏䣱䣴䣧
䣅䣱䣲䣻
䣕䣥䣣䣰
Control panel overview 1
The DCP-9020CDW has a 3.7 in. (93.4 mm) Touchscreen LCD and Touchpanel1.
1
This is a Touchscreen LCD wit h an electrostati c Touchpanel that only shows the LEDs th at can be used.
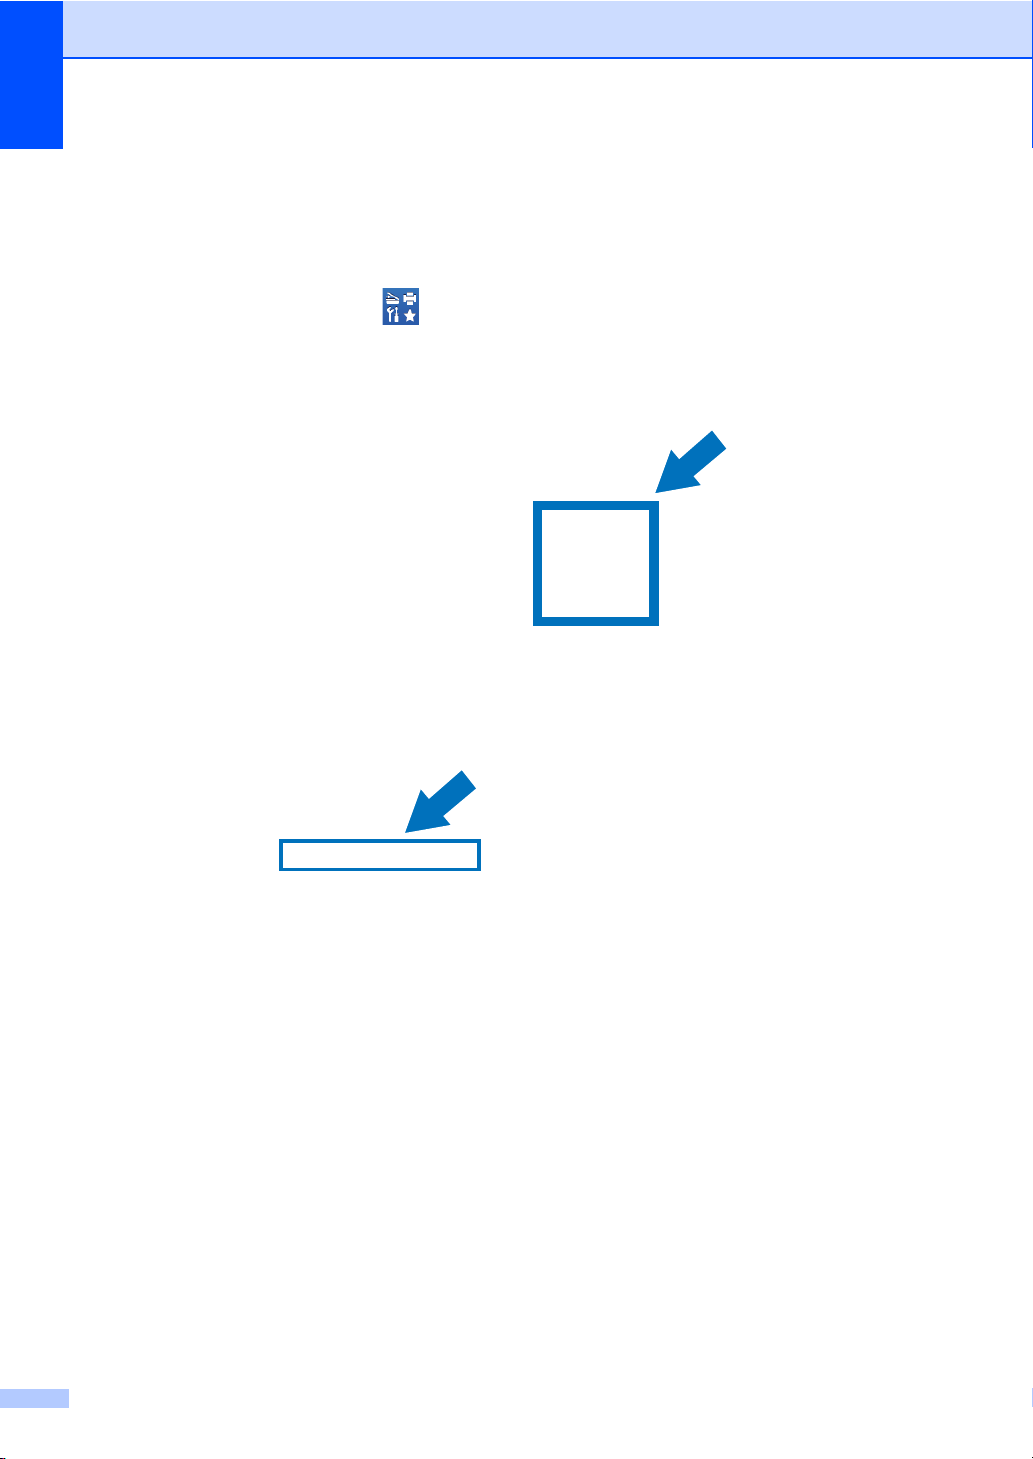
1 3.7 in. (93.4 mm) Touchscreen LCD
(Liquid Crystal Display)
This is a Touchscreen LCD. You can
access the menus and options by
pressing them when they are displayed on
the screen.
8
Page 17
1
4
3
2
General information
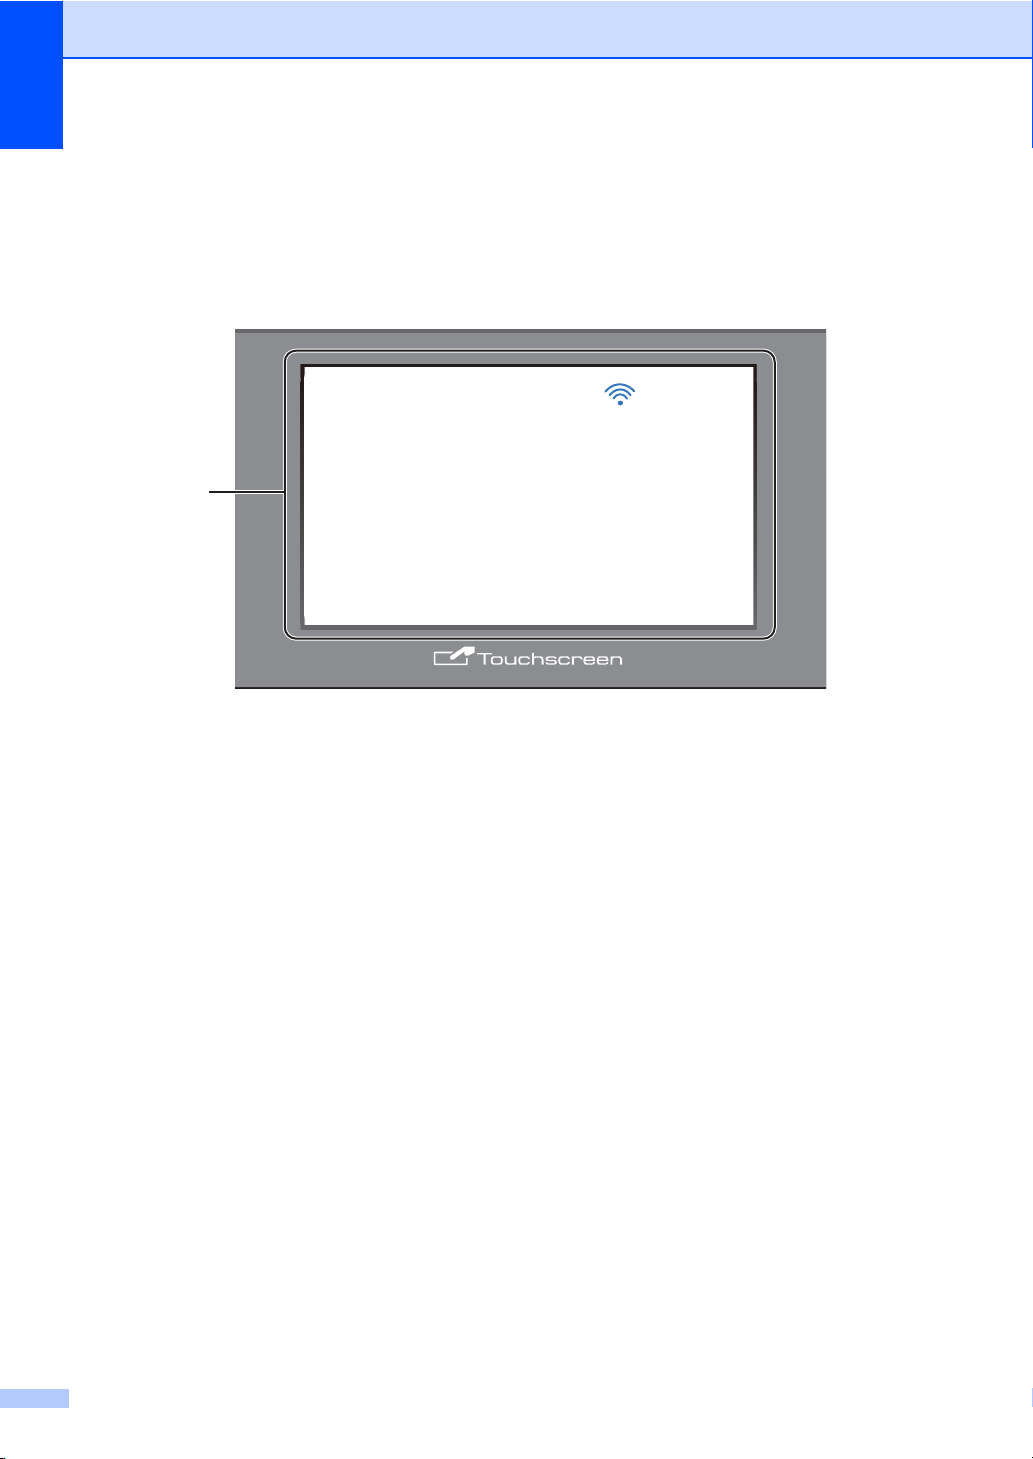
2 Touchpanel:
The LEDs on the Touchpanel only light up
when they are available for use.
Back
Press to go back to the previous menu
level.
Home
Press to return to the Home scr e e n.
The factory setting shows the date and
time, but you can change the Home
screen’s default setting (see Setting
the Ready screen on page 13.)
Cancel
Press to cancel an operation when
illuminated red.
Numerical Pad
Press the numbers on the Touchpanel
to enter the number of copies.
3 Power On/Off
Press to turn on the machine.
Press and hold down to turn off the
machine. The Touchscreen LCD will show
Shutting Down and will stay on for a
few seconds before going off.
4
The Wi-Fi light is on when the network
interface is WLAN.
9
Page 18
Chapter 1
21
56
3 4
䣕䣧䣥䣷䣴䣧
䢢䢢䣒䣴䣫䣰䣶
䢢
䢢䢢䣙䣧䣤
䣏䣱䣴䣧
䣅䣱䣲䣻
䣕䣥䣣䣰
31
7
4
2
䣅䣱䣲䣻
䣕䣥䣣䣰
䣒䣴䣧䣵䣵䢢䣝䢭䣟䢢䣶䣱䢢䣥䣴䣧䣣䣶䣧䢢䣣䢢䣵䣪䣱䣴䣶䣥䣷䣶䢰
䣕䣪䣱䣴䣶䣥䣷䣶䣵䢢䢳䢢
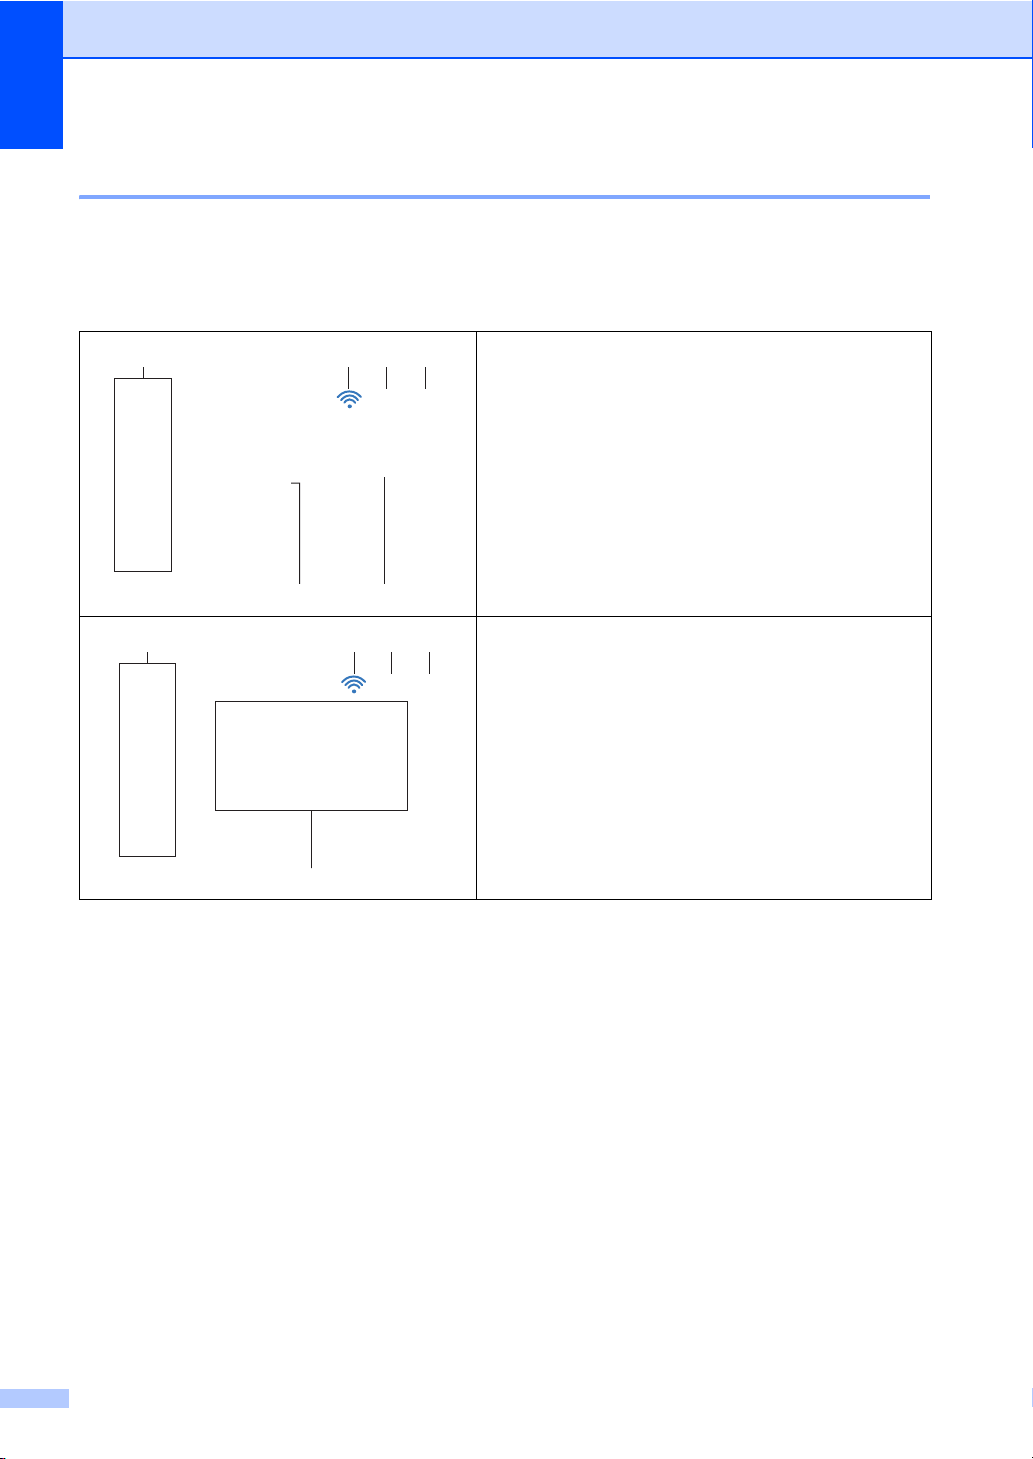
Touchscreen LCD 1
You can select three types of screens for the Home screen. When the Home screen is displayed,
you can change the displayed screen by swiping left or right, or pressing d or c.
The following screens show the machines status when the machine is idle.
More screen
The More screen pr ovides acces s to Copy, Scan, Wi-Fi
setup, Toner levels, Setup screen, Secure Print and
Web Shortcut.
When the More screen is di splayed the machine is in
Ready mode. If Secur e Function Lock
1
has been turned
on an icon is dis p layed.
1
See Advanced User's Guide, Secure Fu nction Lock 2.0.
Shortcut screens
You can quickly cr eate a Shortcut for frequently used
functions , such as making a copy, scanning and Web
Connect (for more inf ormation, see Shortcut Setti ngs
on page 15).
10
Page 19
1
NOTE
Swiping is a type of user operation on the
NOTE
NOTE
Touchscreen that is performed by
brushing your finger across the screen to
display the next page or item.
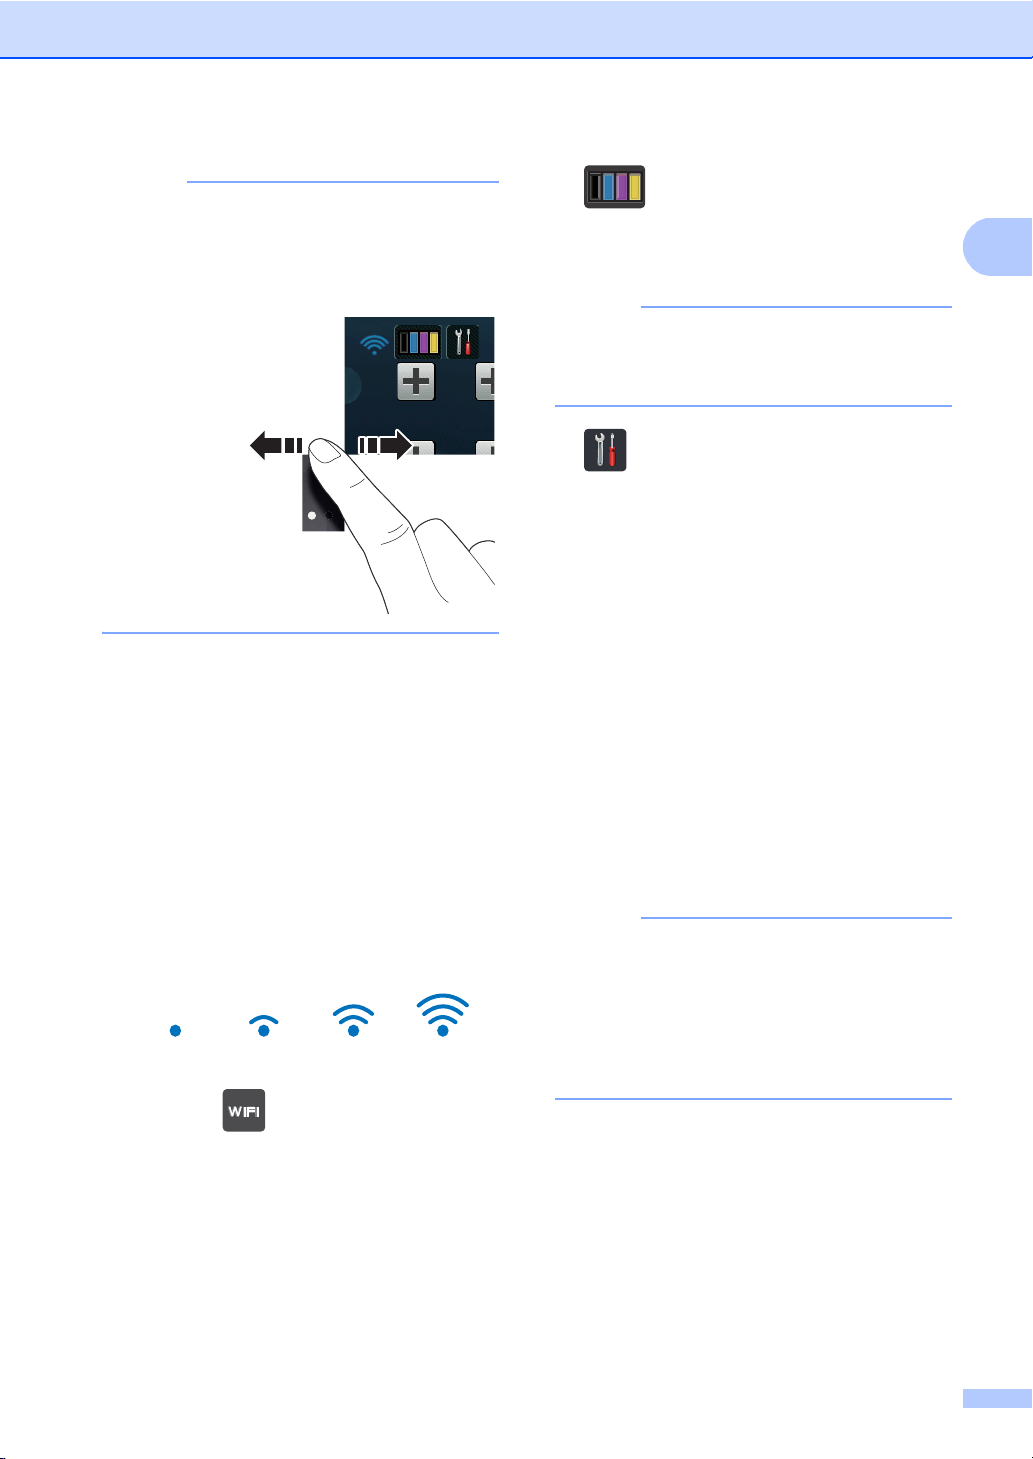
1 Modes:
Copy
Lets you access Copy mode.
Scan
Lets you access Scan mode.
2 Wireless Status
A four-level indicator on the Ready mode
screen shows the current wireless signal
strength if you are using a wireless
connection.
General information
3 (Toner)
See the remaining toner life.
Press to access the Toner menu.
The indication of the remaining toner life
will vary depending on the types of
documents printed and customer’s usage.
4 (Settings)
Press to access the main settings (for
more information, see Settings screen
on page 12).
5 Secure Print
Lets you access the secure print menu.
6 Web
Press to connect the Brother machine to
an Internet service (for more information,
see Web Connect Guide).
7 Shortcuts
Press to set up Shortcuts.
You can quickly copy, scan and connect to
a web service using the options set as
Shortcuts.
• Three Shortcut screens are available. You
can set up to six Shortcuts in each
Shortcut screen. A total of 18 Shortcuts
are available.
0Max
• Swipe left or right, or press d or c, to view
the other Shortcut screens.
If you see at the top on the screen,
you can easily configure the wireless
settings by pressing it (for more
information, see Quick Setup Guide).
11
Page 20
Chapter 1
NOTE
8
䣕䣧䣥䣷䣴䣧
䢢䢢䣒䣴䣫䣰䣶
䢢
䢢䢢䣙䣧䣤
䣅䣱䣲䣻
䣕䣥䣣䣰
䣅䣱䣸䣧䣴䢢䣫䣵䢢䣑䣲䣧䣰䢰䢢
䣆䣧䣶䣣䣫䣮
1243
7 6
5
䢳䢴䢼䢲䢲䢢䢢䢢䢢䢲䢳䢰䢲䢳䢰䢴䢲䢳䢵
䣖䣱䣰䣧䣴 䣐䣧䣶䣹䣱䣴䣭 䣎䣱䣹
䣙䣫䢯䣈䣫䢢䣆䣫䣴䣧䣥䣶 䣖䣴䣣䣻䢢䣕䣧䣶䣶䣫䣰䣩
䣃䣮䣮䢢䣕䣧䣶䣶䣫䣰䣩䣵
䣕䣧䣶䣶䣫䣰䣩䣵
8 Warning icon
The warning icon appears when there
is an error or maintenance message;
press Detail to view it, and then press
to return to Ready mode.
For details, see Error and mainte nance
messages on page 86.
• This product adopts the font of ARPHIC
TECHNOLOGY CO.,LTD.
• MascotCapsule UI Framework and
MascotCapsule Tangiblet develope d by
HI CORPORATION are used.
MascotCapsule is a registered trademark
of HI CORPORATION in Japan.
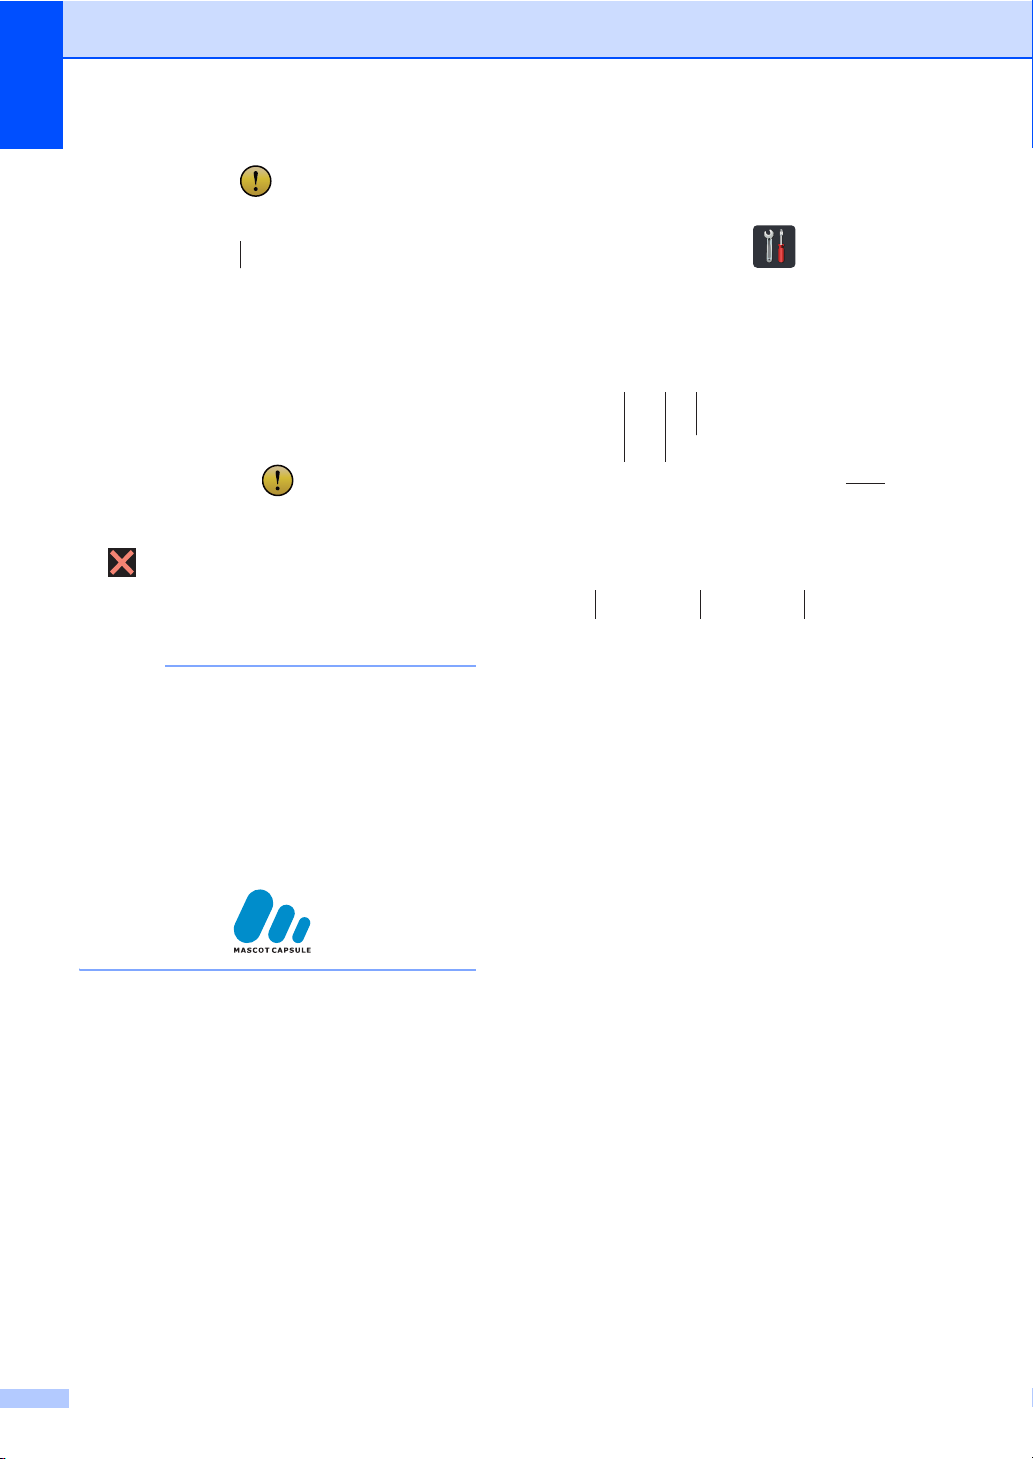
Settings screen 1
The Touchscreen shows the machines
settings when you press .
You can check and access all the machine’s
settings from the following screen.
1 Toner
See the remaining toner life.
Press to access the Toner menu.
2 Network
Press to set up a network connection.
A four level indicator on the screen shows
the current wireless signal strength if you
are using a wireless connection.
3 Date & Time
12
See the date and time.
Press to access the Date & Time menu.
4 Volume
See the selected Beep volume level.
Press to access the Beep volume setting.
5 All Settings
Press to access the full settings menu.
6 Tray Setting
See the selected paper size. Press to
change the paper size and paper type
settings if needed.
Page 21

General information
1
7 Wi-Fi Direct
Press to set up a Wi-Fi Direct™ network
connection.
Setting the Ready screen 1
Set the Ready screen to either More,
Shortcuts 1, Shortcuts 2 or
Shortcuts 3.
When the machine is idle or you press ,
the Touchscreen will return to the screen you
set.
a Press .
b Press All Settings.
c Swipe up or down, or press a or b to
display General Setup.
d Press General Setup.
e Swipe up or down, or press a or b to
display Button Settings.
f Press Home Button Settings.
g Press More, Shortcuts 1,
Shortcuts 2 or Shortcuts 3.
h Press .
The machine will go to your chosen
Home screen.
13
Page 22
Chapter 1
IMPORTANT
NOTE
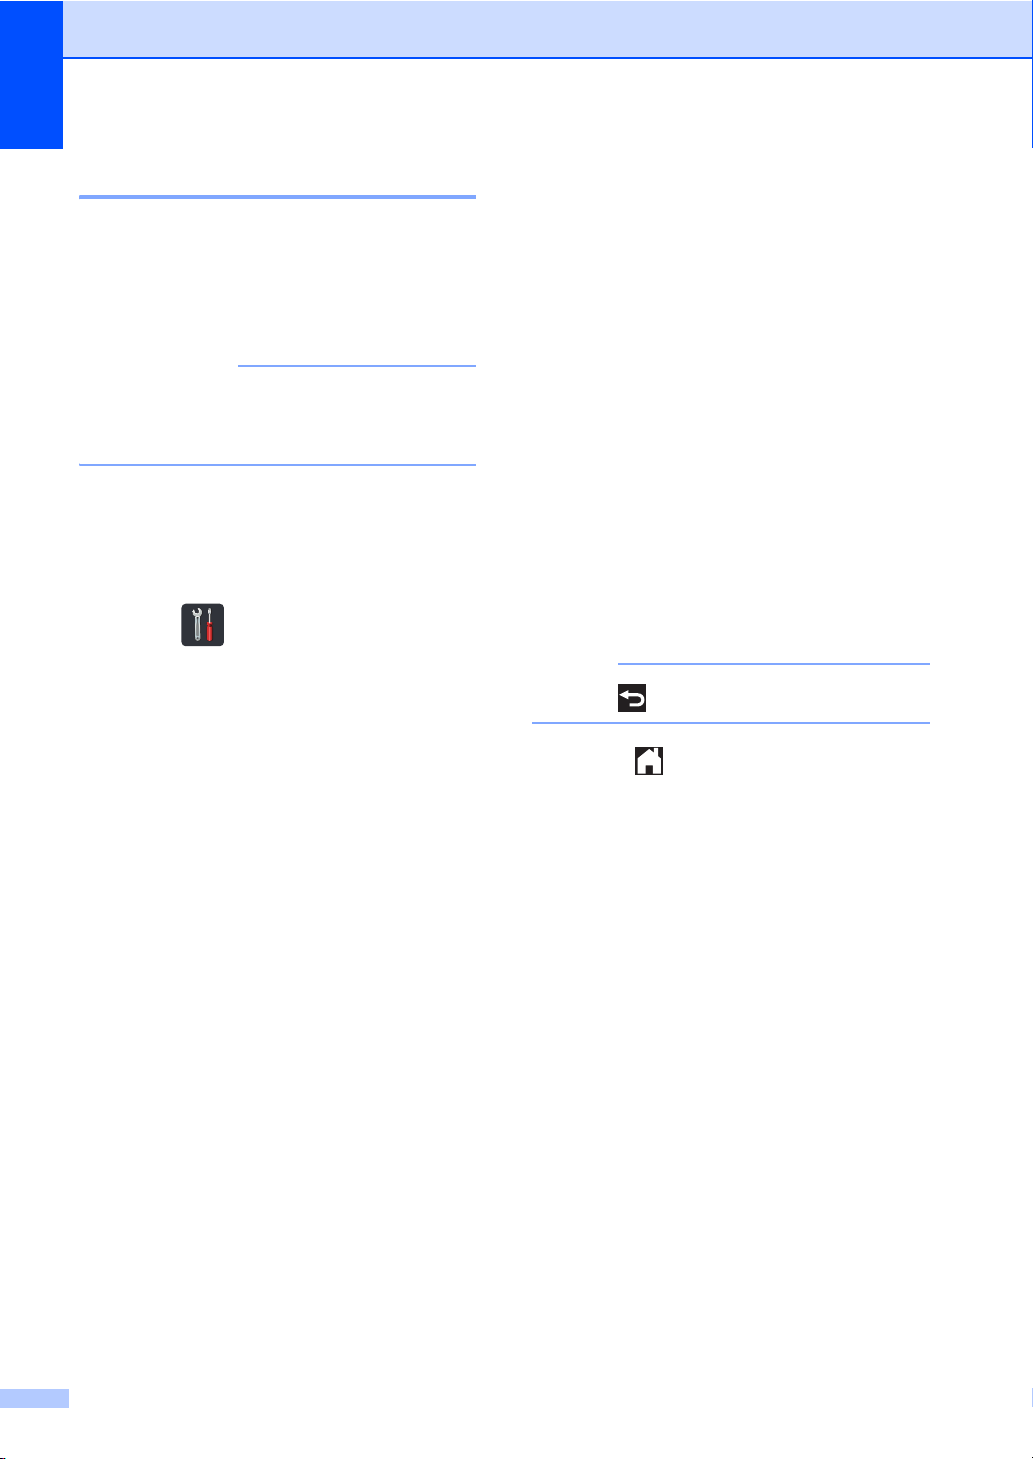
Basic Operations 1
Press your finger on the Touchscreen to
operate it. To display and access all the
screen menus or options, swipe left, right, up,
down, or press d c or a b to scroll through
them.
DO NOT press the Touchscreen with a
sharp object, such as a pen or stylus. It
may damage the machine.
The following steps show how to change a
setting in the machine. In this example, the
Touchscreen Backlight setting is changed
from Light to Med.
a Press .
b Press All Settings.
c Swipe up or down, or press a or b to
display General Setup.
g Press Backlight.
h Press Med.
Press to go back to the previous level.
i Press .
d Press General Setup.
e Swipe up or down, or press a or b to
display LCD Settings.
f Press LCD Settings.
14
Page 23

General information
1
Shortcut Settings 1
You can add the copy, scan and Web
Connect settings you use most frequently by
setting them as your Shortcuts. Later you can
recall and apply these settings quickly and
easily. You can add up to 18 Shortcuts.
Adding Copy Shortcuts 1
The following settings can be included in a
copy Shortcut:
Quality
Enlarge/Reduce
Density
Contrast
Stack/Sort
Page Layout
Colour Adjust
2-sided Copy
Remove Background Colour
g Swipe up or down, or press a or b to
display the available options for the
setting, and then press the option you
want.
Repeat steps f and g until you have
selected all the settings for this Shortcut.
h When you have finished changing
settings, press Save as Shortcut.
i Read and confirm the displayed list of
settings you selected, and then
press OK.
j Enter a name for the Shortcut using the
keyboard on the Touchscreen. (To help
you enter letters, see Entering text
on page 148.)
Press OK.
k Press OK to save your Shortcut.
Adding Scan Shortcuts 1
The following settings can be included in a
scan Shortcut:
a If the displayed screen is More, swipe
left or right, or press d or c to display a
Shortcut screen.
b Press where you have not added a
Shortcut.
c Press Copy.
d Read the information on the
Touchscreen, and then confirm it by
pressing OK.
e Swipe up or down, or press a or b to
display the copy presets, and then press
the preset you want.
f Swipe up or down, or press a or b to
display the available settings, and then
press the setting you want.
to OCR / to File / to Image /
to E-mail
Profile N ame
to FTP / to Network
PC Select
a If the displayed screen is More, swipe
left or right, or press d or c to display a
Shortcut screen.
b Press where you have not added a
Shortcut.
c Press Scan.
d Swipe up or down, or press a or b to
display the type of scan you want, and
then press it.
15
Page 24

Chapter 1
NOTE
NOTE
e Do one of the following:
If you pressed to OCR, to File,
to Image or to E-mail, read the
information on the Touchscreen, and
then press OK to confirm it. Go to
step f.
If you pressed to FTP or
to Network, read the information
on the Touchscreen, and then press
OK to confirm it.
Swipe up or down, or press a or b to
display the Profile Name, and then
press it.
Press OK to confirm the Profile Name
you have selected. Go to step g.
To add a Shortcut for to Network and
to FTP, you must have added the Profile
Name beforehand.
f Do one of the following:
When the machine is connected to a
computer using a USB connection:
Press OK to confirm USB is selected
as the PC Name. Go to step g.
When the machine is connected to a
network:
Swipe up or down, or press a or b to
display the PC Name, and then press
it. Press OK to confirm the PC Name
you selected. Go to step g.
g Enter a name for the Shortcut using the
keyboard on the Touchscreen. (To help
you enter letters, see Entering text
on page 148.)
Press OK.
h Read the information on the
Touchscreen, and then press OK to save
your Shortcut.
Adding Web Connect Shortcuts 1
The settings for the following services can be
included in a Web Connect Shortcut:
Picasa Web Albums™
Google Drive™
Flickr
Facebook
Evernote
Dropbox
• W e b services may have been added
• To add a Web Connect Shortcut, you must
®
and/or service names may have been
changed by the provider since this
document was published.
have an account with the desired service
(for more information, see Web Connect
Guide).
a If the displayed screen is More, swipe
left or right, or press d or c to display a
Shortcut screen.
b Press where you have not added a
Shortcut.
c Press Web.
d If Information about the Internet
connection is displayed, read the
information and confirm it by pressing
OK.
e Swipe left or right, or press d or c to
display the available services, and then
press your desired service.
f Press your account.
If the account needs a PIN code, enter
the PIN for the account using the
keyboard on the Touchscreen.
Press OK.
16
Page 25

General information
1
NOTE
NOTE
NOTE
g Press the function you want.
The functions that can be set vary
depending on the selected service.
h Read and confirm the displayed list of
functions you selected, and then
press OK.
i Press OK to save your Shortcut.
The Shortcut name will be assigned
automatically. If you want to change the
Shortcut names, see Editing Shortcut
Names on page 18.
Changing Shortcuts 1
You can change the settings in a Shortcut.
You cannot change a Web Connect
Shortcut. If you want to change the
Shortcut, you must delete it, and then add
a new Shortcut.
(For more information, see Deleting
Shortcuts on page 18 and Adding Web
Connect Shortcuts on page 16.)
a Press the Shortcut you want. The
settings for the Shortcut that you chose
are displayed.
b Change the settings for the Shortcut you
chose in step a (for more information,
see Shortcut Setti ngs on page 15).
c When you have finished changing
settings, press Save as Shortcut.
d Press OK to conf irm.
e Do one of the following:
To overwrite the Shortcut, press
Yes. Go to step g.
If you do not want to overwrite the
Shortcut, press No to enter a new
Shortcut name. Go to step f.
f To create a new Shortcut, hold down
to delete the current name, and then
enter a new name using the keyboard
on the Touchscreen. (To help you enter
letters, see Entering text on page 148.)
Press OK.
g Press OK to conf irm.
17
Page 26
Chapter 1
NOTE
NOTE
Editing Shortcut Names 1
You can edit a Shortcut name.
a Press and hold the Shortcut until the
dialog box appears.
You can also press , All Settings
and Shortcut Settings.
b Press Edit Shortcut Name.
c To edit the name, hold down to
delete the current name, and then enter
a new name using the keyboard on the
Touchscreen. (To help you enter letters,
see Entering text on page 148.)
Press OK.
Deleting Shortcuts 1
You can delete a Shortcut.
Recalling Shortcuts 1
The Shortcut settings are displayed on the
Shortcut screen. To recall a Shortcut, simply
press the Shortcut name.
a Press and hold the Shortcut until the
dialog box appears.
You can also press , All Settings
and Shortcut Settings.
b Press Delete to delete the Shortcut
that you chose in step a.
c Press Yes to confi rm.
18
Page 27

1
Volume settings 1
Beeper volume 1
When the beeper is on, the machine will beep
when you press a key or make a mistake. You
can choose from a range of volume levels.
a Press .
b Press All Settings.
c Swipe up or down, or press a or b to
display General Setup.
d Press General Setup.
e Swipe up or down, or press a or b to
display Volume.
General information
f Press Volume.
g Press Beep.
h Press Off, Low, Med or High.
i Press .
19
Page 28
2
NOTE
Loading paper 2
Loading paper and print media
The machine can feed paper from the paper
tray or manual feed slot.
If your application software supports
paper size selection on the print menu,
you can select it through the software. If
your application software does not
support it, you can set the paper size in
the printer driver or by pressing the
buttons on the Touchscreen.
Loadin g paper in the paper tray 2
You can load up to 250 sheets in the paper
tray. Paper can be loaded up to the maximum
paper mark ( ) on the right side of the
paper tray (for recommended paper, see
Acceptable paper and other print media
on page 28).
Printing on plain paper, thin paper or recycled paper from the paper tray 2
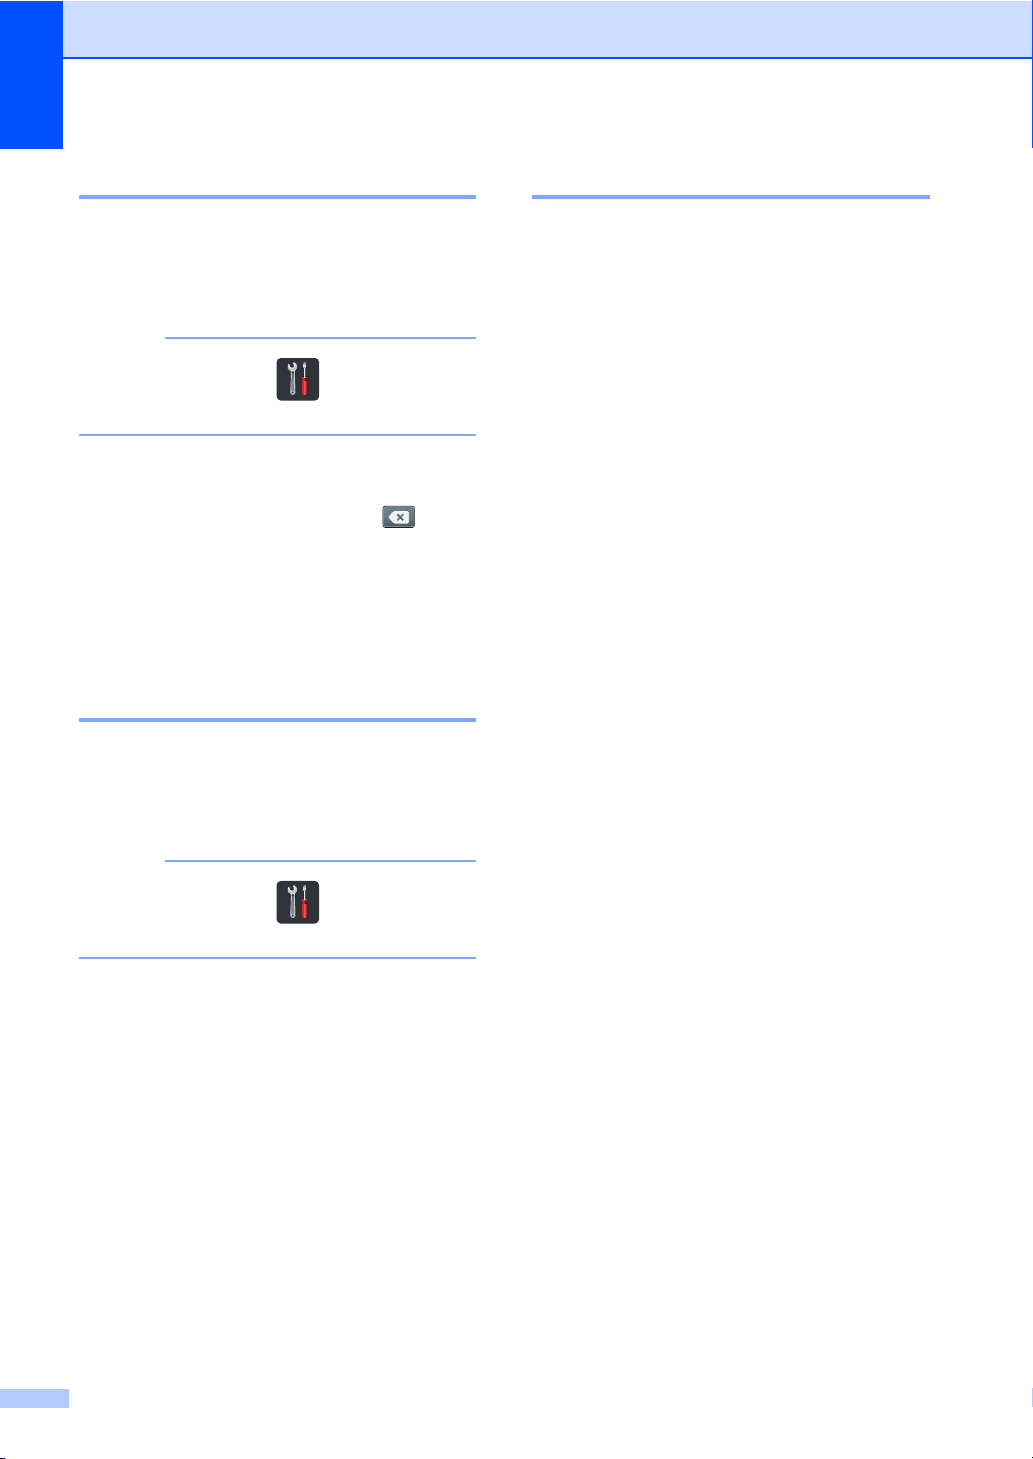
b While pressing the green paper-guide
release levers (1), slide the paper
2
guides to fit the paper you are loading in
the tray. Make sure the guides are firmly
in the slots.
c Fan the stack of paper well to avoid
paper jams and misfeeds.
a Pull the paper tray completely out of the
machine.
20
Page 29
Loading paper
2
1
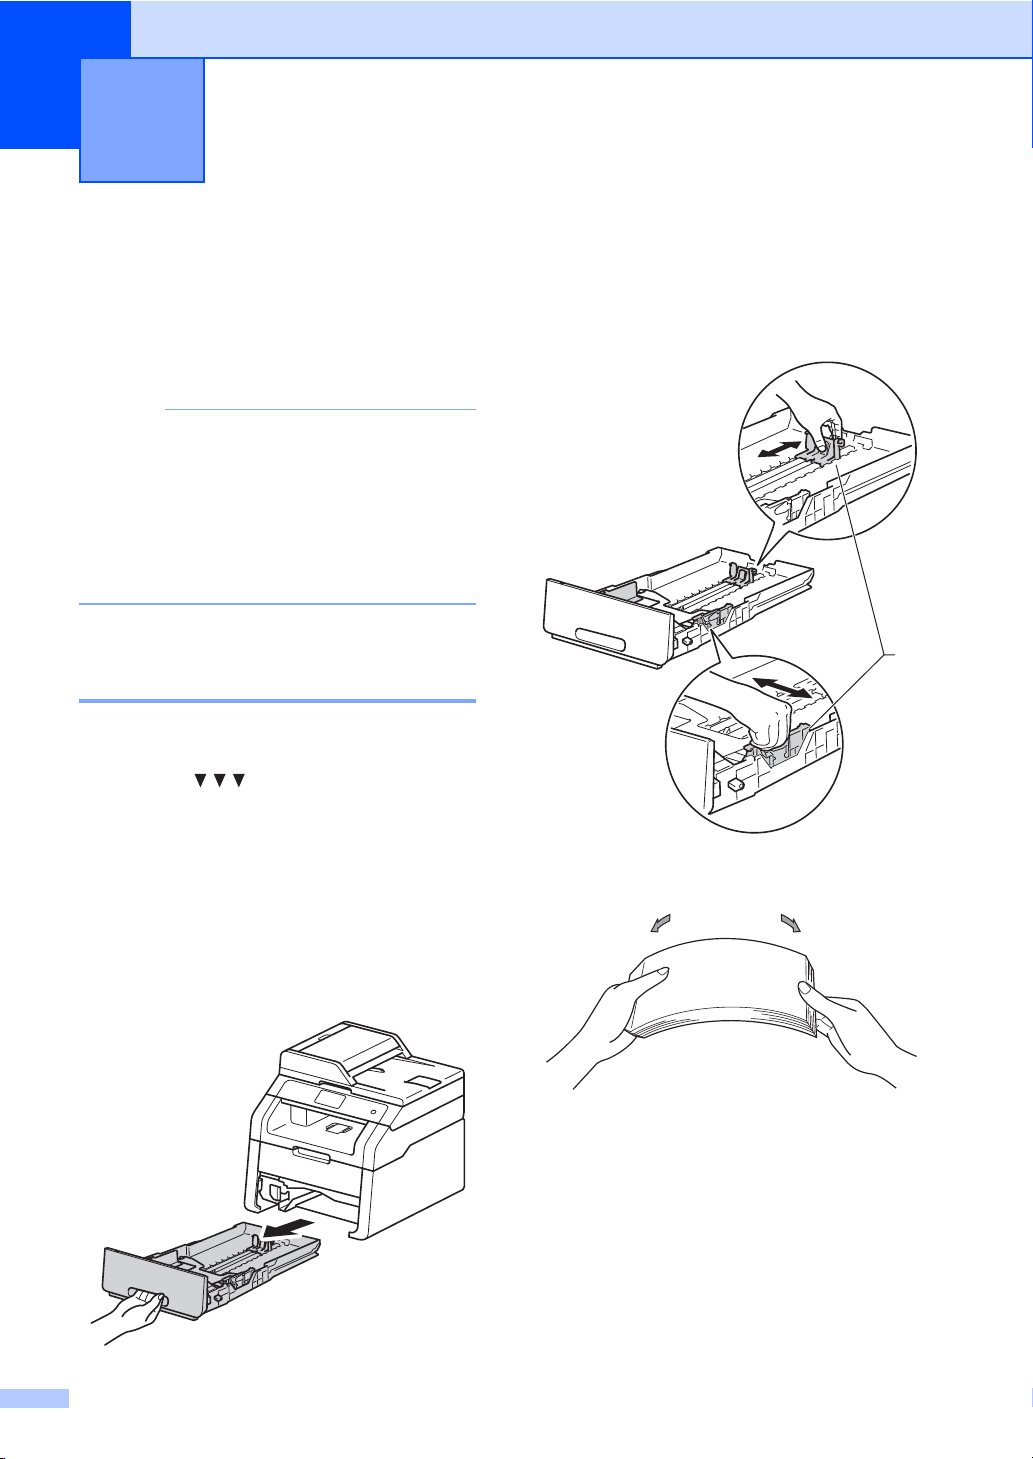
d Load paper in the tray and make sure:
The paper is below the maximum
paper mark ( ) (1), as overfilling
the paper tray will cause paper jams.
The side to be printed on is
face down.
The paper guides touch the sides of
the paper so it will feed correctly.
1
f Lift up the support flap (1) to prevent
paper from sliding off the face-down
output tray, or remove each page as
soon as it comes out of the machine.
e Put the paper tray firmly back in the
machine. Make sure the tray is
completely inserted into the machine.
21
Page 30
Chapter 2
NOTE
1
Loadin g paper in the manual feed slot 2
You can load envelopes and special print
media one-at-a-time into this slot. Use the
manual feed slot to print or copy on labels,
envelopes, thicker paper or glossy paper (for
the recommended paper to use, see
Acceptable paper and other print media
on page 28).
The machine turns on the Manual Feed
mode when you put paper in the manual
feed slot.
Printing on plain paper, thin paper, recycled paper and bond paper from the manual feed slot 2
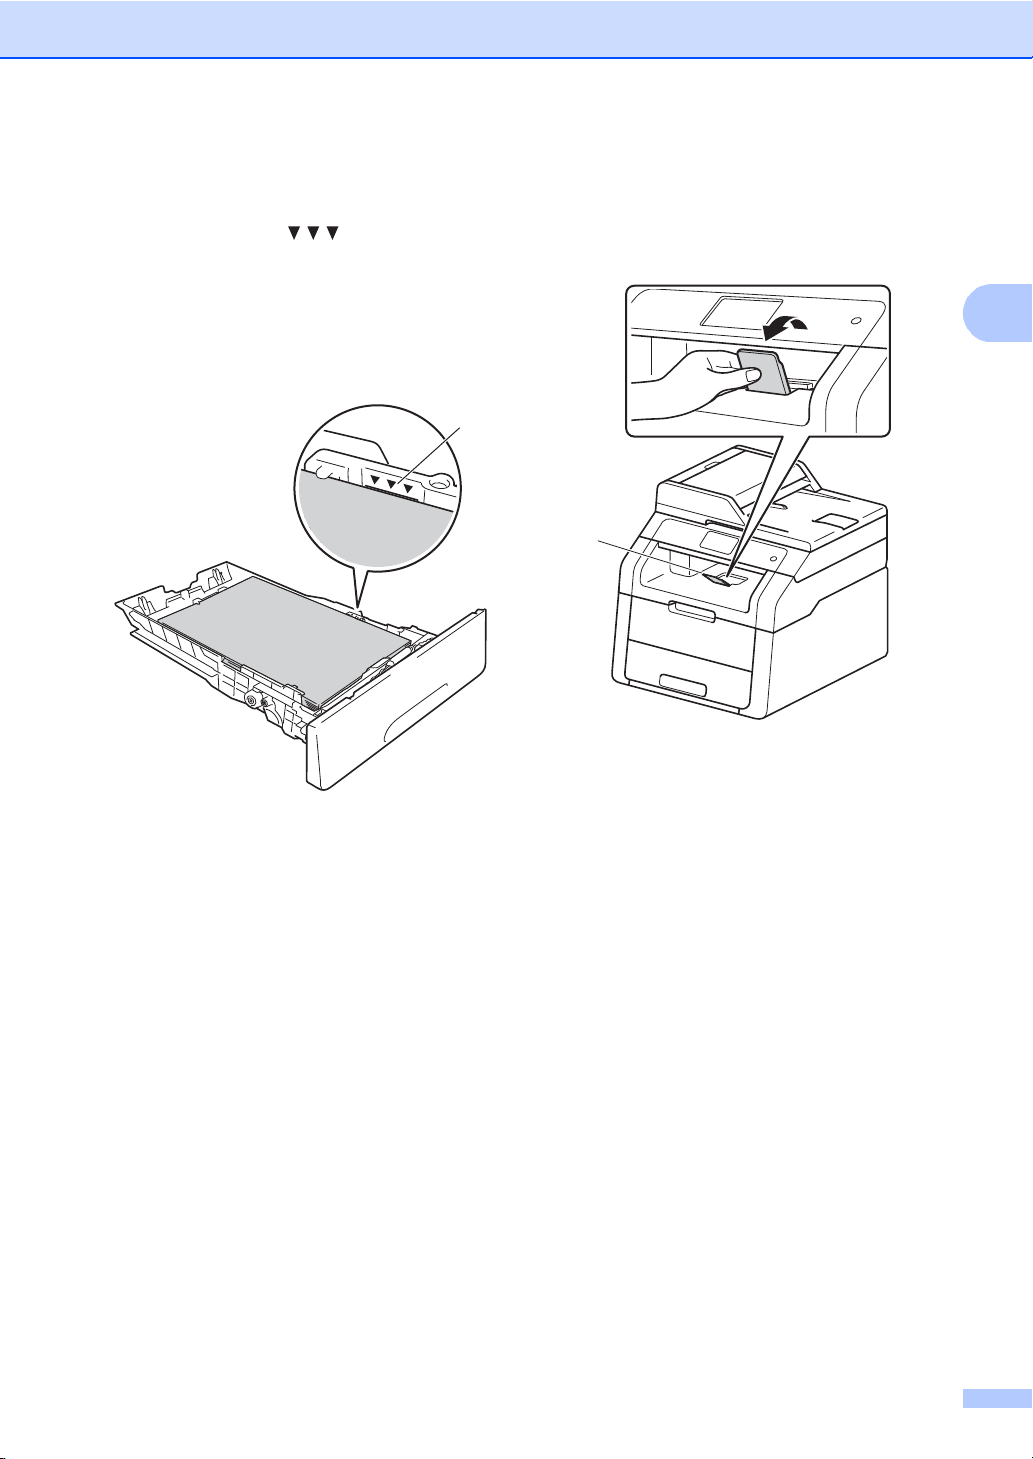
a Lift up the support flap (1) to prevent
paper from sliding off the face-down
output tray, or remove each page as
soon as it comes out of the machine.
b Open the manual feed slot cover.
c Use both hands to slide the manual feed
slot paper guides to the width of the
paper you are going to use.
22
Page 31

Loading paper
2
NOTE
d Use both hands to push one sheet of
paper firmly into the manual feed slot
until the top edge of the paper presses
against the paper feed rollers. Continue
pressing the paper against the rollers for
about two seconds, or until the machine
grabs the paper and pulls it in further.
• If the error message Jam Manual Feed
appears on the Touchscreen, the machine
cannot grasp and pull the paper. Reset
the machine by removing the paper and
then pressing Start on the Touchscreen.
Reinsert the paper and press it firmly
against the rollers.
• To easily remove a small printout from the
output tray use both hands to lift up the
scanner cover as shown in the illustration.
• You can still use the machine while the
scanner cover is up. To close the scanner
cover, push it down with both hands.
• Put the paper into the manual feed slot
with the side to be printed on face up.
• Make sure the paper is straight and in the
correct position on the manual feed slot. If
it is not, the paper may not be fed
correctly, resulting in a skewed printout or
a paper jam.
• Do not put more than one sheet of paper
in the manual feed slot at any one time, as
it may cause a jam.
e After the Touchscreen shows
Manual Feed, return to step d to load
the next sheet of paper. Repeat for each
page you want to print.
23
Page 32

Chapter 2
Printing on thick paper, labels, envelopes and glossy paper from the manual feed slot 2
When the back cover (face-up output tray) is
pulled down, the machine has a straight
paper path from the manual feed slot through
to the back of the machine. Use this paper
feed and output method for printing on thick
paper, labels, envelopes or glossy paper.
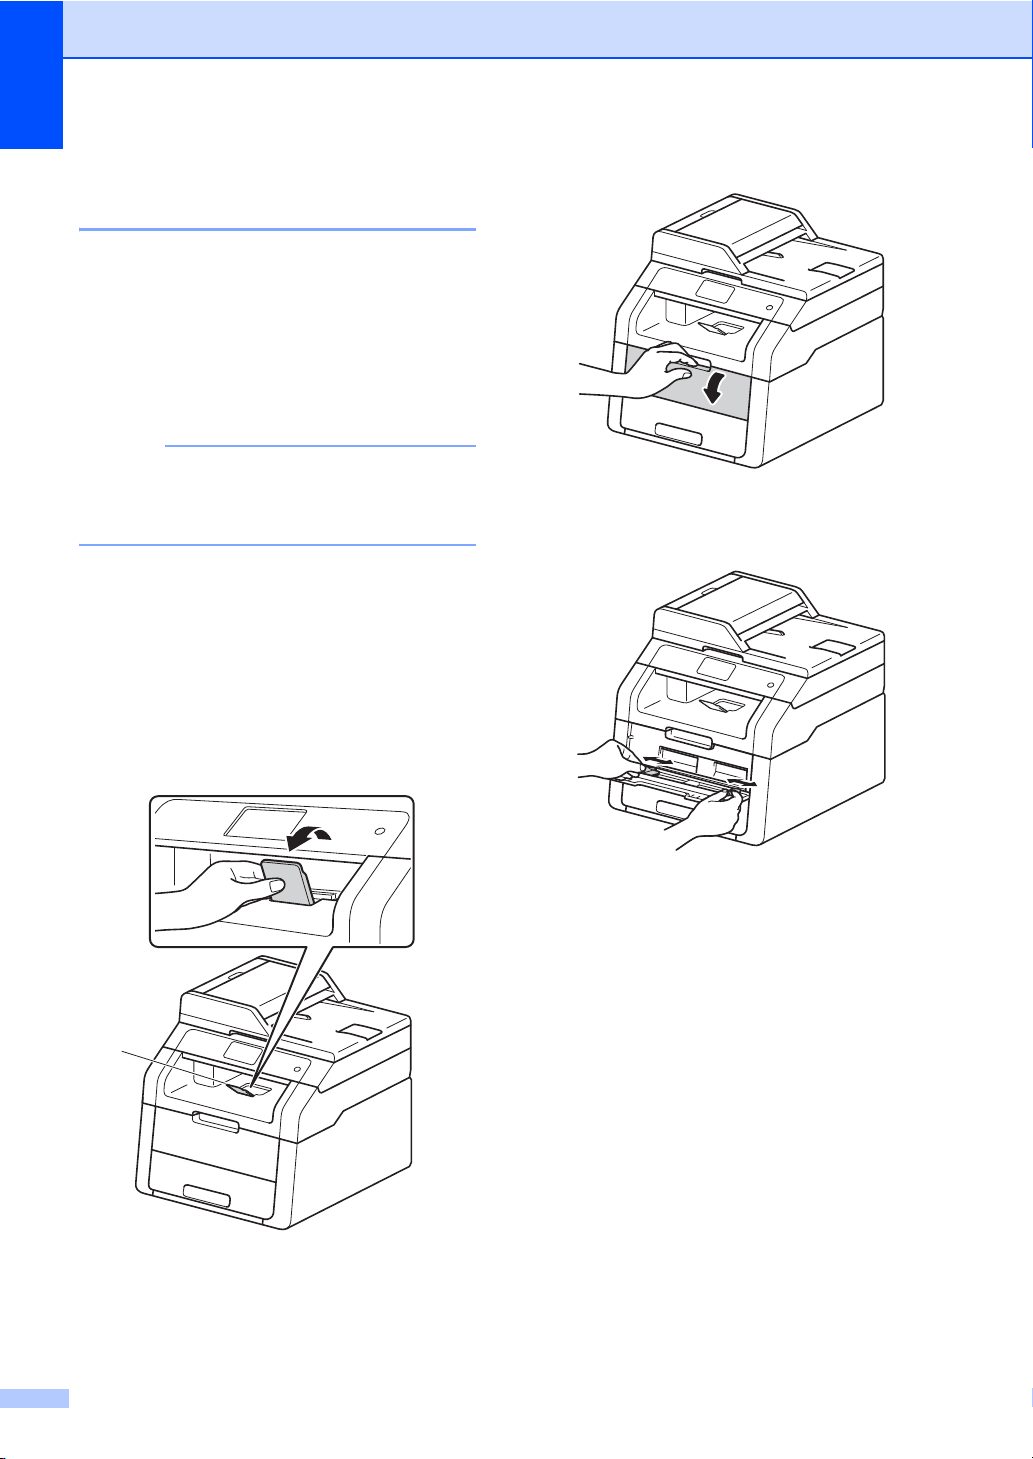
a Open the back cover (face-up output
tray).
c Open the manual feed slot cover.
d Use both hands to slide the manual feed
slot paper guides to the width of the
paper that you are going to use.
b (For printing envelopes only)
Pull down the two grey levers, one on
the left side and one on the right side, as
shown in the illustration.
24
Page 33

Loading paper
2
NOTE
NOTE
e Use both hands to push one sheet of
paper or one envelope firmly into the
manual feed slot until the top edge of the
paper presses against the paper feed
rollers. Continue pressing the paper
against the rollers for about two
seconds, or until the machine grabs the
paper and pulls it in further.
• When Label is sele c ted in the printe r
driver, the machine will feed the paper
from the manual feed slot, even if Manual
is not selected as the paper source.
• Make sure the paper or envelope is
straight and in the correct position in the
manual feed slot. If it is not, the paper or
envelope may not feed correctly, resulting
in a skewed printout or a paper jam.
• Pull the paper or envelope out completely
when you retry putting the paper into the
manual feed slot.
• Do not put more than one sheet of paper
or one envelope in the manual feed slot at
any one time, as it may cause a jam.
f Send the print data to the machine.
Remove each printed page or envelope
immediately to prevent a paper jam.
g After the Touchscreen shows
Manual Feed, return to step e to load
the next sheet of paper. Repeat for each
page you want to print.
h (For printing envelopes)
When you have finished printing, return
the two grey levers, that you pulled
down at step b, back to their original
positions.
i Close the back cover (face-up output
tray) until it locks in the closed position.
• If the error message Jam Manual Feed
appears on the Touchscreen, the machine
cannot grasp and pull the paper or
envelope. Reset the machine by
removing the paper and then pressing
Start on the Touchscreen. Reinsert the
paper or envelope and be sure to press it
firmly against the rollers.
• Put the paper or envelope into the manual
feed slot with the side to be printed on
face up.
25
Page 34

Chapter 2
1
3
24
Unscannable and unprintable areas 2
The figures in the table show the maximum unscannable and unprintable areas. These areas may
vary depending on the paper size or settings in the application you are using.
Usage Document
Size
*
Copy
*
a single copy
Letter 4 mm 4 mm
A4 4 mm 3 mm
Top (1)
Bottom (3)
Left ( 2 )
Right (4)
or a 1 in 1 copy
Legal 4 mm 4 mm
Scan Letter 3 mm 3 mm
A4 3 mm 3 mm
Legal (ADF) 3 mm 3 mm
Print Letter 4.2 mm 4.2 mm
A4 4.2 mm 4.2 mm
Legal 4.2 mm 4.2 mm
26
Page 35

Loading paper
2
Paper settings 2
Paper Size 2
When you change the size of paper in the
tray, you must also change the setting for
paper size at the same time so your machine
can fit the document on the page.
You can use the following sizes of paper.
A4, Letter, Legal, Executive, A5,
A5 L (Long Edge), A6 and Folio (215.9 mm ×
330.2 mm)
a Press .
b Press Tray Setting.
c Press Paper Size.
d Swipe up or down, or press a or b to
display A4, Letter, Legal, EXE, A5,
A5 L, A6 or Folio, and press the
option you want.
Pape r Ty pe 2
To get the best print quality set the machine
for the type of paper you are using.
a Press .
b Press Tray Setting.
c Press Paper Type.
d Swipe up or down, or press a or b to
display Thin, Plain Paper, Thick,
Thicker, Recycled Paper, and
press the option you want.
e Press .
e Press .
27
Page 36

Chapter 2
Acceptable paper and other print media 2
Print quality may vary according to the type of
paper you are using.
You can use the following types of print
media: plain paper, thin paper, thick paper,
thicker paper, bond paper, recycled paper,
labels, envelopes or glossy paper (see Print
media on page 152).
For best results, follow the instructions below:
DO NOT load different types of paper in
the paper tray at the same time because it
may cause the paper to jam or misfeed.
For correct printing, you must choose the
same paper size from your software
application as the paper in the tray.
Avoid touching the printed surface of the
paper immediately after printing.
Before you buy a lot of paper, test a small
quantity to make sure the paper is
appropriate for the machine.
Use labels that are designed for use in
laser machines.
Recommended pape r and print media 2
Paper Type Item
Plain paper
Recycled Paper Xerox Recycled Supre me
Labels Avery laser label L7163
Envelopes Antalis River series (DL)
Glossy Paper Xerox Colotech+ Gloss
Xerox Premier TCF 80 g/m
Xerox Business 80 g/m
2
80 g/m
Coated 120 g/m
2
2
2
Type an d size of paper 2
The machine feeds paper from the installed
paper tray or the manual feed slot.
The names for the paper trays in the printer driver and this Guide are as follows: 2
Tray and optional unit Name
Paper Tray Tray 1
Manual Feed Slot Manual
28
Page 37

Loading paper
2
Paper capacity of the paper trays 2
Paper size Paper types No. of sheets
Paper Tray
(Tray 1)
A4, Letter, Legal,
B5 (JIS), Executive, A5,
A5 L, A6, Folio
1
Manual Feed Slot Width: 76.2 to 215.9 mm
Length: 116.0 to
355.6 mm
Plain paper, Thinpaper,
Recycled paper
Plain paper, Thinpaper,
Thick paper,
Thicker paper,
Bond paper,
up to 250 (80 g/m
1 sheet
1 Envelope
2
)
Recycled paper,
Envelopes, Label s,
Glossy paper
1
Folio size is 215.9mm × 330.2 mm.
Recommended paper specifications 2
The following paper specifications are appropriate for this machine.
Basis weight
75-90 g/m
2
Thickness 80-110 μm
Roughness Higher than 20 sec.
Stiffness
90-150 cm
3
/100
Grain direction Long grain
Volume resistivity
Surface resistivity
Filler
9
-10e11 ohm
10e
9
-10e12 ohm-cm
10e
(Neutral)
CaCO
3
Ash content Below 23 wt%
Brightness Higher than 80%
Opacity Higher than 85%
Use plain paper that is appropriate for laser/LED machines to make copies.
2
Use paper that is 75 to 90 g/m
.
Use long grain paper with a neutral Ph value, and a moisture content of approx. 5%.
This machine can use recycled paper that meets DIN 19309 specifications.
29
Page 38

Chapter 2
IMPORTANT
1
1
Handling and using special paper 2
The machine is designed to work well with
most types of xerographic and bond paper.
However, some paper variables may have an
effect on print quality or handling reliability.
Always test samples of paper before
purchasing to ensure desirable performance.
Store paper in its original packaging and keep
it sealed. Keep the paper flat and away from
moisture, direct sunlight and heat.
Some important guidelines when selecting
paper are:
DO NOT use inkjet paper because it may
cause a paper jam or damage your
machine.
Preprinted paper must use ink that can
withstand the 200 °C temperature of the
machine’s fusing process.
If you use bond paper, paper having a
rough surface, or paper that is wrinkled or
creased, the paper may exhibit degraded
performance.
Types of paper to avoid 2
Some types of paper may not perform well
or may cause damage to your machine.
DO NOT use paper:
• that is highly textured
• that is extremely smooth or shiny
• that is curled or warped
1 A curl of 2 mm or greater may cause
jams to oc c u r.
• that is coated or has a chemical finish
• that is damaged, creased or folded
• that exceeds the recommended weight
specific a t ion in this guide
• with tabs and staples
30
• with letterheads using low temperature
dyes or thermography
• that is multipart or carbonless
• that is designed for inkjet printing
The types of paper listed above may
damage your machine. This damage is
not covered under any Brother warranty or
service agreement.
Page 39

Loading paper
2
IMPORTANT
Envelopes 2
The machine is designed to work well with
most envelopes. However, some envelopes
may have feed and print quality problems
because of the way they have been made.
Envelopes should have edges with straight,
well-creased folds. Envelopes should lie flat
and not be of baggy or flimsy construction.
Use only quality envelopes from a supplier
who understands that you will be using the
envelopes in a laser machine.
Envelopes can only be fed through the
manual feed slot.
We recommend that you print a test envelope
to make sure the print results are what you
want.
Types of envelopes to avoid 2
DO NOT use envelopes:
• that are damaged, curled, wrinkled or
an unusual shape
• with glue on the surface as shown in
the figure below
• with double flaps as shown in the figure
below
• with sealing flaps that are not folded
down when purchased
• with each side folded as shown in the
figure below
• that are extremely shiny or textured
• with clasps, staples, snaps or tie
strings
• with self-adhesive closures
• that are of a baggy construction
• that are not sharply creased
• that are embossed (raised writing)
• that were previously printed by a laser
or LED machine
• that are pre-printed on the inside
• that cannot be arranged neatly when
stacked
• that are made of paper that weighs
more than the paper weight
specifications for the machine
• with edges that are not straight or
consistently square
• with windows, holes, cut-outs or
perforations
If you use any of the types of envelopes
listed above, they may damage your
machine. This damage may not be
covered under any Brother warranty or
service agreement.
Occasionally you may experience paper
feed problems caused by the thickness,
size and flap shape of the envelopes you
are using.
31
Page 40

Chapter 2
IMPORTANT
Labels 2
The machine will print on most types of labels
designed for use with a laser machine. Labels
should have an adhesive that is acrylic-based
since this material is more stable at the high
temperatures in the fuser unit. Adhesives
should not come in contact with any part of
the machine, because the label stock may
stick to the drum unit or rollers and cause
jams and print quality problems. No adhesive
should be exposed between the labels.
Labels should be arranged so that they cover
the entire length and width of the sheet. Using
labels with spaces may result in labels
peeling off and causing serious jams or print
problems.
All labels used in this machine must be able
to withstand a temperature of 200 °C for a
period of 0.1 seconds.
Labels can only be fed through the manual
feed slot.
Types of labels to avoid 2
Do not use labels that are damaged, curled,
wrinkled or an unusual shape.
• DO NOT feed part used label sheets. The
exposed carrier sheet will damage your
machine.
• D O NOT reuse or insert labels that have
previously been used or are missing a few
labels on the sheet.
• Label sheets should not exceed the paper
weight specifications described in this
User’s Guide. Labels exceeding this
specification may not feed or print
correctly and may cause damage to your
machine.
32
Page 41

3
IMPORTANT
NOTE
Loadin g d ocuments 3
1
2
3
How to load documents
You can make copies, and scan from the ADF
(Automatic Document Feeder) and the
scanner glass.
Using th e aut oma tic document feeder (ADF) 3
The ADF can hold up to 35 pages and feeds
each sheet individually. We recommend you
use standard 80 g/m
the pages before putting them in the ADF.
Document Sizes Supported 3
2
paper and always fan
3
• To scan documents that are not
appropriate for the ADF, see Using the
scanner glass on page 34.
• It is easier to use the ADF if you are
loading a multiple page document.
• Make sure documents with correction fluid
or written with ink are completely dry.
a Unfold the ADF document support (1).
Lift up and unfold the ADF document
output support flap (2).
Length: 147.3 to 355.6 mm
Width: 147.3 to 215.9 mm
Weight:
How to load documents 3
• DO NOT leave thick documents on the
scanner glass. If you do this, the ADF may
jam.
• DO NOT use paper that is curled,
wrinkled, folded, ripped, stapled, paperclipped, pasted or taped.
• DO NOT use cardboard, newspaper or
fabric.
• To avoid damaging your machine while
using the ADF, DO NOT pull on the
document while it is feeding.
64 to 90 g/m
2
b Fan the pages well.
c Stagger the pages of your document
face up top edge first, in the ADF until
the Touchscreen shows ADF Ready
and you feel the top page touch the feed
rollers.
33
Page 42

Chapter 3
NOTE
NOTE
IMPORTANT
1
d Adjust the paper guides (1) to fit the
width of your document.
To scan non-standard documents, see Using the scanner glass on page 34.
Using the scanner glass 3
b Using the document guidelines on the
left and top, place the document
face down in the upper left corner of the
scanner glass.
You can use the scanner glass to copy or
scan pages of a book, one page at a time.
Document Sizes Supported 3
Length: Up to 300.0 mm
Width: Up to 215.9 mm
Weight: Up to 2.0 kg
How to load documents 3
To use the scanner glass, the ADF must
be empty.
a Lift the document cover.
c Close the document cover.
If the document is a book or is thick do not
slam the cover or press on it.
34
Page 43

4
4
1
Making copies 4
How to copy 4
The following steps show the basic copy
operation.
a Do one of the following to load your
document:
Place the document face u p in the
ADF (see Using the automatic
document feeder (ADF) on page 33).
Load your document face down on
the scanner glass (see Using the
scanner glass on page 34).
b Press the Copy button on the
Touchscreen.
The Touchscreen shows
Stop copying 4
To stop copying, press .
Copy preset settings 4
You can copy with a variety of settings that
are already set up for you in the machine
simply by pressing t hem.
The following preset settings are available.
Receipt
Normal
2in1(ID)
2in1
2-sided(12)
Paper Save
a Load your document.
b Press (Copy).
c Swipe left or right to display Receipt,
Normal, 2in1(ID), 2in1,
2-sided(12) or Paper Save, and
then press the option you want.
d Enter the number of copies you want.
e Do one of the following:
To change more settings, go to
1 No. of Copies
You can enter the number of cop ies
by using the numeric al pad.
c For multiple copies, enter the two-digit
number (up to 99).
d Press Colour Start or Mono Start.
f Press Options.
g Swipe up or down, or press a or b to
step f.
If you have finished changing
settings, go to ste p i.
display the available settings, and then
press the setting you want.
35
Page 44

Chapter 4
NOTE
h Swipe up or down, or press a or b to
display the available options, and then
press your new option. Repeat steps g
and h for each setting you want. If you
have finished changing settings,
press OK.
Save the settings as a Shortcut by
pressing Save as Shortcut.
i Press Colour Start or Mono Start.
Copy Options 4
You can change the following copy settings.
Press Copy and then press Options. Swipe
up or down, or press a or b to scroll through
the copy settings. When the setting you want
is displayed, press it and choose your option.
When you have finished changing settings,
press OK.
(Advanced User's Guide)
For more information about changing the
following settings, see Advanced User's
Guide: Copy settings:
Quality
Enlarge/Reduce
Density
Contrast
Stack/Sort
Page Layout
2in1(ID)
Colour Adjust
2-sided Copy
Remove Background Colour
Save as Shortcut
36
Page 45

5
How to print from a compu ter 5
5
Printing a document 5
The machine can receive data from your
computer and print it. To print from a
computer, you must install the printer driver.
(For more information about printer driver
settings, see Software User's Guide.)
a Install the Brother printer driver from the
CD-ROM (see Quick Setup Guide).
b From your application, choose the Print
command.
c Choose the name of your machine in the
Print dialog box and click Properties
(or Preferences, depending on the
application you are using).
d Choose the settings you want to change
in the Properties dialog box, and then
click OK.
Paper Size
Orientation
Copies
Media Type
Print Quality
Colour / Mono
Document Type
Multiple Page
2-sided / Booklet
Paper Source
e Click OK to begin printing.
37
Page 46

How to scan to a computer 6
6
Before scanning 6
To use the machine as a scanner, install a scanner driver. If the machine is on a network,
configure it with a TCP/IP address.
Install the scanner drivers from the CD-ROM (see Quick Setup Guide: Install MFL-Pro Suite).
Configure the machine with a TCP/IP address if network scanning does not work (see Software
User's Guide).
38
Page 47

How to sc a n to a co mp u ter
6
NOTE
Scanning a document as a PDF file using ControlCenter4 (Windows®) 6
(For Macintosh users, see Software User's Guide.)
The screens on your computer may vary depending on your model.
ControlCenter4 is a software utility that lets you quickly and easily access the applications you use
most often. Using ControlCenter4 eliminates the need to manually launch specific applications .
You can use ControlCenter4 on your computer.
a Load your document (see How to load documents on page 33).
b Follow the instructions for the operating system you are using.
(Windows®XP, Windows Vista® and Windows® 7)
Open ControlCenter4 by clicking (Start) > All Programs > Brother > XXX-XXXX
(where XXX-XXXX is your model name) > ControlCenter4. The ControlCen ter4
application will open.
(Windows
Click (Brother Utilities), and then click the drop-down list and select your model
name (if not already selected). Click SCAN in the left navigation bar, and then click
ControlCenter4. The ControlCenter4 application will open.
c If the ControlCenter4 Mode screen appears, choose the Advanced Mode and then click OK.
®
8)
39
Page 48

Chapter 6
d Make sure the machine you want to use is selected from the Model drop-down list.
e Click File.
f Press Scan.
The machine starts the scanning process. The folder where the scanned data is saved will
open automatically.
40
Page 49

How to sc a n to a co mp u ter
6
How to scan a document as a PDF file using the Touchscreen 6
a Load your document (see How to load documents on page 33).
b Press Scan.
c Swipe left or right to display to File.
will be displayed in the centre of the Touchscreen highlighted in blue.
d Press OK.
When the machine is connected to a network, press the computer Name.
Do one of the following:
If you want to use the default settings, go to step i.
If you want to change the default settings, go to step e.
e Press Options.
f Press Set with Touch Panel.
Press On.
g Choose the settings for Scan Type, Resolution, File Type, Scan Size and
Remove Background Colour as needed.
h Press OK.
i Press Start.
The machine starts the scanning process.
41
Page 50

Chapter 6
NOTE
The following scan modes are available.
• to Network (Windows®)
• to FTP
• to E-mail
• to Image
• to OCR
• to File
1
• WS Scan
1
Windows® users only (Windows Vista® SP2 or later, Windows® 7 and Windows® 8)
(See Software Us er's Guide.)
(Web Services Scan)
42
Page 51

A
NOTE
Routine ma in tenance A
A
Replacing the consumable items A
You must to replace the consumable items when the machine indicates that the life of the
consumable is over. You can replace the following consumable item s by yourself:
Using non-Brother supplies may affect the print quality, hardware performance, and machine
reliability.
The drum unit and toner cartridge are two separate consumables. Make sure both are installed
as an assembly. If the toner cartridge is placed in the machine without the drum unit, the
messages Drum ! may be displayed.
Toner cartridge Drum unit
See Replacing the toner cartridges on page 47.
Model Name: TN-241BK, TN-241C, TN-24 1M,
TN-241Y, TN-245C, TN-245M, TN-2 45Y
See Replacing the dru m units on page 54.
Model Name: DR-241CL (4 pc. drum set) or
DR-241CL-BK, DR-241CL-CMY (si ngle drums)
Belt unit Waste toner b o x
See Replacing the belt unit on page 60.
Model Name: BU-220CL
See Replacing the waste toner box on page 64.
Model Name: WT-220CL
43
Page 52

The messages in the table appear on the Touchscreen in Ready mode. These messages provide
advanced warnings to replace the consumable items before they reach end of life. To avoid any
inconvenience, you may want to buy spare consumable items before the machine stops printing.
Touchscreen
messages
Toner Lo w
Prepare New
Toner Cartridge.
Consumable item
to prepare
Toner cartridge
BK = Black
C = Cyan
M = Magenta
Y = Yellow
Approximate life How to replace Model nam e
<Black>
2,500 pages
<Cyan, Magenta,
Yellow>
1,400 pages
2,200 pages
Drum End SoonX
1 Drum unit
15,000 pages
X = BK, C, M, Y
BK = Black
C = Cyan
M = Magenta
Y = Yellow
Belt End Soon Belt unit
WT Box End Soon
1
A4 or Let ter size single-si ded pages.
2
Approx. cartridge yield is declared in accord ance with ISO/IEC 19798.
3
1 page per job
4
Drum life is approximate and may vary by type of use.
5
Standard toner cartridge
6
High yield toner cartridge
Waste toner box
50,000 pages
50,000 pages
See page 47.
125
125
126
134
See page 55. 4 Drum units:
1
See page 60. BU-220CL
1
See page 64. WT-220CL
TN-241BK
TN-241C
TN-241M
TN-241Y
TN-245C
TN-245M
TN-245Y
5
5
5
5
6
6
6
DR-241CL
1 Drum unit:
DR-241CL-BK
DR-241CL-CMY
44
Page 53

Routine maintena nce
A
You must clean the machine regularly and replace the consumable items when the messages in
the table are displayed on the Touchscreen.
Touchscreen
messages
Replace Toner
Consumable item
to replace
Toner cartridge
The Touchscreen
shows the toner
cartridge colour
that you must
replace.
BK = Black
C = Cyan
M = Magenta
Y = Yellow
Replace DrumX
Drum unit
X = BK, C, M, Y,
BK = Black
C = Cyan
M = Magenta
Y = Yellow
Drum Stop Drum unit
Replac e Be lt Belt unit
Replac e WT Box W aste toner box
Replac e Fu se r Fuser unit
Replac e PF kit Paper feeding kit
Approximate life How to replace Model name
<Black>
2,500 pages
125
<Cyan, Magenta,
Yellow>
1,400 pages
2,200 pages
125
126
15,000 pages
See page 47.
134
See page 55. 4 Drum units:
TN-241BK
TN-241C
TN-241M
TN-241Y
TN-245C
TN-245M
TN-245Y
5
5
5
6
6
6
DR-241CL
1 Drum unit:
DR-241CL-BK
DR-241CL-CMY
1
50,000 pages
50,000 pages
50,000 pages
See page 60. BU-220CL
1
See page 64. WT-220CL
1
Contact Brother c ustomer service or yo ur
local Brother dealer for a replacement
fuser unit.
1
50,000 pages
Contact Brother c ustomer service or yo ur
local Brother dealer for a replacement
paper feeding kit.
5
1
A4 or Letter size si ngle-si ded pages.
2
Approx. cartridge yield is declared in accor dance with ISO/IEC 19798.
3
1 page per job
4
Drum life is approximate and may vary by type of use.
5
Standard toner cartridge
6
High yield toner cartridge
45
Page 54

NOTE
• Go to http://www.brother.com/original/index.html for instructions on how to return your used
consumable items to the Brother recycling program. If you choose not to return your used
items, discard the used consumable according to local regulations, keeping it separate from
domestic waste. If you have questions, contact your local waste disposal office (see Product
Safety Guide: Recycling information in accordance with the WEEE and Battery Directives).
• We recommend placing used consumable items on a piece of paper to prevent accidentally
spilling or scattering the material inside.
• If you use paper that is not a direct equivalent for the recommended paper, the life of
consumable items and machine parts may be reduced.
• The projected life for each of the toner cartridges is based on ISO/ICE 19798. Freque ncy of
replacement will vary depending on the print volume, percentage of coverage, types of media
used, and powering on/off the machine.
• Frequency of replacement consumables except toner cart ridges will v ary depending on the
print volume, types of media used, and powering on/off the machine.
46
Page 55

Routine maintena nce
A
NOTE
Replacing the toner cartridges A
Model Name: TN-241BK1, TN-241C1,
1
TN-241M
TN-245M
The Standard toner cartridge can print
approximately 2,500 pages
approximately 1,400 pages
Magenta, Yellow). The High Yield toner
cartridge can print approximately 2,200
pages
page count will vary depending on your
average type of document.
When a toner cartridge is running low, the
Touchscreen shows Toner Low.
The toner cartridges that come supplied with
the machine will need to be replaced after
approximately 1,000 pages
1
Standard toner cartridge
2
High yield toner cartridge
3
Approx. cartridge yield is declared in accordance
with ISO/IEC 19798.
, TN-241Y1, TN-245C2,
2
, TN-245Y
3
(Cyan, Magenta, Yellow). Actual
2
3
(Black) or
3
(Cyan,
3
.
Toner Low A
If the Touchscreen shows Toner Low, buy a
new toner cartridge for the colour indicated
on the Touchscreen and have it ready before
you get a Replace Toner message.
Replace Toner A
When the Touchscreen shows Replace
Toner the machine will stop printing until you
replace the toner cartridge.
The Touchscreen shows the toner cartridge
colour that you must replace. (BK=Black,
C=Cyan, M=Magenta, Y=Y ello w )
A new Brother Original toner cartridge will
reset the Replace Toner message.
• The indication of remaining toner life will
vary depending on the types of documents
printed and customer’s usage.
• It is a good idea to keep a new toner
cartridge ready for use when you see the
Toner Low warning.
• To ensure high quality printing, we
recommend that you use only Brother
Original toner cartridges. When you want
to buy toner cartridges, contact Brother
customer service or your local Brother
dealer.
• We recommend that you clean the
machine when you replace the toner
cartridge (see Cleaning and Checking the
machine on page 69).
• DO NOT unpack the new toner cartridge
until you are ready to install it.
47
Page 56

Replacing the toner cartridges A
WARNING
a Make sure the machine is turned on.
b Open the top cover until it locks in the
open position.
c Remove the toner cartridge and drum
unit assembly for the colour shown on
the Touchscreen.
HOT SURFACE
After you have just used the machine, some
intern a l pa rts o f th e ma c hine will be
extremely hot. Wait for the machine to cool
down before you touch the internal parts.
48
Page 57

A
IMPORTANT
• We recommend that you place the toner
WARNING
cartridge and drum unit assembly on a
clean, flat surface with disposable paper
underneath it in case you accidentally spill
or scatter toner.
• To prevent damage to the machine from
static electricity, DO NOT touch the
electrodes shown in the illustration.
Routine maintena nce
d Push down the green lock lever and take
the toner cartridge out of the drum unit.
• DO NOT put a toner cartridge or a toner
cartridge and drum unit assembly into a
fire. It could explode, resulting in
injuries.
• DO NOT use flammable substances,
any type of spray, or an organic
solvent/liquid containing alcohol or
ammonia to clean the inside or outside
of the product. Doing so could cause a
fire or electrical shock. Instead, only use
a dry, lint-free cloth.
(See Product Safety Guide: G eneral
precautions.)
49
Page 58

IMPORTANT
• Handle the toner cartridge carefully. If
NOTE
toner scatters on your hands or clothes,
immediately wipe or wash it off with cold
water.
• To avoid print quality problems, DO NOT
touch the shaded parts shown in the
illustrations.
<Toner cartridge>
<Drum unit>
• Be sure to seal up the used toner cartridge
tightly in a bag so that toner powder does
not spill out of the cartridge.
• Go to http://www.brother.com/original/
index.html for instructions on how to return
your used consumable items to the
Brother recycling program. If you choose
not to return your used items, discard the
used consumable according to local
regulations, keeping it separate from
domestic waste. If you have questions,
contact your local waste disposal office
(see Product Safety Guide: Recycling
information in accordance with the WEEE
and Battery Directives).
• We recommend that you place the toner
cartridge on a clean, flat, level, stable
surface with disposable paper underneath
it in case you accidentally spill or scatter
toner.
50
Page 59

Routine maintena nce
A
IMPORTANT
IMPORTANT
e Unpack the new toner cartridge. Hold
the cartridge level with both hands and
gently shake it from side to side several
times to spread the toner evenly inside
the cartridge.
• Unpack the toner cartridge just before you
put it in the machine. If a toner cartridge is
left unpacked for a long time, the toner life
will be shortened.
• If an unpacked drum unit is placed in
direct sunlight (or room light for long
periods of time), the unit may be
damaged.
• Brother machines are designed to work
with toner of a particular specification and
will work to a level of optimum
performance when used with Brother
Original toner cartridges. Brother cannot
guarantee this optimum performance if
toner or toner cartridges of other
specifications are used. Brother does not
therefore recommend the use of
cartridges other than Brother Original
cartridges with this machine, or the
refilling of empty cartridges with toner from
other sources. If damage is caused to the
drum unit or other parts of this machine as
a result of the use of toner or toner
cartridges other than Brother Original
products due to the incompatibility or lack
of suitability of those products with this
machine, any repairs required as a result
may not be covered by the warranty.
f Pull off the protective cover.
Put the new toner cartridge in the drum
unit immediately after you remove its
protective cover. To prevent any
degradation to the print quality, DO NOT
touch the shaded parts shown in the
illustrations.
51
Page 60
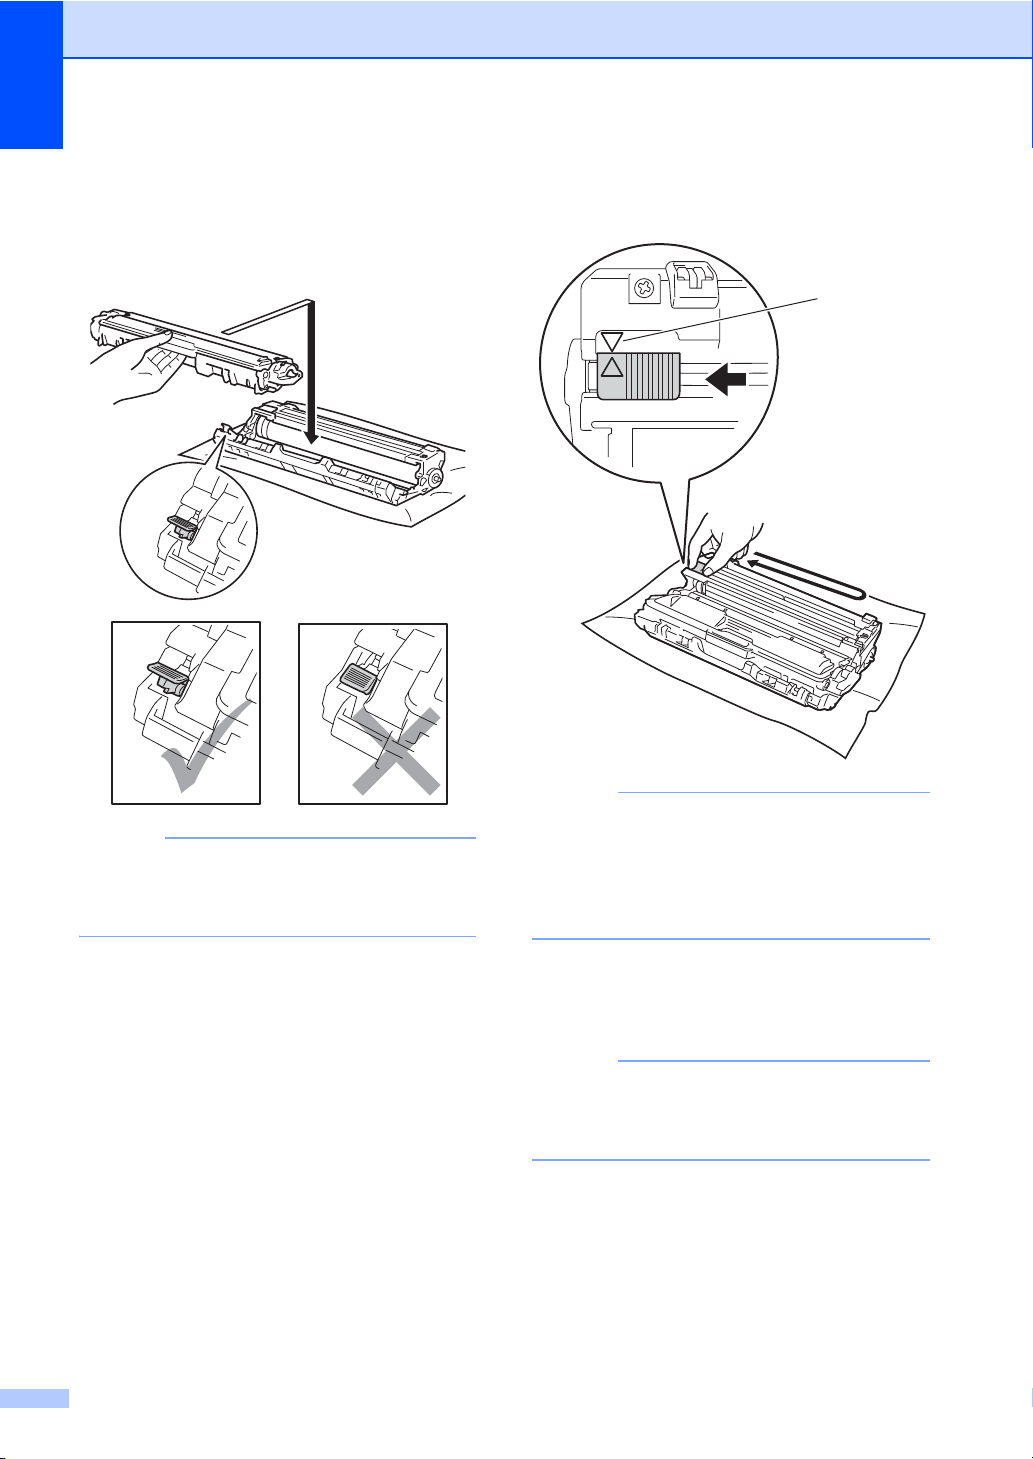
g Put the new toner cartridge firmly into
NOTE
NOTE
NOTE
1
the drum unit until you hear it lock into
place. If you put it in correctly, the green
lock lever on t he dru m u nit w ill lift
automatically.
h Clean the corona wire inside the drum
unit by gently sliding the green tab from
left to right and right to left several times.
Make sure you put the toner cartridge in
correctly or it may separate from the drum
unit.
52
Be sure to return the tab to the Home
position (a) (1). The arrow on the tab must
be aligned with the arrow on the drum unit.
If it is not, printed pages may have a
vertical stripe.
i Repeat step c and step h to clean
each of the three remaining corona
wires.
When cleaning the corona wires, you do
not have to remove the toner cartridge
from the drum unit.
Page 61

Routine maintena nce
A
NOTE
BK
C
M
Y
j Slide each toner cartridge and drum unit
assembly into the machine. Make sure
you match the toner cartridge colour to
the same colour label on the machine.
k Close the top cover of the machine.
After replacing a toner cartridge, DO NOT
turn off the machine or open the top cover
until the Touchscreen clears the
Please wait. message and returns to
Ready mode.
BK = Black, C = Cyan,
M = Magenta, Y= Yellow
53
Page 62

Repla cin g the dr u m un its A
IMPORTANT
Model Name: DR-241CL 4 pc. Drum Set or
single drum units DR-241CL-BK,
DR-241CL-CMY
A new drum unit can print approximately
15,000 A4 or Letter size single-sided pages.
DR-241CL Drum Set contains four drum units
one Black (DR-241CL-BK) and three colour
(DR-241CL-CMY).
DR-241CL-BK contains one Black drum.
DR-241CL-CMY contains one Colour drum.
Drum wear and tear occurs due to general
use, rotation of the drum and interaction with
paper, toner and other materials in the paper
path. In designing this product, Brother
decided to use the number of rotations of the
drum as a reasonable determinant of the
drum life. When a drum reaches the factoryestablished rotation limit corresponding to the
rated page yield, the product’s Touchscreen
LCD will advise you to replace the applicable
drum(s). The product will continue to function;
however, print quality may not be optimal.
As the drums rotate in unison during the
various stages of operation (regardless of
whether toner is deposited on the page) and
because damage to a single drum unit is not
likely, you must replace all of the drums at
once (unless you replaced an individual drum
[DR-241CL-BK for Black and
DR-241CL-CMY for Colour] for reasons other
than reaching its rated life). For your
convenience, Brother sells the drum units as
a set of four (DR-241CL).
For best performance, use a Brother
Original drum unit and Brother Original
toner units. Printing with a third-party drum
unit or toner unit may reduce not only the
print quality but also the quality and life of
the machine itself. Warranty coverage
may not apply to problems caused by the
use of a third-party drum or toner unit.
Drum ! A
The corona wires are dirty. Clean the corona
wir es i n t he f our dru m un its (s ee Cleaning the
corona wires on page 73).
If you cleaned the corona wires and the
Drum ! error is st il l d is p lay ed on the
Touchscreen, then the drum unit is at the end
of its life. Replace the drum units with a new
set.
Drum End SoonX A
If only a specified drum is near the end of its
life, the Touchscreen shows the
Drum End SoonX message. The X indicates
the drum unit colour that is near the end of its
life. (BK=Black, C=Cyan, M=Magenta,
Y=Yellow ). We recommend you keep Brother
Original drum units ready for installation. Buy
a new drum unit DR-241CL-BK (for Black) or
a DR-241CL-CMY (for either C, M, Y colour)
and have it ready before you get a
Replace DrumX message.
Replace DrumX A
If only a specified drum needs to be replaced,
the Touchscreen shows the
Replace DrumX message. The X indicates
the drum unit colour that you must replace.
(BK=Black, C=Cyan, M=Magenta, Y=Yellow )
The drum unit has exceeded its rated life.
Replace the drum unit with a new one. We
recommend a Brother Original drum unit be
installe d at thi s t im e .
When you replace the drum unit with a new
one, you must reset the drum counter.
Instructions of how to do this can be found in
the box your new drum unit came in.
54
Page 63

Routine maintena nce
A
IMPORTANT
Drum Stop A
We cannot guarantee the print quality.
Replace the drum unit with a new one. We
recommend a Brother Original drum unit be
installed at this time.
When you replace the drum unit with a new
one, you must reset the drum counter.
Instructions of how to do this can be found in
the box your new drum unit came in.
Replacing the drum units A
• While removing the drum unit, handle it
carefully because it may contain toner. If
toner scatters on your hands or clothes,
wipe or wash it off with cold water at once.
• Every time you replace the drum unit,
clean the inside of the machine (see
Cleaning and Checking the machine
on page 69).
• DO NOT unpack the new drum unit until
you are ready to install it. Exposure to
direct sunlight (or room light for long
periods of time) may damage the drum
unit.
a Mak e sure the mac hine is turned on .
b Open the top cover until it locks in th e
open position.
55
Page 64

c Remove the toner cartridge and drum
WARNING
IMPORTANT
unit assembly for the colour shown on
the Touchscreen.
HOT SURFACE
After you have just used the machine, some
internal p ar ts o f the mac h ine will be
extremely hot. Wait for the machine to cool
down before you touch the internal parts.
• We recommend that you place the toner
cartridge and drum unit assembly on a
clean, flat surface with disposable paper
underneath it in case you accidentally spill
or scatter toner.
• To prevent damage to the machine from
static electricity, DO NOT touch the
electrodes shown in the illustration.
56
Page 65

A
d Push down the green lock lever and take
WARNING
IMPORTANT
the toner cartridge out of the drum unit.
Routine maintena nce
• Handle the toner cartridge carefully. If
toner scatters on your hands or clothes,
immediately wipe or wash it off with cold
water.
• To avoid print quality problems, DO NOT
touch the shaded parts shown in the
illustrations.
<Toner cartridge>
• DO NOT put a toner cartridge or a toner
cartridge and drum unit assembly into a
fire. It could explode, resulting in
injuries.
• DO NOT use flammable substances,
any type of spray, or an organic
solvent/liquid containing alcohol or
ammonia to clean the inside or outside
of the product. Doing so could cause a
fire or electrical shock. Instead, only use
a dry, lint-free cloth.
(See Product Safety Guide: General
precautions.)
<Drum unit>
• We recommend that you place the toner
cartridge on a clean, flat, level, stable
surface with disposable paper underneath
it in case you accidentally spill or scatter
toner.
57
Page 66

NOTE
• Be sure to seal up the used drum unit
NOTE
tightly in a bag so that toner powder does
not spill ou t of the drum unit.
• Go to http://www.brother.com/original/
index.html for instructions on how to return
your used consumable items to the
Brother recycling program. If you choose
not to return your used items, discard the
used consumable according to local
regulations, keeping it separate from
domestic waste. If you have questions,
contact your local waste disposal office
(see Product Safety Guide: Recycling
information in accordance with the WEEE
and Battery Directives).
e Unpack the new drum unit.
f Pull off the protective cover.
g Put the toner cartridge firmly into the
new drum unit until you hear it lock into
place. If you put the cartridge in
correctly, the green lock lever will lift
automatically.
Make sure you put the toner cartridge in
correctly or it may separate from the drum
unit.
58
Page 67

Routine maintena nce
A
NOTE
NOTE
1
BK
C
M
Y
h Clean the corona wire inside the drum
unit by gently sliding the green tab from
left to right and right to left several times.
j Slide each toner cartridge and drum unit
assembly into the machi ne. Make sure
you match the toner cartridge colour to
the same colour label on the machine.
Be su r e to r e turn th e ta b to the Home
position (a) (1). The arrow on the tab must
be aligned with the arrow on the drum unit.
If it is not, printed pages may have a
vertical stripe.
i Repeat step c and step h to clean
each of three remaining corona wires.
When cleaning the corona wires, you do
not have to remove the toner cartridge
from the drum unit.
BK = Black, C = Cyan,
M = Magenta, Y= Yellow
59
Page 68

k Close the top cover of the machine.
IMPORTANT
Replacing the belt unit A
l When you replace the drum unit with a
new one, you must reset the drum
counter. Instructions of how to do this
can be found in the box your new drum
unit came in.
Model name: BU-220CL
A new belt unit can print approximately
50,000 A4 or Letter size single-sided pages.
Replace Belt A
When the Replace Belt message appears
on the Touchscreen, you must replace the
belt unit.
When you replace the belt unit with a new
one, you must reset the belt unit counter.
Instructions of how to do this can be found in
the box your new belt unit came in.
• DO NOT touch the surface of the belt unit.
If you touch it, it could decrease print
quality.
• D am age caus ed by incorrec t handling of
the belt unit may void your warranty.
a Make sure the machine is turned on.
b Open the top cover until it locks in the
open position.
60
Page 69

A
c Remove all of the toner cartridge and
WARNING
IMPORTANT
drum unit assemblies.
HOT SURFACE
After you have just used the machine, some
internal parts of the machine will be
extremely hot. Wait for the machine to cool
down before you touch the internal parts.
Routine maintena nce
• We recommend that you place the toner
cartridge and drum unit assemblies on a
clean, flat surface with disposable paper
underneath them in case you accidentally
spill or scatter toner.
• To prevent damage to the machine from
static electricity, DO NOT touch the
electrodes shown in the illustration.
61
Page 70

d Hold the green handle of the belt unit
IMPORTANT
and lift the belt unit up, and then pull it
out.
e Unpack the new belt unit and put the
new belt unit in the machine.
To avoid print quality problems, DO NOT
touch the shaded parts shown in the
illustrations.
62
Page 71

Routine maintena nce
A
BK
C
M
Y
f Slide each toner cartridge and drum unit
assembly into the machine, making sure
you match the toner cartridge colours to
the same colour labels on the machine.
g Close the top cover of the machine.
h When you replace the belt unit with a
new one, you must reset the belt unit
counter. Instructions of how to do this
can be found in the box your new belt
unit came in.
BK = Black, C = Cyan,
M = Magenta, Y= Yellow
63
Page 72

Replacing the waste toner boxA
WARNING
Model name: WT-220CL
The life of a waste toner box is approximately
50,000 A4 or Letter size single-sided pages.
WT Box End Soon A
If the Touchscreen shows
WT Box End Soon, it means the waste
toner box is near the end of i ts life. Buy a new
waste toner box and have it ready before you
get a Replace WT Box message.
c Remove all of the toner cartridge and
drum unit assemblies.
Replace WT Box A
When the Replace WT Box message
appears on the Touchscreen, you must
replace the waste toner box.
a Make sure the machine is turned on.
b Open the top cover until it locks in the
open position.
HOT SURFACE
After you have just used the machine, some
intern a l pa rts o f th e ma c hine will be
extremely hot. Wait for the machine to cool
down before you touch the internal parts.
64
Page 73

A
IMPORTANT
• We recommend that you place the toner
IMPORTANT
cartridge and drum unit assemblies on a
clean, flat surface with disposable paper
underneath them in case you accidentally
spill or scatter toner.
• To prevent damage to the machine from
static electricity, DO NOT touch the
electrodes shown in the illustration.
Routine maintena nce
d Hold the green handle of the belt unit
and lift the belt unit up, and then pull it
out.
To avoid print quality problems, DO NOT
touch the shaded parts shown in the
illustrations.
65
Page 74

e Remove the orange packing material
NOTE
and discard it.
f Hold the green handle of the waste toner
box and remove the waste toner box
from the machine.
This step is only necessary when you are
replacing the waste toner box for the first
time, and is not required for the
replacement waste toner box. The orange
packing piece is installed at the factory to
protect your machine during shipment.
66
Page 75

A
WARNING
IMPORTANT
NOTE
• DO NOT put the waste toner box into a
fire. It could explode, resulting in
injuries.
• DO NOT use flammable substances,
any type of spray, or an organic
solvent/liquid containing alcohol or
ammonia to clean the inside or outside
of the product. Doing so could cause a
fire or electrical shock. Instead, only use
a dry, lint-free cloth.
(See Product Safety Guide: General
precautions.)
Routine maintena nce
g Unpack the new waste toner box and
place it in the machine.
• Be sure to seal up the waste toner box
• Discard the used waste toner box
DO NOT reuse the waste toner box.
tightly in a bag so that toner powder does
not spill out of the waste toner box.
according to local regulations, keeping it
separate from domestic waste. If you have
questions, contact your local waste
disposal office.
67
Page 76
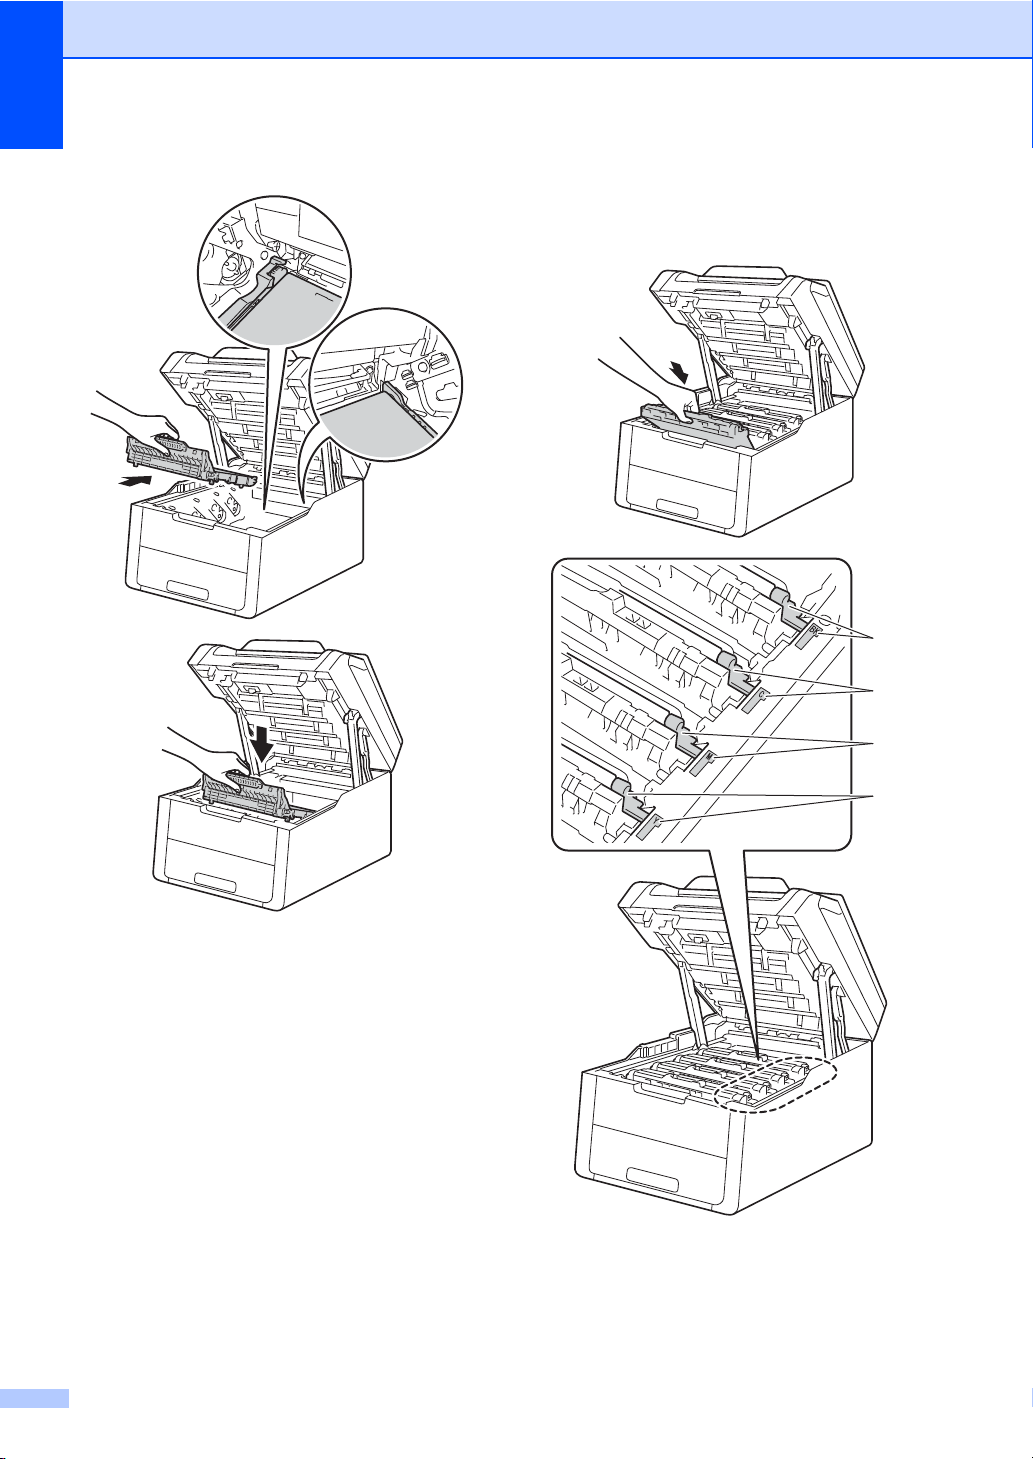
h Put the belt unit back in the machine.
BK
C
M
Y
i Slide each toner cartridge and drum unit
assembly into the machine, making sure
you match the toner cartridge colours to
the same colour labels on the machine.
68
BK = Black, C = Cyan,
M = Magenta, Y= Yellow
j Close the top cover of the machine.
Page 77
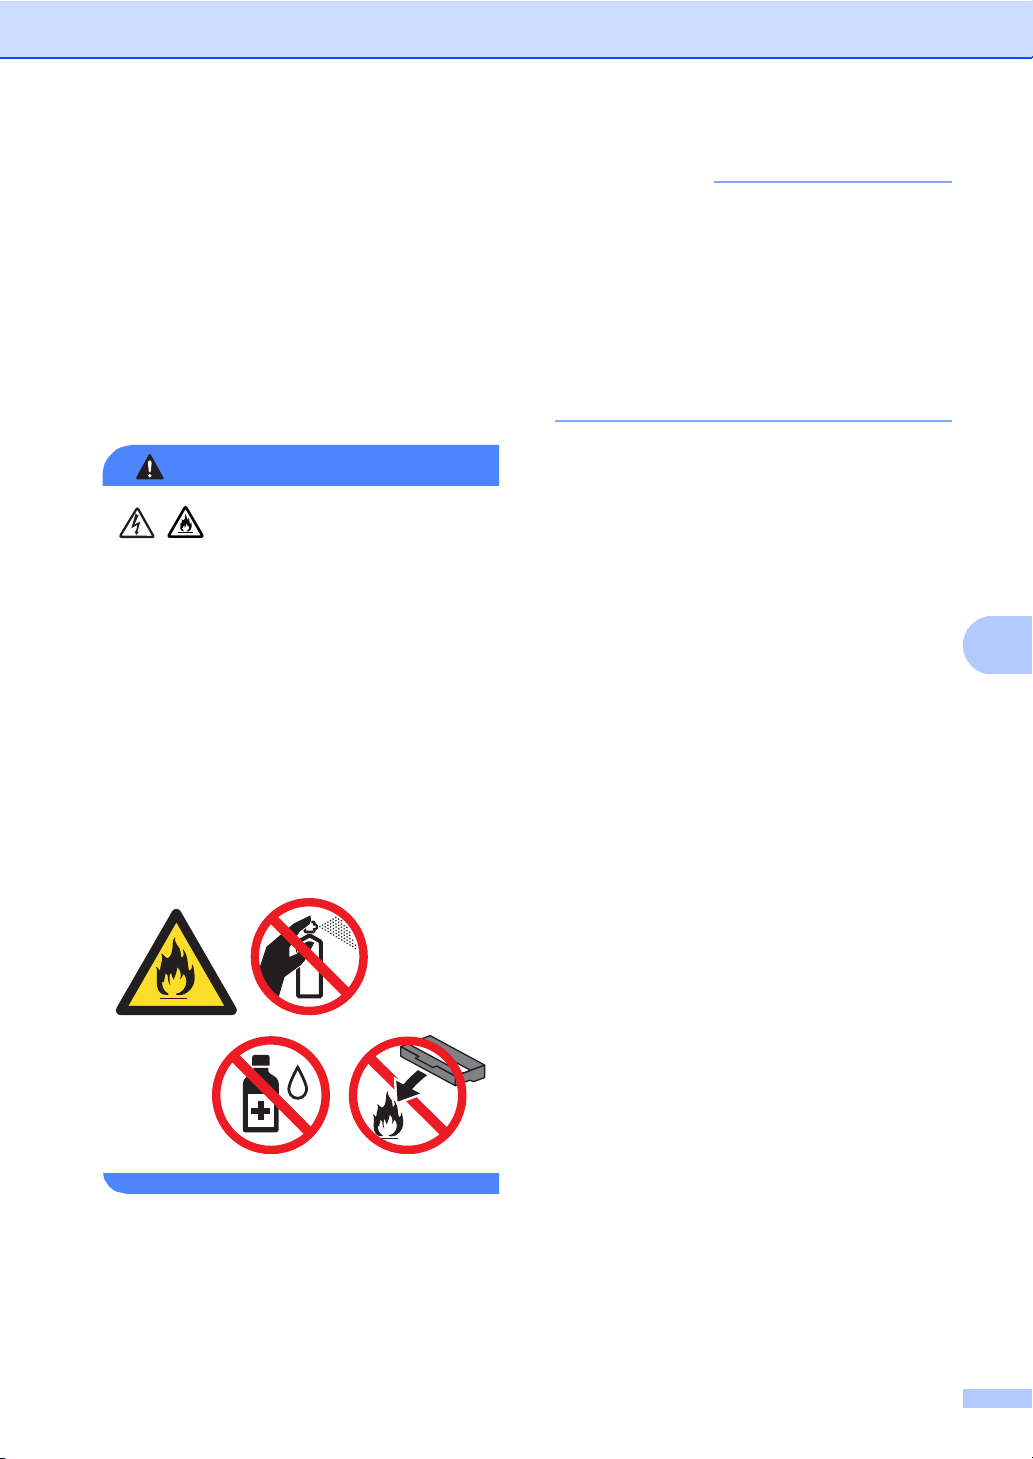
A
Cleaning and Checking
WARNING
IMPORTANT
the machine A
Clean the outside and inside of the machine
regularly with a dry, lint-free cloth. When you
replace the toner cartridge or the drum unit,
make sure that you clean the inside of the
machine. If printed pages are stained with
toner, clean the inside of the machine with a
dry, lint-free cloth.
• DO NOT put a toner cartridge or a toner
cartridge and drum unit assembly into a
fire. It could explode, resulting in
injuries.
• DO NOT use flammable substances,
any type of spray, or an organic
solvent/liquid containing alcohol or
ammonia to clean the inside or outside
of the product. Doing so could cause a
fire or electrical shock. Instead, only use
a dry, lint-free cloth.
(See Product Safety Guide: General
precautions.)
Routine maintena nce
• Use neutral detergents. Cleaning with
volatile liquids such as thinner or benzine
will damage the surface of the machine.
• DO NOT use cleaning materials that
contain ammonia.
• DO NOT use isopropyl alcohol to remove
dirt from the control panel. It may crack the
panel.
69
Page 78

Cleaning the outside of the
IMPORTANT
machine A
DO NOT use any type of liquid cleaners
(including ethanol).
Cleaning the Touchscreen
a Press and hold down to turn the
machine off.
b Clean the Touchscreen with a dry, soft
lint-free cloth.
b Wipe the outside of the machine with a
dry, lint-free cloth to remove dust.
c Pull the paper tray completely out of the
machine.
c Turn on the machine.
Cleaning the outside of the mach i ne
a Press and hold down to turn the
machine off.
70
d If paper is loaded in the paper tray,
remo ve it .
e Remove anything that is stuck inside the
paper tray.
Page 79

Routine maintena nce
A
IMPORTANT
f Wipe the inside and the outside of the
paper tray with a dry, lint-free cloth to
remove dust.
g Re-load the paper and put the paper tray
firmly back in the machine.
h Turn on the machine.
Cleaning the LED heads A
If there is a problem with the print quality,
such as light or faded colours or white streaks
or bands down the page, clean the LED
heads as follows:
DO NOT touch the windows of the LED
heads with your fingers.
a Press and hold down to turn the
machine off.
b Open the top cover until it locks in th e
open position.
71
Page 80

c Wipe the windows of all four LED heads
1
1
2
1
3
(1) with a dry, lint-free cloth. Be careful
not to touch the windows of the LED
heads (1) with your fingers.
Cleaning the scanner glass A
a Press and hold down to turn the
machine off.
b Lift the document cover (1).
Clean the white plastic surface (2) and
scanner glass (3) underneath it with a
soft lint-free cloth slightly moistened with
water.
d Close the top cover of the machine.
e Turn on the machine.
72
Page 81

Routine maintena nce
A
NOTE
2
1
c In the ADF unit, clean the white bar (1)
and the scanner glass strip (2)
underneath it with a soft lint-free cloth
slightly moistened with water.
In addition to cleaning the scanner glass
and glass strip with a soft lint-free cloth
slightly moistened with water, run your
finger tip over the glass to see if you can
feel anything on it. If you feel dirt or debris,
clean the glass again concentrating on
that area. You may need to repeat the
cleaning process three or four times. To
test, make a copy after each cleaning.
d Close the document cover.
Cleaning the corona wires A
If you have print quality problems or the
Touchscreen shows Drum !, clean the
corona wires as follows:
a Open the top cover until it locks in th e
open position.
b Remove the toner cartridge and drum
unit assembly.
e Turn on the machine.
73
Page 82

WARNING
IMPORTANT
HOT SURFACE
After you have just used the machine, some
internal p ar ts o f the mac h ine will be
extremely hot. Wait for the machine to cool
down before you touch the internal parts.
• We recommend that you place the toner
cartridge and drum unit assembly on a
clean, flat surface with disposable paper
underneath it in case you accidentally spill
or scatter toner.
• To prevent damage to the machine from
static electricity, DO NOT touch the
electrodes shown in the illustration.
74
Page 83

Routine maintena nce
A
NOTE
1
BK
C
M
Y
c Clean the corona wire inside the drum
unit by gently sliding the green tab from
left to right and right to left several times.
d Slide the toner cartridge and drum unit
assembly into the machi ne. Make sure
that you match the toner cartridge colour
to the same colour label on the machine.
Be su r e to r e turn th e ta b to the Home
position (a) (1). The arrow on the tab must
be aligned with the arrow on the drum unit.
If it is not, printed pages may have a
vertical stripe.
BK = Black, C = Cyan,
M = Magenta, Y= Yellow
75
Page 84

e Repeat steps b - d to clean the three
NOTE
remaining corona wires.
When cleaning the corona wires, you do
not have to remove the toner cartridge
from the drum unit.
f Close the top cover of the machine.
Cleaning the drum unit A
If your printout has dots at 94 mm intervals,
follow the steps below to solve the problem.
a Make sure that the machine is in the
Ready mode.
b Press .
c Press All Settings.
d Swipe up or down, or press a or b to
display Print Reports.
e Press Print Reports.
f Press Drum Dot Print.
g
The machine will display
Press OK.
Press [OK]
.
h The machine will print the Drum Dot
Check Sheet. Then press .
i Press and hold down to turn the
machine off.
j Open the top cover until it locks in the
open position.
76
Page 85

A
k The colour of printed dots is the colour of
WARNING
IMPORTANT
the drum you should clean. Remove the
toner cartridge and drum unit assembly
of the colour causing the problem.
HOT SURFACE
After you have just used the machine, some
internal parts of the machine will be
extremely hot. Wait for the machine to cool
down before you touch the internal parts.
Routine maintena nce
• We recommend that you place the toner
cartridge and drum unit assembly on a
clean, flat surface with disposable paper
underneath it in case you accidentally spill
or scatter toner.
• To prevent damage to the machine from
static electricity, DO NOT touch the
electrodes shown in the illustration.
77
Page 86

l Push down the green lock lever and take
IMPORTANT
the toner cartridge out of the drum unit.
• H and le the toner cartridge carefully. If
toner scatters on your hands or clothes,
immediately wipe or wash it off with cold
water.
• To avoid print quality problems, DO NOT
touch the shaded parts shown in the
illustrations.
<Toner cartridg e>
<Drum unit>
78
• We recommend that you place the toner
cartridge on a clean, flat, level, stable
surface with disposable paper underneath
it in case you accidentally spill or scatter
toner.
Page 87

Routine maintena nce
A
1
m Turn the drum unit as shown in the
illustration. Make sure that the drum unit
gear (1) is on the left side.
n Read the following information from the
Drum Dot Check Sheet.
Dot location:
The sheet has eight numbered
columns. The number of the column
with the printed dot in it is used to find
the dot position on the drum.
o Use the numbered markers next to the
drum roller to find the mark. For
example, a dot in column 2 on the Drum
Dot Check Sheet would mean that there
is a mark in the "2" region of the drum.
79
Page 88

p Turn the edge of the drum unit toward
NOTE
IMPORTANT
NOTE
you by hand while looking at the surface
of the suspected area.
DO NOT touch the drum’s surface. To
avoid print quality problems, hold the
edges of the drum unit.
q When you have found the mark on the
drum that matches the Drum Dot Check
Sheet, wipe the surface of the drum
gently with a dry cotton swab until the
mark on the surface comes off.
s Put the toner cartridge firmly into the
new drum unit until you hear it lock into
place. If you put the cartridge in
correctly, the green lock lever will lift
automatically.
DO NOT clean the surface of the
photosensitive drum with a sharp object or
any liquids.
r Turn the drum unit back over.
80
Make sure you put in the toner cartridge
correctly or it may separate from the drum
unit.
Page 89

Routine maintena nce
A
BK
C
M
Y
t Slide the toner cartridge and drum unit
assembly into the machine. Make sure
that you match the toner cartridge colour
to the same colour label on the machine.
u Close the top cover of the machine.
v Turn on the machine and try a test print.
BK = Black, C = Cyan,
M = Magenta, Y= Yellow
81
Page 90

Cleaning the paper pick-up
1
1
rollers A
Cleaning the paper pick-up roller periodically
may prevent paper jams by ensuring the
correct feeding of the paper.
If you have paper feed problems, clean the
pick-up rollers as follows:
a Press and hold down to turn the
machine off.
b Pull the paper tray completely out of the
machine.
d Tightly wring out a lint-free cloth soaked
in lukewarm water, and then wipe the
separator pad (1) on the paper tray to
remove dust.
e Wipe the two pick-up rollers (1) inside
the machine to remove dust.
c If paper is loaded in the paper tray,
remo ve it .
82
f Put the paper tray back in the machine.
g Reload the paper and put the paper tray
firmly back in the machine.
h Turn on the machine.
Page 91

A
Calibration A
NOTE
The output density for each colour may vary
depending on the machine’s environment,
such as temperature and humidity.
Calibration helps you to improve the colour
density.
a Press .
b Press Calibration.
c Press Calibrate.
d Press Yes to confirm.
e The machine will display Completed.
f Press .
You can reset the calibration parameters
back to the factory settings.
Routine maintena nce
• If an error message is displayed, press OK
and try again.
(For more information, see Error and
maintenance messages on page 86.)
• If you are using the Windows
driver, the driver will get the calibration
data automatically if both
Use Calibration Data and
Get Device Data Automatically are
selected. The default settings are on (see
Software User's Guide).
• If you are using the Macintosh printer
driver, the printer driver will get the
calibration data automatically. If you want
to get calibration data manually, you must
perform the calibration using the
Status Monitor (see Software User's
Guide).
®
printer
a Press .
b Press Calibration.
c Press Reset.
d Press Yes to confirm.
e The machine will display Completed.
f Press .
83
Page 92

Auto Registration A
If solid areas of colour or images have cyan,
magenta or yellow fringes, you can use the
auto-registration feature to correct the
problem.
a Press .
Frequency (Colour Correction) A
You can set how often the colour correction
(Colour Calibration and Auto Registration)
occurs. The default setting is Normal. The
colour correction process consumes some
amount of the toner.
b Press Auto Regist..
c Press Yes to confi rm.
d The machine will display Completed.
e Press .
a Press .
b Press All Settings.
c Swipe up or down, or press a or b to
display Printer.
d Press Printer.
e Swipe up or down, or press a or b to
display Frequency.
f Press Frequency.
g Press Normal, Low or Off.
h Press .
84
Page 93

B
Troubleshooting B
B
If you think there is a problem with your machine, check each of the items below first and follow
the troubleshooting tips.
You can correct most problems by yourself. If you need additional help, the Brother Solutions
Center offers the latest FAQs and troubleshooting tips.
Visit us at http://solutions.brother.com/
Identifying your problem B
First, check the following:
The machine’s power cord is connected correctly and the machine’s power is on. If the
machine does not turn on after connecting the power cord, see Other difficulties on page 107.
All of the protective parts have been removed.
Paper is inserted correctly in the paper tray.
The interface cables are securely connected to the machine and the computer, or the wireless
connection is set up on both the machine and your computer.
Touchscreen Messag es
.
(See Error and maintenance messages on page 86.)
If you did not solve your problem with the above checks, identify your problem and then go to the
page suggested below.
Paper handling and Printing problems:
Printing difficulties on page 103
Paper handling difficulties on p age 104
Copying problems:
Copying difficulties on page 105
Scanning problems:
Scanning difficulties on page 105
Software and Network problems:
Software difficulties on page 105
Network difficulties on page 106
85
Page 94

Error and maintenance mes sage s B
As with any sophisticated office product, errors may occur and consumable items may have to be
replaced. If this happens, your machine identifies the error or required routine maintenance and
shows the appropriate message. The most common error and maintenance messages are shown
in the table.
You can clear most errors and perform routine maintenance by yourself. If you need more help,
the Brother Solutions Center offers the latest FAQs and troubleshooting tips:
Visit us at http://solutions.brother.com/
Error Message Cause Action
2-side d Dis ab led The back cover of the machi ne
is not closed complet ely.
Access Denied The function you want to us e is
restricted by Secure Function
Lock 2.0.
Calibration
failed.
Cartridge Error
Put the Ton er
Cartridge back
1
inX
1
(X) shows the toner
cartri dg e co lour with
the problem.
(BK)=Black,
(Y)=Yellow,
(M)=Magenta,
(C)=Cyan.
Calibration failed. Press OK and try it again.
The toner cartridge i s not
installed correctly.
.
Close the back cover of the machine until it
locks into the closed position.
Contact your ad m inistrator to check your
Secure Function Lock Settings.
Press and hold down to turn off the
Put in a new belt unit (see Replacing the
If the problem continues, contact Brother
Pull out the toner car tr idge and drum unit
assembly for t he colo ur that is i ndicat ed on the
Touchscreen. Re move the toner cartri dge, and
put it back into the dr um unit again. Put the
toner cartri dge and drum un it assembly back in
the machine.
If the problem continues, contact Brother
customer service or your local Brother dealer.
machine.
Wait a few seconds, and turn on the
machine again.
Perform the colou r cal ibration again using
the Touchscreen or the printer driver (see
Calibration on page 83).
belt unit onpage 60).
customer service or your local Brother
dealer.
86
Page 95

B
Error Message Cause Action
Coolin g Do wn
Wait for a while
The temperature of the drum
unit or toner cartridge is too
hot. The machine will pause its
current print job and go into
cooling down mode. During
the cooling down mode, you
will hear the cooling fan
running while the Tou chscreen
shows Cooling Do wn, and
Wait for a wh il e .
Make sure you can hear the f an in the machine
spinning and that the exhaust outlet is not
blocked by something.
If the fan is spinning, remove any obstacles
that surround the exhaust outlet, and then
leave the machine turned on but do not use it
for severa l minutes.
If the fan is not spinning, disconnect the
machine from the power for several minutes,
then reconnect it.
Cover is Ope n. The top cover is not
Close the top cover of the machi ne.
completely closed.
The fuser cover is not
completely closed or paper
was jammed in t he back of t he
machine when you turned on
the power.
Close the fuser cover located inside the
back cover of the machine.
Make sure paper is not jammed beh ind the
fuser cover at the back of the machine, then
close the fuser cover and press Start (see
Paper is jammed at t he back of the machi ne
on page 96).
The ADF cover is not
Close the ADF cover of the machine.
completely closed.
The ADF cover is open while
loading a document.
Document Jam The document was not
inserted or fed correctl y, or the
document scann ed from the
Close the ADF cover of the machine, then
press .
See Doc ument is jammed i n the top of the ADF
unit on page 92 or Usi ng the aut om atic
document feeder (ADF) on page 33.
ADF was too long.
1
Drum End SoonX
1
(X) shows drum unit
colour that is near the
end of its life.
(BK)=Black,
(Y)=Yellow,
(M)=Magenta,
(C)=Cyan.
The drum unit for the colo ur
indicated on the Touchscreen
is near the end of its life.
Drum ! The corona wires on the drum
units must be cleaned.
The drum unit or the toner
cartridge and drum unit
assembly is not installed
correctly.
Drum Stop It is time to replace the drum
unit.
Order a new drum unit for the colour indicat ed
on the Touchscr een before you get a Replace
DrumX message.
Clean the corona wires on t he drum units (see
Cleaning the corona wires on page 73).
Put the t oner c artr idge i nt o th e d rum uni t t hat is
indicated on the Touchscreen. Then reinstall
the toner cartridg e and drum unit assembly into
the machine.
Replace the drum unit for the colour indicated
on the Touchscreen. (see Replacing the drum
units on page 55).
Troubleshooting
87
Page 96

Error Message Cause Action
Fuser Er ror The temperatur e of the fuser
unit does not rise t o a specified
temperature within the
specified time.
The fuser unit is too hot.
Jam 2-si ded The paper is jammed
underneath the paper tray or
the fuser unit.
Jam Insi de The paper is jammed inside
the m a chine.
Jam Manu al Fe ed The paper is jammed in the
manual feed slot of the
machine.
Jam Rear The paper is jammed in the
back of the machine.
Jam Tray The paper is jammed in the
paper tray of the machine.
Limit Ex cee de d The number of pages you are
allowed to print has been
exceeded. The print job will be
cancelled.
Log Acce ss Er ro r The machine could not access
the pri n t log file in th e server.
Manual Feed Manual was selected as the
paper source when there was
no paper in the manual feed
slot.
No Belt Unit The belt unit is not installed
correctly.
No Permission Printing colo ur documents is
restricted by Secure Function
Lock 2.0. The print job will be
cancelled.
No Paper The machine is out of p aper in
the paper tray, or paper is not
correctly loaded in the paper
tray.
Press and hold down to turn the machine
off, wait a few seconds, and then turn it on
again. Leave the machine idle for 15 minutes
with the power on.
See Paper is jammed unde rneath the paper
tray on page 101.
See Paper is jammed in side the machine
on page 98.
See Paper is jammed in the manual feed slot
on page 94.
See Paper is jammed at the back of the
machine on page 96.
See Paper is jammed in the paper tray
on page 94.
Contact your ad m inistrator to check your
Secure Function Lock Settings.
Contact your admin istrator to check the Store
Print Log to Network settings.
For more information , see Network User's
Guide: Store Print Log to Network
Place paper in the manual feed slot (see
Loading paper in the manual feed slot
on page 22).
Reinstall the bel t uni t (see Replacing the belt
unit on page 60).
Contact your ad m inistrator to check your
Secure Function Lock Settings.
Do one of the following:
Refill paper in the paper tr ay. Make sure the
paper guides are set to the correct size.
Remove the paper and load it agai n. Make
sure the pape r g uides a re set t o t he corr ect
size.
88
Page 97

B
Error Message Cause Action
No Toner The toner cartridge or the
toner cartridge and drum unit
assembly is not installed
correctly.
No Tray The paper tray is not installed
or not installed correctly.
No Waste Toner The waste toner box is not
installed correctly.
Out of Mem or y The machine’s memory is full. Reduce the print resolution.
Out of Mem or y
Secure Print Data
is full. Press
Stop Key and
delete the
previous ly sto red
data.
Print Un ab le XX The machine has a
Registration
failed.
Replac e Be lt It is time to replace the belt
The machine’s memory is full.
mechanical problem.
Registration failed. Press OK and try again.
unit.
Remove the toner cartridge and drum unit
assembly for the colour indicated on the
Touchscreen. Remove the to ner cartridge from
the drum unit, and reinstall the toner cartridge
back into the drum unit. Reinstall the toner
cartridge and drum unit assem bly back in the
machine. If th e proble m continue s, repl ace the
toner cartridge (see Replaci ng the toner
cartridges on page 47).
Reinstall the paper tray.
Reinstall the Waste Toner Box (see Replacing
the waste toner box on page 64).
(See Software User's Guide.)
Press and delete the previously sto red
secure print data.
Do one of the following:
Press and hold down to turn the
machine off, wait a few minutes, and then
turn it on again.
If the problem continues, contact Brother
customer service for support.
Press and hold down to turn off the
machine.
Wait a few seconds, then turn it on again.
Perform the auto colour registration using
the Touchscreen (see Auto Registration
on page 84).
Put in a new belt unit (see Replacing the
belt unit on page 60).
If the problem continues, contact Brother
customer service.
Replace the belt unit (see Replacing the belt
unit on page 60).
Troubleshooting
89
Page 98

Error Message Cause Action
1
Replac e Dru mX
1
(X ) shows drum unit
colour that must be
replaced. BK=Black,
C=Cyan, M=Magenta,
Y=Yellow.
It is time to replace the drum
unit.
The drum unit counter was not
reset when a new drum was
installed.
Replac e Fus er It is time to replace the fuser
unit.
Replace the drum unit for the colour indicated
on the Touchscreen (see Replacing the drum
units on page 55).
Reset the drum unit counter. (see Replacing
the drum units on page 55).
Contact Brother customer servi ce or a Brother
Authorized Servi ce Center to repl ace the fu ser
unit.
Replac e PF ki t It is time to replace the paper
feeding kit.
Contact Brother customer servi ce or a Brother
Authorized Service Center to replace the
PF Kit.
1
Replac e Ton er
1
The Touchscreen
shows the toner
cartri dg e co lour tha t
you must replace.
BK=Black, C=Cyan,
M=Magenta, Y=Yellow
The toner cartridge i s at th e
end of its life. The m achine will
stop all print operations.
Replac e WT Bo x It is time to replace t he waste
toner box.
Scan Unable XX The machine has a
mechanical problem.
Replace the toner cartridge for the colour
indicated on the Touchscreen (see Replacing
the toner cartri dges onpage 47).
Replace the waste toner box (see Replacing
the waste toner box on page 64).
Press and hold down to turn the
machine off, and then turn it on again.
Document is too long for
2-sided scanning.
Short pa per The length of the paper i n the
tray is too short for the
machine to deliver it to the
Face down output tray.
Size Error
2-sided
The paper size defined in the
printer driver and the
Touchscreen menu is not
available for a utomatic 2-si ded
printing.
The paper in t he tray is not the
correct size and is not
available for a utomatic 2-si ded
printing.
90
If the problem continues, contact Brother
customer service for support.
Press . Use the appropriate size of paper
for 2-sided sca nning (see Print media
on page 152).
Open the b ack cove r (face-up output tray) to l et
the printed page exit onto the face up output
tray. Remove the printed pages and then press
Start.
Press . Choose a paper size that is
supported by 2-sided printing.
The paper size you can use for automatic
2-sided printing is A4.
Load the correct size of paper in the tray and
set the size of paper for the t ray (see Paper
Size on page 27).
The paper size you can use for automatic
2-sided printing is A4.
Page 99

B
Error Message Cause Action
Size mismatch The paper in the tra y is not the
correct size.
Small pa pe r The paper size specif ied in the
printer dr iver is too small for
the machine to deliver it to the
Face-down output tray.
Toner Er ro r One or more toner cartridges
are not installed correctly.
Toner Lo w If the Touchscreen shows
Toner Low you can still print;
however, the machine is telli ng
you that the toner cartridge is
near the end of its life.
Touchscreen
Initialisation
Failed
WT Box End Soon The waste toner box is near
The Touchscreen was
pressed before the power on
initializ a ti on was com p le t e d.
Debris may be stuck bet ween
the lower part of the
Touchscreen and its frame.
the end of its life .
Load the correct size of paper in the tray and
set the size of paper to the tray (see Paper Size
on page 27).
Open the back cover (back output tray) to let
the printed paper out on th e back output tray
and then press Start.
Pull out the drum unit s. Remove all of the to ner
cartridges, and then put them back into the
drum units.
Order a new toner cartri dge for the colour that
is indicated on the Touchscreen now so a
replacement toner cartridge will be available
when the Touchscreen shows Replace
Toner.
Make sure nothing i s touching or rest ing on the
Touchscreen.
Insert a piece of sti ff paper between the lower
part of the Touchscreen a nd its fram e and sli de
it back and forth to push out the debris.
Buy a new waste toner box before you get a
Replac e WT Box message.
Troubleshooting
91
Page 100

Document Jams B
Document is jammed in the top of the ADF unit B
Document is jammed under the docum en t co ver B
a Remove any paper from the ADF that is
not jammed.
a Remove any paper from the ADF that is
not jammed.
b Open the ADF cover.
c Pull the jammed document out to the
left.
If the document rips or tears, be sure
you remove all small paper scraps to
prevent future jams.
d Close the ADF cover.
e Press .
b Lift the document cover.
c Pull the jammed document out to the
right.
If the document rips or tears, be sure
you remove all small paper scraps to
prevent future jams.
d Close the document cover.
e Press .
92
 Loading...