


Broan 1050l, 1051 Installation Guide

MODELS 1050, 1051, 1050L, 1051L & 1052
COMPACTOR
USE AND CARE GUIDE
MODELS 1050 & 1051
MODELS 1050L & 1051L MODEL1052

DRAWER
SAFETY LATCH
(MODELS 1050L
& 1051L ONLY)
OPTIONAL CUTTING BOARD
BAG STORAGE
COMPARTMENT
KEY LOCK SWITCH
AIR FRESHENER PANEL
AIR FRESHENER
(NOT INCLUDED)
RAM
“HANDS FREE” DRAWER
OPENING PEDAL
(MODELS 1050 & 1051 ONLY)
REMOVABLE DRAWER
LEG LEVELERS
CONTAINER LATCH
2
SAVE THESE
INSTRUCTIONS
IMPORTANT SAFEGUARDS.
READ ALL INSTRUCTIONS
CAREFULLY BEFORE OPERATING COMPACTOR.
Basic precautions should always be
taken when using an electrical appliance
– including the following:
1. Close supervision is necessary
when any appliance is operated near
children. Do not allow the appliance
to be used as a toy, or to run unattended at any time. Turn key to “OFF”
and remove it to lock the compactor. Store the key out of reach to prevent children or others from operating or tampering with the compactor.
2. Do not push trash into compactor
drawer with hands or feet. Trash
might contain broken glass, sharp
pieces of metal, etc., which would
cause injury.
3. Do not compact volatile material.
Paint, oily rags, lighter fluid cans,
and paint thinner cans could combust spontaneously and cause an
explosion and/or fire.
4. Do not compact aerosol cans or any
other containers still holding toxic
chemicals, insecticides, or combustible contents. Fumes may be released which are hazardous to
health.
5. Do not compact lighted cigarettes,
cigars, or other hot or burning items.
6. Do not overload the compactor.
7. Be careful when removing and carrying bag. Broken glass or other
sharp objects may pierce bag.
8. Do not operate this unit with an extension cord.
9. Use only Broan approved accessories.
10. Do not touch moving parts.
11. Do not take this appliance apart. Incorrect reassembly can cause electrical shock when operated.
12. Do not operate with a damaged
power cord, plug, motor, or after
damage of any kind. Have the compactor examined, and all repairs
made, by an authorized serviceman.
13. This compactor is FOR HOUSEHOLD USE ONLY. Use it only as
described in this manual.
14. Unplug the appliance from outlet
before servicing.
GROUNDING INSTRUCTIONS
TO REDUCE THE RISK OF
ELECTRIC SHOCK.
IMPORTANT — Please read carefully.
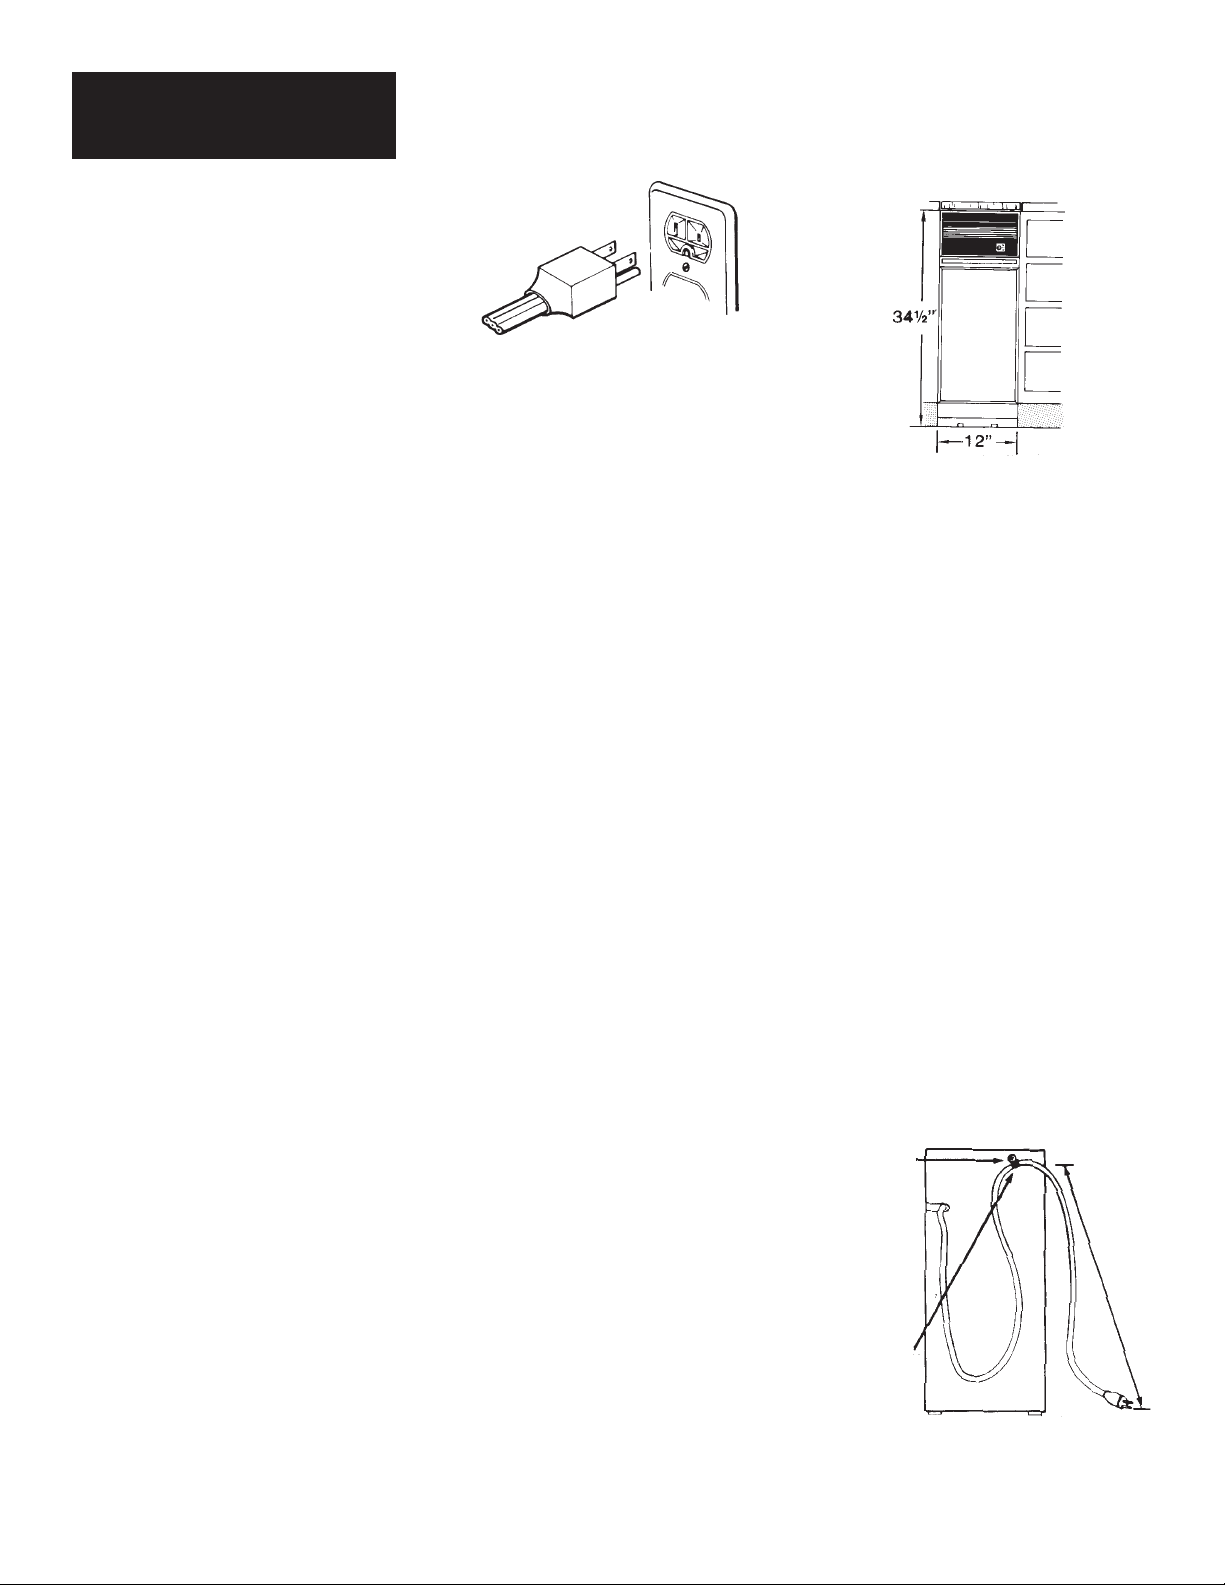
Fig. 1
FOR PERSONAL SAFETY, THIS APPLIANCE MUST BE PROPERLY
GROUNDED. The power cord on this
appliance is equipped with a three-prong
(grounding) plug which mates with a
standard three-prong (grounded) receptacle. (Fig. 1)
If there is a two-prong outlet located
where you will install the compactor, it is
your responsibility to have it replaced with
a properly grounded three-prong wall receptacle.
DO NOT, UNDER ANY CIRCUMSTANCES, CUT OR REMOVE THE
THIRD (GROUND) PRONG FROM THE
POWER CORD PLUG.
The GREEN (or GREEN & YELLOW)
conductor in the cord is the grounding
wire. Never connect the GREEN (or
GREEN & YELLOW) wire to a live terminal.
A 120 volt, 60 Hz., A.C., 15 amp fused
and grounded electrical supply is required (time-delay fuse or circuit breaker
is recommended). It is recommended
that a SEPARATE CIRCUIT serving only
this appliance be provided.
DO NOT USE AN EXTENSION CORD
WITH THIS APPLIANCE.
INSTALLATION
Your Broan Compactor has been designed to require minimum space without loss of capacity whether free-standing or built-in.
FREE-STANDING
The unit should usually be placed where
the bulk of trash is generated — kitchen,
utility room, or garage.
LEVELERS
Your compactor has four adjustable levelers which allow you to adjust for uneven floors and also trim the unit up to
fit the under-counter installation snugly.
To level the unit, tip the compactor to one
side and turn the levelers out only far
enough to properly level the unit. Do the
same on the other side, until the unit sits
level on the floor. Check the unit from
front to back, and side to side.
3
For proper operation, the compactor
must be level with all four legs properly
adjusted. For proper drawer pedal operation, the unit must be level.
UNDER-COUNTER INSTALLATION
Fig. 2
Your compactor has been designed to
require a minimum of space whether
free-standing or built-in. Only 12” wide x
20” deep, your compactor is smaller than
most on the market. (Fig. 2)
To install compactor under counter, use
Figure 2 to determine the cutout size.
Back up compactor with a 2 x 4 to prevent unit from shifting backwards due to
repeated closing of compactor drawer.
The power outlet should be installed per
electrical code near the center of the
opening or unit, and 15” to 18” from the
floor.
The bag storage compartment allows you
to store bags and air fresheners conveniently. The swing open storage compartment door allows easy access to bags,
etc.
IMPORTANT: Make sure compactor can
be easily removed (slid out) from under
counter in case service is ever necessary. DO NOT fasten compactor to cabinets, countertop, or floor. Do not install
flooring material after compactor is
placed under the counter of the flooring
may later interfere with the compactor
being able to be removed from under
counter.
Fig. 3
REMOVE
SCREW
3-4 FT.
WIRE
CLAMP
For free-standing unit, remove wire
clamp to obtain additional cord length if
necessary. (Fig. 3)
Remove top right back panel screw, slip
wire clamp off cord, and replace screw.
 Loading...