


Bosch HMT 85DL53/02, HMT 85DL53/01 Manual

Steam oven HMT85D.53.
[en] Instruction manual

Ú Table of contents |
|
Safety precautions..................................................................... |
4 |
Safety notes ......................................................................................... |
4 |
Causes of damage ............................................................................. |
4 |
Your new appliance ................................................................... |
5 |
Control panel ....................................................................................... |
5 |
Cooking compartment ....................................................................... |
6 |
Accessories ......................................................................................... |
6 |
Automatic calibration ......................................................................... |
6 |
Before using for the first time................................................... |
6 |
Setting the clock ................................................................................. |
6 |
Setting the water hardness range ................................................... |
6 |
Before first use .................................................................................... |
7 |
Cleaning the accessories before use ............................................. |
7 |
Operating the appliance............................................................ |
7 |
Filling the water tank .......................................................................... |
7 |
Switching on the appliance............................................................... |
8 |
Switching off the appliance............................................................... |
9 |
After each use ..................................................................................... |
9 |
Changing the clock time ................................................................... |
9 |
Automatic programmes............................................................. |
9 |
Setting a programme ......................................................................... |
9 |
Notes about the programmes ....................................................... |
10 |
Programme table ............................................................................. |
10 |
Basic settings........................................................................... |
11 |
Care and cleaning.................................................................... |
12 |
Cleaning agents ............................................................................... |
12 |
Descaling........................................................................................... |
13 |
Troubleshooting....................................................................... |
14 |
Changing the door seal.................................................................. |
15 |
Replacing the cooking compartment bulb ................................. |
15 |
After-sales service................................................................... |
15 |
E number and FD number ............................................................. |
15 |
Environmental protection ....................................................... |
16 |
Environmental protection................................................................ |
16 |
Tips for saving energy .................................................................... |
16 |
Tables and tips.......................................................................... |
16 |
Accessories ..................................................................................... |
16 |
Cookware .......................................................................................... |
16 |
Cooking time and quantity............................................................. |
16 |
Distributing food evenly.................................................................. |
16 |
Pressure-sensitive food .................................................................. |
16 |
Cooking a menu .............................................................................. |
16 |
Vegetables ........................................................................................ |
16 |
Side dishes and pulses .................................................................. |
17 |
Poultry and meat.............................................................................. |
17 |
Fish ..................................................................................................... |
18 |
Soup vegetables, miscellaneous.................................................. |
18 |
Dessert, compote ............................................................................ |
19 |
Reheating food................................................................................. |
19 |
Defrosting.......................................................................................... |
19 |
Proving dough .................................................................................. |
20 |
Juicing................................................................................................ |
20 |
Preserving ......................................................................................... |
20 |
Frozen products............................................................................... |
20 |
Additional information on products, accessories, replacement parts and services can be found at www.bosch-home.com and in the online shop www.bosch-eshop.com
3

ã=Safety precautions
Read these instructions for use carefully. Please keep the instructions for use and installation instructions in a safe place. If the appliance changes owners, the instructions should always be included.
Safety notes
This appliance is intended for domestic use only. This appliance must only be used for food preparation.
Adults and children must not operate the appliance without supervision,
■if they are physically or mentally incapable of doing so or
■if they have insufficient knowledge or experience.
Never let children play with the appliance.
Risk of injury!
Do not open the appliance door if the appliance is not integrated or securely fastened with screws. It can tip or fall off the unit. Observe the assembly instructions.
Risk of scalding!
Hot steam may escape when the appliance door is opened. Open the appliance door carefully during or after cooking. When opening, do not stand too close to the appliance. Ensure that, depending on the temperature, steam is not visible.
Risk of burns!
Never touch the interior surfaces of the cooking compartment or the heating elements when they are hot. Small children must be kept at a safe distance from the appliance.
Risk of fire!
Never store combustible items in the cooking compartment.
Risk of scalding!
Never pour water into the cooking compartment when it is hot. This will create hot steam.
Risk of short circuit!
Never trap connecting cables of electrical appliances in the hot appliance door. The cable insulation could melt.
Risk of burning!
Never prepare food containing large quantities of drinks with a high alcohol content. Alcoholic vapours can catch fire in the cooking compartment. Only use small quantities of drinks with a high alcohol content and take care when opening the appliance door.
Risk of burning!
Never remove hot accessories or ovenware from the cooking compartment without oven gloves.
Risk of scalding!
Do not clean the appliance immediately after switching it off. The water in the evaporator dish is still hot. Wait until the appliance has cooled down.
Risk of electric shock!
Incorrect repairs are dangerous. Repairs may only be carried out by one of our trained aftersales engineers. If the appliance is defective, pull out the mains plug or switch off the appliance at the circuit breaker in the fuse box. Call the aftersales service.
Causes of damage
Caution!
■Do not place anything on the cooking compartment floor. Do not cover it with aluminium foil. A build-up of heat could damage the appliance.
The cooking compartment floor and the evaporator dish must always be kept clear. Always place ovenware in a perforated cooking container or on a wire rack.
■Aluminium foil in the cooking compartment must not come into contact with the door panel. This could cause permanent discolouration of the door panel.
■Ovenware must be heat and steam resistant.
■Do not use ovenware that shows signs of rust. Even the smallest spots of rust can lead to corrosion in the cooking compartment.
■When steaming with a perforated cooking container, always insert the baking tray or the solid cooking container underneath. Dripping liquid is caught.
■Do not store moist food in the closed cooking compartment for long periods. It can lead to corrosion in the cooking compartment.
■Fruit juice may leave stains in the cooking compartment. Always remove fruit juice immediately and wipe the cooking compartment with a moist and dry cloth.
■If the door seal is very dirty, the appliance door will no longer close properly during operation. The fronts of adjacent units could be damaged. Always keep the door seal clean and replace when necessary.
■The cooking compartment in your appliance is made of high grade stainless steel. Improper care can lead to corrosion in the cooking compartment. Refer to the care and cleaning instructions in the instruction manual. Remove food residues from the cooking compartment as soon as the appliance has cooled.
4

Your new appliance
In this section, you will find information on |
■ accessories |
■ the control panel |
■ automatic calibration |
■ the cooking compartment |
|
Control panel
!" !## |
|
|
|
|
|
|
|
|
|
|
|
|
|
|
|
|
|
Control / display |
|
Use / meaning |
|
|
|
|
|
|
|
|
|
On/off button |
# |
Switching the appliance on and off |
|
|
|
|
|
|
|
||
Temperature buttons |
40 |
Steams at 40 °C, e.g. for proving dough and defrosting |
|
||
|
|
|
|
|
|
|
60 |
Steams at 60 °C, e.g. for defrosting |
|
|
|
|
|
|
|
||
|
80 |
Steams at 80 °C, e.g. for fish and sausages |
|
||
|
|
|
|||
|
90 |
Steams at 90 °C, e.g. for fish, sausages and extra soup ingredients |
|||
|
|
|
|||
|
100 |
Steams at 100 °C, e.g. for vegetables, fish, meat and side dishes, for juice extraction |
|||
|
|
and preserving |
|
|
|
(For more information about dishes and meals, see section: Tables and tips)
Descaling function button |
r |
Descaling the water system and the evaporator dish (see section: Descale) |
|
|
|
|
|
Programme function button |
` |
Selects the automatic programmes (see section: Automatic programmes) |
|
|
|
|
|
Clock function button |
0 |
Appliance switched on |
Setting the cooking time [r] |
|
|
|
|
|
|
Appliance switched off |
Short press: changes the time [0] |
|
|
|
Press and hold: changes the basic settings |
|
|
|
|
Weight function button |
f |
Sets the weight of the food for a programme |
|
|
|
|
|
Descale display |
Ê |
The Ê indicator prompts you to descale the appliance (see section: Descaling) |
|
|
|
|
|
Fill water tank indicator |
Ë |
The Ë indicator prompts you to fill the water tank (see section: Filling the water tank) |
|
|
|
|
|
Display |
É |
During descaling, the É indicator prompts you to remove the remaining water from the |
|
Empty evaporator dish |
|
evaporator dish using the cleaning sponge supplied |
|
|
|
|
|
Rotary selector |
|
Sets the value in the display |
|
|
|
The rotary selector is retractable. Press on the rotary selector to pop it in our out |
|
|
|
|
|
Start/pause button |
n |
Short press: starts and stops operation (pause) |
|
|
|
Press and hold: ends operation |
|
|
|
|
|
5
Cooking compartment
Press the v symbol to open the appliance door.
The cooking compartment has three shelf positions. The shelf positions are counted from the bottom up.
|
|
|
|
|
|
|
|
|
|
|
|
Use the enclosed cleaning sponge to empty the evaporator dish after every cooking operation. Otherwise, the dish may overflow during the next cooking operation.
Caution!
Do not place anything on the cooking compartment floor. Do not cover it with aluminium foil. A build-up of heat could damage the appliance.
The cooking compartment floor and the evaporator dish must always be kept clear. Always place ovenware in a perforated cooking container or on a wire rack.
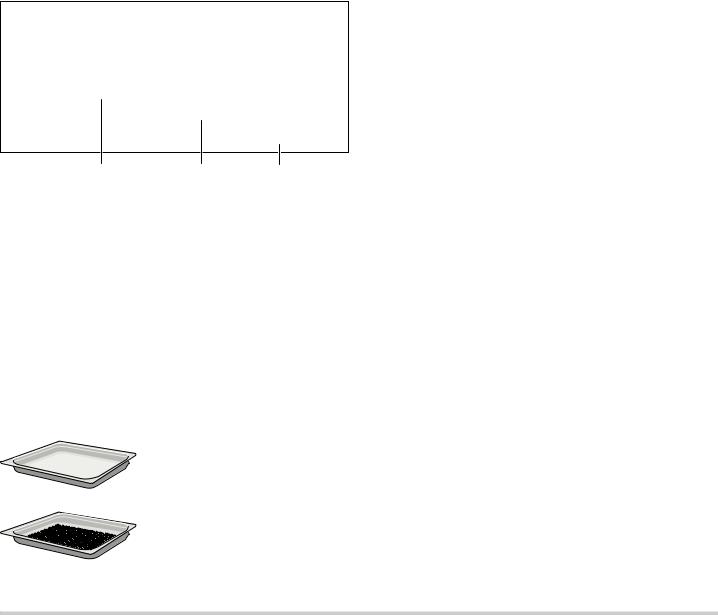
Accessories
Use only the accessories supplied with the product or available from the after-sales service. They are specially designed for your appliance.
Your appliance is equipped with the following accessories:
Cooking container, solid, GN ^,
40 mm deep
for catching dripping liquid when steaming and for cooking rice, pulses and cereals.
Cooking container, perforated,
GN ^, 40 mm deep
for the steaming of whole fish or
large quantities of vegetables, for juicing berries, etc.
You can obtain further accessories from specialist retailers:
Accessories |
Order no. |
|
|
Cooking container, solid, GN ^, 40 mm |
HEZ36D253 |
deep |
|
|
|
Cooking container, perforated, GN ^, |
HEZ36D253G |
40 mm deep |
|
|
|
Cooking container, solid, GN Y, 40 mm |
HEZ36D153 |
deep |
|
|
|
Cooking container, perforated, GN Y, |
HEZ36D153G |
40 mm deep |
|
|
|
Cleaning sponge |
643 254 |
|
|
Descaler |
311 138 |
|
|
Honeycomb microfibre cloth |
460 770 |
|
|
Automatic calibration
The boiling temperature of water depends on the air pressure. During calibration, the appliance is adapted to the pressure conditions in the location where it is installed. This happens automatically when you first use the appliance (see section: First use). More steam develops than usual.
It is important that the appliance steams without interruption for 20 minutes at 100 °C. Do not open the appliance door during this time.
If the appliance was not able to calibrate itself automatically (for example, because the appliance door was opened), the calibration process is carried out again during the next cooking operation.
After moving house
So that the appliance automatically adjusts itself to its new location, you must reset the appliance to the factory settings (see section: Basic settings) and repeat the initial start-up process (see section: First use).
After a power cut
The appliance saves the calibration settings even in the event of a power cut or disconnection from the mains. Recalibration is not necessary.
Before using for the first time
In this section you will find out which steps are required before using the appliance for the first time:
■setting the clock
■changing the water hardness range if required
■before first use
■cleaning the accessories before use
Your appliance was thoroughly factory tested for proper operation. As a result, there may already be a small amount of condensation in the appliance.
Setting the clock
After the power has been connected, the [0] symbol and ‹‹:‹‹ light up in the display.
1.Set the current time using the rotary selector.
2.Press the 0 button.
The current time is applied.
Setting the water hardness range
Descale your appliance regularly. This is the only way to prevent damage.
Your appliance automatically displays when it needs descaling. It has been preset to water hardness range "medium". Change the value if your water is softer or harder.
You can check the water hardness with the test strips supplied or ask your water supplier.
If your water is very hard, we recommend that you use softened water.
You can only dispense with descaling completely if you exclusively use softened water. If this is the case, change the water hardness to "softened".
You can change the water hardness range in the basic settings when the appliance is switched off.
1.If required, press the # button to switch off the appliance.
2.Press and hold the 0 button until ™‚ ‚ appears in the display.
6

3. Press the 0 button repeatedly until ™† ƒ appears (water hardness range "medium").
4. Turn the rotary selector to change the water hardness range. Possible values:
™† ‹ |
softened |
- |
|
|
|
™† ‚ |
soft |
I |
|
|
|
™† ƒ |
medium |
II |
|
|
|
™† „ |
hard |
II |
|
|
|
™† … |
very hard |
IV |
|
|
|
5. Press and hold the 0 button to exit basic settings. The change is saved.
Before first use
Before first use, heat the empty appliance for 20 minutes at 100 °C. Do not open the appliance door during this time. The appliance is automatically calibrated (see section: Automatic calibration).
1.Press the # button to switch on the appliance.
2.Fill the water tank and insert it (see section: Filling the water tank).
3.Press the n button.
The appliance heats up to 100 °C. The cooking time (20 minutes) does not start to count down until the set
temperature has been reached. Do not open the appliance door during this time.
The cooking operation automatically ends and a signal sounds.
4.Press the # button to switch off the appliance.
Leave the appliance door ajar until the appliance has cooled down.
Cleaning the accessories before use
Using soapy water and a soft cloth, clean the accessories thoroughly before first use.
Operating the appliance
In this section, you can read about
■how to fill the water tank
■how to switch the appliance on and off
■what to note after each use
■how to change the clock time
Filling the water tank
Press the v symbol to open the appliance door. You can see the water tank on the right.
Caution!
Use of unsuitable liquids may damage the appliance
■Only use fresh tap water, softened water or uncarbonated mineral water.
■If your tap water is very hard, we recommend that you use softened water.
■Do not use distilled water, highly chlorinated tap water (> 40 mg/l) or other liquids.
You can obtain information about your tap water from your water supplier. The water hardness can be checked with the test strips enclosed.
Fill the water tank before each use:
1.Open the appliance door and take out the water tank.
2.Fill the water tank with cold water.
MIN |
Amount of water required for approx. 30 minutes |
|
steaming at 100 °C |
MAX |
Amount of water required for approx. 2 hours |
|
steaming at 100 °C |
|
|
|
|
|
|
|
|
3.Slide in the water tank and push it in using the textured area on the bottom until it engages.
7
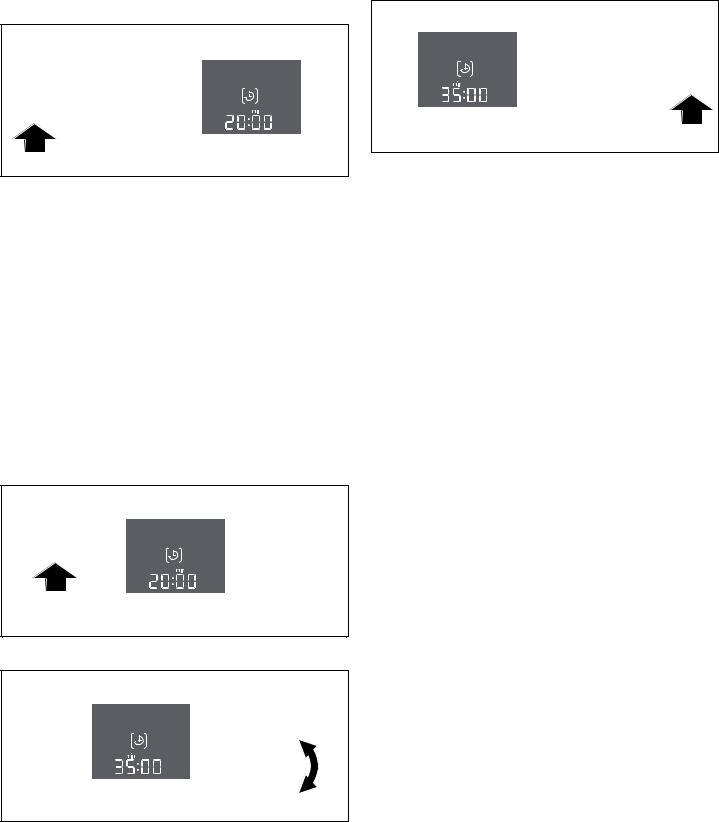
Switching on the appliance
1. Press the # button to switch on the appliance.
The preferred temperature of 100° and the preferred cooking time [r] of 20 minutes appears in the display.
2.Press the temperature button to select a temperature (for more information about dishes and meals, see section: Tables and tips).
Button |
Used for |
Default cooking |
|
|
time |
|
|
|
40 °C |
e.g. for proving dough and |
30 minutes |
|
defrosting |
|
|
|
|
60 °C |
e.g. for defrosting |
20 minutes |
|
|
|
80 °C |
e.g. for fish and sausages |
20 minutes |
|
|
|
90 °C |
e.g. for fish, sausages and extra |
20 minutes |
|
soup ingredients |
|
|
|
|
100 °C |
e.g. vegetables, fish, meat and |
20 minutes |
|
side dishes, for juice extraction |
|
|
and preserving |
|
|
|
|
The appropriate default time appears in the display.
3. Turn the rotary selector to set a cooking time (max. 2 h).
4.Press the n button.
The appliance heats up.
The cooking time does not start counting down until after the heating-up time.
Changing the temperature
You can change the temperature at any time. To do this, press the required temperature button:
■If you have selected a lower temperature, the cooking time continues counting down without interruption.
■If you have selected a higher temperature, the cooking time does not continue counting down until after the heating-up time.
If you press a temperature button twice, the current cooking operation is cancelled. The preferred temperature of 100 °C and cooking time of 20 minutes appear in the display. Press the n button to start.
Changing the cooking time
You can change the cooking time at any time. Turn the rotary selector to set a new cooking time. After a few seconds, the change is automatically adopted.
Stops (pauses) operation
Press the n button briefly to pause operation. The cooling fan may continue to run. To start, press the n button again briefly.
If you open the appliance door during operation, this pauses operation. To start, close the appliance door and press the n button briefly. If you have switched on the basic setting "Continue operation after closing door", restarting is not required (see section: Basic settings).
Fill water tank indicator Ë
If the water tank is empty, a signal sounds and the Ë symbol appears. Operation is stopped.
1.Open the appliance door carefully. Steam will escape.
2.Remove the water tank, fill it with water and reinsert it.
3.Press the n button briefly.
If you have switched on the basic setting "Continue operation after closing door", restarting is not required (see section: Basic settings).
Note: If there is no more water in the tank, you will hear a loud pumping sound until the evaporator dish has boiled dry. Only then will Ë appear and the signal will sound.
When this happens, pause cooking and refill the tank (see: Pausing operation).
8
 Loading...