

Page 1
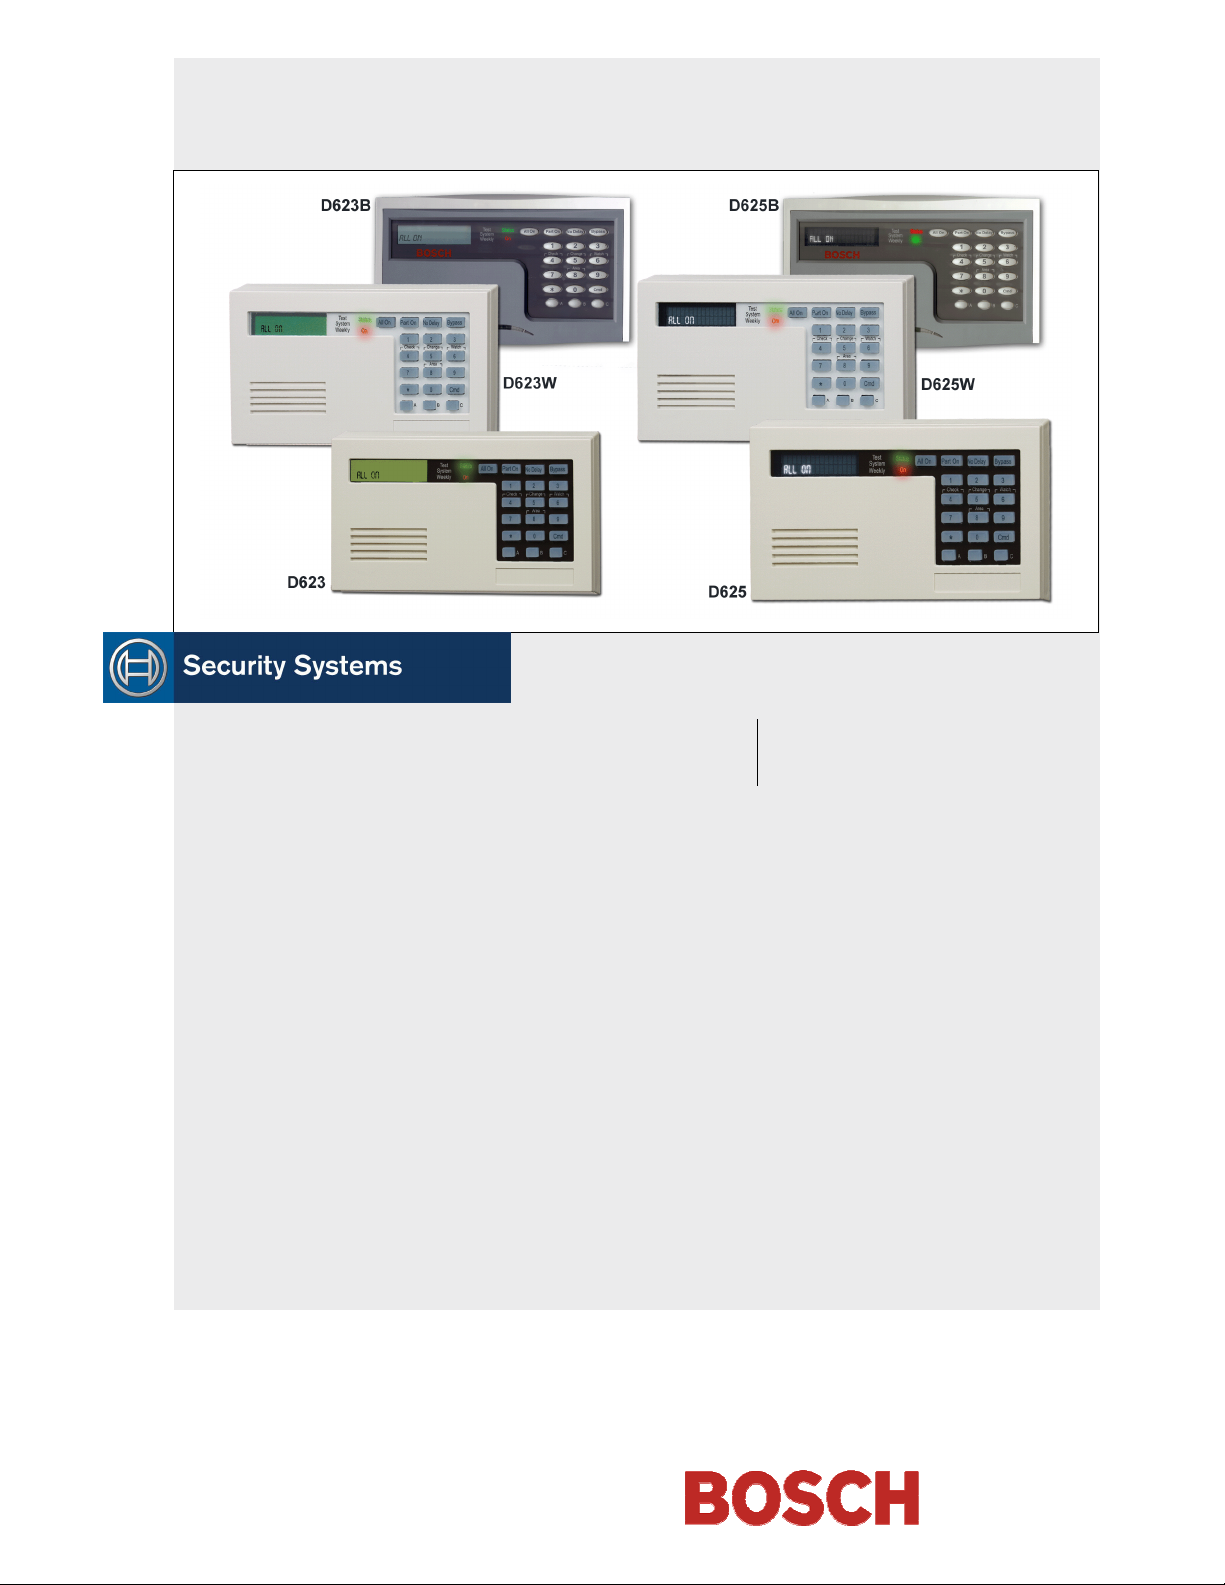
D623 Series/D625 Series
User's Guide
EN
Keypads
Page 2

D623 Series/D625 Series | User's Guide
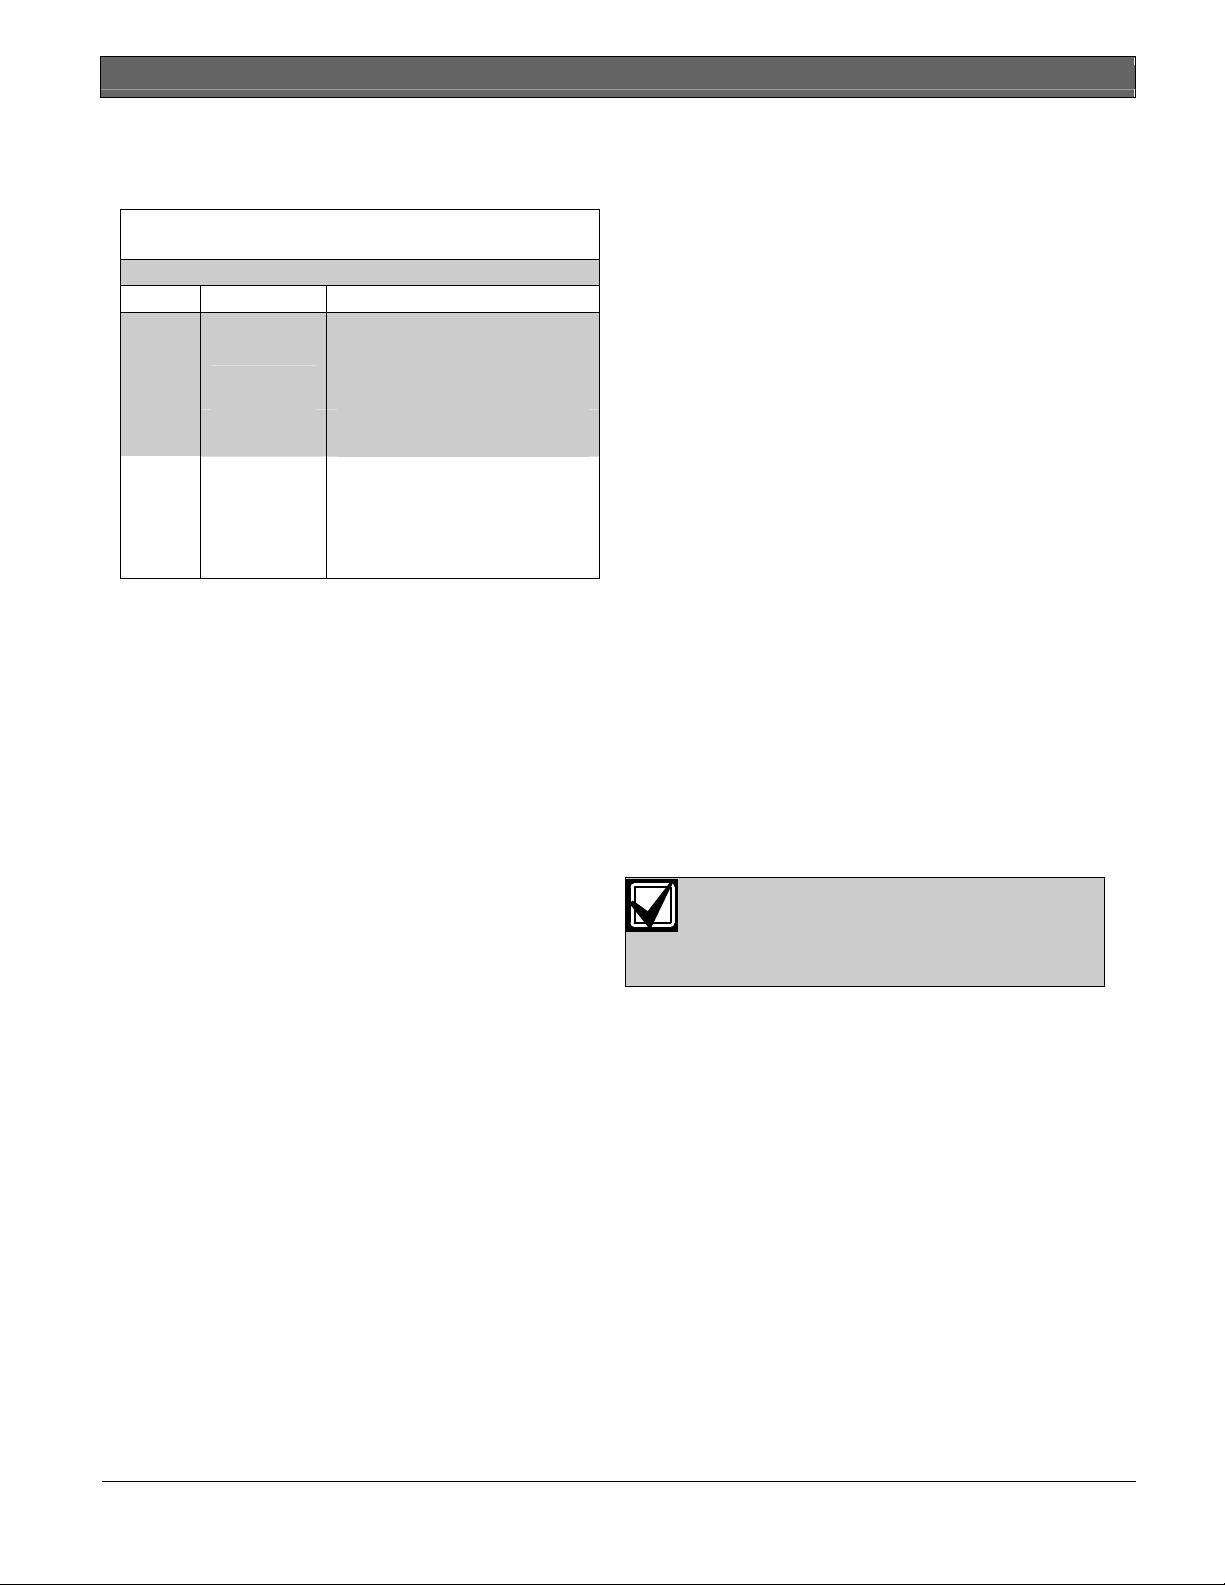
Figure 1: Information Box
MY A
LARM COMPANY IS
C
ALL BEFORE TEST
HIS SECURITY SYSTEM IS CONNECTED TO TELEPHONE NUMBER
T
____________________________________
HE SECURITY CONTROL PANEL IS CONNECTED TO THE PHONE JACK LOCATED
T
____________________________________
RANSFORMER LOCATION
T
IRCUIT BREAKER NUMBER
C
: ____________________________
: _________________________________
: _______________________________
:
:
:
2 Bosch Security Systems | 9/04 | 46841E
Page 3

.
Contents
About this User Guide...................................................5
Introduction.......................................................................5
Security System Basics................................................... 6
What is a Point? ................................................................6
What is a Faulted Point? ..................................................6
Are All Points the Same? .................................................6
Controlled Points ..............................................................6
24-Hour Points ..................................................................6
All On ..............................................................................6
Part On ..............................................................................6
Keypad Keys....................................................................7
Keypad Tones..................................................................7
Keypad LED Descriptions............................................8
Commands.........................................................................8
System Events....................................................................8
Fire Alarms ........................................................................8
Burglary Alarms ................................................................ 8
Fire Trouble Events ..........................................................8
Non-Fire Trouble Events .................................................8
How Your System Reports Alarms.............................8
Check System Status ......................................................9
Log Out of the System ................................................... 9
Silence Alarms ................................................................9
Keypad Adjust (Cmd 49).............................................10
Turn the System Off.....................................................10
Turn the System All On (All On or Cmd 1) ...........10
Turn the System Part On (Part On or Cmd 2) .......11
Turn the System Part 2 On (Cmd 3) .........................12
Set Part 2 Points (Cmd 65) ..........................................12
Turn the System On with No Delay.........................12
Turn the System On with No Exit Tone (Delay
Silent) ............................................................................13
Turn the System On with Points Faulted (Force
Arm) ............................................................................14
View Faulted Points .....................................................15
Bypass Points .................................................................15
Date and Time (Cmd 45).............................................16
Change Passcode (Cmd 55) ........................................16
Change Others’ Passcodes (Cmd 56)........................17
Change Others’ Passcode Authority Levels (Cmd
56) ............................................................................17
Add a Passcode (Cmd 56)............................................18
Delete Passcodes (Cmd 58).........................................19
Renew One-time Passcodes (Cmd 53)......................20
Check System Troubles (Cmd 4)...............................20
D623 Series/D625 Series | User's Guide | Contents
View Alarm Memory (Cmd 40) ................................ 21
View System Trouble (Cmd 42)................................ 21
View Point Trouble (Cmd 48) ................................... 22
System Test (Cmd 41).................................................. 22
Walk Test (Cmd 44) ..................................................... 23
Reset the System (Cmd 47)......................................... 23
Turn Watch On/Off (Cmd 61)................................... 23
Select Watch Tone (Cmd 62)..................................... 24
Select Watch Points (Cmd 63) ...................................24
Extend Auto On Time (Cmd 51)............................... 24
Change Skeds (Cmd 52).............................................. 25
Sked All Days Feature ................................................... 25
All On Skeds................................................................... 25
Part On Skeds ................................................................. 25
Part 2 On Skeds.............................................................. 26
Off Skeds ......................................................................... 27
Output On Skeds............................................................ 27
Output Off Skeds............................................................ 27
Change Outputs (Cmd 54).......................................... 28
Remote Program (Cmd 43) ........................................ 28
All Areas Off (Cmd 81) ............................................... 28
All Areas On (Cmd 80) ............................................... 28
Move to Area (Cmd 50) .............................................. 29
Auto-Forward On Setup (Cmd 83)........................... 29
Auto-Forward Off Setup (Cmd 84)........................... 30
Auto-Forward On/Off (Cmd 82)............................... 30
Remote Arming with Telephone, Area 1............... 31
View Log (Cmd 85)...................................................... 31
Basic Pager Reports..................................................... 32
Control Panel Event Descriptions............................ 33
Security System Limitations ...................................... 38
Fire Safety and Evacuation........................................ 38
Maintenance and Service........................................... 40
Power Failure................................................................ 40
How to clean the keypad............................................ 40
Glossary.......................................................................... 41
Index ............................................................................ 42
Bosch Security Systems | 9/04 | 46841E 3
Page 4

D623 Series/D625 Series | User's Guide | Contents
Figures
Figure 1: Information Box ..........................................2
Figure 2: D623 Series and D625 Series Features .....5
Figure 3: Controlled Points are All On.....................6
Figure 4: Controlled Points are Part On ...................6
Figure 5: Date and Time format ..............................16
Figure 6: Display layout............................................31
Figure 7: Pager Display format ................................32
Figure 8: Smoke Detector locations.........................39
Tables
Table 1: Keypad Keys................................................7
Table 2: Keypad Tones..............................................7
Table 3: Keypad LED Descriptions .........................8
Table 4: System Status Messages .............................. 9
Table 5: Silencing Exit Tone...................................14
Table 6: Watch Tone Selection...............................24
Table 7: Character Code Information....................32
Table 8: Control Panel Event Descriptions...........33
4 Bosch Security Systems | 9/04 | 46841E
Page 5
.
About this User Guide
D623 Series/D625 Series | User's Guide | About this User Guide
This User’s Guide shows you how to use and maintain
your security system. It covers basic functions, such as
turning the system on and off.
The functions described in this guide are programmed
by your security company. Some of them may not be
enabled in your system. Certain functions covered may
require you to enter your personal passcode.
Introduction
Your system helps to secure life, property, and
investments against fire, theft, and bodily harm. It
consists of one or more keypads, motion sensors (such
as detectors or devices located on doors and windows),
and sensing devices designed to detect the presence of
smoke or combustion. Each device is connected to a
sophisticated control panel with a microprocessor that
processes all events registered by the system.
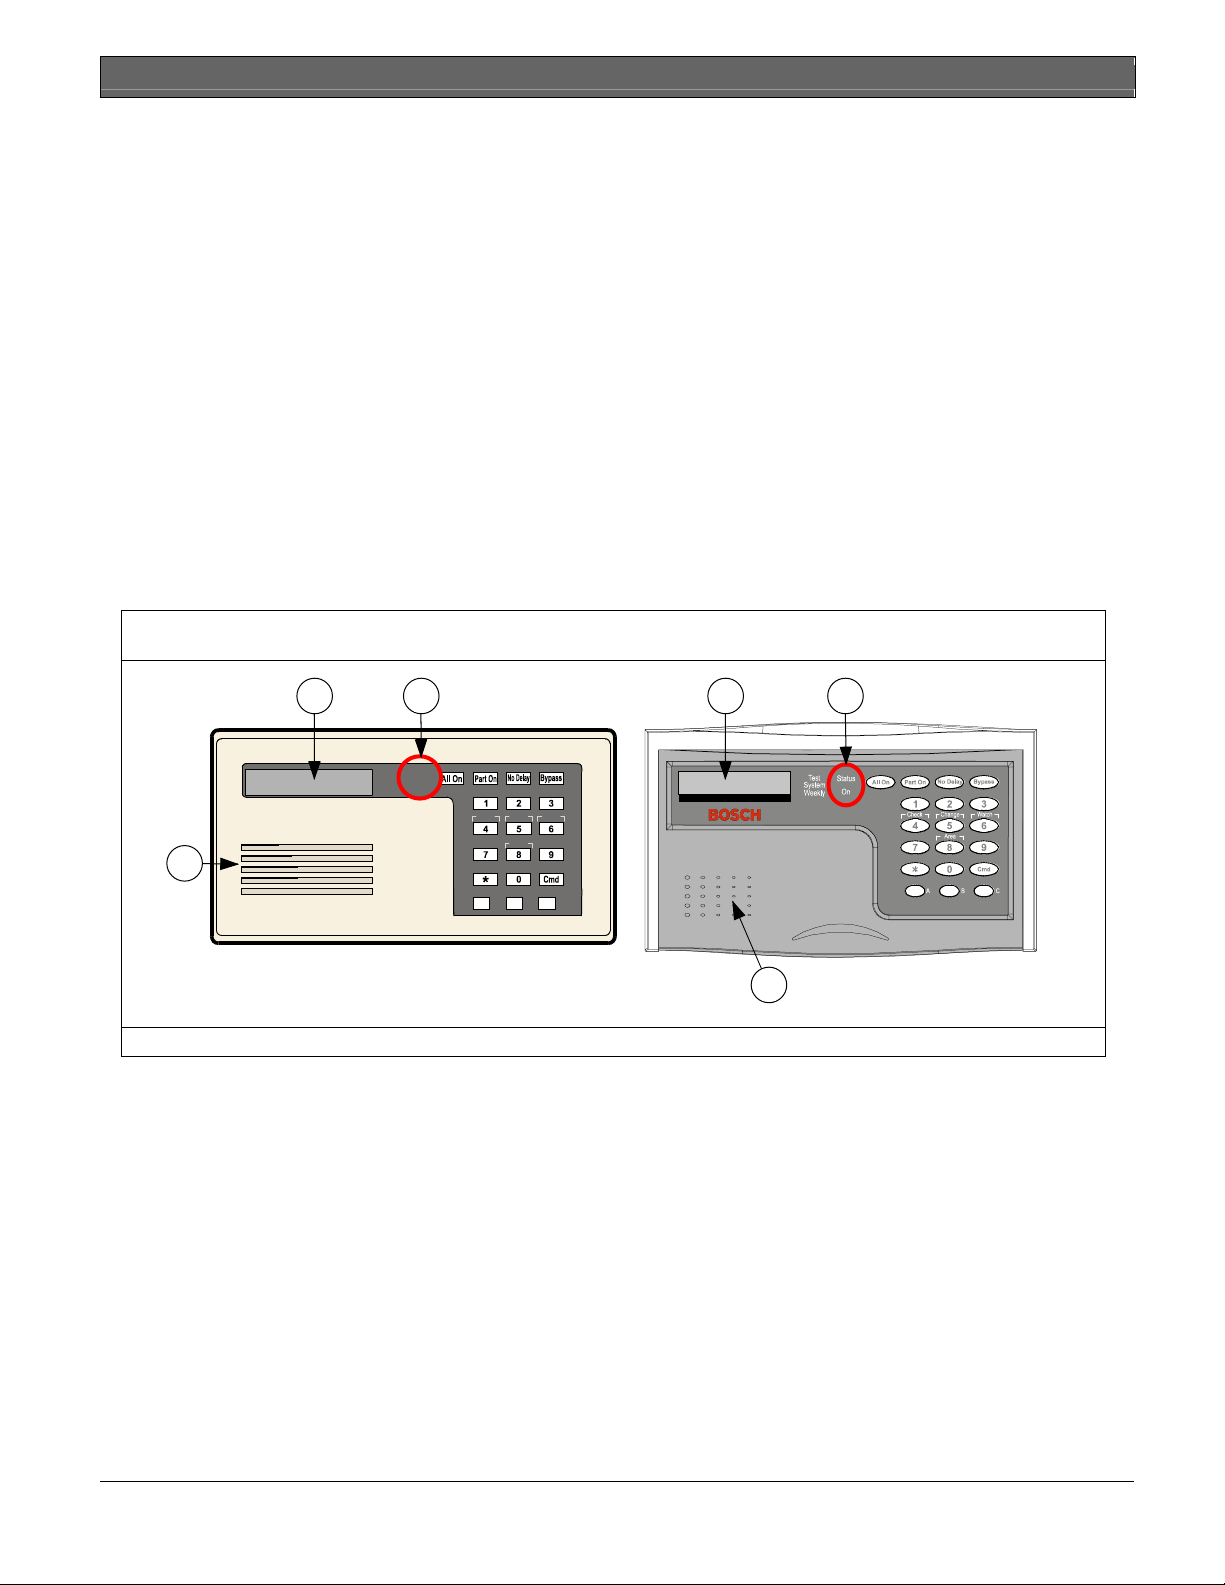
Figure 2: D623 Series and D625 Series Features
21 1
Status
On
Check
Change
Watch
Area
3
Test System Weekly
B
A
C
Control of your security system is achieved through the
keypad, which offers a variety of basic and advanced
features. Its function, versatility, and ease of operation
make it ideal for home or office use. The keypad is
tailored to meet your individual needs. Moreover, it
has been designed with you, the user, in mind.
2
D623/D623W/D625/D625W
3
D623B/D625B
1 - Text display 2- System status indicators 3 - Sounder
Bosch Security Systems | 9/04 | 46841E 5
Page 6
D623 Series/D625 Series | User's Guide | Security System Basics
Security System Basics
What is a Point?
A Point is a detection device or group of devices
connected to your security system. Points are identified
by the area they monitor, such as a front door,
bedroom window, or hallway.
What is a Faulted Point?
When a point (such as a door or window) is closed, it is
said to be normal. When the door or window is open,
the point is said to be faulted, or not normal. When
you turn your system on, you usually want all of the
points in your system to be normal. However, you can
turn your system on with faulted points by using the
Bypass Points command.
You can see if there are any faulted points by pressing
the [*] key when the system is off.
Are All Points the Same?
Not all points are the same. In fact, there are two basic
types of points: Controlled and 24-hour.
Controlled Points
Controlled points respond to alarm conditions
depending upon whether the system is turned on or off.
They are programmed to either respond instantly to
alarm conditions, or to provide a delay for you to reach
the keypad and turn the system off. Various controlled
points may be located throughout your house.
When you turn your system on, you have the option of
turning on all controlled points (All On) or just some of
the controlled points (Part On). See All On and Part
On for more information.
24-Hour Points
24-hour points are always on, even when the system is
turned off. There are two types of 24-hour points: Fire
and Non-Fire. See Reset the System on page 30 for
more information.
• Fire Points: Only monitor fire detection devices
such as smoke detectors. They are always on and
cannot be turned off.
• Non-Fire Points: Always on and cannot be turned
off.
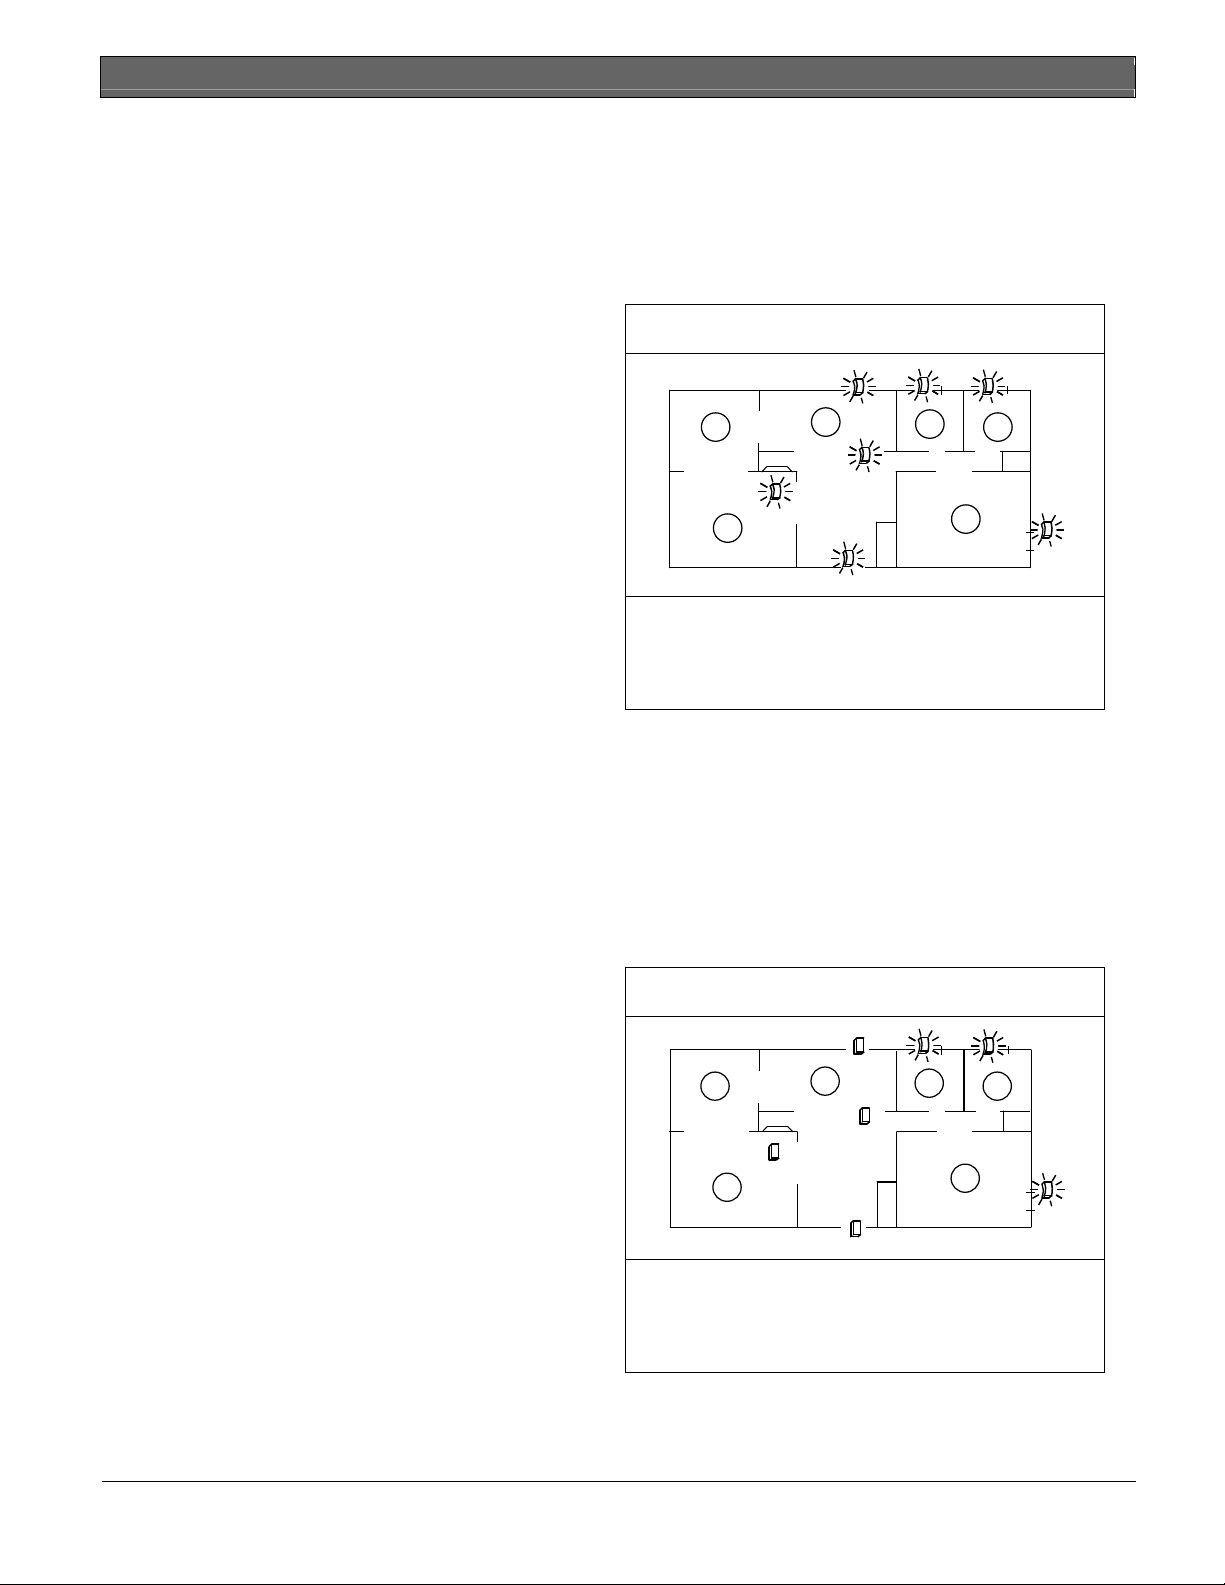
All On
When you turn your system All On you are turning on
all controlled points, both interior (motion detectors)
and perimeter (doors and windows of the building).
Figure 3: Controlled Points are All On
1
4
2
3
3
3
1 - Dining room
2 - Kitchen
3 - Bedroom
4 - Living room
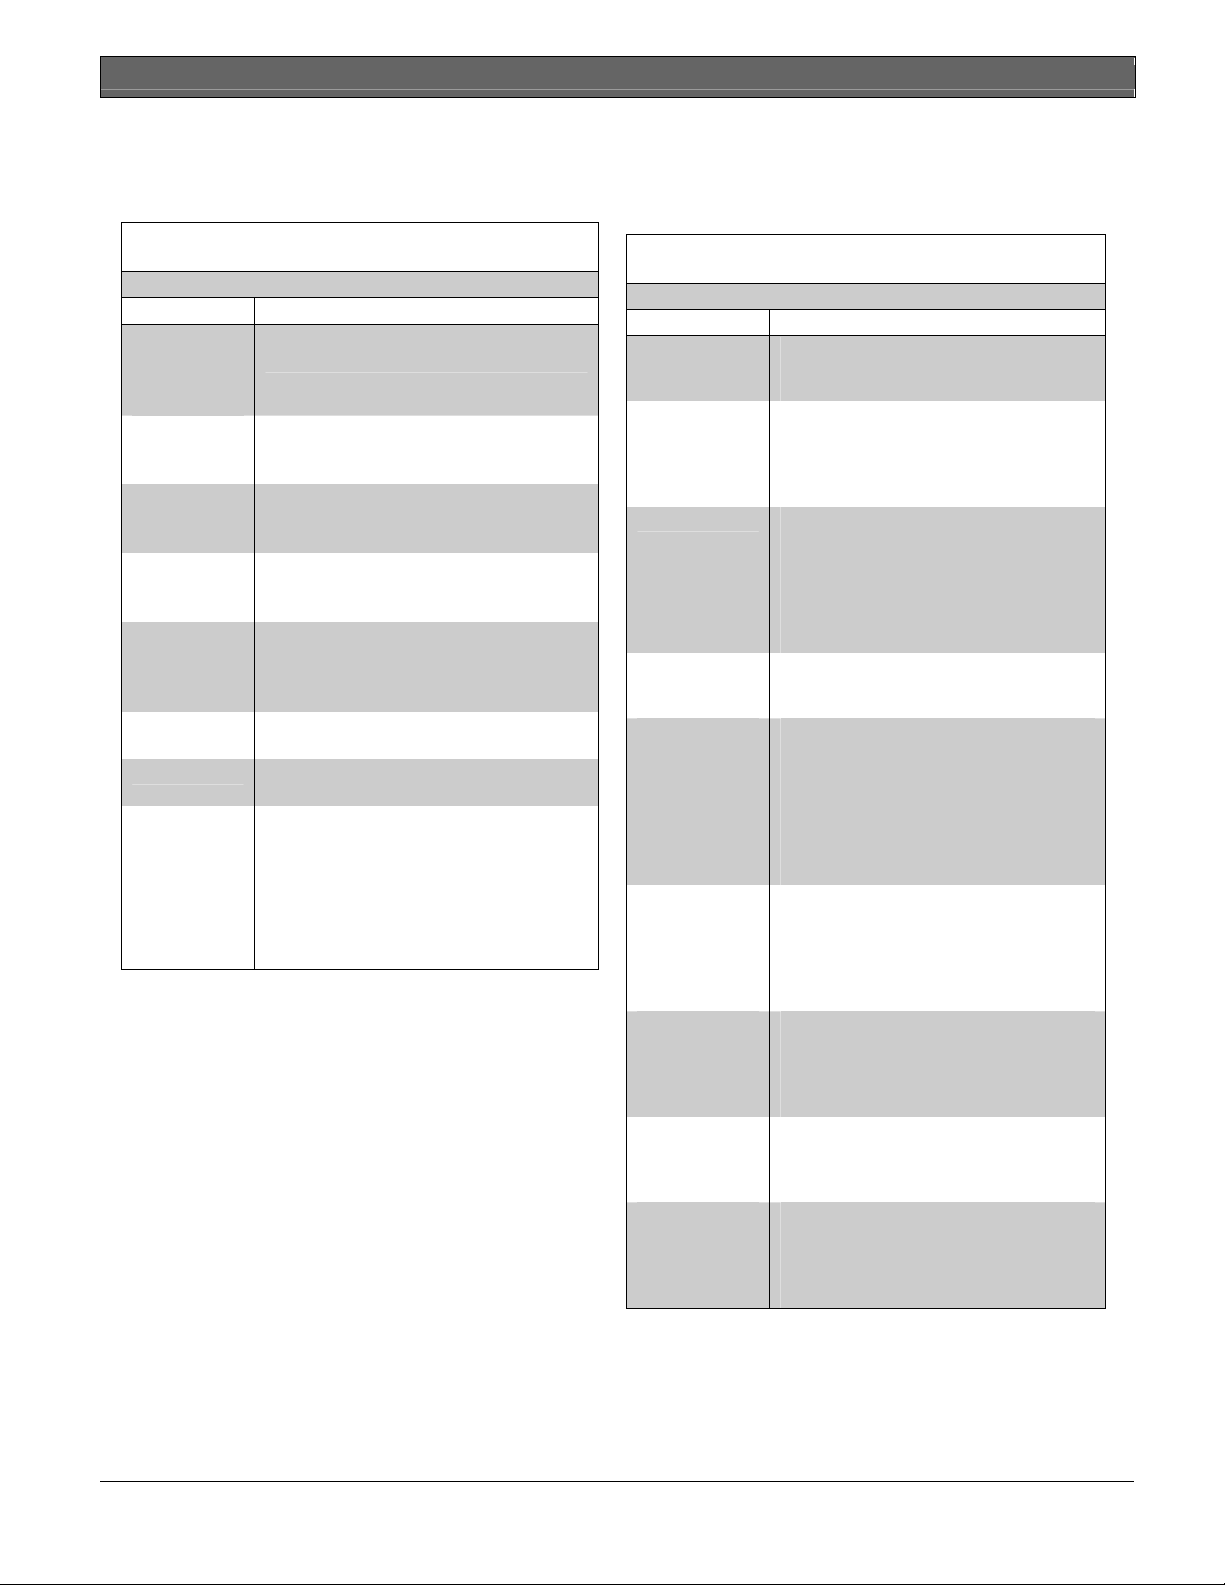
Part On
When you turn your system Part On you are turning
on only a portion of the controlled points. The
particular points included in this portion are
determined by your alarm company. Part points may
include only the perimeter (doors and windows) of
your system, or the points on the first floor of a twostory house. Check with your security company to
learn which points are Part points.
Figure 4: Controlled Points are Part On
1
4
1 - Dining room
2 - Kitchen
3 - Bedroom
4 - Living room
2
3
3
3
6 Bosch Security Systems | 9/04 | 46841E
Page 7
D623 Series/D625 Series | User's Guide | Keypad Keys
.
Keypad Keys
Your Text keypad has nineteen keys for performing
the various functions described below:
Table 1: Keypad Keys
Key Function
[1], [2], [3],
[4], [5], [6],
[7], [8], [9],
[0]
[CMD] Used in conjunction with numeric keys to
[ALL ON]
[PART ON]
[NO DELAY] Turns your system All On or Part On
[BYPASS] Bypasses one or more points (refer to
[*] When available, advances to the next
[A], [B], [C] Emergency functions (Fire, Panic, or
Numeric keys used to enter passcodes
and issue commands.
enter commands. Also displays system
status.
Turns your system All On (refer to Turn
the System All On (All On or Cmd 1) on
page 10).
Turns your system Part On (refer to Turn
the System Part On (Part On or Cmd 2)
on page 11).
without entry or exit delay (refer to Turn
the System On with No Delay on
page 12).
Bypass Points on page 15).
display.
Emergency Alarms) may be assigned to
these keys by your security company.
To activate the special function, press the
key twice (consecutively) within 2 sec.
Your security company labels each key
with its assigned function.
Keypad Tones
The keypad emits several distinct tones and illuminates
lights to alert you to system events.
Table 2: Keypad Tones
Tone Description
Fire Alarm When fire point activates, the keypad emits
a repeated warble tone (on for 2 sec., then
briefly off).
Burglary Alarm When a burglary point activates while your
system is turned on, the keypad emits a
continuous warble tone. The sounder
remains on for the duration of the time set
by your security company.
Trouble When a system component is not
functioning properly, your keypad emits a
repeated warble tone (on briefly, followed
by a pause, followed by the warble tone).
Press [4] to view the trouble. If problem is
point-related, the keypad display indicates
the faulted point.
Key Press Pressing any key on the keypad sounds a
short pip to indicate the pressed key is
accepted.
Entry Delay When you enter the premises through a
point programmed for Entry Delay, the
keypad emits an intermittent beep to
remind you to turn your system off. If the
system is not turned off before the Entry
Delay expires, an alarm condition occurs
and a report may be sent to your alarm
company.
Exit Delay After you turn your system on, the keypad
emits an intermittent beep and counts
down the Exit Delay time. If you do not exit
before the Exit Delay time expires and an
Exit Delay point is faulted, an alarm event
begins.
Error If you press an incorrect key, your keypad
emits an error tone to indicate an invalid
entry. The Error Tone is the same warble
tone as the Trouble Tone, but is not
repeated.
OK Indicates a keypad entry is accepted, such
as a correctly entered passcode. The
Keypad emits a single, high-pitched beep
for 1 sec.
Watch If any watched point is faulted, the keypad
emits a tone to alert. The tone varies in
duration, depending on the selected
Watched Tone (refer to Select Watch
Tone (Cmd 62) on page 24).
Bosch Security Systems | 9/04 | 46841E 7
Page 8
D623 Series/D625 Series | User's Guide | Keypad Tones
Keypad LED Descriptions
The keypad LEDs are described below.
Table 3: Keypad LED Descriptions
LED State Description
Status
On
Commands
Commands allow you to carry out various tasks such as
add/delete passcodes, set the date/time, or test the
system. Each command is detailed in this user guide.
Commands are written as: [CMD] [6] [3]. To enter this
command, first press the [CMD] key, followed by the
[6] key, and then the [3] key.
System Events
Your system responds to four types of alarm events. If
more than one event occurs, your system sorts them
into one of four groups: Fire Alarms (highest priority),
Burglary Alarms, Fire Troubles, and Non-Fire Troubles
(lowest priority). Events grouped as highest priority are
always sent to the central station first.
Fire Alarms
Fire alarms are the highest priority events. When a fire
point activates, your keypad emits a Fire Alarm tone.
The tone sounds for the length of time programmed by
your installation company. Evacuate all occupants and
investigate for smoke or fire. Ensure all occupants
know the difference between the Burglary Alarm tone
and the Fire Alarm tone.
On No system troubles present.
Slow Flash AC failure, system trouble, or
keypad was moved away from
its assigned area.
Fast Flash Command center in Command
Mode.
Off Panel is disarmed.
Slow Flash Panel is armed with No Delay.
On Exit Delay timer is active or
control panel is armed with
Entry/Exit Delay.
Fire Trouble Events
When a fire trouble (such as a loose wire) occurs, your
keypad emits a Trouble tone.
The keypad displays the System Trouble message.
Refer to Check System Troubles (Cmd 4) on page 20 for
more information on determining the nature of the
trouble.
Non-Fire Trouble Events
When a trouble event such as a power failure occurs,
your keypad emits a trouble tone.
The keypad displays the System Trouble message.
Refer to Check System Troubles (Cmd 4) on page 20 for
more information on determining the nature of the
trouble.
How Your System Reports
Alarms
Your security system may be programmed to
automatically disconnect your telephone when sending
reports to your security company. Once the report is
complete, the system returns the telephone to normal
operation (check with your security company).
Your system makes repeated attempts to send reports
to your security company. If your system fails to report,
the keypad signals a system trouble. Refer to Check
System Troubles (Cmd 4) on page 20 to determine the
nature of the trouble.
If your telephone service is interrupted,
your security system cannot send reports
to your security company unless it has an
alternate means of transmitting them.
Burglary Alarms
Burglary alarms are the second priority. When a
burglary point activates, your keypad emits a Burglary
Alarm tone. The tone sounds for the alarm set by your
security company. Ensure all occupants know the
difference between the Burglary Alarm tone and the
Fire Alarm tone.
The keypad scrolls through each point alarm, or you
can press the [*] key to manually advance the list.
8 Bosch Security Systems | 9/04 | 46841E
Page 9

.
Check System Status
When the system is Off, press [CMD] to show the
current system status. The following message may
appear:
Table 4: System Status Messages
System Status
Message
System OK
System Trouble!
Press [4] to view
Points faulted
Press [0] to view
Description
Indicates there are no system
troubles.
Indicates there is a system trouble.
Refer to Check System Troubles
(Cmd 4) on page 20 to determine
the nature of the trouble.
Indicates the system has faulted
points. Refer to View Faulted
Points on page 15 for more
information.
Log Out of the System
D623 Series/D625 Series | User's Guide | Check System Status
3. Press and hold [CMD] to remove the alarm
messages from the keypad display. Refer to
Section View Alarm Memory (Cmd 40) on page 21 to
see which points caused the alarm.
The system remembers passcodes entered for
approximately 10 sec. after you stop pressing keys. To
log out of the system, press the [CMD] key twice.
Logged Out appears on the keypad display.
Silence Alarms
When an alarm occurs, the alarm tone sounds and the
display shows the point(s) in alarm. If you enter your
passcode before the system dials your security
company, the alarm report is aborted.
1. The keypad displays the point(s) in alarm.
Alarm Pt4
Living Room
Enter code to
silence alarm
2. Enter your passcode to silence the alarm and turn
the system off (if it was turned on). An alarm
report is sent to your security company if the
alarm is not acknowledged in time.
The display continues to show the point (or
points) that caused the alarm.
Silenced alarms
listed below
Alarm Pt8
Motion Detector
To remove
silenced alarms
from display,
hold Cmd
Bosch Security Systems | 9/04 | 46841E 9
Page 10

D623 Series/D625 Series | User's Guide | Keypad Adjust (Cmd 49)
2. Enter your passcode to turn the system off. Once
Keypad Adjust (Cmd 49)
I can perform this command.
I cannot perform this command.
Use Command 49 to adjust the keypad sounder
volume and the display brightness.
1. Press [CMD] [4] [9]. Enter a valid passcode if
prompted.
2. To adjust the keypad sounder volume, press and
hold the [*] key and then press [1] to increase the
volume or [4] to decrease the volume.
3. To adjust the keypad display brightness, press and
hold the [*] key and then press [3] to increase the
brightness or [6] to decrease the brightness.
4. Press [CMD] to exit this command function when
all adjustments are made.
Turn the System Off
Entry Delay Time (to be filled in by your security
company).
You have __________ sec. to enter premises and turn
system off.
Enter your passcode to turn the security system off.
When the system is on, you must enter through a
designated entry door to prevent an alarm. Opening a
designated door, such as the Front Door, starts the
entry delay. During entry delay time, the keypad emits
a double tone to remind you to turn the system off.
Enter your passcode before the entry delay time
expires to turn the system off.
If you enter through the wrong door or fail to turn the
system off before the entry delay time expires, you may
cause an alarm. If an alarm occurs, silence the alarm by
entering your passcode and call your security company
to let them know that there is no emergency situation.
1. When the system is on, the On indicator
illuminates. If the system is All On, the keypad
display shows:
Smiths Residence
All On
If the system is Part On, the keypad display
shows (Part 2 On shows if the system is Part 2
On):
Smiths Residence
Part On
the system is off and there are no faulted points,
the keypad displays the idle text (second line) as
shown below:
Turn the System All On (All On
Exit Delay Time (to be filled in by your security
company).
You have __________ sec. to exit premises before
system turns on.
Use this command to turn on the entire system. Once
you press the [ALL ON] key or enter Cmd 1, the Exit
Delay timer starts its countdown. The length of exit
delay is programmed by your security company.
When your system is ready to turn All On, it displays
OK for All On, indicating all points are normal,
such as no open doors or windows and no one standing
in front of a motion detector.
If your keypad displays a message indicating the
system is not ready to arm (such as Not Ready to
Arm), check all doors and windows to see if any are
open or if someone or something is in front of a motion
detector. If all protected doors and windows are closed
and no motion detectors are blocked and the keypad
still displays Not Ready to Arm, contact your
security company for assistance.
In the example below, the exit delay is 60 sec. Leave
before the exit time expires. Leaving after exit delay
expires causes an alarm event.
1. Make sure all points are normal (not faulted). If
your system has a faulted point (door/window
open), you can either close it or bypass it (see
Bypass Points 1 on page 18).
2. Press [ALL ON] or [CMD] [1]. The keypad may
prompt you to enter a valid passcode.
Smiths Residence
OK for All On
or Cmd 1)
Smiths Residence
Ok for All On
10 Bosch Security Systems | 9/04 | 46841E
Page 11

D623 Series/D625 Series | User's Guide | Turn the System Part On (Part On or Cmd 2)
.
3. Enter your passcode if necessary. Exit delay time
begins. The On indicator turns on. Exit the
building now.
60 seconds to
All On.
Enter your passcode to stop the system from
turning on during the exit delay.
Press [BYPASS] to bypass points (see Bypass
Points on page 18). You can turn the system All
On with No Delay by pressing [NO DELAY]. You
can also turn the system Part On by pressing
[PART ON]. The system prompts you through this
procedure.
To bypass points
Press Bypass
For no delay
press No Delay
For Part On
press Part On
4. During the last 10 sec. of Exit Delay, the keypad
displays Do not exit! and emits a double tone
every second to warn you not to exit and to turn
the system off. The system turns All On. The On
indicator remains on steady.
Smiths Residence
All On
5. To turn the system off, enter your passcode.
Turn the System Part On (Part
On or Cmd 2)
Exit Delay Time (to be filled in by your security
company).
You have __________ sec. to exit premises before
system turns on.
I can perform this command.
I cannot perform this command.
Part On turns on only part of your system, leaving the
rest of the system turned off.
If your keypad shows OK for Part On or OK for All
On, this means all of the points that turn on for Part
On operation are normal (such as all protected doors
and windows bing closed).
Smiths Residence
Ok for Part On
Once you press the [PART ON] key, exit delay begins.
Use Part On when you want part of your system turned
on. For example, use Part On if you plan to stay inside
the premises and you only want to protect the
perimeter doors, or you are leaving and you want a pet
to move freely about inside without causing an alarm.
1. Make sure that Part points are normal (not faulted).
If your system has faulted points, return them to
normal, or bypass them.
2. Press [PART ON]. The keypad may prompt you to
enter a valid passcode.
3. Enter your passcode if necessary. The On indicator
turns on and Exit delay time begins. The keypad
display scrolls the following:
60 seconds to
Part On.
To bypass points
Press Bypass.
For no delay
Press No Delay.
For All On
press All On
48 seconds to
Part On.
Enter your passcode to stop the system from
turning on during the exit delay. You can turn the
system Part On with No Delay by pressing [NO
DELAY]. Or you can bypass points by pressing
[BYPASS].
Bosch Security Systems | 9/04 | 46841E 11
Page 12

D623 Series/D625 Series | User's Guide | Turn the System Part 2 On (Cmd 3)
4. During the last 10 sec. of Exit Delay, the keypad
displays Do not exit! and emits a double tone
every second to warn you not to exit and to turn
the system off. The system turns Part On. The On
indicator remains on steady.
Smiths Residence
Part On
5. To turn the system off, enter your passcode.
4. During the last 10 sec. of Exit Delay, the keypad
displays Do not exit! and emits a double tone
every second to warn you not to exit and to turn
the system off. The system turns Part 2 On. The
On indicator remains on steady.
Smiths Residence
Part 2 On
5. Enter your passcode to turn the system off.
Turn the System Part 2 On
(Cmd 3)
Exit Delay Time (to be filled in by your security
company).
You have __________ sec. to exit premises before
system turns on.
I can perform this command.
I cannot perform this command.
Part 2 On turns on the portion of your system
designated as Part 2, leaving the rest of the system
turned off. You can select the points that turn on for
Part 2 On, whereas Part On points are determined by
your security company (refer to Set Part 2 Points (Cmd
65) on page 12). Once you press [CMD] [3], the exit
delay timer countdown begins.
Smiths Residence
Ok for Part On
In the following example, 60 sec, is used as the Exit
Delay. Exit Delay is set by your security company and
may vary from the example shown below.
1. Make sure that points are normal (not faulted).
2. Press [CMD] [3] to turn the system Part 2 On. The
keypad may prompt you to enter a valid passcode.
3. Enter your passcode if necessary. The On indicator
turns on. The keypad display scrolls the following:
60 seconds to
Part 2 On.
To bypass points
Press Bypass.
For no delay
Press No Delay.
For All On
press All On
48 seconds to
Part 2 On.
Enter your passcode to stop the system from
turning on during the exit delay. You can turn the
system Part 2 On with No Delay by pressing [NO
DELAY], or you may bypass points by pressing
the [BYPASS] key.
Set Part 2 Points (Cmd 65)
I can perform this command.
I cannot perform this command.
Use this command to program which points are armed
each time you turn the system Part 2 On. This lets you
turn part of the system on to detect intrusion, while the
remaining part of the system lets you move freely
without sounding an alarm.
1. Make sure the system is turned off (On indicator is
off).
2. Press [CMD] [6] [5]. The keypad may prompt you
to enter a valid passcode.
3. Enter your passcode if necessary. The keypad
display scrolls the following:
Pt2 Part 2 No
Front Door
Press 2* for
Pt2 Part 2 Yes
Pt3 Part 2 Yes
Hallway
Press 3* for
Pt3 Part 2 No
To exit
Press Cmd.
4. Enter the Point Number followed by the [*] key to
toggle between Yes or No for Part 2 On. Repeat
until all points are programmed Yes or No for Part
2 Mode (Yes = Active, ready to detect intrusion;
No = Non-Active, you can move freely without
sounding an alarm).
5. Press [CMD] to exit this command.
Turn the System On with No
Delay
This command turns the system All On or Part On
without entry or exit delays. Remember that turning
the system on with no delay allows no exit or entry
delay time through the designated delay point, like the
Front Door.
1. Make sure all points are normal (not faulted).
12 Bosch Security Systems | 9/04 | 46841E
Page 13

D623 Series/D625 Series | User's Guide | Turn the System On with No Exit Tone (Delay Silent)
.
2. Press [ALL ON] if you want to turn the system All
On, or press [PART ON] if you want to turn the
system Part On. Press [CMD] [3] if you want to
turn the system Part 2 On. The keypad may
prompt you to enter a valid passcode.
3. Enter your passcode if necessary. The keypad
display shows the following for turning the system
All On:
60 seconds to
All On.
To bypass points
Press Bypass.
For no delay
Press No Delay.
Pressing [NO DELAY] begins a 10-sec. “last
chance” window in which you have 10 sec. to
decide if you want to allow the system to arm.
During this window, the display scrolls through the
following messages: No exit time! System
arming. Do not exit! If you decide not to
allow the system to arm, enter your user passcode.
If all points are normal, the display shows the
following for Part On (the display shows Part 2 On
if the system is Part 2 On):
60 seconds to
Part On.
To bypass points
press Bypass.
For no delay
Press No Delay.
4. To turn the system on (All On, Part On, or Part 2
On) with no delay, press [NO DELAY].
The keypad scrolls the following for All On:
No exit time!
System arming.
Do not exit!
Enter code to
turn system off
Smiths Residence
All On
On with No Delay
The keypad scrolls the following for Part On (the
display shows Part 2 On if the system is Part 2
On):
No exit time!
System arming.
Do not exit!
Enter code to
turn system off
Smiths Residence
Part On
On with No Delay
5. When the system is All On with No Delay, the
keypad displays the following:
Smiths Residence
All On
On with No Delay
If the system is Part On or Part 2 On with No
Delay, the keypad displays the following (the
display shows Part 2 On if the system is Part 2
On):
Smiths Residence
Part On
On with No Delay
The On indicator turns on and blinks, indicating
the system is on with no delay.
6. To turn the system off, enter your passcode.
Turn the System On with No Exit
Tone (Delay Silent)
Use this command to turn the entire system All On,
Part On, or Part 2 On without any exit tones.
Remember that turning the system on with no exit tone
eliminates the tone emitted by the keypad intended to
alert occupants that the system is about to arm.
This command is useful when you wish to arm the
system, but not disturb the occupants while the system
counts down prior to arming.
1. Make sure all points are normal (not faulted).
2. Press and hold the appropriate key to silence the
exit tone. The keypad may prompt you to enter a
valid passcode.
Bosch Security Systems | 9/04 | 46841E 13
Page 14

D623 Series/D625 Series | User's Guide |
Table 5: Silencing Exit Tone
Arming With To Silence Exit Tone
All On Press and hold [ALL ON]
OR
Press [CMD], then press and hold [1].
Part On Press and hold [PART ON]
OR
Press [CMD], then press and hold [2].
Part 2 On Press [CMD], then press and hold [3].
Silencing the Exit Delay Tone doubles the
Exit Delay period.
3. Enter your passcode if necessary. The keypad
display shows the following for turning the system
All On:
120 seconds to
All On.
To bypass points
press Bypass.
For no delay
Press No Delay.
If all points are normal, the display shows the
following for Part On or Part 2 On. If the system is
turned Part 2 On, the second line of the display
shows Part 2 On:
120 seconds to
Part On.
To bypass points
press Bypass.
For no delay
Press No Delay.
4. To turn the system on (All On, Part On, or Part 2
On) with no delay, press [NO DELAY]. See Turn
the System On with No Delay on page 14 for
more information.
Turn the System On with Points
Faulted (Force Arm)
Force-arming is not permitted for UL
applications.
I can perform this command.
I cannot perform this command.
1. Press [ALL ON] or [PART ON] to turn the system
All On or Part On.
2. The keypad displays the faulted points as follows:
Pt5 faulted,
Point Text
To Bypass Pt5
Press 5 + *
Then the system identifies the faulted point (in this
example Point 5), followed by instructions for
bypassing the point.
3. To force arm the system All On or Part On with
normal Exit Delay and exit tone, press [ALL ON]
or [PART ON] again. Enter your passcode when
prompted. The following scrolls across the display:
Forced on!
60 seconds to
All On.
1 points are
forced on.
The display above uses an Exit Delay time
of 60 sec. and only one point is forcearmed. Exit Delay time and the number of
points forced on may vary.
4. To force arm the system All On or Part On with
Exit Delay doubled and no exit tone, press and
hold [ALL ON] or [PART ON] until the “point
faulted” message appears (see figure in Step 2).
Then press [ALL ON] or [PART ON] again. Enter
your passcode if prompted. The system then scrolls
the Forced on! message and the doubled Exit
Delay Time countdown. The exit tone is silenced.
The system ‘forces’ the faulted points on. As long
as they remain faulted they do not provide
protection. If the faulted points return to normal
before the system is turned off, they provide
protection and are capable of starting alarm events.
If a point becomes faulted after the exit delay
begins, the keypad displays the faulted point. If the
point remains faulted at the end of exit delay, it
starts an alarm event.
14 Bosch Security Systems | 9/04 | 46841E
Page 15

D623 Series/D625 Series | User's Guide | View Faulted Points
.
View Faulted Points
To correctly turn your system on, all doors and
windows must be in the normal (not faulted) condition.
Use this command to locate faulted points.
1. Ensure the system is turned off (On indicator off).
2. Press [*]. If points are faulted the keypad displays
the following:
System OK
3. If there are faulted points, press [0] to view. The
keypad scrolls through all faulted points:
Pt2 faulted,
Front Door
To bypass Pt2
Press 2 + *
Pt7 faulted,
Back Door
To bypass Pt7
Press 7 + *
4. Return the faulted points to the normal condition
(like close the front door), or you may choose to
bypass the points by following the displayed
instructions (such as Press [2] [*]).
5. Once the points return to normal or are bypassed,
the system is ready to turn on.
Point faulted,
or
Press 0 to view
Bypass Points
I can perform this command.
I cannot perform this command.
Use this command to bypass one or more points before
turning the system All On, Part On, or Part 2 On. You
can access a bypassed point when the system is armed
without activating an alarm.
Example: Your kitchen was just painted and you want
to leave the windows open but still turn the system on.
Bypassing points allows the system to be on, but
prevents it from monitoring undesired areas.
1. Ensure that the system is turned off (On indicator
is off).
2. Press the [BYPASS] key. The keypad may prompt
you to enter a valid passcode.
3. Enter your passcode if necessary. The keypad
scrolls all zones that can be bypassed:
Pt1,
Front Door
To bypass Pt1
Press 1 + *.
Pt2,
Back Door
To bypass Pt2
Press 2 + *.
4. Enter the Point Number that you want to bypass
followed by [*] (for example, if you want to bypass
Point 10, enter [1] [0] [*]). Repeat this step to
bypass all desired points.
If a point is already bypassed, the keypad displays:
Pt3
Hallway
To unbypass 3
Press 3 + *
If a point is faulted, the keypad displays the point
number. If the point is bypassable, the keypad
prompts you to press the point number followed
by the [*] key. If the point is unbypassable, the
display tells you the point cannot be bypassed.
5. Press [CMD] to exit this command function.
Press [CMD] to exit this command function.
Bosch Security Systems | 9/04 | 46841E 15
Page 16

D623 Series/D625 Series | User's Guide | Date and Time (Cmd 45)
Date and Time (Cmd 45)
I can perform this command.
I cannot perform this command.
Use this command to program the system date and
time.
1. Ensure that the system is turned off (On indicator
is off).
2. Press [CMD] [4] [5]. The keypad may prompt you
to enter a valid passcode.
3. Enter your passcode if necessary. The keypad
displays.
Please Enter
Date and Time
MM/DD/YY HH:MM
01/01/01 00:01
4. Enter the date and time using the numeric keys in
MM/DD/YY, HH:MM format.
Figure 5: Date and Time format
___M___
/ ___D__ _
M
1 2 3 4 5
___Y___
/:
D
Y
1 - Month of the year
2 - Day of the month
3 - Current year
4 - Hour of the day
5 - Minute of the hour
5. The keypad displays both the date and time you
entered before returning the keypad to the normal
display. In this example, the keypad displays.
Current Date
04/16/01
Current Time
13:35
The keypad returns to the normal display.
In the event of a power cycle (power is
lost to the system and then restored), the
control panel takes the last event in the
log and uses that as a starting point for
the time and date. It then alerts you to
enter the current time and date.
___H___
H
___M___
M
Change Passcode (Cmd 55)
I can perform this command.
I cannot perform this command.
Use this command to change your passcode at any
time. However, only use this feature under the
direction of your security company. The system
must be off in order to use this command.
Write down your new and old passcode before you
begin.
1. Ensure that the system is turned off (On indicator
is off).
2. Press [CMD] [5] [5]. The OK tone sounds and the
keypad displays:
Please enter
old code
3. Enter your current passcode. As you enter your
passcode, the keypad displays:
Entering Code
***
4. If the passcode you have entered is valid, you are
prompted to enter your new passcode:
Please enter
new code
5. Enter a new passcode with the same number of
digits as your old passcode. If the error tone
sounds, try a different new passcode. As you enter
your new passcode, the keypad displays:
Entering Code
***
6. If you have entered a valid new passcode, the
keypad prompts you to enter the new passcode
again:
Please enter
new code again
7. Enter your new passcode again. As you enter your
new passcode, the keypad displays:
Entering Code
***
8. The keypad displays the following to confirm you
have successfully changed your passcode:
Code changed
The keypad returns to the normal display.
16 Bosch Security Systems | 9/04 | 46841E
Page 17

D623 Series/D625 Series | User's Guide | Change Others’ Passcodes (Cmd 56)
.
Change Others’ Passcodes
(Cmd 56)
I can perform this command.
I cannot perform this command.
Use this command to change passcodes for each user
in the system. This command requires the appropriate
authority level to change passcodes. Only use this
feature under the direction of your security
company.
Cmd 56 is only for changing passcodes
other than the one used to access Cmd
56. For example, if User 1 performs Cmd
56, he/she cannot modify his/her own
1. Ensure that the system is turned off (On indicator
2. Press [CMD] [5] [6]. The keypad may prompt you
3. Enter your passcode if necessary. The keypad
4. Press [1] to change passcodes. The keypad scrolls
5. Enter the passcode number (1 to 32) you want to
6. Enter the new passcode with the same number of
7. If you have entered a valid new passcode, the
passcode. Use Cmd 55 instead.
is off).
to enter a valid passcode.
scrolls through the available options. If an option is
not selected after the list cycles once, the keypad
automatically exits this command.
through all passcodes that are available for
changing.
To change code 2
press 2*.
To change code 3
press 3*.
Push Cmd to exit
change followed by [*]. For example, press [2] [*]
to change Passcode 2. The keypad prompts you to
enter the new passcode.
Please enter new
code 2.
If the user does not exist in the system,
the keypad emits an error tone.
digits as the old passcode. If the error tone sounds,
try a different new passcode.
keypad prompts you to enter the new passcode
again.
Please enter new
code 2 again.
8. Enter the new passcode again.
9. The keypad displays the following to confirm the
passcode change.
Code 2 changed.
10. Repeat Steps 4 through 9 to change another
passcode or press [CMD] to exit this feature.
Pressing [CMD] again returns to the normal
display.
Change Others’ Passcode
Authority Levels (Cmd 56)
I can perform this command.
I cannot perform this command.
Use this command to change passcode authority levels
for each user in the system. This command requires the
appropriate authority level to change passcodes. You
cannot change your own passcode authority level.
Only use this feature under the direction of your
security company. The following is filled in by your
security company.
• Authority Level 1 includes these commands:
____________________________________________
__________________________________________
• Authority Level 2 includes these commands:
____________________________________________
__________________________________________
• Authority Level 3 includes these commands:
____________________________________________
__________________________________________
• Authority Level 4 includes these commands:
____________________________________________
__________________________________________
1. Ensure that the system is turned off (On indicator
is off).
2. Press [CMD] [5] [6]. The keypad may prompt you
to enter a valid passcode.
3. Enter your passcode if necessary. The keypad
scrolls the following:
Push 1 to change
codes.
Push 2 to change
authority level.
Bosch Security Systems | 9/04 | 46841E 17
Page 18

D623 Series/D625 Series | User's Guide | Add a Passcode (Cmd 56)
4. Press [2] to change passcode authority levels. The
keypad display scrolls:
To change level
for code 3,
Press 3*.
Add a Passcode (Cmd 56)
I can perform this command.
I cannot perform this command.
Use this command to add new passcodes to the system.
To change level
for code 4,
Press 4*.
Push Cmd to exit
5. Enter the passcode number (1 to 32) that you want
to change the authority level for, followed by [*]
(for example, press [3] [*] to change the authority
level for Passcode 3). The keypad display scrolls
the following:
Code 3 level 2
Enter new level.
Level choices
are 1 to 4.
Push Cmd to exit
If the user does not exist in the system,
the keypad emits an error tone.
6. Enter the new authority level (1 to 4) for the
passcode that you want to change. The authority
levels are determined by the installing company.
This command requires the appropriate authority level
to add passcodes. To add a new passcode to the
system, you must assign an area(s) to the new user in
addition to using the other Cmd 56 features (changing
a passcode and changing a passcode authority level) as
outlined below. Only use this feature under the
direction of your security company.
1. Ensure that the system is turned off (On indicator
is off).
2. Press [CMD] [5] [6]. The keypad may prompt you
to enter a valid passcode.
3. Enter your passcode. The keypad scrolls through
the following selections:
4. Press [3] to assign an area(s) to the new user.
5. Enter the user number you wish to assign area(s) to
followed by the [*] key. For example, for User 4,
press [4] [*]). The keypad toggles between the
following displays:
7. Press [CMD] to exit this feature. Press [CMD]
again to return to the normal display.
6. Enter the area(s) you want to assign to the new
user by pressing the appropriate numeric key(s).
For example, if the user is to be assigned to Areas
1 and 2, press the [1] and [2] keys. The keypad
displays:
To remove a currently assigned area(s), press the
corresponding numeric key(s). For example, if
User 4 is assigned to Areas 1 and 2, but should
only be assigned to Area 1, press [2] to remove
Area 2 from User 4’s area assignment.
7. Press [CMD] twice to return to the three Cmd 56
selections. Then, press [1] to create a passcode for
the new user.
8. Enter the user number followed by [*]. For
example, press [4] [*] to create the passcode for
User 4.
Push 1 to change
codes.
Push 2 to change
authority level.
Push 3 to change
areas assigned.
Code 4 Areas:
---Press 1 to 4 to
toggle areas.
Code 4 Areas:
12--
18 Bosch Security Systems | 9/04 | 46841E
Page 19

D623 Series/D625 Series | User's Guide | Delete Passcodes (Cmd 58)
.
9. When the display prompts, Please enter new code,
enter a new passcode. If the error tone sounds, try
a different new passcode. Enter the new passcode
again for verification.
10. Press [CMD] twice to return to the three Cmd 56
selections. Then press [2] to assign a passcode
authority level to the new user.
11. Enter the user number and press [*]. For example,
press [4] [*] to assign an authority level for User 4.
12. Enter an authority level (1 to 4) by pressing the
appropriate numeric key. keypad displays:
Code 4 level 0.
Enter new level.
The number following the word “level” on the first
line indicates the authority level the user passcode
is currently assigned to.
13. Use Steps 1 through 12 to add more new users or
press [CMD] until the keypad emits a single beep
tone and the display returns to the normal display.
The new user passcode, area assignment
and authority level automatically logs into
the system’s programming memory. Make
sure that your security company’s
programming records are properly
updated.
Delete Passcodes (Cmd 58)
I can perform this command.
I cannot perform this command.
Use this command to delete passcodes. This command
requires the appropriate authority level to delete
passcodes. You cannot delete your own passcode using
this command. Only use this feature under the
direction of your security company.
1. Make sure the system is turned off (On indicator is
off).
2. Press [CMD] [5] [8]. The keypad may prompt you
to enter a valid passcode.
3. Enter your passcode if necessary. The keypad
prompts you to delete a code.
Delete code 1?
Press 1*.
Delete code 2?
Press 2*.
Push Cmd to exit
4. Enter the passcode number (1 to 32) you want to
delete. For example, press [2] [*] to delete
Passcode 2.
Code 2
deleted.
Press * to
continue.
If the user does not exist in the system,
the keypad emits an error tone.
5. Press [CMD] to exit this command. If no keys are
pressed, the keypad automatically returns to the
normal display.
Bosch Security Systems | 9/04 | 46841E 19
Page 20

D623 Series/D625 Series | User's Guide | Renew One-time Passcodes (Cmd 53)
Renew One-time Passcodes
(Cmd 53)
I can perform this command.
I cannot perform this command.
One-time passcodes can only be used once to turn the
system off. This command allows those with the
applicable authority level to renew previous One-Time
passcodes. Once renewed, the One-Time passcode is
again able to turn the system off only once.
1. Make sure the system is turned off (On indicator is
off).
2. Press [CMD] [5] [6]. The keypad may prompt you
to enter your passcode.
3. Enter your passcode if necessary. The keypad
scrolls through the available one-time passcodes.
To renew all
One-time codes
Press 0*.
To renew code 5
Press 5*.
4. Press [0] [*] if you want to renew all one-time
passcodes or press the passcode number followed
by [*]. For example, if you want to renew Passcode
5, press [5] [*].
5. If you press [0] to renew all one-time passcodes,
the keypad displays:
All one-time
codes renewed.
6. If you select a single passcode to renew, like
Passcode 5, the keypad displays:
One-Time Code 5
renewed.
7. The system returns to the normal display.
Check System Troubles (Cmd 4)
Your system emits a trouble tone and displays the
System Trouble message to alert you to a system
trouble event, like low batteries. Use this command to
learn what is causing the trouble and the steps to take
to correct it.
1. The system may be on or off when a system
trouble occurs. If the system is on, you must turn it
off to check the trouble. The keypad displays:
Trouble! Press
Cmd 4 to view.
2. Press [CMD] [4]. The trouble tone silences and the
keypad scrolls through the list of troubles. Follow
the keypad display instructions to view the trouble
events.
Point Trouble!
Press 8 to view.
Alarm Memory!
Press 0 to view.
Date/time lost!
Press 5 to set.
System Trouble!
Press 2 to view.
To Test System,
press 1.
To Walk Test,
press 4.
To reset,
Press 7.
System OK!
Press Cmd.
3. Press [CMD] to return the keypad to the normal
display.
The trouble tone continues until the situation is
acknowledged.
The trouble tone for AC Failure events
sounds at all keypads in all areas.
However, the trouble tone must be
silenced in each area (silencing it in one
area does not silence it in the other
areas).
20 Bosch Security Systems | 9/04 | 46841E
Page 21

D623 Series/D625 Series | User's Guide | View Alarm Memory (Cmd 40)
.
View Alarm Memory (Cmd 40)
After an alarm is silenced and cleared from the display,
you can still review the points in alarm.
1. Ensure the system is turned off (On indicator is
off).
2. Press [CMD] [4] [0]. The keypad may prompt you
to enter a valid passcode.
3. Enter your passcode if necessary. The keypad
shows all points in alarm memory. In this example,
the keypad displays that Point 5 alarmed.
Alarm Pt5
Bedroom 1 Window
If you enter your passcode before the system
reports to your alarm company, the keypad
displays:
Abort Pt8
Bedroom 1 Window
When the last alarm is shown, the keypad displays:
To clear memory,
Turn system On.
If no alarm memory is present, the keypad
displays:
No alarms in
system memory.
4. The keypad returns to the normal display. Turn
the system on again to clear alarm memory.
View System Trouble (Cmd 42)
Use this command to view system troubles. For
example, a system trouble occurs when the system is
running only on the backup battery, there is
communications trouble, or it is time for the system to
be serviced by your security company.
1. Ensure the system is turned off (On indicator is
off).
2. Press [CMD] [4] [0]. The keypad may prompt you
to enter a valid passcode.
3. Enter your passcode if necessary. The keypad
shows all points in alarm memory. In this example,
the keypad displays that Point 5 alarmed.
If the system has no AC main supply and is
operating off the backup battery, the keypad
displays:
System running
on battery only.
If the system detects the telephone line is missing
or there is no dial tone, the following appears on
the keypad.
Line 1 trouble.
Check Dial tone.
If the system fails to communicate with the security
company, the keypad displays:
Comm Fail
Destination 1
If the system was programmed to be serviced by
your security company at the service interval, the
keypad displays the following:
Call for service
If there are no system troubles, the keypad
displays:
There are no
system troubles!
4. Press [CMD] to return to the normal display.
Bosch Security Systems | 9/04 | 46841E 21
Page 22

D623 Series/D625 Series | User's Guide | View Point Trouble (Cmd 48)
4. Listen for bell activation.
View Point Trouble (Cmd 48)
Use this command to view any points (if any) that are
The strobe output is tested next. This test resets
after approximately 20 min or when [*] is pressed.
in trouble.
1. Ensure the system is turned off (On indicator is
off).
2. Press [CMD] [4] [8]. The keypad may prompt you
to enter a valid passcode.
5. Check for strobe activation.
The next component to be tested is the back-up
battery. This test may take up to 4 min.
3. Enter your passcode if necessary. The keypad
scrolls through all points in trouble.
Be sure to investigate the source of the trouble
The keypad displays the result of the battery test:
condition. Correct the condition if possible. For
example, remove objects blocking a sensor point
or respond appropriately to the trouble indicated.
Battery Test
passed.
If there are no points in trouble, the keypad
displays:
There are no
point troubles.
Finally, the phone connection is tested. This test
may take up to 10 min.
4. Press [CMD] to return to the normal display.
System Test (Cmd 41)
I can perform this command.
I cannot perform this command.
The System Test ensures your system is operating
The keypad displays the result of the phone line
test:
Phone Test
passed.
correctly by testing the system’s bell, strobe, battery,
and phone line. Only those programmed by your
installing security company will be tested. For example,
the system may only be programmed to test the backup battery and the bell output.
I can test:
System Bell
Battery
System Strobe
Phone Line
6. When the test is complete, the system returns to
the normal display.
7. To stop the test currently in progress and skip to
the next test, press [*] . To abort all system tests
and return to the normal display, press [CMD].
If any of these components fail to test, contact your
security company for assistance. Be sure to contact
your security company before you begin the system
test.
1. Ensure the system is turned off (On indicator is
off).
2. Press [CMD] [4] [1]. The keypad may prompt you
to enter a valid passcode.
3. Enter your passcode if necessary. The system starts
the test. The bell output is tested first and should
sound for approximately 2 sec to 3 sec The display
shows:
Testing Bell.
Testing Strobe.
Press * to End
Testing Battery
May take 4 min.
Battery Test
failed!
or
Please call for
service.
Testing Phone.
May take 10 min.
Phone Test
failed.
or
Please check for
dial tone.
22 Bosch Security Systems | 9/04 | 46841E
Page 23

D623 Series/D625 Series | User's Guide | Walk Test (Cmd 44)
.
Walk Test (Cmd 44)
I can perform this command.
I cannot perform this command.
Use this command to walk-test detection devices
connected to your system. Perform the Walk Test on a
weekly basis. The types of devices that can be walktested are configured by your security company.
1. Ensure the system is turned off (On indicator is off).
2. Press [CMD] [4] [4]. The keypad may prompt you
to enter a valid passcode.
3. Enter your passcode if necessary. The system starts
the walk test.
The keypad display scrolls all points one at a time
that need to be tested. To successfully test each
point, you must trigger the corresponding detection
device, such as reed switch or PIR).
Pt2 Un-Tested
Front Door.
Pt3 Un-Tested
Hallway.
Pt4 Un-Tested
Living Room.
To stop test
Press Cmd.
As each point is tested, the keypad display scrolls:
Pt2 Tested OK
Front Door
Pt3 Tested OK
Hallway
4. To stop testing, press [CMD].
Test fire detection devices (smoke/heat
detectors) weekly as instructed by your
security company and in accordance with
the devices’ instructions.
Reset the System (Cmd 47)
I can perform this command.
I cannot perform this command.
Use this command to reset the system (including fire
points) after an alarm. Detection devices, such as
smoke detectors and shock sensors, must be reset after
being activated. Resetting the system takes about 20
sec.
If points do not reset, contact your installing company
for help.
1. Ensure the system is turned off (On indicator is off).
2. Press [CMD] [4] [7]. The keypad may prompt you
to enter a valid passcode.
3. Enter your passcode if necessary. The system resets
and the keypad displays:
Resetting...
After the system has reset, the keypad display
automatically returns to the normal display.
Turn Watch On/Off (Cmd 61)
I can perform this command.
I cannot perform this command.
Use the Watch feature to “watch” points when the
system is off. For example, parents with small children
may want a tone to sound whenever a door or window
is opened as a way of monitoring the location of the
children.
Use this command to turn the watch feature on and off.
Once you have programmed the system with points to
watch and the responses (refer to Select Watch Tone
(Cmd 62) on page 24), you need to turn the watch
function on and off.
1. Ensure the system is turned off (On indicator is off).
2. Press [CMD] [6] [1]. The keypad may prompt you
to enter a valid passcode.
3. Enter your passcode if necessary. The keypad
displays the current Watch status (On or Off).
4. Press [1] to turn Watch On or press [2] to turn
Watch Off.
5. Press [CMD] to exit this feature.
Bosch Security Systems | 9/04 | 46841E 23
Page 24

D623 Series/D625 Series | User's Guide | Select Watch Tone (Cmd 62)
Select Watch Tone (Cmd 62)
I can perform this command.
I cannot perform this command.
The Watch feature gives you the ability to watch points
when the system is turned off. The system can be
programmed to alert you to opened doors and
windows. For example, parents with small children
may want a tone to sound whenever a door is opened
to monitor the children.
Use this command to set the type of response your
system produces when a watch point is faulted. If you
wish, you may tell your system to display the identity
of the point and sound a short tone whenever certain
doors or windows are opened. Refer to Select Watch
Points (Cmd 63) to program which points in your
system are to be watched.
1. Ensure the system is turned off (On indicator is off).
2. Press [CMD] [6] [2]. The keypad may prompt you
to enter a valid passcode.
3. Enter your passcode if necessary. The keypad
displays the current watch tone.
4. Select the type of watch tone (1 to 4) you want by
pressing the appropriate number key.
Table 6: Watch Tone Selection
Watch Tone Key Description
Off [1] Displays point identity, but
sounds no tone when points are
faulted.
Short Beep [2] Displays point identity and
sounds a short tone when point
are faulted.
Beep Till Key [3] Displays point identity and
sounds a tone until the [CMD]
key is pressed.
Beep Till
Closed
If you just want to review (not change) the current
watch tone setting, press [CMD] to exit this
function.
5. After making your selection, the display confirms
the choice you made.
6. Press [CMD] to exit this feature.
[4] Displays point identity and
sounds a tone until the point is
returned to normal (door or
window is closed). Pressing the
[CMD] key also silences the tone.
Select Watch Points (Cmd 63)
I can perform this command.
I cannot perform this command.
Once you decide how your system responds to
watched points (refer to Select Watch Tone (Cmd 62)),
you need to decide which of the points in your system
are “watched”.
Use this command to tell your system which points to
watch. You cannot watch 24-hour and 24-hour fire
points.
Choosing which points to watch depends upon your
security objective. If you have small children, you may
choose to watch points of entry and exit. Each time a
watch point is faulted (door or window is opened), the
keypad responds as programmed.
1. Ensure the system is turned off (On indicator is off).
2. Press [CMD] [6] [3]. Enter your passcode if
necessary. The keypad displays all points that are
currently being watched (Watch On) and those that
are not (Watch Off), followed by instructions for
changing the current setting.
3. Press [0] [*] to turn Off all points. Press the
appropriate number key (non-24-hour points)
followed by [*] for individual points.
The display continues to scroll the remaining
points. You may continue to program as many
Watch Points as are available.
4. When you are finished, press [CMD] to return exit
this command.
Extend Auto On Time (Cmd 51)
I can perform this command.
I cannot perform this command.
Your security company can program your system to
turn on automatically. Use this command to delay the
auto-on time by one hour during the auto-on pre-alert
time.
1. Ensure the system is turned off (On indicator is off).
2. Press [CMD] [5] [1]. The keypad may prompt you
to enter a valid passcode.
3. Enter your passcode if necessary. The keypad
scrolls:
Auto-On Time
moved to:
hh:mm
mm/dd/yy
To exit,
Press Cmd.
4. Press [CMD] to exit.
24 Bosch Security Systems | 9/04 | 46841E
Page 25

D623 Series/D625 Series | User's Guide | Change Skeds (Cmd 52)
.
Change Skeds (Cmd 52)
I can perform this command.
I cannot perform this command.
Use this command to change the time or date that the
sked automatically turns the system All On, Part On,
Part 2 On, off, or operates an output programmed by
your security company. An output can be
programmed by your security company to turn on
lighting, a pool pump, etc.
1. Make sure the system is turned off (On indicator is
off).
2. Press [CMD] [5] [2]. The keypad may prompt you
to enter a valid passcode.
3. Enter your passcode if necessary. The keypad
scrolls all available options.
4. Push the appropriate key for the option you want.
• Push [1] to change All On Skeds.
• Push [2] to change Part On Skeds.
• Push [3] to change Part 2 On Skeds.
• Push [4] to change Off Skeds.
• Push [5] to change Output On Skeds.
• Push [6] to change Output Off Skeds.
Sked All Days Feature
If your security company has programmed
all days of the week for the sked you wish
to change, you must press the [8] key to
remove all days first (A), and then press
the corresponding number key(s) to add
The figure above shows an “A” below “8.” This
indicates the Sked All Days feature is on, which means
the sked is now active every day of the week. If you do
not want to use this feature, press the [8] key once to
clear the “A”, and then press the corresponding
number key(s) to activate or deactivate the sked for the
desired day(s).
For example, if you do not want your sked to operate
on Mondays and Wednesdays, first press the [8] key to
turn the All Days feature off. Then press the
corresponding number keys to clear Monday and
Wednesday from the sked.
or remove the desired days.
Sk1 A1
Days
12345678
SMTWRFSA
5. The keypad scrolls all skeds that turn the system
All On. Press the number key of the sked you want
to change followed by [*].
Sk# A# All On
Time ##:##
Sk# A#
Days
12345678
SMTWRFSA
6. Enter the time you want the system to
automatically turn All On (HH:MM). In this
example, program Sked 1 in Area 1 for 10:35 p.m.
Sk1 A1 Auto On
Time 22:35
7. The second line displays the days as programmed
by your security company. Enter the days for the
system to automatically turn All On (Sunday = 1,
Saturday = 7, and all days = 8). In this example,
suppose your security company programmed the
sked for Monday, Tuesday, Wednesday, Thursday,
and Friday.
Sk1 A1
Days
12345678
-MTWRF--
8. You want to add Saturday. To add Saturday, press
[7].
Sk1 A1
Days
12345678
-MTWRFS-
9. You now decide that you do not want this sked to
activate on Monday. To remove Monday, press
[2].
Sk1 A1
Days
12345678
--TWRFS-
10. Press [CMD] when you are done changing the
sked.
Part On Skeds
Refer to Change Skeds (Cmd 52) on page 25 for Steps 1 to
4.
5. The keypad scrolls all skeds that turn the system
Part On. Press the number key of the sked you
want to change followed by [*].
Sk# A# Part On
Time ##:##
Sk# A#
Days
6. Enter the time for the system to automatically turn
Part On (HH:MM). In this example, program Sked
2 in Area 1 for 5:00 p.m.
Sk2 A1 Part On
Time 17:00
12345678
SMTWRFSA
All On Skeds
Refer to Change Skeds (Cmd 52) on page 25 for Steps 1 to
4.
Bosch Security Systems | 9/04 | 46841E 25
Page 26

D623 Series/D625 Series | User's Guide | Change Skeds (Cmd 52)
7. The second line displays the days as programmed
by your security company. Enter the days for the
system to automatically turn All On (Sunday = 1,
10. Press [CMD] when you are done changing the
sked.
Saturday = 7, and all days = 8). In this example,
suppose your security company programmed the
sked for Monday, Tuesday, Wednesday, Thursday,
and Friday.
Sk2 A1
Days
12345678
-MTWRF--
8. You want to add Saturday. To add Saturday, press
[7] .
Sk2 A1
Days
12345678
-MTWRFS-
9. You now decide that you do not want this sked to
activate on Monday. To remove Monday, press
[2].
Sk2 A1
Days
12345678
--TWRFS-
10. Press [CMD] when you are done changing the
sked.
Part 2 On Skeds
Refer to Change Skeds (Cmd 52) on page 25 for Steps 1 to
4.
5. The keypad scrolls all skeds that turn the system
Part 2 On. Press the number key of the sked you
want to change followed by [*].
Sk# A# Part On
Time ##:##
Sk# A#
Days
6. Enter the time for the system to automatically turn
Part 2 On (HH:MM). In this example, program
Sked 3 in Area 2 for 7:30 p.m.
Sk3 A2 Part On
Time 19:30
7. The second line displays the days as programmed
by your security company. Enter the days for the
system to automatically turn All On (Sunday = 1,
Saturday = 7, and all days = 8). In this example,
suppose your security company programmed the
sked for Monday, Tuesday, Wednesday, Thursday,
and Friday.
Sk3 A2
Days
12345678
-MTWRF--
8. You want to add Saturday. To add Saturday, press
[7].
Sk3 A2
Days
12345678
-MTWRFS-
9. You now decide that you do not want this sked to
activate on Monday. To remove Monday, press
[2].
Sk3 A2
Days
12345678
--TWRFS-
12345678
SMTWRFSA
26 Bosch Security Systems | 9/04 | 46841E
Page 27

D623 Series/D625 Series | User's Guide | Change Skeds (Cmd 52)
.
Off Skeds
Refer to Change Skeds (Cmd 52) on page 25 for Steps 1 to
4.
5. The keypad scrolls all skeds that turn the system
off. Press the number key of the sked you want to
change followed by [*].
Sk# A# Off
Time ##:##
Sk# A#
Days
6. Enter the time for the system to automatically turn
off (HH:MM). In this example, program Sked 4 in
Area 3 to turn off at 7:00 a.m.
Sk4 A3 Off
Time 07:00
7. The second line displays the days as programmed
by your security company. Enter the days for the
system to automatically turn All On (Sunday = 1,
Saturday = 7, and all days = 8). In this example,
suppose your security company programmed the
sked for Monday, Tuesday, Wednesday, Thursday,
and Friday.
Sk4 A3
Days
12345678
-MTWRF--
8. You want to add Saturday. To add Saturday, press
[7].
Sk4 A3
Days
12345678
-MTWRFS-
9. You now decide that you do not want this sked to
activate on Monday. To remove Monday, press
[2].
Sk4 A3
Days
12345678
--TWRFS-
10. Press [CMD] when you are done changing the
sked.
Output On Skeds
This section is intended for turning
outputs on.
Refer to Change Skeds (Cmd 52) on page 25 for Steps 1
to 4.
5. The keypad scrolls all skeds that turn the outputs
on. Press the number key of the sked you want to
change followed by [*].
Sk# Output ## On
Time ##:##
Sk#
Days
6. Enter the time for the system to automatically
operate Output 01 (HH:MM). In this example,
Sked 5 is set for 12:00 a.m.
Sk5 Output 1 On
Time 24:00
12345678
SMTWRFSA
12345678
SMTWRFSA
7. The second line displays the days as programmed
by your security company. Enter the days for the
system to automatically turn All On (Sunday = 1,
Saturday = 7, and all days = 8). In this example,
suppose your security company programmed the
sked for Monday, Tuesday, Wednesday, Thursday,
and Friday.
Sk5
Days
12345678
-MTWRF--
8. You want to add Saturday. To add Saturday, press
[7].
Sk5
Days
12345678
-MTWRFS-
9. You now decide that you do not want this sked to
activate on Monday. To remove Monday, press
[2].
Sk5
Days
12345678
--TWRFS-
10. Press [CMD] if you are done changing the sked.
Output Off Skeds
This section is intended for turning
outputs off.
Refer to Change Skeds (Cmd 52) on page 25 for Steps 1 to
4.
5. The keypad scrolls all skeds that turn the outputs
off. Press the number key of the sked you want to
change followed by [*].
Sk# Output ## Off
Time ##:##
Sk#
Days
12345678
SMTWRFSA
6. Enter the time for the system to automatically
operate Output 01 (HH:MM). In this example,
Sked 5 is set for 1:00 a.m.
Sk6 Output 1 Off
Time 24:00
7. The second line displays the days as programmed
by your security company. Enter the days for the
system to automatically turn All On (Sunday = 1,
Saturday = 7, and all days = 8). In this example,
suppose your security company programmed the
sked for Monday, Tuesday, Wednesday, Thursday,
and Friday.
Sk6
Days
8. You want to add Saturday. To add Saturday, press
12345678
-MTWRF--
[7].
Sk6
Days
12345678
-MTWRFS-
Bosch Security Systems | 9/04 | 46841E 27
Page 28

D623 Series/D625 Series | User's Guide | Change Outputs (Cmd 54)
9. You now decide that you do not want this sked to
activate on Monday. To remove Monday, press
3. Enter your passcode if necessary. The keypad
displays:
[2].
Sk6
Days
10. Press [CMD] when you are done changing the
sked.
12345678
--TWRFS-
If your system is busy and cannot call your
security company’s remote PC computer, the
keypad displays:
Change Outputs (Cmd 54)
I can perform this command.
I cannot perform this command.
Use this command to turn on and off the outputs
programmed by your security company. These outputs
can control outside lighting, pool pumps, watering
systems, etc.
1. Ensure the system is turned off (On indicator is
off).
2. Press [CMD] [5] [4]. The keypad may prompt you
to enter a valid passcode.
3. Enter your passcode if necessary. The keypad
scrolls:
Turn all Outputs
Off? Press 0*
Output 1 is On
To turn Off
Press 1*
4. Press [0] [*] if you want to turn all outputs off, or
press the output number you want to turn off
followed by [*]. For example, if you want to turn
Output 1 off, you press [1] [*]. The keypad
displays:
Output 1 is Off
To Turn On
5. Press [CMD] to return the keypad to the normal
display.
Remote Program (Cmd 43)
I can perform this command.
I cannot perform this command.
Use this command to connect to your security
company’s remote PC computer for programming
alterations via the telephone line.
Only use this command when your
security company instructs you to.
1. Ensure the system is turned off (On indicator is
off).
2. Press [CMD] [4] [3]. The keypad may prompt you
to enter a valid passcode.
4. The keypad automatically returns to the normal
display when programming is complete.
All Areas Off (Cmd 81)
I can perform this command.
I cannot perform this command.
Depending on the areas assigned to your authority
level, this command turns off all areas at the same time
when the system is split into more than one area.
1. Press [CMD] [8] [1]. The keypad may prompt you
to enter a valid code.
2. Enter your passcode if necessary. The keypad
indicates that all areas are off.
All Areas On (Cmd 80)
I can perform this command.
I cannot perform this command.
Depending on the areas assigned to your authority
level, this command turns on all areas at the same time
when the system is split into more than one area.
1. Press [CMD] [8] [0]. The keypad may prompt you
to enter a valid passcode.
2. Enter your passcode if necessary. The keypad
displays:
If an area has a faulted point(s) when you try to
turn all areas All On, the keypad scrolls:
3. If you hold down the All On key for 2 sec., it
forces all areas to All On.
Remote Program
in progress.
System Busy.
Try again later.
All Areas All On
Exit Now!
Area 2 not ready
Smiths Residence
Area 4 not ready
Smiths Residence
To force area on
hold All On key.
To stop,
press Cmd.
All Areas All On
Exit Now!
28 Bosch Security Systems | 9/04 | 46841E
Page 29

D623 Series/D625 Series | User's Guide | Move to Area (Cmd 50)
.
4. The keypad now displays all areas that have been
forced on, one at a time.
A-2 Forced On
Smiths Residence
A-4 Forced On
Smiths Residence
Move to Area (Cmd 50)
I can perform this command.
I cannot perform this command.
Use this command to operate multiple areas from the
same keypad when the system is split into more than
one area. Before operating another area, move the
keypad to the area that you want to operate.
1. Press [CMD] [5] [0]. The keypad may prompt you
to enter a valid passcode.
2. Enter your passcode if necessary. The keypad
scrolls through all available areas you can move to.
In this example, you are at Area 1 keypad, which
prompts you to press 2 to go to Area 2 or to press
3 to go to Area 3:
To go to Area 2
Smiths Residence
Press 2.
To go to Area 3
Smiths Residence
Press 3.
To exit
Press Cmd.
3. Press [CMD] to exit this feature.
4. To return your keypad to its “home” area, press
and hold [CMD].
Auto-Forward On Setup
(Cmd 83)
To utilize this command you must have “call
forwarding” service from your local telephone
company. Using that service, your security system
allows you to program the auto-forward on sequence
that forwards all incoming calls to the telephone
number of your choice when you turn the system All
On.
1. Press [CMD] [8] [3]. The keypad may prompt you
to enter a valid passcode.
2. Enter your passcode if necessary. The keypad
display scrolls:
Auto-Forward On
setup mode.
Enter digits for
Auto-Forward On
For ‘pause’ (P),
press All On.
For ‘flash’ (F)
press Part On.
A and C keys
move cursor.
To delete digit,
Press B key.
To view and edit
press Bypass.
To stop edit,
Press Bypass.
To exit,
Hold Cmd.
3. Enter the auto-forward off sequence to redirect all
incoming calls.
4. Press and hold [Cmd] to exit this command.
A typical dialing sequence might be:
• two-digit telephone company feature code (72)
• pause
• phone number to forward to (315-555-1212)
• flash (on-hook, pause, off-hook)
• terminate (t)
For this sequence, the entry would look like:
7 2 p 3 1 5 5 5 5 1 2 1 2 f t
Bosch Security Systems | 9/04 | 46841E 29
Page 30

D623 Series/D625 Series | User's Guide | Auto-Forward Off Setup (Cmd 84)
Auto-Forward Off Setup
(Cmd 84)
I can perform this command.
I cannot perform this command.
Use this command to program the auto-forward off
sequence that cancels the redirecting of all incoming
calls to another telephone number when you turn the
system off.
1. Press [CMD] [8] [4]. The keypad may prompt you
to enter a valid passcode.
2. Enter your passcode if necessary. The keypad
display scrolls:
Auto-Forward Off
setup mode.
Enter digits for
Auto-Forward Off
For ‘pause’ (P),
press All On.
For ‘flash’ (F)
press Part On.
A and C keys
move cursor.
To delete digit,
Press B key.
To view and edit
press Bypass.
To stop edit,
Press Bypass.
To exit,
Hold Cmd.
3. Enter the auto-forward off sequence to redirect all
incoming calls.
4. Press and hold [CMD] to exit this command.
Auto-Forward On/Off (Cmd 82)
I can perform this command.
I cannot perform this command.
Use this command to turn the auto-forward feature on
or off as necessary.
1. Press [CMD] [8] [2]. The keypad may prompt you
to enter a valid passcode.
2. Enter your passcode if necessary. The keypad
displays the current status and the available
options.
Program the Auto-Forward feature by pressing [1]
to turn Auto-Forward On, or [2] to turn AutoForward Off. For example, if Auto-Forward is On,
press [2] to turn it Off.
3. To exit this function, press [CMD].
30 Bosch Security Systems | 9/04 | 46841E
Page 31

D623 Series/D625 Series | User's Guide | Remote Arming with Telephone, Area 1
.
Remote Arming with Telephone,
Area 1
I can perform this command.
I cannot perform this command.
This function controls the built-in telephone arming
feature for Area 1. When enabled, the control panel
answers the phone on the programmed ring count.
When the control panel answers the phone, it
• Sounds three beeps and starts the handshake tone
for remote programming if the control panel is All
or Part On.
• Sounds one short beep, waits approximately 3 sec.,
and then sounds one long beep if the control panel
is Off. Press and hold the [5] key* for 2 sec.
immediately after the first short arming beep and
before the long beep begins.
• Arms if it detects a [5] key press from the
telephone (All On with Delay, faulted points are
force-armed). The control panel sounds three
beeps (new armed state) and then hangs up.
* If arming from a cell phone, quickly press the [5] key three times. If
pressing and holding the [5] key for 2 sec. from a house (land line)
phone does not produce a tone long enough to arm Area 1, retry
by quickly pressing the [5] key three times.
Remotely disarming the control panel
cannot be done with a telephone.
View Log (Cmd 85)
I can perform this command.
I cannot perform this command.
Use this command to display system events, such as
alarm events, turning the system All On, Part On, and
Part 2 On, and turning the system off. Events are
displayed in reverse chronological order.
1. Press [CMD] [8] [5]. The keypad may prompt you
to enter a valid passcode.
2. Enter your passcode if necessary. The keypad
displays the event and user information and the
date and time of the event.
3. Press [*] to view to the next event.
4. Press [CMD] to exit this function and return to the
normal display.
Figure 6 shows a sample log event entry as
displayed on the Text keypad:
Figure 6: Display layout
1
Sensor Mon Rstl
A1 Pt3 SL
2
3
1 - Event
2 - Event specific
information
3 - Destination 1
4
08:29 06/13/01
4 - Destination 2
5 - Time of event
6 - Date of event
The first line of the log shows the event
description. The second line of the log display
alternates between the time and date of the event
and the area, point (device), user and
communication information for the event. The
keypad displays time in a 24-hour format and the
date in a MM/DD/YY format.
The log displays the following characters to
communicate certain information:
1
Sensor Mon Rstl
5
6
Bosch Security Systems | 9/04 | 46841E 31
Page 32

D623 Series/D625 Series | User's Guide | Basic Pager Reports
Table 7: Character Code Information
Basic Pager Reports
Display Description
A# Area number
Pt## Point number
Dv### Device number
Ln## Phone line number
Mn# Minutes until Auto Arm Sked
Cd## User Code number
Op## Output number
Ks## Keyswitch number
U## User number
## Communication status for Routing Destinations
1 and 2
- (dash) Destination disabled
A Aborted
D Deleted from pending buffer by control panel
reset
F Faulted
L Local
P Pending
S Sent
A pager’s display can show up to four fields of
information in the following order:
Figure 7: Pager Display format
(Account Number) - (Event Number) - (Area Number) - (Point/User Number)
• Account Number: 4-digit account number. If the
• Event Number: Panel event numbers. See Panel
• Area Number: Area number the faulted point is
• Point/User Number: Point number assigned to
Depending on its configuration, your pager can display
any combination of the four fields shown in the order
above with or without field separators. For example:
• Account Number: 1234
• Event Number: 08
• Area Number: 02
• Point Faulted: 21
A pager display configured to show all four fields with
separators using the sample information from above
would look like:
account number is greater than four digits, the first
four digits are sent.
Event Descriptions on page 43 for information on
control panel events.
assigned to.
the faulted point. This field can also show a User
ID number.
1234-08-02-21
A pager display configured to show all four fields
without separators using the sample information from
above would look like:
1234080221.
Contact your security company to modify pager
display configuration.
• User IDs 1 to 32 are reserved for system user.
• User ID 252 is reserved for sked operation.
• User ID 253 is reserved for remote telephone
communication.
• User ID 254 is reserved for remote programming
communication.
• User ID 255 is reserved for keyswitch operation.
32 Bosch Security Systems | 9/04 | 46841E
Page 33

D623 Series/D625 Series | User's Guide | Control Panel Event Descriptions
.
Control Panel Event Descriptions
The following table lists the events generated by the control panel. These events appear in the control panel log by
name and in the pager display by event number.
Table 8: Control Panel Event Descriptions
Event # Event Description Event # Event Description
01 AC Fail AC power to control panel
interrupted.
02 AC Restore AC power to control panel
restored.
03 Alarm,
Tamper
04 Alarm,
Emergency
05 Alarm, Panic Alarm from panic/emergency
06 Alarm,
Invisible
07 Alarm,
24-hr. Burg
08 Alarm, Cntrl,
Dly
09 Alarm,
Cntrl
10 Cross,
Tamper
11 Cross,
Emergency
12 Cross, Panic Panic alarm from detection device
13 Cross,
Invisible
14 Cross,
24-hr. Burg
15 Cross, Cntrl,
Dly
16 Cross,
Cntrl
17 Cross,
Unverified
18 Alarm Exit
Error
Alarm from detection device
tampered with.
Alarm from emergency detection
device or ABC key programmed
for emergency response.
detection device.
Alarm from detection device that
does not appear at keypad during
alarm or trouble conditions.
Alarm from burglary detection
device on 24 hours per day.
Alarm from detection device with
entry/exit delays.
Alarm from detection device such
as keyswitches, motion detectors
(followers), or devices that initiate
an alarm immediately (do not follow
any entry/exit delays).
Tamper alarm from detection
device with Cross Point option
selected.
Emergency alarm from detection
device with Cross Point option
selected.
with Cross Point option selected.
Panic alarm from invisible detection
device with Cross Point option
selected.
Burglary alarm from detection
device with Cross Point option
selected.
Alarm from entry/exit detection
device with Cross Point option
selected.
Alarm from keyswitch, follower, or
instant detection device with Cross
Point option selected.
Fault on one non-fire point type
with Cross Point option selected.
This is not an alarm event.
Detection device faulted at end of
exit delay.
24 Rstrl Batt Low Battery restoral from low battery.
25 Rstrl Batt
Missing
26 Bypass, Fire,
User
27 Bypass, Fire,
RAM IV
28 Bypass, Ctrl,
User
29 Bypass, Ctrl,
RAM IV
30 Bypass, 24-hr,
User
31 Bypass, 24-
hr., RAM IV
32 Bypass,
Forced Pt
33 Bypass,
Swinger
34 UnBypass,
Fire, Usr
35 UnBypass,
Ctrl, Usr
36 UnBypass,
24-hr., Usr
37 Call For
Service
38 Cancel Alarm User acknowledged active alarm
39 Cancel Fire User acknowledged active alarm
40 CheckSum
Fail
41 CheckSum
Fail, SDI
Battery restoral from missing
battery.
Selective bypass by user of fire
detection device.
Selective bypass of fire detection
device by RAM IV.
Selective bypass by user of
controlled detection device.
Selective bypass by RAM IV of
controlled detection device.
Selective bypass by user of 24-hr.
non-fire detection device.
Selective bypass by RAM IV of 24hr. non-fire detection device.
Detection device force-armed
Point swinger bypassed.
User cleared bypass (unbypass) of
fire detection device.
User cleared bypass (unbypass) of
controlled detection device.
User cleared bypass (unbypass) of
24-hr. detection device.
Report sent automatically at Call
For Service interval. Does not
indicate a trouble condition.
before bell time expired for non-fire
detection device.
before bell time expired for fire
detection device.
Checksum on control panel
parameters failed. Contact security
company to verify control panel
program.
Checksum on SDI device
parameters failed. Contact security
company.
Bosch Security Systems | 9/04 | 46841E 33
Page 34

D623 Series/D625 Series | User's Guide | Control Panel Event Descriptions
Table 8: Control Panel Event Descriptions (continued)
Event # Event Description Event # Event Description
42 Cls, All, +Dly,
Skd
43 Cls, All, +Dly,
KS
44 Cls, All, +Dly,
RAM IV
45 Cls, All, +Dly,
Tel
46 Cls, All,
-Dly, Usrl
47 Cls, All,
-Dly,
RAM IV
48 Cls, All,
-Dly, Usr
49 Cls, Prt,
+Dly, Skd
50 Cls, Prt, +Dly,
KS
51 Cls, Prt, +Dly,
RAM IV
52 Cls, Prt, +Dly,
Usr
53 Cls, Prt,
-Dly,
RAM IV
54 Cls, Prt,
-Dly, Usr
55 Frc, All, +Dly,
Skd
56 Frc, All, +Dly,
KS
57 Frc, All, +Dly,
RAM IV
58 Frc, All, +Dly,
Tel
59 Frc, All, +Dly,
Usr
60 Frc, All,
-Dly,
RAM IV
61 Frc, All,
-Dly, Usr
62 Frc, Prt,
+Dly, Skd
System turned All On with
entry/exit delay by sked.
System turned All On with
entry/exit delay by keyswitch.
System turned All On with
entry/exit delay by
RAM IV.
System turned All On with
entry/exit delay by telephone.
System turned All On with no delay
(instant) by user.
System turned All On with no delay
(instant) by RAM IV.
System turned All On with no delay
(instant) by user.
System turned Part On with
entry/exit delay by sked.
System turned Part On with
entry/exit delay by keyswitch.
System turned Part On with
entry/exit delay by RAM IV.
System turned Part On with
entry/exit delay by user.
System turned Part On with no
delay (instant) by RAM IV.
System turned Part On with no
delay (instant) by user.
System forced All On with
entry/exit delay by sked.
System forced All On with
entry/exit delay by keyswitch.
System forced All On with
entry/exit delay by RAM IV.
System forced All On with
entry/exit delay by telephone.
System forced All On with
entry/exit delay by user.
System forced All On with no delay
(instant) by RAM IV.
System forced All On with no delay
(instant) by user.
System forced Part On with
exit/entry delay by sked.
63 Frc, Prt,
+Dly, KS
64 Frc, Prt,
+Dly, RAM IV
65 Frc, Prt,
+Dly, Usr
66 Frc, Prt,
-Dly,
System forced Part On with
exit/entry delay by keyswitch.
System forced Part On with
exit/entry delay by RAM IV.
System forced Part On with
exit/entry delay by user.
System forced Part On with no
delay (instant) by RAM IV.
RAM IV
67 Frc, Prt,
-Dly, Usr
70 Comm Fail,
AltComm
System forced Part On with no
delay (instant) by user.
Report failed to reach routing
destination configured for Alternate
Communication.
71 Comm,
Restoral
After communication fail, report
successfully sent to routing
destination.
72 Comm Rstl,
AltComm
After communication fail, report
successfully sent to routing
destination configured for Alternate
Communication.
73 Date/Time
Change
Date/Time in control panel
changed.
74 Duress User entered Duress passcode or
pressed Panic key sequence on RF
Keyfob.
75 Fire, Alarm Alarm event on fire detection
device.
76 Fire, Cross Verified alarm event on fire
detection device with Cross Point
option.
77 Fire,
Unverified
Unverified alarm event on fire
detection device with Cross Point
option.
78 Fire, Missing Fire detection device assigned to
point expander (wired or RF) not
responding to control panel status
poll.
79 Fire, Alarm,
Rstl
Restoral from alarm, fire detection
device.
80 Fire, Trouble Trouble condition on fire detection
device.
81 Fire, Trbl, Rstl Restoral from trouble, fire detection
device.
82 Instl Mode,
Start
83 Instl Mode,
Installer passcode entered. Installer
Mode accessed.
Installer Mode exited.
End
84 Log Overflow Panel log overflow condition.
Oldest events being overwritten.
85 Log Threshold Panel log reached threshold.
Contact your security company.
34 Bosch Security Systems | 9/04 | 46841E
Page 35

D623 Series/D625 Series | User's Guide | Control Panel Event Descriptions
.
Table 8: Control Panel Event Descriptions (continued)
Event # Event Description Event # Event Description
86 AllCom Low
Signl
87 Missing,
Alarm
88 Missing,
Trouble
89 Open, Skd Opening by sked. 113 Rstrl,
90 Open, RAM
IV
91 Open, Usr Opening by user, by ID reported. 115 Rstrl, Invisible Restoral from alarm, Invisible point
92 Open, KS Opening by keyswitch.
93 Open, Skd,
Alarm
94 Open, RAM
IV, Alarm
95 Open, Usr,
Alarm
96 Open, KS,
Alarm
97 Point
Opening
98 Params
Changed
99 Phone Line
Fail
100 Phone Line
Rstl
101 Bad Call to
RAM IV
102 RAM IV
Access Fail
103 RAM IV
Access OK
104 Re-Boot,
Panel
105 Re-Boot SDI Unexpected reset (reboot) from
106 Output Reset,
Usr
107 Output Reset,
Skd
Low signal strength detected on
alternate communication device.
Point assigned to point expander
(wired or RF) not responding to
110 Output Set,
Skd
111 Output Set,
RAM IV
Relay set by sked.
Relay set by RAM IV.
control panel status poll while
system is armed.
Point assigned to point expander
(wired or RF) not responding to
112 Rstrl, Tamper Restoral from alarm, Tamper point
type.
control panel status poll while
system is armed.
Restoral from alarm, Emergency
Emergency
point type.
Opening by RAM IV. 114 Rstrl, Panic Restoral from alarm, Panic point
type.
type.
Opening after alarm event by sked.
Opening after alarm event by
116 Rstrl,
117 Rstrl, Cntrl, Dly Restoral from alarm, controlled point
118 Rstrl, Cntrl Restoral from alarm, controlled point
24-hr Burg
RAM IV.
Opening after alarm event, ID
119 Rcvr Jam Jammed condition detected on
reported.
Opening after alarm event by
120 Rcvr Jam Rstl Jammed condition detected on
keyswitch.
Point opened by Independent
Point Control device.
121 RF Battery
Low
Panel parameters changed. 122 RF Battery
Rstl
Phone the voltage less than 3 V for
40 sec.
After Phone Line Fail event, phone
line voltage detected at greater
123 RF Tamper
Trbl
124 RF Tamper
Rstl
Restoral from alarm, 24-hour burglary
point types.
types.
types.
premises RF receiver.
premises RF received cleared.
Low battery detected on premises
RF transmitter.
Low battery condition detected on
premises RF transmitter cleared.
Premises RF Transmitter Tamper
Trouble.
Premises RF Transmitter Tamper
Restoral.
than
3 V for 40 sec.
Panel attempted to call RAM IV but
was unsuccessful.
RAM IV attempted to connect to
control panel but was
125 SDI Missing SDI device not responding to
polling.
126 SDI Missing,
Rstl
SDI device declared as missing
now responding to polling.
unsuccessful.
RAM IV successfully connected
and disconnected from control
127 SDI Tamper Tamper open on SDI Device
Tamper.
panel.
Normal start-up or reset with
installer switch.
128 SDI Tamper,
Rstl
SDI Device Tamper restored.
129 SDI Trouble Trouble detected on SDI device.
SDI device.
Relay reset by user. 130 SDI Trouble,
Rstl
Relay reset by sked. 131 SDI Over
Current
SDI (option bus) device trouble
condition cleared.
Over current condition detected on
SDI device.
Bosch Security Systems | 9/04 | 46841E 35
Page 36

D623 Series/D625 Series | User's Guide | Control Panel Event Descriptions
Table 8: Control Panel Event Descriptions (continued)
Event # Event Description Event # Event Description
108 Output Reset,
RAM IV
109 Output Set,
Usr
134 Sensor Mon
Rstl
135 Sensor Reset User pressed Cmd 47. 156 User Code
136 System
Inactive
137 Test, OK No system troubles at automatic
138 Test, Off-
normal
139 Trbl, Tamper Trouble condition on Tamper or
140 Trbl,
Emergency
141 Trbl, Panic Trouble condition on Panic
142 Trbl, Invisible Trouble condition on Invisible
143 Trbl,
24-hr. Burg
144 Trbl, Cntrl, Dly Trouble condition on Delay
145 Trbl, Cntrl Trouble condition on Keyswitch
146 Rstrl, Trbl,
Tmpr
147 Rstrl, Trbl,
Emerg
148 Rstrl, Trbl,
Panic
149 Rstrl, Trbl,
Invis
150 Rstrl, Trbl, 24-
hr.
151 Rstrl, Trbl, Dly Restoral form trouble condition on
152 Rstrl, Trbl,
Cntrl
Relay reset by RAM IV. 132 SDI OverCur,
Rstl
Relay set by user. 133 Sensor Mon
Trbl
Sensor trouble condition restored. 155 User Code
Delete
Tamper
System was not armed in inactive
interval. Cmd 47 or arming system
157 User Level
Set
resets this trouble.
158 Walk Test
test report time.
System trouble present at test
time.
159 Walk Test
Start
End
160 Siren Trouble Trouble condition detected on
Voice Active detection device(s).
Trouble condition o Emergency
161 Siren Restoral Trouble condition on supervised
detection device(s).
162 Grnd Fault Ground fault detected on control
detection device(s).
163 Grnd Fault,
detection device(s).
Trouble condition on Burglary or
164 First Open Panel is configured for multiple
Rstl
Independent Point Control
detection device(s).
165 Last Close Panel is configured for multiple
detection device(s).
166 AltComm
Follower and Instant detection
Cond
device(s).
Restoral from trouble condition on
167 AltComm Fail Network failure detected on
Tamper or Voice Active detection
device(s).
Restoral from trouble condition on
168 AltComm Rstl Network communications resumed
Emergency detection device(s).
Restoral from trouble condition on
169 Reserved
Panic detection device(s).
Restoral from trouble condition on
170 Reserved
Invisible detection device(s).
Restoral form trouble condition on
171 Reserved
Burglary Independent Point
Control detection device(s).
172 Reserved
Delay detection device(s).
Restoral from trouble condition on
173 Rstrl, Swinger Restoral from Swinger Bypass.
Keyswitch, Follower, and Instant
detection device(s).
Over current condition on SDI
device restored.
Sensor trouble detected.
User Code deleted.
Invalid User Codes entered at
keypad exceeded User Tamper
retry count.
User Level set.
Walk Test started with Cmd 44.
Walk Test ended by user or timed
out.
Programmable Output 2
configured as supervised siren
output.
siren output cleared.
panel is sensor loops, SDI bus, or
Aux power outputs.
Ground fault condition cleared.
area functions: first to open, last to
close. Last area has closed.
area functions: first to open, last to
close. Last area has closed.
Trouble detected on alternate
communication network.
alternate communication network.
on alternate communications
network.
36 Bosch Security Systems | 9/04 | 46841E
Page 37

D623 Series/D625 Series | User's Guide | Control Panel Event Descriptions
.
Table 8: Control Panel Event Descriptions (continued)
Event # Event Description Event # Event Description
153 User Code
Area Set
154 User Code
Change
175 Rstrl, Alarm,
Miss
176 Rstrl, Trble,
Miss
177 Rstl, Low
Signl
178 UnBypass,
Fire,
RAM IV
179 UnBypass,
Ctrl,
RAM IV
User Code “added” by assigning
173 Rstrl, Swinger Restoral from Swinger Bypass.
area.
User Code changed. 174 Rstrl, Fire,
Miss
Restoral from Missing. Local event,
no report.
180 UnBypass,
24-hr.,
RAM IV
Local event. No report. 181 RF Battery
Low
Restoral from alternate
communication low signal strength
182 RF Battery
Rstl
event.
Bypass on Fire detection device(s)
183 Default PINS Installer or User PINs are not
cleared using RAM IV (unbypass).
Bypass on Controlled detection
devices(s) cleared using RAM IV
184 Default PINS
Rstl
(unbypass).
Restoral from Fire Missing. Local
event, no report.
Bypass on 24-hr detection
device(s) cleared using RAM IV
(unbypass).
Low battery condition on RF
keyfob.
Low battery condition on RF keyfob
cleared.
changed from default. Local event
only.
Installer or User default PINs are
changed. Local event only.
Bosch Security Systems | 9/04 | 46841E 37
Page 38

D623 Series/D625 Series | User's Guide | Security System Limitations
Security System Limitations
Not even the most advanced security system can
guarantee protection against burglary, fire, or
environmental threats. All security systems are subject
to possible compromise or failure-to-warn for a variety
of reasons including, but not limited to:
• If sirens or horns are placed outside the hearing
range of people in remote areas of the building or
in areas that are frequently closed off, they do not
provide the intended protection.
• If intruders gain access through unprotected points
of entry, the system does not detect their entrance.
• If intruders have the technical means of bypassing,
jamming, or disconnecting all or part of the system,
they are not be detected.
• If the AC power supply is OFF and the back up
battery is either missing or dead, sensors do not
detect intrusion.
• Smoke detectors cannot detect smoke in chimneys,
walls, or roofs, or smoke blocked by a closed door.
They may not detect smoke or fire on a level of the
building different from the one on which they are
located. Smoke detectors may not be able to warn
in time about fires started by explosions, improper
storage of flammables, overloaded electrical
circuits, or other types of hazardous conditions.
• If phone lines are out of service, reports from the
security system to the security company cannot be
sent. Telephone lines are vulnerable to
compromise by several means.
Inadequate maintenance and failure to test are the most
common causes of alarm failure. It is strongly
recommended that you test your system once a week to
be sure that all system components are working
properly. Although having a security system may make
you eligible for reduced insurance premiums, the
system is no substitute for insurance. Warning devices
cannot compensate you for loss of life or property.
Fire Safety and Evacuation
Residential fire is a leading cause of accidental death.
Most fire related deaths occur at night when occupants
suffocate in their sleep from smoke and toxic gases,
rather than from burns. To help reduce this risk, the
following program should be implemented.
1. Minimize fire hazards. Smoking in bed, cleaning
with flammable liquids such as gasoline, leaving
children home alone, and using unsafe holiday
decorations are some of the common causes of
household fire.
2. Install a fire alarm system. The primary purpose of
this system is to protect lives by giving the earliest
possible warning of danger.
3. A smoke detector should be provided to protect
each sleeping area in a home.
4. Practice an escape plan. Because there may be
very little time between detection of a fire and the
time it becomes deadly, it is important that every
family member understands how to quickly
evacuate according to the plan.
5. Plan both primary and alternate escape routes.
Since stairwells and hallways may be blocked
during a fire, exiting through a bedroom window
must be a part of the escape plan. If the sleeping
area is above the ground floor, install a means of
safely descending outside the building if one does
not already exist.
6. As a part of this plan, all family members should
arrange to meet at a location away from the house
(such as a neighbor’s house) so you will know that
everyone is accounted for.
7. If it is determined that the alarm was accidentally
sounded, the bell should be silenced, the detectors
reset, and your security company notified
immediately that there is no emergency situation.
38 Bosch Security Systems | 9/04 | 46841E
Page 39

.
Figure 8: Smoke Detector locations
D623 Series/D625 Series | User's Guide | Fire Safety and Evacuation
1 - Bedroom
2 - Hall
3 - Living room
4 - Dining room
A smoke detector should be located on each story including basements, but excluding crawl spaces
and unfinished attics. Locate smoke detectors between sleeping areas and family living areas.
1
3 4
*
2
5
1
*
*
6
3 1
7
*
1
5 - Basement
6 - Recreation room
7 - Kitchen
* - Smoke detector
*
12
Bosch Security Systems | 9/04 | 46841E 39
Page 40

D623 Series/D625 Series | User's Guide | Maintenance and Service
Maintenance and Service
This security system requires very little maintenance;
however, you should test the system weekly to ensure it
is working properly. A test schedule and maintenance
program can be arranged. If you notice a change in
operation during normal use or testing, call for service
as soon as possible. Do not attempt to repair the
control panel, keypads, or detectors yourself.
Refer to Figure 1 on page 2 for security company,
contact, and installation information.
Power Failure
If the keypad indicates a power failure and you have
power in the rest of your premises, there may be a
problem with the electrical transformer or circuit
breaker supplying power to your security control panel.
First, check to be sure that the transformer is securely
plugged into the electrical outlet. If it appears to be
damaged in any way, do not attempt to repair it. Call
your security company for service.
Refer to Figure 1 on page 2 for transformer information.
If the transformer is plugged in, check the circuit
breaker supplying power to the outlet. If the breaker is
tripped, check the appliances on the circuit for signs of
electrical problems. Make sure someone has not
intentionally turned the breaker off. When all is clear,
reset the breaker.
Refer to Figure 1 on page 2 for the circuit breaker
number.
How to clean the keypad
If your keypad gets dirty, apply a household glass
cleaner to a clean cloth or paper towel and wipe the
surface. Do not spray any liquid directly onto the
keypad. It could run inside the case and damage
electrical circuits.
40 Bosch Security Systems | 9/04 | 46841E
Page 41

.
Glossary
D623 Series/D625 Series | User's Guide | Glossary
24-Hour Point: Points that are always on even when
the system is turned off. There are two types of 24-hour
Points: Fire Points and Non-Fire Points.
All On:
Delay (Instant) is an option. No Exit or Entry Delay is
provided with the No Delay option.
All controlled points are armed. All On with No
Burglary Alarm Tone: Constant warble tone.
Central Station: Facility where trained personnel
monitor a security system 24 hours a day. The security
system may be programmed to contact the central station
during alarm conditions, enabling central station
personnel to dispatch the proper authorities.
Controlled Point: Point that responds to alarm
conditions depending upon whether the system is turned
on or off.
Entry Delay: Programmed delay of the system alarm
responses that allows a person to enter the building
through the entry door to turn the system off. An alarm
response begins if the area is not disarmed before Entry
Delay expires.
Error Tone: Same warble tone as Trouble Tone, but not
repeated.
Exit Delay: Programmed delay of the system alarm
responses that allow a person to exit the area before the
system turns on. An alarm response begins if a point is
faulted after Exit Delay expires.
Faulted Point: Point that is not normal, such as an open
door or window.
Fire Alarm Tone: Warble tone that is on for 1 sec. and
then briefly off (repeatedly).
Force Arming: Method of overriding the safety feature
that prevents arming with a faulted circuit on a control
panel.
Instant Alarm: Point type that initiates an alarm
immediately when faulted. This point type does not follow
any Entry/Exit Delay time.
No Delay: Turning the system on without Entry or Exit
Delay.
Non-Fire Point: Type of 24-hour point that is always on
and cannot be turned off.
Off: Controlled points that are not armed (system is off).
Off Display: Display that appears when the system is
turned off and no keys are pressed (normal display).
On: System is turned on (armed). Controlled points are
armed and begin an alarm response if faulted.
Part On: Installer-defined subset of the controlled points.
Part On with No Delay (Instant) is an option. No Exit or
Entry Delay is provided with the No Delay option.
Part 2 On:
Part 2 On with No Delay (Instant) is an option. No Exit or
Entry Delay is provided with No Delay option.
Point:
your security system.
RAM IV:
based account management and control panel
programming utility designed to remotely set up and
program specific control panels.
Restoral Report:
a trouble or alarm condition from an alarm circuit.
SDI:
User-defined subset of the controlled points.
Detection device or group of devices connected to
Remote Account Manager IV; a Windows® –
Signal transmitted upon the removal of
Serial Device Interface.
Sked: Scheduling parameter that allows a selected event
to happen at a specific time.
Trouble: Service condition that needs to be corrected,
such as a broken wire.
Trouble Tone: Repeating warble tone that is on briefly,
followed by a pause, and then followed by the warble
tone.
Warble Tone: Tone that is on for 1 sec., then briefly off.
Bosch Security Systems | 9/04 | 46841E 41
Page 42

D623 Series/D625 Series | User's Guide | Index
Index
2
24-Hour Point......................................................................... 6
Fire...................................................................................... 6
Non Fire .............................................................................6
A
Add a Passcode .................................................................... 18
Alarm Memory
View.................................................................................. 21
Alarms
Burglary.............................................................................. 8
Fire...................................................................................... 8
Reporting............................................................................ 8
Silence................................................................................. 9
All Areas Off ........................................................................ 28
All Areas On ........................................................................28
All Day Skeds....................................................................... 25
All On Skeds ........................................................................ 25
Area
Move to ............................................................................29
Areas
All Off............................................................................... 28
All On...............................................................................28
Arming
Area 1
Remotely with telephone ...........................................31
Authority Levels
Others’ Passcode
Change......................................................................... 17
Auto On Time
Extend ..............................................................................24
Auto-Forward
Off Setup ..........................................................................30
On Setup ..........................................................................29
On/Off.............................................................................. 30
B
System Trouble ................................................................20
Command
1 - Turn System All On...................................................10
2 - Turn System Part On.................................................11
3 - Turn System Part 2 On..............................................12
4 - Check System Troubles.............................................20
40 - View Alarm Memory...............................................21
41 - System Test...............................................................22
42 - View System Trouble ..............................................21
43 - Remote Program ......................................................28
44 - Walk Test..................................................................23
45 - Date and Time..........................................................16
47 - Reset System.............................................................23
48 - View Point Trouble..................................................22
49 - Keypad Adjust..........................................................10
50 - Move to Area............................................................29
51 - Extend Auto On Time.............................................24
52 - Change Skeds ...........................................................25
53 - Renew One-time Passcode......................................20
54 - Change Outputs .......................................................28
55 - Change Passcode......................................................16
56 - (Select 1) Change Others’ Passcodes......................17
56 - (Select 2) Change Others’ Passcode Authority
Levels............................................................................17
56 - (Select 3) Add a Passcode........................................18
58 - Delete Passcode........................................................19
61 - Turn Watch On/Off.................................................23
62 - Select Watch Tone...................................................24
63 - Select Watch Points..................................................24
65 - Set Part 2 Points........................................................12
80 - All Areas On.............................................................28
81 - All Areas Off.............................................................28
82 - Auto-Forward On/Off .............................................30
83 - Auto-Forward On Setup..........................................29
84 - Auto-Forward Off Setup..........................................30
85 - View Log...................................................................31
Commands..............................................................................8
Control Panel
Event Descriptions...........................................................33
Controlled Point.....................................................................6
Basic Pager Reports............................................................. 32
Burglary Alarm ......................................................................8
Keypad Tone .....................................................................7
Bypass Points........................................................................15
C
Change
Others’ Passcode.............................................................. 17
Authority Levels.......................................................... 17
Outputs............................................................................. 28
Passcode ...........................................................................16
Skeds.................................................................................25
Check
System Status .....................................................................9
Date........................................................................................16
Delay Silent...........................................................................13
Delete Passcode....................................................................19
Descriptions
Control Panel Events.......................................................33
Entry Delay
Keypad Tone......................................................................7
Error
Keypad Tone......................................................................7
Evacuation.............................................................................38
D
E
42 Bosch Security Systems | 9/04 | 46841E
Page 43

.
Event Descriptions
Control Panel...................................................................33
Exit Delay
Keypad Tone .....................................................................7
F
Failure
Power................................................................................ 40
Faulted Point ..........................................................................6
View.................................................................................. 15
Fire Alarm
Keypad Tone .....................................................................7
Fire Alarms............................................................................. 8
Fire Point ................................................................................6
Fire Safety and Evacuation ................................................. 38
Fire Trouble Events............................................................... 8
Force Arm............................................................................. 14
D623 Series/D625 Series | User's Guide | Index
Limitations
Security System................................................................38
Log
View ..................................................................................31
Log Out of the System...........................................................9
M
Maintence..............................................................................40
Move to Area........................................................................29
N
No Delay
Turn System On with......................................................12
Non Fire
24-Hour Point.....................................................................6
Trouble Events...................................................................8
H
How to clean the keypad .................................................... 40
I
information
security system
circuit breaker number................................................. 2
telephone
jack location................................................................ 2
number........................................................................ 2
call to test............................................................... 2
transformer location...................................................... 2
K
Key Press
Keypad Tone .....................................................................7
Keypad
Adjust (Cmd 49) ..............................................................10
Cleaning
How to .........................................................................40
Commands......................................................................... 8
LED Descriptions.............................................................. 8
Tones ..................................................................................7
Burglary Alarm.............................................................. 7
Entry Delay.................................................................... 7
Error ............................................................................... 7
Exit Delay ...................................................................... 7
Fire Alarm...................................................................... 7
Key Press........................................................................ 7
OK.................................................................................. 7
Trouble........................................................................... 7
Watch ............................................................................. 7
Keys......................................................................................... 7
L
LED
Descriptions
Keypad........................................................................... 8
O
Off Skeds...............................................................................27
OK
Keypad Tone......................................................................7
Output
Off Skeds ..........................................................................27
On Skeds...........................................................................27
Outputs
Change..............................................................................28
P
Pager Reports
Basic ..................................................................................32
Part 2
On Skeds...........................................................................26
Points
Set..................................................................................12
Turn System On...............................................................12
Part On
Skeds .................................................................................25
Passcode
Add....................................................................................18
Change..............................................................................16
Change Other’s ................................................................17
Authority Levels ..........................................................17
Delete ................................................................................19
Renew One-Time ............................................................20
Point
24-Hour...............................................................................6
Fire..................................................................................6
Non-Fire .........................................................................6
Controlled...........................................................................6
Faulted.................................................................................6
View..............................................................................15
Part 2
Set..................................................................................12
View Trouble ...................................................................22
Points
Bypass ...............................................................................15
Power
Bosch Security Systems | 9/04 | 46841E 43
Page 44

D623 Series/D625 Series | User's Guide | Index
Failure...............................................................................40
Program
Remote .............................................................................28
R
Remote Arming
Area 1
with telephone............................................................. 31
Remote Program..................................................................28
Renew One-Time Passcode................................................ 20
Reporting
Alarm.................................................................................. 8
Reset the System.................................................................. 23
S
Safety
Fire.................................................................................... 38
Security System Limitations................................................ 38
Select
Watch
Points............................................................................24
Tone .............................................................................24
Service................................................................................... 40
Set Part 2 Points................................................................... 12
Silence Alarms .......................................................................9
Skeds
All Day .............................................................................25
All On...............................................................................25
Change .............................................................................25
Off..................................................................................... 27
Output
Off................................................................................. 27
On................................................................................. 27
Part 2
On................................................................................. 26
Part On............................................................................. 25
Status
Check System ....................................................................9
System
Limitations........................................................................ 38
Log out of........................................................................... 9
Reset .................................................................................23
Test.................................................................................... 22
Trouble
Check ...........................................................................20
View .............................................................................21
System Status
Check.................................................................................. 9
T
Time.......................................................................................16
Tones
Keypad................................................................................7
Burglary Alarm..............................................................7
Entry Delay....................................................................7
Error................................................................................7
Exit Delay.......................................................................7
Fire Alarm......................................................................7
Key Press........................................................................7
OK ..................................................................................7
Trouble ...........................................................................7
Watch..............................................................................7
Trouble
Keypad Tone......................................................................7
Trouble Events
Fire.......................................................................................8
Non Fire..............................................................................8
Turn System Off...................................................................10
Turn System On
All......................................................................................10
No Delay...........................................................................12
No Exit Tone....................................................................13
Part ....................................................................................11
Part 2 .................................................................................12
Points Faulted...................................................................14
Turn Watch On/Off.............................................................23
V
View
Alarm Memory ................................................................21
Faulted Points...................................................................15
Log.....................................................................................31
Trouble
Point..............................................................................22
System...........................................................................21
W
Walk Test ..............................................................................23
Watch
Keypad Tone......................................................................7
Points
Select.............................................................................24
Tone
Select.............................................................................24
Turn On/Off.....................................................................23
44 Bosch Security Systems | 9/04 | 46841E
Page 45

D623 Series/D625 Series | User's Guide
.
Notes
Bosch Security Systems | 9/04 | 46841E 45
Page 46

D623 Series/D625 Series | User's Guide
Notes
46 Bosch Security Systems | 9/04 | 46841E
Page 47

D623 Series/D625 Series | User's Guide
.
Bosch Security Systems | 9/04 | 46841E 47
Page 48

Bosch Security Systems
130 Perinton Parkway
Fairport, NY 14450-9199
Customer Service: (800) 289-0096
Technical Support: (888) 886-6189
© 2004 Bosch Security Systems
46841E
 Loading...