

Bosch B26FT Operating And Installation Instructions

B26FT..
en Operating and installation
instructions
fr Notices d'utilisation et de
montage
es Instrucciones de uso y de
montaje

en Table of Contents 3...
fr Table des matières 32...
es Índice 62..............

en Table of Contents
en-us
IMPORTANT SAFETY INSTRUCTIONS 4........
Disposal information 5........................
Scope of Delivery 6...........................
Installing the appliance 6......................
Installing and connecting the appliance 7.......
Appliance and installation dimensions 12........
Getting to know your appliance 13..............
Control and display panel 14...................
Operating tips 15..............................
Switching on the appliance 15..................
Setting the temperature 15.....................
Alarm function 16..............................
Panel lock 16.................................
Super cooling 16..............................
Super freezing 17..............................
Quick ice 17..................................
Water filter symbol 17..........................
Temperature unit 17...........................
Refrigerator compartment 18...................
VitaFresh Pro compartment 18..................
Deli drawer 19.................................
Variable interior design 19......................
Freezer compartment 20.......................
Freezing food 20..............................
Purchasing and storing deep-frozen food 21.....
Thawing frozen food 21........................
Freezer compartment features 21...............
Ice and water dispenser 22.....................
Water filter 24.................................
Performance data sheet 25....................
Energy-saving tips 26..........................
Operating noises 26...........................
Defrosting 26..................................
Switching off and disconnecting the appliance 26.
Cleaning 27...................................
LED light 28...................................
Troubleshooting minor issues 29................
Customer service 31...........................
3
en-us
IMPORTANT SAFETY INSTRUCTIONS
READ AND SAVE THESE INSTRUCTIONS!
Definitions
WARNING
This indicates that death or serious injuries may
occur as a result of not observing this warning.
CAUTION
This indicates that minor to moderate injuries may
occur as a result of not observing this warning.
NOTICE
This indicates that damage to appliance or property
may occur as a result of not observing this warning.
WARNING: Before you turn on the
appliance
Please read the Operating and Installation Instructions
carefully, including the following. They contain
important safety information and instructions for
installation, use and maintenance of the appliance.
The manufacturer is not responsible if you fail to
comply with the instructions and warnings. Retain all
documents for subsequent use or for the next owner.
Technical safety
Improper installations and repairs may put the user at
risk.
Repairs must be performed by an authorized service
provider.
Only use original parts supplied by the manufacturer.
Only original manufacturer supplied parts satisfy safety
requirements.
If the power cord of this appliance is damaged, it must
be replaced by an authorized servicer.
The appliance comes with a UL listed 3-wire Power
Cord.
Never sever or remove the third (ground) conductor
from the power cord.
This appliance requires a 3-wire grounded wall outlet.
The wall outlet must be installed by a licensed
electrician and it must be done in accordance with
local codes.
Where there is a 2-wire standard wall receptacle, it is
the responsibility of the customer to have this
receptacle replaced with a correctly grounded 3-wire
wall receptacle. Do not use any adapter plugs.
Important information when using the
appliance
n Never use electrical devices inside the appliance.
Risk of explosion!
n Never use a steam cleaner to defrost or clean the
appliance. The steam may penetrate electrical
parts and cause a short-circuit. Risk of electric
shock!
n Do not use pointed or sharp-edged objects to
remove frost or layers of ice. You could damage
the refrigerant tubes. Leaking refrigerant may ignite
or cause eye injuries.
n Do not store products that contain flammable
propellants (e.g. spray cans) or explosive
substances in the appliance. Risk of explosion!
n Do not stand or support yourself on the base,
drawers or doors or other parts of the appliance.
You could damage the appliance or be injured.
n To clean the appliance, pull out the power cord
plug or switch off the electrical breaker or fuse! Do
not pull out the power cord plug by tugging the
cable.
n Bottles that contain a high percentage of alcohol
must be sealed and stored in an upright position.
n Keep plastic parts and the door seals free of oil
and grease. Otherwise, plastic parts and door seal
will become porous.
n Never cover or block the ventilation openings for
the appliance. This forces the appliance to work
harder, increasing its power consumption.
n This appliance must not be used by children
without adult supervision.
n Do not store bottled or canned drinks (especially
carbonated drinks) in the freezer compartment.
Bottles and cans may explode!
n Do not place popsicles or ice cubes straight from
the freezer compartment into your mouth. Risk of
low-temperature burns!
n Do not touch frozen surfaces or food in the freezer
with wet hands. Skin may adhere to these
extremely cold surfaces. Risk of injury!
n Do not scrape off frost or stuck frozen food with a
knife or pointed object. You could damage the
appliance or be injured.
4
IMPORTANT SAFETY INSTRUCTIONS
READ AND SAVE THESE INSTRUCTIONS!
Children in the household
Disposal information
WARNING
x Disposal of packaging
Risk of suffocation from cardboard boxes and
plastic film! Keep packaging and packaging
components away from children.
Do not allow children to play with the appliance!
If the appliance features a lock, keep the key out of
the reach of children.
The packaging protects your appliance from damage
during transit. All utilized materials are environmentally
safe and recyclable. Please help us by disposing of
the packaging in an environmentally friendly manner.
Remove handles from the packaging before disposal.
Please ask your dealer or inquire at your local
authority about current means of disposal.
en-us
General requirements
The appliance is suitable for
n refrigerating food
n freezing food
n making ice
n dispensing drinking water.
This appliance is intended for use in the home and the
home environment.
The refrigeration circuit has been tested for leaks
before leaving the factory.
State of California Proposition 65
Warnings
WARNING
This product can expose you to chemicals
including vinyl chloride, which is known to the
State of California to cause cancer and birth
defects or other reproductive harm.
For more information go to
www.P65Warnings.ca.gov.
x Disposal of your old appliance
Old appliances are useful! Valuable raw materials can
be reclaimed by recycling old appliances.
WARNING
Risk of child entrapment!
Children can lock themselves in the appliance.
Before disposing of the old refrigerator:
Remove the doors and the freezer compartment
drawer.
Leave the shelves and containers in place so that
children may not easily climb inside.
Proper disposal of appliances:
1. Pull out the power plug.
2. Cut off the power cord and discard with the power
plug.
3. Do not take out the trays and shelves. This helps to
prevent children from climbing in!
4. Do not allow children to play with the appliance.
Could cause suffocation!
Refrigerators contain refrigerants and their insulation
contains gases. Refrigerant and gases must be
disposed of properly. Follow local ordinances for
disposal. Ensure that the tubing of the refrigerant
circuit is not damaged prior to proper disposal.
5
en-us
IMPORTANT SAFETY INSTRUCTIONS
READ AND SAVE THESE INSTRUCTIONS!
Installation location
Scope of Delivery
After unpacking all parts, check for any damage in
transit.
If there is damage, do not plug in your appliance.
Please contact the dealer.
The following parts are included:
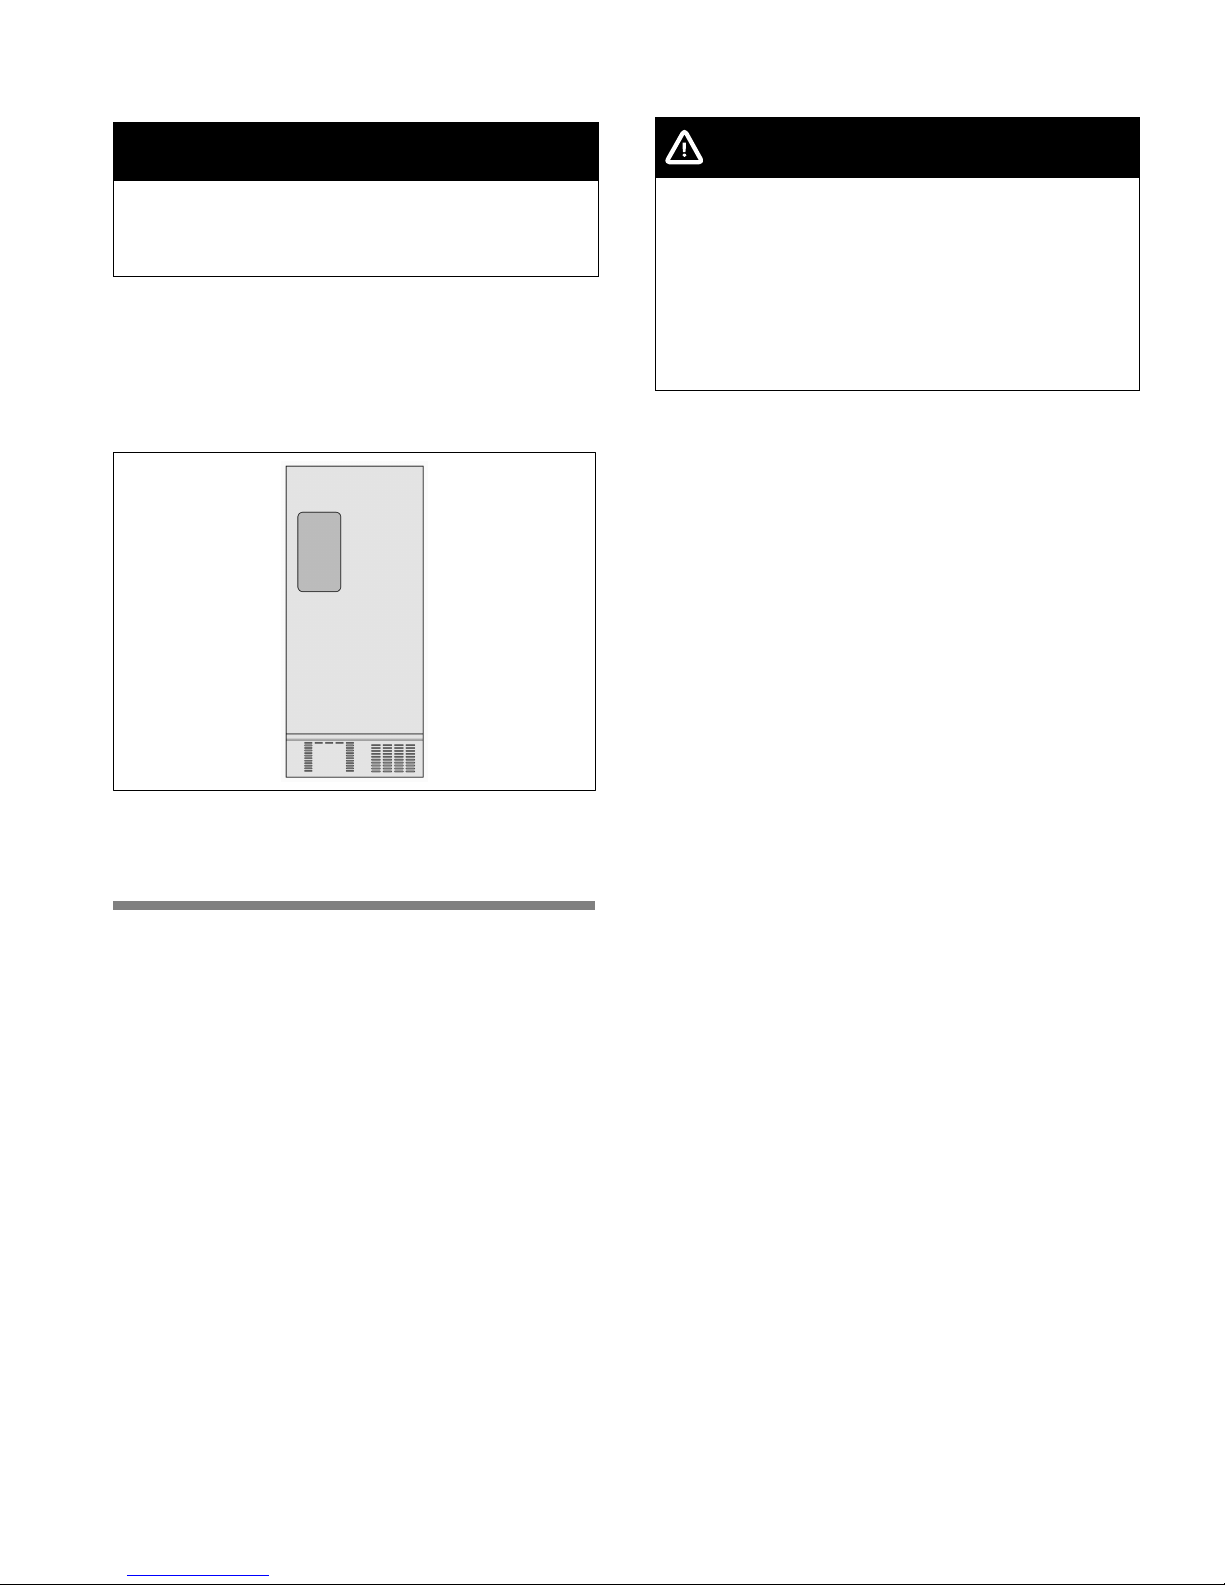
n Free-standing appliance
n Interior fittings (depending on model)
n Bag containing installation materials
n Operating instructions
n Installation instructions
n Registration card
n Information on energy consumption and noises
Installing the appliance
Have a qualified technician install and connect the
appliance according to the enclosed Installation
Instructions.
WARNING
Do not install the appliance:
n outdoors,
n in an environment subject to drips of water,
n in rooms with risk of freezing temperatures.
Transporting
The appliance is heavy and must be secured during
transport and installation.
The castors are provided for installation purposes
only.
Do not use the castors for transporting the appliance.
WARNING
Risk of explosion!
Do not install the appliance near explosive or
flammable substances.
A dry, well-ventilated room is suitable as an installation
location. The installation location should not be
exposed to direct sunlight or placed near a heat
source, e.g. a cooker, radiator, etc. If installation next
to a heat source is unavoidable, use a suitable
insulating plate or observe the following minimum
distances from the heat source:
I
1/4
n 1
n 11
To ensure that the Ice Maker functions correctly, the
appliance must be upright and level.
If installing the refrigerator next to another
refrigerator/freezer, there must be a minimum
clearance of 1” (25 mm) between the appliances to
prevent condensation.
If a panel or cupboard is installed above the
appliance, ensure to leave a 13/32
that the appliance can be pulled out of the recess if
required.
The air heated at the back of the appliance must be
allowed to escape unhindered.
To ensure that the doors can open all the way,
maintain the lateral minimum clearances when
installing the appliance in a corner or recess (see
section on ”Appliance and installation dimensions”).
If the depth of the adjacent kitchen equipment
exceeds 29
clearances in order to utilize the full door opening
angle (see section ”Door opening angle”).
(3 cm) to electric or gas stoves.
I
3/16
(30 cm) to oil or solid fuel stoves.
I
1/8
(75 cm), maintain the minimum lateral
Climatic classes
The climate class can be found on the rating plate.
The climate class indicates within which ambient
temperatures the appliance can be operated.
WARNING
I
(10 mm) gap so
Risk of injury!
The appliance is very heavy. It can fall over and
cause serious injuries during transport and
installation. At least two people are required to
install the appliance safely. Keep the refrigerator
doors closed until the appliance is upright and level
at the installation location.
Hidden surfaces may have sharp edges. During
transport, wear protective gloves. Use caution
when reaching behind or under appliance.
6
Climatic class
SN 50 °F to 90 °F (+10 °C to 32 °C)
N 61 °F to 90 °F (+16 °C to 32 °C)
ST 61 °F to 100 °F (+16 °C to 38 °C)
T 61 °F to 110 °F (+16 °C to 43 °C)
Permitted ambient temperature
en-us
Subsurface
NOTICE
The appliance is very heavy.
The floor on which the appliance is to be installed
must be rigid. Reinforce the floor, if necessary.
Weight of appliance when empty:
Basic model 324 lb (147 kg)
Ventilation
Never cover the ventilation openings on the front base
panel or rear cover plate.
This forces the appliance to work harder, increasing
its power consumption. It also can cause damage to
the compressor.
Installing and connecting the
appliance
Have a technician install and connect the appliance
according to the enclosed Installation Instructions.
Do not remove the transportation protection devices
from the shelves and storage compartments until the
appliance has been installed and aligned.
Always connect the water before the power.
Apart from statutory national regulations, you should
comply with all applicable local electricity and water
companies' codes and requirements.
After installing the appliance, wait at least 6 hours
before switching the appliance on. During
transportation the oil in the compressor may have
flowed into the refrigeration system.
Before switching the appliance on for the first time,
clean the interior of the appliance (see chapter
“Cleaning the Appliance”).
Only a qualified technician should remove the
appliance doors if this is necessary in order to bring
the appliance through any household doors.
Water connection
WARNING
Risk of electric shock and damage to the appliance!
Disconnect the appliance from the power source
before performing any work on the water
connection.
Only a qualified installation technician may connect
the appliance to the water supply in accordance
with plumbing and relevant water utility company
regulations.
Connect the appliance to a drinking water line only:
n Minimum pressure:
14.5 psi (1.0 bar)
n Maximum pressure:
116 psi (8.0 bar)
If the water pressure exceeds 80 psi (5.5 bar), you
must install a pressure limiting valve. Contact a
plumbing professional if you are uncertain how to
check your water pressure. The ice maker will not
work if the water pressure is below 14.5 psi (1.0 bar).
The water should be connected only by a competent
plumber according to the local regulations of the
appropriate Water Supply company.
A cold water connection is necessary for operating the
ice maker.
A separate Shut-Off-Valve should be installed in the
cold-water inflow.
The Shut-Off-Valve should not be located behind the
appliance. It is recommended that you mount the
Shut-Off-Valve directly next to the appliance or at
another place that is easily accessible.
When installing the water connection, pay attention to
the permissible installation area for the water line.
For connection to the drinking water line use only
water pipes that are suitable for drinking water.
Observe national regulations and the connection
conditions of the local Water Supply companies.
The taste and smell of the water can be improved by
installing the filter cartridge included with the
appliance. In this case, observe the separate
connection requirements related to the filter (see
”Water filter”).
The water hose has a 3/4 inch connection.
7
en-us
Electrical connection
WARNING
Risk of electric shock and fire if electrical
connection is not installed properly!
Plug into a fixed, grounded 3-prong outlet only. The
outlet must be installed and grounded according to
code by a qualified electrician. If necessary, have
the installation inspected by a qualified technician
to ensure it is properly grounded.
Do not use an extension cord or power strip.
Never connect the appliance to an electronic
energy saver plug (such as Ecoboy, Sava Plug,
etc.) or to power inverters which convert direct
current (DC) to alternating current (AC) (such as for
solar equipment, power supplies on ships, etc.).
The outlet for the appliance must be located close the
appliance and must be easy to access also after
installation.
Connect the appliance to a properly installed
115 V/60 Hz AC outlet. The fuse for the outlet must be
rated either 15 A or 20 A.
If the appliance is to be used in a country other than
the U.S., check the rating plate to determine if the
specified voltage and current type correspond to the
ratings of your power supply. If the voltage and current
type do not match, the appliance must not be
operated. The power cord may only be replaced by a
qualified electrician.
Aligning the appliance
NOTICE
To ensure that the appliance operates correctly, use
a level to align the appliance.
If the appliance is not level, water may flow out of the
ice maker, ice cubes may be irregular, or the doors
may not close properly.
1. Place the appliance in the designated location.
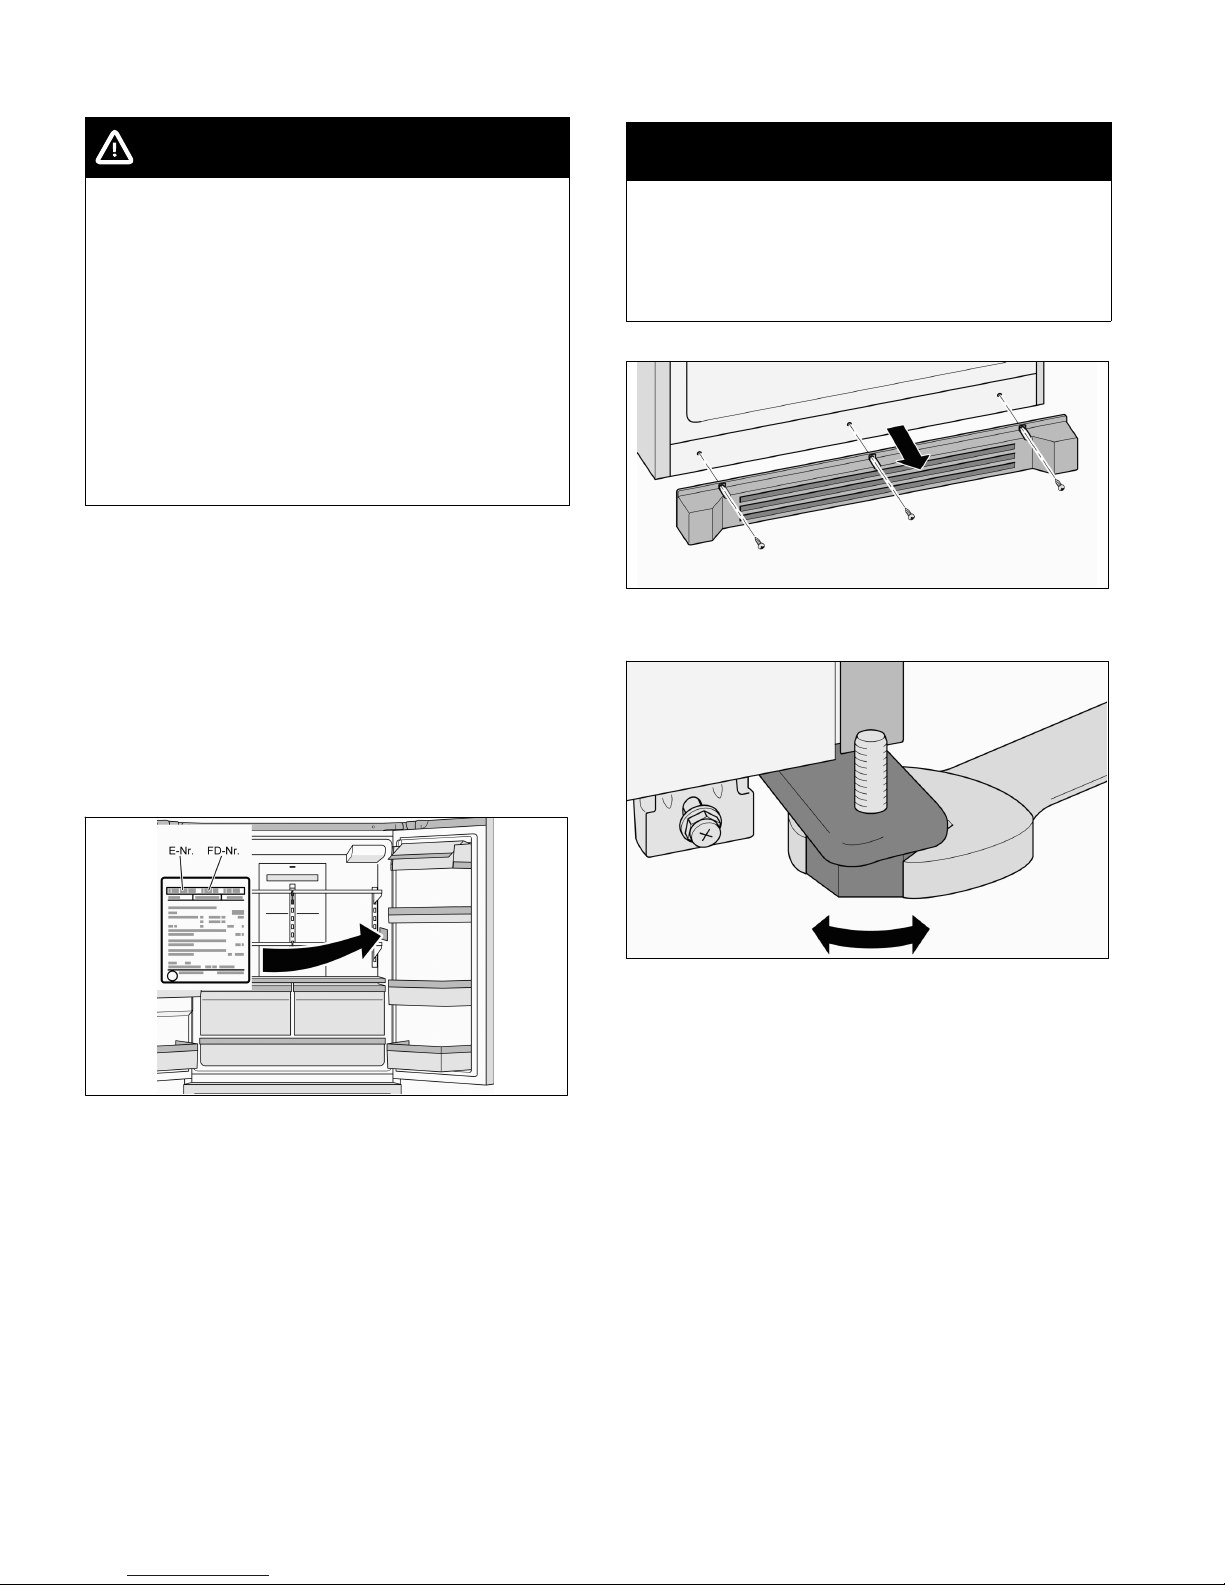
2. Remove the three screws from the base panel.
3. Remove the base panel.
4. Use a 36 mm open end wrench to loosen the two
front feet until they are firmly planted on the floor
and then align the front of the appliance.
8
5. Use an open end wrench to turn the screws and
then align the rear of the appliance.
To raise the rear of the appliance:
Turn the screw clockwise.
To lower the rear of the appliance:
Turn the screw counterclockwise.
en-us
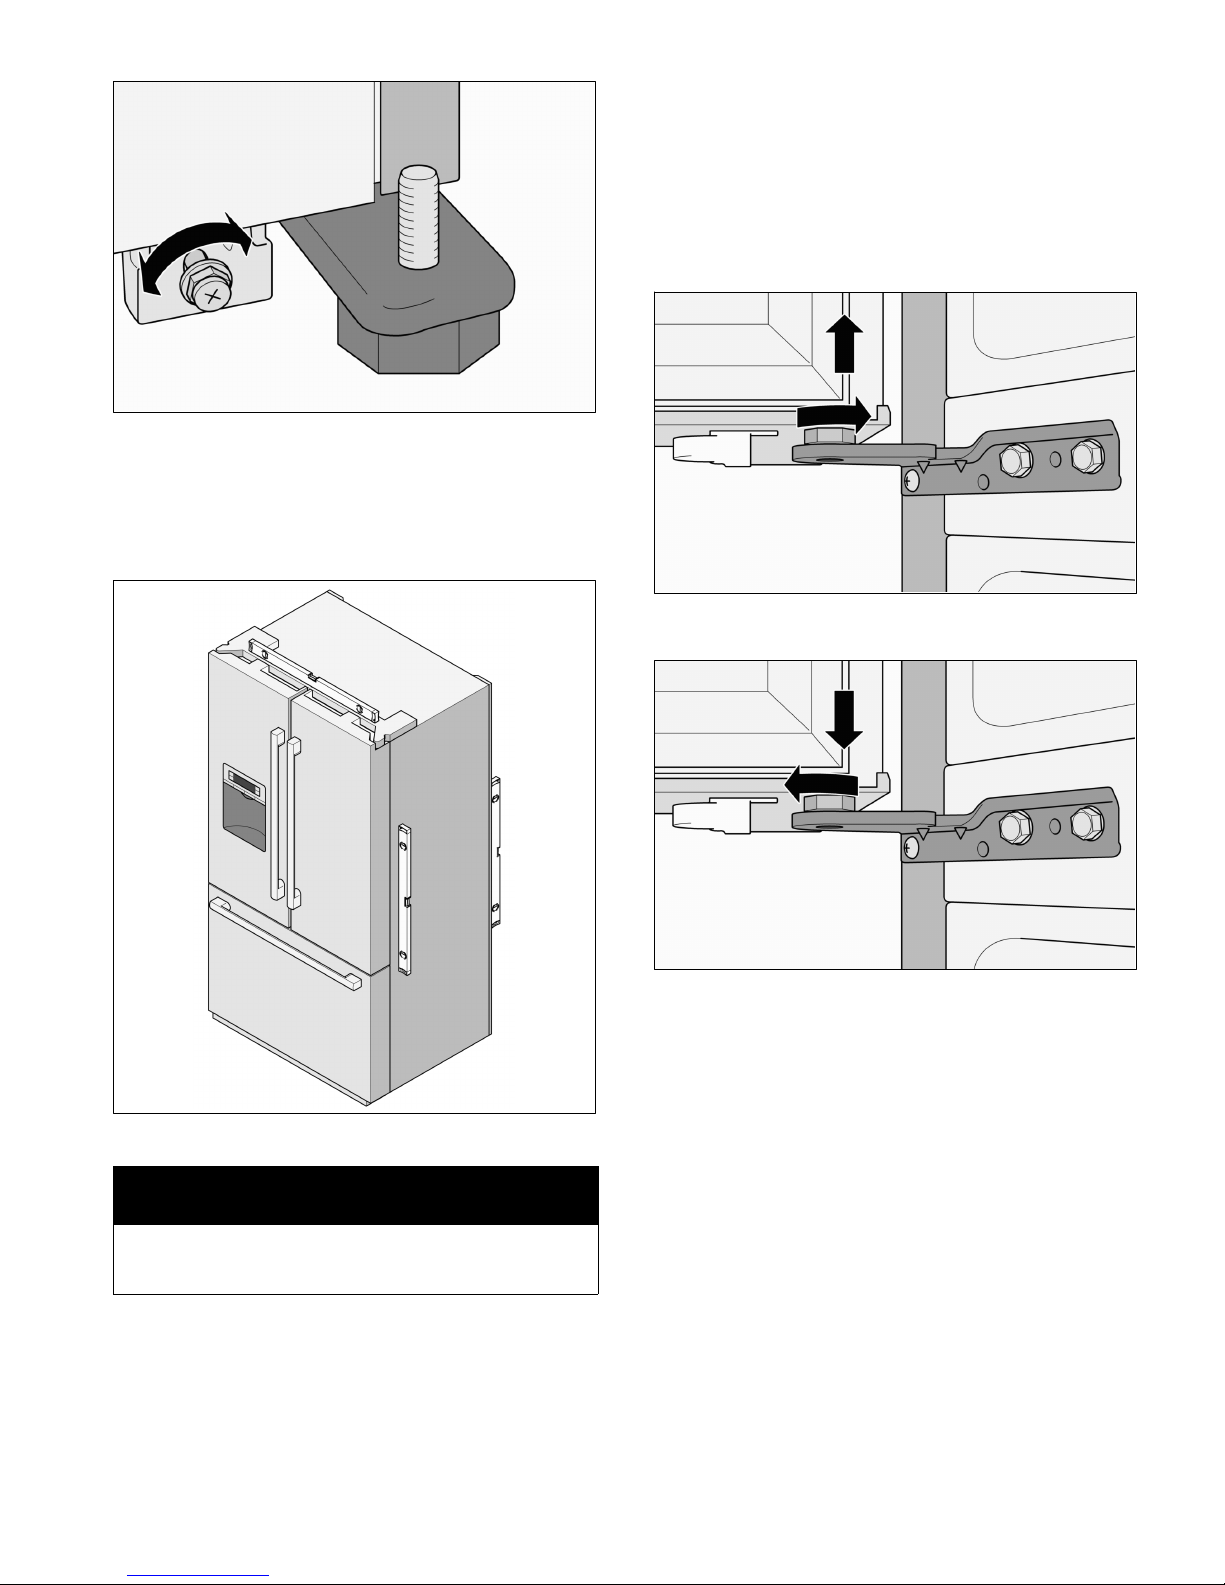
Adjusting a refrigerator door
If the height of the refrigerator doors is uneven:
1. Determine which refrigerator door needs to be
raised.
2. Turn the screw nut on the lower hinge to adjust the
refrigerator door.
To raise a refrigerator door:
Turn the screw counterclockwise.
To lower a refrigerator door:
Turn the screw clockwise.
6. Use the level to check if the appliance is level.
NOTICE
To ensure that the appliance does not move, the
front feet must be firmly planted on the floor.
7. If the height of the refrigerator compartment doors
are uneven or if the freezer compartment drawer is
slanted after adjusting the level of the appliance,
use the following method to adjust them.
9
en-us
If the refrigerator doors are not properly aligned:
WARNING
Risk of electric shock!
Before removing the top panel:
1. Shut off the water supply to the appliance.
2. Unplug the appliance or switch off the circuit
breaker (or fuse).
1. Determine which refrigerator door needs
adjustment.
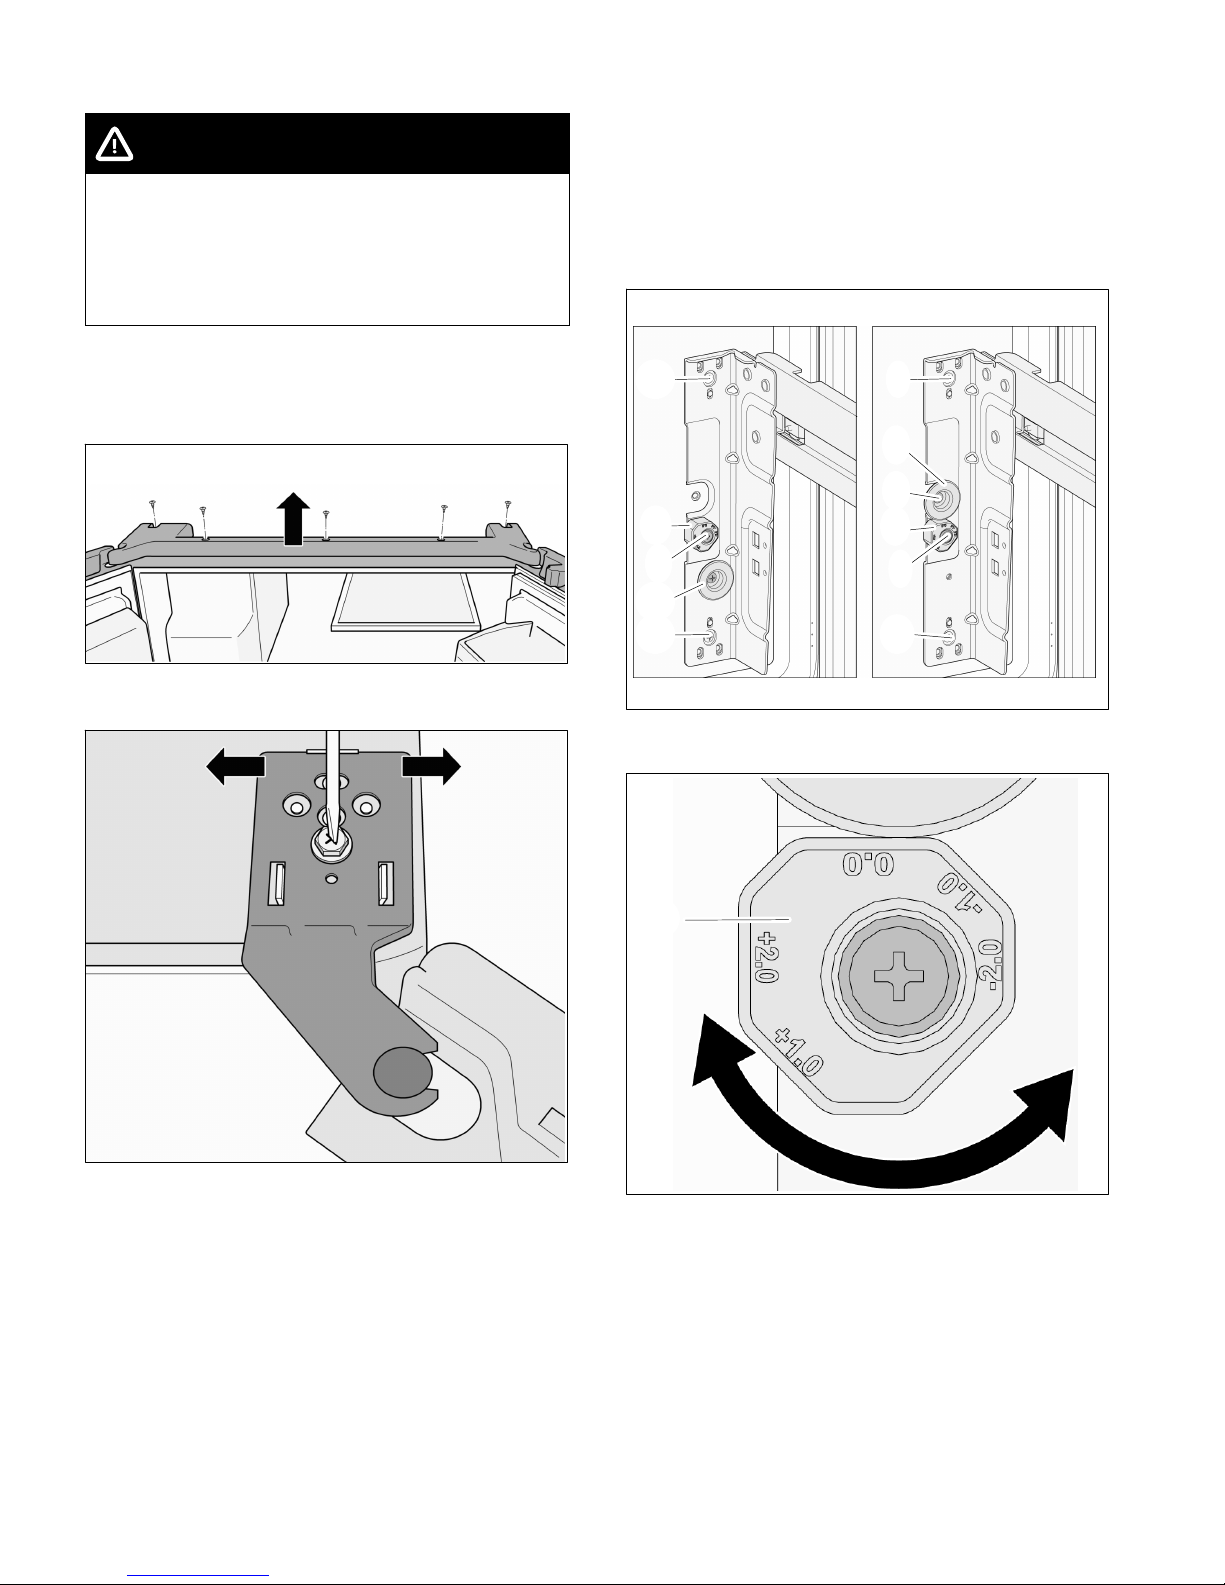
2. Remove the five screws on the top panel.
3. Raise the panel.
Adjusting the freezer compartment
drawer
If the freezer drawer is higher on one side than the
other (not even):
1. Loosen the three side screws (1) on the side
where adjustment is needed.
2. Move the Stopper (2) from "left picture position" to
"right picture position".
1
3
1
2
1
1
2
4
3
1
1
4. Loosen the screw.
Do not remove the screw!
5. Move the hinge sideways to adjust the refrigerator
door.
6. Tighten the screw.
7. Realign panel.
8. Insert and tighten the five screws.
3. Adjust the leveling by rotation the Position
Knob (3). (Pull and rotate the Position Knob)
33
4. After adjusting the leveling, tighten the four side
screws (1)+(4).
10
 Loading...