


Trip™ 2, 2L, 3 and 5W
Owner’s Manual.
ENGLISH

WELCOME.
Thank you for buying a Bontrager Trip™ computer. We hope this computer gives you miles (or kilometers) of pleasure.
Your Trip computer may not include all of the features discussed in this manual. This manual covers Trip 2, 2L, 3 and 5W models.
Please read this manual carefully. If you do not understand the information, or you have a question that this manual does not cover, consult your Authorized Bontrager Dealer or visit www.bontrager.com.
Safety When Riding
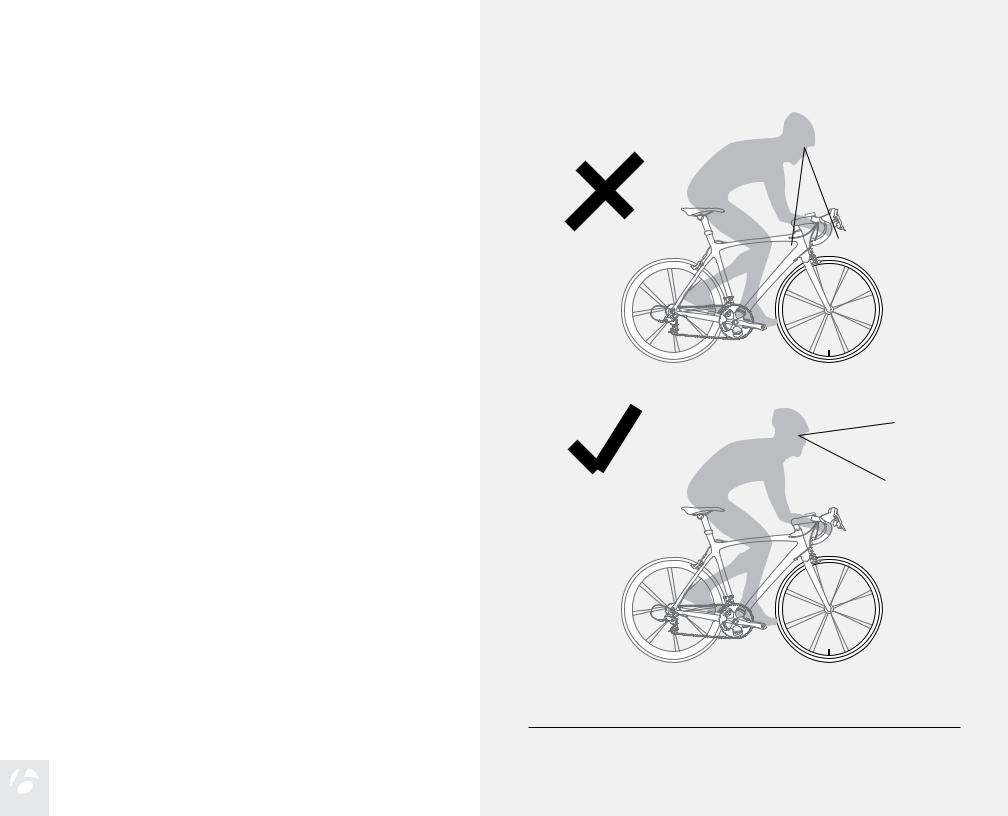
When riding your bicycle, do not stare at the computer for a long time (Figure 1). Failure to pay attention to the road ahead of you, obstacles, and traffic could result in a loss of control, serious injury, or death. Stay alert!
Make sure wires cannot contact the tire, rim, or spokes. Contact with wires could damage the computer or cause you to lose control and fall.
Terms Used
Hold |
Press a button continuously for about two |
seconds. |
|
|
|
Press |
Push a button once, briefly. |
|
|
|
|
Reset |
Set all values in the memory to 0 (zero) and erase |
all settings. |
|
|
|
Trip Restart |
Set Trip values (only) in the memory to 0 (zero). |
|
|
|
|
Scroll |
Press several times to scroll through a list of values |
or display elements. |
|
|
|
Figure 1. Do Not Stare at Computer for Long Periods of Time.

Display Elements and Abbreviations
The Trip can be used on two bicycles with different wheel sizes while still calculating data correctly for each wheel size. You must first set the wheel sizes and choose the appropriate bike setting before riding.
Trip Data (can be reset to 0 without affecting Odometer (ODO) total)
•Trip Distance (TRP)
•Average Speed (AVG) and Maximum Speed (MAX)
•Ride Time (TME)
Abbreviations and Screen Terms
Abbreviation |
Meaning |
|
|
AVG |
Average Speed |
|
|
CLK |
Clock |
|
|
CUR |
Current Speed |
|
|
MAX |
Maximum Speed |
|
|
ODO |
Odometer |
|
|
TME |
Ride Time |
|
|
TRP |
Trip Distance |
|
|
CAD |
Cadence |
|
|
WHEEL SELECTION
Wheel 1 or Wheel 2
PACER
TEMPERATURE
BACKLIGHT
Trip 5W ONLY
SPEED
Current
DISTANCE
Trip (TRP)
Odometer (ODO)
SPEED
Average (AVG)
Maximum (MAX)
CADENCE (CAD)
Trip 3 ONLY
TIME
Clock (CLK)
Ride Time (TME)
Figure 2. Display Elements and Buttons.
Easy Setup
After you install the battery, you can program the wheel size and units.
Install the Battery
To prolong the life of the battery, it is not installed at the factory. (See Figures 10 and 11 at the end of the manual for further help installing the battery.)
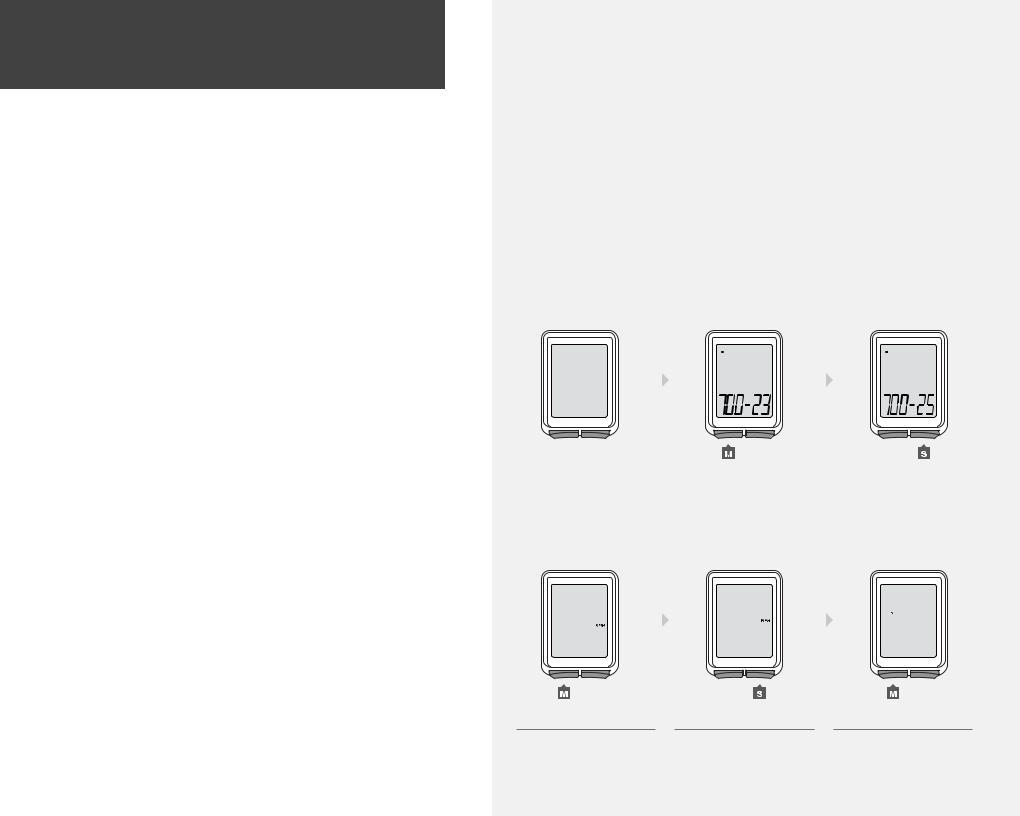
To Program Your Trip
This procedure programs your Trip cycle computer for the first time or after a
Reset. If you would like to program individual features or advanced settings, see the sections Additional Information & Features and Advanced Settings.
1. Install the battery (or push the Reset button—see Figure 12 at end of manual).
2. The wheel size appears on the display.
3. To change the wheel size, press  .
.
To select, press |
|
. |
|
|
|
|
|
|
1. |
2. |
3. |
||||
|
|
|
|||||
4.To scroll between units of measurement, Miles per Hour (MPH) or
Kilometers per Hour (KMH), press  .
.
5.To select, press  .
.
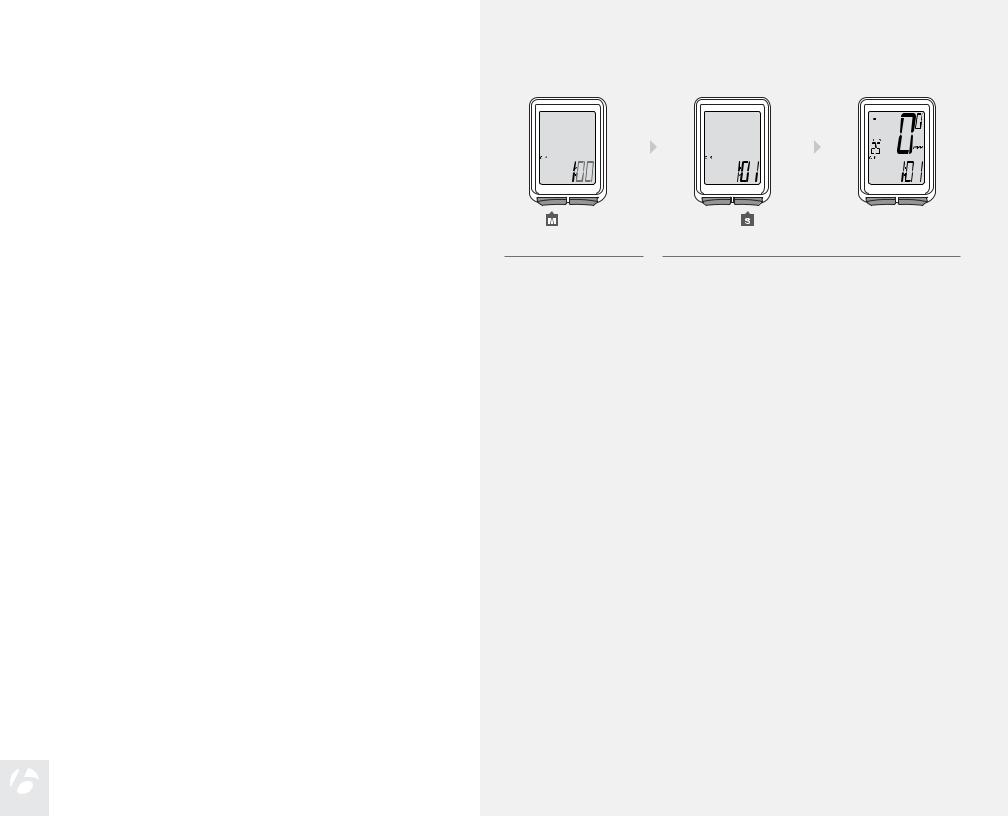
6.To change to ˚F or ˚C, press  .
.
4. |
5. |
6. |
|
|
|
|
|
|
|
|
|

7. To select, press  .
.
The Trip returns to CLK.
7.
To Set the Clock
1. |
Scroll |
|
|
to CLK. |
|||
|
|
|
for 2 seconds. |
||||
2. |
Hold |
|
|
||||
|
|
||||||
3. |
To change to 12hr or 24hr clock, press |
|
. |
||||
(for 2 seconds)
4. |
5. |
6. |
4. |
To select, press |
|
. |
|
|
5. |
To change the flashing digit for hours, press |
|
|||
|
. |
||||
6. |
To select, press |
|
|
|
|
|
. |
|
|
||
7. 8.
7. To change the flashing digit for minutes, press  .
.
8. To select, press  .
.
The Trip returns to CLK.
7. 8.
 Loading...