

Page 1
A
INSTALLATION,OPERATION & M
INTENANCE
SERIES C
Commercial Evaporative
Air Conditioning
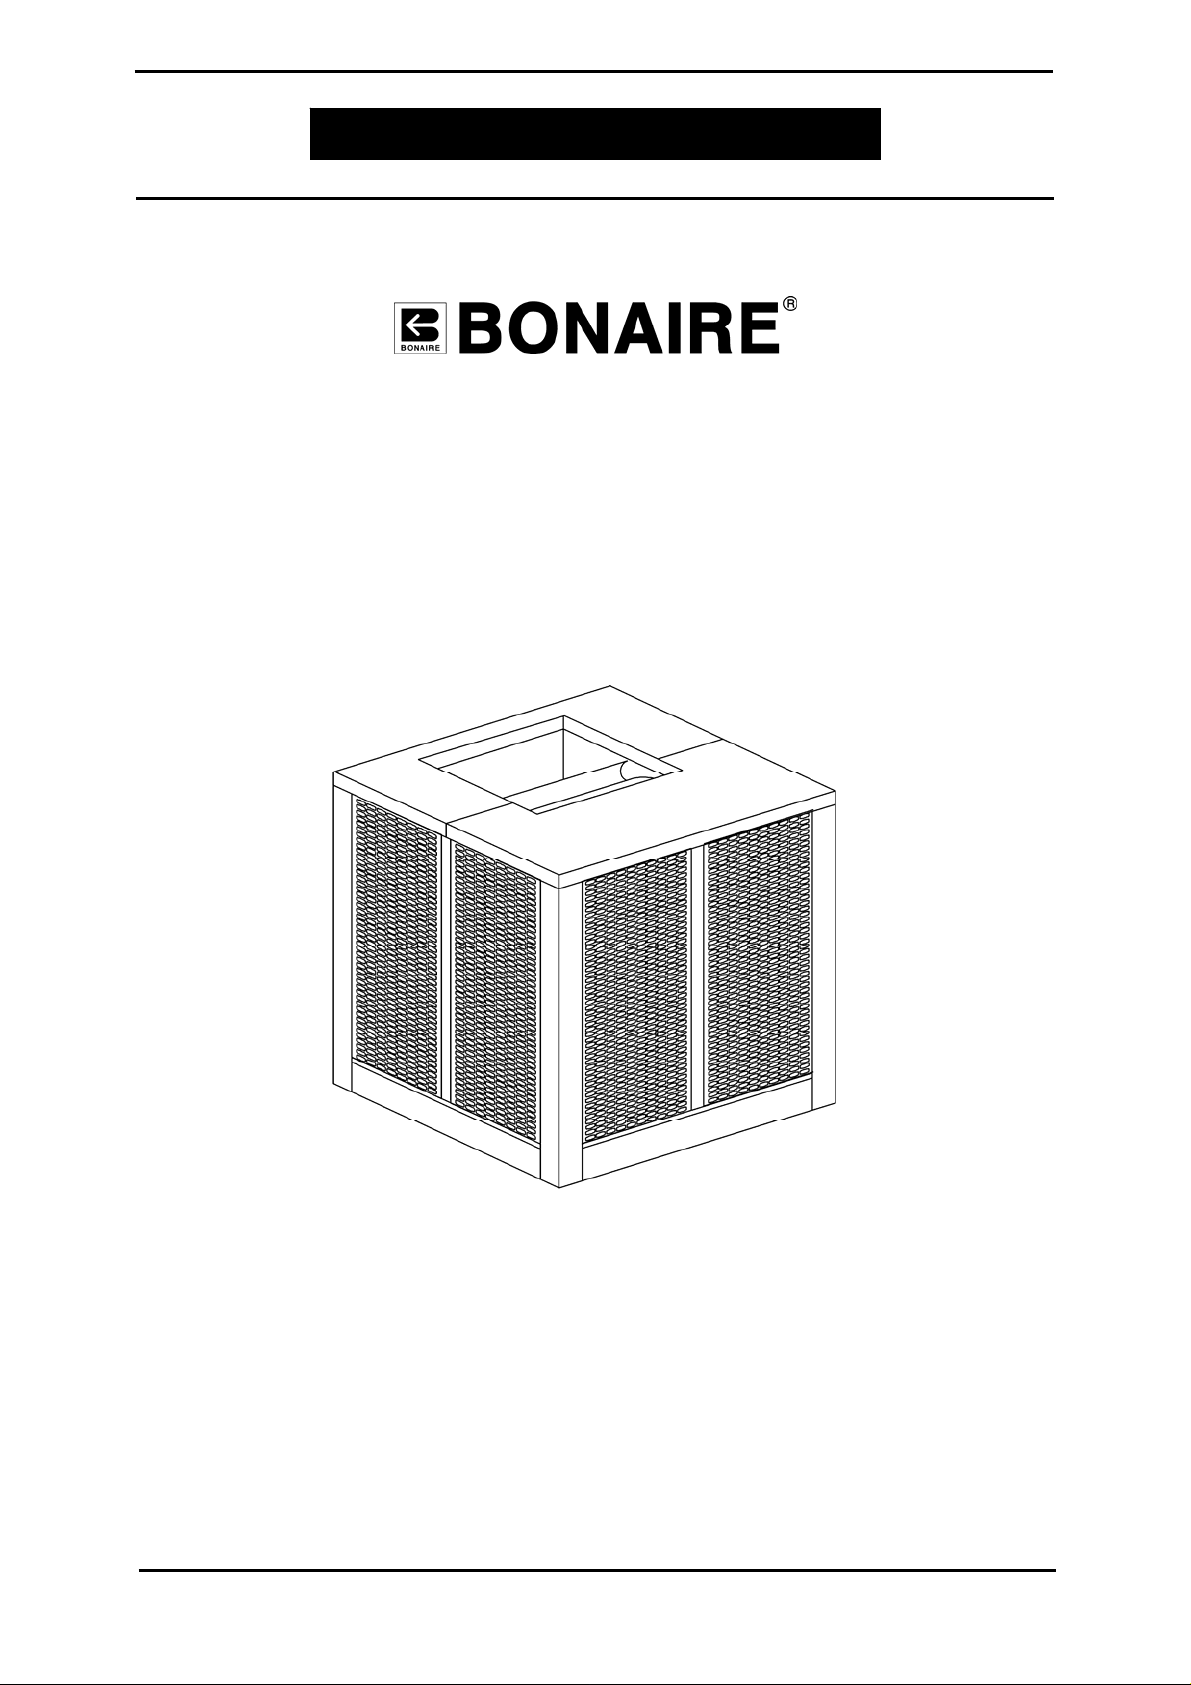
Bonaire 700C – 1500C
• IMPORTANT NOTICE •
Please leave this manual with the owner of this air conditioner.
Please keep this important manual in a safe place. It is the owner’s responsibility to ensure that regular servicing as
per the Bonaire Evaporative Air Conditioner service recording planner is carried out. Failure to complete and record
the periodic service work as outlined will void all guarantees beyond statutory and legal requirements.
Page 2

INSTALLATION, OPERATION & MAINTENANCE
Contents
TABLE OF CONTENTS
TABLE OF CONTENTS __________________________________________________ 2
INTRODUCTION _______________________________________________________ 3
Dealer Responsibility _____________________________________________________ 3
Before Commencing______________________________________________________ 3
UNIT INSTALLATION ___________________________________________________ 4
Unit Location Check List___________________________________________________ 4
Precautions_____________________________________________________________ 4
Location and Orientation___________________________________________________ 4
Duct Connection Details___________________________________________________ 5
Lifting the Unit___________________________________________________________ 6
Mounting the Air Conditioner _______________________________________________ 6
Ductwork System ________________________________________________________ 7
WATER CONNECTIONS _________________________________________________ 8
Unit Base Layout ________________________________________________________ 8
Water Installation ________________________________________________________ 9
Connecting the Water Supply____________________________________________________ 9
Dump Valve ________________________________________________________________ 10
Drain______________________________________________________________________ 10
ELECTRICAL CONNECTIONS ____________________________________________ 11
Wiring Connections______________________________________________________ 11
Wiring – Important Notes _________________________________________________ 11
Wiring Diagram_________________________________________________________ 12
COMMISSIONING_____________________________________________________ 13
Water Levels___________________________________________________________ 13
Bleed-off Rate__________________________________________________________ 13
Distribution Flow________________________________________________________ 13
Fan Operation__________________________________________________________ 14
Controls ______________________________________________________________ 14
Customer hand Over ____________________________________________________ 14
Unit_______________________________________________________________________ 15
Ductwork and general ________________________________________________________ 15
Site_______________________________________________________________________ 15
Customer Hand Over_________________________________________________________ 15
OPERATING INSTRUCTIONS _____________________________________________ 16
WARRANTY – AUSTRALIA ONLY _________________________________________ 17
SERVICE & MAINTENANCE _____________________________________________ 21
Bonaire Commercial / Industrial EAC
Page 2
Page 3

INSTALLATION, OPERATION & MAINTENANCE
Introduction
INTRODUCTION
Please take the time to fully read this Installation manual. Failure to follow these instructions may
result in injury to you and damage to the air conditioner or your customer’s property.
Installation of this Bonaire Evaporative Air Conditioner must conform to local building rules and
regulations, electrical and plumbing codes, Environmental Protection Authority (EPA) regulations,
and all applicable Australian Standards.
Should you not follow these instructions the unit warranty may be void. The cost of warranty would
then be the cost of the customer or the installer / dealer.
Refer to the tick box Commissioning Checklist to ensure you have covered all points when the
installation is complete.
DEALER RESPONSIBILITY
Training
It is the responsibility of all dealers to adequately train their staff to ensure the product
•
is correctly sized and specified.
• It is the responsibility of all dealers to ensure their installation teams / sub-contractors
are trained in the correct installation techniques of both the product and the ducting.
• Climate Technologies will provide technical assistance and training to the dealer as
required. “Train the trainer” will be an on going requirement by Climate Technologies.
Variations to Standard
• Where a variation to standard configuration has been requested or applied during
installation, it is the dealer’s responsibility to ensure such variations will not exceed the
design operating capabilities of the unit e.g. variation to construction materials, drive
requirements, system static etc.
Please Note:- Motor operating current must be verified on ALL UNITS as
detailed in the commissioning section under Fan Operation.
Legal & Statutory obligations
• It is the dealer / installer responsibility to comply with all codes, statutory and legal
requirements, state and council / shire by laws.
Safety and O.H.&S. Requirements
• It is the responsibility of the dealer / installer to insure the environment is safe for the
installer to carry out the installation.
• It is the responsibility of the dealer / installer to ensure safe access to the unit can be
achieved for service.
• It is the responsibility of the dealer / installer to ensure the roof is provided with access
footings and platform where the pitch of the roof is greater than acceptable standards.
• It is the responsibility of the dealer / installer to ensure harness anchorage points are
provided where the pitch of the roof is greater than acceptable standards. See
Australian Standard 1891.4:2000 Part 4 Selection use and maintenance, Table 2.1.
BEFORE COMMENCING
• Packaging – check there is no damage before removing packaging.
• Have you got all the system components?
• Have you got the right unit?
Bonaire Commercial / Industrial EAC
Page 3
Page 4

INSTALLATION, OPERATION & MAINTENANCE
Unit Installation
UNIT INSTALLATION
UNIT LOCATION CHECK LIST
• Place the unit well away from sources of smoke, dust and objectionable fumes so
that only clean, fresh outside air will be drawn into the unit. (Refer AS1668)
• Check the proposed location to ensure that building members are structurally
capable of supporting the operating weight of the air conditioner.
• Provide easy access to the unit(s) for service. It is the responsibility of the dealer
/ installer to ensure safe access to the unit can be obtained for servicing.
• Access to the unit and platform / safe roof area must be provided for safe
service.
• NOTE: The manufacturer and its agents reserve the right to refuse service
unless safety and accessibility to the unit can be guaranteed.
• The cost of any extra equipment required to provide access to the unit for
servicing is the responsibility of the owner.
EPA
Any issues with noise abidance, on an installation that contravenes local council or
EPA requirements and is not installed to the manufacturer’s specification will be the
responsibility of the dealer / installer.
P
RECAUTIONS
Please read this manual thoroughly as failure to do so could result in injury to you or
damage to the air conditioner and property.
Installation of the air conditioner must conform to local electrical, water supply and
environmental codes, rules and regulations and to applicable National Standards.
LOCATION AND ORIENTATION
Check the proposed unit location first to ensure that it is structurally capable of supporting
the weight of the unit. A level stand is required which must be capable of supporting the
operating weight of the unit, including wind loading. Check the technical data for
operating weight.
The preferred location for an evaporative air conditioner on a sloping or pitched roof is on
the side from which the prevailing winds come in the summer season.
Always locate the unit where it will receive a plentiful supply of fresh air and not in a
recess where it may be starved or where the air is polluted.
Keep the unit well away from exhaust fans and ducts. Never undersize the duct system.
Allow adequate access around the unit for maintenance. Provision must be made for
access to electricity, water supply and drains. High roofs need to be provided with
permanent access to carry out maintenance or warranty work.
NOTE: It is the owner’s responsibility to provide safe access to the unit. Climate
Technologies may refuse to do maintenance or warranty work if access is
unsafe. If any additional equipment is needed to provide access to the unit,
this will be provided (and paid for) by the owner.
Bonaire Commercial / Industrial EAC
Page 4
Page 5

INSTALLATION, OPERATION & MAINTENANCE
Unit Installation
DUCT CONNECTION DETAILS
700 Series C 900 Series C
1200, 1400, 1500 Series C
Bonaire Commercial / Industrial EAC
Page 5
Page 6
INSTALLATION, OPERATION & MAINTENANCE
Unit Installation
LIFTING THE UNIT
When lifting the units with a crane, fit the
lifting tabs supplied to the 4 corner posts
of the unit in the holes provided. Ensure
a spreader bar is used to lift vertically
from each lifting lug.
Where lifting with a forklift, ensure the
lifting tines are long enough to reach right
through the bottom of the unit pallet.
Extension fork tines may be required.
Should you fail to do so, the water
reservoir may get damaged.
OUNTING THE AIR CONDITIONER
M
1. A mounting stand must be provided with each
unit installed.
2. The stand must be designed to carry the
operating weight of the product. Where the units
are fitted on a roof, ensure the stand is installed
on a structurally sound section.
All installations must comply with the
relevant building codes, regulations and
engineering specifications for the building.
3. An insulator should be installed between the unit
base and stand to eliminate any possible
reaction between the metal stand and the
aluminium chassis.
4. Always ensure the unit is level.
5. Allow adequate access around the unit for
maintenance. Provision must be made for
access to electricity, water supply and drains.
High roofs need to be provided with permanent
access to carry out maintenance or warranty
work. It is the owner’s responsibility to provide
safe access to the unit. Climate Technologies
may refuse to do maintenance or warranty work
if access is unsafe. If any additional equipment
is needed to provide access to the unit, this must
be provided (and paid for) by the owner.
Bonaire Commercial / Industrial EAC
Page 6
Page 7
INSTALLATION, OPERATION & MAINTENANCE
Unit Installation
6. Down Discharge, Side Discharge and Top
Discharge units should have a minimum of
300mm from base of unit to bottom / ground level
for connecting plumbing.
7. Unit installation should have a minimum of
750mm clearance on all the service sides.
D
UCTWORK SYSTEM
It is essential that water cannot enter the building as
a result of inadequate sealing (caulking or flashing) of
the fixings, the ductwork system, system pipes and
wiring.
All duct designs and airflows must be
calculated by a qualified air conditioning
consultant or contractor in accordance with
normal good ducting practices.
Discharge duct design critical to the air
performance of the product. See diagram
below.
Where flexible ductwork is used, all bends
must have a minimum radius of 1.5 times
the diameter. All joins must be taped
airtight.
The last bend to each ceiling register
must be a smooth radius so that airflow is
even into the room.
Bonaire Commercial / Industrial EAC
Page 7
Page 8
INSTALLATION, OPERATION & MAINTENANCE
Water Connections
WATER CONNECTIONS
UNIT BASE LAYOUT
Series C 700 – 900
Series C 1200 – 1500
Bonaire Commercial / Industrial EAC
Page 8
Page 9

INSTALLATION, OPERATION & MAINTENANCE
Water Connections
WATER INSTALLATION
A permanent water supply is required to be connected to the float valve, for float valve
installation. Units have been type test certified to MP52, Spec101. Certificate No.8663.
700C – 1500C
Connecting the Water Supply
• The water supply pipe work and connection
to the air conditioner must be installed by a
licensed plumber and conform to all local
regulations. The ball valve connection is
inside the unit.
• Ensure copper inlet pipe is secured to
prevent movement of the float valve.
• The supply pipe should be copper pipe or
similar approved. A manual water-isolating
tap must be installed on the supply pipe near
the unit for ease of maintenance. Do not use
duo or non-return valves of any kind.
NOTE: Non return type valves can have
and effect on the operation of the
water solenoid valves. Lock up
and damage can be caused.
• Fit water supply tap close to the unit to assist in routine servicing.
• Before connecting the supply pipe flush it of any swarf or debris that may cause the
float valve to leak.
NOTE: In areas where water pipes freeze, provisions will be needed to drain
the water piping to prevent damage to the air conditioner.
Bonaire Commercial / Industrial EAC
Page 9
Page 10

INSTALLATION, OPERATION & MAINTENANCE
Water Connections
Dump Valve (Optional)
• Where a Dump Valve is to be fitted, the
solenoid MUST be installed in series on the
unit side of the water-isolating tap.
• Fit the black pressure tube between the
dump valve and the solenoid valve.
• The 24V solenoid will be supplied with an
in-line transformer for 240V connection.
• Connect the 240V solenoid transformer
leads in parallel with the pump
terminations.
Or
Connect to a timed / delay independent
circuit supplied by the installer.
• The tank in the unit will only fill once power
has been applied to the solenoid valve
transformer and pressure through the black
tube has closed the dump valve.
Drain
The combination drain/overflow pipe outlet must be connected to a drainpipe, which has
sufficient capacity to take the discharge of water from the reservoir. The pipe must
connect to a suitable waste point.
Note: Refer to local regulations to ensure discharge of drain / overflow water is in
accordance with statutory requirements.
40mm Version
Bonaire Commercial / Industrial EAC
50mm Version
Page 10
Page 11

INSTALLATION, OPERATION & MAINTENANCE
Electrical Connections
ELECTRICAL CONNECTIONS
WIRING CONNECTIONS
• Have a licensed Electrician install a dedicated circuit from the distribution board with a
separate circuit breaker for each unit installed.
• Unit connection isolating switch provided on the corner post of each unit.
WARNING: Multiple unit connections to a single wall control. Live wires
for the control circuit may not be isolated. Isolate the master unit.
• Circuit breaker selection and cable size must be made relevant to the current rating of
the motor and the circuit breaker motor kW specifications.
• Where the units are turned on and off in the high speed setting, a soft start timer must
be provided by the installer to start the unit on low speed.
• The control panel connection point must be easily accessible for service and
maintenance.
• Check to see if the voltage of the air conditioner is compatible with your electrical
system voltage. Check that there will not be excessive voltage drop, which will cause
the unit to run inefficiently or even cause motor burn out. ±5% of the motor
nameplate voltage is usually acceptable by motor manufacturers.
• Prior to completing the installation an electrician must check that the air conditioner is
operating correctly, and that the fan is rotating in the correct direction, on both
speeds.
• Replace all lids and covers.
• The manufacturer advises that they will not be held responsible for replacement of
parts or labour costs on electrical components which fail as a result of incorrect
wiring.
W
IRING – IMPORTANT NOTES
• A LICENSED ELECTRICIAN must carry out all electrical connection wiring to
the unit. It is the responsibility of the LICENSED ELECTRICIAN that the unit is
connected as per AS3000 (Wiring rules) and any local regulations and statutory
or legal requirements.
• Where units are clustered using a single wall control for multiple units, the unit
control box must be labelled indicating live wires inside. There will be voltage
in the control circuit if all units in the cluster are not isolated in the multiple
connections.
Bonaire Commercial / Industrial EAC
Page 11
Page 12

INSTALLATION, OPERATION & MAINTENANCE
Electrical Connections
WIRING DIAGRAM
700C – 1500C
Bonaire Commercial / Industrial EAC
Page 12
Page 13

INSTALLATION, OPERATION & MAINTENANCE
g
Commissionin
COMMISSIONING
WATER LEVELS
• Turn water on to unit and allow the reservoir to fill. The water should be 65mm to
70mm from the bottom of the tank.
• If a dump valve is fitted, turn the pump (or dump circuit) on to activate the solenoid.
Water pressure will be applied to the dump valve plunger via the black pressure pipe,
causing it to close allowing the reservoir to fill.
Note: the dump valve has minimum and maximum operational pressures of 100 kPa
to 1000kPa. Where pressures are below 100 kPa, the dump valve may not
close and the reservoir will not fill.
• Adjust float valve arm as required to set the water level (65 – 70mm).
• Fit Louvre panels and check for even wetting of the filter medium
B
LEED-OFF RATE
• All evaporative air conditioners need some
water bleed-off to prevent build-up of mineral
deposits in the system. The correct setting of
the bleed rate will ultimately govern the life of
the unit.
• Recommended bleed rates should be set at
approximately 5 litres per hour per 1000 litres
of air. Increased water hardness may require
a higher bleed rate and increased
maintenance.
• It is recommended to plumb the bleed off hose
through the overflow fitting and the bleed-off
away to a downpipe in situations where the
discharge may cause unsightly stains.
• To control the bleed-off rate rotate the bleed
dial clockwise for more water and anticlockwise for less water.
NOTE: It is the responsibility of the installer to set a correct bleed rate to suit
local conditions.
• If a dump valve is fitted and is set up for regular timed dumping periods during
operation; the bleed may not need to be set.
• If a dump valve is fitted and is only to be used for the purpose of a dry sump when not
in use, the bleed rate will have to be set for normal operation.
D
ISTRIBUTION FLOW
Generally the flow rate to the water distributors will be set to full. However there will be
some circumstances where water carry-over may occur. To stop water carry over where
there appears to be an excess of water on the filters, adjust the outer knob of the Dialflo
to clockwise to reduce the amount of water to the filters.
Note: Hold the bleed knob while adjusting the distribution flow, as this may go
out of adjustment when turning the distribution flow knob.
Bonaire Commercial / Industrial EAC
Page 13
Page 14

INSTALLATION, OPERATION & MAINTENANCE
g
Commissionin
FAN OPERATION
• Check that pulleys are correctly
aligned.
• Check the belt tension is correct.
Nominally 15 – 20mm
depression.
• Check bearings are tight on shaft
• Check bearings are packed with
grease.
• Set the fan running and check.
• Check that the air is being evenly
distributed through the ductwork.
• Make adjustments, as required, to any manual
air dampers that may be fitted.
• Fan Motor Current. Check the motor
operating current is not greater the rating plate
value.
o For systems with high statics and
non standard drive check motor
current. Where required, review
pulley requirements relative to the
system static. Where variable pitch
pulleys are fitted adjust accordingly.
o For systems with minimal static e.g.
straight dropper and plenums,
check motor current. A smaller
motor pulley to standard may be
required.
C
ONTROLS
Check all control functions are working
USTOMER HAND OVER
C
Instruct the customer in the use of the product.
• Controls
• Bleed off
• Venting the air via the side of the premises the wind is not blowing from.
• Maintenance Requirements
Hand over of the customer’s operational manual.
Bonaire Commercial / Industrial EAC
Page 14
Page 15

INSTALLATION, OPERATION & MAINTENANCE
g
Commissionin
You must complete, date and sign the ‘tick box’ checklist in the owner’s
warranty card. Use this copy to check the installation prior to completing the
owner’s documentation.
Unit
All equipment ordered by the
customer is installed.
The unit is level and secure.
The water supply line has been
flushed to clear swarf and debris and
is free of leaks.
The tank is free of foreign matter and
debris and the water isolating tap is
turned ON.
Water drainpipe work is completed
and sealed.
The water basin fills with water and
the float valve closes correctly when
the water level is 65 -75mm from the
bottom of the tank.
The water pump(s) operates correctly
when turned ON at the controller.
The Dialflow water bleed rate is
adjusted to suit local water
conditions.
The Dump Valve (option). The tank
drains correctly when unit turns off.
All Controller functions for the
appliance operate.
Fan motor current draw.
Ductwork and general
All ductwork is completed to plan,
correctly supported and airtight.
Air distribution checked, dampers are
adjusted and all outlets correctly
adjusted and wiped clean.
All roof penetrations are fully sealed
and watertight.
Man-hole cover replaced.
Site
All rubbish has been removed from
inside and on the roof.
Customer Hand Over
You have explained the following to the
customer.
The fan deck is correctly located and
the fan blade spins freely.
The mains and control wiring are
complete and the circuit breaker is
turned ON.
The fan operates correctly on all
speeds.
Water distribution is even with the
filter pads fitted and the air
conditioner operating pump and fan.
Bonaire Commercial / Industrial EAC
The operation of the Controller.
Adequate exhaust is required for the
effective cooling. Air exit areas
should be at least 0.5 square meters
per 1000 litres of air.
The operation of the bleed or
dumping system and it’s importance
to operate all the time
Maintenance requirements
Page 15
Page 16

INSTALLATION, OPERATION & MAINTENANCE
Operating Instructions
OPERATING INSTRUCTIONS
USING YOUR AIR CONDITIONER
Evaporative Air Conditioners must always function on 100% fresh outside air.
Therefore they require you to open or provide exhaust outlets in the space being cooled.
Such outlets may be provided by the opening of doors and/or windows in various rooms or
sections. They may also be provided by the installation of special exhaust grilles through
doors, walls or into the ceiling (attic) space of the building.
Where the building does not allow such easy exhaust provisions, there must be some kind of
mechanical ventilation installed, such as an exhaust fan which can extract approximately
80% of the air that the air conditioner is discharging.
Never allow conditioned air to exhaust into a closed space, it must always be allowed to
exhaust to the outside.
Generally, the higher the relative humidity, the higher the air quantity required from the air
conditioner. You should therefore control the speed of your air conditioner accordingly. On
very dry days the air conditioner will give maximum cooling and this will decrease as the
humidity increases.
The air distribution system in your building has been fitted with air outlet grilles and they
probably have adjustable louvre blades. You can adjust the blades yourself to create your
own pattern of air distribution in the space.
If you close the louvres too much you may get undesirable air noise.
PERATING INSTRUCTIONS
O
Turn on the water supply at the source and
make sure that the water isolation valve at
the unit is also turned on.
Turn on the electrical power at the source
and make sure that the isolating switch
outside the unit is turned on.
Turn COOL switch on.
It is recommended that you wait 10 minutes
for the pump to saturate the filter pads. A
longer period may be required where a dump
valve is fitted.
Select LOW fan speed, using the switch on
the control panel inside the building, then
switch unit ON. (It is recommended to start
the unit on LOW speed, and then switch to
HIGH if required).
At times, when the outside humidity is very
high, you may feel more comfortable using
ventilation system only. For ventilation
system only, turn the COOL switch off and
run the fan only. The fan speed can be
selected as described above.
Follow the above instructions about providing exhaust opening in the building. This is very
important. When unit is turned OFF the COOL switch should also be turned OFF as the
pump is independently switched.
Bonaire Commercial / Industrial EAC
Page 16
Page 17

INSTALLATION, OPERATION & MAINTENANCE
y
Warranty – Australia Onl
WARRANTY – AUSTRALIA ONLY
IMPORTANT:
Please read this warranty information and complete the Dealer/Product information on the following
page. KEEP this with your original purchase documents for any claim under warranty.
WARRANTY PROCEDURES:
Firstly refer to your owners manual to ensure you have followed the correct operating procedures of your
product, and refer to the trouble shooting guide to assist solving any problems you may have.
1. Read this warranty statement carefully befor e you request warranty service as items relation to
installation are not covered by this appliance warranty.
2. A proof of product purchase must be provided for warranty service, to validate the appliance is within the
manufacturer’s warranty periods.
3. This warranty is only for products and associated original controls for Climate Technologies
manufactured product.
4. Only an authorised Climate Technologies service provi der must carry out warranty servic e .
5. Statutory warranty is 12 months from date of purchase and all additional periods are classified as
manufacturer’s voluntary warranty.
Climate Technologies provides the following Manufacturers warranty on new product additional to
all implied warranties and other statutory rights which you may have under the Trade Practices Act
and similar State & Territory Laws, subject to the following terms and conditions.
TERMS AND CONDITIONS:
Conditions to Warranty
• Subject to the exclusions noted, Climate Technologies warrant the product for the period as prescribed
in the table following this statement to be free from Inherent defects in materials and workmanship for
functional and structural components.
• This product is only valid if the product is operated in accordance with the manufacturers instructions
• The appliance must not be modified or changed in any way.
• Your proof of purchase MUST be produced b efore free service will be provided.
• Travelling time and mileage are included within 30km of either your authorised Climate Technologies
dealer or service provider’s premises. Customers in areas other than the above are responsible for any
travelling time and mileage required to carry out warranty repairs.
• The product must be installed by a qualified person in the manner prescribed by local & statutory
regulations and to the manufacturer’s specifications.
• Service within the terms of this warranty wil l be recognised where we are satisfied that the ap pliance or
part was supplied within the relevant time limi ts. Documents of purchase and Dealer/Installer
information will assist in this process.
• Product fitness for purpose and overall system design / sizing is solely the responsibility of the dealer /
installer. This includes but is not limited to heat load calculations, air flow, system balancing, humidity,
water quality etc.
• The product must be installed in an easily and safe accessible area for service, appliances installed in
areas not easily and safely assessable, costs will be borne by the owner for access equi pment should
maintenance be required.
Bonaire Commercial / Industrial EAC
Page 17
Page 18

INSTALLATION, OPERATION & MAINTENANCE
y
Warranty – Australia Onl
DIY installation Warranty
• If the product has been installed as a DIY, a supply part only warranty will apply. Parts only will be
supplied free of charge on the return of the faulty part and the owner will be responsible for all labour
charges incurred for the part to be fitted by a qualified person. Labour warranty as prescribe d in the
following table is void in this situation.
Remote Location Warranty
• If the product has been installed outside the Climate Technologies service network, a supply part only
warranty will apply. Parts only will be supplied free of charge on the return of the faulty part and the
owner will be responsible for all labour charges incurred for the part to be fitted by a quali fied person.
Labour warranty as prescribed in the following table is void in this situation.
Exclusions to Warranty.
• Consumable items subject to wear and t ear such as filter pads, drive belts and bearings are not covered
by this warranty.
• Components used as part of the installation such as grilles, filters, ducting, fittings, zone motors and
consumer services pipe work are warranted from your place of purchase and not covered by this
warranty.
• Damage caused by elements such as w ind, rain, lighting, floods etc along with power spiking and
brownouts are not considered defective material or workmanship and as such are not co nsidered
warranty.
• No responsibility will be accepted for outside elements such as pests, animals, pets and vermin that may
cause damage to the unit.
• Harsh environmental situations such as salt air that may cause cabinet damage / rusting can not be
considered warranty.
• The manufacturer does not accept liability or any claims for dam age to building contents, carpet, walls,
ceilings, foundations or any other consequential loss either direct or indirect. Damage resulting from,
power spikes, incorrect operation, incorrect installation, incorrect maintenance is also not covered.
• All warranties are NOT transferable.
Conditions Where Warranty May Be Void.
• If there is no certificate of compliance for plumbing, e lectrical or refrigeration as required by State &
Territory Laws. Climate Technologies reserves the right to r efuse service on non-compliant installations.
• The defective operation of the appliance that is due to failure of electricity, gas, water or refrigerant gas
supplied.
• Defects are caused by neglect, incorrect application, abuse or by accidental damage of th e appliance.
• An unauthorised person has attempted to repair the appliance.
• A situation arises referenced in the trouble-shooting guide.
• A charge will be made for work done or a service call where there is nothing wron g with the appliance.
Bonaire Commercial / Industrial EAC
Page 18
Page 19

INSTALLATION, OPERATION & MAINTENANCE
y
Warranty – Australia Onl
PROOF OF PURCHASE
It is important that the name of the Dealer or Retailer from whom y ou purchased your prod uct and the name of
the installer are recorded on this page. The installer is responsible for the correct installation, start up and
demonstrating the operation of this product. The Dealer or retail er is also responsible for issuing the relevant
certificates of compliance for the electrical co nnections. (These may differ from state to state)
Please attach your proof of purchase here. Your receipt is your warranty and will be required to validate any
warranty.
DEALER PRODUCT INFORMATION:
Dealer/Retailer:
Dealer Address:
Dealer Phone Number:
Unit Model Number:
Serial No:
Date Installed:
Installed by:
Date Commissioned:
Commissioned by:
Signature:
PERIODS OF WARRANTY – YEARS BY PRODUCT AND APPLICATION:
Unit Components
Corrosion on Cabinet 2 2
Structural Guarantee 2 2
** All other components 2 2
Parts Labour
** Consumables e.g. filter pads, “V” belts and bearings are not covered by this warranty
Bonaire Commercial / Industrial EAC
Page 19
Page 20

INSTALLATION, OPERATION & MAINTENANCE
y
Warranty – Australia Onl
AGED NEW PRODUCT WARRANTIES
For a new product warranty to apply, a product needs to be purchased and installed within 3 years of the
manufacturing date by the original purchaser.
Product that is aged as the result of extended storage or being used for demonstration purposes, the following
warranty conditions will apply.
• For a product that is greater than 3 years and less than 5 years old from date of manufacture the statutory warranty
will apply and any voluntary warranty originally supplied will be reduced by 1 year
•
For a product that is greater than 5 years of age from date of manufacture, the statutory warranty will apply to
electrically functioning components only. All other components being cabinets, louvres, filters etc. will not be
covered by warranty.
WARRANTY ON REPLACEMENT PARTS:
Parts replaced under warranty are warranted for the balance of the original warranty period.
ERVICE CENTRES:
S
Only qualified service personnel should conduct any service work carried out on your ducted air conditioning
system. It is important that periodical service is carried out on your product to ensure your will receive the
efficiency benefits the product provides.
For Metro Service only ring the numbers below.
South Australia/ (08) 8307 5230
Northern Territory
New South Wales / (03) 8795 2457
Australian Capital Territory
Western Australia (08) 9454 1000
Victoria/Tasmania (03) 8795 2456
Queensland (03) 8795 2457
Bonaire Commercial / Industrial EAC
Page 20
Page 21

INSTALLATION, OPERATION & MAINTENANCE
Service & Maintenance
SERVICE & MAINTENANCE
PROBLEM SOLVING
PROBLEM PROBABLE CAUSE SUGGESTED REMEDY
•
Undersized air conditioner. • Replace with larger air conditioner.
•
Clogged or dirty filter pads. • Clea n or replace pads.
Inadequate
Cooling
•
Insufficient air discharge openings
or inadequate exhaust from area
being cooled, causing high
• Check water distribution system for
possible obstruction in tubing. Check
pump.
humidity and discomfort.
•
Excessive Ambient Humidity (see
also item above re-inadequate
exhaust).
• On days during summer when the
ambient humidity is very high, the air
conditioner will not reduce
temperature as mush as on drier
days. There is no remedy except to
shut off the pump.
•
Fan turning backwards. • Re-connect motor for correct rotation.
•
Fan running too slowly. • Check motor amps. If below
nameplate amperage, re-adjust motor
pulley (sheave) to increase fan
speed.
•
Belt slipping. • Tighten belt by re-adjusting position
of motor. Replace belt if worn.
•
Circuit breaker tripped or fuse
blown.
•
Loose electrical connections. • Check all electrical connections.
• Reset circuit breaker or broken fuse.
Check circuit breaker size correct
Fan fails to
start
Belt slipping or
wearing
excessively
•
Defective control switch. • Replace.
•
Motor burnt out. • Replace.
•
Belt or pulley loose. • Tighten belt and pulleys.
•
Belt broken or missing. • Install new belt
•
Belts too tight. • Adjust belt tension.
•
Belt loose. • Tighten belt.
•
Pulleys out of line. • Align pulleys.
•
Moisture getting on belt. • Stop any water leaks. Adjust Dialflo to
stop water carry over.
•
Worn belts. • Replace belt
•
Worn pulleys. • Replace pulleys.
Bonaire Commercial / Industrial EAC
Page 21
Page 22

INSTALLATION, OPERATION & MAINTENANCE
Service & Maintenance
PROBLEM PROBABLE CAUSE SUGGESTED REMEDY
•
Pump motor failure. • Replace complete pump.
Pump fails to
operate
•
Loose electrical connections. • Tighten electrical connectio ns.
•
Pump control switch faulty. • Replace pump control switch.
•
Insufficient water in pan. • Adjust float level.
Pump runs but
•
does not
circulate water;
Pump strainer blocked. • Clean strainer.
•
Blocked water in tubing. • Clean the tubing.
Pump runs but
pads lack water
Foreign matter lodge in the water
• Clean out foreign matter.
•
distribution piping.
•
Fan rubbing on housing. • Re-position fan.
•
Fan out of balance due to dirt, etc. • Clean fan.
Noisy air
conditioner
Continuous
overflow of
water
Water into the
duct work
Unpleasant
odour
•
Air conditioner delivering more air
than needed.
•
Belt ‘squealing’. • Tighten belt by adjusting motor. Apply
• Adjust ducting baffles to reduce airflow
or balance flow to outlets.
belt dressing to belt. In some cases it
may be necessary to replace belt.
Check the pulley alignment
•
Inadequately sized ducts or grilles. • Increase size or add additional ducts or
grilles.
•
Float valve adjustment incorrect. • Adjust float valve.
•
Loose water tubing connections. • Tighten all connections.
•
Break in water tubing.
•
Too much water from the pump
• • Replace any cracked or broken tubing.
Adjust the dialflo outer knob to reduce
the flow of water to the filter pads.
•
Air conditioner located near source
of unpleasant odour.
• Remove source of odour or place a
barrier between air conditioner and
source of odour.
•
Algae in pan water. • Drain pan and clean thoroughly. Fill
with fresh water. Install new pads.
•
Pads remain wet after shut down. • Allow fan to run for about 10 minutes
Rapid formation
of white
•
High mineral content of supply
water.
deposits
Bonaire Commercial / Industrial EAC
after pump is shut off to dry out pads.
• Increase the bleed rate. Fit a dump
valve and timer for cyclic dumping.
Page 22
Page 23

INSTALLATION, OPERATION & MAINTENANCE
Service & Maintenance
REGULAR MAINTENANCE
A qualified service technician should conduct any service work carried out on your
commercial cooling product. It is important that periodical service is carried out on your
product to ensure your will receive the efficiency benefits the product provides.
Note: Local regulations and codes may require the owner to carry out and record
specific maintenance in a log book e.g. cleaning and draining the
evaporative cooler sump.
Maintenance
1. Turn on the electric power supply.
2. Turn on water isolation valve
3. Remove the winter cover if fitted.
4. Remove the filter frames and clean filters with water
5. Replace filter pads where required
The frequency depends on the daily use of the air conditioner, the state of the
environment and the quality of the water. Each of these factors affects the life of the
pad.
Please note that the filter pads supplied, being CELdek or aspen, have been selected
to give the highest possible cooling performance. Use only Climate Technologies
genuine replacement filters. The manufacturer is not responsible for the performance
of the air conditioner when alternative materials are used.
Note: Filter pads are a consumable and are therefore not covered by warranty
6. Flush and clean the reservoir
7. Check the water level and reset the float arm setting if required.
8. Check the pump operation and clean the filter basket
9. Check the fan bearings.
- Check there is no bearing wear on the shaft and that the bearings are tight on the
shaft.
- Grease the fan bearings. Fan bearings will require regular checking and greasing
subject to the duty cycle e.g. 24/7 operation - review monthly.
Note: Bearings are a consumable and are therefore not covered by warranty
10. Check the fan belt tension and adjust if necessary. To adjust the belts:
- Remove the belts from the drive.
- Mark the motor tray location on the chassis.
- Loosen the motor tray bolts on each side, and slide the tray back in 5mm
increments.
- Tighten the motor tray bolts on each side and refit the vee belts.
- Check the belt tension and pulley alignment. The belt should only depress
approximately 15-20mm in the centre of its span.
Note: Vee belts are a consumable item and are not covered by warranty
Bonaire Commercial / Industrial EAC
Page 23
Page 24

www.climatetechnologies.com.au
Manufactured by
Climate Technologies
ABN 13 001 418 042
P/N 1-M00-05-907/E
 Loading...