

Page 1
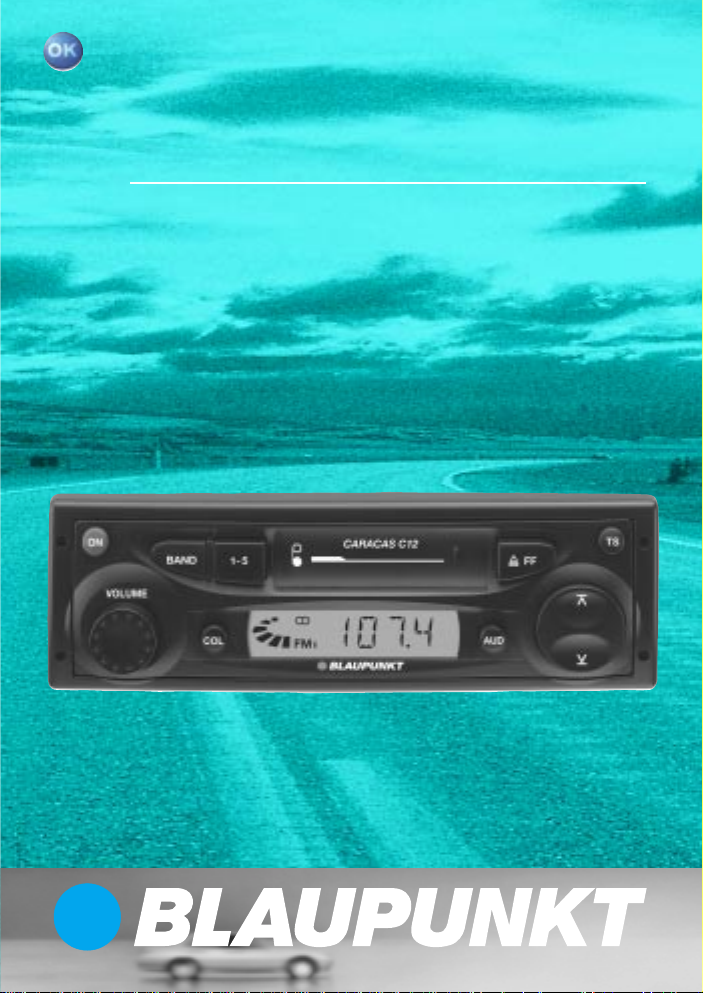
Radio / Cassette
Caracas C12
Operating instructions
http://www.blaupunkt.com
Page 2

Bitte aufklappen
Open here
Ouvrir s.v .p.
Aprite la pagina
Hier openslaan a.u.b.
Öppna
Por favor, abrir
Favor abrir
Åbn her
2
Page 3
DEUTSCH
ENGLISH
FRANÇAIS
2
1
3
46
11
10
5
9
7
ITALIANO
NEDERLANDS
SVENSKA
8
ESPAÑOL
PORTUGUÊS
DANSK
3
Page 4

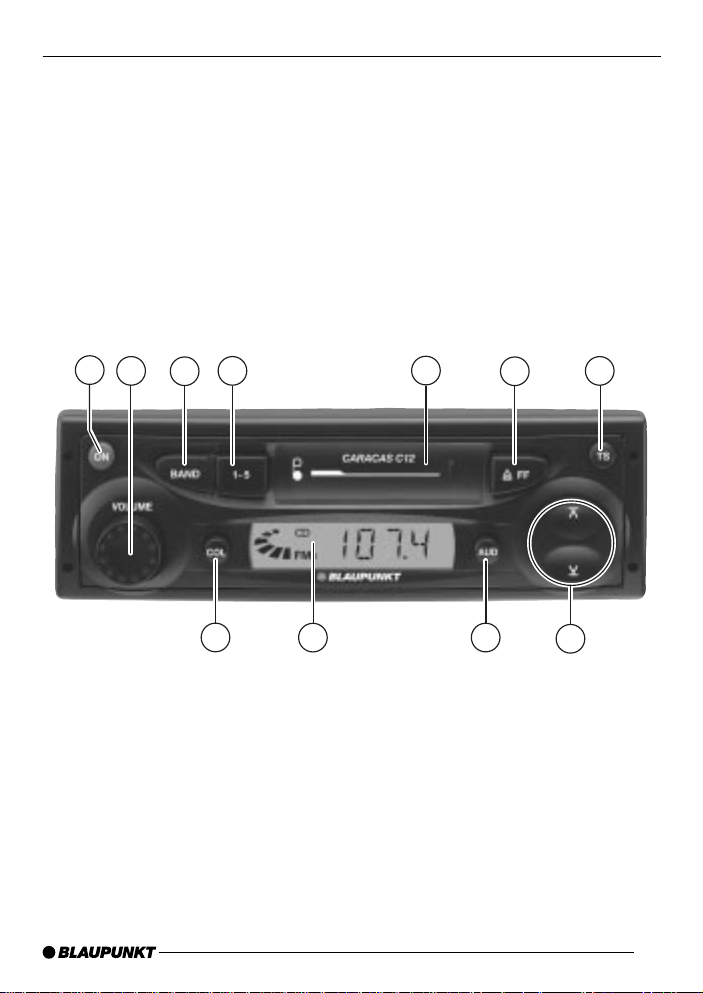
CONTROLS NOTES AND ACCESSORIES
1 ON Button, to switch the unit on/
off
2 Volume control
3 BAND button, to select the FMI,
FMII and FMT memory banks,
and the MW and LW wavebands
4 1-5 button, to select a memory
location
5 Cassette compartment
6 FF button
ding and cassette eject
7 TS button, to start the Travelsto-
re function
8 Arrow buttons
9 AUD button, to adjust the bass,
treble, balance and fader
: Display
; COL button, to change the co-
lour of the display illumination
, fast tape forwar-
Notes and accessories .......... 11
Road safety ................................... 11
Installation ..................................... 11
Accessories .................................. 11
Basic functions ...................... 12
Switching on/off ............................ 12
Adjusting the volume ..................... 12
Adjusting the display...................... 12
Radio mode ............................ 12
Switching to radio mode ................ 12
Selecting the waveband /
memory bank................................. 12
Tuning into a station ....................... 12
Storing stations ............................. 13
Storing stations automatically
(Travelstore) .................................. 13
Listening to stored stations ............ 13
Cassette mode ....................... 14
Switching to cassette mode ........... 14
Fast-forward seek mode ................ 14
Ejecting the cassette ..................... 14
Sound and volume
distribution settings ............... 14
Adjusting the bass ......................... 14
Adjusting the treble ....................... 14
Setting the left/right volume
distribution (balance) ..................... 14
Setting the front/back volume
distribution (fader) ......................... 15
Specifications ........................ 15
Installation instructions .......... 58
10
Page 5

NOTES AND ACCESSORIES
Notes and accessories
Thank you for deciding to use a Blaupunkt product. We hope you enjoy using this new piece of equipment.
Please read these operating instructions before using the equipment for
the first time.
The Blaupunkt editors are constantly
working on making the operating instructions clearer and easier to understand. However, if you still have any
questions on how to operate the equipment, please contact your dealer or the
telephone hotline for your country . You
will find the telephone numbers printed
at the back of this booklet.
We provide a manufacturer guarantee
for our products bought within the European Union. You can view the guarantee conditions at www.blaupunkt.de
or ask for them directly at:
Blaupunkt GmbH,
Hotline,
Robert Bosch Str. 200,
D-31 139 Hildesheim
Road safety
Road safety has absolute priority . Only operate your car radio if the
road and traffic conditions allow you
to do so. Familiarise yourself with the
device before setting off on your journey.
You should always be able to hear
police, fire and ambulance sirens
from afar. For this reason, set the
volume of whatever you are listening to at a reasonable level.
Installation
If you want to install your car radio yourself, please read the installation and
connection instructions that follow these
operating instructions.
Accessories
Only use accessories approved by Blaupunkt.
DEUTSCH
ENGLISH
FRANÇAIS
ITALIANO
NEDERLANDS
SVENSKA
11
ESPAÑOL
PORTUGUÊS
DANSK
Page 6

BASIC FUNCTIONS RADIO MODE
Basic functions
Switching on/off
There are various ways of switching the
unit on/off:
Switching on/off using the vehicle
ignition
If the unit is correctly connected to the
vehicle’s ignition and it was not switched
off using button 1, it will switch on/off
simultaneously with the ignition.
Switching on/off using button
➮ To switch the unit on, press button
1.
The unit switches on.
➮ To switch the unit off, press button
1.
The unit switches off.
Adjusting the volume
The volume can be adjusted in stages
from 0 (off) to 50 (maximum).
➮ To increase the volume, turn the
volume control 2 to the right.
➮ To decrease the volume, turn the
volume control 2 to the left.
Adjusting the display
You can switch the colour of the display
illumination between green and amber.
➮ Press the COL button ; to switch
between the colours.
11
1
11
Radio mode
Switching to radio mode
If you are in cassette mode,
➮ press the FF button 6 until it
goes no further.
The cassette is ejected and the device
switches to radio mode.
Selecting the waveband /
memory bank
This unit can receive programmes
broadcast over the FM frequency range
as well as the MW and LW (AM) ranges.
There are three memory banks available for the FM range and one for each
of the MW and L W ranges.
Five stations can be stored in each
memory bank.
To switch between the memory banks
or wavebands,
➮ keep pressing the BAND button 3
until the required memory bank or
waveband appears in the display.
Tuning into a station
There are various ways of tuning into a
station.
Automatic seek tuning
➮ Press and hold down the or
button 8 until automatic seek tuning begins.
The unit tunes into the next receivable
station.
12
Page 7

RADIO MODE
Tuning into stations manually
You can also tune into stations manually .
➮ Briefly press the or button 8.
Storing stations
Storing stations manually
➮ Select the required memory bank,
i.e. FM1, FM2, FMT, or one of the
MW or L W wavebands.
➮ Use the 1-5 button 4 to select the
memory location where you want
to store the station.
➮ Tune into the required station.
➮ Press the 1-5 button 4 for longer
than two seconds.
Storing stations automatically
(Travelstore)
You can automatically store the five stations with the strongest reception in the
region (only FM). The stations are stored
in the FMT memory bank.
Note:
Any stations that were previously stored
in this memory bank are deleted in the
process.
➮ Press the TS button 7.
The station storing procedure begins.
“TS” appears in the display. Once the
procedure finishes, all the stations
stored in the FMT memory bank are
played briefly .
Listening to stored stations
➮ Select the memory bank or wave-
band.
➮ Repeatedly press the 1-5 station
button 4 until the required memory location is displayed.
DEUTSCH
ENGLISH
FRANÇAIS
ITALIANO
NEDERLANDS
SVENSKA
ESPAÑOL
13
PORTUGUÊS
DANSK
Page 8

CASSETTE MODE
SOUND AND VOLUME
DISTRIBUTION SETTINGS
Cassette mode
You can use this device to play standard audio cassettes.
Switching to cassette mode
➮ Insert the cassette with the open
side facing towards the left into the
drive until you feel it click into place.
The cassette starts playing.
Fast-forward seek mode
To start fast-forward seek mode,
➮ press the FF button 6 until you
feel it click into place.
Stopping seek mode
➮ Press the FF button 6 again
until you feel it unlatch.
Ejecting the cassette
➮ Press the FF button 6 until it
goes no further.
The cassette is ejected and the device
switches to radio mode.
Sound and volume
distribution settings
Adjusting the bass
➮ Press the AUD button 9.
“BA” appears in the display.
➮ Press the or button 8 to ad-
just the bass.
When you have finished making your
changes,
➮ wait 6 seconds for the settings to
be saved.
Adjusting the treble
➮ Keep pressing the AUD button 9
until “TR” appears in the display .
➮ Press the or button 8 to ad-
just the treble.
When you have finished making your
changes,
➮ wait 6 seconds for the settings to
be saved.
Setting the left/right volume
distribution (balance)
➮ Keep pressing the AUD button 9
until “BL” appears in the display .
➮ Press the or button 8 to ad-
just the balance (right/left).
When you have finished making your
changes,
➮ wait 6 seconds for the settings to
be saved.
14
Page 9

SOUND AND VOLUME
DISTRIBUTION SETTINGS
SPECIFICATIONS
Setting the front/back volume
distribution (fader)
➮ Keep pressing the AUD button 9
until “FA” appears in the display.
➮ Press the or button 8 to ad-
just the fader (front/back).
When you have finished making your
changes,
➮ wait 6 seconds for the settings to
be saved.
Specifications
Amplifier
Output power: 4 x 5 watts sine
in accordance with
DIN 45 324 at 14.4 V
4 x 12 watts max.
power
Tuner
Wavebands:
FM: 87.5 - 108 MHz
MW: 522 - 1,620 kHz
LW: 144 - 290 kHz
FM frequency response:
35 - 15,000 Hz
Cassette
Frequency response:
50 - 12,500 Hz
DEUTSCH
ENGLISH
FRANÇAIS
ITALIANO
NEDERLANDS
SVENSKA
Subject to changes!
ESPAÑOL
PORTUGUÊS
DANSK
15
Page 10

Service-Nummern / Service numbers / Numéros du service aprèsvente / Numeri del servizio di assistenza / Servicenummers /
Telefonnummer för service / Números de servicio / Número de
serviço / Servicenumre
Country: Phone: Fax: WWW:
Germany (D) 0180-5000225 05121-49 4002 http://www.blaupunkt.com
Austria (A) 01-610 390 01-610 393 91
Belgium (B) 02-525 5454 02-525 5263
Denmark (DK) 44 898 360 44-898 644
Finland (FIN) 09-435 991 09-435 99236
France (F) 01-4010 7007 01-4010 7320
Great Britain (GB) 01-89583 8880 01-89583 8394
Greece (GR) 0800-550 6550 01-576 9473
Ireland (IRL) 01-4149400 01-4598830
Italy (I) 02-369 6331 02-369 6464
Luxembourg (L) 40 4078 40 2085
Netherland (NL) 023-565 6348 023-565 6331
Norway (N) 66-817 000 66-817 157
Portugal (P) 01-2185 00144 01-2185 11111
Spain (E) 902-120234 916-467952
Sweden (S) 08-7501500 08-7501810
Switzerland (CH) 01-8471644 01-8471650
Czech. Rep. (CZ) 02-6130 0441 02-6130 0514
Hungary (H) 01-333 9575 01-324 8756
Poland (PL) 0800-118922 022-8771260
Turkey (TR) 0212-3350677 0212-3460040
USA (USA) 800-2662528 708-6817188
Brasil
(Mercosur) (BR) +55-19 3745 2769 +55-19 3745 2773
Malaysia
(Asia Pacific) (MAL) +604-6382 474 +604-6413 640
Blaupunkt GmbH
03/02 K7/VKD 8 622 403 262
 Loading...