

Page 1

Orlando
Help
Version: 7.0
To find the latest user guides, visit www.blackberry.com/docs/smartphones.
Page 2

SWD-1456661-0628021655-001
Page 3

Contents
Quick Help.......................................................................................................................................................................................................... 6
Getting started: Your smartphone..................................................................................................................................................................... 6
How to: Top 10................................................................................................................................................................................................... 19
Tips: Top 10........................................................................................................................................................................................................ 22
Personalize: Top 10............................................................................................................................................................................................ 29
Troubleshooting: Top 10.................................................................................................................................................................................... 32
Tips and shortcuts.............................................................................................................................................................................................. 37
Tips: Doing things quickly................................................................................................................................................................................... 37
Tips: Extending battery life................................................................................................................................................................................. 38
Tips: Finding apps............................................................................................................................................................................................... 39
Tips: Freeing and conserving storage space....................................................................................................................................................... 39
Tips: Updating your software............................................................................................................................................................................. 40
Tips: Keeping your information safe.................................................................................................................................................................. 41
Tips: Managing indicators.................................................................................................................................................................................. 42
Phone shortcuts................................................................................................................................................................................................. 42
Typing shortcuts for the touch screen keyboard................................................................................................................................................ 43
Media shortcuts................................................................................................................................................................................................. 43
Troubleshooting: Shortcuts................................................................................................................................................................................ 44
Phone................................................................................................................................................................................................................. 45
How to: Phone.................................................................................................................................................................................................... 45
Tips: Phone......................................................................................................................................................................................................... 60
Personalize: Phone............................................................................................................................................................................................. 61
Troubleshooting: Phone..................................................................................................................................................................................... 63
Voice commands................................................................................................................................................................................................ 67
How to: Voice commands................................................................................................................................................................................... 67
Troubleshooting: Voice commands.................................................................................................................................................................... 69
Messages............................................................................................................................................................................................................ 70
Email................................................................................................................................................................................................................... 70
Text messages.................................................................................................................................................................................................... 95
PIN messages...................................................................................................................................................................................................... 107
Attachments....................................................................................................................................................................................................... 115
Security options for messages............................................................................................................................................................................ 118
Files and attachments........................................................................................................................................................................................ 132
How to: Files....................................................................................................................................................................................................... 132
Troubleshooting: Files........................................................................................................................................................................................ 138
Page 4

Media................................................................................................................................................................................................................. 139
Music.................................................................................................................................................................................................................. 139
Podcasts............................................................................................................................................................................................................. 149
Videos................................................................................................................................................................................................................. 158
Video camera..................................................................................................................................................................................................... 167
Camera............................................................................................................................................................................................................... 174
Pictures............................................................................................................................................................................................................... 182
Voice notes......................................................................................................................................................................................................... 192
Ring tones, sounds, and alerts............................................................................................................................................................................ 201
How to: Ring tones, sounds, and alerts.............................................................................................................................................................. 201
Troubleshooting: Ring tones, sounds, and alerts............................................................................................................................................... 204
Browser.............................................................................................................................................................................................................. 205
How to: Browser................................................................................................................................................................................................. 205
Tips: Browser...................................................................................................................................................................................................... 216
Personalize: Browser.......................................................................................................................................................................................... 216
Troubleshooting: Browser.................................................................................................................................................................................. 216
Calendar............................................................................................................................................................................................................. 218
Getting started: Calendar................................................................................................................................................................................... 218
How to: Calendar................................................................................................................................................................................................ 219
Tips: Calendar..................................................................................................................................................................................................... 226
Personalize: Calendar......................................................................................................................................................................................... 226
Troubleshooting: Calendar................................................................................................................................................................................. 227
Contacts.............................................................................................................................................................................................................. 229
Getting started: Contacts................................................................................................................................................................................... 229
How to: Contacts................................................................................................................................................................................................ 230
Personalize: Contacts......................................................................................................................................................................................... 238
Troubleshooting: Contacts................................................................................................................................................................................. 239
Clock................................................................................................................................................................................................................... 240
Getting started: Clock......................................................................................................................................................................................... 240
How to: Clock..................................................................................................................................................................................................... 241
Personalize: Clock............................................................................................................................................................................................... 244
Troubleshooting: Clock....................................................................................................................................................................................... 244
Tasks and memos............................................................................................................................................................................................... 246
Create a task or memo....................................................................................................................................................................................... 246
Send a task or memo.......................................................................................................................................................................................... 246
Page 5

Change or delete a task or memo...................................................................................................................................................................... 246
Change the status of a task................................................................................................................................................................................ 246
Hide completed tasks......................................................................................................................................................................................... 247
Show tasks in the calendar................................................................................................................................................................................. 247
Synchronizing tasks and memos......................................................................................................................................................................... 247
About categories................................................................................................................................................................................................ 249
Categorize a contact, task, or memo.................................................................................................................................................................. 249
Create a category for contacts, tasks, or memos............................................................................................................................................... 249
Turn off the prompt that appears before you delete items............................................................................................................................... 250
Typing................................................................................................................................................................................................................. 251
How to: Typing................................................................................................................................................................................................... 251
Tips: Typing......................................................................................................................................................................................................... 256
Personalize: Typing............................................................................................................................................................................................. 257
Troubleshooting: Typing..................................................................................................................................................................................... 259
Keyboard............................................................................................................................................................................................................ 261
How to: Keyboard............................................................................................................................................................................................... 261
Troubleshooting: Keyboard................................................................................................................................................................................ 262
Language............................................................................................................................................................................................................ 263
How to: Language............................................................................................................................................................................................... 263
Troubleshooting: Language................................................................................................................................................................................ 264
Screen display..................................................................................................................................................................................................... 265
How to: Screen display....................................................................................................................................................................................... 265
Personalize: Screen display................................................................................................................................................................................ 269
Troubleshooting: Display.................................................................................................................................................................................... 270
GPS technology................................................................................................................................................................................................... 272
Getting started: GPS technology........................................................................................................................................................................ 272
How to: GPS technology..................................................................................................................................................................................... 272
Troubleshooting: GPS technology...................................................................................................................................................................... 274
Compass............................................................................................................................................................................................................. 275
Getting started: Compass................................................................................................................................................................................... 275
How to: Compass................................................................................................................................................................................................ 275
Personalize: Compass......................................................................................................................................................................................... 276
Troubleshooting: Compass................................................................................................................................................................................. 276
Maps................................................................................................................................................................................................................... 278
How to: Maps..................................................................................................................................................................................................... 278
Page 6

Troubleshooting: Maps...................................................................................................................................................................................... 282
Applications........................................................................................................................................................................................................ 284
Getting started: Applications............................................................................................................................................................................. 284
How to: Applications.......................................................................................................................................................................................... 285
Tips: Applications............................................................................................................................................................................................... 288
Troubleshooting: Applications........................................................................................................................................................................... 289
BlackBerry Device Software............................................................................................................................................................................... 294
How to: BlackBerry Device Software.................................................................................................................................................................. 294
Troubleshooting: BlackBerry Device Software................................................................................................................................................... 297
Manage Connections.......................................................................................................................................................................................... 298
Mobile network.................................................................................................................................................................................................. 298
Wi-Fi technology................................................................................................................................................................................................ 306
Manage Connections.......................................................................................................................................................................................... 317
Mobile network.................................................................................................................................................................................................. 317
WLAN technology............................................................................................................................................................................................... 324
Bluetooth technology......................................................................................................................................................................................... 335
Getting started: Bluetooth technology.............................................................................................................................................................. 335
How to: Bluetooth technology........................................................................................................................................................................... 336
Troubleshooting: Bluetooth technology............................................................................................................................................................ 343
NFC technology.................................................................................................................................................................................................. 345
Getting started: NFC technology........................................................................................................................................................................ 345
How to: NFC technology..................................................................................................................................................................................... 346
Troubleshooting: NFC technology...................................................................................................................................................................... 348
Power and battery.............................................................................................................................................................................................. 349
Getting started: Power and battery................................................................................................................................................................... 349
How to: Power and battery................................................................................................................................................................................ 349
Storage space and media cards.......................................................................................................................................................................... 352
How to: Storage space and media cards............................................................................................................................................................ 352
Tips: Storage space and media cards................................................................................................................................................................. 355
Troubleshooting: Storage space and media cards............................................................................................................................................. 356
Search................................................................................................................................................................................................................. 357
How to: Search................................................................................................................................................................................................... 357
Tips: Search........................................................................................................................................................................................................ 360
Troubleshooting: Search.................................................................................................................................................................................... 361
Page 7

SIM card.............................................................................................................................................................................................................. 362
Getting started: SIM card................................................................................................................................................................................... 362
How to: SIM card................................................................................................................................................................................................ 362
Security............................................................................................................................................................................................................... 365
Getting started: Security.................................................................................................................................................................................... 365
How to: Security................................................................................................................................................................................................. 367
Tips: Security...................................................................................................................................................................................................... 396
Troubleshooting: Security.................................................................................................................................................................................. 397
Service books and diagnostic reports................................................................................................................................................................. 399
Accept, delete, or restore a service book........................................................................................................................................................... 399
Run a diagnostic report...................................................................................................................................................................................... 399
View, submit, or delete a diagnostic report....................................................................................................................................................... 399
Set a default recipient for diagnostic reports..................................................................................................................................................... 400
I can't run or submit a diagnostic report............................................................................................................................................................ 400
Find your smartphone model number and version of the BlackBerry Device Software.................................................................................... 400
Synchronization.................................................................................................................................................................................................. 401
How to: Synchronization.................................................................................................................................................................................... 401
Troubleshooting: Synchronization..................................................................................................................................................................... 404
Accessibility options........................................................................................................................................................................................... 406
Getting started: Accessibility.............................................................................................................................................................................. 406
How to: Accessibility.......................................................................................................................................................................................... 406
Calculator........................................................................................................................................................................................................... 411
Use the calculator............................................................................................................................................................................................... 411
Convert a measurement..................................................................................................................................................................................... 411
Glossary.............................................................................................................................................................................................................. 412
Legal notice........................................................................................................................................................................................................ 417
Glossary.............................................................................................................................................................................................................. 422
Legal notice........................................................................................................................................................................................................ 427
Page 8

RIM Strictly Confidential
Quick Help
Getting started: Your smartphone
Find out about apps and indicators, and what the keys do on your BlackBerry® smartphone.
New in this release
This release includes a number of exciting new features and services, as well as some enhancements to existing features.
BlackBerry ID
A BlackBerry® ID gives you convenient access to multiple BlackBerry products and services. After you create a BlackBerry ID,
you can use a single email address and password to log in to any BlackBerry product that supports BlackBerry ID. With
BlackBerry ID, you can manage apps that you downloaded from the BlackBerry App World™ storefront and keep apps you
downloaded when you switch smartphones. For more information, see About the BlackBerry ID, 7.
Voice enabled search
Looking for something? You can now use your voice to search for help, contacts, documents, pictures, videos, and more on
your BlackBerry smartphone and on the Internet. For more information, see Search for an item using voice enabled search,
357.
Home screen customization
Customize the Home screen even more by hiding panels you don't use regularly, and hiding icons in specific panels or all
panels. For more information, see Show or hide a Home screen panel, 16 and Show, hide, or find an application icon, 16.
Compass application
Easily determine your direction in relation to the Earth's magnetic poles or to true north. You can also use the compass with
location-based applications (such as the Maps application) to find directions based on coordinates. For more information, see
Compass, 275.
NFC technology
NFC technology allows you to quickly exchange information between your smartphone and smart accessories, smart payment
terminals, smart access points, and smart tags. When you tap the NFC smart tag reader of your smartphone against a smart
tag, you can see information such as web addresses, coupons, graphics, media files, and event details. For more information,
see NFC technology, 345.
Touch-free call answering
You don't need to use your hands to answer calls when you're using a Bluetooth® enabled headset or a regular headset! Now
you can set your smartphone to answer calls automatically after 5 seconds. For more information, see Change how you answer
calls with a headset, 58.
Bluetooth enhancements
6
Page 9

RIM Strictly Confidential
You can now send multiple pictures at once using Bluetooth technology. For details, see Send a media file, 145.
Conveniently send and receive a contact card (also called a vCard®) using Bluetooth technology, and save the received contact
card into your smartphone's contact list. For more information, see Send and receive a contact card using Bluetooth
technology, 339.
Video enhancements
You can now record and play back videos in full screen size in either landscape or portrait view.
Picture enhancements
When you rotate JPEG and PNG pictures, the pictures are saved automatically in the rotated view.
Sort pictures from either newest to oldest, or oldest to newest. This lets you see a slide show in the order that pictures were
taken.
You can now view pictures in a slide show using transitions such a sliding, zooming, and panning. For more information, see
Change your slide show options, 185.
About the BlackBerry ID
A BlackBerry® ID gives you convenient access to multiple BlackBerry products and services. After you create a BlackBerry ID,
you can use a single email address and password to log in to any BlackBerry product that supports BlackBerry ID. With
BlackBerry ID, you can manage apps that you downloaded from the BlackBerry App World™ storefront and keep apps you
downloaded when you switch smartphones.
When you set up your BlackBerry smartphone, you might be required to create a BlackBerry ID. You can also create a
BlackBerry ID from within an app that uses BlackBerry ID, or by visiting www.blackberry.com/blackberryid.
Some services and apps that support BlackBerry® ID require you to re-enter your login information after a certain amount of
time has passed if you are not actively using the app. You might also be required to re-enter your BlackBerry ID login
information if you change any of your BlackBerry ID information, if you delete all the data on your smartphone, or if you
update your BlackBerry® Device Software on your smartphone.
Related information
Create a BlackBerry ID, 286
Change your BlackBerry ID information, 286
Visit the Setup application
The Setup application helps you learn about navigation and typing, change options to personalize your BlackBerry®
smartphone, and set up network connections, such as Bluetooth® connections. You can also set up email addresses and social
networking accounts. The Setup application should appear automatically the first time that you turn on your smartphone.
1. If the Setup application does not appear automatically, on the Home screen or in a folder, click the Setup icon.
2. Click a section to change options or to complete a short series of prompts that help you set the options.
7
Page 10

RIM Strictly Confidential
Important keys
Watch the video
Front keys
Key Name Actions
Trackpad
Menu
Escape
Send
End/Power
• Slide your finger to move around the screen.
• Press (click) to select an item.
• Press and hold to open a pop-up menu.
• Open a menu.
• Select a highlighted menu item.
• Press and hold to switch applications quickly.
• Return to the previous screen.
• Close the menu.
• Make a call.
• Answer a call.
• End a call.
• Return to the Home screen.
• Press and hold to turn on or turn off your BlackBerry® smartphone.
Top keys
Key
Side keys
Key
8
Name Actions
Lock Lock or unlock the screen.
Name Actions
Volume/Mute
• Press the top and bottom keys to change the volume.
• Press and hold the top or bottom key to play the next or previous
media file.
• Before you take a picture or record a video, press the top or bottom
key to zoom in or out.
• Press the middle key to mute a call or mute the volume.
Page 11

RIM Strictly Confidential
Key Name Actions
Convenience key
Keyboard
Key Name Actions
Shift Capitalize letters.
Alt Type a symbol or number.
Backspace/Delete Delete the previous character or a selected item.
Enter Select an item.
Speakerphone Turn on or turn off the speakerphone during a call.
• If supported, open the camera.
• If supported, take a picture.
• You can also customize this key.
Flashing LED
The LED on the top of your BlackBerry® smartphone flashes different colors to indicate different statuses.
Flashing LED color Description
Green You're in a wireless coverage area. You can turn on or turn off
this notification.
Blue Your smartphone is connected to a Bluetooth® enabled
device. You can turn on or turn off this notification.
Red A new message has arrived and your selected profile is set to
notify you using the flashing LED. If you're using your
smartphone with a smart card, your smartphone is accessing
data on the smart card.
Amber The battery power level for your smartphone is low, or your
smartphone is turned off and is charging. You can't turn off
the notification for the low battery power level. The
notification for charging turns off when you turn on your
smartphone.
Related information
Turn off Bluetooth connection notification, 342
9
Page 12

RIM Strictly Confidential
Turn on flashing LED notification for wireless coverage, 267
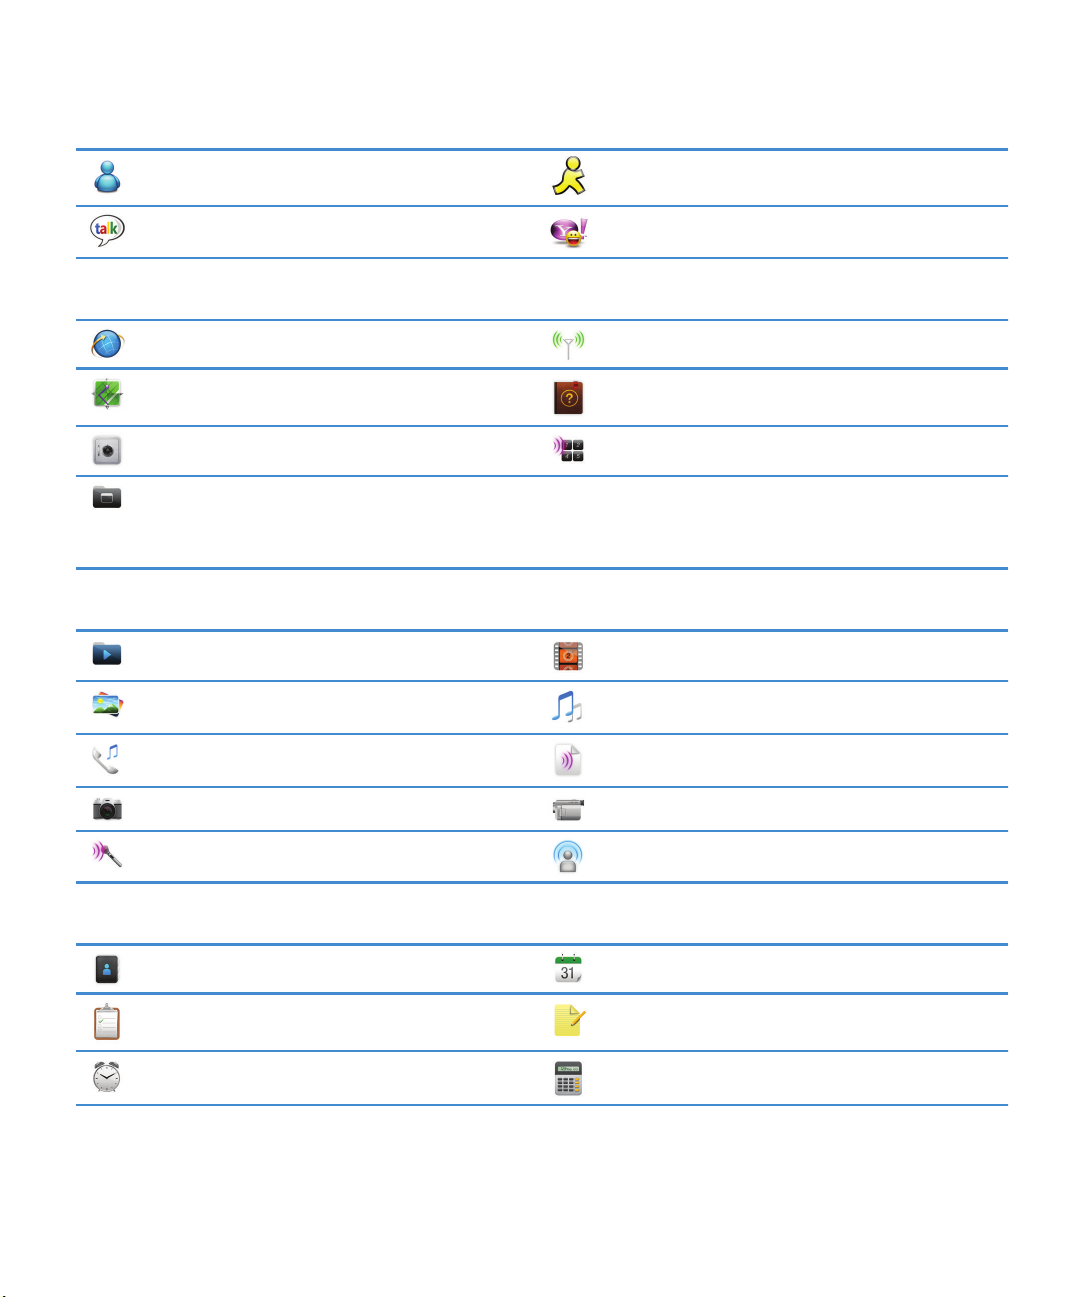
Icons
Application icons
You can access your applications by clicking the icons on the home screen and in folders on the home screen. The initial view of
the home screen displays icons for only some of the available applications. To view more application icons on the home screen,
click All.
Depending on your BlackBerry® smartphone model, administrator, and wireless service provider, some applications might not
be available. You might be able to download some applications from the BlackBerry App World™ storefront.
To see a full icon guide, go to www.blackberry.com/docs/smartphones. Click your smartphone model, then click the Icon
Guide.
Setup
Setup Enterprise Activation
Activate a work email account using the BlackBerry®
Enterprise Server.
Options
Power and lock
Password Lock
Messages
Messages
Added email address Added work email address
Text Messages
Instant messaging
Instant Messaging folder
Some applications might appear in this folder
including applications that you download.
10
Power Off
Saved Messages
BBM™
Page 13
RIM Strictly Confidential
Applications
Media
Windows Live™ Messenger for BlackBerry®
smartphones
AOL® Instant Messenger™ Service for BlackBerry®
smartphones
Google Talk™ for BlackBerry® smartphones Yahoo!® Messenger for BlackBerry® smartphones
Browser Manage Connections
Maps Help
Password Keeper Voice Dialing
Applications folder
Some applications might appear in this folder,
including applications that you download.
Media folder Videos
Pictures Music
Ring Tones Voice Notes
Camera Video Camera
Voice Notes Recorder Podcasts
Personal organizer
Contacts
Tasks MemoPad
Clock Calculator
Files
Calendar
11
Page 14

RIM Strictly Confidential
Documents To Go® Files
Social networking and mobile purchasing
BlackBerry App World™ Social Feeds
Facebook® for BlackBerry® smartphones Twitter® for BlackBerry® smartphones
BlackBerry Device Software update
Software update for the BlackBerry® Device
Software is available
Software update for the BlackBerry Device
Software is ready to be installed
Sounds and alerts
Normal profile Phone Calls Only profile
Loud profile Custom profile
Medium profile Silent profile
Vibrate Only profile All Alerts Off profile
Games
Games folder
Some applications might appear in this folder,
including applications that you download.
Word Mole
Software update for the BlackBerry Device Software
is being downloaded
Software update for the BlackBerry Device Software
is stopped
BrickBreaker
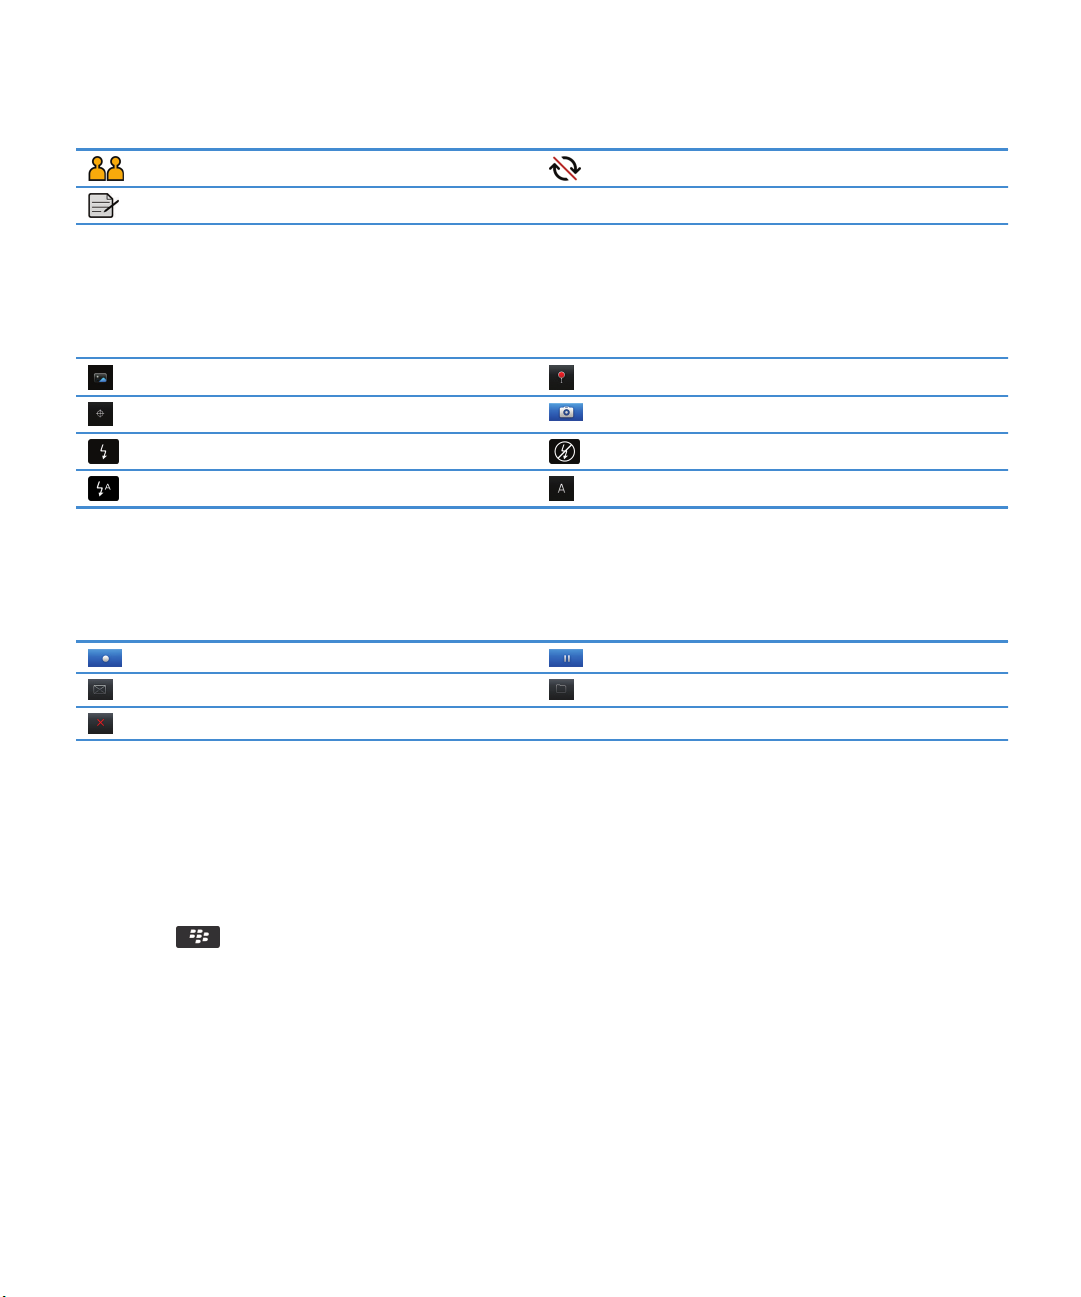
Home screen icons
These icons are status indicators that appear at the top of the home screen.
12
Page 15

RIM Strictly Confidential
Depending on your BlackBerry® smartphone model and wireless service provider, some of these icons might not appear.
New item
To clear this icon, open each item that has this
Update is available in the BlackBerry App World™
storefront
indicator.
Sending data New item in the Social Feeds application
Receiving data System is busy
New BBM™ item
New BBM Groups item
To clear this icon, open each chat that has this
icon.
Roaming Unread message count
Alarm is set Missed call count
Calendar reminder count Bluetooth® technology is turned on
Wi-Fi® technology is turned on NFC technology is turned on
Message inbox icons
These icons indicate the type or status of each message in your inbox.
Depending on your BlackBerry® smartphone model and wireless service provider, some of these icons might not appear.
Unread message
New BBM™ item
To clear this indicator, open each chat that has this
indicator.
Read message BBM chat is open
Draft message New BBM Groups item
Filed message New RSS item
Message with an attachment Message is being sent
Message is high priority Message has not been sent
13
Page 16

RIM Strictly Confidential
Text message with an attachment Message has been sent
Text message Message has been delivered
Message has been read
Battery power level icons
These icons appear at the top of the Home screen and at the top of the screen in some applications.
Full battery Battery is charging
Low battery
Typing icons
These icons appear in the upper-right corner of the screen when you type.
CAP lock (capital letter lock) Multi-tap mode
NUM lock (number lock) Current input language
Alt mode
Phone icons
These icons appear at the top of the Home screen and in the Phone application.
Missed call
Placed call Voice mail message
Received call
Calendar icons
These icons appear at the bottom of the screen when you highlight a calendar entry.
Event reminder
14
Recurring appointment
Page 17
RIM Strictly Confidential
Meeting reminder Exception for recurring appointment
Notes
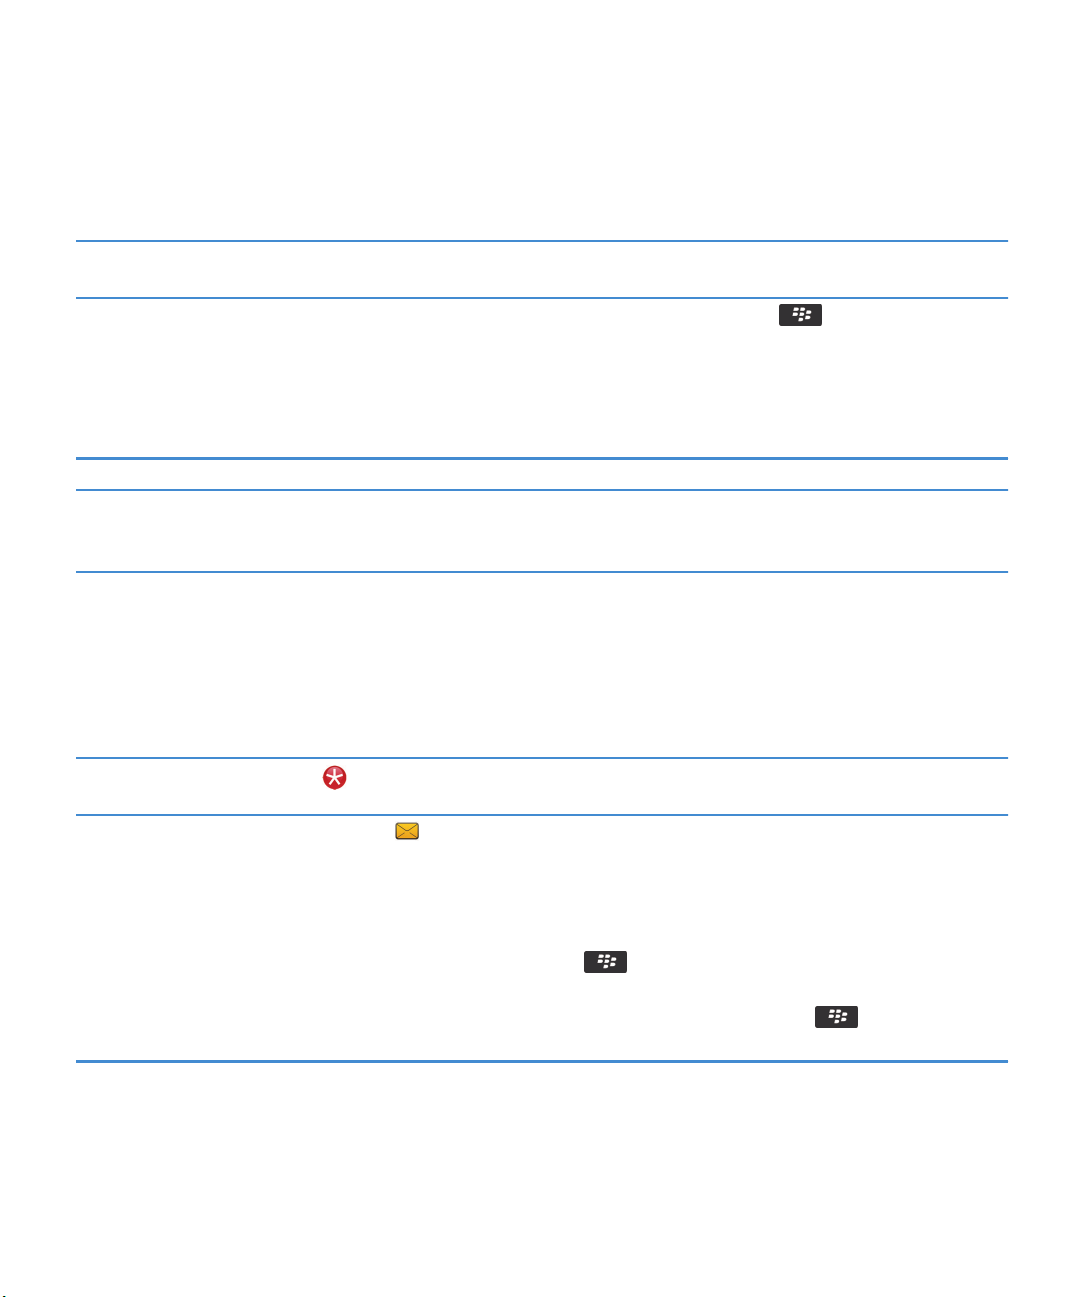
Camera icons
These icons appear at the bottom of the screen in the camera. You can click these icons.
View pictures Geotagging is turned on
Geotagging is turned off Take another picture
Flash is turned on Flash is turned off
Automatic flash mode Scene mode
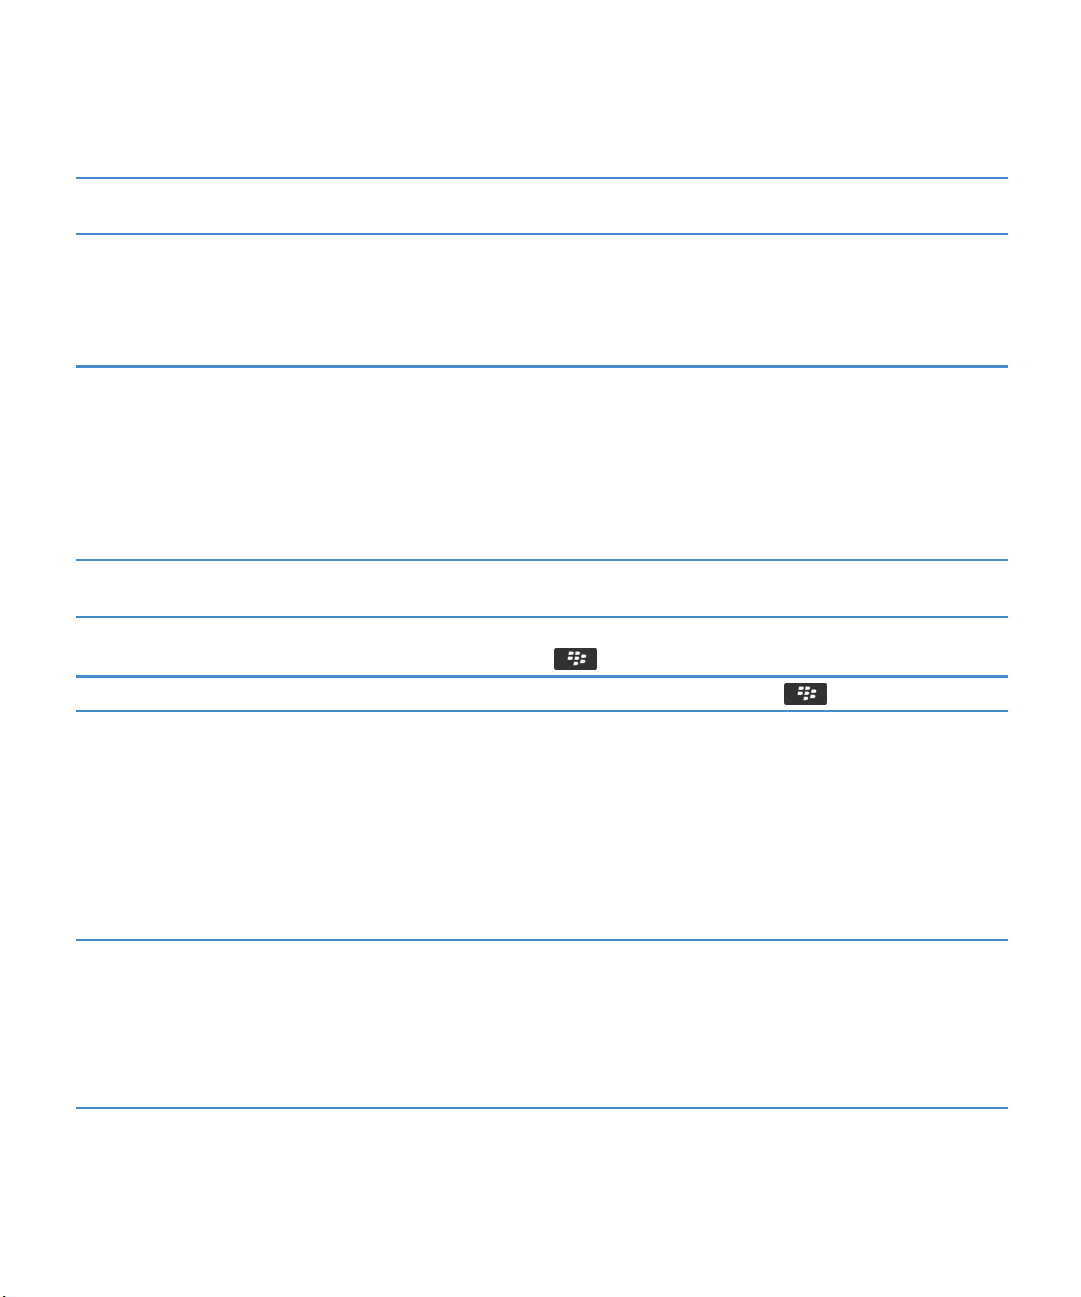
Video camera
These icons appear at the bottom of the screen in the video camera. You can click these icons.
Start recording Pause recording
Send video Rename video
Delete video
Your Home screen
Use a picture as your smartphone wallpaper
1. On the Home screen, click the Media icon > Pictures icon.
2. Browse to a picture.
3. Press the
Try this now!
Related information
My display changed, 270
key > Set As Wallpaper.
15
Page 18

RIM Strictly Confidential
Add a shortcut to your Home screen or Favorites panel
You can add a shortcut to give yourself quick access to items such as frequently used websites, contacts, applications, files,
podcast channels, or media categories.
1. Browse to a website, or highlight the item that you want to create a shortcut for.
2. Press the key > Add to Home Screen.
• To change the name of the shortcut, type a new name.
• To change the location where the shortcut appears, change the Location field.
• To add the shortcut to your Favorites panel, select the Mark as Favorite checkbox.
3. Click Add.
Show or hide a Home screen panel
1. On the Home screen, press the
2. Select or clear the checkbox for each panel.
3.
Press the key > Save.
key > Manage Panels.
Show, hide, or find an application icon
Depending on your theme, you might not be able to hide some application icons.
On the Home screen or in a folder, do any of the following:
• To see all your application icons, on the navigation bar, click All.
• To hide an application icon, highlight the icon. Press the
can hide the icon in all panels or in the current panel only.
• To show all hidden application icons, press the key > Show All Icons.
• To stop hiding an application icon, highlight the icon. Press the
beside the Hide Icon field.
key > Hide Icon. If the icon appears in other panels, you
key > Hide Icon. A check mark should not appear
Related information
My display changed, 270
Move an application icon
1. On the Home screen or in an application folder, highlight an application icon.
2.
Press the key.
• To move the application icon to a different location on the Home screen, click Move. Click the new location.
• To move the application icon into an application folder, click Move To Folder. Click an application folder.
• To move the application icon out of an application folder, click Move To Folder. Click Home or an application folder.
Switch themes
1. On the Home screen or in a folder, click the Options icon.
2. Click Display > Screen Display.
3. In the Theme section, click a theme.
16
Page 19

RIM Strictly Confidential
4. Click Activate.
To delete a theme, click the theme. Click Delete.
Set the number of icons that appear on the Home screen
1. On the Home screen or in a folder, click the Options icon.
2. Click Accessibility.
3. Change the Home Screen Grid Layout field.
4.
Press the
key > Save.
Add a message that appears when your smartphone is locked
1. On the Home screen or in a folder, click the Options icon.
2. Click Display > Message on Lock Screen.
3. Type the text that you want to appear on the screen when your smartphone is locked.
4.
Press the key > Save.
Feature availability
The following items affect the availability of features on your BlackBerry® smartphone. The features discussed are meant as
examples, and are not inclusive of every feature that might or might not be available on your smartphone.
Smartphone model Features such as GPS, the camera and video camera, and
network connection options are dependent on your
smartphone model. To find feature specifications for your
smartphone model, visit www.blackberry.com/go/devices.
Wireless service plan You must purchase or change your wireless service plan
through your wireless service provider.
A wireless service plan with phone or voice is required for you
to use the Phone application and to send and receive text
messages.
A wireless service plan with data is required for you to use the
browser service and instant messaging applications, and to
send and receive email messages and PIN messages.
A wireless service plan might affect which apps you can
download and how you can download them.
For more information about your plan, contact your wireless
service provider.
17
Page 20

RIM Strictly Confidential
BlackBerry Internet Service and BlackBerry Enterprise Server Once you have a data plan, you must set up your email address
or third-party instant messaging account in order to send and
receive email messages, use third-party instant messaging
applications, and use some browser options.
If you are an individual user, when you set up your email
address or instant messaging account, you are associating it
with the BlackBerry® Internet Service.
If you are a corporate user, your administrator sets up your
email account by associating it with a BlackBerry® Enterprise
Server. Your administrator might set options that determine
the features and settings that are available on your
smartphone and if you can add or update an app. To view the
IT policies that have been set by your administrator, on the
Home screen or in a folder, click the Options icon. Click
Security > Security Status Information > View IT Policy.
Wireless service provider Features such as text messaging, location-based services, and
some phone features are dependent on your wireless service
provider's offerings. You might have the option to download
apps from a webpage or an application. For more information,
contact your wireless service provider.
Wireless network The wireless network that your smartphone is connected to
might affect the availability of some features. Depending on
your wireless service provider and available roaming options,
different wireless networks are available. Some wireless
networks don't support features such as call blocking, call
forwarding, or cell broadcasting. For more information,
contact your wireless service provider.
Region Depending on your region, you might have the option to add
or update apps using the BlackBerry App World™ storefront.
You might also be able to download apps from a web page or
an application. The availability of certain apps varies by region.
Related information
BlackBerry Device Software, 294
Check what wireless networks your smartphone connects to, 299
Find more information, 19
18
Page 21

RIM Strictly Confidential
Find more information
• Help on your smartphone: Find step-by-step instructions in the user guide for your BlackBerry® smartphone. Click Help on
the Home screen or in an application menu.
• www.discoverblackberry.com: Find software, applications, and accessories for your smartphone.
• Your wireless service provider website: Find information about your wireless network or wireless service plan.
• www.blackberry.com/go/declarationofconformity: View the Declaration of Conformity made under Directive 1999/5/EC
(HG nr.88/2003).
How to: Top 10
BlackBerry® smartphone users have spoken! Here are the top 10 things they want to know how to do on their smartphones.
Set up an email address
1. On the Home screen, click the Setup icon.
2. In the Setup section, click the Email Accounts icon.
3. Follow the screens to set up your email address. When your email address is set up correctly, you receive a confirmation
message. To view and manage your email messages, on the Home screen, click the Messages icon.
Note: In some cases, you might see the following options. If so, select one of the options.
• Internet Mail Account: Use this option to associate your BlackBerry® smartphone with one or more existing email accounts
(for example, Windows Live™ Hotmail®) or to create a new email address for your smartphone.
• Enterprise Account: If your administrator gave you an enterprise activation password, use this option to associate your
smartphone with your work email account using the BlackBerry® Enterprise Server.
Try this now!
If you are trying to set up a Internet email account (for example, Windows Live™ Hotmail® or Google Mail™) or a new email
address for your smartphone, and do not see this option, contact your administrator or wireless service provider.
Related information
Change options for your personal email account, 86
About downloading apps with the BlackBerry App World
With the BlackBerry App World™ storefront, you can search for and download games, themes, social networking apps,
personal productivity apps, and much more. Using an existing PayPal® account, you can buy and download apps to your
smartphone over the wireless network.
If you don't already have the BlackBerry App World on your smartphone, you can download it at
www.blackberryappworld.com. For more information about managing apps using BlackBerry App World, click the BlackBerry
App World icon. Press the
key > Help.
19
Page 22

RIM Strictly Confidential
Depending on your wireless service provider and region, you might have the option to add or update apps using the BlackBerry
App World™ storefront. You might also be able to download apps from a webpage (try visiting mobile.blackberry.com from
your BlackBerry smartphone), or through your wireless service provider. Data charges might apply when you add or use an app
over the wireless network. For more information, contact your wireless service provider.
Transfer a file from your computer to your smartphone using your
smartphone as a USB memory drive
You must use the BlackBerry® Desktop Software to manage and preserve the information or the encryption that is associated
with your media files when you transfer files between your BlackBerry smartphone and your computer.
1. Connect your smartphone to your computer using a USB cable.
2. Do one of the following:
• If you want to transfer most types of files, in the dialog box that appears on your smartphone, select the USB option.
• If you want to transfer media files that are protected with DRM, in the dialog box that appears on your smartphone,
select the media transfer option.
3. If necessary, type a password. Your smartphone appears as a drive on your computer.
4. Drag a file from a location on your computer to a folder on your smartphone.
To view the transferred file on your smartphone, disconnect your smartphone from your computer and find the file.
Related information
Transfer your media files from your computer to your smartphone using the BlackBerry Desktop Software, 140
Synchronize email over the wireless network
You can set the Wireless Reconcile option for each email address that is associated with your BlackBerry® smartphone, which
will synchronize your email over the wireless network.
1. On the Home screen, click the Messages icon.
2.
Press the
3. If the Message Services field appears, set this field to the appropriate email account.
4. Select the Wireless Reconcile checkbox.
5.
Press the key > Save.
Try this now!
key > Options > Email Reconciliation.
Copy contacts from your SIM card to your contact list
Depending on your wireless service provider and wireless network, this feature might not be supported.
1. In the contact list, press the key > SIM Phone Book.
2. Press the key > Copy All To Contacts.
Note: If you try to copy a SIM card contact with a phone number that matches the phone number of a contact that already
appears in your contact list, your BlackBerry® smartphone does not copy the SIM card contact.
20
Page 23

RIM Strictly Confidential
Send a text message
The number of recipients that you can send a text message to depends on your wireless service provider.
1. On the Home screen, click the Text Messages icon.
2. Press the
3. In the To field, do one of the following:
• Type a contact name.
• Press the
• Type a phone number that can receive text messages (including the country code and area code). For languages with
non-Latin characters, press the Alt key to type numbers. Press the key on the keyboard.
• If your BlackBerry® smartphone is connected to a CDMA network, you can type an email address.
4. Type a message.
5.
Press the
Related information
Personal distribution lists, 235
I can't send messages, 33
Attach a media file, contact card, appointment, or location to a text message, 97
key > Compose Text Message.
key > Choose Contact. Click a contact.
key on the keyboard.
View a location on a map
1. On the Home screen, click the Maps icon.
2. Press the key > Find a Location.
• To search for a point of interest such as a business or landmark, in the Find a store, café, etc. field, type the information
for the point of interest. Highlight the point of interest.
• To view a new location, in the Find an address field, type an address. Highlight the location.
• To view a location for a contact, in the Find a store, café, etc. field, type the contact name. Highlight the contact
information.
• To view a favorite location, in the Favorites section, highlight the location.
3. Press the
If you are viewing a location other than your current location, to get directions to this location from your current location,
press the key > Navigate to Here. Your BlackBerry® smartphone must have an internal GPS receiver or be paired with a
Bluetooth® enabled GPS receiver to perform this task.
key > View on Map.
Lock or unlock your smartphone
You can lock the screen to avoid pressing it or making calls accidentally and, if you have set a BlackBerry® smartphone
password, you can also lock your smartphone with a password.
21
Page 24

RIM Strictly Confidential
Depending on how you or your administrator set your password options, if you don't use your smartphone for a certain period
of time, your smartphone might lock with a password automatically.
Do one of the following:
• To lock the screen, press the key on the top of your smartphone.
• To unlock the screen, press the
• To lock your smartphone with a password, on the Home screen or in a folder, click the
• To unlock your smartphone, enter your password. Press the key.
key again.
icon.
Turn on or turn off a network connection
You should keep network connections turned off in certain places, such as on an airplane or in a hospital. For more
information, see the Safety and Product Information booklet for your BlackBerry® smartphone.
On the Home screen, click the connections area at the top of the screen, or click the Manage Connections icon.
• To turn on a network connection, select the checkbox beside a connection type.
• To turn off a network connection, clear the checkbox beside a connection type.
• To turn on the network connections that were turned on previously, click Restore Connections.
Related information
I can't connect to the mobile network, 305
I can't connect to a Wi-Fi network, 316
I can't connect to the mobile network, 305
I can't connect to a Wi-Fi network, 316
I can't connect to a WLAN, 334
I can't connect to the mobile network, 324
I can't connect to the mobile network, 324
I can't connect to a WLAN, 334
Turn off word substitution
1. On the Home screen or in a folder, click the Options icon.
2. Click Typing and Input > Typing.
3. For a keyboard, click Advanced Style Options.
4. Clear the Spelling checkbox.
5.
Press the key > Save.
Tips: Top 10
Save time and maximize your efficiency with these quick tips.
22
Page 25
RIM Strictly Confidential
Tips: Finding apps
Look in a folder on your home screen. Some apps are located in folders on your home screen. Click
a folder to see what apps are inside.
Make all hidden apps visible on the home screen.
Search for an app. On the home screen, start typing the app name.
Verify that the app is installed. On the home screen or in a folder, click the Options icon. Click
On the home screen, press the key > Show All Icons. To
unhide the app, highlight it and then click Hide Icon to clear
the check mark. If the icon is hidden in other panels, you can
unhide the icon in all panels, or in the current panel only. If
Show All Icons does not appear in the menu, there are no apps
hidden from view.
Device > Application Management. If the app is listed, it is
installed on your BlackBerry® smartphone.
Tips: Managing indicators
Indicators tell you that there is something new or updated, such as a new message, voice mail message, or feed, or they inform
you of the status of something, such as the battery or network connection. Indicators often appear on app icons, new content
within apps, and at the top of the Home screen.
Remove the new item indicator
Remove the unopened message indicator .
Identify an indicator.
.
Open each item that has this indicator. For example, to remove
it from the Messages icon, click the icon.
In the Messages app, do one or more of the following:
• Open all of your messages by clicking on them. If you can't
find all of your unread messages in your inbox, look in your
messages folders.
• Mark a message as read. Highlight a message. Press the
key > Mark Read.
• Mark all messages that are prior to a date as read.
Highlight a date field. Press the key > Mark Prior
Read.
• You might be able to identify an indicator by seeing the
icon of the application that the indicator refers to. To see
a complete list of applications on your BlackBerry®
23
Page 26

RIM Strictly Confidential
smartphone and their icons, on the Home screen or in a
folder, click the Options icon. Click Device > Application
Management.
• For a complete list of indicators, visit
www.blackberry.com/docs/smartphones. Click your
smartphone model, and then click the Icons guide.
Tips: Updating your software
Updated BlackBerry® Device Software and BlackBerry® Desktop Software are released periodically, and you might be able to
update the software from either your computer or your smartphone. Research In Motion recommends that you regularly
create and save a backup file on your computer, especially before you update any software. Maintaining a current backup file
on your computer might allow you to recover smartphone data if your smartphone is lost, stolen, or corrupted by an
unforeseen issue.
Check to see if there is updated BlackBerry Device Software
that you can download over the network.
Update your BlackBerry Device Software from your computer. On your computer, visit www.blackberry.com/update. Click
Set your BlackBerry Desktop Software to check for updates
automatically.
Update your BlackBerry Desktop Software . Visit www.blackberry.com/desktopsoftware.
Related information
BlackBerry Device Software, 294
Depending on your smartphone model, this feature might not
be supported. On the Home screen or in a folder, click the
Options icon. Click Device > Software Updates.
Check for Updates. Connect your smartphone to your
computer.
For instructions, see the Help in BlackBerry Desktop Software.
Tips: Doing things quickly
For full instructions, click the links under Related information at the bottom.
Access popular options such as changing your ring tone,
setting the alarm, viewing notifications, and turning on or
turning off network connections.
See all the apps and folders on the Home screen, or minimize
the panel and view the wallpaper.
Switch to another app.
Highlight and click the areas at the top of the Home screen.
On the navigation bar, click All.
Press and hold the key. Click an app.
24
Page 27
RIM Strictly Confidential
Note: The other app might still be running in the background.
Open an app with a convenience key. Press a convenience key on the side of your smartphone.
Note: You can customize which app a convenience key opens.
Use toolbars. Toolbars are available in most applications, and appear at the
bottom of the screen. For example, you can click icons on the
toolbar in the message list to quickly search the message list,
compose an email, and delete the selected message. To see a
description for a toolbar icon, touch and hold the icon.
Use pop-up menus. Pop-up menus provide common available actions, and appear
in the center of the screen. For example, you can use the popup menu in a message to file, forward, or reply to the message.
To open a pop-up menu, touch and hold the screen or press
and hold the trackpad. To select a command, tap the icon or
click the trackpad.
Watch the video
Switch to the Favorites, Media, Downloads, and Frequent
panels.
Add an app to the Favorites panel. Highlight an app on the Home screen or in a folder. Press the
Change options for the Home screen such as the wallpaper.
On the Home screen, highlight All on the navigation bar and
swipe right or left.
key > Mark as Favorite.
On the Home screen, press the key > Options.
Related information
Change what happens when you type on the Home screen, 0
Assign an application to a convenience key, 31
Keep an application running in the background and switch to another application, 286
Tips: Extending battery life
For full instructions, click the links under Related information at the bottom.
Set your BlackBerry® smartphone to turn on and turn off
automatically.
You can set your smartphone to turn off while you aren't using
it for an extended period, like when you sleep. Data you
receive when the smartphone is turned off automatically
updates when the smartphone turns on.
On the Home screen or in a folder, click the Options icon. Click
Device > Auto On/Off.
25
Page 28
RIM Strictly Confidential
Set backlighting to remain on for a shorter period of time, and
lower its brightness.
Turn off network connections you aren't using. On the Home screen, click the connections area at the top of
Close apps when you're finished with them.
When you switch from one app to another, some apps, such
as the Browser app or the Music app, run in the background,
which uses battery power.
Switch your vibrating notifications to sound notifications or
LED notifications, lower the volume of your sound
notifications, or select a shorter ring tone.
Delete the original text from a reply message.
If your smartphone has a camera flash, turn off the flash. On the Home screen, click the Camera icon. Click the flash icon
Keep your battery connections clean.
Keeping the battery clean extends the life of your battery.
Related information
Delete the original text from a reply message, 73
Change your ring tone, notifiers, or reminders, 29
Turn on or turn off a network connection, 22
Set options for backlighting, 265
Set your smartphone to turn on and turn off automatically, 349
On the Home screen or in a folder, click the Options icon. Click
Display > Screen Display.
the screen, or click the Manage Connections icon. Click a
network connection to clear the checkbox.
In an app, press the key > Close.
On the Home screen, click the Sound and Alert Profiles icon.
Click Change Sounds and Alerts.
When you are replying to a message, press the key >
Delete Original Text.
at the bottom of the screen until the flash off indicator
appears.
Every few months, use a cotton swab or dry cloth to clean the
metal contacts on the battery and the smartphone.
Tips: Freeing and conserving storage space
Try to maintain at least 400 KB of available application storage on your BlackBerry® smartphone. If you find that your
smartphone processes are unusually slow, try freeing storage space by deleting files that you don't need. Changing options for
email, calendar entries, and media files might help you conserve storage space.
Check how much free storage space you have.
Close any apps you're not using.
26
On the home screen or in a folder, click the Options icon. Click
Device > Storage.
In an app, press the key > Close or press the key
until the home screen appears.
Page 29
RIM Strictly Confidential
Delete unneeded files. On the home screen or in a folder, click the Files icon. Find and
highlight a file. Press the key > Delete.
Delete browsing history and clear the cache.
Reduce the amount of time that your smartphone stores email
messages and calendar entries.
Stop storing sent messages on your smartphone.
Receive only the first section of long email messages, and
choose whether to download more.
Store files on a media card instead of the smartphone. Your BlackBerry smartphone supports media card sizes up to
Reduce the size of pictures you take.
Research In Motion recommends that you regularly create and save a backup file on your computer, especially before you
update any software. Maintaining a current backup file on your computer might allow you to recover smartphone data if your
smartphone is lost, stolen, or corrupted by an unforeseen issue.
Related information
Copy, move, rename, or delete a file, 135
Receive only the first section of long email messages, 85
Change the size of pictures that you take, 175
View the amount of available storage space on your smartphone, 353
Set how long your smartphone stores messages, 84
Stop storing messages sent from your computer on your smartphone, 84
Stop storing messages sent from your smartphone on your computer, 84
Change how long your smartphone stores calendar entries, 224
Keep an application running in the background and switch to another application, 286
The application storage on my smartphone is low, 356
On the home screen, click the Browser icon. Press the
key > Options. Go to the Clear Browsing Data section.
On the home screen, click the Messages icon or Calendar icon.
Press the key > Options.
On the home screen, click the Messages icon. Press the
key > Options > Email Preferences.
On the home screen, click the Messages icon. Press the
key > Options > Message Display and Actions.
32 GB. Only microSD media cards are supported.
On the home screen, click the Camera icon. Press the
key > Options.
Tips: Keeping your information safe
You can take some simple steps to help prevent the information on your BlackBerry® smartphone from being compromised,
such as avoiding leaving your smartphone unattended.
Research In Motion recommends that you regularly create and save a backup file on your computer, especially before you
update any software. Maintaining a current backup file on your computer might allow you to recover smartphone data if your
smartphone is lost, stolen, or corrupted by an unforeseen issue.
27
Page 30
RIM Strictly Confidential
Set a smartphone password. On the Home screen or in a folder, click the Options icon. Click
Security > Password.
Encrypt contacts and files. On the Home screen or in a folder, click the Options icon. Click
Security > Encryption.
Back up your smartphone data to your computer. Use the BlackBerry® Desktop Software to back up your
smartphone data to your computer. To download the
BlackBerry Desktop Software, from your computer, visit
www.blackberry.com/desktop and select the appropriate
option for your computer.
Back up your smartphone data to a media card. On the Home screen, click the Setup icon. In the Setup section,
click Device Switch > Save Data.
Related information
Set a smartphone password, 365
Turn on encryption, 354
Phone shortcuts
Depending on the typing input language that you're using, some shortcuts might not be available.
Change your ring tone
Send an incoming call to voice mail when your
BlackBerry® smartphone is inserted in a holster
Set up speed dial for a contact
Insert a plus sign (+) when typing a phone number Press and hold 0.
Change the active phone number
From the Home screen, press the key. Press the key > Phone
Ring Tones.
Press and hold the Volume Down key on the right side of your smartphone.
From the Home screen, press the key. Press and hold the key that
you would like to assign speed dial to.
From the Home screen, press the key. Click your phone number at
the top of the screen. Click a phone number.
Media shortcuts
Depending on the typing input language that you're using, some shortcuts might not be available.
Audio and video files
28
Page 31

RIM Strictly Confidential
Pause an audio or video file Press the Mute key on the right side of your BlackBerry®
smartphone.
Resume playing an audio or video file Press the Mute key again.
Play the next audio file Press and hold the Volume Up key on the right side of your
smartphone.
Play the previous audio file Press and hold the Volume Down key on the right side of your
smartphone.
Turn on the audio boost feature if you're using a headset Press the Volume Up key until the audio boost feature turns
on.
Camera
Zoom in to a subject before taking a picture Press the Volume Up key.
Zoom out from a subject before taking a picture Press the Volume Down key.
Take a picture Press the Convenience key on the right side of your
smartphone.
Personalize: Top 10
Make your BlackBerry® smartphone your own by getting apps, transferring your files, and personalizing your settings.
Change your ring tone, notifiers, or reminders
In addition to changing the tone, you can also change options for notifcation during calls, volume, LED, and vibration.
1. On the Home screen, click the Sound and Alert Profiles icon.
2. Click Change Sounds and Alerts > Sounds for Selected Profile.
• To change your ring tone, click Phone.
• To change notifiers or reminders, click to expand a section. Click an option.
3. In the Ring Tone, Notifier Tone, or Reminder Tone field, do one of the following:
• Click a tone.
• To use a song that is on your BlackBerry® smartphone or on a media card, click All Music. Find and click a song.
• To use a voice note that you recorded, click All Voice Notes. Find and click a voice note.
• To use a preloaded alert, click All Alerts. Find and click an alert.
4.
Press the key > Save.
Try this now!
29
Page 32

RIM Strictly Confidential
Related information
I can't change the number of times that my smartphone rings, 65
Use a picture as your smartphone wallpaper
1. On the Home screen, click the Media icon > Pictures icon.
2. Browse to a picture.
3. Press the
Try this now!
Related information
My display changed, 270
key > Set As Wallpaper.
Add, rename, or delete a folder on the home screen
On the home screen, do one of the following:
• To add a folder, press the key > Add Folder. Type a name for the folder. Click Add.
• To rename a folder, highlight a folder. Press the key > Edit Folder. Type a name for the folder. Click Save.
• To delete a folder, highlight a folder. Press the
key > Delete.
Add or change your signature
Depending on your wireless service plan, this feature might not be supported.
1. On the Home screen, click the Messages icon.
2. Press the key > Options.
• For a work email account, click Email Preferences. If the Message Services field appears, change this field to the
appropriate email account. If the Use Auto Signature check box is not selected, select it. In the field that appears, place
your cursor.
• For a personal email account, click Email Account Management. Click an email account. Click Edit.
3. Type a signature.
4.
Press the key > Save.
Your signature is added to your email after you send it.
Try this now!
Change the language
1. On the Home screen or in a folder, click the Options icon.
2. Click Typing and Input > Language.
• To change the display language, change the Display Language field.
• To change the typing language, change the Typing Language field.
• To change the language for voice commands, change the Voice Dialing Language field.
30
Page 33

RIM Strictly Confidential
3.
Press the key > Save.
Change the display font
1. On the Home screen or in a folder, click the Options icon.
2. Click Display > Screen Display.
3. Change the font fields.
4.
Press the
key > Save.
Assign an application to a convenience key
Your BlackBerry® smartphone has a convenience key on the side of the smartphone. Depending on your theme, you might not
be able to change the application that is assigned to a convenience key.
1. On the Home screen or in a folder, click the Options icon.
2. Click Device > Convenience Key.
3. Change the Convenience Key Opens field.
4.
Press the key > Save.
Set up speed dial for a contact
1.
From the Home screen, press the key.
2.
Press the key > View > Speed Dial List.
3. In the Speed Dial Numbers list, click an unassigned key.
4. Click a contact.
5. If necessary, click a phone number for the contact.
To make a call using speed dial, in the Phone application, press and hold the key that you assigned to the contact.
Add or delete a contact alert
You can create contact alerts that allow you to customize ring tones and alerts for calls and messages from specific contacts or
groups of contacts. When you receive a call or message from the contact, your BlackBerry® smartphone uses the assigned ring
tone or alert, even if you select the Silent profile or Vibrate Only profile. If you do not want to be notified with the assigned ring
tone or alert, you can select the All Alerts Off profile.
1. On the home screen, click the Sound and Alert Profiles icon.
2. Click Change Sounds and Alerts > Sounds for Contacts > Add Contact Alert.
3. In the Name field, type the name of the contact alert.
4. In the Contacts field, type the name of the contact.
5. Click a contact.
6. Change the ring tone and alert information for calls and messages.
7.
Press the key > Save.
To delete a contact alert, highlight the contact alert that you want to delete. Press the key > Delete.
31
Page 34

RIM Strictly Confidential
Add a contact picture for caller ID
1. On the Home screen, click the Contacts icon.
2. Highlight a contact.
3.
Press the
4. Press the key > Add Picture.
5. Find, highlight, and click a picture.
6. If necessary, move the crop box to the portion of the picture that you want to use.
7. Press the
8.
Press the
Related information
My contact pictures keep changing, 239
key > Edit.
key > Crop & Save.
key > Save.
Troubleshooting: Top 10
Save time and maximize your efficiency with these quick tips.
I can't make or receive calls
Try the following actions:
• Verify that your BlackBerry® smartphone is connected to the wireless network.
• Verify that your wireless service plan includes phone or voice services.
• If you can't make calls and fixed dialing is turned on, verify that the phone number for your contact appears in your fixed
dialing list or turn off fixed dialing.
• If you have traveled to another country and you haven't changed your smart-dialing options, dial the full phone number,
including the country code and area code, for your contact.
• If you're not receiving calls, verify that call blocking and call forwarding are turned off.
• Your smartphone or your SIM card might support more than one phone number, even if you only have one phone number.
Verify that your phone number is set as your active phone number.
• If you have more than one phone number associated with your smartphone, verify that the phone number that you want
to make calls from and receive calls to is set as your active phone number.
• If you're using your BlackBerry® MVS Client phone number, verify that support for the BlackBerry MVS Client is turned on.
• If you're using your BlackBerry MVS Client phone number, verify that your smartphone is registered with the BlackBerry®
Mobile Voice System. From the Home screen, press the
MVS Client. Press the
fails, contact your administrator. If the registration doesn't complete, wait for a short period of time and then try again.
• If you have set call forwarding for the phone number provided by your wireless service provider, calls to your BlackBerry
MVS Client phone number are also forwarded. To receive calls to your BlackBerry MVS Client phone number, verify that
call forwarding is turned off.
32
key. Click Register Now. If the Register Now menu item doesn't appear, or if the registration
key. Press the key. Click Options. Click BlackBerry
Page 35

RIM Strictly Confidential
Related information
Fixed dialing and smart dialing, 51
Call waiting, call forwarding, and call blocking, 50
Switch the active phone number, 56
I'm not receiving messages
Try the following actions:
• Verify that your BlackBerry® smartphone is connected to the wireless network. If you're not in a wireless coverage area,
you should receive messages when you return to a wireless coverage area.
• Reset your smartphone. Connect to the network and try again.
• If you created an email address or added an existing email address to your smartphone using the email setup screen in the
Setup application, verify that you have received an activation message on your smartphone from the BlackBerry® Internet
Service. If you haven't received an activation message (the message might take a short period of time to arrive), in the
Setup application, open the email setup screen to send a service book to your smartphone.
• If you haven't received a registration message from the wireless network, register your smartphone. On the Home screen
or in a folder, click the Options icon. Click Device > Advanced System Settings > Host Routing Table. Press the
Register Now.
• Verify that data service is turned on.
• If you use email filters, verify that the options for email filters are set correctly.
• Verify that email forwarding is turned on and that you have selected all the email folders, including your inbox folder, that
you want to receive email from.
• Verify that your smartphone is not blocking messages. For more information, contact your administrator.
key >
Related information
Change, prioritize, or delete an email filter, 76
Forward messages from a specific email folder to your smartphone, 83
I can't send messages
Try the following actions:
• Verify that your BlackBerry® smartphone is connected to the wireless network.
• If the menu item for sending a message doesn't appear, verify that you have added an email address, a PIN, or a phone
number for your contact.
• If you created an email address or added an existing email address to your smartphone using the email setup screen in the
Setup application, verify that you have received an activation message on your smartphone from the BlackBerry® Internet
Service. If you haven't received an activation message (the message might take a short period of time to arrive), in the
Setup application, open the email setup screen to send a service book to your smartphone.
• If you haven't received a registration message from the wireless network, register your smartphone. On the Home screen
or in a folder, click the Options icon. Click Device > Advanced System Settings > Host Routing Table. Press the
Register Now.
• Generate an encryption key.
• Verify that data service is turned on.
key >
33
Page 36

RIM Strictly Confidential
• Resend the message.
Related information
Generate an encryption key, 373
Wireless coverage indicators, 298
Change or delete a contact, 231
Turn on or turn off a network connection, 22
Turn on or turn off data service or set roaming options, 301
Wireless coverage indicators, 298
Turn on or turn off a network connection, 22
Options for email filters, 75
Turn on or turn off data service or set roaming options, 301
Resend a message, 72
I forget my smartphone password
If you forget your BlackBerry® smartphone password, it can't be recovered. If your smartphone uses a BlackBerry® Enterprise
Server, your administrator might be able to reset your password without deleting your smartphone data. Otherwise, the only
way you can reset your password without knowing your current password is to delete all your smartphone data. You can do
this by exceeding the number of allowed password attempts.
If your email account uses a BlackBerry Enterprise Server, depending on the options that your administrator sets, when you
delete your smartphone data, you might also delete the data on your media card. For more information, contact your
administrator.
Research In Motion recommends that you regularly create and save a backup file on your computer, especially before you
update any software. Maintaining a current backup file on your computer might allow you to recover smartphone data if your
smartphone is lost, stolen, or corrupted by an unforeseen issue.
My smartphone isn't ringing or vibrating when I receive a call or message
Try the following actions:
• On the Home screen, click the Sound and Alert Profiles icon. Verify that your profile isn't set to All Alerts Off or Silent.
• If you have created contact alerts, on the Home screen, click the Sound and Alert Profiles icon. Click Change Sounds and
Alerts > Sounds for Contacts. Click a contact alert. Click Phone or Messages. Verify that the Volume field isn't set to Silent
and that the Vibration field isn't set to Off.
The screen turns off
When you don't use your BlackBerry® smartphone for a period of time, the screen turns off to conserve battery power. You can
change the length of time that the backlight stays on when you aren't touching your smartphone.
Related information
Set options for backlighting, 265
34
Page 37

RIM Strictly Confidential
Email messages aren't reconciling over the wireless network
Try the following actions:
• Verify that your BlackBerry® smartphone is connected to the wireless network.
• Verify that wireless email reconciliation is turned on.
• Reconcile email messages manually.
Organizer data isn't synchronizing over the wireless network
Try the following actions:
• Verify that your BlackBerry® smartphone is connected to the wireless network.
• Verify that wireless data synchronization is turned on in the Contacts application, Calendar application, Tasks application,
and MemoPad.
• If you use the BlackBerry® Internet Service, you must synchronize calendar data using the BlackBerry® Desktop Software.
For more information, see the Help in the BlackBerry Desktop Software.
I can't pair with a Bluetooth enabled device
Try the following actions:
• Verify that your BlackBerry® smartphone is compatible with the Bluetooth® enabled device. For more information, see the
documentation that came with the Bluetooth enabled device.
• If you don't know the passkey for your Bluetooth enabled device, see the documentation that came with the Bluetooth
enabled device.
• If your BlackBerry smartphone doesn't detect the Bluetooth enabled device that you want to pair with, try making your
BlackBerry smartphone discoverable for a short period of time. Many car kits need to discover your BlackBerry smartphone
rather than your BlackBerry smartphone discovering the car kit. On the Home screen, click the connections area at the top
of the screen, or click the Manage Connections icon. Click Networks and Connections > Bluetooth Connections. Click Add
New Device. Click Listen. Bluetooth enabled devices can detect your BlackBerry smartphone for 2 minutes.
• Turn off encryption for Bluetooth connections between your BlackBerry smartphone and the Bluetooth enabled device. On
the Home screen, click the connections area at the top of the screen, or click the Manage Connections icon. Click
Networks and Connections > Bluetooth Connections. Highlight a Bluetooth enabled device. Press the
Properties. Clear the Encryption check box. Press the key > Save.
Related information
Make your BlackBerry smartphone discoverable, 339
> Devices
The media player screen closes
If you pause or stop a media file for a certain period of time, the media player screen closes to optimize the performance of
your BlackBerry® smartphone. In the media options, you can stop the media player screen from closing or change the amount
of time before the media player screen closes.
35
Page 38

RIM Strictly Confidential
Related information
Change the amount of time before the media player screen closes, 143
36
Page 39

RIM Strictly Confidential
Tips and shortcuts
Tips: Doing things quickly
For full instructions, click the links under Related information at the bottom.
Access popular options such as changing your ring tone,
setting the alarm, viewing notifications, and turning on or
turning off network connections.
See all the apps and folders on the Home screen, or minimize
the panel and view the wallpaper.
Switch to another app.
Open an app with a convenience key. Press a convenience key on the side of your smartphone.
Use toolbars. Toolbars are available in most applications, and appear at the
Use pop-up menus. Pop-up menus provide common available actions, and appear
Switch to the Favorites, Media, Downloads, and Frequent
panels.
Add an app to the Favorites panel. Highlight an app on the Home screen or in a folder. Press the
Change options for the Home screen such as the wallpaper.
Highlight and click the areas at the top of the Home screen.
On the navigation bar, click All.
Press and hold the key. Click an app.
Note: The other app might still be running in the background.
Note: You can customize which app a convenience key opens.
bottom of the screen. For example, you can click icons on the
toolbar in the message list to quickly search the message list,
compose an email, and delete the selected message. To see a
description for a toolbar icon, touch and hold the icon.
in the center of the screen. For example, you can use the popup menu in a message to file, forward, or reply to the message.
To open a pop-up menu, touch and hold the screen or press
and hold the trackpad. To select a command, tap the icon or
click the trackpad.
Watch the video
On the Home screen, highlight All on the navigation bar and
swipe right or left.
key > Mark as Favorite.
On the Home screen, press the key > Options.
Related information
Change what happens when you type on the Home screen, 0
37
Page 40

RIM Strictly Confidential
Assign an application to a convenience key, 31
Keep an application running in the background and switch to another application, 286
Tips: Extending battery life
For full instructions, click the links under Related information at the bottom.
Set your BlackBerry® smartphone to turn on and turn off
automatically.
You can set your smartphone to turn off while you aren't using
it for an extended period, like when you sleep. Data you
receive when the smartphone is turned off automatically
updates when the smartphone turns on.
Set backlighting to remain on for a shorter period of time, and
lower its brightness.
Turn off network connections you aren't using. On the Home screen, click the connections area at the top of
Close apps when you're finished with them.
When you switch from one app to another, some apps, such
as the Browser app or the Music app, run in the background,
which uses battery power.
Switch your vibrating notifications to sound notifications or
LED notifications, lower the volume of your sound
notifications, or select a shorter ring tone.
Delete the original text from a reply message.
If your smartphone has a camera flash, turn off the flash. On the Home screen, click the Camera icon. Click the flash icon
Keep your battery connections clean.
Keeping the battery clean extends the life of your battery.
On the Home screen or in a folder, click the Options icon. Click
Device > Auto On/Off.
On the Home screen or in a folder, click the Options icon. Click
Display > Screen Display.
the screen, or click the Manage Connections icon. Click a
network connection to clear the checkbox.
In an app, press the key > Close.
On the Home screen, click the Sound and Alert Profiles icon.
Click Change Sounds and Alerts.
When you are replying to a message, press the key >
Delete Original Text.
at the bottom of the screen until the flash off indicator
appears.
Every few months, use a cotton swab or dry cloth to clean the
metal contacts on the battery and the smartphone.
Related information
Delete the original text from a reply message, 73
Change your ring tone, notifiers, or reminders, 29
38
Page 41

RIM Strictly Confidential
Turn on or turn off a network connection, 22
Set options for backlighting, 265
Set your smartphone to turn on and turn off automatically, 349
Tips: Finding apps
Look in a folder on your home screen. Some apps are located in folders on your home screen. Click
a folder to see what apps are inside.
Make all hidden apps visible on the home screen.
Search for an app. On the home screen, start typing the app name.
Verify that the app is installed. On the home screen or in a folder, click the Options icon. Click
On the home screen, press the key > Show All Icons. To
unhide the app, highlight it and then click Hide Icon to clear
the check mark. If the icon is hidden in other panels, you can
unhide the icon in all panels, or in the current panel only. If
Show All Icons does not appear in the menu, there are no apps
hidden from view.
Device > Application Management. If the app is listed, it is
installed on your BlackBerry® smartphone.
Tips: Freeing and conserving storage space
Try to maintain at least 400 KB of available application storage on your BlackBerry® smartphone. If you find that your
smartphone processes are unusually slow, try freeing storage space by deleting files that you don't need. Changing options for
email, calendar entries, and media files might help you conserve storage space.
Check how much free storage space you have.
Close any apps you're not using.
Delete unneeded files. On the home screen or in a folder, click the Files icon. Find and
Delete browsing history and clear the cache.
On the home screen or in a folder, click the Options icon. Click
Device > Storage.
In an app, press the key > Close or press the key
until the home screen appears.
highlight a file. Press the key > Delete.
On the home screen, click the Browser icon. Press the
key > Options. Go to the Clear Browsing Data section.
39
Page 42

RIM Strictly Confidential
Reduce the amount of time that your smartphone stores email
messages and calendar entries.
Stop storing sent messages on your smartphone.
Receive only the first section of long email messages, and
choose whether to download more.
Store files on a media card instead of the smartphone. Your BlackBerry smartphone supports media card sizes up to
Reduce the size of pictures you take.
Research In Motion recommends that you regularly create and save a backup file on your computer, especially before you
update any software. Maintaining a current backup file on your computer might allow you to recover smartphone data if your
smartphone is lost, stolen, or corrupted by an unforeseen issue.
Related information
Copy, move, rename, or delete a file, 135
Receive only the first section of long email messages, 85
Change the size of pictures that you take, 175
View the amount of available storage space on your smartphone, 353
Set how long your smartphone stores messages, 84
Stop storing messages sent from your computer on your smartphone, 84
Stop storing messages sent from your smartphone on your computer, 84
Change how long your smartphone stores calendar entries, 224
Keep an application running in the background and switch to another application, 286
The application storage on my smartphone is low, 356
On the home screen, click the Messages icon or Calendar icon.
Press the key > Options.
On the home screen, click the Messages icon. Press the
key > Options > Email Preferences.
On the home screen, click the Messages icon. Press the
key > Options > Message Display and Actions.
32 GB. Only microSD media cards are supported.
On the home screen, click the Camera icon. Press the
key > Options.
Tips: Updating your software
Updated BlackBerry® Device Software and BlackBerry® Desktop Software are released periodically, and you might be able to
update the software from either your computer or your smartphone. Research In Motion recommends that you regularly
create and save a backup file on your computer, especially before you update any software. Maintaining a current backup file
on your computer might allow you to recover smartphone data if your smartphone is lost, stolen, or corrupted by an
unforeseen issue.
Check to see if there is updated BlackBerry Device Software
that you can download over the network.
40
Depending on your smartphone model, this feature might not
be supported. On the Home screen or in a folder, click the
Options icon. Click Device > Software Updates.
Page 43

RIM Strictly Confidential
Update your BlackBerry Device Software from your computer. On your computer, visit www.blackberry.com/update. Click
Check for Updates. Connect your smartphone to your
computer.
Set your BlackBerry Desktop Software to check for updates
automatically.
Update your BlackBerry Desktop Software . Visit www.blackberry.com/desktopsoftware.
Related information
BlackBerry Device Software, 294
For instructions, see the Help in BlackBerry Desktop Software.
Tips: Keeping your information safe
You can take some simple steps to help prevent the information on your BlackBerry® smartphone from being compromised,
such as avoiding leaving your smartphone unattended.
Research In Motion recommends that you regularly create and save a backup file on your computer, especially before you
update any software. Maintaining a current backup file on your computer might allow you to recover smartphone data if your
smartphone is lost, stolen, or corrupted by an unforeseen issue.
Set a smartphone password. On the Home screen or in a folder, click the Options icon. Click
Security > Password.
Encrypt contacts and files. On the Home screen or in a folder, click the Options icon. Click
Security > Encryption.
Back up your smartphone data to your computer. Use the BlackBerry® Desktop Software to back up your
smartphone data to your computer. To download the
BlackBerry Desktop Software, from your computer, visit
www.blackberry.com/desktop and select the appropriate
option for your computer.
Back up your smartphone data to a media card. On the Home screen, click the Setup icon. In the Setup section,
click Device Switch > Save Data.
Related information
Set a smartphone password, 365
Turn on encryption, 354
41
Page 44

RIM Strictly Confidential
Tips: Managing indicators
Indicators tell you that there is something new or updated, such as a new message, voice mail message, or feed, or they inform
you of the status of something, such as the battery or network connection. Indicators often appear on app icons, new content
within apps, and at the top of the Home screen.
Remove the new item indicator .
Remove the unopened message indicator .
Identify an indicator.
Open each item that has this indicator. For example, to remove
it from the Messages icon, click the icon.
In the Messages app, do one or more of the following:
• Open all of your messages by clicking on them. If you can't
find all of your unread messages in your inbox, look in your
messages folders.
• Mark a message as read. Highlight a message. Press the
key > Mark Read.
• Mark all messages that are prior to a date as read.
Highlight a date field. Press the key > Mark Prior
Read.
• You might be able to identify an indicator by seeing the
icon of the application that the indicator refers to. To see
a complete list of applications on your BlackBerry®
smartphone and their icons, on the Home screen or in a
folder, click the Options icon. Click Device > Application
Management.
• For a complete list of indicators, visit
www.blackberry.com/docs/smartphones. Click your
smartphone model, and then click the Icons guide.
Phone shortcuts
Depending on the typing input language that you're using, some shortcuts might not be available.
Change your ring tone
42
From the Home screen, press the key. Press the key > Phone
Ring Tones.
Page 45

RIM Strictly Confidential
Send an incoming call to voice mail when your
BlackBerry® smartphone is inserted in a holster
Set up speed dial for a contact
Insert a plus sign (+) when typing a phone number Press and hold 0.
Change the active phone number
Press and hold the Volume Down key on the right side of your smartphone.
From the Home screen, press the key. Press and hold the key that
you would like to assign speed dial to.
From the Home screen, press the key. Click your phone number at
the top of the screen. Click a phone number.
Typing shortcuts for the touch screen keyboard
Depending on the typing input language that you are using, some shortcuts might not be available.
Show the keyboard
Hide the keyboard Touch the top of the keyboard and slide your finger quickly
down the screen.
Insert a period
Insert an at sign (@) or a period (.) in an email address field
Capitalize a letter
Turn on CAP lock
Type a symbol
Type an accented character
Type a number in a text field
Type a number in a number field
Turn on NUM lock
Move the cursor to edit text
Change the typing input language
Media shortcuts
Depending on the typing input language that you're using, some shortcuts might not be available.
43
Page 46

RIM Strictly Confidential
Audio and video files
Pause an audio or video file Press the Mute key on the right side of your BlackBerry®
smartphone.
Resume playing an audio or video file Press the Mute key again.
Play the next audio file Press and hold the Volume Up key on the right side of your
smartphone.
Play the previous audio file Press and hold the Volume Down key on the right side of your
smartphone.
Turn on the audio boost feature if you're using a headset Press the Volume Up key until the audio boost feature turns
on.
Camera
Zoom in to a subject before taking a picture Press the Volume Up key.
Zoom out from a subject before taking a picture Press the Volume Down key.
Take a picture Press the Convenience key on the right side of your
smartphone.
Troubleshooting: Shortcuts
I can't use a shortcut
Try the following actions:
• Depending on the typing input language that you're using, some shortcuts might not be available. Try changing the typing
input language.
• If media shortcuts aren't working, verify that you have turned on audio and video shortcuts in the Media options.
Related information
Change the language, 30
44
Page 47

RIM Strictly Confidential
Phone
How to: Phone
Phone icons
These icons appear at the top of the Home screen and in the Phone application.
Missed call Received call
Placed call Voice mail message
Phone basics
Find your phone number
Do one of the following:
•
To view your active phone number, from the home screen, press the
of the screen.
• If you have multiple phone numbers associated with your BlackBerry® smartphone, to view a list of your phone
numbers, from the home screen, press the
wireless service plan supports text messaging, the first phone number in the list is the phone number that you use to
send and receive text messages.
key.Click the area at the top of the screen, above the tabs. If your
key.Your phone number appears at the top
Related information
About multiple phone numbers, 56
My phone number appears as Unknown in the Phone application, 65
Make a call
Watch the video
1. Do one of the following:
•
If your BlackBerry® smartphone is unlocked, press the
• If your smartphone is locked and you don't want to unlock it, press the key > Place Call.
2. Type a phone number or contact name.
3.
Press the
To end the call, press the key.
key.
key.
45
Page 48

RIM Strictly Confidential
Related information
Add a pause or a wait to a phone number, 231
Available voice commands, 67
Turn on dialing from the Lock screen, 57
Sort phone numbers or contacts on the Phone screen, 57
I can't make or receive calls, 32
Answer or end a call
Watch the video
Press the key.
To end a call, press the key.
Related information
Change your ring tone, notifiers, or reminders, 29
I can't make or receive calls, 32
Answer a second call
Depending on your wireless service provider and wireless network, this feature might not be supported.
During a call, press the key.
• To answer the incoming call and place the current call on hold, click Answer - Hold Current.
• To answer the incoming call and end the current call, click Answer - Drop Current.
To return to the first call, press the
key > Swap or Flash.
Change your ring tone, notifiers, or reminders
In addition to changing the tone, you can also change options for notifcation during calls, volume, LED, and vibration.
1. On the Home screen, click the Sound and Alert Profiles icon.
2. Click Change Sounds and Alerts > Sounds for Selected Profile.
• To change your ring tone, click Phone.
• To change notifiers or reminders, click to expand a section. Click an option.
3. In the Ring Tone, Notifier Tone, or Reminder Tone field, do one of the following:
• Click a tone.
• To use a song that is on your BlackBerry® smartphone or on a media card, click All Music. Find and click a song.
• To use a voice note that you recorded, click All Voice Notes. Find and click a voice note.
• To use a preloaded alert, click All Alerts. Find and click an alert.
4.
Press the
Try this now!
Related information
I can't change the number of times that my smartphone rings, 65
46
key > Save.
Page 49

RIM Strictly Confidential
Mute a call
During a call, press the Mute key on the right side of your smartphone.
To turn off mute, press the Mute key again.
Place a call on hold
If your BlackBerry® smartphone is connected to a CDMA network, you can't place a call on hold.
During a call, press the key > Hold.
To resume a call, press the key > Resume.
Dial using numbers or letters
When you type a letter in a phone number, your BlackBerry® smartphone dials the number that's associated with the letter on
a conventional phone keypad.
• To type a number, press a number key.
• To type a letter, press a letter key.
Switch applications during a call
During a call, press the key > Switch Application.
Note: If you switch to a different application and you want to end the call, press the
key.
About using a headset
You can purchase an optional headset to use with your BlackBerry® smartphone.
If you use a headset, you can use a headset button to answer or end a call, or to turn on or turn off mute during a call.
Depending on your smartphone model, you might be able to use a headset button to make a call using a voice command.
Depending on your headset, you might also be able to use a headset button to pause, resume, skip, or adjust the volume of
audio or video files.
For more information about using the headset, see the documentation that came with your headset.
Emergency calls
About emergency calls and Emergency Callback Mode
If you're outside of a wireless coverage area and the SOS wireless coverage indicator appears at the top of the screen, you can
call only emergency numbers. Your BlackBerry® smartphone is designed to allow emergency calls even when your smartphone
is locked. Depending on your smartphone model and the wireless network that your smartphone is connected to, your
47
Page 50

RIM Strictly Confidential
smartphone is also designed to allow emergency calls when the SIM card isn't inserted. If the connection to the wireless
network is turned off when you initiate an emergency call, your smartphone is designed to connect to the wireless network
automatically. You can make emergency calls by typing only official emergency access numbers (for example, 911 or 112).
Note: You should not rely on any wireless smartphone for essential communications, including medical emergencies.
Emergency numbers may vary by location and emergency calls may be blocked or impeded by network, environmental, or
interference issues.
If your smartphone is connected to a CDMA network, when you end an emergency call, your smartphone enters Emergency
Callback Mode. This mode allows the operator to call you back or find your approximate location. Depending on your wireless
service provider, Emergency Callback Mode is active for 5 minutes or until you make a non-emergency call. In Emergency
Callback Mode, you can't send and receive messages or browse web pages.
If your smartphone supports GPS and you make an emergency call, an emergency operator might be able to use GPS
technology to find your approximate location.
Make an emergency call
Do one of the following:
• If your screen or BlackBerry® smartphone is unlocked, from the Home screen, press the
number. Press the
• If your smartphone is locked, press the key > Emergency. Press the key.
• If your screen is locked, press the
number. Press the key.
key.
key on the top of your smartphone. Press the key. Type the emergency
key. Type the emergency
Volume
Adjust the volume
• To increase the volume, press the Volume Up key on the right side of your BlackBerry® smartphone.
• To decrease the volume, press the Volume Down key on the right side of your smartphone.
• To mute the volume, press the Mute key on the right side of your smartphone. To turn off mute, press the Mute key again.
If you press the Mute key during a call, your smartphone mutes the call so that you can hear others on the call, but they
can't hear you.
Related information
Mute a call, 47
Amplify the volume using the audio boost feature, 142
Improve sound quality for media files, 142
Change the default volume for calls
You can increase or decrease the default volume for calls. The higher you set the volume percentage, the louder the volume is.
1.
From the Home screen, press the
2.
Press the key > Options > In-call Settings.
3. Change the Default Call Volume field.
48
key.
Page 51

RIM Strictly Confidential
4.
Press the key > Save.
Improve sound quality during a call
You can't change sound quality when you are using a Bluetooth® enabled headset.
1. During a call, press the key > Enhance Call Audio.
2. Select a Boost Bass or Boost Treble option.
Improve sound quality for all calls
You can't change sound quality when you are using a Bluetooth® enabled headset.
1.
From the Home screen, press the
2. Press the
3. Change the Phone Call Audio field or Headset Call Audio field.
4.
Press the
key > Options > In-call Settings.
key > Save.
key.
Speed dial
Set up speed dial for a contact
1.
From the Home screen, press the
2.
Press the key > View > Speed Dial List.
3. In the Speed Dial Numbers list, click an unassigned key.
4. Click a contact.
5. If necessary, click a phone number for the contact.
key.
To make a call using speed dial, in the Phone application, press and hold the key that you assigned to the contact.
Change the contact that is assigned to a speed dial key
1.
From the Home screen, press the
2.
Press the key > View > Speed Dial List.
3. Highlight a contact or phone number.
4.
Press the key.
• To change the contact that is assigned to a speed dial key, click Edit. Click a new contact.
• To assign the contact to a different speed dial key, click Move. In the Speed Dial Numbers list, click a new speed dial
key.
• To delete the contact from the Speed Dial Numbers list, click Delete.
key.
49
Page 52

RIM Strictly Confidential
Call waiting, call forwarding, and call blocking
Turn on call waiting
To perform this task, your wireless service provider must set up your SIM card or BlackBerry® smartphone for this service.
1.
From the Home screen, press the
2. Press the
3. Select the Enabled checkbox.
4.
Press the key > Save.
To turn off call waiting, clear the Enabled checkbox.
key > Options > Call Waiting.
key.
About call forwarding
Depending on your wireless service provider, one or more call forwarding phone numbers might already be available on your
SIM card or BlackBerry® smartphone. You might not be able to change or delete these phone numbers or add new ones.
For more information, contact your wireless service provider.
Forward calls
To perform this task, your wireless service provider must set up your SIM card or BlackBerry® smartphone for this service.
1.
From the Home screen, press the key.
2.
Press the key > Options > Call Forwarding.
• To forward all calls to a call forwarding number, change the Forward Calls field to Always. Change the Forward All Calls
field to a call forwarding number.
• To forward unanswered calls only, change the Forward Calls field to Conditional. Change the If Busy, If No Reply, and If
Not Reachable fields to a call forwarding number.
3.
Press the
Your call forwarding settings apply to all subsequent incoming calls, until you change your settings again.
To stop forwarding calls, change the Forward Calls field to Never.
key > Save.
Add, change, or delete a call forwarding number
To perform this task, your wireless service provider must set up your SIM card or BlackBerry® smartphone for this service.
1. From the Home screen, press the Send key.
2. Press the
3. Press the key.
•
To add a call forwarding number, click New Number. Type a phone number. Press the key on the keyboard.
50
key > Options > Call Forwarding.
Page 53

RIM Strictly Confidential
•
To change a call forwarding number, click Edit Numbers. Highlight a phone number. Press the key > Edit. Change
the phone number. Press the key on the keyboard.
• To delete a call forwarding number, click Edit Numbers. Click a phone number. Click Delete.
4. Press the key > Close.
About call blocking
The blocked calling feature allows you to block all incoming calls or block incoming calls only when roaming. You can also block
all outgoing calls and all outgoing international calls, or you can block outgoing international calls only when roaming.
To use the blocked calling feature, your BlackBerry® smartphone must use a SIM card, and your wireless service provider must
set up your SIM card for this service and provide you with a call blocking password. Depending on your wireless service
provider and wireless network, this feature might not be supported.
Block calls
To perform this task, your BlackBerry® smartphone must use a SIM card, and your wireless service provider must set up your
SIM card for this service and provide you with a call blocking password.
1.
From the Home screen, press the key.
2.
Press the key > Options > Call Barring.
3. Highlight a call blocking option.
4. Press the key > Enable.
5. Type your call blocking password.
To stop blocking calls, highlight a call blocking option. Press the
key > Disable.
Change the call blocking password
1.
From the Home screen, press the key.
2.
Press the key > Options > Call Barring.
3. Press the key > Change Password.
Fixed dialing and smart dialing
Depending on your wireless service provider and wireless network, this feature might not be supported.
About fixed dialing
If you turn on fixed dialing, you can only make calls to contacts that appear in your fixed dialing list and to official emergency
access numbers (for example, 911 or 112).
If your wireless service plan includes text messaging, you can also send text messages to contacts that appear in your fixed
dialing list.
51
Page 54

RIM Strictly Confidential
To use fixed dialing, your wireless service provider must set up your SIM card for this service and provide you with a SIM card
PIN2 code. Depending on your wireless service provider and wireless network, this feature might not be supported.
Turn on fixed dialing
To perform this task, your BlackBerry® smartphone must use a SIM card, and your wireless service provider must set up your
SIM card for this service and provide you with a SIM card PIN2 code.
1.
From the Home screen, press the key.
2.
Press the key > Options > FDN Phone List.
3. Press the key > Enable FDN Mode.
4. Type your PIN2 code.
5.
Press the key on the keyboard.
To turn off fixed dialing, press the
Related information
I can't make or receive calls, 32
key > Disable FDN Mode.
Add, change, or delete a contact in your fixed dialing list
To perform this task, your wireless service provider must set up your SIM card for this service and provide you with a SIM card
PIN2 code.
1. From the Home screen, press the Send key.
2. Press the
• To add a contact, press the key > New. Type your PIN2 code. Press the key. Type a name and phone
number.
• To change a contact, press the
• To delete a contact, highlight a contact. Press the key > Delete.
3.
Press the key > Save.
key > Options > FDN Phone List.
key > Edit. Change the contact information.
About smart dialing
With the smart-dialing feature, you can set a default country code and area code for phone numbers in the Contacts
application so that you don't have to dial a country code and area code each time that you make a call, unless the country code
or area code are different from the default codes that you set. Some country codes are not supported by the smart-dialing
feature.
In the smart-dialing options, you can also specify the main phone number for an organization that you call frequently so that
you can quickly call a contact in that organization by dialing only the extension for the contact. If you add contacts from that
organization to your contact list, when you add their phone numbers, you can type only the extensions instead of typing out
the main phone number for the organization.
Related information
I can't make or receive calls, 32
52
Page 55

RIM Strictly Confidential
Set options for dialing extensions
1.
From the Home screen, press the key.
2.
Press the
3. In the Number field, type the main phone number for an organization.
4. In the Wait For field, set how long your BlackBerry® smartphone waits before dialing an extension.
5. In the Extension Length field, set the default length for extensions.
6.
Press the
key > Options > Smart Dialing.
key > Save.
Set the default country code and area code
1.
From the Home screen, press the
2.
Press the key > Options > Smart Dialing.
3. Set the Country Code and Area Code fields.
4. If necessary, set the Local Country Code field and International Dialing Digits field.
5. In the National Number Length field, set the default length for phone numbers in your country.
6.
Press the key > Save.
Note: When you determine the default length for phone numbers, include your area code and local number, but don't include
your country code or the National Direct Dialing prefix.
key.
Conference calls
About conference calls
You can create two types of conference calls with your BlackBerry® smartphone. If your organization or a conferencing service
has provided you with a conference call bridge number, you can create conference call meetings in the calendar on your
smartphone or computer. Conference call meetings allow participants who have a BlackBerry smartphone to enter the
conference call meeting with a one-touch Join Now option, if this feature is supported on their smartphone, so that they don't
have to dial the conference call bridge number and access codes. If you don't have a conference call bridge number, you can
create a conference call by calling other contacts and joining the calls together.
Related information
Conference call meetings, 225
Make a conference call
Depending on your wireless service provider or your wireless service plan, this feature might not be supported.
If your BlackBerry® smartphone is connected to a CDMA network, you can't join more than two contacts to a conference call.
1. During a call, press the
2. Type a phone number or highlight a contact.
3.
Press the key.
key > Add Participant.
53
Page 56

RIM Strictly Confidential
4.
During the new call, press the key to join your first contact to the conference call.
5. To join another contact to the call, repeat steps 1 to 4.
Related information
Place a call on hold, 47
Create a phone number link for a conference call
1. Type a phone number for the conference call bridge.
2. Type X and the access code.
Speak privately with a contact during a conference call
You can perform this task only if you make a conference call by calling other contacts and joining the calls together, and not if
you create a conference call meeting in the calendar of your smartphone.
1. During a conference call, press the
2. Click a contact.
To return to the conference call, press the
key > Split Call.
key > Join Conference.
Disconnect a contact from a conference call
You can perform this task only if you make a conference call by joining calls together, and not if you create a conference call
meeting in the calendar.
1. During a conference call, press the key > Drop Call.
2. Click a contact.
Leave a conference call
You can perform this task only if you make a conference call by joining calls together, and not if you create a conference call
meeting in the calendar.
If you make a conference call, you can leave the conference call and the call continues without you. Depending on your
wireless service provider, this feature might not be supported.
During a conference call, press the key > Transfer or Flash.
Call logs
About call logs
Call logs appear in the Phone application and show the status of recent calls by showing either a missed call indicator, placed
call indicator or received call indicator. A call log also includes the date of the call, the phone number, and the estimated
duration of the call. For more information about the exact duration of a call, contact your wireless service provider.
54
Page 57

RIM Strictly Confidential
The phone list view option allows you to sort how call logs appear in the Phone application. Depending on how you set your
call logging options, you can also view call logs in the Messages application. Depending on your theme, when you miss a call, a
missed call indicator might also appear at the top of the Home screen.
You can also add notes to call logs or send call logs as email messages. Unless you delete a call log, it's stored on your
BlackBerry® smartphone for 30 days.
Send a call log
1.
From the Home screen, press the key.
2. Click the Call Log icon.
3. Highlight a call log.
4.
Press the
5. Highlight a call log.
6. Press the key > Forward.
key > View > History.
Delete call logs
1.
From the Home screen, press the
2. Do one of the following:
• To delete a single call log, highlight a call log.
• To delete a range of call logs, touch two call logs simultaneously and slide your finger up or down to select additional
call logs.
3.
Press the
key > Delete.
key.
Add, change, or delete call log notes
1.
From the Home screen, press the
2. Click the Call Log icon.
3. Highlight a call log.
4.
Press the key > View > History.
5. Click a call log.
6.
Press the key.
• To add notes, click Add Notes. Type call notes.
• To change notes, click Edit Notes. Change the call notes.
• To delete notes, click Edit Notes. Press the key > Clear Field.
7.
Press the key > Save.
key.
View or hide call logs in the Messages application
You can set your BlackBerry® smartphone to show call logs, including missed calls, in the Messages application.
1.
From the Home screen, press the
2.
Press the key > Options > Call Logs and Lists.
• To show recent and missed calls in the Messages application, select the All Calls option.
key.
55
Page 58

RIM Strictly Confidential
• To hide call logs in the Messages application, select the None option.
3.
Press the key > Save.
Multiple phone numbers
About multiple phone numbers
When you have multiple phone numbers associated with your BlackBerry® smartphone, you can switch the phone number that
you use as your active phone number. You have multiple phone numbers associated with your smartphone if one of the
following situations applies:
• Your smartphone uses a SIM card and your SIM card supports more than one phone number.
• Your wireless service provider has set up your smartphone to support more than one phone number.
• Your wireless service provider has provided you with a phone number, and your organization has provided you with a
BlackBerry® MVS Client phone number.
If your SIM card supports more than one phone number, you can make calls using your active phone number only, but you
receive calls to all phone numbers. If you're already on a call, you receive calls to your active phone number only, and any calls
that you receive to your other phone numbers receive a busy signal or are sent to voice mail.
If your wireless service provider has set up your smartphone to support more than one phone number, you can make calls and
receive calls using your active phone number only. Any calls that you receive to your other phone numbers receive a busy
signal or are sent to voice mail.
If your wireless service provider has provided you with a phone number, and your organization has provided you with a
BlackBerry MVS Client phone number, you can make calls using your active phone number only, but you receive calls to all
phone numbers. If you're already on a call, you can receive calls to all phone numbers.
If your wireless service plan supports text messaging, the first phone number that appears in the drop-down list at the top of
the screen in the phone application is the phone number that you use to send and receive text messages.
You can change call waiting, call forwarding, and voice mail options for each phone number associated with your smartphone.
Switch the active phone number
1.
From the Home screen, press the
2. Click the area at the top of the screen, above the tabs.
3. Click the phone number that you want to set as the active phone number.
Related information
My phone number appears as Unknown in the Phone application, 65
I can't make or receive calls, 32
56
key.
Page 59

RIM Strictly Confidential
Phone options
Turn on dialing from the Lock screen
1. On the Home screen or in a folder, click the Options icon.
2. Click Security > Password.
3. Select the Allow Outgoing Calls While Locked check box.
4.
Press the
Sort phone numbers or contacts on the Phone screen
1.
From the Home screen, press the key.
2.
Press the
• To sort phone numbers or contacts by frequency of use, change the Phone List View field to Most Used.
• To sort contacts alphabetically by contact name, change the Phone List View field to Name.
• To sort phone numbers or contacts by most recent use, change the Phone List View field to Most Recent.
3.
Press the key > Save.
Related information
Turn on dialing from the Lock screen, 57
key > Save.
key > Options > Call Logs and Lists.
Hide or display your phone number when you make calls
Your wireless network can override the option that you choose.
1.
From the Home screen, press the key.
2.
Press the key > Options > In-call Settings.
• To hide your phone number when you make calls, change the Restrict My Identity field to Always.
• To display your phone number when you make calls, change the Restrict My Identity field to Never.
• To allow your wireless network to decide whether to hide or display your phone number, change the Restrict My
Identity field to Network Determined.
3.
Press the key > Save.
Turn off the prompt that appears before you delete items
You can turn off the prompt that appears before you delete messages, call logs, contacts, calendar entries, tasks, memos, or
passwords.
1. On the Home screen, click the application icon for an application that prompts you before you delete items.
2.
Press the key > Options.
3. If necessary, click General Options.
4. Clear the Confirm Delete checkbox.
5.
Press the
key > Save.
57
Page 60

RIM Strictly Confidential
Change how you answer or end calls with the holster
1.
From the Home screen, press the key.
2. Press the
• To answer calls automatically when you remove your BlackBerry® smartphone from the holster, change the Auto
Answer Calls field to Out of Holster.
• To stop answering calls automatically when you remove your smartphone from the holster, change the Auto Answer
Calls field to Never.
• To end calls automatically when you insert your smartphone in the holster, change the Auto End Calls field to Into
Holster.
• To stop ending calls automatically when you insert your smartphone in the holster, change the Auto End Calls field to
Never.
3.
Press the
key > Options > In-call Settings.
key > Save.
Change how you answer calls with a headset
If your BlackBerry® smartphone is paired with a Bluetooth® enabled headset or you have a headset plugged into your
smartphone, you can set your smartphone to answer calls automatically after 5 seconds.
1.
From the Home screen, press the key.
2. Press the key > Options > In-call Settings.
• To answer calls automatically after 5 seconds, change the Auto Answer Calls field to After 5s (Bluetooth/Headset
Only).
• To stop answering calls automatically after 5 seconds, change the Auto Answer Calls field to Never.
3.
Press the key > Save.
Reset a call timer
A call timer provides the estimated duration of calls. For more information about the exact duration of a call, contact your
wireless service provider.
1.
From the Home screen, press the key.
2. Press the key > Status > Last Call or Total Calls > Clear Timer.
3.
Press the key > Save.
About TTY support
When you turn on TTY support and you connect your BlackBerry® smartphone to a TTY device that operates at 45.45 bits per
second, you can make calls to and receive calls from TTY devices. Your smartphone is designed to convert received calls to text
that you can read on your TTY device.
If your TTY device is designed for use with a 2.5-mm headset jack, you must use an adapter accessory to connect your TTY
device to your smartphone. To get an adapter accessory that Research In Motion® has approved for use with your smartphone,
visit www.shopblackberry.com.
58
Page 61

RIM Strictly Confidential
Turn on TTY support
1.
From the Home screen, press the key.
2. Press the
3. Change the TTY field to On.
4.
Press the key > Save.
A TTY indicator appears in the connections area at the top of the Home screen.
To turn off TTY support, change the TTY field to Off.
Related information
About TTY support, 58
Phone options, 57
key > Options > TTY.
Voice mail
About your voice mail greeting and voice mail password
Depending on your wireless service provider, the method for changing your voice mail greeting or voice mail password might
differ. You should be able to access the options for changing your voice mail greeting or voice mail password when you check
your voice mail. For more information, contact your wireless service provider.
Check your voice mail
Depending on your theme, you might be able to check your voice mail from the Home screen.
1.
From the Home screen, press the
2. Press the key > Call Voice Mail.
Related information
I can't check my voice mail, 64
key.
Change the voice mail access number and password
If a voice mail access number isn't already set on your BlackBerry® smartphone, you can type the access number for a different
voice mail system.
Note: If you change the voice mail password on your smartphone, you must also call your voice mail system to change the
password there. Otherwise, the password for your voice mail isn't updated in your voice mail system. If you forget your voice
mail password, call your wireless service provider to get a new password.
1. From the Home screen, press the Send key.
2. Press the
3. Type a voice mail access number and a password.
4.
Press the key > Save.
key > Options > Voice Mail.
59
Page 62

RIM Strictly Confidential
Related information
I can't check my voice mail, 64
Change how many times your smartphone rings before the call goes to voice mail
To change how many times your BlackBerry® smartphone rings before the call is forwarded to voice mail, you must call your
wireless service provider's voice mail system. Each wireless service provider has a different voice mail system. For more
information, contact your wireless service provider.
1. Call your wireless service provider's voice mail system.
2. Listen to your options and follow the audible prompts.
Related information
I can't change the number of times that my smartphone rings, 65
Tips: Phone
Phone shortcuts
Depending on the typing input language that you're using, some shortcuts might not be available.
Change your ring tone
Send an incoming call to voice mail when your
BlackBerry® smartphone is inserted in a holster
Set up speed dial for a contact
Insert a plus sign (+) when typing a phone number Press and hold 0.
Change the active phone number
60
From the Home screen, press the key. Press the key > Phone
Ring Tones.
Press and hold the Volume Down key on the right side of your smartphone.
From the Home screen, press the key. Press and hold the key that
you would like to assign speed dial to.
From the Home screen, press the key. Click your phone number at
the top of the screen. Click a phone number.
Page 63

RIM Strictly Confidential
Personalize: Phone
Change your ring tone, notifiers, or reminders
In addition to changing the tone, you can also change options for notifcation during calls, volume, LED, and vibration.
1. On the Home screen, click the Sound and Alert Profiles icon.
2. Click Change Sounds and Alerts > Sounds for Selected Profile.
• To change your ring tone, click Phone.
• To change notifiers or reminders, click to expand a section. Click an option.
3. In the Ring Tone, Notifier Tone, or Reminder Tone field, do one of the following:
• Click a tone.
• To use a song that is on your BlackBerry® smartphone or on a media card, click All Music. Find and click a song.
• To use a voice note that you recorded, click All Voice Notes. Find and click a voice note.
• To use a preloaded alert, click All Alerts. Find and click an alert.
4.
Press the
Try this now!
Related information
I can't change the number of times that my smartphone rings, 65
key > Save.
Change the default volume for calls
You can increase or decrease the default volume for calls. The higher you set the volume percentage, the louder the volume is.
1.
From the Home screen, press the key.
2.
Press the key > Options > In-call Settings.
3. Change the Default Call Volume field.
4.
Press the key > Save.
Change the voice mail access number and password
If a voice mail access number isn't already set on your BlackBerry® smartphone, you can type the access number for a different
voice mail system.
Note: If you change the voice mail password on your smartphone, you must also call your voice mail system to change the
password there. Otherwise, the password for your voice mail isn't updated in your voice mail system. If you forget your voice
mail password, call your wireless service provider to get a new password.
1. From the Home screen, press the Send key.
2. Press the
3. Type a voice mail access number and a password.
key > Options > Voice Mail.
61
Page 64

RIM Strictly Confidential
4.
Press the key > Save.
Related information
I can't check my voice mail, 64
Change how many times your smartphone rings before the call goes to
voice mail
To change how many times your BlackBerry® smartphone rings before the call is forwarded to voice mail, you must call your
wireless service provider's voice mail system. Each wireless service provider has a different voice mail system. For more
information, contact your wireless service provider.
1. Call your wireless service provider's voice mail system.
2. Listen to your options and follow the audible prompts.
Related information
I can't change the number of times that my smartphone rings, 65
Set up speed dial for a contact
1.
From the Home screen, press the key.
2.
Press the key > View > Speed Dial List.
3. In the Speed Dial Numbers list, click an unassigned key.
4. Click a contact.
5. If necessary, click a phone number for the contact.
To make a call using speed dial, in the Phone application, press and hold the key that you assigned to the contact.
Add, change, or delete a call forwarding number
To perform this task, your wireless service provider must set up your SIM card or BlackBerry® smartphone for this service.
1. From the Home screen, press the Send key.
2. Press the key > Options > Call Forwarding.
3. Press the key.
•
To add a call forwarding number, click New Number. Type a phone number. Press the key on the keyboard.
•
To change a call forwarding number, click Edit Numbers. Highlight a phone number. Press the key > Edit. Change
the phone number. Press the
• To delete a call forwarding number, click Edit Numbers. Click a phone number. Click Delete.
4. Press the
key > Close.
key on the keyboard.
Change the call blocking password
1.
From the Home screen, press the key.
62
Page 65

RIM Strictly Confidential
2.
Press the key > Options > Call Barring.
3. Press the key > Change Password.
Add, change, or delete a contact in your fixed dialing list
To perform this task, your wireless service provider must set up your SIM card for this service and provide you with a SIM card
PIN2 code.
1. From the Home screen, press the Send key.
2. Press the key > Options > FDN Phone List.
• To add a contact, press the key > New. Type your PIN2 code. Press the key. Type a name and phone
number.
• To change a contact, press the key > Edit. Change the contact information.
• To delete a contact, highlight a contact. Press the key > Delete.
3.
Press the key > Save.
Change how you answer or end calls with the holster
1.
From the Home screen, press the key.
2. Press the key > Options > In-call Settings.
• To answer calls automatically when you remove your BlackBerry® smartphone from the holster, change the Auto
Answer Calls field to Out of Holster.
• To stop answering calls automatically when you remove your smartphone from the holster, change the Auto Answer
Calls field to Never.
• To end calls automatically when you insert your smartphone in the holster, change the Auto End Calls field to Into
Holster.
• To stop ending calls automatically when you insert your smartphone in the holster, change the Auto End Calls field to
Never.
3.
Press the
key > Save.
Troubleshooting: Phone
Some features aren't available on my smartphone
The availability of certain features on your BlackBerry® smartphone might be affected by items such as your smartphone model
and wireless service plan.
Depending on your messaging service plan, some features or options might not be available in the message options on the
Email Preferences screen.
63
Page 66

RIM Strictly Confidential
If your email account uses a BlackBerry® Enterprise Server, your organization might not have set up some features or might
prevent you from using some features or options. If your administrator has set an option for you, a lock indicator appears
beside the option field.
For more information about the features that are available on your smartphone, contact your wireless service provider or
administrator, or visit www.blackberry.com/go/devices.
I can't make or receive calls
Try the following actions:
• Verify that your BlackBerry® smartphone is connected to the wireless network.
• Verify that your wireless service plan includes phone or voice services.
• If you can't make calls and fixed dialing is turned on, verify that the phone number for your contact appears in your fixed
dialing list or turn off fixed dialing.
• If you have traveled to another country and you haven't changed your smart-dialing options, dial the full phone number,
including the country code and area code, for your contact.
• If you're not receiving calls, verify that call blocking and call forwarding are turned off.
• Your smartphone or your SIM card might support more than one phone number, even if you only have one phone number.
Verify that your phone number is set as your active phone number.
• If you have more than one phone number associated with your smartphone, verify that the phone number that you want
to make calls from and receive calls to is set as your active phone number.
• If you're using your BlackBerry® MVS Client phone number, verify that support for the BlackBerry MVS Client is turned on.
• If you're using your BlackBerry MVS Client phone number, verify that your smartphone is registered with the BlackBerry®
Mobile Voice System. From the Home screen, press the
MVS Client. Press the key. Click Register Now. If the Register Now menu item doesn't appear, or if the registration
fails, contact your administrator. If the registration doesn't complete, wait for a short period of time and then try again.
• If you have set call forwarding for the phone number provided by your wireless service provider, calls to your BlackBerry
MVS Client phone number are also forwarded. To receive calls to your BlackBerry MVS Client phone number, verify that
call forwarding is turned off.
key. Press the key. Click Options. Click BlackBerry
Related information
Fixed dialing and smart dialing, 51
Call waiting, call forwarding, and call blocking, 50
Switch the active phone number, 56
I can't check my voice mail
Try the following actions:
• If you have more than one phone number associated with your BlackBerry® smartphone and you're trying to check
your voice mail using a shortcut key, your smartphone calls the voice mail access number for your active phone
number. Check the voice mail for your alternate phone number.
• You need a voice mail access number to check your voice mail. To obtain a voice mail access number, contact your
wireless service provider or administrator.
64
Page 67

RIM Strictly Confidential
Related information
Switch the active phone number, 56
I can't block calls
• Your wireless service provider might not support the blocked calling feature. For more information, contact your wireless
service provider.
• If the BlackBerry® MVS Client is installed on your BlackBerry smartphone, you can block calls from unwanted callers. For
more information, see the BlackBerry MVS Client User Guide.
I can't change the number of times that my smartphone rings
Depending on your wireless service provider, you might not be able to choose the length of time that your BlackBerry®
smartphone rings before the call is picked up by voice mail. For more information, contact your wireless service provider.
My phone number appears as Unknown in the Phone application
If your BlackBerry® smartphone uses a SIM card, try changing the phone number on your SIM card to change how your phone
number appears in the Phone application.
1. On the Home screen or in a folder, click the Options icon.
2. Click Device > Advanced System Settings > SIM Card.
3. Highlight the phone number.
4.
Press the
5. Type your phone number.
6. Click OK.
key > Edit SIM Phone Number.
I can't make calls using a voice command
Try the following actions:
• Verify that your BlackBerry® smartphone is connected to the wireless network.
• If you're using a Bluetooth® enabled device, such as a hands-free car kit or wireless headset, verify that the Bluetooth
enabled device supports this feature and that you have paired the Bluetooth enabled device with your BlackBerry
smartphone.
• Verify that your screen is unlocked.
• Verify that the language that you use to say voice commands is the same as the voice dialing language that you have set
in the language options. Certain languages might not be supported.
Related information
Bluetooth technology, 335
Change the language for voice commands, 68
65
Page 68

RIM Strictly Confidential
My headset makes calls instead of my smartphone
If your BlackBerry® smartphone is connected to a Bluetooth® enabled headset, your smartphone might automatically make
calls on the Bluetooth enabled headset.
Try the following actions:
• Disconnect the Bluetooth enabled headset from your BlackBerry smartphone.
•
During a call, press the
key, click Activate Handset.
66
Page 69

RIM Strictly Confidential
Voice commands
How to: Voice commands
Perform an action using a voice command
1. On the Home screen or in a folder, click the Voice Dialing icon.
2. After the beep, say a voice command.
Related information
I can't make calls using a voice command, 65
Change the options for voice prompts
After you say a voice command, voice prompts might prompt you for further information or clarification, or voice prompts
might read out instructions that appear on the screen.
1. On the Home screen or in a folder, click the Options icon.
2. Click Call Management > Voice Dialing.
• To turn off voice prompts, change the Audio Prompts field to No Prompts.
• To turn on voice prompts, change the Audio Prompts field to Basic Prompts.
• To turn on voice prompts and to have the voice prompts read out instructions that appear on the screen, change the
Audio Prompts field to Detailed Prompts.
3.
Press the key > Save.
Improve voice recognition
You can improve voice recognition by completing a short series of prompts that ask you to say specific numbers and words.
1. On the Home screen or in a folder, click the Options icon.
2. Click Call Management > Voice Dialing.
3. In the Voice Adaptation section, click Start.
4. Complete the instructions on the screen.
Available voice commands
Voice command
"Call <contact name or phone number>" Say this voice command to make a call. To perform this task with a Bluetooth®
Description
enabled device, such as a handsfree car kit or wireless headset, the paired Bluetooth
enabled device must support this feature and you must turn on Bluetooth
technology. You can't make calls to emergency numbers using voice commands.
67
Page 70

RIM Strictly Confidential
Voice command Description
"Call <contact name> <phone number
type>"
"Call extension <extension number>" Say this voice command to dial an extension. To perform this task, you must set
"Check my phone number" If you have multiple phone numbers associated with your BlackBerry® smartphone,
"Check signal strength" Say this voice command to check your wireless coverage level.
"Check network" Say this voice command to check the wireless network that your smartphone is
"Check battery" Say this voice command to check the battery power level.
"Repeat" Say this voice command to have the last voice prompt repeated to you.
"Cancel" Say this voice command to close the voice dialing application.
Related information
Set options for dialing extensions, 53
Say this voice command to call a specific phone number for a contact that is in your
contact list. For example, if the contact has a work number and a mobile number,
you can say "call <contact name> work" to call the work number.
options for dialing extensions. You can dial extensions only within your company.
say this voice command to check your active phone number.
connected to.
Change the language for voice commands
When you change the language for voice commands, you change the language for voice prompts and the language that you
use to make a voice command.
1. On the Home screen or in a folder, click the Options icon.
2. Click Typing and Language > Language and Method.
3. Change the Voice Dialing Language field.
4.
Press the key > Save.
Related information
My smartphone doesn't recognize names or numbers in voice commands, 69
Turn off choice lists for voice commands
If your BlackBerry® smartphone identifies more than one possible match to a voice command, your smartphone presents you
with a list of possible matches, or a choice list. You can turn off choice lists so that your smartphone always selects the best
match and dials the phone number automatically.
1. On the Home screen or in a folder, click the Options icon.
2. Click Call Management > Voice Dialing.
3. Set the Choice Lists field to Always Off.
4.
Press the key > Save.
68
Page 71

RIM Strictly Confidential
Troubleshooting: Voice commands
I can't make calls using a voice command
Try the following actions:
• Verify that your BlackBerry® smartphone is connected to the wireless network.
• If you're using a Bluetooth® enabled device, such as a hands-free car kit or wireless headset, verify that the Bluetooth
enabled device supports this feature and that you have paired the Bluetooth enabled device with your BlackBerry
smartphone.
• Verify that your screen is unlocked.
• Verify that the language that you use to say voice commands is the same as the voice dialing language that you have set
in the language options. Certain languages might not be supported.
Related information
Bluetooth technology, 335
Change the language for voice commands, 68
My smartphone doesn't recognize names or numbers in voice commands
Try the following actions:
• Say the first name and the last name of your contact.
• Improve voice recognition of numbers.
69
Page 72

RIM Strictly Confidential
Messages
Getting started: Email
Message inbox icons
These icons indicate the type or status of each message in your inbox.
Depending on your BlackBerry® smartphone model and wireless service provider, some of these icons might not appear.
Unread message New BBM™ item
To clear this indicator, open each chat that has this
indicator.
Read message BBM chat is open
Draft message New BBM Groups item
Filed message New RSS item
Message with an attachment Message is being sent
Message is high priority Message has not been sent
Text message with an attachment Message has been sent
Text message Message has been delivered
Message has been read
Set up an email address
1. On the Home screen, click the Setup icon.
2. In the Setup section, click the Email Accounts icon.
70
Page 73

RIM Strictly Confidential
3. Follow the screens to set up your email address. When your email address is set up correctly, you receive a confirmation
message. To view and manage your email messages, on the Home screen, click the Messages icon.
Note: In some cases, you might see the following options. If so, select one of the options.
• Internet Mail Account: Use this option to associate your BlackBerry® smartphone with one or more existing email accounts
(for example, Windows Live™ Hotmail®) or to create a new email address for your smartphone.
• Enterprise Account: If your administrator gave you an enterprise activation password, use this option to associate your
smartphone with your work email account using the BlackBerry® Enterprise Server.
Try this now!
If you are trying to set up a Internet email account (for example, Windows Live™ Hotmail® or Google Mail™) or a new email
address for your smartphone, and do not see this option, contact your administrator or wireless service provider.
Related information
Change options for your personal email account, 86
Synchronize email over the wireless network
You can set the Wireless Reconcile option for each email address that is associated with your BlackBerry® smartphone, which
will synchronize your email over the wireless network.
1. On the Home screen, click the Messages icon.
2.
Press the key > Options > Email Reconciliation.
3. If the Message Services field appears, set this field to the appropriate email account.
4. Select the Wireless Reconcile checkbox.
5.
Press the key > Save.
Try this now!
How to: Email
Composing and sending email
Send an email
1. On the Home screen, click the Messages icon.
2. Press the
3. In the To field, type an email address or a contact name.
4. Type a message.
5. Press the key > Send.
Related information
Search for a contact, 229
Personal distribution lists, 235
I can't send messages, 33
Attach a file to an email, 72
key > Compose Email.
71
Page 74

RIM Strictly Confidential
Resend a message
You cannot change a text message before you resend it.
In a sent message, press the key.
•
To change the message, click Edit. Change the message. Press the key > Send.
• To change the recipients, click Edit. Highlight a contact. Press the key > Change Address. Click a new contact.
Press the key > Send.
• To resend the message without changing it, click Resend.
Related information
I can't send messages, 33
Reply to or forward an email or PIN message
In a message, press the
• To reply to a message, click Reply or Reply to All.
• To forward a message, click Forward or Forward As.
Related information
I can't send messages, 33
key.
Check spelling
You can check spelling in messages, calendar entries, tasks, or memos that you create.
1. Press the key > Check Spelling.
2. Do any of the following:
• To accept the suggested spelling, click a word in the list that appears.
• To ignore the suggested spelling, press the key.
• To ignore all instances of the suggested spelling, press the
• To add the word to the custom dictionary, press the key > Add To Dictionary.
• To stop checking spelling, press the
key > Cancel Spell Check.
key > Ignore All.
Save a draft of a message
When you are composing a message, press the key > Save Draft.
Attach a file to an email
To attach a file that is saved on your organization's network, your email account must use a BlackBerry® Enterprise Server that
supports this feature. For more information, contact your administrator.
When you are composing an email, press the
• To attach a file that is saved on your BlackBerry smartphone or media card, find and click the file.
72
key > Attach > File.
Page 75

RIM Strictly Confidential
• To attach a file that is saved on your organization's network, press the key > Go To. Find and click the file. If
necessary, type the credentials that you use to connect to your organization's network.
Attach a contact card to a message
You can attach a contact card to an email, a PIN message, or a text message.
1. When you are composing a message, press the key > Attach > Contact.
2. Find and highlight a contact.
3. Press the key > Continue.
Related information
I can't attach a file to a text message, 106
Change the email address that you use to send messages or meeting invitations
1. On the Home screen or in a folder, click the Options icon.
2. Click Device > Advanced System Settings > Default Services.
3. Change the Messaging (CMIME) field or the Calendar (CICAL) field.
4.
Press the
key > Save.
Delete the disclaimer from an email
If your email account uses a BlackBerry® Enterprise Server that supports this feature, the BlackBerry Enterprise Server might
add a disclaimer to your email after you send it.
When you are composing an email, press the
key > Remove Disclaimer.
To add the disclaimer again, press the key > Add Disclaimer.
Delete the original text from a reply message
When you are replying to a message, press the key > Delete Original Text.
Set the importance level for an email or a PIN message that you send
If you change the importance level of an email or a PIN message, a high priority indicator or low priority indicator appears
beside that message on your BlackBerry® smartphone. If the recipient's messaging application supports importance levels for
messages, the importance level will also be indicated to the recipient.
1. When you are composing an email or a PIN message, press the key > Options.
2. Change the Importance field.
3.
Press the key > Save.
73
Page 76

RIM Strictly Confidential
Blind carbon copy a contact
You can blind carbon copy a contact in an email or a PIN message.
When you are composing an email or a PIN message, press the key > Add Bcc.
Stop a message from sending
You can stop a message from sending only if a clock icon appears beside the message.
1. On the Home screen, click the Messages icon.
2. Highlight the message.
3.
Press the
key > Delete.
Email filters
About email filters
You can create email filters to specify which email is forwarded to your BlackBerry® smartphone and which remains in the
email application on your computer.
Email filters are applied to email based on the order in which they appear in your list of email filters. If you create multiple
email filters that could apply to the same email, you must decide which one should be applied first by placing that filter higher
in the list.
Create an email filter
To perform this task, your work email account must use a BlackBerry® Enterprise Server that supports this feature. For more
information, contact your administrator.
For information about completing this task for a personal email account that you have on your BlackBerry smartphone (such as
Google Mail™ or Windows Live™ Hotmail®), visit www.blackberry.com/docs/smartphones and click the link under Email Setup.
1. On the Home screen, click the Messages icon.
2.
Press the key > Options > Email Filters.
3.
Press the key > New.
4. Type a name for the email filter.
5. Set the email filter options.
6.
Press the key > Save.
Create an email filter based on a contact or subject
1. On the Home screen, click the Messages icon.
2. Highlight an email.
3. Press the
4. Type a name for the email filter.
74
key > Filter by > Sender or Subject.
Page 77

RIM Strictly Confidential
5. Set the email filter options.
6.
Press the key > Save.
Options for email filters
Option Description
From Specify one or more contacts or email addresses that the email
filter should search for in the From field of your email. Separate
multiple contacts or email addresses with a semicolon (;). To
specify that the email filter should search for all contacts or
email addresses that contain specific text, type the text and
use an asterisk (*) as a wildcard character to represent the rest
of the contact or email address.
Sent to Specify one or more contacts or email addresses that the email
filter should search for in the Sent To field of your email.
Separate multiple contacts or email addresses with a
semicolon (;). To specify that the email filter should search for
all contacts or email addresses that contain specific text, type
the text and use an asterisk (*) as a wildcard character to
represent the rest of the contact or email address.
Subject Specify the text that the email filter should search for in the
Subject field of your email.
Message Specify the text that the email filter should search for in the
body of your email.
Sent directly to me Set whether the email filter applies to email that includes your
email address in the To field.
Cc to me Set whether the email filter applies to email that includes your
email address in the Cc field.
Bcc to me Set whether the email filter applies to email that includes your
email address in the Bcc field.
Importance Set the importance level of email that the email filter applies
to.
Sensitivity Set the sensitivity level of email that the email filter applies to.
75
Page 78

RIM Strictly Confidential
Option Description
Action Set whether email that the email filter applies to is forwarded
to your BlackBerry® smartphone. If email is forwarded, specify
whether it is forwarded with high importance or with the email
header only.
Turn on an email filter
1. On the Home screen, click the Messages icon.
2.
Press the
3. Select the check box beside an email filter.
4.
Press the key > Save.
key > Options > Email Filters.
Change, prioritize, or delete an email filter
1. On the Home screen, click the Messages icon.
2.
Press the
3. Highlight an email filter.
4.
Press the key.
•
To change an email filter, click Edit. Change the options for the email filter. Press the key > Save.
• To prioritize an email filter, click Move. Click the new location.
• To delete an email filter, click Delete.
key > Options > Email Filters.
Synchronizing email
About synchronization and reconciliation
The wireless data synchronization feature is designed to synchronize organizer data (contacts, calendar entries, tasks, and
memos) between your BlackBerry® smartphone and the email application on your computer over the wireless network.
The wireless email reconciliation feature is designed to reconcile email between your smartphone and the email application on
your computer over the wireless network. When you file or delete email messages on your smartphone, these email messages
should be filed or deleted in the email application on your computer. Likewise, any changes that you make to email messages
in the email application on your computer should be reflected on your smartphone.
In rare cases, if your smartphone doesn't recognize fields in a contact, calendar entry, or email account, some data or email
can't be synchronized or reconciled.
If wireless data synchronization isn't available on your smartphone or if you turned off this feature, you can use the
BlackBerry® Desktop Software to synchronize your organizer data. For more information, see the Help in the BlackBerry
Desktop Software.
76
Page 79

RIM Strictly Confidential
Research In Motion recommends that you regularly create and save a backup file on your computer, especially before you
update any software. Maintaining a current backup file on your computer might allow you to recover smartphone data if your
smartphone is lost, stolen, or corrupted by an unforeseen issue.
Synchronize email over the wireless network
You can set the Wireless Reconcile option for each email address that is associated with your BlackBerry® smartphone, which
will synchronize your email over the wireless network.
1. On the Home screen, click the Messages icon.
2.
Press the
3. If the Message Services field appears, set this field to the appropriate email account.
4. Select the Wireless Reconcile checkbox.
5.
Press the key > Save.
Try this now!
key > Options > Email Reconciliation.
Delete email on your smartphone and in your email application on your computer
You can set the Delete On option for each email address that is associated with your BlackBerry® smartphone.
1. On the Home screen, click the Messages icon.
2.
Press the key > Options > Email Reconciliation.
3. If the Message Services field appears, set this field to the appropriate email account.
4. Change the Delete On field to Mailbox & Handheld.
5.
Press the
key > Save.
It takes a short period of time for email to be deleted over the wireless network.
Related information
Delete a message, 80
Empty the deleted items folder on your computer from your smartphone
To perform this task, your work email account must use a BlackBerry® Enterprise Server that supports this feature. For more
information, contact your administrator.
1. On the Home screen, click the Messages icon.
2.
Press the
3. If the Message Services field appears, set this field to the appropriate email account.
4. Press the key > Purge Deleted Items.
key > Options > Email Reconciliation.
About synchronization conflicts
A synchronization conflict occurs when you change the same email or organizer data item on your BlackBerry® smartphone and
in the email application on your computer.
77
Page 80

RIM Strictly Confidential
If you reconcile your email using wireless email reconciliation, on your smartphone, you can set whether the email on your
smartphone or the email on your computer takes precedence when an email reconciliation conflict occurs.
If you synchronize your organizer data using wireless data synchronization, the organizer data on your computer takes
precedence over the organizer data on your smartphone when a data synchronization conflict occurs.
Research In Motion recommends that you regularly create and save a backup file on your computer, especially before you
update any software. Maintaining a current backup file on your computer might allow you to recover smartphone data if your
smartphone is lost, stolen, or corrupted by an unforeseen issue.
Related information
Some characters in calendar entries don't appear correctly after synchronization, 227
Synchronize organizer data over the wireless network, 218
Manage email reconciliation conflicts
You can set the On Conflicts option for each email address that is associated with your BlackBerry® smartphone.
1. On the Home screen, click the Messages icon.
2.
Press the
3. If the Message Services field appears, set this field to the appropriate email account.
4. Change the On Conflicts field.
5.
Press the key > Save.
key > Options > Email Reconciliation.
Stop forwarding email to your smartphone
To perform this task, your work email account must use a BlackBerry® Enterprise Server that supports this feature. For more
information, contact your administrator.
1. On the Home screen, click the Messages icon.
2.
Press the
3. If the Message Services field appears, set this field to the appropriate email account.
4. Clear the Send Email to Handheld checkbox.
5.
Press the key > Save.
To forward email to your BlackBerry smartphone again, select the Send Email to Handheld checkbox.
key > Options > Email Preferences.
Viewing and replying to email
About email account icons
Depending on your wireless service plan or administrator, you might be able to associate your BlackBerry® smartphone with a
work email account and one or more personal email accounts. If you associate your smartphone with more than one email
account, multiple email account icons might appear on your smartphone, in addition to the main Messages icon. For more
information about associating your smartphone with more than one email account, visit www.blackberry.com/docs/
smartphones and click the link under Email Setup.
Depending on your theme, a separate icon might appear for text messages.
78
Page 81

RIM Strictly Confidential
Search for text in a message, in a file, or on a webpage
To search for text in a presentation, you must view the presentation in text view or in text and slide view.
1. In a message, in a file, in an attachment, or on a webpage, press the key > Find or Find on Page.
2. Type the text.
3. Press the Enter key.
To search for the next instance of the text, press the
key > Find Next or Find Next on Page.
Preview more of grouped email messages
To display more lines of each email in a group, you must have set your BlackBerry® smartphone to group email messages by
subject.
1. On the Home screen, click the Messages icon.
2. Click Options > Message Display and Actions.
3. Change the Preview Length field.
4.
Press the
key > Save.
View an address instead of a display name
In a message, press the key > Show Address.
To view the display name again, press the key > Show Name.
View email in plain text format
1. On the Home screen, click the Messages icon.
2.
Press the
3. If the Message Services field appears, set this field to the appropriate email account.
4. Clear the Enable HTML Email check box.
5.
Press the key > Save.
key > Options > Email Preferences.
View saved messages
1. On the Home screen, click the Messages icon.
2. Press the
key > View Saved Messages.
Organizing your email inbox
Mark a message as opened or unopened
On the Home screen, click the Messages icon.
79
Page 82

RIM Strictly Confidential
• To mark a message as opened or unopened, highlight the message. Press the key > Mark Read or Mark Unread.
• To mark all messages that are prior to a specific date as opened, highlight a date field. Press the key > Mark Prior
Read.
Save a message
Saved messages aren't deleted even if your BlackBerry® smartphone is set to delete messages automatically after a certain
period of time.
On the Home screen, click the Messages icon.
•
To save an email or PIN message, highlight an email or PIN message. Press the key > Save.
• To save a text message, open a conversation and highlight a text message. Press the key > Save Message.
Related information
View saved messages, 79
Delete a message
On the Home screen, click the Messages icon.
•
To delete a message, highlight the message. Press the
• To delete a saved message, press the key > View Saved Messages. Highlight the message. Press the key >
Delete. If necessary, delete the message from your message inbox as well.
• To delete a range of messages, touch two messages simultaneously and slide your finger up or down to select
additional messages. Press the
• To delete all messages prior to a certain date, highlight a date field. Press the key > Delete Prior > Delete.
key > Delete Messages.
key > Delete.
Note: Email messages that you delete using the Delete Prior menu item are not deleted from the email application on your
computer during email reconciliation.
About flags
Depending on the message service that you use, you can add flags to email messages that you receive or send as a reminder to
you or the recipients to follow up with the messages. You can use flags of different colors, add follow-up notes, and set due
dates so that your BlackBerry® smartphone reminds you to return to the email.
If wireless email reconciliation is turned on and your email account uses a BlackBerry® Enterprise Server that supports flags,
changes that you make to flags on your smartphone should be reflected in the email application on your computer. Likewise,
changes that you make to flags in the email application on your computer should be reflected on your smartphone.
If wireless email reconciliation is turned off, you can still manage flags for email messages on your smartphone.
80
Page 83

RIM Strictly Confidential
Add, change, or remove a flag
If you make changes to a flag in an email that you sent, the changes are reflected only on your BlackBerry® smartphone and are
not sent to the recipient. Depending on the message service you're using, you might not be able to do this task.
When you are composing or viewing an email, press the
•
To add a flag, click Flag for Follow Up. Set the flag properties. Press the
•
To change a flag, click Flag Properties. Change the flag properties. Press the key > Save.
• To remove a flag, click Clear Flag.
key.
key > Save.
Change how you group email messages
1. On the Home screen, click the Messages icon.
2. Press the
key > Display Style > Group by Subject or Single Messages.
Hide sent messages from the message inbox
1. On the Home screen, click the Messages icon.
2.
Press the key > Options > Message Display and Actions.
3. Select the Hide Sent Messages check box.
4.
Press the
key > Save.
Hide messages from the Messages application
You can prevent messages from specific email accounts from appearing in the Messages application. You can also set a
separate icon to appear on the Home screen for text messages. Depending on your theme, a separate icon might already
appear by default.
1. On the Home screen, click the Messages icon.
2. Press the key > Options > Inbox Management.
• To hide messages from specific email accounts, in the Email Accounts section, clear the check box beside one or more
email accounts.
• To hide text messages, in the Other Message Types section, clear the Text Messages check box.
3.
Press the key > Save.
Change how a message inbox displays messages
1. On the Home screen, click the Messages icon.
2.
Press the key > Options > Message Display and Actions.
• To change the order of the subject line and sender, change the Display Order field.
• To change how messages are separated, change the Separators field.
• To change how many messages can fit on the screen, change the Display Message Header On field.
3.
Press the key > Save.
81
Page 84

RIM Strictly Confidential
Use color to differentiate work messages from other messages
To perform this task, your work email account must use a BlackBerry® Enterprise Server that supports this feature. For more
information, contact your administrator.
1. On the Home screen or in a folder, click the Options icon.
2. Click Display > Message Categorization.
3. In the Message Outline Colors section, do any of the following:
• To set an outline color for email that is sent to your BlackBerry smartphone through a BlackBerry Enterprise Server,
change the Enterprise Messages field.
• To set an outline color for your other messages, change the Other Messages field.
4.
Press the
Note: PIN messages might use the outline color that you have set for your work email. For more information, contact your
administrator.
key > Save.
Storing and filing email
About synchronization of email folders
You can add, change, or delete email folders in the email application on your computer or in the Messages application on your
BlackBerry® smartphone.
If wireless email reconciliation is turned on and your email account uses a BlackBerry® Enterprise Server that supports this
feature, changes that you make to email folders are synchronized over the wireless network.
Related information
Synchronize email over the wireless network, 20
File an email
To perform this task, your work email account must use a BlackBerry® Enterprise Server that supports this feature. For more
information, contact your administrator.
1. On the Home screen, click the Messages icon.
2. Highlight an email.
3. Press the
4. Highlight a folder.
5. Press the key > File.
Related information
Synchronize email over the wireless network, 20
I can't file email messages, 93
82
key > File.
Page 85

RIM Strictly Confidential
Add, move, rename, or delete an email folder
To perform this task, your work email account must use a BlackBerry® Enterprise Server that supports this feature. For more
information, contact your administrator.
1. On the Home screen, click the Messages icon.
2.
Press the key > View Folder.
3. Highlight a folder.
4.
Press the
• To add a folder, click Add Folder.
• To move a folder, click Move Folder. Click the new location.
• To rename a folder, click Rename Folder.
• To delete a folder, click Delete Folder.
key.
Forward messages from a specific email folder to your smartphone
To perform this task, your work email account must use a BlackBerry® Enterprise Server that supports this feature. For more
information, contact your administrator.
1. On the Home screen, click the Messages icon.
2.
Press the
3. If the Message Services field appears, set this field to the appropriate email account.
4.
Press the key > Folder Redirection.
5. Select the checkbox beside an email folder.
6.
Press the key > Save.
key > Options > Email Preferences.
Note: If you click the Select All menu item, all email, including email that appears in the sent items folder in the email
application on your computer, appears on your BlackBerry smartphone.
Related information
Stop storing messages sent from your computer on your smartphone, 84
Hide filed email from the message inbox
1. On the Home screen, click the Messages icon.
2.
Press the key > Options > Message Display and Actions.
3. Select the Hide Filed Messages check box.
4.
Press the key > Save.
View filed messages
1. On the Home screen, click the Messages icon.
2.
Press the
3. Click a folder.
key > View Folder.
83
Page 86

RIM Strictly Confidential
Set how long your smartphone stores messages
1. On the Home screen, click the Messages icon.
2.
Press the key > Options > Message Display and Actions.
3. Change the Days To Keep Messages field.
4.
Press the key > Save.
Related information
Some messages no longer appear on my smartphone, 93
Stop storing messages sent from your computer on your smartphone
To perform this task, your work email account must use a BlackBerry® Enterprise Server that supports this feature. For more
information, contact your administrator.
1. On the Home screen, click the Messages icon.
2.
Press the
3. If the Message Services field appears, set this field to the appropriate email account.
4.
Press the key > Folder Redirection.
5. Clear the checkbox beside the Sent Items folder.
6.
Press the key > Save.
key > Options > Email Preferences.
Stop storing messages sent from your smartphone on your computer
To perform this task, your work email account must use a BlackBerry® Enterprise Server that supports this feature. For more
information, contact your administrator.
1. On the Home screen, click the Messages icon.
2.
Press the
3. If the Message Services field appears, set this field to the appropriate email account.
4. Clear the Save Copy In Sent Folder checkbox.
5.
Press the key > Save.
key > Options > Email Preferences.
Email options
Add or change your signature
Depending on your wireless service plan, this feature might not be supported.
1. On the Home screen, click the Messages icon.
2. Press the key > Options.
• For a work email account, click Email Preferences. If the Message Services field appears, change this field to the
appropriate email account. If the Use Auto Signature check box is not selected, select it. In the field that appears, place
your cursor.
84
Page 87

RIM Strictly Confidential
• For a personal email account, click Email Account Management. Click an email account. Click Edit.
3. Type a signature.
4.
Press the key > Save.
Your signature is added to your email after you send it.
Try this now!
Hide the new or unopened message indicator
1. On the Home screen, click the Messages icon.
2.
Press the
• To hide the new message indicator, clear the Display New Message Indicator check box.
• To hide the unopened message indicator, change the Display Message Count field to None.
3.
Press the key > Save.
key > Options > Message Display and Actions.
Receive only the first section of long email messages
1. On the Home screen, click the Messages icon.
2.
Press the
3. Clear the Auto More check box.
4.
Press the key > Save.
key > Options > Message Display and Actions.
To download more of an email, press the key > More or More All.
View or hide call logs in the Messages application
You can set your BlackBerry® smartphone to show call logs, including missed calls, in the Messages application.
1.
From the Home screen, press the
2.
Press the key > Options > Call Logs and Lists.
• To show recent and missed calls in the Messages application, select the All Calls option.
• To hide call logs in the Messages application, select the None option.
3.
Press the
key > Save.
key.
Set an out-of-office reply
To perform this task, your work email account must use a BlackBerry® Enterprise Server that supports this feature. For more
information, contact your administrator.
1. On the Home screen, click the Messages icon.
2.
Press the key > Options > Email Preferences.
3. If the Message Services field appears, set this field to the appropriate email account.
4. Select the Use Out Of Office Reply check box.
5. In the field that appears, type a reply.
85
Page 88

RIM Strictly Confidential
6. If you use IBM® Lotus Notes®, in the Until field, set the date on which the out-of-office reply should turn off.
7.
Press the key > Save.
To turn off the out-of-office reply, clear the Use Out Of Office Reply check box.
Change options for your personal email account
Depending on your wireless service provider, you might not be able to change some options for your personal email account.
You can change options for each personal email account that you added to your BlackBerry® smartphone. You can create email
filters, synchronize your contacts, change your signature or display name, and more.
1. On the Home screen, click the Messages icon.
2. Press the
3. Click the email account that you want to change options for.
For more information about personal email accounts, visit www.blackberry.com/docs/smartphones and click the link under
Email Setup.
key > Options > Email Account Management.
Turn on or turn off read receipts
Depending on your wireless service provider or administrator, you might not be able to perform this task, or some of the
options might not appear.
1. On the Home screen, click the Messages icon.
2.
Press the
3. If the Message Services field appears, set this field to the appropriate email account.
4. To set whether your BlackBerry® smartphone sends a read receipt or delivery receipt when a sender requests it, change
the Send Read Receipts field.
5.
Press the key > Save.
key > Options > Email Preferences.
Stop loading pictures in HTML email messages
By default, your BlackBerry® smartphone automatically downloads and displays inline pictures that are embedded in HTML
email messages.
1. On the Home screen, click the Messages icon.
2.
Press the
3. If the Message Services field appears, set this field to the appropriate email account.
4. Clear the Download Images Automatically checkbox.
5.
Press the key > Save.
To view pictures in an HTML email message, press the
86
key > Options > Email Preferences.
key > Get Images.
Page 89

RIM Strictly Confidential
Turn off the prompt that appears before downloading external pictures in HTML email
messages
Some HTML email messages contain links to external pictures on the Internet. By default, your BlackBerry® smartphone
prompts you before downloading external pictures.
1. On the Home screen, click the Messages icon.
2.
Press the
3. If the Message Services field appears, set this field to the appropriate email account.
4. Clear the Confirm External Image Download checkbox.
5.
Press the
key > Options > Email Preferences.
key > Save.
Open a new message automatically when you remove your smartphone from your holster
1. On the Home screen, click the Messages icon.
2.
Press the key > Options > Message Display and Actions.
3. Change the Auto Open Newest Message After Removing Device From Holster field.
4.
Press the key > Save.
Stop displaying recent contacts in email address fields
By default, when you type the first few characters of a contact name or an email address in a To, Cc, or Bcc field, your
BlackBerry® smartphone displays the email addresses of recent contacts who are not in your contact list.
1. On the Home screen, click the Messages icon.
2.
Press the
3. Clear the Show Recent Contacts When Composing Email checkbox.
4.
Press the key > Save.
key > Options > Message Display and Actions.
Turn off the prompt that appears before you delete a message
1. On the Home screen, click the Messages icon.
2.
Press the
3. Clear the Confirm Delete check box.
4.
Press the key > Save.
key > Options > Message Display and Actions.
Turn off the prompt that appears when you mark messages as opened
1. On the Home screen, click the Messages icon.
2.
Press the
3. Clear the Confirm Mark Prior Read checkbox.
4.
Press the key > Save.
key > Options > Message Display and Actions.
87
Page 90

RIM Strictly Confidential
Google Mail
About Google Mail on your smartphone
Depending on your wireless service plan and administrator, you can add a Google Mail™ account (also known as a Gmail®
account) to your BlackBerry® smartphone. Similar to the Google Mail web application that you can access using a browser on
your computer, related messages are grouped into a single conversation. To help organize your message inbox, you can create
and apply your own custom labels, report spam, archive messages, and add stars to highlight what's important.
For more information about Google Mail, visit www.googlemail.com.
Add or remove a star for a Google Mail message or conversation
You can mark an important Google Mail™ message or conversation with a star.
1. On the Home screen, click the Messages icon.
2. Highlight a Google Mail message or conversation.
3. Press the
• To add a star, click Add Star.
• To remove a star, click Remove Star.
key.
Apply or remove a label for a Google Mail message or conversation
You can apply a label or multiple labels to a Google Mail™ message or conversation to help organize your message inbox. If you
apply a label to an individual message in a conversation, the label is applied to all of the messages in the conversation.
1. On the Home screen, click the Messages icon.
2. Highlight a Google Mail message or conversation.
3. Press the
4. Do one of the following:
• To apply a label, select the check box beside the label.
• To remove a label, clear the check box beside the label.
5.
Press the
key > Labels.
key > Save.
View Google Mail messages with a specific label
1. On the Home screen, click the Messages icon.
2.
Press the
3. Click a label.
key > View Folder.
Create or delete a Google Mail label
1. On the Home screen, click the Messages icon.
2. Press the key > Labels.
88
Page 91

RIM Strictly Confidential
• To create a new label, click New Label. Type a label name. Click Save.
• To delete a label, highlight a label. Press the key > Delete.
Archive a Google Mail message or conversation
If you archive a Google Mail™ message that is part of a conversation, the Archive label is applied to all of the messages in the
conversation.
1. On the Home screen, click the Messages icon.
2. Highlight a Google Mail message or conversation.
3. Press the
Note: Depending on how you've set your BlackBerry® smartphone to store messages, archived messages might be
automatically deleted from your smartphone after a certain period of time.
key > Archive > Yes.
Move an archived Google Mail message or conversation to your message inbox
1. On the Home screen, click the Messages icon.
2. Click View Folder > Archive.
3. Highlight a message or conversation.
4. Press the key > Move to Inbox.
Report spam messages sent to your Google Mail account
When you report a Google Mail™ message as a spam message, it's deleted from your BlackBerry® smartphone. If you report a
message that is part of a conversation, all of the messages in the conversation are also reported as spam.
1. On the Home screen, click the Messages icon.
2. Highlight a Google Mail message or conversation.
3. Press the
4. If necessary, click Yes.
key > Report Spam.
Tips: Email
Message shortcuts
Depending on the typing input language that you are using, some shortcuts might not be available.
In a message
Reply to a message
Reply to all in an email or a PIN message Press L
Forward a message Press F
File an email message Press I
Press R
89
Page 92

RIM Strictly Confidential
View or hide the email address of a contact Highlight the contact in the To or From field. Press Q.
Move to the next message Press N
Move to the previous message Press P
In your message inbox
Open a message
Compose a message from a message inbox Press C
Mark a message as read or unread Press the Alt key and U.
Add a flag to a message Press W
View all flagged messages Press the Alt key and F.
View received messages and received call logs Press the Alt key and I.
View draft and sent messages Press the Alt key and O.
View voice mail messages Press the Alt key and V.
View text messages Press the Alt key and S.
View call logs Press the Alt key and P.
View all your messages
Move around your message inbox
Move up a screen
Move down a screen Press the Space key.
Move to the top of a message inbox Press T
Move to the bottom of a message inbox Press B
Move to the next unread item Press U
Move to the next related message Press J
Move to the previous related message Press K
Press the key.
Press the key.
Press the Shift key and the Space key.
Personalization: Email
Change how you group email messages
1. On the Home screen, click the Messages icon.
2. Press the key > Display Style > Group by Subject or Single Messages.
90
Page 93

RIM Strictly Confidential
Use color to differentiate work messages from other messages
To perform this task, your work email account must use a BlackBerry® Enterprise Server that supports this feature. For more
information, contact your administrator.
1. On the Home screen or in a folder, click the Options icon.
2. Click Display > Message Categorization.
3. In the Message Outline Colors section, do any of the following:
• To set an outline color for email that is sent to your BlackBerry smartphone through a BlackBerry Enterprise Server,
change the Enterprise Messages field.
• To set an outline color for your other messages, change the Other Messages field.
4.
Press the
Note: PIN messages might use the outline color that you have set for your work email. For more information, contact your
administrator.
key > Save.
Change how a message inbox displays messages
1. On the Home screen, click the Messages icon.
2.
Press the
• To change the order of the subject line and sender, change the Display Order field.
• To change how messages are separated, change the Separators field.
• To change how many messages can fit on the screen, change the Display Message Header On field.
3.
Press the key > Save.
key > Options > Message Display and Actions.
Add or change your signature
Depending on your wireless service plan, this feature might not be supported.
1. On the Home screen, click the Messages icon.
2. Press the key > Options.
• For a work email account, click Email Preferences. If the Message Services field appears, change this field to the
appropriate email account. If the Use Auto Signature check box is not selected, select it. In the field that appears, place
your cursor.
• For a personal email account, click Email Account Management. Click an email account. Click Edit.
3. Type a signature.
4.
Press the
Your signature is added to your email after you send it.
Try this now!
key > Save.
91
Page 94

RIM Strictly Confidential
Troubleshooting: Email
I can't send messages
Try the following actions:
• Verify that your BlackBerry® smartphone is connected to the wireless network.
• If the menu item for sending a message doesn't appear, verify that you have added an email address, a PIN, or a phone
number for your contact.
• If you created an email address or added an existing email address to your smartphone using the email setup screen in the
Setup application, verify that you have received an activation message on your smartphone from the BlackBerry® Internet
Service. If you haven't received an activation message (the message might take a short period of time to arrive), in the
Setup application, open the email setup screen to send a service book to your smartphone.
• If you haven't received a registration message from the wireless network, register your smartphone. On the Home screen
or in a folder, click the Options icon. Click Device > Advanced System Settings > Host Routing Table. Press the key >
Register Now.
• Generate an encryption key.
• Verify that data service is turned on.
• Resend the message.
Related information
Generate an encryption key, 373
Wireless coverage indicators, 298
Change or delete a contact, 231
Turn on or turn off a network connection, 22
Turn on or turn off data service or set roaming options, 301
Wireless coverage indicators, 298
Turn on or turn off a network connection, 22
Options for email filters, 75
Turn on or turn off data service or set roaming options, 301
Resend a message, 72
I'm not receiving messages
Try the following actions:
• Verify that your BlackBerry® smartphone is connected to the wireless network. If you're not in a wireless coverage area,
you should receive messages when you return to a wireless coverage area.
• Reset your smartphone. Connect to the network and try again.
• If you created an email address or added an existing email address to your smartphone using the email setup screen in the
Setup application, verify that you have received an activation message on your smartphone from the BlackBerry® Internet
Service. If you haven't received an activation message (the message might take a short period of time to arrive), in the
Setup application, open the email setup screen to send a service book to your smartphone.
92
Page 95

RIM Strictly Confidential
• If you haven't received a registration message from the wireless network, register your smartphone. On the Home screen
or in a folder, click the Options icon. Click Device > Advanced System Settings > Host Routing Table. Press the key >
Register Now.
• Verify that data service is turned on.
• If you use email filters, verify that the options for email filters are set correctly.
• Verify that email forwarding is turned on and that you have selected all the email folders, including your inbox folder, that
you want to receive email from.
• Verify that your smartphone is not blocking messages. For more information, contact your administrator.
Related information
Change, prioritize, or delete an email filter, 76
Forward messages from a specific email folder to your smartphone, 83
I'm not receiving email messages from personal folders on my computer
If your BlackBerry® smartphone is associated with a Microsoft® Outlook® email account, you must use the synchronization tool
of the BlackBerry® Desktop Software to reconcile email messages in personal folders. For more information, see the Help in the
BlackBerry Desktop Software.
I can't file email messages
Try the following actions:
• Verify that wireless email reconciliation is turned on.
• If your email folders don't appear on your BlackBerry® smartphone, reconcile your email using the email settings tool of
the BlackBerry® Desktop Software. For more information, see the Help in the BlackBerry Desktop Software.
Related information
Synchronize email over the wireless network, 20
Some messages no longer appear on my smartphone
If the application storage on your BlackBerry® smartphone is full or you have more than 65,000 email messages, PIN messages,
and text messages, your smartphone deletes the oldest messages from the message list. Your smartphone doesn't delete
saved messages.
If wireless email reconciliation is turned on and, in the message options, the Delete On field is set to Mailbox & Handheld,
email that you delete in the email application on your computer is also deleted from your smartphone.
A message, attachment, or Google Mail conversation is cut short or doesn't appear
Try the following actions:
• Wait for a short period of time. Your BlackBerry® smartphone receives long messages and attachments in sections.
•
If "More available" appears at the end of the message or attachment, press the
•
If part of a Google Mail™ conversation doesn't appear, press the key > More of Conversation.
key > More or More All.
93
Page 96

RIM Strictly Confidential
• If you're downloading an attachment, cancel the download and wait for a short period of time. Try downloading the
attachment again.
Related information
Receive only the first section of long email messages, 85
Receive only the first section of long email messages, 85
HTML email messages don't appear correctly
Try the following actions:
• Wait for a short period of time. Your BlackBerry® smartphone receives long messages and attachments in sections.
•
Try downloading external pictures. Press the
•
Try viewing your message in plain text. Press the key > Get Plain Text.
Related information
View email in plain text format, 79
key > Get Images.
Some email folders appear dimmed
If you can't forward email from an email folder, the check box beside the folder appears dimmed.
Try the following actions:
• Wait for a few seconds. The email folders might become available after a short period of time.
• Turn off wireless email reconciliation, and then turn it on again.
Related information
Synchronize email over the wireless network, 20
Email filters aren't working correctly
Try the following actions:
• Verify that your email filters are turned on.
• Verify that your email filters appear in the order that you want your BlackBerry® smartphone to apply them to email
messages.
Related information
Email filters, 74
The number of new or unopened messages is different than I expect
The number of new or unopened messages includes saved messages and filed messages.
If you have set your BlackBerry® smartphone to hide filed messages and you receive a new message from an email folder in the
email application on your computer other than your inbox, your smartphone files the message.
Related information
94
Page 97

RIM Strictly Confidential
View filed messages, 83
Hide messages from the Messages application, 81
Hide filed email from the message inbox, 83
I can't use a shortcut to view one type of message in a message inbox
If you switch BlackBerry® smartphones and you restore smartphone data from your previous smartphone to your current
smartphone, the message inbox shortcuts for your previous smartphone replace the message inbox shortcuts for your current
smartphone.
To view the shortcuts for viewing one type of message in a message inbox, view your list of saved searches.
Some features aren't available on my smartphone
The availability of certain features on your BlackBerry® smartphone might be affected by items such as your smartphone model
and wireless service plan.
Depending on your messaging service plan, some features or options might not be available in the message options on the
Email Preferences screen.
If your email account uses a BlackBerry® Enterprise Server, your organization might not have set up some features or might
prevent you from using some features or options. If your administrator has set an option for you, a lock indicator appears
beside the option field.
For more information about the features that are available on your smartphone, contact your wireless service provider or
administrator, or visit www.blackberry.com/go/devices.
Text messages
How to: Text messages
Message inbox icons
These icons indicate the type or status of each message in your inbox.
Depending on your BlackBerry® smartphone model and wireless service provider, some of these icons might not appear.
Unread message
Read message BBM chat is open
New BBM™ item
To clear this indicator, open each chat that has this
indicator.
95
Page 98

RIM Strictly Confidential
Draft message New BBM Groups item
Filed message New RSS item
Message with an attachment Message is being sent
Message is high priority Message has not been sent
Text message with an attachment Message has been sent
Text message Message has been delivered
Message has been read
About text messages
To send and receive text messages, your wireless service provider must set up your wireless service plan for text messaging.
Depending on your wireless service provider, this feature might not be supported.
Depending on the typing input language that you use to type your text messages, your messages might display to your
recipients differently than you expect.
Depending on your wireless service provider, you might also be able to send and receive the following media files in text
messages: .jpg, .gif, .wbmp, .midi, .vcf (vCard®), .ics (iCalendar), .avi, .mpg, or .mov.
If you have more than one phone number associated with your BlackBerry® smartphone, your smartphone sends text
messages using the first phone number that appears in the My Number field in the Phone application.
Composing and sending text messages
Send a text message
The number of recipients that you can send a text message to depends on your wireless service provider.
1. On the Home screen, click the Text Messages icon.
2. Press the key > Compose Text Message.
3. In the To field, do one of the following:
• Type a contact name.
• Press the key > Choose Contact. Click a contact.
• Type a phone number that can receive text messages (including the country code and area code). For languages with
non-Latin characters, press the Alt key to type numbers. Press the key on the keyboard.
• If your BlackBerry® smartphone is connected to a CDMA network, you can type an email address.
4. Type a message.
5.
Press the key on the keyboard.
96
Page 99

RIM Strictly Confidential
Related information
Personal distribution lists, 235
I can't send messages, 33
Attach a media file, contact card, appointment, or location to a text message, 97
Resend a message
You cannot change a text message before you resend it.
In a sent message, press the key.
•
To change the message, click Edit. Change the message. Press the key > Send.
• To change the recipients, click Edit. Highlight a contact. Press the key > Change Address. Click a new contact.
Press the key > Send.
• To resend the message without changing it, click Resend.
Related information
I can't send messages, 33
Forward a text message
You cannot forward text messages that contain content that is copyright protected.
In a message, press the key > Forward or Forward As.
Attach a media file, contact card, appointment, or location to a text message
1. When you are composing a text message, press the key > Attach.
2. Click one of the following menu items:
• Picture
• Video
• Location
• Audio
• Voice Note
• Contact
• Appointment
3. Click a file.
Related information
I can't attach a file to a text message, 106
Attach a contact card to a message
You can attach a contact card to an email, a PIN message, or a text message.
1. When you are composing a message, press the
2. Find and highlight a contact.
3. Press the key > Continue.
key > Attach > Contact.
97
Page 100

RIM Strictly Confidential
Related information
I can't attach a file to a text message, 106
Set the importance level for text messages that you send
Depending on your wireless service provider, the Priority field might not be available.
If you change the importance level for text messages, a high priority indicator or low priority indicator appears on your
BlackBerry® smartphone beside every text message that you send. If the recipient's device model and messaging application
supports importance levels for messages, the importance level will also be indicated to the recipient.
1. On the Home screen, click the Text Messages icon.
2.
Press the key > Options.
• To set the importance level for text messages, in the SMS Text section, change the Priority field.
• To set the importance level for text messages with an attachment, in the MMS section, in the Message Filtering
section, change the Importance field.
3.
Press the key > Save.
Request delivery notification or read notification for a text message
1. On the Home screen, click the Text Messages icon.
2.
Press the
3. In the MMS section, do one of the following:
• To receive notification when the message is delivered to the recipient, select the Confirm Delivery check box.
• To receive notification when the recipient opens the message, select the Confirm Read check box.
4.
Press the
key > Options.
key > Save.
Stop a message from sending
You can stop a message from sending only if a clock icon appears beside the message.
1. On the Home screen, click the Messages icon.
2. Highlight the message.
3.
Press the
key > Delete.
Set whether pressing the Enter key sends text messages
You can stop your text messages from being sent each time that you press the
accidentally sending a message if you plan to include several lines of text.
1. On the Home screen, click the Text Messages icon.
2.
Press the key > Options > Text Messaging.
3. In the General Text Messaging Options section, clear the Press Enter Key to Send check box.
4.
Press the key > Save.
98
, which might prevent you from
 Loading...