

Page 1
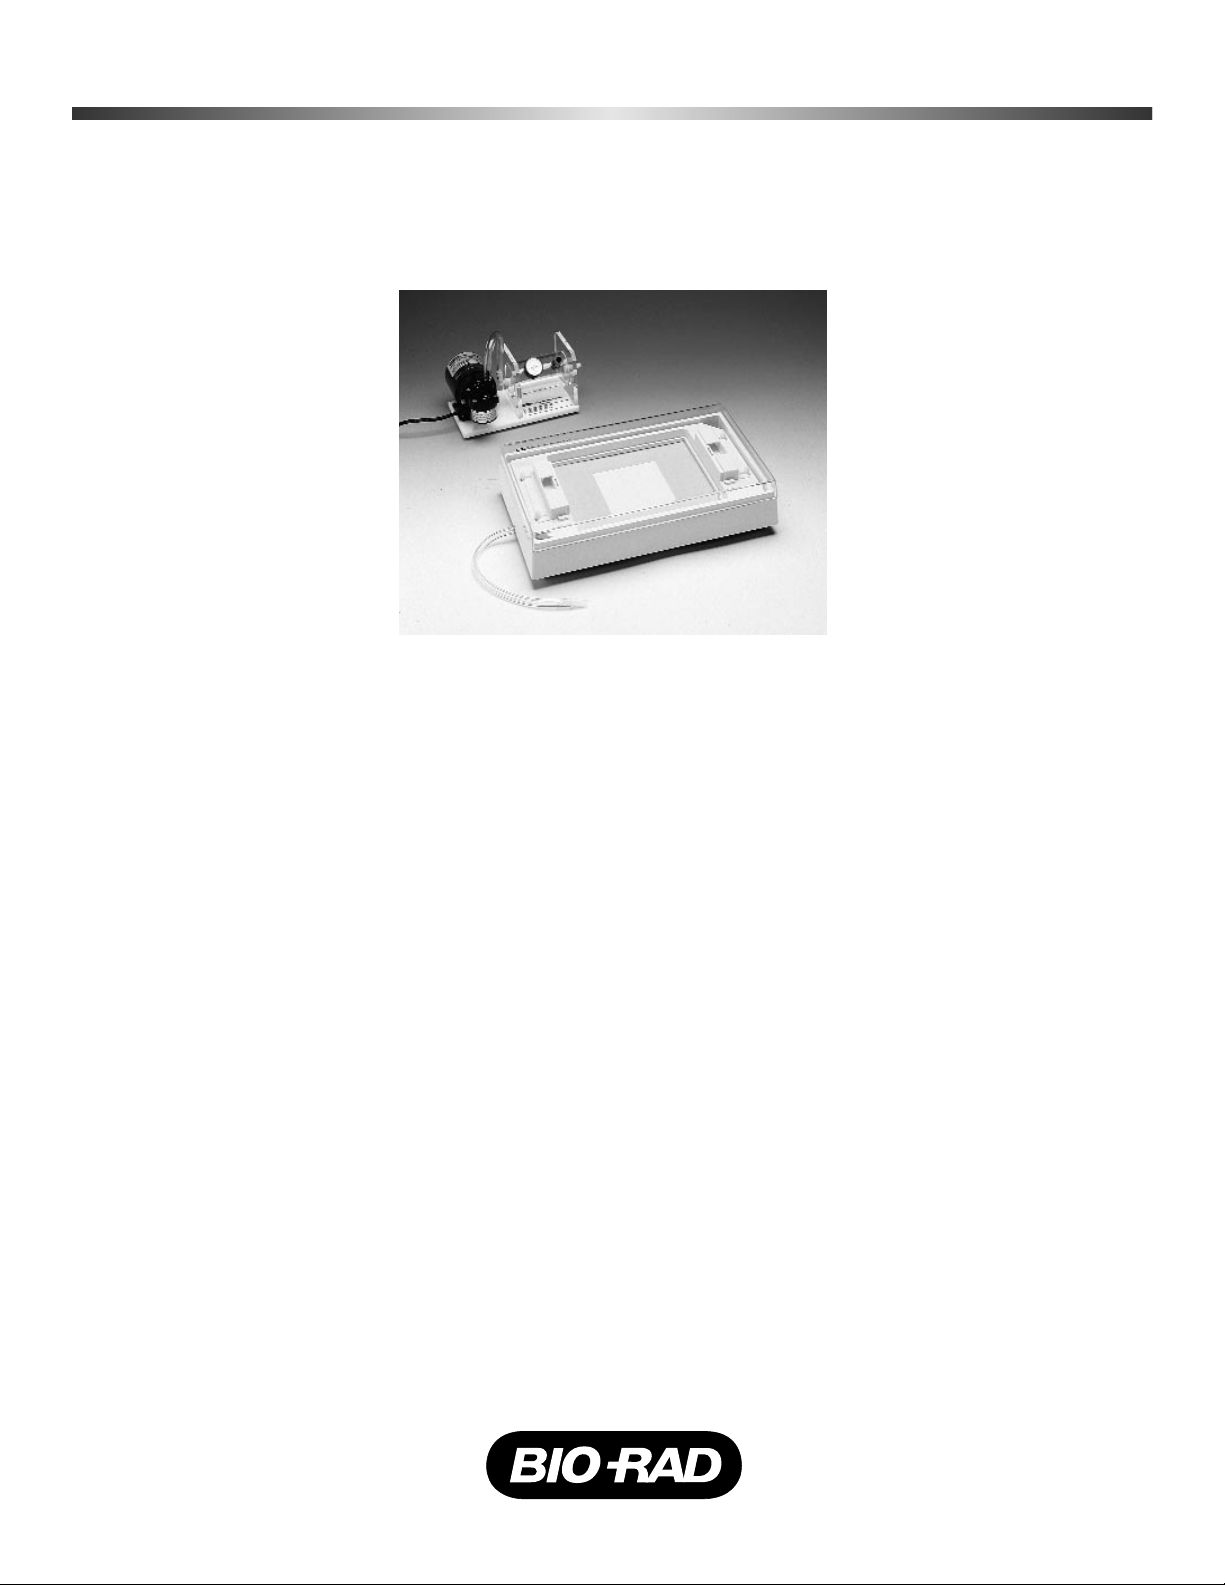
Model 785
Vacuum Blotter
Instruction
Manual
For Technical Service
Call Your Local Bio-Rad Office or
in the U.S. Call 1-800-4BIORAD
(1-800-424-6723)
Page 2

Table of Contents
Section 1 General Information............................................................................................. 1
1.1 Safety/Definition of Symbols.................................................................................... 1
1.2 Introduction to Model 785 Vacuum Blotter............................................................... 1
1.3 List of Parts................................................................................................................1
1.4 Features.....................................................................................................................1
1.5 Specifications............................................................................................................ 2
Section 2 Description of Major Parts.................................................................................. 3
2.1 Base Unit................................................................................................................... 3
2.2 Vacuum Stage........................................................................................................... 3
2.3 Porous Vacuum Plate................................................................................................ 3
2.4 Window Gasket......................................................................................................... 3
2.5 Sealing Frame........................................................................................................... 4
2.6 Vacuum Regulator..................................................................................................... 4
2.7 Vacuum Pump........................................................................................................... 4
2.8 Lid............................................................................................................................. 4
Section 3 Operating Instructions........................................................................................ 5
3.1 Vacuum Blotter Setup............................................................................................... 5
3.2 Preparation for Vacuum Transfer.............................................................................. 5
3.3 Gel Pretreatment........................................................................................................ 5
3.4 Vacuum Transfer....................................................................................................... 7
3.5 Post Transfer............................................................................................................. 8
Section 4 Cleaning and Maintenance.................................................................................... 8
4.1 Cleaning.................................................................................................................... 8
4.2 Replacement Parts..................................................................................................... 8
Section 5 Troubleshooting Guide....................................................................................... 9
5.1 Operational Troubleshooting..................................................................................... 9
5.2 Southern Hybridization Troubleshooting................................................................ 10
5.3 Repairing Cracked Gels.......................................................................................... 11
Section 6 Equipment and Accessories............................................................................. 12
6.1 Model 785 Vacuum Blotter and Accessories.......................................................... 12
6.2 Electrophoresis Reagents........................................................................................ 12
6.3 Electrophoresis Units.............................................................................................. 13
6.4 Blotting Reagents..................................................................................................... 13
Section 7 Appendix........................................................................................................... 14
7.1 Facts About Vacuum Transfer................................................................................. 14
7.2 Required Solutions and Equipment......................................................................... 16
Page 3

Section 1
General Information
1.1 Safety/Definition of Symbols
Caution
This instrument is intended for laboratory use only.
This product conforms to the “Class A” standards for electromagnetic emissions intended for
laboratory equipment applications. It is possible that emissions form this product may interfer
with some sensitive appliances when placed nearby or in the some circuit as those applicances.
The user should be aware of this potential and take appropriate measures to avoid interference.
1.2 Introduction to the Model 785 Vacuum Blotter
The Model 785 Vacuum Blotter is a nucleic acid transfer apparatus which rapidly transfers
DNA or RNA from agarose gels onto nylon membranes by using low vacuum. The Model 785
Vacuum Blotter simplifies every step of the blotting process. In addition, the Model 785 Vacuum
Blotter is constructed for long term heavy use. The following protocols have been thoroughly
tested and have the continuing technical support of Bio-Rad Laboratories.
1.3 List of Parts
Each Model 785 Vacuum Blotter unit comes with the items listed below. Check to make sure
that all components are present. Also note any damage to the instrument that may have occured
during shipping. Inform Bio-Rad Laboratories if any items are missing or damaged.
Item Quantity
Base Unit 1
Vacuum Stage 1
Porous Vacuum Plate 1
Window Gasket
– precut 15 x 15 cm 2
– precut 15 x 20 cm 2
– blank 2
Sealing Frame 1
Lid 1
Offered Accessories
Vacuum Regulator 1
Vacuum Station 1
1.4 General Description
The Vacuum Blotter has several innovative features which simplify the nucleic acid blotting
process and facilitate complete transfer. The Model 785 Vacuum Blotter features include:
• Easy-to-use spring latches which make assembly and disassembly quick. No screws or
nuts to tighten.
• Vacuum Stage and Porous Vacuum Plate create an even vacuum pressure throughout the
transfer area, providing even transfers and highly reproducible results.
• Large Vacuum Stage format permits large or small gel transfer using the blank Window
1
Page 4

Gasket or standard gel transfer using the precut Window Gasket.
• Green Window Gasket allows you to easily see the gel/gasket overlap for easy
alignment.
• Vacuum Regulator facilitates accurate vacuum pressure using Bio-Rad’s Vacuum
Pump or almost any vacuum source.
• Durable molded construction for long term heavy use.
• Base Unit and Sealing Frame designed for easy alignment of gel and membrane.
1.5 Specifications
Dimensions
Overall outer size 20” (L) x 12” (W) x 5” (H)
Gel capacity (maximum size) 20 cm x 25 cm
Unit weights
Complete assembly 8 lb
Lid weight 1.5 lb
Sealing frame assembly 1.5 lb
Porous vacuum support 0.25 lb
Materials
Base Mindel-S plastic
Springs Stainless steel
Posts Delrin plastic
Vacuum stage Mindel-S plastic
Window gasket Flexible green vinyl
Porous vacuum plate Polypropylene
Sealing frame Glass-filled Mindel-S
O-ring Silicone rubber
Lid Acrylic
Tubing Tygon (1/2” OD x 1/4” ID)
Vacuum regulator pump
Dimensions
Overall outer size 11” (L) x 6” (W) x 5” (H)
Weights
With pump 7.5 lb
Without pump 1.5 lb
Materials
Valve Polyvinylchloride
Fittings Nylon
Housing Acrylic
Interior pump components Teflon
Ratings
Vacuum pump 20 inches Hg (max)/250 Torr
Regulator 0-25 inches Hg (max)/125 Torr
Electrical
Input voltage range 100–120 VAC/50-60 Hz/1.5 A
220–240 VAC/50 Hz/0.75 A
Fuses
Internal Thermal Fuse
2
Page 5

Enviornmental
Operating 50 °F (10 °C) to 90 °F (32 °C) temperature
30–80% humidity
Storage 32 °F (0 °C) to 140 °F (60 °C) temperature
10–90% humidity
Cautions
1. Not designed to handle liquids or heavy vapors. If pump does get liquid inside, open
valve to max position and let run for 15 minutes to allow interior components to dry.
2. If valve knob loosens up during operation, wrap threads with teflon tape to increase
thread engagement.
3. Pump will become hot after a few hours of continuous use. This is normal and should
not be a cause for concern.
Section 2
Description of Major Parts
2.1 Base Unit
The Base Unit is the foundation of the Model 785 Vacuum Blotter. The plastic used to
make the Base Unit is an off-white color with a slight texture. The Base Unit is made of a
durable and chemically resistant mindel-S plastic. In low concentrations, acids and bases 0.25
N HCl or 0.5 N NaOH will not damage the Base Unit or the Vacuum Stage. The Base Unit
supports the Vacuum Stage on springs and catches the transfer solution during disassembly.
2.2 Vacuum Stage
The Vacuum Stage is supported by springs on the Base Unit. The spring action on
the Vacuum Stage is used to lock and unlock the Sealing Frame. The center portion of
the Vacuum Stage has a grooved grid pattern. This grid pattern helps distribute the
vacuum pressure evenly across the Porous Vacuum Plate. In the center of the grid pattern
is a port. This port is the vacuum inlet and is connected to vacuum tubing underneath the
Vacuum Stage. Surrounding the grid area is a soft silicon Reservoir Seal O-ring that
provides a water-tight seal to the upper buffer chamber.
2.3 Porous Vacuum Plate
The Porous Vacuum Plate is a white polypropylene sheet. The Porous Vacuum Plate
is used to support the transfer membrane and the gel. Along with the grid pattern on the
Vacuum Stage, the Porous Vacuum Plate helps distribute the vacuum pressure evenly.
2.4 Window Gasket
The Precut Window Gasket is a green vinyl sheet with a window cut out of the
center. Refer to Section 3.2 for instructions on how to cut the Blank Window Gasket. The
Window Gasket is used to mask off the remaining Porous Vacuum Plate not covered by
the gel. The Window Gasket forces the vacuum through the gel/membrane complex by
making a watertight seal where the gel overlaps the Window Gasket. The Window
Gasket also seals in the vacuum along the Reservoir Seal O-ring when the Sealing Frame
is compressed onto the Vacuum Stage.
3
Page 6

2.5 Sealing Frame
The Sealing Frame is made of the same mindel-S plastic as the Base Unit and has the
same off-white color as the Base Unit. The Sealing Frame features easy-to-use latches.
The latches will lock on to the post when the Sealing Frame is pressed onto the Vacuum
Stage. Simply press the latches inward to unlock the Sealing Frame. The Sealing Frame
compresses the Reservoir Seal O-ring onto the Window Gasket, creating an air-tight seal
between the Porous Vacuum Plate and the Window Gasket. The Sealing Frame also
holds the transfer solution over the gel during the transfer.
2.6 Vacuum Regulator
The Vacuum Regulator is used to control the vacuum pressure. There is a post on
either end of the Vacuum Regulator. One post is used for the vacuum source inlet and the
other post is used to connect the Model 785 Vacuum Blotter. The Vacuum Regulator has
a vacuum gauge attached to the center portion. Because the vacuum gauge is sensitive to
liquids, it is very important to connect a side-arm flask between the Vacuum Blotter and
the Vacuum Regulator. There is an adjustment valve in front of the pressure gauge.
Unscrewing the outer-most adjustment nut causes the vacuum pressure to decrease.
Screwing the adjustment nut clockwise increases the pressure.
2.7 Vacuum Pump
The Vacuum Pump is used to create a vacuum underneath the gel/Window Gasket
complex. The Vacuum Pump is connected directly to the Vacuum Regulator with vacuum
tubing. The Vacuum Pump is either 100–120 VAC or 220–240 VAC. The voltage is not
user settable and is configured at the factory. Verify that the voltage of the pump is
appropriate for your country.
2.8 Lid
The Vacuum Blotter Lid is made of a clear polycarbonate. The Lid shields the gel
from falling objects during transfer. It also protects the instrument during storage. The
Model 785 Vacuum Blotter Lid allows you to stack vacuum blotting units on top of each
other without damaging the units.
4
Page 7

Section 3
Operating Instructions
3.1 Vacuum Blotter Setup
1. Set the instrument up as illustrated in the diagram below.
Fig. 3.1. Model 785 Vacuum Blotter with liquid trap, Vacuum Regulator, and pump.
2. To start, make a liquid-trap from a side-arm flask 1,500–2,000 ml. Connect the tube
from the Base Unit to the arm of the side-arm flask. Then, find a stopper for the side-
arm flask with a single hole that tightly fits a 5 ml pipet. Push half of pipet through
the stopper. Place the stopper on the side-arm flask.
3. Connect a vacuum tubing between the 5 ml pipet of the side-arm flask to the Vacuum
Regulator port.
4. Connect vacuum tubing from the Vacuum Regulator port to the Vacuum Pump. Refer
to Figure 1.
Note: Setting up for an alternative vacuum source and for two Vacuum Blotters using
the same vacuum source are discussed in Section 7.2B.
3.2 Preparation For Vacuum Transfer
1. Cut a nylon membrane 0.5 cm bigger than each border of the precut window on the
Window Gasket. Cut a sheet of filter paper the same size as the nylon membrane.
Note: The larger the membrane/filter paper, the easier the task of centering the
Window Gasket on top of the membrane.
2. When cutting a customized window from the blank Window Gasket, make sure the
window dimensions are at least 0.5 cm smaller than the gel dimensions, i.e., if the
gel is 15 x 10 cm, then the maximum window size should be 14 x 9 cm.
3.3 Gel Pretreatment
1. Fill the wells of the agarose gel with melted agarose gel of equal concentration.
Allow agarose to dry before continuing.
5
Page 8

2. There are three transfer procedures listed: the Standard Transfer Procedure, the
Rapid Transfer Procedure, and the RNA Transfer Procedure. The Standard Transfer
Procedure is for detection of single copy gene in genomic DNA. The Rapid Transfer
Procedure is for fast identification of DNA inserts from various cloned vectors.
Standard Procedure:
1. Depurinate the gel in 0.25 N HCl for 15 minutes in a tray. Cover the gel with 0.25 N
HCl and shake gently.
2. Remove the 0.25 N HCl solution. Rinse the gel twice with deionized distilled water.
3. Denature the gel in 0.5 N NaOH for 30 minutes. Cover the gel with 0.5 N NaOH and
shake gently.
4. Transfer the gel in 10x SSC for 90 minutes at 5 inches Hg. Follow the instructions in
Section 3.4 for the transfer procedures.
Rapid Transfer Procedure:
1. Depurinate the gel in 0.25 N HCl for 15 minutes in a tray. Cover the gel with 0.25 N
HCl and shake gently.
2. Remove the 0.25 N HCl solution. Rinse the gel twice with deionized distilled water.
3. Immediately, transfer in 0.5 N NaOH, 0.6 N NaCl for 90 minutes at 5 inches Hg.
Follow the instructions in Section 3.4 for the transfer procedures.
6
Fig. 3.2. Exploded view of vacuum transfer set-up.
Sealing frame
Agarose gel
Window gasket
Nylon membrane
Filter paper
Porous vacuum plate
Page 9

RNA Transfer Procedure:
1. After electrophoresis rinse the RNA gel in deionized distilled water.
2. Transfer in 10x SSC for 90 minutes at 5 inches of Hg. Follow the instructions in
Section 3.4 for the transfer procedures.
3.4 Vacuum Transfer
1. Wet the precut nylon membrane from Section 3.2 in double distilled water by slowly
lowering the membrane at a 45 degree angle to the water. Then, wet the membrane
and the filter paper in the appropriate transfer solution.
2. Make sure that the Porous Vacuum Plate lies flush on the Vacuum Stage. Place the
wetted filter paper on the Porous Vacuum Plate. Lay the filter paper in the area where
the cut window of the Gasket will be. Place the wetted membrane on top of the filter
paper. Remove the bubbles by rolling a 10 ml glass pipet over the membrane.
3. Wet the Reservoir Seal O-ring with water.
4. Place the Window Gasket on top of the membrane/filter paper. Make sure the
Window Gasket covers the entire O-ring on the Vacuum Stage. At the same time,
make sure that the filter/membrane is overlapping the Window Gasket. Realign as
necessary. Refer to Figure 2.
Alternatively, place the Window Gasket on the Porous Vacuum Plate first. Adjust
the Window Gasket to cover the entire O-ring. Then, hold one end of the Window
Gasket and slowly peel the other end back until the window area is up off the Porous
Vacuum Plate. Place the wet membrane/filter on the Porous Vacuum Plate under the
window area and under the Window Gasket. Finally, replace the partially peeled
back Window Gasket over the membrane/filter paper. Make sure the Window Gasket
covers the entire O-ring and overlaps the membrane/filter paper on all sides.
5. Gently place the gel, well side up, on top of the Window Gasket. The gel must
overlap the window. Remove bubbles by using a 10 ml glass pipet. As a final check,
make sure that the gel edges overlap the Window Gasket by at least 5 mm.
6. Place the Sealing Frame on top of the Vacuum Stage. Lock the Sealing Frame onto
the four latch posts. The spring latch handle of the Sealing Frame has a precut region
in the middle. Push down on this exposed area of the Sealing Frame with your thumb
until the latches snap onto all four latch posts.
7. Unscrew (counterclockwise) the Vacuum Regulator bleeder valve several turns to
prevent strong initial vacuum.
8. Start the vacuum source and slowly turn the bleeder valve clockwise until the gauge
reads at 5 in. of Hg. If the Bio-Rad Vacuum Pump is used, prewarm the pump for 10
minutes before blotting. Without prewarming, the vacuum pump will slowly increase
the pressure and then stabilize after 10 minutes. Adjust the pressure to 5 inches of Hg.
9. With a finger, apply gentle pressure on top of the gel along the window border. The
pressure helps to form a tight vacuum seal between the gel and the Window Gasket.
10. Gently pour 1,000–1,500 ml of the appropriate transfer solution (refer to Section 3.3)
into the upper reservoir. Check to see if the gel is displaced. The gel should stick to
the Window Gasket. If the gel floats, simply disassemble the Sealing Frame to drain
the transfer solution and repeat Steps 5 to 10 again.
11. Place the lid on top of the Vacuum Blotter. Occasionally check the buffer level. It
should be higher than the gel. Check the vacuum pressure and adjust the vacuum
pressure to 5 inches Hg as needed.
12. Transfer the gel for 90 minutes at 5 inches Hg.
7
Page 10

3.5 Post-Transfer
1. After 90 minutes, turn off the vacuum source.
2. Squeeze the Sealing Frame spring handle inward to release it from the latch posts.
Remove the Sealing Frame. Let the upper buffer drain into the Base Unit.
3. Remove the transferred gel. The gel area inside the window should be half as thick as
the gel area outside the window. To check for any remaining DNA, stain the gel with
1.0 µg/ml of Ethidium Bromide.
4. Remove Window Gasket and nylon membrane. Soak the membrane in 2x SSC for
5 minutes and air-dry between two sheets of filter paper. Dry the membrane
between two sheets of filter paper in a vacuum oven at 80 degrees for 30 minutes.
The blotted membrane is now ready for hybridization.
5. Remove the filter paper on the Porous Vacuum Plate and dump the transfer
solution from the Base Unit. Clean the Model 785 Vacuum Blotter according to
Section 4.
Section 4
Instrument Maintenance
4.1 Cleaning
1. Rinse all Vacuum Blotter components with warm water. Remove any salts by rinsing
the Vacuum Stage and the Reservoir Seal O-ring with water. Clear all vacuum tubing
of any liquids before transferring.
Caution: Do NOT rinse or wet the Vacuum Regulator or the Vacuum Pump.
2. Remove any agarose particles or filter paper fiber from the Porous Vacuum Plate by
rinsing it with a strong jet of water. Be careful not to smash any agarose into the
Porous Vacuum Plate. These cleaning instructions will prevent the fine pores of the
Porous Vacuum Plate from clotting due to salts, filter paper fibers, or agarose.
4.2 Replacement Parts
The parts listed below will wear out over time. These parts have a definite lifetime,
depending on use and maintenance. Please examine these parts carefully before each use.
Replace these parts as needed:
Catalog
Number Product Description
165-5007 Reservoir Seal O-ring, 1
165-5008 Blank Window Gasket, 6
165-5009 15 x 15 cm Precut Window Gasket, 6
165-5010 15 x 20 cm Precut Window Gasket, 6
165-5011 Assortment Window Gaskets include: Blank window gaskets (2);
15 x 15 cm precut window gaskets (2); 15 x 20 cm precut window
gaskets (2)
165-5012 Porous Vacuum Plate, 1
8
Page 11

Section 5
Troubleshooting Guide
5.1 Operational Troubleshooting
The following table summarizes possible Vacuum Blotter operational difficulties,
probable causes, and remedies. Refer to Sections 3 and 4 for recommended procedures.
Solutions/
Condition Probable Causes Preventions
1. Upper buffer level • No water-tight seal • Make sure that gasket
drops too fast during formed between O-ring covers the entire Orun. and Window Gasket. ring before placing
the reservoir frame.
• Prewet O-ring with H2O.
• Incorrect window size • Refer to Section 3.2,
for the transferred gel. Step 2 on how to deter-
mine correct window
dimensions.
2. Gel does not attach • No vacuum in the • Check tubings, connto window or float window area. ections, and regulator
during transfer. bleeder for vacuum leaks.
• Check vacuum pump by
placing finger at vacuum
port.
• Too low vacuum + • Maintain a constant
violent disturbance 5 inches Hg throughout
during transfer. the run. Minimize bench
disturbance.
• Incorrect window • Refer to Section 3.2,
dimensions for a gel. Step 2 on determination
of window dimensions.
3. Difficult to get acc- • Too strong vacuum • Bleed some pressure off
urate reading from pump used. by employing a three-way
the regulator gauge. valve.
• Violent shaking of • Stop the shaking or place
pump when placed near pump on another bench.
regulator.
• If using Bio-Rad pump. • Prewarm pump for 10
minutes before transfer.
4. Vacuum pressure • Pump was not pre- • Prewarm pump before
changes during run. warmed. transfer.
5. Moisture in regulator. • Liquid trap container is • Use a 1,500-2,000 ml
too small. side-arm flask
• Too much liquid in the • Remove liquids from the
trap. trap every run.
9
Page 12

5.2 Southern Hybridization Troubleshooting
The performance of the vacuum transfer will reflect in Southern hybridization
results. The table below summarizes the problems, the probable causes, and the
solutions. The term “signal” refers to the band on the Southern hybridization
autoradiograph. Refer to the Zeta-Probe®GT manual also for specific troubleshooting.
Solutions/
Condition Probable Causes Preventions
1. No signal/ • Insufficient DNA loaded. • Load between 5-10 µg
weak signal. of DNA.
• Poor or no DNA trans- • Stain gel after it is transferred. ferred. Have positive
control lane. Both precautions are for checking
if DNA has transferred.
•32P-labeled probe is • Make sure probe concenfaulty. trations and specific
activity is correct.
• Prolonged vacuum • Vacuum transfer no longer
transfer. than 90 minutes.
• Nylon membrane was • Bake membrane in 80
not baked. degree oven for 30
minutes.
2. Partial signal. • Porous membrane is • Use new porous gel
clotted.with agarose support or clean the
or salt at signal. clotted spot.
3. High background. • Uncleaned probe. • Remove all radio-isotopic
nucleotides in labelling
reaction. Can use Bio-Rad
P-30 desalting column.
• Dirty nylon membrane. • Soak nylon membrane
in 2x SSC for 5 minutes
before air drying.
• Hybridization conditions. • For Zeta-Probe membrane
use hybridization buffer
with 7% SDS + 0.5 M
NaH2PO4pH 7.2 + 1 mM
EDTA.
• Check hybridization
temperature.
10
Page 13

5.3 Repairing Cracked Gels
A slightly damaged gel can be transferred with the Model 785 Vacuum Blotter. The
gel can be successfully transferred if it is partially torn on the side. However, if the gel is
completely cracked in two, or if it cracks in four, the chance of a succcessful transfer will
vary from case to case. The following instructions can help you piece together and
transfer a damaged gel.
1. Pretreat the gel as described in Section 3.3. Do not use the Rapid Transfer Procedure,
Section 3.3 for cracked gels. Carry out Steps 1-4 of Section 3.4.
2. Assemble the gel pieces on the casting tray. Dry the top and the cracked side of the
gel with filter paper or absorbance paper.
3. Tape both ends of the casting tray to hold the gel in place.
4. Use a pasteur pipet to pipet melted agarose along the cracked area. Allow the agarose
to dry.
5. Remove the tape and squirt distilled water under the gel with a squirt bottle. The
water allows the gel to slide out of the tray easily.
6. Carefully slide gel onto the Gasket Window at a low angle. Try to minimize
manipulation of gel.
7. Carefully remove bubbles underneath the gel by gently pressing them out to the
sides.
8. Carry out Steps 6-12 of Section 3.4.
11
Page 14

Section 6
Equipment and Assessories
6.1 Model 785 Vacuum Blotter and Accessories
Catalog
Number Product Description
165-5000 Model 785 Vacuum Blotter with Regulator, includes Vacuum
Regulator, Base Unit with Vacuum Stage, Porous Vacuum Plate,
Reservoir Seal O-ring, Sealing Frame, Assortment Window Gaskets,
Vacuum Blotter Lid, Instruction Manual
165-5001 Model 785 Vacuum Blotter System, includes Vacuum Pump (120 V),
Vacuum Regulator, Base Unit with Vacuum Stage, Porous Vacuum
Plate, Reservoir Seal O-ring, Sealing Frame Assortment Window
Gaskets, Vacuum Blotter Lid, Instruction Manual
165-5002 Model 785 Vacuum Blotter System, includes Vacuum Pump
(220/240 V), Vacuum Regulator, Base Unit with Vacuum Stage,
Porous Vacuum Plate, Reservoir Seal O-ring, Sealing Frame,
Assortment Window Gaskets, Vacuum Blotter Lid, Instruction Manual
165-5003 Model 785 Vacuum Blotter Basic Unit, includes Base Unit with
Vacuum Stage, Porous Vacuum Plate, Reservoir Seal O-ring, Sealing
Frame, Assortment Window Gaskets, Vacuum Blotter Lid, Instruction
Manual
165-5004 Vacuum Station, includes Vacuum Pump (120 V), Regulator,
Instruction Manual
165-5005 Vacuum Station, includes Vacuum Pump (220/240 V), Regulator,
Instruction Manual
165-5006 Vacuum Regulator, with instruction manual
165-5007 Reservoir Seal O-ring, 1
165-5008 Blank Window Gasket, 6
165-5009 15 x 15 cm Precut Window Gasket, 6
165-5010 15 x 20 cm Precut Window Gasket, 6
165-5011 Assortment Window Gaskets, includes (2) Blank Window Gaskets,
(2) 15 x 15 cm Precut Window Gaskets, (2) 15 x 20 cm Precut
Window Gaskets
165-5012 Porous Vacuum Plate, 1
6.2 Electrophoresis Reagents
Ultra Pure DNA Agarose
Catalog
Number Product Description
162-0017 Low Melt Preparative Grade Agarose, 25 g
162-0019 Low Melt Preparative Grade Agarose, 100 g
162-0125 High Strength Analytical Grade Agarose, 100 g
162-0126 High Strength Analytical Grade Agarose, 500 g
12
Page 15

Ultra Pure DNA Agarose (Continued)
Catalog
Number Product Description
162-0133 Molecular Biology Certified Agarose, 100 g
162-0134 Molecular Biology Certified Agarose, 500 g
162-0135 Chromosomal Grade Agarose, 25 g
162-0136 Chromosomal Grade Agarose, 100 g
161-0716 Tris Base, 500 g
161-0719 Tris Base, 1 kg
161-0750 Boric Acid, 500 g
161-0751 Boric Acid, 1 kg
161-0728 EDTA, 100 g
161-0729 EDTA, 500 g
161-0733 10x TBE Buffer,1 L
161-0756 10x TBE Buffer, 6 x 1 L
161-0430 Ethidium Bromide Tablets, 10 tablets
161-0404 Bromophenol Blue, 10 g
161-0423 Xylene Cyanole FF, 25 g
6.3 Electrophoresis Units
Catalog
Number Product Description
170-4343 Wide Mini-Sub®Cell Basic Unit, includes cell body, lid with cables,
15 x 10 cm gel tray, 30-well 1.5 mm thick comb and comb holder,
buffer recirculation connectors
170-4307 Mini-Sub Cell, includes cell body, lid with cables; 7 x 10 cm gel tray,
1.0 mm 8-well comb and comb holder, buffer recirculation connectors
170-4300 Sub-Cell®DNA Electrophoresis System, Basic Unit, includes cell
body, lid with cables, gel forming gates, 1.5 mm 15-well comb and
comb holder, recirculation connectors
6.4 Blotting Reagents
Catalog
Number Product Description
162-0153 Zeta-Probe Membrane, sheets, 9 x 12 cm, 15
162-0154 Zeta-Probe Membrane, sheets, 10 x 15 cm, 15
162-0155 Zeta-Probe Membrane, sheets, 15 x 15 cm, 15
162-0156 Zeta-Probe Membrane, sheets, 15 x 20 cm, 15
162-0157 Zeta-Probe Membrane, sheets, 20 x 20 cm, 15
162-0158 Zeta-Probe Membrane, sheets, 20 x 25 cm, 3
162-0159 Zeta-Probe Membrane, roll 30 cm x 3.3 m, 1
162-0165 Zeta-Probe Membrane, roll 20 cm x 3.3 m, 1
162-0190 Zeta-Probe GT Membrane, 9 x 12 cm, 15
162-0191 Zeta-Probe GT Membrane, 10 x 15 cm, 15
162-0192 Zeta-Probe GT Membrane, 15 x 15 cm, 15
162-0193 Zeta-Probe GT Membrane, 20 x 15 cm, 15
13
Page 16

6.4 Blotting Reagents (Continued)
Catalog
Number Product Description
162-0194 Zeta-Probe GT Membrane, 20 x 20 cm, 15
162-0195 Zeta-Probe GT Membrane, 20 x 25 cm, 3
162-0196 Zeta-Probe GT Membrane, 30 cm x 3.3 m, 1
162-0197 Zeta-Probe GT Membrane, 20 cm x 3.3 m, 1
161-0302 Sodium Dodecyl Sulfate (SDS), 1 kg
170-3557 Random Primer DNA Labeling Kit, 25 reactions
165-0962 Filter Paper Backing, 35 x 45 cm, 50 sheets
165-0921 Filter Paper Backing, 18 x 34 cm, 25 sheets
732-6004 Bio-Spin®Columns, 30 columns
For more information on related products from Bio-Rad Laboratories see Bulletin
1900. For a complete list of molecular biology products refer to the Bio-Rad general
catalog.
Section 7
Appendix
7.1 Facts About Vacuum Transfer
Quantitative vacuum transfer mainly depends on three factors: transfer time, vacuum
pressure, and agarose concentration.
We studied the effect these three factors have on quantitive vacuum transfer. In our
study, we used four different sized target fragments: 0.8 kb, 4.1 kb, 15 kb, and 29 kb. We
electrophoresed 10 pg, 1 pg, and 0.5 pg of the target DNA fragments with a total
background DNA of 5 µ g. Our experimental control was an overnight capillary
Southern. The densitometer readings of the overnight Southern on the 1 pg and 0.5 pg
lanes were our 100% transfer standard. Therefore, 100% vacuum transfer means the
vacuum transfer is equal to the overnight Southern transfer. Greater than a 100% vacuum
transfer means the vacuum transfer exceeded the Southern transfer. Efficiency of vacuum
transfer is calculated as follows:
% of Transfer = 100 x
O.D. of vacuum transfer
O.D. of overnight capillary transfer
We found the optimum vacuum transfer at 90 minutes using 5 inches of Hg with a
gel concentration of 0.7% agarose. We have summarized our work in the following
charts. The three essential factors in vacuum transfer are varied: time of transfer, vacuum
pressure, and gel concentration. The following charts illustrate the effect these factors
have on vacuum transfer.
14
Page 17

Chart 1: Time Effect on Transferring Efficiency
Vacuum Pressure - 5 inches Hg.; Time of Transfer - varied; Gel Percentage - 0.7%.
Chart 2: Vacuum Effect on Transferring Efficiency
Vacuum Pressure – varied; Time of Transfer - 90 minutes; Gel percentage - 0.7%.
15
,,
,,
,,
,,
,,
,,
,
,,
,,
,,
,,
,,
,,
,,
,,
,,
,,
,,,
,,
120
100
80
60
% of Transfer
40
20
,
,
,
,
,
,
,
,
,
,
,
,
,
,
,
,
0
0.8 kb 4.1 kb 15 kb 29 kb
Fragment Size
150
100
30 Minutes
90 Minutes
4 hours
3 in. Hg
5 in. Hg
7 in. Hg
10 in. Hg
% of Transfer
50
0
0.8 kb 4.1 kb 15 kb 29 kb
Fragment Size
Page 18

Chart 3: Gel Concentration Effect On Transferring Efficiency
Vacuum Pressure - 5 inches Hg; Time of Transfer - 90 minutes; Gel percentage – varied.
7.2 Required Solutions and Equipment
The check list below consists of stock solutions and equipment that are necessary for
the vacuum transfer process.
A. Stock Solutions: To Make 1,000 ml Solution
1. 20x SSC 175.3 g of NaCl + 88.2 g of sodium citrate in 800 ml
of double distilled water. Adjust to pH 7.0 with a few
drops of concentrated HCl. Adjust to 1,000 ml.
2. 5 M NaCl 292.2 g of NaCl in 800 ml of double distilled water.
Adjust to 1,000 ml.
3. 5 N NaOH 200 g NaOH pellets in 800 ml of double distilled
water. Adjust to 1,000 ml. Caution: Highly
exothermic reaction.
4. HCl Purchase concentrated liquid stock.
16
,,
,,
,,
,,
,,
,,,
,,,
,,,
,,
,,
,,
,
100
80
60
% of Transfer
40
20
,
,
,
,
,
,
,
,
,
0.7% Gel
1.0% Gel
1.5% Gel
0
0.8 kb 4.1 kb 15 kb 23 kb
Fragment Size
Page 19

B. Equipment: Comments/Setup
1. Model 785 Vacuum Two or three units can be operated from the same
Blotter Unit vacuum source. A three or four-way splitter can be
installed between the vacuum units and the liquid
trap. Each connector port from the splitter is
connected to the vacuum unit by vacuum tubing.
One port from the splitter is connected to the liquid
trap which in turn is connected to the Vacuum
Regulator. The Vacuum Regulator is connected to the
vacuum source.
2. Vacuum Regulator Only one regulator is needed to run two to three
Vacuum Blotter units. Will not work efficiently with
too strong a vacuum pressure (≥ 25 inches of Hg).
3. Vacuum sources Bio-Rad’s Vacuum Pump, house vacuum, or vacuum
pumps can be used. A strong pump may require a
three-way valve to reduce the vacuum pressure. This
valve should be connected between the pump and the
Vacuum Regulator.
Caution: Do not apply ≥ 25 inches of Hg to the
Vacuum Regulator.
4. Tygon tubing 1/4” inner diameter and 1/2” outer diameter. Offered
by Fisher Scientifics.
5. Liquid trap 1,500 ml-2,000 ml side-arm flask or commercially
available liquid trap.
6. Three or four-way splitter Offered by the following venders: Fisher Scientific,
VWR, Baxter, and others.
7. Three-way valve Offered by Fisher Scientific.
8. Plug For side-arm flask. It should have a single hole that
fits a 5 ml pipet.
17
Page 20

Bio-Rad
M1655000 Rev D
Laboratories
Life Science
Group
2000 Alfred Nobel Drive
Hercules, California 94547
Telephone (510) 741-1000
Fax: (510) 741-5800
www.bio-rad.com
Australia, Bio-Rad Laboratories Pty. Ltd., Block Y, Unit 1, Regents Park Industrial Estate, 391 Park Road, Regents Park, NSW 2143
Phone 02 9914 2800 • Fax 02 9914 2889
Austria, Bio-Rad Laboratories Ges.m.b.H., Auhofstraße 78D, A-1130 Wien • Phone (01)-877 89 01 • Fax (01)-876 56 29
Belgium, Bio-Rad Laboratories S.A.-N.V., Begoniastraat 5, B-9810 Nazareth • Phone 09-385 55 11 • Free Phone 0800/97032 • Fax 09-385 65 54
Brazil, Bio-Rad Laboratories (Brazil), Rua dos Invalidos 212 - 5 andar, Lapa - Rio de Janeiro - RJ, CEP 20331-020 • Phone 55 21 507 6191
Canada, Bio-Rad Laboratories (Canada) Ltd., 5671 McAdam Road, Mississauga, Ontario L4Z 1N9 • Phone (905) 712-2771 • Fax (905) 712-2990
China, Bio-Rad China (Beijing), Rm 615, Shang Fang Plaza, No. 27, North Third Round Center Road, West District, Beijing 100029
Phone 86-10-8201-1366/68 • Fax 86-10-8201-1367
Denmark, Bio-Rad Laboratories, Generatorvej 8 C, 2730 Herlev • Phone 45 44 52-1000 • Fax 45 44 52-1001
Finland, Bio-Rad Laboratories, Pihatörmä 1A, FIN-02240 Espoo • Phone 358 (0)9 804 2200 • Fax 358 (0)9 804 1110
France, Bio-Rad Laboratories, 3, Boulevard Raymond Poincaré, 92430 Marnes-la-Coquette • Phone 01 47 95 69 65 • Fax 01 47 41 9133
Germany, Bio-Rad Laboratories GmbH, Heidemannstraße 164, D-80939 München, Postfach 45 01 33, D-80901 München
Phone 089 318 84-177 • Fax 089 318 84-123
Hong Kong, Bio-Rad Pacific Ltd., Unit 1111, 11/F, New Kowloon Plaza, 38 Tai Kok Tsui Road, Tai Kok Tsui, Kowloon
Phone 852-2789-3300 • Fax 852-2789-1257
India, Bio-Rad Laboratories (India) Pvt. Ltd., B&B1, Enkay Towers Vanijyanikunj, Udhyog Vihar Phase V, Gurgaon, Haryana 122016
Phone (91-124)-6398112/113/114 • Fax (91-124)-6398115
Israel, Bio-Rad Laboratories, Ltd., 14 Homa Street, P.O. Box 5044, Rishon Le Zion 75150 • Phone 03 951 4124 • Fax 03 951 4129
Italy, Bio-Rad Laboratories S.r.l., Via M. Peroglio 23, 00144 Rome • Phone 34 91 590 5200 • Fax 34 91 590 5211
Japan, Nippon Bio-Rad Laboratories KK, 7-18 Higashi-Nippori 5-chome, Arakawa-ku Tokyo 116-0014 • Phone 03-5811-6270 • Fax 03-5811-6272
Korea, Bio-Rad Korea Ltd., Cambridge Building, 1461-15 Seocho-Dong Seocho-Ku, Seoul 137-070 • Phone 82-2-3473-4460 • Fax 82-2-3472-7003
Latin America, Bio-Rad Latin America, 14100 Palmetto Frontage Road, Suite 101, Miami Lakes, Florida USA 33016 • Phone 305-894-5950 • Fax 305-894-5960
Mexico, Bio-Rad Laboratorios Mexico, Adolfo Prieto No. 1653, Col. De Valle, CP. 03100, Mexico D.F. • Phone 52 5 534 2552 to 54 • Fax 52 5 524 5971
The Netherlands, Bio-Rad Laboratories B.V., Fokkerstraat 10, 3905 KV Veenendaal • Phone 0318-540666 • Fax 0318-542216
New Zealand, Bio-Rad Laboratories Pty Ltd., PO Box 300-571, Albany, Auckland • Phone 64-9-4152280 • Fax 64-9-443 3097
Norway, Bio-Rad Laboratories, Johan Scharffenbergs vei 91, N-0694 Oslo • Phone 47-23-38-41-30 • Fax 47-23-38-41-39
Russia, Bio-Rad Laboratorii, ul. Butirskaya 79 "B", office 156 RF-125015 Moscow • Phone 7 095 979 98 00 • Fax 7 095 979 98 56
Singapore, Bio-Rad Laboratories, Singapore, 211 Henderson Rd. #03-02, Henderson Industrial Park, 159552 • Phone 65-2729877 • Fax 65-2734835
Spain, Bio-Rad Laboratories, S.A., Lopez de Hoyos, 245-247, 28043 Madrid • Phone 34-91-590-5200 • Fax 34-91-590-5211
Sweden, Bio-Rad Laboratories AB, Vintergatan 1, Box 1097, S-172 22 Sundbyberg • Phone 46 (0)8-55 51 27 00 • Fax 46 (0)8-55 51 27 80
Switzerland, Bio-Rad Laboratories AG, Nenzlingerweg 2, CH-4153 Reinach • Phone 061-717-9555 • Fax 061-717-9550
United Kingdom, Bio-Rad Laboratories Ltd., Bio-Rad House, Maylands Avenue, Hemel Hempstead, Hertfordshire HP2 7TD
Phone 0181 328 2000 • Free Phone 0800-181134 • Fax 01442-259118
00-000 0000 Sig 1200Bulletin 0000 US/EG Rev A
 Loading...