

Page 1
REF : 93 073
Version : F
05/2008
VIDAS® PC
User's Manual
bioMérieux S.A. 69280 Marcy l'Etoile / France
Tel. 33 (0)4 78 87 20 00 - Fax 33 (0)4 78 87 20 90
4501-1714-en
http://www.biomerieux.com
Printed in France / 673 620 399 RCS Lyon
© 2005-2008.bioMérieux, S.A.
Page 2

Page 3

4501-1584 E en
Argentina
bioMérieux Argentina
Av. Congreso 1745
(C1428BUE) Capital Federal
Buenos Aires
tel. (54) 11 5555-6800
fax (54) 11 5555-6888
Australia
bioMérieux Australia P/L
Unit 25, Parkview Business Center
1 Maitland Place
Baulkham Hills NSW 2153
tel. (61) 2 8852 4700
fax (61) 2 8852 4777
Austria
bioMérieux Austria GmbH
Eduard-Kittenberger-Gasse 97
Top 3
A-1230 Wien
tel. (43) 186 50 650
fax (43) 186 50 661
Belgium
bioMérieux Benelux s.a./n.v.
Media Square
18-19 Place des Carabiniers
Bruxelles 1030
tel. (32) 2 743 01 70
fax (32) 2 733 55 97
Brazil
bioMérieux Brasil SA
Estrada Do Mapua
491 Taquara - Jacarepaguá
CEP 22710 261 Rio de Janeiro R.J
Rio de Janeiro R.J
tel. (55) 21 2444 1400
fax (55) 21 2445 6025
Canada
bioMérieux Canada, Inc.
7815, Henri-Bourassa West
Saint Laurent, QC
H4S 1P7
tel. (1) 514 336 7321
fax (1) 514 807 0015
Chile
bioMérieux Chile S.A.
Seminario 131
Providencia
Santiago
tel. (56) 2634 20 92
fax (56) 2634 20 93
China
bioMérieux China Limited
Room 1601-02B & 10
Est Ocean Centre
n° 24A Jiang Guo Men Nei Street,
100004 Beijing
tel. (86) 10 6515 6963
fax (86) 10 6515 6993
bioMérieux China Limited
Room 2605, South Tower,
World Trade Center
371-375 Huan Shi Dong East Road
510095 Guangzhou
tel. (86) 20 8762 7010
fax (86) 20 8762 7015
Colombia
bioMérieux Colombia Ltda
Avenida 15 No. 100-43
Piso 2
Bogotá D.C.
tel. (57) 1 520 0080
fax (57) 1 520 0088 / 1 520 0831
Czech republic
bioMérieux CZ s.r.o.
Business Park Kosice,
Jinonická 80
158 00 Praha 5
tel. (420)
2 57 290 623 / (420) 2 57 290 232
fax (420) 2 57 290 964
Denmark
bioMérieux Danmark Aps
Smedeholm 13C,
2730 Herlev
tel. (45) 70 10 84 00
fax (45) 70 10 84 01
Finland
bioMérieux Suomi Oy
Konalantie 47 C
FI-00390 Helsinki
tel. (358) 9 8545 6000
fax (358) 9 8545 6045
France
bioMérieux S.A.
69280 Marcy l’Etoile
tel. 33 (0)4 78 87 20 00
fax 33 (0)4 78 87 20 90
http://www.biomerieux.com
Germany
bioMérieux Deutschland GmbH
Weberstrasse 8
D-72622 Nürtingen
tel. (49) 7022 30070
fax (49) 7022 36110
Greece
bioMérieux Hellas S.A.
Papanikoli 70
15232 Halandri
Athens
tel. (30) 210 81 72 400
fax (30) 210 68 00 880
Hungary
bioMérieux Hungária Kft.
Fóti út. 56 (5
H-1047 Budapest
tel. (36) 1 231 3050
fax (36) 1 231 3059
India
bioMérieux India Pvt. Ltd
A-32, Mohan Co-Operative Ind. Estate
New Delhi 110 024
tel. (91) 11 42 09 88 00
fax (91) 11 24 64 88 30
Indonesia
Representation office
bioMérieux Indonesia
Enseval Building
Kawasan Industri Pulo Gadung - JI. Pulo
Lentut No. 10
Jakarta Timur 13920
tel. (62) 21 461 51 11
fax (62) 21 460 41 07
Italy
bioMérieux Italia S.p. A
Via Fiume Bianco, 56
00144 Roma
tel. (39) 0 6 523081
fax (39) 0 6 52308240
Ivory Coast
bioMérieux Afrique Occidentale
08 BP 2634
Abidjan 08
tel. (225) 22 40 93 93 / (225) 22 40 41 40
fax (225) 22 40 93 94
Japan
bioMérieux Japan, Ltd
Seizan Bldg.,
12-28 Kita-Ayoama 2-chome
Minato-ku,
Tokyo 107-0061
tel. (81) 3 5411 87 11
fax (81) 3 5411 87 10
Korea
bioMérieux Korea Co., Ltd
st
1
# 830-67 Yoksam-dong, Kangnam ku
Seoul 135-080
tel. (82) 2 2188 4700
fax (82) 2 547 6263
th
& 2nd Floor, Yoosung Building
Floor)
Page 4

Mexico
bioMérieux México SA de CV
Chihuahua 88, col. Progreso
México 01080, D.F.
tel. (52) 55 5481 9550
fax (52) 55 5616 2245
Netherlands (The)
bioMérieux Benelux BV
Boseind 15
P.O. Box 23
5280 AA Boxtel
tel. (31) 411 65 48 88
fax (31) 411 65 48 73
New Zealand
bioMérieux New Zealand Ltd
C/- Logical Freight Solutions
12 C Rennie Drive, Airport Oaks
Auckland
tel. (64) 9 918 6354
fax (64) 9 918 6355
Norway
bioMérieux Norge AS
∅kernveien 145
N - 0513 Oslo
tel. (47) 23 37 55 50
fax (47) 23 37 55 51
Philippines (The)
Representation office
bioMérieux Philippines Rep. Office
11th Floor, Pearlbank Centre
146 Valero Street, Salcedo Village
1227 Makati City
tel. (632) 817 7741
fax (632) 812 0896
Poland
bioMérieux Polska Sp. Z.o.o.
ul. Zeromskiego 17
01-882 Warsaw
tel. (48) 22 569 85 00
fax (48) 22 569 85 54
Portugal
bioMérieux Portugal, Lda.
Av. 25 de Abril de 1974, nº 23 – 3º
2795-197-LINDA-A-VELHA
tel. (351) 21 415 23 50
fax (351) 21 418 32 67
Russia
o.o.o. bioMérieux
Derbenevskaya ul. 20, str. 11
115 114 Moscow
tel. (7) 495 221 10 79
fax (7) 495 221 10 79
Spain
bioMérieux España S.A.
Manual Tovar, 45-47
28034 Madrid
tel. (34) 91 358 11 42
fax (34) 91 358 06 29
Sweden
bioMérieux Sverige AB
Hantverksvägen 15
436 33 Askim
tel. (46) 31 68 84 90
fax (46) 31 68 48 48
Switzerland
bioMérieux Suisse s.a.
51, avenue Blanc
Case postale 2150
1211 Genève 2
tel. (41) 22 906 57 60
fax (41) 22 906 57 42
Taiwan
Representation office
bioMérieux China Limited - Taiwan Branch
RM 608, No. 6-3 Ching Cheng Street
Taipei 105
tel. (886) 2 2545 2250
fax (886) 2 2545 0959
Distribution in over 130 countries
Thaïland
bioMérieux Thaïland Ltd
Regent House Bldg, 16 th Floor
183 Rajdamri Road, Lumpini, Pathumwan
Bangkok 10330
tel. (66) 2 651 98 00
fax (66) 2 651 98 01
Turkey
bioMérieux Diagnostik A.S.
Değirmen Sok. Nida Plaza Kat:6
34742 Kozyataği / Istanbul
tel. (90) 216 444 00 83
fax (90) 216 373 16 63
United Kingdom
bioMérieux UK Ltd
Grafton Way, Basingstoke
Hampshire RG22 6HY
tel. (44) 1256 461881
fax (44) 1256 816863
USA
bioMérieux, Inc.
100 Rodolphe Street
Durham NC 27712
tel. (1) 919 620 20 00
fax (1) 919 620 22 11
Vietnam
Representation office
bioMérieux (Thailande) Ltd. Rep. Office
in Vietnam
Room 4A, 4th Floor
Green House Building
62A Pham Ngoc Thach Street, Ward 6
District 3
Ho Chi Minh City
tel. (84) 88 209 906
fax (84) 88 209 905
Page 5

4501-1618 A en
The content of this manual is based on the Software release 4.0.0 and later Software
releases.
This manual is periodically updated. The updates shall be included in the new
releases of the Software.
Information supplied in this manual may be subject to modifications before the
products described become available.
This manual may contain information or references relating to certain
bioMérieux S.A. products, software or services which are not available in the country
of release; this shall not mean that bioMérieux S.A. intends to market such products,
software or services in such country
To request copies of publications or for any technical request, contact
bioMérieux S.A. or your local distributor.
Liability disclaimer
THIS MANUAL IS PROVIDED "AS IS" WITHOUT ANY WARRANTY, EITHER EXPRESS OR
, OF MERCHANTABILITY, SAFETY, QUALITY, ACCURACY OR THE PERFORMANCE OF
IMPLIED
PRODUCTS DESCRIBED IN THIS MANUAL
WARRANTY OF MERCHANTABILITY OR FITNESS FOR A PARTICULAR PURPOSE
INFRINGEMENT OF THIRD PARTIES
In no event shall bioMérieux S.A. be liable for any direct, consequential, incidental or
indirect damage or consequence related to, arising out of or in connection with, any
use of this manual and/or its results by the User and/or any third party.
In no event shall this manual be construed as an undertaking of bioMérieux S.A.
bioMérieux S.A. reserves the right to modify this manual without notice and shall
incur no liability as a result of such modification.
This manual is provided for information purposes only.
. IN ADDITION, THERE SHALL BE NO IMPLIED
, NOR NON
' INTELLECTUAL PROPERTY RIGHTS.
Intellectual Property
bioMérieux S.A. is the sole owner of copyright, patrimonial rights and any other
intellectual property rights in and to this manual and its content, except for the
potential third parties' rights.This manual and its content are protected under the
p r o v i s i o n s o f s e c ti o n L . 111-1 and following articles of the French Intellectual Property
Code and International Copyright and Author Rights Treaties.
The rights to use this manual granted herein are non-exclusive and limited to the
extent necessary to use the Software and Instrument. In no event shall the Users be
granted any other right to use this manual including without limitation, the right to
reproduce, represent, adapt or translate all or part of this manual by any means
whatsoever without the prior written consent of bioMérieux S.A.
Any use of this manual other than expressly permitted hereunder may be
prosecuted.
IMPORTANT!
USE OF THIS MANUAL CONSTITUTES ACCEPTANCE OF THE TERMS AND
CONDITIONS SET FORTH HEREIN.
Page 6

bioMérieux, the blue logo, VIDAS, BCI RS232 and BCI NET are used, pending and/or registered trademarks
belonging to bioMérieux S.A. or one of its subsidiaries.
Windows and Excel are used, pending and/or registered trademarks belonging to Microsoft Corporation.
Page 7

4501-1577 A en
SOFTWARE LICENSE AGREEMENT
User: No.:
Software: VIDAS PC, BCI RS232 and/or BCI NET
Computer: Brand name:
Printer: Brand name:
Disk player: Brand name:
IMPORTANT! The use of this Software is strictly governed by the following terms and
conditions.
I – Purpose of this Agreement / Rights granted
bioMérieux S.A. hereby grants, to the User who, by using this manual, accepts a
non-exclusive right to use the Software. The license is personal, non transferable,
non assignable and does not comprise the right to grant sub-licenses.
The User expressly agrees, in its own name and behalf as well as in the name and
on behalf of its employees, agents and collaborators, not to make any copy of the
Software-except one single backup copy for archival purposes- display the Software
on any computer other than the Computer, reproduce, sell, rent, lease, modify,
adapt, translate or otherwise dispose of, all or part of the Software, the equipment,
the user manual and its related documentation.
Specifically, the User agrees not to decompile, reverse engineer or disassemble all
or part of the Software.
Release:
II – Intellectual Property
All intellectual property rights including patrimonial rights, in and to the Software are
and shall remain bioMérieux S.A. exclusive property, subject to possible third party
rights. Consequently, the User is not entitled to copy or reproduce the Software
except as set forth above.
Except as expressly specified above, nothing contained herein shall be construed as
conferring to the User any right, title or interest in and to the Software.
III – Warranties
Provided that this Agreement duly signed is received by bioMérieux S.A. within ten
(10) business days from the delivery, bioMérieux S.A. warrants that the Software is
free from defect in materials and workmanship under normal conditions of use during
three (3) months from the delivery. Should any defect occur during such period,
bioMérieux S.A. or one of its authorized distributors in the country of sale shall
replace the Software provided that the User makes its request in writing together with
copy of the Software invoice and, as the case may be, the defective media.
Apart from the foregoing, the Software is provided "AS IS" and no warranty, whether
express or implied, of merchantability, safety, quality, or fitness for a particular
purpose is given hereunder nor any warranty that the Software shall not infringe
upon the intellectual property rights of any third party.
Page 8

IV – Liability
The warranty provided herein shall apply provided that Software is used under
normal conditions and to the exclusion of any replacement caused by accidental or
willful damage, or misuse of the software or accident whatsoever.
It is expressly understood that, according to this License, bioMérieux S.A. shall not
perform any service related to the training, assistance or maintenance of the
Software unless otherwise agreed upon between the parties through a separate
written agreement setting forth the terms and conditions (in particular, financial
conditions) of such training, assistance or maintenance.
In no event shall bioMérieux S.A. be liable for consequences related to, arising out of
or in connection with, modifications of Software by anyone other than
bioMérieux S.A.
In no event shall bioMérieux S.A. be liable for any direct, indirect, special,
consequential, incidental or material damage (including loss of goodwill, profits, data
or any other economic advantage) related to, arising out of or in connection with, any
use of the Software and/or its results by the User and/or any third party, including
without limitation, its clients, customers and sub-contactors. User hereby agrees to
indemnify, defend and hold bioMérieux S.A. harmless from all claims, damages,
expenses, suits, losses or liabilities relating to, arising out of or in connection with
User or such parties as well for any action of such third parties against
bioMérieux S.A.
Should this provision be held unenforceable or void, the User irrevocably agrees that
bioMérieux S.A. liability and expenses for all causes shall not exceed the total
amount actually paid by the User hereunder for the software release concerned by
the claim.
V – Applicable Law and settlement of disputes
This agreement is governed and construed in accordance with French Law.
Parties shall make their best efforts to settle any dispute through amicable
discussions. In the event no amicable settlement is reached in the period of three (3)
months after communication of the claim, any litigation shall be held in the exclusive
jurisdiction of the courts of Lyon, France.
Done..............................................................................
This…….....................day of .........................................
Signature and User's stamp:
COPY TO BE RETURNED TO BIOMERIEUX S.A.
Page 9

4501-1577 A en
SOFTWARE LICENSE AGREEMENT
User: No.:
Software: VIDAS PC, BCI RS232 and/or BCI NET
Computer: Brand name:
Printer: Brand name:
Disk player: Brand name:
IMPORTANT! The use of this Software is strictly governed by the following terms and
conditions.
I – Purpose of this Agreement / Rights granted
bioMérieux S.A. hereby grants, to the User who, by using this manual, accepts a
non-exclusive right to use the Software. The license is personal, non transferable,
non assignable and does not comprise the right to grant sub-licenses.
The User expressly agrees, in its own name and behalf as well as in the name and
on behalf of its employees, agents and collaborators, not to make any copy of the
Software-except one single backup copy for archival purposes- display the Software
on any computer other than the Computer, reproduce, sell, rent, lease, modify,
adapt, translate or otherwise dispose of, all or part of the Software, the equipment,
the user manual and its related documentation.
Specifically, the User agrees not to decompile, reverse engineer or disassemble all
or part of the Software.
Release:
II – Intellectual Property
All intellectual property rights including patrimonial rights, in and to the Software are
and shall remain bioMérieux S.A. exclusive property, subject to possible third party
rights. Consequently, the User is not entitled to copy or reproduce the Software
except as set forth above.
Except as expressly specified above, nothing contained herein shall be construed as
conferring to the User any right, title or interest in and to the Software.
III – Warranties
Provided that this Agreement duly signed is received by bioMérieux S.A. within ten
(10) business days from the delivery, bioMérieux S.A. warrants that the Software is
free from defect in materials and workmanship under normal conditions of use during
three (3) months from the delivery. Should any defect occur during such period,
bioMérieux S.A. or one of its authorized distributors in the country of sale shall
replace the Software provided that the User makes its request in writing together with
copy of the Software invoice and, as the case may be, the defective media.
Apart from the foregoing, the Software is provided "AS IS" and no warranty, whether
express or implied, of merchantability, safety, quality, or fitness for a particular
purpose is given hereunder nor any warranty that the Software shall not infringe
upon the intellectual property rights of any third party.
Page 10

IV – Liability
The warranty provided herein shall apply provided that Software is used under
normal conditions and to the exclusion of any replacement caused by accidental or
willful damage, or misuse of the software or accident whatsoever.
It is expressly understood that, according to this License, bioMérieux S.A. shall not
perform any service related to the training, assistance or maintenance of the
Software unless otherwise agreed upon between the parties through a separate
written agreement setting forth the terms and conditions (in particular, financial
conditions) of such training, assistance or maintenance.
In no event shall bioMérieux S.A. be liable for consequences related to, arising out of
or in connection with, modifications of Software by anyone other than
bioMérieux S.A.
In no event shall bioMérieux S.A. be liable for any direct, indirect, special,
consequential, incidental or material damage (including loss of goodwill, profits, data
or any other economic advantage) related to, arising out of or in connection with, any
use of the Software and/or its results by the User and/or any third party, including
without limitation, its clients, customers and sub-contactors. User hereby agrees to
indemnify, defend and hold bioMérieux S.A. harmless from all claims, damages,
expenses, suits, losses or liabilities relating to, arising out of or in connection with
User or such parties as well for any action of such third parties against
bioMérieux S.A.
Should this provision be held unenforceable or void, the User irrevocably agrees that
bioMérieux S.A. liability and expenses for all causes shall not exceed the total
amount actually paid by the User hereunder for the software release concerned by
the claim.
V – Applicable Law and settlement of disputes
This agreement is governed and construed in accordance with French Law.
Parties shall make their best efforts to settle any dispute trough amicable
discussions. In the event no amicable settlement is reached in the period of three (3)
months after communication of the claim, any litigation shall be held in the exclusive
jurisdiction of the courts of Lyon, France.
Done..............................................................................
This…….....................day of .........................................
Signature and User's stamp:
COPY TO BE KEPT BY USER
Page 11
General warnings
DANGER ! All biological fluids should be considered as potentially infectious.
Powderless protective gloves must be worn when manipulating blood,
products derived from blood or objects contaminated with blood.
Qualified laboratory personnel should use acceptable procedures for
biohazardous material.
IMPORTANT! The configuration that you have purchased is adapted to the
legislation and standards of the different countries it will be sent to.
For this reason, it may differ from the one presented in this
document. However, it will not prevent VIDAS from operating
correctly.
This product is an in vitro diagnostic medical device. It complies
with the directives and standards mentioned in the certificate
supplied with it.
You are advised to read and understand all the instructions in this
manual to be able to derive the best performance from your VIDAS.
bioMérieux
warnings inscribed on the instrument itself and indicated in the
documentation supplied.
The equipment may also cause inteference if not installed in
accordance with the instructions given in this manual.
Electromagnetic Compatibility (EMC):
This is a Class A product.
In a residential area, this product may cause harmful interference in
which case the user may be required to take adequate measures at
his own expense.
SA recommends that you observe the different
Page 12

IMPORTANT! Never download into the computer, programs other than those provided
by bioMérieux
. If these instructions are not complied with, the computer
could become infected with computer viruses. Any intervention directly or
indirectly resulting from the presence of such a virus cannot be covered
by the warranty or the maintenance contract.
This statement only applies
bearing the
symbol with regard to the waste electrical and electronic
to European countries and instruments
equipment European directive.
You can play an important role in contributing to reuse, recycling and
other forms of recovery of waste electrical and electronic equipment.
Sorting this type of waste significantly reduces potential negative effects
on the environment and human health as a result of the presence of
hazardous substances in electrical and electronic equipment.
At the end of the life cycle of this product, do not dispose of
the product as unsorted municipal waste, even if it is
decontaminated. Please contact bioMérieux or its distributor
in order to organize its collection.
Page 13

Revisions
The list of revisions below summarizes replacements or additional pages in your
VIDAS PC User’s Manual.
Manual Reason Page(s)
V.C 08.2003 Update of a few screens + text 1-7,1-8,
1-11, 2-3,
3-7, 3-8, 4-2,
4-5,5-21,
6-6, 6-7,
11-17
V.D. 03.2005 Modification relating to the new
VIDAS model
V.E. 12.005 New VIDAS software version All
V.F 05.2008 Addition of a backup mode Chapter 9
All
VIDAS
®
PC User's Manual Revisions-1
Page 14

Page 15

Table of Contents
1 How to use this manual 1-1
Finding topics and procedures ............................................................................................................. 1-2
Typographic conventions ..................................................................................................................... 1-3
Warnings.............................................................................................................................................. 1-3
Graphic symbols .................................................................................................................................. 1-4
2 Functional description 2-1
Description / Aim.................................................................................................................................. 2-2
General features .................................................................................................................................. 2-3
Principle of operation ........................................................................................................................... 2-3
3 Getting started 3-1
Safety instructions................................................................................................................................ 3-2
Precautions for use of reagents ........................................................................................................... 3-3
Control devices .................................................................................................................................... 3-4
Main function keys.......................................................................................................................... 3-4
The mouse keys ............................................................................................................................. 3-5
Main computer terminology ............................................................................................................ 3-5
Recommendation for use of the bar code reader ........................................................................... 3-6
Starting VIDAS PC............................................................................................................................... 3-7
Shutting down VIDAS PC .................................................................................................................. 3-10
Changing the system date and time................................................................................................... 3-13
User management ............................................................................................................................. 3-14
Creating a user .................................................................................................................................. 3-16
Modifying a user................................................................................................................................. 3-20
Deleting a user................................................................................................................................... 3-22
Unlocking a user account................................................................................................................... 3-24
Opening a session for a new user...................................................................................................... 3-25
Selecting a default printer .................................................................................................................. 3-26
Logging on with a user group after opening a session....................................................................... 3-27
Changing the password ..................................................................................................................... 3-29
Changing the password when opening Windows®....................................................................... 3-29
Changing the password when starting VIDAS PC........................................................................ 3-29
VIDAS® PC User's Manual V-1
Page 16

Table of Contents
Locking and unlocking the VIDAS PC software ................................................................................. 3-30
Locking and unlocking the BCI RS232 software ................................................................................3-31
4 Instructions for use 4-1
Theory of operation .............................................................................................................................. 4-2
User interface....................................................................................................................................... 4-5
Presentation of the main screen..................................................................................................... 4-5
The navigation tree......................................................................................................................... 4-7
The three main menus.................................................................................................................... 4-7
The VIDAS PC status summaries .................................................................................................. 4-8
Calibration status ...................................................................................................................... 4-8
Instrument status ...................................................................................................................... 4-8
Section status ........................................................................................................................... 4-8
User identification........................................................................................................................... 4-9
Minimize button .............................................................................................................................. 4-9
Presentation of a typical menu ..................................................................................................... 4-10
Entering assays (or assay requests).................................................................................................. 4-11
Summary table for the different entries ........................................................................................ 4-13
Entry in simple demographics mode ............................................................................................ 4-14
Entry in complete demographics mode ........................................................................................4-15
Entry in "Industrial context" mode................................................................................................. 4-16
Modifying and deleting assay requests ........................................................................................ 4-17
Managing creation of predefined sections for two connected VIDAS®
analytical modules........................................................................................................................ 4-17
Transferring assays............................................................................................................................ 4-18
Transferring an assay from the job list to a predefined section .................................................... 4-20
Manual transfer....................................................................................................................... 4-20
Optimized transfer .................................................................................................................. 4-21
Transferring assays from predefined sections to the job list......................................................... 4-21
Reserving sections............................................................................................................................. 4-22
Individual reservation.................................................................................................................... 4-24
Grouped reservation..................................................................................................................... 4-24
Manual reservation....................................................................................................................... 4-25
Printing.................................................................................................................................... 4-27
Running assays ................................................................................................................................. 4-29
Loading plan................................................................................................................................. 4-29
Load help screen .................................................................................................................... 4-31
Printing.................................................................................................................................... 4-32
Quitting the menu ................................................................................................................... 4-32
Running assays ...................................................................................................................... 4-33
Emergencies ...................................................................................................................................... 4-35
Reserving a section and running an assay................................................................................... 4-36
Modification - Deletion........................................................................................................................ 4-37
Modification of an assay............................................................................................................... 4-37
Deletion ........................................................................................................................................ 4-39
Deletion of an assay from the job list ...................................................................................... 4-40
Deletion of an assay in a predefined section .......................................................................... 4-41
Halting an assay ..................................................................................................................... 4-41
V-2 VIDAS
®
PC User's Manual
Page 17

Table of Contents
5 Updating a VIDAS assay 5-1
Purpose of the PTC update ................................................................................................................. 5-2
Updating .............................................................................................................................................. 5-2
Preliminary instructions .................................................................................................................. 5-2
Reading PTC cards ........................................................................................................................ 5-3
6 Calibration 6-1
Calibration / recalibration ..................................................................................................................... 6-2
Calibrators...................................................................................................................................... 6-3
How to calibrate.............................................................................................................................. 6-3
Controls .................................................................................................................................... 6-8
MLE card (Master Lot Entry) or specifications sheet ...................................................................... 6-9
Presentation ............................................................................................................................. 6-9
Composition............................................................................................................................ 6-11
"Calibrations" menu ........................................................................................................................... 6-12
Entry of MLE card data................................................................................................................. 6-14
Automatic reading by the VIDAS analyzer.............................................................................. 6-14
Manual entry or entry using the bar code reader .................................................................... 6-16
Displaying Calibrations................................................................................................................. 6-18
Calibrations to do.................................................................................................................... 6-18
Current calibrations................................................................................................................. 6-20
All calibrations (valid and expired) .......................................................................................... 6-23
Deleting calibrations ..................................................................................................................... 6-24
Other recalibration methods............................................................................................................... 6-25
7 Results 7-1
Calculating results................................................................................................................................ 7-2
Qualitative assays..................................................................................................................... 7-2
Quantitative assays .................................................................................................................. 7-2
Results menu....................................................................................................................................... 7-3
"Results" menu commands ............................................................................................................ 7-5
Details of a result............................................................................................................................ 7-6
List of functions .............................................................................................................................. 7-8
Validate..................................................................................................................................... 7-8
Retest ....................................................................................................................................... 7-8
Recompute ............................................................................................................................... 7-8
Retransmit .............................................................................................................................. 7-10
Exporting results..................................................................................................................... 7-10
Print ........................................................................................................................................ 7-12
8 The different VIDAS PC menus 8-1
Functions ............................................................................................................................................. 8-2
Loading ................................................................................................................................................ 8-2
Results................................................................................................................................................. 8-2
Calibrations.......................................................................................................................................... 8-3
VIDAS® PC User's Manual V-3
Page 18

Table of Contents
Quality control ...................................................................................................................................... 8-3
Kit quality control reports................................................................................................................ 8-5
Select data................................................................................................................................ 8-5
Display...................................................................................................................................... 8-7
External quality control report......................................................................................................... 8-8
Select data................................................................................................................................ 8-8
Display.................................................................................................................................... 8-10
Linearity report ............................................................................................................................. 8-14
Selecting data ......................................................................................................................... 8-14
Text mode display................................................................................................................... 8-15
Graphic mode display ............................................................................................................. 8-18
Patient data........................................................................................................................................ 8-19
"Patient data" menu commands ...................................................................................................8-21
Search procedure......................................................................................................................... 8-22
Procedure for patient search................................................................................................... 8-23
Printing of results .................................................................................................................... 8-24
Instrument .......................................................................................................................................... 8-26
Section status window.................................................................................................................. 8-28
Statuses.................................................................................................................................. 8-28
Managing sections.................................................................................................................. 8-28
Error window ................................................................................................................................8-30
List of errors............................................................................................................................ 8-31
Log..................................................................................................................................................... 8-38
Configuration...................................................................................................................................... 8-39
"Routine" submenu....................................................................................................................... 8-41
"Assay assignment" submenu ......................................................................................................8-43
"Profiles" submenu ....................................................................................................................... 8-45
Entering a profile of assays.................................................................................................... 8-46
"BCI" submenu ............................................................................................................................. 8-46
"Units" submenu........................................................................................................................... 8-46
"Assay activation" submenu ......................................................................................................... 8-48
"Controls" submenu...................................................................................................................... 8-49
The "Westgard" submenu............................................................................................................. 8-51
Specific assay set up .............................................................................................................. 8-53
Printing.................................................................................................................................... 8-53
Maintenance ...................................................................................................................................... 8-54
"About" dialog box............................................................................................................................. 8-54
9 Backup 9-1
Programming automatic backup .......................................................................................................... 9-2
Starting manual backup .......................................................................................................................9-5
Restoring data...................................................................................................................................... 9-7
®
V-4 VIDAS
PC User's Manual
Page 19

Table of Contents
Bidirectional Computer Interface (BCI) 10-1
10
Introduction ........................................................................................................................................ 10-2
BCI Configuration............................................................................................................................... 10-3
"Routine" submenu....................................................................................................................... 10-4
"BCI Link" submenu ..................................................................................................................... 10-6
Selecting the BCI RS232 link.................................................................................................. 10-6
Selecting the BCI NET link ................................................................................................... 10-10
BCI RS232 Configuration................................................................................................................. 10-11
Status of the connection ....................................................................................................... 10-12
Alarm connection.................................................................................................................. 10-12
Unused connection ............................................................................................................... 10-12
"Link Operations" submenu ........................................................................................................ 10-13
Starting/stopping the connection .......................................................................................... 10-14
Transmission of results (Upload) .......................................................................................... 10-14
Reception of requests (Download)........................................................................................ 10-14
Results on hold (Back in Service/Out of Service) ................................................................. 10-14
Displaying communications tracking data............................................................................. 10-15
Displaying uploaded messages ............................................................................................ 10-16
Searching for uploaded messages ....................................................................................... 10-17
Deleting uploaded messages ............................................................................................... 10-18
Printing uploaded messages ................................................................................................ 10-18
"Link Configuration" submenu .................................................................................................... 10-19
"Tools" submenu ........................................................................................................................ 10-20
Unidirectional interface .................................................................................................................... 10-21
BCI RS232 parameter setting .................................................................................................... 10-21
Starting/stopping the connection .......................................................................................... 10-21
Transmission of results (Upload) .......................................................................................... 10-21
Reception of requests (Download)........................................................................................ 10-21
Connection statuses ............................................................................................................. 10-21
Setting VIDAS PC parameters ................................................................................................... 10-22
Loading ...................................................................................................................................... 10-22
Automatic transmission of results............................................................................................... 10-23
Bidirectional connection ................................................................................................................... 10-24
Setting BCI RS232 parameters .................................................................................................. 10-24
Starting/stopping the connection .......................................................................................... 10-24
Transmission of results (Upload) .......................................................................................... 10-24
Reception of requests (Download)........................................................................................ 10-24
Connection statuses ............................................................................................................. 10-24
Setting VIDAS PC parameters ................................................................................................... 10-25
Loading ...................................................................................................................................... 10-26
Automatic transmission of results ......................................................................................... 10-26
Validation / Retransmission of results .............................................................................................. 10-27
"Results" Menu........................................................................................................................... 10-27
Displaying results ....................................................................................................................... 10-27
Validation of results .................................................................................................................... 10-27
Retransmission of results ........................................................................................................... 10-27
VIDAS® PC User's Manual V-5
Page 20

Table of Contents
11 Maintenance 11-1
Patient database purge ...................................................................................................................... 11-2
Maintenance "Instrument run"............................................................................................................ 11-7
12 Troubleshooting 12-1
Reagent errors ................................................................................................................................... 12-2
Instrument errors................................................................................................................................ 12-3
List of errors from 12 to 57 and corresponding corrective action.................................................. 12-4
List of errors from 101 to 163 .......................................................................................................12-8
List of errors from 101 to 163 and corresponding corrective action ...................................... 12-10
Software errors ................................................................................................................................12-16
Internal errors ............................................................................................................................. 12-17
Assay preparation and loading errors:........................................................................................ 12-17
"Results" window errors.............................................................................................................. 12-20
"Configuration" window errors .................................................................................................... 12-21
Errors or warnings printed on reports............................................................................................... 12-22
Error not related to the equipment ................................................................................................... 12-24
13 Glossary 13-1
14 Index 14-1
Notes
V-6 VIDAS
®
PC User's Manual
Page 21

List of figures
1 How to use this manual 1-1
2 Functional description 2-1
3 Getting started 3-1
Fig. III 1: VIDAS PC initialization screen .............................................................................................. 3-8
Fig. III 2: Main screen .......................................................................................................................... 3-9
Fig. III 3: Shutting down Windows®.................................................................................................... 3-11
Fig. III 4: Shutting down the computer ............................................................................................... 3-12
Fig. III 5: Date/Time Properties window ............................................................................................. 3-13
Fig. III 6: Opening the VIDAS user manager window......................................................................... 3-16
Fig. III 7: Add user window................................................................................................................. 3-17
Fig. III 8: Group membership window ................................................................................................ 3-18
Fig. III 9: Group membership window ................................................................................................ 3-20
Fig. III 10: Deleting a user account .................................................................................................... 3-22
Fig. III 11: Unlocking a user account.................................................................................................. 3-24
Fig. III 12: Selecting a printer ............................................................................................................. 3-26
Fig. III 13 : VIDAS PC login window.................................................................................................. 3-30
Fig. III 14 : BCI RS232 login window.................................................................................................. 3-31
4 Instructions for use 4-1
Fig. IV 1: Basic VIDAS workflow .......................................................................................................... 4-3
Fig. IV 2: Basic VIDAS workflow (cont’d) ............................................................................................. 4-4
Fig. IV 3: Main screen .......................................................................................................................... 4-5
Fig. IV 4: List of VIDAS PC menus....................................................................................................... 4-6
Fig. IV 5 : A typical menu ................................................................................................................... 4-10
Fig. IV 6: "Loading" window (complete demographics mode) ............................................................ 4-12
Fig. IV 7: Entry zone (simple demographics) .....................................................................................4-14
Fig. IV 8: Entry zone (complete demographics) ................................................................................. 4-15
Fig. IV 9: Entry zone (industrial context) ............................................................................................ 4-16
Fig. IV 10: Transfer to predefined sections ........................................................................................ 4-19
Fig. IV 11: Main reservation commands............................................................................................. 4-23
Fig. IV 12: Manual reservation window .............................................................................................. 4-25
Fig. IV 13: Job list report (example) ................................................................................................... 4-28
Fig. IV 14 : Predefined sections list report (example)......................................................................... 4-28
Fig. IV 15: Loading plan commands................................................................................................... 4-29
Fig. IV 16: Loading plan window ........................................................................................................ 4-30
VIDAS® PC User's Manual VI-1
Page 22

List of figures
Fig. IV 17: Loading report (example).................................................................................................. 4-32
Fig. IV 18: Section assigned to emergencies .....................................................................................4-35
Fig. IV 19: Modification of an assay ................................................................................................... 4-37
Fig. IV 20: Deletion of an assay ......................................................................................................... 4-39
5 Updating a VIDAS assay 5-1
Fig. V 1 : "Assay activation" function.................................................................................................... 5-3
Fig. V 2 : Assay update card reading screen .......................................................................................5-4
Fig. V 3 : Examples of bar codes ......................................................................................................... 5-4
Fig. V 4 : Status after reading of the first bar code (example).............................................................. 5-5
Fig. V 5 : Status after reading of the last bar code (example) .............................................................. 5-6
Fig. V 6 : Assay update report (example)............................................................................................. 5-7
6 Calibration 6-1
Fig. VI 1: Master curve......................................................................................................................... 6-5
Fig. VI 2: Establishing the master curve............................................................................................... 6-6
Fig. VI 3:Recalibration of the master curve .......................................................................................... 6-7
Fig. VI 4: MLE card (qualitative assays)............................................................................................... 6-9
Fig. VI 5: MLE card (quantitative assays)........................................................................................... 6-10
Fig. VI 6: Calibrations window (example)........................................................................................... 6-13
Fig. VI 7: Read MLE card window...................................................................................................... 6-14
Fig. VI 8: MLE Card report (example) ................................................................................................ 6-17
Fig. VI 9: "Calibrations to do" window ................................................................................................ 6-18
Fig. VI 10: "Valid calibrations" window ............................................................................................... 6-20
Fig. VI 11: Calibration details ............................................................................................................. 6-22
7 Results 7-1
Fig. VII 1: "Results" menu window ....................................................................................................... 7-4
Fig. VII 2: Example of results ............................................................................................................... 7-6
Fig. VII 3: Additional assay data........................................................................................................... 7-7
Fig. VII 4: "Recompute" submenu ........................................................................................................ 7-9
Fig. VII 5: Exporting data from the Results Menu............................................................................... 7-11
Fig. VII 6: Results report (list of results) ............................................................................................. 7-13
Fig. VII 7: Results reports (one result)................................................................................................ 7-13
8 The different VIDAS PC menus 8-1
Fig. VIII 1: "Quality control" menu window ...........................................................................................8-4
Fig. VIII 2: Window for the result of a kit quality control ....................................................................... 8-7
Fig. VIII 3: Window for the result of an external control (text mode)................................................... 8-11
Fig. VIII 4: Result of an external quality control (graphic mode)......................................................... 8-12
Fig. VIII 5: Expected concentrations .................................................................................................. 8-15
Fig. VIII 6: Result of a text mode linearity report ................................................................................ 8-16
Fig. VIII 7: Result of a linearity control (graphic mode).......................................................................8-18
VI-2 VIDAS® PC User's Manual
Page 23

List of figures
Fig. VIII 8: "Patient data" menu window............................................................................................. 8-20
Fig. VIII 9: Detailed patient data......................................................................................................... 8-22
Fig. VIII 10: Printing of results............................................................................................................ 8-25
Fig. VIII 11: "Instrument" menu status window...................................................................................8-27
Fig. VIII 12: Error display window....................................................................................................... 8-30
Fig. VIII 13: Online help window......................................................................................................... 8-32
Fig. VIII 14: "Log" menu window ........................................................................................................ 8-38
Fig. VIII 15: "Routine" submenu window ............................................................................................ 8-41
Fig. VIII 16: "Assay assignment" submenu window ........................................................................... 8-43
Fig. VIII 17: "Profiles" submenu window ............................................................................................ 8-45
Fig. VIII 18: "Units" submenu window ................................................................................................ 8-47
Fig. VIII 19: "Assay activation" submenu ........................................................................................... 8-48
Fig. VIII 20: "Controls" submenu window ........................................................................................... 8-49
Fig. VIII 21: "Westgard" submenu window .........................................................................................8-51
Fig. VIII 22: Specific set-up ................................................................................................................ 8-53
Fig. VIII 23: "About" menu window (example).................................................................................... 8-54
9 Backup 9-1
Fig. IX 1: Backup selection .................................................................................................................. 9-2
Fig. IX 2: Setting automatic backup parameters ..................................................................................9-3
Fig. IX 3: Maintenance menu (backup) ................................................................................................ 9-6
Fig. IX 4: Maintenance Menu (restore)................................................................................................. 9-8
10 Bidirectional Computer Interface (BCI) 10-1
Fig. X 1: "Routine" submenu.............................................................................................................. 10-4
Fig. X 2: "Link BCI" submenu - "BCI RS232" link.............................................................................. 10-6
Fig. X 3: Field selection zone............................................................................................................. 10-8
Fig. X 4: " Submenu BCI Link"–BCI NET Link.................................................................................. 10-10
Fig. X 5: "BCI RS232 Configuration" Menu...................................................................................... 10-11
Fig. X 6: BCI-NT Configuration: "Link Operations" submenu ........................................................... 10-13
Fig. X 7: Displaying communications tracking data.......................................................................... 10-15
Fig. X 8: Displaying uploaded messages ......................................................................................... 10-16
Fig. X 9: Search for transmitted messages ...................................................................................... 10-17
Fig. X 10: "Link Configuration" submenu ......................................................................................... 10-19
VIDAS® PC User's Manual VI-3
Page 24

List of figures
Maintenance 11-1
11
Fig. XI 1: "Run" window...................................................................................................................... 11-3
Fig. XI 2: VidasPurge selection window ............................................................................................. 11-4
Fig. XI 3: VidasPurge selection window ............................................................................................. 11-5
Fig. XI 4: Invalid password................................................................................................................. 11-5
Fig. XI 5: Purge confirmation window................................................................................................. 11-6
Fig. XI 6: End of VidasPurge.............................................................................................................. 11-6
Fig. XI 7: Maintenance Menu ............................................................................................................. 11-7
Fig. XI 8: Password for the "Instrument run" submenu....................................................................... 11-8
12 Troubleshooting 12-1
Fig. XII 1: Indication of an error (example)......................................................................................... 12-8
Fig. XII 2: Description of an error (example) ......................................................................................12-9
Note: The copies of VIDAS PC software screens are only given as examples.
VI-4 VIDAS® PC User's Manual
Page 25

1 How to use this manual
Introduction
This manual covers the procedures for the major functions of the VIDAS as well
as its software and consumables.
It also deals with the various procedures relating to the VIDAS installation and
start-up.
The instruments are described in the VIDAS Instrument User’s Manual.
CAUTION! The software must be used by trained personnel only, who are authorized
to do so.
You are advised to read and understand all the instructions in this manual
to be able to derive the best performance from your VIDAS.
VIDAS
®
PC User's Manual 1-1
Page 26

How to use this manual
Finding topics and procedures
Finding topics and procedures
This manual is divided into fourteen chapters. The first eleven chapters are used
for the description and procedures. Chapter 13 contains the glossary and
chapter 14 the index.
Table of contents
List of figures
Graphic symbols
Warnings
Page headers and
page footers
Glossary
Index
The main table of contents of the manual is located on pages V-1 to V-6.
It lists each chapter and the procedures and/or topics contained in the chapter.
Pages VI-1 to VI-3 contain a list of the figures in this manual.
The standard symbols used for bioMérieux instruments, and their meanings,
can be found in the list on page 1-4.
The warning messages are used throughout the procedures for use.
All the warnings in this manual should be read carefully before using VIDAS PC
in any way.
Apart from the first page of every chapter, each page of the manual includes a
page header and footer.
Each page header includes the chapter title and the title of a procedure or its
corresponding description.
These titles are located on the outside of the page so that you can thumb
through the pages to quickly locate a chapter or a procedure.
The footers contain the title of the manual, the name of the product and the
page number.
The glossary is located in Chapter 13 at the back of the manual. It gives the
definition of the main technical terms used in the manual.
The index is located in Chapter 14 at the back of the manual. It is used to locate
a particular description or procedure.
1-2 VIDAS® PC User's Manual
Page 27

How to use this manual
Typographic conventions
Typographic conventions
These conventions are used in the different chapters of the manual.
"Calibration…”
• Click on...
< >
"O" and "I" are letters.
A bullet point is used to denote an action to be performed.
Quotation marks are used for information which appears on the screen:
messages, menu options, functions.
Keyboard keys are represented in angle brackets.
1
2
"ø" and "1"
Warnings
are the digits zero and one.
The following warnings are used throughout the manual:
for safety reasons (DANGER!), −
− − to ensure that VIDAS is maintained in good working condition (CAUTION!),
or to allow optimum use of your VIDAS (IMPORTANT!).
3
4
5
VIDAS
®
PC User's Manual 1-3
Page 28

How to use this manual
Graphic symbols
Graphic symbols
4501-1582 A en
The standard symbols used for the bioMérieux systems and their meanings
can be found below:
Direct current
Alternating current
Both direct and alternating current
Three-phase alternating current
Earth (ground) TERMINAL
PROTECTIVE CONDUCTOR TERMINAL
Frame or chassis TERMINAL
Equipotentiality
ON (power supply)
OFF (power supply)
1-4 VIDAS® PC User's Manual
Page 29

How to use this manual
Graphic symbols
"ON" (only for a component of the system equipment)
"OFF" (only for a component of the system equipment)
Equipment protected throughout by DOUBLE INSULATION or
REINFORCED INSULATION (equivalent to Class II of IEC 536)
Risk of electric shock
Caution, consult accompanying documents
High temperature
Potential pinch point
Biological risks
1
2
3
VIDAS
LOT
REF
EC REP
®
PC User's Manual 1-5
or REF
Consult Instructions for Use
Batch code
Catalogue number
Temperature limitation
Authorised Representative in the European Community
4
5
Page 30
How to use this manual
Graphic symbols
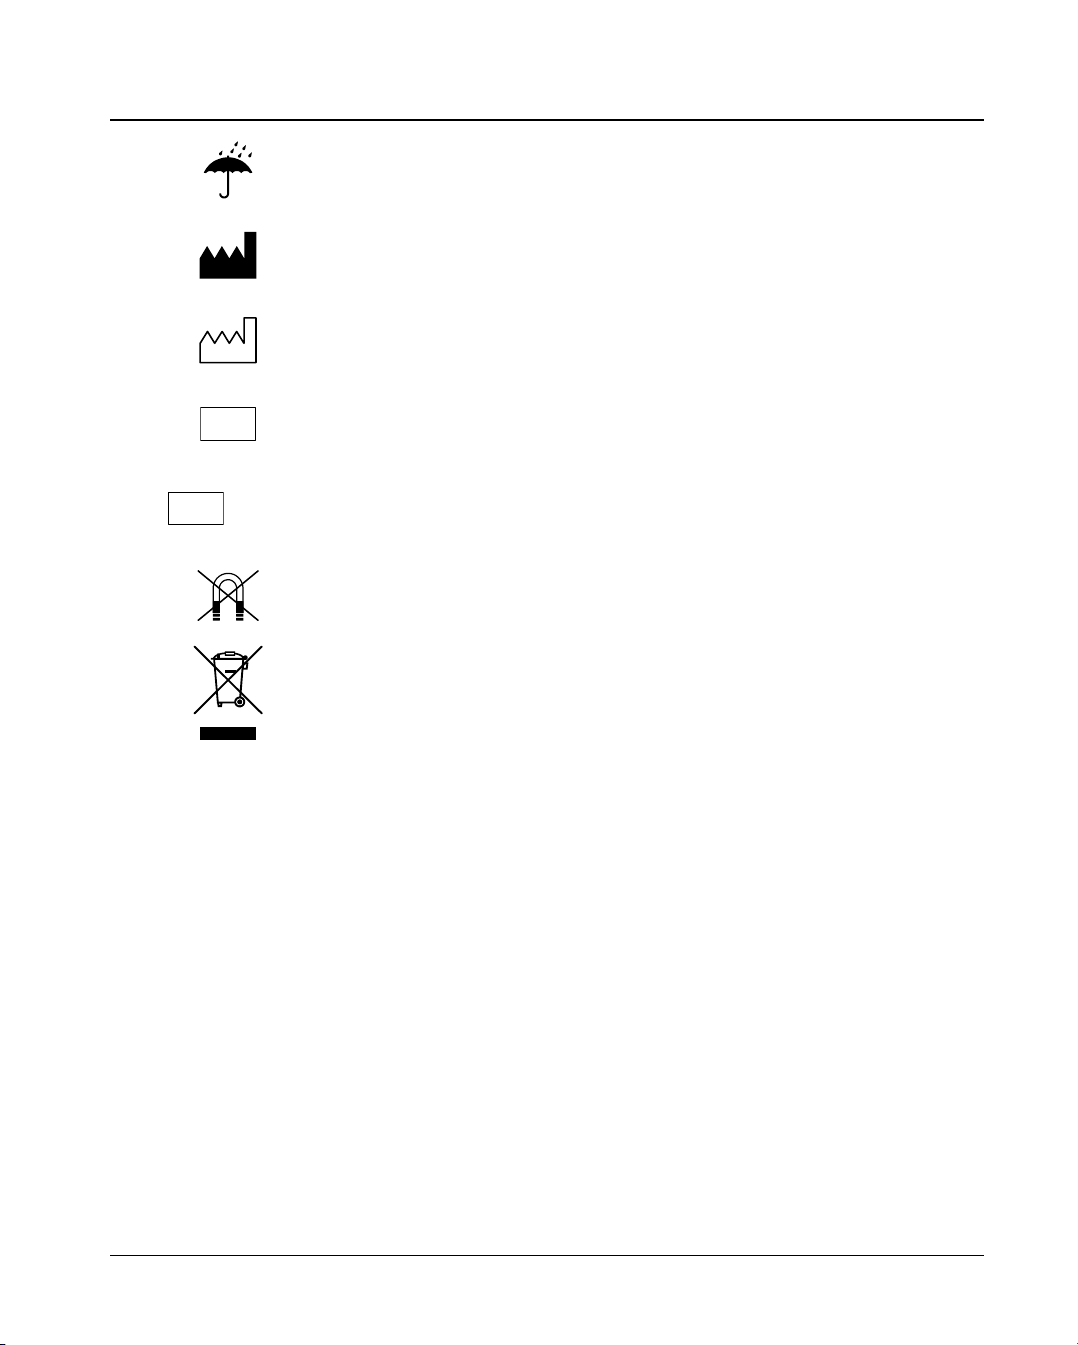
Keep dry
SN
IVD
or SN
Manufacturer
Date of manufacture
In Vitro Diagnostic Medical Device
Serial number
Keep away from magnetic field
Separate collection for waste electrical and electronic equipment
1-6 VIDAS® PC User's Manual
Page 31

2 Functional description
Introduction
This chapter describes the main features of the VIDAS® PC software.
VIDAS
®
PC User's Manual 2-1
Page 32

Functional description
Description / Aim
Description / Aim
The VIDAS software is multi-task.
It enables:
Entry of patient data and analyses via the keyboard or the bidirectional
−
connection with or without the bar code reader,
−
Printing of results via the printer, the screen or the uni/bidirectional
connection (on request).
−
System operation and self-tests.
−
Management of calibrations and controls in memory.
−
Display and validation of results.
−
Management of patient records.
−
Running of one or two analytical modules.
The computer contains software programs and various files which enable it to
run the VIDAS system.
VIDAS PC
software: This software contains all the elements and information required to run the
system.
Protocol software:
PTC Protocol Test Change: this software contains all the protocols and tests required
to perform assays.
B
Bidirectional Interface
Software: BCI
idirectional Connection Interface: this is an optional software which controls
the bidirectional interface with the Laboratory Information System (LIS).
2-2 VIDAS
®
PC User's Manual
Page 33

Functional description
General features
General features
Hardware
Consumables
Principle of operation
•
Refer to Chapter 2 of the VIDAS Instrument User's Manual in which the
analytical and computer modules are described.
Refer to Chapter 2 of the VIDAS Instrument User's Manual in which the
•
consumables are described.
• Refer to Chapter 2 of the VIDAS Instrument User's Manual in which the
following are described:
− Methods for immunoassay.
− Protocol concept.
− The optical system.
1
2
3
VIDAS
®
PC User's Manual 2-3
4
5
Page 34

Page 35

3 Getting started
Introduction
This chapter covers the first steps you need to take before you can use the
VIDAS PC :
safety instructions, −
−
precautions for use of reagents,
−
starting and shutting down the software,
−
defining and using user groups.
VIDAS
®
PC User's Manual 3-1
Page 36

Getting started
Safety instructions
Safety instructions
This manual contains information and warnings which you must respect in order
to ensure that the software runs properly.
IMPORTANT! Never download into the computer, software programs other than those
provided by bioMérieux
®
.
If these instructions are not complied with, the computer and software
provided by bioMérieux
could become infected with computer viruses.
Any intervention directly or indirectly resulting from the use of a software
program other than the one provided by bioMérieux
shall not be covered
by the warranty or the maintenance contract.
Do not install a screen saver on the computer.
CAUTION! The system must be installed and brought into service by or under the
guidance of bioMérieux Technical Assistance.
The computer media containing the VIDAS PC software programs or the
user’s backups used for installation or reinstallation, must be stored in an
appropriate location.
The different elements composing your VIDAS: hardware, software
programs, software configuration (especially date and time format,
language, type of keyboard …), are part of a configuration validated by
bioMérieux. Any modification or addition resulting in a different
configuration to the one validated may cause incorrect operation.
3-2 VIDAS
®
PC User's Manual
Page 37

Getting started
Precautions for use of reagents
Precautions for use of reagents
IMPORTANT! Reagent kits must be stored between 2 and 8°C.
Bring reagents to room temperature before use (refer to the package insert
in the reagent kits).
To ensure that the standard duration of temperature control is respected,
the strips should not be kept in the trays, or the SPR
for any longer than it takes to prepare or normally perform the tests. Strips
and SPRs should not be loaded into the instrument in advance, but just
before the corresponding test is performed.
Do not use the reagents after the expiration date.
Do not mix reagents from different lots.
Carefully reseal the SPR pouch with the desiccant inside after use.
Powderless gloves should be worn when using the reagents.
Homogenize the standard, controls and samples before use.
Check that each SPR has a color-coded dot. If a SPR does not have its
color-coded dot:
®
s in the SPR block,
1
2
3
VIDAS
−
Reject the result corresponding to the defective SPR.
−
Clean the SPR block.
−
Repeat the assay corresponding to the defective SPR.
®
−
Inform bioMérieux
®
PC User's Manual 3-3
Technical Assistance.
4
5
Page 38

Getting started
Control devices
Control devices
You can access most of the VIDAS PC software functions using the mouse.
However, you can also use the keyboard to run the software.
Main function keys
Ctrl
Num
Lock
Delete
This key is always combined with another one (on the keyboard or on the
mouse). Both keys should be pressed simultaneously.
(E.g.: <CTRL> + <left mouse button> enables you to select one or several lines
on the screen).
Caps Lock key. This is used to lock the keyboard in upper case characters.
Combined with the left mouse button, it allows you to select data lists in a table.
This key must be activated (light on) if you want to use the numeric keypad.
Left and right arrow keys are used for moving the cursor in the entry zones.
This key enables you to delete a character to the right of the cursor.
This key enables you to delete a character to the left of the cursor.
In certain windows, the tabulation key enables you to move the cursor from one
entry field to another.
These function keys at the top of the keyboard correspond to keyboard
shortcuts which are used in the "Loading" menu.
3-4 VIDAS
®
PC User's Manual
Page 39

Getting started
Control devices
The mouse keys
The left button is used for selecting.
The middle scroll wheel is used for rapid scrolling. The right button is not used
in the VIDAS PC software.
1
Note: Left-handed users can invert the mouse buttons. To do so, please refer to the
Main computer terminology
Enable/disable boxes
enabled
enabled
Enabled/disabled icon
List zone
Entry zone
disabled
disabled
− Small boxes which correspond to one or several options which can be
enabled or disabled.
− Small circles corresponding to one or several options which can be enabled
or disabled. Only one option at a time can be enabled.
− When a function or a menu represented by an icon is accessible, the icon is
colored (enabled).
− When a function or a menu is not available, the icon is a bluish color
(disabled).
− In a dialog box, this zone lists available options. If all the options do not fit in
the zone, a scroll bar can be used.
− In a dialog box, this zone can be used to enter information.
Windows user's manual.
2
3
4
Text zone
®
VIDAS
PC User's Manual 3-5
− A zone in which you can enter information required to carry out a command.
When the dialog box opens, the text zone may be blank or already contain
text.
5
Page 40

Getting started
Control devices
Recommendation for use of the bar code reader
To read a bar code:
•
Hold the reader about 5 cm from the bar code.
•
Check that the reader is perpendicular to the bar code (maximum 5° tilt).
•
Depress the trigger.
A red beam of light will appear on the bar code.
•
Hold the trigger and slowly scan the bar code from top to bottom or bottom
to top until the code has been read completely.
A beep and a green LED indicate that reading has been performed correctly.
When reading is complete:
•
Release the trigger.
If reading does not occur immediately:
•
Slowly move the reader away from and/or towards the bar code until the
optimal position for reading has been reached.
•
If the problem persists, refer to Chapter 7 "Troubleshooting" of the VIDAS
Instrument manual.
3-6 VIDAS
®
PC User's Manual
Page 41

Getting started
Starting VIDAS PC
Starting VIDAS PC
•
Turn on the instruments in the following order:
− UPS (if necessary),
− VIDAS analytical modules,
− printer and screen,
− computer.
The configuration initializes.
•
Wait for the Windows® welcome window to appear.
•
Enter the user’s name and password.
1
2
Note: Your user name, your password and the user group you are a member of, must be pre-
defined in your laboratory.
This information will determine the level at which you can use your VIDAS PC
software.
A user who is a member of the VIDAS_ADMIN group has access to all the
software functions and certain administration functions such as programming
backups, changing the system time etc.
A user who is a member of the VIDAS_ROUTINE group can access the main
functions of the software, except the "Configuration" menu. The administration
functions, however, are not available.
Group membership is predefined for each user by a bioMérieux
engineer, the local bioMérieux representative or your laboratory system
admininstrator.
®
Field Service
3
4
5
VIDAS
®
PC User's Manual 3-7
Page 42

Getting started
Starting VIDAS PC
The Windows
•
Wait for 2 minutes before starting the VIDAS PC application.
•
Double click on the VIDAS PC icon,
®
desktop is displayed.
The VIDAS PC initialization screen displays.
Fig. III 1: VIDAS PC initialization screen
3-8 VIDAS
®
PC User's Manual
Page 43

Getting started
Starting VIDAS PC
After a short time, the VIDAS PC main screen appears.
Fig. III 2: Main screen
1
2
3
Note: For optimum performance of the VIDAS PC software, only one application can be started
at a time. If you try to start a second application, the following error message appears.
VIDAS
• Click on "OK" to close the window.
®
PC User's Manual 3-9
4
5
Page 44

Getting started
Shutting down VIDAS PC
When you turn on the analytical module, leave it to warm up for 45 minutes.
When the analytical module initializes, it automatically calibrates according to a
solid standard which reacts to temperature.
Note: If the room temperature is too low when the analytical module is turned on, an error is
generated (error 160) by VIDAS PC after the self-calibration phase (see "Error 160 – Selfcalibration drift", on page 12-15).
After the instrument has warmed up for 45 minutes, turn it off for one minute and
then turn it back on again. This operation enables the instrument to store in
memory the solid standard value after temperature stabilization.
Note: If error 160 was generated when the analytical module was turned on for the first time,
another error 160 will appear after the new self-calbiration phase. Turn off the module and
then turn it back on again. If error 160 persists call your bioMérieux
Service.
CAUTION! Never connect or disconnect cables when the computer is switched on.
Shutting down VIDAS PC
•
Make sure that:
− no assays are running,
− no reagents (strips and SPR
blocks,
− printing is not in progress.
To quit the VIDAS PC software,
•
Click on the stop icon in the top right-hand corner of your work window.
The following dialog box displays.
Technical Assistance
®
s) remain in the strip sections and SPR
• Click on "Yes".
®
The Windows
3-10 VIDAS
desktop displays.
®
PC User's Manual
Page 45

Getting started
Shutting down VIDAS PC
To quit the BCI RS232 or BCI NET software (if necessary),
Click on the stop icon in the top right-hand corner of the BCI window. •
Note: For more information on BCI RS232, see chapter "Bidirectional Computer Interface (BCI)"
in this manual.
For more information on BCI NET, see the BCI NET User’s Manual.
The Windows® desktop displays.
To shut down the computer,
1
• Click on the button in the bottom left-hand corner of the
screen or press one of the Windows key situated either side of the space
bar.
• Select "Shut Down".
2
3
VIDAS
Fig. III 3: Shutting down Windows®
®
PC User's Manual 3-11
4
5
Page 46

Getting started
Shutting down VIDAS PC
Note: For optimum operation of your PC, it is recommended to shut it down once a week.
The following window appears.
Fig. III 4: Shutting down the computer
•
Select "Shut down"
•
Click "OK".
The computer will stop and shut down.
•
Turn off the other instruments:
− screen,
− printer,
− analytical module(s),
− UPS (if necessary).
3-12 VIDAS
®
PC User's Manual
Page 47

Getting started
Changing the system date and time
Changing the system date and time
CAUTION! Incorrect setting of the date and time can lead to incorrect running of
programs and loss of data.
IMPORTANT! In order to change the system date and time, you must be logged on with a
user identifier which gives administration rights over the operating
system.
For additional information, contact your laboratory system administrator.
1
•
Go to the Windows® desktop.
•
Double click in the bottom right-hand corner of the window where the time
is displayed.
The following dialog box appears :
2
3
4
VIDAS
Fig. III 5: Date/Time Properties window
•
Change the date and time.
•
Click "Apply ".
•
Click "OK".
The new date and time are displayed in the bottom right-hand corner of the
Windows
®
PC User's Manual 3-13
®
desktop.
5
Page 48

Getting started
User management
User management
The "User Manager" utility developed by bioMérieux® SA enables the laboratory
administrator to:
− manage user accounts for Windows
− create and manage new user accounts.
®
XPe, VIDAS PC and BCI RS232 or
BCI NET created with previous versions of the VIDAS PC software;
Note: User management operations can only be performed by the laboratory system
administrator or another person qualified to do so.
The following table presents the user groups and their rights for for
Windows XPe, VIDAS PC and BCI RS232 or BCI NET.
GROUP WINDOWS
Users
Administrators
VIDAS_ROUTINE
VIDAS_ADMIN
BCI_ROUTINE
BCI_ADMIN
ORDINARY / /
FULL / /
/ ORDINARY /
/ FULL /
/ / ORDINARY
/ / FULL
VIDAS PC
The "Users" group can use Windows XPe, but not modify its properties.
The "Administrators" group gives full access rights to the Windows software.
The "VIDAS_ROUTINE" group gives access rights to the main VIDAS PC
menus, except the "Configuration" menu and the Maintenance/Instrument run
menu.
The "VIDAS_ADMIN" group gives full access rights to all the VIDAS PC software
menus
except the Maintenance/Instrument run menu.
The BCI_ROUTINE group allows you to view the BCI.
The "BCI_ADMIN" and "BCI_ROUTIN" groups give full access rights to the BCI
RS232 or BCI NET software menus.
BCI RS232 or
BCI NET
3-14 VIDAS
®
PC User's Manual
Page 49

Getting started
User management
Example: To have full access rights to Windows® XPe, VIDAS PC and BCI RS232 or BCI NET, you
IMPORTANT! Each user must belong to a VIDAS group (VIDAS_ADMIN or
must be a member of the "Administrators", "VIDAS_ADMIN" and "BCI_ADMIN" and "BCI
ROUTINE" groups.
To have limited access rights to Windows XPe but full access rights to VIDAS PC and
BCI RS232 or BCI NET, you must be a member of the "Users", "VIDAS_ADMIN" and
"BCI_ADMIN" and "BCI ROUTINE" groups.
To have limited access rights to Windows XPe, VIDAS PC and BCI RS232 or BCI NET,
you must be a member of the "Users", "VIDAS_ROUTINE" and "BCI_ROUTINE" groups.
VIDAS_ROUTINE) and a Windows XPe group (Users or Administrators) to
be able to use the VIDAS PC software.
If a bidirectional connection interface is used, each user must belong to a
BCI group ("BCI_ADMIN" or "BCI_ROUTINE") to be able to use BCI RS232
or BCI NET.
1
2
3
4
5
VIDAS
®
PC User's Manual 3-15
Page 50

Getting started
Creating a user
Creating a user
Note: During user management, you must close the VIDAS PC interface.
• If necessary, open the session using the administrator's identifier and
On the Windows
• Double click on the "User Manager" icon.
The "Vidas user manager" menu opens and the following window is displayed.
password.
®
desktop:
Fig. III 6: Opening the VIDAS user manager window
To create a new user account,
• Click on "Add".
3-16 VIDAS
®
PC User's Manual
Page 51

Getting started
Creating a user
The following window displays:
•
Enter the user's name in the "Name" text box.
•
Enter the password in the "Password" text box.
•
Confirm the password in the corresponding text box.
•
Click on "OK" to confirm creation of the new user account.
Fig. III 7: Add user window
1
2
3
VIDAS
®
PC User's Manual 3-17
4
5
Page 52

Getting started
Creating a user
The following window displays:
Fig. III 8: Group membership window
The name of the new user account is displayed at the top of the "Vidas user
manager" window.
•
Select the user group(s) (Users, Administrators, VIDAS_ADMIN,
VIDAS_ROUTINE, BCI_ADMIN, BCI_ROUTINE) in the "Groups" field
according to the permissions or rights assigned to the new user.
•
Click on the button to assign permissions or rights, or on the
button to remove them.
Note: A user can belong to several user groups, for example:
- VIDAS_ADMIN and BCI_ADMIN.
- VIDAS_ROUTINE and BCI_ROUTINE.
•
Proceed in the same way to create other user accounts.
•
Click on "Quit" to close the "Vidas user manager" window.
3-18 VIDAS
®
PC User's Manual
Page 53

Getting started
Creating a user
The following dialog box opens:
1
• Click on "Yes" to confirm creation of the new user account.
Note: A new user must be assigned a default printer (see section Selecting a default printer, on
page 3-26).
For a new user opening Windows XPe
for a new user, on page 3-25.
®
for the first time, see section Opening a session
2
3
VIDAS
®
PC User's Manual 3-19
4
5
Page 54

Getting started
Modifying a user
Modifying a user
Note: During user management operations, you must close the VIDAS PC interface.
• Open a session by entering the administrator's identifier and password (if
On the Windows
• Double click on the "User Manager" icon.
The "Vidas user manager" menu opens and the following window is displayed.
necessary).
®
desktop:
Fig. III 9: Group membership window
In the "Vidas user manager" window,
• Select the user whose rights you want to modify.
3-20 VIDAS
®
PC User's Manual
Page 55

Getting started
Modifying a user
In the "Groups" field,
Select the group to be removed or added using the add button or the
•
remove button
• Click on "Quit" when modification is finished.
The following window is displayed.
.
1
2
• Click on "Yes" to confirm the modifications.
The user's permissions and rights are now modified.
3
VIDAS
®
PC User's Manual 3-21
4
5
Page 56

Getting started
Deleting a user
Deleting a user
Note: During user management operations, you must close the VIDAS PC interface.
• Open a session by entering the administrator's identifier and password (if
necessary).
®
On the Windows
desktop:
• Double click on the "User Manager" icon.
The " Vidas user manager" menu opens and the following window is displayed.
Fig. III 10: Deleting a user account
•
Select the user you want to delete in the list of users.
•
Click on "Delete".
3-22 VIDAS
®
PC User's Manual
Page 57

Getting started
Deleting a user
The following window is displayed.
•
Click on "Yes" to confirm deletion.
The user account is definitively deleted.
•
Click on "Quit" to close the "Vidas user manager" window.
1
2
Note: This operation has no effect on the results or calibrations that the user obtained in the
application. When the user is deleted, the user data remain in the VIDAS PC database
and can be consulted by any other users who have access rights to this information.
3
VIDAS
®
PC User's Manual 3-23
4
5
Page 58

Getting started
Unlocking a user account
Unlocking a user account
After three unsuccessful attempts to connect, the software will lock.
To unlock it:
• Open a session by entering the administrator's identifier and password.
®
On the Windows
• Double click on the "User Manager" icon.
The "Vidas user manager" menu opens and the following window is displayed.
desktop:
Fig. III 11: Unlocking a user account
•
Select the user account you want to unlock.
The "Unlock" button is activated.
•
Click on "Unlock" to unlock the account.
•
Click on "Quit" to close the "Vidas user manager" window.
The user account is now unlocked.
3-24 VIDAS
®
PC User's Manual
Page 59

Getting started
Opening a session for a new user
Opening a session for a new user
When Windows
appear for modification of the password.
•
Click on OK.
A dialog box is displayed.
•
Enter your new password.
•
Confirm your new password.
•
Click on "OK".
A message is displayed informing you that your password has been changed.
•
Validate by clicking on "OK".
The Windows session opens.
Note: The numeric keypad is disabled when a new session is opened. Press
®
XPe is opened for the first time by a new user, various screens
Verr
num
to enable it.
1
2
3
VIDAS
®
PC User's Manual 3-25
4
5
Page 60

Getting started
Selecting a default printer
Selecting a default printer
When a new user account is created, the administrator must select a printer
using Windows
®
Xpe. To do so, on the Windows desktop:
• Click on the button in the bottom left-hand corner of the screen
or press one of the "Windows" keys situated either side of the space bar.
• Select "Settings" and then "Printers and Faxes".
Fig. III 12: Selecting a printer
In the "Printers and Faxes" menu,
•
Click on the icon of the printer to be selected by default.
•
Click on the right mouse button and select "Set as default printer".
This printer will be selected by default for the user's print-outs.
3-26 VIDAS
®
PC User's Manual
Page 61

Getting started
Logging on with a user group after opening a session
Logging on with a user group after opening a session
To log on using a different user group ("Routine" or "Administrator") to the one
you initially logged on to the VIDAS PC software with, you have to quit the
CAUTION! • If you need to open a new Windows session, you must shut down the
VIDAS PC software and open a Windows® session using your own user
identifier .
connection and quit the BCI software before closing the current Windows
session.
Proceed as follows:
click on the button in the bottom left-hand corner of the screen
or press one of the "Windows" key situated either side of the space bar.
• select "Log Off…".
1
2
3
4
5
VIDAS
®
PC User's Manual 3-27
Page 62

Getting started
Logging on with a user group after opening a session
The "Log Off Windows" dialog box displays.
•
Select "Log off" .
The session closes and a new session opening screen is displayed.
•
Enter the data required to open a new Windows® session corresponding to
the desired user group.
3-28 VIDAS
®
PC User's Manual
Page 63

Getting started
Changing the password
Changing the password
Changing the password when opening Windows®
Changing the password when starting VIDAS PC
When you enter your password, a dialog box will inform you if your password
has expired.
•
Click on "OK".
A dialog box displays.
•
Enter your new password.
•
Confirm your new password.
•
Click on "OK".
A message will appear to inform you that your password has been changed.
When you enter your password in the VIDAS PC prompt screen, a dialog box
will inform you if your password has expired.
•
Click on "OK".
•
Simultaneously press <Ctrl>, <Alt> and <Del>.
The Windows security window displays.
1
2
3
VIDAS
•
Click on "Change password".
•
Enter your old password.
•
Enter your new password.
•
Confirm your new password.
•
Click on "OK".
You can also change your password at any time using the above procedure.
®
PC User's Manual 3-29
4
5
Page 64

Getting started
Locking and unlocking the VIDAS PC software
Locking and unlocking the VIDAS PC software
After 30 minutes of inactivity, or if requested by the user (by clicking on the key
icon in the bottom right-hand corner of the screen), the VIDAS PC software
locks. This has no effect on assays in progress.
Note: The default time is 30 minutes, but it can be modified by any user who has sufficient rights
to access the "Routine" submenu in the "Configuration" screen.
The following window is displayed on the screen:
Fig. III 13 : VIDAS PC login window
To unlock the software,
•
Enter your user name.
•
Enter your password.
•
Click on "Login".
When you unlock the software, you can also log on as a different user but from
the same group, i.e. "Routine" or "Administrator".
To do so,
•
Enter your user name.
•
Enter your password.
•
Click on "Login".
When you unlock the software, you can also log on as a different user but from
another group. Refer to "Logging on with a user group after opening a session"
on page 3-27.
CAUTION!
3-30 VIDAS
After 3 unsuccessful attempts, the software will lock. To unlock it, call
your laboratory system administrator.
®
PC User's Manual
Page 65

Getting started
Locking and unlocking the BCI RS232 software
CAUTION!
CAUTION!
To log on as a different user, you must be a member of the same user
group ("Routine" or "Administrator"). If this is not the case, a warning
message will appear on the screen. You will therefore have to quit the
VIDAS PC software and open a Windows
identifier.
If you need to open a new Windows session, you must shut down the
connection and quit the BCI RS232 software before closing the current
Windows session.
®
session using your own user
Locking and unlocking the BCI RS232 software
After 10 minutes of inactivity, the BCI RS232 software locks. This has no effect
on the assays or the interface with the LIS.
The following window appears on the screen:
1
2
3
VIDAS
Fig. III 14 : BCI RS232 login window
To unlock the software,
•
Enter your password.
•
Click on "OK".
When you unlock the software, you can also log on as a different user but from
the same group, i.e. "Routine" or "Administrator".
To do so,
•
Enter your user name.
•
Enter your password.
•
Click on "OK".
CAUTION!
If you need to open a new Windows session, you must shut down the
connection and quit the BCI RS232 software before closing the current
Windows
®
session.
Note: For the BCI NET software, see the BCI NET User’s Manual.
®
PC User's Manual 3-31
4
5
Page 66

Page 67

4 Instructions for use
Introduction
This chapter deals with the use of the VIDAS® PC software for preparing and
starting assays.
VIDAS® PC User's Manual 4-1
Page 68

Instructions for use
Theory of operation
Theory of operation
VIDAS is a multiparametric system for immunoassay. It is composed of
hardware, software and consumables.
The VIDAS analytical module is divided into 5 sections each containing up to
−
6 assays with compatible protocols.
−
The VIDAS PC software can manage two VIDAS modules.
−
The reagent kits of 60, 30 or 10 tests are composed of:
− the reagent strips and SPR
− the necessary additional consumables such as standard(s), control(s),
diluent,
− the master curve in the form of bar codes (MLE card),
− the package insert.
The theory of operation on VIDAS consists of:
−
creating predefined sections,
−
running assays,
−
performing calibrations and controls.
®
s (Solid Phase Receptacle),
4-2 VIDAS
®
PC User's Manual
Page 69

Instructions for use
Theory of operation
Step 1
Prepare the sample
Step 5
Place the reagent strips in their
positions and fill them.
Step 2
Create a predefined section
and then reserve a section.
Step 4
Place the SPR
®
s in their slots.
Step 3
Fill the sample well
1
2
3
Step 6
Close the door of the SPR
®
block.
Step 7
Lower the section's cover.
Fig. IV 1: Basic VIDAS workflow
(continued on next page)
VIDAS® PC User's Manual 4-3
4
5
Page 70

Instructions for use
Theory of operation
Step 8
Run assays.
Step 9
Results are printed (depending on the software
configuration).
Fig. IV 2: Basic VIDAS workflow (cont’d)
IMPORTANT! Always observe good laboratory practices and universal safety
precautions when handling VIDAS reagents.
Step 10
When assays are completed, remove the reagent
strips and SPRs.
CAUTION!
Check that each SPR® has a color-coded dot.
If a SPR
−
−
−
−
®
does not have its color-coded dot :
Reject the result corresponding to the defective SPR
Check that the dot has not become stuck on the SPR® block or the
®
SPR
seal and if it has, then remove it.
Repeat the assay corresponding to the defective SPR
Inform bioMérieux® Technical Assistance.
4-4 VIDAS
®
.
®
.
®
PC User's Manual
Page 71

Instructions for use
User interface
User interface
Presentation of the main screen
When you start the VIDAS PC software, the following window displays:
1. Navigation tree
2. Three main menus
3. VIDAS status summary
1
1
3
Fig. IV 3: Main screen
2
2
3
4
5
VIDAS® PC User's Manual 4-5
Page 72

Instructions for use
User interface
The main window is divided into two parts:
the navigation tree and the three main menus, −
− the VIDAS PC status summaries.
• Click on the navigation tree in the main window to display the list of
VIDAS PC menus. The following window appears :
Fig. IV 4: List of VIDAS PC menus
4-6 VIDAS
®
PC User's Manual
Page 73

Instructions for use
User interface
The navigation tree
You can access 10 menus through this window :
− LOADING menu
The three main menus
Loading menu
− RESULTS menu
− CALIBRATIONS menu
− QUALITY CONTROL menu
− PATIENT DATA menu
− INSTRUMENT menu
− JOURNAL menu
− CONFIGURATION menu
− MAINTENANCE menu
− ABOUT menu
Enables you to prepare and run assays.
1
2
3
Calibrations menu
VIDAS® PC User's Manual 4-7
Results menu
Enables you to display and access the various procedures
for calibration.
Enables you to display and validate assay results.
4
5
Page 74

Instructions for use
User interface
The VIDAS PC status summaries
Calibration status
Recently expired
calibrations
Instrument status
Analytical module
affected by the error
Section status
Enables you to view the status of the various sections.
The statuses are the following:
The flashing icon in the bottom left-hand corner of the screen
indicates that at least one calibration has expired (see page
6-18).
Instrument error 101 to 163 : the icon corresponding to the
analytical module affected by the error is circled in red (see
page 12-8).
(white)
(white)
(white)
(green)
(green)
(green)
(white)
(red)
(black)
The section is available.
The section is reserved for emergencies.
The section has been reserved for a predefined section (see Reserving sections
page 4-22).
Verifications are in progress in this section (reading of bar codes, strips,
verification of calibrations, etc.). The section number is displayed below the
section concerned, under the status bar.
The section is running an assay. The time indicated corresponds to the time of
completion of the assay.
®
Strips and SPR
The section is being reset.
An error has occurred in a section.
The section is disconnected.
s are waiting to be unloaded from the section.
4-8 VIDAS
®
PC User's Manual
Page 75

Instructions for use
User interface
User identification
The identification icon shown opposite gives access to the VIDAS PC login
window (see Fig. III 13). The user name is displayed below the icon.
To lock the VIDAS PC software,
•
Click on the identification icon.
The VIDAS PC login window displays. The VIDAS PC software is now locked.
Assays continue normally.
It is possible to enter a user name and a password that are different to those
initially entered.
This can be useful when several users work routinely with the VIDAS.
•
Enter the desired user name.
•
Enter the corresponding password.
•
Click on OK.
1
2
CAUTION!
Minimize button
The new user name is displayed below the icon.
To log on as a different user, you must be a member of the same user
group ("VIDAS_ROUTINE" or "VIDAS_ADMIN"). If this is not the case, a
warning message will appear on the screen. You will therefore have to quit
the VIDAS PC software and open a Windows
user name.
This button in the top right-hand corner of the window enables you to minimize
a window to the size of an icon in the task bar.
To restore the window,
®
session using your own
• click on the icon in the task bar.
3
4
5
VIDAS® PC User's Manual 4-9
Page 76

Instructions for use
User interface
Presentation of a typical menu
All the VIDAS PC menu and submenu screens are divided into several zones
with a similar architecture.
1. Menu bar. The menu bar enables you to access the three main menus
(Loading, Calibrations and Results) and to return to the main menu. The
icon of the current menu is shaded.
2. Menu name. The name of the current menu or submenu is displayed.
3. Tool bar. The tool bar enables you to access the specific tools for the
current menu or submenu.
4. Menu screen. This is the specific screen for the current menu or submenu.
5. Sub-menu bar. The submenu bar enables you to access the different
submenus of the current menu.
6. Status bar. The status summary indicates the following information:
- section status,
- presence of errors,
- system time,
- name of the technician currently using the software.
5
1
2
3
4
6
Fig. IV 5 : A typical menu
4-10 VIDAS
®
PC User's Manual
Page 77

Instructions for use
Entering assays (or assay requests)
Entering assays (or assay requests)
In the main window, or any other window,
or,
• Click on the "Loading" button,
in the main window,
•
click on the navigation tree and then,
•
select the "Loading" button.
1
2
3
VIDAS® PC User's Manual 4-11
4
5
Page 78

Instructions for use
Entering assays (or assay requests)
The following window is displayed.
1. Job list. List of entered assays waiting to be run, and assay requests
received from the LIS.
2. Predefined sections. List of the predefined sections waiting to be reserved
and then started.
3. Entry zone. Entry of data according to the entry mode selected (simplified,
complete, industrial). The fields of this zone are detailed in each entry
mode.
4. Section number. The number of a predefined section is displayed below
the reserved section to which it corresponds.
5. Clear. The "Clear" button enables you to delete all the fields (including
the "Dilution" field).
by default, to 1. You can also press <F12> to do so (keyboard shortcut).
When you do this, the "Multiplier" check box returns,
5
3
1
2
4
Fig. IV 6: "Loading" window (complete demographics mode)
4-12 VIDAS
®
PC User's Manual
Page 79

Instructions for use
Entering assays (or assay requests)
Before entering assays, you can select one of the following three entry modes:
−
simple demographics mode (see page 4-14).
−
complete demographics mode (see page 4-15).
−
industrial context mode (see page 4-16).
Summary table for the different entries
The selection of these modes is described in Chapter 8 - The different
VIDAS PC menus.
1
Description of fields
(Maximum number of characters)
Assay code (obligatory field)
Dilution (3 characters)
Sample ID (12 characters - obligatory field)
Origin (5 characters)
Patient ID (12 characters)*
Patient’s name (30 characters)
Patient’s sex
Patient’s date of birth
Specimen*
Transfer mode ("Reserve" box to be enabled)
* This ID must be unique and specific for a patient or a specimen.
Simple
demographics
Yes Yes Yes
Depending on
type of assay
Yes Yes Yes
Yes Yes Yes
No Yes No
No Yes No
No Yes No
No Yes No
No No Yes
Depending on
work method
Complete
demographics
Depending on
type of assay
Depending on
work method
Industrial
context
Depending on
type of assay
Depending on
work method
2
3
4
VIDAS® PC User's Manual 4-13
5
Page 80

Instructions for use
Entering assays (or assay requests)
Entry in simple demographics mode
1. Assay selection. Manual entry or selection of an assay code from a pull-
down entry list.
2. Sample ID. Sample ID (12 characters maximum).
3. Dilution. Dilution factor for a defined assay. This window is only for
quantitative assay codes (from 1 to 999).
4. Origin. Five characters indicating the origin of the assay (laboratory,
specimen location, etc).
5. Multiplier. Enables you to repeat an assay up to 30 times.
6. Reserve. 2 work modes :
"Reserve" box enabled
This enables automatic recording of an assay in a predefined section.
"Reserve" box disabled:
This enables automatic recording of an assay in the job list.
7. Create. The "Create" button enables you to validate entry of an assay. You
can also press <F10> to do so (keyboard shortcut).
8. Modify. The "Modify" button enables you to modify an entry in the job list or
a predefined section (see Modification - Deletion page 4-37). You can also
press <F11> to do so (keyboard shortcut).
:
9. Clear. The "Clear" button enables you to delete all the fields (including the
"Dilution" field). By default the "Multiplier" check box resets to 1 when this is
done. You can also press <F12> to do so (keyboard shortcut).
7 8
2
1
Fig. IV 7: Entry zone (simple demographics)
4-14 VIDAS
4
3
5
®
PC User's Manual
9
6
Page 81

Instructions for use
Entering assays (or assay requests)
To enter an assay request,
•
Select the assay.
•
Enter the necessary information in the entry zone according to the patient
data.
•
Click on "Create" or press <F10> (keyboard shorcut).
The assay request is displayed as a list or predefined section, depending on the
recording mode selected ("Reserve" box enabled or disabled).
1
Note: The cursor for entering the next assay request is automatically positioned in the "Sample
ID" text box.
Entry in complete demographics mode
1. Date of birth. Patient’s date of birth (depending on the configuration:
dd/mm/yyyy or mm/dd/yyyy).
2. Sex. Patient’s sex (M, F, -).
3. Patient name. Patient’s name (max. 30 characters). The patient’s name
will only be taken into account if a Patient ID has also been entered.
4. Patient ID. Patient ID (max. 12 characters).
4
Fig. IV 8: Entry zone (complete demographics)
To enter an assay request,
3
1
2
2
3
4
•
Select the assay.
•
Enter the necessary information in the entry zone according to the patient
data.
VIDAS® PC User's Manual 4-15
Note: If a patient ID has previously been used, the patient’s data will appear by default.
See "Entry in simple demographics mode" on page 4-14 for entry of basic
information.
•
Click on "Create" or press <F10> (keyboard shortcut).
The assay request is displayed as a job list or predefined section, depending on
the recording mode selected ("Reserve" box enabled or disabled).
5
Page 82

Instructions for use
Entering assays (or assay requests)
Entry in "Industrial context" mode
1. Specimen. Specimen type (max. 30 characters).
To enter an assay request,
•
Select the assay.
•
Enter the necessary information in the entry zone.
See "Entry in simple demographics mode" on page 4-14 for entry of basic
information.
•
Click on "Create" (or press <F10>.).
The assay request is displayed as a job list or a predefined section, depending
on the recording mode selected ("Reserve" box enabled or disabled).
1
Fig. IV 9: Entry zone (industrial context)
4-16 VIDAS
®
PC User's Manual
Page 83

Instructions for use
Entering assays (or assay requests)
Modifying and deleting assay requests
The methods for modification and deletion of assay requests which have been
entered and queued are described in "Modification - Deletion" on page 4-37.
Managing creation of predefined sections for two connected VIDAS® analytical
modules
− If compatible assays have been assigned to different VIDAS® analytical
modules (VIDAS 1, VIDAS 2 in the Configuration menu) during the
creation of an analysis including these assays, separate predefined
sections are automatically created.
− The "Reorganize all sections by compatible tests" icon does not allow
you to group these tests together in one section.
1
2
3
4
5
VIDAS® PC User's Manual 4-17
Page 84

Instructions for use
Transferring assays
Transferring assays
The following window shows assays and indicates the commands used to
transfer them to a predefined section or the job list.
1. List of predefined sections. List of the predefined sections ready to be
reserved or run by the VIDAS module(s) (up to 20 predefined sections
displayed at the same time).
2. One predefined section. Predefined section composed of a maximum of 6
assays with compatible protocols. The VIDAS PC software assigns a
number to the predefined section and displays the expected time for
completion of the assay.
3. Job list. The job list is composed of up to 200 lines. Each line is a request
for a given assay.
You can sort by category by clicking on the column header (eg : Patient ID).
The width of the columns can be adjusted. To do so,
Click on the ↔ arrows of the column header while holding down the left
•
button of the mouse until you obtain the width you want.
4. Selection of compatible assays. Selection of the first 6 compatible assays
in the job list. They will display in inverse video.
5. Entry commands for loading assays. Entry commands required to load
assays in a predefined section or the job list.
Note: It is possible to automatically perform a search for identical sample numbers in the job list.
To do so, use the bar code reader to scan a tube bar code corresponding to the sample
number you are searching for.
4-18 VIDAS
®
PC User's Manual
Page 85

Instructions for use
Transferring assays
4
3
Fig. IV 10: Transfer to predefined sections
5
2
1
1
2
3
4
VIDAS® PC User's Manual 4-19
5
Page 86

Instructions for use
Transferring assays
Transferring an assay from the job list to a predefined section
Transfer of assay requests can be manual or optimized.
Manual transfer
Creating a predefined section in manual mode
• Select an assay in the job list (the assay is in inverse video).
• Transfer the assay by clicking on the "Transfer" button.
The assay appears in a predefined section numbered by VIDAS PC (if the
"Manual assignment" box has not been selected).
If a predefined section has already been created for the same protocol, the
assays will automatically be assigned to this section until all six positions have
been filled.
If you want to transfer an assay to a predefined section of your choice, select
the "Manual assignment" box beforehand.
If the "Manual assignment" box has been selected, a dialog box is displayed
which will enable you to either use a new section or select the predefined
section to which you want to transfer the assay.
The time required to run the assay (in minutes) is displayed below the number of
the predefined section.
An assay that is transferred to a predefined section will disappear from the job
list.
4-20 VIDAS
®
PC User's Manual
Page 87

Instructions for use
Transferring assays
Optimized transfer
Optimized transfer enables you to rapidly fill the positions of predefined sections
by selecting the first six assay requests with compatible protocols from the job
list.
This function can only be used if assays with compatible protocols have been
assigned to the same VIDAS module (see "Assay assignment" submenu on
page 8-43).
The "Select 6 compatible assays" button is enabled (colored).
1
The selected assays appear in the job list in inverse video.
• Click on this button.
• Transfer them to the predefined section by clicking on the "Transfer" button.
Note: If two assays with compatible protocols are assigned to two different VIDAS instruments,
two predfined lists will be created.
Transferring assays from predefined sections to the job list
Transferring an assay
• In the predefined section to be modified, select the assay you want to
transfer (the assay is displayed on a blue background).
• Click on the "Transfer" button.
The assay disappears from the predefined section and is returned to the top of
the job list.
Sorting is possible by clicking on the column header.
Transferring a predefined section
2
3
4
• Select the predefined section by clicking in the white background of the
predefined section button.
The assays and the predefined section appear on a blue background.
• Click on the "Transfer" button.
VIDAS® PC User's Manual 4-21
All the assays loaded in this predefined section are returned to the top of the job
list and the predefined section is cancelled.
5
Page 88

Instructions for use
Reserving sections
Reserving sections
Reserving a section consists of loading a previously created predefined section
in a section defined by VIDAS PC or the user.
You must then physically load the strips, SPR
indicated on the loading plan provided by VIDAS PC. The instrument will then
run the assays.
Two types of reservations are possible:
by VIDAS PC : −
− individual reservation
− grouped reservation
−
by the user:
− manual reservation
®
s and samples into the sections
4-22 VIDAS
®
PC User's Manual
Page 89

Instructions for use
Reserving sections
The window of the "Loading" menu displays the various functions used for the
reservation of sections.
1. Individual reservation.
2. Grouped reservation.
3. Manual reservation.
Fig. IV 11: Main reservation commands
1
3
1
2
2
3
4
VIDAS® PC User's Manual 4-23
5
Page 90

Instructions for use
Reserving sections
Individual reservation
VIDAS PC automatically assigns a predefined section to an available section.
Individual reservation is performed section by section.
• Click on the predefined section number.
The number is displayed in red.
Grouped reservation
The status of one of the sections of the VIDAS which is still available changes
to reserved in the status bar.
When all the sections of each VIDAS module are loaded, you can no longer
reserve sections.
A warning message alerts you when the VIDAS module is full (or modules if
there are several).
Grouped reservation is managed by VIDAS PC. This procedure enables you to
load all the predefined sections into the available sections of each VIDAS
module in numerical order (except the sections dedicated to emergencies
"EMERG." (see "Emergencies" on page 4-35).
• Click on the "Reserve all" button.
Note: Individual and grouped reservations take into account the assignment of assays by
module (see the "Assay assignment" submenu on page 8-43).
4-24 VIDAS
®
PC User's Manual
Page 91

Instructions for use
Reserving sections
Manual reservation
To perform manual reservation, proceed as follows:
/
The "Section reservation" window appears.
• Click on an "AVAIL" or "EMERG." button corresponding to the desired
section (the "Emergency" mode is described on page 4-35).
1. The section reservation window displays the number of the VIDAS
analytical module and the selected section.
1
1
Fig. IV 12: Manual reservation window
2
3
4
5
VIDAS® PC User's Manual 4-25
Page 92

Instructions for use
Reserving sections
• In the "Section reservation" window, click on the number of the predefined
section to be reserved.
The technician’s name is displayed.
• Click on the "Reserve" button if you only want to reserve a section (the
"Section reservation" window disappears).
The section status changes to "RESER",
or,
• Click on the "Start immediately" button if you want to reserve a section and
run it immediately (the "Section reservation" window disappears).
Note: Check that reagents and samples have been inserted before starting the
assay.
4-26 VIDAS
®
PC User's Manual
Page 93

Instructions for use
Reserving sections
Printing
It is possible at any time to print information on assays and predefined sections.
The following window appears:
Note: If you select "Job list and predef. sections list" the 2 reports are printed one after another.
• Click on the "Print" button.
• Click on "Cancel" to close the window without printing,
or
• Select the option you want and click on "OK".
1
2
3
4
VIDAS® PC User's Manual 4-27
5
Page 94

Instructions for use
Reserving sections
Pending VIDAS patients
Patient ID
----------------MIL849
MOR564
Total number of pending assays : 6
Test
------RSV
TXG
TXG
TXG
TXG
TXG
Dilution
--------- 127848
Pending patients tests on Aug 02 2005 13:56:19
Sample ID
--------------
123564
C2
C1
S1
S1
Origin
-------C
M
Name
-------MILLER
MORTON
Fig. IV 13: Job list report (example)
Predefined sections
16 juil. 2005 18:55:23
Section Position Test Dilution Patient ID Sample ID
---------- ------------ ------ ---------- ------------- ------------------ 107 1 RSV MIL849 127848
2 TXG MOR564 123564
3 TXG C2
4 TXG C1
5 TXG S1
6 TXG S1
Section Position Test Dilution Patient ID Sample ID
---------- ------------ ------ ---------- ------------- ------------------ 108 1 OPT OPT
2 OPT OPT
Fig. IV 14 : Predefined sections list report (example)
4-28 VIDAS
®
PC User's Manual
Page 95

Instructions for use
Running assays
Running assays
The assay is performed from start to finish by VIDAS PC.
Loading plan
Loading is made easier by the loading plan provided by VIDAS PC.
The following procedures were defined for one or two VIDAS modules.
You can access the VIDAS PC loading plan by clicking on one of the icons
shown in the figure below.
1
1. Loading plan. These icons enable you to access the loading plan for
module 1 or module 2 before the start up phase.
1
2
3
4
Fig. IV 15: Loading plan commands
VIDAS® PC User's Manual 4-29
5
Page 96

Instructions for use
Running assays
Note: If two VIDAS modules are used, assays can be assigned specifically to one or another of
the modules (see "Assay assignment" page 8-43).
• Click on the "Access to loading plan" icon on the VIDAS 1 module,
or
• Click on the "Access to loading plan" icon on the VIDAS 2 module.
Note: If only one VIDAS module is connected, the button giving access to the loading plan of the
other module is disabled (blue).
The loading plan window appears.
1. Load help zone. Enables you to find an assay which has been reserved or
is being run, by searching for the patient ID or the sample ID.
2. VIDAS module. Indicates the VIDAS analytical module currently running.
3. Number of predefined reserved section. Displays the number of the
predefined section that has been reserved.
1
2
3
3
Fig. IV 16: Loading plan window
4-30 VIDAS
®
PC User's Manual
Page 97

Instructions for use
Running assays
You can now view the loading plans of the VIDAS 1 or VIDAS 2 modules with
their sections labeled A to E.
• In the VIDAS 2 loading plan, click on the VIDAS 1 icon (colored and
enabled) to view the VIDAS 1 loading plan.
Load help screen
•
In the VIDAS 1 loading plan, click on the VIDAS 2 icon (colored and
enabled) to view the VIDAS 2 loading plan.
You must then load each chosen section with the appropriate reagents and
samples using the loading plans shown on the screen.
The load help screen (mark 1) enables you to find an assay which has been
reserved or is being run, by searching for the patient ID or the sample ID.
•
Select the "Patient" or "Sample" option box.
•
Enter the information manually or using the bar code reader. You must
respect upper case and lower case characters.
• Press <TAB> to quit.
The corresponding section is automatically selected and displayed on the
screen.
1
2
3
The "Run" icon is used to start a section.
The "Run all" icon is used to start all the reserved sections in the VIDAS
module.
VIDAS® PC User's Manual 4-31
4
5
Page 98

Instructions for use
Running assays
Printing
VIDAS : 2 Technician : Robert Printed on Aug 02 2005 13:57:14
Section
---------A:497 1
B:498 1
C 1
D 1
E 1
Position
----------
2
3
4
5
6
2
3
4
5
6
2
3
4
5
6
2
3
4
5
6
2
3
4
5
6
• To print the loading plan displayed on the screen, click on this icon.
Loading report
Assay
-------HCG
HCG
HCG
HCG
HBS
HBS
HBS
HBS
HBS
Dilution
----------
Fig. IV 17: Loading report (example)
Patient ID
-------------
MOR564
MIL251
Patient name
------------------
MORTON
MILLER
Sample
---------S1
S1
C1
123564
S1
S1
C1
C2
659251
Quitting the menu
• You can return to the loading menu at any time by clicking on this icon.
4-32 VIDAS
®
PC User's Manual
Page 99

Instructions for use
Running assays
Running assays
There are three different ways to run assays:
at the time of reservation of a section (see "Manual reservation" on page
−
4-25).
− − using the individual mode,
using the complete mode.
Individual mode
In the loading plan,
1
• click on the "Run" icon next to the desired section.
The icon disappears.
The status button of the section concerned switches from "RESER" to "VERIF".
It then changes to "busy" (analysis end time is displayed).
Complete mode
In the loading plan,
•
click on the "Run all" icon to start all the reserved sections in the VIDAS
module.
The "Run" icons of each section disappear.
The status button of all the sections of the VIDAS module switch from "RESER"
to "VERIF".
If an error occurs on one of the sections run in complete mode, only the section
with the error will be jammed. To correct the error:
•
Check what type of error has occurred (see the instructions on page 8-30,
"Error window").
•
Reset the section to enable the assay to continue (see the instructions on
page 8-28, "Resetting a section").
2
3
4
VIDAS® PC User's Manual 4-33
5
Page 100

Instructions for use
Running assays
Errors
The instrument and reagents are checked for errors. If an error occurs, the
section concerned changes to red and displays the type of error.
Operating errors or errors occurring during analysis, are described in "Error
window" on page 8-30 as well as in Chapter 12 "Troubleshooting".
Halting an assay
You can halt an assay that is being run in one or several sections. This
procedure is described in the "Instrument" menu on page 8-28.
4-34 VIDAS
®
PC User's Manual
 Loading...