How it Works
Log In / Sign Up
Buy Points
How it Works
FAQ
Contact Us
Questions and Suggestions
Users
Beko
Loading...
W
WMB10
WMB51230EBL
WMB61011 CSN
3
WMB61021W
WMB61220M
WMB61220S
WMB61221
3
WMB61221MS
WMB61221S
WMB61221W
WMB61231SY
WMB 71443 PTLA
2
WMB 71444 HPTLA
2
WMB 71444 PT LA
WMB 71631 A
WMB 71632 A
WMB 71632 PTE
WMB 71632 PTEU
WMB 71642 LA
WMB 71642 PT LA
WMB 71643 PTE
4
WMB 71643 PTL
2
WMB 71643 PTM
2
WMB 71643 PTS
2
WMB 81021 M
4
WMB 81031 M
WMB 81032M
2
WMB 81041 L
4
WMB 81041 LM
7
WMB 81041 LS
3
WMB 81042 PTLM
6
WMB 81044 LA
4
WMB 81045 LA
3
WMB 81045 LC
WMB 81231
WMB 81231 M
4
WMB 81231 PTLMC
2
WMB 81241
WMB 812411 DLC
WMB 812411 DLSC
WMB 81241 L
2
WMB 81241 LA
4
WMB 81241 LB
8
WMB 81241 LC
5
WMB 81241 LM
7
WMB 81241 LMA
5
WMB 81241 LMB
7
WMB 81241 LMC
2
WMB 81241 LMRC
WMB 81241 LMS
4
WMB 81241LW
2
WMB 81241 M
WMB 81241 PTLMC
2
WMB 81242 LM
6
WMB 81242 LMA
WMB 81242 LMB
5
WMB 81242 LMBB
WMB 81242 LMS
WMB 81242 PTLM
3
WMB 81242PTMNX
2
WMB 81243 LBB
WMB 81243 LRC
WMB 81244 LA
5
WMB 81244 XRC
2
WMB 81252 LC
WMB 81431 LW
WMB 81433 LM
2
WMB 81441 LAM
WMB 81442 LM
5
WMB 81442LW
2
WMB 814431 DLA
WMB 814431 DLSC
WMB 81443 AL
WMB 81443 LA
WMB 81443 LX
WMB 81445 LW
WMB 81466
3
WMB 81466 ST
WMB 81641 LC
WMB 81643 LA
WMB 81643 LW
WMB 91042 LC
WMB 912421 DLC
WMB 912421 DLSC
WMB 91242DLSC
WMB 91242 LA
WMB 91242 LC
23
WMB 91242 LSC
3
WMB 91243 LC
6
WMB 91243LW
WMB 91263 L
WMB 91442 HLC
2
WMB 91442 LA
WMB 91442 LC
3
WMB 91442 LE
WMB 91442 LR
WMB 91442 LW
WMB 91445 HLC
WMB 91465
WMB 91465 ST
Loading...
Loading...
Nothing found
WMB 81243 LRC
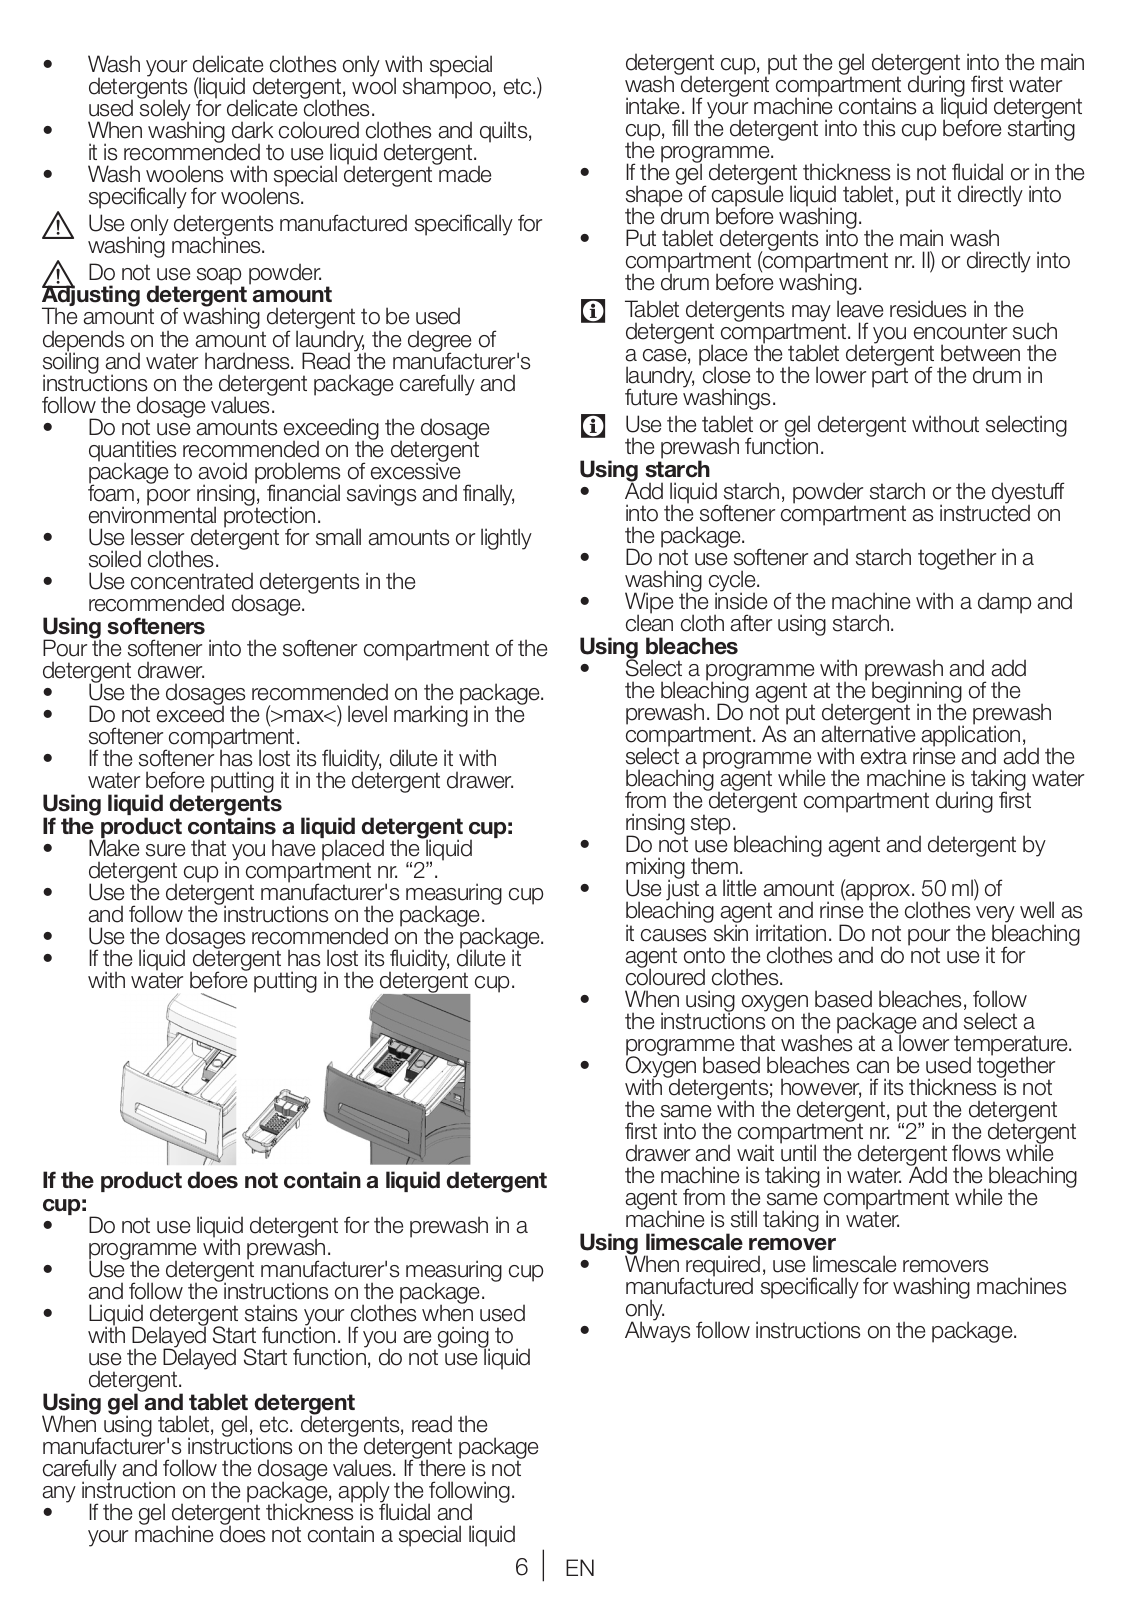
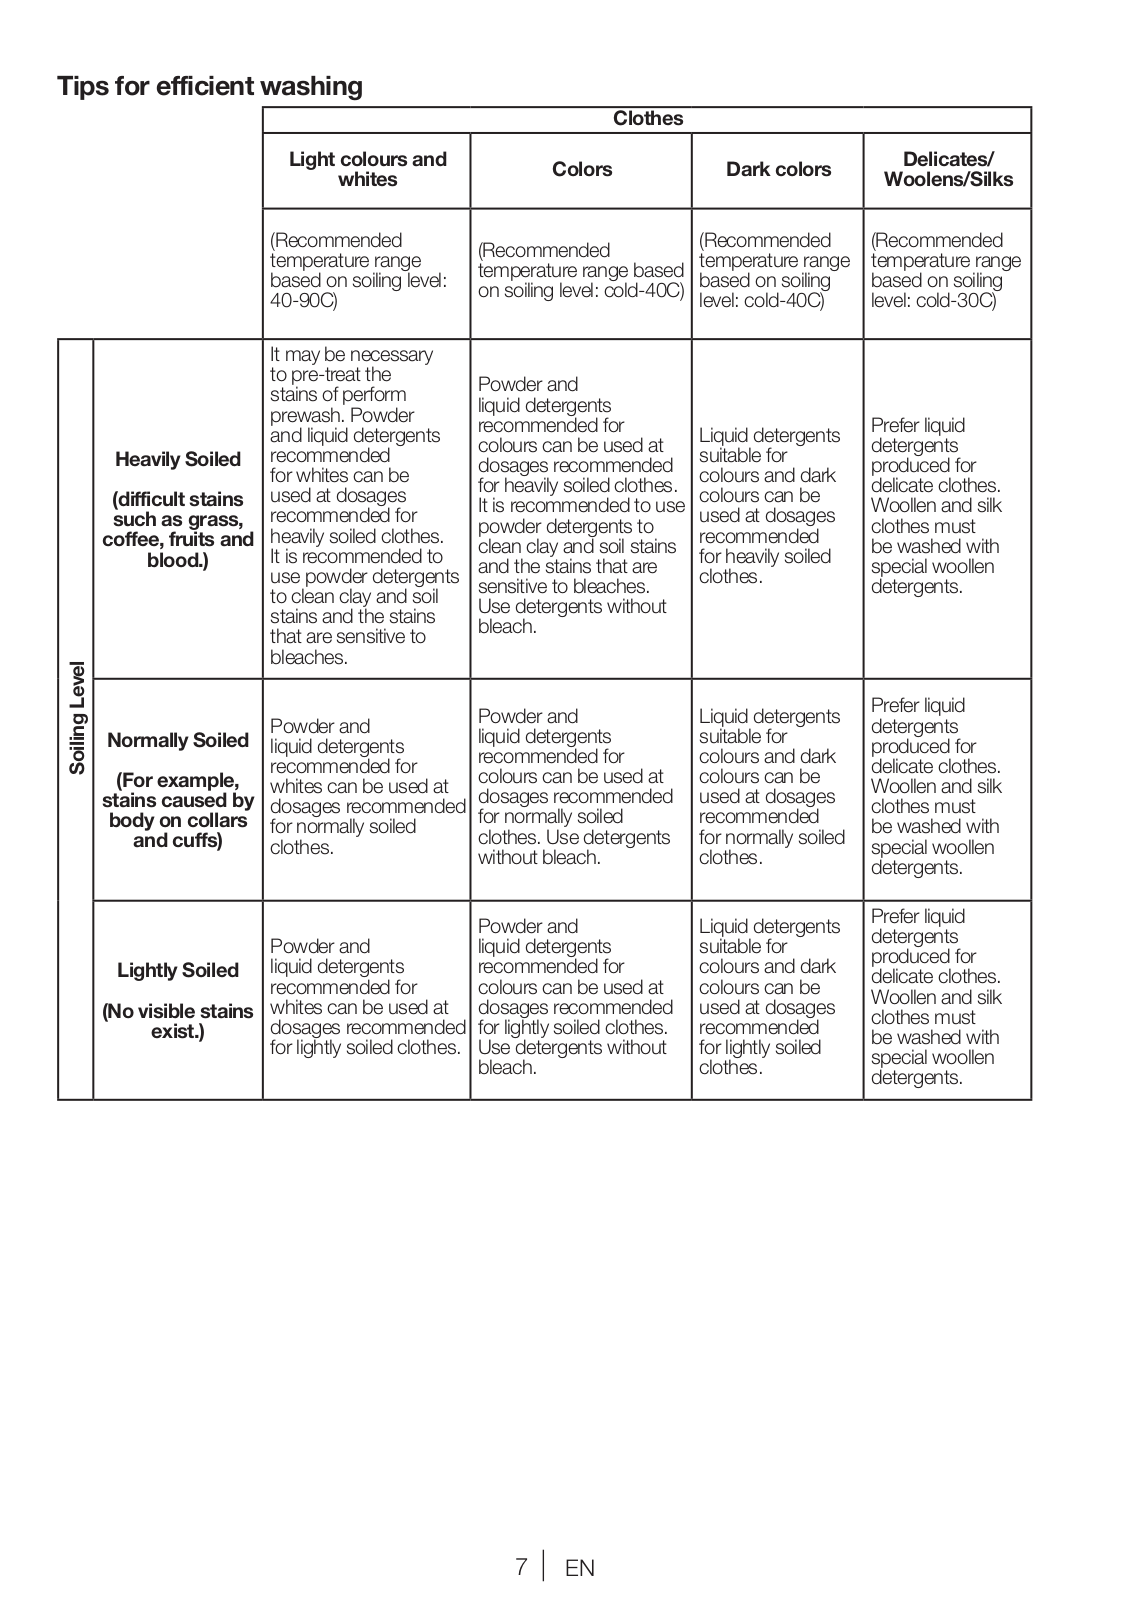
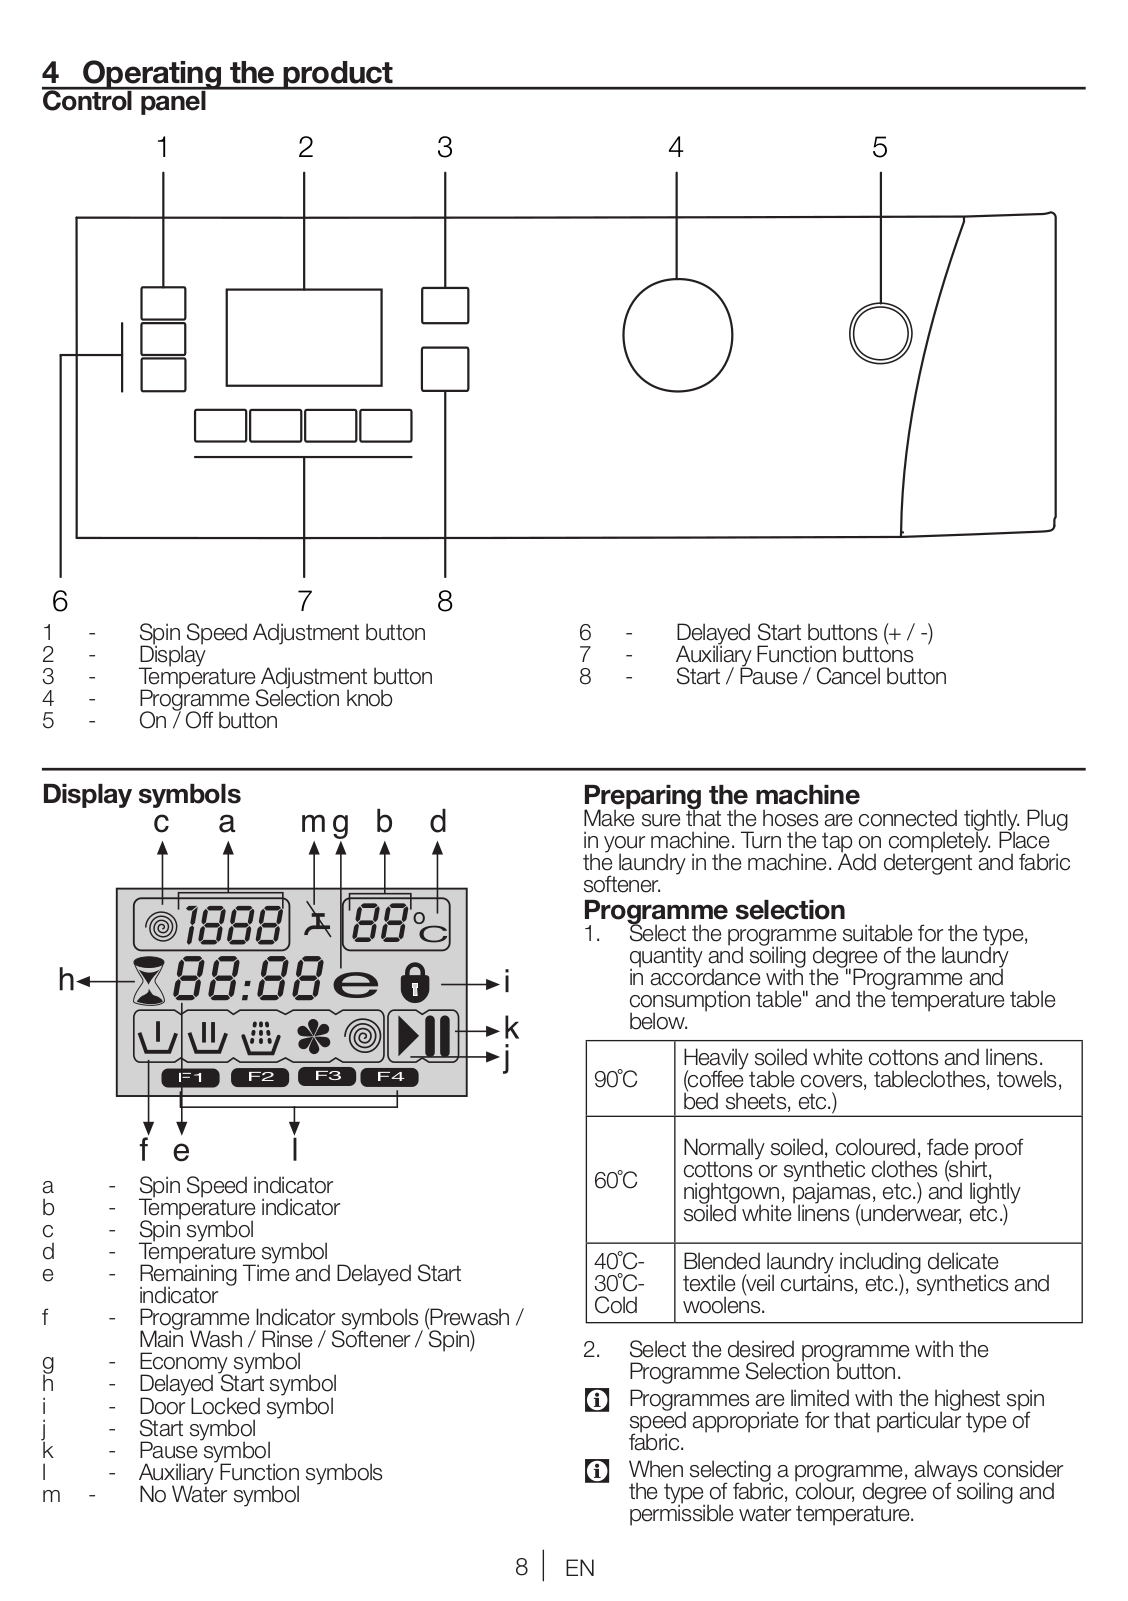
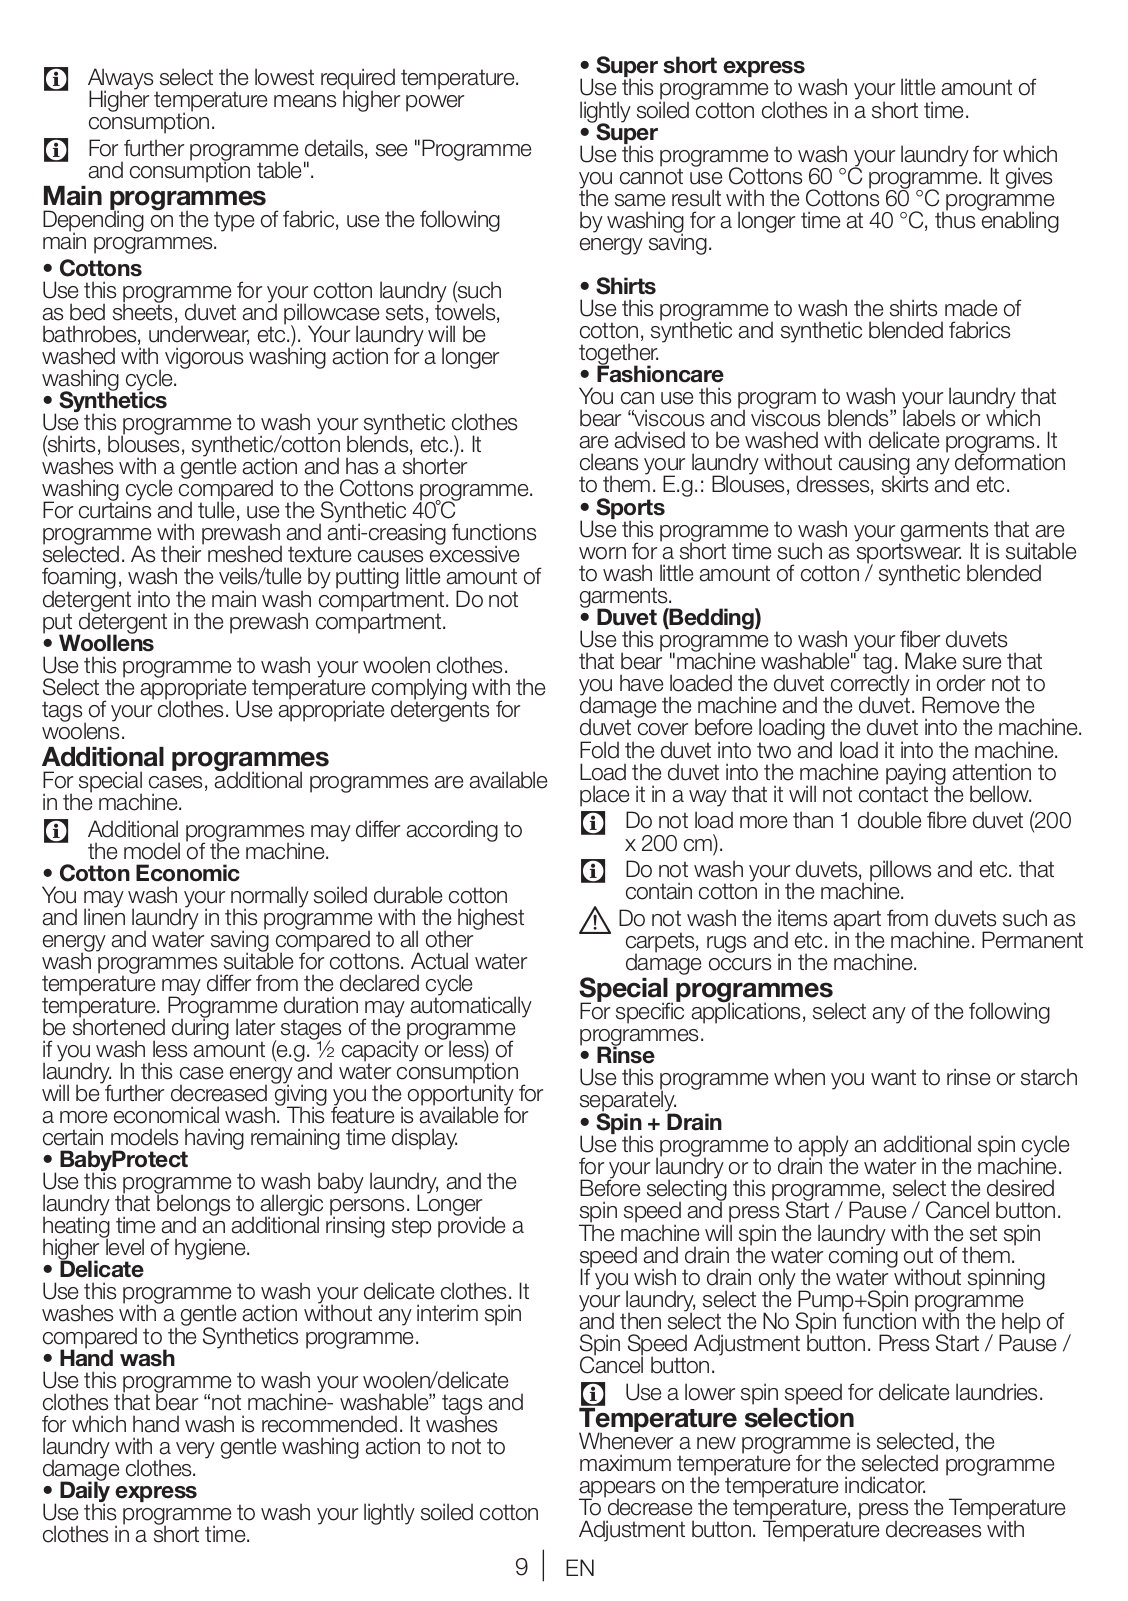
User manual
72 pgs
3.06 Mb
0
Table of contents
Loading...
Beko WMB 81243 LRC User manual
...
Beko User manual
Download
Specifications and Main Features
Frequently Asked Questions
User Manual
Download
Loading...
+
50
hidden pages
Unhide
You need points to download manuals.
1 point = 1 manual.
You can buy points or you can get point for every manual you upload.
Buy points
Upload your manuals
 Loading...