

Washer-Dryer
User’s Manual
WDA 96143 H
EN HU
Document Number=
2820524540_EN / 16-04-19.(17:02)

This product was manufactured using the latest technology in environmentally friendly conditions.
1 Important instructions for safety and environment
This section contains safety instructions that will help protect from risk of personal injury or property damage. Failure to follow these instructions
shall void any warranty.
1.1 General safety
CAUTION
¾ This product can be used by children at and above 8 years old and by persons whose physical, sensory or
mental capabilities were not fully developed or who lack experience and knowledge provided that they are
A
A
C
1.1.1 Electrical safety
B
A
A
supervised or trained on the safe usage of the product and the risks it brings out. Children must not play
with the product. Cleaning and maintenance works which can be done by users should not be performed by
children unless they are supervised by someone.
CAUTION
¾ Never place the product on a carpet-covered floor. Otherwise, lack of airflow beneath the machine will cause
electrical parts to overheat. This will cause problems with your product.
NOTE
¾ Always have the installation and repairing procedures carried out by the Authorized Service Agent. Manufacturer shall not
be held liable for damages that may arise from procedures carried out by unauthorized persons.
DANGER
¾ If the product has a failure, it should not be operated unless it is repaired by the Authorized Service
Agent. There is the risk of electric shock!
¾ Never wash the product by spreading or pouring water onto it! There is the risk of electric shock!
CAUTION
¾ If the power cable is damaged, it must be replaced by the manufacturer, after-sales service or a similarly
qualified person (preferably an electrician) or someone designated by the importer in order to avoid possible
risks.
CAUTION
¾ Unplug the product when not in use.
¾ Never touch the plug with wet hands! Never unplug by pulling on the cable, always pull out by grabbing the plug.
¾ Unplug the product during installation, maintenance, cleaning and repairing procedures.
¾ Do not make connections via extension cables or multi-plugs.
C
User’s Manual
NOTE
¾ This product is designed to resume operating in the event of powering on after a power interruption. If you wish to cancel
the programme, see "Cancelling the programme" section.
3 / EN
Important instructions for safety and environment
1.1.2 Product safety
DANGER
A
A
C
1.1.3 Warnings for dryer
A
A
¾ Never open the loading door or remove the filter while there is still water in the drum. Otherwise, risk of
flooding and scalds from hot water will occur.
CAUTION
¾ The water supply and draining hoses must be securely fastened and remain undamaged. Otherwise, there is
the risk of water leakage.
NOTE
¾ Do not force open the locked loading door. The loading door will be ready to open just a few minutes after the washing
cycle is completed. The loading door will not open if the machine is not cooled down enough after the programme. You
can ensure a faster cool down of the machine by running a 10-minute drying programme, or wait until it cools down by
itself. Do not force the loading door open. The door and the lock mechanism can get damaged.
¾ There should not be any lockable, sliding or hinged door that may restrain the loading door to open fully in the installation
place of this product.
¾ Follow the instructions on the textile tags and on the detergent package.
¾ Only detergents, softeners and supplements suitable for washing machines should be used.
¾ Do not install or leave this product in places where it will be exposed to weather conditions.
¾ Controls should not be tampered with.
DANGER
¾ As the laundry which had been cleaned, washed, soiled or stained with benzine/diesel oil, dry cleaning
solvents or other combustible and explosive materials before will emit flammable or explosive vapour,
they should not be dried in the machine. This may cause risk of fire.
¾ Clothes soiled with liquid cooking oil, acetone, alcohol, benzine, gas oil, stain remover, turpentine,
waxes or wax removers must be washed with hot water and plenty of detergent before they are dried.
This may cause risk of fire.
¾ Clothes or pillows supported by rubber foam (latex foam), shower caps, water-repellent textile
products, rubber supported materials and rubber foam pads should not be dried in the machine. This
may cause risk of fire.
¾ If you use Washing Balls, Detergent Scales, Laundry Cages or Balls while washing in your appliance,
these may melt while drying. Do not use these products if drying will be selected. This may cause risk
of fire.
¾ Never run the drying function when you are using industrial chemicals for cleaning. This may cause
risk of fire.
DANGER
¾ Do not touch the door glass with bare hands after drying. This may cause risk of burn.
¾ To keep the laundry under a temperature at which they will not be damaged, a cooling step is carried
out as the last stage. If you open the loading door before cooling step is completed, you may be exposed
to hot vapour. This may cause risk of scalding.
¾ When drying programmes are interrupted (cancelling the programme or power cut), laundry in the
machine may be hot. Be careful.
CAUTION
¾ Do not stop the machine before the drying programme is completed. If you have to stop it, take out all laundry
promptly and spread them on somewhere appropriate where they can cool down.
¾ Do not dry tulle curtains, rugs and blankets in the machine.
¾ Your product is suitable to operate under ambient temperatures between 0°C and +35°C.
¾ Ambient temperatures between 15°C and +25°C are the ideal operating temperatures for your product.
¾ Pay care that pets do not enter into the product. Check inside of the product prior to use.
¾ Do not perform drying by overloading the machine. Follow the maximum load amounts specified for drying.
4 / EN
Washer-Dryer
Important instructions for safety and environment
CAUTION
¾ Drying should not be performed on leather garments or garments containing leather (e.g. leather jeans tags, etc.).
Leather piece may colour.
¾ Turn off the machine in failures that cannot be eliminated by applying the information given in the safety instructions,
then unplug it and call the Authorized Service Agent.
¾ It is possible only to wash the laundry or only to dry the laundry or perform both washing and drying in the washer-
A
C
1.2 Intended use
C
1.3 Children's safety
A
1.4 Compliance with WEEE Directive
dryer. Machine should not be used for drying for a long time only with damp load. If the machine is used only for
drying, any of the short washing programmes should be run without putting in laundry after every 15 cycles.
¾ Control all clothes before loading the machine to make sure that no belongings such as lighter, coins, metal pieces,
pins, etc have been left in the pockets or among them.
¾ Underwear with metal supports should not be dried in the machine. Metal supports may get loose and broken
during drying process, thus cause damage on the cloth.
¾ Do not dry voluminous laundry such as duvet and alike in the machine. Otherwise, your laundry may get damaged.
NOTE
¾ Do not dry the unwashed laundry in the machine.
¾ Do not use fabric softeners or antistatic products in the machine unless these are recommended by their manufacturers.
¾ Fabric softeners and products alike should be used in accordance with the instructions of their producers.
¾ Do not dry delicate clothes such as silk, woollen, etc. in the machine. Otherwise, woollen clothes may shrink and become
smaller and other delicate clothes may get damaged.
¾ Check the symbols on the product label on the garment prior to Drying and Washing processes.
NOTE
¾ This product has been designed for domestic use. It is not suitable for commercial use and it must not be used out of
its intended use.
¾ Use the product only for washing, rinsing and drying of textile products that are marked accordingly.
¾ The manufacturer waives any responsibility arisen from incorrect usage or transportation.
¾ The service life of your product is 10 years. During this period, original spare parts will be available to operate the
appliance properly.
CAUTION
¾ Keep children under 3 years of age away from the appliance unless they are supervised.
¾ Packaging materials are dangerous to children. Keep packaging materials in a safe place away from reach of
the children.
¾ Electrical products are dangerous for the children. Keep children away from the product when it is in use. Do
not let them to tamper with the product. Use child lock to prevent children from intervening with the product.
¾ Do not forget to close the loading door when leaving the room where the product is located.
¾ Store all detergents and additives in a safe place away from the reach of the children by closing the cover of
the detergent container or sealing the detergent package.
¾ This product complies with EU WEEE Directive (2012/19/EU). This product bears a classification symbol
for waste electrical and electronic equipment (WEEE).
¾ This product has been manufactured with high quality parts and materials which can be reused and
are suitable for recycling. Do not dispose of the waste product with normal domestic and other wastes
at the end of its service life. Take it to the collection center for the recycling of electrical and electronic
equipment. Please consult your local authorities to learn about these collection centers.
1.5 Package information
• Packaging materials of the product are manufactured from recyclable materials in accordance with our National Environment Regulations.
Do not dispose of waste package together with domestic or other wastes. Dispose them at package collection points specified by the
local authorities.
User’s Manual
5 / EN

2 Technical specifications
Models
Maximum dry laundry capacity (kg) _Washing
Maximum dry laundry capacity (kg)_Drying
Height (cm)
Width (cm)
Depth (cm)
Net weight (±4 kg.)
Electrical input (V/Hz)
Total current (A)
Total power (W)
Spin speed (rpm max.)
WDA 96143 H
9
6
84
60
63
87
230 V / 50 Hz
10
2200
1400
C
6 / EN
NOTE
¾ Technical specifications may be changed without prior notice to improve the quality of the product.
¾ Figures in this manual are schematic and may not match the product exactly.
¾ Values stated on the product labels or in the documentation accompanying it are obtained in laboratory conditions in
accordance with the relevant standards. Depending on operational and environmental conditions of the product, these
values may vary.
Washer-Dryer
3 Installation
Refer to the nearest Authorised Service Agent for installation of the product. To make the product ready for use, review the information in the
user manual and take care that the electricity, tap water supply and water drainage systems are appropriate before calling the Authorized Service
Agent. If they are not, call a qualified technician and plumber to have any necessary arrangements carried out.
DANGER
¾ Have the installation and electrical connections of the product made by the Authorized Service Agent.
B
A
A
3.1 Appropriate installation location
• Place the machine on a rigid floor. Do not place it on a long pile rug or similar surfaces.
• Do not place the product on the power cable.
• Do not install the product at places where temperature may fall below 0ºC. (See, Warnings for drying)
• Place the product at least 1.5 cm away from the edges of other furniture.
• There should not be any lockable, sliding or hinged door that may restrain the loading door to open fully in the installation place of this
product.
• Operate the product in a well-ventilated and dust-free environment.
3.2 Removing packaging reinforcement
Manufacturer shall not be held liable for damages that may arise from procedures carried out by
unauthorized persons.
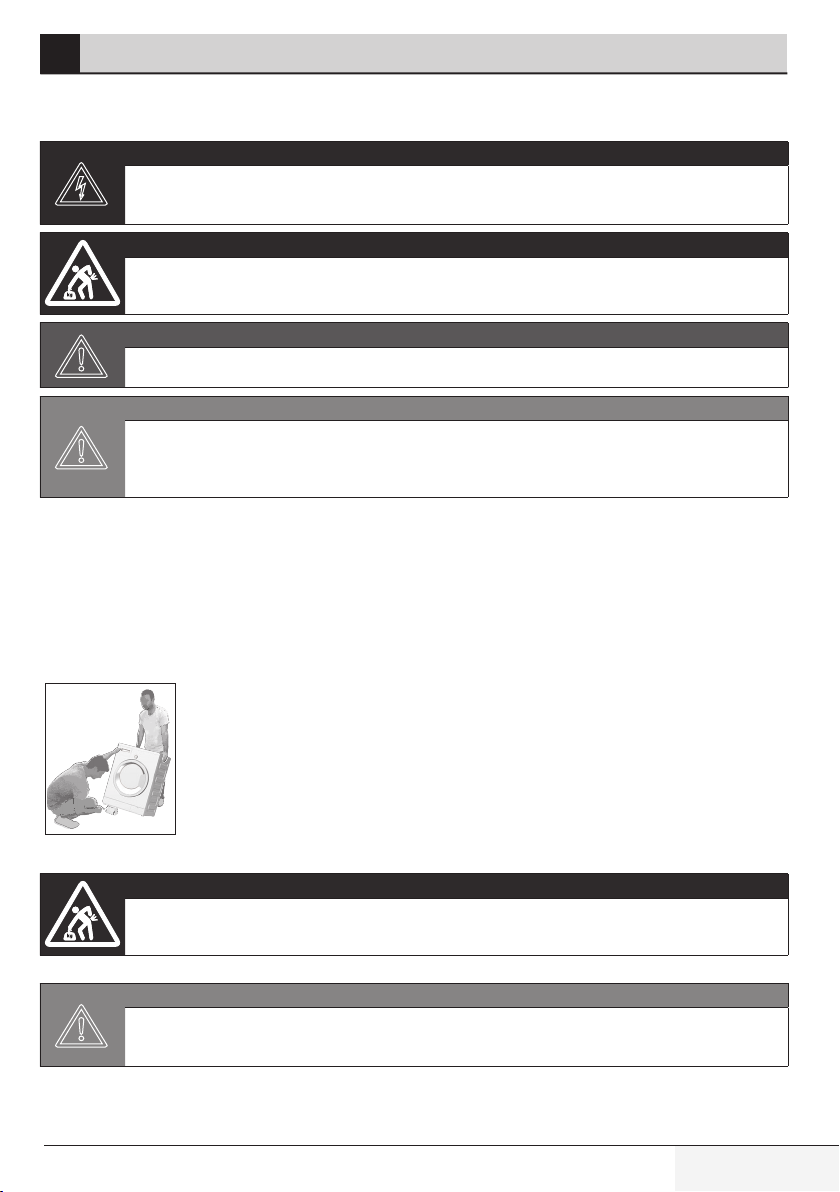
DANGER
¾ Product The weight of your product is not suitable to be carried by one person.
CAUTION
¾ Prior to installation, visually check if the product has any defects on it. If so, do not have it installed. Damaged
products cause risks for your safety.
CAUTION
¾ Preparation of the location and electrical, tap water and waste water installations at the place of installation are
under customer’s responsibility.
¾ Make sure that the water inlet and discharge hoses as well as the power cable are not folded, pinched or crushed
while pushing the product into its place after installation or cleaning procedures.
Tilt the machine backwards to remove the packaging reinforcement. Remove the packaging reinforcement by pulling the ribbon.
DANGER
¾ The product is heavy. Remove the packaging reinforcement as illustrated.
¾ Pay attention not to squeeze your hand under the machine during this procedure.
3.3 Removing the transportation locks
CAUTION
¾ Do not remove the transportation locks before taking out the packaging reinforcement.
A
User’s Manual
¾ Remove the transportation safety bolts before operating the washing machine! Otherwise, the product will be
damaged.
7 / EN
Installation
1
2
3
1 Loosen all bolts with the tool supplied in the User Manual bag until they turn freely.
2 Remove transportation safety bolts by turning them gently.
3 Attach the plastic covers supplied in the User Manual bag into the holes on the rear panel.
NOTE
C
¾ Keep the transportation safety bolts in a safe place to reuse when the machine needs to be moved again in the future.
¾ Never move the product without the transportation safety bolts properly fixed in place!
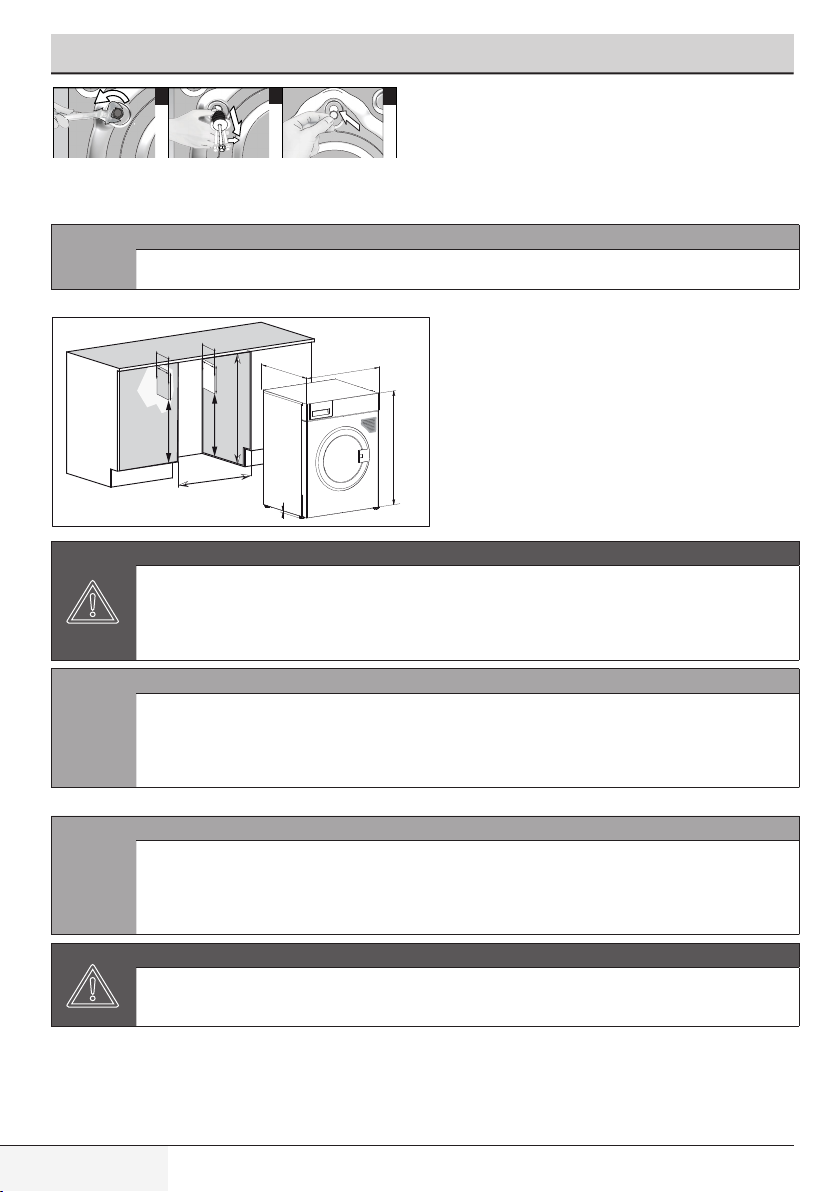
3.4 Flush usage with the bench
15 cm
15 cm
20 cm
60 cm
66cm
20 cm
60 cm
86 cm
1,4 cm
65,5 cm
59,5 cm
84,0 cm
CAUTION
¾ Your machine should never be operated without the top plate.
¾ When the Washer-Dryer is placed under the bench, front of the machine should never be blocked by the
A
cupboard door.
¾ When the Washer-Dryer is placed under the bench, air vents must be bored into the left and right sides of the
cupboard.
NOTE
¾ Follow the above dimensions when installing the product under the bench. These dimensions are indispensable to avoid
any change in the performance of your machine.
C
¾ Drying washing machine can be used under a bench if the height of the bench allows.
¾ At least 3 cm clearance must be left between the sides and the back of the product and the wall when it is installed under
the bench or in a cupboard.
3.5 Connecting water supply
NOTE
¾ The water supply pressure required to run the product is between 1 to 10 bars (0.1 – 1 MPa). It is necessary to have
10 – 80 litres of water flowing from the fully open tap in one minute to have your machine run smoothly. Attach a pressure
C
A
reducing valve if water pressure is higher.
¾ If you are going to use the double water-inlet product as a single (cold) water-inlet unit, you must install the supplied blind
stopper to the hot water valve before operating the product. (Applies for the products supplied with a blind stopper group.)
CAUTION
¾ Models with a single water inlet should not be connected to the hot water tap. In such a case the laundry will
get damaged or the product will switch to protection mode and will not operate.
¾ Do not use old or used water inlet hoses on the new product. It may cause stains on your laundry.
8 / EN
Washer-Dryer
Installation
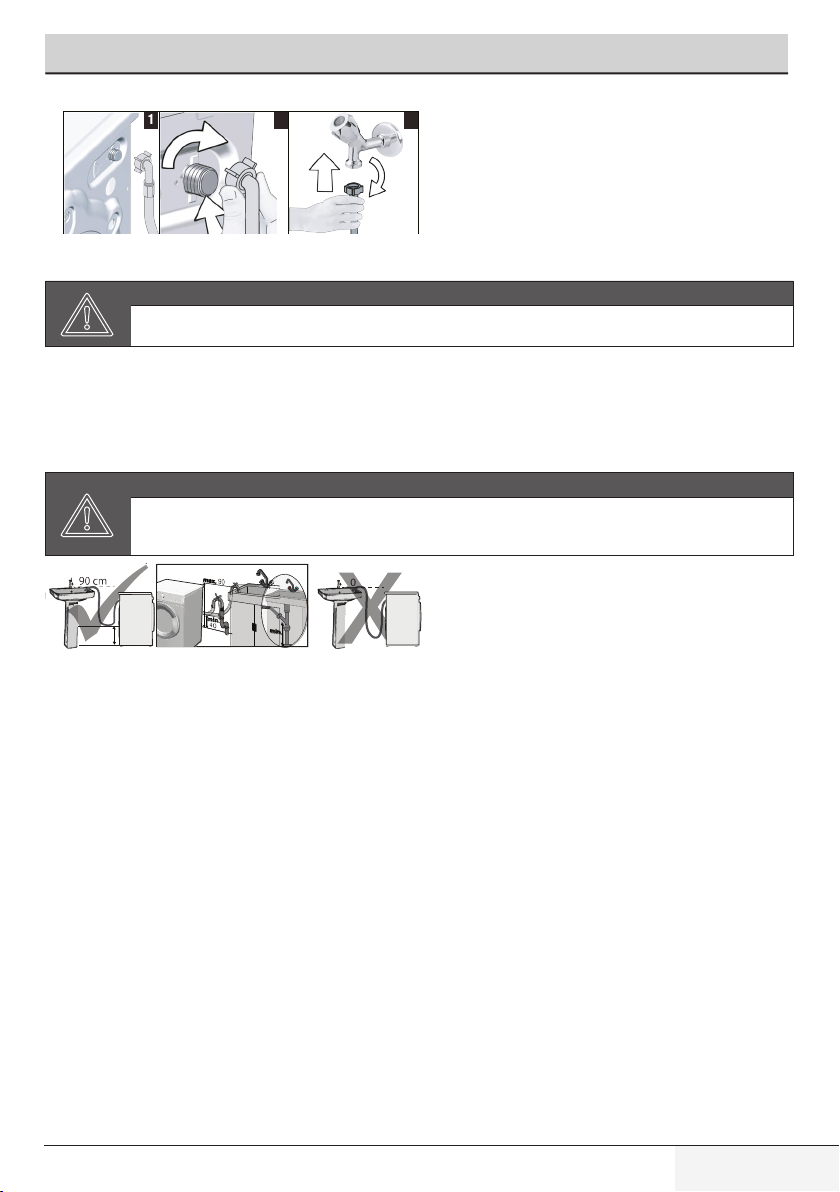
90 cm
1 2 3
1 Connect the special hoses supplied with the product to the water inlets on the product. Red hose (left) (max. 90 ºC) is for hot water inlet,
blue hose (right) (max. 25 ºC) is for cold water inlet.
CAUTION
A
2 Tighten all hose nuts by hand. Never use a tool when tightening the nuts.
3 Open the taps completely after making the hose connection to check for water leaks at the connection points. If any leaks occur, turn off
the tap and remove the nut. Retighten the nut carefully after checking the seal. To prevent possible water leakages, keep the taps closed
when the machine is not in use.
3.6 Connecting to the drain
• Connect the end of the drain hose directly to the wastewater drain, sink or to the washbasin.
A
90 cm
¾ Ensure that the cold and hot water connections are made correctly when installing the product. Otherwise, your
laundry will come out hot at the end of the washing process and wear out.
CAUTION
¾ Your house will be flooded if the hose comes out of its housing during water discharge. Moreover, there is risk
of scalding due to high washing temperatures! To prevent such situations and to ensure smooth water intake
and discharge of the machine, fix the end of the discharge hose tightly so that it cannot come out.
90
90
90 cm
min.40
• The distance to the wall so that the machine be placed up to 30 cm.
• Attach the hose at a height of at least 40 cm, and 90 cm at most.
• In case the hose is elevated after laying it on the floor level or close to the ground (less than 40 cm above the ground), water discharge
becomes more difficult and the laundry may come out excessively wet. Therefore, follow the heights described in the figure.
• To prevent flowing of waste water back into the machine and to allow for easy discharge, do not immerse the hose end into the waste
water or do not drive it in the drain more than 15 cm. If it is too long, cut it short.
• Pay care not to bend the end of the hose, step on it or pinch the hose between the drain and the machine.
• If the length of the hose is too short, use it by adding an original extension hose. Length of the hose may not be longer than 3.2 m.
To avoid water leak failures, the connection between the extension hose and the drain hose of the product must be fitted well with an
appropriate clamp as not to come off and leak.
User’s Manual
40
40
9 / EN
Installation
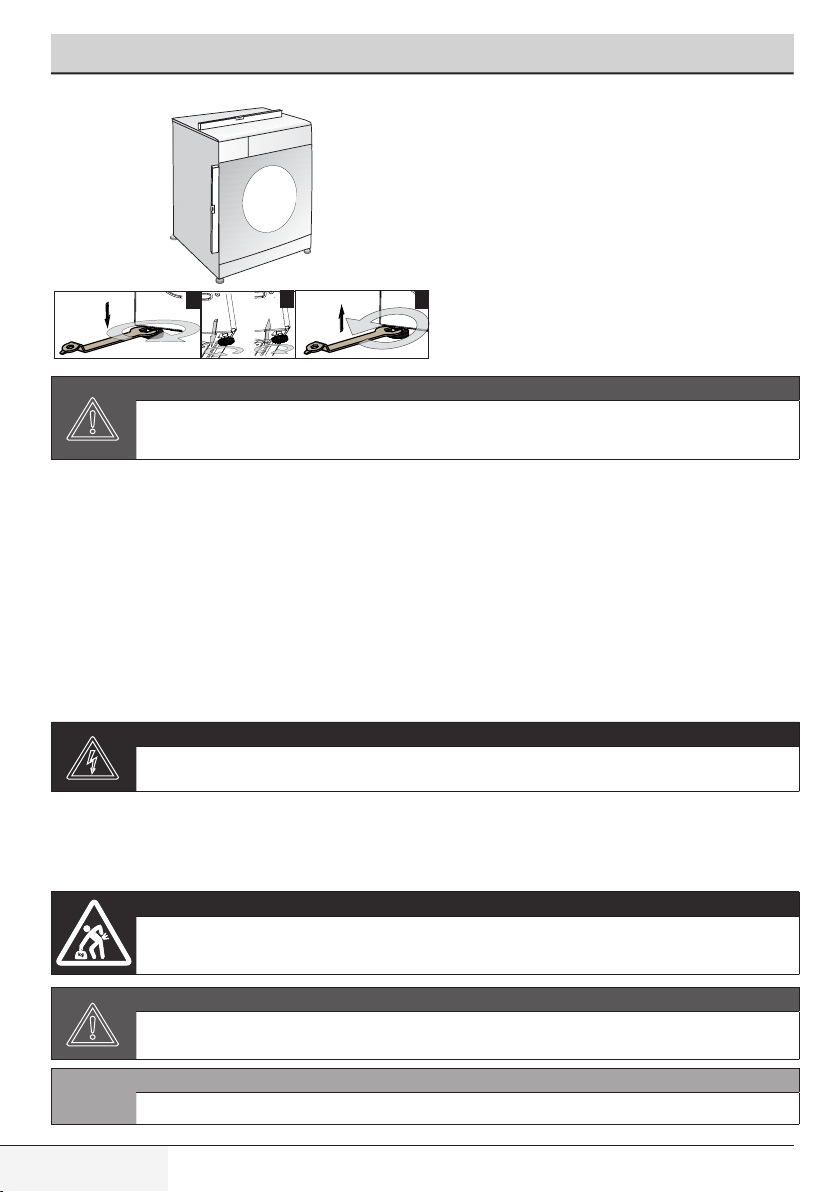
3.7 Adjusting the feet
1
CAUTION
¾ In order to ensure that the product operates more silently and vibration-free, it must stand level and balanced
A
1 Loosen the nuts on the feet in the direction of arrow with the tool supplied in the User Manual bag.
2 Adjust the feet until the product stands level and balanced. You can move the feet downwards by turning them counterclockwise or
upwards by turning clockwise.
3 Tighten all lock nuts again in the direction of arrow by the tool supplied. You can move the nuts upwards by turning them counterclockwise
or downwards by turning clockwise.
on its feet. Balance the machine by adjusting the feet. Otherwise, the product may move from its place and
cause crushing and vibration problems.
2
3
3.8 Electrical connection
Connect the product to a grounded outlet protected by a 16 A fuse. Our company shall not be liable for any damages that will arise when the
product is used without grounding in accordance with the local regulations.
• Connection must comply with national regulations.
• Power cable plug must be within easy reach after installation.
• If the current fuse or circuit breaker is less than 16 Amperes, please have a qualified electrician install a 16 Ampere fuse or circuit
breaker.
• The voltage specified in the "Technical specifications" section must be equal to your mains voltage.
DANGER
B
¾ Damaged power cables must be replaced by the Authorized Service Agents.
3.9 Transportation of the product
1 Unplug the product before transporting it.
2 Remove water drain and water supply connections.
3 Drain all water that has remained in the product. See. 6.6
4 Install transportation safety bolts in the reverse order of removal procedure; see 3.3.
DANGER
¾ The weight of your product is not suitable to be carried by one person.
¾ The product is heavy; it should be carried by two persons very carefully on the stairs. Falling of your
product on you may cause disabilities.
A
C
10 / EN
CAUTION
¾ Packaging materials are dangerous to children. Keep packaging materials in a safe place away from reach of
the children.
NOTE
¾ Never move the product without the transportation safety bolts properly fixed in place!
Washer-Dryer
4 Preparation
4.1 Sorting the laundry
• Sort laundry according to type of fabric, colour, and degree of soiling and allowable water temperature.
• Always obey the instructions given on the garment tags.
4.2 Preparing laundry for washing
• Laundry items with metal attachments such as, underwired bras, belt buckles or metal buttons will damage the machine. Remove the
metal pieces or wash the clothes by putting them in a cotton laundry bag or cotton pillow case. Moreover, such clothes may warm up
excessively during drying and get damaged. For this reason, do not dry such laundry in the machine.
• Put small size clothes such as infant's socks and nylon stockings in a cotton laundry bag or cotton pillow case.
• Place curtains in without compressing them. Remove curtain attachment items. Do not dry tulle curtains in the machine.
• Fasten zippers, sew loose buttons and mend rips and tears.
• Wash “machine washable” or “hand washable” labeled products only with an appropriate programme. Do not dry such clothes in the
machine; either hang or spread them to dry.
• Do not wash colours and whites together. New, dark coloured cottons release a lot of dye. Wash them separately.
• Use only dyes/colour changers and limescale removers suitable for machine wash. Always follow the instructions on the package.
NOTE
¾ Laundry that are subjected to materials such as flour, lime dust, milk powder, etc. intensely must be shaken off before
placing into the machine. Such dusts and powders on the laundry may build up on the inner parts of the machine in time
and can cause damage.
C
4.3 Things to be done for energy saving
Following information will help you use the product in an ecological and energy-efficient manner.
• Operate the product in the highest capacity allowed by the programme you have selected, but do not overload. See, “Programme and
consumption table”.
• Always follow the instructions on the detergent packaging.
• Wash slightly soiled laundry at low temperatures.
• Use faster programmes for small quantities of lightly soiled laundry.
• Do not use prewash and high temperatures for laundry that is not heavily soiled or stained.
• If you plan to dry your laundry, select the highest spin speed recommended during washing process.
• Do not use detergent in excess of the amount recommended on the detergent package.
4.4 First use
Before starting to use the product, make sure that all preparations are completed in accordance with the instructions in sections "Important safety
and environment instructions" and "Installation".
¾ Keep laundry items made of Angora wool in the freezer for a few hours before washing. This will reduce pilling.
¾ Wash trousers and delicate laundry turned inside out.
¾ Tough stains must be treated properly before washing. If unsure, check with a dry cleaner.
¾ Take out all substances in the pockets such as coins, pens and paper clips, and turn pockets inside out and brush. Such
objects may damage the product or cause noise problem.
To prepare the product for washing laundry, perform first operation in Drum Cleaning programme. If your machine is not featured with this
program, apply the method described in 6.2.
NOTE
¾ Use an anti-limescale suitable for the washing machines.
C
User’s Manual
¾ Some water might have remained in the product due to the quality control processes in the production. It is not harmful
for the product.
11 / EN
Preparation
1
3
2
4.5 Correct load capacity
The maximum load capacity depends on the type of laundry, the degree of soiling and the washing programme desired.
The machine automatically adjusts the amount of water according to the weight of the loaded laundry.
DANGER
¾ Follow the information in the “Programme and consumption table”. When overloaded, machine's
B
Laundry type Weight (g) Laundry type Weight (g)
Bathrobe 1200 Hand towel 100
Napkin 100 Evening gown 200
Duvet cover 700 Underclothing 100
Bed Sheet 500 Men’s overalls 600
Pillowcase 200 Men’s shirt 200
Tablecloth 250 Men’s pajamas 500
Towel 200 Blouses 100
4.6 Loading the laundry
1 Open the loading door.
2 Place laundry items loosely into the machine.
3 Push the loading door to close until you hear a locking sound. Ensure that no items are caught in the door.
C
washing performance will drop. Moreover, noise and vibration problems may occur. For a good drying
performance, do not dry laundry more than the amounts specified.
NOTE
¾ The loading door is locked while a programme is running. The door can only be opened a while after the programme
comes to an end. The loading door will not open until the temperature drops if the inside of the machine is very hot at the
end of the programme.
CAUTION
A
4.7 Using detergent and softener
C
4.7.1 Detergent drawer
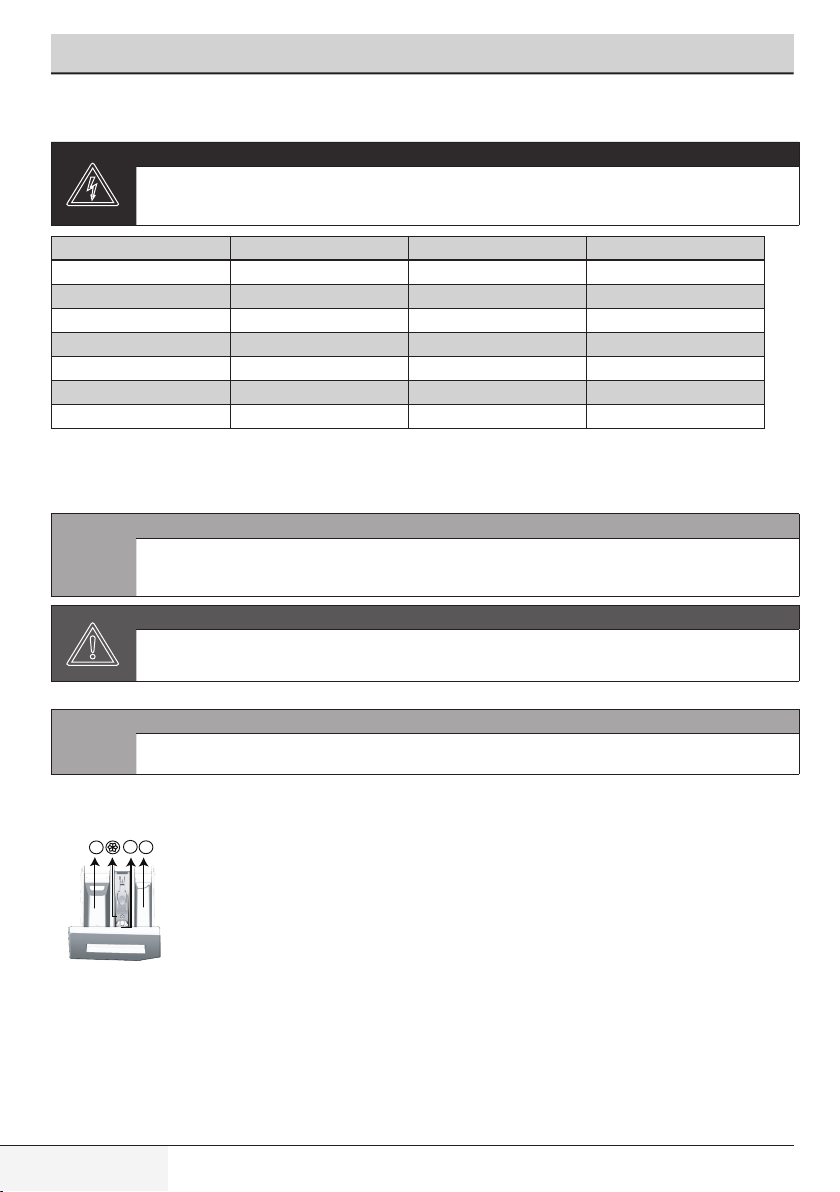
The detergent drawer is composed of three compartments:
– (1) for prewash
– (2) for main wash
– (3) for softener
– (*) in addition, there is siphon piece in the softener compartment.
12 / EN
¾ In case of misplacing the laundry, noise and vibration problems may occur in the machine.
NOTE
¾ When using detergent, softener, starch, fabric dye, bleach or limescale remover read the manufacturer's instructions on
the package carefully and follow the suggested dosage values. Use measuring cup if available.
Washer-Dryer

Preparation
2
4.7.2 Detergent, softener and other cleaning agents
• Add detergent and softener before starting the washing programme.
• Never leave the detergent drawer open while the washing programme is running!
• When using a programme without prewash, do not put any detergent into the prewash compartment (compartment nr. "1").
• In a programme with prewash, do not put liquid detergent into the prewash compartment (compartment nr. "1").
• Do not select a programme with prewash if you are using a detergent bag or dispensing ball. Place the detergent bag or the dispensing
ball directly among the laundry in the machine.
• If you are using liquid detergent, do not forget to place the liquid detergent cup into the main wash compartment (compartment nr. "2").
• Do not add any washing chemicals (liquid detergent, softener, etc.) when the machine is in drying step.
4.7.3 Choosing the detergent type
The type of detergent to be used depends on the type and colour of the fabric.
• Use different detergents for coloured and white laundry.
• Wash your delicate clothes only with special detergents (liquid detergent, wool shampoo, etc.) used solely for delicate clothes.
• When washing dark coloured clothes and quilts, it is recommended to use liquid detergent.
• Wash woolens with special detergent made specifically for woolens.
CAUTION
A
4.7.4 Adjusting detergent amount
The amount of washing detergent to be used depends on the amount of laundry, the degree of soiling and water hardness.
• Do not use amounts exceeding the dosage quantities recommended on the detergent package to avoid problems of excessive foam,
poor rinsing, financial savings and finally, environmental protection.
• Use lesser detergent for small amounts or lightly soiled clothes.
4.7.5 Using softeners
Pour the softener into the softener compartment of the detergent drawer.
• Do not exceed the (>max<) level marking in the softener compartment.
• If the softener has lost its fluidity, dilute it with water before putting it in the detergent drawer.
4.7.6 Using liquid detergents
¾ Use only detergents manufactured specifically for washing machines.
¾ Do not use soap powder.
4.7.6.1 If the product has a liquid detergent cup
• Place the liquid detergent cup in compartment nr. "2".
• If the liquid detergent has lost its fluidity, dilute it with water before putting in the detergent cup.
4.7.6.2 If the product does not have a liquid detergent cup
• Do not use liquid detergent for the prewash in a programme with prewash.
• Liquid detergent stains your clothes when used with Delayed Start function. If you are going to use the Delayed Start function, do not use
liquid detergent.
4.7.7 Using gel and tablet detergent
• If the gel detergent thickness is fluidal and your machine does not contain a special liquid detergent cup, put the gel detergent into the
main wash detergent compartment during first water intake. If your machine contains a liquid detergent cup, fill the detergent into this
cup before starting the programme.
• If the gel detergent thickness is not fluidal or in the shape of capsule liquid tablet, put it directly into the drum before washing.
• Put tablet detergents into the main wash compartment (compartment nr. "2") or directly into the drum before washing.
User’s Manual
13 / EN

Preparation
NOTE
¾ Tablet detergents may leave residues in the detergent compartment. If you encounter such a case, place the tablet
C
4.7.8 Using starch
• Add liquid starch, powder starch or the fabric dye into the softener compartment.
• Do not use softener and starch together in a washing cycle.
• Wipe the inside of the machine with a damp and clean cloth after using starch.
4.7.9 Using bleaches
• Select a programme with prewash and add the bleaching agent at the beginning of the prewash. Do not put detergent in the prewash
compartment. As an alternative application, select a programme with extra rinse and add the bleaching agent through an empty
compartment of the detergent drawer as soon as the first rinsing step appears on the display, and add 1 glass of water in the same
compartment.
• Do not use bleaching agent and detergent by mixing them.
• Use just a little amount (approx. 50 ml) of bleaching agent and rinse the clothes very well as it causes skin irritation. Do not pour the
bleaching agent onto the clothes and do not use it for coloured clothes.
• When using oxygen based bleaches, select a programme that washes at a lower temperature.
• Oxygen based bleaches can be used together with detergents; however, if its thickness is not the same with the detergent, put the
detergent first into the compartment nr. "2" in the detergent drawer and wait until the detergent flows while the machine is taking in
water. Add the bleaching agent from the same compartment while the machine is still taking in water.
4.7.10 Using limescale remover
• When required, use limescale removers manufactured specifically for washing machines only.
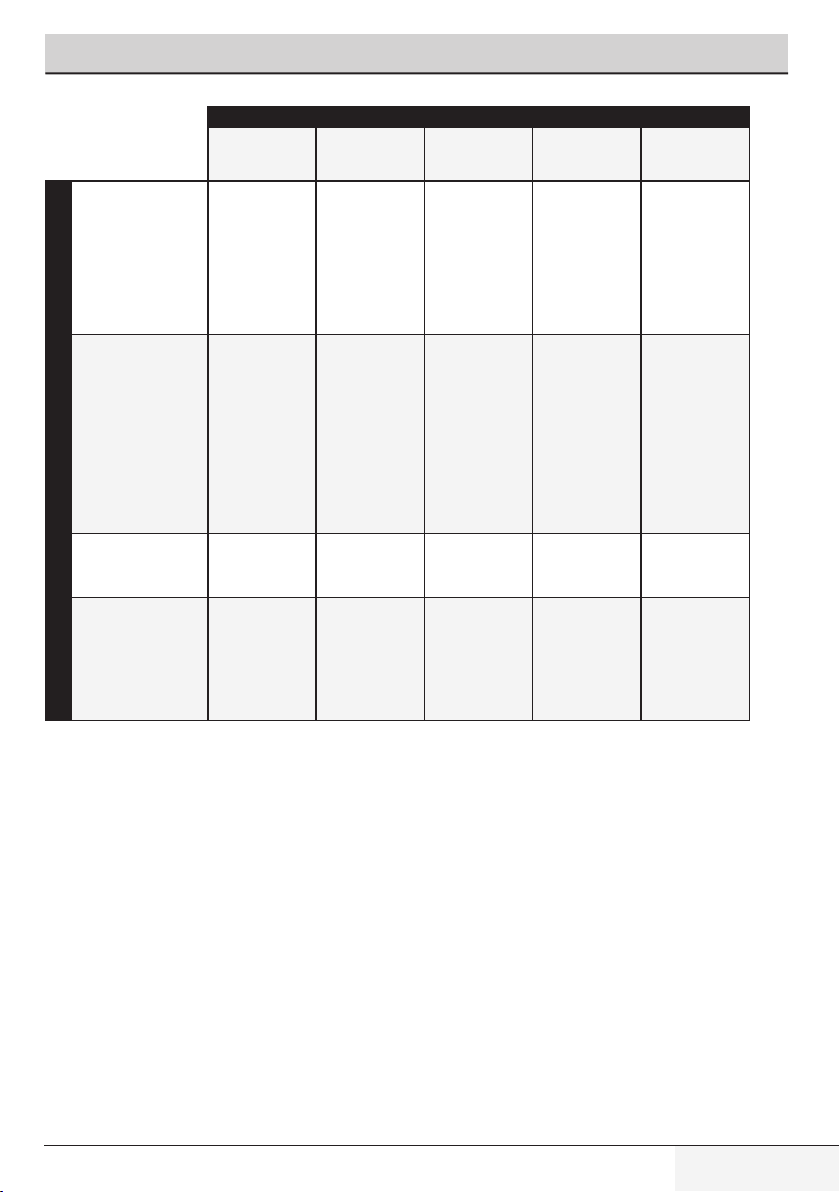
4.8 Tips for efficient washing
Heavily Soiled
(difficult stains such as
grass, coffee, fruits and
blood.)
Normally Soiled
Soiling Level
(For example, stains
caused by body on collars
and cuffs)
Lightly Soiled
(No visible stains exist.)
detergent between the laundry, close to the lower part of the drum in future washings.
¾ Use the tablet or gel detergent without selecting the prewash function.
Clothes
Light colours
and whites
(Recommended temperature
range based on soiling level:
40-90 oC)
It may be necessary to pretreat the stains or perform
prewash. Powder and liquid
detergents recommended
for whites can be used at
dosages recommended for
heavily soiled clothes. It is
recommended to use powder
detergents to clean clay and
soil stains and the stains that
are sensitive to bleaches.
Powder and liquid detergents
recommended for whites
can be used at dosages
recommended for normally
soiled clothes.
Powder and liquid detergents
recommended for whites
can be used at dosages
recommended for lightly
soiled clothes.
Colours Dark colors
(Recommended temperature
range based on soiling level:
cold -40 oC)
Powder and liquid
detergents recommended
for colours can be used at
dosages recommended for
heavily soiled clothes. It is
recommended to use powder
detergents to clean clay and
soil stains and the stains that
are sensitive to bleaches. Use
detergents without bleach.
Powder and liquid detergents
recommended for colours
can be used at dosages
recommended for normally
soiled clothes. Use detergents
without bleach.
Powder and liquid detergents
recommended for colours
can be used at dosages
recommended for lightly soiled
clothes. Use detergents without
bleach.
(Recommended
temperature range
based on soiling level:
cold -40 oC)
Liquid detergents
suitable for colours
and dark colours can
be used at dosages
recommended for
heavily soiled clothes.
Liquid detergents
suitable for colours
and dark colours can
be used at dosages
recommended for
normally soiled clothes.
Liquid detergents
suitable for colours
and dark colours can
be used at dosages
recommended for
lightly soiled clothes.
Delicates/
Woolens/Silks
(Recommended
temperature range
based on soiling level:
cold -30 oC)
Prefer liquid detergents
produced for delicate
clothes. Woolen and
silk clothes must be
washed with special
woolen detergents.
Prefer liquid detergents
produced for delicate
clothes. Woolen and
silk clothes must be
washed with special
woolen detergents.
Prefer liquid detergents
produced for delicate
clothes. Woolen and
silk clothes must be
washed with special
woolen detergents.
14 / EN
Washer-Dryer
Preparation
4.9 Tips for efficient drying
Cottons Drying
Synthetics
Drying
Programs
Babyprotect + Wash&Dry Wash&Wear
Durable Cotton Blend
Clothes
Cloth Types
Synthetics (Polyester,
nylon etc.):
Delicate (Silk, Woolen,
Cashmire, Angora etc.)
Clothes
Duvet, jacket, curtain, etc.
voluminous laundry
Bed sheets, duvet
covers, baby
clothes, t-shirts,
sweatshirts,
knitwear, blue jeans,
canvas trousers,
shirts, cotton socks,
and alike
Not recommended!
Not recommended! Not recommended! Not recommended! Not recommended! Not recommended!
Not recommended!
Drying voluminous
laundry in the
machine is not
appropriate. Dry
them by hanging or
spreading.
Not recommended!
Recommended for
polyester, polyamide
(nylon), polyacetate,
acrylic blended
clothes. Drying is
not recommended
for viscose blend
clothes. Drying
instructions found
on the maintenance
tag should be
observed.
Not recommended!
Drying voluminous
laundry in the
machine is not
appropriate. Dry
them by hanging or
spreading.
Washes and dries
directly! Bed sheets,
duvet covers, baby
clothes, t-shirts,
sweatshirts,
knitwear, blue jeans,
canvas trousers,
shirts, cotton socks,
and alike
Considering the
washing and drying
warnings found on
the maintenance
tag, lower
temperatures are
recommended for
polyester, polyamide
(nylon), polyacetate,
acrylic blended
clothes.
Not recommended!
Drying voluminous
laundry in the
machine is not
appropriate. Dry
them by hanging or
spreading.
Lightly soiled and
unstained shirt,
t-shirt, sweatshirt,
etc. The amount of
the laundry should
be very little.
Synthetic blend
clothes such as
lightly soiled and
unstained shirt,
t-shirt etc. The
amount of the
laundry should be
very little.
Not recommended!
Drying voluminous
laundry in the
machine is not
appropriate. Dry
them by hanging or
spreading.
User’s Manual
15 / EN
5 Operating the product
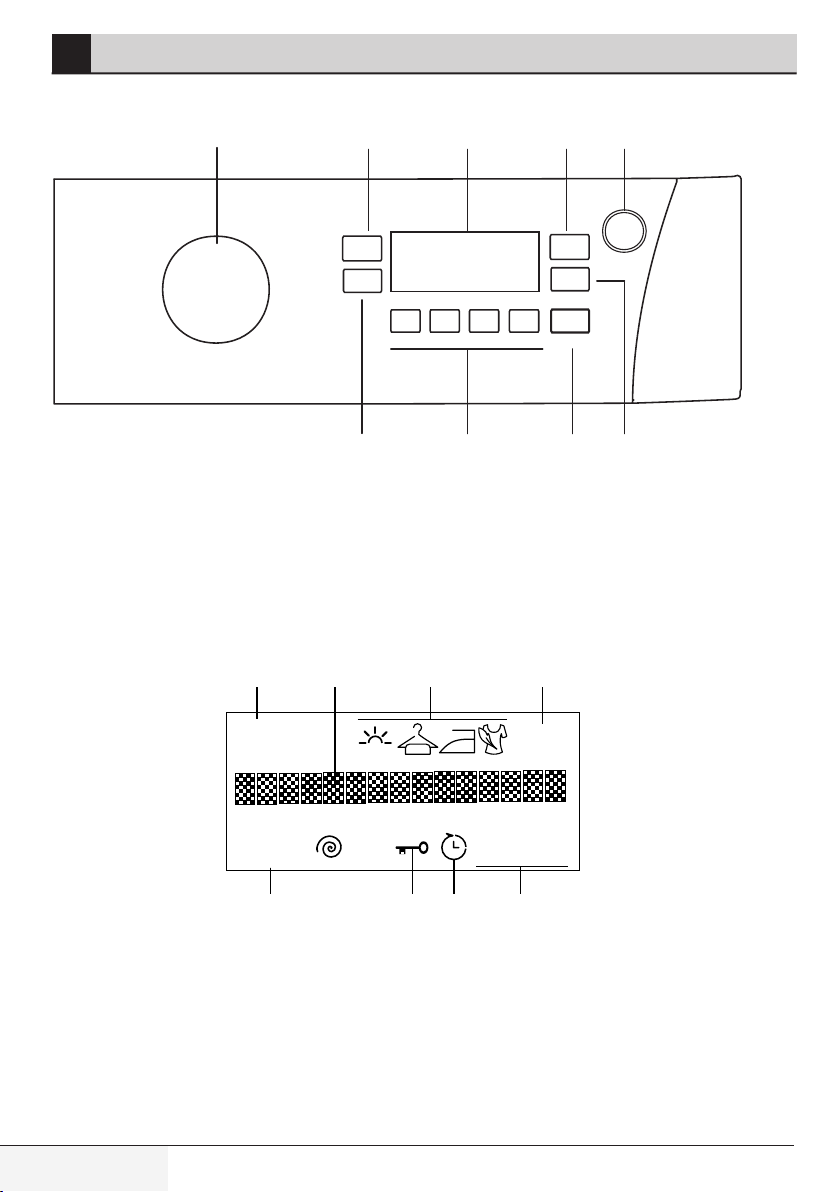
5.1 Control panel
1
1 - Programme Selection knob
2 - Temperature Adjustment button
3 - Display
4 - Drying Selection knob
5 - On / Off button
5.2 Display symbols
a b
2 3 4 5
6789
6 - End Time Adjustment button
7 - Start / Pause button
8 - Auxiliary Function buttons
9 - Spin Speed Adjustment button
c d
16 / EN
88
o
C
extra
180’
1880 88:88
efgh
a. - Temperature indicator (0C)
b - Information line
c - Drying Levels indicator
d - Drying Time indicator (minutes)
e - Time indicator (hours:minutes)
f - End Time indicator
g - Lock indicator
h - Spin Speed indicator (rpm)
Washer-Dryer
Operating the product
5.3 Preparing the machine
1. Check if the hoses are connected tightly.
2. Plug in your machine.
3. Turn the tap on completely.
4. Place the laundry in the machine.
5. Add detergent and fabric softener.
5.4 Wash programme selection
1. Select the programme suitable for the type, quantity and soiling level of the laundry in accordance with the "Programme and consumption
table" and the temperature table below.
90˚C Heavily soiled white cottons and linens. (coffee table covers, tablecloths, towels, bed sheets, etc.)
60˚C
40˚C- 30˚C- Cold Blended laundry including delicate textile (veil curtains, etc.), synthetics and woolens.
Normally soiled, coloured, fade proof linens, cottons or synthetic clothes (shirt, nightgown, pajamas, etc.) and lightly
soiled white linens (underwear, etc.)
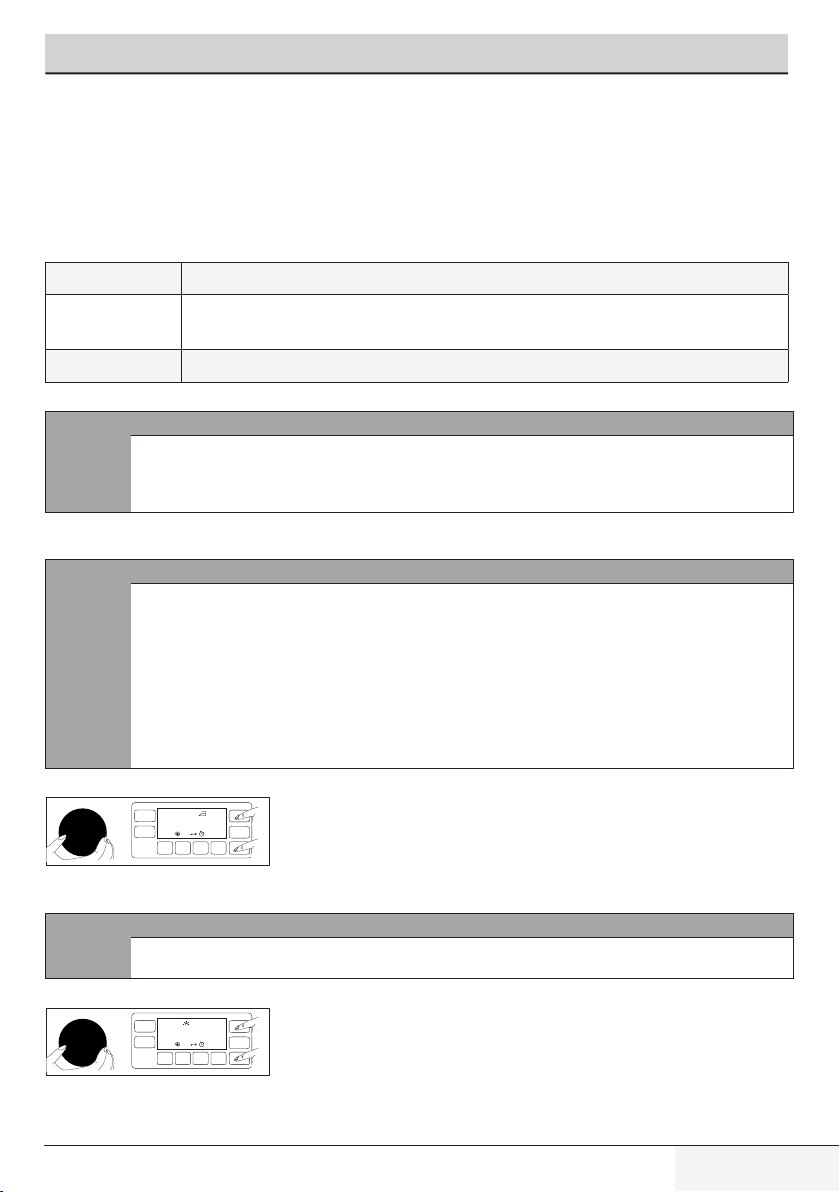
2. Select the desired programme with the Programme Selection knob.
NOTE
¾ Programmes are limited with the highest spin speed appropriate for that particular type of fabric.
C
¾ When selecting a programme, always consider the type of fabric, colour, degree of soiling and permissible water
temperature.
¾ Always select the lowest required temperature. Higher temperature means higher power consumption.
5.5 Washing programs
Depending on the type of fabric, use the following main programmes.
NOTE
¾ You can make drying directly after washing by pressing the Drying button after selecting the programme you want to
wash your laundry with. The step in which the drying will be made will be displayed on the information line every time you
press the button, and the related symbol lights. If you like, you can make drying for maximum allowed time by keeping
on pressing the button.
C
• Cottons
Step.1
Use this programme for your cotton laundry (such as bed sheets, duvet and pillowcase sets, towels, bathrobes, underwear, etc.). Your laundry
will be washed with vigorous washing action for a longer washing cycle.
C
• Synthetics
Step. 1
Use this programme to wash your synthetic clothes (shirts, blouses, synthetic/cotton blends, etc.). It washes with a gentle action and has a
shorter washing cycle compared to the Cotton programme.
¾ Figures and inscriptions included in the programme steps are schematic and may not match the product exactly. .
¾ Name of the programme you have selected by the programme selection knob will appear on the display of the machine.
¾ If you do not want to have drying made after the programme you selected, press the Drying button until "Drying cancelled"
is displayed.
¾ Load maximum 6kg laundry when you are going to make washing and drying by using the Drying function of the
machine. If it is overloaded, the laundry will not dry and the machine will run for a longer time and consume extra power.
o
40
C
COTTONS
1200
88:88
Step. 2
Step. 3
NOTE
¾ You can dry your laundry immediately after washing them (Automatic or scheduled drying can be made after washing).
For this, you have to select the drying function too before starting the washing programme.
o
extra
40
C
SYNTHETICS
1200
88:88
Step. 2
Step. 3
User’s Manual
17 / EN
Operating the product
For curtains and tulle, use the Synthetic 40˚C programme with prewash and anti-creasing functions selected. As their meshed texture causes
excessive foaming, wash the veils/tulle by putting little amount of detergent into the main wash compartment. Do not put detergent in the
prewash compartment.
NOTE
C
• Woollens
Step.1
Use this programme to wash your woolen clothes. Select the appropriate temperature complying with the tags of your clothes. Use appropriate
detergents for woolens.
C
• Cottons Eco
Step.1
Use this programme to wash your normally soiled, durable cotton and linen laundry. Although it washes longer than all other programmes, it
provides high energy and water savings. Actual water temperature may be different from the stated wash temperature. When you load the
machine with less laundry (e.g. ½ capacity or less), programme time may automatically get shorter. In this case, energy and water consumption
will decrease more, providing a more economic wash. This programme is available in the models with the remaining time indicator.
C
¾ You can dry your laundry immediately after washing them (Automatic or scheduled drying can be made after washing).
For this, you have to select the drying function too before starting the washing programme.
o
30
C
W O O L L E N S
800 00:58
Step. 2
NOTE
¾ Drying function cannot be selected in the washing programme for woollens.
o
40
C
COTTON ECO
1000
88:88
Step. 2
Step. 3
NOTE
¾ You can dry your laundry immediately after washing them (Automatic or scheduled drying can be made after washing).
For this, you have to select the drying function too before starting the washing programme.
• Delicate
Use this programme to wash your delicate clothes. It washes with a gentler action compared to the Synthetics programme.
• Hand Wash
Step.1
Use this programme to wash your woollen/delicate clothes that bear “not machine-washable” tags and for which hand wash is recommended.
It washes laundry with a very gentle washing action to not to damage clothes.
o
60
C
HANDWASH
800
88:88
100’
Step. 2
Step.3
NOTE
C
• Daily express
Step.1
Use this programme to wash your lightly soiled and unspotted cotton laundry in a short time.
18 / EN
¾ You can dry your laundry immediately after washing them (Automatic or scheduled drying can be made after washing).
For this, you have to select the drying function too before starting the washing programme.
o
30
C
DAILY XPRESS
1200
88:88
Step. 2
Step. 3
Washer-Dryer
Operating the product
NOTE
C
• Super short express
Step.1
Use this programme to wash your small amounts of lightly soiled cotton laundry in a short time. It washes your laundry in 14 minutes.
C
• Shirts
Step.1
Use this programme to wash the cotton, synthetic and synthetic blended shirts together.
C
• Rinse
Use this programme when you want to rinse or starch separately.
• Spin+Drain
Use this programme to drain the water in the machine.
5.6 Temperature selection
60
1200
¾ You can dry your laundry immediately after washing them (Automatic or scheduled drying can be made after washing).
For this, you have to select the drying function too before starting the washing programme.
o
30
60’
C
XPRESSSUPERSHORT
1200
88:88
Step. 2
Step. 3
NOTE
¾ You can dry your laundry immediately after washing them (Automatic or scheduled drying can be made after washing).
For this, you have to select the drying function too before starting the washing programme.
¾ When drying function is selected, additional drying time will be displayed at the end of washing.
o
40
C
SHIRTS
1000
88:88
Step. 2
Step. 3
NOTE
¾ You can dry your laundry immediately after washing them (Automatic or scheduled drying can be made after washing).
For this, you have to select the drying function too before starting the washing programme.
o
110’
C
88:88
Whenever a new programme is selected, the recommended temperature for the programme appears on the temperature indicator. It is possible
that the recommended temperature value is not the maximum temperature that can be selected for the current programme.
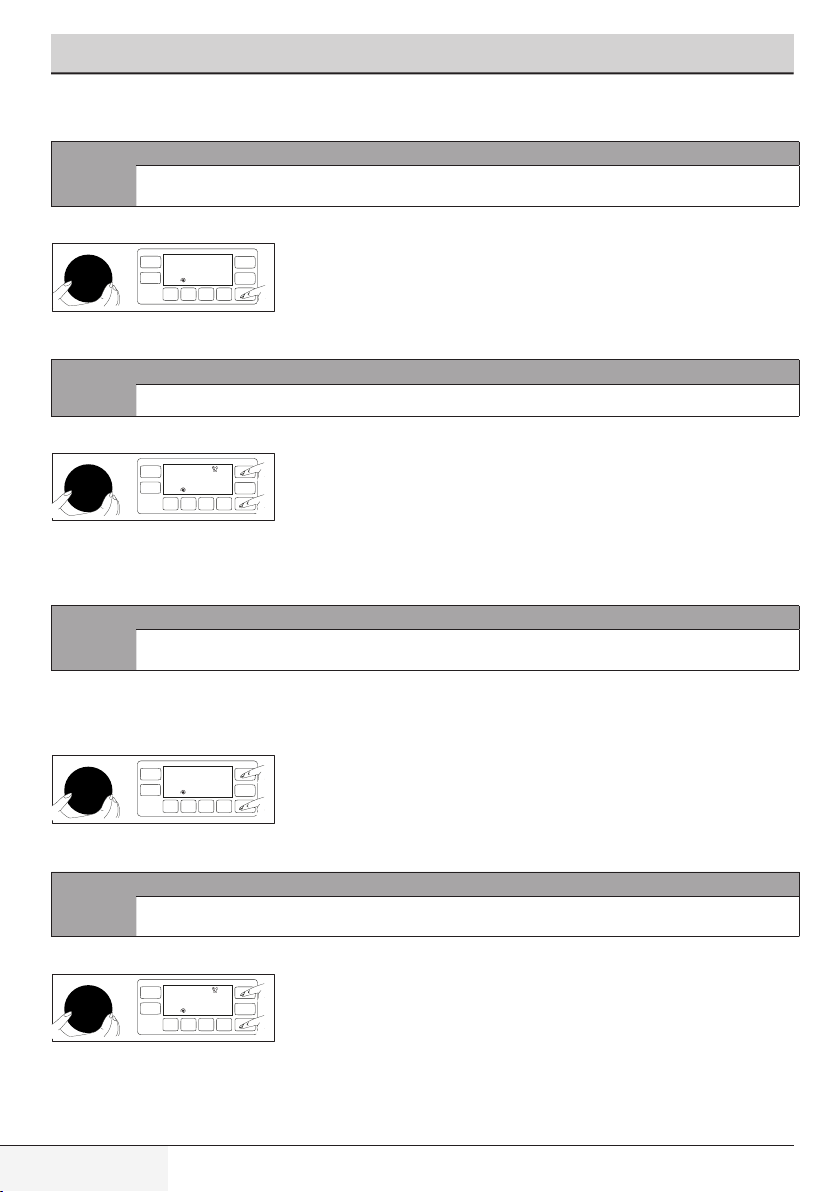
Press the Temperature Adjustment button to change the temperature. Temperature will decrease by steps of 10 °C.
NOTE
¾ Temperature Adjustment button works backwards only. For example, if you wish to select 60°C when 40°C is displayed
on the screen, you need to press the button in a row to go back from 40°C until you reach 60°C.
C
Finally, “-” symbol indicating the cold option appears on the display. "Cold Wash" appears on the display.
You can also change the temperature after the washing starts. If the Temperature indicator's light is on after the wash cycle has started, you
can select the desired temperature. If the wash cycle has reached a point where you cannot change the temperature, the light of temperature
indicator goes off.
User’s Manual
¾ The light of temperature indicator is off in the programmes that do not allow temperature adjustment.
¾ If you scroll to cold wash option and press Temperature Adjustment button again, the recommended maximum
temperature for the selected programme appears on the display. Press the Temperature Adjustment button again to
decrease the temperature.
19 / EN
Operating the product
5.7 Selecting the spin speed
o
70
1000
Whenever a new programme is selected, the recommended spin speed for the selected programme is displayed on the Spin Speed indicator.
C
Press the Spin Speed Adjustment button to change the spin speed. Spin speed decreases gradually.
Then, depending on the model of the product, "Rinse Hold" and "No Spin" options appear on the display.
C
5.7.1 If you want to spin your laundry after the Rinse Hold function:
- Adjust the Spin Speed.
- Press Start / Pause / Cancel button. Program resumes. Machine discharges the water and spins the laundry.
If you want to discharge the water at the end of the programme without spinning, use No Spin function.
C
You can also change the Spin Speed after the washing starts. If the Spin Speed indicator's light is on after the wash cycle has started, you can
select the desired spin speed. If the wash cycle has reached a point where you cannot change the spin speed, the light of spin speed indicator
goes off.
5.8 Drying Programmes
A
C
• Synthetic Drying
Step.1
Use this programme to dry humid or damp synthetic clothes whose dry weight corresponds to 4 kg. This programme performs drying only.
C
50’
C
88:88
NOTE
¾ It is possible that the recommended spin speed value is not the maximum spin speed that can be selected for the current
programme.
NOTE
¾ Spin Speed Adjustment button works backwards only. For example, if you wish to select 1000 rpm when 800 rpm is
displayed on the screen, you need to press the button in a row to go back from 800 rpm until you reach 1000 rpm.
¾ Rinse Hold option is indicated with “ı_ı” symbol and No Spin option is indicated with “_” symbol.
o
70
50’
C
88:88
-
NOTE
¾ Light of the Spin Speed indicator is off in the programmes that do not allow the adjustment of spin speed. When you press
the Spin Speed Adjustment button, "Not adjustable" appears on the display.
CAUTION
¾ Piles coming from the clothes during drying are automatically cleaned by the machine. Water is automatically
taken in to perform cleaning. For this reason, water tap of the machine should also be open during drying
programmes.
NOTE
¾ Spinning step already exists in the drying programmes. Your machine carries out this process to shorten the drying time.
When drying is selected, spin speed setting is in the 1200 - Maximum rpm range.
SYNTHETIC DRY
02:16
Step. 2
NOTE
¾ For dry weights of laundry, see Section 4, Step 4.5
20 / EN
Washer-Dryer
Operating the product
• Cotton Drying
Use this programme to dry humid or damp cotton clothes whose dry weight corresponds to 6 kg. This programme performs drying only.
NOTE
C
5.9 Washing and Drying Programmes
A
• 6 kg Wash & 6kg Dry
Step. 1
Use this programme to wash cotton clothes up to 6 kg and dry them immediately afterwards without making any selection.
C
For the 6Kg Wash & 6kg Dry cycle, we advise you to load the laundry to the appliance up to the level specified in the figure above (level arrow is
shown with the door of the product open) for ideal drying conditions.
• Wash&Wear
Step. 1
Use this programme to wash and dry 0.5 kg of laundry (2 shirts) in 35 minutes. Maximum amount of laundry that can be washed with this
programme is 1 kg (5 shirts).
C
¾ Load 4.5kg of laundry to dry the towels and bathrobes only.
¾ For dry weights of laundry, see Section 4, Step 4.5
CAUTION
¾ Piles coming from the clothes during drying are automatically cleaned by the machine. Water is automatically
taken in to perform cleaning. For this reason, water tap of the machine should also be open during drying
programmes.
o
60
C
6 WASH & DRY
1200 04:12
Step. 2
NOTE
¾ Auxiliary additional drying function cannot be selected when this programme is selected.
o
40
C
WASH & WEAR
00:34
1200
Step. 2
NOTE
¾ Use this programme to quickly wash and dry daily clothes worn for a short time and taken off recently. It is suitable for
fine-textured, quickly drying laundry. (Shirt, T-Shirt)
¾ Other drying options or programmes should be used for coarse-textured and slowly drying clothes.
• BabyProtect+
Up to 2 kg, use this programme to wash and immediately dry your laundry for which you require anti-allergic and hygienic results (baby clothes,
bed linens, duvet cover, underwear, etc.).
NOTE
C
User’s Manual
¾ Babyprotect+ Wash & Dry 60°C programme is tested and approved by “The British Allergy Foundation” (Allergy UK) in
United Kingdom.
21 / EN
Operating the product
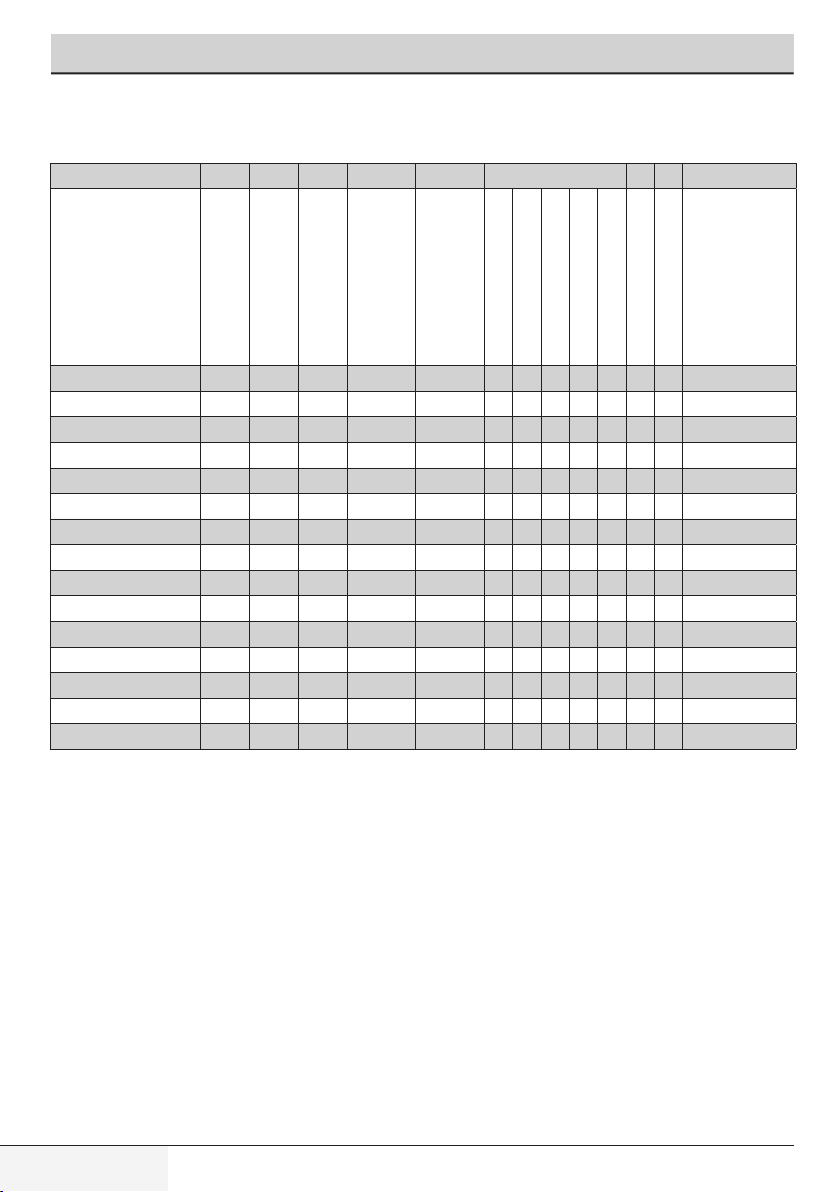
5.10 Programme and consumption table
(For washing)
EN
Programme (°C)
Cottons 90 9 95 2.55 1600 • • • • • • • 90-Cold
Cottons 60 9 95 2.05 1600 • • • • • • • 90-Cold
Cottons 40 9 95 1.35 1600 • • • • • • • 90-Cold
Cotton Economic 60** 9 53 1.03 1600 • 60-Cold
Cotton Economic 40 9 53 0.80 1600 • 60-Cold
Synthetics 60 4 65 1.20 1200 • • • • • • • 60-Cold
Synthetics 40 4 65 0.65 1200 • • • • • • • 60-Cold
Woollens 40 2 45 0.30 1200 • • 40-Cold
Delicate 40 4 50 0.40 1000 • 40-Cold
Hand wash 30 1.5 40 0.21 1200 30-Cold
Super short express 30 2 35 0.10 1400 • • • 30-Cold
Daily express 90 9 60 2.00 1400 • • • 90-Cold
Daily express 60 9 60 1.15 1400 • • • 90-Cold
Daily express 30 9 50 0.15 1400 • • • 90-Cold
Shirts 60 4 70 1.40 800 • • • * • • • 60-Cold
2
Max. Load (kg)
Water Consumption (l)
Energy Consumption (kWh)
Max. Speed***
Auxiliary functions
Prewash
Quick Wash
Extra Rinse
Anti-Creasing
Rinse Hold
Drying
Selectable
temperature
range °C
Pet hair removal
• : Selectable.
* : Automatically selected, not cancellable.
** : Energy Label programme (EN 50229)
***: If maximum spin speed of the machine is lower then this value, you can only select up to the maximum spin speed.
****: Programme detects the type and quantity of the laundry to automatically adjust water and energy consumption and programme time.
- : See the programme description for maximum load.
22 / EN
Washer-Dryer
Operating the product
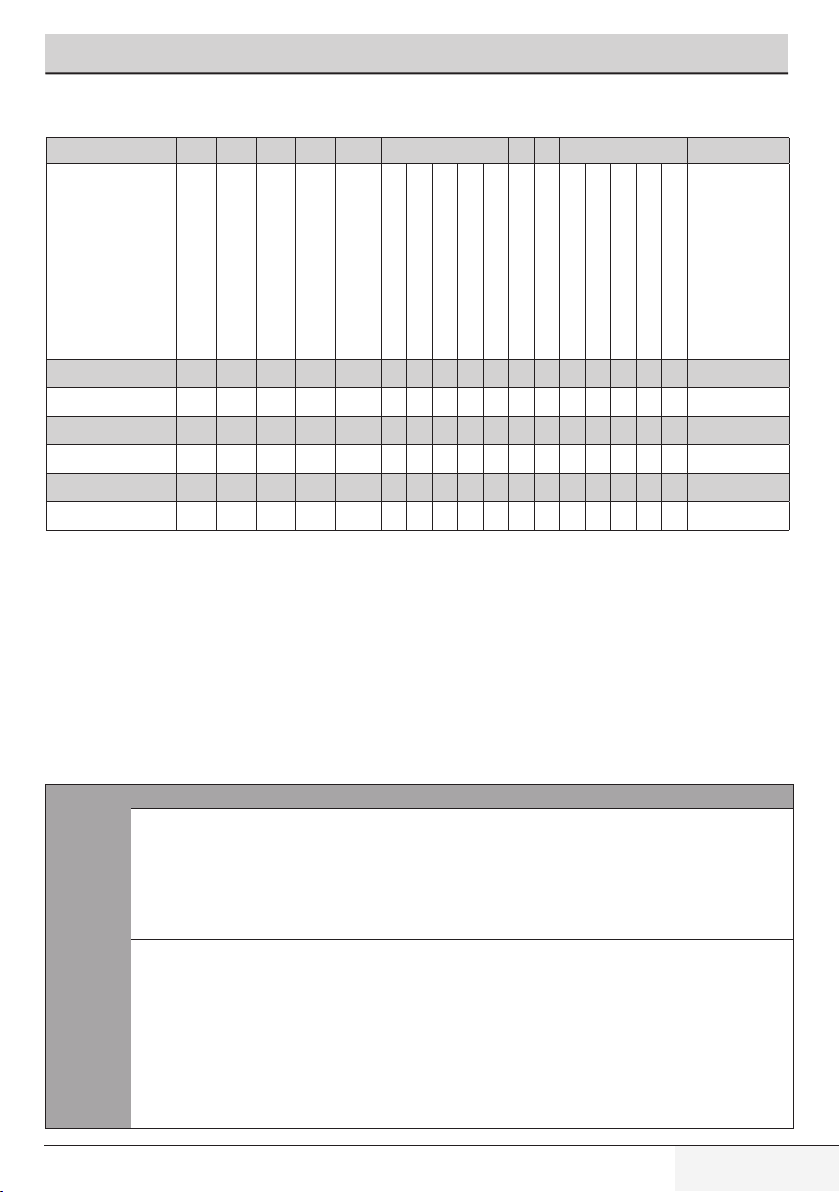
Program and consumption table
(For drying)
EN
Programme (°C)
Cottons Drying - 6 4 2.7 1600 * • • • • Synthetics Drying - 4 4 2.45 - * • • • • BabyProtect+ 60 2 84 2.9 1600 * * • • • • 90-30
6Kg Wash&6Kg Dry 60 6 64 5.3 1600 * • • • • 60-Cold
Wash&Wear 30 0.5 28 0.6 1000 • * • 30-Cold
Wash&Wear 30 1 28 1 1000 • * • 30-Cold
2
Max. Load (kg)
Water Consumption (l)
Energy Consumption (kWh)
Auxiliary functions Drying level
Max. Speed***
Prewash
Quick Wash
Extra Rinse
Anti-Creasing
Rinse Hold
Pet hair removal
Drying
Extra wardrobe dry
Selectable
temperature
range °C
Wardrobe dry
Iron dry
Delicate drying
Time based drying - minutes
C
User’s Manual
NOTE
¾ ***: If maximum spin speed of the machine is lower then this value, you can only select up to the maximum spin speed.
¾ The auxiliary functions in the table may vary according to the model of your machine.
¾ Water and power consumption may vary subject to the changes in water pressure, water hardness and temperature,
ambient temperature, type and amount of laundry, selection of auxiliary functions and spin speed, and changes in electric
voltage.
¾ You can see the washing time of the programme you have selected on the display of the machine. It is normal that small
differences may occur between the time shown on the display and the real washing time.
Information for the testing organizations;
Information for the testing organizations;
Washing performance tests for EU energy labelling are performed in „Cottons Eco
60°C“ programme as per the EN 50229 standard.
According to the EN 50229 standard for EU energy labelling drying performance,
the maximum washing load must be divided into groups as the maximum drying
load and the remaining drying load, and then each load must be dried using the
option „Cottons Drying Extra Dry.
23 / EN

Operating the product
5.11 Auxiliary function selection
o
extra
88
1880 88:88
Select the required auxiliary functions before starting the program. Whenever a programme is selected, frames of the auxiliary function symbols
that can be selected together with it illuminate. And when you select an auxiliary function, the interior area of the auxiliary function symbol also
starts to illuminate and the name of the selected function appears on display for "3" seconds.
C
Also the frames of the auxiliary function suitable for the current programme after the washing has started remains illuminated. You can select or
cancel the auxiliary functions whose frames are illuminated. If the wash cycle has reached a point where you cannot select the auxiliary function,
the function's frame goes off.
C
180’
C
NOTE
¾ Frame of the auxiliary function symbol that cannot be selected with the current programme will not illuminate. When you
press the button of such auxiliary functions, "Not adjustable" appears on the display for ... seconds.
NOTE
¾ Some functions cannot be selected together. If a second auxiliary function conflicting with the first one is selected before
starting the machine, the function selected first will be cancelled and the second auxiliary function selection will remain
active. For example, if you want to select Quick Wash after you have selected the Prewash, Prewash will be cancelled and
Quick Wash will remain active.
¾ Auxiliary function that is not compatible with the program cannot be selected. (See "Programme and consumption table")
¾ Some programmes have auxiliary functions that must be operated simultaneously. Those functions cannot be cancelled.
The frame of the auxiliary function will not be illuminated, only inner area will be illuminated.
¾ The machine will extend the duration of the programme automatically unless the required dampness level (ironing, closet,
extra closet and delicate) is reached at the end of the drying. Program will last longer.
¾ If time based drying is selected, the programme will be ended even if the laundry is still wet at the end of the programme.
¾ The machine will shorten the duration of the programme if the required dampness level (ironing, closet, extra closet and
delicate) is reached during the drying operations or in time based drying selections. A time decrease will be seen on the
display.
• Prewash
A Prewash is only worthwhile for heavily soiled laundry. Not using the Prewash will save energy, water, detergent and time.
• Quick Wash
This function can be used in Cottons and Synthetics programmes. It decreases the washing times for lightly soiled laundries and also the number
of rinsing steps.
NOTE
C
• Extra Rinse
This function enables you to wash and rinse your laundry with plenty of water in Cottons, Synthetics, Lingerie, and Woollens programmes. Use
this function for delicate laundries that crease easily.
C
• Anti-creasing
This function creases the clothes lesser when they are being washed. Drum movement is reduced and spin speed is limited to prevent creasing.
In addition, washing is done with a higher water level.
24 / EN
¾ When you select this function, load your machine with half of the maximum laundry specified in the programme table.
NOTE
¾ Pressing for the first time will add single rinse, a second press will add double rinse. The third press will cancel it.
Washer-Dryer

Operating the product
• Drying
This function provides drying of laundry after washing. Check from the programme table in which programmes this auxiliary function is selectable.
5.12 Drying Steps
5.12.1 Iron Dry
Drying is carried on until dryness level reaches Iron Dry step.
5.12.2 Wardrobe dry
Drying is carried on until dryness level reaches Wardrobe Dry step.
5.12.3 Extra wardrobe dry
Drying is carried on until dryness level reaches Extra Wardrobe Dry step.
5.12.4 Delicate drying
Use this programme to dry 100% synthetic and synthetic blend sateen type underwear (nightwear, upper underwear, lower underwear, pajamas)
which are dryable as per washing instructions.
NOTE
¾ Dryness level may change due to the blend, weave/knit type, amount and dampness level of the laundry.
C
5.12.5 Time-based drying
You may select either of 10´, 20´, 30´, 60´, 90´, 120´ and 150´ drying times to reach the final drying degree at low temperature.
C
5.13 Time display
Remaining time for the completion of the programme while it is running is displayed as “01:30” in hours and minutes format.
C
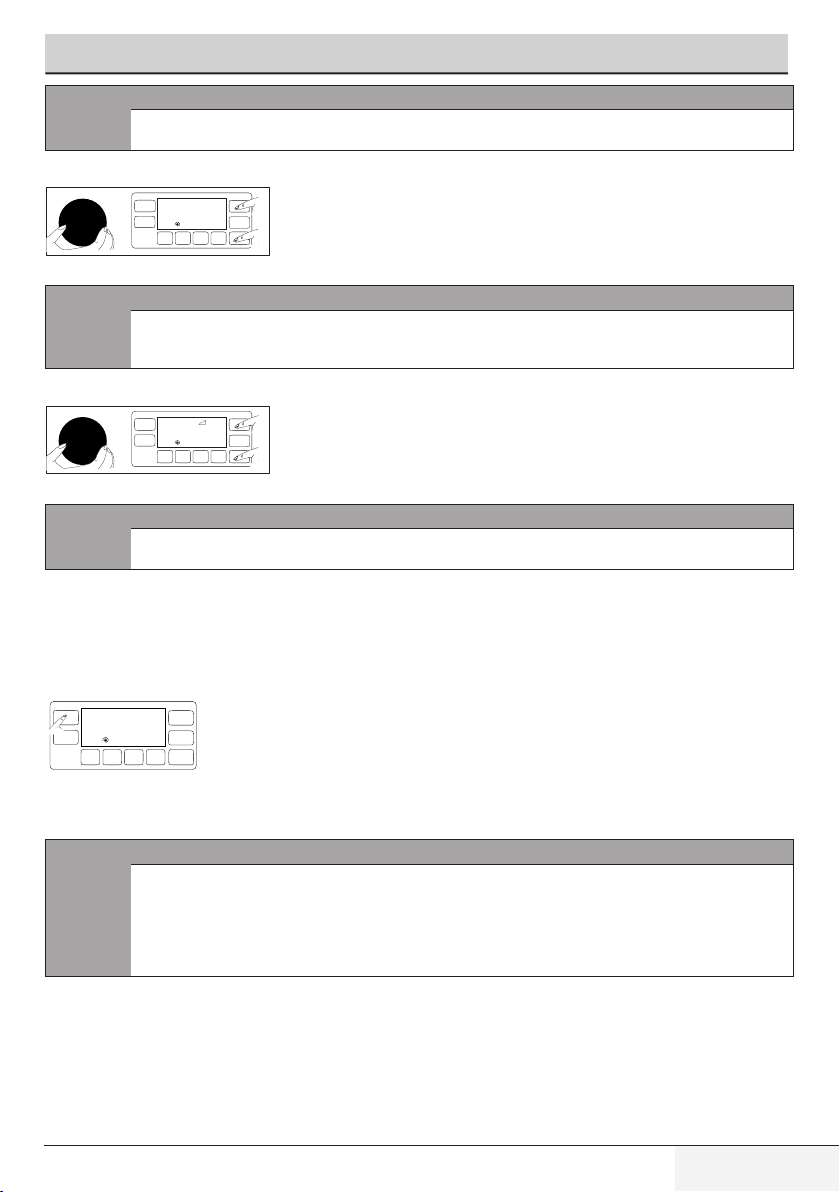
5.14 End Time
60
FINISH TIME SETTING
1200
With the End Time function, the startup of the programme may be delayed up to 24 hours. After pressing End Time button, the displayed time
is the programme's estimated end time. If the End Time is adjusted, End Time indicator is illuminated. “End Time Setting” appears on the
display. Meantime, Start / Pause button flashes.
In order for the End Time function is activated and the programme is completed at the end of the specified time, you must press Start / Pause
button after adjusting the time. “Finish Time On” appears on the display when you press the button. Start / Pause button stops flashing
and remains illuminated continuously.
If you want to cancel End Time function, press End Time button until the End Time indicator turns off or press On / Off button to turn off and
on the machine.
1. Open the loading door, place the laundry and put detergent, etc.
2. Select the washing programme, temperature, spin speed and, if required, the auxiliary functions.
3. Set the end time of your choice by pressing the End Time button. End Time indicator illuminates.
4. Press Start / Pause button. Time countdown starts. “:” sign in the middle of the end time on the display starts flashing.
¾ Products that contain accessories such as lace, tulle, stone, bead, spangle, wire and products with high content of silk
should not be dried in the machine.
¾ Silk blend clothes containing cotton or have a sateen appearance may remain damp when dried in this programme.
NOTE
¾ For drying laundry up to two pieces, you should prefer timed drying steps in the cotton or synthetic drying programmes to
be selected according to the type of the laundry.
¾ When you select 10´ drying function, only Aeration and Cooling is performed.
¾ If the laundry is not dry as required after the drying programmes, you should prefer timed drying steps in the cotton or
synthetic drying programmes to be selected according to the type of the laundry.
¾ When this function is selected, machine performs drying up to the set time independent of the drying degree.
NOTE
¾ Programme time may differ from the values in the "Programme and consumption table" depending on the water
pressure, water hardness and temperature, ambient temperature, amount and the type of laundry, auxiliary functions
selected and the changes at the mains voltage.
o
C
88:88
o
60
C
FINISH TIME ON
1200
88:88
User’s Manual
25 / EN

Operating the product
NOTE
¾ Do not use liquid detergents when you activate End Time function! There is the risk of staining of the clothes.
¾ Loading door remains locked during the End Time countdown period. Machine must be switched to Pause mode by
C
5.15 Starting the programme
o
60
C
PROGRAM STARTS
1200
1. Press Start / Pause button to start the programme.
2. The Start / Pause button which was flashing starts to illuminate steadily now, indicating that the programme has started. “Program
started” appears on the display for "3" seconds.
3. Loading door is locked. "Door is Closing" appears on the display when the door is being locked.
5.16 Loading door lock
DOOR IS LOCKED
There is a locking system on the loading door of the machine that prevents opening of the door in cases when the water level is unsuitable.
"Door is Locked" appears on the display when the loading door is locked.
5.17 Changing the selections after programme has started
5.17.1 Adding laundry after the programme has started:
o
60
C
DOOR OPENING
1200
pressing the Start/Pause button to open the loading door. At the end of the countdown, End Time indicator turns off,
washing cycle starts and the time of the selected programme appears on the display.
¾ When the End Time selection is completed, the time appearing on the screen consists of end time plus the duration of
the selected programme.
88:88
88:88
If the water level in the machine is suitable when you press Start / Pause button, "Door is opening" will appear on the display.
If the water level in the machine is not suitable when you press Start / Pause button, the display will show that the loading door is locked.
5.17.2 Switching the machine to pause mode:
o
60
C
PAUSE
88:88
1200
Press the Start / Pause button to switch the machine to pause mode. The frame around the Start / Pause button starts flashing. "Pause"
appears on the display.
5.17.3 Changing the programme selection after programme has started:
The programme change is not allowed when the current programme is running.
If you turn the Programme Selection knob while the programme is running, "Pause to make changes" appears on the display.
You can select the new programme after switching the current programme to pause.
NOTE
C
¾ The selected program starts anew.
5.17.4 Changing the auxiliary function, speed and temperature settings
Depending on the step the programme has reached, you can cancel or activate the auxiliary functions; see, "Auxiliary function selection".
You can also change the speed, temperature and drying settings; see, "Spin speed selection" and "Temperature selection".
26 / EN
Washer-Dryer

Operating the product
NOTE
C
5.18 Child Lock
Use Child Lock function to prevent children from tampering with the machine. Thus you can avoid any changes in a running programme.
C
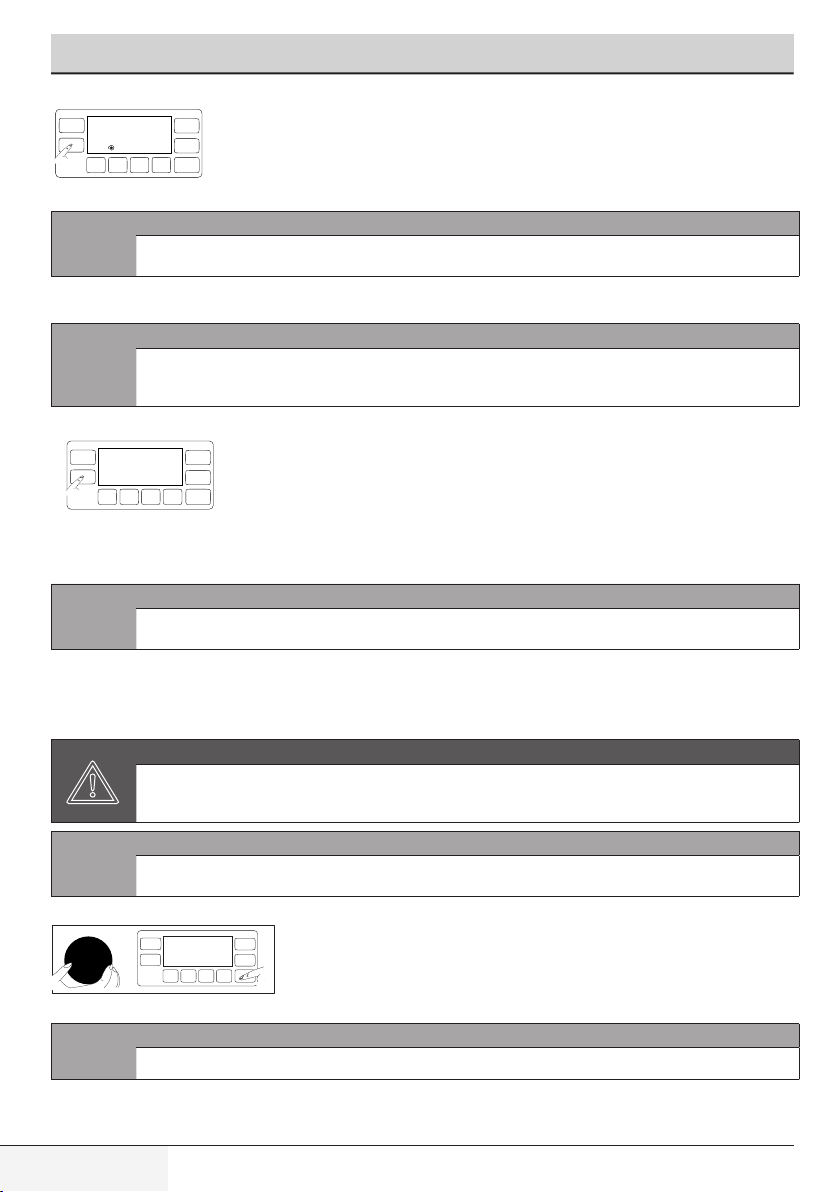
5.18.1 To activate the Child Lock:
60
CHILD LOCK ENABLED
1200
Press and hold 2nd and 4th Auxiliary Function buttons for 3 seconds. After the countdown as "Child Lock 3-2-1" on the display is
over, "Child Lock Enabled" appears on the display. You can release 2nd and 4th Auxiliary Function buttons when this warning is displayed.
C
5.18.2 To deactivate the Child Lock:
60
CHILD LOCK DISABLED
1200
Press and hold 2nd and 4th Auxiliary Function buttons for 3 seconds. After the countdown as "Child Lock 3-2-1" on the display is over,
"Child Lock Disabled" appears on the display.
5.19 Cancelling the programme
60
CANCEL
1200
¾ The loading door will not open if the water temperature in the machine is high or the water level is above the door opening.
NOTE
¾ You can switch on and off the machine with On / Off button when the Child Lock is active. When you switch on the
machine again, programme will resume from where it has stopped.
¾ If you press any button when the Child Lock is activated, the machine will give an audible warning. Audible warning will
be cancelled when the buttons are pressed 5 times in a row. The warning phrase on the screen goes on to be displayed.
o
C
88:88
NOTE
¾ "Child Lock Enabled" appears on the display if you press any button when Child Lock is enabled.
o
C
88:88
o
C
88:88
The programme is cancelled when the machine is turned off and on again. Press and hold On / Off button for 3 seconds. After the countdown
as "Cancel 3-2-1" on the display is over, the machine turns off.
NOTE
¾ If you press On / Off button when the Child Lock is enabled, the programme will not be cancelled. You should cancel the
Child Lock first. Countdown as "Pause 3-2-1" appears on the display.
C
¾ If you have to open the loading door after you have cancelled the programme, but it is not possible to open the loading
door since the water level in the machine is above the loading door level, then turn the Programme Selection knob to
Pump+Spin programme and discharge the water in the machine.
5.20 End of programme
“Laundry can be taken out” appears on the display when the programme is completed.
If you do not press any button for 2 minutes, the machine will switch to pause mode. Display and all indicators are turned off. Only the frame of
the Programme Selection knob remains flashing.
If you press any button or turn the Programme Selection knob when the machine is in pause mode, programme steps that are completed
will appear on the display.
5. 21 Entering the Settings menu
You can perform the following operations in Settings menu:
• Changing the language selection,
User’s Manual
27 / EN

Operating the product
• Changing the screen brightness setting,
• Turning on and off the volume,
Press Temperature Adjustment button and Spin Speed Adjustment button simultaneously for 3 seconds to enter the Settings menu.
“Select Language” menu appears on the display.
Use Temperature or Drying Adjustment buttons to navigate in menus.
5.21.1 Changing the language selection
S E T T I N G S
1. Press Temperature Adjustment button and Spin Speed Adjustment button simultaneously for 3 seconds to enter the Settings
menu. “Select Language” menu is the first menu to appear on the display.
LANGUAGE SELECTION
2. Turn the Programme Selection knob until the desired language appears on the display in Select Language menu.
S E T
3. Press the light button on the lower right corner of the display when the desired language is displayed. Light goes off and “Set” appears
on the display.
5.21.2 Changing the screen brightness setting
E N G L I S H
S E T T I N G S
S E T
1. Press Temperature Adjustment button and Spin Speed Adjustment button simultaneously for 3 seconds to enter the Settings
menu. Using the Drying button, open "Brightness" menu.
2. Turn the Programme Selection knob until the desired brightness option appears on the display in Brightness menu.
3. Press the light button on the lower right corner of the display when the desired brightness is displayed. Light goes off and “Set” appears
on the display.
5.21.3 Turning on and off the Audio Warning
S E T T I N G S
VOLUME SETTING ON
1. Press Temperature Adjustment button and Spin Speed Adjustment button simultaneously for 3 seconds to enter the Settings
menu. Using the Drying button, open "Volume Setting" menu.
2. Turn the Programme Selection knob until the desired volume option appears on the display in Volume Setting menu.
S E T
3. If you want to turn up the volume, press the light button on the lower right corner of the display when "VOLUME ON" is selected. Light
goes off and “Set” appears on the display.
4. If you want to turn down the volume, press the light button on the lower right corner of the display when "VOLUME OFF" is selected. Light
goes off and “Off” appears on the display.
28 / EN
Washer-Dryer

Operating the product
5.22 Memory (Favourite) programme setting
You can create a favourite programme by saving frequently used programme and other settings. Use this function when you want to select
quickly the same settings you use for the laundry that you wash regularly.
Favourite programme will remain at the factory set programme until you make a new favourite programme setting.
5.22.1 To store a new favourite programme:
1. Select the desired temperature, speed and auxiliary function in the programme where you are allowed to set memory programme.
2. Keep the Favourite button pressed for 3 seconds.
3. Countdown as "Storing favourite 3-2-1" appears on the display.
NOTE
C
5.22.2 To select a favourite programme:
1. Press Favourite button. “Favourite selected” appears on the display.
2. Programme and other settings saved as favourite appear on the display.
3. Press Start / Pause button to start your Favourite programme.
5.23 Your machine is equipped with a "Standby Mode"
In case of not starting any programme or waiting without making any other operation when the machine is turned on by On/Off button and while
it is in selection step or if no other operation is performed approximately 2 minutes after the programme you selected has come to an end, your
machine will automatically switch to energy saving mode. Brightness of indicator lights will decrease. Also, if your product is equipped with a
display showing the programme duration, this display will completely turn off. In case of rotating the Programme Selection knob or pressing any
button, lights and display will restore to their previous condition. Your selections made while exiting the energy saving mode may change. Check
the appropriateness of your selections before starting the programme. Readjust if necessary. This is not a fault.
¾ If storing is not successful, “Favourite not saved” appears on the display.
User’s Manual
29 / EN

6 Maintenance and cleaning
Service life of the product extends and frequently faced problems decrease if cleaned at regular intervals.
6.1 Cleaning the detergent drawer
Clean the detergent drawer at regular intervals (every 4-5 washing cycles) as shown below in order to prevent accumulation of powder detergent
in time.
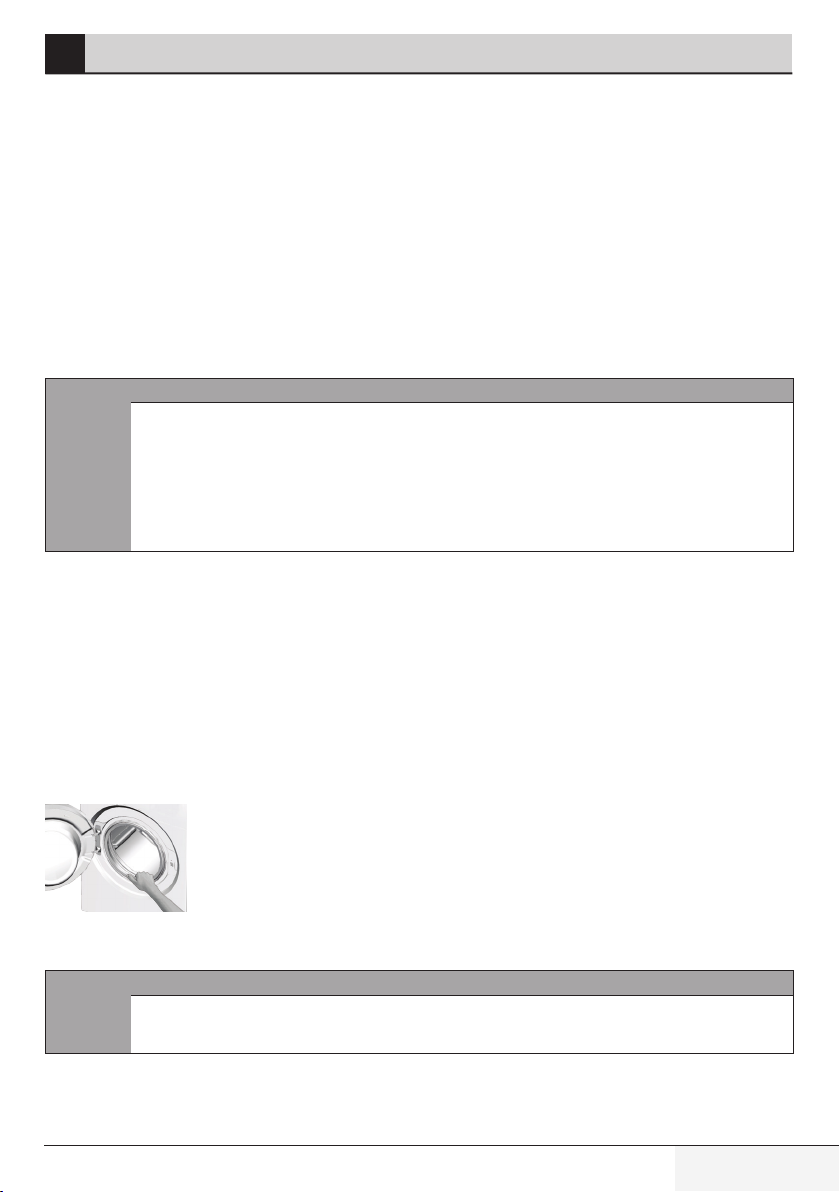
1 Lift the rear part of the siphon to remove it as illustrated. After performing the cleaning procedures explained below, replace the siphon
back to its seating and push its front section downwards to be sure that the locking tab engages.
NOTE
C
2 Wash the detergent drawer and the siphon with plenty of lukewarm water in a washbasin. Wear protective gloves or use an appropriate
brush to avoid touching of the residues in the drawer with your skin when cleaning.
3 After cleaning, seat the siphon well in its place and insert the drawer back.
6.2 Cleaning the loading door and the drum
For products with drum cleaning programme, please see Operating the product - Programmes.
For products without drum cleaning, follow the below steps to clean the drum:
Select Additional Water or Extra Rinse auxiliary functions. Use a Cottons programme without pre-wash. Set the temperature to
the level recommended on the drum cleaning agent which can be provided from authorized services. Apply this procedure
without any laundry in the product. Before starting the programme, put 1 pouch of special drum cleaning agent (if the special agent
could not be supplied, put max. 100 g of powder anti-limescale) into the main wash detergent compartment (compartment no. “2”). If the antilimescale is in tablet form, put only one tablet into the main wash compartment no. “2”. Dry the inside of the bellow with a clean piece of cloth
after the programme has come to an end.
C
¾ If more than normal amount of water and softener mixture starts to gather in the softener compartment, clean the siphon.
NOTE
¾ Repeat Drum Cleaning process in every 2 months.
¾ Use an anti-limescale suitable for the washing machines.
After every washing check that no foreign substance is left in the drum.
If the holes on the bellow shown in the figure is blocked, open the holes using a toothpick.
NOTE
C
30 / EN
¾ Foreign metal substances will cause rust stains in the drum. Clean the stains on the drum surface by using cleaning
agents for stainless steel. Never use steel wool or wire wool.
Washer-Dryer

Maintenance and cleaning
CAUTION
A
¾ Never use sponge or scrub materials. These will damage the painted and plastic surfaces.
6.3 Cleaning the air suction filter
To clean the air suction filter:
Unplug the machine.
1
1 Attach the rear of the tool supplied in the Operation Manual bag to the place on the filter cap illustrated in Fig. 1.
2 Pull the filter cap towards yourself with the help of a finger after pulling the latch leftwise with the back side of the appartus as illustrated
in Fig. 2.
3 Filter cap will come out easily.
4 Wash the filter cap.
5 Replace the filter cap and make sure that it seats well. If not seated twist the latch to the right with the help of the apparatus.
A
2
4
CAUTION
¾ Never use sponge or scrub materials. These will damage the painted and plastic surfaces.
¾ After every 50 washing and drying operation (approx. 3 months), clean the air suction filter of the machine.
¾ If the machine is operated only for drying for 10 times in a row, always perform an empty washing afterwards
by using 1 short programme.
3
5
6.4 Cleaning the body and control panel
Wipe the body of the machine with soapy water or non-corrosive mild gel detergents as necessary, and dry with a soft cloth.
Use only a soft and damp cloth to clean the control panel.
6.5 Cleaning the water intake filters
There is a filter at the end of each water intake valve at the rear of the machine and also at the end of each water intake hose where they are
connected to the tap. These filters prevent foreign substances and dirt in the water to enter the washing machine. Filters should be cleaned as
they do get dirty.
1 Close the taps.
2 Remove the nuts of the water intake hoses to access the filters on the water intake valves. Clean them with an appropriate brush. If the
filters are too dirty, take them out by means of pliers and clean them.
3 Take out the filters on the flat ends of the water intake hoses together with the gaskets and clean thoroughly under running water.
4 Replace the gaskets and filters carefully in their places and tighten the hose nuts by hand.
6.6 Draining remaining water and cleaning the pump filter
The filter system in your machine prevents solid items such as buttons, coins and fabric fibers clogging the pump impeller during discharge of
washing water. Thus, the water will be discharged without any problem and the service life of the pump will extend.
If the machine fails to drain water, the pump filter is clogged. Filter must be cleaned whenever it is clogged or in every 3 months. Water must
be drained off first to clean the pump filter.
In addition, prior to transporting the machine (e.g., when moving to another house) and in case of freezing of the water, water may have to be
drained completely.
User’s Manual
31 / EN

Maintenance and cleaning
CAUTION
¾ Foreign substances left in the pump filter may damage the machine or may cause noise problem.
A
6.6.1 In order to clean the dirty filter and discharge the water:
1. Unplug the machine to cut off the supply power.
A
2 Open the filter cap.
Press the tab on the filter cap downwards and pull the piece out towards yourself.
6.6.2 To discharge the water:
a Pull the emergency draining hose out from its seat
b Place a large container at the end of the hose. Drain the water into the container by pulling out the plug at the end of the hose. When the
container is full, block the inlet of the hose by replacing the plug. After the container is emptied, repeat the above procedure to drain the
water in the machine completely.
c When draining of water is finished, close the end by the plug again and fix the hose in its place.
d Turn the pump filter to take it out.
¾ If the product is not in use, turn the tap off, detach the supply hose and drain the water inside the machine
against any freezing possibility in the region of installation.
¾ After each use close the supply hose tap of the product.
CAUTION
¾ Temperature of the water inside the machine may rise up to 90 ºC. To avoid burning risk, cleaned the filter after
the water in the machine cools down.
32 / EN
Washer-Dryer

7 Troubleshooting
Program does not start after closing the door.
• Start / Pause / Cancel button was not pressed. >>> *Press the Start / Pause / Cancel button.
• It may be difficult to close the loading door in case of excessive loading. >>> Reduce the amount of laundry and make sure that the
loading door is closed properly..
Programme cannot be started or selected.
• Machine has switched to self protection mode due to a supply problem (line voltage, water pressure, etc.). >>> Press and hold On/
Off button for 3 seconds to reset the machine to factory settings. (See "Cancelling the programme")
Water in the machine.
• Some water might have remained in the product due to the quality control processes in the production. >>> This is not a failure;
water is not harmful to the machine.
There is water leaking from the bottom of the machine.
• Likely problems with hoses or the pump filter. >>> Be sure the seals of the water inlet hoses are securely fitted. Attach the hose to
the tap tightly.
• Pump filter might not be closed fully. >>> Check if the pump filter is completely closed.
Machine does not fill with water.
• Tap is turned off. >>> Open the taps.
• Water inlet hose is bent. >>> Correct the hose.
• Water inlet filter is clogged. >>> Clean the filter.
• The loading door is ajar. >>> Close the Loading Door.
Machine does not drain water.
• Water drain hose might be clogged or twisted. >>> Clean or flatten the hose.
• Pump filter is clogged. >>> Clean the pump filter.
Machine vibrates or makes noise.
• Machine might be standing unbalanced. >>> Adjust the feet to level the machine.
• A hard substance might have entered into the pump filter. >>> Clean the pump filter.
• Transportation safety bolts are not removed. >>> Remove the transportation safety bolts.
• Laundry quantity in the machine might be too little. >>> Add more laundry to the machine.
• Machine might be overloaded with laundry. >>> Take out some of the laundry from the machine or distribute the load by hand to
balance it homogenously in the machine.
• Machine might be leaning on a rigid item. >>> Check if the machine is not leaning on anything.
Machine stopped shortly after the programme started.
• Machine might have stopped temporarily due to low voltage. >>> It will resume running when the voltage restores to the normal
level.
Machine directly discharges the water it takes in.
• Draining hose might not be at adequate height. >>> Connect the water draining hose as described in the operation manual.
No water can be seen in the machine during washing.
• The water level is not visible from outside of the washing machine. This is not a failure.
Loading door cannot be opened.
• Door lock is activated because of the water level in the machine. >>> Drain the water by running the Pump or Spin programme.
• Machine is heating up the water or it is at the spinning cycle. >>> Wait until the programme completes.
• Child lock is engaged. Door lock will be deactivated a couple of minutes after the programme has come to an end. >>> Wait for a
couple of minutes for deactivation of the door lock.
• Loading door may be stuck because of the pressure it is subjected to. >>> Grab the handle and push and pull the loading door to
release and open it.
User’s Manual
33 / EN

Troubleshooting
Washing takes longer than the specified in the manual.(*)
• Water pressure is low. >>> Machine waits until taking in adequate amount of water to prevent poor washing quality due to the
decreased amount of water. Therefore, the washing time extends.
• Voltage might be low. >>> Washing time is prolonged to avoid poor washing results when the supply voltage is low.
• Input temperature of water might be low. >>> Required time to heat up the water extends in cold seasons. Also, washing time can
be lengthened to avoid poor washing results.
• Number of rinses and/or amount of rinse water might have increased. >>> Machine increases the amount of rinse water when good
rinsing is needed and adds an extra rinsing step if necessary.
• Excessive foam might have occurred and automatic foam absorption system might have been activated due to too much detergent
usage. >>> Use recommended amount of detergent.
Programme time does not countdown. (On models with display) (*)
• Timer may stop during water intake. >>> Timer indicator will not countdown until the machine takes in adequate amount of water.
The machine will wait until there is sufficient amount of water to avoid poor washing results due to lack of water. Timer indicator
will resume countdown after this.
• Timer may stop during heating step. >>> Timer indicator will not countdown until the machine reaches the selected temperature.
• Timer may stop during spinning step. >>> Automatic unbalanced load detection system might be activated due to the unbalanced
distribution of the laundry in the drum.
Programme time does not countdown. (*)
• There might be an imbalance of laundry in the machine. >>> Automatic unbalanced load detection system might be activated due
to the unbalanced distribution of the laundry in the drum.
Machine does not switch to spinning step. (*)
• There might be an imbalance of laundry in the machine. >>> Automatic unbalanced load detection system might be activated due
to the unbalanced distribution of the laundry in the drum.
• The machine will not spin if water is not drained completely. >>> Check the filter and the draining hose.
• Excessive foam might have occurred and automatic foam absorption system might have been activated due to too much detergent
usage. >>> Use recommended amount of detergent.
Washing performance is poor: Laundry turns gray. (**)
• Insufficient amount of detergent was used over a long period of time. >>> Use the recommended amount of detergent appropriate
for water hardness and the laundry.
• Washing was made at low temperatures for a long time over a long period of time. >>> Select the proper temperature for the
laundry to be washed.
• Insufficient amount of detergent is used with hard waters. >>> Using insufficient amount of detergent with hard water causes
the soil to stick on the cloth and this turns the cloth into gray in time. It is difficult to eliminate graying once it happens. Use the
recommended amount of detergent appropriate for water hardness and the laundry.
• Too much detergent is used. >>> Use the recommended amount of detergent appropriate for water hardness and the laundry.
Washing performance is poor: Stains persist or the laundry is not whitened. (**)
• Insufficient amount of detergent is used. >>> Use recommended amount of detergent appropriate for the laundry.
• Excessive laundry was loaded in. >>> Do not load the machine in excess. Load with amounts recommended in the "Programme
and consumption table".
• Wrong programme and temperature were selected. >>> Select the proper programme and temperature for the laundry to be
washed.
• Wrong type of detergent is used. >>> Use original detergent appropriate for the machine.
• Detergent is put in the wrong compartment. >>> Put the detergent in the correct compartment. Do not mix the bleaching agent
and the detergent with each other.
Washing performance is poor: Oily stains appeared on the laundry. (**)
• Regular drum cleaning is not applied. >>> Clean the drum regularly. For this, please see 6.2.
Washing performance is poor: Clothes smell unpleasantly. (**)
• Odours and bacteria layers are formed on the drum as a result of continuous washing at lower temperatures and/or in short
programmes. >>> Leave the detergent drawer as well as the loading door of the machine ajar after each washing. Thus, a humid
environment favorable for bacteria cannot occur in the machine.
34 / EN
Washer-Dryer

Troubleshooting
Colour of the clothes faded. (**)
• Excessive laundry was loaded in. >>> Do not load the machine in excess.
• Detergent in use is damp. >>> Keep detergents closed in an environment free of humidity and do not expose them to excessive
temperatures.
• A higher temperature is selected. >>> Select the proper programme and temperature according to the type and soiling degree of
the laundry.
It does not rinse well.
• The amount, brand and storage conditions of the detergent used are inappropriate. >>> Use a detergent appropriate for the washing
machine and your laundry. Keep detergents closed in an environment free of humidity and do not expose them to excessive
temperatures.
• Detergent is put in the wrong compartment. >>> If detergent is put in the prewash compartment although prewash cycle is not
selected, machine can take this detergent during rinsing or softener step. Put the detergent in the correct compartment.
• Pump filter is clogged. >>> Check the filter.
• Drain hose is folded. >>> Check the drain hose.
Laundry became stiff after washing. (**)
• Insufficient amount of detergent is used. >>> Using insufficient amount of detergent for the water hardness can cause the laundry
to become stiff in time. Use appropriate amount of detergent according to the water hardness.
• Detergent is put in the wrong compartment. >>> If detergent is put in the prewash compartment although prewash cycle is not
selected, machine can take this detergent during rinsing or softener step. Put the detergent in the correct compartment.
• Detergent might be mixed with the softener. >>> Do not mix the softener with detergent. Wash and clean the dispenser with hot
water.
Laundry does not smell like the softener. (**)
• Detergent is put in the wrong compartment. >>> If detergent is put in the prewash compartment although prewash cycle is not
selected, machine can take this detergent during rinsing or softener step. Wash and clean the dispenser with hot water. Put the
detergent in the correct compartment.
• Detergent might be mixed with the softener. >>> Do not mix the softener with detergent. Wash and clean the dispenser with hot
water.
Detergent residue in the detergent drawer. (**)
• Detergent is put in wet drawer. >>> Dry the detergent drawer before putting in detergent.
• Detergent has gotten damp. >>> Keep detergents closed in an environment free of humidity and do not expose them to excessive
temperatures.
• Water pressure is low. >>> Check the water pressure.
• The detergent in the main wash compartment got wet while taking in the prewash water. Holes of the detergent compartment are
blocked. >>> Check the holes and clean if they are clogged.
• There is a problem with the detergent drawer valves. >>> Call the Authorized Service Agent.
• Detergent might be mixed with the softener. >>> Do not mix the softener with detergent. Wash and clean the dispenser with hot
water.
There is detergent left on the laundry. (**)
• Excessive laundry was loaded in. >>> Do not load the machine in excess.
• Wrong programme and temperature were selected. >>> Select the proper programme and temperature for the laundry to be
washed.
• Wrong detergent was used. >>> Select the proper detergent for the laundry to be washed.
Too much foam forms in the machine. (**)
• Improper detergents for the washing machine are being used. >>> Use detergents appropriate for the washing machine.
• Excessive amount of detergent is used. >>> Use only sufficient amount of detergent.
• Detergent was stored under improper conditions. >>> Store detergent in a closed and dry location. Do not store in excessively hot
places.
• Some meshed laundry such as tulle may foam too much because of their texture. >>> Use smaller amounts of detergent for this
type of item.
• Detergent is put in the wrong compartment. >>> Put the detergent in the correct compartment.
• Softener is being taken early. >>> There may be problem in the valves or in the detergent dispenser. Call the Authorized Service
Agent.
User’s Manual
35 / EN

Troubleshooting
Foam is overflowing from the detergent drawer.
• Too much detergent might be used. >>> Mix 1 tablespoonful softener and ½ l water and pour into the main wash compartment of
the detergent drawer.
• Put detergent into the machine suitable for the programmes and maximum loads indicated in the “Programme and consumption table”.
When you use additional chemicals (stain removers, bleaches and etc), reduce the amount of detergent.
Laundry remains wet at the end of the programme. (*)
• Excessive foam might have occurred and automatic foam absorption system might have been activated due to too much detergent
usage. >>> Use recommended amount of detergent.
Drying process lasts long.
• Pores of the Air inlet filter in front of the machine might be clogged. >>> Wash the Air inlet filter with lukewarm water.
• The Air inlet filter in front of the machine might be blocked. >>> Remove everything, if any, that is blocking ventilation in front of the Air inlet
filter.
• Ventilation may be inadequate due to the very small area of installation. >>> Open the doors and windows to avoid too much increase in the
ambient temperature.
• Excessive laundry was loaded in. >>> Do not overload the Washer-Dryer.
• Laundry may not have been spun adequately. >>> Have the Washer-Dryer perform spin in a higher spin speed during washing step.
• Tap is turned off. >>> Open the taps.
Laundry remains wet at the end of drying.
• Improper programme might have been used for the laundry type >>> Select a proper programme for the type of the laundry by checking
the maintenance tags on the clothes or use time programmes additionally.
• Pores of the Air inlet filter in front of the machine might be clogged. >>> Wash the Air inlet filter with lukewarm water.
• Excessive laundry was loaded in. >>> Do not overload the Washer-Dryer.
• Laundry may not have been spun adequately. >>> Have the Washer-Dryer perform spin in a higher spin speed during washing step.
Machine does not turn on or the programme does not start.
• Power cable might not be plugged in. >>> Make sure that the power cable is plugged in.
• Programme might not be set or Start / Pause / Cancel button might not be pressed. >>> Make sure that the program has been set and the
machine is not in Pause mode.
• Child lock might be enabled. >>> Deactivate the Child Lock.
Laundry is shrunk, yellowed, felted or damaged.
• Improper programme might have been used for the laundry type >>> Select a proper programme for the type of the laundry by checking
the maintenance tags on the clothes or use time programmes additionally. Laundry not suitable for drying should not be dried.
Drying cannot be performed
• Laundry might not be dry or drying function has not been enabled. >>> Check if drying function is also selected after the selected washing
programme.
Loading door cannot be opened.
• Loading door of the machine may not be opened due to safety reasons. >>> If "wait to cool down to open...." warning is displayed, machine
will keep the loading door locked for your safety until it cools down. You can accelerate cooling by running any 10-minute drying
programme.
(*) Machine does not switch to spinning step when the laundry is not evenly distributed in the drum to prevent any damage to the machine and to its
surrounding environment. Laundry should be rearranged and re-spun.
(**) Regular drum cleaning is not applied. >>> Clean the drum regularly. See, 6.2
A
36 / EN
CAUTION
If you cannot eliminate the problem although you follow the instructions in this section, consult your dealer or the Authorized
Service Agent. Never try to repair a nonfunctional product yourself.
Washer-Dryer

COTTONS
TEMPERATURE
WASH&WEAR
COTTON
ECO
SYNTHETICS
DELICATE
WOOL
HAND
WASH
SHIRTS
RINSE
SPIN
PREWASH
EXTRA RINSE
ANTI
CREASING
FAVOURITE
ON OFF
START
PAUSE
kg
6 KG WASH &
6 KG DRY
BABYPROTECT
PLUS
SYNTHETICS
DRYING
COTTONS
DRYING
DRYING
User’s Manual
SPIN DRAIN
SUPER
SHORT
EXPRESS
DAILY
EXPRESS
END TIME
37 / EN

Mosó-Szárítógép
Használati útmutató
WDA 96143 H
HU
Dokumentum Száma=
2820524540_HU / 16-04-19.(17:23)

Ez a termék a legújabb technológiával, környezetbarát körülmények között készült.

1 Fontos útmutató a biztonságra és a környezetvédelemre vonatkozóan
Ez a fejezet olyan biztonsági utasításokat tartalmaz, melyek segítenek elkerülni a személyi sérüléseket és az anyagi károkat. Ezen utasítások
figyelmen kívül hagyása garanciavesztést von maga után.
1.1 Általános biztonsági utasítások
FIGYELMEZTETÉS
¾ A terméket csak abban az esetben használhatják 8 évesnél idősebb gyermekek és olyan személyek, akiknél
érzékszervi vagy mentális képességek nem teljes mértékben fejlődtek ki vagy nem ismerik a terméket, ha
A
A
C
1.1.1 Elektromos biztonság
B
A
A
felügyelet alatt vannak, mely megfelelő képzésben részeülnek a termék biztonságos használatát illetően. A
gyermekek nem játszhatnak a termékkel. A felhasználó által végezhető tisztítási és karbantartási feladatokat a
gyermekek csak felügyelet mellett végezhetik el.
FIGYELMEZTETÉS
¾ Soha ne helyezze a terméket szőnyegre. Ellenkező esetben a gép alja nem fog megfelelően szellőzni, melynek
hatására az elektromos részek túlmelegedhetnek. Mindez problémákat okoz a termékben.
MEGJEGYZÉS
¾ Az üzembe helyezési és javítási munkálatokat minden esetben egy Képzett Szakemberrel végeztesse el. A gyártó nem
vállal felelősséget a képzetlen személy által végzett javítási munkák következtében létrejövő károkért.
VESZÉLY
¾ Amennyiben a termék hibásan működik, ne használja addig, amíg egy Szakképzett Szakember meg
nem vizsgálta azt. Ezzel áramütésnek teszi ki magát!
¾ Soha ne mossa úgy a terméket, hogy vizet önt a felületére vagy a belsejébe! Ezzel áramütésnek teszi
ki magát!
FIGYELMEZTETÉS
¾ Amennyiben a tápkábel megsérült, a kockázatok elkerülése érdekében azt a gyártóval, a szervizzel vagy más
hozzáértő személlyel (lehetőleg villanyszerelővel), illetve az importőr által e célból kijelölt személlyel ki kell
cseréltetni.
FIGYELMEZTETÉS
¾ Ha nem használja, húzza ki a készülék dugaszát az aljzatból.
¾ Nedves kézzel soha ne érintse meg a csatlakozót! Az áramtalanítást soha ne a zsinór húzásával végezze, mindig
csak a csatlakozót húzza ki.
¾ A terméket üzembe helyezés, karbantartás, tisztítás vagy javítási munkálatok alatt mindig húzza ki a konnektorból.
¾ Hosszabbítók és többdugaszos aljazatok segítségével ne csatlakoztassa a készüléket.
C
40 / HU
MEGJEGYZÉS
¾ A terméket úgy tervezték, hogy az áramszünetet követően ne kapcsoljon vissza automatikusan. Amennyiben meg
szeretne szakítani egy programot, tekintse meg a "Program megszakítása" című fejezetet.
Mosó-Szárítógép

Fontos útmutató a biztonságra és a környezetvédelemre vonatkozóan
1.1.2 Termékbiztonság
VESZÉLY
A
A
C
1.1.3 Szárítógépre vonatkozó figyelmeztetések
A
A
¾ A betöltőajtót soha ne nyissa ki, illetve ne vegye ki a szűrőt, ha a dob belsejében még víz van. Ellenkező
esetben a víz kifolyhat és a forró víz megégetheti.
FIGYELMEZTETÉS
¾ A vízforrásokat és a leeresztő tömlőket biztosan kell rögzíteni. Ellenkező esetben szivárgás jöhet létre.
MEGJEGYZÉS
¾ A lezárt betöltőajtót soha ne próbálja meg erővel kinyitni. A betöltőajtó pár perccel a mosási program végét követően kinyílik.
Ha a program végét követően a gép még nem hűlt le eléggé, a betöltőajtó nem nyílik ki. Egy 10 perces szárítóprogram
lefuttatásával a gép gyorsabban lehűthető vagy várja meg, amíg magától lehűl. A lezárt betöltőajtót soha ne próbálja meg
erővel kinyitni. Az ajtó és a zárszerkezet megsérülhet.
¾ Azon a helyen, ahol a termék beszerelésre kerül, nem lehet olyan zárható, toló- vagy forgóajtó, amely akadályozhatja a
betöltőajtó kinyílását.
¾ Minden esetben tartsa be a ruha címkéjén és a mosószer csomagolásán feltüntetett utasításokat.
¾ Kizárólag mosógépekhez használatos mosószereket, öblítőszereket és adalékanyagokat használjon.
¾ A terméket ne helyezze el, illetve ne hagyja olyan helyen, ahol az ki van téve az időjárási viszonyoknak.
¾ A vezérlőpanelt nem szabad babrálni.
VESZÉLY
¾ Mivel a korábban benzinnel/dízelolajjal, száraztisztítós oldószerekkel vagy egyéb gyúlékony és
robbanásveszélyes anyagokkal tisztított, mosott, szennyezett vagy foltos ruhák tűzveszélyes vagy
robbanásveszélyes gőzöket bocsátanak ki, azokat tilos a gépben szárítani. Mindez tűzveszélyes lehet.
¾ A folyékony étolajjal, acetonnal, alkohollal, benzinnel, gázolajjal, folttisztítóval, terpentinnel, viasszal
vagy viasztisztítóval szennyezett ruhákat szárítás előtt bő mosószeres forró vízben ki kell mosni.
Mindez tűzveszélyes lehet.
¾ Habszivaccsal (latex habbal) töltött ruhák vagy párnák, zuhanysapkák, vízlepergető textíliák, gumi
töltetű anyagok és habszivacs betétek a gépben nem száríthatók. Mindez tűzveszélyes lehet.
¾ A gépben mosás közben használt mosólabdák, mosószer-lerakodások, szennyestartók vagy -labdák
a szárítás során megolvadhatnak. Szárítás esetén ne használja ezeket. Mindez tűzveszélyes lehet.
¾ Ha ipari vegyszereket használ a tisztításhoz, soha ne használja a szárítás funkciót. Mindez tűzveszélyes
lehet.
VESZÉLY
¾ Szárítást követően ne nyúljon puszta kézzel az ajtóüveghez. Az égésveszélyt okozhat.
¾ Annak érdekében, hogy a ruhák olyan hőmérsékleten legyenek, ami még nem károsítja őket, utolsó
lépésként hűtésre kerül sor. Ha a hűtés befejeződése előtt nyitja ki a betöltőajtót, forró gőznek teszi ki
magát. Ez égésveszéllyel jár.
¾ A szárítóprogram megszakítása esetén (programtörlés vagy áramszünet) a gépben lévő ruha forró
lehet. Legyen óvatos!
FIGYELMEZTETÉS
¾ Ne állítsa le a gépet mielőtt a szárítóprogram befejeződne. Ha a gépet leállította, azonnal szedje ki belőle az
összes ruhát és teregesse ki őket egy megfelelő helyre, ahol lehűlhetnek.
¾ Ne szárítson a gépben tüll függönyöket, szőnyegeket és takarókat.
¾ A termék 0°C és +35°C közötti környezeti hőmérsékleten üzemeltethető.
¾ A működés szempontjából a 15°C és +25°C közötti környezeti hőmérséklet az ideális.
¾ Ügyeljen arra, hogy háziállatok ne másszanak be a gépbe. Használat előtt ellenőrizze a gép belsejét.
¾ Ne végezzen szárítást úgy, hogy túl sok ruha van a gépben. Tartsa be a szárításra vonatkozóan meghatározott
maximális töltőmennyiséget.
Használati útmutató
41 / HU

Fontos útmutató a biztonságra és a környezetvédelemre vonatkozóan
FIGYELMEZTETÉS
¾ Bőrből készült vagy bőrt tartalmazó (pl. farmeren lévő bőrbetétek) ruházat a gépben nem szárítható. A bőr
elszíneződést okozhat.
¾ A biztonsági előírásokban szereplő tájékoztató alapján ki nem küszöbölhető meghibásodás esetén kapcsolja ki a
gépet, húzza ki és forduljon szervizhez.
¾ A mosó-szárítógépben lehetséges csak mosni vagy csak szárítania ruhákat, illetve mindkettő. Ha a ruhák csak
nedvesek, a szárítás nem használható hosszú ideig. Ha a gépet csak szárításra használja, az egyes 15 perces
A
C
1.2 Rendeltetési cél
C
1.3 Gyermekek biztonsága
A
1.4 WEEE-irányelv betartása
programok után a rövid mosás programok valamelyikét le kell futtatni.
¾ Gépbe rakás előtt ellenőrizze a ruhákat, nehogy pl. a zsebekben maradt öngyújtó, érmék, fémtárgyak, kitűzők stb.
keveredjenek közéjük.
¾ Fémből készült tartozékokkal ellátott alsónemű a gépben nem szárítható. A szárítás során e fémtartozékok
meglazulhatnak és eltörhetnek, így kárt tehetnek a ruhákban.
¾ Ne szárítson a gépben nagy méretű darabokat, például paplant. Ellenkező esetben a mosandó károsodást
szenvedhet.
MEGJEGYZÉS
¾ Mosatlan ruhákat ne szárítson a gépben.
¾ Gyártói ajánlás hiányában ne használjon lágyítószereket vagy antisztatizáló termékeket a gépben.
¾ Lágyítószerek és más hasonló termékek használata esetén kövesse azok gyártójának útmutatásait.
¾ Kényes, pl. selyemből vagy gyapjúból készült ruhákat ne szárítson a gépben. Ellenkező esetben a gyapjúnemű összemehet
és kisebb lesz, a többi kényes ruha pedig károsodhat.
¾ Szárítás és mosás előtt ellenőrizze a ruhacímkén található piktogramokat.
MEGJEGYZÉS
¾ A terméket otthoni használatra tervezték. Nem használható ipari célokra és nem használható a rendeltetésszerű
használattól eltérő feladatokhoz.
¾ A terméket a megfelelő jelöléssel ellátott textilneműk mosására, öblítésére és szárítására használja.
¾ A gyártó nem vállal felelősséget a helytelen használatból vagy szállításból eredő károkért.
¾ A berendezés élettartama 10 év. Ez időre biztosítani fogjuk az eredeti cserealkatrészeket annak érdekében, hogy a
berendezés hiba nélkül üzemelhessen.
FIGYELMEZTETÉS
¾ 3 évesnél kisebb gyereket ne hagyjon felügyelet nélkül a készülék közelében.
¾ A csomagolóanyagok veszélyesek a gyermekek számára. Olyan helyen tárolja őket, ahol a gyermekek nem
érhetik el.
¾ Az elektromos termékek veszélyesek a gyermekek számára. Ha a gép működik, a gyermekeket ne engedje a
közelébe! Ne hagyja, hogy a gyermekek a géppel játszanak! Annak érdekében, hogy a gyermekek ne tudjanak
beavatkozni a gép működésébe, használja a gyerekzárat.
¾ Amennyiben elhagyja a termet, ahol a gép található, soha ne felejtse el bezárni a készülék ajtaját.
¾ A mosószereket és az egyéb anyagokat biztonságos helyen, a gyermekek számára nem elérhető helyen, pl.
egy zárható mosószeres szekrényben tárolja.
¾ A készülék a az elektromos készülékekre vonatkozó szelektív hulladékgyűjtő szimbólummal van
ellátva. (WEEE).
¾ Ez azt jelenti, hogy a készüléket a 2002/96/EC európai direktíváknak megfelelően kell eltávolítani,
kidobni, a környezet megóvása érdekében. További információért keresse fel a helyi illetékes szerveket.
¾ Azok a készülékek, amelyeket nem a szelektív hulladékgyűjtésnek megfelelően távolít el, dob ki,
szennyezi a környezetet, valamint az emberi egészségre is ártalmas lehet.
1.5 Csomagolási információk
• A termék csomagolóanyagai a Nemzeti Környezetvédelmi Jogszabályoknak megfelelően újrahasznosítható anyagokból készülnek. A
termék csomagolását ne a háztartási vagy egyéb hulladékkal együtt dobja ki. Vigye el azokat a helyi hatóságok által e célból kijelölt
begyűjtőhelyek egyikére.
42 / HU
Mosó-Szárítógép

2 Műszaki adatok
Modellek
Maximális száraz ruha kapacitás (kg)
Maximum száraz ruha kapacitás (kg) Szárítás
Magasság (cm)
Szélesség (cm)
Mélység (cm)
Nettó súly (±4 kg)
Elektromos bemenet (V/Hz)
Teljes áram (A)
Teljes teljesítmény
Centrifugálási sebesség (max. ford./perc)
WDA 96143 H
9
6
84
60
63
87
230 V / 50 Hz
10
2200
1400
C
Használati útmutató
MEGJEGYZÉS
¾ A változtatás jogát fenntartjuk!
¾ A jelen használati útmutatóban található ábrák csupán illusztrációk, így előfordulhat, hogy azok nem egyeznek teljesen
az adott termékkel.
¾ A gép címkéin vagy a dokumentumokon feltűntetett értékek laboratóriumi körülmények között kerültek meghatározásra,
a vonatkozó szabványok szem előtt tartása mellett. A működési körülményektől függően az értékek eltérőek lehetnek.
43 / HU

3 Üzembe helyezés
A termék beszerelésével kapcsolatban kérdezze meg a legközelebbi Szervizt. A termék üzembe helyezése előtt és mielőtt kihívná a szervizt,
olvassa el a használati útmutatót és ellenőrizze, hogy az áramforrás, a csapvíz és a vízleeresztő rendszer megfelelő-e. Ellenkező esetben, a
szükséges teendők elvégzéséhez hívjon szerelőt.
VESZÉLY
B
A
A
3.1 Megfelelő helyszín az üzembe helyezéshez
• A gépet szilárd talajon helyezze el. Ne helyezze a gépet hosszú, bolyhos szőnyegre vagy más, hasonló felületre.
• Soha ne helyezze a készüléket a tápkábelre.
• Soha ne helyezze a készüléket olyan helyre, ahol a környezeti hőmérséklet 0ºC alá csökkenhet. (Lásd: Szárítással kapcsolatos
figyelmeztetések)
• A terméket úgy helyezze el, hogy a bútorok szélétől legalább 1,5 cm távolságra legyen.
• Azon a helyen, ahol a termék beszerelésre kerül, nem lehet olyan zárható, toló- vagy forgóajtó, amely akadályozhatja a betöltőajtó
kinyílását.
• A gépet jól szellőző és pormentes környezetben üzemeltesse.
3.2 A csomagolás eltávolítása
¾ Az üzembe helyezést és a termék elektromos csatlakoztatását szervizzel végeztesse el. A gyártó nem
vállal felelősséget a képzetlen személy által végzett javítási munkák következtében létrejövő károkért.
VESZÉLY
¾ Termék A gép súlyát egy ember nem bírja el.
FIGYELMEZTETÉS
¾ A beszerelést megelőzően ellenőrizze a gépet, hogy nincsenek-e rajta sérülések. Amennyiben vannak, ne
szerelje be a készüléket. A sérült készülékek veszélyesek.
FIGYELMEZTETÉS
¾ A beszerelés helyén található elektromos hálózat, csapvíz- és szennyvízcsatornák előkészítése minden esetben a
vásárló felelőssége.
¾ Biztosítsa, hogy az üzembe helyezéskor vagy a tisztítási műveletek során végzett mozgatáskor a vízbevezető és a
leeresztő csövek, továbbá a tápkábel soha ne hajoljanak meg és törjenek meg.
A csomagolóanyag eltávolításához billentse hátra a csomagot. A csomagolást a szalag meghúzásával tudja leválasztani.
VESZÉLY
¾ A termék súlyos. A csomagolást az ábrán megadottak szerint távolítsa el.
¾ Ügyeljen arra, hogy a keze e közben ne szoruljon a gép alá.
3.3 A szállításhoz használt zárak eltávolítása
FIGYELMEZTETÉS
¾ A csomagolás eltávolítása előtt soha ne távolítsa el a szállításhoz használt zárakat.
A
44 / HU
¾ A gép használata előtt távolítsa el a szállításhoz használt biztonsági csavarokat. Ellenkező esetben a gép
megsérülhet.
1 2 3
Mosó-Szárítógép

Üzembe helyezés
1 A Használati útmutatóhoz adott csomagban lévő szerszámmal lazítsa meg az összes csavart, hogy azok szabadon mozogjanak. (C)
2 Óvatos csavarásokkal távolítsa el őket.
3 A műanyag fedőket (a használati útmutatóval együtt a csomagban található) erősítse a panel hátulján lévő csövekhez. (P)
MEGJEGYZÉS
C
3.4 Használat egy síkban a munkaasztallal
A
C
3.5 Csatlakoztassa a vízellátást
C
A
¾ A szállításhoz használt biztonsági csavarokat tartsa biztonságos helyen arra az esetre, ha a gépet ismét mozgatni kellene.
¾ A megfelelően rögzített biztonsági csavarok nélkül soha ne kezdjen bele a gép szállításába!
65,5 cm
15 cm
15 cm
20 cm
20 cm
86 cm
60 cm
60 cm
66cm
1,4 cm
59,5 cm
84,0 cm
FIGYELMEZTETÉS
¾ A gép soha nem használható a fedőlap nélkül.
¾ Ha a mosó-szárítógépet munkaasztal alá helyezi, a gép elejét szekrényajtó soha ne akadályozza.
¾ Munkaasztal alatt elhelyezett mosó-szárítógép esetén a szekrény bal és jobb oldalába légszellőző lyukakat
kell fúrni.
MEGJEGYZÉS
¾ Kövesse a fenti méreteket, ha a terméket munkaasztal alatt helyezi üzembe. A gép teljesítménye megváltozásának
elkerülése érdekében a méretek betartása elengedhetetlen.
¾ A mosó-szárítógép akkor helyezhető el munkaasztal alatt, ha annak magassága ezt lehetővé teszi.
¾ Ha a terméket munkaasztal alatt vagy egy szekrénybe illesztve helyezi el, akkor az oldalak között, illetve a fal és a gép
hátoldala között legalább 3 cm helyet szabadon kell hagyni.
MEGJEGYZÉS
¾ A gép üzemeltetéséhez a víznyomásnak 1 és 10 bar (0.1 – 1 MPa) közt kell lennie. A gép megfelelő működéséhez
a teljesen kinyitott csapból 10-80 liter víznek kell átfolynia percenként. Magasabb víznyomás esetén iktasson be
nyomáscsökkentő szelepet.
¾ Amennyiben dupla vízbemenetes (hideg és meleg) terméket egy vízbemenetesként (hideg) kíván használni, akkor a
termék használatát megelőzően csatlakoztassa a csomagban található vakdugót a melegvizes bemenethez. (Kizárólag
dugóval ellátott termékekre vonatkozik.)
FIGYELMEZTETÉS
¾ Egyetlen vízbeömlővel rendelkező modellek nem csatlakoztathatók a melegvizes csaphoz. Ilyen esetekben a
ruhák megsérülhetnek, de az is előfordulhat, hogy a gép átkapcsol biztonsági módba és nem indul el.
¾ Az új termékhez ne használjon régi vagy használt csöveket. Az ugyanis szennyeződést okozhat a mosott ruhán.
1 2 3
1 A csomagban található speciális tömlőket erősítse a gépen található vízbeömlőkhöz. Piros tömlő (bal oldal) (max. 90 ºC) a melegvízhez,
kék tömlő (jobb oldal) (max. 25 ºC) a hidegvízhez.
Használati útmutató
45 / HU

Üzembe helyezés
FIGYELMEZTETÉS
A
2 Húzza meg kézzel az anyákat. Az anyák megszorításához soha ne használjon szerszámot.
3 A csatlakoztatás után nyissa ki teljesen a csapot és ellenőrizze, észlel-e szivárgást a csatlakozási pontokon. Amennyiben szivárgást talál,
zárja el a csapot és távolítsa el az anyát. A tömítő ellenőrzését követően gondosan erősítse vissza az anyát. Az esetleges vízszivárgás
megelőzése érdekében, ha a gép használaton kívül van, tartsa zárva a csapokat.
3.6 Vízlevezető csatornához való csatlakoztatás
• A vízleeresztő cső végét csatlakoztassa közvetlenül a szennyvíz-lefolyóhoz, mosdókagylóhoz vagy a kádhoz.
A
¾ Üzembe helyezéskor győződjön meg róla, hogy a hideg- és melegvizes csatlakoztatások megfelelőek-e.
Máskülönben a mosás végeztével a ruhák forrók maradhatnak, illetve elkophatnak.
FIGYELMEZTETÉS
¾ Ha a vízleeresztés közben a tömlő kikerül az illesztés helyéről, a lakást elöntheti a víz. Ezen felül, a magas
mosási hőmérsékletek miatt a forrázás kockázata is fennáll! Az ilyen helyzetek elkerülése érdekében, továbbá
az egyetlenes vízfelvétel és leeresztés biztosítása érdekében a leeresztő tömlő végét megfelelően szorítsa
meg, hogy ne tudjon kicsúszni a helyéről.
90 cm
• A tömlőt legalább 40, maximum 100 cm magasan kell csatlakoztatni.
• Amennyiben a tömlőt kevesebb, mint 40 centi választja el a padlótól, akkor a vízelvezetés nehézzé válik, a mosott ruhák pedig túlságosan
vizesek maradhatnak. Ennek következtében, tartsa be az ábrán megadott magasságokat.
• Annak elkerülése érdekében, hogy a szennyes víz visszafolyjon a gépbe, továbbá a könnyebb leeresztés érdekében soha ne merítse bele
a tömlőt a piszkos vízbe, illetve ne nyomja 15 cm-nél mélyebbre a leeresztő csonkba. Amennyiben a tömlő ennél hosszabb, vágja vissza.
• Ügyeljen arra, hogy a tömlő vége ne görbüljön meg, ne lépjen rá és a tömlő ne szoruljon a lefolyó és a gép közé.
• Amennyiben a tömlő hossza túl rövid, csatlakoztasson hozzá egy eredeti hosszabbító tömlőt. A tömlő hossza soha nem haladhatja
meg a 3.2 métert. A vízszivárgás elkerülése érdekében a hosszabbító cső és a gép lefolyócsöve közötti csatlakozást megfelelően kell
megszorítani, hogy az ne jöjjön szét, és ne szivárogjon.
90
40
40
90 cm
3.7 A lábak beállítása
1
2
3
46 / HU
Mosó-Szárítógép

Üzembe helyezés
FIGYELMEZTETÉS
¾ A termék csendesebb és rázkódásmentes működése érdekében annak vízszintesen, lábain megfelelően
A
1 A Használati útmutatóhoz adott csomagban található szerszámmal a nyíl irányában lazítsa meg a lábon lévő csavarokat.
2 Állítsa be a lábat úgy, hogy a termék vízszintesen és stabilan álljon. Az óramutató járásával ellentétes irányban csavarva a láb lefelé
mozgatható, illetve felfelé, ha az óramutató járása irányába tekeri azt.
3 A szállított szerszám segítségével, a nyíl irányában szorítsa meg ismét az összes csavart. Az óramutató járásával ellentétes irányban
csavarva az anyák felfelé mozgathatók, illetve lefelé, ha az óramutató járása irányában csavarja azokat.
3.8 Elektromos csatlakoztatás
A terméket egy 16A-es biztosítékkal védett, földelt konnektorhoz csatlakoztassa. Cégünk nem vállal felelősséget a termék (az országában
érvényes jogszabályoknak megfelelő) földelés nélkül használatából eredő károkért.
• A csatlakozásnak meg kell felelnie az adott ország nemzeti előírásainak.
• A tápkábel dugaszának könnyen elérhető helyen kell lennie.
• Ha a biztosíték vagy a megszakító 16 Amperesnél kisebb, szakképzett villanyszerelővel szereltessen be 16 Amperes biztosítékot, illetve
megszakítót.
• A "Műszaki adatok" fejezetben meghatározott feszültségnek egyeznie kell a hálózati feszültséggel.
kiegyensúlyozva kell állnia. A lábak beállításával egyensúlyozza ki a gépet! Ellenkező esetben a gép
elmozdulhat a helyéről, ami károkat okozhat.
VESZÉLY
B
3.9 A termék szállítása
1 A szállítás előtt húzza ki a készüléket a konnektorból.
2 Távolítsa el a leeresztő és a vízforrás csatlakozásait.
3 Engedjen le minden, a termékben maradt vizet. Lásd az 6.6. fejezetet.
4 Az eltávolítási folyamat sorrendjével ellentétes sorrendben helyezze vissza a szállításhoz használt biztonsági csavarokat; lásd a 3.3.
fejezetet.
A
C
¾ A sérült tápkábeleket Képzett Szakemberrel cseréltesse ki.
VESZÉLY
¾ A gép súlyát egy ember nem bírja el.
¾ A termék súlyos; a lépcsőn két embernek kell rendkívül óvatosan vinnie. Ha a gép ráesik valakire, az
fogyatékosságot okozhat.
FIGYELMEZTETÉS
¾ A csomagolóanyagok veszélyesek a gyermekek számára. Olyan helyen tárolja őket, ahol a gyermekek nem
érhetik el.
MEGJEGYZÉS
¾ A megfelelően rögzített biztonsági csavarok nélkül soha ne kezdjen bele a gép szállításába!
Használati útmutató
47 / HU

4 Előkészítés
4.1 A szennyes ruha szétválogatása
• A program kiválasztása előtt válogassa ki a ruhákat az anyag, szín, és a megengedett vízhőmérséklet értékek alapján.
• Minden esetben tartsa be a ruhák címkéjén feltüntetett utasításokat.
4.2 A szennyes ruhák előkészítése mosásra
• A fémrészeket is tartalmazó ruhadarabok (például drótozott melltartók, övcsattok és fémgombok) károsíthatják a gépet. A mosás előtt
távolítsa el a fém tartozékokat, illetve mosózsákban vagy pamut párnahuzatban mossa a ruhákat. A szárítás során az ilyen ruhák rendkívül
felmelegedhetnek és károsodhatnak. Ezért az ilyen ruhákat ne szárítsa gépben.
• A kisméretű ruhákat, pl. gyermekzoknikat és nejlonzoknikat pamut mosózsákban vagy pamut párnahuzatban mossa.
• A függönyöket összenyomás nélkül helyezze a gépbe. Távolítsa el a függöny csipeszeit. Tüll függönyöket ne szárítson a gépben.
• Húzza fel a zipzárakat, varrja fel a meglazult gombokat és javítsa meg a szakadásokat.
• A „gépben mosható” vagy a „kézzel mosható” termékeket csak a megfelelő programmal mossa. Az ilyen ruhákat ne szárítsa a gépben,
akassza fel vagy teregesse ki őket.
• Ne mossa együtt a színes és fehér ruhákat. Az új, sötét ruhák sok festéket kiereszthetnek magukból. Ezért fontos, hogy azokat külön
mossa.
• Minden esetben gépi mosáshoz használható festékeket és vízkőmentesítőket használjon. Mindig kövesse a csomagoláson látható
utasításokat.
MEGJEGYZÉS
¾ Az olyan szennyest, melyen liszt, mészkőpor, tejpor, stb. található, a mosógépbe történő behelyezés előtt alaposan rázza ki.
Az ilyen porok idővel összegyűlhetnek a mosógép belső alkatrészeiben, és kárt tehetnek a gépben.
¾ Az angora gyapjúból készült ruhákat mosás előtt tegye be pár órára a fagyasztóba. Ily módon megóvhatja ezt a kényes
C
4.3 Teendők az energiatakarékosság jegyében
A következő információk elősegítik a termék gazdaságos és energiatakarékos használatát.
• A terméket minden esetben a program által megengedett legnagyobb kapacitással használja, de soha ne helyezzen be ennél több ruhát.
Lásd: „Program és fogyasztási táblázat".
• Mindig kövesse a mosószer csomagolásán feltüntetett utasításokat.
• A kismértékben szennyezett ruhákat mindig alacsony hőmérsékleten mossa.
• Kismennyiségű, kismértékben szennyezett ruhákhoz használjon gyorsított programokat.
• A kismértékben szennyezett ruhákhoz ne használjon előmosást és magas mosási hőmérsékletet.
• Ha a ruhákat szárítani szeretné, akkor a mosás során válassza a leggyorsabb centrifugálási sebességet.
• A mosószer csomagolásán javasolt mennyiségnél soha ne használjon több mosószert.
4.4 Első használat
A termék használatának megkezdése előtt győződjön meg róla, hogy a „Fontos biztonsági és környezetvédelmi utasítások" és az „Üzembe
helyezés" című fejezetekben leírt útmutató szerint elvégezte-e az összes előkészítő műveletet.
ruhaneműt.
¾ A nadrágokat és a kényes ruhákat mossa kifordítva.
¾ A makacs foltokat kezelje megfelelően a mosás előtt. Ha nem biztos a dolgában, kérjen tanácsot egy száraztisztítótól.
¾ A mosás előtt szedjen ki minden tárgyat a ruhák zsebéből, pl. pénzérme, toll, gémkapcsok, majd fordítsa ki a zsebeket. Az
ilyen tárgyak kárt tehetnek a termékben, illetve zajt okozhatnak mosás közben.
Az első mosás megkezdése előtt végezze el a Dobtisztító programot. Ha az Ön gépe esetében nincs ilyen program, kövesse a 6.2 pontban
ismertetett eljárást.
MEGJEGYZÉS
C
¾ Kizárólag mosógépekhez használható vízkőmentesítőt használjon.
¾ A minőség-ellenőrzési folyamatot követően víz maradt a gépben. Ez nincs káros hatással a termékre.
4.5 Helyes ruhamennyiség
A maximálisan mosható ruhamennyiség a szennyes jellegétől, a szennyezettség fokától és a használni kívánt mosási programtól függ.
A gép a belehelyezett ruha súlyának megfelelő vizet tölt be automatikusan.
48 / HU
Mosó-Szárítógép

Előkészítés
VESZÉLY
¾ Tartsa be a “Program és fogyasztási táblázatban” közölt információkat. Túlterhelés esetén a gép
B
Szennyes típusa Tömeg (g) Szennyes típusa Tömeg (g)
Fürdőköpeny 1200 Kéztörlő 100
Zsebkendő 100 Köntös 200
Pehelypaplan-huzat 700 Alsónemű 100
Ágytakaró 500 Férfi kezeslábas 600
Párnahuzat 200 Férfi ing 200
Asztalterítő 250 Férfi pizsama 500
Törölköző 200 Blúz 100
4.6 A szennyes betöltése
1 Nyissa ki az ajtót.
2 A ruhaneműt lazán helyezze be a gépbe.
3 Nyomja be az ajtót, míg egy kattanó hangot nem hall. Győződjön meg róla, hogy semmi sem csípődött be az ajtónál.
C
A
4.7 A mosószer és az öblítőszer használata
C
mosóteljesítménye nagymértékben lecsökken. Ez rezgést és erős zajt okozhat. A megfelelő szárítási
teljesítmény érdekében ne szárítson a megadott mennyiségnél több ruhát.
MEGJEGYZÉS
¾ Az ajtó a program működése közben bezáródik. Az ajtó csak a program befejeztével nyitható. A betöltőajtó addig nem
nyílik ki amíg a hőmérséklet nem mérséklődik, illetve ha a program végén a gép belseje még túl forró.
FIGYELMEZTETÉS
¾ A szennyes rossz behelyezése rezgést és erős zajt okozhat a gép belsejében.
MEGJEGYZÉS
¾ Mosószer, öblítő, keményítő, ruhafesték, fehérítő vagy vízkő eltávolító használata esetén alaposan olvassa el a
csomagoláson található utasításokat és a javasolt mennyiségeket használja. Használjon mérőpoharat, ha van.
4.7.1 Mosószeradagoló fiók
A mosószeradagoló fiók három egységből áll:
1
2
3
– (1) előmosáshoz
– (2) főmosáshoz
– (3) öblítéshez
– (*) az öblítő adagolójában egy szifon is található.
4.7.2 Mosószer, öblítő és egyéb tisztítószerek
• A program kezdete előtt öntsön a gépbe mosószert és öblítőt.
• A program futása alatt soha ne hagyja nyitva a mosószeradagoló fiókot!
• Amennyiben előmosás nélküli programot használ, soha ne öntsön mosószert az előmosó rekeszbe (I "1").
• Előmosást alkalmazó program használata során, soha ne öntsön folyékony mosószert az előmosó rekeszbe (I "1").
• Mosószeres zacskó vagy mosólabda használata esetén soha ne válasszon előmosást használó programot. A mosószeres zacskót vagy
a mosólabdát közvetlenül a mosandó ruha közé helyezze.
Használati útmutató
49 / HU

Előkészítés
• Folyékony mosószer használata esetén soha ne feledje el betenni folyékony mosószer kupakot a fő mosószeradagolóba (II "2").
• A gép szárítási programja alatt ne adagoljon mosószereket (folyékony mosószert, öblítőt stb.).
4.7.3 A mosószer fajtájának megválasztása
Az alkalmazandó mosószer fajtája a ruhanemű jellegétől és színétől függ.
• Színes és fehér ruhaneműhöz más-más mosószert használjon.
• A kényes ruhákat speciális, kizárólag kényes ruhákhoz használható mosószerrel mossa (pl. folyékony mosószer, gyapjúsampon, stb.).
• Színes ruhák és paplan mosásakor folyékony mosószert célszerű használni.
• Gyapjú ruhákat speciális gyapjú mosószerrel mosson.
FIGYELMEZTETÉS
A
4.7.4 A mosószer mennyiségének beállítása
A használandó mosószer mennyisége attól függ, hogy mennyi ruhát kell kimosni, mennyire koszosak a ruhák, illetve milyen a vízkeménység.
• Ne használjon a csomagoláson feltüntetettet mennyiségnél több mosószert, így elkerülheti a túlzott mértékű habzást, emellett spórolhat
és a környezetet is kíméli.
• Kisebb mennyiségű és kevésbé koszos ruhákhoz kevesebb mosószert használjon.
4.7.5 Öblítő használata
Öntse az öblítőt a mosószer adagoló öblítő részébe.
• Az öblítőt soha ne töltse a (>max<) szint fölé.
• Ha az öblítő besűrűsödött, hígítsa fel vízzel, mielőtt a mosószeradagoló fiókba töltené.
4.7.6 Folyékony mosószerek használata
¾ Kizárólag gépi mosáshoz kifejlesztett mosószert használjon.
¾ Soha ne használjon szappanport.
4.7.6.1 Amennyiben a termékhez folyékonymosószer-tartó kupak is tartozik
• Helyezze be a folyékony mosószer tartó tartályt a „2” számú rekeszbe.
• Ha a folyékony mosószer besűrűsödött, hígítsa fel vízzel mielőtt a rekeszbe töltené.
4.7.6.2 Amennyiben a termékhez nem tartozik folyékonymosószer-tartó kupak
• Ne használjon folyékony mosószert olyan programok esetén, melyek előmosást használnak.
• Amennyiben a Késleltetett Indítás funkciót használja a folyékony mosószer foltossá teheti a ruhákat. Amennyiben Késleltetett Indítást
kíván használni, soha ne használjon folyékony mosószert.
4.7.7 Gél és mosószeres tabletta használata
• Amennyiben a gél folyékony halmazállapotú és a mosógép nem tartalmaz speciális folyékony mosószertartó kupakot, a gélt az első
vízbeszívás során öntse fő mosószertartó rekeszbe. Amennyiben a mosógép folyékony mosószertartó kupakot is tartalmaz, a mosószert
ebbe a kupakba öntse a program elindítása előtt.
• Amennyiben a gél nem folyékony halmazállapotú vagy kapszula alakú folyékony tablettát használ, ezeket közvetlenül a dobba kell
behelyeznie a mosás megkezdése előtt.
• A tablettás mosószert a mosógép fő mosórészébe (II. rekesz), vagy közvetlenül a dobba kell tenni.
MEGJEGYZÉS
¾ Előfordulhat, hogy a rekeszbe helyezett tabletták egy része a rekeszben marad. Ha ilyet tapasztal, a következő mosások
C
4.7.8 Keményítő használata
• A folyékony keményítőt, a por alapú keményítőt vagy a ruhafestéket az öblítő rekeszébe töltse.
• Egy mosási menetben ne használjon öblítőt és keményítőt is.
• Keményítő használata után tisztítsa meg a mosógép belsejét egy tiszta, nedves ronggyal.
50 / HU
alkalmával helyezze a tablettát a szennyes közé, majd csukja be a dob alsó részét.
¾ Tablettát vagy gélt csak előmosás nélküli programok esetén használjon.
Mosó-Szárítógép

Előkészítés
4.7.9 Fehérítők használata
• Válasszon ki egy előmosást is tartalmazó programot, majd az előmosás előtt öntsön a gépbe fehérítőszert. Ne tegyen mosószert az
előmosás rekeszbe. Alternatív megoldásként válasszon ki egy extra öblítéssel futó programot és amint az első öblítéses lépés megjelenik
a kijelzőn, a mosószertartó fiók egyik üres rekeszén keresztül adagolja a fehérítőszert, valamint ugyanebben a rekeszben adjon hozzá 1
pohár vizet.
• Soha ne keverje össze a mosószert és a fehérítőt.
• A bőrirritáció elkerülése érdekében nagyon kevés fehérítőszert használjon (kb. 50 ml) és öblítse ki alaposan a ruhákat. A fehérítőszert
soha ne öntse közvetlenül a ruhákra, és soha ne használja színes ruhákon.
• Oxigén alapú fehérítők esetén alacsony hőmérsékletű programot válasszon.
• Az oxigén alapú fehérítőszerek a mosószerekkel együtt is használhatók; igaz, ha a viszkozitása nem egyezik meg a mosószer
viszkozitásával, abban az esetben előbb a mosószert öntse a "2" rekeszbe, és várja meg, amíg a gép a vízbeszívás közben beviszi a
mosószert. A fehérítőt ugyanazon a rekeszen keresztül, ugyanazon vízbeszívás során adja hozzá.
4.7.10 Vízkőmentesítő használata
• Minden esetben kizárólag mosógéphez készült vízkőmentesítőszert használjon.
4.8 Tippek a hatékony mosáshoz
Ruhák
(A javasolt
hőmérséklettartományt a
szennyezettségi szint határozza
meg: hideg -40 ºC)
A színes és sötét ruhákhoz
folyékony mosószerek
használhatók az erősen
szennyezett ruhákhoz javasolt
mennyiségben.
A színes és sötét ruhákhoz
folyékony mosószerek
használhatók a normál szinten
szennyezett ruhákhoz javasolt
mennyiségben.
A színes és sötét ruhákhoz
folyékony mosószerek
használhatók a kismértékben
szennyezett ruhákhoz javasolt
mennyiségben.
Kényes/pamut/
selyem ruhák
(A javasolt
hőmérséklettartományt
a szennyezettségi szint
határozza meg: hideg -30 ºC)
Lehetőleg a kényes ruhákhoz
gyártott folyékony mosószert
használjon. A pamut és
selyem ruhákat speciálisan
ilyen anyagokhoz készített
mosószerekkel mossa.
Lehetőleg a kényes ruhákhoz
gyártott folyékony mosószert
használjon. A pamut és
selyem ruhákat speciálisan
ilyen anyagokhoz készített
mosószerekkel mossa.
Lehetőleg a kényes ruhákhoz
gyártott folyékony mosószert
használjon. A pamut és
selyem ruhákat speciálisan
ilyen anyagokhoz készített
mosószerekkel mossa.
Erősen szennyezett
(makacs foltok, pl. fű, kávé,
gyümölcs és vér.)
Normál
szennyezettség
(Például, a test által a
Szennyezettségi szint
gallérokon és az ingujjakon
lévő szennyeződések)
Kismértékű
szennyeződés
(Nincs látható
szennyeződés.)
Világos és
fehér ruhák
(A javasolt
hőmérséklettartományt
a szennyezettségi szint
határozza meg: 40-90 ºC)
Előfordulhat, hogy előkezelést
kell végeznie a foltokon vagy
előmosást kell végeznie. A
fehér ruhákhoz mosóporok
és folyékony mosószerek
is használhatók az erősen
szennyezett ruhákhoz javasolt
mennyiségben. A mosópor
használatát anyag vagy föld
szennyeződésekhez, illetve
olyan szennyeződésekhez
használja, melyek érzékenyek
a fehérítőkre.
A fehér ruhákhoz mosóporok
és folyékony mosószerek
is használhatók a normál
szinten szennyezett ruhákhoz
javasolt mennyiségben.
A fehér ruhákhoz mosóporok
és folyékony mosószerek is
használhatók a kismértékben
szennyezett ruhákhoz
javasolt mennyiségben.
Színek Sötét ruhák
(A javasolt
hőmérséklettartományt a
szennyezettségi szint határozza
meg: hideg -40 ºC)
A színes ruhákhoz mosóporok
és folyékony mosószerek
is használhatók az erősen
szennyezett ruhákhoz javasolt
mennyiségben. A mosópor
használatát anyag vagy föld
szennyeződésekhez, illetve
olyan szennyeződésekhez
használja, melyek érzékenyek
a fehérítőkre. A mosószereket
fehérítő nélkül használja.
A színes ruhákhoz mosóporok
és folyékony mosószerek is
használhatók a normál szinten
szennyezett ruhákhoz javasolt
mennyiségben. A mosószereket
fehérítő nélkül használja.
A színes ruhákhoz mosóporok
és folyékony mosószerek is
használhatók a kismértékben
szennyezett ruhákhoz javasolt
mennyiségben. A mosószereket
fehérítő nélkül használja.
Használati útmutató
51 / HU

Előkészítés
4.9 Tippek a hatékony szárításhoz
Pamutruhák
szárítása
Lepedő,
paplanhuzat,
Tartós pamut kevertszálas
ruhák
Ruhafajták
Szintetikus (poliészter,
nejlon stb.):
Kényes (selyem, gyapjú,
kasmír, angóra stb.) ruhák
Nagy méretű darabok, pl.
paplan, dzseki, függöny
stb.
babaruha, pólók,
pulóverek, kötött
ruhák, farmer,
vászonnadrág, ing,
pamut zokni és
hasonlók
Nem ajánlott!
Nem ajánlott! Nem ajánlott! Nem ajánlott! Nem ajánlott! Nem ajánlott!
Nem ajánlott! Nagy
méretű darabok
szárítására a gép
nem alkalmas. Az
ilyeneket felakasztva
vagy teregetve
szárítsa.
Szintetikus
ruhák
szárítása
Nem ajánlott!
Poliészter, poliamid
(nejlon), poliacetát,
akril keverszálas
ruhákhoz ajánlott.
Viszkóz kevertszálas
ruhák esetében
a szárítás nem
ajánlott. A szárításra
vonatkozóan a
címkén található
utasításokat be kell
tartani.
Nem ajánlott! Nagy
méretű darabok
szárítására a gép
nem alkalmas. Az
ilyeneket felakasztva
vagy teregetve
szárítsa.
Programok
Babyprotect + Mosás és szárítás
Mosás és szárítás
közvetlenül! Lepedő,
paplanhuzat, babaruha,
pólók, pulóverek,
kötött ruhák, farmer,
vászonnadrág, ing,
pamut zokni és
hasonlók
A címkén lévő
mosási és szárítási
figyelmeztetések
figyelembe vételével
poliészter, poliamid
(nejlon), poliacetát,
akril keverszálas ruhák
esetében alacsonyabb
hőmérsékletek
alkalmazása ajánlott.
Nem ajánlott! Nagy
méretű darabok
szárítására a gép nem
alkalmas. Az ilyeneket
felakasztva vagy
teregetve szárítsa.
Mosás és szárítás
közvetlenül! Lepedő,
paplanhuzat, babaruha,
pólók, pulóverek,
kötött ruhák, farmer,
vászonnadrág, ing,
pamut zokni és hasonlók
A címkén lévő
mosási és szárítási
figyelmeztetések
figyelembe vételével
poliészter, poliamid
(nejlon), poliacetát,
akril keverszálas ruhák
esetében alacsonyabb
hőmérsékletek
alkalmazása ajánlott.
Nem ajánlott! Nagy
méretű darabok
szárítására a gép nem
alkalmas. Az ilyeneket
felakasztva vagy
teregetve szárítsa.
Mosás és
viselés
Enyhén szennyezett
és foltmentes
ing, póló, pulóver
stb. A mosási
mennyiségnek
nagyon kicsinek kell
lennie.
Szintetikus
kevertszálas
ruhák, pl. enyhén
szennyezett és
foltmentes ing,
póló stb. A mosási
mennyiségnek
nagyon kicsinek kell
lennie.
Nem ajánlott! Nagy
méretű darabok
szárítására a gép
nem alkalmas. Az
ilyeneket felakasztva
vagy teregetve
szárítsa.
52 / HU
Mosó-Szárítógép

5 A termék használata
5.1 Kezelőpult
1 - Programválasztó gomb
2 - Hőmérséklet beállító gomb
3 - Kijelző
4 - Szárítás kiválasztása gomb
5 - Be- / Kikapcsoló gomb
1
5.2 Szimbólumok
a b
2 3 4 5
6789
6 - Befejezési idő beállító gomb
7 - Start/Szünet gomb
8 - Kiegészítő funkció gombok
9 - Centrifugázás sebességbeállító gomb
c d
Használati útmutató
88
o
C
extra
180’
1880 88:88
efgh
a - Hőmérséklet kijelző (0C)
b - Információs vonal
c - Szárítási fokozat kijelző
d - Szárítási idő kijelző (perc)
e - Időjelző (óra:perc)
f - Befejezési idő kijelző
g - Zár kijelző
h - Centrifugálási sebesség-jelző (rpm)
53 / HU

A termék használata
5.3 A gép előkészítése
1. Ellenőrizze, hogy a tömlők megfelelően vannak-e csatlakoztatva.
2. Dugja be a gép tápkábelét.
3. Fordítsa el teljesen a sapkát.
4. Helyezze a gépbe a ruhákat.
5. Adjon hozzá mosószert és öblítőt.
5.4 Mosási programválasztó
1. Válasszon ki egy a mosandó ruha típusának, mennyiségének és szennyezettségének megfelelő programot a „Program és fogyasztási
táblázat", valamint az alábbi hőmérsékleteket mutató táblázat szerint.
90 ˚C
Nagyon koszos, fehér pamut anyagok és fehérneműk esetében. (kávézóasztal borítók, asztalterítők, törülközők, lepedők
stb.)
60 ˚C
40˚C- 30˚C- Hideg Vegyes ruhák, például finom textíliák (fátyolfüggönyök stb.), szintetikus anyagok és gyapjúszövetek.
2. A programválasztó gomb segítségével válassza ki a kívánt programot.
Átlagosan koszos, színes, színűket nem eresztő pamut és szintetikus anyagokhoz, ágyneműkhöz (ing, hálóing, pizsama
stb.) és enyhén koszos fehérneműkhöz (alsónadrág stb.)
MEGJEGYZÉS
¾ Az egyes programok maximális centrifugálási sebessége az adott ruhatípusnak megfelelően korlátozott.
¾ A program kiválasztásakor mindig vegye figyelembe az anyag típusát, színét, koszosságát és maximális mosási
C
hőmérsékletét.
¾ Mindig a lehető legalacsonyabb hőmérsékletet válassza. A nagyobb hőmérsékletű mosás során nagyobb a gép
energiafogyasztása.
5.5 Mosási programok
Az anyag típusától függően használja az alábbi főprogramokat.
MEGJEGYZÉS
¾ Azt követően, hogy kiválasztotta a ruhákhoz a kívánt mosási programot, a Szárítás gomb megnyomásával közvetlenül
a mosás után elvégezheti a szárítást. Ahányszor csak megnyomja a gombot, a tájékoztató sorban megjelenik az a
programlépés, amelyben a szárításra sor kerül és a megfelelő szimbólum kigyullad. A gomb folyamatos nyomásával a
szárítás kívánság szerint a maximálisan megengedett időre állítható be.
¾ A programlépésekben szereplő számok és feliratok sematikusak és adott esetben nem pontosan felelnek meg a
C
• Pamut
1. lépés
Pamut anyagokhoz ajánlott (pl. lepedő, paplan- és párnahuzat, törülköző, köntös, fehérnemű stb.). Hosszabb mosási ciklus alatt ruháit a gép
erőteljesen mossa.
C
terméknek. .
¾ A programválasztó gombbal kiválasztott program neve megjelenik a gép kijelzőjén.
¾ Ha a kiválasztott program után nem kíván szárítást, nyomja meg a Szárítás gombot, amíg a „Szárítás törölve” megjelenik
a képernyőn.
¾ Amennyiben a szárítás funkció segítségével mosást és szárítást egyaránt végezni fog, maximum 6 kg ruhát töltsön a
gépbe. Ha a gépet túltölti, a ruha nem fog megszáradni, a gép pedig hosszabb ideig marad működésben és többlet
energiát használ fel.
o
40
C
PAMUT
1200 88:88
2. lépés 2
3. lépés 3
MEGJEGYZÉS
¾ A ruhákat közvetlenül a mosást követően is száríthatja (Mosás után automatikus vagy ütemezett szárítás végezhető).
Ehhez ki kell választania a szárítás funkciót is, még mielőtt elindítja a mosási programot.
54 / HU
Mosó-Szárítógép

A termék használata
• Szintetikus
1. lépés 1
Szintetikus anyagokhoz ajánlott (ingek, blúzok, szintetikus/pamut keverék stb.). Kíméletesen mos, rövidebb mosási ciklussal a Pamut programhoz
képest.
Függönyök és csipke esetében ajánlatos a „Szintetikus 40 ˚C" program használata, az előmosás és a gyűrődésgátló funkciók kiválasztása
mellett. Mivel ezek hálós textúrája fokozza a habzást, a fátylak/csipkék mosásához kevés mosószert használjon. Ne tegyen mosószert az
előmosás rekeszbe.
C
• Gyapjú
1. lépés
Gyapjú ruhákhoz ajánlott. Válassza ki a ruhák címkéjén feltűntetett hőmérsékletet. Gyapjúneműhöz használjon megfelelő mosószert.
C
• Pamut Eco
1. lépés
Ezt a programot használja a normál szennyezettségű, tartós pamutból és vászonból készült ruhákhoz. Bár a mosási idő hosszabb, mint az
összes többi program esetében, komoly energia- és víz-megtakarítást biztosít. A tényleges vízhőmérséklet eltérhet a megállapított mosási
hőmérséklettől. Amennyiben a normálnál kevesebb ruhát rak be a gépbe (a kapacitás felét vagy kevesebbet), a program ideje automatikusan
lerövidülhet. Ebben az esetben az energia- és vízfogyasztás még tovább csökken és a mosás még gazdaságosabbá válik. Ez a program a
hátralévő időt kijelző modelleken található meg.
C
o
extra
40
C
SZINTETIKUS
1200 88:88
2. lépés 2
3. lépés 3
MEGJEGYZÉS
¾ A ruhákat közvetlenül a mosást követően is száríthatja (Mosás után automatikus vagy ütemezett szárítás végezhető).
Ehhez ki kell választania a szárítás funkciót is, még mielőtt elindítja a mosási programot.
o
30
C
GYAPJÚ
800 00:58
2. lépés 2
MEGJEGYZÉS
¾ Nem választható ki szárítási funkció a gyapjú mosási programban.
o
40
C
PAMUT ECO
1000 88:88
2. lépés 2
3. lépés 3
MEGJEGYZÉS
¾ A ruhákat közvetlenül a mosást követően is száríthatja (Mosás után automatikus vagy ütemezett szárítás végezhető).
Ehhez ki kell választania a szárítás funkciót is, még mielőtt elindítja a mosási programot.
• Kényes ruhadarabok
Ez a program a rendkívül kényes ruhák mosásához ajánlott. Ez a szintetikus programhoz képest kíméletesebb.
• Kézi mosás
1. lépés
Ezzel a programmal moshatóak a „gépben nem mosható” címkével ellátott gyapjú/ finom ruhák, amelyek esetében a kézi mosás ajánlott. A
ruhákat igen kíméletesen mossa, hogy nehogy kárt tegyen bennük.
o
60
C
KÉZI MOSÁS
800 88:88
100’
2. lépés 2
3. lépés
MEGJEGYZÉS
C
Használati útmutató
¾ A ruhákat közvetlenül a mosást követően is száríthatja (Mosás után automatikus vagy ütemezett szárítás végezhető).
Ehhez ki kell választania a szárítás funkciót is, még mielőtt elindítja a mosási programot.
55 / HU

A termék használata
• Napi Expressz
1. lépés
E programmal az enyhén szennyezett és foltmentes pamut ruhák moshatók ki gyorsan.
C
• Szuper rövid expressz
1. lépés
Ezzel a programmal kis mennyiségű, enyhén szennyezett pamut ruha mosható ki gyorsan. A mosás 14 percet vesz igénybe.
C
• Ing
1. lépés
Ezzel a programmal együtt moshatóak a pamut, a szintetikus és a kevertszálas ingek.
C
o
30
C
NAPI XPRESS
1200 88:88
2. lépés 2
2. lépés 3
MEGJEGYZÉS
¾ A ruhákat közvetlenül a mosást követően is száríthatja (Mosás után automatikus vagy ütemezett szárítás végezhető).
Ehhez ki kell választania a szárítás funkciót is, még mielőtt elindítja a mosási programot.
o
30
60’
C
XPRESSSUPERSHORT
1200 88:88
2. lépés 2
2. lépés 3
MEGJEGYZÉS
¾ A ruhákat közvetlenül a mosást követően is száríthatja (Mosás után automatikus vagy ütemezett szárítás végezhető).
Ehhez ki kell választania a szárítás funkciót is, még mielőtt elindítja a mosási programot.
¾ Ha a szárítás funkció ki van választva, akkor a mosás végén a további szárítási idő megjelenik a kijelzőn.
o
40
C
INGEK
1000 88:88
2. lépés 2
2. lépés 3
MEGJEGYZÉS
¾ A ruhákat közvetlenül a mosást követően is száríthatja (Mosás után automatikus vagy ütemezett szárítás végezhető).
Ehhez ki kell választania a szárítás funkciót is, még mielőtt elindítja a mosási programot.
• Öblítés
Ezt a programot akkor használja, ha külön szeretne öblíteni és keményíteni.
• Centrifugázás + Szivattyúzás
Ezt a programot használja a gépben lévő víz leeresztésére.
5.6 Hőmérséklet kiválasztása
o
60
1200 88:88
Új program kiválasztásakor a hőmérséklet kijelzőn megjelenik az adott programhoz ajánlott hőmérséklet. Lehetséges, hogy az ajánlott
hőmérsékleti érték nem a maximális hőmérséklet, amely az aktuális programhoz kiválasztható.
A hőmérséklet megváltoztatásához nyomja meg a Hőmérséklet beállítása gombot. A hőmérséklet csökkentése 10 °C-os lépésekben
történik.
C
56 / HU
110’
C
MEGJEGYZÉS
¾ A hőmérséklet beállító gomb csak visszafelé működik. Ha például 60°C-ot akar kiválasztani amikor a képernyőn a 40°C
látható, akkor a gombot sorozatosan meg kell nyomnia, hogy visszalépjen 40°C-ról egészen addig, amíg el nem ér a
60°C-hoz.
¾ A hőmérséklet kijelző mezője a hőmérséklet beállítását nem engedő programok esetében kikapcsolt állapotban van.
¾ A hidegmosás opcióra lépve és még egyszer megnyomva a hőmérséklet beállító gombot, a kijelzőn a kiválasztott
programhoz ajánlott maximális hőmérséklet jelenik meg. A hőmérséklet csökkentéséhez ezután nyomja meg ismét a
Hőmérsékletbeállító gombot.
Mosó-Szárítógép

A termék használata
Végül a hidegmosást jelző “-” szimbólum jelenik meg a kijelzőn. A „Hideg mosás” megjelenik a képernyőn.
A hőmérséklet a mosás elindulását követően is változtatható. Ha a mosási program elindulását követően a hőmérséklet kijelző mező világít,
akkor a kívánt hőmérséklet kiválasztható. Amennyiben a mosási program már elérte azt a pontot, ahol a hőmérséklet nem változtatható, akkor
a hőmérséklet kijelző mező kialszik.
5.7 Centrifugálási sebesség kiválasztása
o
70
1000 88:88
Új program kiválasztásakor az adott programhoz tartozó ajánlott centrifugázási sebesség megjelenik a Centrifugálási sebesség kijelzőn.
C
A centrifugálási sebesség megváltoztatásához nyomja meg a Centrifugálási sebesség beállítása gombot. Így a sebesség fokozatosan
csökken.
Ezután az adott modelltől függően a "Rinse Hold" (Öblítés tartás) vagy a "No Spin" (Nincs centrifugázás) opció megjelenik a kijelzőn.
C
5.7.1 Ha az Öblítés tartás funkció után ki szeretné centrifugálni a ruhákat:
50’
C
MEGJEGYZÉS
¾ Lehetséges, hogy az ajánlott centrifugálási sebességérték nem a maximális centrifugálási sebesség, amely az aktuális
programhoz kiválasztható.
MEGJEGYZÉS
¾ A Centrifugázási sebesség beállító gomb csak visszafelé működik. Ha például 1000 rpm-et kíván kiválasztani amikor
a képernyőn 800 rpm látható, akkor a gombot sorozatosan meg kell nyomnia, hogy visszalépjen 800 rpm-ről egészen
addig, amíg el nem éri a 1000 rpm-et.
¾ Az Öblítés tartás opciót a “ı_ı” szimbólum jelzi, a Nincs centrifugálás opciót pedig a “_” szimbólum.
o
70
C
- 88:88
50’
- Állítsa be a centrifugálási sebességet.
- Nyomja meg a Start / Szünet / Törlés gombot. A program folytatódik. A gép kiengedi a vizet és kicentrifugázza a ruhákat.
Ha a program végén centrifugálás nélkül kívánja leereszteni a vizet, akkor használja a Nincs centrifugázás funkciót.
MEGJEGYZÉS
¾ A Centrifugázási sebesség kijelző mezője a centrifugázási sebesség beállítását nem engedő programok esetében
C
A centrifugázási sebesség a mosás elindulását követően is változtatható. Ha a mosási program elindulását követően a centrifugázási sebesség
kijelző mező világít, akkor a kívánt centrifugázási sebesség kiválasztható. Amennyiben a mosási program már elérte azt a pontot, ahol a
centrifugázási sebesség nem változtatható, akkor a centrifugázási sebesség kijelző mező kialszik.
kikapcsolt állapotban van. A Centrifugázási sebesség beállítás gomb megnyomásakor a kijelzőn a „Nem választható”
jelenik meg.
5.8 Szárítás programok
FIGYELMEZTETÉS
A
C
• Szintetikus ruhák szárítása
1. lépés
Használati útmutató
¾ A szárítás során keletkező ruhabolyhokat a gép automatikusan kitisztítja. A tisztítás elvégzéséhez a vízvétel
automatikusan történik. Ezért a szárítási programok alatt a gép vízcsapjának végig nyitva kell lennie.
MEGJEGYZÉS
¾ A centrifugázás már benne van a szárító programokban. A gép ezt a lépést a szárítási idő lerövidítése érdekében végzi el.
Szárítás kiválasztása esetén a centrifugázási sebesség a maximális 1200 rpm-re van beállítva.
SZINTETIKUS SZÁRAZ
02:16
2. lépés 2
57 / HU

A termék használata
E program 4 kg-nyi nyirkos vagy nedves szintetikus ruha szárítására alkalmas. A program csak szárítást végez.
MEGJEGYZÉS
C
• Pamutruhák szárítása
E program 6 kg-nyi nyirkos vagy nedves pamut ruha szárítására alkalmas. A program csak szárítást végez.
C
5.9 Mosás és szárítás programok
A
• 6 kg mosás 6 kg szárítás
1. lépés 1
E program legfeljebb 6 kg pamut ruhanemű mosására és mosás utáni azonnali szárítására alkalmas, külön kiválasztás nélkül.
C
¾ A ruhák száraz súlya kapcsán lásd a 4. pont 4.5 lépését.
MEGJEGYZÉS
¾ Törölközők és köntösök szárításakor csak 4,5 kg ruhát töltsön be.
¾ A ruhák száraz súlya kapcsán lásd a 4. pont 4.5 lépését.
FIGYELMEZTETÉS
¾ A szárítás során keletkező ruhabolyhokat a gép automatikusan kitisztítja. A tisztítás elvégzéséhez a vízvétel
automatikusan történik. Ezért a szárítási programok alatt a gép vízcsapjának végig nyitva kell lennie.
o
60
C
6 MOSÁS & SZÁRÍTÁS
1200 04:12
2. lépés 2
MEGJEGYZÉS
¾ E program kiválasztása esetén további szárítási segédfunkciók nem választhatók ki.
A 6 kg mosás és 6 kg szárítás program esetében az ideális szárítási feltételek érdekében javasoljuk, hogy a ruhákat legfeljebb a fenti ábrán
meghatározott szintig töltse be a készülékbe (a szintet jelző nyíl úgy látható, hogy a gép ajtaja nyitva van).
• Mosás és viselés
1. lépés 1
E program 0,5 kg-nyi ruha (2 ing) 35 perc alatt történi kimosására és szárítására alkalmas. Az ezzel a programmal mosható maximális
ruhamennyiség 1 kg (5 ing).
o
40
C
MOSÁS & VISELÉS
1200 00:34
2. lépés 2
MEGJEGYZÉS
¾ A program naponta rövid ideig viselt és nemrég levetett ruhák gyors kimosására alkalmas. Finom textúrájú, gyorsan
C
száradó ruhákhoz felel meg. (ing, póló)
¾ Durvább textúrájú és lassan száradó ruhák esetén egyéb szárítási lehetőséget, illetve programot kell alkalmazni.
• Babyprotect+
E program legfeljebb 2 kg ruha kimosására és azonnali szárítására alkalmas, amennyiben azok anti-allergén és higiéniás kezelést igényelnek
(babruha, ágynemű, paplanhuzat, alsónemű stb.).
MEGJEGYZÉS
C
58 / HU
¾ A Babyprotect+ Mosás és Szárítás 60 °C programot bevizsgálta és jóváhagyta a brit allergiaalapítvány, a „The British
Allergy Foundation” (Allergy UK).
Mosó-Szárítógép

A termék használata
5.10 Program és fogyasztási táblázat
(Mosáshoz)
HU
15
Kiegészítő funkció
Választható
Program (°C)
hőmérséklettartomány °C
Max betöltés (kg)
Vízfogyasztás (l)
Energiafogyasztás (kWh)
Max. sebesség***
Előmosás
Gyors mosás
Öblítés plusz
Gyűrődésgátlás
Öblítés tartás
Szárítás
Állatszőr eltávolítása
Pamut 90 9 95 2.55 1600 • • • • • • • 90-Hideg
Pamut 60 9 95 2.05 1600 • • • • • • • 90-Hideg
Pamut 40 9 95 1.35 1600 • • • • • • • 90-Hideg
Pamut Eco 60** 9 53 1.03 1600 • 60-Hideg
Pamut Eco 40 9 53 0.80 1600 • 60-Hideg
Szintetikus 60 4 65 1.20 1200 • • • • • • • 60-Hideg
Szintetikus 40 4 65 0.65 1200 • • • • • • • 60-Hideg
Gyapjú 40 2 45 0.30 1200 • • 40-Hideg
Kényes ruhadarabok 40 4 50 0.40 1000 • 40-Hideg
Kézi mosás 30 1.5 40 0.21 1200 30-Hideg
Szuper rövid expressz 30 2 35 0.10 1400 • • • 30-Hideg
Napi expressz 90 9 60 2.00 1400 • • • 90-Hideg
Napi expressz 60 9 60 1.15 1400 • • • 90-Hideg
Napi expressz 30 9 50 0.15 1400 • • • 90-Hideg
Ing 60 4 70 1.40 800 • • • * • • • 60-Hideg
• : Választható.
* : Automatikus kiválasztás, nem törölhető.
** : Energia címke program (EN 50229)
***: Ha a gép maximális centrifugázási sebessége alacsonyabb, mint ez az érték, akkor csak a maximális centrifugázási sebességet lehet kiválasztani.
****: A program érzékeli a mosandó ruha típusát és mennyiségét és a víz-, illetve energiafogyasztást, valamint a programidőt automatikusan annak
megfelelően állítja be.
- : Tekintse meg a program leírását a maximális ruhamennyiséget illetően.
Használati útmutató
59 / HU

A termék használata
Program és fogyasztási táblázat
(Szárításhoz)
HU
Program (°C)
Pamutruhák szárítása - 6 4 2.7 1600 * • • • • -
Szintetikus ruhák szárítása - 4 4 2.45 - * • • • • BabyProtect+ (Babaruha
program)
6Kg Mosás & 6Kg szárítás 60 6 64 5.3 1600 * • • • • 60-Hideg
Mosás és viselés 30 0.5 28 0.6 1000 • * • 30-Hideg
Mosás és viselés 30 1 28 1 1000 • * • 30-Hideg
15
Max betöltés (kg)
Vízfogyasztás (l)
Energiafogyasztás (kWh)
60 2 84 2.9 1600 * * • • • • 90-30
Kiegészítő funkció Szárítási szint
Max. sebesség***
Előmosás
Gyors mosás
Öblítés plusz
Gyűrődésgátlás
Öblítés tartás
Állatszőr eltávolítása
Szárítás
Extra gardrób szárítás
Gardrób szárítás
Vasaló szárítás
Kényes szárítás
Választható
hőmérséklettartomány °C
Időalapú szárítás - percek
C
60 / HU
MEGJEGYZÉS
¾ ***: Ha a gép maximális centrifugázási sebessége alacsonyabb, mint ez az érték, akkor csak a maximális centrifugázási
sebességet lehet kiválasztani.
¾ A táblázatban szereplő segédfunkciók modellenként eltérőek lehetnek.
¾ A vízfogyasztás és az energiafogyasztás a víznyomás, vízkeménység és hőmérséklet, környezeti hőmérséklet, szennyes
típusa és mennyisége, kiválasztott kiegészítő funkciók és a tápfeszültség változásának függvényében változhat.
¾ A program mosási ideje megjelenik a gép kijelzőjén. Előfordulhat, hogy a tényleges mosási idő némiképp eltér a kijelzőn
látható értéktől.
Információ a vizsgálatot végző szervezetek számára;
Az EU energiabesoroláshoz szükséges mosási teljesítménytesztek az EN 50229 szabvány alapján a „Pamut Eco 60°C“
programban történtek.
Az EN 50229 szabvány szerinti EU energiabesorolás szárítási teljesítményéhez a maximális mosási mennyiséget részekre kell
bontani, maximális és hátralévő szárítási mennyiség szerint, majd mindkét mennyiséget a „Pamut extra szárítás“ opcióval kell
szárítani.
Mosó-Szárítógép

A termék használata
5.11 Segédfunkció választás
o
extra
88
1880 88:88
A program megkezdése előtt válassza ki a kívánt segédfunkciókat. Programválasztáskor a hozzá választható segédfunkciók szimbólumának
mezője világít. Segédfunkció kiválasztásakor pedig a segédfunkció szimbólum belső területe is kigyullad és a kiválasztott segédfunkció neve „3”
másodpercre megjelenik a kijelzőn.
C
A mosás elindulását követően az aktuális programnak megfelelő segédfunkció mezője továbbra is világít. Azok a segédfunkciók választhatók ki
vagy törölhetők, amelyek mezője világít. Amennyiben a mosási program már elérte azt a pontot, ahol segédfunkció nem választható ki, a funkció
mező kialszik.
C
180’
C
MEGJEGYZÉS
¾ Az aktuális programhoz nem választható segédfunkció szimbólumának mezője nem világít. Az ilyen segédfunkciók
gombjának megnyomásakor a kijelzőn ... másodpercig a „Nem választható” látható.
MEGJEGYZÉS
¾ Egyes funkciók nem használhatók egyszerre. Ha második segédfunkcióként olyat választ ki a gép elindítása előtt, amelyik
összeférhetetlen az elsővel, akkor az első segédfunkció törlődik és csak a második marad aktív. Ha például először
kiválasztja az Előmosás funkciót, majd ezután a Gyorsmosás funkciót, akkor az Előmosás funkció törlődik, és csak a
Gyorsmosás funkció marad aktív.
¾ Olyan segédfunkciót nem lehet kiválasztani, amelyik összeférhetetlen a főprogrammal. (Lásd: „Program és fogyasztási
táblázat")
¾ Egyes programokhoz olyan segédfunkciók tartoznak, amelyeket egyidejűleg kell működtetni. E funkciók nem törölhetők.
Az ilyen segédfunkció mezője nem, csak a belső terület világít.
¾ A gép automatikusan meghosszabbítja a program időtartamát, kivéve, ha a szárítás végén az elért nedvességi szint már
megfelel a kívántnak (vasalás, szekrény, extra szekrény és kényes). A program tovább fog tartani.
¾ Időalapú szárítás kiválasztása esetén a program akkor is lejár, ha a ruhák a program végén még nedvesek.
¾ A program időtartamát a gép lerövidíti, ha a szárítás során vagy az időalapú szárítás kiválasztásakor a kívánt nedvességi
szintet (vasalás, szekrény, extra szekrény és kényes) már sikerült elérni. Az idő csökkenése a kijelzőn látható.
• Előmosás
Előmosás csak erősen szennyezett anyagok esetén ajánlott. Előmosás nélkül energiát, vizet, mosószert és időt spórolhat.
• Gyorsmosás
Ezt a funkciót a pamut és a szintetikus programokhoz lehet használni. Enyhén szennyezett ruhák esetében csökken a mosási idő és az öblítések
száma is.
MEGJEGYZÉS
C
• Öblítés plusz
E funkcióval lehetősége van bő vízzel mosni és öblíteni a Pamut, Szintetikus, Finom és Gyapjú programokban. Ezt a funkciót könnyen gyűrődő,
finom ruhák esetében használja.
C
• Gyűrődésgátlás
Ezzel a funkcióval a ruhák kevésbé gyűrődnek mosás közben. A gyűrődés megelőzése érdekében a dob mosáskor és centrifugázáskor is
lassabban forog. A mosásra továbbá magasabb vízállás mellett kerül sor.
• Szárítás
E funkció a mosást követő szárítást biztosítja. Ellenőrizze a program táblázatban, hogy e segédfunkció melyik programokkal együtt választható ki.
Használati útmutató
¾ Amikor kiválasztja ezt a funkciót, a gépet a program táblázatban meghatározott maximális mennyiségű szennyes felével
töltse meg.
MEGJEGYZÉS
¾ “Az gomb egyszeri lenyomása egyszeri öblíést, a kétszeri lenyomása kétszeres öblítést indít. A gomb hardmadik
lenyomása törli az öblítést.”
61 / HU

A termék használata
5.12 Szárítási lépések
5.12.1 Vasaló szárítás
A szárítás a Vasalás száraz lépésnek megfelelő szárazsági szintig folytatódik.
5.12.2 Gardrób szárítás
A szárítás a Szekrény száraz lépésnek megfelelő szárazsági szintig folytatódik.
5.12.3 Extra gardrób szárítás
A szárítás az Extra szekrény száraz lépésnek megfelelő szárazsági szintig folytatódik.
5.12.4 Kényes szárítás
Ezt a programot olyan 100% szintetikus és szintetikus kevertszálas szatén típusú fehérneműk (hálóruha, alsó és felső fehérnemű, pizsama)
szárítására használja, amelyek a mosási útmutató szerint száríthatók.
MEGJEGYZÉS
¾ A szálkeverék, a szövés/kötés jellege, a ruhamennyiség és a nedvességi fok következtében a szárítás foka változhat.
¾ Csipke, tüll, kő, gyöngy, flitter, drót kellékekkel ellátott, illetve a magas selyemtartalmú termékeket nem szabad a gépben
C
5.12.5 Időalapú szárítás
A végső száradási fokozat alacsony hőmérsékleten történő eléréséhez 10´, 20´, 30´, 60´, 90´, 120´ és 150´ szárítási idők választhatók ki.
C
5.13 Idő megjelenítése
A program működése közben a befejezésig hátralévő idő órában és percben kifejezve, “01:30” formában jelenik meg a kijelzőn.
C
5.14 Befejezési idő
o
60
C
BEFEJEZÉSI IDŐ BEÁLLÍTÁSA
1200 88:88
A Befejezési idő funkció segítségével a program elindítása akár 24 órával is eltolható. A Befejezési idő gomb megnyomását követően a
kijelzőn megjelenik a program befejeződésének becsült ideje. A Befejezési idő beállításakor a Befejezési idő kijelzője világít. A „Befejezési
idő beállítása” megjelenik a kijelzőn. E közben a Start / Szünet gomb villog.
A Befejezési idő funkció aktiválásához és ahhoz, hogy a program a meghatározott idő leteltével véget érjen, az idő beállítása után meg kell
nyomni a Start / Szünet gombot. A gomb megnyomásakor a kijelzőn megjelenik „Befejezési idő bekapcsolva”. A Start / Szünet
gomb villogása leáll és folyamatosan világít.
Ha törölni kívánja a Befejezési idő funkciót, akkor tartsa nyomva a Befejezési idő gombot, amíg a Befejezési idő kijelző kialszik vagy nyomja
meg a Be- / Kikapcsoló gombot a gép ki- és bekapcsolásához.
1. Nyissa ki a betöltőajtót, tegye be a ruhákat és adja hozzá a mosószert stb.
2. Válassza ki a mosási programot, a hőmérsékletet, a centrifugázási sebességet, és ha szükséges, a segédfunkciókat.
3. A Befejezési idő gomb megnyomásával válassza ki a kívánt befejezési időt. A Befejezési idő kijelző világít.
4. Nyomja meg a Start / Szünet gombot. Az idő visszaszámlálás elkezdődik. “:” A kijelző közepén látható hátralévő idő elkezd villogni.
szárítani.
¾ A selyem kevertszálas, pamutot is tartalmazó ruhák, illetve azok, amelyek szatén kinézetűek, e programban történő
szárításkor nedvesek maradhatnak.
MEGJEGYZÉS
¾ Legfeljebb két darabból álló szennyes esetén előnyben kell részesíteni a pamut vagy szintetikus szárítási programokban
megtalálható időzített szárítási lépéseket, melyeket a ruha jellegének megfelelően kell kiválasztani.
¾ A 10´ szárítási funkció kiválasztásakor csak Szellőztetésre és Hűtésre kerül sor.
¾ Amennyiben a szárítási programokat követően a ruhák nem érik el a szükséges szárazsági fokot, akkor kívánatos a
pamut vagy szintetikus szárítási programokban megtalálható időzített szárítási lépéseket kiválasztani, a ruha jellegének
megfelelően.
¾ E funkció kiválasztása esetén a gép a száradás fokától függetlenül a beállított ideig végzi a szárítást.
MEGJEGYZÉS
¾ A program időtartama eltérhet a „Program és fogyasztási táblázatban" feltüntetett értékektől, függően a víznyomástól,
a víz keménységétől és hőmérsékletétől, a környezeti hőmérséklettől, a mosandó ruha típusától és mennyiségétől, a
kiválasztott segédfunkcióktól és az esetleges feszültségingadozásoktól.
o
60
C
BEFEJEZÉSI IDŐ BEKAPCSOLVA
1200 88:88
62 / HU
Mosó-Szárítógép

A termék használata
MEGJEGYZÉS
¾ A Befejezési idő aktiválásakor ne használjon folyékony mosószert! Fennáll a ruhák elszíneződésének veszélye.
¾ A Befejezési idő visszaszámlálása alatt a betöltőajtó zárva marad. Az ajtó kinyitásához a Start/Szünet gomb megnyomásával
C
5.15 A program elindítása
o
60
C
A PROGRAM ELINDUL
1200 88:88
1. A program elindításához nyomja meg a Start / Szünet gombot.
2. A Start / Szünet gomb, amelyik eddig villogott, ekkor folyamatosan világít, jelezve, hogy a program elindult. A „Programindítás” „3”
másodpercig megjelenik a kijelzőn.
3. A betöltőajtó lezáródik. Az ajtó lezáródásakor az „Ajtózárás” jelenik meg a kijelzőn.
5.16 Ajtózár
AJTÓ ZÁRVA
A betöltő ajtó egy olyan zárrendszerrel rendelkezik, mely nem megfelelő vízszint esetén megakadályozza az ajtó kinyitását.
A betöltőajtó lezárásakor az „Ajtó zárva” jelenik meg a kijelzőn.
5.17 A kiválasztások módosítása a program elindulását követően
5.17.1 Ruhák hozzáadása a program elindulását követően:
o
60
C
AJTÓNYITÁS
1200 88:88
a gépet Szüneteltetés üzemmódba kell kapcsolni. A visszaszámlálás végén a Befejezési idő kijelző kialszik, elindul a
mosási program és a kiválasztott program ideje megjelenik a kijelzőn.
¾ A Befejezési idő kiválasztásakor a képernyőn megjelenő idő a befejezési időből plusz a kiválasztott program időtartamából
tevődik össze.
Ha a Start / Szünet gomb megnyomásakor a gépben lévő vízszint megfelelő, akkor a kijelzőn megjelenik az „Ajtónyitás".
Ha a gépben lévő vízszint a Start / Szünet gomb megnyomásakor nem megfelelő, akkor a kijelző azt mutatja, hogy a betöltőajtó le van zárva.
5.17.2 A gép szünet üzemmódba állítása:
o
60
C
SZÜNET
1200 88:88
Ha a gépet szünetelési üzemmódba kívánja helyezni, akkor nyomja meg a Start/Szünet gombot. A Start / Szünet gomb körüli mező
villogni kezd. A „Szünet” felirat megjelenik a kijelzőn.
5.17.3 A programválasztás módosítása a program elindulását követően:
Az aktuális program futása közben a program módosítása nem lehetséges.
Ha a program működése alatt elfordítja a Programválasztó gombot, akkor a kijelzőn megjelenik a „Módosításhoz kapcsoljon szünet állapotba".
Miután az aktuális programot szünet állapotba kapcsolta, kiválaszthatja az új programot.
MEGJEGYZÉS
C
Használati útmutató
¾ A kiválasztott program újra elindul.
63 / HU

A termék használata
5.17.4 A segédfunkció, a sebesség és a hőmérséklet módosítása
Az elért programlépéstől függően, törölheti vagy aktiválhatja a segédfunkciókat; lásd a „Segédfunkciók kiválasztása" című fejezetet.
A sebesség, a hőmérséklet és a szárítás beállításai is módosítók; lásd a „Centrifugázási sebesség kiválasztása" és a „Hőmérséklet kiválasztása"
című fejezeteket.
MEGJEGYZÉS
C
5.18 Gyerekzár
Annak érdekében, hogy a gyermekek ne tudjanak babrálni a géppel, használja a gyerekzárat. Ezzel elkerülhető, hogy a gyermekek módosításokat
végezzenek egy adott programon.
C
5.18.1 A gyerekzár aktiválása:
60
GYEREKZÁR BEKAPCSOLVA
1200 88:88
Nyomja meg és tartsa lenyomva 3 másodpercig a 2.. és a 4. Segédfunkció gombokat. Amint a kijelzőről eltűnik a „Gyerekzár
3-2-1" visszaszámlálást, a „Gyerekzár bekapcsolva" jelenik meg a kijelzőn. Ha a figyelmeztetés megjelenik, akkor elengedheti a 2. és 4.
Segédfunkció gombokat.
C
5.18.2 A gyerekzár kikapcsolása:
60
GYEREKZÁR KIKAPCSOLVA
1200 88:88
¾ A mosógép ajtaja nem nyílik ki, ha a víz forró, vagy ha a vízszint eléri az ajtó nyílását.
MEGJEGYZÉS
¾ A mosógépet a bekapcsoló gombbal lehet be-/kikapcsolni, ha a gyerekzár aktív. A mosógép ismételt bekapcsolásakor a
program onnan folytatódik, ahol az le lett állítva.
¾ Ha bármelyik gombot megnyomja miközben a gyerekzár aktív, a gép hangjelzéssel figyelmeztet. Ha a gombokat egymás
után 5-ször megnyomja, a hangjelzéses figyelmeztetés törlődik. A képernyőn lévő figyelmeztetés továbbra is látható.
o
C
MEGJEGYZÉS
¾ A „Gyerekzár bekapcsolva” jelenik meg a kijelzőn akkor is, ha bármelyik gombot megnyomja, miközben a gyerekzár
funkció be van kapcsolva.
o
C
Nyomja meg és tartsa lenyomva 3 másodpercig a 2. és a 4. Segédfunkció gombokat. Amint a kijelzőről eltűnik a „Gyerekzár 3-2-1"
visszaszámlálás, a „Gyerekzár kikapcsolva" jelenik meg a kijelzőn.
5.19 Program megszakítása
o
60
C
TÖRLÉS
1200 88:88
A gép kikapcsolásakor és ismételt bekapcsolásakor a program törlődik. Nyomja meg és tartsa lenyomva a Be- / Kikapcsoló gombot 3
másodpercig. Amint a kijelzőről eltűnik a „Törlés 3-2-1" visszaszámlálás, a gép kikapcsol.
MEGJEGYZÉS
¾ Ha megnyomja a Be- / Kikapcsoló gombot miközben a gyerekzár be van kapcsolva, a program nem törlődik. Először a
gyerekzárat kell törölni. A kijelzőn megjelenik a „Szünet 3-2-1" visszaszámlálás.
C
64 / HU
¾ Ha a program törlését követően ki szeretné nyitni a mosógép ajtaját, de ez nem lehetséges, mert a gépben lévő víz szintje
eléri az ajtót, akkor a Programválasztó gombot állítsa a Szivattyúzás+Centrifugálás programra és eressze le a vizet a
gépből.
Mosó-Szárítógép

A termék használata
5.20 Program vége
Ha a programnak vége, a kijelzőn megjelenik a „Ruhák kivehetők”.
Ha 2 percig egyik gombot sem nyomja meg, akkor a gép szünetelés üzemmódba kapcsol. A kijelző és az összes jelzőlámpa kikapcsol. Csak a
Programválasztó gomb mezője villog tovább.
Ha bármelyik gombot megnyomja vagy elfordítja a Programválasztó gombot miközben a gép szünetelés üzemmódban van, akkor a kijelzőn
megjelennek a már befejeződött programlépések.
5. 21 Belépés a Beállítások menübe
A Beállítások menüben a következő műveletek hajthatók végre:
• Nyelv kiválasztás módosítása,
• Képernyő fényerő beállítás módosítása,
• Hangerő be- és kikapcsolása,
A Beállítások menübe történő belépéshez nyomja meg egyszerre 3 másodpercig a Hőmérséklet beállító gombot és a Centrifugázási
sebesség beállító gombot. A kijelzőn megjelenik a „Nyelv kiválasztása”.
A menükben történő navigáláshoz használja a Hőmérséklet vagy a Szárítás beállítása gombokat.
5.21.1 Nyelv kiválasztás módosítása
BEÁLLÍTÁSOK
1. A Beállítások menübe történő belépéshez nyomja meg egyszerre 3 másodpercig a Hőmérséklet beállító gombot és a Centrifugázási
sebesség beállító gombot. Elsőként a „Nyelv kiválasztása” menü jelenik meg a kijelzőn.
NYELV KIVÁLASZTÁSA
2. Fordítsa el a Programválasztó gombot, amíg a kijelzőn a Nyelv kiválasztása menüben megjelenik a kívánt nyelv.
MAGYAR
BEÁLLÍT
3. Ha a kívánt nyelv megjelent, akkor nyomja meg a kijelző jobb alsó sarkában világító gombot. A lámpa kikapcsol és a „Beállítva” megjelenik
a kijelzőn.
5.21.2 Képernyő fényerő beállítás módosítása
BEÁLLÍTÁSOK
BEÁLLÍT
1. A Beállítások menübe történő belépéshez nyomja meg egyszerre 3 másodpercig a Hőmérséklet beállító gombot és a Centrifugázási
sebesség beállító gombot. A Szárítás gomb segítségével nyissa meg a „Fényerő” menüt.
2. Fordítsa el a Programválasztó gombot, amíg a kijelzőn a Fényerő menüben megjelenik a kívánt fényerő.
3. Ha a kívánt fényerő megjelent, akkor nyomja meg a kijelző jobb alsó sarkában világító gombot. A lámpa kikapcsol és a „Beállítva”
megjelenik a kijelzőn.
Használati útmutató
65 / HU

A termék használata
5.21.3 Hangfigyelmeztetés ki- és bekapcsolása
BEÁLLÍTÁSOK
1. A Beállítások menübe történő belépéshez nyomja meg egyszerre 3 másodpercig a Hőmérséklet beállító gombot és a Centrifugázási
sebesség beállító gombot. A Szárítás gomb segítségével nyissa meg a „Hangerő beállítása” menüt.
2. Fordítsa el a Programválasztó gombot, amíg a kijelzőn a Hang beállítása menüben megjelenik a kívánt hangerő.
BEÁLLÍT
3. Ha fokozni kívánja a hangerőt, akkor a „HANGERŐ BEKAPCSOLVA” kiválasztásakor nyomja meg a kijelző jobb alsó sarkában világító
gombot. A lámpa kikapcsol és a „Beállítva” megjelenik a kijelzőn.
4. Ha le akarja kapcsolni hangerőt, akkor a „HANGERŐ KIKAPCSOLVA” kiválasztásakor nyomja meg a kijelző jobb alsó sarkában világító
gombot. A lámpa kikapcsol és a „Kikapcsolva” megjelenik a kijelzőn.
5.22 Memória (Kedvenc) program beállítása
A gyakran használt program és egyéb beállítások mentésével kedvenc program hozható létre. Használja ezt a funkciót a rendszeresen mosott
ruhákhoz használt ugyanazon beállítások gyors kiválasztásához.
Új kedvenc program beállításáig a gyári beállítás szerinti program marad a kedvenc program.
5.22.1 Új kedvenc program mentése:
1. Válassza ki a kívánt programot, hőmérsékletet, centrifugázási sebességet, szennyezettségi fokot és segédfunkciót.
2. Tartsa lenyomva 3 másodpercig a Kedvenc gombot.
3. A kijelzőn megjelenik a "Kedvenc mentése 3-2-1" visszaszámlálás.
MEGJEGYZÉS
C
¾ Sikertelen mentés esetén a „Kedvenc nincs mentve” jelenik meg a kijelzőn.
5.22.2 Kedvenc program kiválasztása:
1. Nyomja meg a Kedvenc gombot. A kijelzőn megjelenik a „Kedvenc kiválasztva”.
2. Amint a kedvenc megjelenik a kijelzőn, megtörtént a program és a többi beállítás mentése.
3. A Kedvenc program elindításához nyomja meg a Start / Szünet gombot.
5.23 A készülék „Készenléti üzemmóddal" is rendelkezik
Ha a gépet bekapcsolja a be/kikapcsoló gombbal, és nem indít el programot vagy nem végez semmilyen műveletet, illetve, ha a kiválasztott
program lejárta után körülbelül 2 percig nem nyom meg egy gombot sem, a készülék automatikusan energiatakarékos üzemmódra vált.
A jelzőlámpák fényereje lecsökken. Amennyiben a termék a program időtartamát kijelző kijelzővel is rendelkezik, ez teljesen kikapcsol. A
programválasztó gomb elforgatása vagy bármely gomb megnyomása esetén a lámpák és a kijelző visszakapcsolnak. Az energiatakarékos
üzemmódból történő kilépéskor kiválasztott dolgok megváltozhatnak. A program indítása előtt ellenőrizze, hogy a kiválasztások megfelelőek-e.
Szükség esetén állítsa be újra. Ez nem hiba.
MENNYISÉG BEÁLLÍTÁS
BEKAPCSOLVA
66 / HU
Mosó-Szárítógép

6 Karbantartás és tisztítás
A termék élettartama meghosszabbítható, a gyakran előforduló problémák pedig elkerülhetők, ha a gépet rendszeresen tisztítja.
6.1 A mosószeres fiók tisztítása
Tisztítsa meg rendszeresen a mosószertartót (4-5 menetenként) annak érdekében, hogy ne rakódjon le benne a mosópor.
1 Az eltávolításhoz emelje fel a szifon hátsó részét az ábrán látható módon. A fenti tisztítási műveletek elvégzése után helyezze vissza a
szifont a helyére és tolja lefelé az elülső részét, hogy a záró fül megfelelően rögzüljön.
MEGJEGYZÉS
C
2 Mossa ki a mosószertartó fiókot majd a szívócsövet bő, langyos vízzel a kádban. Tisztítás közben viseljen védőkesztyűt vagy használjon
megfelelő kefét, hogy védje a kezét a visszamaradt mosószer-maradványoktól.
3 A tisztítást követően illessze a helyére a szifont és tegye vissza a fiókot.
6.2 Tisztítsa meg a betöltőajtót és a dobot.
Az idő múlásával öblítőszer, mosószer és kosz gyűlhet össze, mely kellemetlen szagokat és elégtelen mosási teljesítményt eredményezhet.
Ennek elkerülése érdekében használja a Dobtisztítás programot. Amennyiben a gép nem rendelkezik Dobtisztító programmal, akkor
használja a Pamut-90 programot és válassza ki hozzá a Víz hozzáadása vagy az Extra öblítés segédfunkciók valamelyikét. Ennek a
programnak a futtatása közben ne legyen ruha a gépben! A program elindítása előtt tegyen egy teáscsészényi (max. 100 g) vízkőmentesítő port
a fő mosószer-adagolóba (rekesz száma: "2"). Amennyiben tablettás vízkőmentesítőt használt, csak egy tablettát helyezzen a következő számú
rekeszbe: 2. A program végeztével egy száraz ruha segítségével törölje szárazra a rekeszt.
C
¾ Amennyiben a víz és az öblítő keveréke a normálisnál nagyobb mértékben kezd összegyűlni a lágyító tartórekeszében,
akkor a szifont ki kell tisztítani.
MEGJEGYZÉS
¾ Kéthavonta ismételje meg a Dobtisztítás programot.
¾ Kizárólag mosógépekhez használható vízkőmentesítőt használjon.
Minden mosás után ellenőrizze, hogy nem maradt-e idegen anyag a dobban.
Amennyiben a lenti képen látható lyukak eltömődnek, egy fogpiszkáló segítségével tisztítsa ki őket.
MEGJEGYZÉS
C
A
Használati útmutató
¾ Az idegen anyagok a dob rozsdásodását okozhatják. Rozsdamentes acél tisztításához való anyaggal tisztítsa meg a dob
felületén lévő foltokat. Soha ne használjon fém dörzsit vagy kefét.
FIGYELMEZTETÉS
¾ Soha ne használjon szivacsot vagy súrolószert. Ezek kárt tehetnek a festett és a műanyag felületekben.
67 / HU

Karbantartás és tisztítás
6.3 A légbeszívó szűrő tisztítása
A légbeszívó szűrő tisztításához:
Húzza ki a gépet.
1
1 A Használati útmutatóval kapott csomagban lévő szerszám hátulját csatlakoztassa szűrősapkán található helyre az 1. ábrán megadottak
szerint.
2 Az ujja segítségével húzza maga felé a szűrősapkát miután az eszköz hátoldalával a tolózárat balra nyomta a 2. ábrán megadottak szerint.
3 A szűrősapka könnyen lejön.
4 Mossa el a szűrősapkát.
5 Tegye vissza a szűrősapkát ügyelve arra, hogy megfelelően rögzüljön. Ha nem illeszkedik, akkor az eszköz segítségével tekerje el a
tolózárat jobbra.
2
4
5
3
FIGYELMEZTETÉS
¾ Soha ne használjon szivacsot vagy súrolószert. Ezek kárt tehetnek a festett és a műanyag felületekben.
A
¾ 50 mosás és szárítás után (kb. 3 hónap) tisztítsa meg a gép légbeszívó szűrőjét.
¾ Ha a gépet egymás után 10-szer csak szárításra használja, akkor utána 1 rövid program lefuttatásával mindig
végezzen el üresen egy mosást.
6.4 A gép és a vezérlőpanel tisztítása
Szükség esetén szappanos vízzel vagy nem korrozív, gyenge gél mosogatószerrel mossa le a gép külsejét, majd egy száraz, puha ruhával
törölgesse át.
A vezérlőpanel tisztításához kizárólag puha, száraz ruhát használjon.
6.5 A vízbeeresztő szűrők tisztítása
Az egyes vízbeömlő szelepek végein (a gép hátulsó részén) és az egyes bemeneti víztömlők végén (ahol azok a csaphoz vannak kapcsolva)
szűrők találhatóak. Ezek a szűrők megakadályozzák, hogy idegen anyagok és piszok kerülhessen a vízbe, és azon keresztül a gépbe. A piszkos
szűrőket meg kell tisztítani.
1 Zárja le a csapokat.
2 Távolítsa el a vízbeeresztő csövek anyáit, hogy hozzáférjen a vízbeeresztő szelepek szűrőihez. Tisztítsa meg őket egy erre alkalmas
kefével. Amennyiben a szűrők nagyon piszkosak lennének, vegye ki azokat harapófogóval, és így tisztítsa meg őket.
3 Vegye ki a bemeneti víztömlők lapos végén található szűrőket a tömítésekkel együtt, majd alaposan tisztítsa meg őket folyóvízben.
4 A tömítéseket és a szűrőket óvatosan illessze vissza a helyére, majd kézzel húzza meg a tömlőanyákat.
6.6 Az esetlegesen ottmaradt víz leszivattyúzása és a szivattyú tisztítása
A gép szűrőrendszere megakadályozza, hogy a mosóvíz leeresztése közben gombok, pénzérmék, szövetfoszlányok és más szilárd anyagok
eltömítsék a szivattyú propellerét. Ily módon a víz akadály nélkül távozhat, és a szivattyú tovább marad működőképes.
Amennyiben a gép nem szivattyúzná le a vizet, akkor a szivattyú szűrője eltömítődhetett. A szűrőt háromhavonta, vagy akkor kell megtisztítani,
ha az eltömítődik. A szivattyú szűrőjének kitisztításához a vizet előbb le kell szivattyúzni.
Ezenkívül a gép szállítása előtt (pl. költözéskor), valamint fagypont alatti hőmérséklet esetén is teljesen le kell ereszteni a vizet.
68 / HU
Mosó-Szárítógép

Karbantartás és tisztítás
FIGYELMEZTETÉS
¾ A szivattyú szűrőjén fennakadt idegen anyagok kárt tehetnek a gépben vagy zajossá tehetik a gép működését.
A
6.6.1 A piszkos szűrő megtisztításához és a víz leszivattyúzásához:
1. Húzza ki a gépet az áramtalanításhoz.
A
2 Nyissa ki a szűrőt.
Nyomja le a szűrősapka fülét és húzza azt maga felé.
6.6.2 A víz leeresztéséhez:
a Húzza ki a helyéről a vészleeresztő tömlőt.
b Helyezze a tömlő végét egy nagy edénybe. Eressze le a vizet az edénybe úgy, hogy kihúzza a tömlő végén lévő dugót. Ha az edény
megtelt, zárja el a tömlőt a dugó visszahelyezésével. Az edény kiürítése után ismételje meg a fenti műveletet annyiszor, hogy a gépből
teljesen kifogyjon a víz.
c Ha végzett a víz leeresztésével, zárja el a tömlőt ismét, majd tegye azt vissza a helyére.
d Fordítsa el a szivattyúszűrőt annak kivételéhez.
¾ Ha a gép használaton kívül van, zárja el a csapot, szerelje le a vízbeömlő tömlőt és eressze le a gépben lévő
vizet, elkerülendő a beszerelés helyén fennálló esetleges fagyásveszélyt.
¾ Minden használat után zárja el a gép vízcsapját.
FIGYELMEZTETÉS
¾ A gépben a víz hőmérséklete akár a 90ºC-ot is elérheti. Az égési sérülések kockázatának elkerülése érdekében
a szűrőt csak azután szabad megtisztítani, hogy a gépben lévő víz lehűlt.
Használati útmutató
69 / HU

7 Hibaelhárítás
A program nem indítható vagy választható ki.
• A gép önvédelmi üzemmódra kapcsolta magát valamilyen közmű probléma miatt (például feszültség, víznyomás stb. következtében).
>>> Tartsa nyomva 3 másodpercig a Start / Szünet / Törlés gombot a gyári alapértelmezett beállítások visszaállításához. (Lásd:
"Program megszakítása")
Víz van a gépben.
• A minőség-ellenőrzési folyamatot követően víz maradt a gépben. >>> Ez nem hiba; a víz nem tesz kárt a gépben.
Víz szivárog a gép aljából.
• Valószínűleg tömlő vagy szivattyúszűrő probléma. >>> Ügyeljen rá, hogy a vízbeeresztő tömlők tömítései biztonságosan
illeszkedjenek. A tömlőt szorosan csatlakoztassa a csaphoz.
• Lehet, hogy a szivattyúszűrő nem teljesen zárt. >>> Ellenőrizze, hogy a szivattyúszűrő teljesen zárva van-e.
A gép nem töltődik fel vízzel.
• A csap el van zárva. >>> Nyissa ki a csapokat.
• A vízbeeresztő tömlő megtekeredett. >>> Igazítsa meg a tömlőt.
• A vízbeeresztő szűrő eltömődött. >>> Tisztítsa meg a szűrőt.
• A betöltőajtó félig nyitva van. >>> Csukja be a betöltőajtót.
A gép nem ereszti le a vizet.
• A vízleeresztő tömlő esetleg eltömődött vagy megtekeredett. >>> Tisztítsa meg vagy egyenesítse ki a tömlőt.
• A szivattyúszűrő eltömődött. >>> Tisztítsa meg a szivattyú szűrőjét.
A gép rázkódik vagy zajos.
• Lehet, hogy a gép nem áll stabilan. >>> Állítsa be a gép lábát úgy, hogy az vízszintesen álljon.
• Lehet, hogy egy kemény tárgy került a szivattyú szűrőjébe. >>> Tisztítsa meg a szivattyú szűrőjét.
• A szállításnál használatos biztonsági csavarok nincsenek eltávolítva. >>> Távolítsa el a szállításnál használt biztonsági csavarokat.
• Lehet, hogy túl kevés ruha van a gépben. >>> Helyezzen több ruhát a gépbe.
• Lehet, hogy túl sok ruha van a gépben. >>> Vegyen ki a gépből pár ruhadarabot, vagy rendezze el a ruhákat egyenletesen.
• Lehet, hogy a gép nekinyomódik egy merev tárgynak. >>> Ügyeljen rá, hogy a gép ne nyomódjon neki semminek.
A gép röviddel a program kezdete után megállt.
• Lehet, hogy a gép az alacsony feszültség miatt állt meg ideiglenesen. >>> A feszültség normális szintre való visszaállását követően
a gép ismét működni fog.
A felvett vizet a gép rögtön leereszti.
• A vízleeresztő tömlő esetleg nincs a megfelelő magasságban. >>> Csatlakoztassa a vízleeresztő tömlőt a használati útmutatóban
megadottak szerint.
Mosás közben nem látható víz a gépben.
• A mosógépben található víz nem látható kívülről. Ez nem hiba.
A betöltőajtó nem nyitható ki.
• A gépben lévő vízszint miatt az ajtózár aktiválva van. >>> A Szivattyúzás vagy a Centrifugálás program lefuttatásával eressze le a
vizet.
• A gép melegíti a vizet vagy a centrifugálás lépésben van. >>> Várja meg a program végét.
• A gyerekzár aktív. Az ajtózár a program vége után néhány perccel deaktiválódik. >>> Várjon pár percet, amíg az ajtózár kikapcsol.
A mosás a használati útmutatóban megadottnál hosszabb ideig tart.(*)
• Alacsony a víznyomás. >>> A kevesebb vízmennyiség miatt bekövetkező gyenge mosásminőség elkerülése érdekében a gép
megvárja, amíg elegendő vizet tud vételezni. Ezért a mosási idő meghosszabbodik.
• Lehet, hogy alacsony a feszültség. >>> Ha a feszültség alacsony, a gyenge mosási eredmény elkerülése érdekében a mosási idő
meghosszabbodik.
• Lehet, hogy alacsony a beömlő víz hőmérséklete. >>> Hideg évszakokban a víz felmelegítéséhez több idő szükséges. Az is
lehetséges, hogy a gyenge mosási eredmény elkerülése érdekében több időre van szükség.
• Esetleg megnőtt az öblítések száma és/vagy az öblítővíz mennyisége. >>> A megfelelő öblítés érdekében a gép megnöveli az
öblítővíz mennyiségét és szükség esetén plusz öblítést iktat be.
• Lehet, hogy túl sok mosóport tett a gépbe, ami fokozott mértékű habzáshoz vezetett, és így az automatikus habelnyelő rendszer
bekapcsolt. >>> Ügyeljen a mosópor megfelelő mennyiségére.
70 / HU
Mosó-Szárítógép

Hibaelhárítás
A program időzítője nem számol vissza. (Kijelzővel ellátott modelleknél) (*)
• Vízfelszíváskor az időzítő leállhat. >>> Az időzítő addig nem kezd el visszaszámolni, amíg a gép fel nem szívta a szükséges
mennyiségű vizet. A gép egészen addig vár, amíg elegendő mennyiségű víz kerül bele, hogy ezzel elkerülhető legyen a rossz
mosási eredmény. Az időzítő ezután folytatja csak a visszaszámlálást.
• Melegedéskor az időzítő leállhat. >>> Az időzítő addig nem számol vissza, amíg a gép el nem éri a kívánt hőmérsékletet.
• Centrifugázáskor az időzítő leállhat. >>> Ha a dobban egyenetlenül van elrendezve a szennyes, akkor bekapcsolhat az automatikus
egyenetlen szennyeselrendeződés érzékelő rendszer.
A program időzítője nem számol vissza. (*)
• A gépben lévő ruhák esetleg nincsenek egyenletesen elrendezve. >>> Ha a dobban egyenetlenül van elrendezve a szennyes, akkor
bekapcsolhat az egyenetlenül elrendezett szennyest érzékelő automatikus rendszer.
A gép nem kapcsol centrifugálásra. (*)
• A gépben lévő ruhák esetleg nincsenek egyenletesen elrendezve. >>> Ha a dobban egyenetlenül van elrendezve a szennyes, akkor
bekapcsolhat az egyenetlenül elrendezett szennyest érzékelő automatikus rendszer.
• Ha a víz nincs teljesen leszivattyúzva, a gép nem centrifugál. >>> Ellenőrizze a szűrőt és a vízleeresztő tömlőt.
• Lehet, hogy túl sok mosóport tett a gépbe, ami fokozott mértékű habzáshoz vezetett, és így az automatikus habelnyelő rendszer
bekapcsolt. >>> Ügyeljen a mosópor megfelelő mennyiségére.
A mosási teljesítmény gyenge: A ruhák elszürkülnek. (**)
• A használt mosószer mennyisége hosszú ideig nem volt elég. >>> Használjon a vízkeménység és a szennyes ruha alapján ajánlott
mennyiségű mosószert.
• A mosás sokáig alacsony hőmérsékleten történt. >>> Válassza a mosandó ruháknak megfelelő hőmérsékletet.
• Elégtelen mennyiségű mosószer használata kemény víz esetén. >>> Ha a víz kemény és nem használ elegendő mosószert, akkor
a szennyeződés rátapad a ruhákra és ez idővel a ruhák elszürkülésével jár. A már bekövetkezett elszürkülést nehéz kiküszöbölni.
Használjon a vízkeménység és a szennyes ruha alapján ajánlott mennyiségű mosószert.
• Túl sok mosószert tett a fiókba. >>> Használjon a vízkeménység és a szennyes ruha alapján ajánlott mennyiségű mosószert.
A mosási teljesítmény gyenge: A foltok megmaradnak vagy a ruhák nem lesznek fehérek. (**)
• Elégtelen mennyiségű mosószer használata. >>> Használjon a ruhákhoz ajánlott mennyiségű mosószert.
• Túl sok ruhát töltött be. >>> Ne töltse túl a gépet. A „Program és fogyasztási táblázat" szerinti mennyiségeket töltse be.
• Rossz program és hőmérséklet lett kiválasztva. >>> A mosandó ruháknak megfelelő programot és hőmérsékletet válasszon ki.
• Nem megfelelő mosószer használata. >>> A géphez megfelelő, eredeti mosószert használjon.
• Nem megfelelő rekeszbe tette a mosószert. >>> A mosószert a megfelelő rekeszbe tegye. A fehérítőt és a mosószert ne keverje
össze egymással.
A mosási teljesítmény gyenge: A ruhán olajfoltok jelentek meg. (**)
• Nem került sor a dob rendszeres tisztítására. >>> A dobot rendszeresen tisztítsa meg. Lásd a 6.2. pontot.
A mosási teljesítmény gyenge: A ruhák kellemetlen szagot árasztanak. (**)
• Az alacsonyabb hőmérsékleten és/vagy rövidprogramokkal történő folyamatos mosás eredményeként a dobon szag- és baktériumlerakodás jött létre. >>> Minden mosás után hagyja félig nyitva a mosószeres fiókot és a betöltőajtót. Így nem alakulhat ki a
gépben a baktériumok számára kedvező nedves környezet.
A ruhák színe kifakult. (**)
• Túl sok ruhát töltött be. >>> Ne töltse túl a gépet.
• Az éppen használt mosószer nyirkos. >>> A mosószereket páramentes környezetben, elzárva tárolja és ne tegye ki azokat
szélsőséges hőmérsékletnek.
• Magasabb hőmérséklet lett kiválasztva. >>> A ruha fajtájának és szennyezettségi fokának megfelelő programot és hőmérsékletet
válasszon ki.
Az öblítés nem megfelelő.
• Nem megfelelő a használt mosószer mennyisége, márkája és tárolása. >>> Használjon a mosógépnek és a ruháknak megfelelő
mosószert. A mosószereket páramentes környezetben, elzárva tárolja és ne tegye ki azokat szélsőséges hőmérsékletnek.
• Nem megfelelő rekeszbe tette a mosószert. >>> Ha a mosószert az előmosás rekeszbe teszi, noha előmosás nincs kiválasztva,
akkor a gép ezt a mosószert használja fel az öblítés és lágyítás lépések során. A mosószert a megfelelő rekeszbe tegye.
• A szivattyúszűrő eltömődött. >>> Ellenőrizze a szűrőt.
• A vízleeresztő tömlő meghajlott. >>> Ellenőrizze a tömlőt.
Használati útmutató
71 / HU

Hibaelhárítás
A mosás után a ruhák merevek/kemények lesznek. (**)
• Elégtelen mennyiségű mosószer használata. >>> A vízkeménységnek nem megfelelő mennyiségű mosószer használata idővel
azzal jár, hogy a ruhák merevekké, keményekké válnak. Használjon a vízkeménységnek megfelelő mennyiségű mosószert.
• Nem megfelelő rekeszbe tette a mosószert. >>> Ha a mosószert az előmosás rekeszbe teszi, noha előmosás nincs kiválasztva,
akkor a gép ezt a mosószert használja fel az öblítés és lágyítás lépések során. A mosószert a megfelelő rekeszbe tegye.
• Lehet, hogy a mosószer összekeveredett a lágyöblítővel. >>> Ne keverje össze az öblítőt és a mosószert. Forró vízzel mossa ki és
tisztítsa meg a mosószeradagolót.
A ruháknak más az illata, mint az öblítőnek. (**)
• Nem megfelelő rekeszbe tette a mosószert. >>> Ha a mosószert az előmosás rekeszbe teszi, noha előmosás nincs kiválasztva, akkor
a gép ezt a mosószert használja fel az öblítés és lágyítás lépések során. Forró vízzel mossa ki és tisztítsa meg a mosószeradagolót.
A mosószert a megfelelő rekeszbe tegye.
• Lehet, hogy a mosószer összekeveredett a lágyöblítővel. >>> Ne keverje össze az öblítőt és a mosószert. Forró vízzel mossa ki és
tisztítsa meg a mosószeradagolót.
Mosószer-lerakodás a mosószeres fiókban. (**)
• A mosószer nedves fiókba került. >>> A mosószer adatolása előtt törölje ki a fiókot.
• A mosószer megnyirkosodott. >>> A mosószereket páramentes környezetben, elzárva tárolja és ne tegye ki azokat szélsőséges
hőmérsékletnek.
• Alacsony a víznyomás. >>> Ellenőrizze a víznyomást.
• Az előmosáshoz szükséges víz vételezésekor a főmosás rekeszben lévő mosószer nedves lett. Eltömődtek a mosószeres rekeszen lévő
lyukak. >>> Ellenőrizze a lyukakat és tisztítsa meg őket, ha eltömődtek.
• Gond van a mosószeres fiók szelepeivel. >>> Hívjon Szakképzett Szerelőt.
• Lehet, hogy a mosószer összekeveredett a lágyöblítővel. >>> Ne keverje össze az öblítőt és a mosószert. Forró vízzel mossa ki és
tisztítsa meg a mosószeradagolót.
Mosószer maradt a ruhákon. (**)
• Túl sok ruhát töltött be. >>> Ne töltse túl a gépet.
• Rossz program és hőmérséklet lett kiválasztva. >>> A mosandó ruháknak megfelelő programot és hőmérsékletet válasszon ki.
• Nem megfelelő mosószer használata. >>> Válasszon a mosandó ruháknak megfelelő mosószert.
Túl sok hab képződik a gépben. (**)
• Nem a mosógéphez megfelelő mosószereket használja. >>> Használjon a mosógéphez megfelelő mosószereket.
• Túl sok mosószer használata. >>> Csak az elégséges mennyiségű mosószert használja.
• A mosószer tárolása nem volt megfelelő. >>> A mosószert zárt és száraz helyen tárolja. A túl meleg helyek nem alkalmasak a
tárolásra.
• Egyes hálós textúrájú mosandók, pl. tüll anyag esetében erőteljes a habképződés. >>> Az ilyen szennyes esetében kevesebb
mosószert használjon.
• Nem megfelelő rekeszbe tette a mosószert. >>> A mosószert a megfelelő rekeszbe tegye.
• A gép a lágyöblítőt korán használja fel. >>> Gond lehet a szelepekkel vagy a mosószeradagolóval. Forduljon szervizhez.
Habzik a mosószertartó.
• Lehet, hogy túl sok mosószert használ. >>> Tegyen 1 evőkanál öblítőt fél liter vízbe, és öntse ezt a mosószertartó fő mosórészébe.
• Tegye be a programnak és a ruha mennyiségének megfelelő mennyiségű mosóport (Lásd: “Program és fogyasztási táblázat”).
Kiegészítő vegyszerek (pl. folteltávolítók, fehérítők stb.) esetén kevesebb mosószert kell használni.
A program lejárta után a ruha nedves marad. (*)
• Lehet, hogy túl sok mosószert tett a gépbe, ami fokozott mértékű habzást eredményezett, ezért bekapcsolt az automatikus habelnyelő
rendszer. >>> Ügyeljen a mosópor megfelelő mennyiségére.
72 / HU
Mosó-Szárítógép

Hibaelhárítás
A szárítás túl sokáig tart.
• Lehet, hogy a gép elején található légbeeresztő szűrő pórusai eltömődtek. >>> Mossa át a légbeeresztő szűrőt langyos vízzel.
• Lehet, hogy a gép elején található légbeeresztő szűrő eltömődött. >>> Távolítson el mindent, ami akadályozhatja a légbeeresztő szűrő előtt
a szellőzést.
• Lehetséges, hogy a szellőzés azért nem kielégítő, mert túl kicsi az a hely, ahová a gépet beszerelték. >>> A környezeti hőmérséklet túlzott
megemelkedésének elkerülése érdekében nyissa ki az ajtókat és az ablakokat.
• Túl sok ruhát töltött be. >>> Ne töltse túl a mosó- szárítógépet.
• Lehetséges, hogy a ruhák centrifugázása nem volt megfelelő. >>> A mosási ciklus alatt nagyobb centrifugálási sebességgel működtesse
a mosó- szárítógépet.
• A csap el van zárva. >>> Nyissa ki a csapokat.
A szárítás után a ruha nedves marad.
• Lehetséges, hogy nem a ruha fajtájának megfelelő programot használta >>> A ruhacímkék ellenőrzését követően válasszon a ruha fajtájának
megfelelő programot, illetve használjon időzítéses programokat is.
• Lehet, hogy a gép elején található légbeeresztő szűrő pórusai eltömődtek. >>> Mossa át a légbeeresztő szűrőt langyos vízzel.
• Túl sok ruhát töltött be. >>> Ne töltse túl a mosó- szárítógépet.
• Lehetséges, hogy a ruhák centrifugázása nem volt megfelelő. >>> A mosási ciklus alatt nagyobb centrifugálási sebességgel működtesse
a mosó- szárítógépet.
A gép nem kapcsol be vagy a program nem indul el.
• Lehet, hogy a tápkábel nincs bedugva. >>> Ellenőrizze, be van-e dugva a tápkábel.
• Lehetséges, hogy a program nincs beállítva vagy a Start / Szünet / Törlés gomb nincs megnyomva. >>> Ellenőrizze, hogy beállította-e a
programot, illetve, hogy a gép nincs-e Szünet üzemmódban.
• Be van kapcsolva a gyerekzár. >>> Kapcsolja ki a gyerekzárat.
A ruhák összementek, megsárgultak, kifilcesedtek vagy megsérültek.
• Lehetséges, hogy nem a ruha fajtájának megfelelő programot használta >>> A ruhacímkék ellenőrzését követően válasszon a ruha
fajtájának megfelelő programot, illetve használjon időzítéses programokat is. Gépben nem szárítható ruhák esetében nem szabad
szárítást végezni.
Nem végezhető szárítás
• Lehet, hogy a ruha nem száraz vagy nincs bekapcsolva a szárítási funkció. >>> Ellenőrizze, hogy a kiválasztott mosási program után
kiválasztotta-e a szárítási funkciót is.
A betöltőajtó nem nyitható ki.
• Lehet, hogy a gép ajtaja biztonsági okokból nem nyitható ki. >>> Ha megjelenik a „várjon amíg lehűl...." figyelmeztetés, a biztonság
érdekében a betöltőajtó zárva marad mindaddig, amíg a gép le nem hűl. Egy 10 perces szárítóprogram lefuttatásával a gép
gyorsabban lehűthető.
(*) Ha a ruhák egyenetlenül vannak elosztva a dobban, a gép és annak környezete védelme érdekében a centrifugálás nem indul el. Ilyenkor a
szennyest át kell rendezni, majd el kell indítani a centrifugázást.
(**) Nem került sor a dob rendszeres tisztítására. >>> A dobot rendszeresen tisztítsa meg. Lásd a 6.2 pontot
A
Használati útmutató
FIGYELMEZTETÉS
Ha az itt közöltek segítségével sem tudja elhárítani a problémát, akkor forduljon a viszonteladóhoz vagy a hivatalos
márkaszervizhez. Sose próbálja saját maga megjavítani a készüléket!
73 / HU

PAMUT
HŐMÉRSÉKLET
MOSÁS ÉS
VISELÉS
PAMUT ECO
SZİNTETIKUS
KÉNYES RUHADARABOK
GYAPJÚ
KÉZI MOSÁS
ING
ÖBLÍTÉS
CENTRIFUGÁZÁS
ELŐMOSÁS
EXTRA
ÖBLÍTÉS
GYŰRŐDÉSGÁ
TLÁS
KEDVENC
BE KI
INDÍTÁS
SZÜNET
kg
6 KG MOSÁS ÉS
6 KG SZÁRÍTÁS
BABYPROTECT
PLUSZ
MŰSZÁLAS
ANYAG SZÁRÍTÁSA
PAMUT
SZÁRÍTÁSA
SZÁRÍTÁS
74 / HU
CENTRIFUGA
SZIVATTYÚZÁS
SZUPER RÖVİD
EXPRESSZ
NAPI
EXPRESSZ
BEFEJEZÉSI
IDŐ
Mosó-Szárítógép

Használati útmutató
75 / HU

www.beko.com
 Loading...