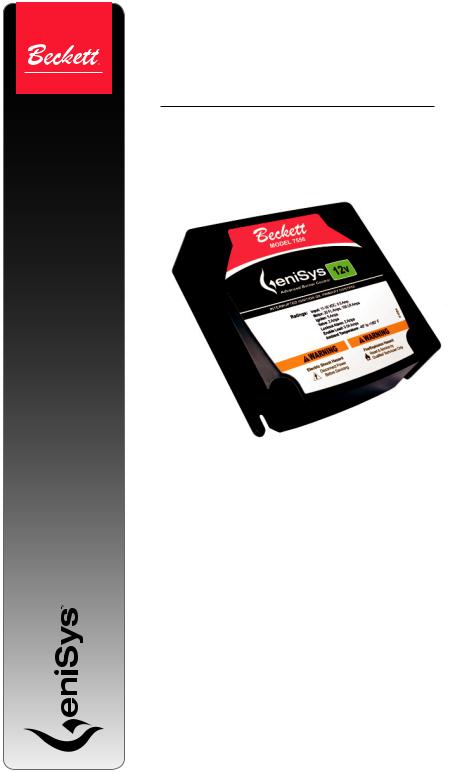
Beckett 7556 User Manual

GeniSys™ 12V
PARTS & ACCESSORIES
Model 7556
Advanced 12 Vdc Burner Control
Description / Applications
The Beckett GeniSysTM 12V Advanced Burner Control is a 12 Vdc primary safety control for oil burners used in special applications including, but not limited to, water heaters, pressure washers, crack sealers and portable heaters having firing rates less than 5.5 GPH. The GeniSysTM 12V is used with a suitable cad cell flame sensor to control the oil burner motor, igniter, and optional solenoid valve. It has 12 volt enable input compatible with mechanical and high limit switches. It can provide interrupted or intermittent duty ignition, and it has a 15 second lockout time on flame failure.

Features
◦Welded Relay Protection
◦Limited Relight
◦Valve-On Delay / Motor-Off Delay (Field programmable with Beckett’s Contractor Tool)
◦15 Second Lockout Time
◦Interrupted Ignition
◦Communication Port
◦Lockout Alarm Output
Specifications
|
Do Not Use This |
CAUTION |
|
|
Control in an |
|
Application that is Not Within the Ratings Listed in This Section. Improper Control Operation May Result.
|
Do Not Use This |
CAUTION |
|
|
Control Above 5.5 GPH |
|
|
Electrical Ratings
Inputs:
◦Voltage: 12 Vdc nominal (11 to 16 Vdc)
◦Current: 160 mA nominal (500 mA max at 16 Vdc)*
◦Enable Load: 40mA at 12 Vdc
Outputs:
◦Motor: 12 Vdc, 20 full load amps (FLA), 100 locked rotor amps (LRA)
◦Igniter: 12 Vdc, 5 A
◦Solenoid Valve: 12 Vdc, 2 A
◦Lockout Alarm: 12 Vdc, 2A
* |
|
|
The 7556 control |
|
|
||
|
|
|
draws 60-75mA in the |
|
|
|
|
|
standby state. If the red control wire is left |
||
|
powered without a battery charging system, |
||
|
it can drain a standard 45 Amp hour |
||
|
automotive battery in two to four weeks. |
||
Environmental Ratings:
◦Storage and Operating Ambient Temperature: -40°F to +160°F (-40°C to +71°C)
◦Moisture: 5 to 95% RH, condensing
WARNING |
Maintain Specified |
|
Voltage |
|
A low or erratic power supply could result in impaired burner operation, severe delayed ignition or an explosion inside the heat exchanger resulting in a burn and/or asphyxiation hazard.
•Beckett DC Burners require a continuous supply of 11 to 16 volts DC (at 15 amps for Model ADC or 25 amps for Model SDC), measured at the burner during operation.
•Consult other DC burner manufacturers’ specifications for the correct voltage range.
•Special Note: The 7556 Control shuts the burner down if the input voltage drops to a sustained level of 10 volts DC, or below. Operation resumes at a sustained input voltage of 11 volts DC, or above.
•An automotive or small engine charging system that is capable of supplying the required continuous voltage/amperage is recommended with certain road equipment, such as asphalt hot patchers and similar applications.
•This is especially true while maintaining nominal load temperatures during idle periods.
Table 1 - Model Guide
Beckett |
|
Valve-on |
Motor- |
||
GeniSys |
Lockout |
off |
|||
delay |
|||||
12V Control |
Time |
delay |
|||
time |
1 |
||||
Part No. |
|
|
time1 |
||
7556A 00001 |
15 sec |
0 sec |
0 sec |
||
7556P 15301 |
15 sec |
15 sec |
30 sec |
||
7556P 151M1 |
15 sec |
15 sec |
1 min |
||
7556P 152M1 |
15 sec |
15 sec |
2 min |
||
7556P 158M1 |
15 sec |
15 sec |
8 min |
||
1 - Valve-on delay and motor-off delay timings on all models are programmable with the Beckett Contractor Tool. Other factory set timings are available. Contact Beckett for alternate timings.
2

Installation/Operation/Maintenance
WARNING Professional
Service Required.
Incorrect installation or misuse of this control could result in severe personal injury or death from heavy smoke, explosion or fire.
Please read and understand the manual supplied with this control. This control must be installed, adjusted and put into operation only by a qualified individual or service agency that is:
•Licensed or certified to install and provide technical service to oil heating systems.
•Experienced with all applicable codes, standards and ordinances.
•Responsible for the correct installation and commission of this equipment.
•Skilled in the adjustment of oil burners using combustion test instruments.
The installation must strictly comply with all applicable codes, authorities having jurisdiction and the latest revision of the National Fire Protection Association Standard for the Installation of OilBurning Equipment, NFPA 31 (or CSA-B139 and CSA-B140 in Canada) for stationary equipment. Regulation by these authorities take precedence over the general instructions provided in this installation manual.
|
Electrical Shock |
WARNING |
|
|
Hazard |
|
Electrical shock can cause severe personal injury or death.
•Disconnect ALL electrical power to the equipment/burner circuit before installing or servicing this control.
•Provide ground wiring to the equipment, burner and metal control mounting box.
•Perform all wiring in compliance with the National Electrical Code ANSI/NFPA 70 (Canada CSA C22.1).
|
Explosion, Fire, |
WARNING |
|
|
Scald, & Burn |
|
|
|
Hazard |
All heating equipment must have HIGH LIMIT controls to protect against excessive temperature and/or pressure. The control must
interrupt electrical power and shutdown the burner, if operating or safety controls fail and cause a runaway condition.
•Follow the equipment manufacturer’s wiring diagrams and note all required safety controls.
•Typical safety controls include high temperature or pressure limits, low water cutoffs, pressure relief valves and blocked flue sensing switches.
•Verify all limit and safety controls are installed and functioning correctly, as specified by the manufacturer, applicable safety standards, codes and all authorities having jurisdiction.
•Insure that the equipment is free of oil and oil vapor before starting or resetting the burner.
•Do not wire power directly to the burner motor. Only wire the motor as shown in Figure 2. If instant burner heat is required by the application, purchase or program a control with a long motor-off delay time, which will ensure instant heat if a new call for heat is received within the motor-off delay time.
Mounting:
Mount the control on a 4” x 4” junction box on the burner, or inside the equipment cabinet. In replacement applications, mount the new control in the same location as the old control. In some replacement applications, it may be necessary to rotate the control on the 4” x 4” box for best fit. Mounting orientation: any orientation is acceptable with the exception of up-side down.
GeniSys 12V Control Installation and Operation Manual |
3 |
 Loading...