

Page 1
,
User s manual
950 Speakerphone
with caller ID/call
waiting
For customer service or product
information, call
1 (866) 288-4268 (Canada), or visit our
website at
1 (800) 222-3111 (US),
www.telephones.att.com.
Please also read
Part 1 Important
product information
Page 2

Table of contents
Product overview
Before you begin
Parts list
About caller identification
(caller ID)
About call history
About home area code
and local area codes
Installation
Battery installation
Tabletop/desktop installation
Wall mount installation
Data port
Feature setup
Language selection
Set contrast
Set home area code
Set local area code
Set time and date
Set remaining features
Feature summary
One touch memory
Store a number in a
one touch location
Store a pause or flash in a
one touch entry
Store a call history number
in a one touch location
Review a one touch entry
Dial a one touch number
Delete a one touch entry
Directory memory
Keypad characters
Store numbers and names
in the directory
Store a pause or flash
in a directory number
Store a call history number
in the directory
View directory entries
Dial a directory number
Delete a directory entry
Contents
Contents
Telephone
operation
Make a call
Answer a call
Switch between handset
and speakerphone
Handset or speakerphone
volume
Redial
Flash/call waiting
Hold
Mute
Ringer volume/call info
Display screen icons
Base lights
Caller ID operation
Caller ID
Review call history
Remove call records
Display dial
Screen messages
Default settings
General
product care
Technical
specifications
In case of difficulty
INDEX
i
Page 3

Product overview
This AT&T 950 Speakerphone with caller ID with call waiting can be
used flat on a tabletop or desktop or mounted on a wall and does
not require AC power for operation. The 950 features a speakerphone
for hands-free use and a data port which allows the use of another
device such as a modem, fax machine, or answering system with the
same wall jack. The 950 also features a 14-number memory for fast
dialing and a directory which can store up to 25 additional numbers
with names. This telephone has a caller ID feature which supports
caller ID with call waiting service. (Caller ID services are subscriber
services available form many local telephone companies for a fee.)
This User's manual contains detailed instructions for installing and
operating your AT&T 950 Speakerphone with caller ID/call waiting.
Please be sure to follow the directions carefully.
Product overview
Product overview
1
Page 4
Before you begin
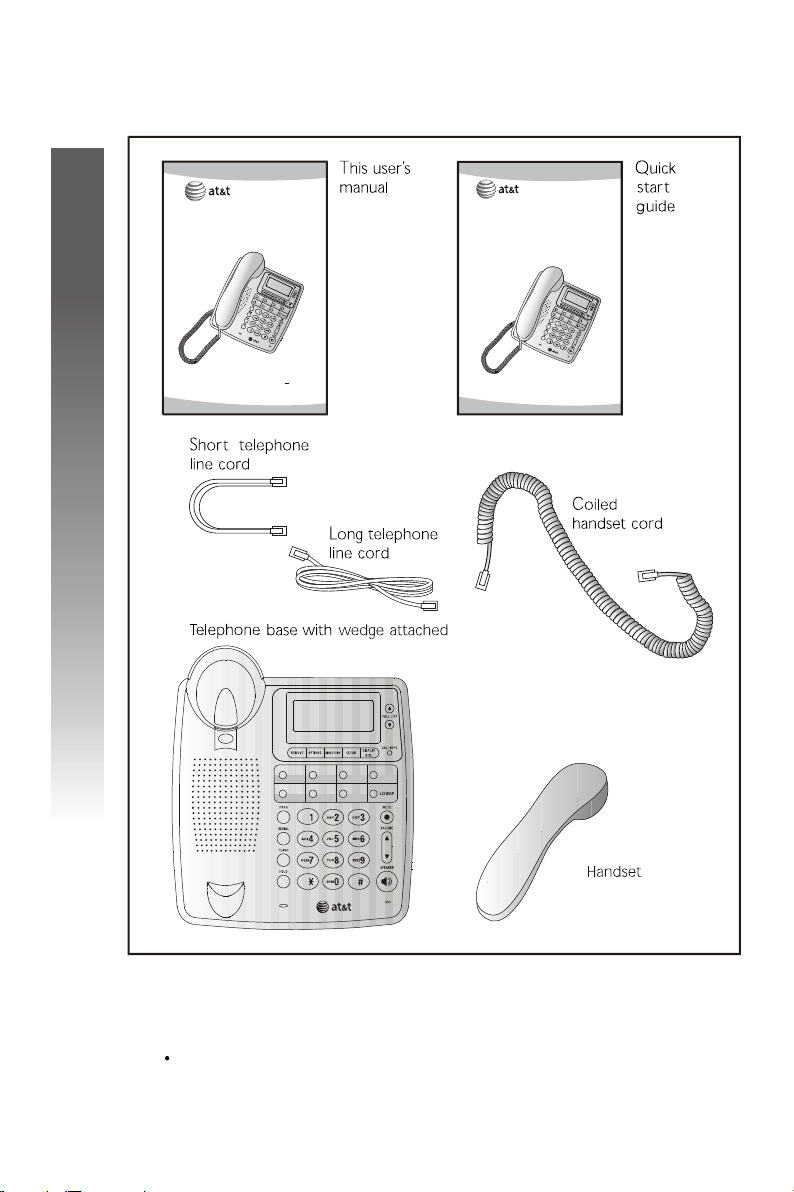
Parts list
Your box should include:
,
User s manual
950 Speakerphone
with caller ID/call
waiting
Quick start guide
950 Speakerphone
with caller ID/call
waiting
Before you begin
Before you begin
For customer service or product
information, call
1 (800) 222-3111 (US),
1 (866) 288-4268 (Canada), or visit our
www.telephones.att.com.
website at
Please also read
Part 1 Important
product information
Also needed
You will also need the following to install your phone:
Four AA batteries (purchased separately).
2
Page 5

About caller identification (caller ID)
This product has a caller ID with call waiting feature that works with
services from your local telephone service provider.
Caller ID with call waiting lets you see who s calling before you answer
the phone, even when you re on another call.
You may need to change your telephone service to use this feature.
Contact your phone service provider if:
You have both caller ID and call waiting, but as separate
services (you may need combined service).
You have only caller ID service, or only call waiting service.
You don't subscribe to any caller ID or call waiting services.
You can use this product with regular caller ID service, and you can
use this product's other features without subscribing to either caller ID
or combined caller ID with call waiting service.
There are fees for caller ID services, and they may not be available in
all areas.
This product can provide information only if both you and the caller
are in areas offering caller ID service, and if both telephone companies
use compatible equipment.
,
,
About call history
This telephone assigns each incoming call a number from 1 to 65. The
most recent call will have the highest number. When the memory is full,
the earliest call information is deleted to make room for new incoming
call information.
If you answer a call before the call information appears on the screen,
it will not be stored in the call log.
Before you begin
Before you begin
About home area code and local area codes
Always program your home area code, and if you need them, up to
four local area codes (see Set home area code and set local area
codes on pages 11 and 12). programming these area codes will
change how numbers are displayed in the call history by using the
dialing option feature, and will allow for correct operation of the
display dial feature.
3
Page 6

Installation
Battery installation
Before using the telephone, you should install four AA batteries
(purchased separately). You can use the phone without the batteries
to dial and receive calls using the handset, but four AA batteries are
required to power the display screen,
Program, Flash, Hold, Mute
and caller ID features.
speakerphone, Features Setup,
CAUTION:
new batteries.
1.
Press down on the battery compartment tabs as shown
and pull to open the battery cover.
Installation
Installation
2.
Insert four new AA batteries (purchased separately)
following the polarity markings in the battery
compartment.
Always unplug the line cord before installing
Base wedge
3.
Close the battery compartment cover, making sure
the cover snaps into place.
4
Page 7
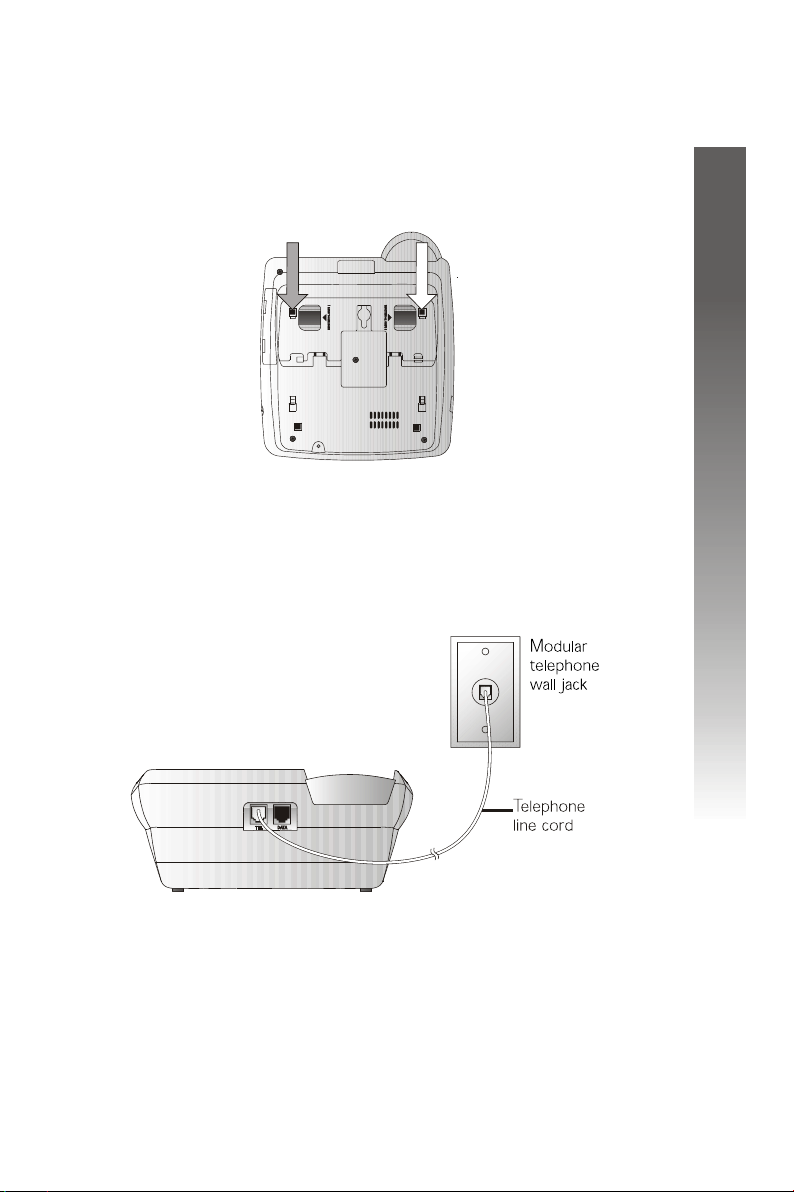
Tabletop/desktop installation
1.
Check the base wedge.
The set arrived with the base wedge positioned for desk use.
Make sure it is secure by pressing the two feet.
2.
Connect the long telephone line cord to the jack
labeled TEL on the back of the telephone.
Installation
Installation
3.
Connect the line cord to a modular wall jack.
continued on page 6
5
Page 8
Tabletop/desktop installation
continued from page 5
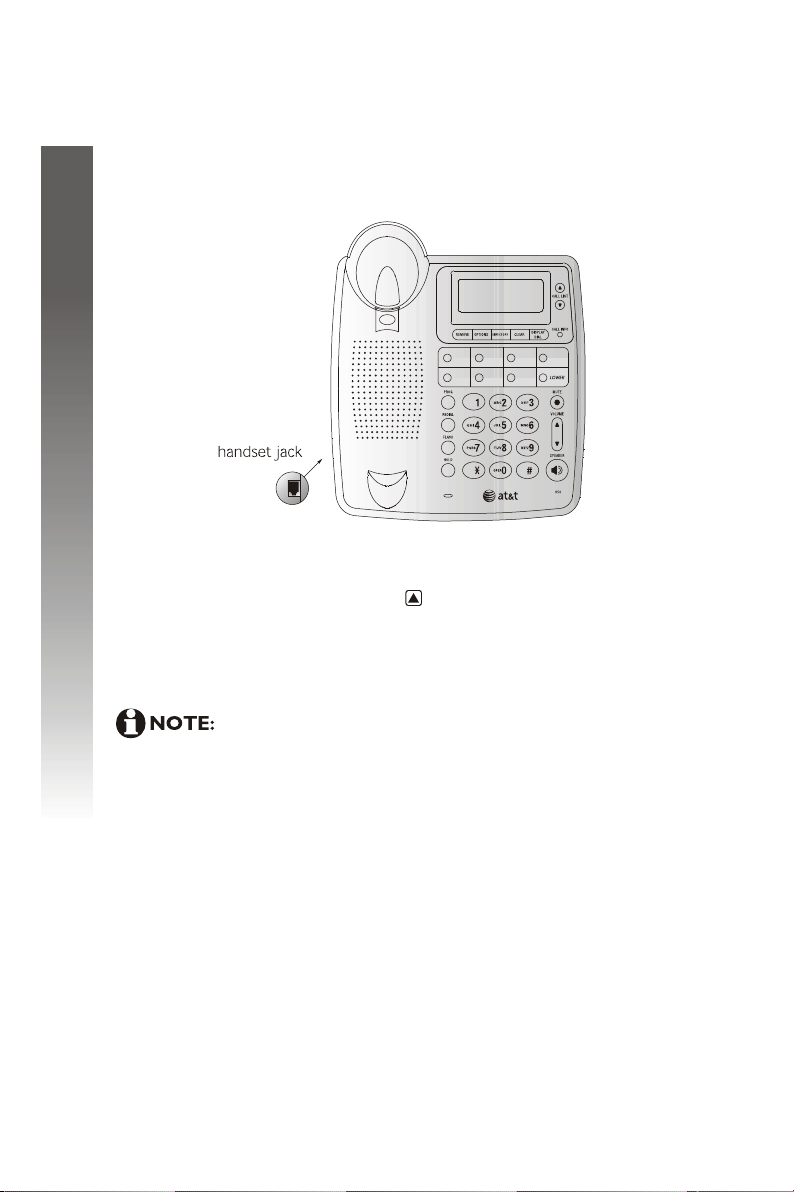
Connect the handset to the telephone.
4.
Plug the coiled handset cord into the handset jack on the left
side of the base. Plug the other end of the coiled
cord into the handset, then hang up.
Installation
Installation
Check for dial tone.
5.
Lift the handset and listen for a dial to ne. If you cannot hear a
dial tone, press VOLUME . If you still do not hear a dial tone,
see the I section, pages 34-36, of this manual.n case of difficulty
Your phone will work immediately after installation using the default
feature settings (see Default settings on page 31).
telephone
If you subscribe to caller ID services from your local
telephone service provider, you must follow the instructions in
Set home area code, (see page 11), for your phone to properly
recognize and dial calls from the call history list. You may also
need to check Set local area code (see page 12) if you want the
phone to recognize multiple area codes.
6
Page 9

Wall mount installation
Reposition the base wedge for wall use.
1.
Press on the base wedge as shown in figure a to release the
wedge. Rotate the wedge as shown in figure b so that the
larger end is toward the bottom of the telephone. Lock the
wedge by positioning it as shown in figure c and pressing,
(as shown by the arrow), it into the telephone base until it
locks in place.
Connect the short telephone line cord to the telephone.
2.
Plug one end of the short line cord into the jack labeled
TEL LINE and thread the cord through the tabs under the
phone as shown.
Installation
Installation
continued on page 8
7
Page 10

Wall mount installation
continued from page 7
Reverse the handset tab.
3.
This tab holds the handset when you hang up. Hold down the
switchhook, and slide the handset tab up and out of its slot.
Turn the tab so that the end with the hook is up. Then insert
the handset tab back into its slot.
Switchhook
Handset tab
Installation
Installation
4.
Connect the short telephone line cord to a modular wall
jack and mount the telephone on the wall jack.
Make sure the short telephone line cord snaps firmly into place.
Place the telephone on the wall jack mounting studs and pull
down until it is held securely.
Follow steps 4-5 in Tabletop/desktop installation on page 6.
5.
8
Page 11

Data port
If you want to connect another device (such as a modem or fax machine)
to the wall jack, use the jack on the telephone labeled DATA. A call
picked up at another extension may interrupt a fax, modem or message
transmission.
Data Port
Installation
Installation
9
Page 12
Feature setup
The screen will display prompts to help you setup the phone when
you first install it. You can always get back to these setup screens by
pressing .
You can exit feature setup at any time by
CLEAR
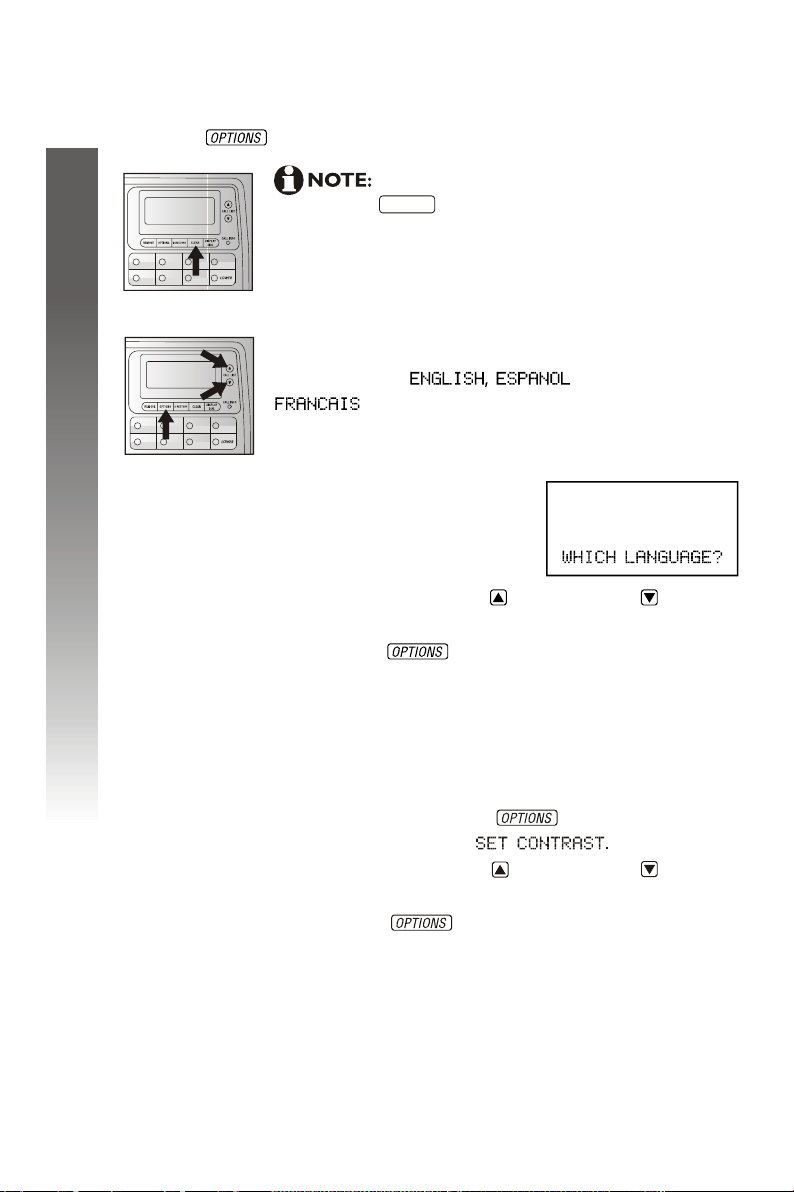
Press CALL LIST or CALL LIST until the
screen displays your language selection.
Press to save the setting. You will
see the contrast setup screen.
Feature setup
Feature setup
pressing or by lifting the handset when there
is no incoming call. The order features appear in the
menu changes after the initial setup. For complete
feature setup, see Set remaining features on page 14.
Language selection
You can select (Spanish) or
(French) as the language in which your
screen prompts are displayed. When you first install
batteries, the screen displays:
1.
2.
10
Set contrast
Adjust screen lighting to a comfortable level, from 1
(light) to 4 (dark).
Press and release until the
1.
screen displays
Press CALL LIST or CALL LIST until the
2.
screen displays the contrast level you prefer.
Press to save the setting. You will see
3.
the HOME AREA CODE setup screen.
Page 13
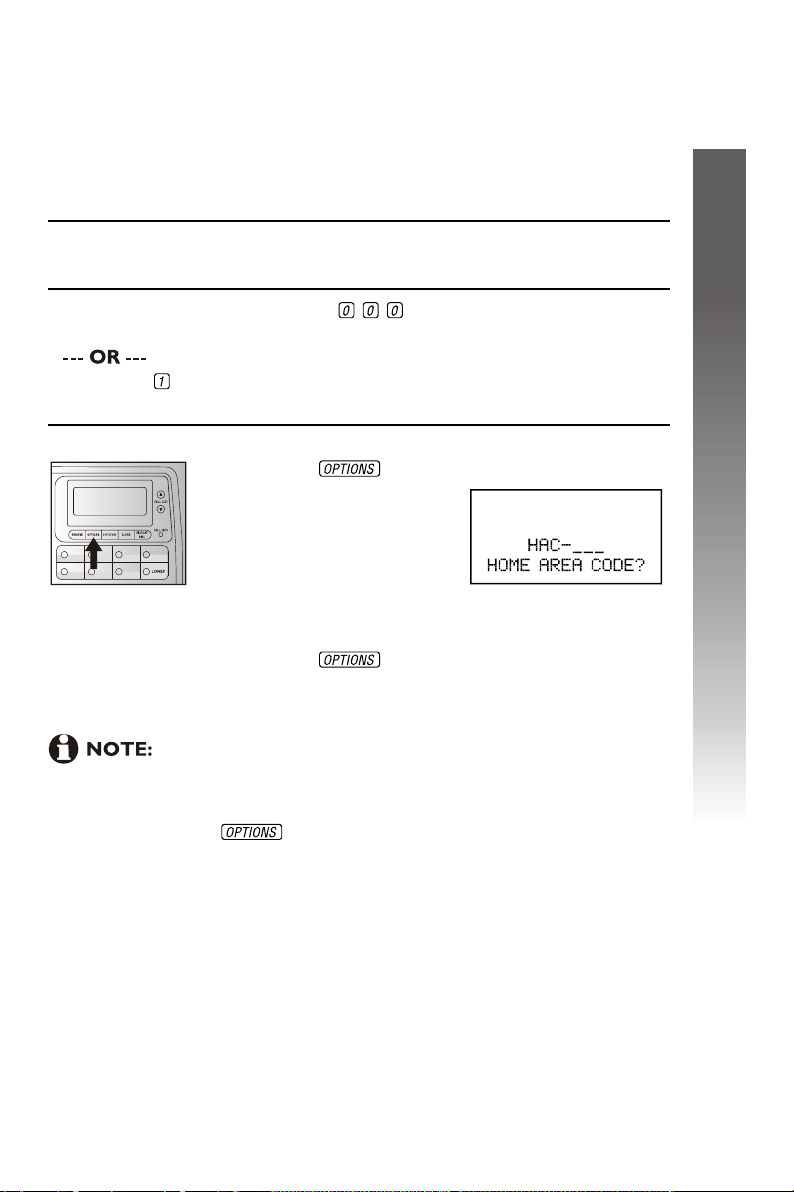
Set home area code
You must program your area code, so your phone can properly
recognize and dial calls.
For calls within your area code
You dial: Enter in step 2:
7 digits
(phone number, no area code)
10 digits
(area code telephone number)
11 digits ( + area code +
telephone number
A home area code must be programmed to use the display
dial feature. If you try to use display dial before entering a home area
code, you will be prompted to enter the home area code. Enter the
code and press .
+
Press until the screen displays:
1.
Use the keypad to enter your three digits of
2.
your home area code.
Press to save the setting. You will see
3.
the LOCAL AREA CODE setup screen.
Your area code
Feature setup
Feature setup
11
Page 14
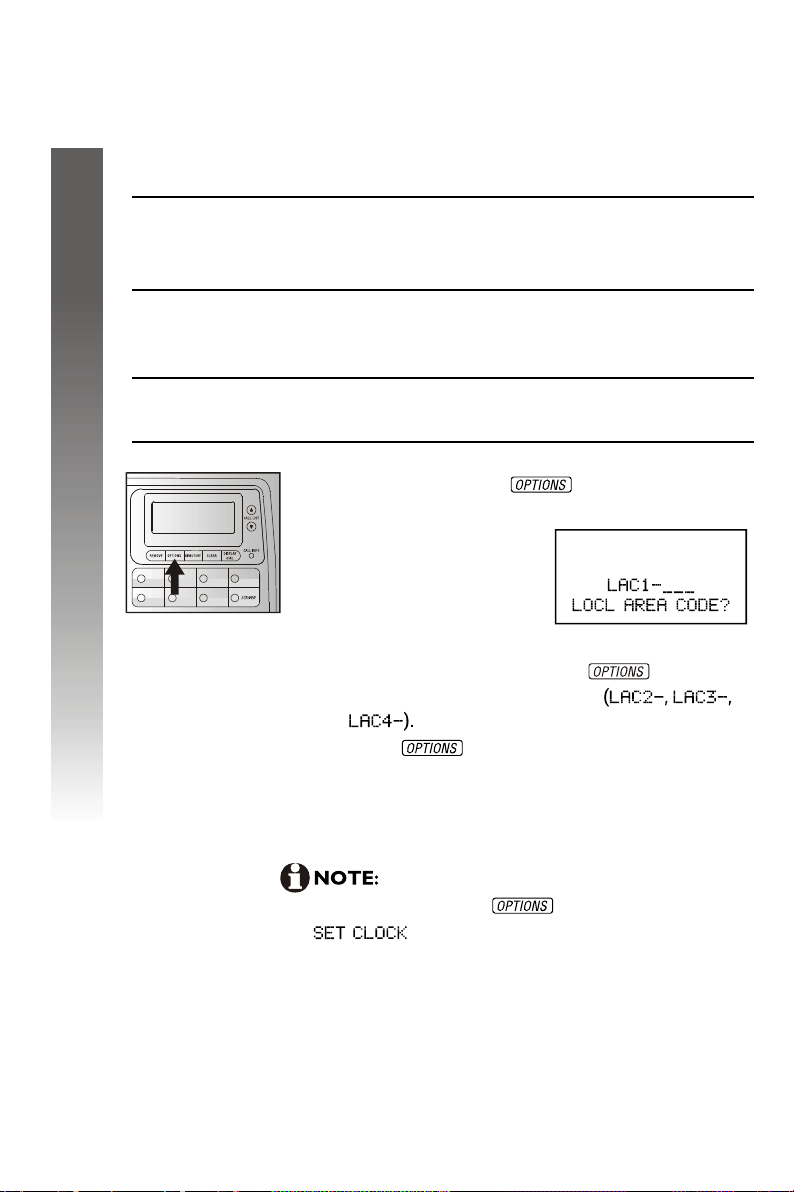
Set local area code
You can program up to four local area codes.
Calls outside your area
For: You dial: Enter in step 2:
All calls outside
your area code
Some calls
outside your
area code
If you dial 10 digits (area code + phone number) for calls within your
own area code, include your area code as a local area code.
Feature setup
Feature setup
11 digits
(1+ area code+
telephone number)
10 digits
(area code +
telephone number)
Press and release until the screen
1.
displays:
Use the keyp ad to enter the three digits of the
2.
first local area code. Press to advance
to the next local area code
Press to save the settings when you
3.
have finished entering local area codes. You
will see the call history screen.
No local
area code
Area codes
that do not
require a 1
12
If you do not need to program the local
area codes, pressing repeatedly until the
screen appears.
Page 15

Set time and date
Press and release Until the screen displays:
1.
Use the keypad to change the blinking digit.
2.
To enter a number that is less than 10, you must
enter a 0 before the number.
For example: To enter 1 , you must enter 01,
and to enter the month of March, you must enter 03.
Use CALL LIST or CALL LIST to move to the
nex digit. Use to select between and
When the correct time and date, (month first)
3.
are shown, press to save the new
setting and to move to the next option.
o'clock
Feature setup
Feature setup
13
Page 16

Set remaining features
You can customize how the features of this product work.
Press and release until the screen
1.
displays the desired feature.
Press CALL LIST or CALL LIST until the
2.
screen displays your selected setting. Refer to
the Feature summary below for a full
description of the features and your choices.
Press
3.
This saves your selection and automatically moves you
to the next option. When you finish setting features,
the phone will automatically return to standby in 30
seconds or you can press to exit programming
immediately.
Feature setup
Feature setup
Feature summary
Default settings indicated by*.
Feature/options: Choice:
(Refer to page 31 for the list of default settings.)
SET CLOCK
WHICH LANGUAGE
SET CONTRAST
SET HOME AREA CODE
SET LOCAL AREA CODES
14
Set the and time. Use to toggle
between and Use CALL LIST
and CALL LIST to choose a digit to
edit, then use the to change
the digits.
Choose whether the display
appears is English, Spanish,
or French.
Adjust screen lighting to a
comfortable level, from 1 (light)
to 4 (dark).
Set screen to recognize calls from
your area code.
Program up to four local area codes
that do not require dialing a 1
before them.
date
keypad
Page 17

Default settings indicated by*.
(Refer to page 31 for the list of default settings.)
Feature/options: Choice:
CALL HISTORY
REPEATED CALLS
CALL LIST ORDER
CID-CALL WAITING
Choose which incoming calls are stored.
The telephone stores all calls received.
The telephone does not store call history.
Choose how new calls from the same
number are displayed.
The screen shows only the most recent
call from this number, and REP is displayed.
Each call from this number is listed
separately.
Choose in what order calls are displayed.
Reverse order. Last call received is
displayed first.
Unreviewed calls are displayed first,
then calls by time.
Set for the type of service to which
you subscribe.
For type 2 service (screen displays
information about call waiting calls).
For type 1 service (screen does not
display information about call waiting
calls). Also choose this setting if you do
not subscribe to any caller ID services
or if you have data equipment connected
in series with the phone.
Feature setup
Feature setup
15
Page 18

Telephone operation
Make a call
1.
Lift the handset, then dial the number.
Press then dial the number.
To end the call, hang up.
2.
Press again.
Answer a call
Lift the handset.
Press
Note that the CALL INFO indicator flashes quickly to
show that the phone is ringing.
Switch between handset and
speakerphone
Telephone operation
Telephone operation
While on a handset call, press and replace
the handset in the telephone base.
While on a speakerphone call, lift the handset.
16
Handset or speakerphone volume
Press VOLUME or VOLUME to adjust the
volume of what you hear while on a call.
Page 19

Redial
The last number called from this telephone (up to 32 digits),
is stored in redial memory.
1.
Lift the handset.
Press
2.
Press The number is dialed automatically.
You can erase the redial memory by
pressing in idle mode.
PROG , REDIAL ,
PROG
Flash/call waiting
If you subscribe to call waiting service with your local
telephone service provider, you can answer a new
incoming call without losing your current call.
1.
While on a call press to connect to the
new call when you receive a call-waiting signal.
2.
Press again to return to the original call.
1. Use to access other phone company
subscriber services, as described by your
telephone company.
2. The telephone cannot display the information if
another telephone on the same line is in use.
Make sure all extensions are on hook when no t
in use.
Telephone operation
Telephone operation
Hold
Press to put a call on hold.
The CALL INFO will flash slowly to indicate the
call is on hold.
To return to the call, press again.
Lift the handset .
Press .
Pick up the call at another extension connected to
the same telephone line.
indicator
17
Page 20

Mute
Press to prevent the other party from hearing you
(you will still be able to hear the other party). Press
again to return to conversation.your two-way
Ringer volume
Use the ringer switch on the right side of the base to
adjust the ringer volume to OFF, LO or HI. If the ringer
switch is set of OFF, this telephone will not ring when
there is an incoming call. However, the CALL INFO
indicator will still flash to indicate an incoming call.
Call info
The CALL INFO indicator on the phone is used to indicate there is
additional information in the display about the current or previous calls.
Telephone operation
Telephone operation
18
Page 21

Display screen icons
Screen display: Indicates:
There is an error in the caller ID
information.
No phone cord connected, or this
phone or another phone on the
same line is in use. The screen might
also display
NEW
REP
Base lights
Light:
CALL INFO
CALL INFO
The caller ID information displayed is
unreviewed, (see Caller ID operation
beginning on page 27).
The caller ID information displayed is
for a repeat call from this caller. (see
ID operationCaller beginning on page 27).
Status: Indicates:
flashing slowly
flashing quickly
Line is in use.
Call is on hold.
You have unreviewed
caller ID information.
No phone cord connected.
Incoming call
Telephone operation
Telephone operation
Telephone operation
SPEAKER
MUTE
on
on
Speakerphone
Mute on
19
Page 22

One touch memory
This telephone has 14 one touch locations where you can store phone
numbers you want to dial using only one or two keys. You can store up to
24 digits in each location. The first seven locations can be accessed using
the one touch buttons. To access the remaining seven locations, press
and then the one touch button for the desired location.
You may wish to write the names or telephone numbers of one touch
entries on the directory card. Use the white spaces for the first seven
locations and the gray spaces for the other seven locations.
One touch memory
One touch memory
20
Page 23

Store a number in a one touch
location
1. Press . The screen displays
2. Dial the telephone number you want to store
(up to 24 digits).
Press to store the last number dialed.
If the redial number is longer than 24 digits,
you will hear an error tone if you are off hook while
storing the number. The number cannot be stored.
3. Press the one touch button for the desired
location
Press , then press the one touch
button for the desired location. The
screen displays
Store a pause or flash in a
one touch entry
Press CALL LIST twice to store a pause in the dialing
sequence (the screen displays ). Press to store a
press of the flash button (the screen displays F).
One touch memory
One touch memory
Store a call history number in a
one touch location
1. Press CALL LIST or CALL LIST to scroll
through the call history.
2. Press , then press a one touch button
Press , then press and a one
touch button to store the number.
The screen displays
21
Page 24

One touch memory
One touch memory
Review a one touch entry
1. Press the one touch button for the entry you
want to review.
Press , then press the one touch button
for the entry you want to review.
2. Press to return to the idle screen.
Dial a one touch number
When the phone is off hook (handset or
speakerphone):
Press the one touch button for the number you want
to call.
Press , then press the one touch button for the
number you want to call.
When the phone is on hook:
1. Press the one touch button for the number
you want to call.
22
Press , then the one touch button
for the number you want to call.
2. When the number is displayed on screen, press
. The call is dialed using the
speakerphone.
You can switch to the handset after dialing
begins by lifting the handset.
press
Delete a one touch entry
1. Follow the directions in Review a one touch
entry.
2. When the number you want to delete is
displayed, press . The entry is deleted.
Page 25

Directory memory
This telephone has a directory where you can store up
to 25 additional telephone numbers and names.
Numbers can be up to 24 digits long and names can
be up to 15 characters.
Directory entries are stored in alphabetical order. You
may wish to enter names with the last name first to
maintain consistency with information stored through
the caller ID features of this phone.
Press at any time to exit the directory without
saving changes and return to the idle screen.
Keypad characters
Dial key
Presses
Directory memory
Directory memory
Entries cannot be edited after screen displays
23
Page 26

Directory memory
Directory memory
Store numbers and names in the
directory
1. Press , then . The screen
displays
2. Dial the telephone number you want to
store (up to 24 digits).
Press to store the last number dialed.
If the redial number is longer than 24
digits, you will hear an error tone if you are off
hook while storing the number. The number
cannot be stored.
3. Press . The screen display includes
4. Use the Keypad characters chart on page
23 to enter a name up to 15 characters long.
Use CALL LIST to backspace and CALL
LIST to advance or add a space. When you
want to enter two characters in a row which
share a keypad button (for example M and O),
you must press CALL LIST to move the
cursor to the next position. There is no time
limit for entering the name.
5. Press to store the name and number.
24
To exit the directory at any time without
saving changes, press
CLEAR .
Store a pause or flash in a
directory number
Press CALL LIST twice to store a pause in the dialing
sequence (the screen displays ). Press to store
a press of the flash button (the screen displays ).
To exit the directory at any time without
saving changes, press
CLEAR .
Page 27

Store a call history number in
the directory
1. Press CALL LIST or CALL LIST to
scroll through the call history.
2. Press to store displayed call
information in the telephone directory.
The screen displays
Call information is stored exactly as it
appears in the call history. You cannot edit the
name or number before it is stored.
View directory entries
1. Press .
2. Press CALL LIST or CALL LIST to scroll
through an alphabetical list of numbers/names
stored in the telephone directory.
Use the keypad and the Keypad characters
chart on page 23 to enter the first character
of the name you want to view, then press
CALL LIST if needed to move to the
desired name.
3. Press to exit.
Directory memory
Directory memory
To exit the directory at any time without
saving changes, press
CLEAR .
25
Page 28

Directory memory
Directory memory
Dial a directory number
1. Follow the directions in View directory
entries on page 25 to find the number you
want to call.
2. When the entry you want is displayed,
press to make the call. The
speakerphone is activated.
Lift the handset, then press to
make the call.
To exit the directory at any time without
saving changes, press
CLEAR .
Delete a directory entry
1. Follow the directions in View directory
entries to find the number you want to
delete.
2. When the number you want to delete
is displayed, press . The entry is deleted.
26
To exit the directory at any time without
saving changes, press
CLEAR .
Page 29

Caller ID operation
If you subscribe to caller ID service with your local service
provider, this stores all incoming calls with valid caller ID
information in the call history. Name, number, time and date can all be
stored, if they are sent with the call. A call is assigned a number from
1 to 65. The most recent call will have the highest number. The call
history number appears next to the phone number on the display.
N
ew (unreviewed) call information shows NEW in the display. A repeat
call from the same number shows REP in the display.
If you answer a call before information appears on the screen, it will not
be stored in the call history. Between the first and second rings, the
screen displays:
Call information is displayed for about 30 seconds.
telephone
The caller's name (up to 15 letters are sent by your phone company),
The caller's area code and telephone number (area code is not
displayed if it is programmed as the home area code),
The time and date of the call.
The call's position in call history, which is displayed to
the left of the phone number.
telephone
Caller ID operation
Caller ID operation
1. If you press while the phone is ringing, or while
you are on a call, the call information will not be stored in
the call history.
2. If you are using the display for setup or to see entries in the
set's memory and a call comes in, press while the
phone is ringing to see the call information. If you were
setting up the phone, press first to save the
set up information.
Even if the call information is not displayed, it will be
stored in the call history.
REMOVE
CLEAR
OPTIONS
27
Page 30

Caller ID operation
Caller ID operation
Caller ID
You can customize how the caller ID features of this
product work. See Set remaining features on page 14
for instructions. For options, see CALL HISTORY, REPEAT
CALLS, and CALL LIST ORDER in the
on page 15.
Feature summary
Review call history
To review earlier calls, press CALL LIST . To advance
through call history from an earlier call, press CALL LIST
. When you reach the end of call history, the screen
displays the beginning of the list again.
Remove call records
Remove a specific call record
1. Press CALL LIST or CALL LIST to display
the call record you want to remove.
2. Press and release . The call record is
removed.
Remove all call records
1. Form the idle screen press and hold
until the screen displays (for approximately
1.5 seconds):
28
2. Pres s again to remove all calls.
The screen will briefly display DELETED
and then automatically return to the
idle screen.
Once a call is removed from call history,
it cannot be retrieved.
Page 31
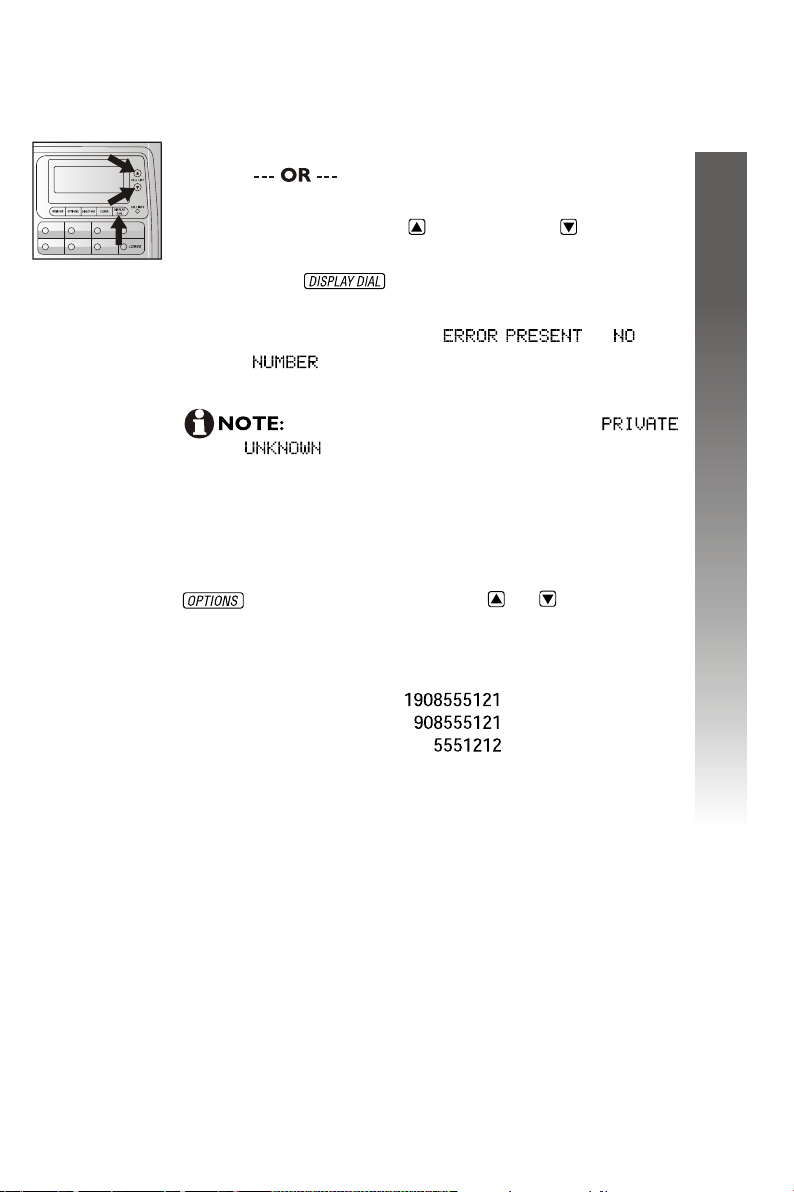
Display dial
While you are reviewing the call history, you can dial
a number displayed on the screen.
1. Lift the handset.
Skip to step 2 to use the speakerphone.
2. Press CALL LIST or CALL LIST until
the number you want to dial is displayed.
3. Press . The screen shows the number
being called and the call is dialed automatically.
If the screen displays or
, the present number cannot be dialed.
You cannot use this feature to dial
or numbers, see page 30.
Dialing Options
If the number displayed in the call history needs to have
a 1 or the area code added or removed, you can do that.
When the number you wish to call is displayed, press
and then press CALL LIST or to scroll
through the dialing format choices.
Caller ID operation
Caller ID operation
The various dialing
options are:
The specific dialing options available for each call
history record depends on the format of the
original call.
29
Page 32

Screen messages
Screen displays: When:
Caller ID operation
Caller ID operation
The other party is blocking name
information.
The other party is blocking number
information.
The other party is blocking name and
number information.
Your phone company is unable to receive
information about this caller's name.
Your phone company is unable to receive
information about this caller's number.
Your phone company is unable to receive
information about this caller's name and
number.
There is no directory entry beginning
with the letter you entered.
This number cannot be dialed.
30
This number cannot be dialed.
Page 33

Default settings
Function: Default setting:
Language
Contrast
Clock
Call history
Repeated calls
Call list order
CID - call waiting
English
AM
All calls
Combined
New calls first
On
Default settings
Default settings
31
Page 34

General product care
To keep your phone working and looking good, follow these guidelines:
Avoid putting it near heating appliances and devices that generate
electrical noise (for example, motors or fluorescent lamps).
DO NOT expose it to direct sunlight or moisture.
Avoid dropping the phone and/or other rough treatment.
Clean with a soft cloth.
Never use a strong cleaning agent or abrasive powder because
this will damage the finish.
Retain the original packaging in case you need to ship it at a
later date.
General product care
General product care
32
Page 35

Technical specifications
Technical specifications
REN
Batteries
Product weight
(unpacked)
Product
dimensions
B
AA
pounds
Inches long x
inches long x
inches high
Technical specifications
Technical specifications
33
Page 36

In case of difficulty
If you have difficulty operating this phone, try the suggestions below.
For customer service, visit our website at
or call 1 (800)222-3111. In Canada, please call 1 (866) 288-4268.
Have the serial number, found on the underside of your phone, available
when contacting customer service. Please also retain your receipt as your
proof of purchase.
To purchase accessories or replacement parts, please contact customer
service through the above website or telephone number.
Telephone operation
www.telephones.att.com
Problem
No dial tone
In case of difficulty
In case of difficulty
Problem
Telephone does
not ring
Problem
Incorrect time
and date on
incoming calls
Solution
Make sure all plugs are connected properly.
Inspect the telephone line cord connections
at the modular jack and telephone. Also
inspect the coiled handset cord connections
at both ends.
Unplug the telephone and connect it to
another modular jack. If it still does not
work and other telephones in your home
are working, the problem is with this
telephone.
Solution
Make sure the RINGER switch is not set to
OFF.
If there are several other telephones on the
same line, try disconnecting some of the
other telephones. Having too many
telephones connected can also create
problems such as low ringer volume or
impaired sound quality during calls.
Solution
The local telecom provides the time of
the call along with the other caller ID
information. Report the problem to the
telephone company. (Telephone should
show correct time after the first call) If
you do not have caller ID service, please
set the time manually.
34
Page 37

Telephone operation
Problem
CALL INFO light
incorrectly flashing
Solution
Make sure the telephone line cord is
connected properly.
Telephone directory
Problem
Difficulty storing
numbers in memory
Solution
Make sure you are pressing the correct
sequence of buttons for storing numbers.
If you are interrupted by a recorded
announcement asking you to hang up
or by a loud buzzing noise, hang up
and store the number without lifting
the handset.
Caller ID operation
Problem
Screen is blank
Solution
Make sure the batteries are correctly
installed.
Replace batteries with new batteries.
Caller ID operation
In case of difficulty
In case of difficulty
Problem
Screen displays
Solution
The phone has received incomplete
or corrupted caller identification
information from the telephone company.
The phone will display as much
information as possible.
35
Page 38

Problem
No caller ID
information while
on a call
Solution
Make sure your telephone company
provides caller ID information while you are
on a call. This is sometimes known as caller
ID on call waiting or type 2 caller ID.
Make sure you have the CID - call wait
feature on this phone set to (see
Feature summary beginning on page
in Feature setup).
The phone cannot display the information
if another phone on the same line is in use.
Make sure all extensions are on hook.
Problem
Display dial does
not work
In case of difficulty
In case of difficulty
Screen incorrectly
displays LINE IN
USE
No caller ID
information for
some calls
Solution
A home area code must be programmed.
If you try to display dial before entering
a home area code, you will be prompted to
enter the home area code. Enter the code
and press .
SolutionProblem
Make sure the telephone line cord is
connected properly.
SolutionProblem
The phone cannot display or store the
information while another phone is
using the same telephone line and this
phone is being used or not.
36
Page 39

directory card
Base unit
base wedge
batteries
battery compartment
call history
call information
call record
Call waiting service
call-waiting signal
Caller ID
Caller ID information
Caller ID service
Caller ID with call waiting
CALL INFO light
Display dial
display screen
fax machine
feature setup
flash
handset
Index
Index
Data port
date and time
dial tone
dialing options
Difficulty storing numbers
in memory
directroy
handset cord
handset tab
hold
Home area code
language
line cord
Local area code
loud buzzing noise
37
Page 40

modem
Screen displays
MUTE light
Index
Index
No caller ID information
while call waiting
No dial tone
One touch buttons
One touch locations
Screen is blank
screen lighting
SPEAKER light
speaker phone
switchhook
Telephone does not ring
time and date
redial memory
redial number
REP
REPEATED CALLS
RINGER switch
ringer volume
38
volume
wall jack mounting studs
Page 41

www.telephones.att.com
2007 Advanced American Telephones. All rights reserved.
AT&T and the AT&T logo are trademarks of AT&T Knowledge Ventures,
licensed to Advanced American Telephones.
Printed in China. Issue 6 AT&T 07/07
 Loading...