


Asus X8EJV User Manual
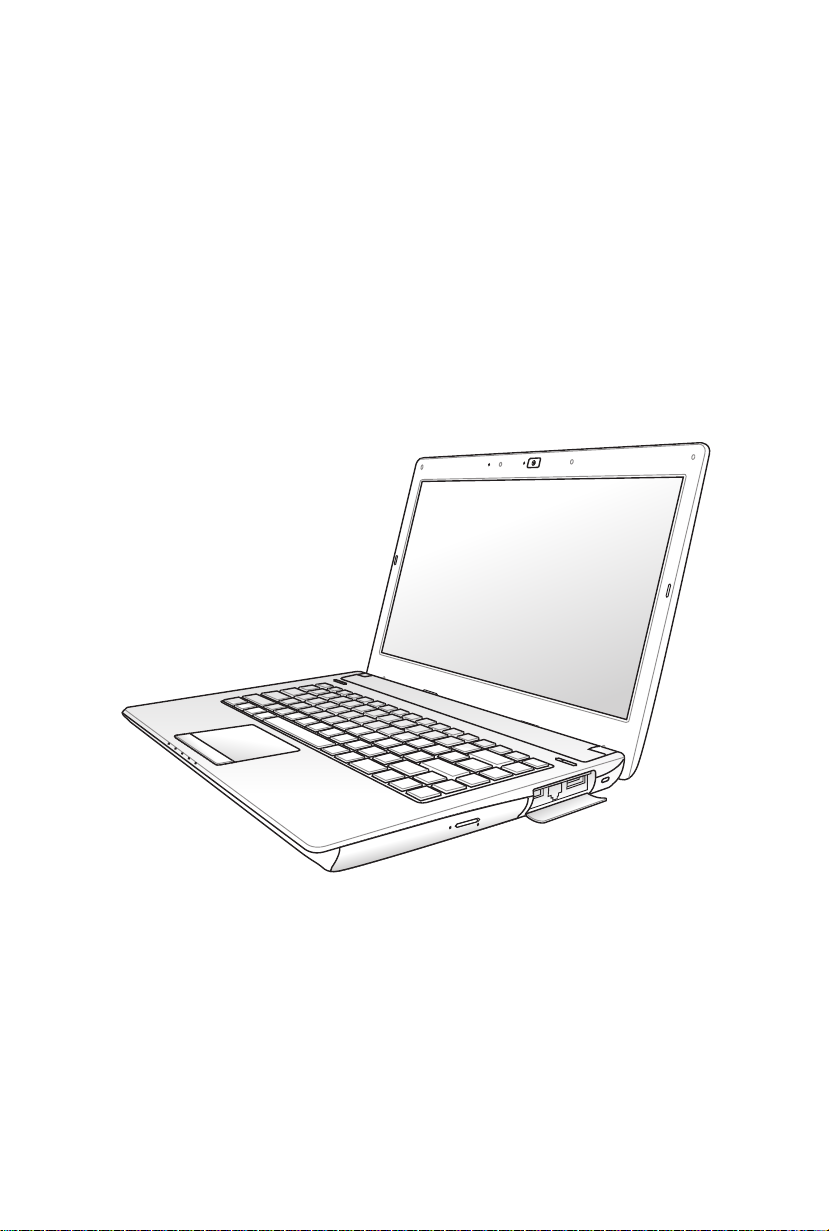
E5286
Notebook PC User Manual
January 2010

2
Notebook PC User Manual
Table of Contents
Safety Precautions ............................................................................................. 3
Preparing your Notebook PC ......................................................................... 5
Using the Touchpad .......................................................................................... 7
Knowing the Parts .............................................................................................. 8
Right Side ............................................................................................................8
Left Side .............................................................................................................10
Rear Side ............................................................................................................12
Front Side ..........................................................................................................13
Recovering Your Notebook PC ....................................................................14
Using Recovery Partition ............................................................................14
Using Recovery DVD (on selected models) ...........................................15
Declarations and Safety Statements .........................................................17
Federal Communications Commission Statement .............................17
FCC Radio Frequency (RF) Exposure Caution Statement .................18
Declaration of Conformity(R&TTE directive 1999/5/EC) ...................18
CE Marking ........................................................................................................19
IC Radiation Exposure Statement for Canada ......................................19
Wireless Operation Channel for Different Domains ...........................20
France Restricted Wireless Frequency Bands .......................................20
Power Safety Requirement .........................................................................21
REACH .............................................................................................................21
UL Safety Notices ............................................................................................22
Nordic Lithium Cautions (for lithium-ion batteries) ...........................23
European Union Eco-label ...........................................................................24
Global Environmental Regulation Compliance and Declaration .25
Takeback Services ...........................................................................................25
Notebook PC User Manual
3
Safety Precautions
The following safety precautions will increase the life of the
Notebook PC. Follow all precautions and instructions. Except as
described in this manual, refer all servicing to qualified personnel.
Disconnect the AC power and remove the battery pack(s) before
cleaning. Wipe the Notebook PC using a clean cellulose sponge
or chamois cloth dampened with a solution of nonabrasive
detergent and a few drops of warm water and remove any extra
moisture with a dry cloth.
DO NOT place on
uneven or unstable work
surfaces. Seek servicing
if the casing has been
damaged.
DO NOT expose to dirty
or dusty environments.
DO NOT operate during a
gas leak.
DO NOT press or touch
the display panel. Do not
place together with small
items that may scratch or
enter the Notebook PC.
DO NOT leave the
Notebook PC on your lap
or any part of the body
to prevent discomfort
or injury from heat
exposure.
DO NOT place or drop
objects on top and
do not shove any
foreign objects into the
Notebook PC.
DO NOT expose to
strong magnetic or
electrical fields.
DO NOT expose to or
use near liquids, rain,
or moisture. DO NOT
use the modem during
electrical storms.
Battery safety warning:
DO NOT throw the
battery in fire. DO NOT
short circuit the contacts.
DO NOT disassemble the
battery.
4
Notebook PC User Manual
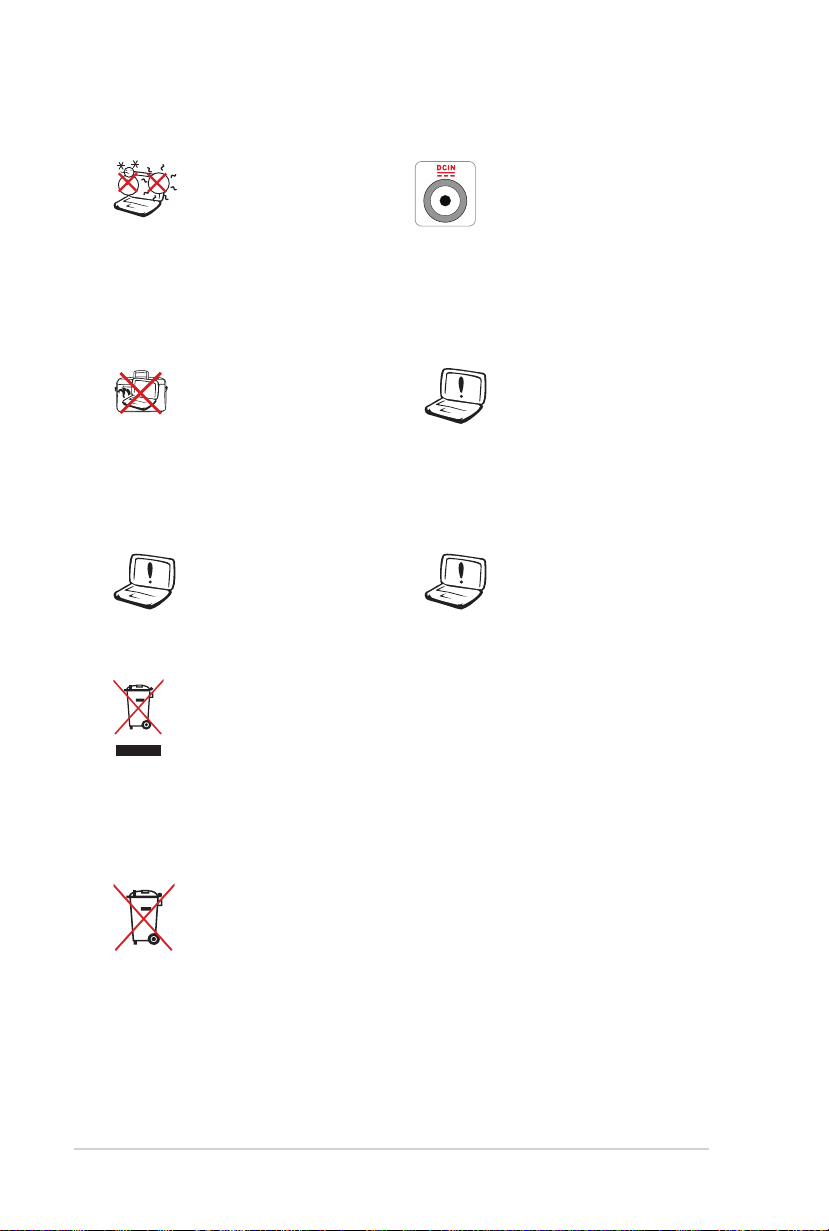
SAFE TEMP: This
Notebook PC should
only be used in
environments with
ambient temperatures
between 10°C (50°F) and
35°C (95°F).
INPUT RATING: Refer to
the rating label on the
bottom of the Notebook
PC and be sure that your
power adapter complies
with the rating.
DO NOT carry or cover
a Notebook PC that
is powered ON with
any materials that will
reduce air circulation
DO NOT use strong
solvents such as
thinners, benzene, or
other chemicals on or
near the surface.
such as a carrying bag.
DO NOT use damaged
power cords, accessories,
or other peripherals.
Incorrect installation
of battery may cause
explosion and damage
the Notebook PC.
DO NOT throw the Notebook PC in municipal waste. This
product has been designed to enable proper reuse of parts
and recycling. The symbol of the crossed out wheeled bin
indicates that the product (electrical, electronic equipment
and mercury-containing button cell battery) should not
be placed in municipal waste. Check local regulations for
disposal of electronic products.
DO NOT throw the battery in municipal waste. The symbol
of the crossed out wheeled bin indicates that the battery
should not be placed in municipal waste.
Notebook PC User Manual
5
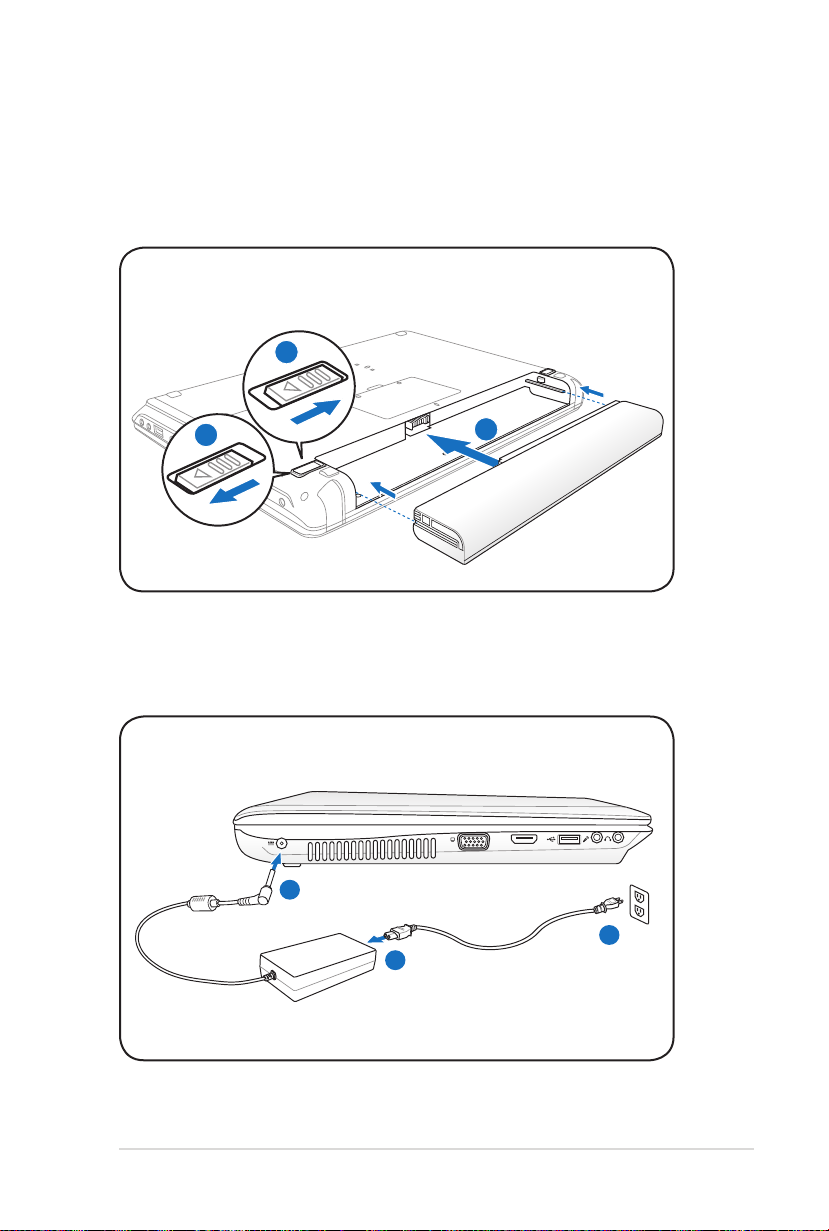
Preparing your Notebook PC
1
2
3
HDMI
1
2
3
110
V-240V
These are only quick instructions for using your Notebook PC.
Installing the Battery Pack
Connecting the Power Adapter
6
Notebook PC User Manual
OFF ON
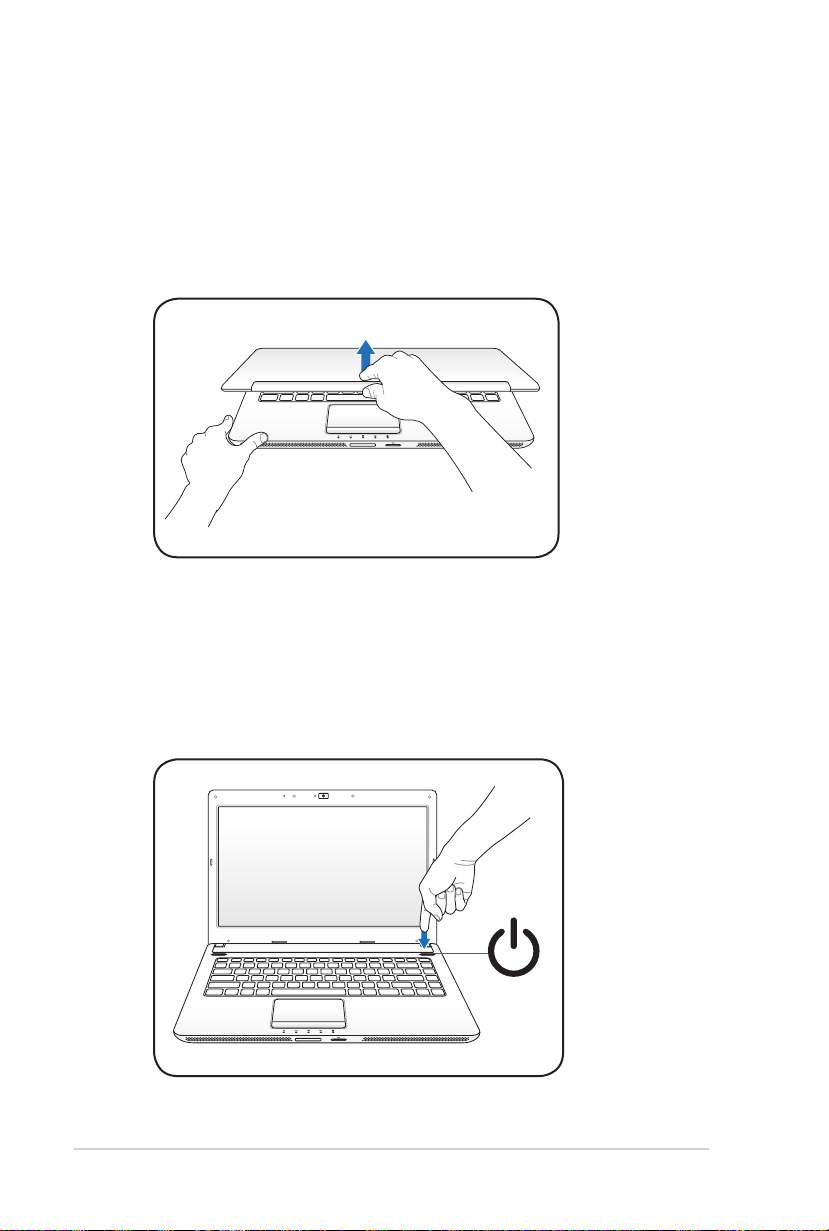
Opening the LCD display panel
OFF ON
1. Carefully lift up the display panel with your thumb.
2. Slowly tilt the display panel forward or backward to a
comfortable viewing angle.
Turning on the Power
1. Push and release the power button located beneath the LCD
display panel.
2. Use [Fn]+[F5] or [Fn]+[F6] to adjust the LCD brightness.
Notebook PC User Manual
7
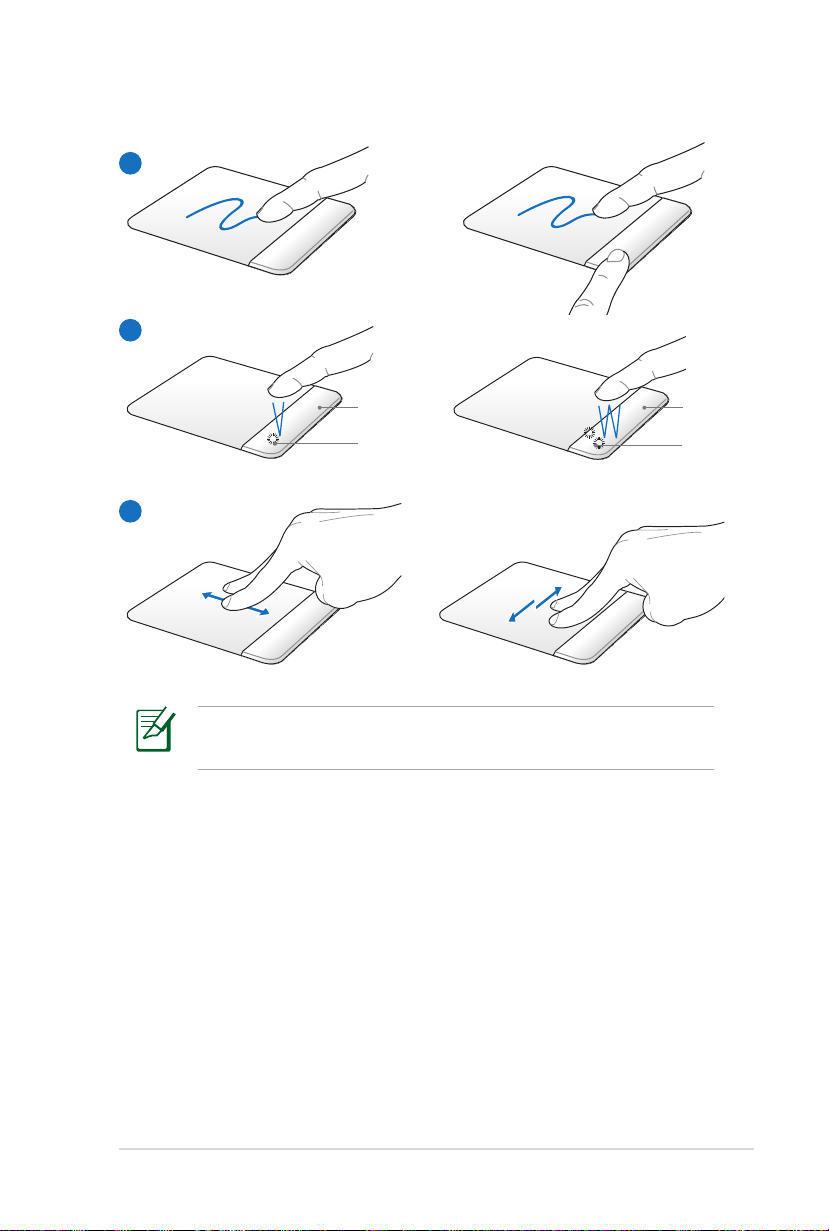
Using the Touchpad
A
B
Right button
Left button
Right button
Left button
C
Customize the touchpad’s behavior in Windows Control Panel
> Hardware and Sound > Mouse....
A. Slide your finger across the touchpad to move the pointer. You
can also hold the left button and slide your finger to drag the
selected item.
B. Use the left and right buttons like a standard mouse.
C. Use two fingertips to slide up/down/left/right on the touchpad
to scroll a window up/down/left/right.
8
Notebook PC User Manual
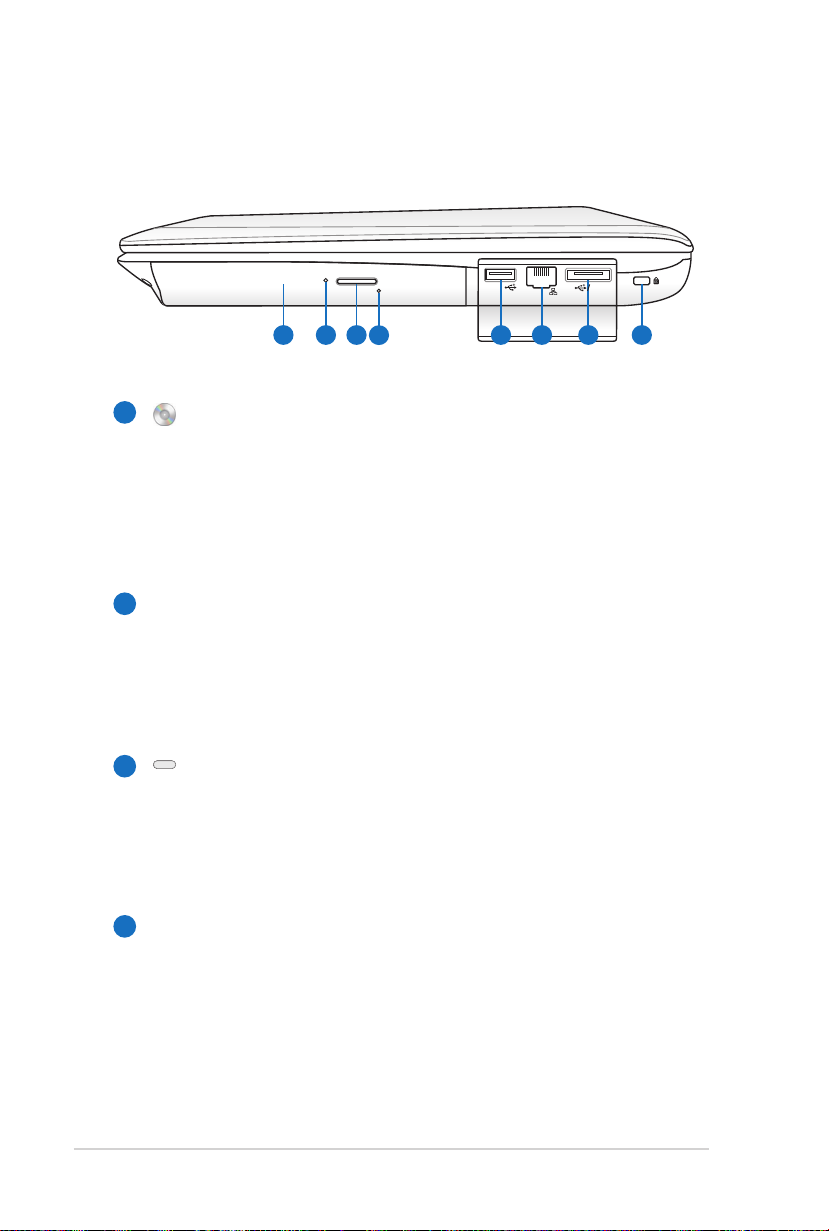
Knowing the Parts
21 3
4
5 6 7 8
E-SATA
Right Side
1
Optical Drive
The Notebook PC comes in various models with different
optical drives. The Notebook PC’s optical drive may support
compact discs (CD) and/or digital video discs (DVD) and
may have recordable (R) or re-writable (RW) capabilities.
See the marketing specifications for details on each model.
Optical Drive Activity Indicator
2
(location varies by model)
The optical drive activity indicator shows when data is
being transferred by the optical disk drive. This indicator
will light in proportion to the data size transferred.
Optical Drive Electronic Eject
3
The optical drive eject has an electronic eject button for
opening the tray. You can also eject the optical drive tray
through any software player or by right clicking the optical
drive in Windows “Computer” and selecting Eject.
Optical Drive Emergency Eject
4
(location varies by model)
The emergency eject is used to eject the optical drive tray
in case the electronic eject does not work. Do not use the
emergency eject in place of the electronic eject.

Notebook PC User Manual
9
5
USB Port (2.0)
The USB (Universal Serial Bus) port is compatible with USB
2.0 or USB 1.1 devices such as keyboards, pointing devices,
cameras, hard disk drives, printers, and scanners connected
in a series up to 12Mbits/sec (USB 1.1) and 480Mbits/sec
(USB 2.0). USB allows many devices to run simultaneously
on a single computer, with some peripherals acting as
additional plug-in sites or hubs. USB supports hot-swapping
of devices so that most peripherals can be connected or
disconnected without restarting the computer.
6
LAN Port
The RJ-45 LAN port with eight pins is larger than the RJ-11
modem port and supports a standard Ethernet cable for
connection to a local network. The built-in connector allows
convenient use without additional adapters.
E-SATA
7
E-SATA Port & USB Combo Port
External SATA or eSATA allows external connection of Serial-
ATA devices originally designed for use inside the computer.
It is up to six times faster than existing USB 2.0, & 1394 for
external storage solutions and is also hot pluggable using
shielded cables and connectors up to two meters. See USB
Port for description.
Kensington® Lock Port
8
The Kensington® lock port allows the Notebook PC to
be secured using Kensington® compatible Notebook PC
security products. These security products usually include
a metal cable and lock that prevent the Notebook PC to
be removed from a fixed object. Some may also include a
motion detector to sound an alarm when moved.
 Loading...