


 Loading...
USER MANUAL

Special Thanks
DIRECTION
Frédéric BRUN |
Nicolas DUBOIS |
Jean-Gabriel |
Philippe CAVENEL |
Kévin MOLCARD |
SCHOENHENZ |
|
ENGINEERING
Olivier DELHOMME (project Aurore BAUD |
Yannick DANNEL |
Frédéric MESLIN / Fred's |
|
manager) |
Robert BOCQUIER |
Lionel FERRAGUT |
Lab |
|
|
||
Kévin ARCAS |
Claire BOUVET |
Nadine LANTHEAUME |
Luc WALRAWENS |
|
|
||
Thomas AUBERT |
Thierry CHATELAIN |
Samuel LIMIER |
|
|
|
||
DESIGN
Sébastien ROCHARD |
Glen DARCEY |
Morgan PERRIER |
(product Manager) |
DesignBox |
Jonas SELLAMI |
|
SOUND DESIGN
Jean-Baptiste ARTHUS |
Joey BLUSH |
Simon GALLIFET |
Ed TEN EYCK |
Clément BASTIAT |
Maxime DANGLES |
Tom HALL |
|
Jean-Michel BLANCHET |
Ken FLUX |
Victor MORELLO |
|
TESTING
Arnaud BARBIER Florian MARIN Germain MARZIN Benjamin RENARD
BETA TESTING
Gustavo BRAVETTI |
Jeffrey M CECIL |
Boele GERKES |
Terry MARSDEN |
Andrew CAPON |
Marco CORREIA |
Tom HALL |
|
Chuck CAPSIS |
Ken FLEX PIERCE |
Are LEISTAD |
|
MANUAL
Gert BRAAKMAN (author) |
Vincent LE HEN |
Charloote METAIS |
Holger STEINBRINK |
Minoru KOIKE |
Randy LEE |
Jose RENDON |
Jack VAN |
Special thanks to Mutable Instruments for providing the Plaits code under MIT license.
© ARTURIA SA – 2019 – All rights reserved. 11 Chemin de la Dhuy
38240 Meylan FRANCE www.arturia.com
Information contained in this manual is subject to change without notice and does not represent a commitment on the part of Arturia. The software described in this manual is provided under the terms of a license agreement or non-disclosure agreement. The software license agreement specifies the terms and conditions for its lawful use. No part of this manual may be reproduced or transmitted in any form or by any purpose other than purchaser’s personal use, without the express written permission of ARTURIA S.A.
All other products, logos or company names quoted in this manual are trademarks or registered trademarks of their respective owners.
Product version: 1.0.0
Revision date: 13 March 2019
Thank you for purchasing MicroFreak!
This manual covers the features and operation of Arturia’s MicroFreak, the latest in a long line of powerful virtual instruments.
Be sure to register your product as soon as possible! When you purchased MicroFreak you were sent a serial number and an unlock code by e-mail. These are required during the online registration process.
Special Messages
Specifications Subject to Change:
The information contained in this manual is believed to be correct at the time of printing. However, Arturia reserves the right to change or modify any of the specifications without notice or obligation to update the hardware that has been purchased.
IMPORTANT:
The instrument, when used in combination with an amplifier, headphones or speakers, may be able to produce sound levels that could cause permanent hearing loss. DO NOT operate for long periods of time at a high level or at a level that is uncomfortable,or a level that exceeds prevailing safety standards for hearing exposure. Always follow the basic precautions listed below to avoid the possibility of serious injury or even death from electrical shock, damages, fire or other risks. If you encounter any hearing loss or ringing in the ears, consult an audiologist immediately. It is also a good idea to have your ears and hearing checked annually.
Introduction
Congratulations on your purchase of Arturia's MicroFreak!
We’d like to thank you for purchasing MicroFreak, our latest product and heir apparent to the role of Best. Synth. Ever.
Arturia has a passion for excellence, and MicroFreak is no exception. Listen to the sounds; tweak a few controls; skim through the features, or dive as deep as you like; you will never reach the bottom of it. We are confident that MicroFreak will prove to be an invaluable companion as you sail the waters of your imagination.
Be sure to visit the Arturia website for information about all of our other great hardware and software instruments. They have become indispensable, inspiring tools for musicians around the world.
Musically yours,
The Arturia team
Table Of Contents |
|
1. Welcome and Introduction.................................................................................................................................... |
4 |
1.1. A fascinating adventure..................................................................................................................................................... |
4 |
1.2. About reading manuals..................................................................................................................................................... |
5 |
2. Installation....................................................................................................................................................................... |
6 |
2.1. Usage Precautions................................................................................................................................................................ |
6 |
2.2. Warning...................................................................................................................................................................................... |
6 |
2.3. Notice............................................................................................................................................................................................ |
6 |
2.4. Precautions include, but are not limited to, the following:........................................................................ |
7 |
2.5. Register your Instrument................................................................................................................................................ |
7 |
2.6. Connecting the MicroFreak to the World.............................................................................................................. |
8 |
3. MicroFreak Overview................................................................................................................................................ |
9 |
3.1. Front panel overview .......................................................................................................................................................... |
9 |
3.1.1. Top Row ............................................................................................................................................................................................................................... |
9 |
3.1.2. Middle Row..................................................................................................................................................................................................................... |
13 |
3.1.3. Bottom Row.................................................................................................................................................................................................................... |
15 |
3.2. Rear Panel Overview ....................................................................................................................................................... |
19 |
3.2.1. Audio outputs ................................................................................................................................................................................................................ |
19 |
3.2.2. Pitch/Gate/Pressure outputs ............................................................................................................................................................................. |
19 |
3.2.3. Clock input/output .................................................................................................................................................................................................. |
20 |
3.2.4. MIDI input/output ................................................................................................................................................................................................... |
20 |
3.2.5. USB/DC IN ................................................................................................................................................................................................................... |
20 |
3.2.6. Power switch ............................................................................................................................................................................................................... |
21 |
3.2.7. Power Connector....................................................................................................................................................................................................... |
21 |
3.3. Signal Flow ............................................................................................................................................................................ |
22 |
4. The MicroFreak Presets......................................................................................................................................... |
23 |
4.1. Loading Presets................................................................................................................................................................... |
23 |
4.2. Saving Presets..................................................................................................................................................................... |
24 |
4.3. Tweaking the Preset Configurations .................................................................................................................... |
25 |
4.4. Panel .......................................................................................................................................................................................... |
27 |
4.5. Understanding Digitally-Controlled Analog ..................................................................................................... |
27 |
5. Making Connections................................................................................................................................................ |
28 |
5.1. Control Signals ..................................................................................................................................................................... |
28 |
5.2. The Matrix and its encoder ........................................................................................................................................ |
30 |
5.2.1. Sources and Destinations..................................................................................................................................................................................... |
31 |
5.2.2. Assigning destinations.......................................................................................................................................................................................... |
32 |
5.3. Freaky ideas......................................................................................................................................................................... |
35 |
6. The Digital Oscillator............................................................................................................................................... |
36 |
6.1. The oscillator as a sound generator ...................................................................................................................... |
36 |
6.2. The Parameter Controls................................................................................................................................................ |
37 |
6.3. Oscillator types: An Overview................................................................................................................................... |
38 |
6.3.1. Basic Waves Oscillator.......................................................................................................................................................................................... |
38 |
6.3.2. Superwave Oscillator ............................................................................................................................................................................................ |
38 |
6.3.3. Wavetable oscillator............................................................................................................................................................................................... |
39 |
6.3.4. Harmonic OSC ........................................................................................................................................................................................................... |
39 |
6.3.5. KarplusStrong............................................................................................................................................................................................................ |
40 |
6.3.6. Pair of classic waveforms (PI.VA) ................................................................................................................................................................. |
41 |
6.3.7. Waveshaping oscillator (Fold) (PI.Waveshapr).................................................................................................................................... |
42 |
6.3.8. Two operator FM (PI.FM)..................................................................................................................................................................................... |
42 |
6.3.9. Granular formant oscillator (PI.Grain)....................................................................................................................................................... |
43 |
6.3.10. Chords (PI.Chords)............................................................................................................................................................................................... |
44 |
6.3.11. Vowel and speech synthesis (PI.Speech) ............................................................................................................................................... |
46 |
6.3.12. Modal Resonator (PI.Modal)............................................................................................................................................................................. |
47 |
7. The filter: sound in close-up ............................................................................................................................... |
48 |
7.1. Modifying sound.................................................................................................................................................................. |
48 |
7.1.1. Low Pass Filter ............................................................................................................................................................................................................. |
49 |
7.1.2. Band Pass Filter.......................................................................................................................................................................................................... |
49 |
7.1.3. High Pass Filter ........................................................................................................................................................................................................... |
49 |
7.1.4. Cutoff frequency....................................................................................................................................................................................................... |
50 |
7.1.5. Resonance or Q ......................................................................................................................................................................................................... |
50 |
7.2. Animating sound................................................................................................................................................................. |
51 |
7.2.1. Cutoff Modulation....................................................................................................................................................................................................... |
51 |
7.2.2. Emphasis/Resonance Modulation.................................................................................................................................................................. |
51 |
8. The LFO............................................................................................................................................................................ |
52 |
8.1. Waveform Shape and Rate ......................................................................................................................................... |
52 |
8.1.1. Shape.................................................................................................................................................................................................................................. |
53 |
8.1.2. Rate..................................................................................................................................................................................................................................... |
53 |
8.1.3. LFO retriggering......................................................................................................................................................................................................... |
54 |
8.2. Freaky Tips and Tricks ................................................................................................................................................... |
54 |
9. The Envelope Generator ...................................................................................................................................... |
55 |
9.1. What does an Envelope Generator do? .............................................................................................................. |
55 |
9.2. Gates and Triggers ........................................................................................................................................................... |
56 |
9.3. Envelope stages.................................................................................................................................................................. |
56 |
9.3.1. Attack................................................................................................................................................................................................................................. |
56 |
9.3.2. Decay/Release........................................................................................................................................................................................................... |
56 |
9.3.3. Sustain............................................................................................................................................................................................................................. |
56 |
9.4. Filter amount ........................................................................................................................................................................ |
57 |
9.5. The Amp Mod button....................................................................................................................................................... |
57 |
9.6. The Cycling Envelope Generator............................................................................................................................. |
58 |
9.6.1. The stages of the Cycling Envelope.............................................................................................................................................................. |
58 |
9.6.2. About Changing Shapes...................................................................................................................................................................................... |
59 |
9.6.3. Using the Legato options ................................................................................................................................................................................... |
60 |
9.7. Freaky Cycling Envelope Suggestions................................................................................................................ |
60 |
10. The Keyboard Section .......................................................................................................................................... |
61 |
10.1. Another look at Gates and Triggers..................................................................................................................... |
62 |
10.2. Keyboard responsiveness......................................................................................................................................... |
63 |
10.2.1. Using Keyboard Responsiveness................................................................................................................................................................. |
63 |
10.3. Glide......................................................................................................................................................................................... |
65 |
10.4. Octave Buttons ................................................................................................................................................................. |
66 |
10.5. Tutorial: modulating LFO speed ............................................................................................................................ |
66 |
11. Using the Icon Strip ................................................................................................................................................ |
67 |
11.1. The Key Hold Button......................................................................................................................................................... |
67 |
11.2. Sequencer and Arpeggiator....................................................................................................................................... |
68 |
11.3. The Touch strip ................................................................................................................................................................... |
69 |
11.3.1. Spice & Dice.................................................................................................................................................................................................................. |
69 |
11.3.2. Bend ................................................................................................................................................................................................................................. |
70 |
12. The Arpeggiator......................................................................................................................................................... |
71 |
12.1. Using Patterns....................................................................................................................................................................... |
71 |
12.1.1. Creating Pattern Variations................................................................................................................................................................................. |
72 |
12.1.2. Transferring Arpeggios to the Sequencer ................................................................................................................................................ |
72 |
12.2. Gates and Triggers revisited ..................................................................................................................................... |
72 |
12.3. Arpeggio Rate...................................................................................................................................................................... |
73 |
12.3.1. Using Sync .................................................................................................................................................................................................................... |
73 |
12.4. Making it Swing ................................................................................................................................................................. |
74 |
12.5. Arpeggio Range ................................................................................................................................................................. |
74 |
12.6. Arpeggiator fun................................................................................................................................................................. |
75 |
12.6.1. Spicing up your Arpeggios................................................................................................................................................................................. |
75 |
13. The Sequencer .......................................................................................................................................................... |
76 |
13.1. Using the Sequencer ....................................................................................................................................................... |
77 |
13.1.1. Selecting and playing a sequence ................................................................................................................................................................. |
78 |
13.1.2. The Sequencer and the keyboard................................................................................................................................................................. |
78 |
13.1.3. Recording a sequence .......................................................................................................................................................................................... |
79 |
13.2. The Modulation Tracks .................................................................................................................................................. |
81 |
13.2.1. Step-time recording of modulation .............................................................................................................................................................. |
81 |
13.2.2. Real-time recording of modulation ............................................................................................................................................................ |
83 |
13.2.3. Smoothing................................................................................................................................................................................................................... |
83 |
13.3. Fun with Sequences ...................................................................................................................................................... |
84 |
13.3.1. A hidden feature ...................................................................................................................................................................................................... |
84 |
13.3.2. First experiment: mixing pitches .................................................................................................................................................................. |
84 |
13.3.3. Second experiment: wobbling pitches ..................................................................................................................................................... |
85 |
13.3.4. Third experiment: Hoketus ............................................................................................................................................................................... |
85 |
14. MicroFreak Configuration .................................................................................................................................. |
86 |
14.1. Utility & MIDI Control Center...................................................................................................................................... |
87 |
14.2. MIDI Control Center...................................................................................................................................................... |
90 |
14.2.1. MIDI Control Center settings .......................................................................................................................................................................... |
90 |
15. Connecting external gear................................................................................................................................... |
94 |
15.1. CV/GATE FUNCTIONS .................................................................................................................................................... |
95 |
15.1.1. Control voltages: Pitch, Gate and Pressure ............................................................................................................................................. |
95 |
15.1.2. MIDI and CV/Gate signals: DAW configuration................................................................................................................................... |
97 |
15.2. Clock sources/destinations....................................................................................................................................... |
97 |
15.3. The MicroFreak and your Modular System.................................................................................................... |
98 |
16. Cheat Sheet ................................................................................................................................................................. |
99 |
17. Software License Agreement ...................................................................................................................... |
100 |
18. Declaration of Conformity.............................................................................................................................. |
102 |

1. WELCOME AND INTRODUCTION
Congratulations on your purchase of the Arturia MicroFreak!
The MicroFreak is a compact, versatile, semi-modular synthesizer with many unique features that will spark your imagination and creativity in a new way. It enables you to experiment with modular sound construction without the hassle of patch cords.
Its core is an advanced digital oscillator with newly developed control options. The classic Analog Filter guarantees a warm sound. Together they offer the best of two worlds: digital and analog.
In addition to a standard envelope, a cycling envelope provides you with modulation options only found on high-end modular systems.
The center point of the MicroFreak is a versatile matrix patchboard that has options similar to the matrix of its elder brother, the MatrixBrute. The Matrix allows you to take control and route modulation sources to a great number of destinations.
Another unique feature of the MicroFreak is an expressive touch capacitor keyboard that responds to your finger pressure. Couple this with the paraphonic playing option, an arpeggiator, and assignable matrix destinations, and you will understand why the MicroFreak will soon be your favorite performance synthesizer.
Be sure to visit the Arturia website and check for the latest firmware, download the MIDI Control Center, and check out the tutorials and FAQs. Get ready to explore synthesis in new ways.
Musically yours, The Arturia team.
1.1. A fascinating adventure
As soon as you start experimenting with the MicroFreak, you'll be faced with many questions: How do I make connections, what does the Filter do, what is an Envelope Generator?
The answers to these question come slowly: by reading forums online, comparing user experiences and most importantly, by diving in.
Whatever you do, take the time to get to know the MicroFreak inside out. It will help you to avoid a situation where you sit in front of your system tweaking knobs randomly, without understanding what's happening, but hoping that something magical will happen. This is a certain recipe for losing interest very fast.
To sustain the fascination you feel, learn the functions of the MicroFreak one by one and test your knowledge continuously. It's the only way to experience the reward that comes with being able to create the sounds as you imagine them.
Arturia - User Manual MicroFreak - Welcome and Introduction |
4 |

1.2. About reading manuals
Reading manuals can be much more than familiarizing yourself with an instrument. Yes, it is excellent for learning, but it serves another purpose that is much less understood: creating the base for inspiration.
Inspiration can flourish when you have many little pieces of knowledge "online". Having many pieces of information available enables you to interconnect and crosslink them; it widens the scope of your creativity. It helps to look at the current state of your knowledge as something that needs to be maintained and expanded. Reading a manual, again and again, causes a shift in what you absorb from it. You are building a living model of the instrument in your brain.
Reading a manual the first time helps you to get acquainted with the parameters of an instrument; what does a knob do and how does it affect the sound or other parameters of the instrument? Second and third readings give you a better understanding of the structure of an instrument/plugin. Beyond that, reading becomes a source of creative input that inspires you to think of new ways to use the instrument.
5 |
Arturia - User Manual MicroFreak - Welcome and Introduction |
2. INSTALLATION
2.1. Usage Precautions
The MicroFreak uses an external power adapter. Do not use any power supply or adapter other than the one provided by Arturia. Arturia accepts no responsibility for damage caused by use of an unauthorized power supply.
The MicroFreak has a touch capacitive keyboard. It can be used with a power bank, but for it to be fully functional the MicroFreak must be properly grounded. It's why we recommend that you use the three pin wall plug provided by Arturia.
Use the included adapters (1/8" TRS jack to 5-pin DIN, grey) to connect your external MIDI devices to the MicroFreak.
2.2. Warning
Do not place this product in a place or position where one might walk on, trip over, or roll anything over power cords or connecting cables. The use of an extension cord is not recommended. However if you must use one, make sure that the cord has the ability to handle the maximum current needed by this product. Please consult a local electrician for more information on your power requirements. This product should be used only with the components supplied or recommended by Arturia. When used with any components, please observe all safety markings and instructions that accompany the accessory products.
2.3. Notice
The manufacturer’s warranty does not cover service charges incurred due to a lack of knowledge relating to how a function or feature works (when the unit is operating as designed); reading the manual is the owner's responsibility. Please study this manual carefully and consult your dealer before requesting service.
Arturia - User Manual MicroFreak - Installation |
6 |

2.4.Precautions include, but are not limited to, the following:
•Read and understand all the instructions.
•Always follow the instructions on the instrument.
•Before cleaning the instrument, always remove the electrical plug from the outlet, as well as the USB cable. When cleaning, use a soft and dry cloth. Do not use gasoline, alcohol, acetone, turpentine or any other organic solutions; do not use liquid cleaner, spray or cloth that’s too wet.
•Do not use the instrument near water or moisture, such as a bathtub, sink, swimming pool or similar place. Do not place the instrument in an unstable position where it might accidentally fall over.
•Do not place heavy objects on the instrument. Do not block openings or vents of the instrument; these locations are used for ventilation to prevent the instrument from overheating. Do not place the instrument near a heat vent or any place of poor air circulation.
•Use only the provided AC adapter, as specified by Arturia.
•Make sure the line voltage in your location matches the input voltage specified on the AC power adapter.
•Do not open and insert anything into the instrument, as this could cause a fire or electrical shock.
•Do not spill any kind of liquid onto the instrument.
•In the event of a malfunction, always take the instrument to a qualified service center. You will invalidate your warranty if you open and remove the cover, and improper testing may cause electrical shock or other malfunctions.
•Do not use the instrument when thunder and lightning are present.
•Do not expose the instrument to hot sunlight.
•Do not use the instrument when there is a gas leak nearby.
•Arturia is not responsible for any damage or data loss caused by improper operations to the instrument.
•Arturia recommends the use of shielded and less than 3 meters long cables for Audio, and ferrite equipped CV/Gate cables.
2.5.Register your Instrument
Registering your instrument establishes your legal ownership, which entitles you to access the Arturia Technical Support service, and to be informed of updates. Additionally, you can subscribe to the Arturia newsletter to be informed of Arturia-related news as well as promotional offers. Connect to your Arturia account, go to the section “My Registered Products”, and add the MicroFreak synthesizer by entering its serial number, as printed on the sticker located under the machine.
7 |
Arturia - User Manual MicroFreak - Installation |

2.6. Connecting the MicroFreak to the World
Always power-off all audio gear before making any connections. Failing to do so may damage your speakers, the MicroFreak synthesizer, or other audio equipment. After completing all connections, set all levels to 0. Power-on the various devices, with audio amplifier or monitoring system last, then raise the volumes to a comfortable listening level.
Here is an overview of the MicroFreak synthesizer’s connectors:
Purpose |
Connector type |
|
|
Audio output |
6.35 mm (1/4'') TS or TRS jack |
|
|
Headphones |
1/8" TRS jack (signal is mono) |
|
|
MIDI input & output |
1/8" TRS jack (see note below) |
|
|
USB |
Standard USB type B |
|
|
Power |
DC input: internal 2.1 mm, external 5.5 mm |
!: Please use the included adapter (1/8" TRS jack to 5-pin DIN, gray) to connect your external MIDI devices to the MicroFreak
Arturia - User Manual MicroFreak - Installation |
8 |

3. MICROFREAK OVERVIEW
You're probably anxious to start exploring your MicroFreak, so in this chapter, we'll guide you through the front panel and explain what the knobs on the front panel do. If you are new to synthesis, it may help to read the chapters about the Digital Oscillator [p.36], the Filter [p.48] and the Envelope Generator [p.55]. These are the basic building blocks of synthesis.
3.1. Front panel overview
The first thing you'll notice about the MicroFreak is how small and compact it is.
3.1.1. Top Row
Top Row
3.1.1.1. The Matrix
The matrix
The Modulation Matrix is an electronic patchbay that routes MicroFreak modulation sources to modulation destinations. When turning the white matrix modulation knob, the connection indicator LED moves to different patch points. Once you've reached the last point on the last row, then the LED cycles back to the first point of the matrix, which makes it easier to jump to your destination point.
Think of this as a grid of patch cords, each with an attenuator that allows for positive or negative modulation. Every parameter that it would make sense to modulate - pretty much anything with a knob - can be a destination.
•The modulation sources are in rows 1 to 5, and destinations are in columns 1 to 7.
•Destinations 1 to 4 are hardwired, and destinations 5, 6, and 7 are freely assignable.
Next to the matrix, you see the Matrix encoder, which enables you to select a connection point and when clicked, set the modulation amount for a connection.
9 |
Arturia - User Manual MicroFreak - MicroFreak Overview |
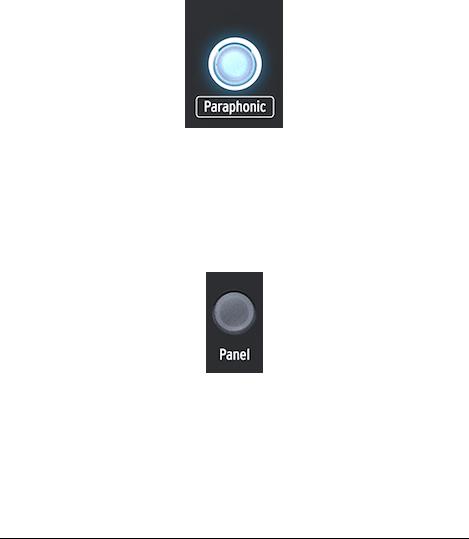
3.1.1.2. Paraphonic
The MicroFreak is a paraphonic four-voice synthesizer. You can trigger the voices independently when this knob is lit. Their sound will be similar as they all share the same analog filter. The amplitude (volume) of each voice can be different on the MicroFreak, which is not possible on most paraphonic synthesizers. You might call the MicroFreak paraphony a form of extended paraphony. The MicroFreak has internal, invisible VCA envelopes that shape the volume of the individual voices together with the Main Envelope. These internal voice envelopes also are available on the matrix when you choose a polyphonic destination, such as the Oscillator parameters.
Some of the sources in the MicroFreak are capable of generating signals polyphonically: the Main Envelope, Pressure, the Keyboard, and the Arpeggiator. When you apply these polyphonic sources to polyphonic destinations such as the Oscillator parameters (Type, Wave, Timbre and Shape) each voice receives its own modulation.
Selecting paraphonic mode
3.1.1.3. Panel Select
Panel toggles between the physical and loaded preset positions of knobs. When Panel mode is active the position of the knobs reflects the sound you hear. Panel mode is the mode to use if you are looking to get 1:1 feedback of parameters and the sound you are editing.
Panel Select
Arturia - User Manual MicroFreak - MicroFreak Overview |
10 |
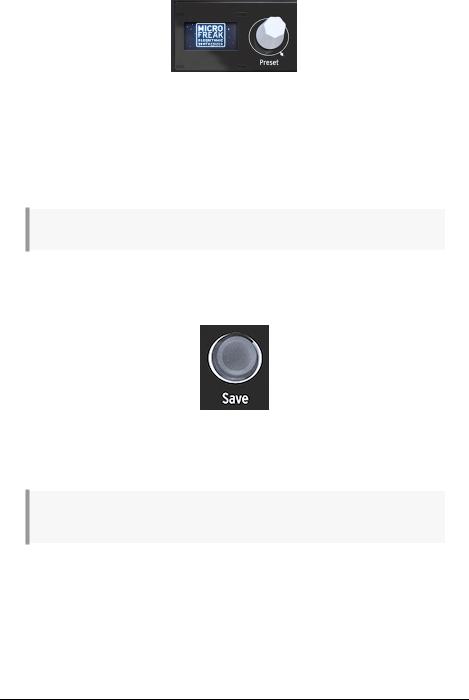
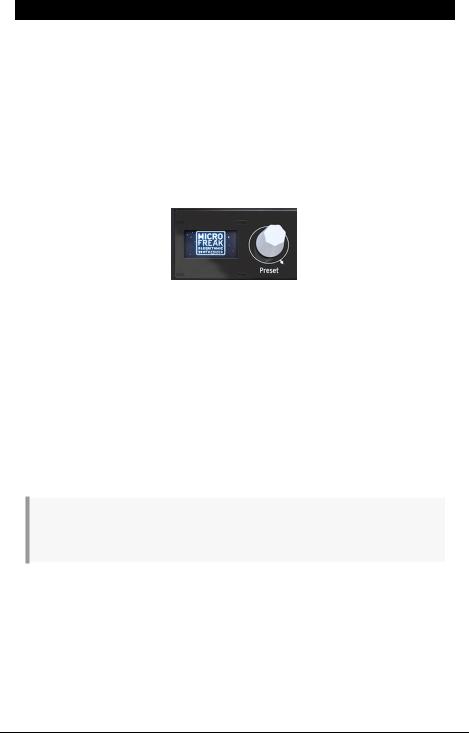
3.1.1.4. The Display and the Preset encoder
The Preset manager
The low-power OLED display is a constant source of information. It will display valuable information about the knobs you turn and the buttons you push.
The Preset Encoder next to the display enables you to browse through the MicroFreak presets. It will display the name of the preset and its category. The first 128 slots are filled with factory presets. The last 128 presets are empty for you to fill with your sound design. When empty their default name is "Init" and the default category is "Lead".
!: You can overwrite the factory presets, so the total number of writable preset locations is 256.
3.1.1.5. Save
Saving your work every now and helps to keep you mentally sane.
Saving Presets
The "Save" button allows you to do so. It involves several steps that we've outlined in the Presets chapter [p.24].
!: You can't save when you're in Utility mode. First deactivate Utility and then proceed with saving your Preset.
11 |
Arturia - User Manual MicroFreak - MicroFreak Overview |

3.1.1.6. Utility
Access to the Utility settings
In Utility you change the Global settings of your MicroFreak and some settings specific for each preset: the Preset Volume, the Bend Range, Pressure mode, and many other settings.
3.1.1.7. Master Volume
The Master volume sets the Global volume of your MicroFreak. If you need one preset to be louder than another you can set its relative volume in Utility: select Utility>Preset>Preset volume.
The Volume knob
Master Volume affects both the line level and the headphone level of your MicroFreak.
Arturia - User Manual MicroFreak - MicroFreak Overview |
12 |
3.1.2. Middle Row
Middle row of the Microfreak
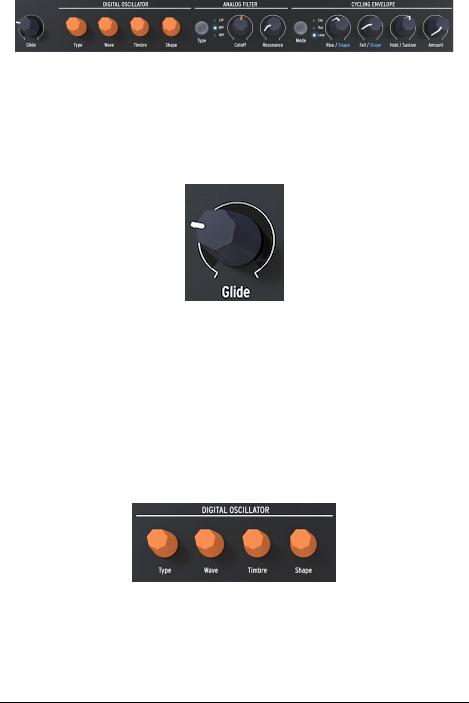
3.1.2.1. Keyboard glide
Glide is a musical tool that enables you to make gradual pitch changes. When you go from one key to the next on the keyboard, the pitch changes are abrupt. Glide smoothens the transition. This knob enables you to set a glide amount.
The Glide knob
The value you select with the Glide knob sets the time for the pitch to glide from one note/pitch to another. With this knob fully counter-clockwise, there is no glide, and the pitch transitions are instant. Turning this knob clockwise increases the glide effect. At the maximum setting, it takes approximately 4 seconds to glide from the lowest C of the MicroFreak keyboard to the highest C (two octaves above). For a more detailed explanation of Glide refer to chapter 10 [p.65].
3.1.2.2. Digital oscillator
The Digital Oscillator is the heart of the MicroFreak. It's a digital circuit that generates the core sound of this instrument.
The Digital Oscillator
The other parts of the MicroFreak - the Analog Filter, the Envelopes, and the LFO - exist only to shape/mangle/wobble the sound of Digital Oscillator. The Type, Wave, Timbre, and Shape knobs enable you to control the actual parameters of the Digital Oscillator [p.36] itself.
13 |
Arturia - User Manual MicroFreak - MicroFreak Overview |

3.1.2.3. Analog filter
The Analog Filter enables you to emphasize or suppress the harmonics contained in the sound of the Digital Oscillator. Simply put, the filter changes the timbre of the oscillator.
The Analog Filter
The Analog Filter [p.48] is like a magnifying glass that reveals everything that is present in the sound of the Digital Oscillator. Or to use a better analogy; it is a searchlight that moves over the waveform generated by the Digital Oscillator, dynamically revealing its harmonic content. It can sweep over the sound with a broad beam or with a very focused, narrow beam. The focus of this beam is called Resonance. The point where the filtering becomes effective is called the cutoff point.
The are three types of filters in the MicroFreak: a Low Pass Filter (LPF), a Band Pass Filter (BPF), and a High Pass Filter (HPF). The Low Pass Filter attenuates (weakens) or removes frequencies above the cutoff frequency. The Band Pass Filter attenuates (weakens) or removes frequencies above and below the cutoff frequency. The High Pass Filter attenuates (weakens) or removes frequencies below the cutoff frequency.
3.1.2.4. Cycling Envelope
The Cycling Envelope Generator is an excellent tool for generating complex modulation signals. An envelope is often used to control the loudness of a sound, but it can be used for many other purposes. The Cycling Envelope is a general purpose envelope, the output of which you can use to modulate all destinations on the Matrix.
The Cycling Envelope Generator
Unlike a standard envelope that cycles through its stages only once, the Cycling Envelope [p.58] can retrigger itself after the last stage has finished.
Arturia - User Manual MicroFreak - MicroFreak Overview |
14 |

3.1.3. Bottom Row
Bottom row of the MicroFreak
3.1.3.1. Octave select
Octave select
Enables you to select the active octave range for the keyboard.
3.1.3.2. Shift
The shift button
Holding Shift allows you to change a number of functions, some are printed printed in blue on the panel others are more hidden. for a complete overview please refer to chapter 16: Cheat sheet [p.99].
•Toggle between Arp / Seq (activates either the Arpeggiator or the Sequencer)
•Set a swing rate
•Control the shape of the Attack stage of the Cycling Envelope
•Control the shape of the Fall stage of the Cycling Envelope
In addition you can use Shift to transpose sequences, reload them or copy an Arpeggio to a sequence. Please refer to chapter 12 [p.76] and chapter 13 [p.71] for details
15 |
Arturia - User Manual MicroFreak - MicroFreak Overview |
3.1.3.3. Arp|Seq (Arpeggiator/Sequencer)
The Arpeggiator generates notes based on the keys you have pressed and plays them back according to the settings of the Pattern buttons and the Oct | Mod range button.
The Arpeggiator and the Sequencers
The Sequencer [p.76] and the Arpeggiator [p.71] share several features. We will focus on those features in later chapters.
Arp | Seq lets you toggle between the Arpeggiator or the Sequencer.
Oct | Mod sets the range for the Arpeggiator. When the Sequencer is active, it enables you to select one of four sequencer modulation tracks.
The Rate knob sets the speed of the Arpeggiator or the Sequencer. In synced mode, it locks to the selected clock source.
Arturia - User Manual MicroFreak - MicroFreak Overview |
16 |
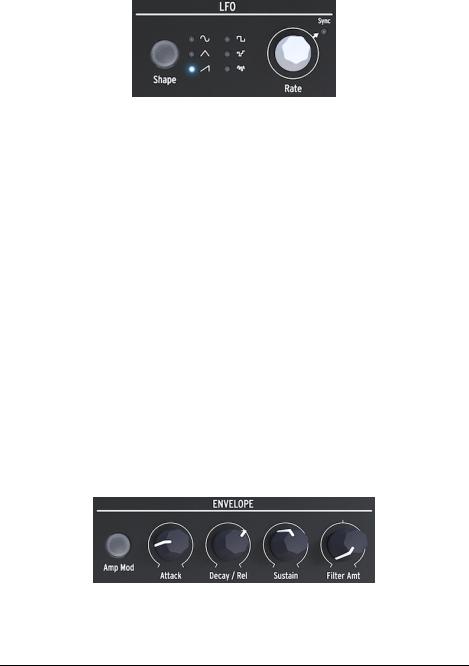
3.1.3.4. LFO
An LFO is a low-frequency oscillator that can produce various waveforms at sub-audio frequencies (0.05Hz up to 100Hz). The MicroFreak provides one LFO with six waveforms.
The LFO
You select a waveform with the Shape button: sine, triangle, rising sawtooth, square, random stepped (also referred to as sample & hold), and random gliding (or smoothed random).
•Sine rises and falls between its minimum and maximum values
•Triangle rises and falls in more of a linear way between its minimum and maximum values
•Sawtooth rises linearly to its maximum value and then drops suddenly to its minimum value
•Square rises and falls suddenly between its minimum and maximum values
•Random stepped rises and falls suddenly between values that are generated at random
•Random gliding rises and falls gradually between values that are generated at random
The Rate control knob doubles as a Sync switch. It sets the LFO rate’s operating mode. It can be slaved to the Sequencer/Arpeggiator tempo clock (Seq) or set to Free mode (i.e., the LFO rate depends solely on the Rate knob setting).
3.1.3.5. The General Envelope Generator
The Envelope Generator is one of the basic building blocks of MicroFreak. It enables you to shape the overall loudness of a tone or the timbre of a sound. It's a sound sculpting tool. It can be patched to all destinations on the Matrix, including the destinations you create yourself. The first three knobs - Attack, Decay/Release, and Sustain - affect the Filter by default. The last knob, Filter Amt, enables you to set the amount by which the Filter will be affected by the Envelope. Their functions are described extensively in the Envelope Generator [p.55] chapter.
The Envelope Generator
When the Amp Mod switch is active, the Envelope will also affect the loudness of the VCA and thus shape the overall loudness of the MicroFreak.
17 |
Arturia - User Manual MicroFreak - MicroFreak Overview |
3.1.3.6. Keyboard section
The keyboard section consists of the keyboard and an Icon Strip with access to the Arpeggiator and Sequencer controls, and a touch strip with a Bend icon and two Spice and Dice icons that enable you to create variations on the Sequencer and Arpeggiator patterns.
The keyboard of the MicroFreak is touch capacitive and has 25 keys. When played the keys generate gate, a pitch, and pressure. It covers a two-octave range, which can be extended using the Octave Down/Up buttons.
!: There's a setting in Utility [p.86] that allows you to select whether the keyboard generates pressure or velocity.
The Keyboard
Depending on the settings in Utility or the MIDI Control Center, the keyboard provides either aftertouch or velocity control. It can also be used as a fully polyphonic MIDI controller for other devices via the USB and MIDI out connectors on the rear panel.
3.1.3.7. The Icon strip
Right above the keyboard, you'll see a strip with eight mysterious-looking icons.
Using these icons, you can access the most intriguing parts of the MicroFreak; its Arpeggiator, Pattern Generator, Sequencer, and the three live controls: Spice, Dice, and Bend.
The icon strip
The Spice and Dice icons enable you to create variations on the sequencer and arpeggio pattern. Dice acts on the gates and triggers of the currently playing arpeggio or sequence.
Spice & Dice
Spice sets the amount of variety. For detailed info about the Icon strip refer to the Keyboard [p.61] chapter. How to use the Arpeggiator and the Sequencer is explained in chapters 11 [p.71] and 12 [p.76].
Arturia - User Manual MicroFreak - MicroFreak Overview |
18 |
3.2. Rear Panel Overview
Rear Panel Overview
3.2.1. Audio outputs
The headphone output is a standard 3.5 mm TS or TRS jack. The output of the MicroFreak is monaural. Connecting a stereo headphone will merely provide the identical sound on the left and right sides (i.e., mono).
Audio output
The Line output is a 6.35 mm TRS jack. It's output is monaural. Use this output to connect to your amplifier or mixer. Line out is symmetrical/balanced type output. This is a symmetrised TRS jack, connecting a TRS jack will improve the signal-to-noise ratio.
3.2.2. Pitch/Gate/Pressure outputs
These are typically used together to send electrical signals to an external device such as Arturia’s powerhouse monophonic analog synthesizers (MatrixBrute, MiniBrute/SE, and the MicroBrute) or a Eurorack modular system.
CV, Gate and Pressure
outputs
The CV output sends a control voltage you can use to control external oscillators. Gate can trigger external devices. Pressure generates either a pressure voltage or a velocity voltage depending on the settings in Utility [p.86]: Utility>Preset>Press mode.
19 |
Arturia - User Manual MicroFreak - MicroFreak Overview |
3.2.3. Clock input/output
You can use Clock input/output to sync the MicroFreak to external synthesizers or modular systems.
Clok input and output
♪: The use of a TRS jack provides both clock and start signals. A TS jack provides only clock signals.
3.2.4.MIDI input/output
MIDI input and output
Use the included MIDI adapters (1/8" TRS jack to 5-pin DIN, grey) to send and receive controller data and MIDI data to/from external MIDI-compatible devices.
3.2.5. USB/DC IN
This connector provides the power and data connections to a computer. It can also be used with a standard USB mobile phone charger (5V, 500mA), allowing you to use your controller presets and sequences even without a computer present.
The USB connector
The USB port is also used to connect the MicroFreak to Arturia's MIDI Control Center. This software enables you to configure various settings, update the firmware of the MicroFreak and to manage your presets.
Arturia - User Manual MicroFreak - MicroFreak Overview |
20 |
3.2.6. Power switch
If you want to turn the unit off without disconnecting the USB cable, use this recessed switch. The power switch toggles between OFF and USB power / DC power. When both are connected, DC is used. If you plug in DC power the MicroFreak will reset.
The On/Off switch
Note: The power requirements of the MicroFreak are so low that you can power it with the same power bank you use to recharge your phone or tablet when you're in a place without power outlets.
3.2.7. Power Connector
The power connector connects the MicroFreak to the mains outlet. Please only use the Power Supply provided by Arturia.
The power connector
It was designed specifically to provide the ground needed for the capacitive keyboard to operate properly.
21 |
Arturia - User Manual MicroFreak - MicroFreak Overview |

3.3. Signal Flow
Working with the MicroFreak becomes a lot easier when you understand how signals flow in the machine.
The Digital Oscillator generates a waveform, which is then sent to the Filter and an analog VCA. The main Envelope is hardwired (a fixed connection) with the VCA. When you press the "Amp Mod" button the main envelope controls the internal analog VCA. When off, the keyboard Gate signal controls the VCA.
The signal flow of the MicroFreak
In Paraphonic mode with Amp Mod ON the envelope is duplicated several times depending on the number of voices you have specified in Utilty. These envelopes control a number of internal digital VCAs that only become active in Paraphonic mode.
The main envelope is also hardwired to control the Filter cutoff frequency by means of the Filter Amount knob. As soon as you turn the Filter Amount knob you'll notice that the "envelope to filter" connection point on the Matrix lights up.
Arturia - User Manual MicroFreak - MicroFreak Overview |
22 |
4. THE MICROFREAK PRESETS
We at Arturia invite to create your own presets. There are so many fantastic sounding synths these days with an overwhelming number of presets that it is easy to get lost in an endless search for the magic sound. In the end, the best sound preset is the one you create yourself, because only you know what sort of sound you're after. And as a bonus, you teach yourself the skills you need to create sounds that match your sonic ideal. So....let's get started!
4.1. Loading Presets
Turn the Preset encoder to load a preset. To get started you can select one of the 128 factory presets. However, you may want to keep those intact if you have limited experience with the MicroFreak or with music synthesis in general. In that case, select one of the presets in the range 129 to 256 to save your sounds.
the Preset encoder
Make sure that the Panel button is OFF when you browse presets. When the Panel button is ON, you will hear the preset as it was once saved but with the current positions of the Front panel knobs. More about the Panel button later in this chapter.
You can now tweak the preset to give it your flavor. If you like what you hear, remember to save it.
Warning! If you turn the encoder to load another preset, you'll lose the changes you made to the original Preset. So use the encoder with care: by default, switching presets clears any modifications done on the previously loaded preset, without a warning message. If you don't like this behavior, you can change a setting in Utility called "Click to Load". With that setting ON you can scroll through presets without losing the modifications of the preset you are currently working on. It's only when you click the encoder that the new preset will load and your modifications saved. Press Utility>Browsing>Click to Load to change this setting.
!: There's a nifty trick that enables you to erase the content of the current preset quickly: press the preset encoder quickly three times in a row. This will reset the preset to its initial empty state. It is also an excellent way to clear existing presets.
23 |
Arturia - User Manual MicroFreak - The MicroFreak Presets |

4.2. Saving Presets
You probably know what it is like to ruin a brilliant patch with one wrong decision and to discover that you can't go back to that moment because you forgot to save your patch. That's why we've put the Save button right next to the browsing encoder. Press the Save button to enter "save" mode. Once in save mode, you can:
•Save a preset to the current slot or
•Save to different location.
If you want to save it to a different location turn the encoder to select a location and press the encoder to select the new location. The display will respond with "Click to save": you can now select a category by turning the Encoder. You can change the category to any of the nine available types: Bass, Brass, Keys, Lead, Pad, Percussion, Sequence, SFX, and Strings.
Click once more after selecting the Category and dial in a name for the preset. The Save button will now blink to indicate that you're doing something new; you're about to change the name of the preset.
Turning the encoder will guide you through the alphabet, first in Upper case then in Lower case and finally through the numbers 0 to 9. To enter a space turn the encoder all the way to the left.
!: To edit a character in an existing name push+turn the preset encoder. To quickly scroll through the characters options hold [shift] and turn the encoder.
Click to make a letter selection final; this brings you to the next field in the name where you can repeat your selection until you have a complete preset name. Now press "Save" to save the preset with its new name.
When you save your patch to a preset location, everything related to that preset gets saved:
• the position of the knobs
• sequences and the modulation tracks
• the configuration changes you made in Utility that are specific for this preset (Utility>Preset)
!: Spice & Dice settings are not saved with a preset. !: If you see a message saying "Memory protect is on", select Utility>Misc>Mem Protect and set it to OFF.
Arturia - User Manual MicroFreak - The MicroFreak Presets |
24 |

4.3. Tweaking the Preset Configurations
In Utility, you'll find settings that you use to change the standard configuration of the current preset. These settings are saved with the preset. That means that each preset can be made to behave uniquely; one preset can be paraphonic, respond to pressure, and have a sequence length of five; another sequence can be monophonic and have a sequence length of 32.
!: The two sequences that are part of each preset will always have the same length.
Changing these settings can make all the difference. For example, you've created a sequence and used one of the modulation tracks to add a varying amount of glide to some of the steps. By changing some of the Utility>Preset settings, you can explore alternative options:
•What difference does it make when I change the Glide setting from Time to Rate? Utility>Preset>Glide Mode
•Does Resetting the Envelope make the sequence snappier? Utility>Preset>Envelope reset
•Will changing the sequence smooth settings create a different mood? Utility>Preset>Seq (1-4) smooth
25 |
Arturia - User Manual MicroFreak - The MicroFreak Presets |
Loading...