

Page 1
Touchstone® WECB460
Wi-Fi® MoCA® Bridge
Installation Guide
Page 2

©ARRIS Enterprises, Inc. 2014 All rights reserved. No part of this publication
may be reproduced in any form or by any means or used to make any
derivative work (such as translation, transformation, or adaptation) without
written permission from ARRIS Enterprises, Inc. (“ARRIS”). ARRIS reserves
the right to revise this publication and to make changes in content from time to
time without obligation on the part of ARRIS to provide notification of such
revision or change.
ARRIS provides this guide without warranty of any kind, implied or expressed,
including, but not limited to, the implied warranties of merchantability and
fitness for a particular purpose. ARRIS may make improvements or changes in
the product(s) described in this manual at any time. The capabilities, system
requirements and/or compatibility with third-party products described herein
are subject to change without notice.
ARRIS and the ARRIS logo are all trademarks of ARRIS Enterprises, Inc.
Other trademarks and trade names may be used in this document to refer to
either the entities claiming the marks and the names of their products. ARRIS
disclaims proprietary interest in the marks and names of others.
ARSVD01566 Standard 1.0 May 2014
Page 3
1
Package Contents
The following items should be included: If any of these items are
damaged or missing, please contact the provider of this equipment
immediately.
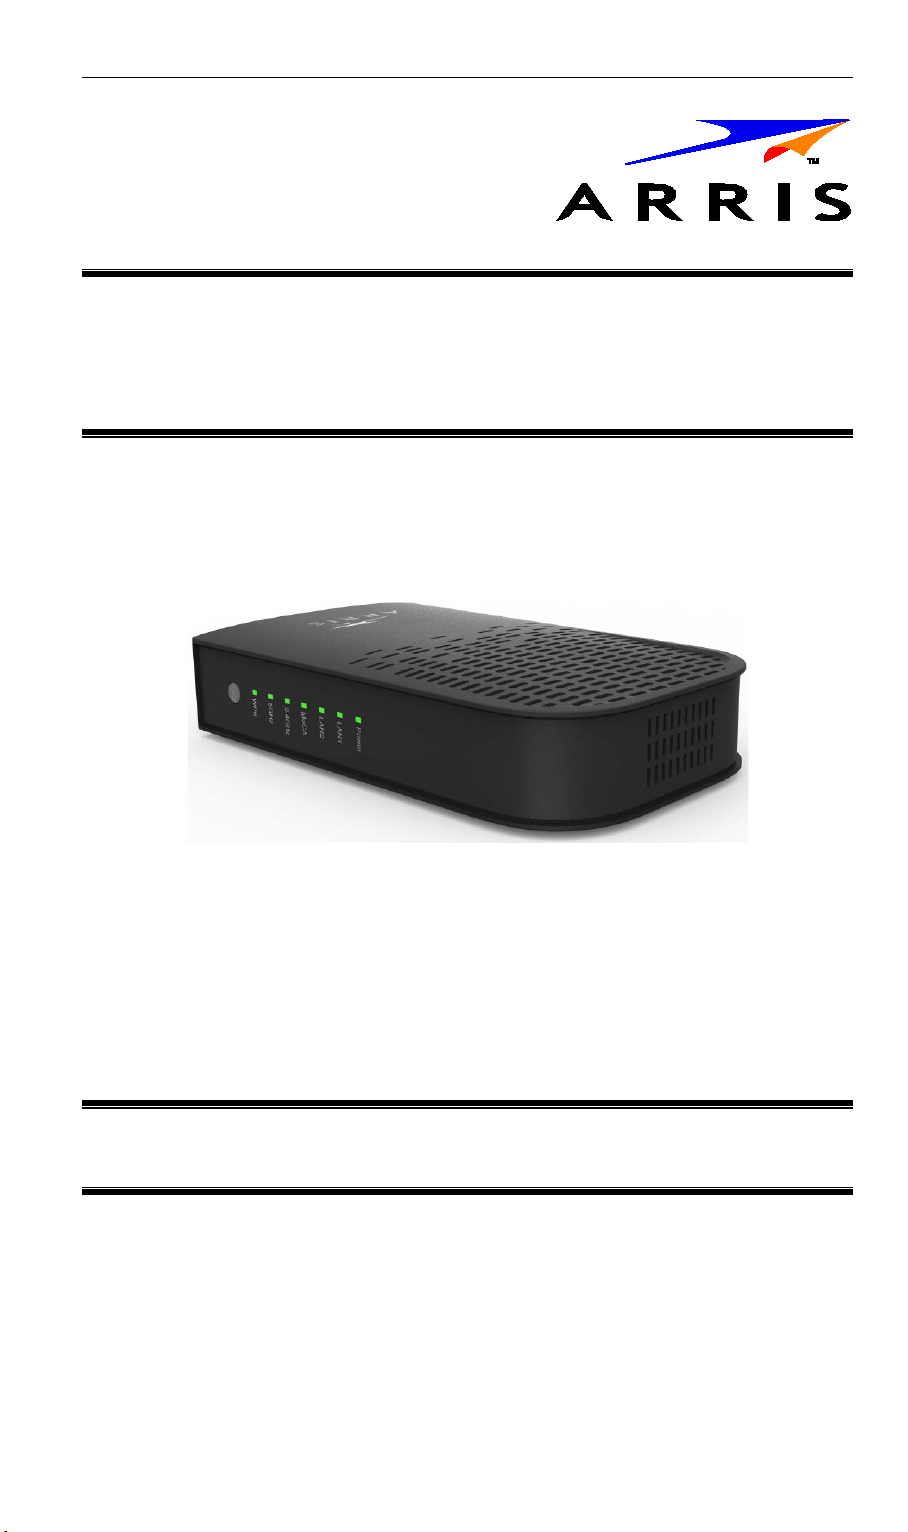
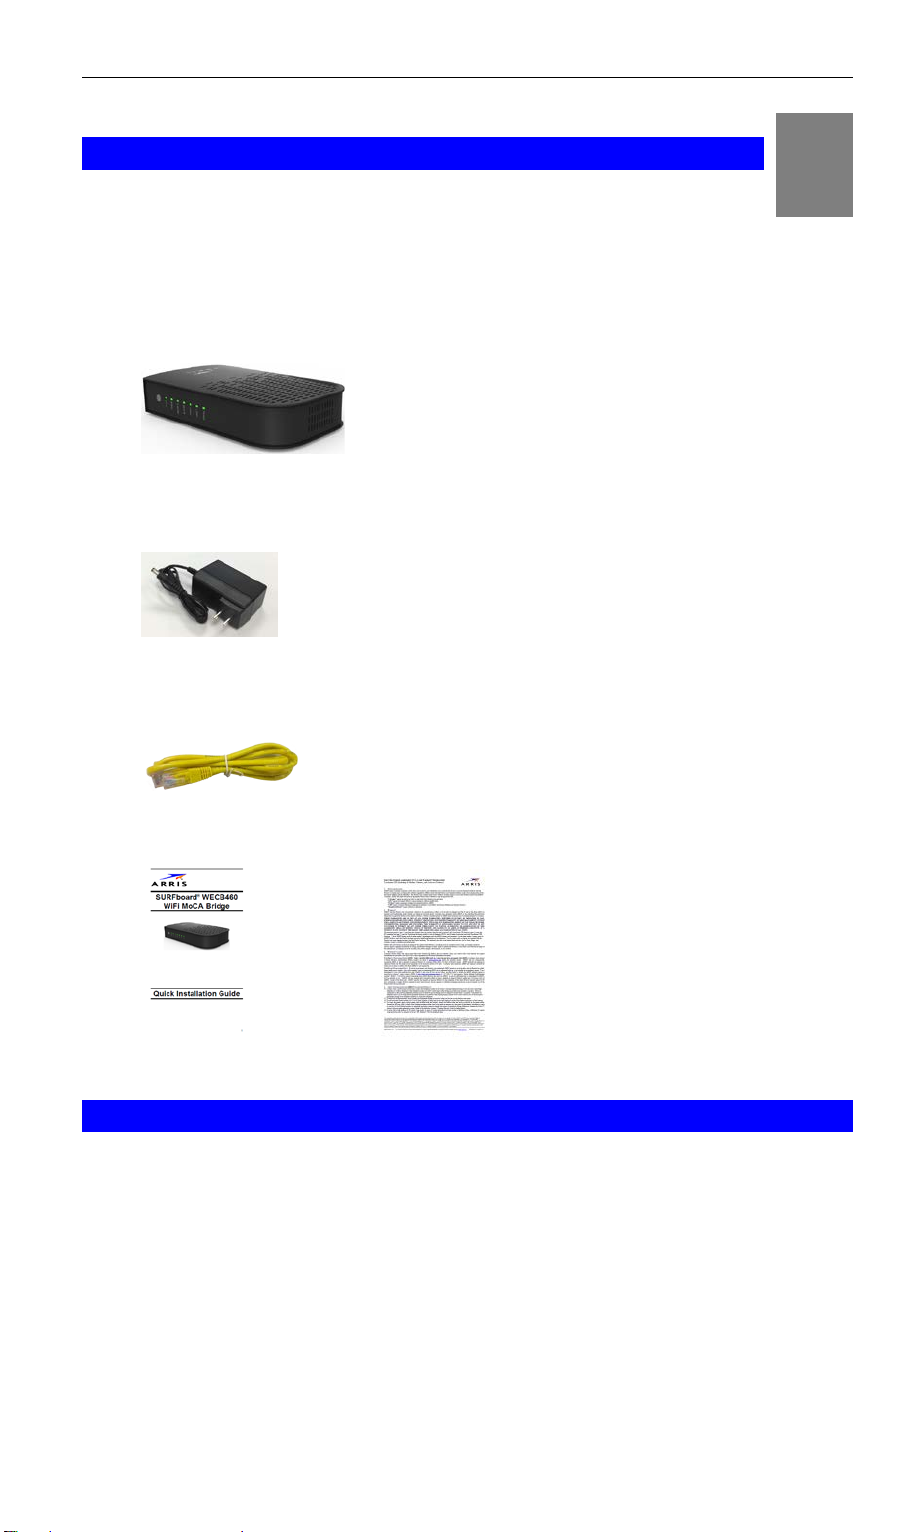
1. WECB460 Wi-Fi MoCA Bridge
2. AC Power Adapter
3. Cat5e Ethernet Cable
4. Installation Guide and End User License Agreement
What You Need
The WECB460 Wi-Fi MoCA Bridge is used to extend coverage of existing
Ethernet or MoCA networks. As such, you will need:
• Active I nt er net service
• POE filter(s)
• Splitters/cables
1
Page 4

Chapter 1
Introduction
This chapter summarizes the WECB460 Wi-Fi MoCA Bridge’s features,
components and capabi lities.
Overview
The Touchstone® WECB460 Wi-Fi MoCA Bridge enhances network range,
coverage, and connectivity by extending existing Ethernet or MoCA service,
while adding 802.11ac wireless network capability for connection to hard-toreach and mobile wireless devices (IP cameras, laptops, tablets, etc) in your
home. The WECB460 Wi-Fi MoCA Bridge offers consumers an improved
network experience on all devices in the home via a simple and intuitive setup
procedure. This high-speed, 802.11ac device will work with ARRIS Modems,
ARRIS Gateways, and most other wireless routers and access points.
Features
• Easy Setup. Use your PC and web browser for configuration. WPS™
(Wi-Fi Protected Setup™) simplifies making client connections.
• Multimedia over Coax (MoCA) compliance. Compliant to the latest
MoCA 2.0 standard, the WECB460 Wi-Fi MoCA Bridge is capable of using
the coaxial network throughout your home to extend your network to any
room with an unused TV coax connection, when paired with another
MoCA-c apable device. W here Wi-Fi coverage can often be “spotty”,
guarantee network access throughout your home with MoCA!
Wireless Features
• Supports DBC (Dual-Band Concurrent) 802.11ac @ 5GHz / 802.11n @
2.4GHz and earlier Wireless Clients: Compatible with the latest
802.11ac Wi-Fi standard, while backward compatible with the 802.11a,
802.11b, 802.11g, and 802.11n standards. This ensures simultaneous
operation for all Wi-Fi-capable devices.
• WPS Support: Wi-Fi Protected Setup can simplify connection of client
devices to the Wi-Fi network using the configuration button on the device.
• Security Support: Full WEP (64/128 Bit), WPA and WPA2 Personal
standards are supported on the wireless interface, allowing advanced
encryption of wireless data.
Location Considerations
For best performance, locate the WECB460 Wi-Fi MoCA Bridge away from
known interfering devices, such as microwave ovens and baby monitors.
2
Page 5
On (Amber) - System failure.
On - System with Ethernet port connected.
connected via Ethernet cable to Ethernet port 1.
2
Chapter 2
Basic Setup
This Chapter provides details on ho w to install and setup the
WECB460 Wi-Fi MoCA Bridge.
System Requirement
To use the wireless interface on the WECB460 Wi-Fi MoCA Bridge, other
wireless devices must be compliant with the IEEE 802.11ac, IEEE 802.11a,
IEEE 802.11b, IEEE 802.11g or IEEE 802.11n specifications. All wireless
stations must use compatible settings.
Physical Details
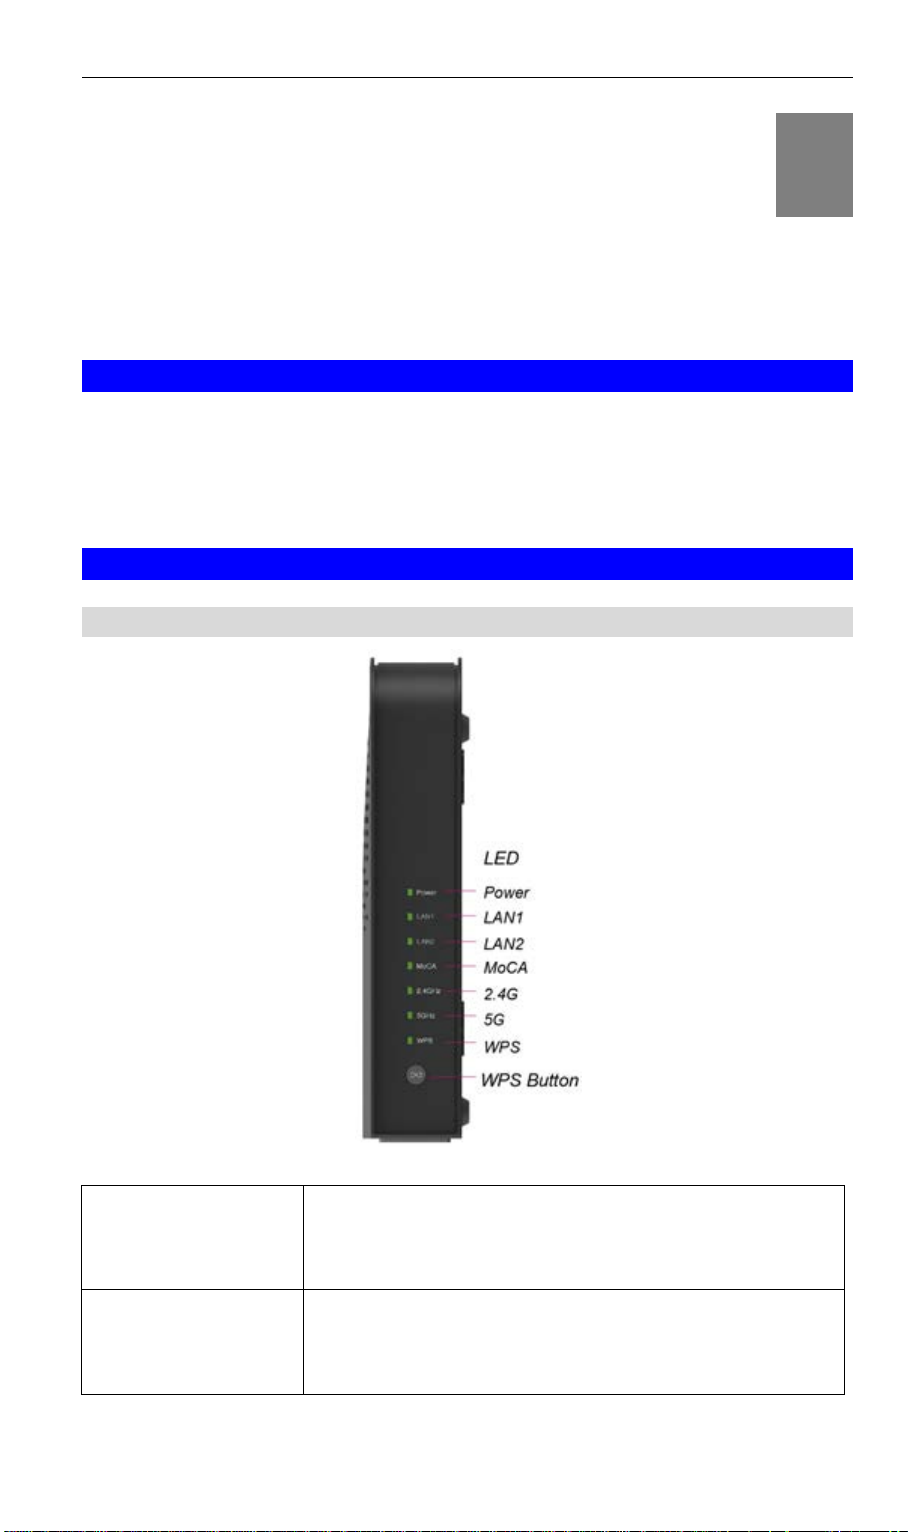
LED Indicator Panel
Power LED
(Green/Amber)
LAN1 (Green)
On (Green) - Power on.
Off - No power.
Off - No system connected.
Blinking (Green) – Indicates traffic with device
3
Page 6

LAN2 (Green)
On - System with Ethernet port connected.
cable to Ethernet port 2.
completed within 2 minutes.
Off - No system connected.Blinking (Green) –
Indicates traffic with device connected via Ethernet
MoCA On (Green) – MoCA network enabled.
Off – MoCA network disabled.
Slow Blinking (Green) – Indicates traffic with
connected client device(s) via MoCA.
2.4GHz (Green) On (Green) – 2.4 GHz wireless network is enabled
and active.
Off – 2.4 GHz wireless network is disabled.
Fast Blinking (Green) – Indicates traffic with
connected client device.
5GHz (Green) On (Green) – 5 GHz wireless network is enabled
and active.
Off – 5 GHz wireless network is disabled.
Fast Blinking (Green) – Indicates traffic with
connected client device.
WPS LED (Green) Off – Not in use.
WPS Button
Slow Blinking (Green) - When the WPS button is
pressed, the LED will slow blink for up to 2 minutes
or until connection to the client device is established.
The LED will turn off immediately upon client pairing.
Press the WPS button on the WECB460 Wi-Fi
MoCA Bridge and on your client wireless device to
perform WPS setup that easily creates an
encryption-secured wireless connection
automatically.
Client Connection: When pressed and held for
over 1 second, then released, the WECB460 Wi-Fi
MoCA Bridge will perform WPS setup with client
devices. The WPS LED will blink for up to 2
minutes, so the WPS connection process should be
4
Page 7

AC/DC power adapter connection.
Connector Panel
Reset Button
Ethernet ports
Ethernet LED
(Green/Amber)
This button is recessed. Use a pointed non-metallic
object to press this button.
• Reset. Press for 1 to 2 seconds and release for a
standard reset.
• Reset to manufacturer default values and
reboot. When pressed and held for over 15
seconds, the settings of the WECB460 Wi-Fi
MoCA Bridge will be reset to their default values.
Use a standard Ethernet cable to connect:
• A PC or other direct wired client device to the
WECB460 Wi-Fi MoCA Bridge.
• The WECB460 Wi-Fi MoCA Bridge to a non-
MoCA enabled router or gateway. (Port 1 only)
On (Green) – System with 1Gbps LAN port
connected.
On (Amber) – System with 100Mbps/10Mbps LAN
port connected.
Blinking (Green/Amber) – Network data activity.
Off (Green/Amber) - LAN is not connected.
Cable
Coaxial cable connection to home MoCA network.
DC In
5
Page 8

Connecting the WECB460 Wi-Fi MoCA Bridge
Using the WECB460 Wi-Fi MoCA Bridge and existing coax or Ethernet cab les
you may extend the range of your wireless network and reduce “dead spots” in
the house in locations where the gateway/access point signal is weak.
Option 1: Connecting to a MoCA Enabled Network
Requirement: You must have a MoCA enabled router or gateway installed
that is capable of processing MoCA signals on the home coaxial cable RF
network to install the WECB460 Wi-Fi MoCA Bridge in this configuration.
Connecting to a MoCA enabled network is the most common installation. The
following diagram shows a typical installation.
You must have a MoCA POE (Point of Entry) filter
installed within inches of the first multi-w ay RF splitter
feeding the RF wiring in your home. This is required to
isolate MoCA signals in the home.
You should also install a MoCA filter on any non-MoCA
devices, such as a set top box, that will be connected to
the coax network to avoid interference-related
performance issues on these devices.
6
Page 9

Perform the following steps to install the WECB460 Wi-Fi MoCA Bridge.
Step 1: Connect the WECB460 Wi-Fi MoCA Bridge to the Coax Backbone
Using a coaxial cable, connect the Cable connector on the WECB460
Wi-Fi M oCA Bridge to either an existing coaxial cable wall outlet in the
home or dir ectly to a splitter feeding the RF wiring in the home. Selecting
the proper location for the WECB460 should be based on where improved
Wi-Fi signal or a direct Ethernet connection is desired.
Step 2: Connect any Direct Wired Client Devices
Using an Ethernet cable, connect any client devices, such as desktop or
laptop computers, to one or both of the Ethernet connectors on the
WECB460 Wi-Fi MoCA Bridge. (These should be devices located close
enough to make a direct wired connection practical.) Use Cat5e Ethernet
cables for optimal performance on the Ethernet LAN.
Step 3: Connect your Wireless Client Devices
Configure any wireless devices, such as laptop computers, notepads or
other mobile devices, to connect to the WECB460 Wi-Fi MoCA Bridge.
See Setting Up your Wireless Client Devices for instructions.
Step 4: Configure Wireless Security
The WECB460 Wi-Fi MoCA Bridge ships with wireless LAN security set by
default. If you need to modify the default wireless security or other wireless
LAN settings, see Configuring your Wireless Connection for instructions.
7
Page 10

Option 2: Connecting to a Non-MoCA Network via Ethernet Cable
If the router or gateway present in the home network is not MoCA enabled,
you must connect the WECB460 Wi-Fi MoCA Bridge to the network using
Ethernet cable. The following diagram shows a typical installation.
Perform the following steps to install the WECB460 Wi-Fi MoCA Bridge.
Step 1: Connect the WECB460 Wi-Fi MoCA Bridge to the Router or Cable
Modem
Using an Eth ernet cable, connect the Ethernet 1 connector on the
WECB460 Wi-Fi MoCA Bridge to an available Ethernet connector on the
router or cable modem.
Step 2: Connect any Direct Wired Client Devices
Using an Ethernet cable, connect any client devices, such as desktop or
laptop computers, to the Ethernet 2 connector on the WECB460 Wi-Fi
MoCA Bridge. (This should be a device located close enough to make a
direct wired connection practical.)
Step 3: Connect your Wireless Client Devices
Configure any wireless devices, such as laptop computers, notepads or
other mobile devices, to connect to the WECB460 Wi-Fi MoCA Bridge.
See Setting Up your Wireless Client Devices for instructions.
8
Page 11

Step 4: Configure Wireless Security
The WECB460 Wi-Fi MoCA Bridge ships with wireless LAN security set by
default. If you need to modify the default wireless security or other wireless
LAN settings, see Configuring your Wireless Connection for instructions.
Step 5a: Set the Ethernet Port Direction to Internet
Access the configuration interface and select the HSD tab, Interface
screen. Set Ethernet Port to Port 1 and set the Direction field to Internet.
This tells the WECB460 Wi-Fi MoCA Bridge to consider this interface as its
connection back to the Internet.
Click the Apply button to save and apply the changes.
9
Page 12

Step 5b: Set the MoCA Direction to Client
Access the configuration interface and select the MoCA tab, Interface
screen. Set the Direction field to Client. This ensures that the MoCA
interface points to the home network.
Click the Apply button to save and apply the changes.
Step 6: Create a new MoCA Network in the Home (Optional)
The WECB460 Wi-Fi MoCA Bridge that is connected to the Router or
Cable Modem via Ethernet can use the available RF connector to establish
a new MoCA network. This requires the user to:
• connect a coaxial cable between the WECB460 Wi-Fi MoCA Bridge
and the nearest available coaxial cable wall outlet, and
• to ensure a POE filter is installed at the entry of the RF network to the
home and on any connected non-MoCA devices subject to interference
from MoCA signals, and
• to place one or more MoCA clients on the home RF network for MoCA
communications
10
Page 13

You must set up your computer and other client devices
security.
Configuring your Wir ele s s Connec t ion
The WECB460 Wi-Fi MoCA Bridge ships with wireless LAN security set by
default. See the security label on your product for the factory security settings:
network name (SSID), encryption method, network (pre-shared) key, and WPS
PIN.
to work with the security settings on the WECB460 Wi-Fi
MoCA Bridge. Refer to the documentation for your client
device for instructions on setting security. On most
computer systems you only need to select the network
name (SSID) device and enter the encryption (preshared) key.
If your computer or client device supports Wi-Fi Alliance
WPS (Wireless Protected Setup), activate WPS on your
computer or client device and the WECB460 Wi-Fi MoCA
Bridge simultaneously to easily set up your system
Accessing the Configuration Interface
If you need to modify the WECB460 Wi-Fi MoCA Bridge’s default wireless
security settings, or if you want to configure any other wireless LAN settings,
refer to the following instructions.
Follow these steps to access the configuration interface. You should have
already set up the WECB460 Wi-Fi MoCA Bridge as described in Connecting
the WECB460 Wi-Fi MoCA Bridge.
Step 1a: If security has been properly set up on your computer to access the
wireless LAN on the WECB460 Wi-Fi MoCA Bridge, use the connection
utility for your operating system to connect to the wireless LAN using its
network name (SSID), as shown on the security label.
Step 1b: If you cannot access the wireless LAN, you must first establish a
wired Ethernet connection between your computer and the WECB460
Wi-Fi MoCA Bridge.
Step 2: In your web browser, open the page http://192.168.100.1/ or the
predefined URL, http://www.myArrisMocaRepeater.net
WECB460 Wi-Fi MoCA Bridge configuration interface*. It is normal that
this interface will not become available immediately after power is applied
to the WECB460 Wi-Fi MoCA Bridge. Please allow up to one minute to
pass before attempting connection to the configuration interface.
* If you can’t access the configuration interface, the WECB460 Wi-Fi
MoCA Bridge may have been assigned a dynamic IP address by your
router or gateway. If so, access your router’s or gateway’s interface to
determine the IP address assigned to it and access the WECB460 Wi-Fi
MoCA Bridge’s configuration interface using that IP address.
, to access the
11
Page 14

The Login screen displays.
Step 3: Enter the user name and password and click the Apply button to log
in.
The default user name is “admin”. The default password is “password”,
in lower case letters.
The Device Summary screen displays.
Step 4: Click Wireless on the top menu, then click either the 2.4 GHz Radio
tab or the 5 GHz Radio tab.
The Wireless Basic Setup screen for the respective radio displays.
2.4 GHz Radio Setup screen:
12
Page 15

Click the Apply button to save and apply any changes.
5 GHz Radio Setup screen:
Use the online help information in the configuration interface to set wireless
radio configuration parameters as required.
13
Page 16

IMPORTANT: For best performance check that “Auto” is
selected for your Channel setting. If manually selecting
your channel, be sure to select a channel that does not
conflict with the channel used by your existing network
router’s or gateway’s wireless radio. You can reset the
WECB460 Wi-Fi MoCA Bridge to rescan for the best
channel when using the “Auto” setting.
Additional configuration settings and system information are available on the
Advanced, Statistics, MAC Address Control, and Connected Devices screens.
Click the Apply button to save and apply any changes.
Step 5: Click the WPS tab.
The Wireless Protected Setup (WPS) screen displays.
Use the online help information in the configuration interface to set WPS
configuration parameters as required.
Click the Apply button to save and apply your changes.
14
Page 17

The WECB460 Wi-Fi MoCA Bridge creates a new access
point indefinitely until manually changed by the user.
Setting Up your Wireless Client Devices
You must configure your wireless client devices to access the WECB460 Wi-Fi
MoCA Bridge.
point at the installed location to supplement existing
Wi-Fi services. Users sometimes replicate the same
SSID settings to allow clients to “roam” and choose
which access point to connect to based on signal
strength. Note that the ability of a client to roam as
signal conditions change is solely a function of the
individual client. Some are designed to roam quickly
while others will remain connected to an inferior access
Configuring Client Devices without WPS
PCs and laptops typically do not have a WPS function. However, if previously
configured to your wireless router/access point, they should automatically
access the network through the WECB460 Wi-Fi MoCA Bridge without any
additional configuration.
If your client was NOT previously configured for your router/access point,
perform the following steps:
Step 1: Configure the client device (e.g. PC or laptop) with the same SSID
and encryption keys using your operating system’s network utility.
Step 2: The connection is successfully established after the 2.4 GHz or 5 GHz
LED remains on.
Step 3: The client device can then access the wireless network.
Configuring WPS Enabled Client Devices
Step 1: Power on the WPS enabled client device (e.g. IP Camera) and make
sure it is in wireless mode
Step 2: Press the WPS button on the WECB460 Wi-Fi MoCA Bridge for more
than 1 second and then release it. The WPS LED will start blinking and
blink for up to 2 minutes.
Step 3: Next press the WPS button on the client device. Make sure to press
the button within 2 minutes after pressing the WECB460 Wi-Fi MoCA
Bridge WPS button.
Step 4: Wait for the WPS LEDs to be solid on both the WECB460 Wi-Fi MoCA
Bridge and the client device. The WPS connection process should be
completed within 2 minutes. The client device can now access the
wireless network.
15
Page 18

Appendix A
A
Specifications
WECB460 Wi-Fi MoCA Bridge
Dimensions 11.8 cm (W) x 19.5 cm (H) x 4.2 cm (D)
Weight 307 grams (0.677 lbs.)
Operating
Temperature
Operating Relative
Humidity
Antenna Internal antenna
Storage
Temperature
Network Interface 1 External 75 Ohm Coaxial Connector (MoCA)
Wireless interface 2.4 GHz/5 GHz Dual-Band Concurrent, 2x2:2 MIMO
5° C to 40° C (41° F to 104° F)
5 to 90% non-condensing
-40° C to 70° C (-40° F to 158° F)
2 Gigabit Ethernet 100/1000 Base-T (RJ45) LAN
connections
2.4 GHz Typical EIRP (Effective Isotropic Radiated
Power) at 100% transmission power are:
802.11b: 22 dBm @ 11Mbps
802.11g: 20 dBm @ 54Mbps
802.11n: 19 dBm @ HT40 MCS7
5 GHz Typical EIRP at 100% transmission power are:
LEDs 7
Power AC/DC Power Adapter
Standards RoHS, WEEE
802.11a: 19 dBm @ 54 Mbps
802.11ac: 18 dBm @ VHT80 MCS9
100~120V AC, 60 Hz
IEEE 802.3, 802.11a, 802.11b, 802.11g, 802.11n.
802.11ac
UL, Industry Canada, FCC Part 15 Class B
Wi-Fi Alliance Certified
MoCA 2.0 Compliant
16
Page 19

Regulatory Approvals
FCC Statement
This equipment has been tested and found to comply with the requirements
for a Class B digital device under Part 15 of the Federal Communications
Commission (FCC) rules. These requirements are intended to provide
reasonable protection against harmful interference in a residential installation.
This equipment generates, uses, and can radiate radio frequency energy and,
if not installed and used in accordance with the instructions, may cause
harmful interference to radio communications. However, there is no guarantee
that interference will not occur in a particular installation. If this equipment
does cause harmful interference to radio or television reception, which can be
determined by turning the equipment off and on, the user is encouraged to try
to correct the interference by one of the following measures:
• Reorient or relocate the receiving antenna.
• Increase the separation between the equipment and receiver.
• Connect the equipment into an outlet on a circuit differe nt from that to
which the receiver is connected.
• Consult the dealer or an experienced radio/TV technician for help.
Warning: To assure continued compliance, any changes or modifications not
expressly approved by the party responsible for compliance could void the
user's authority to operate this equipment. (Example - use only shielded
interface cables when connecting to computer or peripheral devices).
FCC Radiation Exposure Statement
This equipment complies with FCC RF radiation exposure limits set forth for
an uncontrolled environment. This equipment should be installed and operated
with a minimum distance of 7.9 inches (20 centimeters) between the radiator
and your body.
This device complies with Part 15 of the FCC Rules. Operation is subject to
the following two conditions:
(1) This device may not cause harmful interference, and
(2) This device must accept any interference received, including interference
that may cause undesired operation.
This transmitter must not be co-located or operating in conjunction with any
other antenna or transmitter.
17
Page 20

(blank page)
18
 Loading...