

Page 1

CP 649 FT.2
CP 759 FT
Cucina mista
Istruzioni per l'uso e l'installazione
Mixed cooker
Instructions for use and installation
Cuisinière mixte
Instructions pour l'emploi et l'installation
Gemengd fornuizen
Instructies voor het gebruik en installeren
Herd
Gebrauchs- und Installationsanleitungen
Fogão Misto
Instruções para o uso e a instalação
Page 2

La ringraziamo per aver scelto un prodotto Ariston, sicuro e davvero facile da usare. Per conoscerlo, utilizzarlo al meglio e
a lungo, le consigliamo di leggere questo manuale. Grazie.
AVVERTENZE
QUESTE ISTRUZIONI SONO VALIDE SOLO PER I PAESI DI DESTINAZIONE I CUI SIMBOLI FIGURANO SUL LIBRETTO
E SULLA T ARGA MA TRICOLA DELL ’APP ARECCHIO.
1. Questo apparecchio è stato concepito per essere utilizzato
da privati per un uso di tipo non professionale all’interno di
abitazione comune.
2. Leggere attentamente le avvertenze contenute nel presente
libretto istruzioni, in quanto forniscono importanti indicazioni
riguardanti la sicurezza di installazione, d’uso e di
manutenzione. Conservare con cura questo libretto per ogni
eventuale consultazione.
3. Gli accessori del forno che possono venire a contatto con gli
alimenti, sono costruiti con materiali conformi a quanto
prescritto dalla Direttiva CEE 89/109 del 21-12-88 e dal D.L.
108 del 25-01-92.
4. Dopo aver tolto l’imballaggio assicurarsi dell’integrità
dell’apparecchio. In caso di dubbio non utilizzare l’apparecchio
e rivolgersi a personale professionalmente qualificato. Gli
elementi dell'imballaggio (sacchetti in plastica, polistirolo
espanso, chiodi, ecc.) non devono essere lasciati alla portata
dei bambini, in quanto potenziali fonti di pericolo.
5. Alcune parti sono coperte da una pellicola antigraffio
asportabile. Prima di mettere in funzione l’apparecchio, la
pellicola deve essere rimossa e la parte protetta va pulita
con un panno e un prodotto non abrasivo per la pulizia
domestica. Consigliamo, alla prima accensione, di riscaldare
il forno vuoto per circa 30 minuti alla temperatura massima
allo scopo di eliminare eventuali residui di lavorazione.
6. È necessario che tutte le operazioni relative all’installazione
e alla regolazione vengano eseguite da personale qualificato,
secondo le norme in vigore. Le istruzioni specifiche sono
descritte nella sezione riservata all’installatore.
7. Prima di collegare l’apparecchio accertarsi che i dati sulla
targhetta caratteristiche (su parte inferiore dell’apparecchio
e su ultima pagina libretto) siano rispondenti a quelli della
rete di distribuzione elettrica e gas.
8. Durante le cotture al forno e al grill, l’apparecchiatura è
sottoposta ad un sensibile riscaldamento in corrispondenza
del cristallo porta forno e parti adiacenti. Assicurarsi quindi
che i bambini non si avvicinino con l’intento di giocarvi.
9. Verificare che la portata elettrica dell’impianto e delle prese
di corrente siano adeguate alla potenza massima
dell’apparecchio indicata sulla targhetta. In caso di dubbio
rivolgersi ad una persona professionalmente qualificata.
10. Verificare periodicamente il buono stato del tubo di
collegamento gas e farlo sostituire da personale qualificato
non appena presenta qualche anomalia.
11. Il cavo di alimentazione ed il tubo di collegamento gas di
questo apparecchio non devono essere sostituiti dall’utente.
In caso di danneggiamento e di eventuale sostituzione
rivolgersi esclusivamente ad un centro di assistenza tecnica
autorizzato.
12. Non lasciare l’apparecchio inutilmente inserito. Spegnere
l’interruttore generale dell’apparecchio quando lo stesso non
è utilizzato e chiudere il rubinetto del gas.
13. I bruciatori e le griglie rimangono caldi per lungo tempo dopo
l’uso. Fare attenzione a non toccarli.
14. Sui bruciatori non devono essere poste pentole instabili o
deformate onde evitare incidenti per rovesciamento.
Posizionatele sul piano di cottura in modo che i manici siano
rivolti verso l'interno, per evitare urti accidentali.
15. Non utilizzare liquidi infiammabili in vicinanza dell’apparecchio
quando è in uso.
16. Se la cucina è posta su un piedistallo, si devono prendere
misure per evitare che l'apparecchio scivoli dal piedistallo.
17. Non utilizzare macchine a vapore per la pulizia
dell'apparecchio
18. Non ostruire le aperture o fessure di ventilazione o di
smaltimento del calore.
19. Questo apparecchio dovrà essere destinato solo all'uso per
il quale è stato concepito. Ogni altro uso (ad esempio: il
riscaldamento di ambienti) è improprio e quindi pericoloso. Il
costruttore non può essere considerato responsabile per
eventuali danni derivanti da usi impropri dell'apparecchio.
20.L’uso di un qualsiasi apparecchio elettrico comporta l’osser-
vanza di alcune regole fondamentali. In particolare:
• non toccare l’apparecchio con mani o piedi bagnati o umidi
• non usare l’apparecchio a piedi nudi
• non usare, se non con particolare cautela, prolunghe
• non tirare il cavo di alimentazione, o l’apparecchio stesso,
per staccare la spina dalla presa di corrente.
• non lasciare esposto l’apparecchio ad agenti atmosferici
(pioggia, sole, ecc.)
• non permettere che l’apparecchio sia usato dai bambini o
da incapaci, senza sorveglianza
21. In caso di guasto e\o di cattivo funzionamento dell'apparecchio, spegnerlo. Per l'eventuale riparazione rivolgersi solamente ad un centro di assistenza tecnica autorizzato e richiedere l'utilizzo di ricambi originali. Il mancato rispetto di
queste condizioni può compromettere la sicurezza dell'apparecchio.
22.Controllare sempre che le manopole siano nella posizione “
/0” quando l’apparecchio non è utilizzato.
23.Allorché si decida di non utilizzare più l’apparecchio, si rac-
comanda di renderlo inoperante tagliandone il cavo di alimentazione, dopo aver staccato la spina dalla presa di corrente.
Si raccomanda inoltre di rendere innocue quelle parti dell’apparecchio suscettibili di costituire un pericolo, specialmente
per i bambini che potrebbero servirsi dell’apparecchio fuori
uso per i propri giochi.
24 Durante l'uso dell'apparecchio gli elementi riscaldanti e alcu-
ne parti della porta forno diventano molto calde. Fare attenzione a non toccarle e tenere i bambini a distanza.
25 Gli apparecchi gas necessitano, per un corretto funzionamen-
to, di un regolare ricambio d’aria. Accertarsi che nella loro
installazione siano rispettati i requisiti richiesti nel paragrafo
relativo al “Posizionamento”.
1
Page 3

DESCRIZIONE DELLA CUCINA
E
CP 649 FT.2
CP 759 FT
D
I
G
H
M
M
M
M
700
D
I
G
H
M
M
M
M
M
A Bruciatore gas ausiliario
B Bruciatore gas semirapido
C Bruciatore gas rapido
D Bruciatore gas tripla corona
E Candela di accensione dei bruciatori gas
F Dispositivo di sicurezza - Interviene in caso di spe-
gnimento accidentale della fiamma (trabocco di liquidi,
correnti d'aria, ...) bloccando l'erogazione del gas al
bruciatore.
G Manopola di selezione funzioni di cottura
H Manopola per la temperatura di cottura
I. Programmatore elettronico - Consente di program-
mare qualsiasi funzione di cottura impostando la durata
e l’ora di fine cottura. Ha anche una funzione di
contaminuti.
M Manopole di comando dei bruciatori
R Griglie di supporto per recipienti di cottura
F
2
Page 4
ISTRUZIONI PER L'USO DEL PIANO
Bruciatori gas
Sul pannello comandi, intorno ad ogni manopola "M" oppure
sulle manopole stesse, sono indicati i simboli:
Rubinetto chiuso
Apertura massima
Apertura minima
Inoltre, nelle vicinanze delle manopole i simboli indicano
la posizione sul piano del bruciatore relativo.
I bruciatori sono dotati di sicurezza contro fughe di gas
a termocoppia. Questo dispositivo provvede a bloccare
l’uscita del gas nel caso che la fiamma del bruciatore si
spenga durante il funzionamento.
Per accendere uno dei bruciatori procedere come segue:
• ruotare la manopola corrispondente in senso antiorario fino
al simbolo della fiamma grande;
Il bruciatore è dotato di accensione elettronica che entra
in funzione automaticamente premendo la manopola.
• premere la manopola a fondo per azionare l’accensione
automatica del gas;
Poichè il bruciatore è dotato di dispositivo di sicurezza
"F", è necessario mantenere premuta la manopola per
circa 6 secondi finchè non si scalda il dispositivo che
mantiene automaticamente accesa la fiamma.
• rilasciare la manopola, verificando che l’accensione sia
avvenuta in modo stabile. In caso contrario, ripetere
l’operazione.
Per avere la potenza minima ruotare la manopola verso il
simbolo della fiamma piccola. Sono possibili regolazioni
intermedie, posizionando la manopola tra il simbolo di fiamma
grande e quello della fiamma piccola.
• Nel caso di uno spegnimento accidentale della fiamma
dei bruciatori, il gas continua ad uscire per qualche istante
prima che intervenga il dispositivo di sicurezza. Chiudere
la manopola di comando e non ritentare l’accensione per
almeno 1 minuto, lasciando così dileguare il gas uscito
che può essere pericoloso.
• Quando l’apparecchiatura non è in funzione controllare che
le manopole siano in posizione di chiuso
“ /0”. Si consiglia
inoltre di chiudere il rubinetto principale del condotto di
alimentazione del gas.
Consigli pratici per l’uso dei bruciatori
Per ottenere dai bruciatori il massimo rendimento si consiglia
adoperare solo pentole di diametro adatto al bruciatore
utilizzato, evitando che la fiamma fuoriesca dal fondo della
pentola (vedi tabella seguente).
Inoltre, quando un liquido inizia a bollire, si consiglia di ridurre
la fiamma quanto basta per mantenere l’ebollizione.
erotaicurB)mc(itneipiceRortemaiDø
.A oirailisuA
.B odipaRimeS
.C odipaR
.D anorocalpirT
41–6
02–51
62–12
62-42
Per spegnere il bruciatore occorre ruotare la manopola in
senso orario fino all’arresto (corrispondente al simbolo “ / 0”).
Al fine di ottenere il massimo rendimento è utile ricordare quanto
segue: Sui bruciatori possono essere utilizzati tutti i tipi di casseruole. L’importante è che il fondo sia perfettamente piano.
Importante:
• Non azionare il dispositivo di accensione automatica per
più di 15 secondi consecutivi.
• In alcuni casi la difficoltà di accensione è dovuta ad
eventuale aria che può trovarsi all’interno del condotto del
gas.
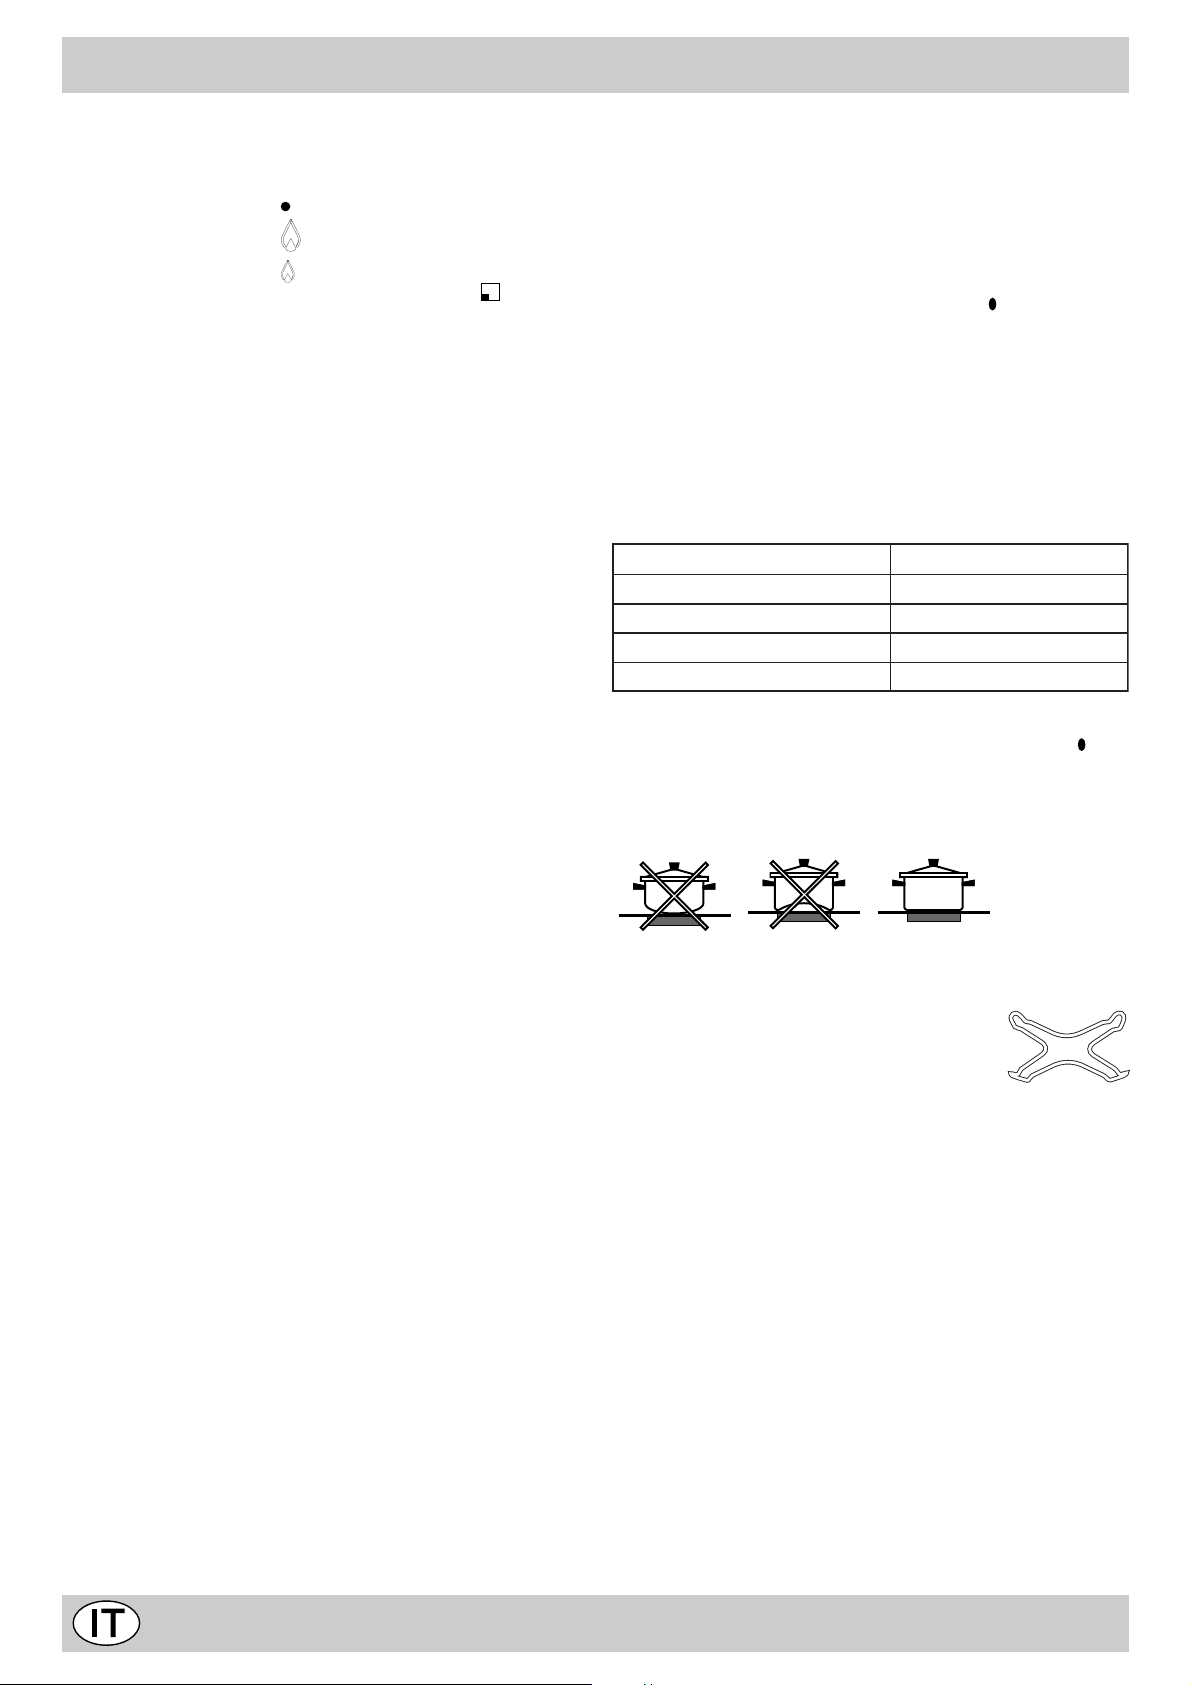
Il piano di cottura è dotato di una griglia di
riduzione (fig.1), che va usata solo sul
bruciatore ausiliario "A".
fig.1
3
Page 5
LE DIVERSE FUNZIONI DEL FORNO
La selezione delle varie funzioni dei forni ARISTON
avviene tramite gli organi di comando e le spie luminose
presenti sul cruscotto.
LA MANOPOLA DI SELEZIONE DELLE FUNZIONI
Presenta 10 tacche di riferimento, contrassegnate nell'ordine
dai seguenti simboli:
/ 0": Spento
"
. : illuminazione
: "Tradizionale"
È il sistema di cottura più tradizionale, ideale per la cottura
di singole pietanze. Due resistenze (una, visibile, posta in
alto, sotto la parete superiore e l'altra nascosta sotto il fondo
del forno) funzionano insieme.
Al contatto con queste fonti di calore, l'aria si scalda e si
sposta all'interno del vano forno secondo il fenomeno per
cui l'aria calda, più leggera, tende a salire verso l'alto. Si
tratta del fenomeno della convezione naturale. Questo tipo
di cottura è particolarmente indicato per le cotture lente in
pentole di ghisa coperte (backenhof, trippa, ecc.) o la
cottura a bagno-maria (crème caramel, pâté, ecc.).
Come piano di appoggio, si consiglia di utilizzare la leccarda
posta sul 2° ripiano.
Infornare sempre a caldo.
: "Pasticceria"
Si attiva unicamente l'elemento riscaldante circolare inferiore
ed entra in funzione la ventola, in modo da fornire un calore
"delicato", idoneo alla cottura di dolci di pasticceria, come
brioches, torte al cioccolato, plum-cake, pan di spagna,
pasticcini, meringhe, ecc.
Come piano di appoggio, si consiglia di utilizzare la leccarda
posta sul 2° ripiano.
Infornare sempre a caldo.
: "Fast cooking"
L'accensione di tutti gli elementi riscaldanti e l'attivazione
della ventola garantiscono una distribuzione uniforme del
calore all'interno del vano forno. Questa funzione è
particolarmente indicata per le cotture rapide (che non
richiedono preriscaldamento) e i piatti già cotti (surgelati,
precotti). Come piano di appoggio, si consiglia di utilizzare
la leccarda posta sul 2° ripiano.
: "Multicottura"
L'accensione di tutti gli elementi riscaldanti e l'attivazione
della ventola garantiscono una distribuzione uniforme del
calore all'interno del vano forno. Questo tipo di cottura è
indicato per cucinare pietanze poste contemporaneamente
su più ripiani. In questo caso, la cottura avviene senza
alterazione del sapore dei cibi, anche se molto diversi tra di
loro. Per l'utilizzo di questa funzione è comunque necessario
che tutte le pietanze richiedano la stessa temperatura di
cottura (i vari piatti verranno sfornati man mano che vengono
cotti). Per una cottura su due ripiani, ad esempio, si consiglia
di utilizzare come piano di appoggio la leccarda posta sul 1°
ripiano e la griglia posta sul 3° ripiano. Infornare sempre a
caldo.
: "Forno pizza"
Gli elementi riscaldanti (inferiore e circolare) entrano in
funzione in modo tale da scaldare rapidamente il forno. Per
la preparazione di pizze e crostate si ottengono notevoli
vantaggi, in quanto il maggiore apporto di calore proveniente
dal basso garantisce la corretta cottura a fuoco vivo
dell'impasto durante la cottura. La funzione della ventola
permette invece di ottenere la necessaria doratura sul lato
superiore dell'alimento, che lo rende più appetitoso. Come
piano di appoggio, si consiglia di utilizzare la leccarda posta
sul 2° ripiano.
Infornare sempre a caldo.
: "Grill"
In questa posizione entra in funzione esclusivamente
l'elemento riscaldante superiore: il grill, reso incandescente,
emette una irradiazione infrarossa simile a quella prodotta
dai raggi solari. La funzione grill, infatti, non mira a riscaldare
l'aria contenuta all'interno del vano forno, ma, soprattutto,
ad esporre l'alimento direttamente a questa irradiazione. La
cottura avviene con la porta chiusa e preferibilmente con
partenza a freddo. Il calore irradiato è regolabile tramite la
manopola di selezione delle temperature. Si consiglia di
inserire la leccarda sul 1° ripiano per raccogliere i grassi e il
sugo di cottura, e la griglia su un ripiano superiore, scelto in
funzione dello spessore della carne da cuocere.
: "Gratin"
Entra in funzione unicamente l'elemento riscaldante
superiore, con emissione di una irradiazione infrarossa. La
circolazione forzata dell'aria, prodotta dalla ventola del forno,
garantisce una distribuzione uniforme della temperatura,
cosicché gli alimenti vengono sottoposti
contemporaneamente all'azione:
• dei raggi infrarossi, che garantiscono la cottura
superficiale dei cibi,
• dell'aria calda, che permette una cottura in profondità
per effetto della conduzione.
Il grill ventilato è particolarmente apprezzato per la cottura
di arrosti (carni rosse o bianche) e di pollame. Posizionare
la griglia sul 2° ripiano come piano di appoggio della carne e
la leccarda sul 1° ripiano per raccogliere i grassi e i sughi di
cottura.
Infornare sempre a freddo.
Se il vostro forno è dotato di un girarrosto, potete utilizzarlo
con le funzioni "grill" e "gratin". La cottura deve avvenire con
la porta del forno chiusa. Si raccomanda inoltre di infornare
a freddo, per evitare il rischio di ustioni durante l'operazione
di inserimento dello spiedo. Si consiglia di riporre la leccarda
sul 1° ripiano per il recupero dei grassi e dei sughi di cottura
e il girarrosto sul 3° ripiano (per l'inserimento del girarrosto
vedere paragrafo seguente).
Durante la cottura al "grill" e "gratin", le parti accessibili
possono diventare molto calde; tenere i bambini a
distanza.
: pulizia automatica mediante fast clean
È la funzione di pulizia integrale del forno. Per le informazioni
riguardanti il fast clean, vedere pagina 6.
4
Page 6

GLI ACCESSORI
o
Il forno è dotato di numerose possibilità di cottura, per la
cui riuscita è necessario utilizzare un certo numero di
accessori da noi scelti.
Questi accessori possono essere installati sui vari ripiani
della guida di scorrimento posta all'interno del forno,
permettendo così di stabilire l'altezza più idonea in funzione
della cottura da eseguire.
Per ciascuna funzione di cottura e per ciascun esempio
fornito, viene indicato il numero di ripiano (dal basso verso
l'alto).
Guida n˚5
Guida n˚4
Guida n˚3
Guida n˚2
Guida n˚1
Cremagliere
La leccarda
Viene utilizzata:
• come piano di appoggio per qualsiasi recipiente di
cottura su un solo livello e a bagno-maria,
• come piano di appoggio per gli alimenti (pasticcini,
ecc.),
• come contenitore di raccolta dei sughi e grassi di
cottura, abbinata alla griglia grande.
Si sconsiglia di utilizzare la leccarda sui ripiani 4 e 5.
La griglia grande
Viene sempre utilizzata in abbinamento alla leccarda, con
le tacche rivolte verso il basso.
• Posizionata sul 2° ripiano, funge da piano di
appoggio per le carni, con la leccarda inserita sul 1°
ripiano per il recupero di grassi e sughi di cottura.
• Posizionata sul gradino superiore (a seconda dello
spessore dell'alimento) per le carni ai ferri, con la
leccarda inserita sul 1° ripiano per il recupero di grassi
e sughi di cottura.
• Posizionata sul ripiano superiore per la cottura su
più livelli.
Evitare di riporre le carni da cuocere direttamente sulla
leccarda per le cotture al "gratin"; il forte calore
proveniente dall'alto verso il basso provoca infatti la
fuoriuscita degli umori e dei grassi, i quali rischiano di
bruciare o schizzare sulle pareti, con conseguente
creazione di fumo.
Il girarrosto
Vite ad alette
Spiedo
Supporto
del girarrost
Grazie a questo accessorio, gli arrosti vengono cotti
lentamente, girando costantemente, e con una perfetta
rosolatura, fino alla cottura completa. Il girarrosto è composto
da:
• un supporto posto sul 3° ripiano della guida di
scorrimento, che permette l'inserimento del girarrosto
all'interno dell'albero cavo del motore situato sul retro
del vano, dietro la parete perforata;
• uno spiedo sul quale infilare il pezzo di carne da
arrostire, che poggia, alle due estremità, su due
forchette scorrevoli, ciascuna fissata all'asse tramite
una vite ad alette.
Attenzione: durante l'installazione del girarrosto, accertarsi
che lo spiedo sia correttamente inserito all'interno dell'albero
cavo collegato al motore.
Fare attenzione a posizionare:
- lo spiedo al centro del pezzo da arrostire;
- il pezzo da arrostire in un punto equidistante dalle estremità
dello spiedo.
• un manico estraibile in materiale isolante che si
avvita sulla parte posteriore dello spiedo permette:
- di aumentare la lunghezza disponibile sul girarrosto
per potervi cuocere anche pezzi di carni di notevoli
dimensioni;
- di evitare ustioni quando si estrae la pietanza al
termine della cottura.
Avvitare a fondo il manico per estrarre lo spiedo (durante
la cottura il manico deve essere svitato).
Timer del girarrosto
I forni ARISTON sono provvisti di un dispositivo di
temporizzazione del girarrosto. Al termine della cottura, il
motore continua a far girare lo spiedo, arrestandosi soltanto
quando la temperatura è opportunamente scesa, evitando
così ogni rischio di bruciatura della carne.
Una volta terminata la cottura, lasciare la manopola di
selezione delle funzioni sul tipo di cottura in corso di
esecuzione e riportare la manopola di selezione delle
temperature al minimo.
Mantenimento della ventilazione
Al termine della cottura, il forno mantiene attiva la funzione
di ventilazione, allo scopo di raffreddare i componenti.
Pertanto, se dopo l'arresto del forno, la ventola continua a
funzionare, non vi è motivo di preoccuparsi: essa si arresterà
non appena la temperatura sarà scesa sotto i 120 °.
Luce forno
È possibile illuminare l'interno del forno posizionando la
manopola di selezione sul simbolo
.
Il forno resta illuminato durante l'intera fase di cottura,
qualunque sia la funzione utilizzata (fatta eccezione per la
pulizia automatica).
In caso di impostazione di una cottura ritardata, la luce forno
resta accesa dal momento della programmazione fino alla
fine della cottura.
Manico dello spiedo
Forchetta
5
Page 7

LA PULIZIA AUTOMA TICA MEDIANTE FAST CLEAN
Dispositivi di sicurezza
Attivando la funzione fast clean, la temperatura interna del
vano forno raggiunge i 500 °C necessari per la
carbonizzazione dei residui, come illustrato di seguito.
Data l'alta temperatura, il forno è dotato di alcuni dispositivi
di sicurezza:
• la porta si blocca automaticamente non appena la
temperatura raggiunge valori elevati, per evitare ogni
rischio di ustioni;
• gli elementi riscaldanti non sono più alimentati
elettricamente, a titolo preventivo nel caso in cui
sopraggiungesse un evento anomalo.
Note:
1- Nonostante l'elevata temperatura interna mantenuta
durante l'intera operazione di fast clean, le pareti esterne
del forno rimangono tiepide, grazie a:
• un isolamento rinforzato del vano di cottura;
• una ventola che garantisce una circolazione d'aria
per il raffreddamento delle pareti.
2- Attraverso il vetro della porta forno è possibile notare
alcune particelle che si illuminano durante la loro
carbonizzazione per pirolisi entrando in contatto con le
resistenze: si tratta di una combustione istantanea,
fenomeno assolutamente normale, che non comporta
alcun pericolo.
Come attivare la pulizia automatica?
– Estrarre tutti gli accessori dal forno. Eliminare lo
sporco accumulato in eccesso e soprattutto gli
scolamenti più consistenti, per evitare che si producano
fiamme o che si sprigioni fumo.
- Chiudere la porta.
- Posizionare la manopola di selezione su
- Eseguire la programmazione. È possibile scegliere tra
· un inizio immediato: stesso procedimento adottato per
la cottura;
· un inizio ritardato: stesso procedimento adottato per
la cottura.
– L'operazione di pulizia automatica richiederà
approssimativamente 90 minuti.
Cosa accade durante la pulizia automatica?
Quando la temperatura raggiunge 325 °C, la porta del forno
si blocca automaticamente: sul display compare la lettera
"P" e l'indicazione della durata in progressiva diminuzione.
Fintantoché la temperatura all'interno del forno è elevata, la
porta rimane bloccata.
Cosa accade al termine della pulizia automatica?
Alcuni utili accorgimenti prima della pulizia automatica
1- Cercare di eliminare i residui di sostanze alimentari più
consistenti con una spugna umida. Evitare rigorosamente
di utilizzare detergenti o qualsiasi altro prodotto consigliato
per la pulizia dei forni.
2- Estrarre tutti gli accessori, i quali, infatti, non sono
concepiti per resistere a temperature così elevate. Inoltre,
alcuni accessori potrebbero alterare l'esito della pulizia
automatica ostacolando la circolazione del calore su tutte le
pareti. Gli accessori possono essere lavati facilmente come
normali stoviglie (anche in lavastoviglie).
3- Non lasciare strofinacci da cucina sulla maniglia.
Attenzione: durante la pulizia automatica, le superfici
possono diventare molto calde. Tenere i bambini a
distanza.
ALCUNI PICCOLE ANOMALIE DI FUNZIONAMENTO
NON PREOCCUP ATEVI SE ...
Può accadere che si verifichino alcune anomalie di
funzionamento, dovute generalmente a manovre non
corrette o alla valutazione erronea di un fenomeno.
Se nel corso di una cottura il forno sprigiona molto
fumo:
• Verificare che sia stata selezionata la funzione idonea
rispetto al tipo di cottura desiderata, che siano stati scelti
gli accessori adeguati e che il cibo sia stato infornato sul
ripiano consigliato.
Al termine della pulizia automatica, sul display compare "P.
0.00".
Per poter aprire la porta del forno sarà necessario attendere
che:
• la temperatura del forno sia scesa a un livello accet
tabile;
• la manopola di selezione sia stata riportata su " / 0".
A questo punto è possibile constatare la presenza di alcuni
depositi di polvere bianca sul fondo e sulle pareti del forno;
rimuoverle con una spugna umida una volta che il forno si è
completamente raffreddato.
Se invece si desidera approfittare del calore immagazzinato
per avviare una cottura, le polveri possono anche restare,
in quanto non comportano alcun pericolo per gli alimenti da
cucinare.
• Controllare inoltre la temperatura selezionata, che
verosimilmente risulterà eccessiva a fronte del tipo di
cottura prevista.
• Ispezionare lo stato di sporcizia del forno e valutare
l'eventualità di una pulizia. Potrebbero infatti essere
presenti residui alimentari attaccati allo smalto che,
carbonizzando, liberano fumo e odori acri.
• Gli schizzi di grasso o gli scolamenti sulle superfici molto
calde possono determinare la produzione di fumo.
6
Page 8

IL PROGRAMMATORE
Quadrante de visualizzazione per
tutte le funzioni : ora, temporizza-
zione e ora di fine cottura o fast
clean
Spia d'uso del
temporizzatore acustico
Tasto di avvio della cottura
Tasto di regolazione del
tempo di cottura
Tasto di regolazione della
fine della cottura
Tasto per regolare il
temporizzatore acustico
Regolazione dell'ora
La regolazione dell'ora può essere effettuata unicamente con
la manopola di selezione in posizione " / 0".
Quando il forno viene collegato elettricamente per la prima
volta (o dopo un'interruzione di corrente), il display "0.00"
lampeggia. Premere i tasti "+" e/o "-" per impostare l'ora.
Al rilascio dei tasti, segue un periodo di 3 secondi durante il
quale tutti gli altri tasti sono disabilitati, e, se non si agisce
ulteriormente sui tasti di regolazione, l'ora impostata viene
memorizzata.
Regolazione del contaminuti
La funzione contaminuti è attiva unicamente con il forno
spento (manopola di selezione su / 0).
Premere brevemente il tasto
e impostare il tempo
tramite i tasti "+" e/o "-". Al rilascio dei tasti, segue un periodo
di 3 secondi durante il quale, se non si agisce ulteriormente
sui tasti di regolazione, la durata scelta viene memorizzata;
quindi si accende le spia
e inizia il conto alla rovescia del
tempo.
La fine del tempo impostato viene segnalata da un allarme
acustico emesso per 1 minuto; per spegnerlo è sufficiente
premere un tasto qualsiasi; la spia
si spegne.
Il contaminuti è indipendente dallo stato di
funzionamento del forno.
Spia di funzionamento di
un'operazione programmata
- accesa: operazione in corso
- spento : operazione terminata
- lampeggiante : operazione
programmata terminata
Spia A di programmazione :
- spento: uso manuale
- acceso : programmazione eseguita
Tasti + e - per regolare i vari display,
regolazione dell'ora, temporizzazione
5 s.
tempo e ora della fine di un'operazione,
premete :
+ per incrementare le cifre
- per decrementare le cifre
Cottura senza programmatore
Quando il forno è spento (manopola di selezione su "
/ 0"),
tutti i tasti (tranne "-" per la regolazione del volume
dell'allarme acustico) sono inattivi.
Selezionare una funzione ruotando in senso orario la
manopola di selezione delle funzioni. Ogni funzione ha un
tempo di cottura predeterminato, che potete visualizzare
premendo
funzione della vostra ricetta. Per far questo, premete
. Potete modificare il tempo di cottura in
e
regolate il tempo desiderato con i tasti “-” e/o “+”.
Il display indica una temperatura consigliata, indipendente
rispetto a quella indicata sulla manopola di selezione della
temperatura e modificabile ruotando la stessa manopola.
Per la funzione “grill”, il display indica un livello di potenza
compreso fra 1 (1/5 della potenza massima) e 5 (potenza
massima).
Il forno è pronto ad eseguire un'operazione di cottura:
premere il tasto
preriscaldamento, riconoscibile dal simbolo
. Il forno avvia la fase di
che appare
lampeggiante. Al termine del preriscaldamento (che dura
10 minuti circa), il simbolo diventa fisso.
Volume dell'allarme acustico
È possibile regolare il volume dell'allarme acustico premendo
il tasto "-" (durante l'emissione dell'allarme) fino a ottenere il
volume desiderato.
Se, dopo aver selezionato una funzione, non si procede a
confermare l'inizio dell'operazione di cottura entro un minuto,
sul display appare il messaggio "OFF" e i tasti vengono
disattivati. Posizionare allora la manopola di selezione su
"0" e procedere alle varie regolazioni.
ATTENZIONE
L'apparecchio è dotato di un sistema di diagnosi degli
errori segnalato sul programmatore tramite la
visualizzazione di "FnFm" (dove n e m rappresentano cifre).
In questi casi, rivolgersi al più vicino centro di assistenza
tecnica autorizzato.
7
Page 9

PROGRAMMAZIONE DELLE COTTURE
Programmazione cottura con inizio immediato
La cottura viene avviata immediatamente e si interrompe
automaticamente allo scadere del tempo programmato.
Procedere nel modo seguente:
• posizionare la manopola di selezione sulla funzione
desiderata;
• regolare la temperatura agendo sulla manopola di
selezione della temperatura (regolazione con incrementi
di 10°), nel caso in cui il valore consigliato non sia ritenuto
idoneo;
Per la funzione “grill”, il display indica un livello di potenza
compreso fra 1 (1/5 della potenza massima) e 5 (potenza
massima).
• a ciascuna funzione è associata una durata
consigliata che è possibile modificare premendo
tasti"+" e/o "-" (la durata deve includere il tempo di
riscaldamento di 10 minuti circa): trascorsi 3 secondi dal
rilascio dei tasti, se non si agisce ulteriormente su di
essi la durata di cottura viene memorizzata.
Durante la fase di preriscaldamento, il simbolo
e il tempo di cottura è visualizzato. Al termine del
preriscaldamento, il simbolo
3 brevi segnali acustici.
La fase di preriscaldamento non è prevista per le funzioni di
"cottura rapida" e "cottura grill".
diventa fisso e il forno emette
lampeggia
e i
Programmazione cottura con inizio ritardato
Il programmatore stabilisce automaticamente l'ora di inizio
cottura in funzione dei parametri impostati dall'utente: durata
di cottura e fine cottura.
Procedere nel modo seguente:
• posizionare la manopola di selezione sulla funzione
desiderata;
• regolare la temperatura agendo sulla manopola di
selezione della temperatura, nel caso in cui il valore
consigliato non sia ritenuto idoneo;
Per la funzione “grill”, il display indica un livello di potenza
compreso fra 1 (1/5 della potenza massima) e 5 (potenza
massima).
• premere il tasto
della durata;
• impostare la durata premendo i tasti "+" e/o "-" (la
durata deve comprendere il tempo di preriscaldamento):
trascorsi 3 secondi dal rilascio dei tasti, se non si agisce
ulteriormente su di essi, la durata di cottura viene
memorizzata;
• per attivare una cottura ritardata, è necessario
stabilire l'ora di fine cottura premendo in sequenza i tasti
, quindi "+" e/o "-": trascorsi 3 secondi dal rilascio dei
tasti, se non si agisce ulteriormente su di essi, la fine
cottura viene memorizzata.
per accedere alla regolazione
Durante la cottura, il display indica il tempo di cottura
rimanente. Per visualizzare la temperatura, è necessario
premere il tasto "+".
La durata minima di cottura programmabile è di 2 minuti.
La durata massima di cottura programmabile è di 10 ore.
• premere il tasto
Se, dopo aver selezionato una funzione, non si procede a
confermare l'inizio dell'operazione di cottura entro un minuto,
sul display appare il messaggio "END" e i tasti vengono
disattivati. Posizionare allora la manopola di selezione su
"0" e procedere alle varie regolazioni.
Al termine della cottura, l'apparecchio emette un allarme
acustico per 1 minuto e il display visualizza il messaggio
"END"; per interrompere il segnale acustico è sufficiente
premere un tasto qualsiasi.
• Riportare la manopola di selezione su "0": il
messaggio "END" scompare e appare "OFF" per 3
secondi.
Durante la cottura, è possibile modificare la funzione (senza
interferire sulla durata e la temperatura), la temperatura
(senza interferire sulla durata) e la durata di cottura.
È inoltre possibile interrompere una cottura e spegnere il
forno portando la manopola di selezione in posizione "
In questo caso, il display visualizza "OFF" per 3 secondi
prima di spegnersi.
per avviare la cottura.
/ 0".
La durata minima di cottura programmabile è di 2 minuti. La
durata massima di cottura programmabile è di 10 ore.
• premere il tasto
Dal momento in cui si effettua la programmazione fino
all'inizio cottura, è possibile modificare soltanto la temperatura
e la funzione.
Giunto il momento stabilito per l'inizio cottura, il forno si
accende e avvia la fase di preriscaldamento, durante la quale
il simbolo
sul display.
Alla fine del preriscaldamento, ha inizio la cottura, il simbolo
diventa fisso e il programmatore emette tre brevi segnali
acustici.
La fase di preriscaldamento non è prevista per le funzioni di
"cottura rapida" e "cottura grill".
• Riportare la manopola di selezione su "
lampeggia; la durata di cottura è visualizzata
; il simbolo "A" si accende.
/ 0".
8
Page 10

ESEMPI DI COTTURE SU UN SOLO LIVELLO
Ricette Modo di cottura Temperatura Tempo Guida Osservazioni
Pane (pagnotta-1kg)
Sfoglie porzioni
singole
Pizza (pasta di pane) Pizza 240°C 10-15' 1 Su piastra smaltata Sì
Crosta ta
(pasta brisée)
Soufflé al formaggio Multicottura 200°C 30-40' 2
Terr ine
Cosciotto d'agnello Gratin 210°C 1 ora per 1,5 à 2 kg 2-1* Carne su griglia No
Gratin dauphinois
Pesce
Pollo
Arrosto di m anzo
Arrosto di maiale
Arrosto di vitello Gratin 210°C 1 ora per 1kg 2-1* Carne su griglia No
Pomodori ripieni
Piatti surgelati
Lasagne
Parmigiana
Brioche Pasticceria 160°C 35-45' 2
Cake Pasticceria 160°C 60' 2
Choux Pasticceria 200°C 20-25' 2
Crème caram e l Tradizionale 180°C 30' 2
Pan di Spagna
Amaretti Pasticceria 180°C
Meringhe bianche
Meringhe ambrate
Mele al forno
Frollini
Torta di m e le Pizza 220°C 30' 1 Stampo su piastra smaltata Sì
Frollini al burro
Multicottura 210°C 30-35' 2 Su piastra smaltata Sì
Multicottura 200°C
Pizza 220°C 30' 1
Tradizionale 180°C 50-60' 2
Gratin 200°C
Tradizionale
Gratin
Grill
Gratin
Grill girarrosto
Gratin 210°C
Gratin 210°C 1 ora per 1kg 2-1* Carne su griglia No
Multicottura 200°C 20-25' 2 Teglia su piastra smaltata Sì
Fast cooking
Fast cooking 200°C Secondo spessore 2 Teglia su piastra smaltata No
Fast cooking 200°C Secondo spessore 2 Teglia su piastra smaltata No
Pasticceria 190°C 30' 2
Pasticceria 70-80°C
Pasticceria 110°C
Multicottura 210°C
Pasticceria 190°C 10-15' 2 Piastra smaltata Sì
Ventilato 190°C 10-15' 2 Stampo alluminio su griglia
200°C
240°C
250°C
210°C
250°C
Secondo le
indicazioni
dell'imballaggio
20-25'
secondo lo spessore
40-45'
secondo lo spessore
Secondo il tipo
di pesce e
lo spessore
1 ora per
1,2 à 1,5 kg
Variabile secondo il grado
di cottura
Secondo le indicazioni
dell'imballaggio
15-20'
secondo la grossezza
3 ore
secondo la grossezza
2 ore
secondo la grossezza
20-25'
secondo la grossezza
2 Su piastra smaltata Sì
Stampo su piastra
smaltata
Stampo diam. 20cm
su piastra smaltata
Al bagnomaria nella piastra
smaltata (avvio acqua calda)
2 Teglia su piastra smaltata Sì
2
2-1*
2-1*
2-1*
3-1*
2-1* Carne su griglia No
2 Teglia su piastra smaltata No
2 Su piastra smaltata Sì
2
2
2 Teglia su piastra smaltata Sì
Filetti+sugo, piastra smaltata
Intero sulla griglia
Grigliate di pesce sulla griglia
Carne su griglia
Girarrosto porta chiusa
Stampo di alluminio su piastra
Stampo di alluminio su piastra
zuccherati su piastra smaltata
Stampo di alluminio su piastra
smaltata
smaltata
Piccoli profiterole non
Ramequin singoli a
bagnomaria partenza acqua
calda
smaltata
Asciugatura per piccole
meringhe
Asciugatura per piccole
meringhe
Preriscalda-
mento
Sì
Sì
Sì
Sì
No
Sì
Sì
Sì
Sì
Sì
Sì
Sì
Si
Crosta ta alla
marmellata
Bisco ttini s ala ti
(pasta brisée)
X - Y* nella colonna guida
X = griglia o spiedo inseriti nella guida X
Y = piastra smaltata inserita nella guida Y per il recupero dei grassi e dei sughi di cottura
Ventilato 190°C 15-25' 2 Stampo alluminio su griglia
Ventilato 190°C 10-15' 2 Stampo alluminio su griglia
Nota b en e: la grig lia v ien e s em p re utilizz at a co n le tac ch e rivo lte v ers o il b asso.
9
Si
Si
Page 11

ALCUNI CONSIGLI PER LA COTTURA AL FORNO
La cottura è, per definizione, il passaggio dallo stato crudo
allo stato cotto. Il risultato dell'operazione di cottura viene
apprezzato in funzione di vari requisiti: la colorazione assunta dai cibi, le successive fasi di preparazione, la
morbidezza, il grado di cottura desiderato, ecc.
Le regolazioni del forno (temperature e tempi di cottura) dipendono ovviamente da due parametri fondamentali:
PULIZIA E MANUTENZIONE
Importante: L’apparecchiatura deve essere disinserita
elettricamente prima di iniziare la pulizia.
Per una lunga durata dell’apparecchiatura è indispensabile
eseguire frequentemente una accurata pulizia generale, osservando le seguenti istruzioni.
Interno del forno:
Si consiglia di procedere alla pulizia del forno dopo ogni uso
(PIRO'), specie dopo la cottura di arrosti. È bene infatti evitare l'accumulo dei residui schizzati durante la cottura, i quali,
al successivo utilizzo del forno, subirebbero una nuova cottura, con conseguente carbonizzazione e liberazione di
fumo e odori sgradevoli.
- il volume della pietanza;
- la capacità dell'alimento di assumere il colore auspicato (quantità di zucchero, di uova nella ricetta).
Le regolazioni di cottura proposte nella nostra tabella sono
state effettuate facendo riferimento a parametri di carattere generale, che ciascun utente sarà libero di modificare
opportunamente allo scopo di adattarli alle proprie esigenze specifiche e al livello di cottura desiderato.
• Aprire completamente la porta e alzare le 2 levette "B"
(fig.2);
• Ora, chiudendo parzialmente la porta, è possibile sollevarla estraendo i ganci "A" come indicato in figura 3.
Per rimontare la porta:
• Con la porta in posizione verticale, inserire i 2 ganci "A"
nelle feritoie;
• Assicurarsi che la sede "D" sia agganciata perfettamente
al bordo della feritoia (muovere leggermente la porta avanti
ed indietro);
• Tenere la porta completamente aperta, sganciare le 2
levette "B" verso il basso, quindi chiudere la porta.
Uso di pellicola alluminio
Evitare rigorosamente di coprire il fondo del forno con una
pellicola di alluminio (pensando in questo modo di poter evitare la pulizia del fondo). L'alluminio, posto a contatto di-
retto con lo smalto riscaldato rischia di fondere e di rovinare irrimediabilmente lo smalto del fondo.
Piano di cottura:
• Gli elementi mobili dei bruciatori del piano di cottura vanno
lavati frequentemente con acqua calda e detersivo avendo cura di eliminare le eventuali incrostazioni. Controllare
che le fessure di uscita del gas non siano otturate. Asciugarli accuratamente prima di riutilizzarli.
• Eseguire frequentemente la pulizia della parte terminale
delle candelette di accensione automatica del piano di cottura e del forno a gas.
Esterno del forno:
• Eseguire la pulizia soltanto quando il forno è freddo.
• Le parti in acciaio e soprattutto le zone con i simboli
serigrafati non devono essere pulite con diluenti o detersivi abrasivi; utilizzare preferibilmente solo un panno inumidito con acqua tiepida e detersivo liquido per piatti. L'acciaio inox può rimanere macchiato se rimane a contatto
per lungo tempo con acqua fortemente calcarea o con detergenti aggressivi (contenenti fosforo). Pertanto è sempre necessario sciacquare abbondantemente ed asciugare accuratamente la superficie dopo la pulizia.
Importante: la pulizia deve essere eseguita in senso orizzontale, come il senso della satinatura dell'acciaio.
• Dopo la pulizia si possono eseguire eventuali trattamenti
per risaltare la lucentezza della superficie: utilizzare esclusivamente prodotti specifici per l'acciaio inox.
Importante: non utilizzare polveri abrasive, detergenti aggressivi o sostanze acide per la pulizia.
Smontaggio/montaggio della porta del forno:
Per facilitare la pulizia all'interno del forno è possibile togliere la porta del forno, procedendo nel seguente modo (fig.2-
3):
FIGURA 3FIGURA 2
Sostituzione della lampada del forno
• Prima di effettuare qualsiasi operazione, disinserire
elettricamente il forno, staccando la spina o agendo
sull'interruttore utilizzato per il collegamento del forno
all'impianto elettrico.
• Servendosi di un oggetto stretto e piatto (cacciavite,
manico di cucchiaio, ecc.), togliere il coperchio in vetro.
• Svitare la lampada e sostituirla con una dalle
caratteristiche analoghe:
- tensione 230/240 W
- potenza 15 W
- attacco E 14
• Rimontare il coperchio in vetro prestando attenzione a
posizionare correttamente la guarnizione.
cavità
lampadina
guarnizione
coperchio
Ingrassaggio dei rubinetti
Con il tempo può verificarsi il caso di un rubinetto che si
blocchi o presenti difficoltà nella rotazione, pertanto sarà
necessario provvedere alla pulizia interna e alla sostituzione del grasso. Questa operazione deve essere effettuata
da un tecnico autorizzato dal costruttore.
10
Page 12
ISTRUZIONI PER L'INSTALLAZIONE
Le istruzioni che seguono sono rivolte all’installatore
qualificato affinché compia le operazioni di installazione,
regolazione e manutenzione tecnica nel modo più corretto e
secondo le norme in vigore.
Importante: qualsiasi intervento di regolazione,
manutenzione, ecc. deve essere eseguito con
l'apparecchiatura elettricamente disinserita. Qualora sia
necessario mantenerla collegata elettricamente, si dovranno
prendere le massime precauzioni. Le cucine hanno le
seguenti caratteristiche tecniche:
- Cat. II2H3+
Classe 1 Classe 2 sottoclasse 1
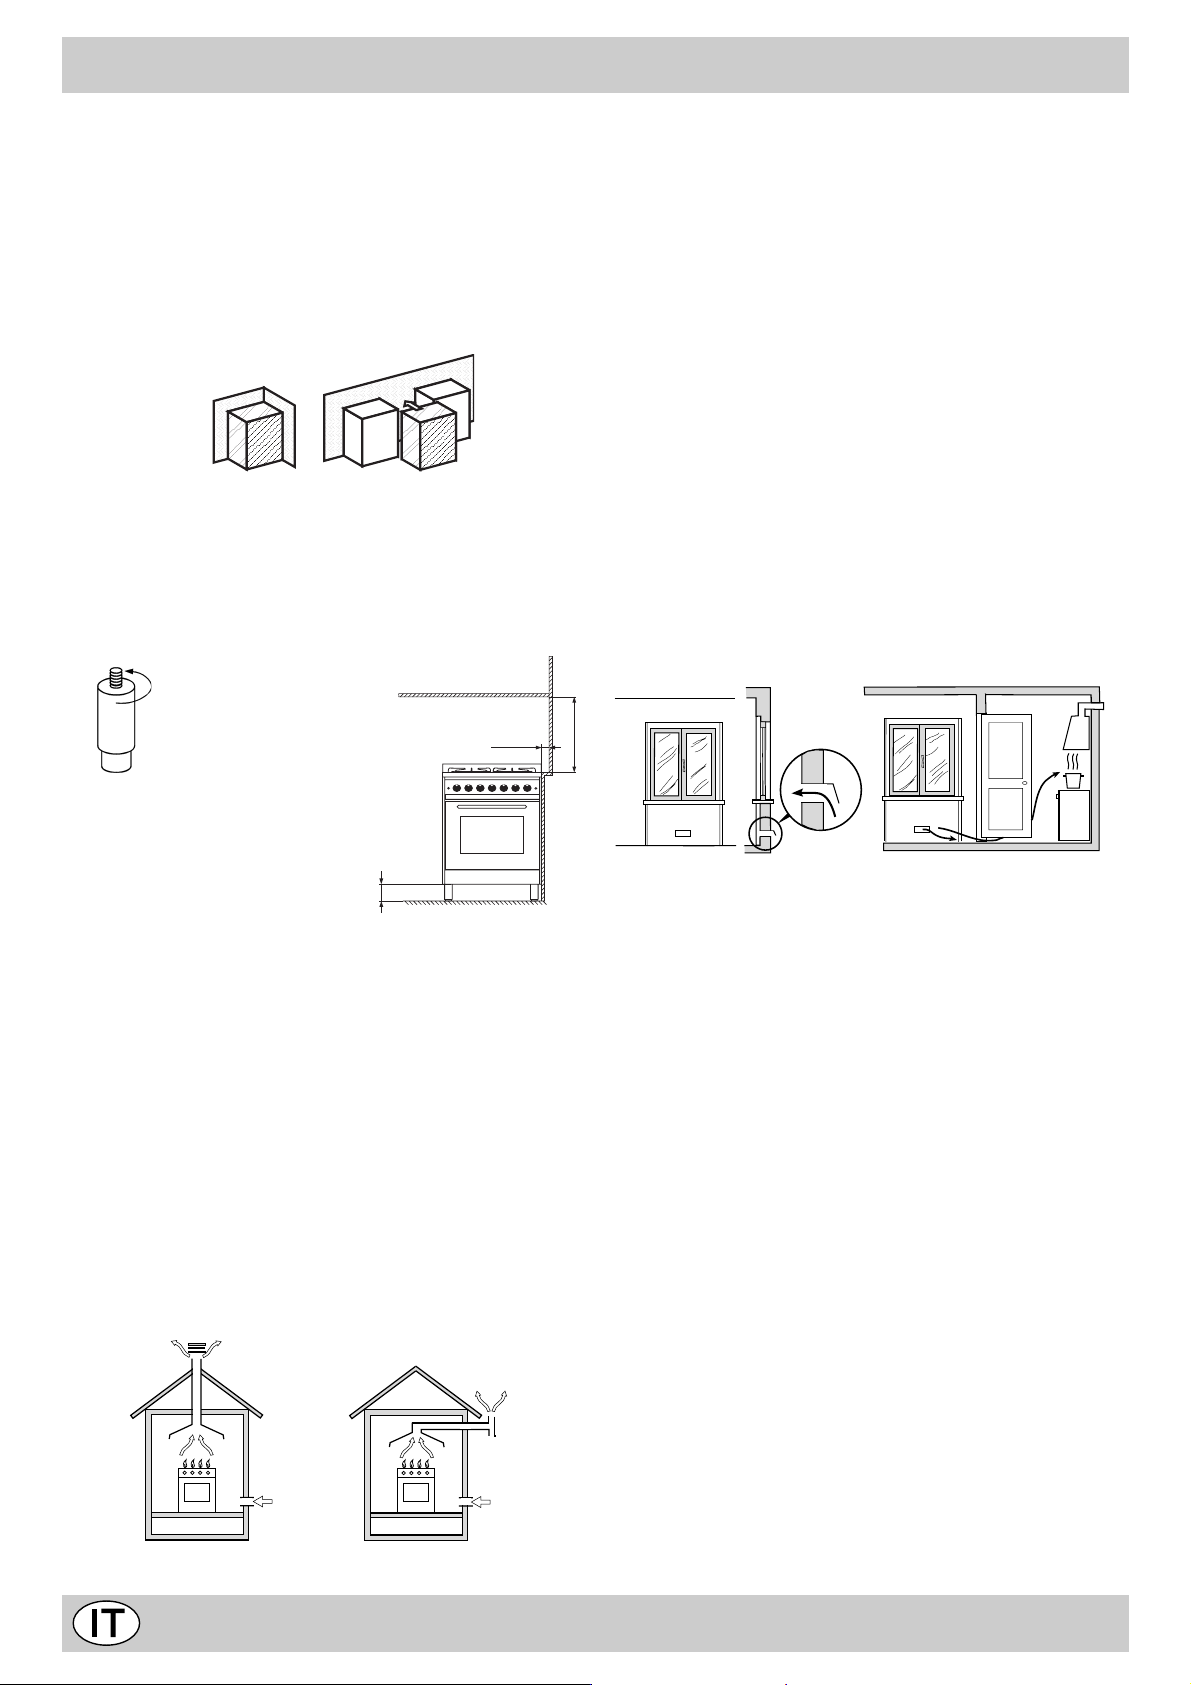
Le dimensioni di massima della cucina sono indicate nella
figura a pagina 2. Per un buon funzionamento
dell’apparecchiatura installata nei mobili, devono essere
rispettate le distanze minime indicate in fig.4. Inoltre, le
superfici adiacenti e la parete posteriore devono essere
idonee per resistere ad una sovratemperatura di 65 °C
Ventilazione ambiente cucina
É necessario che nell’ambiente dove viene installato
l’apparecchio possa affluire una quantità di aria pari a quanta
ne viene richiesta dalla regolare combustione del gas e dalla
ventilazione dell’ambiente. L’afflusso naturale dell’aria deve
avvenire attraverso aperture permanenti praticate su pareti
del locale che danno verso l’esterno, oppure da condotti di
ventilazione singoli o collettivi ramificati conformi alla norma
UNI-CIG 7129. L’aria deve essere prelevata direttamente
dall’esterno, lontana da fonti di inquinamento. L’apertura di
aerazione dovrà avere le seguenti caratteristiche (fig.7A):
• avere una sezione libera totale netta di passaggio di almeno
6 cm² per ogni kW di portata termica nominale
dell’apparecchio, con un minimo di 100 cm² (la portata
termica è rilevabile nella targhetta segnaletica);
• essere realizzata in modo che le bocche di apertura, sia
all’interno che all’esterno della parete, non possano venire
ostruite;
• essere protette ad esempio con griglie, reti metalliche, ecc.
in modo da non ridurre la sezione utile suindicata;
• essere situate ad una altezza prossima al livello del
pavimento.
Particolare A Locale Locale da
adiacente ventilare
min. 100mm
fig.5
fig.4
95÷155mm
Prima di installare la cucina è necessario fissare i piedini di
supporto alti 95÷155 mm in dotazione nei fori predisposti
nella parte inferiore della cucina (fig.5). Tali piedini sono
regolabili a vite, quindi permettono di eseguire il livellamento
della cucina quando è necessario.
Posizionamento
Questa apparecchiatura può essere installata e funzionare
solo in locali permanentemente ventilati secondo le
prescrizioni delle norme UNI-CIG 7129 e 7131 in vigore.
Devono essere osservati i seguenti requisiti:
• L’apparecchio deve scaricare i prodotti della combustione
in una apposita cappa, che deve essere collegata ad un
camino, canna fumaria o direttamente all’esterno (fig.6).
• Se non è possibile l’applicazione di una cappa, è permesso
l’uso di un elettroventilatore, installato su finestra o su
parete affacciate all’esterno, da mettere in funzione
contemporaneamente all’apparecchio.
fig.6
In camino o in canna fumaria ramificata Direttamente all’esterno
(riservata agli apparecchi di cottura)
min. 700mm
A
Esempi di aperture di ventilazione Maggiorazione della fessura fra
per l’aria comburente porta e pavimento
fig. 7A fig.7B
L’afflusso dell’aria può essere ottenuto anche da un locale
adiacente purché questo locale non sia una camera da letto
o un ambiente con pericolo di incendio quali rimesse, garage,
magazzini di materiale combustibile, ecc., e che sia ventilato
in conformità alla norma UNI-CIG 7129. Il flusso dell’aria dal
locale adiacente a quello da ventilare deve avvenire
liberamente attraverso aperture permanenti, di sezione non
minore di quella suindicata. Tali aperture potranno anche
essere ricavate maggiorando la fessura tra porta e pavimento
(fig.7B). Se per l’evacuazione dei prodotti della combustione
viene usato un elettroventilatore, l’apertura di ventilazione
dovrà essere aumentata in funzione della massima portata
d’aria dello stesso. L’elettroventilatore dovrà avere una
portata sufficiente a garantire un ricambio orario di aria pari
a 3÷5 volte il volume del locale. Un utilizzo intensivo e
prolungato dell’apparecchio può necessitare di un’aerazione
supplementare, per esempio l’apertura di una finestra o
un’aerazione più efficace aumentando la potenza di
aspirazione dell’elettroventilatore se esso esiste. I gas di
petrolio liquefatti, più pesanti dell’aria, ristagnano verso il
basso. Quindi i locali contenenti bombole di GPL devono
avere delle aperture verso l’esterno al livello del pavimento,
così da permettere l’evacuazione dal basso delle eventuali
fughe di gas. Inoltre non depositare bombole di GPL (anche
vuote) in locali a livello più basso del suolo; è opportuno
tenere nel locale solo la bombola in utilizzo, collegata lontana
da sorgenti di calore che possano portarla ad una
temperatura superiore a 50 °C.
11
Page 13

ISTRUZIONI PER L'INSTALLAZIONE
Alimentazione gas
• Il collegamento dell’apparecchio alla tubazione o alla
bombola del gas deve essere effettuato secondo le
prescrizioni delle norme in vigore (UNI-CIG 7129 e 7131)
solo dopo essersi accertati che l’apparecchiatura è
regolata per il tipo di gas con cui sarà alimentata.
• Questo apparecchio è predisposto per funzionare con il
gas indicato nell’etichetta posta sul piano. Nel caso che il
gas distribuito non corrisponda a quello per cui
l’apparecchio è predisposto, procedere alla sostituzione
degli ugelli corrispondenti (in dotazione), consultando il
paragrafo “Adattamento ai diversi tipi di gas”.
• Per un sicuro funzionamento, per un adeguato uso
dell’energia e maggiore durata dell’apparecchiatura,
assicurarsi che la pressione di alimentazione rispetti i valori
indicati nella tabella 1 “Caratteristiche dei bruciatori ed
ugelli”, altrimenti installare sulla tubazione di ingresso un
apposito regolatore di pressione secondo la norma UNICIG 7430.
• Effettuare Il collegamento in modo da non provocare
sollecitazioni di nessun genere sull’apparecchio.
Collegare al raccordo filettato ½"G maschio cilindrico/conico
"F" (fig.8) posto nel lato posteriore dell’apparecchio,
utilizzando tubo metallico rigido con raccordi (fig.8-D)
conforme alla norma UNI-CIG 7129, oppure tubo flessibile
metallico a parete continua con raccordi (fig.8-C), conforme
alla norma UNI-CIG 9891, la cui massima estensione non
deve superare i 2000 mm. Verificare che il tubo non possa
venire a contatto con parti mobili in grado di danneggiarlo o
schiacciarlo. Se si utilizza tubo flessibile in gomma, applicare
l'apposito portagomma per gas liquido (fig.8-A) oppure per
gas naturale (fig.8-B). La guarnizione "G" (in dotazione)
deve essere utilizzata in tutti i vari sistemi di collegamento.
Fissare le due estremità del tubo con appositi collari
stringitubo "E" secondo UNI-CIG 7141. Il tubo flessibile deve
essere conforme alle norme UNI-CIG 7140 e specifico per
il tipo di gas utilizzato. Inoltre:
• deve essere il più corto possibile, con una lunghezza mas-
sima di 1,5 metri;
• non deve presentare pieghe e strozzature;
• non deve essere posto a contatto con la parete posterio-
re dell'apparecchiatura, o comunque con parti che possono raggiungere i 50° di temperatura;
• Non deve attraversare fori o fessure adibiti allo scarico
dei gas combusti del forno;
• non deve venire a contatto con parti taglienti o spigoli
vivi;
• deve essere facilmente ispezionabile lungo tutto il suo
percorso, allo scopo di controllare il suo stato di conservazione;
• deve essere sostituito entro la data stampigliata sul tubo
stesso.
Importante: Per effettuare l’allacciamento con gas
liquido (in bombola), interporre tra la bombola ed il tubo
un regolatore di pressione conforme alla norma UNICIG 7432-75.
Ad installazione ultimata accertarsi che la tenuta del circuito
gas sia perfetta impiegando una soluzione saponosa (mai
una fiamma). Accertarsi che la conduttura del gas naturale
sia sufficiente per alimentare l’apparecchio quando tutti i
bruciatori sono in funzione.
Adattamento ai diversi tipi di gas (Istruzioni per il piano)
Per adattare il piano ad un tipo di gas diverso da quello per
il quale esso è predisposto (indicato sulla etichetta fissata
nella parte posteriore del piano e sull'imballo), occorre
sostituire gli ugelli dei bruciatori effettuando le seguenti
operazioni:
• togliere le griglie del piano e sfilare i bruciatori dalle loro
sedi.
• svitare gli ugelli (fig.9), servendosi di una chiave a tubo da
7 mm. e sostituirli con quelli adatti al nuovo tipo di gas
(vedi tabella 1 “Caratteristiche dei bruciatori ed ugelli”).
rimontare le parti eseguendo all’inverso le operazioni.
• al termine dell’operazione, sostituite la vecchia etichetta
taratura con quella corrispondente al nuovo gas d’utilizzo,
reperibile presso i Nostri Centri Assistenza Tecnica.
A
fig.9
fig.8
fig.10
Nota
Qualora la pressione del gas utilizzato sia diversa (o variabile)
da quella prevista, è necessario installare, sulla tubazione d’ingresso un appropriato regolatore di pressione (secondo
UNI-CIG 7430 “regolatori per gas canalizzati”).
Regolazione aria primaria dei bruciatori
I bruciatori non necessitano di nessuna regolazione dell’aria
primaria.
Regolazione minimi
• Portare il rubinetto sulla posizione di minimo;
• togliere la manopola ed agire sulla vite di regolazione posta sulla destra del rubinetto (fig.10) fino ad ottenere una
piccola fiamma regolare, utilizzando un cacciavite (svitando la vite il minimo aumenta, avvitandola diminuisce).
N.B.: nel caso dei gas liquidi, la vite di regolazione dovrà
essere avvitata a fondo.
• Verificare che ruotando rapidamente la manopola dalla
posizione di massimo a quella di minimo non si abbiano
spegnimenti dei bruciatori.
• Negli apparecchi provvisti del dispositivo di sicurezza
(termocoppia), in caso di mancato funzionamento del dispositivo con bruciatori al minimo aumentare la portata
dei minimi stessi agendo sulla vite di regolazione.
Effettuata la regolazione, ripristinate i sigilli posti sui by-pass
con ceralacca o materiali equivalenti.
12
Page 14

ISTRUZIONI PER L'INSTALLAZIONE
COLLEGAMENTO ELETTRICO
I forni dotati di cavo di alimentazione tripolare, sono predisposti per il funzionamento con corrente alternata alla tensione e frequenza di alimentazione indicate sulla targhetta
caratteristiche (posta sull’apparecchio) e sul libretto istruzioni. Il conduttore di terra del cavo è contraddistinto dai colori
giallo-verde.
Montaggio cavo di alimentazione
Apertura morsettiera:
• Servendosi di un cacciavite, fare leva sulle linguette late-
rali del coperchio della morsettiera;
• Tirare ed aprire il coperchio della morsettiera.
Per la messa in opera del cavo eseguire le seguenti operazioni:
• svitare la vite del serracavo e le tre viti dei
contatti L-N-
• fissare i cavetti sotto le teste delle viti rispettando i colori:
Blu (N) Marrone (L) Giallo-Verde
• fissare il cavo di alimentazione nell’apposito fermacavo
e chiudere il coperchio
NL
Allacciamento del cavo di alimentazione alla rete
Montare sul cavo una spina normalizzata per il carico indicato
sulla targhetta caratteristiche, nel caso di collegamento diretto
alla rete è necessario interporre tra l’apparecchio e la rete un
interruttore omnipolare con apertura minima fra i contatti di 3
mm. dimensionato al carico e rispondente alle norme in vigore
(il filo di terra non deve essere interrotto dall’interruttore). Il cavo
di alimentazione deve essere posizionato in modo che non raggiunga in nessun punto una temperatura superiore di 50°C a
quella ambiente. Prima di effettuare l’allacciamento accertarsi
che:
• La sicurezza elettrica di questo apparecchio è assicurata
soltanto quando lo stesso è correttamente collegato ad un
efficiente impianto di messa a terra come previsto dalle vigenti norme di sicurezza elettrica. E’ necessario verificare
questo fondamentale requisito di sicurezza e, in caso di
dubbio, richiedere un controllo accurato dell’impianto da parte di personale professionalmente qualificato. Il costruttore
non può essere considerato responsabile per eventuali danni
causati dalla mancanza di messa a terra dell’impianto.
• Prima di collegare l’apparecchio accertarsi che i dati di targa (posti sull’apparecchio e/o sull’imballo) siano rispondenti a quelli della rete di distribuzione elettrica e gas.
• Verificare che la portata elettrica dell’impianto e delle prese
di corrente siano adeguate alla potenza massima dell’apparecchio indicata in targa. In caso di dubbio rivolgersi ad
una persona professionalmente qualificata.
• In caso di incompatibilità tra la presa e la spina dell’apparecchio fare sostituire la presa con altra di tipo adatto da
personale professionalmente qualificato. Quest’ultimo, in
particolare, dovrà anche accertare che la sezione dei cavi
della presa sia idonea alla potenza assorbita dall’apparecchio. In generale è sconsigliabile l’uso di adattatori, prese
multiple e/o prolunghe. Qualora il loro uso si rendesse indispensabile è necessario utilizzare solamente adattatori semplici o multipli e prolunghe conformi alle vigenti norme di
sicurezza, facendo però attenzione a non superare il limite
di portata in valore di corrente, marcato sull’adattatore semplice e sulle prolunghe, e quello di massima potenza marcato sull’adattatore multiplo. La spina e la presa devono
essere facilmente accessibili.
13
Page 15

CARATTERISTICHE DEI BRUCIATORI ED UGELLI
1allebaT odiuqilsaGelarutansaG
ortemaiD
)mm(
EROTAICURB
aznetoP
acimret
)*.s.H(Wk
ssap-yB
001/1
ollegU
001/1
*atatroP
h/g
ollegU
001/1
*atatroP
h/l
.nimoN.todiR03G13G02G
.C odipaR
.B odiparimeS
.A oirailisuA
.D )ODIUQILSAG(anoroCalpirT
.D )ELARUTANSAG(anoroCalpirT
enoizatnemilaidinoisserP
Questa apparecchiatura è conforme alle seguenti Direttive
Comunitarie:
- 73/23/CEE del 19/02/73 (Bassa Tensione) e successive
modificazioni;
- 89/336/CEE del 03/05/89 (Compatibilità Elettromagnetica) e
successive modificazioni;
- 90/336/CEE del 29/06/90 (Gas) e successive modificazioni ;
- 93/68/CEE del 22/07/93 e successive modificazioni.
00100.37.00468812412611682
5709.14.00307831631601181
550.14.0030537179759
03152.35.13619632232
03104.35.1331423
)mm(
)rabm(elanimoN
)rabm(aminiM
)rabm(amissaM
* A 15°C e 1013 mbar-gas secco
Propano P.C.S. = 50.37 MJ/Kg
Butano P.C.S. = 49.47 MJ/Kg
Naturale P.C.S. = 37.78 MJ/m3
)mm(
03-82
02
53
73
52
54
)mm(
02
71
52
CARATTERISTICHE TECNICHE FORNO
Volume utile del forno ELETTRICO: Litri 56
Tensione e frequenza di alimentazione:
230V ~ 50Hz 2800W
ENERGY LABEL
Direttiva 2002/40/CE sull’etichetta dei forni elettrici
Norma EN 50304
Consumo energia convezione Naturale
funzione di riscaldamento: Tradizionale
Consumo energia dichiarazione Classe convezione Forzata
funzione di riscaldamento: Pasticceria
14
Page 16

Congratulations on choosing an Ariston appliance, which you will find is dependable and easy to use . We recommend you
read though this booklet for the best performance and to extend the life of your appliance. Thank you.
WARNINGS
THESE INSTRUCTIONS ARE ONLY V ALID FOR THE COUNTRIES OF DESTINATION WHOSE SYMBOLS ARE SHO WN
IN THE BOOKLET AND THE APPLIANCE RATING PLATE.
1. This appliance has been designed for private, nonprofessional use in normal dwellings.
2. Read the recommendations in this instruction booklet
carefully, as they give important advice regarding safe
installation, use and maintenance. Keep this booklet in a
safe place for further reference when required.
3. The oven accessories that may come into contact with
food are made of materials which comply with the
provisions set forth by the EEC Directive 89/109 of 21/
12/88 and by Italian law decree no. 108 of 25/01/92.
4. After having removed the packaging, check that the
appliance is intact. If in doubt, do not use the appliance
and contact professionally qualified personnel. Never lea ve
the packing components (plastic bags, foamed
polystyrene, nails, etc.) within the reach of children, since
they are a source of potential danger.
5. Some par ts are covered with a removable scratch-proof
film. Bef ore using the appliance the film should be removed
and the underlying part cleaned with a cloth and a nonabrasive household cleaning product. When switching on
for the first time, it is advisable to heat the empty oven at
maximum temperature for about 30 minutes to eliminate
any residue from manufacture.
6. All installation and adjustment operations should be carried
out by a qualified technician in accordance with the
regulations in force. Specific indications are given in the
section intended for the installer.
7. Before connecting the appliance, make sure that the data
on the rating plate (situated on the rear part of the
appliance and on the last page of the instruction booklet)
correspond to those of the mains electricity and gas
supplies.
8. During operation, the oven glass door and adjacent parts
of the appliance become hot. Make sure, therefore, that
children do not touch the appliance.
9. Check that the capacity of the electrical system and the
power outlets are suitable for the maximum power of the
appliance, indicated on the rating plate. If in doubt, consult
a professionally qualified technician.
10. Periodically check the condition of the gas connection
pipe and have it replaced by a qualified technician as
soon as it shows any signs of wear or anomaly.
11. Under no circumstances should the user replace the power
supply cable or the gas connection pipe of this appliance.
In the event of damage or the necessity for replacement,
only contact an authorised service centre.
12. Do not leave the appliance plugged in if it is not in use.
Switch off the main switch and gas supply when you are
not using the cooker.
13. The burners and the cast-iron pan suppor ts remain hot
for a long time after use. Take care not to touch them.
14. To avoid accidental spillage do not use cookware with
uneven or deformed bottoms on the burners.
Turn the handles of pots and pans inwards to avoid knocking
them over accidentally.
15. Never use flammable liquids such as alcohol or gasoline,
etc. near the appliance when it is in use.
16. If the cooker is placed on a pedestal, take the necessary
precautions to prevent the same from sliding off the
pedestal itself.
17. Do not use steam cleaners to clean your appliance
18. The openings and slots used for ventilation and dispersion
of heat on the rear and below the control panel must
never be covered.
19. This appliance must be used for the purpose for which it
was designed. Any other use (for e xample: heating rooms)
is considered to be improper and consequently dangerous.
The manufacturer declines all responsibility for damage
resulting from improper use of the appliance.
20. A number of fundamental rules must be followed when
using electrical appliances. The following are of particular
importance:
• do not touch the appliance when your hands or feet are
wet
• do not use the appliance barefooted
• do not use extensions, but if these are necessary
caution must be exercised.
• never pull the power supply cable or the appliance to
unplug the appliance plug from the mains.
• never leave the appliance exposed to atmospheric
agents (rain, sun etc.)
• do not allow children or persons who are not familiar
with the appliance to use it, without supervision.
21. In the case of f aults and/or f aulty operation, s witch off the
appliance. For repairs call only an authorised after-sales
servicing centre and request the use of original spare
parts only. Failure to comply with these conditions may
compromise the safety of the appliance.
22. Make sure the knobs are in the " / 0" position when the
appliance is not in use.
23. If you are no longer using an appliance of this type,
remember to make it unserviceable by unplugging the
appliance from the mains and cutting the supply cable.
Also make all potentially dangerous parts of the appliance,
safe, above all for children who could play with the
appliance.
24. When the appliance is in use, the heating elements and
some parts of the oven door become extremely hot. Make
sure you don't touch them and keep children well away.
25. Gas appliances require regular air exchange to ensure
trouble-free performance. When installing the cooker,
follow the instructions provided in the paragraph on
"Positioning" the appliance.
1
Page 17

COOKER DESCRIPTION
CP 649 FT.2
CP 759 FT
D
I
G
H
M
M
M
M
700
D
I
G
H
M
M
M
M
M
A Auxiliary gas burner
B Semi-rapid gas burner
C Rapid gas burner
D Triple ring gas burner
Timer
E Ignitor for Gas Burners
F Safety Device - Activates if the flame accidentally
goes out (spills, drafts, etc.), interrupting the supply of
gas to the burner.
G Electric oven selector knob (cooking mode
F
selection)
H Electric oven thermostat knob (temperature selec-
tion)
I Timer
E
M Control knobs for gas burners
R Support grid for cookware
2
Page 18

INSTRUCTIONS FOR USE THE HOB
Gas burners
On the control panel, the following symbols are indicated
around each knob "M" or on the knob itself: Cock
Off
High flame
Low flame
Moreover, the symbols near the knobs indicate the
position of the relative burner on the hob.
The burners are fitted with a safety thermocouple device
against gas leaks. This device interrupts the gas supply
should the burner flame go out during operation.
To light one of the burners, proceed as follows:
• turn the relative knob anti-clockwise until the pointer is
on the high-flame symbol;
• press the knob down fully to actuate the automatic gas
ignition;
Since the burner is fitted with a safety device "F", the
knob should be pressed for approximately 6 seconds
for the device keeping the flame lit automatically to
heat up.
• release the knob, checking that the flame is stable. If it is
not, repeat the operation.
For minimum power, turn the knob towards the low flame
symbol. Intermediate positions are possible by simply
setting the knob anywhere between the high and the low
flame symbol.
Burner ø Pan Diameter (cm)
A.Auxiliary
B.Semi-rap id 15 – 20
C.Rapid
D. Tripl e rin g
6 – 14
21 – 26
24 - 26
The hob is fitted with reducing pan stands
(fig. 1), which should only be used on
auxiliary burner "A".
fig.1
To turn the burner off, turn the knob clockwise until it
stops (corresponding again with the " / 0" symbol).
For the best performance of your b urners, keep the following
in mind: All types of pans can be used on the burners. The
important thing is that the bottom should be completely
even.
Important:
• Do not actuate the automatic ignition device for more
than 15 consecutive seconds.
• Difficulty in ignition is sometimes due to air inside the
gas duct.
• If a burner flame accidentally goes out, the gas continues
to exit for a few moments before the safety device is
actuated. Turn the control knob to the off position and do
not attempt ignition again for at least 1 minute, thereby
letting the gas disperse, which could otherwise be a
danger.
• When the appliance is not in operation, check that the
knobs are set to the off position " / 0". The main gas supply
cut-off cock should also be turned off.
Practical advice on using the burners
To obtain maximum efficiency from the burners, we
recommend you only use pans with a diameter suitable fo r
the burner being used, so that the flame does not extend
beyond the pan base (see the following table).
When a liquid starts boiling, we recommend you turn the
flame down just enough to keep the liquid simmering.
3
Page 19

THE DIFFERENT COOKING MODES A V AILABLE
ARISTON o vens are equipped with controls and indicator
lights to ease operation, all situated on the control panel.
THE COOKING MODE SELECTOR
It comprises 10 marks represented in order by the following
pictograms:
" / 0" : stop
: oven light
: "Convection mode"
This is the oldest cooking mode suitable for cooking individual
dishes. Two heating elements (one at the top of the oven
and the other at the bottom) work together.
The air heats up upon contact with these heat sources, and
circulates around the inside of the oven to provide unifor m
heat, as the hot, lighter air tends to rise. This is caused by
natural convection. This cooking mode is especially recommended when cooking simmered recipes using covered
casserole dishes (hotpots, tripe, etc.) or for Bain Marie
cooking (crème caramel, terrines, etc.). In this case, use
the dripping pan as a dish support and place it on the 2nd
rack from the oven bottom.
We recommend you pre-heat the oven before placing your
dish in it.
: «Pizza mode»
The heating elements (bottom and circular) are turned on to
heat the oven up quickly. Your pizzas and tarts will benefit
from a greater amount of heat from below, thus guaranteeing
the rapid baking of the dough during cooking. As f or the fan, the
latter browns the surface as necessary, making the food even
more appetising. Use the dripping pan as a dish support and
place it on the 1st rack from the oven bottom. We recommend
you pre-heat the oven before placing your dish in it.
: «Grill»
The top heating element comes on: the grill goes red and emits
infrared rays just like those contained in sunlight.
In fact, this cooking mode does not essentially intend to heat
up the air inside the oven, but rather to e xpose the f ood directly
to these rays.
Use this cooking mode with the oven door closed. We recommend you start with the oven cold.
The amount of heat radiated is adjustable on the temperature
selector.
Place the dripping pan on the first rack from the bottom in
order to catch any fat or juices that may drip from the dish and
place the grid on one of the top racks depending on the size of
the meat.
: "Baking mode"
Only the circular heating element at the back of the oven
and the fan come on to provide delicate heat, suitable for
baking cakes and pastries such as brioches, chocolate
cake, fruitcake, sponge cake, mini cup cakes, meringues,
etc.
In this case, use the dripping pan as a dish support and
place it on the 2nd rack from the oven bottom.
We recommend you pre-heat the oven before placing your
dish in it.
: "Fast cooking"
The combination of all the heating elements together with
the fan guarantees a uniform distribution of heat throughout
the oven.
This particular cooking mode is ideal for fast cooking (not
requiring any pre-heating) and for cooked dishes (frozen,
pre-cooked food).
In this case, use the dripping pan as a dish support and
place it on the 2nd rack from the oven bottom.
: "Multi-cooking mode"
The combination of all the heating elements together with
the fan guarantees a uniform distribution of heat throughout
the oven. This cooking mode is recommended for cooking
several dishes on more than one rack. Even if the dishes
vary in nature, their respective flavours are not mingled
during cooking. When using this cooking mode, all the dishes
should require the same cooking temperature (you just need
to take them out gradually as each one is ready). When
cooking on two racks, for example, use the dripping pan as
a dish support on the first oven rack from the bottom and
the grid on the third rack from the bottom.
We recommend you pre-heat the oven before placing your
dish in it.
: "Gratin"
Only the top heating element comes on, with the emission of
infrared rays. The forced circulation of air caused by the fan at
the back of the oven ensures the unifor m distribution of heat
throughout the latter, and all f oods thus benefit from the f ollo wing at the same time:
• the infrared rays that guarantee the perfect cooking of
the food surface, thus sealing in the tenderness and juices
in the case of meat,
• the hot air that also allows for the food to be cooked
thoroughly via conduction.
This cooking mode is recommended when cooking roasts (red
or white meats), and for poultry.
Place the grid on the 2nd rack from the oven bottom as a
support for the meat and the dripping pan on the 1st rack from
the bottom to catch any dripping fat or juices.
It is best to start with a cold oven.
Your appliance is fitted with a rotisserie, which can be used
with the "grill" and "gratin" modes.
Always keep the o v en door shut when using the rotisserie and
start with the oven cold in order to avoid scalding yourselves
when positioning the spit.
Place the dripping pan on the 1st oven rack from the bottom to
catch any dripping fat or juices and position the rotisserie on
the 3rd rack from the oven bottom (please see the next paragraph for instructions on positioning the rotisserie)
When using the "grill" or "gratin" modes, remember to
keep children away from the accessible parts of the appliance as they become very hot.
: fast clean
This process cleans the oven fully.
For further details on the oven's fast clean self-cleaning properties, please see page 6.
4
Page 20

THE ACCESSORIES
Your oven offers you many differing cooking modes. These
can only be achieved thanks to a certain number of
accessories which we have chosen for you.
These accessories slide in and out of the different oven
racks inside your oven and can thus be positioned in
accordance with the individual cooking requirements of
differing foods and dishes.
For each cooking mode and each example suggested, we
specify the oven rack to use (from the oven bottom up).
Rung n˚ 5
Rung n˚ 4
Rung n˚ 3
Rung n˚ 2
Rung n˚ 1
Trammels
The dripping pan
Use it:
• as a dish support for all dishes when cooking on
one rack only and in Bain Marie cooking,
•as a support for food (mini cup cakes, etc.),
• as a dripping pan to catch juices and fat dripping
from food situated on the large grid.
We advise against using the dripping pan on the 4th and
5th racks from the oven bottom.
The large grid
Always use the large grid with the edges upwards and
together with the dripping pan.
• When it is positioned on the 2nd rack from the oven
bottom, it acts as a meat support, with the dripping
pan placed on the 1st rack from the bottom to catch
any dripping fat or juices.
• When it is positioned on the top rack (depending on
the size of the foodstuff) for grilled food, the dripping
pan is to be placed on the 1st rack from the oven bottom
to catch any dripping fat or juices.
• When it is positioned on the top rack for cooking on
more than one rack.
We advise against placing meat directly onto the
dripping pan when using the "gratin" mode as the fat
and juices heated from below in this particular cooking
mode could in fact char and splash onto the oven inside
panels and create smoke.
The rotisserie
This specific accessory is ideal for roasting meats, as the
latter rotate slowly and are browned uniformly until cooking
is done. It is compr ised of the following:
• a support situated on the 3rd oven rack from the
oven bottom so the rotisserie fits into the hollow shaft
of the rotisserie motor located at the back of the
oven, behind the perfo rated oven back panel.
• a spit that passes through the roast, which is kept
firmly in place on both ends by two adjustable sliding
forks each fastened onto the spit by means of a wing
nut.
Warning: when positioning the rotisserie assembly, ensure
the spit fits firmly into the hollow shaft connected to the
motor.
Make sure you position the following correctly:
- the spit in the centre of the roast
- the roast at an equal distance from both ends of the spit.
• a removable handle made of insulating material to
screw onto the front of the spit allows you:
- to have a rotisserie which is long enough for even
the largest of roasts
- to avoid scalding yourself when removing the roast
at the end of cooking.
Screw on the handle tightly to take out the spit (the handle
should be removed from the spit during cooking).
Rotisserie timer
ARISTON ovens are fitted with a rotisserie timing device.
When cooking is done, the rotisserie motor continues to
turn the spit and only comes to a stop when the temperature
inside the oven has dropped sufficiently: this prevents the
surface of the meat from burning.
When cooking is done, leave the mode selector set to the
cooking mode under way and set the temperature selector
back to the minimum setting.
Continued ventilation
The fan stays on when cooking is done in order to cool the
oven down. So do not worry if you hear the fan going even
after you have turned the oven off: the ventilation will come
to a stop when the temperature has dropped below 120°.
Oven light
To turn the oven light on, set the mode selector knob to the
symbol.
The oven light sta ys on during cooking, whatever the cooking
mode (with the exception of the self-cleaning mode).
If you decide to delay the cooking start, the oven light
comes on as soon as you programme the start and stays
on until cooking is done.
Wing screw
Spit
Spit cradle
Prong
Spit handle
5
Page 21

THE OVEN: FAST CLEAN
Safety devices
In fast clean mode, the temperature inside the oven reaches
500°, which is necessary for the destruction of food and fat
residue, as illustrated below.
Given this high temperature, your oven is fitted with some
safety devices:
• the oven door is locked automatically as soon as
the temperature is high in order to avoid all risks of
burns.
• the heating elements are no longer powered if an
anomaly occurs.
Notes:
1- Despite the high temperature inside the oven during the
fast clean process, the external surfaces of the appliance
remain lukewarm, thanks to:
• a reinforced insulation of the oven compartment
•a fan that ensures the circulation of air to cool down
the oven wall panels.
2- When looking through the oven door, you may notice
some particles that light up when they are destroyed by
pyrolysis upon contact with the heating elements: this is
simply spontaneous combustion, it is extremely normal
and without danger.
How to start the cleaning process
– T ake all the accessories out of the ov en. Remove the
toughest grease and food spots and especially all substantial overflows in order to avoid the creation of flames
or smoke.
– Shut the oven door.
– Set the mode selector to
– Programme it. You can choose between
· an immediate start: same procedure as for cooking,
· a delayed start: same procedure as for cooking,
– The process takes approximately 90 minutes.
What happens during the fast clean process?
When the temperature reaches 325°C, the oven door is
automatically locked: the letter "P" comes up on the displa y ,
along with the remaining process time, as it decreases.
The oven door stays locked for as long as the temperature
inside the oven remains high.
What happens at the end of the fast clean process?
Precautions to take
1- Tr y to remove the larg er food residue from inside the
oven using a wet sponge. We highly advise against the use
of detergents or all other products recommended for
cleaning ovens.
2- Try to remove the larger food residue from inside
the oven using a wet sponge. We highly advise against the
use of detergents or all other products recommended for
cleaning ovens.
3- Don't leave any tea towels on the oven door handle.
Warning: the o ven surfaces may get hot during the fast
clean process: keep children well away.
TROUBLESHOOTING
DO NOT WORRY IF…
Some operating anomalies may arise. These are generally
due to incorrect handling or to the erroneous assessment
of a phenomenon.
If your oven releases a lot of smoke during cooking:
• Make sure you have selected the correct cooking mode
for the type of dish you want to prepare and that you
have selected the right accessories and put the dish in
the oven at the recommended rack height.
• Check the temperature selected: it is no doubt too high
for the type of cooking required.
When the fast clean process is over, "P. 0.00" comes up
on the display.To be able to open the oven door, you will
have to:
• wait for the temperature inside it to have dropped
back to an acceptable level,
• have set the mode selector knob back to " / 0".
You will notice some white dust deposits on the bottom
and sides of the oven, remove them with a damp sponge
when the oven has cooled down completely.
If on the other hand you want to take advantage of the heat
accumulated during the process to start cooking, the dust
can stay where it is: it does not form a source of danger to
your food.
• Check the degree of soil of the oven, and whether the
latter needs to be cleaned. F ood residue encrusted onto
the enamel coating inside the oven becomes charred
and creates both smoke and pungent smells.
• Splashes of grease or overflows onto very hot surfaces
could crate smoke.
6
Page 22

THE OVEN: THE PROGRAMMER
Display for all functions
cooking duration and
end-of-cooking/fast-cleaning time
Timer indicator light
Button to start cooking
Button to set the
cooking duration
Button to set the
end-of-cooking time
Button to set the timer
:
clock, timer,
Setting the time
You can only set the time if the mode selector is set to "0".
After the appliance has been connected to the power supply (or following a power failure), a flashing "0.00" is displayed. Press keys "+" and/or "-" to set the time.
The time set is memorised, but you still have another 3
seconds to modify it, as all the other buttons remain disabled for that time.
Setting the timer
The timer only works when the oven is switched off (mode
selector set to " / 0").
Press key briefly and set the time using keys "+"
and/or "-". As soon as you release the keys, the selected
duration is memorised and can still be modified for 3 seconds, indicator light comes on and the countdown begins.
When the end of the time set is reached, an acoustic signal sounds for 1 minute; to tur n it off, just press any of the
keys; indicator light comes off.
The timer operation is independent from that of the
oven.
Indicator light for a programmed
operation:
- lit : operation underway
- off: operation finished
- flashing: programmed operation
has finished
Letter A:
- off: manual mode
- lit: an operation has been programmed
Buttons + and - to set the clock, timer,
cooking duration and end-of-operation
5 s.
time, press on:
+ to increase the time
- to reduce the time
Cooking without the programmer
When the oven is switched off (mode selector set to 0), all
the keys (except for "-" to adjust the volume of the acoustic signal) are disabled.
Select a cooking mode by turning the mode selector knob
clockwise. Each cooking mode has a pre-set cooking time,
which you can view by pressing . You can modify the
cooking time to suit your recipe. To do so, press and
set the desired cooking time using keys "+" and "-". The
display indicates a recommended temperature, which is
independent from that indicated on the temperature selector: you can change it by turning the temperature selector
knob.
For the "grill" mode, the display indicates a power level
between 1 and 5, with 5 being the highest setting.
Your oven is now ready to start cooking: press the
key. The oven begins the pre-heating phase, during which
symbol blinks. It stops blinking when pre-heating is done
(after approximately 10 minutes).
Acoustic signal volume
You can adjust the volume of the acoustic signal by
pressing button "-" (when the signal sounds) until you attain the required volume.
If you fail to press the cooking start key one minute after
having selected a mode, the word "OFF" comes up on the
display and the keys are disabled. In this case, set the
mode selector back to "0" and proceed with the various
adjustments.
WARNING
Your appliance is fitted with a diagnosis system which
detects any malfunctions and displays "FnFm" on the programmer (n and m are numbers).
In this case, please contact your nearest after-sales service centre for assistance.
7
Page 23

THE OVEN: PR OGRAMMED COOKING
Programmed cooking with immediate start
Cooking starts immediately and comes to an automatic
stop when the end cooking time is reached.
Proceed as follows:
• set the mode selector to the selected mode,
• set the temperature using the temperature selector knob (in steps of 10° at a time) if the recommended
one is not to your liking,
For the "grill" mode, the display indicates a power level
between 1 and 5, with 5 being the highest setting.
•a recommended cooking time is associated with
each cooking mode. You may change the recommended
cooking time by pressing and keys "+" and/or "-"
(the cooking time must include approximately 10 min-
utes for the oven to pre-heat). The cooking time is
memorised, but you still have another 3 seconds to
modify it.
During the pre-heating phase, symbol blinks and the
cooking time is displayed. When pre-heating is done, sym-
bol stops blinking and the oven emits 3 acoustic beeps.
There is no pre-heating phase when using the "fast cook-
ing" and "grill" modes.
The amount of time left until cooking is done is displayed
during cooking. To see the temperature, press key "+".
The minimum programmable cooking time is 2 minutes.
The maximum programmable cooking time is 10 hours.
• press key to start cooking.
If you fail to press the cooking start key one minute after
having selected a mode, the word "END" comes up on the
display and the keys are disabled. In this case, set the
mode selector back to " / 0" and proceed with the various
adjustments.
Programmed cooking with delayed start
The programmer automatically selects the cooking start
time according to the parameters you have set: cooking
time and end cooking time.
Proceed as follows:
• set the mode selector to the selected mode,
• set the temperature using the temperature selector
knob if the recommended one is not to your liking,
For the "grill" mode, the display indicates a power level
between 1 and 5, with 5 being the highest setting.
• press key to set the cooking time,
• set the cooking time by pressing keys "+" and/or "-"
(cooking time should include the pre-heating time): The
cooking time is memorised, but you still have another 3
seconds to modify it.
• to delay cooking, you need to set the end cooking
time by pressing , and then "+" and/or "-" repeat-
edly: the end cooking time is memorised, but you still
have another 3 seconds to modify it.
The minimum programmable cooking time is 2 minutes.
The maximum programmable cooking time is 10 hours.
• press key ; symbol "A" turns on.
From the time of your programming to the start of cooking,
only the temperature and the mode can be modified.
When the cooking start time has been reached, the oven is
turned on and pre-heating begins, during which symbol
blinks; the cooking time is displayed.
When pre-heating is done, cooking starts, symbol stops
blinking and the oven emits 3 acoustic beeps.
There is no pre-heating phase when using the "fast cook-
ing" and "grill" modes.
When cooking is done, an acoustic signal sounds for
one minute and the word "END"comes up on the dis-
play; you can stop this acoustic signal by pressing any of
the keys.
• Set the mode selector knob back to "0": the word
"END" disappears and "OFF" comes up for 3 seconds.
During cooking, you can change the cooking mode (without affecting the cooking time or temperature), the temperature (without affecting the cooking time) and the cooking time.
You can bring the cooking to a stop and turn the oven off
just by setting the mode selector knob to " / 0". In this case,
the word "OFF" is displayed for 3 seconds before it turns
off.
• Set the mode selector knob back to " / 0":
8
Page 24

A FEW EXAMPLES OF COOKING ON ONE LEVEL
Dish Cooking mode Temperature Time Shelf level Remarks Preheat
Bread (1 kg loaf)
Savoury pasties
Pizza (bread dough)
Multicooking 210°C 30-35' 2 on backing tray Yes
Multicooking 200°C
Pizza 240°C 10-15' 1 on backing tray Yes
20-25'
Depending on thickness
2 on backing tray Yes
Quiche
Cheese soufflé
Pâté
Leg of lamb
Potatoes au gratin
cooked with cream
Fish
Chicken
Roast beef
Roast pork
Roast veal
Stuffed tomatoes
Frozen meals
Lasagne
Moussaka
Buns
Pizza 220°C 30' 1 Tin on backing tray Yes
Multicooking 200°C 30-40' 2
Traditional 180°C 50- 60' 2
Gratin 210°C 1 hour for 1,5 à 2 kg 2-1* Meat on shelf No
Gratin 200°C
Traditional
Gratin
Grill
Gratin
Rotisserie grill
Gratin 210°C
Gratin 210°C 1 hour for 1kg 2-1* Meat on shelf No
Gratin 210°C 1 hour for 1kg 2-1* Meat on shelf No
Multicooking 200°C 20-25' 2 Tin on backing tray Yes
Fast cooking
Fast cooking 200°C
Fast cooking 200°C
Pastry 160°C 35-45' 2 Aluminium t i n on backing tray Yes
200°C
240°C
250°C
210°C
250°C
Follow
instructions on
packet
40-45'
Depending on thickness
Depending on type and
thickness of fish
1 hour for
1,2 à 1,5 kg
Depends on how well
cooked required
Follow instructions on
packet
Depending on
thickness
Depending on
thickness
2 Tin on backing tray Yes
2
2-1*
2-1*
2-1*
3-1*
2-1* Meat on shelf No
2 Tin on backing tray No
2 Tin on backing tray No
2 Tin on backing tray No
Tin diam. 20 cm on backing
Bain-marie on backing tray
Fillets + liquid, enamelled tray
tray
(star t with hot water)
Whole on shelf
Fish on shelf for grilling
Meat on shelf
Rotisserie,oven door shut
Yes
Yes
Yes
No
Cake
Profiteroles
Crème caramel
Sponge cake
Macaroons
White meringues
Blond meringues
Baked apples
Shortbread biscuits
Apple tart
Shortbread biscuits
Jam tart
Savoury biscuits
X - Y* in the "Shelf level" column
X = shelf or spit rod at level X
Y = baking tray at level Y to catch the roasting juices
Pastry 160°C 60' 2 Aluminium tin on backing tray Yes
Pastry 200°C 20-25' 2
Traditional 180°C 30' 2
Pastry 190°C 30' 2 Aluminium tin on backing tray Yes
Pastry 180°C
Pastry 70-80°C
Pastry 110°C
Multicooking 210°C
Pastry 190°C 10-15' 2 on backing tray Yes
Pizza 220°C 30' 1 Cake tin on backing tray Yes
Ventilated oven 190°C 10-15' 2
Ventilated oven 190°C 15-25' 2
Ventilated oven 190°C 10-15' 2
15-20'
Depending on thickness
3 hour
Depending on thickness
2 hour
Depending on thickness
20-25'
Depending on thickness
Reminder: always place the shelf with the inden tati ons f acing downwards
Small savoury profiteroles on
backing tray
Individual ramekins in bain-
marie (start with hot water)
2 on backing tray Yes
2 Dr ying small meringues Yes
2 Dr ying small meringues Yes
2 Tin on backing tray Yes
Aluminium baking tin on
backing tray
Aluminium baking tin on
backing tray
Aluminium baking tin on
backing tray
Yes
Yes
Yes
Yes
Yes
9
Page 25

COOKING ADVICE
Cooking is by definition the passage from a raw state to a
cooked one.
The consequent result is appreciated according to
different criteria: the colouring, any development in the
dish, its smoothness or tenderness, how cooked you
want it to be, etc….
The oven settings (temperatures and cooking time)
obviously depend on two important parameters:
- the size of the food or dish,
OVEN CARE
Important: The appliance should be disconnected fr om
the mains supply before starting cleaning operations.
To ensure a long life cycle for the appliance, it is essential
to carry out a thorough general clean frequently, while
observing the following instructions:
Inside the oven:
We recommend you clean your oven each time you use
it (PIRO'), especially after cooking roasts. In fact, it is
advisable to prevent food residue from building up during
cooking: the residue would be re-cooked each time the
oven is used and would char and release smoke and
unpleasant odours.
- the ability of the food to brown (quantity of sugar and
eggs in the recipe).
The cooking settings contained in our table were
calculated according to precise parameters and you may
feel the need to make slight changes to the same in
order to adapt them to your own dish and your desired
degree of cooking.
Disassembling/assembling the oven door:
To make it easier to clean the inside of your oven, the oven
door can be removed, by proceeding as follows (fig. 2-3):
• Open the door completely and lift the 2 levers “B” (fig. 2);
• Now , shutting the door slightly, you can lift it out by pulling
out the hooks “A” as shown in figure 3.
To reassemble the door:
• With the door in a vertical position, insert the two
hooks “A” into the slots;
• Ensure that seat “D” is hooked perfectly onto the edge
of the slot (move the oven door backwards and forward
slightly);
Using aluminium foil
To avoid having to clean the bottom of the oven, you may
be tempted to line the same with some aluminium foil. We
strongly advise against this. The aluminium foil sheet
in direct contact with the heated enamel coating could
melt and damage the enamel coating inside the oven
irreversibly.
Hob:
• The remo vable parts of the burners on the hob should be
washed frequently with warm water and soap, making
sure to remove any caked-on substances. Check that
the gas outlet slits are not clogged. Dry the burners
carefully before using them again.
• Clean the end part of the automatic glow plug ignitors of
the hob and gas oven frequently.
Oven exterior:
• Only clean the appliance when the oven is cold.
• The steel parts and especially the areas with the screenprinted symbols should not be cleaned with solvents or
abrasive detergents. It is advisable to use only a damp
cloth with lukewarm water and washing up liquid.
Stainless steel may remain stained if in long-term contact
with very calcareous water or aggressive detergents
(containing phosphorus). It is theref ore always necessary
to rinse and dry all surfaces thoroughly after cleaning.
Important: cleaning operations must be made
horizontally, in the direction of the steel glazing.
• After cleaning, any treatments to polish the surfaces may
be performed: only use specific products for stainless
steel.
Important: do not use abrasive powders, aggressive
detergents or acidic substances for cleaning.
• Keep the oven door open fully, unhook the 2 levers “B”
downwards and then shut the door again.
FIG. 2
FIG. 3
Replacing the oven lamp
• Always unplug the appliance from the mains or switch
off the main switch before all operations.
• With the aid of a narrow, flat item (such as a screwdriver
or a spoon handle, etc…), remove the glass cove r.
• Unscrew the lamp and replace it with another featuring
the same characteristics:
- voltage 230/240 W
Glass door
Oven
compartment
Lamp
Seal
- wattage 15 W
- type E 14
• Replace the glass cover
and ensure you
reposition the seal
correctly.
Greasing the taps
As time passes, a tap may lock or become difficult to turn.
In this case it will be necessary to clean inside and replace
the grease. This procedure must be performed by a
technician authorized by the manufacturer.
10
Page 26

INSTRUCTIONS FOR THE INST ALLER
The following instructions are provided f or qualified installers
so that they may accomplish installation, adjustment and
technical maintenance operations correctly and in
compliance with national current regulations and standards.
Important: the appliance should be disconnected from
the mains electricity supply before any adjustment,
maintenance, etc. is carried out. Maximum caution should
be exercised should it be necessary to keep the appliance
connected to the electricity supply.
The cookers have the following technical specifications:
Cat. II2H3+
Class 1 Class 2 sub-class 1
The maximum dimensions of the appliance are given in
the figure on page 2. F or trouble-free operation of appliances
installed in housing units, the minimum distances shown
in fig.4 should be observed. Adjacent surfaces and the wall
at the rear should also be able to withstand a temperature
of 65 °C
fig.5
min. 50mm
fig.6
In a chimney stack or branched flue Directly to the outside
(exclusively for cooking appliances)
Kitchen ventilation
The air flow into the room where the appliance is installed
must be equal to the quantity of air that is required for
regular combustion of the gas and for ventilating the same
room. Air must be taken in naturally through permanent
apertures made in the outside walls of the room or through
single or branching collective ventilation ducts in
compliance with the standards in force. The air must be
taken directly from the outside, from an area far from
sources of pollution. The ventilation aperture must have
the following characteristics (fig.7A):
• total free cross section of passage of at least 6 cm² for
every kW of rated heating capacity of the appliance, with
a minimum of 100 cm² (the heating capacity is indicated
on the rating plate);
• it must be made in such a way that the aperture cannot
min. 700mm
be obstructed both on the inside and outside of the wall;
• it must be protected, e.g. with grills, wire mesh, etc. in
such a way that the above-mentioned free section is not
reduced;
• it must be situated as near to floor level as possible.
Detail A Adjacent Room to be
room ventilated
fig.4
Prior to installing the cooker, 99 ÷ 155 mm high supporting
feet (provided) should be fitted into the holes to be found in
the bottom of the cooker (fig.5). These feet are screwadjustable and whenever necessary should be used to make
sure the cooker stands level.
Positioning
This appliance may only be installed and operated in
permanently ventilated rooms in compliance with provisions
laid down by current regulations and standards. The
following requirements must be observed:
• The appliance must discharge combustion products into
a special hood, which must be connected to a chimney,
flue pipe or directly to the outside (fig.6).
• If it is impossible to fit a hood, the use of an electric fan
is permitted, either installed on a window or on an external
wall, which must be switched on at the same time as the
appliance.
A
Examples of ventilation holes Enlarging the ventilation slot
for comburant air between window and floor
fig. 7A fig.7B
The air inflow may also be obtained from an adjoining room,
provided the latter is not a bedroom or a room where there
is a risk of fire, such as warehouses, garages, fuel stores,
etc. and is ventilated in compliance with the standards in
force. Air from the adjoining room to the one to be v entilated
may be made to pass freely through permanent apertures
with a cross section at least equal to that indicated above.
These apertures may also be obtained by increasing the
gap between the door and the floor (fig.7B). If an electric
fan is used for extracting the combustion products, the
ventilation aperture must be increased in relation to its
maximum performance. The electric fan should have a
11
Page 27

INSTRUCTIONS FOR THE INSTALLER
sufficient capacity to guarantee an hourly exchange of air
equal to 3 ÷ 5 times the volume of the kitchen. Prolonged,
intensive use of the appliance may require extra ventilation,
e.g. an open window or a more efficient ventilation system
by increasing the extraction power of the electric fan if
installed. Liquid petroleum gas descends towards the floor
as it is heavier than air. Apertures in the outside walls in
rooms containing LPG cylinders should therefore be at floor
level, in order to allow any gas from leaks to be expelled.
Do not store LPG cylinders (even when empty) in basements/
rooms below ground level; it is advisable to keep only the
cylinder in use in the room and connected far from heat
sources which could raise its temperature to above 50°C.
Gas supply
• Check that the appliance is set for the type of gas av ailable
and then connect it to the mains gas piping or the gas
cylinder in compliance with the applicable norms in force.
• This appliance is designed and set to work with the gas
indicated on the label situated on the actual hob. If the
gas supply is different from the type for which the
appliance has been set, replace the corresponding nozzles
(provided), follo wing the instructions given in the paragraph
"Adaptation to different types of gas".
• For trouble-free operation, suitable use of energy and a
longer life cycle for the appliance, make sure that the
supply pressure complies with the values indicated in table
1 "Burner and nozzle specifications", otherwise install a
special pressure regulator on the supply pipe in
compliance with current standards and regulations.
• Connect in such a way that the appliance is subjected to
no strain whatsoever.
Either a rigid metal pipe with fittings (fig. 8-D) in compliance
with norms must be used for connecting to the nipple union
(threaded - cylindrical/conical ½"G fitting "F") situated at
the rear of the appliance (fig. 8), or a flexible steel pipe with
a continuous wall and fittings (fig. 8-C) in compliance with
norms, which must not exceed 2000 mm in length. Check
that the connecting pipe cannot come into contact with
moving parts which could damage or crush it. For installation
with a flexible rubber pipe, apply the special hose support
for liquid gas (fig. 8-A) or natural gas (fig. 8-B). The gasket
"G" (provided) must be utilised in every type of connection.
The two ends of the pipe must be fastened with the purpose
designed pipe collars "E", in compliance with the norms.
The flexible pipe should comply with the norms, and be
specific for the type of gas used. In addition:
• it should be as short as possible , with a maximum length
of 1.5 metres;
• it should not be bent or kinked;
• it should not be in contact with the rear panel of the
appliance or in any case with parts which may reach a
temperature of 50°;
• it should not pass through holes or slits used for dis-
charging the oven flue gases;
• it should not come into contact with pointed parts or
sharp corners;
• it should be easy to inspect along its entire length in
order to be able to check its condition;
• it should be replaced before the date printed on the actual
pipe.
Important: A pressure regulator, in compliance with the
applicable norm in force, must be inserted when
connecting to a liquid gas supply (in a cylinder).
Upon completion of installation, check for leaks from the
gas circuit using a soapy solution (never use a flame).
Make sure that the natural gas pipe is adequate for a
sufficient supply to the appliance when all the burners are
lit.
Adapting to different types of gas (instructions for the hob)
To adapt the hob to a different type of gas from the factoryset one (indicated on the rating plate at the top of the hood
or on the packaging), the burner nozzles should be replaced
as follows:
• Remove the pan supports and the burners.
• Unscrew the nozzles “A” (fig.9) using a 7 mm socket
wrench and replace them with the ones which have a
diameter suitable for the type of gas to be used, according
to the table 1 "burners and nozzles specifications).
• On completing the operation, replace the old rating label
with the one showing the new type of gas; the sticker is
available from our Service Centres.
Note
Should the pressure of the gas used be different (or vary)
from the recommended pressure, it is necessary to fit a
suitable pressure regulator onto the inlet pipe in compliance
with the norms regarding "regulators for channelled gas".
A
fig.9
fig.8
fig.10
Adjusting the primary air of the burners
The primary air of the burners does not need to be adjusted.
Adjusting the low flame
• Turn the tap to the low flame position;
• Remove the knob and turn the adjusting screw, situated
to the right of the tap (fig. 10) until you obtain a regular
small flame, using a screwdriver (loosening the screw
increases the height of the flame, tightening decreases
it).
N.B.: In the case of liquid gas, the regulation screw
must be screwed in all the way.
• Having obtained the low flame setting required and with
the burner lit, abruptly change the position of the knob
several times from minim um to maximum and vice versa
and check that the flame does not go out.
• In appliances fitted with the safety device
(thermocouple), should the device fail to work with the
burners set to the low flame setting, increase the low
flame setting of the same on the adjusting screw.
Once the adjustment has been made, remount the seals
on the by-passes using sealing wax or similar.
12
Page 28

INSTRUCTIONS FOR THE INSTALLER
ELECTRICAL CONNECTION
Those ovens equipped with a three-pole power supply cable
are designed to operate with an alternating current with the
voltage and frequency indicated on the data plate (located
on the appliance) and in the instruction booklet. The wire
for earthing the appliance is yellow-green in colour.
Fitting on a power supply cable
Opening the terminal board:
• Using a screwdriver, prise on the side tabs of the terminal
board cover;
• Pull open the cover of the terminal board.
To install the cable, proceed as follows:
• Remove the wire clamp screw and the three contact
screws L-N-
• Fasten the wires beneath the screwheads using the following colour scheme: Blue (N) Brown (L) Yellow-
Green
NL
• Secure the supply cable in place with the clamp and
close the cover of the terminal board.
Connecting the supply cable to the mains
Install a standardised plug corresponding to the load
indicated on the data plate. When connecting the cable
directly to the mains, install an omnipolar circuit-breaker
with a minimum contact opening of 3 mm between the
appliance and the mains. The omnipolar circuit breaker
should be sized according to the load and should comply
with current regulations (the earth wire should not be
interrupted by the circuit breaker).
The supply cable must be in such a position that no part of
it can reach a temperature of 50°C above room temperature.
Before connecting to the power supply, make sure that:
• The electrical safety of this appliance can only be guaranteed if the cooker is correctly and efficiently earthed,
in compliance with regulations on electrical safety.
Always ensure that the earthing is efficient; if you have
any doubts call in a qualified technician to check the
system. The manufacturer denies all responsibility for
damage resulting from a system which has not been
earthed.
• Before plugging the appliance into the mains, check that
the specifications indicated on the date plate (on the
appliance and/or packaging) correspond to those of the
electrical and gas mains of your home.
• Check that the electrical capacity of the system and
sockets will support the maximum power of the
appliance, as indicated on the data plate. If in doubt,
consult a qualified technical engineer.
• If the socket and appliance plug are not compatible,
have the socket replaced with a suitable model by a
qualified technical engineer. The latter, in particular, will
also have to ensure that the cross section of the socket
cables are suitable for the power absorbed by the
appliance. The use of adapters, multiple sockets and/or
extensions, is not recommended. If their use cannot be
avoided, remember to use only single or multiple
adapters and extensions which comply with current
safety regulations. In these cases, never exceed the
maximum current capacity indicated on the single
adapter or extension and the maximum power indicated
on the multiple adapter. The plug and socket must be
easily accessible.
13
Page 29

BURNER AND NOZZLE SPECIFICATIONS
Table 1 Liquid gas Natural gas
Diameter
(mm)
BURNER
Thermal power
kW (H.s.*)
By-pass
1/100
Injector
1/100
Flow *
g/h
Injector
1/100
Flow*
l/h
Nomin. Reduc. G30 G31 G2 0
C.Rapid
B. Semi-rapid
A. Auxiliary
D. Triple Ring (Liquid Gas )
D. Triple Ring (Na tural gas)
Supply pressure
This appliance conforms to the following European Economic
Community directives:
- 73/23/EEC of 19/02/73 (Low Voltage) and subsequent
modifications;
- 89/336/EEC of 03/05/89 (Electromagnetic Compatibility) and
subsequent modifications;
- 90/336/EEC of 29/06/90 (Gas) and subsequent modifications;
- 93/68/EEC of 22/07/93 and subsequent modifications.
100 3.00 0.7 40 86 218 214 116 286
75 1.90 0.4 30 70 138 136 106 181
55 1.00 0.3 27 50 73 71 71 95
130 3.25 1.5 63 91 236 232
130 3.40 1.5 133 324
Nominal
Minimum
Maximum
(mm)
* At 15°C and 1013 mbar-dry gas
Propane P.C.S. = 50.37 MJ/Kg
Butane P.C.S. = 49.47 MJ/Kg
Natural P.C.S. = 37.78 MJ/m3
(mm)
28-30
20
35
37
25
45
(mm)
20
17
25
OVEN TECHNICAL SPECIFICATIONS
Inner V olume of the ELECTRIC Oven: 56 litres
Voltage and Frequency of Power Supply:
230V ~ 50Hz 2800W
ENERGY LABEL
Directive 2002/40/EC on the label of electric ovens
Norm EN 50304
Energy consumption for Natural convection:
heating mode: Convection
Declared energy consumption for Forced convection
Class:
heating mode: "Baking mode"
14
Page 30

Merci d'avoir choisi un produit Ariston, fiable et facile à utiliser. Pour mieux le connaître et l'utiliser le plus longtemps
possible, nous vous conseillons de lire attentivement ce livret. Merci.
AVERTISSEMENTS
CES INSTRUCTIONS NE SONT VALABLES QUE POUR LES PAYS DE DESTINATION DONT LES SYMBOLES SONT
REPRODUITS SUR LE LIVRET ET SUR LA PLAQUETTE SIGNALETIQUE DE L'APPAREIL.
1. Cet appareil a été conçu pour un usage familial de type
non-professionnel à l'intérieur d'une habitation normale.
2. Lisez attentivement les avertissements contenus dans ce
livret, ils vous fourniront des renseignements importants
concernant la sécurité d'installation, d'emploi et d'entretien
de votre four. Gardez-le ensuite à portée de la main afin
de pouvoir le consulter en cas de besoin.
3. Les accessoires du four pouvant entrer en contact avec
les aliments sont fabriqués avec des matériaux conformes
aux prescriptions de la Directive CEE 89/109 du 21.12.88
et au D .L. 108 du 25.01.92.
4. Après avoir déballé l'appareil, vérifiez s'il est intact. En cas
de doute, et avant toute utilisation, consultez un technicien
qualifié. Les éléments de l'emballage (sachets plastique,
polystyrène expansé, clous, etc.) ne doivent pas être
laissés à portée des enfants car ils pourraient être
dangereux.
5. Certaines pièces sont recouvertes d'une pellicule
protectrice anti-choc. Il faut absolument l'enlever avant la
mise en service de l'appareil et les parties protégées
doivent être nettoyées à l'aide d'un chiffon et d'un produit
de nettoyage normal non abrasif. Nous vous conseillons,
lors de la première utilisation, de laisser chauffer le four
vide pendant 30 minutes environ à la température
maximale afin d'éliminer les éventuels résidus de
fabrication.
6. Toutes les opér ations relatives à l'installation et au réglage
doivent être effectuées par du personnel qualifié,
conformément aux réglementations en vigueur. Les
instructions techniques sont décrites dans la partie
réservée à l'installateur.
7. Avant de brancher l'appareil, assurez-vous que
l'alimentation électrique et du gaz du réseau correspondent
bien aux données indiquées sur la plaquette signalétique
(apposée sur la partie arrière de l'appareil et à la dernière
page du livret).
8. Pendant la cuisson, l'appareil se réchauffe sensiblement
au niveau de la vitre du four et des parties adjacentes.
Veillez à ce que les enfants ne s'en approchent pas pour
jouer.
9. Vérifiez que la puissance électrique de l'installation et des
prises de courant est bien appropriée à la puissance
maximale de l'appareil indiquée sur la plaquette
signalétique. En cas de doute, faites appel à un
professionnel du secteur.
10. Vérifiez périodiquement le bon état du tuyau de raccord
gaz et adressez-vous à un professionnel qualifié pour le
faire remplacer dès qu'il présente une anomalie.
11. Le câble d'alimentation et le tuyau de raccord gaz de cet
appareil ne peuvent en aucun cas être remplacés par
l'utilisateur. En cas d'endommagement et d'éventuel
remplacement, faites appel exclusivement à un centre de
service après-vente agréé.
12. Ne laissez pas votre appareil branché inutilement.
Eteignez l'interrupteur général de l'appareil quand vous
ne l'utilisez pas et fermez le robinet du gaz.
13. Les brûleurs restent chauds longtemps après l'usage.
Faites attention, ne les touchez pas.
14. Ne posez pas de casseroles instables ou déformées sur
les brûleurs afin d'éviter tout renversement accidentel.
Placez-les sur le plan de cuisson, manches tournés vers
l'intérieur, vous éviterez ainsi de les heurter par mégarde.
15. N'utilisez pas de solutions inflammables (alcool,
essence..) à proximité de l'appareil lorsqu'il est en marche.
16. Si la cuisinière est posée sur un socle, prenez les
précautions qui s'imposent afin d'éviter qu'elle tombe.
17. Ne pas utiliser d'appareils de nettoyage à vapeur pour
l'entretien de l'appareil
18. Les orifices ou les fentes d'aération ou d'évacuation de la
chaleur ne doivent pas être bouchés.
19. Cet appareil doit être destiné à l'usage pour lequel il a été
conçu. Toute autre utilisation (comme par exemple le
chauffage d'une pièce) est impropre et donc dangereux.
Le fabricant décline toute responsabilité en cas de
dommages provoqués par un usage impropre de l'appareil.
20. L'usage de tout appareil électrique implique le respect de
certaines règles fondamentales. A savoir:
• ne pas toucher l'appareil les pieds ou les mains mouillés
ou humides;
• ne jamais utiliser l'appareil pieds nus;
• ne jamais utiliser de rallonges ou bien le faire avec un
maximum de précautions;
• ne jamais tirer sur le cordon d'alimentation ou sur
l'appareil pour débrancher la fiche de la prise de
courant;
• ne pas exposer l'appareil aux agents atmosphériques
(pluie, soleil, etc.);
• ne pas laisser utiliser l'appareil, sans surveillance, par
des enfants ou par des personnes incapables de le faire.
21. En cas de panne et/ou de mauvais fonctionnement de
l'appareil, éteignez-le. Pour son éventuelle réparation,
faites appel uniquement à un centre de service après-vente
agréé et exigez l'emploi de pièces détachées originales.
Le non respect de ces indications peut compromettre la
sécurité de l'appareil.
22. Contrôlez toujours que les manettes soient bien dans la
position
23. Si vous décidez de ne plus utiliser cet appareil, il est
recommandé de le rendre inopérant en coupant le cordon
d'alimentation, après l'avoir débranché de la prise de
courant. Nous recommandons vivement de neutraliser les
parties de l'appareil susceptibles de représenter un
danger quelconque, surtout pour des enfants qui pourraient
utiliser l'appareil pour jouer.
24. En cours de fonctionnement, les éléments chauffants et
certaines parties de la porte peuvent dev enir très chauds .
Attention à ne pas les toucher et à garder les enfants à
distance.
25. Les appareils à gaz ont besoin d'un appor t d'air régulier
pour un fonctionnement correct. Il est important de vérifier
lors de leur installation, que tous les points indiqués dans
le paragraphe relatif à leur "Positionnement" soient
respectés.
" / 0" quand l'appareil n'est pas utilisé.
1
Page 31

DESCRIPTION DE LA CUISINIERE
CP 649 FT.2
CP 759 FT
D
I
G
H
M
M
M
M
700
D
I
G
H
M
M
M
M
M
A Brûleur gaz Auxiliaire
B Brûleur gaz Semi rapide
C Brûleur gaz Rapide
D Brûleur gaz Triple couronne
E Bougie d'allumage des brûleurs gaz
F
F Dispositif de sécurité - Inter vient en cas d'extinction
accidentelle de la flamme (débordement de liquides,
courants d'air , ...) en interrompant automatiquement l'ar-
E
rivée de gaz.
G Manette commutateur du four électrique (sélecteur
types de cuisson)
H Manette thermostat du four électrique (sélection des
températures)
I Programmateur
M Manettes de commande des brûleurs gaz
R Grilles support de casseroles
2
Page 32

INSTRUCTIONS POUR L'UTILISA TION
Brûleurs à gaz
Sur le bandeau de commandes, les symboles suivants
sont reproduits autour de chaque manette "M" ou bien
directement sur les manettes : Robinet
Fermé
Ouverture maximale
Ouverture minimale
En outre, à côté des manettes les symboles indiquent
la position du brûleur correspondant sur le plan de cuisson.
Les brûleurs sont équipés d'un dispositif de sécurité
à thermocouple contre les fuites de gaz Ce dernier
coupe l'arrivée de gaz dès que la flamme du brûleur
s'éteint.
Pour allumer un des brûleurs procédez comme suit:
• tournez la manette correspondante dans le sens inverse
des aiguilles d'une montre afin de placer l'index en face
du symbole de la grande flamme;
• appuyez à fond sur la manette pour actionner
l'allumage automatique du gaz;
Le brûleur étant équipé d'un dispositif de sécurité de
flamme "F", appuyez pendant au moins 6 secondes de
suite sur la manette pour permettre au dispositif de se
réchauffer.
• relâchez la manette et assurez-vous que l'allumage s'est
bien fait de manière stable. Dans le cas contraire,
renouvelez l'opération.
Tournez la manette vers le symbole de la petite flamme
pour obtenir la puissance minimale. Il est possible de régler
la hauteur de la flamme en variant la position de la manette
entre les positions "grande flamme" et "petite flamme".
Brûleur à gaz ø Diamètre Casseroles (cm)
A.Auxiliaire
B.Semi-rapide
C.Rapide
D.Triple couronne
6 – 14
15 – 20
21 – 26
24 - 26
Le plan de cuisson est muni de grilles de
réduction (fig.1), qui ne peuvent être
utilisées que sur le brûleur auxiliaire "A".
fig.1
Pour éteindre le brûleur tournez la manette dans le sens
des aiguilles d'une montre pour la ramener en face du symbole " / 0").
Pour obtenir un meilleur rendement, n'oubliez pas: Vous
pouvez utiliser n'importe quel type de casserole sur les
brûleurs. A condition que leur fond soit parfaitement plat.
Important :
• N'actionnez pas le dispositif d'allumage automatique
pendant plus de 15 secondes consécutives.
• Dans cer tains cas, les problèmes d'allumage peuvent
être dus à la présence d'air à l'intérieur de la canalisation
du gaz.
• Si la flamme d'un des brûleurs s'éteint accidentellement,
le gaz continue à s'échapper pendant quelques instants
avant l'intervention du dispositif de sécurité. Fer mez la
manette de commande et attendez, par sécurité, au
moins 1 minute avant de renouveler l'allumage pour
permettre à la fuite de gaz de se dissiper dans l'air.
• Lorsque le plan de cuisson n'est pas utilisé, contrôlez si
les manettes sont bien sur la position de fermeture " / 0".
Il est conseillé, en outre, de fermer le robinet de barrage
principal de la canalisation d'alimentation du gaz.
Conseils pratiques pour l'utilisation des brûleurs
Afin d'obtenir un rendement optimal des brûleurs,
choisissez un brûleur approprié au diamètre du récipient
à utiliser. Réglez la couronne de flammes pour qu'elle ne
déborde pas le pourtour du récipient (voir tableau ci-après).
Il est conseillé, en outre, de réduire la flamme dès qu'un
liquide commence à bouillir, juste ce qu'il f aut pour maintenir
l'ébullition.
3
Page 33

LES DIFFÉRENTES FONCTIONS DE V OTRE FOUR
Les fours ARISTON sont dotés de commandes et de
voyants nécessaires à leur fonctionnement, réunis sur
le bandeau.
LE SELECTEUR DE FONCTIONS
Il comporte 10 repères représentés dans l’ordre par les
pictogrammes suivants:
" / 0" : arrêt
: éclairage
: «Traditionnel»
C'est le mode de cuisson le plus ancien qui convient aux
cuissons individuelles. Deux résistances (l'une visible
située sous la voûte au plafond, l'autre invisble en bas
sous la sole) fonctionnent ensemble.
L'air s'échauffe au contact de ces sources de chaleur, se
déplace à l'intérieur de l'enceinte du four selon un
phénomène qui fait que l'air chaud, plus léger, a tendance
à remonter. C'est le phénomène de convection naturelle.
Ce mode de cuisson est particulièrement recommandé pour
les plats mijotés en cocotte fermée (backenhof, tripes,
...) ou la cuisson au bain-marie (crème caramel, terrine,
...).
Il convient d'utiliser le plateau émaillé comme support de
plat au gradin 2.
L'enfournement à chaud est préconisé.
: "Pâtisserie"
Seules la résistance chauffante circulaire du fond de four
et la turbine sont sollicitées de façon à fournir une chaleur
délicate, propice à la cuisson des préparations de
pâtisseries telles que brioches, gâteau au chocolat, cake,
génoise, petits fours, meringues, ...
Il convient d'utiliser le plateau émaillé comme support de
plat au gradin 2.
L'enfournement à chaud est préconisé.
: «Cuisson rapide»
La combinaison de tous les éléments chauffants associés
à la turbine garantit la répartition de la chaleur dans
l'enceinte du four.
Ce mode de cuisson est recommandé pour les cuissons
rapides (ne nécessitant pas de préchauffage), les plats
cuisinés (surgelés, précuits).
Il convient d'utiliser le plateau émaillé comme support de
plat au gradin 2.
: «Multicuisson»
La combinaison de tous les éléments chauffants associés
à la turbine vous garantit une répartition de la chaleur dans
l'enceinte du four.
Ce mode de cuisson est recommandé pour cuire des
préparations placées sur plusieurs niveaux.
Si les préparations sont de natures différentes, la cuisson
se fait sans altération de leur saveur respective.
L'utilisation de cette fonction implique que toutes les
préparations requièrent la même température de cuisson
(vous retirerez les plats au fur et à mesure de leur cuisson).
Pour une cuisson sur deux niv eaux par ex emple, il convient
d'utiliser le plateau émaillé comme support de plat au gradin
1 et la grille au gradin 3.
L'enfournement à chaud est préconisé.
: «Pizza»
Les éléments chauffants (sole et circulaire) sont sollicités
afin de faire chauffer le four rapidement.
V os pizzas ainsi que vos tartes bénéficieront d'un apport de
chaleur plus important sur le dessous de façon à garantir une
bonne saisie de la pâte durant la cuisson. La turbine, quant à
elle,permettra d'apporter la coloration nécessaire sur le dessus
afin d'obtenir une préparation appétissante.
Il convient d'utiliser le plateau émaillé au gradin 1 comme
support de plat.
L'enfournement à chaud est préconisé.
: «Gril»
Seule la résistance de voûte fonctionne : le gril est por té
au rouge et émet des rayonnements infrarouges tels ceux
contenus dans le rayonnement solaire.
En effet, on ne vise pas essentiellement à chauffer l'air
contenu dans l'enceinte du four, mais sur tout à exposer
l'aliment directement à ces rayons.
La cuisson se fait porte fermée et le départ à froid est
recommandé.
La chaleur rayonnée est réglable avec le sélecteur de
températures.
Il convient de placer le plateau émaillé au gradin 1 afin de
récupérer les graisses et jus de cuisson et la grille en
gradin supérieur en fonction de l'épaisseur de votre viande .
: "Gratin"
Seule la résistance de voûte fonctionne avec émission
d'infrarouges. La turbine de fond de four, par brassage,
assure une répartition uniforme de la température, ainsi
les aliments sont soumis en même temps à l'action :
• des infrarouges qui saisissent la préparation en
surface,
• de l'air chaud qui permet une cuisson en profondeur
par conduction.
Ce mode de cuisson est recommandé pour la cuisson des
rôtis (viandes rouges ou blanches), et de la volaille.
La grille sera positionnée au gradin 2 comme support de
viande et le plateau émaillé viendra au gradin 1 pour
récupérer les graisses et les jus.
L'enfournement à froid est préconisé.
Si votre appareil est doté d'un tournebroche, vous pouvez
l'utiliser avec les fonctions "gril" et "gratin".
La cuisson se fait porte fermée et le départ à froid est
recommandé afin d'éviter de se brûler lors de la mise en
place de la broche.
Il convient de placer le plateau émaillé au gradin 1 pour la
récupération des graisses et jus de cuisson et le
tournebroche au gradin 3 (voir paragraphe suivant pour la
mise en place du tournebroche).
En cuisson "gril" et "gratin", les parties accessibles
peuvent être chaudes, éloignez les jeunes enfants.
: fast clean
C’est le nettoyage intégral du four.
Pour ce qui concerne les informations concernant
l’autonettoyage fast clean voir page 6.
4
Page 34

LES ACCESSOIRES
V otre four est doté de nombreuses possibilités de cuissons.
Celles-ci ne peuvent être réussies qu’avec un cer tain
nombre d’accessoires que nous avons choisis.
Ces accessoires coulissent dans les différents gradins
de la crémaillère à l’intérieur de l’enceinte du four et
peuvent ainsi être placés à la bonne hauteur pour la
cuisson à réaliser.
Pour chaque mode de cuisson et chaque exemple donné,
nous vous précisons le numéro de gradin (à partir du bas).
Gradinn˚ 5
Gradinn˚ 4
Gradinn˚ 3
Gradinn˚ 2
Gradinn˚ 1
Crémaillères
Le plateau émaillé
Il est utilisé :
• comme support de plat pour toutes les cuissons
un niveau et le bain-marie,
• comme suppor t de préparations (petits fours, ...),
• comme récupérateur des jus et graisses de
cuisson associé à la grande grille.
Il est déconseillé d'utiliser le plateau émaillé aux gradins
4 et 5.
La grande grille
Elle est toujours utilisée en décrochement vers le bas et
associée au plateau émaillé.
• Positionnée au gradin 2, elle sert de support de
viandes, le plateau émaillé se trouvant au gradin 1
pour la récupération des graisses et des jus.
• Positionnée en gradin supérieur (en fonction de
l'épaisseur de l'aliment) pour les grillades, le plateau
émaillé se trouvant au gradin 1 pour la récupération
des graisses et des jus.
• Positionnée en gradin supérieur pour la
multicuisson.
Nous vous déconseillons de placer les viandes à cuire
dans le plateau émaillé pour les cuissons "gratin"; en
effet, les jus et les graisses chauffés par le dessous
dans ce mode de cuisson, risquent de carboniser , d'être
projetés sur les parois et de donner naissance à de la
fumée.
Le tournebroche
Vis à ailettes
Broche
Poignée de broche
Berceau de
tournebroche
Fourche
Cet accessoire est apprécié pour les pièces à rôtir qui
tournent lentement et se colorent régulièrement jusqu’à
cuisson complète. Il se compose de:
• un berceau qui se place au 3ème gradin de la
crémaillère afin que le tournebroche puisse
s’encastrer dans l’axe creux du moteur
d’entraînement situé au fond de l’enceinte, derrière
la paroi perforée.
• une broche qui traverse la pièce à rôtir, laquelle est
immobilisée de part et d’autre à l’aide de deux
fourches coulissantes qui se fix ent chacune sur l’ax e
par une vis à ailettes.
Attention: lors de la mise en place de l’ensemble, vérifiez
que la broche soit bien engagée dans l’axe creux de sortie
du moteur.
Veillez à bien positionner:
- la broche au centre de la pièce à rôtir
- la pièce à rôtir à égale distance des extrémités de la
broche.
• une poignée amovible en matière isolante qui se
visse à l’avant de la broche et permet:
- d’avoir un tournebroche suffisamment long pour
accueillir des pièces à rôtir de grande dimension
- d’éviter de se brûler lorsqu’on retire la pièce en fin
de cuisson.
Vissez à fond la poignée pour retirer la broche (la poignée
doit être retirée durant la cuisson).
Temporisation du tournebroche
Les fours ARISTON sont dotés d’un dispositif de
temporisation du tournebroche. En fin de cuisson, le
moteur continue à entraîner la broche, il ne s’arrête que
lorsque la température est suffisamment redescendue: tout
risque de carbonisation est ainsi écarté.
En fin de cuisson, laissez le sélecteur de fonctions sur le
mode de cuisson en cours et ramenez le sélecteur de
températures à son minimum.
Maintien de la ventilation
Le four maintient la ventilation après une cuisson afin de
refroidir ses composants. Ne vous inquiétez donc pas, si
après l'arrêt du four, la ventilation est maintenue : elle
s'arrêtera quand la température sera inférieure à 120 °.
Eclairage du four
Vous pouvez éclairer l'intérieur du four en positionnant le
sélecteur de fonctions sur le symbole .
Le four est éclairé durant toute la phase de cuisson, quelle
que soit la fonction utilisée hors fast clean.
Si vous choisissez de retarder une cuisson, le four est
éclairé dès que vous programmez et jusqu'à la fin de la
cuisson.
5
Page 35

LE NETTO YAGE FAST CLEAN
Sécurités
En fonction fast clean la température intérieure de l’enceinte
atteint 500° nécessaires à la destruction des salissures,
voir ci-dessus.
Aussi votre four est-il doté de dispositifs de sécurité:
• la porte est automatiquement verrouillée dès que
la température est élevée afin d’éviter des risques
de brûlure.
• les éléments chauffants ne sont plus alimentés
si un événement anormal survenait.
Remarques:
1- Malgré la température intérieure élevée pendant toute
la durée de l’opération fast clean, les parois e xtérieures du
four restent tièdes grâce à:
• une isolation renforcée de l’enceinte de cuisson
• un ventilateur qui assure une circulation d’air
refroidissant les parois.
2- Il peut arriver que, à travers le hublot, vous observiez
des particules qui s’illuminent lors de leur destruction
par pyrolyse au contact des résistances, il s’agit d’une
combustion instantanée, phénomène très normal et sans
danger.
Comment enclencher le nettoyage ?
– Sortez tous les accessoires du four. Enlevez les
salissures en excès et surtout les débordements
importants afin d’éviter le risque d’inflammation ou une
production de fumée.
– Fermez la porte.
– Placez le sélecteur de fonctions sur
– Programmez. Vous avez le choix entre
· un départ immédiat: même procédé que pour la
cuisson,
· un départ différé: même procédé que pour la
cuisson,
– Prévoyez 90 minutes environ pour l'opération.
Que se passe-t-il pendant le fast clean ?
Quand la température arrive à 325 °C, la porte du four se
verrouille automatiquement : l'affichage indique "P" et la
durée qui se décrémente.
La porte reste verouillée tant que la température à l'intérieur
du four est élevée.
Précautions à prendre
1- Veillez à éliminer les projections alimentaires
importantes avec une éponge humide. Il est vivement
déconseillé d’utiliser des produits détergents ou tout autre
produit conseillé pour le nettoyage des fours.
2- Sortez tous les accessoires : ils ne sont en effet pas
conçus pour résister à de telles températures. De plus,
certains d’entre eux altéreraient le résultat de la pyrolyse
en faisant obstacle à la circulation de la chaleur sur toutes
les parois. Les accessoires peuvent être facilement
nettoyés comme de la vaisselle courante y compris en
lave-vaisselle.
3- Ne laissez pas de torchon de cuisine sur la poignée.
Attention: pendant le fast clean, les surfaces peuvent
devenir chaudes, éloignez les jeunes enfants.
PETITES ANOMALIES DE FONCTIONNEMENT
NE VOUS INQUIETEZ PAS SI...
Que se passe-t-il en fin de nettoyage ?
A la fin de l'opération fast clean, l'affichage indique "P.
0.00".
Vous ne pourrez ouvrir la porte du four qu'après que :
• la température soit redescendue à un niveau
acceptable,
• avoir ramené le sélecteur de fonction sur " / 0".
Vous pouvez constater que quelques poussières blanches
se sont déposées sur la sole et les parois du four , enlevezles avec une éponge humide quand le four est
complètement refroidi.
Si vous souhaitez profiter de la chaleur emmagasinée pour
débuter une cuisson, les poussières peuvent rester : elles
sont sans danger pour votre préparation.
Quelques anomalies de fonctionnement peuvent apparaître,
elles sont généralement dues à une mauvaise manipulation
ou à une appréciation erronée d’un phénomène.
Si au cours d’une cuisson votre four déga ge beaucoup de
fumée :
• Vér ifiez que vous avez sélectionné la bonne fonction par
rapport à la cuisson recherchée, choisi les bons
accessoires et enfourné à la hauteur conseillée.
• Vérifiez également la température sélectionnée, elle est
sans doute trop élevée pour le type de cuisson considéré.
• Vér ifiez si le degré de salissure du four ne nécessite pas
un nettoyage. Ce sont en effet les déchets alimentaires
collés sur l’émail, qui se carbonisent avec dégagement de
fumées et d’odeurs âcres.
• Des projections de graisse ou des débordements sur des
surfaces très chaudes peuvent produire de la fumée.
6
Page 36

PROGRAMMATEUR
Cadran d'affichage pour toutes
les fonctions : heure, minuterie,
durée et heure de fin de cuisson
ou de fast clean
Témoin d'utilisation de la
minuterie sonore
Touche de démarrage de
la cuisson
Touche de réglage de
la durée de cuisson
Touche de réglage de la fin
de cuisson
Touche pour régler la
minuterie sonore
Réglage de l'heure
V ous ne pouvez régler l'heure que si le sélecteur de f onction
est sur "0".
A la mise sous tension (ou après une panne de courant),
l'affichage "0.00" clignote. Appuyez sur les touches "+" et/
ou "-" pour régler l'heure.
L'heure est mémorisée et modifiable durant 3 secondes,
toutes les autres touches étant inactives.
Réglage de la minuterie
La minuterie ne fonctionne que lorsque le four est éteint
(sélecteur de fonctions sur 0).
Appuyez brièvement sur la touche et réglez le temps
avec les touches "+" et/ou "-". Dés que vous relachez les
touches, la durée choisie est mémorisée et modifiable
durant 3 secondes, le voyant s'allume, et le temps
commence à s'écouler.
La fin du temps fixé est signalé par un signal sonore qui
retentit durant 1 minute; vous pouvez l'éteindre en appuyant
indifféremment sur l'une des touches ; le v oy ant s'éteint.
La minuterie est indépendante du fonctionnement du
four.
V olume sonore
V ous pouvez régler le v olume sonore du signal en appuyant
sur la touche "-" (pendant l'émission du signal) jusqu'à
obtenir le volume souhaité.
Témoin de fonctionnement d'une
opération programmée :
- allumé : opération en cours
- éteint : opération terminée
- clignotant : opération programmée
terminée
Témoin A de programmation :
- éteint : utilisation manuelle
- allumé : programmation faite
Touches + et - pour régler les différents
affichages, mise à l'heure, minuterie,
durée et heure de fin d'une opération,
5 s.
appuyez sur :
+ pour augmenter les chiffres
- pour diminuer les chiffres
Cuisson sans programmateur
Quand votre four est éteint (sélecteur de fonctions sur 0),
toutes les touches (sauf "-" pour le réglage du volume du
signal sonore) sont inactives.
Sélectionnez une fonction en tournant la manette du
sélecteur de fonction dans le sens des aiguilles d'une
montre. Chaque fonction a une durée de cuisson
prédéterminée que vous pouvez visualiser en appuyant
sur . vous pouvez modifier le temps d cuisson en
fonction de votre recette. Pour cela, appuyez sur et
réglez la durée souhaitée au moyen des touches "+" et "-".
L'affichage indique une température conseillée, qui est
indépendante de celle indiquée sur le sélecteur de
température : vous pouvez la modifier en tournant la manette du sélecteur de températures.
Pour la fonction "gril", l'affichage indique un niveau de
puissance compris entre 1 et 5, 5 étant la puissance
maximale.
Votre four est prêt à démarrer une cuisson : appuyez sur
la touche . Le four démarre la phase de préchauffage
pendant laquelle le symbole clignote. Il devient fixe
quand le préchauffage est terminé (environ 10 minutes).
Si, après avoir sélectionné une fonction depuis une minu-
te, vous ne validez pas le début de cuisson, l'affichage
indique "OFF" et les touches sont désactivées. P ositionnez
alors le sélecteur de fonctions sur " / 0" et procédez aux
différents réglages.
ATTENTION
Votre appareil est doté d'un système de diagnostic
d'erreur signalé sur le programmateur par l'affichage
"FnFm" (n et m sont des chiffres).
Dans ce cas, vous devez contacter le centre technique
qualifié le plus proche de votre domicile.
7
Page 37

CUISSONS PROGRAMMÉES
Cuisson programmée en départ immédiat
La cuisson démarre immédiatement et s'arrête
automatiquement à la fin du temps programmé.
Procédez ainsi :
• placez le sélecteur de fonctions sur la fonction
choisie,
• réglez la température grâce au sélecteur de
température (de 10° en 10°) si celle qui est conseillée
ne vous convient pas,
Pour la fonction "gril", l'affichage indique un niveau de
puissance compris entre 1 et 5, 5 étant la puissance
maximale.
• à chaque fonction est associée une durée conseillée
que vous pouvez modifier en appuyant sur et sur
les touches "+" et/ou "-" (la durée doit comprendre le
temps de préchauffage environ 10 minutes) : la durée
de cuisson est ainsi mémorisée et est modifiable durant
3 secondes.
Durant la phase de préchauffage, le symbole clignote et
le temps de cuisson est affiché. A la fin du préchauffage,
le symbole devient fixe et le four émet 3 bips sonores.
Il n'y a pas de phase de préchauffage pour les "cuissons
rapides" et les "cuissons gril".
Pendant la cuisson, l'affichage indique le temps de cuisson
restant. Vous pouvez visualiser la température en appuyant
sur la touche "+".
Cuisson programmée en départ différé
Le programmateur détermine automatiquement l'heure de
début de cuisson en fonction des paramètres que vous
avez déterminé : durée de cuisson et fin de cuisson.
Procédez ainsi :
• placez le sélecteur de fonctions sur la fonction
choisie,
• réglez la température grâce au sélecteur de
température si celle qui est conseillée ne vous convient
pas,
Pour la fonction "gril", l'affichage indique un niveau de
puissance compris entre 1 et 5, 5 étant la puissance
maximale.
• appuyez sur la touche pour accéder au réglage
de la durée,
• réglez la durée en appuyant sur les touches "+" et/
ou "-" (la durée doit comprendre le temps de
préchauffage) : la durée de cuisson est ainsi mémorisée
et est modifiable durant 3 secondes.
• pour retarder une cuisson, il est nécessaire de
déterminer l'heure de fin de cuisson en appuyant
successivement sur les touches puis sur "+" et/ou
"-" : la fin de cuisson est ainsi mémorisée et modifiable
pendant 3 secondes.
La durée minimum de cuisson programmable est de 2
minutes. La durée maximum de cuisson programmable est
de 10h.
La durée minimum de cuisson programmable est de 2
minutes. La durée maximum de cuisson programmable est
de 10h.
• appuyez sur la touche pour démarrer la cuisson.
Si, après avoir sélectionné une fonction depuis une minute, vous ne validez pas le début de cuisson, l'affichage
indique "END" et les touches sont désactivées. P ositionnez
alors le sélecteur de fonctions sur " / 0" et procédez aux
différents réglages.
En fin de cuisson, un signal sonore retentit durant une
minute et l'affichage indique "END" ; vous pouvez stopper
le signal sonore en appuyant sur une des touches.
• Ramenez le sélecteur de fonctions sur "0" :
l'affichage "END" disparait et indique "OFF" durant 3
secondes
Durant la cuisson, vous pouvez modifier la fonction (sans
influencer la durée et la température), la température (sans
influencer la durée) et la durée de cuisson.
Vous pouvez stopper une cuisson et arrêter le four en
plaçant le sélecteur de fonction sur "0". Dans ce cas
l'affichage indique "OFF" durant 3 secondes avant de
s'éteindre.
• appuyez sur la touche , le symbole "A" s'allume.
Entre le moment où vous programmez et le début de la
cuisson, seules la température et la fonction sont
modifiables.
Au moment déterminé de début de cuisson, le four s'allume
et démarre la phase de préchauffage, durant laquelle le
symbole clignote ; la durée de cuisson est affichée.
A la fin du préchauffage, la cuisson démarre, le symbole
devient fixe et le programmateur émet 3 bips.
Il n'y a pas de phase de préchauffage pour les "cuissons
rapides" et les "cuissons gril".
• Ramenez le sélecteur de fonctions sur " / 0".
8
Page 38

QUELQUES EXEMPLES DE CUISSONS SUR UN SEUL NIVEAU
Recettes Mode de cuisson Température Temps Gradin Remarques Préchauffage
Pain (mic he -1 k g)
Feuilletés individuels
Pizza (pâte à pain)
Quiche lorraine
(pâte brisée)
Soufflé au fromage
Pâté de campagne
Gigot d'agneau
Gratin dauphinois
Multicuisson 210°C 30-35' 2 Sur plateau ém aillé Oui
Multicuisson 200°C
Pizza 240°C 10-15' 1 Sur plateau émaillé Ou
Pizza 220°C 30 ' 1 Moule sur plateau ém aillé Oui
Multicuisson 200°C 30-40' 2
Traditionnel 180°C 50-60' 2
Gratin 210°C
Gratin 200°C
20-25'
suivant épaisseur
1 heure pour
1,5 à 2 kg
40-45' suivant
épaisseur
2 Sur plateau ém aillé Oui
Moule diam. 20cm sur plateau
Au bain- m a rie d a n s pla te au é m a illé
2-1* Viande sur g r ille Non
2 Plat sur plat ea u é m a illé Oui
émaillé
(départ eau chaude)
Oui
Oui
Poisson
Poulet
Rôti de bœuf
Rôti de porc
Rôti de veau
Tomat es f arcies
Plats surgelés
Lasagnes
Moussaka
Brioche
Cake
Choux
Crème caramel
Génoise
Macarons
Meringues blanches
Meringues ambrées
Pommes au four
Sablés
Tarte aux pommes
Sablés (au beurre)
Tarte à la confiture
Salés apéritif (pâte
brisée)
X - Y* dans la colonne gradin :
X = gr ille ou b ro c he p lac é s a u g rad in x
Y = pla te au é m a illé p la cé a u g ra d in Y p our la récupé ra tion d e s ju s et g rais se s
Rappel : la grille est toujours utilisée en décrochement vers le bas.
Tradition ne l
Gratin
Gril
Gratin
Gril tournebroche
Gratin 210°C
Gratin 21 0° C 1 heu re p o u r 1k g 2-1* Viande su r gr ille Non
Gratin 21 0° C 1 heu re p o u r 1k g 2-1* Viande su r gr ille Non
Multicu iss on 200°C 2 0 -2 5 ' 2 Plat sur plate a u é m aillé Oui
Cuisson rapide
Cuisso n ra pid e 200°C Suivant épaisseur 2 Pla t su r plateau ém a illé Non
Cuisso n ra pid e 200°C Suivant épaisseur 2 Pla t su r plateau ém a illé Non
Pâtisserie 160°C 35-45' 2
Pâtisserie 160°C 60' 2
Pâtisserie 200°C 20-25' 2
Traditionnel 18 0°C 30' 2
Pâtisse r ie 190°C 30' 2 Moule alum iniu m sur p lat eau ém aillé O ui
Pâtisserie 180°C
Pâtisserie 70-80°C
Pâtisserie 110°C
Multicuisson 210°C
Pâtisse r ie 190°C 10-15' 2 Platea u émaillé Ou i
Pizza 220°C 30 ' 1 Moule sur plateau ém aillé Oui
Chaleur brassée 190°C 10-15' 2 Moule sur plateau émaillé O ui
Chaleur brassée 190°C 15-25' 2 Moule sur plateau émaillé O ui
Chaleur brassée 190°C 10-15' 2 Moule sur plateau émaillé O ui
200°C
240°C
250°C
210°C
250°C
suivant
indications sur
emballage
Suivant nature
poisson et épaisseur22-1*
Variable suivant
degré de cuisson
suivant in dic atio ns
sur emballage
suivant grosseur
suivant grosseur
suivant grosseur
suivant grosseur
1 heure pour
1,2 à 1,5 kg
15-20'
3 heures
2 heures
20-25'
Filets+liq uid es, p late au é m aillé
Entier s ur gr ille
2-1*
2-1*
3-1*
2-1* Viande sur g r ille Non
2 Plat sur plat ea u é m a illé Non
2 Sur plateau ém aillé Oui
2 Séchage pour pe tites meringues Oui
2 Séchage pour pe tites meringues Oui
2 Plat sur plat ea u é m a illé Oui
Grillades poisson sur grille
Viande s ur g rille
T.Broche porte fermée
Moule aluminium sur
platea u é m a illé
Moule aluminium sur
platea u é m a illé
Petites profiterolles non sucrées sur
platea u é m a illé
Ramequins individuels au bain-
marie départ eau chaude
Oui
Non
Oui
Oui
Oui
Oui
9
Page 39

CONSEILS DE CUISSON
La cuisson est par définition le passage de l'état cru à
l'état cuit.
Le résultat obtenu est apprécié en fonction de différents
critères : la coloration, le développement éventuel de
la préparation, le moëlleux, le degré de cuisson souhaité,
...
Les réglages du four (températures et temps de cuisson)
dépendent évidemment de deux paramètres importants :
ENTRETIEN
Important: débranchez l’appareil avant de procéder à
toute opération de nettoyage.
Pour assurer la longévité de votre four, il est indispensable
d’effectuer fréquemment un nettoyage général et soigné,
en tenant compte des conseils suivants.
L'intérieur du four
Il est recommandé de nettoyer le f our après chaque usage
surtout après la cuisson de rôtis. Il faut en effet éviter de
laisser s’accumuler les salissures projetées pendant la
cuisson: celles-ci recuiraient à chaque nouvel usage et
se carboniseraient en dégageant de la fumée et des
odeurs désagréables.
Usage de papier aluminium
Pour éviter d’avoir à nettoyer la sole, vous pourriez être
tenté de tapisser cette surface d’un papier aluminium.
Nous vous le déconseillons vivement. La feuille
d’aluminium en contact direct avec l’émail chauffé
risque de fondre et de détériorer irréversiblement
l’émail du moufle.
- le volume de la préparation,
- la capacité de l'aliment à prendre de la couleur (quantités
de sucre, d'oeufs dans la recette).
Les réglages de cuisson proposés dans notre tableau
ont été effectués avec des paramètres bien précis et
vous serez donc peut-être amenés à les modifier
légèrement afin de les adapter à votre propre
préparation et au degré de cuisson que vous souhaitez.
démonter la porte du four en procédant comme suit (fig.2-
3) :
• Ouvrez complètement la porte et soulevez les 2 leviers
“B” (fig. 2) ;
• Fermez à présent partiellement la porte et soulevez-la
en dégageant les crochets “A” comme illustré figure 3.
Pour remonter la por te :
• Tenez la porte en position verticale, introduisez les 2
crochets “A” dans les fentes ;
• Vérifiez que l’encoche “D” soit bien insérée sur le bord
de la fente (déplacez légèrement la porte en avant et en
arrière) ;
• Porte complètement ouverte, décrochez les 2 leviers “B”
vers le bas, puis fermez la porte.
Plan de cuisson:
• Les pièces amovibles des brûleurs doivent être lavées
souvent avec de l'eau chaude et du détergent en veillant
à éliminer toute incrustation possible. Vérifiez qu’aucun
orifice de sortie du gaz ne soit obstrué. Il faudra ensuite
les essuyer soigneusement avant de les réutiliser.
• Nettoyer régulièrement l’e xtrémité des bougies d’allumage
automatique du plan de cuisson.
Extérieur du four:
• Effectuer le netto yage seulement lorsque le f our est froid.
• La surface en acier inox et surtout les zones comportant
les symboles sérigraphiés ne doivent pas être nettoyées
avec des détergent abrasifs; utiliser de préférence
uniquement un chiffon humide avec de l'eau tiède et du
liquide vaisselle. L'acier inox peut rester taché s'il est en
contact prolongé avec de l'eau calcaire ou un détergent
agressif. Il est donc nécessaire de rinçer abondamment
la surface après le nettoyage.
Important: le nettoy age doit être effectué dans le sens
horizontale (sens du dessin de l'acier).
• Après le nettoyage il est possible de traiter l'inox pour
rendre à la surface sa brillance: utiliser exclusivement
un produit spécifique pour l'acier inox.
Avertissement: ne pas utiliser de poudre abrasive, de
détergent agressif ou de liquide acide pour le nettoyage.
Démontage/montage de la porte du four
Pour faciliter le nettoyage à l’intérieur du four, vous pouvez
FIG. 2
FIG. 3
Remplacement de la lampe du four
• Avant toute opération, déconnectez l'appareil en le
débranchant ou en agissant sur l'interrupteur général pour
couper l'électricité.
• A l'aide d'un objet étroit et plat (tournevis, manche de
cuillère,...), retirez le couvercle en verre.
• Dévissez la lampe et
remplacez-la par une
lampe de même type:
- tension 230/240 W
- puissance 15 W
- culot E 14
• Remettez en place la
cavité
lampe
joint
vitre en prenant bien
soin de repositionner
correctement le joint.
hublot
Graissage des robinets
Il peut arriver qu'au bout d'un certain temps un robinet se
bloque ou tourne difficilement, il faut alors procéder à son
nettoyage interne et remettre de la graisse. Cette
opération doit être effectuée par un technicien agréé
par le fabricant.
10
Page 40

INSTRUCTIONS POUR L'INST ALLA TION
Les instructions qui suivent s’adressent à l’installateur
qualifié afin qu’il exécute les opérations d’installation,
réglage et entretien technique conformément aux normes
en vigueur.
Important: avant d’effectuer toute opération de réglage,
entretien, etc., assurez-vous que l'appareil soit
déconnecté électriquement. Si l’appareil doit
obligatoirement rester sous tension, il faudr a prendre toutes
les mesures de précaution nécessaires.
La cuisinière a les caractéristiques techniques suivantes:
Cat. II 2E+3+
Classe 1 Classe 2 sous-classe 1
Les dimensions de la cuisinière sont indiquées dans la
figure page 2. Afin de garantir un fonctionnement parfait
de l’appareil installé à côté des meubles, il est
indispensable de respecter les distances minimales
indiquées à la fig.4. En outre, les surfaces adjacentes et
la paroi arrière doivent être en mesure de résister à une
surchauffe de 65°C.
fig.5
min. 50mm
min. 700mm
fig.4
fig.6
En cas de cheminée ou conduit de
fumée ramifié Directement à l'extérieur
(réservé aux appareils de cuisson)
Ventilation de la cuisine
Il est indispensable que la pièce où l’appareil est installé
dispose d'une quantité d’air égale à la quantité nécessaire
pour une bonne combustion du gaz et l’aération de la pièce.
L’afflux naturel de l’air doit se produire à travers des
ouvertures permanentes réalisées dans les murs de la
pièce qui donnent vers l’extérieur, ou bien des conduits de
ventilation individuels ou collectifs ramifiés, conformes aux
normes en vigueur. L’air de ventilation doit être prélevé
directement de l’extérieur, dans une zone loin de sources
de pollution. L’ouverture d’aération devra avoir les
caractéristiques suivantes (fig.7A):
• avoir une section libre totale nette de passage de 6 cm²
au moins pour chaque kW de débit thermique nominal de
l’appareil, avec un minimum de 100 cm² (le débit
thermique est indiqué sur la plaquette signalétique);
• être réalisée de manière à ce que les bouches
d’ouverture, aussi bien à l’intérieur qu’à l’extérieur du
mur, ne puissent pas être obstruées;
• être protégée par exemple par des grilles, treillis
métallique, etc. de façon à ne pas réduire la section utile
susmentionnée;
• être située à une hauteur proche du niveau du sol.
Détail A Local Local à
adjacent ventiler
Avant d'installer la cuisinière, fixez les pieds support de
95÷155 mm de haut (fournis avec l'appareil) dans les trous
prévus dans le bas de la cuisinière (fig.5). Ces pieds sont
réglables au moyen de vis, ils permettent par conséquent
de mettre la cuisinière à niveau en cas de besoin.
Positionnement
Cet appareil ne peut être installé et utilisé que dans un
local toujours parfaitement aéré conformément aux normes
en vigueur. Les conditions essentielles suivantes doivent
être respectées:
• L ’appareil doit évacuer les produits de la combustion dans
une hotte prévue à cet effet qui doit être raccordée à
une cheminée, à un carneau ou directement à l’extérieur
(fig.6).
• Si l’installation de la hotte n’est pas possible, il est permis
d’installer un électroventilateur, sur une fenêtre ou sur
un mur donnant vers l’extérieur, qui devra être mis en
marche en même temps que l'appareil.
A
Exemples d'ouverture de ventilation Agrandissement de la fissure
pour l'air comburant entre la porte et le sol
fig. 7A fig.7B
L'afflux de l'air peut provenir également d'une pièce voisine
pourvu que cette pièce ne soit pas une chambre à coucher
ou une pièce à risque d'incendie telle que débarras, garage,
dépôt de matériaux combustibles, etc., et qu'elle soit
ventilée conformément aux normes applicables en la
matière. Le flux d'air de la pièce voisine jusqu'à la pièce à
ventiler peut se produire librement à trav ers des ouvertures
permanentes, ayant une section
11
Page 41

INSTRUCTIONS POUR L'INST ALLA TION
A
non inférieure à celle susmentionnée. Ces ouvertures
pourront également être réalisées en agrandissant la fissure
entre la porte et le sol (fig. 7B). Si on utilise un
électroventilateur pour l'évacuation des produits de la
combustion, l'ouverture de ventilation devra être augmentée
en fonction du débit d'air maximal de ce dernier.
L'électroventilateur devr a av oir un débit suffisant à garantir,
pour la pièce de la cuisine, un renouvellement horaire d'air
égal à 3-5 fois son volume. Une utilisation intensive et
prolongée de l'appareil peut exiger une aération
supplémentaire, par exemple l'ouver ture d'une fenêtre ou
une aération plus efficace en augmentant la puissance
d'aspiration de l'électroventilateur s'il existe. Les gaz de
pétrole liquéfiés, plus lourds que l'air, se déposent et
stagnent vers le bas. Par conséquent, les pièces contenant
des bouteilles de GPL doivent disposer d'ouvertures vers
l'extérieur au niveau du sol afin de permettre l'évacuation à
partir du bas d'éventuelles fuites de gaz. En outre, ne jamais
stocker des bouteilles de GPL (même vides) dans des
locaux souterrains. Il est oppor tun de conserver dans la
pièce uniquement la bouteille de gaz utilisée, raccordée
loin de sources de chaleur qui risqueraient d'en augmenter
la température au-delà de 50 °C.
Alimentation gaz
• Le raccord de l'appareil à la canalisation du gaz ou à la bouteille
de gaz doit être effectué en conformité avec les règlements
en vigueur et après avoir vérifié que l'appareil soit bien réglé
pour ce type de gaz.
• Cet appareil est prédisposé pour fonctionner avec le gaz
indiqué sur l'étiquette apposée sur le plan de cuisson. Si
le plan de cuisson doit être raccordé à un gaz différent
du type de gaz indiqué sur l'étiquette, il faudra remplacer
les injecteurs (en dotation) en respectant les instructions
du paragraphe "Adaptation aux différents types de gaz".
• Afin de garantir un fonctionnement sûr , un usage approprié
de l'énergie et une plus longue durée de l'appareil, vérifiez
que la pression d'alimentation corresponde aux valeurs
indiquées sur le tableau 1 "Caractéristiques des brûleurs
et des injecteurs", dans le cas contraire installez sur la
canalisation d'arrivée du gaz un régulateur de pression
spécial conforme aux normes applicables en la matière.
• Effectuez le raccord de manière à ne pas provoquer de
sollicitations d'aucune sorte sur l'appareil.
Reliez le raccord fileté ½"G mâle cylindrique/conique "F"
(fig. 8) placé sur le côté arrière de l'appareil, par tuyau
métallique rigide avec des raccords (fig. 8-D) conformes
aux normes applicables, ou bien par tuyau flexible métallique
à paroi continue avec raccords (fig. 8-C) conforme aux
normes, qui ne doit pas dépasser 2000 mm d'extension
totale. Vérifiez en outre que le tube de raccordement ne
puisse entrer en contact avec des parties mobiles risquant
de l'abîmer ou de l'écraser. Si vous utilisez un tuyau flexible
en caoutchouc, appliquez l'about annelé spécial pour gaz
liquide (fig. 8-A) ou pour gaz naturel (fig. 8-B).Le joint "G"
(fourni) doit ètre utilisèpour tous les types des raccordement
. Fixez les deux extrémités du tuyau au moyen de colliers
serre-tube "E" selon les normes en vigueur. Le tuyau flexib le
doit être conforme aux normes en vigueur et spécifique
pour le type de gaz utilisé.
En outre:
• il doit être le plus court possible, avec une longueur
maximale de 1,5 mètres;
• il ne doit pas présenter de plis ou d'étranglements;
• il ne doit pas entrer en contact avec la paroi arrière de
l'appareil, ou de toute façon avec des par ties pouvant
atteindre une température de 50°;
• il ne doit pas passer à travers des orifices ou des fentes destinés à l'évacuation des gaz brûlés du four;
• il ne doit pas entrer en contact avec des parties coupantes ou des arêtes vives;
• il doit pouvoir être facilement examiné tout le long de
son parcours afin de contrôler son état de conservation;
• il doit être remplacé avant la date imprimée sur le tuyau
même.
Important : Pour eff ectuer le raccordement avec du gaz
liquide (en bouteille), interposez un régulateur de
pression conforme aux normes en vigueur.
A la fin du travail, assurez-vous que l'étanchéité du
raccordement gaz soit parfaite en utilisant de l'eau
savonneuse (n'utilisez jamais une flamme!). Assurez-vous
que la conduite du gaz naturel suffit à alimenter l'appareil
quand tous les brûleurs sont allumés.
Adaptation aux différents types de gaz (Instructions
pour le plan)
Pour adapter l'appareil à un type de gaz autre que celui
pour lequel il a été conçu (indiqué sur la plaquette fixée
sur le plan ou sur l'emballage) remplacez les injecteurs de
tous les brûleurs en procédant comme suit :
• enlevez les grilles du plan de cuisson et sortez les brû-
leurs de leur logement.
• dévissez les injecteurs (fig. 9) à l'aide d'une clé à tube
de 7 mm. et remplacez-les par les injecteurs adaptés au
nouveau type de gaz (voir tableau 1 "Caractéristiques
des brûleurs et des injecteurs") remontez les différentes
parties en effectuant les opérations dans le sens inverse.
• en fin d’opération, remplacez l’ancienne étiquette de
calibrage par la nouvelle, correspondant au nouveau gaz
utilisé, que vous trouverez dans nos centres de Service
Après-vente.
Note
Si la pression du gaz utilisé est différente (ou variable) par
rapport à la pression prévue, il faut installer, sur la
tuyauterie d'entrée un régulateur de pression approprié
conforme aux Normes applicables en la matière sur les
"régulateurs pour gaz canalisés".
fig.9
fig.10
fig.8
12
Page 42

INSTRUCTIONS POUR L'INST ALLA TION
Réglage de l'air primaire des brûleurs
Les brûleurs ne nécessitent d'aucun réglage de l'air primaire.
Réglage des minima
• Placer le robinet sur la position de minima;
• enlevez la manette du robinet et effectuez le réglage au
moyen de la vis de réglage située à droite du robinet
(fig.10) jusqu'à ce que vous obteniez une flamme
régulière, utilisez un tournevis (en dévissant la vis le
minima augmente, en la vissant il diminue).
N.B.: en cas de gaz liquides, il faut visser à fond la vis
de réglage.
RACCORDEMENT ELECTRIQUE
Les fours munis d'un cordon d'alimentation tripolaire, sont
prévus pour un fonctionnement au courant alternatif à la
tension et à la fréquence d'alimentation indiquées sur la
plaquette des caractéristiques (placée sur l'appareil) et dans
le livret d'instructions. Le conducteur de terre du câble est
jaune-vert.
Montage du cordon d'alimentation
Ouverture du bornier :
• Faites pression à l'aide d'un tournevis sur les languettes
latérales du couvercle du bornier ;
• Tirez et ouvrez le couvercle du bornier.
Pour monter le cordon d'alimentation, procédez comme suit
:
• dévissez la vis du serre-câble de même que les trois
vis des contacts L-N-
• Fixez les fils sous les têtes de vis en respectant les
couleurs : Bleu (N) Marron (L) Jaune-Vert
• fixez le câble d'alimentation dans le serre-câble correspondant et fermez le couvercle
Branchement du câble d'alimentation au réseau
électrique
Montez sur le câble une fiche normalisée pour la charge
indiquée sur la plaquette des caractéristiques; en cas de
branchement direct au réseau, intercalez entre l'appareil
et l'installation électrique un interrupteur omnipolaire ayant
au moins 3 mm d'ouverture entre les contacts, dimensionné
à la charge et conforme aux normes applicables
(l'interrupteur ne doit pas interrompre le fil de la terre).
Le câble d'alimentation ne doit atteindre, en aucun point,
des températures dépassant de 50°C la température
ambiante.
Avant de procéder au branchement, vérifiez que :
• La sécurité électrique de cet appareil n'est assurée que
si ce dernier est correctement raccordé à une
installation de mise à la terre conformément aux normes
applicables en matière de sécurité électrique. Il est
indispensable de vérifier si cette condition fondamentale
de sécurité est bien remplie; en cas de doute, faites
appel à un professionnel du secteur pour un contrôle
minutieux de l'installation électrique. Le fabricant ne peut
• Une fois obtenu le débit minimal souhaité, allumez le
brûleur et tournez brusquement la manette de la position
de ralenti à la position d'ouverture maximale et vice
versa à plusieurs reprises. Vérifiez ainsi qu'il n'y ait pas
extinction du brûleur.
• En cas de mauvais fonctionnement du dispositif de sécurité gaz (thermocouple) équipant cer tains appareils,
réglez les brûleurs au minima et augmentez leur débit
en agissant sur la vis de réglage.
Après avoir procédé à ce réglage, reposez les scellés sur
les by-pass en utilisant de la cire ou autre matériau
équivalent.
en aucun cas être considéré responsable des dommages pouvant survenir si l'installation de mise à la terre fait
défaut.
• Avant de brancher l'appareil, vérifiez si les caractéristiques techniques reportées sur les étiquettes (apposées
sur l'appareil et/ou sur l'emballage) correspondent bien à
celles de votre installation électrique et gaz.
• Vérifiez si la charge électrique de l'installation et des prises de courant est apte à supporter la puissance maximale de l'appareil figurant sur la plaquette. En cas de
doute, faites appel à un prof essionnel du secteur.
• En cas d'incompatibilité entre la prise et la fiche de l'appareil, faites remplacer cette prise par une autre appropriée par un professionnel du secteur . Ce dernier devra
aussi vérifier si la section des câbles de la prise est apte
à supporter la puissance absorbée par l'appareil. En général, il vaut mieux n'utiliser ni adaptateurs, ni prises multiples ni rallonges. Si leur emploi s'avère indispensable,
n'utilisez que des adaptateurs simples ou multiples et
des rallonges conformes aux normes de sécurité, tout en
veillant à ne pas dépasser la limite de la charge électrique indiquée sur l'adaptateur simple ou sur les rallonges
et la puissance max. indiquée sur l'adaptateur multiple.
La fiche et la prise doivent être facilement accessibles.
NL
13
Page 43

CARACTÉRISTIQ UES DES BRÛLEURS ET DES INJECTEURS
Tableau 1 Gaz liquides Gaz naturels
BRÛLEUR
Diamètre
brûleur
(mm)
Puissance
thermique
kW (H.s.*)
Nom. Red. G30 G31 G20 G25
By-pass
1/100
(mm)
Injecteur
1/100
(mm)
Débit *
g/h
Injecteur
1/100
(mm)
Débit *
l/h
C. Rapide
B. Demi-rapide
A. Au xiliaire
D. Triple Couronne (Gaz Liquides)
D. Tr iple Couronne(Gaz naturels)
Pression de alimentation
* A 15°C et 1013 mbar-gaz sec
Propane G31 H.s. = 50,37 MJ/kg
Butane G30 H.s. = 49,47 MJ/kg
Méthane G20 H.s. = 37,78 MJ/m
Méthane G25 H.s. = 32,49 MJ/m
100 3.00 0.7 40 86 218 214 116 286 332
75 1.90 0.4 30 70 138 118 106 181 210
55 1.00 0.4 30 50 73 71 79 95 111
130 3.25 1.5 63 91 236 232
130 3.40 1.5 133 324 376
Nom.(mbar)
Min.(mbar)
Max.(mbar)
3
3
Cet appareil est conforme aux Directives Communautaires suivantes :
- 73/23/CEE du 19/02/73 (Basse Tension) et modifications successives ;
- 89/336/CEE du 03/05/89 (Compatibilité électromagnétique) et modifications successives ;
- 90/336/CEE du 29/06/90 (Gaz) et modifications successives;
- 93/68/CEE du 22/07/93 et modifications successives.
28-30
20
35
37
25
45
20
17
25
25
20
30
CARACTÉRISTIQUES TECHNIQUES FOUR
ETIQUETTE ENERGIE
Directive 2002/40/CE sur l'étiquette des fours électriques
Norme EN 50304
Consommation énergie convection naturelle:
fonction four : Statique
Consommation énergie déclarée pour Classe
convection for cée:
fonction four : "Pâtisserie"
14
Page 44

Wir danken Ihnen, dass Sie dieses sichere und äußerst leicht zu bedienende Ariston-Gerät gewählt haben. Um sich mit
diesem vertraut zu machen und es auf optimale Art zu gebrauchen lernen, empfehlen wir Ihnen, dieses Handbuch
aufmerksam durchzulesen. Danke.
HINWEISE
DIESE ANLEITUNGEN GELTEN NUR FÜR DIE BESTIMMUNGSLÄNDER, DEREN SYMBOLE IM HANDBUCH UND
AUF DEM TYPENSCHILD DES GERÄTES ABGEBILDET SIND.
1. Dieses Gerät wurde für den Einsatz nicht professioneller Art in
Haushalten konzipiert.
2. Lesen Sie bitte die in diesem Handbuch enthaltenen Hinweise
aufmerksam durch, da sie wichtige Angaben hinsichtlich der
Sicherheit bei der Installation, dem Gebrauch und der W artung
liefern. Bewahren Sie dieses Handbuch sorgfältig auf, um es
jederzeit zu Rate ziehen zu können.
3. Die mit Lebensmitteln eventuell in Berührung kommenden
Backofenzubehörteile bestehen aus Materialien, die den
V orschriften der EG-Richtlinien 89/109 vom 21.12.88 und der
Rechtsverordnung 108 vom 25.01.92 entsprechen.
4. Nach Entfernen der V erpackung überprüfen Sie bitte, dass das
Gerät auch nicht beschädigt wurde. Im Zweifelsfall raten wir,
das Gerät nicht zu benutzen und sich an Fachpersonal zu
wenden. Be wahren Sie V erpackungsmaterial wie Plastikbeutel,
Schaumstoffe, Nägel usw . nicht in Reichweite v on Kindern auf;
es könnte eine große Gefahr darstellen.
5. Um Kratzer zu vermeiden, wurden einige Teile mit einem
abnehmbaren Schutzfilm überzogen. Vor Inbetriebnahme des
Gerätes muss dieser Film entfernt werden, die geschützten T eile
sind daraufhin mit einem weichen Tuch und einem milden
Reinigungsmittel zu reinigen. V erwenden Sie hierzu bitte k eine
Scheuermittel. Es empfiehlt sich, den Backofen vor erstmaligem
Benutzen für etwa 30 Minuten auf Höchsttemperatur in Betrieb
zu setzen, um eventuelle F ertigungsrückstände zu beseitigen.
6. Die zur Installation und Einstellung erforderlichen Arbeiten sind
gemäß den einschlägigen Richtlinien und ausschließlich durch
Fachpersonal durchzuführen. Für die entsprechenden
spezifischen Anweisungen verweisen wir auf den für den
Installateur bestimmten Teil des Handbuches.
7. V or Anschluss des Gerätes kontrollieren Sie bitte, dass die auf
dem Typenschild (befindlich auf dem unteren Geräteteil und auf
der letzten Seite des Handbuchs) angegebenen Daten mit
denen des Strom- und Gasversorgungsnetzes übereinstimmen.
8. Bei in Betrieb befindlichem Backofen oder Grill könnten das
Backofenf enster und die daran ang renz enden T eile sehr heiß
werden. Spielende Kinder sollten demnach ferngehalten werden.
9. Stellen Sie sicher, dass die elektrische Leistung der Anlage und
der Steckdosen der maximalen, auf dem Typenschild
angegebenen Höchstleistung des Gerätes entspricht. Im
Zweifelsfalle ziehen Sie bitte einen F achmann zu Rate.
10. Überprüfen Sie regelmäßig den Gasanschlussschlauch auf
seine Beschaffenheit, und lassen Sie diesen durch
Fachpersonal austauschen, sobald er irgendwelche Anomalien
aufweist.
11. Das V ersorgungskabel und der Gasanschlussschlauch dieses
Gerätes dürfen nicht seitens des Verbrauchers ausgetauscht
werden. Bei Beschädigung wenden Sie sich zwecks
Austauschs ausschließlich an eine autorisierte
Kundendienstzentrale.
12. Lassen Sie das Gerät nicht unnötigerweise eingeschaltet.
Schalten Sie den Gerätehauptschalter ab und drehen Sie den
Gashahn zu, wenn das Gerät nicht gebraucht wird.
13. Brenner und Roste bleiben auch nach Ausschalten des Gerätes
noch lange heiß. Achten Sie darauf, diese nicht zu berühren.
14. Stellen Sie keine unstabilen oder verformten Töpfe auf die
Brenner, um Unfälle durch Umkippen zu vermeiden. Stellen Sie
Stieltöpfe so auf die Kochstelle , dass ein zufälliges Anstoßen
vermieden wird.
15. Benutzen Sie keine brennbaren Flüssigkeiten in der Nähe des
in Gebrauch befindlichen Gerätes.
16. Wird der Herd auf einem Sockel aufgestellt, dann achten Sie
bitte darauf, dass das Gerät f est genug ve rankert wurde, und
nicht von diesem Sockel rutschen kann.
17. Verwenden Sie bitte keine Dampfreiniger zur Reinigung
Ihres Gerätes.
18. Öffnungen und Schlitze für Belüftung und Wärmeableitung
dürfen nicht verstopft werden.
19. Dieses Gerät darf nur für den Zweck, für den es geschaffen
wurde, eingesetzt werden. Jeder andere Einsatz (zum Beispiel:
zum Beheizen von Räumen) ist als unsachgemäß und
gefährlich anzusehen. Der Hersteller kann für eventuelle, durch
unsachgemäßen Gebrauch verursachte Schäden nicht zur
V erantwortung gezogen werden.
20. Die V erwendung eines jeden Elektrogerätes setzt die Einhaltung
einiger wichtiger Grundregeln voraus, insbesondere folgender:
• Berühren Sie das Gerät nicht mit nassen oder feuchten
Händen oder Füßen;
• Benutzen Sie das Gerät nicht barfuß;
• Verwenden Sie keine Verlängerungen, es sei denn mit
besonderer V orsicht;
• Ziehen Sie den Stecker nicht am Versorgungskabel oder
sogar an dem Gerät selbst aus der Steckdose;
• Setzen Sie das Gerät nicht der Witterung aus (Regen, Sonne
usw.);
• Lassen Sie das Gerät nicht von unbeaufsichtigten Kindern
oder unbefugten Personen ben utzen.
21. Bei Störungen und/oder schlechter Betriebsweise, schalten Sie
das Gerät aus. Wenden Sie sich zwecks eventueller
Reparaturen ausschließlich an eine anerkannte
Kundendienststelle und verlangen Sie den Einsatz von
Originalersatzteilen. Die Nichtbeachtung dieser Hinweise kann
die Sicherheit des Gerätes in Frage stellen.
22. Vergewissern Sie sich stets, dass sich die Reglerknöpfe
auf Position
Gebrauch befindet.
23. Soll das Gerät nicht mehr verwendet werden empfehlen wir,
dieses durch Durchschneiden des Versorgungskabels, nach
Herausziehen desselben aus der Steckdose, unbrauchbar zu
machen. F erner raten wir, jene Geräteteile zu v ernichten, die
vor allem für Kinder, die das unbr auchbare Gerät zum Spielen
benutzen könnten, eine Gefahr darstellen.
24. Bei in Betrieb befindlichem Gerät werden die Heizelemente und
einige Ofentürteile sehr heiß. Vermeiden Sie demnach, diese
zu berühren und halten Sie Kinder vom Ofen fern.
25. Gasgeräte erfordern eine ordnungsgemäße Belüftung um einen
einwandfreien Betrieb zu gewährleisten. V erge wissern Sie sich
deshalb davon, dass bei der Installation die im Abschnitt
"Aufstellung" aufgeführten Anforderungen gegeben sind.
" / 0" befinden, wenn sich das Gerät nicht in
1
Page 45

BESCHREIBUNG DES HERDES
CP 649 FT.2
CP 759 FT
D
I
G
H
M
M
M
M
700
D
I
G
H
M
M
M
M
M
A Kleinbrenner
B Normalbrenner
C Schnellbrenner
D Brenner mit Dreifachkrone
E Zündkerze Gasbrenner
F Sicherheitsvorrichtung - Diese spricht an, wenn die
Flamme unversehens erlöschen sollte (durch Überlaufen
F
von Flüssigkeiten, Durchzug usw.), und unterbricht
automatisch die Gaszufuhr.
G Backofen-Reglerknopf (Funktionswähler)
I Timer
E
H Thermostatenregler (Temperaturwähler)
M Reglerknöpf e K ochfeldbrenner
R Kochfeldroste
2
Page 46

BEDIENUNGSANLEITUNG
Gasbrenner
Auf der Bedienblende sind um jeden Drehknopf "M" herum
bzw. auf dem Drehknopf selbst folgende Symbole abgebildet:
Hahn
Geschlossen
Maximale Einstellung
Kleinste Einstellung
Die neben den Reglerknöpfen aufgedruckten Symbole
zeigen an, welcher Kochfeldbrenner dem jeweiligen Knopf
entspricht.
Die Brenner sind mit einer ThermoelementSicherheitsvorrichtung gegen Gasverluste ausgestattet.
Letztere unterbricht automatisch die Gaszufuhr, wenn die
Flamme während des Betriebs erlischt.
Zur Zündung eines Brenners verfahren Sie wie folgt:
• Drehen Sie den entsprechenden Reglerknopf gegen den
Uhrzeigersinn bis auf das Symbol der großen Flamme;
• drücken Sie den Reglerknopf bis zum Anschlag, um die
Gaszündautomatik einzuschalten;
Da der Brenner mit einer Sicherheitsvorrichtung "F"
ausgestattet ist, muss der Reglerknopf für ca. 6
Sekunden gedrückt werden, bis die
Sicherheitsvorrichtung, dank derer die Flamme
automatisch gezündet wird und brennend gehalten
bleibt, heiß wird.
• lassen Sie den Reglerknopf wieder frei und vergewissern
Sie sich, dass die Flamme gleichmäßig brennt. Sollte
dies nicht der Fall sein, ist Obiges zu wiederholen.
Zur Einstellung der niedrigsten Leistung drehen Sie den
Reglerknopf auf die kleine Flamme. Mittlere Leistungsstuf en
erhalten Sie durch Drehen des Reglerknopfes auf eine
Zwischenposition zwischen der großen und kleinen
Flamme.
Praktische Hinweise zum Gebrauch der Brenner
Um optimale Leistungen der Brenner zu gewährleisten, sollte
stets die für den jeweilig eingesetzten Brenner geeignete
Topfgröße verwendet werden, um zu vermeiden, dass die
Flammen über den Topfboden herausschlagen (siehe
nachstehende Tabelle).
Außerdem sollte die Flamme auf Minimum gedreht werden,
sobald das Gargut zu kochen beginnt.
Gasbrenner ø Topfdurchmesser (cm)
A.Kleinbrenner
B.Normalbrenner
C.Schnellbrenner
Brenner mit Dreifachkrone
D.
6 – 14
15 – 20
21 – 26
24 - 26
Als Zubehör zum Kochfeld werden
Reduzierroste mitgeliefert (Abb.1), die nur
für den Kleinbrenner "A".
Abb.1
Zum Ausschalten des Brenners wird der Reglerknopf im
Uhrzeigersinn auf die Position 'AUS' (die mit dem Symbol "
/ 0" übereinstimmt), gedreht.
Um optimale Leistungen zu gewährleisten, ist Folgendes
zu beachten: Auf die Brenner kann jede Ar t von Töpfen
gestellt werden. Wichtig ist, dass der Topfboden eben ist.
Wichtig:
• Aktivieren Sie die Zündautomatik für nicht länger als 15
Sekunden.
• Sollten Schwierigkeiten bei der Zündung auftreten, könnte
dies an eventuell in der Gasleitung befindlichen Luft
liegen.
• Sollte die Flamme unversehens erlöschen, tritt noch für
einen kurzen Augenblick Gas aus, bevor die
Sicherheitsvorrichtung anspricht. Drehen Sie den
Reglerknopf auf AUS und w arten Sie mindestens 1 Minute
bevor Sie den Brenner erneut anzünden, damit das noch
ausgeströmte Gas, das eine Gefahr darstellen könnte,
abziehen kann.
• Befindet sich das Gerät nicht in Betrieb ist
sicherzustellen, dass sich sämtliche Reglerknöpfe auf
Pos. Aus " / 0" befinden. Auch der Haupthahn sollte
abgedreht werden.
3
Page 47

DIE EINZELNEN BACK OFENFUNKTIONEN
Die Wahl der einzelnen Backofenfunktionen erfolgt bei
den ARISTON Öfen über die auf der Schalterblende
angeordneten Drehschalter und Betriebsleuchten.
DER FUNKTIONSWÄHLSCHAL TER
Der Funktionswählschalter verfügt über 10 Bezugskerben,
die mit den folgenden, der Reihe nach aufgelisteten Symbolen
gekennzeichnet sind:
" / 0" : AUS
. : Beleuchtung
: "Traditionell"
Diese Einstellung entspricht der traditionellen Garmethode
und ist ideal für die Zubereitung von Einzelgerichten. Zwei
Heizwiderstände setzen sich gleichzeitig in Betrieb (der eine
befindet sich sichtbar an der oberen Ofeninnenwand, der
andere nicht sichtbar unter dem Ofenboden). Diese beiden
Wärmequellen erhitzen die Luft im Ofeninnern: Die warme,
leichtere Luft steigt nach oben und sorgt somit für die
Luftzirkulation. Dies wird als Wärmeübergang bezeichnet.
Diese Garmethode ist besonders geeignet für das langsame
Garen in geschlossenen Gusseisentöpfen (Fleischeintöpfe ,
Kutteln etc.) oder für das Garen im Wasserbad (Crème
Caramel, Pasteten etc.). Es empfiehlt sich, das Backblech
als Auflagefläche für das Kochgeschirr zu benutzen, und
dieses auf die erste Schiene von unten zu schieben.
Schieben Sie das Gargut in den heißen Backofen.
: "Kuchen- Gebaeck"
Bei dieser Funktion wird nur das hintere, runde Heizelement
sowie das Gebläse aktiviert. Diese "delikate" Wärme ist ideal
zum Garen von Ku chen und Kleingebäck, wie z.B. Brioches,
Schokoladenkuchen, Plum-Cake, Biscuitböden, Plätzchen,
Baisers etc. Es empfiehlt sich, das Backblech dazu auf die
zweite Schiene von unten zu schieben und das Gargut darauf
zu platzieren. Schieben Sie das Gargut in den heißen
Backofen.
: "Intensivbacken"
Sämtliche Heizelemente sowie das Gebläse werden in Betrieb
gesetzt, sodass sich die heiße Luft im Backofenraum
gleichmäßig verteilt. Diese Funktion eignet sich besonders
zum schnellen Garen (ohne vorher iges Vorheizen) und für
bereits vorgegarte Speisen (Tiefgefrorenes, F ertiggerichte).
Es empfiehlt sich, das Backblech als Auflagefläche für die
entsprechenden Behältnisse zu benutzen, und dieses auf die
erste Schiene von unten zu schieben.
: "Multicooking"
Sämtliche Heizelemente sowie das Gebläse werden in Betrieb
gesetzt, sodass sich die heiße Luft im Backofenraum
gleichmäßig verteilt. Diese Garfunktion kann verwendet
werden, um verschiedene Gerichte gleichzeitig auf
verschiedenen Ebenen im Ofen garen zu lassen. Bei dieser
Garfunktion bleibt der Eigengeschmack der verschiedenen
Speisen erhalten, selbst wenn diese sehr unterschiedliche
Geschmacksrichtungen aufweisen. Voraussetzung für diese
Funktion ist, dass alle Gerichte bei derselben Temperatur
gegart werden müssen (die fertigen Speisen werden
nacheinander aus dem Ofen genommen). Soll auf zwei
Führungsschienen gleichzeitig gegart werden, so empfiehlt
es sich, das Backblech auf die erste Führungsschiene von
unten und den Backofenrost auf die dritte Führungsschiene
von unten zu geben. Schieben Sie das Gargut in den heißen
Backofen.
: "Pizza"
Die Heizelemente (unteres und rundes Heizelement) sorgen
schnell für Heißluft im Ofen. Aufgrund der starken Unterhitze
ist diese Funktion besonders für das vollständige Garen von
Pizzateig und Mürbeteig geeignet. Das Gebläse sorgt für
die Bräunung der Oberseite, sodass das Backgut eine
appetitliche Farbe erhält. Es empfiehlt sich, das Backblech
als Auflagefläche zu benutzen, und dieses auf die erste
Schiene von unten zu schieben.
Schieben Sie das Gargut in den heißen Backofen.
: "Grillen"
Bei dieser Funktion wird ausschließlich das obere Heizelement
aktiviert. Der Grill wird zum Glühen gebracht und gibt eine
Infrarotstrahlung (mit den Eigenschaften der
Sonneninfrarotstrahlung) ab. Bei Einschalten der Grillfunktion
werden die Speisen nicht nur mittels Hitze sondern vor allen
Dingen mittels dieser Infrarotstrahlung gegart. Grillen Sie bei
geschlossener Backofentür. Das Grillgut sollte möglichst in
den kalten Backofen geschoben werden. Die Strahlungs wärme
ist mittels des Temperaturwählschalters einstellbar. Es
empfiehlt sich, das Backblech auf die erste Führungsschiene
von unten zu geben, sodass dieses abtropfendes Fett und
Fleischsaft auffangen kann; der Rost dagegen wird auf eine
höhere Schiene geschoben, je nach der Dicke des zu garenden
Fleisches.
: "Gratinieren"
Nur das obere Heizelement, welches Infrarotstrahlung abgibt,
wird in Betrieb gesetzt. Das Gebläse sorgt für die Zirkulation
der Heißluft im Ofen und damit für eine gleichmäßige
Temperaturverteilung. Das Gargut wird gleichzeitig folgenden
Faktoren ausgesetzt:
• Infrarotstrahlen zum Garen an der Oberfläche;
• Heißluft zum vollständigen Garen durch Wärmeleitung.
Die Funktion "Umluftgrill" eignet sich insbesondere zum
schmackhaften Zubereiten von Braten (egal ob rotes oder
weißes Fleisch) sowie Geflügel. Geben Sie das Fleisch auf
den Rost, der auf die zweite Führungsschiene von unten
geschoben wird und schieben Sie das Backblech zum
Auffangen v on abtropfendem Fett und Fleischsaft auf die erste
Schiene von unten. Schieben Sie das Gr illgut in diesem Fall
in den nicht vorgeheizten Ofen. W enn Ihr Ofen mit Drehspieß
ausgestattet wird, können Sie es mit den Funktionen "Grill"
und "Gratinieren" benutzen. Grillen Sie bei geschlossener
Backofentür. Zur Vermeidung von Verbrennungen bei
Einsetzen des Spießes empfiehlt es sich, den Ofen nicht
vorzuheizen. Das Backblech zum Auffangen von
abtropfendem Fett und Fleischsaft sollte sich auf der ersten
Führung und der Drehspieß auf der dritten Führung von unten
befinden (Hinweise zum Einsetzen des Drehspießes: siehe
nächsten Abschnitt).
Während des Betriebs der Funktionen "Grill" und
"Gratinieren" können die äußeren Ofenteile sehr heiß
werden. Halten Sie daher Kinder vom Ofen fern.
: Fastclean-Selbstreinigung
Zur vollständigen Reinigung Ihres Backofens. Detaillierte
Angaben zur Fastclean-Selbstreinigung siehe Seite 6.
4
Page 48

ZUBEHÖR
Ihr Backofen ist für eine Vielzahl an unterschiedlichen
Garmethoden ausgestattet. Damit Sie bestmögliche
Zubereitungsergebnisse erzielen können, bieten wir eine Reihe
an Zubehörteilen an.
Dieses Zubehör kann je nach Bedarf auf den verschiedenen
Führungsschienen im Ofeninnern installiert werden.
Für jede aufgeführte Funktion und Garmethode wird die
jeweils empfohlene Führungsschiene angegeben
(durchnummeriert von unten nach oben).
Höhenstufe n˚5
Höhenstufe n˚4
Höhenstufe n˚3
Höhenstufe n˚2
Höhenstufe n˚1
Zahnleisten
Das Backblech
Wird verwendet…
• als Auflagefläche des jeweiligen Speisenbehälters
beim Garen auf einer Ebene und beim Garen im
Wasserbad;
• als direkte A uflagefläche für das Gargut (Kleingebäck
etc.);
• zum Auffangen von abtropfendem Fett oder
Fleischsaft, bei gleichzeitiger Verwendung des großen
Rostes.
Es empfiehlt sich nicht, das Backblech auf die
Führungsschienen 4 und 5 zu schieben.
Der große Backofenrost
Er wird stets zusammen mit dem Backblech in der
vorgesehenen P osition (d.h. mit den Halterungen nach oben)
verwendet:
• Auf der zweiten Führungsschiene von unten dient er
als Auflagefläche für zu garendes Fleisch; das
Backblech wird dann auf die erste Führung geschoben
und dient dem Auffangen von abtropfendem Fett oder
Fleischsaft.
• Auf der oberen Führungsschiene (je nach Fleischdicke)
dient er als Ablage für das zu grillende Fleisch (Fleisch
vom Rost); das Backblech wird auf die erste Führung
gegeben und dient dem Auffangen v on abtropfendem F ett
oder Fleischsaft.
• Zum Garen verschiedener Speisen auf
verschiedenen "Ebenen" wird der große Rost in die obere
Führungsschiene geschoben.
Bei der Funktion "Gratinieren" sollte das Fleisch auf
keinen Fall direkt auf das Backblech gelegt werden, da
die Unterhitze den Austritt von Fleischsaft und Fett
hervorruft, was zu Spritzern oder Verkrustungen an den
Ofenwänden und schließlich zu Rauchbildung durch
Verbrennung führen könnte.
DER BRA TSPIESS
Flügelmuttern
Spieß
Handgriff des Drehspießes
Traggestell
Gabel
Dieses Zubehör ermöglicht ein langsames, vollständiges
Garen auf einem sich ununterbrochen drehenden Spieß. Das
Ergebnis ist eine perfekte Bräunung des Fleisches. Der
Drehspieß setzt sich zusammen aus:
• einer Halterung, die auf der dritten Führungsschiene
von unten installiert wird, sodass der Drehspieß in die
Hohlachswelle des Motors, der sich hinter der mit
Öffnungen versehenen Ofenrückwand befindet,
eingesetzt werden kann;
• einem Spieß, auf den das zu grillende Stück Fleisch
gespießt wird, und der an beiden Enden auf je einer
mit einer Flügelschraube befestigten Gabel aufliegt.
Anmerkung: Achten Sie bei Installieren des Drehspießes
darauf, dass der Spieß korrekt in die mit dem Motor
verbundene Hohlachsw elle eingeführt wird. Achten Sie darauf,
dass…
- das zu grillende Fleischstück in der Mitte aufgespießt wird;
- das zu grillende Fleisch sich in der Mitte des Spießes befindet.
• ein verlängerbarer Griff aus Isoliermaterial, der vorn
auf den Spieß geschraubt wird…
- ermöglicht die Verwendung des Spießes auch für das
Garen sehr großer Fleischstücke
- verhindert Verbrennungen beim Herausnehmen des
fertiggegarten Fleisches.
Schrauben Sie den Griff zum Herausnehmen des Spießes
bis zum Anschlag fest (während des Garens muss der Griff
entfernt werden).
Zeitschalter für den Drehspieß
Der Drehspieß der ARISTON Backöfen kann über einen
Zeitschalter zeitlich vorprogrammiert werden. Nach Ablauf
der Garzeit sorgt der Motor dafür, dass sich der Spieß so
lange weiterdreht, bis die Temperatur im Ofen ausreichend
gesunken ist, sodass kein Risiko besteht, dass das Fleisch
verbrennen könnte.
Nach Beendigung des Garvorgangs wird die Einstellung des
Funktionswählschalters beibehalten und die Temperatur auf
"0" gestellt.
Aufrechterhalten der Gebläsefunktion
Das Gebläse schaltet sich nicht unmittelbar nach Beendigung
des Garvorgangs ab. Auf diese Weise kann das Ofeninnere
besser abkühlen. Es ist also völlig normal, dass das Gebläse
trotz Ausschalten des Ofens noch so lange funktioniert, bis
die Temperatur im Ofeninnern weniger als 120º beträgt.
Backofenbeleuchtung
Die Backofenbeleuchtung wird durch Drehen des
Funktionswählschalters auf das Symbol eingeschaltet.
Solange der Ofen eine Garfunktion ausführt, bleibt die
Backofenbeleuchtung eingeschaltet (mit Ausnahme der
Funktion zur Selbstreinigung). Wird der Backofen
vorprogrammiert, dann schaltet sich die Ofenbeleuchtung zum
Zeitpunkt des Programmierens ein und schaltet sich erst nach
Beendigung des Garvorgangs automatisch wieder aus.
5
Page 49

FAST CLEAN
Sicherheitsvorrichtungen
Bei Aktivierung der Fast-cleanfunktion erreicht die T emperatur
im Backofenraum 500º. Bei derartigen Temperaturen
verkohlen die im Ofen zurückgebliebenen Speisereste.
Angesichts der hohen Temperaturen, die hierbei erreicht
werden, ist der Ofen mit einigen Sicherheitsvorrichtungen
ausgestattet:
• bei Erreichen höherer Temperaturen wird die Ofentür,
zur Vermeidung eventueller Verbrennungen,
automatisch gesperrt;
• bei jedweder Störung wird die Stromversorgung
der Heizelemente sofort unterbrochen
Anmerkungen:
1- Trotz der extrem hohen Temperaturen, die während des
gesamten Pyrolyse-Reinigungsverfahrens im
Backofenraum erreicht werden, erwärmt sich der Back ofen
außen nur gering. Das ist zurückzuführen auf…
• eine starke Isolierung des Backofenraums;
• ein Gebläse, welches durch Luftzirkulation für eine
Abkühlung der Wände sorgt.
2- Durch das Glas der Ofentür kann beobachtet werden,
wie aufgrund des Pyrolyseverfahrens einige Speisereste
bei Kontakt mit den Heizelementen verkohlen und
aufglimmen: Es handelt sich um eine spontane
Verbrennung, einen völlig normalen Vorgang, der
keinerlei Risiken birgt.
Einige nützliche Hinweise, die Sie vor Einstellen der
Selbstreinigungs-Funktion beachten sollten:
1- Versuchen Sie zunächst, größere Speisereste mit einem
feuchten Schwamm zu entfernen. Verwenden Sie auf
keinen Fall Spülmittel oder spezielle Ofenreinigungsmittel.
2- Entfernen Sie sämtliches Zubehör: Es hält derart
hohen Temperaturen nicht stand. Darüberhinaus könnten
einige Zubehörteile das Reinigungsergebnis
beeinträchtigen, indem sie die gleichmäßige Zirkulation
der heißen Luft im Ofeninnern verhindern. Das Zubehör läßt
sich problemlos wie normales Geschirr reinigen (auch in der
Spülmaschine).
3- Hängen Sie keine Geschirrtücher zum Trocknen an den
Ofentürgriff.
Anmerkung: Während der Fast clean können einzelne
Ofenteile sehr heiß werden. Halten Sie daher Kinder
vom Ofen fern.
– Entfernen Sie zunächst sämtliches Zubehör.
Entfernen Sie grobe Speisereste und Spritzer; so
vermeiden Sie eventuelle Flammen- und Rauchbildung.
– Schließen Sie die Ofentür.
– Wählen Sie über den Funktionswählschalter die
Funktion
– Nun können Sie programmieren. Sie können wählen
zwischen…
· einem sofortigen Pyrolysestart: dieselbe
Vorgehensweise wie bei der Einstellung der
Garfunktionen;
· einem vorprogrammierten, verzögerten
Pyrolysestart: dieselbe Vorgehensweise wie bei der
Programmierung der Garfunktionen;
– Die vollständige Selbstreinigung dauert ca. 90 Minuten.
Was geschieht während der Fast clean?
Bei Erreichen einer Temperatur von 325 °C wird die Ofentür
automatisch gesperrt: auf dem Display erscheint der
Buchstabe "P" sowie die noch verbleibende Restzeit bis
zum Pyrolyseabschluss.
Solange die Temperatur im Ofeninnern extrem hoch ist,
läßt sich die Ofentür nicht öffnen.
Was geschieht nach Fastc leanabschluss?
Nach Abschluss der Fastclean-Selbstreinigung erscheint
auf dem Display "P. 0.00".
Die Ofentür läßt sich erst dann öffnen, wenn…
• die Ofentemperatur entsprechend gesunken ist;
• der Funktionswählschalter erneut auf "0" gestellt
wurde.
An den Ofenwänden und unten im Ofen könnte sich während
der Reinigung etwas weißer Staub abgelagert haben.
Entfernen Sie diesen mittels eines feuchten Schwamms,
nachdem der Ofen vollständig erkaltet ist.
Möchten Sie jedoch die noch vorhandene Ofenwärme zum
Garen nutzen, dann ist es nicht erforderlich, diese
Staubablagerungen sofort zu entfernen; sie sind
unschädlich.
Wie wird die Selbstreinigung in Gang gesetzt?
EINIGE KLEINERE FUNKTIONSSTÖRUNGEN
KEIN GRUND ZUR SORGE …
wenn nachstehende, kleinere Betriebsanomalien auftreten;
diese sind im allgemeinen auf unkorrekte Bedienung oder
falsche Bewertung vermeintlicher Störungen
zurückzuführen.
Beim Backen bzw. Braten tritt starker Rauch aus dem
Backofen aus:
• Vergewissern Sie sich, dass für die gewünschte Garart
auch die geeignete Funktion eingestellt wurde, dass das
geeignete Kochgeschirr gewählt, und das Gargut auf
die empfohlene Einschubhöhe eingeschoben wurde.
• Prüfen Sie auch die eingestellte Temperatur, die sehr
wahrscheinlich zu hoch für die vorgesehene Garart ist.
• Kontrollieren Sie den Verschmutzungsgrad des
Backofens, wahrscheinlich sollte er gereinigt werden.
Am Email könnten Speisereste zurückgeblieben sein,
die verkohlen und so den Rauch verursachen.
• Fettspritzer, oder eventuell heruntergelaufene
Flüssigkeiten auf heißen Oberflächen können ebenfalls
die Ursache von Rauchbildung sein.
6
Page 50

DER GARZEITPROGRAMMIERER
Anzeigefeld für alle Funktionen :
Uhrzeit, Zeitprogrammierung,
Dauer und Ende der Garzeit bzw.
des Fastclean-Vorgangs
Leuchtanzeige der Zeitprogram-
mierung mit Tonsignal
Taste zum Starten des
Garvorgangs
Taste zum Einstellen der
Gardauer
Taste zum Einstellen des
Endes der Gardauer
Taste zum Einstellen der
Zeitprogrammierung mit
Tonsignal
Einstellung der Uhrzeit
Die Uhrzeit kann nur eingestellt werden, wenn der
Funktionswählschalter auf "0" steht.
Nach dem Netzanschluss oder nach einem Stromausfall
blinkt auf dem Display die Anzeige "0.00". Drücken Sie die
Taste "+" und/oder "-", um die Uhrzeit zurück- bzw.
vorzustellen.
Nach Freigabe der Tasten folgt eine Zeit von 3 Sekunden,
während der sämtliche übrigen Tasten deaktivier t werden,
wird während dieser 3 Sekunden der Wert nicht weiter
verändert, wird die eingegebene Uhrzeit g espeichert.
Einstellung des Kurzzeitweckers
Diese Kurzzeitwecker-Funktion kann nur bei
ausgeschaltetem Backofen (Funktionswählschalter
demnach auf "0") in Anspruch genommen werden.
Um den Kurzzeitwecker einzustellen drücken Sie kurz auf
die Taste und regulieren dann die Zeit über die Taste
"+" und/oder "-". Wird innerhalb 3 Sekunden nach Freigabe
der Tasten der Wert nicht weiter verändert, wird die gewählte
Zeit gespeichert; die Anzeigeleuchte schaltet sich ein,
die Zeitrechnung (rückwärtiger Ablauf) setzt ein.
Nach abgelaufener Zeit ertönt ein akustisches Signal (1
Minute), das durch Druck auf eine beliebige Taste abgestellt
werden kann; die Anzeigeleuchte erlischt. erlischt.
Der Kurzzeitwecker hat keinen Einfluss auf den Betrieb
des Backofen.
T onsignal-Lautstärke
Die Lautstärke des Tonsignals kann (solange es
vernehmbar ist) durch Druck auf die Taste "-" bis auf die
gewünschte Lautstärke herabgesetzt werden.
Garen ohne Startvorwahl
Ist der Backofen ausgeschaltet (Funktionswählschalter auf
"0") sind sämtliche Tasten (mit Ausnahme der Taste "-" zur
Lautstärkeneinstellung des Kurzzeitwecker-Tonsignals)
deaktiviert.
Wählen Sie durch Drehen des Funktionswählschalters (im
Kontrolllampe eines programmierten
Vorgangs:
- ein: Vorgang noch im Gange
- aus: Vorgang beendet
· blinkt: programmierter Vorgang
beendet
Kontrolllampe der Programmierung A:
· aus: manueller Betrieb
· ein: Programmierung beendet
Mit den „+" und „-"-Tasten wird die Anzeige eingestellt (Einstellung der Uhrzeit,
Zeitprogrammierung, Einstellung der
5 s.
Dauer bzw. des Endes eines Vorganges).
„+" die Zahlen erhöhen
„-" die Zahlen verringern.
Uhrzeigersinn) die von Ihnen gewünschte Funktion. Each
function has a predefined cooking time that you can
visualise by pressing . You can modify the cooking
time according to the recipes you use. Simply press
and choose the cooking time you require using the “-” and/
or “+”.
Auf dem Display wird eine empfohlene Temperatur
eingeblendet, unabhängig von der Temperatur, die auf dem
T emperaturwählschalter angezeigt wird. Dieser empf ohlene
Temperaturwert kann durch Drehen des Schalters beliebig
verändert werden.
The grill display indicates a power level between 1 and 5
(1 for minimum power and 5 for maximum power).
Der Backof en ist einsatzbereit: Drücken Sie die Taste .
Der Backofen schaltet auf Vorheizen, erkenntlich an dem
nun blinkenden Symbol . Nach Ablauf der Vorheizzeit
(Dauer ca. 10 Minuten) schaltet das Blinklicht auf Festlicht
um.
Wird nach Einstellen einer Funktion nicht innerhalb einer
Minute der Start des Gar vorgangs bestätigt, erscheint auf
dem Display die Anzeige "OFF", die Tasten werden
deaktiviert. Drehen Sie demnach den
Funktionswählschalter auf " / 0" und wiederholen Sie die
Einstellungen.
ZUR BEACHTUNG
Das Gerät ist mit einem Fehlerdiagnose-System
ausgestattet. Ev entuelle Fehler werden durch Anz eigen des
Typs "Fn Fm" (n und m=einstellige Zahlen) gemeldet.
Wenden Sie sich in solchen Fällen bitte an die
nächstgelegene anerkannte Kundendienststelle.
7
Page 51

VORWAHL DES GARPROGRAMMS
Vorwahl der Garzeit mit sofortigem Star t
Der Garvorgang startet sofort, nach Ablauf der eingestellten
Zeit schaltet sich der Backofen aus.
Verfahren Sie hierzu wie folgt:
• drehen Sie den Funktionswählschalter auf die
gewünschte Funktion;
• regulieren Sie die Temperatur über den
Temperaturwählschalter (in jeweils 10°C-Stufen), falls
der empfohlene Wert als nicht geeignet angesehen
werden sollte.
The grill display indicates a power le vel between 1 and 5 (1
for minimum power and 5 for maximum power).
• Jeder Garfunktion wird eine empfohlene Garzeit
zugeordnet, die durch Drücken der Taste und der
Taste "+" und/oder "-" geändert werden kann. (Bei der
Garzeit sind ca. 10 Minuten als Vorheizzeit mit
einzuberechnen). Sollte der eingestellte Wert nicht
innerhalb der nach Freilassen der Tasten folgenden 3
Sekunden nochmals geändert werden, wird die Garzeit
gespeichert.
Während der Vorheizphase blinkt das Symbol die
eingestellte Garzeit wird eingeblendet. 3 kurze Tonsignale
zeigen das Ende der Vorheizzeit an, das Symbol schaltet
auf Festlicht um.
Für die Funktionen "Schnellgaren" und "Grillen" ist kein
Vorheizen vorgesehen.
Während des Garvorgangs wird auf dem Display die noch
verbleibende Restzeit eingeblendet. Zur Einblendung der
Temperatur muss die Taste "+" gedrückt werden.
Die kürzest einstellbare Garzeit beträgt 2 Minuten, die
längste 10 Stunden.
• Drücken Sie die Taste um den Garvorgang zu
starten.
Wird nach Einstellen einer Funktion nicht innerhalb einer
Minute der Start des Garvorgangs bestätigt, erscheint auf
dem Display die Anzeige "END", die Tasten werden
deaktiviert. Drehen Sie demnach den Funktionswählschalter
auf "0" und wiederholen Sie die Einstellungen.
Nach Ablauf der Garzeit ertöt ein akustisches Signal
(für 1 Minute) und auf dem Display wird die Anzeige
"END" eingeblendet. Das Signal kann durch Druck auf
eine beliebige Taste abgestellt werden.
• Drehen Sie den Funktionswählschalter wieder auf
" / 0". Die Anzeige "END" erlischt, für 3 Sekunden wird
nun die Anzeige "OFF" eingeblendet.
Außerdem ist es möglich, ein Garprogramm gänzlich zu
unterbrechen bzw. abzubrechen und den Backofen
auszuschalten. Drehen Sie hierzu den
Funktionswählschalter auf "0". In einem solchen Fall wird
auf dem Display für 3 Sekunden die Anzeige "OFF"
eingeblendet, bevor es sich gänzlich ausschaltet.
Vorwahl der Garzeit mit verzög ertem Start
Auf der Grundlage der vom Benutzer eingegebenen Daten
bestimmt der Garzeitprogrammierer automatisch die
Uhrzeit, zu der der Garvorgang startet, die Garzeit und
das Garzeitende.
Verfahren Sie hierzu wie folgt:
• Drehen Sie den Funktionswählschalter auf die
gewünschte Funktion.
• Regulieren Sie die Temperatur über den
Temperaturwählschalter, falls der empfohlene Wert als
nicht geeignet angesehen werden sollte.
The grill display indicates a power level between 1 and 5
(1 for minimum power and 5 for maximum power).
• Drücken Sie die Taste um die Garzeit bzw . Dauer
einzustellen.
• Regulieren Sie die Zeit anhand der Tasten "+" und/
oder "-" (bei der Berechnung der Garzeit ist die
Vorheizzeit mit einzubeziehen). Sollte der eingestellte
Wert nicht innerhalb der nach Freilassen der Tasten
folgenden 3 Sekunden nochmals geändert werden, wird
die Garzeit gespeichert.
• Zur Vorwahl eines Garprogramms ist zuerst zu
ermitteln, zu welcher Uhrzeit das Gericht gegart werden
soll; geben Sie diese durch Drücken der Taste und
anschließend der Taste "+" und/oder "-" ein: Sollte der
eingestellte Wert nicht innerhalb der nach Freilassen
der Tasten folgenden 3 Sekunden nochmals geändert
werden, wird das Garzeitende gespeichert.
Die kürzest einstellbare Garzeit beträgt 2 Minuten, die
längste 10 Stunden.
• Drücken Sie die Taste , das Symbol "A" leuchtet
auf.
Nach erfolgter Programmv orwahl bis zum eigentlichen Start
des Garvorgangs kann nur noch die Temperatur und die
Funktion geändert werden.
Zu der vorbestimmten Uhrzeit schaltet sich der Backofen
ein und startet mit der Vorheizphase, die durch Blinken
des Symbols angezeigt wird, die Garzeit bzw. -dauer
wird auf dem Display eingeblendet.
Für die Funktionen "Schnellgaren" und "Grillen" ist kein
Vorheizen vorgesehen.
• Drehen Sie den Funktionswählschalter wieder auf " /
0"
.
Während des Garvorgangs können folgende Einstellungen
noch geändert werden: die Funktion (ohne hierdurch die
eingestellte Garzeit und Temperatur zu beeinflussen), die
Temperatur (ohne hierdurch die eingestellte Garzeit zu
beeinflussen) und die Garzeit.
8
Page 52

EINIGE BEISPIELE ZUM GAREN AUF EINER EBENE
Rezepte Backofenfunktion Temperatur Garzeit Höhenstufe Hinweise Vorheizen
Brot (1 kg)
Blätterteiggebäck
Pizza (Brotteig)
Quiche lorraine
(Mürbeteig)
Käse-Soufflé
Pâté de campagne
Lammkeule
Überbackene
Kartoffeln
Fisch
Hühnchen
Rinderbraten
Schweinebraten
Kalbsbraten
Multicooking 210°C 30-35' 2 Auf Emailleblech Ja
Multicooking 200°C
Pizza 240°C 10-15' 1 Auf Emailleblech Ja
Pizza 220°C 30' 1 Backform auf Emailleblech Ja
Multicooking 200°C 30-40' 2
Traditionell 180°C 50-60' 2
Gratinieren 210°C
Gratinieren 200°C
Traditionell
Gratinieren
Grillen
Gratinieren
Grillen Drehspieß
Gratinieren 210°C
Gratinieren 210°C 1 Std. für 1 kg 2-1* Fleisch auf Rost Nein
Gratinieren 210°C 1 Std. für 1 kg 2-1* Fleisch auf Rost Nein
200°C
240°C
250°C
210°C
20-25'
je nach Dicke
1 Std. für
1,5 bis 2 kg
40-45'
je nach Dicke des Auflaufs
je nach Fisch und Dicke
1 Std. für
1,2 bis 1,2 kg
je nach gewünschter
Konsistenz
2 Auf Emailleblech Ja
Backform Ø 20 cm auf
Emailleblech
Im Wasserbad (warm) auf
Emailleblech
2-1* Fleisch auf Rost Nein
2 Auflaufform auf Emailleblech Ja
Filets + Flüssigkeiten, Emailleblech
2
2-1*
2-1*
2-1*
3-1*
2-1* Fleisch auf Rost Nein
Ganzer Fisch, Rost
Grillfisch, Rost
Fleisch auf Rost
Drehspieß bei geschl.
/Gescholssene Tür
Ja
Ja
Ja
Nein
Gefüllte Tomaten
Aufwärmen von
Fertiggerichten
Lasagne
des Auflaufs
Hefegebäck
Napfkuchen
Windbeutel
Karamelcreme
Biskuitteig
Macaron
Weiße Baisers
Braune Baisers
Bratäpfel
Sandgebäck
Apfeltorte
Buttergebäck
Mürbeteigtorte
Salzgebäck
X - Y* in der Spalte "Höhenstufe" :
X = Rost oder Spiess auf H¨henstufe X
Y = Emailleblech zum Auffangen des Fleischsafts und Fetts auf Höhenstufe Y
Multicooking 200°C 20-25' 2 Teller auf Emailleblech Ja
Intensivbacken
Intensivbacken 200°C
Intensivbacken 200°C
Kuchen / Gebaeck 160°C 35-45' 2
Kuchen / Gebaeck 160°C 60' 2
Kuchen / Gebaeck 200°C 20-25' 2
Traditionell 180°C 30' 2
Kuchen / Gebaeck 190°C 30' 2
Kuchen / Gebaeck 180°C
Kuchen / Gebaeck 70-80°C
Kuchen / Gebaeck 110°C
Multicooking 210°C
Kuchen/Gebaeck 190°C 10-15' 2 Auf Emailleblech Ja
Pizza 220°C 30' 1 Backform auf Emailleblech Ja
Heißluftofens 190°C 10-15' 2 Backblech a/Backrost Ja
Heißluftofens 190°C 15-25' 2 Backblech a/Backrost Ja
Heißluftofens 190°C 10-15' 2 Backblech a/Backrost Ja
siehe Angaben
auf der
Verpackung
siehe Angaben auf der
Verpackung
je nach Dicke
des Auflaufs
je nach Dicke
des Auflaufs
15-20'
je nach Größe
3 Std.
je nach Größe
2 Std.
je nach Größe
20-25'
je nach Größe
Hinweis : Das Rost ist immer mit der Wölbung nach unten in den Backofen zu schieben.
2 Teller auf Em ailleblech Nein
2 Teller auf Em ailleblech Nein
2 Teller auf Em ailleblech Nein
Backform aus Aluminium auf
Emailleblech
Backform aus Aluminium auf
Emailleblech
Kleine Beutel ohne Zucker auf
Emailleblech
Kleine Töpfchen im
Wasserbad (warm)
Backform aus Aluminium auf
Emailleblech
2 Auf Emailleblech Ja
2 Trocknung kleiner Baisers Ja
2 Trocknung kleiner Baisers Ja
2 Teller auf Em ailleblech Ja
Ja
Ja
Ja
Ja
Ja
9
Page 53

PRAKTISCHE BACK-/BRATHINWEISE
Durch den Back-/Bratvorgang werden rohe Speisen in
schwackhafte Gerichte verwandelt.
Zum guten Gelingen eines solchen Back-/Bratvorgangs tragen
nicht nur die Zutaten bei, sondern auch: die von den Speisen
angenommene Färbung, ihre nachfolgenden
Zubereitungsphasen, ob sie schön zart geblieben sind und
optimal gegart wurden usw.
Die Backof en-Einstellungen (T emperaturen und Garzeiten) hängen
REINIGUNG UND PFLEGE
Wichtig: Trennen Sie das Gerät vor jeder Reinigung und
Pflege vom Stromnetz.
Um eine optimale Lebensdauer des Gasherdes zu
gewährleisten, muss er regelmäßig gründlich gereinigt werden.
Beachten Sie hierbei Folgendes:
Innenteile des Backofens:
Es empfiehlt sich, das Backofeninnere nach jedem Gebrauch
(PIRO'), besonders nach der Zubereitung von Braten zu
reinigen. Auch um eine Ablagerung von Speiserestespritzern
zu vermeiden, die bei dem nächsten Einsatz des Backofens
neu eingebrannt würden, und demnach durch Verkohlen
unangenehme Gerüche und Rauchbildung verursachen
würden.
Gebrauch von Alufolie
Der Backofenboden darf nicht mit Alufolie ausgelegt
werden, (weil man vielleicht denkt, sich hierdurch ein
Reinigen des Backofenbodens zu ersparen). Der direkte
Kontakt des Aluminiums auf dem heißen Emailboden
würde einen derartigen Wärmestau verursac hen, der das
Email zum Schmelzen bringen und so hoffnungslos
beschädigen würde.
natürlich von zwei wichtigen Parametern ab:
- von der Größe bzw. Menge des Garguts
- von der Fähigkeit, die gewünschte Färbung zu erreichen
(Zuckermenge, die Anzahl der Eier des Rezepts).
Bei den in unserer Tabelle vorgeschlagenen
Backofeneinstellungen, die unter Zugrundelegung allgemeiner
Parameter ausgearbeitet wurden, handelt es sich um
Richtwerte, die je nach Wunsch geändert werden können.
Abnahme/Montage der Backofentür
Zur Erleichterung der Reinigung des Backofeninnern kann die
Backofentür wie folgt abgenommen werden: (Abb. 2-3):
• Backofentür ganz öffnen und die 2 kleinen Hebel "B" hoch
drücken (Abb. 2);
• Backofentür nun teilweise wieder schließen; die Tür kann
jetzt nach oben hin aus den beiden Haken "A"
herausgezogen werden. (Abb. 3).
Montage der Backofentür:
• Die Backofentür mittels der 2 Hak en "A" (Tür hierbei vertikal
halten) in die Schlitze einhängen;
• Stellen Sie sicher, dass die Halterung "D" ordnungsgemäß
am Rand der Schlitze eingehakt ist (bewegen Sie hierzu die
Tür leicht hin und her);
• Abschließend die Tür ganz öffnen und die 2 kleinen Hebel
"B" nach unten klappen; Tür wieder schließen.
Kochfeld:
• Die abnehmbaren Brennerteile sollten regelmäßig in
lauwarmer Spüllauge gereinigt, und von etwaigen
V erkrustungen befreit werden. V ergewissern Sie sich hierbei,
dass die Flammenkranzöffnungen nicht verstopft sind. Vor
erneutem Gebrauch sind diese Teile gründlich abzutrocknen.
• Die Spitzen der Zündautomatikkerzen des Kochfelds sowie
die des Gasbackofens sind regelmäßig zu reinigen.
Außenteile des Backofens:
• Reinigen Sie diese erst dann, wenn der Backofen gänzlich
abgekühlt ist.
• Die Stahlteile und vor allem die mit Symbolaufdrucken
versehenen Stellen dürfen nicht mit Löse- oder
Scheuermitteln gereinigt werden; verwenden Sie hierzu
ausschließlich ein mit milder, lauwarmer Spüllauge
angefeuchtetes Tuch. Auf den Edelstahlteilen könnten
Flecken zurückb leiben, sollte stark kalkhaltiges W asser oder
ein scharfes (phosphorhaltiges) Spülmittel für längere Zeit
darauf stehenbleiben. Es empfiehlt sich demnach, diese
T eile nach der Reinigung sof ort gründlich nachzuspülen und
trockenzureiben.
Wichtig: Reiben Sie bei der Reinigung stets in
waagerechter Richtung, d.h. in Richtung der Satinierung
des Edelstahls.
• Gegebenenfalls können die Stahlteile nach ihrer Reinigung
mit einer Hochglanzcreme behandelt werden: Verwenden
Sie jedoch ausschließlich Spezialprodukte für Edelstahl.
Wichtig: Verwenden Sie zur Reinigung keine Scheuermittel,
keine scharfen Reinigungsmittel oder Säuren.
ABBILDUNG 2 ABBILDUNG 3
Austausch der Backofenlampe
• Vor jedem Eingriff ist der Backofen entweder durch
Herausziehen des Steckers oder durch Abschalten des zum
Anschluss des Gerätes an die Hausanlage verwendeten
Schalters stromlos zu machen.
• Nehmen Sie unter Zuhilfenahme eines schmalen und
flachen Werkzeuges (Schraubenziehen, Löffelgriff usw.) die
Glasabdeckung ab.
• Schrauben Sie die
Lampe aus und ersetzen
Sie sie durch eine neue
gleicher Eigenschaften.
- Spannung 230/240 V
- Leistung 15 W
- Sockel E 14
• Bringen Sie die
Glasabdeckung wieder
an; achten Sie hierbei
darauf, dass die Dichtung
ordnungsgemäß
eingelegt wird.
Schmieren der Gashahnarmatur
Auf die Dauer könnte der Gashahn blockieren oder sich nur sehr schwer
drehen lassen, in einem solchen Fall ist er innen zu reinigen und neu
zu schmieren. Diese Arbeit darf nur durch einen vom Hersteller
anerkannten Techniker durchgeführt werden.
Backofenraum
Lampe
Dichtung
Glasscheibe
10
Page 54

INSTALLATIONSANWEISUNGEN
A
Die nachstehend aufgeführten Anweisungen sind an den
Fach-Installateur gerichtet und gelten als Leitlinien zur
korrekten technischen Installation, Einstellung und W artung
gemäß den geltenden Richtlinien.
Wichtig: Jeder beliebige Eingriff zur Einstellung,
Wartung usw . m uss bei stromlosem Herd vor genommen
werden. Sollte das Gerät elektrisch eingeschaltet bleiben
müssen, ist größte Vorsicht geboten. Bei diesem Herd
handelt es sich um ein Gerät folgender technischer
Eigenschaften:
Kategorie: II 2E+3+
Klasse 1 (freistehend) Klasse 2 Unterklasse 1(einbau)
Die maximalen Abmessungen des Gasherdes entnehmen
Sie bitte aus der Abbildung der Seite 2. Zur Gewährleistung
der ordnungsgemäßen Betriebsweise des in einer
Möbelzeile installierten Gerätes sind die in Abb. 4
angegebenen Abstände unbedingt einzuhalten. Die
angrenzenden Oberflächen, sowie die Rückwand müssen
aus geeignetem Material beschaffen sein, um einer
Übertemperatur von 65 °C standhalten zu können.
Abb.5
min. 50mm
Abb.6
In Abzugsschächte oder Kamine mit Abzweigungen Direkt ins Freie
(ausschließlich für Kochgeräte bestimmt)
Küchenbelüftung
Es ist absolut erforderlich, dass dem Raum, in dem das
Gerät installiert wird, die genaue Menge der zur
ordnungsgemäßen Gasverbrennung und Belüftung der
Küche erforderlichen Luft auch wieder zugeführt wird. Die
natürliche Belüftung ist durch eine permanente Öffnung in
einer Küchen-Außenwand, oder mittels eines einzelnen oder
kollektiven, mit Abzweigungen versehenen, den geltenden
Bestimmungen entsprechenden Belüftungsschachtes zu
gewährleisten. Die Luftaufnahme direkt aus dem F reien und
fern von Luftverschmutzungsquellen ist zu gewähr leisten.
Die Belüftungsöffnung muss folgende Eigenschaften
besitzen (Abb.7A):
• Sie muss einen freien, gesamten NettoDurchgangsquerschnitt von mindestens 6 cm² pro kW der
thermischen Geräte-Nennleistung aufweisen, mindestens
jedoch von 100 cm² (die thermische Leistung ist dem
Typenschild zu entnehmen).
• Sie muss so angelegt werden, dass die Öffnungen weder
von Innen noch von A ußen her verstopft bzw. verschlossen
werden können.
• Sie ist auf geeignete Weise zu schützen, z.B. durch Gitter,
min. 700mm
Metallnetze usw ., und zwar so , dass der o.g. Nutzquerschnitt
nicht verringert wird.
• Sie ist in Bodennähe anzulegen.
Detail A Angrenzender Zu belüftender
Raum Raum
Abb.4
Vor der Installation des Herdes müssen die mitgelieferten
95 - 155 mm hohen Füße in die im unteren Teil des Herdes
bereits vorgesehenen Löcher eingesetzt werden. (Abb. 5)
Mittels dieser mit Schraubgewinde versehenen Füße kann
die Höhe des Herdes ggf. justier t werden.
Aufstellung
Dieses Gerät darf nur in ständig belüfteten Räumen und in
Übereinstimmung mit den geltenden Normenvorschriften
installiert und in Betrieb genommen werden. Folgende
Anforderungen müssen gegeben sein:
• Die Verbrennungsabgase müssen über eine geeignete
Abzugshaube, die an einen Rauchabzugsschacht, einen
Kamin oder eine direkt ins Freie führende Öffnung
anzuschließen ist, abgeleitet werden. (Abb.6)
• Sollte die Installation einer Abzugshaube nicht möglich
sein,
ist auch der Einsatz eines im Fenster oder in einer
Außenmauer installierten Elektrolüfters gestattet, der
gleichzeitig mit dem Gerät in Betrieb zu setzen ist.
Beispiel einer Zuluftöffnung Vergrößerung des Lichtspalts
für die Verbrennungsluft zwischen Tür und Fußboden
Abb. 7A Abb.7B
Die Belüftung kann auch durch angrenzende Räume erfolgen,
die vorschriftsmäßig (gemäß den einschlägigen
Bestimmungen) belüftet werden, bei denen es sich jedoch
weder um Schlafzimmer, Gebäudeteile gemeinsamen
Gebrauchsnoch um Räume handeln darf, in denen
Brandgefahr besteht, wie Garagen, Lagerhäuser , Lagerstätten
für entflammbares Material usw. Die aus dem angrenzenden
Raum strömende Luft muss ungehindert durch permanente
Öffnungen desselben eingangs erwähnten Querschnitts in das
zu belüftende Zimmer strömen können. Derartige
Belüftungsöffnungen können auch durch Vergrößer ung des
Lichtspaltes zwischen Tür und Fußboden geschaff en werden.
(Abb.7B) Wird zur Ableitung der Verbrennungsgase ein
Elektrolüfter eingesetzt, dann muss die Belüftungsöffnung im
Verhältnis zur maximalen Luftförderung des Elektrolüfters
11
Page 55

INSTALLATIONSANWEISUNGEN
vergrößert werden. Auf jeden Fall muss der Elektrolüfter eine
Luftförderungsleistung erbringen, die so hoch ist, dass eine
stündliche Lufterneuerung von 3-5 Mal das Raumvolumen
gewährleistet wird. W erden mehrere Gasflammen gleichz eitig
für längere Zeit benutzt, könnte sich eine zusätzliche
Belüftung, z.B. durch Öffnen eines Fensters oder durch eine
noch stärkere Belüftung, die die Leistung eventuell
vorhandener mechanischer Belüftungssysteme optimiert, als
notwendig erweisen. Die Flüssiggase, die schwerer als die
Luft sind, stauen sich im unteren Raumbereich. Räume, in
denen Gasflaschen mit GPL-Flüssiggas aufbewahrt werden,
müssen demnach in Bodenhöhe Abzugsöffnungen ins Freie
vorsehen, damit eventuell ausgetretenes Gas nach unten hin
abziehen kann. Außerdem dürfen leere oder halb gefüllte
Flüssiggasflaschen nicht in Räumen, die unter der Erde liegen
(Keller usw.) installiert oder gelager t werden. Es ist ratsam,
nur die in Verwendung befindliche Gasflasche im Raum
aufzubewahren, und diese so aufzustellen, dass sie keiner
direkten Einwirkung von Wärmequellen, die einen
Temperaturanstieg von mehr als 50°C bewirken können,
ausgesetzt werden.
Gasanschluss
• Der Anschluss des Gerätes an die Gasleitung oder an die
Gasflasche muss gemäß der einschlägigen Bestimmungen
erfolgen und nur nachdem man sich vergewissert hat, dass
es auf die Gasart, mit der es betrieben wird, eingestellt ist.
• Dieses Gerät ist für den Betrieb mit der auf dem Typenschild
angegebenen Gasart eingestellt. Sollte die vorhandene
Gasanlage mit dieser nicht übereinstimmen, müssen
sämtliche Düsen durch die jeweilig geeigneten (im Beipack)
ausgewechselt werden. Beachten Sie hierzu bitte die
Anleitungen des Abschnitts "Anpassung an die verschiedenen
Gasarten".
• Um einen sicheren Betrieb, einen angemessenen
Energieverbrauch und eine optimale Lebensdauer des Gerätes
zu gewährleisten, ist sicherzustellen, dass der
V ersorgungsdruck den in der T abelle 1 "Merkmale der Brenner
und Düsen" angegebenen Werten entspricht, andernfalls ist
das Eingangsrohr mit einem den geltenden Bestimmungen
entsprechenden Druckregler zu versehen.
• Der Anschluss ist so vorzunehmen, dass das Gerät keinerlei
Zugspannungen ausgesetzt wird.
Schließen Sie das Gerät mittels des auf der Rückseite
befindlichen zylinderförmigen ½"G-Gewindeanschlusses
"F" (Abb.8) an. Verwenden Sie hierzu ein mit
Anschlussverschraubungen versehenes, den einschlägigen
Bestimmungen entsprechendes starres Metallrohr (Abb.8D), oder ein mit Anschlüssen versehenes, den
einschlägigen Bestimmungen entsprechendes metallenes
Flexrohr mit durchgehenden Wänden (Abb.8-C), dessen
Länge bei größter Ausdehnung 2000 mm nicht
überschreiten darf. Über prüfen Sie, dass das metallene
Flexrohr nicht mit beweglichen Geräteteilen, durch die es
beschädigt oder eingeklemmt werden könnte, in Berührung
kommt. Wird ein Gummischlauch verwendet, ist der
entsprechende Schlauchanschluss für Flüssiggas (Abb.8A) oder für Erdgas (Abb.8-B) zu verwenden. Der Dichtring
"G" (im Beipack) muss bei allen Anschlusssystemen
verwendet werden. Befestigen Sie die beiden
Schlauchenden mit den entsprechenden, den gültigen
Richtlinien entsprechenden Schlauchschellen "E".
Verwenden Sie für den Anschluss mittels Flexschläuchen
nur solche, die den einschlägigen Bestimmungen, sowie
der jeweils eingesetzten Gasart entsprechen.
Beachten Sie bitte auch Folgendes:
• Er ist so kurz wie möglich zu halten, seine maximale
Länge darf 1,5 m nicht überschreiten.
• Er darf keine Biegungen oder Drosselstellen aufweisen;
• Er darf weder mit der Geräterückseite, noch mit Teilen,
die eine Temperatur von 50°C erreichen können, in
Berührung geraten.
• Er darf nicht durch Öffnungen verlegt werden, die der
Ableitung der Backofenverbrennungsgase dienen.
• Er darf nicht mit scharfkantigen Stellen oder Ecken in
Berührung kommen.
• Er muss leicht zugänglich sein, um ihn über die gesamte
Länge hinweg jederzeit leicht auf seine Beschaffenheit
überprüfen zu können.
• Er muss nach Ablauf des aufgedruckten Datums
ausgetauscht werden.
Wichtig: Bei Anschluss an Flüssiggas (Gasflasche) ist
zwischen Gasflasche und Gasschlauch ein den
einschlägigen Bestimmungen entsprechender
Druckregler zu montieren.
Überprüfen Sie den gesamten Gaskreis nach Abschluss
sämtlicher Installationsmaßnahmen auf Dichtheit.
Verwenden Sie hierzu eine Seifenlösung (auf keinen Fall
eine Flamme). Stellen Sie sicher, dass auch bei Einsatz
sämtlicher Flammen ein ausreichender
Erdgasleitungsdruck besteht.
Umstellung auf andere Gasarten:
Wenn die Kochplatte an eine andere Gasart als Erdgas
bzw. die auf dem Typenschild der Kochplatte selbst
angegebene Gasart angeschlossen werden soll, sind die
folgenden Operationen sorgfältig durchzuführen:
• die Roste und die Brenner entfernen.
• die Düsen “A” (Abb.9) mit Hilfe eines 7 mm
Steckschlüssels ausschrauben und durch die Düsen
ersetzen, die einen geeigneten Durchmesser
entsprechend der verwendeten Gasart gemäß
nachstehender Tabelle 1 "Merkmale der Brenner und
Düsen" aufweisen.
• Ersetzen Sie anschließend das Etikett der alten Eichung
mit dem im Düsenbeipack befindlichen Etikett der neu
eingestellten Gasart.
A
Abb.9
Abb.8
Abb.10
12
Page 56

Hinweis
Sollte der Gasdruck der Anlage von den vorgesehenen Werten
abweichen, oder nicht konstant sein, muss am Zuleitungsrohr
ein geeigneter, den einschlägigen inländischen Normen für
"Druckregler für Gasleitungen" entsprechender Druckregler installiert werden.
Einstellung der Brenner-Primärluft
An den Brennern ist keine Primärlufteinstellung erforderlich.
Einstellung des Minimalleistung
• Den Gashahn auf die Mindestposition einstellen;
• Den Drehknopf des Gashahns entfernen und die im
ELEKTROANSCHLUSS
Inner des Gashahnstiftes befindliche Stellschraube (Abb.10)
unter Verwendung eines entsprechenden Schraubenziehers
betätigen (durch das Lockern der Schraube das Minimum
erhöht und durch das Anziehen verringert wird).
Merke: bei Flüssiggas muß die Stellschraube bis zum
Anschlag festgezogen werden.
• Nachdem die gewünschte Minimalleistung bei gezündetem
Brenner erzielt wurde, den Brennerkopf mehrfach abrupt
von der Minimal-auf die Maximalleistung und umgekehrt
drehen, und sicherstellen, daß dabei die Flamme nicht
ausgeht.
Die mit einem Dreileiterkabel ausgerüsteten Backöfen sind
für den Betrieb mit Wechselstrom bei der auf dem Typenschild
(befindlich auf dem Gerät) und in der Bedienungsanleitung
angegebenen V ersorgungsspannung und -frequenz ausgelegt.
Der Erdleiter des Kabels ist gelb/grün.
Verlegen des Netzkabels
Öffnen des Klemmengehäuses:
• Heben Sie unter Zuhilfenahme eines Schraubenziehers die
seitlichen Zungen des Klemmengehäusedeckels an.
• Ziehen Sie den Deckel des Klemmengehäuses ab.
Ver legen Sie nun das Versorgungskabel wie folgt:
• die Schraube der Kabelklemme sowie die drei Schrauben
der Kontakte L-N- herausschrauben;
• die Drähte unter Beachtung der entsprechenden Farben
unter den Schraubenköpfen befestigen Blau (N) Braun
(L) Gelb/Grün
• das Versorgungskabel in der entsprechenden Kabelklemme
befestigen und den Deckel schließen.
Anschluss des Versorgungskabels an das Stromnetz
Versehen Sie das Kabel mit einem Nor mstecker für die auf
dem Typenschild angegebene Belastung; wird das Gerät direkt
an das Stromnetz angeschlossen, ist ein allpoliger Schalter
mit einer Mindestöffnung von 3 mm, der der Strombelastung
NL
und den geltenden Richtlinien entspricht, zwischenzuschalten
(der Erdleiter darf nicht durch den Schalter unterbrochen
werden).
Das Versorgungskabel muss so verlegt werden, dass es an
keiner Stelle einer Temperatur ausgesetzt wird, die 50°C über
der Raumtemperatur liegt.
Vor dem Anschluss ist Folgendes zu beachten:
• Die elektrische Sicherheit dieses Gerätes ist nur dann gewährleistet, wenn es sachgemäß und gemäß den geltenden
Sicherheitsvorschriften an eine leistungsfähige Erdungsanlage angeschlossen wird. Die Gegebenheit dieser grundlegenden Sicherheitsanforderung muss überprüft werden,
im Zweifelsfalle ist eine Kontrolle durch Fachpersonal anzufordern. Der Hersteller kann für e ventuelle, durch F ehlen
einer Erdungsanlage verursachte Schäden nicht
verantwortlich gemacht werden.
• Vor Anschluss des Gerätes kontrollieren Sie bitte, dass
die auf dem Typenschild (befindlich auf dem Gerät und/
oder auf der Verpackung) angegebenen Daten mit denen
des Strom- und Gasversorgungsnetzes übereinstimmen.
• Vergewissern Sie sich, dass die elektrische Leistung der
Anlage und der Steckdosen der maximalen, auf dem T ypenschild angegebenen Höchstleistung des Gerätes
entspricht. Im Zweif elsfalle ziehen Sie bitte einen Fachmann
zu Rate.
• Falls Steckdose und Stecker des Gerätes nicht übereinstimmen sollten, ist die Steckdose von einem Fachmann
durch eine andere geeigneten Typs zu ersetzen. Dieser
muss bei der Gelegenheit auch überprüfen, dass der
Steckdosen-Kabelquerschnitt der Leistungsaufnahme des
Gerätes entspricht. Allgemein ist die Verwendung von
Adaptern, Vielfachsteckdosen und/oder Ve rlängerungen
nicht ratsam. Falls deren Gebrauch jedoch unvermeidlich
sein sollte, dürfen nur Einfach- oder Vielfachadapter und
Ver längerungen verwendet werden, die den geltenden
Sicherheitsvorschriften entsprechen; achten Sie darauf,
dass die auf dem Einfachadapter und den V erlängerungen
angegebene Stromleistungsgrenze und die auf dem
Vielfachadapter angegebene Höchstleistungsgrenze nicht
überschritten wird. Stecker und Steckdose müssen leicht
zugänglich sein.
13
Page 57

EIGENSCHAFTEN DER BRENNER UND DÜSEN
Tabelle 1 (BELGIE)
Brenner Durch-
messer
(mm) Nom. Red.
C.Starkbrenner
B.Mittelstarker Brenner
A.Hilfsbrenner
D.Dreiflammen - kranz (Erdgas)
D.Dreiflammen - kranz (Flüssiggas)
Versorgungs-druck
Dieses Gerät entspricht den folgenden EG-Richtlinien:
- 73/23/EWG vom 19.02.73 (Niederspannung) und nachfolgenden
Änderungen;
- 89/336/EWG vom 03.05.89 (elektromagnetische V erträglichkeit)
und nachfolgenden Änderungen;
- 90/396/EWG vom 29.06.90 (Gas) und nachfolgenden
Änderungen;
- 93/68/EWG vom 22.07.93 und nachfolgenden Änderungen.
100 3,00 0,70 40 86 218 214 116 286 332
75 1,90 0,40 30 70 138 118 106 181 210
55 1,00 0,40 30 50 73 71 79 95 111
130 3,25 1,50 63 91 236 232
130 3,40 1,50 133 324 376
Nominal (mbar)
Minimum (mbar)
Maximum (mbar)
Wärmeleistung
kW (p.c.s.*)
Erdgas Flüssiggas
By-pass
1/100
(mm) (mm) Butan Propan (mm) G20 G25
* Bei 15°C und 1013 mbar-T rock engas
Propangas G31 Hs (oberer Heizwert) = 50,37 MJ/kg
Butangas G30 Hs (oberer Heizwert) = 49,47 MJ/kg
Methangas G20 Hs (oberer Heizwert) = 37,78 MJ/m³
Methangas G25 Hs (oberer Heizwert) = 32,49 MJ/m³
Düse
1/100
28-30
20
35
Menge*
g/h
Düse
1/100
37
25
45
Menge*
l/h
20
15
25
25
15
30
TECHNISCHE EIGENSCHAFTEN DES BACKOFENS
Inhoud van de oven: 56 Liters
Voltage en frekwentie van de stroomverzorging:
230V ~ 50Hz 2800W
ENERGIE-ETIKETT
Richtlinie 2002/40/EG über die Etikettierung von
Elektrobacköfen
Norm EN 50304
Energieverbrauch Natürliche Konvektion
Heizfunktion: Traditionell
Deklarierte Energieverbrauchsklasse:
Erzwungene Konvektion
Heizfunktion: Kuchen- Gebaeck
14
Page 58

Wir danken Ihnen, dass Sie dieses sichere und äußerst leicht zu bedienende Ariston-Gerät gewählt haben. Um sich mit
diesem vertraut zu machen und es auf optimale Art zu gebrauchen lernen, empfehlen wir Ihnen, dieses Handbuch
aufmerksam durchzulesen. Danke.
HINWEISE
DIESE ANLEITUNGEN GELTEN NUR FÜR DIE BESTIMMUNGSLÄNDER, DEREN SYMBOLE IM HANDBUCH UND
AUF DEM TYPENSCHILD DES GERÄTES ABGEBILDET SIND.
1. Dieses Gerät wurde für den Einsatz nicht professioneller Art in
Haushalten konzipiert.
2. Lesen Sie bitte die in diesem Handbuch enthaltenen Hinweise
aufmerksam durch, da sie wichtige Angaben hinsichtlich der
Sicherheit bei der Installation, dem Gebrauch und der W artung
liefern. Bewahren Sie dieses Handbuch sorgfältig auf, um es
jederzeit zu Rate ziehen zu können.
3. Die mit Lebensmitteln eventuell in Berührung kommenden
Backofenzubehörteile bestehen aus Materialien, die den
V orschriften der EG-Richtlinien 89/109 vom 21.12.88 und der
Rechtsverordnung 108 vom 25.01.92 entsprechen.
4. Nach Entfernen der V erpackung überprüfen Sie bitte, dass das
Gerät auch nicht beschädigt wurde. Im Zweifelsfall raten wir,
das Gerät nicht zu benutzen und sich an Fachpersonal zu
wenden. Be wahren Sie V erpackungsmaterial wie Plastikbeutel,
Schaumstoffe, Nägel usw . nicht in Reichweite v on Kindern auf;
es könnte eine große Gefahr darstellen.
5. Um Kratzer zu vermeiden, wurden einige Teile mit einem
abnehmbaren Schutzfilm überzogen. Vor Inbetriebnahme des
Gerätes muss dieser Film entfernt werden, die geschützten T eile
sind daraufhin mit einem weichen Tuch und einem milden
Reinigungsmittel zu reinigen. V erwenden Sie hierzu bitte k eine
Scheuermittel. Es empfiehlt sich, den Backofen vor erstmaligem
Benutzen für etwa 30 Minuten auf Höchsttemperatur in Betrieb
zu setzen, um eventuelle F ertigungsrückstände zu beseitigen.
6. Die zur Installation und Einstellung erforderlichen Arbeiten sind
gemäß den einschlägigen Richtlinien und ausschließlich durch
Fachpersonal durchzuführen. Für die entsprechenden
spezifischen Anweisungen verweisen wir auf den für den
Installateur bestimmten Teil des Handbuches.
7. V or Anschluss des Gerätes kontrollieren Sie bitte, dass die auf
dem Typenschild (befindlich auf dem unteren Geräteteil und auf
der letzten Seite des Handbuchs) angegebenen Daten mit
denen des Strom- und Gasversorgungsnetzes übereinstimmen.
8. Bei in Betrieb befindlichem Backofen oder Grill könnten das
Backofenf enster und die daran ang renz enden T eile sehr heiß
werden. Spielende Kinder sollten demnach ferngehalten werden.
9. Stellen Sie sicher, dass die elektrische Leistung der Anlage und
der Steckdosen der maximalen, auf dem Typenschild
angegebenen Höchstleistung des Gerätes entspricht. Im
Zweifelsfalle ziehen Sie bitte einen F achmann zu Rate.
10. Überprüfen Sie regelmäßig den Gasanschlussschlauch auf
seine Beschaffenheit, und lassen Sie diesen durch
Fachpersonal austauschen, sobald er irgendwelche Anomalien
aufweist.
11. Das V ersorgungskabel und der Gasanschlussschlauch dieses
Gerätes dürfen nicht seitens des Verbrauchers ausgetauscht
werden. Bei Beschädigung wenden Sie sich zwecks
Austauschs ausschließlich an eine autorisierte
Kundendienstzentrale.
12. Lassen Sie das Gerät nicht unnötigerweise eingeschaltet.
Schalten Sie den Gerätehauptschalter ab und drehen Sie den
Gashahn zu, wenn das Gerät nicht gebraucht wird.
13. Brenner und Roste bleiben auch nach Ausschalten des Gerätes
noch lange heiß. Achten Sie darauf, diese nicht zu berühren.
14. Stellen Sie keine unstabilen oder verformten Töpfe auf die
Brenner, um Unfälle durch Umkippen zu vermeiden. Stellen Sie
Stieltöpfe so auf die Kochstelle , dass ein zufälliges Anstoßen
vermieden wird.
15. Benutzen Sie keine brennbaren Flüssigkeiten in der Nähe des
in Gebrauch befindlichen Gerätes.
16. Wird der Herd auf einem Sockel aufgestellt, dann achten Sie
bitte darauf, dass das Gerät f est genug ve rankert wurde, und
nicht von diesem Sockel rutschen kann.
17. Verwenden Sie bitte keine Dampfreiniger zur Reinigung
Ihres Gerätes.
18. Öffnungen und Schlitze für Belüftung und Wärmeableitung
dürfen nicht verstopft werden.
19. Dieses Gerät darf nur für den Zweck, für den es geschaffen
wurde, eingesetzt werden. Jeder andere Einsatz (zum Beispiel:
zum Beheizen von Räumen) ist als unsachgemäß und
gefährlich anzusehen. Der Hersteller kann für eventuelle, durch
unsachgemäßen Gebrauch verursachte Schäden nicht zur
V erantwortung gezogen werden.
20. Die V erwendung eines jeden Elektrogerätes setzt die Einhaltung
einiger wichtiger Grundregeln voraus, insbesondere folgender:
• Berühren Sie das Gerät nicht mit nassen oder feuchten
Händen oder Füßen;
• Benutzen Sie das Gerät nicht barfuß;
• Verwenden Sie keine Verlängerungen, es sei denn mit
besonderer V orsicht;
• Ziehen Sie den Stecker nicht am Versorgungskabel oder
sogar an dem Gerät selbst aus der Steckdose;
• Setzen Sie das Gerät nicht der Witterung aus (Regen, Sonne
usw.);
• Lassen Sie das Gerät nicht von unbeaufsichtigten Kindern
oder unbefugten Personen ben utzen.
21. Bei Störungen und/oder schlechter Betriebsweise, schalten Sie
das Gerät aus. Wenden Sie sich zwecks eventueller
Reparaturen ausschließlich an eine anerkannte
Kundendienststelle und verlangen Sie den Einsatz von
Originalersatzteilen. Die Nichtbeachtung dieser Hinweise kann
die Sicherheit des Gerätes in Frage stellen.
22. Vergewissern Sie sich stets, dass sich die Reglerknöpfe auf
Position
Gebrauch befindet.
23. Soll das Gerät nicht mehr verwendet werden empfehlen wir,
dieses durch Durchschneiden des Versorgungskabels, nach
Herausziehen desselben aus der Steckdose, unbrauchbar zu
machen. F erner raten wir, jene Geräteteile zu v ernichten, die
vor allem für Kinder, die das unbr auchbare Gerät zum Spielen
benutzen könnten, eine Gefahr darstellen.
24. Bei in Betrieb befindlichem Gerät werden die Heizelemente und
einige Ofentürteile sehr heiß. Vermeiden Sie demnach, diese
zu berühren und halten Sie Kinder vom Ofen fern.
25. Gasgeräte erfordern eine ordnungsgemäße Belüftung um einen
einwandfreien Betrieb zu gewährleisten. V erge wissern Sie sich
deshalb davon, dass bei der Installation die im Abschnitt
"Aufstellung" aufgeführten Anforderungen gegeben sind.
" / 0" befinden, wenn sich das Gerät nicht in
1
Page 59

BESCHREIBUNG DES HERDES
CP 649 FT.2
CP 759 FT
D
I
G
H
M
M
M
M
700
D
I
G
H
M
M
M
M
M
A Kleinbrenner
B Normalbrenner
C Schnellbrenner
D Brenner mit Dreifachkrone
F
E Zündkerze Gasbrenner
F Sicherheitsvorrichtung - Diese spricht an, wenn die
Flamme unversehens erlöschen sollte (durch Überlaufen
von Flüssigkeiten, Durchzug usw.), und unterbricht
E
automatisch die Gaszufuhr.
G Backofen-Reglerknopf (Funktionswähler)
I Timer
H Thermostatenregler (Temperaturwähler)
M Reglerknöpf e K ochfeldbrenner
R Kochfeldroste
2
Page 60

BEDIENUNGSANLEITUNG
Gasbrenner
Auf der Bedienblende sind um jeden Drehknopf "M" herum
bzw. auf dem Drehknopf selbst folgende Symbole abgebildet:
Hahn
Geschlossen
Maximale Einstellung
Kleinste Einstellung
Die neben den Reglerknöpfen aufgedruckten Symbole
zeigen an, welcher Kochfeldbrenner dem jeweiligen Knopf
entspricht.
Die Brenner sind mit einer ThermoelementSicherheitsvorrichtung gegen Gasverluste ausgestattet.
Letztere unterbricht automatisch die Gaszufuhr, wenn die
Flamme während des Betriebs erlischt.
Zur Zündung eines Brenners verfahren Sie wie folgt:
• Drehen Sie den entsprechenden Reglerknopf gegen den
Uhrzeigersinn bis auf das Symbol der großen Flamme;
• drücken Sie den Reglerknopf bis zum Anschlag, um die
Gaszündautomatik einzuschalten;
Da der Brenner mit einer Sicherheitsvorrichtung "F"
ausgestattet ist, muss der Reglerknopf für ca. 6
Sekunden gedrückt werden, bis die
Sicherheitsvorrichtung, dank derer die Flamme
automatisch gezündet wird und brennend gehalten
bleibt, heiß wird.
• lassen Sie den Reglerknopf wieder frei und vergewissern
Sie sich, dass die Flamme gleichmäßig brennt. Sollte
dies nicht der Fall sein, ist Obiges zu wiederholen.
Zur Einstellung der niedrigsten Leistung drehen Sie den
Reglerknopf auf die kleine Flamme. Mittlere Leistungsstuf en
erhalten Sie durch Drehen des Reglerknopfes auf eine
Zwischenposition zwischen der großen und kleinen
Flamme.
Praktische Hinweise zum Gebrauch der Brenner
Um optimale Leistungen der Brenner zu gewährleisten, sollte
stets die für den jeweilig eingesetzten Brenner geeignete
Topfgröße verwendet werden, um zu vermeiden, dass die
Flammen über den Topfboden herausschlagen (siehe
nachstehende Tabelle).
Außerdem sollte die Flamme auf Minimum gedreht werden,
sobald das Gargut zu kochen beginnt.
Gasbrenner ø Topfdurchmesser (cm)
A.Kleinbrenner
B.Normalbrenner
C.Schnellbrenner
Brenner mit Dreifachkrone
D.
6 – 14
15 – 20
21 – 26
24 - 26
Als Zubehör zum Kochfeld werden
Reduzierroste mitgeliefert (Abb.1), die nur
für den Kleinbrenner "A".
Abb.1
Zum Ausschalten des Brenners wird der Reglerknopf im
Uhrzeigersinn auf die Position 'AUS' (die mit dem Symbol
"0" übereinstimmt), gedreht.
Um optimale Leistungen zu gewährleisten, ist Folgendes
zu beachten: Auf die Brenner kann jede Ar t von Töpfen
gestellt werden. Wichtig ist, dass der Topfboden eben ist.
Wichtig:
• Aktivieren Sie die Zündautomatik für nicht länger als 15
Sekunden.
• Sollten Schwierigkeiten bei der Zündung auftreten, könnte
dies an eventuell in der Gasleitung befindlichen Luft
liegen.
• Sollte die Flamme unversehens erlöschen, tritt noch für
einen kurzen Augenblick Gas aus, bevor die
Sicherheitsvorrichtung anspricht. Drehen Sie den
Reglerknopf auf AUS und w arten Sie mindestens 1 Minute
bevor Sie den Brenner erneut anzünden, damit das noch
ausgeströmte Gas, das eine Gefahr darstellen könnte,
abziehen kann.
• Befindet sich das Gerät nicht in Betrieb ist
sicherzustellen, dass sich sämtliche Reglerknöpfe auf
Pos. Aus " / 0" befinden. Auch der Haupthahn sollte
abgedreht werden.
3
Page 61

DIE EINZELNEN BACK OFENFUNKTIONEN
Die Wahl der einzelnen Backofenfunktionen erfolgt bei
den ARISTON Öfen über die auf der Schalterblende
angeordneten Drehschalter und Betriebsleuchten.
DER FUNKTIONSWÄHLSCHAL TER
Der Funktionswählschalter verfügt über 10 Bezugskerben,
die mit den folgenden, der Reihe nach aufgelisteten Symbolen
gekennzeichnet sind:
" / 0" : AUS
. : Beleuchtung
: "Traditionell"
Diese Einstellung entspricht der traditionellen Garmethode
und ist ideal für die Zubereitung von Einzelgerichten. Zwei
Heizwiderstände setzen sich gleichzeitig in Betrieb (der eine
befindet sich sichtbar an der oberen Ofeninnenwand, der
andere nicht sichtbar unter dem Ofenboden). Diese beiden
Wärmequellen erhitzen die Luft im Ofeninnern: Die warme,
leichtere Luft steigt nach oben und sorgt somit für die
Luftzirkulation. Dies wird als Wärmeübergang bezeichnet.
Diese Garmethode ist besonders geeignet für das langsame
Garen in geschlossenen Gusseisentöpfen (Fleischeintöpfe,
Kutteln etc.) oder für das Garen im Wasserbad (Crème
Caramel, Pasteten etc.). Es empfiehlt sich, das Backblech
als Auflagefläche für das Kochgeschirr zu benutzen, und
dieses auf die erste Schiene von unten zu schieben.
Schieben Sie das Gargut in den heißen Backofen.
: "Kuchen- Gebaeck"
Bei dieser Funktion wird nur das hintere, runde Heizelement
sowie das Gebläse aktiviert. Diese "delikate" Wärme ist ideal
zum Garen von Kuc hen und Kleingebäck, wie z.B. Brioches,
Schokoladenkuchen, Plum-Cake, Biscuitböden, Plätzchen,
Baisers etc. Es empfiehlt sich, das Backblech dazu auf die
zweite Schiene von unten zu schieben und das Gargut darauf
zu platzieren. Schieben Sie das Gargut in den heißen
Backofen.
: "Intensivbacken"
Sämtliche Heizelemente sowie das Gebläse werden in Betrieb
gesetzt, sodass sich die heiße Luft im Backofenraum
gleichmäßig verteilt. Diese Funktion eignet sich besonders
zum schnellen Garen (ohne vorheriges Vorheizen) und für
bereits vorgegarte Speisen (Tiefgefrorenes, F ertiggerichte).
Es empfiehlt sich, das Backblech als Auflagefläche für die
entsprechenden Behältnisse zu benutzen, und dieses auf die
erste Schiene von unten zu schieben.
: "Multicooking"
Sämtliche Heizelemente sowie das Gebläse werden in Betrieb
gesetzt, sodass sich die heiße Luft im Backofenraum
gleichmäßig verteilt. Diese Garfunktion kann verwendet
werden, um verschiedene Gerichte gleichzeitig auf
verschiedenen Ebenen im Ofen garen zu lassen. Bei dieser
Garfunktion bleibt der Eigengeschmack der verschiedenen
Speisen erhalten, selbst wenn diese sehr unterschiedliche
Geschmacksrichtungen aufweisen. Voraussetzung für diese
Funktion ist, dass alle Gerichte bei derselben Temperatur
gegart werden müssen (die fertigen Speisen werden
nacheinander aus dem Ofen genommen). Soll auf zwei
Führungsschienen gleichzeitig gegart werden, so empfiehlt
es sich, das Backblech auf die erste Führungsschiene von
unten und den Backofenrost auf die dritte Führungsschiene
von unten zu geben. Schieben Sie das Gargut in den heißen
Backofen.
: "Pizza"
Die Heizelemente (unteres und rundes Heizelement) sorgen
schnell für Heißluft im Ofen. Aufgrund der starken Unterhitze
ist diese Funktion besonders für das vollständige Garen von
Pizzateig und Mürbeteig geeignet. Das Gebläse sorgt für
die Bräunung der Oberseite, sodass das Backgut eine
appetitliche Farbe erhält. Es empfiehlt sich, das Backblech
als Auflagefläche zu benutzen, und dieses auf die erste
Schiene von unten zu schieben.
Schieben Sie das Gargut in den heißen Backofen.
: "Grillen"
Bei dieser Funktion wird ausschließlich das obere Heizelement
aktiviert. Der Grill wird zum Glühen gebracht und gibt eine
Infrarotstrahlung (mit den Eigenschaften der
Sonneninfrarotstrahlung) ab. Bei Einschalten der Grillfunktion
werden die Speisen nicht nur mittels Hitze sondern vor allen
Dingen mittels dieser Infrarotstrahlung gegart. Grillen Sie bei
geschlossener Backofentür. Das Grillgut sollte möglichst in
den kalten Backofen geschoben werden. Die Strahlungs wärme
ist mittels des Temperaturwählschalters einstellbar. Es
empfiehlt sich, das Backblech auf die erste Führungsschiene
von unten zu geben, sodass dieses abtropfendes Fett und
Fleischsaft auffangen kann; der Rost dagegen wird auf eine
höhere Schiene geschoben, je nach der Dicke des zu garenden
Fleisches.
: "Gratinieren"
Nur das obere Heizelement, welches Infrarotstrahlung abgibt,
wird in Betrieb gesetzt. Das Gebläse sorgt für die Zirkulation
der Heißluft im Ofen und damit für eine gleichmäßige
Temperaturverteilung. Das Gargut wird gleichzeitig folgenden
Faktoren ausgesetzt:
• Infrarotstrahlen zum Garen an der Oberfläche;
• Heißluft zum vollständigen Garen durch Wärmeleitung.
Die Funktion "Umluftgrill" eignet sich insbesondere zum
schmackhaften Zubereiten von Braten (egal ob rotes oder
weißes Fleisch) sowie Geflügel. Geben Sie das Fleisch auf
den Rost, der auf die zweite Führungsschiene von unten
geschoben wird und schieben Sie das Backblech zum
Auffangen v on abtropfendem Fett und Fleischsaft auf die erste
Schiene von unten. Schieben Sie das Gr illgut in diesem Fall
in den nicht vorgeheizten Ofen. W enn Ihr Ofen mit Drehspieß
ausgestattet wird, können Sie es mit den Funktionen "Grill"
und "Gratinieren" benutzen. Grillen Sie bei geschlossener
Backofentür. Zur Vermeidung von Verbrennungen bei
Einsetzen des Spießes empfiehlt es sich, den Ofen nicht
vorzuheizen. Das Backblech zum Auffangen von
abtropfendem Fett und Fleischsaft sollte sich auf der ersten
Führung und der Drehspieß auf der dritten Führung von unten
befinden (Hinweise zum Einsetzen des Drehspießes: siehe
nächsten Abschnitt).
Während des Betriebs der Funktionen "Grill" und
"Gratinieren" können die äußeren Ofenteile sehr heiß
werden. Halten Sie daher Kinder vom Ofen fern.
: Fastclean-Selbstreinigung
Zur vollständigen Reinigung Ihres Backofens. Detaillierte
Angaben zur Fastclean-Selbstreinigung siehe Seite 6.
4
Page 62

ZUBEHÖR
Ihr Backofen ist für eine Vielzahl an unterschiedlichen
Garmethoden ausgestattet. Damit Sie bestmögliche
Zubereitungsergebnisse erzielen können, bieten wir eine Reihe
an Zubehörteilen an.
Dieses Zubehör kann je nach Bedarf auf den verschiedenen
Führungsschienen im Ofeninnern installiert werden.
Für jede aufgeführte Funktion und Garmethode wird die
jeweils empfohlene Führungsschiene angegeben
(durchnummeriert von unten nach oben).
Höhenstufe n˚5
Höhenstufe n˚4
Höhenstufe n˚3
Höhenstufe n˚2
Höhenstufe n˚1
Zahnleisten
Das Backblech
Wird verwendet…
• als Auflagefläche des jeweiligen Speisenbehälters
beim Garen auf einer Ebene und beim Garen im
Wasserbad;
• als direkte A uflagefläche für das Gargut (Kleingebäck
etc.);
• zum Auffangen von abtropfendem Fett oder
Fleischsaft, bei gleichzeitiger Verwendung des großen
Rostes.
Es empfiehlt sich nicht, das Backblech auf die
Führungsschienen 4 und 5 zu schieben.
Der große Backofenrost
Er wird stets zusammen mit dem Backblech in der
vorgesehenen P osition (d.h. mit den Halterungen nach oben)
verwendet:
• Auf der zweiten Führungsschiene von unten dient er
als Auflagefläche für zu garendes Fleisch; das
Backblech wird dann auf die erste Führung geschoben
und dient dem Auffangen von abtropfendem Fett oder
Fleischsaft.
• Auf der oberen Führungsschiene (je nach Fleischdicke)
dient er als Ablage für das zu grillende Fleisch (Fleisch
vom Rost); das Backblech wird auf die erste Führung
gegeben und dient dem Auffangen v on abtropfendem F ett
oder Fleischsaft.
• Zum Garen verschiedener Speisen auf
verschiedenen "Ebenen" wird der große Rost in die obere
Führungsschiene geschoben.
Bei der Funktion "Gratinieren" sollte das Fleisch auf
keinen Fall direkt auf das Backblech gelegt werden, da
die Unterhitze den Austritt von Fleischsaft und Fett
hervorruft, was zu Spritzern oder Verkrustungen an den
Ofenwänden und schließlich zu Rauchbildung durch
Verbrennung führen könnte.
DER BRA TSPIESS
Flügelmuttern
Spieß
Handgriff des Drehspießes
Traggestell
Gabel
Dieses Zubehör ermöglicht ein langsames, vollständiges
Garen auf einem sich ununterbrochen drehenden Spieß. Das
Ergebnis ist eine perfekte Bräunung des Fleisches. Der
Drehspieß setzt sich zusammen aus:
• einer Halterung, die auf der dritten Führungsschiene
von unten installiert wird, sodass der Drehspieß in die
Hohlachswelle des Motors, der sich hinter der mit
Öffnungen versehenen Ofenrückwand befindet,
eingesetzt werden kann;
• einem Spieß, auf den das zu grillende Stück Fleisch
gespießt wird, und der an beiden Enden auf je einer
mit einer Flügelschraube befestigten Gabel aufliegt.
Anmerkung: Achten Sie bei Installieren des Drehspießes
darauf, dass der Spieß korrekt in die mit dem Motor
verbundene Hohlachsw elle eingeführt wird. Achten Sie darauf,
dass…
- das zu grillende Fleischstück in der Mitte aufgespießt wird;
- das zu grillende Fleisch sich in der Mitte des Spießes befindet.
• ein verlängerbarer Griff aus Isoliermaterial, der vorn
auf den Spieß geschraubt wird…
- ermöglicht die Verwendung des Spießes auch für das
Garen sehr großer Fleischstücke
- verhindert Verbrennungen beim Herausnehmen des
fertiggegarten Fleisches.
Schrauben Sie den Griff zum Herausnehmen des Spießes
bis zum Anschlag fest (während des Garens muss der Griff
entfernt werden).
Zeitschalter für den Drehspieß
Der Drehspieß der ARISTON Backöfen kann über einen
Zeitschalter zeitlich vorprogrammiert werden. Nach Ablauf
der Garzeit sorgt der Motor dafür, dass sich der Spieß so
lange weiterdreht, bis die Temperatur im Ofen ausreichend
gesunken ist, sodass kein Risiko besteht, dass das Fleisch
verbrennen könnte.
Nach Beendigung des Garvorgangs wird die Einstellung des
Funktionswählschalters beibehalten und die Temperatur auf
"0" gestellt.
Aufrechterhalten der Gebläsefunktion
Das Gebläse schaltet sich nicht unmittelbar nach Beendigung
des Garvorgangs ab. Auf diese Weise kann das Ofeninnere
besser abkühlen. Es ist also völlig normal, dass das Gebläse
trotz Ausschalten des Ofens noch so lange funktioniert, bis
die Temperatur im Ofeninnern weniger als 120º beträgt.
Backofenbeleuchtung
Die Backofenbeleuchtung wird durch Drehen des
Funktionswählschalters auf das Symbol eingeschaltet.
Solange der Ofen eine Garfunktion ausführt, bleibt die
Backofenbeleuchtung eingeschaltet (mit Ausnahme der
Funktion zur Selbstreinigung). Wird der Backofen
vorprogrammiert, dann schaltet sich die Ofenbeleuchtung zum
Zeitpunkt des Programmierens ein und schaltet sich erst nach
Beendigung des Garvorgangs automatisch wieder aus.
5
Page 63

FAST CLEAN
Sicherheitsvorrichtungen
Bei Aktivierung der Fast-cleanfunktion erreicht die
Temperatur im Backofenraum 500º. Bei derartigen
Temperaturen verkohlen die im Ofen zurückgebliebenen
Speisereste.
Angesichts der hohen Temperaturen, die hierbei erreicht
werden, ist der Ofen mit einigen Sicherheitsvorrichtungen
ausgestattet:
• bei Erreichen höherer Temperaturen wird die Ofentür,
zur Vermeidung eventueller Verbrennungen,
automatisch gesperrt;
• bei jedweder Störung wird die Stromversorgung
der Heizelemente sofort unterbrochen
Anmerkungen:
1- Trotz der extrem hohen Temperaturen, die während des
gesamten Pyrolyse-Reinigungsverfahrens im
Backofenraum erreicht werden, erwärmt sich der Back ofen
außen nur gering. Das ist zurückzuführen auf…
• eine starke Isolierung des Backofenraums;
• ein Gebläse, welches durch Luftzirkulation für eine
Abkühlung der Wände sorgt.
2- Durch das Glas der Ofentür kann beobachtet werden,
wie aufgrund des Pyrolyseverfahrens einige Speisereste
bei Kontakt mit den Heizelementen verkohlen und
aufglimmen: Es handelt sich um eine spontane
Verbrennung, einen völlig normalen Vorgang, der
keinerlei Risiken birgt.
Einige nützliche Hinweise, die Sie vor Einstellen der
Selbstreinigungs-Funktion beachten sollten:
1- Versuchen Sie zunächst, größere Speisereste mit einem
feuchten Schwamm zu entfernen. Verwenden Sie auf
keinen Fall Spülmittel oder spezielle Ofenreinigungsmittel.
2- Entfernen Sie sämtliches Zubehör: Es hält derart
hohen Temperaturen nicht stand. Darüberhinaus könnten
einige Zubehörteile das Reinigungsergebnis
beeinträchtigen, indem sie die gleichmäßige Zirkulation
der heißen Luft im Ofeninnern verhindern. Das Zubehör
läßt sich problemlos wie normales Geschirr reinigen (auch
in der Spülmaschine).
3- Hängen Sie keine Geschirrtücher zum Trocknen an den
Ofentürgriff.
Anmerkung: Während der Fast clean können einzelne
Ofenteile sehr heiß werden. Halten Sie daher Kinder
vom Ofen fern.
Wie wird die Selbstreinigung in Gang gesetzt?
– Entfernen Sie zunächst sämtliches Zubehör.
Entfernen Sie grobe Speisereste und Spritzer; so
vermeiden Sie eventuelle Flammen- und Rauchbildung.
– Schließen Sie die Ofentür.
– Wählen Sie über den Funktionswählschalter die
Funktion
– Nun können Sie programmieren. Sie können wählen
zwischen…
· einem sofortigen Pyrolysestart: dieselbe
Vorgehensweise wie bei der Einstellung der
Garfunktionen;
· einem vorprogrammierten, verzögerten
Pyrolysestart: dieselbe Vorgehensweise wie bei der
Programmierung der Garfunktionen;
– Die vollständige Selbstreinigung dauert ca. 90 Minuten.
Was geschieht während der Fast clean?
Bei Erreichen einer Temperatur von 325 °C wird die Ofentür
automatisch gesperrt: auf dem Display erscheint der
Buchstabe "P" sowie die noch verbleibende Restzeit bis
zum Pyrolyseabschluss.
Solange die Temperatur im Ofeninnern extrem hoch ist,
läßt sich die Ofentür nicht öffnen.
Was geschieht nach Fastc leanabschluss?
Nach Abschluss der Fastclean-Selbstreinigung erscheint
auf dem Display "P. 0.00".
Die Ofentür läßt sich erst dann öffnen, wenn…
• die Ofentemperatur entsprechend gesunken ist;
• der Funktionswählschalter erneut auf " / 0" gestellt
wurde.
An den Ofenwänden und unten im Ofen könnte sich während
der Reinigung etwas weißer Staub abgelagert haben.
Entfernen Sie diesen mittels eines feuchten Schwamms,
nachdem der Ofen vollständig erkaltet ist.
Möchten Sie jedoch die noch vorhandene Ofenwärme zum
Garen nutzen, dann ist es nicht erforderlich, diese
Staubablagerungen sofort zu entfernen; sie sind
unschädlich.
EINIGE KLEINERE FUNKTIONSSTÖRUNGEN
KEIN GRUND ZUR SORGE …
wenn nachstehende, kleinere Betriebsanomalien auftreten;
diese sind im allgemeinen auf unkorrekte Bedienung oder
falsche Bewertung vermeintlicher Störungen
zurückzuführen.
Beim Backen bzw. Braten tritt starker Rauch aus dem
Backofen aus:
• Vergewissern Sie sich, dass für die gewünschte Garart
auch die geeignete Funktion eingestellt wurde, dass das
geeignete Kochgeschirr gewählt, und das Gargut auf
die empfohlene Einschubhöhe eingeschoben wurde.
• Prüfen Sie auch die eingestellte Temperatur, die sehr
wahrscheinlich zu hoch für die vorgesehene Garart ist.
• Kontrollieren Sie den Verschmutzungsgrad des
Backofens, wahrscheinlich sollte er gereinigt werden.
Am Email könnten Speisereste zurückgeblieben sein,
die verkohlen und so den Rauch verursachen.
• Fettspritzer, oder eventuell heruntergelaufene
Flüssigkeiten auf heißen Oberflächen können ebenfalls
die Ursache von Rauchbildung sein.
6
Page 64

DER GARZEITPROGRAMMIERER
Anzeigefeld für alle Funktionen :
Uhrzeit, Zeitprogrammierung,
Dauer und Ende der Garzeit bzw.
des Fastclean-Vorgangs
Leuchtanzeige der Zeitprogram-
mierung mit Tonsignal
Taste zum Starten des
Garvorgangs
Taste zum Einstellen der
Gardauer
Taste zum Einstellen des
Endes der Gardauer
Taste zum Einstellen der
Zeitprogrammierung mit
Tonsignal
Einstellung der Uhrzeit
Die Uhrzeit kann nur eingestellt werden, wenn der
Funktionswählschalter auf "0" steht.
Nach dem Netzanschluss oder nach einem Stromausfall
blinkt auf dem Display die Anzeige "0.00". Drücken Sie die
Taste "+" und/oder "-", um die Uhrzeit zurück- bzw.
vorzustellen.
Nach Freigabe der Tasten folgt eine Zeit von 3 Sekunden,
während der sämtliche übrigen Tasten deaktivier t werden,
wird während dieser 3 Sekunden der Wert nicht weiter
verändert, wird die eingegebene Uhrzeit g espeichert.
Einstellung des Kurzzeitweckers
Diese Kurzzeitwecker-Funktion kann nur bei
ausgeschaltetem Backofen (Funktionswählschalter
demnach auf "0") in Anspruch genommen werden.
Um den Kurzzeitwecker einzustellen drücken Sie kurz auf
die Taste und regulieren dann die Zeit über die Taste
"+" und/oder "-". Wird innerhalb 3 Sekunden nach Freigabe
der Tasten der Wert nicht weiter verändert, wird die gewählte
Zeit gespeichert; die Anzeigeleuchte schaltet sich ein,
die Zeitrechnung (rückwärtiger Ablauf) setzt ein.
Nach abgelaufener Zeit ertönt ein akustisches Signal (1
Minute), das durch Druck auf eine beliebige Taste abgestellt
werden kann; die Anzeigeleuchte erlischt. erlischt.
Der Kurzzeitwecker hat keinen Einfluss auf den Betrieb
des Backofen.
T onsignal-Lautstärke
Die Lautstärke des Tonsignals kann (solange es
vernehmbar ist) durch Druck auf die Taste "-" bis auf die
gewünschte Lautstärke herabgesetzt werden.
Garen ohne Startvorwahl
Ist der Backofen ausgeschaltet (Funktionswählschalter auf "
/ 0") sind sämtliche Tasten (mit Ausnahme der Taste "-" zur
Lautstärkeneinstellung des Kurzzeitwecker-Tonsignals)
deaktiviert.
Kontrolllampe eines programmierten
Vorgangs:
- ein: Vorgang noch im Gange
- aus: Vorgang beendet
· blinkt: programmierter Vorgang
beendet
Kontrolllampe der Programmierung A:
· aus: manueller Betrieb
· ein: Programmierung beendet
Mit den „+" und „-"-Tasten wird die Anzeige eingestellt (Einstellung der Uhrzeit,
Zeitprogrammierung, Einstellung der
5 s.
Dauer bzw. des Endes eines Vorganges).
„+" die Zahlen erhöhen
„-" die Zahlen verringern.
Wählen Sie durch Drehen des Funktionswählschalters (im
Uhrzeigersinn) die von Ihnen gewünschte Funktion. Each
function has a predefined cooking time that you can visualise
by pressing . You can modify the cooking time according
to the recipes you use. Simply press and choose the
cooking time you require using the “-” and/or “+”.
Auf dem Display wird eine empfohlene Temperatur
eingeblendet, unabhängig von der Temperatur, die auf dem
T emperaturwählschalter angez eigt wird. Dieser empf ohlene
Temperaturwert kann durch Drehen des Schalters beliebig
verändert werden.
The grill display indicates a power level between 1 and 5
(1 for minimum power and 5 for maximum power).
Der Backof en ist einsatzbereit: Drücken Sie die Taste .
Der Backofen schaltet auf Vorheizen, erkenntlich an dem
nun blinkenden Symbol . Nach Ablauf der Vorheizzeit
(Dauer ca. 10 Minuten) schaltet das Blinklicht auf Festlicht
um.
Wird nach Einstellen einer Funktion nicht innerhalb einer
Minute der Start des Garvorgangs bestätigt, erscheint auf
dem Display die Anzeige "OFF", die Tasten werden
deaktiviert. Drehen Sie demnach den
Funktionswählschalter auf " / 0" und wiederholen Sie die
Einstellungen.
ZUR BEACHTUNG
Das Gerät ist mit einem Fehlerdiagnose-System
ausgestattet. Ev entuelle Fehler werden durch Anz eigen des
Typs "Fn Fm" (n und m=einstellige Zahlen) gemeldet.
Wenden Sie sich in solchen Fällen bitte an die
nächstgelegene anerkannte Kundendienststelle.
7
Page 65

VORWAHL DES GARPROGRAMMS
Vorwahl der Garzeit mit sofortig em Start
Der Garvorgang startet sofort, nach Ablauf der eingestellten
Zeit schaltet sich der Backofen aus.
Verfahren Sie hierzu wie folgt:
• drehen Sie den Funktionswählschalter auf die
gewünschte Funktion;
• regulieren Sie die Temperatur über den
Temperaturwählschalter (in jeweils 10°C-Stufen), falls
der empfohlene Wert als nicht geeignet angesehen
werden sollte.
The grill display indicates a power le vel between 1 and 5 (1
for minimum power and 5 for maximum power).
• Jeder Garfunktion wird eine empfohlene Garzeit
zugeordnet, die durch Drücken der Taste und der
Taste "+" und/oder "-" geändert werden kann. (Bei der
Garzeit sind ca. 10 Minuten als Vorheizzeit mit
einzuberechnen). Sollte der eingestellte Wert nicht
innerhalb der nach Freilassen der Tasten folgenden 3
Sekunden nochmals geändert werden, wird die Garzeit
gespeichert.
Während der Vorheizphase blinkt das Symbol die
eingestellte Garzeit wird eingeblendet. 3 kurze Tonsignale
zeigen das Ende der Vorheizzeit an, das Symbol schaltet
auf Festlicht um.
Für die Funktionen "Schnellgaren" und "Grillen" ist kein
Vorheizen vorgesehen.
Während des Garvorgangs wird auf dem Display die noch
verbleibende Restzeit eingeblendet. Zur Einblendung der
Temperatur muss die Taste "+" gedrückt werden.
Die kürzest einstellbare Garzeit beträgt 2 Minuten, die
längste 10 Stunden.
• Drücken Sie die Taste um den Garvorgang zu
starten.
Wird nach Einstellen einer Funktion nicht innerhalb einer
Minute der Start des Garvorgangs bestätigt, erscheint auf
dem Display die Anzeige "END", die Tasten werden
deaktiviert. Drehen Sie demnach den Funktionswählschalter
auf " / 0" und wiederholen Sie die Einstellungen.
Nach Ablauf der Garzeit ertöt ein akustisches Signal
(für 1 Minute) und auf dem Display wird die Anzeige
"END" eingeblendet. Das Signal kann durch Druck auf
eine beliebige Taste abgestellt werden.
• Drehen Sie den Funktionswählschalter wieder auf
"0". Die Anzeige "END" erlischt, für 3 Sekunden wird
nun die Anzeige "OFF" eingeblendet.
Während des Garvorgangs können folgende Einstellungen
noch geändert werden: die Funktion (ohne hierdurch die
eingestellte Garzeit und Temperatur zu beeinflussen), die
Temperatur (ohne hierdurch die eingestellte Garzeit zu
beeinflussen) und die Garzeit.
Außerdem ist es möglich, ein Garprogramm gänzlich zu
unterbrechen bzw. abzubrechen und den Backofen
auszuschalten. Drehen Sie hierzu den
Funktionswählschalter auf "0". In einem solchen Fall wird
auf dem Display für 3 Sekunden die Anzeige "OFF"
eingeblendet, bevor es sich gänzlich ausschaltet.
Vorwahl der Garzeit mit verzög ertem Start
Auf der Grundlage der vom Benutzer eingegebenen Daten
bestimmt der Garzeitprogrammierer automatisch die
Uhrzeit, zu der der Garvorgang startet, die Garzeit und
das Garzeitende.
Verfahren Sie hierzu wie folgt:
• Drehen Sie den Funktionswählschalter auf die
gewünschte Funktion.
• Regulieren Sie die Temperatur über den
Temperaturwählschalter, falls der empfohlene Wert als
nicht geeignet angesehen werden sollte.
The grill display indicates a power level between 1 and 5
(1 for minimum power and 5 for maximum power).
• Drücken Sie die Taste um die Garzeit bzw . Dauer
einzustellen.
• Regulieren Sie die Zeit anhand der Tasten "+" und/
oder "-" (bei der Berechnung der Garzeit ist die
Vorheizzeit mit einzubeziehen). Sollte der eingestellte
Wert nicht innerhalb der nach Freilassen der Tasten
folgenden 3 Sekunden nochmals geändert werden, wird
die Garzeit gespeichert.
• Zur Vorwahl eines Garprogramms ist zuerst zu
ermitteln, zu welcher Uhrzeit das Gericht gegart werden
soll; geben Sie diese durch Drücken der Taste und
anschließend der Taste "+" und/oder "-" ein: Sollte der
eingestellte Wert nicht innerhalb der nach Freilassen
der Tasten folgenden 3 Sekunden nochmals geändert
werden, wird das Garzeitende gespeichert.
Die kürzest einstellbare Garzeit beträgt 2 Minuten, die
längste 10 Stunden.
• Drücken Sie die Taste , das Symbol "A" leuchtet
auf.
Nach erfolgter Programmv orwahl bis zum eigentlichen Start
des Garvorgangs kann nur noch die Temperatur und die
Funktion geändert werden.
Zu der vorbestimmten Uhrzeit schaltet sich der Backofen
ein und startet mit der Vorheizphase, die durch Blinken
des Symbols angezeigt wird, die Garzeit bzw. -dauer
wird auf dem Display eingeblendet.
Für die Funktionen "Schnellgaren" und "Grillen" ist kein
Vorheizen vorgesehen.
• Drehen Sie den Funktionswählschalter wieder auf " /
0"
.
8
Page 66

EINIGE BEISPIELE ZUM GAREN AUF EINER EBENE
Rezepte Backofenfunktion Temperatur Garzeit Höhenstufe Hinweise Vorheizen
Brot (1 kg)
Blätterteiggebäck
Pizza (Brotteig)
Quiche lorraine
(Mürbeteig)
Käse-Soufflé
Pâté de campagne
Lammkeule
Überbackene
Kartoffeln
Fisch
Hühnchen
Rinderbraten
Schweinebraten
Kalbsbraten
Multicooking 210°C 30-35' 2 Auf Emailleblech Ja
Multicooking 200°C
Pizza 240°C 10-15' 1 Auf Emailleblech Ja
Pizza 220°C 30' 1 Backform auf Emailleblech Ja
Multicooking 200°C 30-40' 2
Traditionell 180°C 50-60' 2
Gratinieren 210°C
Gratinieren 200°C
Traditionell
Gratinieren
Grillen
Gratinieren
Grillen Drehspieß
Gratinieren 210°C
Gratinieren 210°C 1 Std. für 1 kg 2-1* Fleisch auf Rost Nein
Gratinieren 210°C 1 Std. für 1 kg 2-1* Fleisch auf Rost Nein
200°C
240°C
250°C
210°C
20-25'
je nach Dicke
1 Std. für
1,5 bis 2 kg
40-45'
je nach Dicke des Auflaufs
je nach Fisch und Dicke
1 Std. für
1,2 bis 1,2 kg
je nach gewünschter
Konsistenz
2 Auf Emailleblech Ja
Backform Ø 20 cm auf
Emailleblech
Im Wasserbad (warm) auf
Emailleblech
2-1* Fleisch auf Rost Nein
2 Auflaufform auf Emailleblech Ja
Filets + Flüssigkeiten, Emailleblech
2
2-1*
2-1*
2-1*
3-1*
2-1* Fleisch auf Rost Nein
Ganzer Fisch, Rost
Grillfisch, Rost
Fleisch auf Rost
Drehspieß bei geschl.
/Gescholssene Tür
Ja
Ja
Ja
Nein
Gefüllte Tomaten
Aufwärmen von
Fertiggerichten
Lasagne
des Auflaufs
Hefegebäck
Napfkuchen
Windbeutel
Karamelcreme
Biskuitteig
Macaron
Weiße Baisers
Braune Baisers
Bratäpfel
Sandgebäck
Apfeltorte
Buttergebäck
Mürbeteigtorte
Salzgebäck
X - Y* in der Spalte "Höhenstufe" :
X = Rost oder Spiess auf H¨henstufe X
Y = Emailleblech zum Auffangen des Fleischsafts und Fetts auf Höhenstufe Y
Multicooking 200°C 20-25' 2 Teller auf Emailleblech Ja
Intensivbacken
Intensivbacken 200°C
Intensivbacken 200°C
Kuchen / Gebaeck 160°C 35-45' 2
Kuchen / Gebaeck 160°C 60' 2
Kuchen / Gebaeck 200°C 20-25' 2
Traditionell 180°C 30' 2
Kuchen / Gebaeck 190°C 30' 2
Kuchen / Gebaeck 180°C
Kuchen / Gebaeck 70-80°C
Kuchen / Gebaeck 110°C
Multicooking 210°C
Kuchen/Gebaeck 190°C 10-15' 2 Auf Emailleblech Ja
Pizza 220°C 30' 1 Backform auf Emailleblech Ja
Heißluftofens 190°C 10-15' 2 Backblech a/Backrost Ja
Heißluftofens 190°C 15-25' 2 Backblech a/Backrost Ja
Heißluftofens 190°C 10-15' 2 Backblech a/Backrost Ja
siehe Angaben
auf der
Verpackung
siehe Angaben auf der
Verpackung
je nach Dicke
des Auflaufs
je nach Dicke
des Auflaufs
15-20'
je nach Größe
3 Std.
je nach Größe
2 Std.
je nach Größe
20-25'
je nach Größe
Hinweis : Das Rost ist immer mit der Wölbung nach unten in den Backofen zu schieben.
2 Teller auf Em ailleblech Nein
2 Teller auf Em ailleblech Nein
2 Teller auf Em ailleblech Nein
Backform aus Aluminium auf
Emailleblech
Backform aus Aluminium auf
Emailleblech
Kleine Beutel ohne Zucker auf
Emailleblech
Kleine Töpfchen im
Wasserbad (warm)
Backform aus Aluminium auf
Emailleblech
2 Auf Emailleblech Ja
2 Trocknung kleiner Baisers Ja
2 Trocknung kleiner Baisers Ja
2 Teller auf Em ailleblech Ja
Ja
Ja
Ja
Ja
Ja
9
Page 67

PRAKTISCHE BACK-/BRATHINWEISE
Durch den Back-/Bratvorgang werden rohe Speisen in
schwackhafte Gerichte verwandelt.
Zum guten Gelingen eines solchen Back-/Bratvorgangs tragen
nicht nur die Zutaten bei, sondern auch: die von den Speisen
angenommene Färbung, ihre nachfolgenden
Zubereitungsphasen, ob sie schön zart geblieben sind und
optimal gegart wurden usw.
Die Backof en-Einstellungen (T emperaturen und Garzeiten) hängen
REINIGUNG UND PFLEGE
Wichtig: Trennen Sie das Gerät vor jeder Reinigung und
Pflege vom Stromnetz.
Um eine optimale Lebensdauer des Gasherdes zu
gewährleisten, muss er regelmäßig gründlich gereinigt werden.
Beachten Sie hierbei Folgendes:
Innenteile des Backofens:
Es empfiehlt sich, das Backofeninnere nach jedem Gebrauch
(PIRO'), besonders nach der Zubereitung von Braten zu
reinigen. Auch um eine Ablagerung von Speiserestespritzern
zu vermeiden, die bei dem nächsten Einsatz des Backofens
neu eingebrannt würden, und demnach durch Verkohlen
unangenehme Gerüche und Rauchbildung verursachen
würden.
Gebrauch von Alufolie
Der Backofenboden darf nicht mit Alufolie ausgelegt
werden, (weil man vielleicht denkt, sich hierdurch ein
Reinigen des Backofenbodens zu ersparen). Der direkte
Kontakt des Aluminiums auf dem heißen Emailboden
würde einen derartigen Wärmestau verursac hen, der das
Email zum Schmelzen bringen und so hoffnungslos
beschädigen würde.
natürlich von zwei wichtigen Parametern ab:
- von der Größe bzw. Menge des Garguts
- von der Fähigkeit, die gewünschte Färbung zu erreichen
(Zuckermenge, die Anzahl der Eier des Rezepts).
Bei den in unserer Tabelle vorgeschlagenen
Backofeneinstellungen, die unter Zugrundelegung allgemeiner
Parameter ausgearbeitet wurden, handelt es sich um
Richtwerte, die je nach Wunsch geändert werden können.
Abnahme/Montage der Backofentür
Zur Erleichterung der Reinigung des Backofeninnern kann die
Backofentür wie folgt abgenommen werden: (Abb. 2-3):
• Backofentür ganz öffnen und die 2 kleinen Hebel "B" hoch
drücken (Abb. 2);
• Backofentür nun teilweise wieder schließen; die Tür kann
jetzt nach oben hin aus den beiden Haken "A"
herausgezogen werden. (Abb. 3).
Montage der Backofentür:
• Die Backofentür mittels der 2 Hak en "A" (Tür hierbei vertikal
halten) in die Schlitze einhängen;
• Stellen Sie sicher, dass die Halterung "D" ordnungsgemäß
am Rand der Schlitze eingehakt ist (bewegen Sie hierzu die
Tür leicht hin und her);
• Abschließend die Tür ganz öffnen und die 2 kleinen Hebel
"B" nach unten klappen; Tür wieder schließen.
Kochfeld:
• Die abnehmbaren Brennerteile sollten regelmäßig in
lauwarmer Spüllauge gereinigt, und von etwaigen
V erkrustungen befreit werden. V ergewissern Sie sich hierbei,
dass die Flammenkranzöffnungen nicht verstopft sind. Vor
erneutem Gebrauch sind diese Teile gründlich abzutrocknen.
• Die Spitzen der Zündautomatikkerzen des Kochfelds sowie
die des Gasbackofens sind regelmäßig zu reinigen.
Außenteile des Backofens:
• Reinigen Sie diese erst dann, wenn der Backofen gänzlich
abgekühlt ist.
• Die Stahlteile und vor allem die mit Symbolaufdrucken
versehenen Stellen dürfen nicht mit Löse- oder
Scheuermitteln gereinigt werden; verwenden Sie hierzu
ausschließlich ein mit milder, lauwarmer Spüllauge
angefeuchtetes Tuch. Auf den Edelstahlteilen könnten
Flecken zurückb leiben, sollte stark kalkhaltiges W asser oder
ein scharfes (phosphorhaltiges) Spülmittel für längere Zeit
darauf stehenbleiben. Es empfiehlt sich demnach, diese
T eile nach der Reinigung sof ort gründlich nachzuspülen und
trockenzureiben.
Wichtig: Reiben Sie bei der Reinigung stets in
waagerechter Richtung, d.h. in Richtung der Satinierung
des Edelstahls.
• Gegebenenfalls können die Stahlteile nach ihrer Reinigung
mit einer Hochglanzcreme behandelt werden: Verwenden
Sie jedoch ausschließlich Spezialprodukte für Edelstahl.
Wichtig: Verwenden Sie zur Reinigung keine Scheuermittel,
keine scharfen Reinigungsmittel oder Säuren.
ABBILDUNG 2 ABBILDUNG 3
Austausch der Backofenlampe
• Vor jedem Eingriff ist der Backofen entweder durch
Herausziehen des Steckers oder durch Abschalten des zum
Anschluss des Gerätes an die Hausanlage verwendeten
Schalters stromlos zu machen.
• Nehmen Sie unter Zuhilfenahme eines schmalen und
flachen Wer kzeuges (Schraubenziehen, Löffelgriff usw.) die
Glasabdeckung ab.
• Schrauben Sie die Lampe aus und ersetzen Sie sie durch
eine neue gleicher
Eigenschaften.
- Spannung 230/240 V
- Leistung 15 W
Backofenraum
- Sockel E 14
• Bringen Sie die
Lampe
Glasabdeckung wieder
an; achten Sie hierbei
Dichtung
darauf, dass die
Dichtung
Glasscheibe
ordnungsgemäß
eingelegt wird.
Schmieren der
Gashahnarmatur
Auf die Dauer könnte der Gashahn blockieren oder sich nur sehr schwer
drehen lassen, in einem solchen Fall ist er innen zu reinigen und neu
zu schmieren. Diese Arbeit darf nur durch einen vom Hersteller
anerkannten Techniker durchgeführt werden.
10
Page 68

INSTALLATIONSANWEISUNGEN
A
Die nachstehend aufgeführten Anweisungen sind an den
Fach-Installateur gerichtet und gelten als Leitlinien zur
korrekten technischen Installation, Einstellung und W artung
gemäß den geltenden Richtlinien.
Wichtig: Jeder beliebige Eingriff zur Einstellung,
Wartung usw . m uss bei stromlosem Herd vor genommen
werden. Sollte das Gerät elektrisch eingeschaltet bleiben
müssen, ist größte Vorsicht geboten. Bei diesem Herd
handelt es sich um ein Gerät folgender technischer
Eigenschaften:
Kategorie: II 2E+3+
Klasse 1 (freistehend) Klasse 2 Unterklasse1
(einbau)
Die maximalen Abmessungen des Gasherdes entnehmen Sie
bitte aus der Abbildung der Seite 2. Zur Gewährleistung der
ordnungsgemäßen Betriebsweise des in einer Möbelzeile
installierten Gerätes sind die in Abb. 4 angegebenen Abstände
unbedingt einzuhalten. Die angrenzenden Oberflächen, sowie
die Rückwand müssen aus geeignetem Material beschaffen
sein, um einer Übertemperatur von 65 °C standhalten zu
können.
Abb.5
min. 50mm
min. 700mm
Abb.6
In Abzugsschächte oder Kamine mit Abzweigungen Direkt ins Freie
(ausschließlich für Kochgeräte bestimmt)
Küchenbelüftung
Es ist absolut erforderlich, dass dem Raum, in dem das
Gerät installiert wird, die genaue Menge der zur
ordnungsgemäßen Gasverbrennung und Belüftung der
Küche erforderlichen Luft auch wieder zugeführt wird. Die
natürliche Belüftung ist durch eine permanente Öffnung in
einer Küchen-Außenwand, oder mittels eines einzelnen oder
kollektiven, mit Abzweigungen versehenen, den geltenden
Bestimmungen entsprechenden Belüftungsschachtes zu
gewährleisten. Die Luftaufnahme direkt aus dem F reien und
fern von Luftverschmutzungsquellen ist zu gewähr leisten.
Die Belüftungsöffnung muss folgende Eigenschaften
besitzen (Abb.7A):
• Sie muss einen freien, gesamten NettoDurchgangsquerschnitt von mindestens 6 cm² pro kW der
thermischen Geräte-Nennleistung aufweisen, mindestens
jedoch von 100 cm² (die thermische Leistung ist dem
Typenschild zu entnehmen).
• Sie muss so angelegt werden, dass die Öffnungen weder
von Innen noch von A ußen her verstopft bzw. verschlossen
werden können.
• Sie ist auf geeignete Weise zu schützen, z.B. durch Gitter,
Metallnetze usw ., und zwar so , dass der o.g. Nutzquerschnitt
nicht verringert wird.
• Sie ist in Bodennähe anzulegen.
Detail A Angrenzender Zu belüftender
Raum Raum
Abb.4
Vor der Installation des Herdes müssen die mitgelieferten
95 - 155 mm hohen Füße in die im unteren Teil des Herdes
bereits vorgesehenen Löcher eingesetzt werden. (Abb. 5)
Mittels dieser mit Schraubgewinde versehenen Füße kann
die Höhe des Herdes ggf. justier t werden.
Aufstellung
Dieses Gerät darf nur in ständig belüfteten Räumen und in
Übereinstimmung mit den geltenden Normenvorschriften
installiert und in Betrieb genommen werden. Folgende
Anforderungen müssen gegeben sein:
• Die Verbrennungsabgase müssen über eine geeignete
Abzugshaube, die an einen Rauchabzugsschacht, einen
Kamin oder eine direkt ins Freie führende Öffnung
anzuschließen ist, abgeleitet werden. (Abb.6)
• Sollte die Installation einer Abzugshaube nicht möglich
sein,
ist auch der Einsatz eines im Fenster oder in einer
Außenmauer installierten Elektrolüfters gestattet, der
gleichzeitig mit dem Gerät in Betrieb zu setzen ist.
Beispiel einer Zuluftöffnung Vergrößerung des Lichtspalts
für die Verbrennungsluft zwischen Tür und Fußboden
Abb. 7A Abb.7B
Die Belüftung kann auch durch angrenzende Räume erfolgen,
die vorschriftsmäßig (gemäß den einschlägigen
Bestimmungen) belüftet werden, bei denen es sich jedoch
weder um Schlafzimmer, Gebäudeteile gemeinsamen
Gebrauchsnoch um Räume handeln darf, in denen
Brandgefahr besteht, wie Garagen, Lagerhäuser , Lagerstätten
für entflammbares Material usw. Die aus dem angrenzenden
Raum strömende Luft muss ungehindert durch permanente
Öffnungen desselben eingangs erwähnten Querschnitts in das
zu belüftende Zimmer strömen können. Derartige
Belüftungsöffnungen können auch durch Vergrößerung des
Lichtspaltes zwischen Tür und Fußboden geschaffen w erden.
(Abb.7B) Wird zur Ableitung der Verbrennungsgase ein
Elektrolüfter eingesetzt, dann muss die Belüftungsöffnung im
Verhältnis zur maximalen Luftförder ung des Elektrolüfters
11
Page 69

INSTALLATIONSANWEISUNGEN
vergrößert werden. Auf jeden Fall muss der Elektrolüfter eine
Luftförderungsleistung erbringen, die so hoch ist, dass eine
stündliche Lufterneuerung von 3-5 Mal das Raumvolumen
gewährleistet wird. W erden mehrere Gasflammen gleichz eitig
für längere Zeit benutzt, könnte sich eine zusätzliche
Belüftung, z.B. durch Öffnen eines Fensters oder durch eine
noch stärkere Belüftung, die die Leistung eventuell
vorhandener mechanischer Belüftungssysteme optimiert, als
notwendig erweisen. Die Flüssiggase, die schwerer als die
Luft sind, stauen sich im unteren Raumbereich. Räume, in
denen Gasflaschen mit GPL-Flüssiggas aufbewahrt werden,
müssen demnach in Bodenhöhe Abzugsöffnungen ins Freie
vorsehen, damit eventuell ausgetretenes Gas nach unten hin
abziehen kann. Außerdem dürfen leere oder halb gefüllte
Flüssiggasflaschen nicht in Räumen, die unter der Erde liegen
(Keller usw.) installiert oder gelager t werden. Es ist ratsam,
nur die in Verwendung befindliche Gasflasche im Raum
aufzubewahren, und diese so aufzustellen, dass sie keiner
direkten Einwirkung von Wärmequellen, die einen
Temperaturanstieg von mehr als 50°C bewirken können,
ausgesetzt werden.
Gasanschluss
• Der Anschluss des Gerätes an die Gasleitung oder an die
Gasflasche muss gemäß der einschlägigen Bestimmungen
erfolgen und nur nachdem man sich vergewissert hat, dass
es auf die Gasart, mit der es betrieben wird, eingestellt ist.
• Dieses Gerät ist für den Betrieb mit der auf dem Typenschild
angegebenen Gasart eingestellt. Sollte die vorhandene
Gasanlage mit dieser nicht übereinstimmen, müssen
sämtliche Düsen durch die jeweilig geeigneten (im Beipack)
ausgewechselt werden. Beachten Sie hierzu bitte die
Anleitungen des Abschnitts "Anpassung an die verschiedenen
Gasarten".
• Um einen sicheren Betrieb, einen angemessenen
Energieverbrauch und eine optimale Lebensdauer des Gerätes
zu gewährleisten, ist sicherzustellen, dass der
V ersorgungsdruck den in der T abelle 1 "Merkmale der Brenner
und Düsen" angegebenen Werten entspricht, andernfalls ist
das Eingangsrohr mit einem den geltenden Bestimmungen
entsprechenden Druckregler zu versehen.
• Der Anschluss ist so vorzunehmen, dass das Gerät keinerlei
Zugspannungen ausgesetzt wird.
Schließen Sie das Gerät mittels des auf der Rückseite
befindlichen zylinderförmigen ½"G-Gewindeanschlusses
"F" (Abb.8) an. Verwenden Sie hierzu ein mit
Anschlussverschraubungen versehenes, den einschlägigen
Bestimmungen entsprechendes starres Metallrohr (Abb.8D), oder ein mit Anschlüssen versehenes, den
einschlägigen Bestimmungen entsprechendes metallenes
Flexrohr mit durchgehenden Wänden (Abb.8-C), dessen
Länge bei größter Ausdehnung 2000 mm nicht
überschreiten darf. Über prüfen Sie, dass das metallene
Flexrohr nicht mit beweglichen Geräteteilen, durch die es
beschädigt oder eingeklemmt werden könnte, in Berührung
kommt. Wird ein Gummischlauch verwendet, ist der
entsprechende Schlauchanschluss für Flüssiggas (Abb.8A) oder für Erdgas (Abb.8-B) zu verwenden. Der Dichtring
"G" (im Beipack) muss bei allen Anschlusssystemen
verwendet werden. Befestigen Sie die beiden
Schlauchenden mit den entsprechenden, den gültigen
Richtlinien entsprechenden Schlauchschellen "E".
Verwenden Sie für den Anschluss mittels Flexschläuchen
nur solche, die den einschlägigen Bestimmungen, sowie
der jeweils eingesetzten Gasart entsprechen.
Beachten Sie bitte auch Folgendes:
• Er ist so kurz wie möglich zu halten, seine maximale
Länge darf 1,5 m nicht überschreiten.
• Er darf keine Biegungen oder Drosselstellen aufweisen;
• Er darf weder mit der Geräterückseite, noch mit Teilen,
die eine Temperatur von 50°C erreichen können, in
Berührung geraten.
• Er darf nicht durch Öffnungen verlegt werden, die der
Ableitung der Backofenverbrennungsgase dienen.
• Er darf nicht mit scharfkantigen Stellen oder Ecken in
Berührung kommen.
• Er muss leicht zugänglich sein, um ihn über die gesamte
Länge hinweg jederzeit leicht auf seine Beschaffenheit
überprüfen zu können.
• Er muss nach Ablauf des aufgedruckten Datums
ausgetauscht werden.
Wichtig: Bei Anschluss an Flüssiggas (Gasflasche) ist
zwischen Gasflasche und Gasschlauch ein den
einschlägigen Bestimmungen entsprechender
Druckregler zu montieren.
Überprüfen Sie den gesamten Gaskreis nach Abschluss
sämtlicher Installationsmaßnahmen auf Dichtheit.
Verwenden Sie hierzu eine Seifenlösung (auf keinen Fall
eine Flamme). Stellen Sie sicher, dass auch bei Einsatz
sämtlicher Flammen ein ausreichender
Erdgasleitungsdruck besteht.
Umstellung auf andere Gasarten:
Wenn die Kochplatte an eine andere Gasart als Erdgas
bzw. die auf dem Typenschild der Kochplatte selbst
angegebene Gasart angeschlossen werden soll, sind die
folgenden Operationen sorgfältig durchzuführen:
• die Roste und die Brenner entfernen.
• die Düsen “A” (Abb.9) mit Hilfe eines 7 mm
Steckschlüssels ausschrauben und durch die Düsen
ersetzen, die einen geeigneten Durchmesser
entsprechend der verwendeten Gasart gemäß
nachstehender Tabelle 1 "Merkmale der Brenner und
Düsen" aufweisen.
• Ersetzen Sie anschließend das Etikett der alten Eichung
mit dem im Düsenbeipack befindlichen Etikett der neu
eingestellten Gasart.
A
Abb.9
Abb.8
Abb.10
12
Page 70

Hinweis
Sollte der Gasdruck der Anlage von den vorgesehenen Werten
abweichen, oder nicht konstant sein, muss am Zuleitungsrohr
ein geeigneter, den einschlägigen inländischen Normen für
"Druckregler für Gasleitungen" entsprechender Druckregler
installiert werden.
Einstellung der Brenner-Primärluft
An den Brennern ist keine Primärlufteinstellung erforderlich.
Einstellung des Minimalleistung
• Den Gashahn auf die Mindestposition einstellen;
• Den Drehknopf des Gashahns entfernen und die im
ELEKTROANSCHLUSS
Inner des Gashahnstiftes befindliche Stellschraube
(Abb.10) unter Verwendung eines entsprechenden
Schraubenziehers betätigen (durch das Lockern der
Schraube das Minimum erhöht und durch das Anziehen
verringert wird).
Merke: bei Flüssiggas muß die Stellschraube bis zum
Anschlag festgezogen werden.
• Nachdem die gewünschte Minimalleistung bei gezündetem
Brenner erzielt wurde, den Brennerkopf mehrfach abrupt
von der Minimal-auf die Maximalleistung und umgekehrt
drehen, und sicherstellen, daß dabei die Flamme nicht
ausgeht.
Die mit einem Dreileiterkabel ausgerüsteten Backöfen sind
für den Betrieb mit Wechselstrom bei der auf dem Typenschild
(befindlich auf dem Gerät) und in der Bedienungsanleitung
angegebenen V ersorgungsspannung und -frequenz ausgelegt.
Der Erdleiter des Kabels ist gelb/grün.
Verlegen des Netzkabels
Öffnen des Klemmengehäuses:
• Heben Sie unter Zuhilfenahme eines Schraubenziehers die
seitlichen Zungen des Klemmengehäusedeckels an.
• Ziehen Sie den Deckel des Klemmengehäuses ab.
Ver legen Sie nun das Versorgungskabel wie folgt:
• die Schraube der Kabelklemme sowie die drei Schrauben
der Kontakte L-N- herausschrauben;
• die Drähte unter Beachtung der entsprechenden Farben
unter den Schraubenköpfen befestigen Blau (N) Braun
(L) Gelb/Grün
• das Versorgungskabel in der entsprechenden Kabelklemme
befestigen und den Deckel schließen.
Anschluss des Versorgungskabels an das Stromnetz
Versehen Sie das Kabel mit einem Nor mstecker für die auf
dem Typenschild angegebene Belastung; wird das Gerät direkt
an das Stromnetz angeschlossen, ist ein allpoliger Schalter
mit einer Mindestöffnung von 3 mm, der der Strombelastung
NL
und den geltenden Richtlinien entspricht, zwischenzuschalten
(der Erdleiter darf nicht durch den Schalter unterbrochen
werden).
Das Versorgungskabel muss so verlegt werden, dass es an
keiner Stelle einer Temperatur ausgesetzt wird, die 50°C über
der Raumtemperatur liegt.
Vor dem Anschluss ist Folgendes zu beachten:
• Die elektrische Sicherheit dieses Gerätes ist nur dann gewährleistet, wenn es sachgemäß und gemäß den geltenden
Sicherheitsvorschriften an eine leistungsfähige Erdungsanlage angeschlossen wird. Die Gegebenheit dieser grundlegenden Sicherheitsanforderung muss überprüft werden,
im Zweifelsfalle ist eine Kontrolle durch Fachpersonal anzufordern. Der Hersteller kann für e ventuelle, durch F ehlen
einer Erdungsanlage verursachte Schäden nicht
verantwortlich gemacht werden.
• Vor Anschluss des Gerätes kontrollieren Sie bitte, dass
die auf dem Typenschild (befindlich auf dem Gerät und/
oder auf der Verpackung) angegebenen Daten mit denen
des Strom- und Gasversorgungsnetzes übereinstimmen.
• Vergewissern Sie sich, dass die elektrische Leistung der
Anlage und der Steckdosen der maximalen, auf dem T ypenschild angegebenen Höchstleistung des Gerätes
entspricht. Im Zweif elsfalle ziehen Sie bitte einen Fachmann
zu Rate.
• Falls Steckdose und Stecker des Gerätes nicht übereinstimmen sollten, ist die Steckdose von einem Fachmann
durch eine andere geeigneten Typs zu ersetzen. Dieser
muss bei der Gelegenheit auch überprüfen, dass der
Steckdosen-Kabelquerschnitt der Leistungsaufnahme des
Gerätes entspricht. Allgemein ist die Verwendung von
Adaptern, Vielfachsteckdosen und/oder Ve rlängerungen
nicht ratsam. Falls deren Gebrauch jedoch unvermeidlich
sein sollte, dürfen nur Einfach- oder Vielfachadapter und
Ver längerungen verwendet werden, die den geltenden
Sicherheitsvorschriften entsprechen; achten Sie darauf,
dass die auf dem Einfachadapter und den V erlängerungen
angegebene Stromleistungsgrenze und die auf dem
Vielfachadapter angegebene Höchstleistungsgrenze nicht
überschritten wird. Stecker und Steckdose müssen leicht
zugänglich sein.
13
Page 71

EIGENSCHAFTEN DER BRENNER UND DÜSEN
Tabelle 1 (BELGIE)
Brenner Durch-
messer
(mm) Nom. Red.
C.Starkbrenner
B.Mittelstarker Brenner
A.Hilfsbrenner
D.Dreiflammen - kranz (Erdgas)
D.Dreiflammen - kranz (Flüssiggas)
Versorgungs-druck
* Bei 15°C und 1013 mbar-T rock engas
Propangas G31 Hs (oberer Heizwert) = 50,37 MJ/kg
Butangas G30 Hs (oberer Heizwert) = 49,47 MJ/kg
Methangas G20 Hs (oberer Heizwert) = 37,78 MJ/m³
Methangas G25 Hs (oberer Heizwert) = 32,49 MJ/m³
100 3,00 0,70 40 86 218 214 116 286 332
75 1,90 0,40 30 70 138 118 106 181 210
55 1,00 0,40 30 50 73 71 79 95 111
130 3,25 1,50 63 91 236 232
130 3,40 1,50 133 324 376
Wärmeleistung
kW (p.c.s.*)
Nominal (mbar)
Minimum (mbar)
Maximum (mbar)
Erdgas Flüssiggas
By-pass
1/100
(mm) (mm) Butan Propan (mm) G20 G25
Dieses Gerät entspricht den folgenden EG-Richtlinien:
- 73/23/EWG vom 19.02.73 (Niederspannung) und nachfolgenden
Änderungen;
- 89/336/EWG vom 03.05.89 (elektromagnetische V erträglichkeit)
und nachfolgenden Änderungen;
- 90/396/EWG vom 29.06.90 (Gas) und nachfolgenden
Änderungen;
- 93/68/EWG vom 22.07.93 und nachfolgenden Änderungen.
Düse
1/100
28-30
20
35
Menge*
g/h
37
25
45
Düse
1/100
Menge*
l/h
20
15
25
25
15
30
TECHNISCHE EIGENSCHAFTEN DES BACKOFENS
Nutzvolumen des Backofens: Liter 56
Versor gungsspannung und -frequenz:
230V ~ 50Hz 2800W
ENERGIE-ETIKETT
Richtlinie 2002/40/EG über die Etikettierung von
Elektrobacköfen
Norm EN 50304
Energieverbrauch Natürliche Konvektion
Heizfunktion: Traditionell
Deklarierte Energieverbrauchsklasse:
Erzwungene Konvektion
Heizfunktion: Kuchen- Gebaeck
14
Page 72

Agradecemos a sua escolha de um produto Ariston, seguro e realmente fácil de utilizar. Para conhecê-lo e utilizá-lo da
melhor maneira e durante mais tempo, aconselhamos que leia este manual. Obrigado.
ADVER TÊNCIAS
ESTAS INSTRUÇÕES SÃO VÁLID AS SOMENTE PARA OS PAÍSES DE DESTINO CUJOS SÍMBOLOS CONSTAM NO
LIVRETE E NA PLACA DE IDENTIFICAÇÃO DO APARELHO.
1. Este aparelho foi idealizado para uma utilização de tipo não
profissional, no interior de uma morada normal.
2. Leia atentamente as advertências contidas no presente livrete
porque as mesmas fornecem importantes indicações relativas
à segurança na instalação, utilização e manutenção. Guarde
com cuidado este livrete para todas as consultas posteriores.
3. Os componentes do forno que possam entrar em contacto com
os alimentos, são fabricados com materiais conformidade com
o estabelecido pela Directiva CEE 89/109 de 21-12-88 e pelo
D. L. 108 de 25-01-92.
4. Depois de o ter retirado da embalagem, certifique-se do bom
estado do aparelho. No caso de dúvida, não utilize o aparelho e
contacte pessoal profissionalmente qualificado. Não deixe os
componentes da embalagem (saquinhos de plástico,
poliestireno, pregos etc.) ao alcance de crianças porque são
potenciais fontes de perigo.
5. Alguns componentes vêem cobertos por uma película extraível
protectora contra arranhões. Antes de colocar o aparelho a
funcionar, esta película de ve ser retirada e o componente que
era protegido deve ser limpado com um pano e um produto não
abrasivo de limpeza doméstica. É aconselhável, a primeira vez
que o acender, aquecer o for no vazio durante cerca de 30
minutos na temperatura máxima, a fim de eliminar eventuais
resíduos da elaboração.
6. É necessário que todas as operações relativas à instalação e
à regulação sejam efectuadas por pessoal qualificado, em
conformidade com as normas em vigor. As instruções
específicas estão descritas na secção reservada ao instalador.
7. Antes de realizar a ligação do aparelho, certifique-se que os
dados da placa de identificação (na parte inferior do aparelho e
na última página do livrete) correspondam às da rede de
distribuição eléctrica e de gás.
8. Durante as cozeduras no forno ou na grelha, o aparelho é
submetido a um sensível aquecimento a nível do vidro da porta
do forno e dos componentes vizinhos. Portanto, certifique-se
que crianças não se aproximem com intenção de brincar.
9. Verifique se a capacidade eléctrica da instalação e das tomadas
eléctricas são adequadas à potência máxima do aparelho
indicada na placa. No caso de dúvida, contacte pessoal
profissionalmente qualificado.
10. V erifique periodicamente o bom estado do tubo de ligação do
gás e mande trocá-lo por pessoal qualificado assim que houver
qualquer anomalia.
11. O cabo de alimentação e o tubo de ligação do gás deste aparelho
não devem ser trocados pelo utilizador. No caso de danos e
para a eventual troca, contacte exclusivamente um centro de
assistência técnica autorizado.
12. Não deixe o aparelho ligado a toa. Desligue o interruptor geral
do aparelho quando o mesmo não for ser utilizado e feche a
torneira do gás.
13. Os queimadores e as grades permanecem quentes durante
muito tempo depois da utilização. Preste atenção para não tocálos.
14. Sobre os queimadores não devem ser colocadas panelas
instáveis nem deformadas para evitar que tombem. Coloque-
os sobre o plano de cozedura de maneira que os cabos estejam
virados para trás, para evitar batidas acidentais.
15. Não utilize líquidos inflamáveis nas proximidades do aparelho
quando estiver em utilização.
16. Se o fogão for colocado sobre um estrado, será necessário
tomar medidas para evitar que o aparelho escorregue do
estrado.
17. Não utilize máquinas a vapor para limpar este aparelho.
18. Não tape as aberturas nem as fendas de ventilação ou de
dissipação de calor.
19. Este aparelho deverá ser destinado somente ao uso para o
qual foi concebido. Todos os demais usos (por exemplo:
aquecimento de ambientes) é impróprio e portanto perigoso . o
fabricante não poderá ser considerado responsável pelos
danos que houver derivantes de usos impróprios desde
aparelho.
20. O uso de qualquer aparelho eléctrico implica obedecer algumas
regras fundamentais. Nomeadamente:
• não toque este aparelho com mãos ou pés molhados ou
húmidos,
• não use este aparelho descalço ,
• não use extensões, excepto com se muita cautela,
• não puxe o cabo de alimentação , o próprio aparelho , par a
tirar a ficha da tomada eléctrica.
• não deixe este aparelho exposto a agentes atmosféricos
(chuva, sol etc.)
• não permita que este aparelho seja usado por crianças ou
incapazes, sem vigilância.
21. No caso de a varia e/ou de mau funcionamento deste aparelho,
desligue-o. Para as reparações que f orem necessárias, dirijase somente a um centro de assistência técnica autorizado e
peça que utilizem peças de reposição originais. A desobediência
destas condições poderá comprometer a segurança do
aparelho.
22. Certifique-se sempre que os botões estejam na posição
/ 0" quando o aparelho não estiver a ser utilizado.
23. Quando for decidido não utilizar mais este aparelho,
recomenda-se, para torná-lo inoperante, cortar o cabo de
alimentação, depois de ter desligado a ficha da tomada eléctrica.
Para mais recomenda-se neutralizar todas as peças do
aparelho susceptíveis de constituir perigo, especialmente para
crianças que poderão usar para brincar o aparelho não mais
utilizado.
24. Durante o uso deste aparelho, os elementos aquecedores e
algumas das partes da por ta do forno esquentam-se muito.
Tome cuidado para não tocá-las e mantenha as crianças
afastadas.
25. Para os aparelhos a gás funcionarem correctamente é
necessário uma troca de ar regular do ambiente. Certifique-se
que na instalação dos mesmos sejam obedecidos os requisitos
do parágrafo relativo ao "P osicionamento".
"
1
Page 73

DESCRIÇÃO DO FOGÃO
CP 649 FT.2
CP 759 FT
D
I
G
H
M
M
M
M
700
D
I
G
H
M
M
M
M
M
A Queimador a gás auxiliar
B Queimador a gás semi-rápido
C Queimador a gás rápido
D Queimador a gás de tripla coroa
P Timer
F
E Vela para acender os queimadores a gás
F Dispositivo de segurança - Intervém se a chama apa-
gar-se por acaso (líquido vazado, correntes de ar ... ) e
bloqueia o fornecimento de gás ao queimador.
E
fig.1
G Botão comutador do forno eléctrico (selector das fun-
ções de cozedura)
H Botão termostato do forno eléctrico (selecção das
temperaturas)
M Botões de comando dos queimadores
R Grades de suporte para recipientes de cozedura
2
Page 74

INSTRUÇÕES PARA O USO PLANO DE COZEDURA
Queimadores a gás
No painel de comandos, ao redor de cada botão "M" ou
dos próprios botões, há indicados os símbolos:
T orneira Fechada
Abertura máxima
Abertura mínima
Para mais, nas proximidades dos botões, os símbolos
indicam a posição do respectivo queimador no plano.
Os queimadores são equipados com dispositivos de
segurança contra vazamentos de gás com termopar. Este
dispositivo providencia um bloqueio da saída de gás se a
chama do queimador apagar-se durante o funcionamento.
Para acender um dos queimadores proceda da seguinte
maneira:
• gire o respectivo botão na direcção antiorária até o
símbolo da chama grande;
• carregue no selector até o fundo para acender
automaticamente o gás;
Como o queimador é equipado com um dispositivo de
segurança "F", é necessário manter cerca de 6 segundos
pressionado o selector até aquecer-se o dispositivo que
mantém automaticamente acesa a chama.
• solte o botão, verifique se acendeu-se de modo estável.
Se não tiver acendido, repita a operação.
Para obter a potência mínima, gire o botão na direcção do
símbolo da chama pequena. São possíveis regulações
intermediárias, se colocar o botão entre o símbolo da chama
grande e o da chama pequena.
rodamieuQ).mc(setneipiceRsodortemâiDø
railixuA.A
odipár-imeS.B
odipáR.C
aorocalpirT.D
41–6
02–51
62–12
62-42
O plano de cozedura é equipado com
grades de redução (fig. 2), que devem ser
utilizadas somente sobre o queimador
auxiliar "A".
fig.2
Para apagar o queimador é necessário rodar o selector
(correspondente ao símbolo " / 0" ) na direcção horária até
que se apague.
Para obter a máxima performance é bom lembrar-se do
seguinte: Sobre os queimadores podem ser utilizados todos
os tipos de panelas. O importante é o fundo ser
perfeitamente chato .
Importante:
• Não accione o dispositivo de acendimento automático
durante mais de 5 segundos consecutivos.
• Em alguns casos há dificuldades de acendimento por
causa de ar que se encontrar no interior do condutor do
gás.
• Se a chama dos queimadores apagar-se por acaso, o
gás continua a sair durante uns instantes antes da
intervenção do dispositivo de segurança. Feche o botão
de comando e não tente acender novamente pelo menos
1 minuto, deste modo deixa-se espalhar-se o gás que
tiver saído, que pode ser perigoso.
• Quando o aparelho não estiver a funcionar, controle se
os botões estão na posição de fechado " / 0". Além disso ,
é aconselhável fechar a torneira principal do condutor de
alimentação do gás.
Conselhos práticos para utilização dos queimadores
Para obter o máximo rendimento dos queimadores é
aconselhável utilizar somente panelas de diâmetro
adequado ao queimador utilizado, e evitar que a chama
ultrapasse o fundo da panela (veja a seguinte tabela).
Além disso, quando um líquido começar a ferver, é
aconselhável abaixar a chama o necessário para manter a
fervura.
3
Page 75

AS VÁRIAS FUNÇÕES DO FORNO
A selecção das várias funções dos fornos ARISTON são
realizadas mediante os componentes de comando e os
indicadores luminosos presentes no painel.
O BOTÃO DE SELECÇÃO DAS FUNÇÕES
T em 10 marcas de referência, colocadas na ordem dos seguintes
símbolos:
" / 0" : descanso
: iluminação
: «Tradicional»
É o sistema de cozedura mais tradicional, ideal para preparar
pratos individuais. Duas resistências (uma, visível, colocada no
alto, embaixo da parede superior , e a outra escondida embaixo
do fundo do forno) funcionam juntas.
Em contacto com estas fontes de calor , o ar aquece-se e deslocase para dentro do compartimento do forno por causa do fenómeno
que o ar quente, mais leve, tende a ir para cima. Trata-se do
fenómeno da convecção natural. Este tipo de cozedura é
especificamente indicado para cozeduras lentas em caçarolas
em ferro gusa cobertas (assados, bucho etc.) ou cozedura
em banho-maria (pudim de caramelo, patê etc.). Como plano
de apoio, é aconselhado utilizar a bandeja pingadeira colocada
na 2a prateleira.
Coloque sempre os pratos no forno já quente.
: "Pastelaria"
Activa-se unicamente o elemento aquecedor circular inferior e
entra em funcionamento a ventoinha, de maneira a f ornecer um
calor “delicado”, idóneo para assar doces como pastéis,
croissants, bolos de chocolate, plum-cake, pão-de-ló,
pasteizinhos, merengues etc.
Como plano de apoio, é aconselháv el utilizar a bandeja pingadeira
colocada na 2a prateleira.
Coloque sempre os pratos no forno já quente.
: «Cozinha rápida»
T odos os elementos aquecedores acessos e a ventoinha activada
garantem uma distribuição uniforme do calor dentro do
compartimento do forno. Esta função é especificamente indicada
para cozeduras rápidas (que não precisarem de pré-
aquecimento) e para pratos já cozidos (congelados,
anteriormente cozidos).
Como plano de apoio, é aconselháv el utilizar a bandeja pingadeira
colocada na 2a prateleira.
: «Cozedura multipla»
T odos os elementos aquecedores acessos e a ventoinha activada
garantem uma distribuição uniforme do calor dentro do
compartimento do forno.
Este tipo de cozedura é indicado para assar pratos colocados
contemporaneamente em várias prateleiras.
Neste caso, a cozedura é realizada sem alterar o sabor dos
alimentos, mesmo se forem muitos dif erentes um do outro.
Para utilizar esta função é em todo o caso necessário que todos
os pratos precisem da mesma temperatura de cozedura (os
vários pratos podem ser tirados do forno a medida que ficarem
prontos). Para uma cozedura sobre prateleiras, por exemplo, é
aconselhável como plano de apoio a bandeja pingadeira colocada
sobre a 1a prateleira e a grelha sobre a 3a prateleira.
Coloque os pratos sempre no forno quente.
: «Pizza»
Os elementos aquecedores (inferior e circular) entram em
funcionamento para aquecer rapidamente o forno.
Para assar pizza e tortas doces obtêm-se notáv eis v antagens ,
porque o maior fluxo de calor proveniente de baixo garante uma
correcta cozedura com fogo alto da massa durante a cozedura.
Por outro lado, o funcionamento da ventoinha possibilita obter o
doirado necessário do lado de cima do alimento, que fica mais
apetitoso. Como plano de apoio, é aconselhável usar a bandeja
pingadeira colocada sobre a 1a prateleira.
Coloque os pratos sempre no forno quente.
: «Grill»
Nesta posição entra em funcionamento exclusivamente o
elemento aquecedor superior: a grelha, ficando incandescente,
emite irradiação infravermelha similar à produzida pelos raios
solares. De f acto , o funcionamento da grelha não visa aquecer o
ar dentro do compartimento do forno, mas principalmente expor
o alimento directamente a esta irradiação.
A cozedura deve ser realizada com a por ta fechada e
preferivelmente iniciada a frio . O calor irradiado pode ser regulado
mediante o botão de selecção das temperaturas. É aconselhável
colocar a bandeja pingadeira sobre a 1a prateleira para colectar
a gordura e o molho do assado, e a grelha sobre uma pr ateleira
superior, escolhida em função da espessura da carne a ser
assada.
: "Gratine"
Entra em funcionamento unicamente o elemento aquecedor
superior, com emissão de irradiação infra v ermelha. A circulação
forçada de ar, realizada pela ventoinha do forno, garante uma
distribuição uniforme da temperatura, de maneira que os alimentos
sejam submetidos contemporaneamente à acção:
• dos raios infravermelhos, que garantem a cozedura da
superfície dos alimentos,
• do ar quente, que possibilita uma cozedura em
profundidade mediante o efeito da condução.
A grelha ventilado é especialmente apreciada para preparar
assados (carnes vermelhas ou brancas) e aves.
Posicione a grelha sobre a 2a pr ateleira como plano de apoio da
carne e a bandeja pingadeira sobre a 1a prateleira para colectar
a gordura e o molho do assado.
Coloque sempre os pratos no forno ainda frio.
Se o vosso forno for dotado do espeto r otatório, pode utilizar-o
com as funções “ grelha ” e “ gratine ”. A cozedura deve ser
realizada com a porta do forno fechada. T ambém é recomendável
colocar os pratos no forno ainda frio, para evitar o risco de
queimaduras durante a operação de introdução do espeto .
É aconselhável colocar a bandeja pingadeira sobre a 1a prateleira
para colectar a gordura e o molho do assado, e o espeto rotatório
sobre a 3a prateleira (para colocar o espeto rotatório veja o
parágrafo seguinte).
Durante a cozedura na “grelha” ou “gratine”, as partes
acessíveis podem ficar muito quentes; mantenha as crianças
afastadas.
: fast clean
É a função de limpeza integral do forno.
Para as infor mações relativas à limpeza automática mediante
fast clean, veja a página 6.
4
Page 76

OS ACESSÓRIOS
Este forno oferece numerosas possibilidades de cozedura,
para as quais é necessário utilizar um certo número de
acessórios escolhidos por nós.
Estes acessórios podem ser instalados sobre as prateleiras
da guia de deslizamento situada dentro do forno, desta maneira será possível definir a altura mais idónea em função
da cozedura a ser realizada.
Alheta n˚5
Alheta n˚4
Alheta n˚3
Alheta n˚2
Alheta n˚1
Cremalheiras
A bandeja pingadeira
É utilizada:
• como plano de apoio para qualquer recipiente de
cozedura em um único nível e em banho-maria,
• como plano de apoio para os alimentos
(pasteizinhos etc.),
• como recipiente de colecta de molho e gordura de
cozedura, juntamente com a grelha grande.
É desaconselhado utilizar a bandeja pingadeira nas 4a e 5a
prateleiras.
A grelha grande
É sempre utilizada juntamente com a bandeja pingadeira,
enganchada na mesma.
• Posicionada sobre a 2a prateleira, também funciona
como plano de apoio para carnes, com a bandeja
pingadeira colocada sobre a 1a prateleira a colecta de
gordura e molho do assado.
• Posicionada sobre o grau superior (depende da
espessura do alimento) para carnes na chapa, com a
bandeja pingadeira colocada sobre a 1a prateleira para a
colecta de gordura e molho do assado.
• Posicionada sobre a prateleira superior para assar
em mais de um nível.
Evite colocar as carnes a serem assadas directamente
sobre a bandeja pingadeira para cozê-las à “gratine”; o
forte calor proveniente de cima para baixo praticamente
provoca saída do suco e da gordura, portanto há risco
de queimar ou borrifar nas paredes, com consequente
criação de fumo.
O ESPETO RO TA TÓRIO
Parafuso
com elhetas
Espeto
Berço de
espeto de
manivela
Garfo
Graças a este acessório, os assados são preparados
lentamente, a girar constantemente, e ficam perfeitamente
doirados, até assarem-se completamente. O espeto
rotatório é constituído por:
• um suporte colocado sobre a 3a prateleira da guia de
deslizamento, que possibilita colocar o espeto rotatório
dentro do veio oco do motor situado sobre a parte
traseira do forno, atrás da parede perfurada;
• um espeto no qual enfia-se o pedaço de carne a ser
assado, que apoia as duas pontas sobre garfos
corrediços, cada uma presa ao veio mediante um
parafuso borboleta.
Atenção: durante a instalação do espeto rotatório,
certifique-se que o espeto esteja correctamente enfiado
no veio oco ligada ao motor.
Preste atenção para colocar:
- o espeto no centro da peça a ser assada;
- a peça a ser assada em um ponto equidistante das pontas
do espeto.
• uma pega extraível em material isolante que se atarraxa
na parte dianteira do espeto e possibilita:
- aumentar o comprimento disponível no espeto rotatório
para poder assar também peças de carne muito grandes;
- evitar queimaduras quando for tirar o alimento do f orno,
no final da cozedura.
Atarraxe até o fundo a pega para poder tirar o espeto
(para cozedura a pega deve ser desatarraxada).
Timer do espeto rotatório
Os fornos ARISTON são equipados com um dispositivo de
temporização do espeto rotatório. No final da cozedura, o
motor continua a fazer o espeto rodar e pára somente
quando a temperatura tiver descido oportunamente, desta
maneira evita-se o risco de queimar-se a carne.
Depois de terminar de assar, deixe o botão de selecção
das funções no tipo de cozedura que estiver a realizar e
coloque novamente o botão de selecção das temperaturas
no mínimo.
Manutenção da ventilação
No final da cozedura, o forno manterá activa a função de
ventilação, a fim de arrefecer o interior do for no. Portanto,
se depois de parar o forno, a v entoinha continuar a funcionar,
não há motivo para preocupar-se: vai parar assim que a
temperatura tiver chegado a menos de 120°.
Luz do forno
É possível iluminar o interior do forno se o botão de selecção
for colocado no símbolo
..
O forno fica iluminado durante a inteira fase de cozedura,
seja qual for a função utilizada (excepto para a limpeza
automática).
Se for definida uma cozedura com início posterior, a luz do
forno fica acesa desde o momento da programação até acabar
de cozer.
Puho de espeto
5
Page 77

A LIMPEZA A UT OMÁTICA MEDIANTE F AST CLEAN
Dispositivo de segurança
Se activar a função de fast clean, a temperatura interna
do compartimento do forno chega aos 500 °C necessários
para carbonizar os resíduos, da maneira a seguir
apresentada.
Por causa da alta temperatura, o for no é equipado com
alguns dispositivos de segurança:
• a porta tranca-se automaticamente assim que a
temperatura chegar a valores altos, par a evitar todos
os riscos de queimaduras;
• os elementos aquecedores não serão mais
alimentados de electricidade, para prevenir-se
caso aconteça um evento anómalo.
Observações:
1- Apesar da alta temperatura interna mantida durante as
inteiras operações de fraccionamento térmico, as paredes
externas do forno permanecem apenas mornas, graças a:
•um isolamento reforçado do compartimento de
cozedura;
• uma ventoinha que garante a circulação de ar para
arrefecer as paredes.
2- Mediante o vidro da porta do forno é possível ver
algumas partículas que se iluminam durante a sua
carbonização por fraccionamento térmico, ao entrarem em
contacto com as resistências: trata-se de uma combustão
instantânea, um fenómeno absolutamente normal, que
não implica perigo algum.
Alguns conselhos úteis antes da limpeza automática
1- Procure eliminar os resíduos de substâncias
alimentares maiores com uma esponja húmida. Evite
rigorosamente utilizar detergentes ou quaisquer outros
produtos aconselhados para a limpeza de fornos.
2 - Extraia todos os acessórios, que de facto não foram
concebidos para resistir a temperaturas assim tão altas.
Além disso, alguns dos acessórios poderão alterar o
resultado da limpeza automática porque dificultam a
circulação do calor em todas as paredes. Os acessórios
podem ser facilmente lavados como quaisquer utensílios
(inclusive na máquina de lavar loiça).
3 - Não deixe panos de prato na pega.
Como activar a fast clean?
– Tire todos os acessórios do forno. Elimine a sujidade
excessiva acumulada e principalmente os vazamentos
maiores, para evitar que se produzam chamas ou fumo.
– Feche a porta.
– Coloque o botão de selecção em
– Realize a programação. É possível escolher dentre
· início imediato: o mesmo processo adoptado para a
cozedura;
· início posterior: mesmo processo adoptado para a
cozedura,
– A operação de limpeza automática leva aproximada-
mente 90 minutos.
O que acontece durante a fast clean?
Quando a temperatura chegar a 325 °C, a porta do forno
tranca-se automaticamente: no visor aparece a letra “P” e
a indicação da duração em contagem regressiva.
Enquanto a temperatura dentro do forno estiver elevada, a
porta per manecerá trancada.
O que acontece no final da fast clean?
No final da limpeza automática, no visor aparece "P. 0.00".
Para poder abrir a porta do forno será necessário aguardar
que:
• a temperatura do forno desça até um nível aceitável;
• o botão de selecção seja novamente colocado no " /
0"
Nesta altura será possível observar a presença de alguns
depósitos de pó branco no fundo e nas paredes do forno;
tire-a mediante uma esponja húmida depois que o forno
estiver arrefecido completamente.
Por outro lado, se desejar aproveitar o calor acumulado
para iniciar a assar, é possível deixar o pó dentro, porque
não causa perigo algum para os alimentos a serem
preparados.
Atenção: durante a lfast clean, as superfícies podem ficar
muito quentes. Mantenha as crianças afastadas.
ALGUMAS PEQUENAS ANOMALIAS DE FUNCIONAMENTO
NÃO SE PREOCUPE SE ...
Pode se que aconteçam algumas anomalias de
funcionamento, geralmente por causa de manobras
incorrectas ou de uma avaliação errada de um fenómeno.
Se no decorrer de uma cozedura o forno emitir muito
fumo:
• Verifique se foi seleccionada a função idónea
correspondente ao tipo de cozedura desejado , se foram
escolhidos os acessórios adequados e se o alimento
foi colocado sobre a prateleira do fo rno aconselhada.
• Controle também a temperatura seleccionada, que
provav elmente é e xcessiva para o tipo de coz edura previsto.
• Inspeccione o estado de sujidade do forno e pondere a
possibilidade de limpá-lo. Praticamente pode haver
presentes resíduos de comidas presos no esmalte que,
ao carbonizarem-se, emitem fumo e odores fortes.
• A gordura que borrifar e os vazamentos sobre
superfícies muito quentes poderão determinar a produção de fumo.
6
Page 78

O PROGRAMADOR
Visor de afixação para todas as
funções: hora, temporizador,
duração e horas de final de
cozedura ou de fast clean
Indicador de utilização do
temporizador sonoro
Tecla de desencadeamento
da cozedura
Tecla de regulação do
tempo de cozedura
Tecla de regulação do
final de cozedura
Tecla para ajustar o
temporizador sonoro
Acertar a hora
É possível acertar a hora unicamente se o botão de
selecção estiver na posição do " / 0".
A primeira vez que ligar o forno na electricidade (ou depois
de uma interrupção da corrente), o visor "0.00" piscará.
Carregue nas teclas "+" e/ou "-" para acertar a hora.
Quando soltar as teclas, há um prazo de 3 segundos durante o qual todas as demais teclas estarão desactivadas,
e, se nada mais for feito nas teclas de regulação, a hora
definida será guardada na memória.
Indicador de funcionamento de uma
operação programada:
- aceso: operação em curso
- apagado: operação terminada
- aceso por intermitência: operação
programada terminada.
Indicador A de programação:
- apagado: utilização manual
- aceso: foi feita a programação
Teclas + e - para regular as
diferentes afixações, regular a hora,
temporizador, duração e hora de final
5 s.
de operação, prima:
+ para aumentar os números
- para diminuir os números
Cozedura sem programador
Quando o forno estiver apagado (botão de selecção no " /
0"
), todas as teclas (excepto "-" para a regulação do volume
do alarme sonoro) estarão desactivadas.
Para seleccionar uma função, rode na direcção horária o
botão de selecção das funções. Cada função tem uma
duração de cozedura previamente determinada. Pode
visualizar a duração de cozedura premindo . Pode alterar o tempo de cozedura em função da sua receita. Para
Regulação do contador de minutos
O funcionamento do contador de minutos fica activo unicamente com o forno apagado (botão de selecção no " /
0"
).
Carregue brevemente na tecla e defina o tempo
mediante as teclas "+" e/ou "-". Quando soltar as teclas,
há um prazo de 3 segundos durante o qual todas as demais
teclas estarão desactivadas, e, se nada mais for feito nas
teclas de regulação, a duração escolhida será guardada
na memória e, em seguida, acendem-se os indicadores
luminosos e inicia a contagem regressiva do tempo.
O final do tempo definido será avisado mediante um alarme
sonoro que toca 1 minuto; para desligá-lo é suficiente
carregar em qualquer tecla; apaga-se o indicador lumino-
so .
O contador de minutos é independente do estado de
funcionamento do forno.
Volume do alarme sonoro
É possível regular o volume do alarme sonoro se carregar
na tecla "-" (enquanto o alarme estiver a tocar) até chegar
ao volume desejado.
o fazer, prima , regule a duração desejada utilizando
as teclas “-” e/ou “+”.
O visor indicará uma temperatura aconselhada,
independente da indicada no botão de selecção da temperatura e que pode ser modificada ao rodar-se este botão
mesmo.
Para a função”g relhador”, a afixação indica o nível de potência
compreendido entre 1 (1/5 da potência máxima) e 5 (potência
máxima).
O forno está pronto para realizar uma operação de
cozedura: carregue na tecla . O forno inicia a fase de
pré-aquecimento, reconhecida pelo símbolo que aparece
a piscar .No final do pré-aquecimento (que dura
aproximadamente 10 minutos), o símbolo passa a ser fixo .
Se, depois de ter seleccionado uma função, não for
confirmado o início da operação de cozedura dentro de
um minuto, no visor aparecerá a mensagem "OFF" e as
teclas serão desactivados. Posicione em seguida o botão
de selecção no " / 0" e proceda com as várias regulações.
A TENÇÃO
Este aparelho é equipado com um sistema de diagnóstico
dos erros assinalado pelo programador mediante a
visualização de"FnFm"(onde 'n' e 'm' são algarismos).
Nestes casos, contacte o mais próximo centro de
assistência técnica autorizado.
7
Page 79

PROGRAMAÇÃO D AS COZEDURAS
Programação de cozedura com início imediato
A cozedura é iniciada imediatamente e interrompe-se
automaticamente quando acabar o tempo programado.
Proceda da seguinte maneira :
• posicione o botão de selecção na função desejada;
• regule a temperatura mediante o botão de selecção
da temperatura (regulação com aumentos de 10°), se o
valor aconselhado não for considerado idóneo,
Para a função”grelhador”, a afixação indica o nível de
potência compreendido entre 1 (1/5 da potência máxima)
e 5 (potência máxima).
• a cada uma das funções é associada uma duração
aconselhada que pode ser modificada se carregar nas
teclas , "+" e/ou "-" (a duração deve incluir o tempo
de aquecimento de aproximadamente 10 minutos):
depois de terem passado 3 segundos desde que tiver
soltado as teclas, se as mesmas não tiverem mais sido
tocadas, a duração da cozedura será guardada na
memória.
Durante a fase de pré-aquecimento, o símbolo piscará
e o tempo de cozedura será visualizado. No final do pré-
aquecimento, o símbolo passa a ser fixo e o forno tocará
3 breves sinais sonoros.
Não há fase de pré-aquecimento para as funções de
"cozedura rápida" e "cozedura grelha".
Programação da cozedura com início posterior
O programador estabelece automaticamente a hora de
início de cozedura em função dos parâmetros definidos
pelo utilizador: duração da cozedura e final da cozedura.
Proceda da seguinte maneira:
• posicione a botão de selecção na função desejada;
• regule a temperatura mediante o botão de selecção
da temperatura, se o valor aconselhado não for
considerado idóneo,
Para a função”grelhador”, a afixação indica o nível de potência
compreendido entre 1 (1/5 da potência máxima) e 5 (potência
máxima).
• carregue na tecla para ter acesso à regulação
da duração,
• defina a duração carregando nas teclas "+" e/ou "-"
(a duração deve incluir o tempo de pré-aquecimento):
depois de 3 segundos após ter soltado as teclas, se
não as tocar mais, a duração da cozedura é guardada
na memória;
• para activar uma cozedura com início posterior,
é necessário definir a hora para a cozedura acabar
carregando em seguida as teclas e, em seguida,
"+" e/ou "-": depois de 3 segundos após ter soltado as
teclas, se não as tocar mais, o fim da cozedura é
guardado na memória.
Durante a cozedura, o visor indicará o tempo de cozedura
restante. Para visualizar a temperatura, é necessário
carregar na tecla "+".
A duração mínima de cozedura programável é de 2
minutos. A duração máxima de cozedura programável é
de 10 horas.
• carregue na tecla para iniciar a cozedura.
Se, depois de ter seleccionado uma função, não for
confirmado o início da operação de cozedura dentro de
um minuto, no visor aparece a mensagem "END" e as teclas
serão desactivadas. Coloque então o botão de selecção
no "0" e proceda às várias regulações.
No final da cozedura, o aparelho toca um alarme sonoro
1 minuto e o no visor aparece a mensagem "END"; para
desligar este sinal sonoro, é suficiente carregar em
qualquer tecla.
• Coloque novamente o botão de selecção no " /
0"
: a mensagem "END" desaparecerá e será visualizado
"OFF" durante 3 segundos.
Durante a cozedura, é possível modificar: a função (sem
interferir na duração nem na temperatura), a temperatura
(sem interferir na duração) e a duração de cozedura.
Também é possível interromper uma cozedura e desligar
o forno se colocar o botão de selecção na posição do " / 0".
Neste caso, no visor aparecerá "OFF" 3 segundos antes
de se apagar.
A duração mínima de cozedura programável é de 2 minutos.
A duração máxima de cozedura programável é de 10 horas.
• carregue na tecla , o símbolo "A" acende-se.
Desde o momento em que se efectuar a programação até
o início da cozedura, é possível modificar somente a
temperatura e a função.
Quando chegar ao momento definido para iniciar a
cozedura, o forno acende-se e começa a fase de pré-
aquecimento, durante o qual o símbolo piscará; a
duração de cozedura é mostrada no visor.
No final do pré-aquecimento, inicia a cozedura, o símbolo
fica aceso fixo e o programador toca três breves sinais
sonoros.
Não há fase de pré-aquecimento para as funções de
"cozedura rápida" e "cozedura grelha".
• Coloque novamente o botão de selecção no " / 0".
8
Page 80

ALGUNS EXEMPLOS DE COZEDURAS NUM ÚNICO NÍVEL
Receitas Modo de cozedur a Temperatura Tempo Alh eta Observações
Pão (pedaço-1kg)
Mil folhas individuais
Pizza (massa para pão)
Quiche lorraine (massa
quebrada)
Soufflé de queijo
Pâté rústico
Perna de borrego
Gratiné dauphinois
Peixe
Frango
Assado de carne
de vaca
Assado de carne
de porco
Assado de vitela
Tomates recheados
Pratos ultracongelados
Lasanhes
Moussaka
Brioche
Cake
Choux
Creme caramelo
Bolo de amêndoa
Macarons
Suspiros brancos
Suspiros ambarados
Maçã no forno
Biscoitos tenros
Torta de maçã
Biscoitos tenros de
manteiga
Torta de geleia
Biscoitinhos salgados
X - Y* na coluna alheta
X = grade ou espeto colocado na alh eta X
Y = tabuleiro esmaltado colocado na a lheta Y para r ecupe ração do s mo lhos e gorduras
Nota: a grelha é sempre utilizad a com desengate para baixo
Cozedura multipla 210°C 30-35' 2 No tabuleiro esmalta do Sim
Cozedura multipla 200°C
Pizza 240°C 10-15' 1 No tabuleiro esmaltado Sim
Pizza 220°C 30' 1 Forma no tabuleiro esmaltad o Sim
Cozedura multipla 200°C 30-40' 2
Tradicional 180°C 50-60' 2
Gratinè 210°C
Gratinè 200°C
Tradicional
Gratinè
Grill
Gratinè
Grill espeto rotatório
Gratinè 210°C
Gratinè 210°C 1 hora para 1kg 2-1* Carne no grelhador Não
Gratinè 210°C 1 hora para 1kg 2-1* Carne no grelhador Não
Cozedura multipla 200°C 20- 25' 2
Cozinha rápida
Cozinha rápida 200°C
Cozinha rápida 200°C
Pastelaria 160°C 35-45' 2
Pastelaria 160°C 60' 2
Pastelaria 200°C 20-25' 2
Tradicional 180°C 30' 2
Pastelaria 190°C 30' 2
Pastelaria 180°C
Pastelaria 70- 80°C
Pastelaria 110°C
Cozedura multipla 210°C
Pastelaria 190°C 10-15' 2 No tabuleiro esmaltado Sim
Pizza 220°C 30' 1
Ventilado 190°C. 10-15' 2
Ventilado 190°C. 15-25' 2
Ventilado 190°C. 10-15' 2
200°C
240°C
250°C
210°C
250°C
Consoante as
indicações na
embalagem
20-25' consoante
a espessura
1 hora para
1,5 a 2 kg
40-45' consoante
a espessura
Consoante o tipo de peixe
e a espessura
1 hora para
1,2 a 1,5 kg
Variável consoante o grau
de cozedura
Consoante as indicações
na embalagem
consoante a
espessura
consoante a
espessura
15-20'
consoante o tamanho
3 horas consoante
o tamanho
2 horas
consoante o tamanho
20-25'
consoante o tamanho
2 No tabuleiro esmaltado Sim
tabuleiro esmaltado (início com
2-1* Carne no grelhador Não
2 Plat No tabuleiro esm altado Sim
2
2-1*
2-1*
2-1*
3-1*
2-1* Carne no grelhador Não
Filetes+líquidos, tabuleiro esmaltado
Grelhados de peixe sobre a grelha
Espeto rotativo, porta fechada
2
2
2
Forma de alumínio sobre
Forma de alumínio sobre
Profiterolles pequenos não
açucarados sobre tabuleiro
banho-maria início com á gua
Forma de alumínio sobre
2 No tabuleiro esmaltado Sim
2
2
2
Forma em alumínio sobre a
Forma em alumínio sobre a
Forma em alumínio sobre a
Forma diam. 20cm
No tabuleiro esmaltado
Em banho-maria sobre
água quente)
Inteiro sobre grelha
Carne no grelhador
Prato sobre tabuleiro
esmaltado
Prato sobre tabuleiro
esmaltado
Prato sobre tabuleiro
esmaltado
Prato sobre tabuleiro
esmaltado
tabuleiro esmaltado
tabuleiro esmaltado
esmaltado
Tacinhas individuais em
quente
tabuleiro esmaltado
Secagem para suspiros
pequenos
Secagem para suspiros
pequenos
Prato sobre tabuleiro
esmaltado
Forma sobre tabuleiro
esmaltado
grelha
grelha
grelha
Pré-aqueci-
mento
Sim
Sim
Sim
Não
Sim
Não
Não
Não
Sim
Sim
Sim
Sim
Sim
Sim
Sim
Sim
Sim
Sim
Sim
Sim
9
Page 81

CONSELHOS PRÁTICOS PARA COZEDURA NO FORNO
A cozedura é, por definição, a passagem do estado de cru
para o estado de cozido.
O resultado desta operação de cozedura é apreciado em
função de vários requisitos: a coloração que os alimentos obtêm, as sucessivas fases de preparação, a maciez,
o grau de cozedura desejado etc....
As regulações do forno (temperaturas e tempos de cozedura)
dependem obviamente de dois parâmetros fundamentais:
LIMPEZA E MANUTENÇÃO
Importante: O aparelho deve estar desligado da
electricidade antes de começar a limpeza.
Para a aparelhagem durar muito, é indispensável realizar
frequentemente uma limpeza cuidadosa, a obedecer as
seguintes instruções:
Interno do forno:
É aconselhável realizar uma limpeza do forno depois de
cada uso, principalmente depois da cozedura de assados .
De facto, é bom evitar que se acumulem resíduos gotejados durante a cozedura que, a próxima vez que utilizar o
forno, serão novamente cozidos, com consequente car-
bonização e emissão de fumo e odores desagradáveis.
Uso de papel de alumínio
Evite absolutamente cobrir o fundo do forno com papel de alumínio (se pensar que desta maneira poderá
evitar a limpeza do fundo). O alumínio, colocado em
contacto directo com o esmalte aquecido risca fundirse e estragar irremediavelmente o esmalte do fundo.
- o volume dos alimentos;
- a capacidade do alimento de absorver o color desejado (por
causa da quantidade de açúcar, dos ov os na receita).
As regulações de cozedura propostas na nossa tabela
foram obtidas em relação a parâmetros de carácter geral
que cada um dos utilizadores terá liberdade de modificar oportunamente a fim de adaptá-los às próprias exigências específicas e ao nível de cozedura desejado.
Desmontar/montar a porta do forno
Para facilitar a limpeza do interior do forno é possível tirar a
porta do forno, realize as seguintes operações (fig. 6-7):
• Abra inteiramente a porta e levante as 2 alavancas “B” (fig.
6);
• Feche parcialmente a porta, agora será possível levantá-la
e tirar os ganchos “A” da maneira indicada na figura 7.
Para montar novamente a porta:
• Com a porta na posição vertical, coloque os 2 ganchos “A”
nos carris;
• Certifique-se que a peça “D” esteja perfeitamente
enganchada no carril (mova ligeiramente a porta para a
frente e para trás);
• Mantenha a porta inteiramente aberta, desenganche as 2
alavancas “B” para baixo e, em seguida feche a porta.
Plano de cozedura:
• Os componentes móveis dos queimadores do plano de
cozedura precisam ser lavados frequentemente com
água quente e detergente, tome cuidado para eliminar as
eventuais crostas. Controle se as aberturas para a saída
do gás não estão entupidas. Enxugue-as cuidadosamente
antes de utilizá-las novamente.
• Realize frequentemente a limpeza das pontas das velas
de acender automaticamente o plano de cozedura e do
forno a gás.
Exterior do forno:
• Realize a limpeza somente quando o forno estiver frio.
• As peças de aço e principalmente as zonas com os
símbolos em serigrafia não devem ser limpadas com
diluente nem detergente abrasivos; utilize pref erivelmente
apenas um pano humedecido com água morna e
detergente líquido para lavar loiça. O aço inoxidável
poderá manchar-se se ficar em contacto durante muito
tempo com água fortemente calcária ou com detergentes
agressivos (contendo fósforo). Portanto é sempre
necessário enxaguar com abundante água e enxugar
cuidadosamente a superfície depois da limpeza.
Importante: a limpeza deve ser realizada no sentido
horizontal, na mesma direcção do acetinado do aço.
• Depois da limpeza é possível eventualmente realizar
tratamentos para realçar o lustro da superfície: utilize
exclusivamente produtos específicos para aço ino xidável.
Importante: não utilize pós abrasivos, detergentes
agressivos nem substâncias ácidas de limpeza.
FIG. 7FIG.6
Troca da lâmpada do forno
• Antes de realizar qualquer operação, para desligar o
forno da electricidade, tire a ficha da tomada ou desligue o
interruptor utilizado para a ligação eléctrica do equipamento.
• Use um objecto estreito e chato (chave de fenda, cabo
de colher etc.) para tirar a
tampa de vidro.
• Desenrosque a lâmpada
e troque-a por outra de ca-
Compartimento
do forno
racterísticas análogas:
- Tensão de 230/240 V.
Lãmpada
- potência 15 W
- bocal E 14
Juntado
• Monte novamente a
tampa de vidro, preste
Vidro
atenção para colocar
correctamente a
guarnição.
Aplicação de graxa nas torneiras
Com o passar do tempo, pode acontecer de uma torneira
bloquear-se ou haver dificuldades na rotação, portanto será
necessário realizar a limpeza interna e a troca da graxa da
mesma. Esta operação deve ser efectuada por um téc-
nico autorizado pelo fabricador.
10
Page 82

INSTRUÇÕES PARA A INST ALAÇÃO
As seguintes instruções são destinadas ao instalador qualificado, para que possa efectuar as operações de
instalação, regulação e manutenção técnica do modo mais
correcto e em conformidade com as normas em vigor.
Importante: quaisquer intervenções de regulação, manutenção etc. precisam ser efectuadas com o aparelho
desligado da electricidade. Se for preciso mantê-lo sob
tensão, será preciso tomar o máximo cuidado. Os fogões
possuem as seguintes características técnicas:
- Cat. II2H3+
Classe 1 Classe 2 subclasse 1
As medidas máximas do fogão estão indicadas na figura
da pagina 2. P ara um bom funcionamento da aparelhagem
instalada nos móveis, de vem ser respeitadas as distâncias
mínimas indicadas na fig. 8. Além disso, as superfícies
adjacentes e o painel traseiro precisam ter capacidade
para resistir a uma alta temperatura de 65°C
fig.9
min. 50mm
fig.10
Na chaminé ou condutor de fumo ramificado Directamente para fora
(reservada aos aparelhos de cozedura)
Ventilação do ambiente da cozinha
É necessário que no ambiente onde for instalado o aparelho
possa afluir uma quantidade de ar igual à precisa para
uma normal combustão do gás e da ventilação do ambiente.
O fluxo natural do ar deve ser através de aberturas permanentes realizadas nas paredes da cozinha que dêem
para fora, ou de condutos de ventilação individuais ou
colectivos ramificados em conformidade com a norma. O
are deve ser obtido directamente de fora, longe de fontes
de poluição. A aber tura de ventilação deve possuir as seguintes características (fig. 11A):
• possuir uma secção livre total líquida de passagem de
pelo menos 6 cm.² para cada kW de capacidade térmica
nominal do aparelho, com um mínimo de 100 cm.² (a
capacidade térmica pode ser encontrada na placa de
identificação);
min. 700mm
• ser realizada de maneira que as bocas de abertura, seja
no interior que no exterior da parede, não possam ser
obstruídas;
• estar protegida, por exemplo , com grades, redes de metal
etc. de modo da não se reduza a secção útil acima indicada;
• estar situada a uma altura próxima ao nível do chão.
fig.8
Antes de instalar o fogão, é necessário fixar os pezinhos
de suporte fornecidos a entre 95÷155 mm de altura,
preparados na parte inferior do fogão (fig. 9). Estes
pezinhos podem ser regulados mediante o parafuso,
portanto possibilitam efectuar o nivelamento do fogão, se
for necessário.
Posicionamento
Este aparelho pode ser instalado e funcionar somente em
lugares permanentemente ventilados, em conformidade
com o estabelecido pelas normas em vigor. Precisam ser
observados os seguintes requisitos:
• O aparelho precisar escoar os produtos da combustão
mediante um adequado exaustor, que deve estar ligado
a uma chaminé, a um condutor de fumo ou directamente
para o externo (fig. 10).
• Se não for possível o emprego de uma campânula para
o exaustor , é permita a utilização de uma ventoinha eléctrica, instalada na janela ou numa parede externa, a ser
colocada em funcionamento simultaneamente com o
aparelho.
Pormenor A Sala Sala a
A
Exemplos de abertura para Aumento do vão entra
ventilação do ar comburente a porta e o chão
ao lado ser ventilada
fig. 11A fig.11B
O fluxo de ar pode também ser obtido a partir de uma sala
ao lado, desde que o mesmo não seja um quarto nem um
ambiente com perigo de incêndio, nomeadamente uma garagem, depósito, armazém de material combustível etc., e
que seja ventilado em conformidade com a norma. O fluxo
de ar da sala ao lado ao a ser ventilado deve ser realizado
livremente através de aberturas permanentes, de diâmetro
não menor do que o acima indicado. Estas aber turas
11
Page 83

INSTRUÇÕES PARA A INST ALAÇÃO
O fluxo de ar pode também ser obtido a partir de uma sala
ao lado, desde que o mesmo não seja um quarto nem um
ambiente com perigo de incêndio, nomeadamente uma garagem, depósito, armazém de material combustível etc., e
que seja ventilado em conformidade com a norma. O fluxo
de ar da sala ao lado ao a ser ventilado deve ser realizado
livremente através de aberturas permanentes, de diâmetro
não menor do que o acima indicado. Estas aberturas
também podem ser obtidas se for aumentado o vão entre
a porta e o chão (fig. 11B). Se para o escoamento dos
produtos da combustão for empregada uma ventoinha eléctrica, a abertura de ventilação deve ser aumentada em
função da capacidade máxima do próprio ar. A ventoinha
eléctrica deve ter uma capacidade suficiente para garantir
uma troca horário de ar equivalente a entre 3 e 5 vezes o
volume da cozinha. Uma utilização intensiva e prolongada
do aparelho pode precisar de ventilação suplementar, por
exemplo, a abertura de uma janela ou uma v entilação mais
eficaz, mediante o aumento da potência de aspiração da
ventoinha eléctrica, se houver. Os gases de liquefeitos de
petróleo, mais pesados do que o ar , estagnam-se embaixo .
Portanto, os cómodos que contiverem cilindros de GLP
precisam possuir aberturas para fora a nível do chão, de
maneira que possibilitem o escoamento por baixo dos
eventuais escapes de gás que houver. Além disso, não
deposite cilindros de GLP (mesmo vazios) em cómodos a
nível mais baixo do solo; é oportuno manter na cozinha
somente o cilindro a ser utilizado na altura, ligado longe de
fontes de calor que possam levá-lo a uma temperatura
superior a 50 °C.
Fornecimento de gás
• A ligação do aparelho aos tubos ou ao cilindro de gás
deve ser ef ectuada em conf ormidade com o estabelecido
pelas normas em vigor, e somente depois de ter se
certificado se o aparelho está regulado para o tipo de
gás com o qual será alimentado.
• Este aparelho é predisposto para funcionar com o gás
indicado na etiqueta situada no plano. No caso do gás
fornecido não corresponder ao para qual o aparelho é
predisposto, proceda à troca dos correspondentes bicos
(fornecidos) , para tanto consulte o parágrafo "Adaptação
aos diversos tipos de gás".
• Para um funcionamento seguro, para uma adequada utilização da energia e maior duração do aparelho, certifiquese que a pressão de alimentação corresponda aos valores
indicados na tabela 1 "Características dos queimadores
e bicos", senão instale no tubo de entrada um apropriado
regulador de pressão em conformidade com a norma.
• Efectue a ligação de maneira que não provoque solicitações de nenhum género ao aparelho.
Ligue à união com rosca de ½" G macho cilíndrica "F" (fig.
12) situada do lato traseiro do aparelho, mediante um tubo
rígido de metal com uniões (fig. 12-D) em confor midade
com a norma, ou um tubo flexível de metal de parede
contínua com uniões (fig. 12-C), em confor midade com a
norma, cuja máxima extensão não deve ultrapassar 2000
mm. Certifique-se que o tubo não possa entrar em contacto
com os componentes móveis capazes de danificá-lo ou
esmagá-lo. Se for utilizado uma mangueira flexível de
borracha, instale o apropriado porta-mangueira para gás
líquido (fig. 12-A) ou para gás natural (fig. 12-B). A
guarnição “G” deve ser utilizada em todos os vários
sistemas de conexão Gás. Prenda as duas pontas do tubo
com adequados grampos braçadeiras "E" nos termos. O
tubo flexível deve ser em conformidade com as normas e
específico para o tipo de gás utilizado.
Além disso:
• deve ser o mais curta possível, com um comprimento
máximo de 1,5 metros;
• não deve haver dobras nem esmagamentos;
• não deve ser colocada em contacto com o painel traseiro
do aparelho nem com componentes que possam chegar
a 50° de temperatura;
• não deve atravessar furos nem vãos dedicados ao escoamento dos gases combustos do forno;
• não deve entrar em contacto com componentes cortantes nem arestas agudas;
• deve ser fácil de inspeccionar ao longo de todo o próprio
percurso, a fim de controlar o estado de conservação
da mesma;
• deve ser trocada antes da data impressa na própria
mangueira.
Importante: Para efectuar a ligação com gás líquido
(em cilindros), interponha entre o cilindro e o tubo, um
regulador de pressão em conformidade com a norma.
Depois de terminar a instalação, certifique-se que a retenção do circuito do gás seja perfeita, mediante uma solução
de água e sabão (nunca uma chama). Certifique-se que o
condutor de gás natural seja suficiente para alimentar o
aparelho quando todos os queimadores estiverem a
funcionar.
Adaptação aos diferentes tipos de gás (Instruções para
o plano)
Para adaptar o plano de coz edura a um tipo de gás diferente
ao para o qual estiver preparado (indicado na etiqueta presa
na parte de cima do plano ou na embalagem), será necessário trocar os bicos dos queimadores mediante as
seguintes operações:
• tire as grades do plano e solte os queimadores do lugar.
• desenrosque os bicos (fig. 13), mediante uma chave de
tubo de 7 mm. e troque-os por apropriados ao novo tipo
de gás (veja a tabela 1 "Características dos queimadores
e bicos").
Monte outra vez as partes, realizando estas operações
na ordem contrária.
• Ao terminar a operação, substitua a etiqueta de tara velha
com a que corresponde ao novo gás empregado, que se
encontra nos nossos centros de Assistência Técnica.
Observação
Se a pressão do gás utilizado for diferente (ou variável)
da prevista, será necessário instalar, no encanamento de
entrada, um apropriado regulador de pressão (segundo a
“reguladores para gases canalizados”).
12
Page 84

INSTRUÇÕES PARA A INST ALAÇÃO
A
fig.13
fig.12
fig.14
Regulação do ar primário dos queimadores
Os queimadores não necessitam de qualquer regulação
de ar primário.
LIGAÇÃO ELÉCTRICA
Regulação dos mínimos
• Coloque a torneira na posição de mínimo;
• retire o botão e mova o parafuso de regulação situado
à direita da torneira (fig. 14) até obter uma pequena
chama regular, mediante uma chave de fenda (ao
desatarraxar o parafuso, o mínimo aumenta; ao
atarraxar, diminui).
Obs. no caso dos gases líquidos, o parafuso de
regulação deve ser atarraxado até o fundo.
• Verifique se ao girar rapidamente o botão da posição
de máximo até a de mínimo, os queimadores não se
apagam.
• Nos aparelhos equipados com dispositivo de segurança
(termopar), em caso de não funcionamento do dispositivo
com os queimadores no mínimo, aumente a capacidade
dos próprios mínimos mediante o parafuso de regulação.
Depois de realizar a regulação, restabeleça os lacres
situados nos 'by-pass' com cera lacre ou materiais
equivalentes.
Os fornos equipados com cabo de fornecimento eléctrico
com três pólos, são preparados para funcionar com
corrente alternada na tensão e frequência de fornecimento
indicadas na placa de identificação (situada no aparelho)
e no livrete de instruções. A ligação à terra do cabo
distingue-se pelas cores amarelo - verde.
Montagem do cabo de fornecimento
Abertura da caixa de bor nes:
• Utilize uma chave de fenda, para fazer alavanca nas
linguetas laterais da tampa da caixa de bornes;
• Puxe e abra a tampa da caixa de bornes.
Para instalar o cabo, realize as seguintes operações:
• desatarraxe o parafuso do prendedor do cabo e os três
parafusos dos contactos L - N -
• Prenda os cabinhos embaixo das pontas dos parafusos,
obedeça as cores: Azul (N) Castanho (L) Amarelo -
Verd e
• prenda o cabo de fornecimento no apropriado prendedor
de cabo e feche a tampa.
NL
Ligação à rede do cabo de fornecimento eléctrica
Instale no cabo uma ficha regulamentar para a carga
indicada na placa de identificação, no caso de ligação
directa à rede é necessário interpor entre o aparelho e a
rede um interruptor omnipolar com abertura mínima entre
os contactos de 3 mm. dimensionado para a carga e
correspondente às normas em vigor (o fio de ligação à
terra não deve ser interrompido pelo interruptor).
O cabo de alimentação deve estar posicionado de modo
que não chegue, em nenhum ponto, a uma temperatura
superior de 50°C à ambiente.
Antes de efectuar a ligação, certifique-se que:
• A segurança eléctrica deste aparelho é assegurada somente quando o mesmo estiver correctamente ligado a
um eficiente sistema de ligação à terra da maneira
estabelecida pelas normas em vigor para segurança
eléctrica. É necessário verificar este fundamental
requisito de segurança e, no caso de dúvida, pedir uma
verificação cuidadosa do sistema a pessoal
profissionalmente qualificado. O fabricante não poderá
ser considerado responsável por eventuais danos
causados por falta de ligação à terra do equipamento.
• Antes de realizar a ligação do aparelho, certifique-se
que os dados da placa de identificação (situada no
aparelho e/o indicados na embalagem) correspondam
aos da rede de distribuição eléctrica e de gás.
• Verifique se a capacidade eléctrica da instalação e das
tomadas eléctricas são adequadas à potência máxima
do aparelho indicada na placa. No caso de dúvida,
contacte pessoal profissionalmente qualificado.
• No caso de incompatibilidade entre a tomada e a ficha
do aparelho, mande trocar a ficha por outra de tipo
adequado, por pessoal profissionalmente qualificado.
Este deverá especificamente certificar-se que o
diâmetro dos cabos da ficha seja idónea à potência
absorvida pelo aparelho. Em geral é desaconselhado
na utilização de adaptadores, fichas múltiplas e/ou
extensões. Se a utilização for indispensável, será
necessário utilizar somente adaptadores simples ou
múltiplos, e extensões em conf ormidade com as normas
em vigor de segurança, entretanto preste atenção para
não ultrapassar o limite da capacidade em valor de
corrente, indicado no adaptador simples e nas
extensões, e o de máxima potência marcado no
adaptador múltiplo. Deve haver fácil acesso à tomada
e a tomada.
13
Page 85

CARACTERÍSTICAS DOS QUEIMADORES E BICOS
Tabela 1 Gás líquido Gás natural
Capaci-
dade *
l/h
Queimador
Diâmetro
(mm)
Potência
térmicA
kW (H.s.*)
By-pass
1/100
Bico
1/100
Capacidade *
g/h
Bico
1/100
Nomin. Reduz. G30 G31 G20
C. Rápido
B. Semi-rápido
A. Auxiliar 55 1.0 0.4 30 50 73 71 79 95
D. Tripla Coroa (Gás líquido)
D. Tripla Coroa (Gás natural)
Pressões de forn ecim e nto
100 3. 00 0.7 40 86 21 8 214 11 6 286
75 1.90 0.4 30 70 138 136 10 6 181
130 3.25 1.5 63 91 236 232
130 3.40 1.5
Nominal (mbar)
Mínima (mbar)
Máxima (mbar)
(mm)
(mm)
28-30
20
35
37
25
45
(mm)
133 324
* A 15°C e 1013 mbars-gás seco
Propano G31 H.s. = 50,37 MJ/kg
Butano G30 H.s. = 49,47 MJ/kg
Metano G20 H.s. = 37,78 MJ/m³
ETIQUETA DE ENERGIA
Directiva 2002/40/CE acerca dos fornos eléctricos
Este aparelho é em conformidade com as seguintes Directivas
da Comunidade Europeia:
- 73/23/CEE de 19/02/73 (Baixa Tensão) e posteriores modificações;
- 89/336/CEE de 03/05/89 (Compatibilidade Electromagnética) e
posteriores modificações;
- 90/336/CEE de 29/06/90 (Gás) e posteriores modificações;
- 93/68/CEE de 22/07/93 e posteriores modificações.
Norma EN 50304
Consumo de energia com convecção natural:
função de aquecimento: Estático
Consumo de energia da declaração de Classe com
convecção f orçada:
função de aquecimento: Ventilado
20
17
25
14
Page 86

Page 87

Page 88

viale Aristide Merloni, 47 - 60044 Fabriano
tel. 0732/6611 - tele x 560196 - fax 0732/662954
www.Merloni.com
Mod.ARISTON
10-03 - 195039852.02Xerox Business Services - Docutech
 Loading...