

Page 1
15/07/03
Page 1 of 4
3782649
If you have any queries regarding the installation of this product please contact the distributor from whom it was purchased, or alternatively the ARB office in your state.
Head Office – ARB corporation Ltd VIC: 42-44 Garden Street, Kilsyth, Victoria, 3137 Tel: (03) 9761 6622 Fax: (03) 9761 6807
WA:(08) 9244 3553 NSW: (02) 9821 3633 ACT: (02) 6280 7475 SA: (08) 8244 5001 QLD: (07) 3872 3872 NT: (08) 8947 2262 TAS: (03) 6331 4190
NISSAN XTERRA (USA) WINCH BULL BAR 97 ON No 3438110
WARNING
THIS BULL BAR MUST NOT BE FITTED TO AIRBAG EQUIPPED VEHICLES.
FITMENT TO AIRBAG EQUIPPED VEHICLES MAY INTERFERE WITH THE
PROPER OPERATION OF THE AIRBAGS AND MAY RESULT IN SERIOUS INJURY.
TAKE NOTE OF THE FOLLOWING:
• THIS PRODUCT MUST BE INSTALLED EXACTLY AS PER THESE INSTRUCTIONS USING ONLY THE
HARDWARE SUPPLIED.
• IN THE EVENT OF DAMAGE TO ANY BULL BAR COMPONENT, CONTACT YOUR NEAREST
AUTHORISED ARB STOCKIST. REPAIRS OR MODIFICATIONS TO THE IMPACT ABSORPTION SYSTEM
MUST NOT BE ATTEMPED.
• DO NOT USE THIS PRODUCT FOR ANY VEHICLE MAKE OR MODEL, OTHER THAN THOSE SPECIFIED
BY ARB.
• DO NOT REMOVE LABELS FROM THIS BULL BAR.
• THIS PRODUCT OR IT’S FIXING MUST NOT BE MODIFIED IN ANY WAY.
FITTING KIT No 6171371
6151040
4
BOLT M10 X 30 X 1.25mm
4581048
4
WASHER SPRING M10 X 1/8” X 1/8” ZP
4581040
8
WASHER FLAT 3/8” X 1” X 16”
3751581
1
BRKT CONTROL BOX
6151180
2
BOLT M6 X 20mm
EG50
1
RUBBER GROMMET
3751595
1
BRKT NUMBER PLATE
6151017
8
BOLT M6 X 16 X 1mm HEX
6151128
10
NUT M6 FLANGE
6151046
10
WASHER FLAT 6mmZP
6151100
2
BOLT 1 ½” UNC X ½”
6151138
2
NUT UNC ½” ZP
4581007
4
WASHER FLAT 13mm x 40mm HD
4581050
2
WASHER SPRING ½” X 1/8” X 1/8” ZP
6151110
2
BOLT 5/8" x 6" UNC
6151140
2
NUT NYLOC 5/8" UNC
4581051
4
WASHER FLAT 5/8"
3500080
1
INDICATOR KIT AND LOOM
TOOLS REQUIRED
Basic tool kit, drill with 12mm drill bit
Page 2
15/07/03 Page 2 of 4 3782649
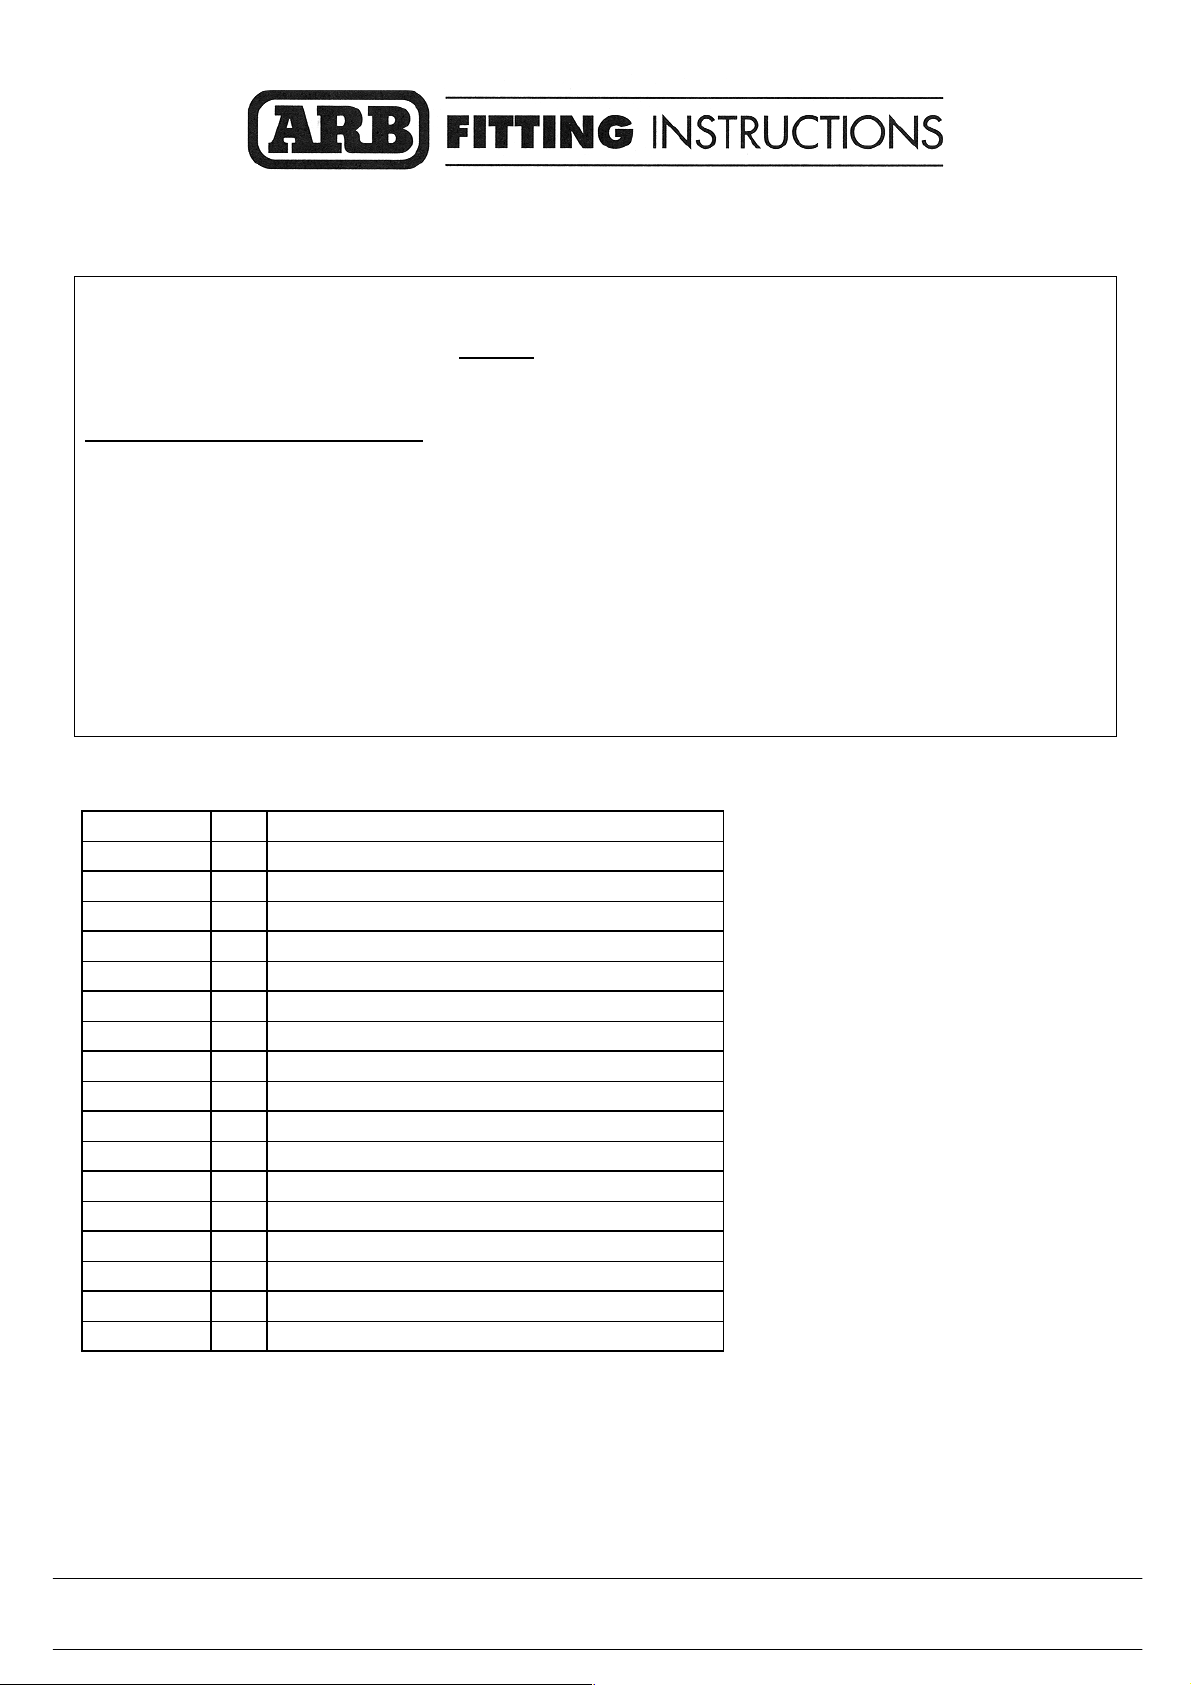
Assembly sequence for winch installation.
Rest bull bar face down on two stands so that
the winch can be easily installed.
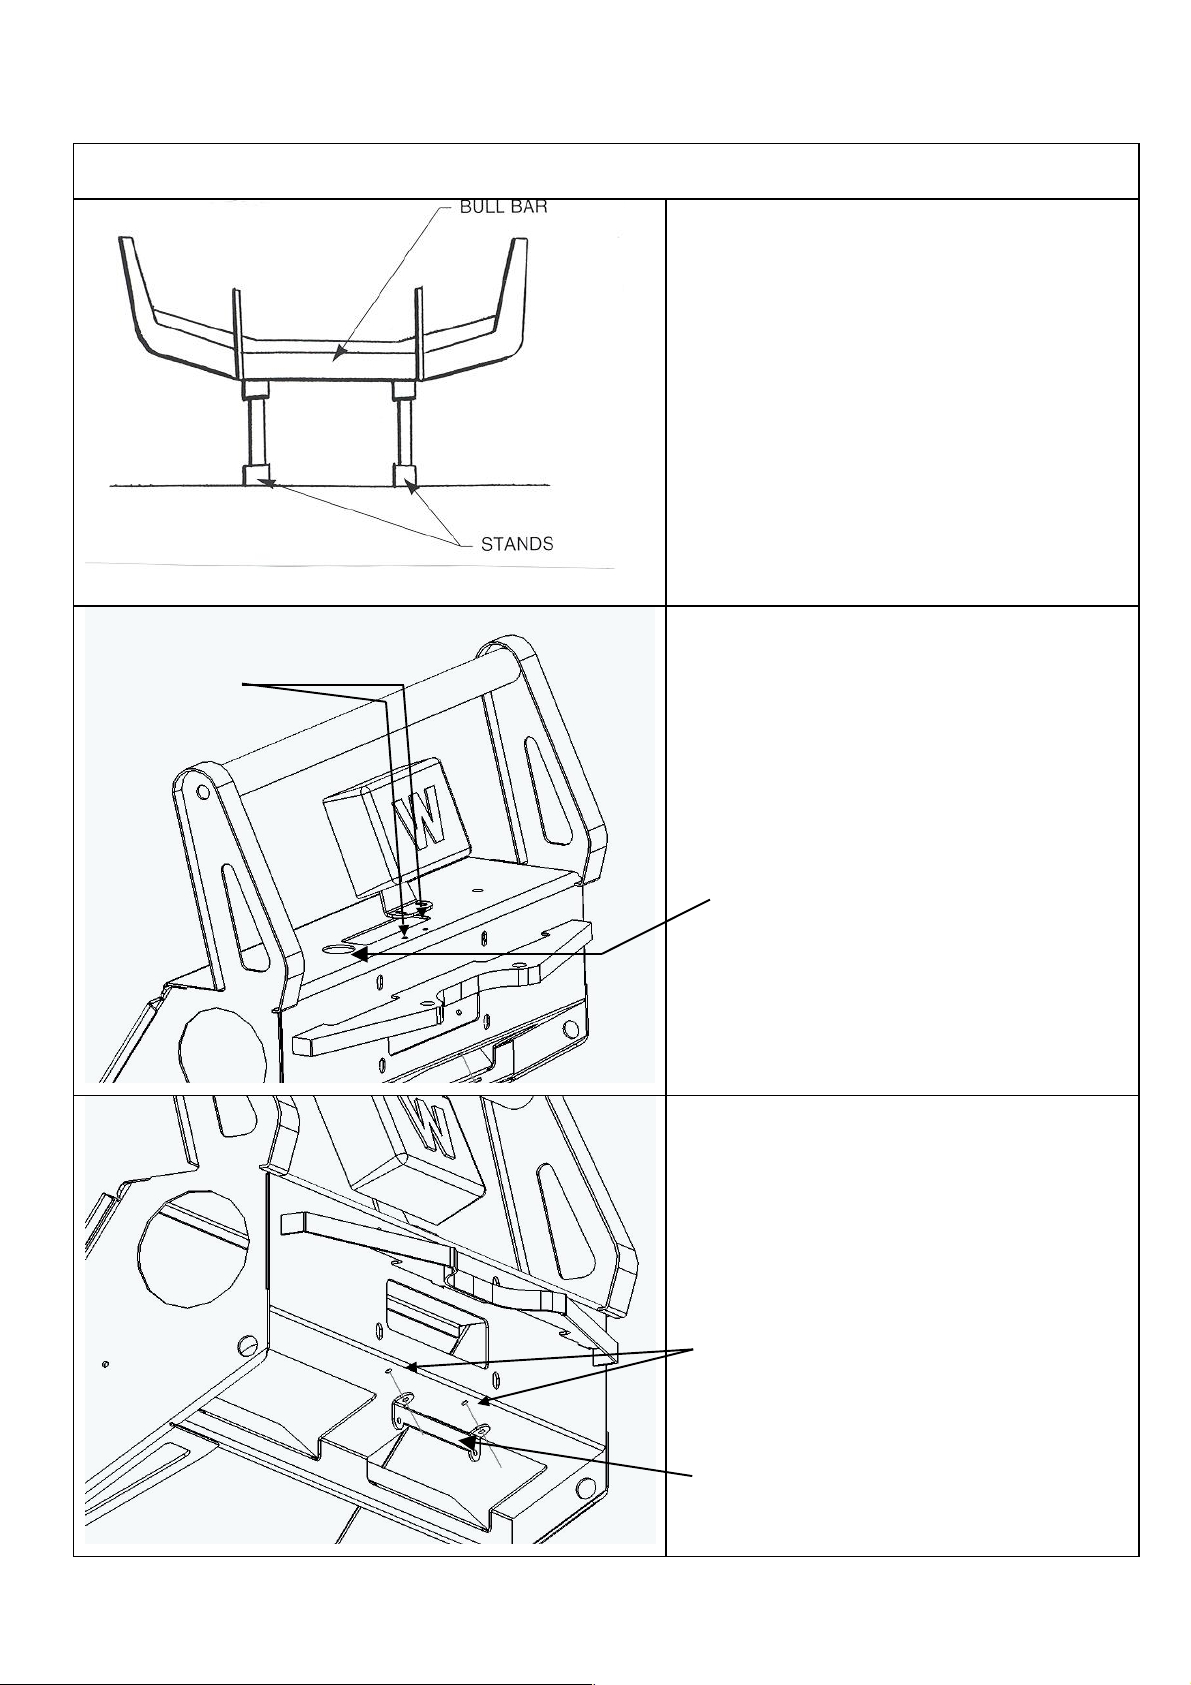
Assemble the control box bracket (Part No.
3751180) onto the control box, fastening with
control box nuts. Insert rubber grommet
supplied in bolt kit into control box cable hole
and run cables through. Fix control box
bracket to bar using M6x20mm bolts, flat
washers and flange nuts from bolt kit (2 of
each item).
Rubber Grommet
Assemble number plate bracket (Part No.
3751595) onto bull bar using M6x16mm bolts,
flange nuts and 6mm flat washers (2 of each
item), fastening through number plate mount
holes.
Number Plate Bracket Mounting Holes.
Number Plate Bracket.
Attach control box
bracket to bar using two
M6 x 20mm bolts
Page 3

15/07/03 Page 3 of 4 3782649
Assembly sequence for winch installation.
To place winch clutch handle in a convenient
location the winch gearbox must be rotated 2
hole spacings, 72 degrees, in a clockwise
direction. Place winch on its end and remove
all gearbox bolts. Gently raise gearbox just
enough to rotate it. Do not completely remove
gearbox and avoid damage to the gasket. Refit
all bolts and tighten
The roller fairlead must have new holes drilled
to allow for correct wire rope angle. Using a
12mm diameter drill bit, redrill the fairlead in
the position shown in the diagram.
Using the 5/8” x 6” bolts, place the 5/8” flat
washers (2 of each item) under the head of
both bolts and insert the bolts through the
roller fairlead bracket and side rollers. Fit the
5/8” flat washers and nyloc nuts (2 of each
item), then tighten so that the rollers turn
freely.
Install the winch and roller fairlead using,
bolts, nuts and spring washers supplied by
Warn, and 3/8” flat washers (4 off) supplied in
bolt kit. Refer to Warn installation instructions
for correct procedure. Adjust winch in slots
until winch clutch lever can rotate freely in air
vent opening on bull bar.
Connect the winch control box cables to the
winch motor. Refer to the Warn handbook for
additional information. Connect the long
winch + & - cables to the vehicle after the bull
bar is installed. Refer to the Warn winch
manual for vehicle wiring instructions.
Page 4

15/07/03 Page 4 of 4 3782649
Assembly sequence for bull bar installation.
Remove existing bumper from vehicle by removing
chassis bolts, outer tie bars and bolts connecting
rubber body supports to the vehicle.
Fit plastic screw plugs provided in indicator kit to
bull bar and install indicator lamps using self
tapping screws provided with lamps.
Connect harness to wires in vehicle lamp harness
using scotch locks provided.
Fasten number plate to the number plate bracket.
Fasten the number plate using M6x16mm bolts,
flange nuts and 6mm flat washers (2 of each item).
NOTE- If the vehicle is fitted with A/C, remove
lower air guide from existing bumper. Using side
cutters, trim back the wide sections on the front
outer flanges to allow air guide to be fitted to bull
bar. Install the M6x16mm bolts, flange nuts and ¼”
flat washers (4 of each item).
Using 3 people carefully lift the bull bar up to the
vehicle and position so it can be side mounted to
captive nuts in chassis. Fasten with M10 x 30mm
bolts, spring washers and 3/8” flat washers (4 of
each item).
Bolt through lower mount hole using the 1 ½” x ½”
UNC bolts, spring washer, nut (2 of each item) and
13 x 40mm flat washer (4 off). Bolt through hole
from outside as per diagram, diagram has passenger
side drawn.
Align bull bar to the vehicle and tighten the mount
bolts to the following torques, M10 bolts to 44Nm
and 1 1/2”x 1/2”UNC bolts to 77Nm.
NOTE- After fitment bounce vehicle to settle
suspension. Check front suspension “H” dimension
and adjust if necessary. Refer to D22 workshop
manual for specifications.
 Loading...