

Aprilia SXV450, SXV 550 Upgrade Book 2008
UPGRADE BOOK
APRILIA SXV 450-550
Replica VAN DEN BOSCH
MY 08
ENGLISH VERSION

CONTENTS
SUMMARY TABLE OF TECHNICAL DATA 3
VEHICLE START-UP 4
REMOTE ADJUSTMENT OF THE POSITION OF THE FRONT BRAKE LEVER 5
CHANGING ECU MAPPING 5
ACTIVATION/DEACTIVATION OF THE ELECTRONIC TRASMISSION 6
STARTING DEVICE 6
ASYMMETRIC CHAIN TENSIONER PADS 7
FRONT FORK 8
REAR MONO SHOCK ABSORBER 13
SADDLE SUPPORT CHASSIS 14
STM SLIPPERING CLUTCH 15
2

SUMMARY TABLE OF TECHNICAL DATA
FRONT FORK
Type Marzocchi Shiver 50
Travel 267 mm
Std. adjustment hydraulic brake under compression 20 clicks from all closed
Std. adjustment hydraulic brake under extension 20 clicks from all closed
Steering angle with centred bushings 25°
Steering angle with eccentric bushings 24° - 26°
Fork offset with centred bushings 14 mm
Fork offset with eccentric bushings 11 mm – 17 mm
REAR SHOCK ABSORBER
Type Mono Sachs racing
Travel 120 mm
Std. spring elasticity (K) 6 kgf/mm
Std. adjustment hydraulic brake under compression at high speed 7 clicks from all closed
Std. adjustment of the hydraulic brake under compression at low speed 12 clicks from all closed
Std. adjustment hydraulic brake under extension 15 clicks from all closed
STM CLUTCH
Calibration of primary standard spring SXV VDB 450 (wet race) 120 kg
Calibration of primary supplied spring SXV VDB 450 130 kg
Calibration of secondary standard spring SXV VDB 450 (wet race) 30 kg
Calibration of secondary supplied spring SXV VDB 450 40 kg
Calibration of primary standard spring SXV VDB 550 (wet race) 130 kg
Calibration of primary supplied spring SXV VDB 550 140 kg
Calibration of secondary standard spring SXV VDB 550 (wet race) 30 kg
Calibration of secondary supplied spring SXV VDB 550 40 kg
Wear limit clutch pack 35 mm
FRONT / REAR CHAIN SPROCKETS
Standard pinion SXV VDB 450 z=14
Supplied pinion SXV VDB 450 z=15
Standard sprocket SXV VDB 450 z=45
Supplied sprocket SXV VDB 450 z=44, z=46
Standard pinion SXV VDB 550 z=16
Supplied pinion SXV VDB 550 z=15
Standard sprocket SXV VDB 550 z=46
Supplied sprocket SXV VDB 550 z=45, z=47
3
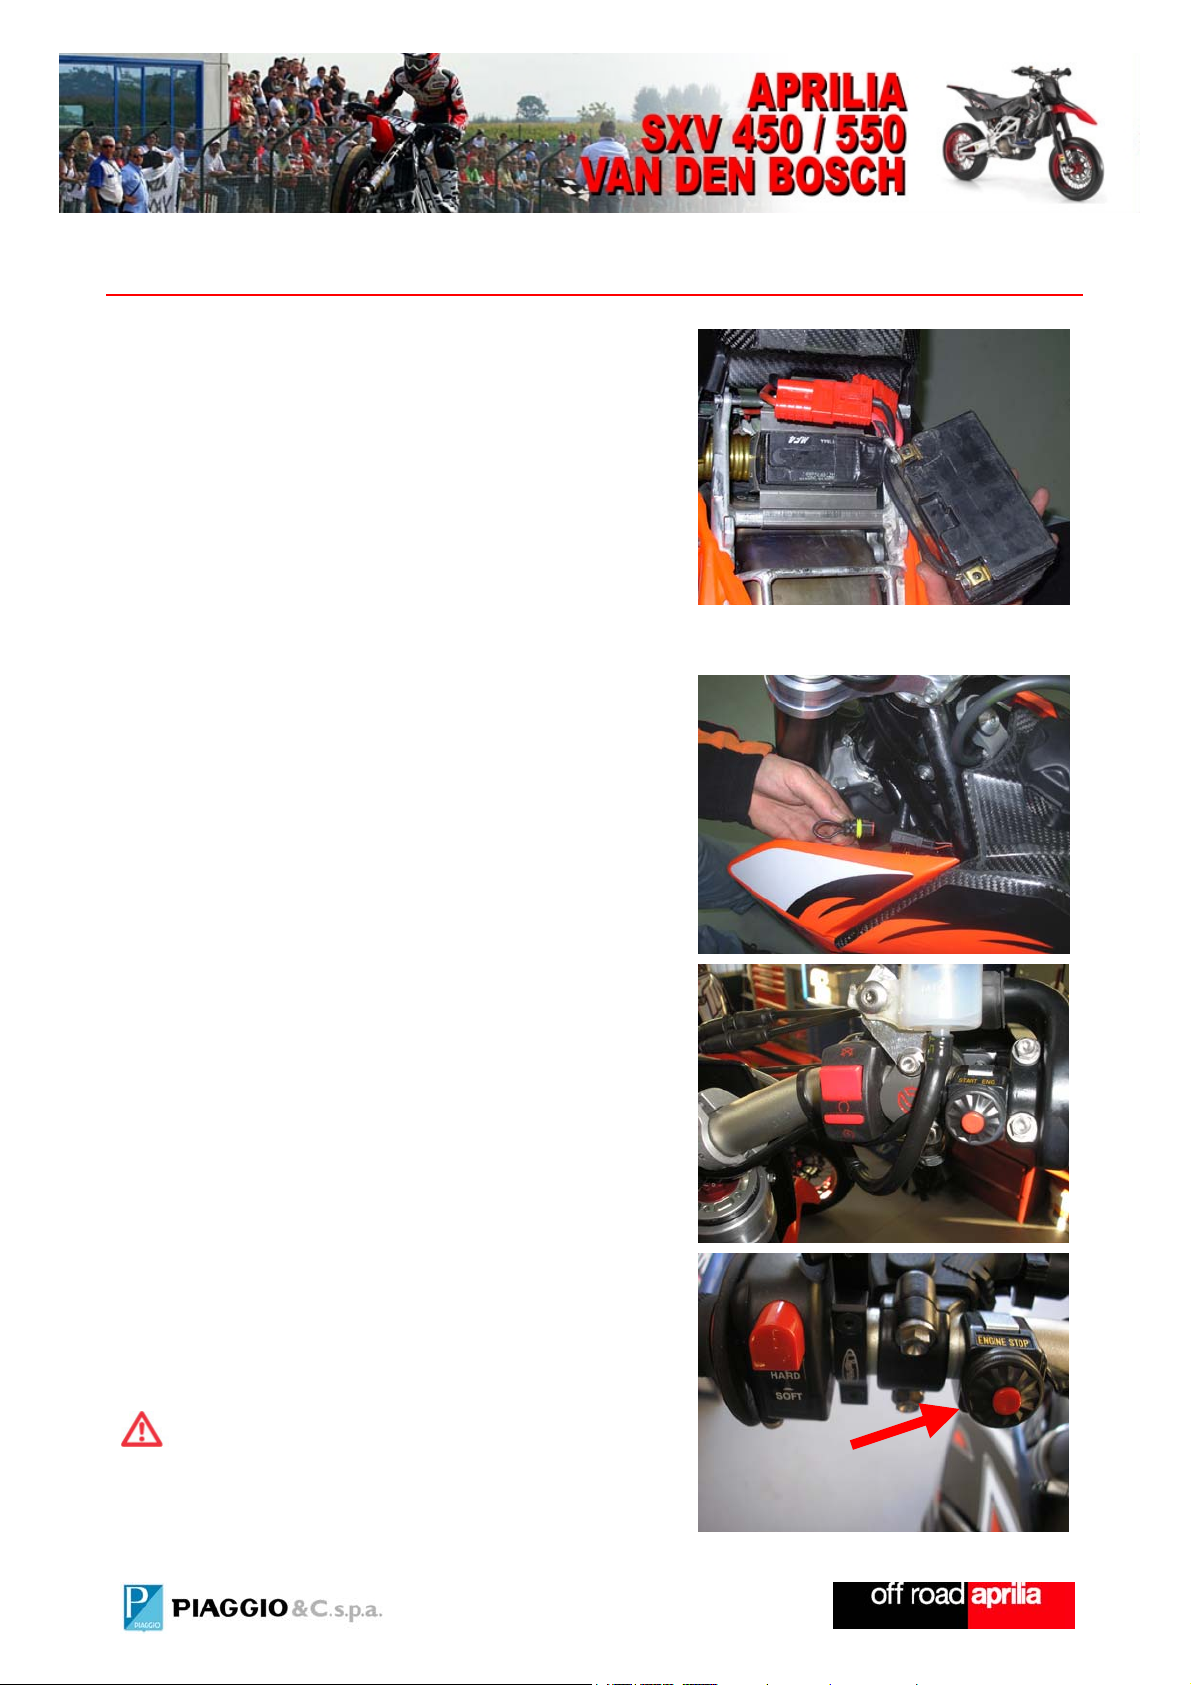
VEHICLE START-UP
This vehicle, having been designed for exclusive
use in competitions, is equipped with a small and
lightweight battery, sufficient for amperages
needed during warm start-up and for the normal
operation of the engine.
For cold start it is necessary to use the external
battery that comes with as an accessory to the
vehicle.
Remove the saddle.
Disconnect the jack from the regular battery and
connect it to the external battery.
Feed the injection circuit of the vehicle by
connecting the key jack on the handlebar.
Start the engine using the ignition button on the
right side of the handlebar.
With the engine running, disconnect the external
battery and reconnect the installed battery.
To turn off the vehicle just press the off button
on the left side of the handlebar.
WARNING
After use the key jack has to be
disconnected.
4
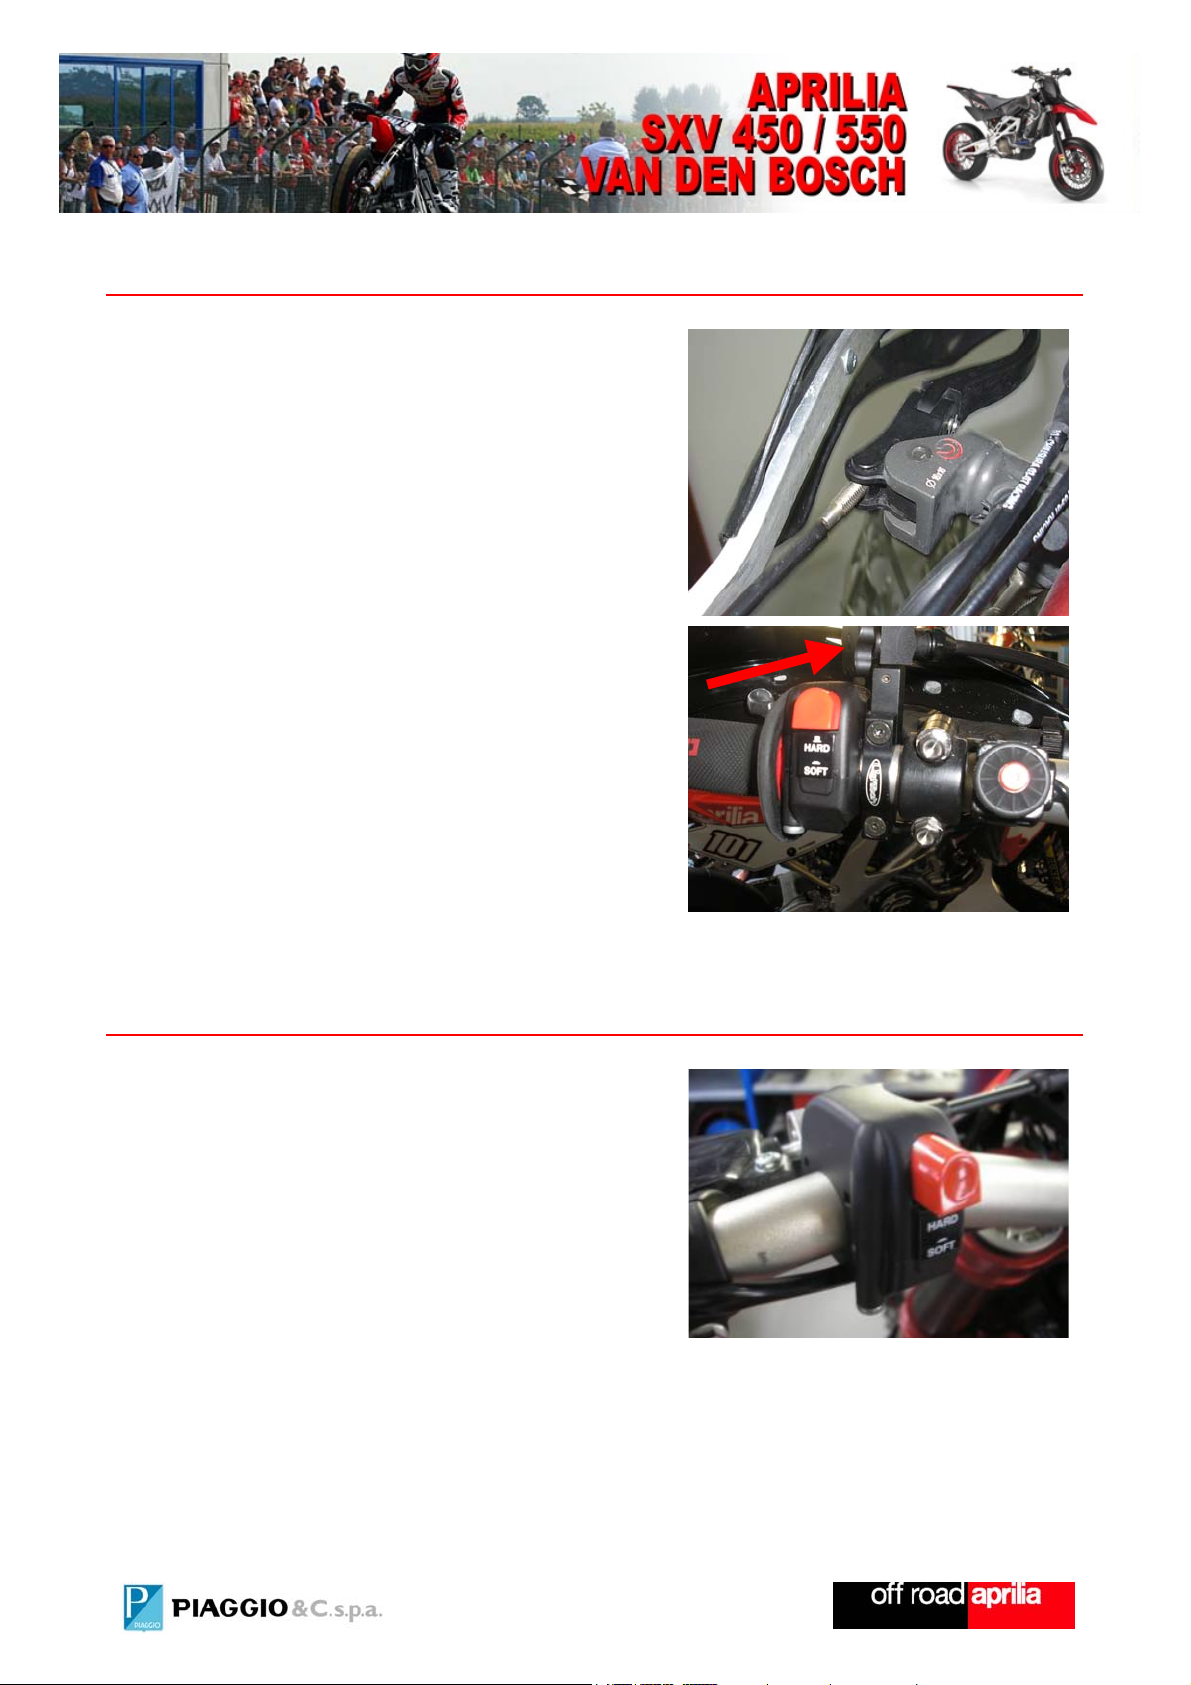
REMOTE ADJUSTMENT OF THE POSITION OF THE FRONT BRAKE LEVER
The vehicle is prearranged for a remote
adjustment of the distance of the front brake
lever from the handlebar.
Use the adjustment knob on the left handlebar
until the desired distance is obtained.
CHANGING ECU MAPPING
The vehicle offers the possibility of choosing
between two different mappings of the control
unit.
The mapping change can be accomplished while
the vehicle is in motion.
Push the button on the left side of the handlebar
to chose between HARD and SOFT modes.
5
ACTIVATION/DEACTIVATION OF THE ELECTRONIC TRASMISSION
The vehicle is supplied with an electronic
control mechanism for the gear ratio.With the
electronic control mechanism activated, it is
possible to change the ratio upward without the
aid of friction and while keeping the throttle
control open.
Push the button on the right side of the handlebar
to activate or deactivate the electronic control
mechanism:
1 - Device OFF
2 - Device ON
1
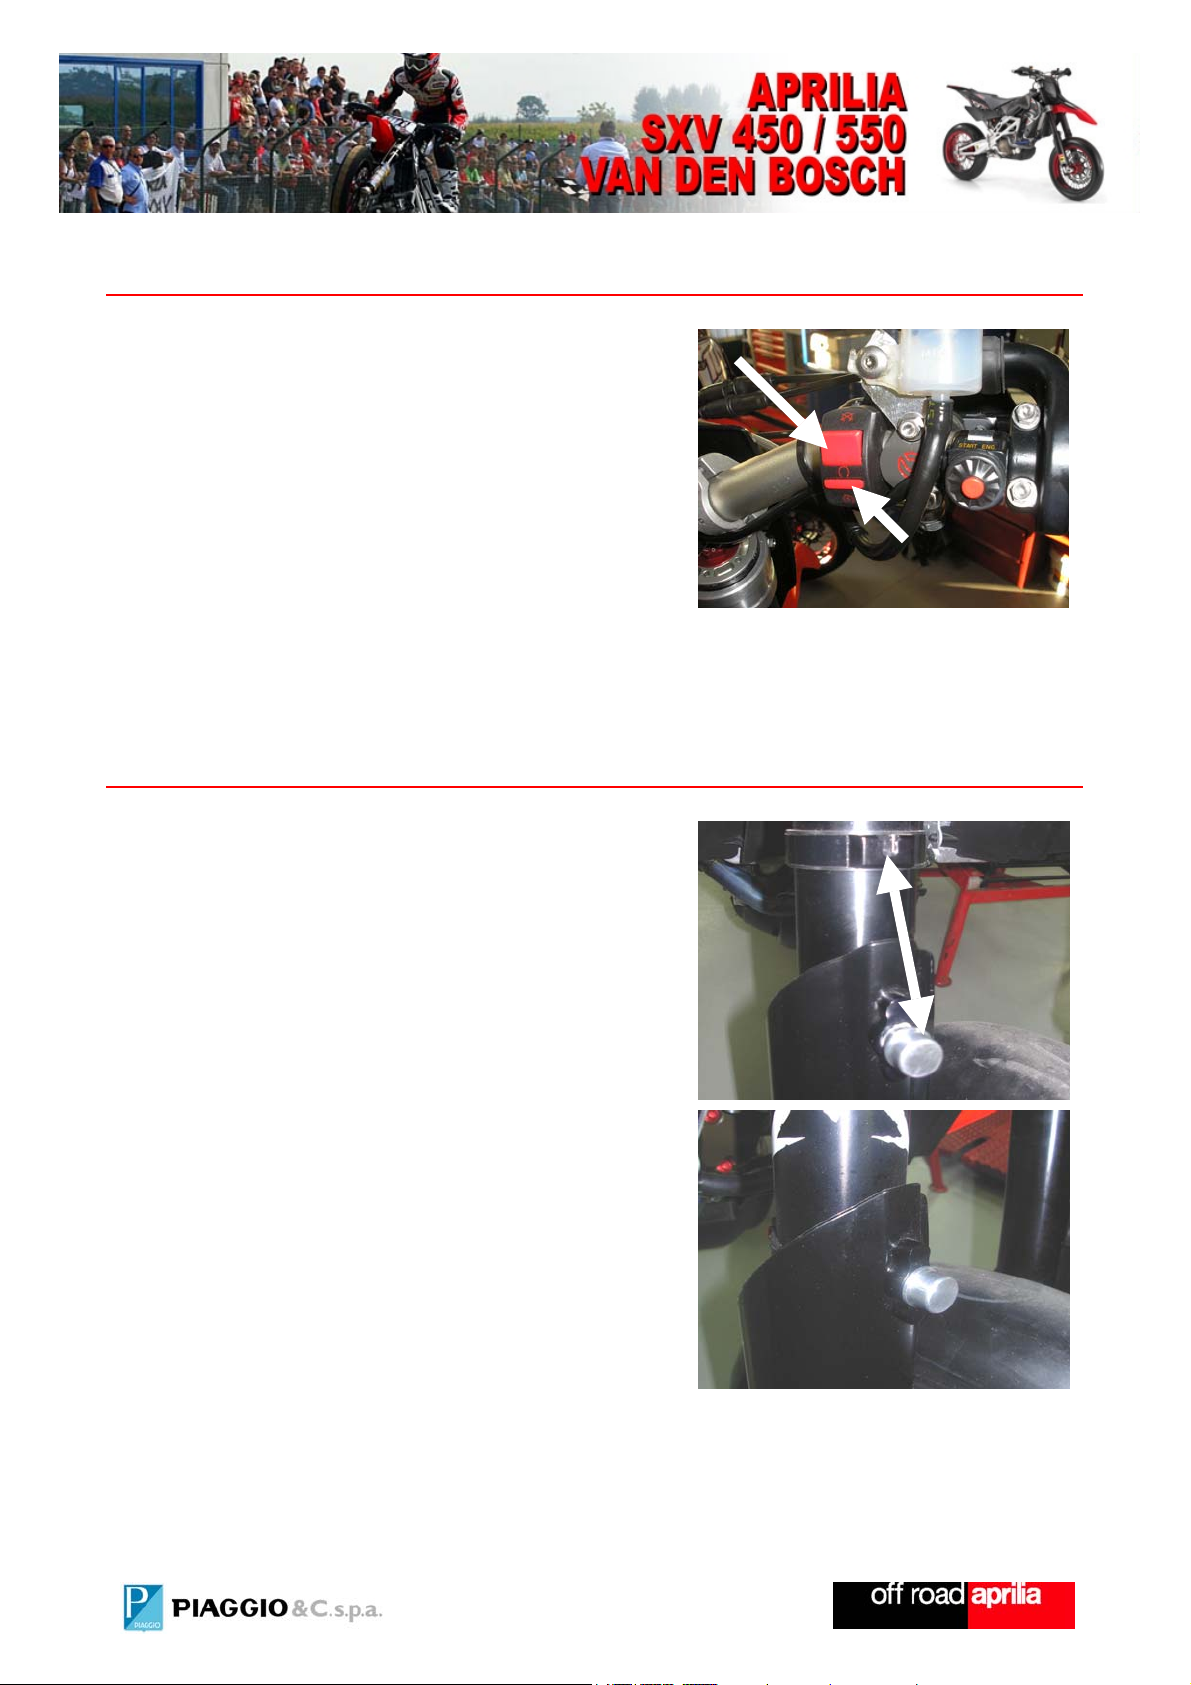
STARTING DEVICE
FITTING
The distance between two components should be:
D = 11 mm
D
= 13 mm
MAX
USE
The vehicle is set up for locking the fork under
compression as a launch control.
Press the fork all the way.
Press on the locking pin.
Release the fork so that the pin engages on the
slot of the ring mounted on the fork.
Release the pin.
2
D
6
 Loading...