

Page 1

Xserve
Hard Drive
Replacement Instructions
Follow the instructions in this document carefully. Failure to follow these instructions could
damage your equipment and void its warranty.
Online instructions are available at http://www.apple.com/support/diy/.
Note: These instructions apply to the hard drive of various Xserve models. Your server may look
slightly dierent than the one shown in the images.
Note: Blank drive carriers, which may ll some of the hard drive bays, follow the same
replacement procedure as hard drives. If you are replacing a blank carrier with a drive module,
be sure to keep the blank for possible future use. Blank drive carriers must be installed in all
empty drive bays to maintain proper airow through the server. Be careful not to apply excessive
pressure when installing the blank carriers.
Backing Up Your Data
Warning: Before replacing your hard drive, make sure you back up all data on the drive.
Tools Required
No tools are required for this procedure.
Preliminary Steps
The server includes three drive bays for the Apple Drive Modules. The modules consist of hard
drives attached to carriers; they are removed from or installed in the server as a unit. You can
replace hard drives while the system is running; you do not need to shut down or open the
server rst.
Note: There are two LED indicators on the front of each drive.
The upper LED shows drive status—a green light indicates the drive is good; a yellow or red •
light indicates the drive should be replaced or removed and reinserted.
The lower LED shows drive activity—when the light is blinking, the server is reading from •
073-1178 Rev. A
Page 2
or writing to the drive. To avoid losing data, never remove a drive when the lower LED is
blinking.
If the hard drives are in the locked position (the yellow security LED on the front panel is on), 1.
use the Allen key that came with the server to unlock them.
Warning: Drives must be in the unlocked position before you attempt to remove a drive.
If a drive is locked, pulling on the drive to remove it could damage the drive handle.
Wait for the lower LED on the front of the drive to stop blinking.2.
Removing the Installed Hard Drive
Make sure the drive being replaced is not in use by any application and that removing it will 1.
not disrupt the RAID scheme in use.
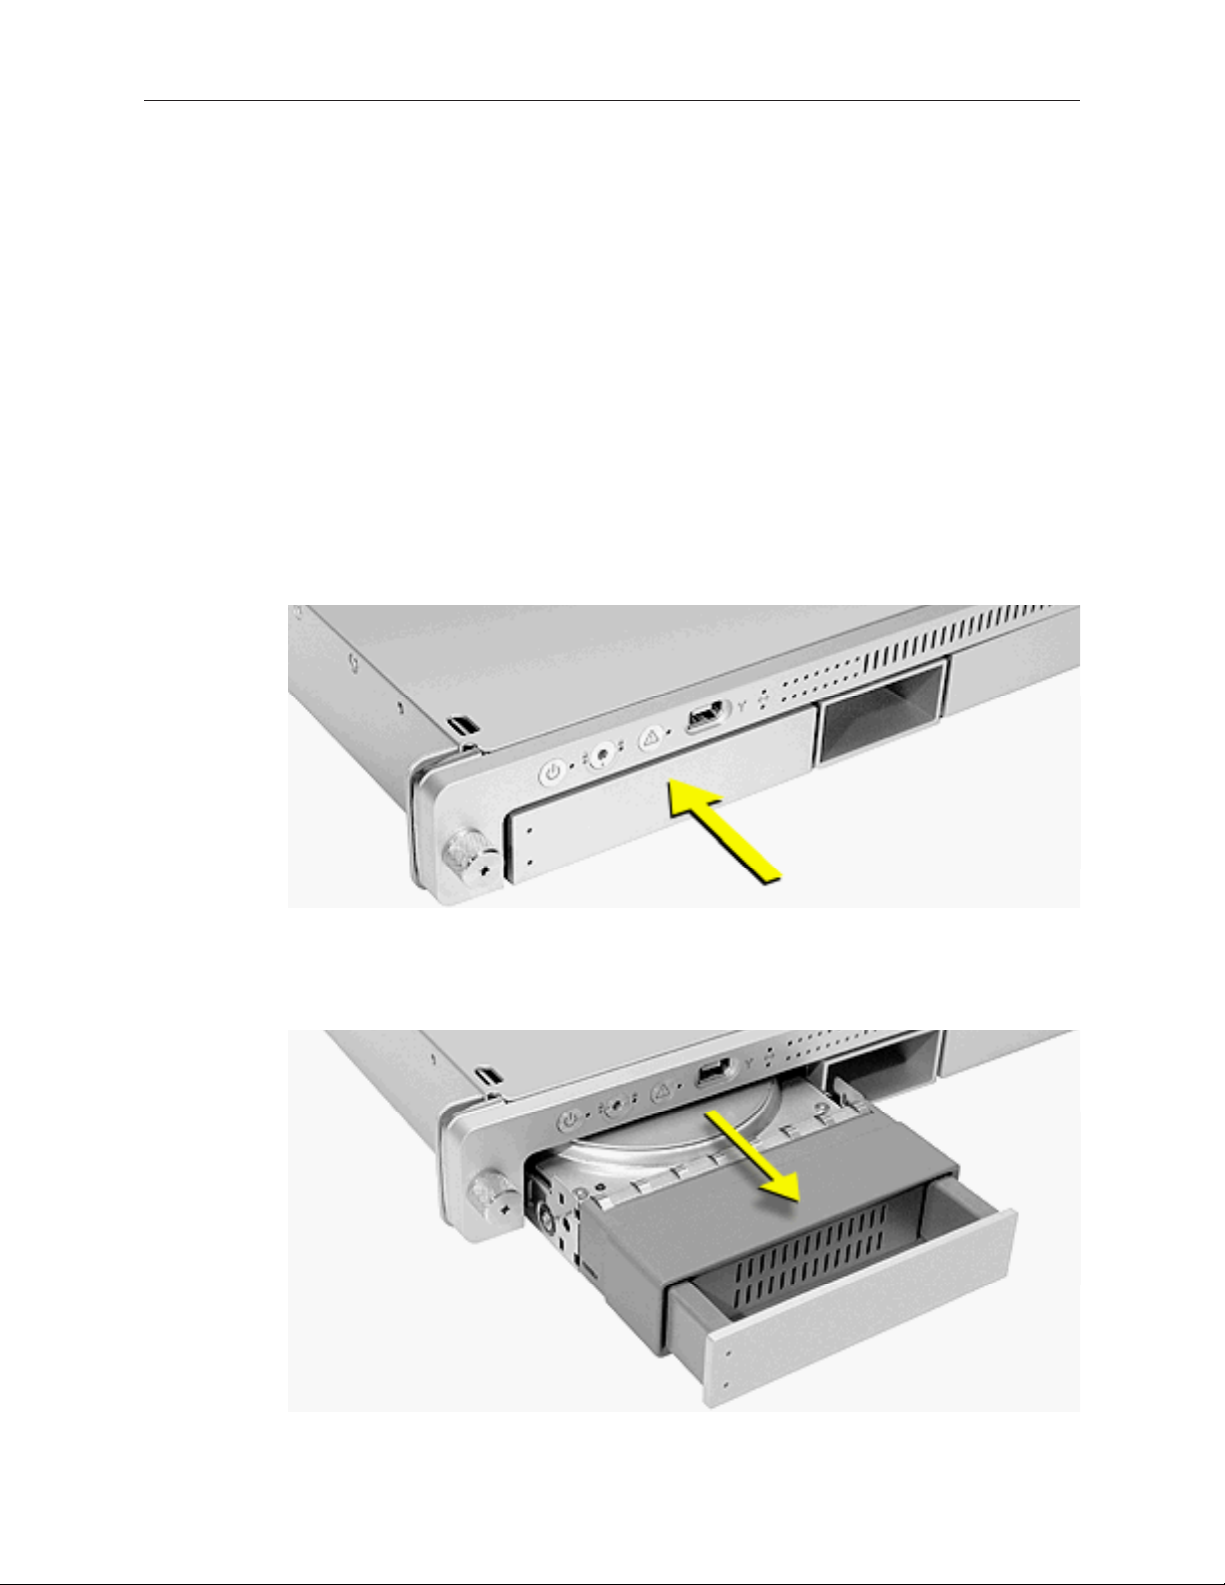
Press the handle on the front of the drive module so the handle pops out. 2.
Wait for the upper LED on the drive to go out. Then grasp the drive handle, and pull the 3.
drive module out of the server.
Xserve Hard Drive Replacement Instructions 2
Page 3

Installing the Replacement Hard Drive
Press the handle on the front of the replacement drive module so that the handle pops out.1.
Place your ngers on the center of the drive faceplate directly below the handle. Push the 2.
drive into the empty bay until its connector clicks into place.
Press in the handle on the drive module so that it is ush with the front panel.3.
Wait for the upper LED to turn green, indicating normal operation.4.
Formatting the Hard Drive
Start up from the Install Disc that came with your server, and choose the language.1.
From the menu bar, choose Utilities > Disc Utility.2.
To format the primary drive, use the Disc Utility on the Install disc.3.
Click the Partition tab.4.
Click on Options, and verify GUID is selected if this is the startup drive.5.
Name the volume “Macintosh HD.”6.
Apply the change by clicking the Partition tab.7.
Leave the Disc Utility application open, and restore the backed up les from the image you 8.
created before removing the hard drive.
Apple Inc.
© 2008 Apple Inc. All rights reserved.
Under the copyright laws, this document may not be copied, in whole or in part, without the
written consent of Apple.
Every eort has been made to ensure that the information in this document is accurate. Apple is
not responsible for printing or clerical errors.
Apple
1 Innite Loop
Cupertino, CA 95014-2084
USA
+ 1 408 996 1010
http://www.apple.com
Apple, the Apple logo, Mac, Macintosh, and Xserve are trademarks of Apple Inc., registered in the
U.S. and other countries.
Xserve Hard Drive Replacement Instructions 3
 Loading...