

Page 1
C O M B I T H E R M®
STEP BY STEP OPERATION MANUAL
Page 2

C O M B I N A T I O N O V E N / S T E A M E R
IN TR ODUCTIO N . . . . . . . . . . . . . . . . . . . . . .1.
CO NT ROL PANEL ID E N TIFICAT I O N
Standa rd a nd Progr ammable Delux e Model s . . .2.
Standa rd a nd Delux e Control P anel
Basic Func tion . . . . . . . . . . . . . . . . . . . . . . . 3.
SE T-UP PRO C E D URES
Set U p Menu . . . . . . . . . . . . . . . . . . . . . . . .5 .
Signal Tone . . . . . . . . . . . . . . . . . . . . . . . . .5.
Volume . . . . . . . . . . . . . . . . . . . . . . . . . . . .6.
Time . . . . . . . . . . . . . . . . . . . . . . . . . . . . .6.
Date . . . . . . . . . . . . . . . . . . . . . . . . . . . . .6.
Progra m Index . . . . . . . . . . . . . . . . . . . . . . .6.
Defaul t/Memo S ettin g . . . . . . . . . . . . . . . . .7.
Temper ature Displa y . . . . . . . . . . . . . . . . . . . 8.
Networ k Address . . . . . . . . . . . . . . . . . . . . . 8.
Langua ge . . . . . . . . . . . . . . . . . . . . . . . . . .8.
SA F E TY PRECA U T I ONS . . . . . . . . . . . . . . . .9.
DE L U XE PROGR A M F U NCTION
Record ing a Cooki ng P rocedure . . . . . . . . . .32.
Cancel ing the Reco rding Functi on . . . . . . . . .33.
Saving a Reco rded Co oking Proced ure . . . . .33.
Creati ng a Ne w Cooki ng P rocedure . . . . . . .34.
rogram med Proc edures
P
Start . . . . . . . . . . . . . . . . . . . . . . . . . .35.
Copy . . . . . . . . . . . . . . . . . . . . . . . . . .35.
Delete . . . . . . . . . . . . . . . . . . . . . . . . .35.
Edit . . . . . . . . . . . . . . . . . . . . . . . . . . .36 .
Insert a Step . . . . . . . . . . . . . . . . . . . . . 37.
Append a Step . . . . . . . . . . . . . . . . . . .38.
Deleti ng a St ep . . . . . . . . . . . . . . . . . . .39.
OP E R ATION MO D E S
Steam . . . . . . . . . . . . . . . . . . . . . . . . . . .10.
Combin ation . . . . . . . . . . . . . . . . . . . . . . .12.
Convec tion . . . . . . . . . . . . . . . . . . . . . . . .1 4.
Rether m . . . . . . . . . . . . . . . . . . . . . . . . . . 16.
Core Temperatu re P robe . . . . . . . . . . . . . . .18.
Core Temperatu re - De lta- T . . . . . . . . . . . . .19.
AU X I LIARY F UNCTIO N
Prehea ting . . . . . . . . . . . . . . . . . . . . . . . .20.
Gold-n -Brown . . . . . . . . . . . . . . . . . . . . . .21.
Cool-D own Feat ure . . . . . . . . . . . . . . . . . .2 2.
Reduce d Fan S peed . . . . . . . . . . . . . . . . . .23.
Reduce d Power . . . . . . . . . . . . . . . . . . . . .23.
Key L ock . . . . . . . . . . . . . . . . . . . . . . . . . 24.
Steam Inje ction . . . . . . . . . . . . . . . . . . . . . 25.
Smokin g Function . . . . . . . . . . . . . . . . . . .26 .
Smoker Fe ature . . . . . . . . . . . . . . . . . . . . .27.
Energy Lock . . . . . . . . . . . . . . . . . . . . . . .2 8.
AD VA NCE FEATU R ES
Moistu re Vent Key . . . . . . . . . . . . . . . . . . .29.
Quick Prog ramm ing . . . . . . . . . . . . . . . . . .30.
RA P I D-TOUC H K E Y S . . . . . . . . . . . . . . . . .40.
S-CONT R O L M ODELS . . . . . . . . . . . . . .41.
PR E H EATING . . . . . . . . . . . . . . . . . . . . . . .46.
BA K E RY
Bread, Fr ench . . . . . . . . . . . . . . . . . . . . . .47.
Bread, Fr uit . . . . . . . . . . . . . . . . . . . . . . . 48.
Bread, Various . . . . . . . . . . . . . . . . . . . . . .49.
Browni es . . . . . . . . . . . . . . . . . . . . . . . . . 50.
Cookie s . . . . . . . . . . . . . . . . . . . . . . . . . . 51.
Croiss ants . . . . . . . . . . . . . . . . . . . . . . . . . 52.
Danish Pa stry . . . . . . . . . . . . . . . . . . . . . . 53.
Muffin s . . . . . . . . . . . . . . . . . . . . . . . . . . .54.
Pie, Fruit . . . . . . . . . . . . . . . . . . . . . . . . . 55 .
Proofi ng, Brea d Dough . . . . . . . . . . . . . . . .56.
Puff Pastr y . . . . . . . . . . . . . . . . . . . . . . . .57 .
Rolls, Ci nnamon . . . . . . . . . . . . . . . . . . . . 58.
Rolls, Di nner . . . . . . . . . . . . . . . . . . . . . . .59.
Rolls, Pa r-Baked . . . . . . . . . . . . . . . . . . . .60.
Start Time Preselec t . . . . . . . . . . . . . . . . . .31.
Sheet Cake . . . . . . . . . . . . . . . . . . . . . . . .61.
Page 3

C O M B I N A T I O N O V E N / S T E A M E R
CO N V ENIENC E P R O DUCTS
Precoo ked Snac k Foods . . . . . . . . . . . . . . .62.
Precoo ked Chic ken Pieces . . . . . . . . . . . . . .63.
Frozen En trées . . . . . . . . . . . . . . . . . . . . . 64.
IS H & S E AFOOD
F
aked Haddo ck/O ther Fish,
B
Fresh or Froz en . . . . . . . . . . . . . . . . . . . . .65.
Lobste r, Whole or Tail . . . . . . . . . . . . . . . .66.
Orange Ro ughy, Frozen . . . . . . . . . . . . . . .67.
Salmon , Fresh . . . . . . . . . . . . . . . . . . . . . .68.
Salmon , Cold Smok ed . . . . . . . . . . . . . . . . . 69.
Shrimp . . . . . . . . . . . . . . . . . . . . . . . . . . .70.
Trout, Fre sh . . . . . . . . . . . . . . . . . . . . . . .71.
ME AT & P OULTRY
Bacon, Sl iced . . . . . . . . . . . . . . . . . . . . . .72 .
Beef Brisk et, Smok ed . . . . . . . . . . . . . . . . .73.
Beef Round s, Top or B ottom . . . . . . . . . . . .74.
Beef, Shor t Ribs . . . . . . . . . . . . . . . . . . . . 75.
Beef, Shor t Ribs, Smo ked . . . . . . . . . . . . . .76.
Chicke n, O ven Frie d, P ieces . . . . . . . . . . . .77 .
Chicke n, P ieces & Hal ves . . . . . . . . . . . . . .78.
Chicke n, W hole . . . . . . . . . . . . . . . . . . . . .79.
Chicke n, W hole, Smoked . . . . . . . . . . . . . .80.
Duck, Piec es . . . . . . . . . . . . . . . . . . . . . . .81.
Duck, Whol e . . . . . . . . . . . . . . . . . . . . . . .8 2.
Ham, Cured . . . . . . . . . . . . . . . . . . . . . . .83.
Hambur g er P atties, Fresh or Frozen . . . . . . .84.
Hot D ogs . . . . . . . . . . . . . . . . . . . . . . . . .85.
Grilli ng . . . . . . . . . . . . . . . . . . . . . . . . . . .86.
Lamb, Leg . . . . . . . . . . . . . . . . . . . . . . . .87.
Lamb, Rack . . . . . . . . . . . . . . . . . . . . . . . . 88.
Meat Loaf . . . . . . . . . . . . . . . . . . . . . . . . .89.
Pork, Back Ri bs . . . . . . . . . . . . . . . . . . . . .90.
Pork, Back Ri bs, Smok ed . . . . . . . . . . . . . .91 .
Pork Ribs (2-Step Meth od) . . . . . . . . . . . . . .9 2.
Pork, Loin Ro ast . . . . . . . . . . . . . . . . . . . . 93.
Pork Shoul der, Smoked . . . . . . . . . . . . . . . .94.
Sausag e, B reak fast Links . . . . . . . . . . . . . . . 95.
Sausag e, F resh . . . . . . . . . . . . . . . . . . . . .96.
Sausag e, P reco oked or Smok ed . . . . . . . . . . 97.
Turkey Breas t . . . . . . . . . . . . . . . . . . . . . .98.
Turkey Breas t, Smoke d . . . . . . . . . . . . . . . . 99.
MI S C ELLANE O U S
Casser oles . . . . . . . . . . . . . . . . . . . . . . . .1 00.
Cold Smoki ng C H EES E /FIS H /VE G E TAB L E S . . . .101.
Custar d . . . . . . . . . . . . . . . . . . . . . . . . . .102.
Eggs, Hardboil ed . . . . . . . . . . . . . . . . . . .103.
Eggs, Poac hed . . . . . . . . . . . . . . . . . . . . .104.
Eggs, Scra mble d . . . . . . . . . . . . . . . . . . . .1 05.
French Fr ies . . . . . . . . . . . . . . . . . . . . . .106.
Galant ine or Mouss e . . . . . . . . . . . . . . . . .10 7.
Pâté en C route . . . . . . . . . . . . . . . . . . . .108.
Pizza, Fr esh . . . . . . . . . . . . . . . . . . . . . . .109.
Rice, Conv erted or Long Grain . . . . . . . . . .110.
Tamales . . . . . . . . . . . . . . . . . . . . . . . . .11 1.
VE G E TABLES
Potato es, Bake d . . . . . . . . . . . . . . . . . . . 112.
Potato es, Red or Salad . . . . . . . . . . . . . . . 113.
Vegeta bles, Fresh . . . . . . . . . . . . . . . . . . 1 14.
Vegeta bles, Frozen . . . . . . . . . . . . . . . . . 115 .
TR O U BLE SHOO T I N G
Contro l Reset . . . . . . . . . . . . . . . . . . . . .11 6.
Error Code s . . . . . . . . . . . . . . . . . . . . . . .116.
CL E A NING & MAI N T E NANCE
Preven tive Mai ntena nce . . . . . . . . . . . . . . .120.
Food Troll ey C leaning . . . . . . . . . . . . . . . .120 .
Protec ting Sta inles s Steel Su r f aces . . . . . . .121 .
Cleani ng A gents . . . . . . . . . . . . . . . . . . . .121.
Cleani ng M aterials . . . . . . . . . . . . . . . . . .121 .
Daily Gask et Clean ing . . . . . . . . . . . . . . . .122.
Probe Usag e and Clean ing . . . . . . . . . . . . .12 2.
Daily Oven Cl eaning . . . . . . . . . . . . . . . . .122.
Daily Stea m Generator Flush . . . . . . . . . . .122 .
Regula r Decalcific ation . . . . . . . . . . . . . . .122 .
Monthl y Cleaning . . . . . . . . . . . . . . . . . . .1 22.
Combit herm O ven Clea ner . . . . . . . . . . . .123.
AutoCl ean - Stand ard or D elux e Contro l . . .1 24.
AutoCl ean - S-Con trol . . . . . . . . . . . . . . . .126.
Decalc ification - Stan dard or De luxe Control 127.
Decalc ification - S-Co ntro l . . . . . . . . . . . . .129 .
Steam Generato r Flush
- Sta ndard or De luxe Co ntrol . . . . . . . . .131 .
Page 4

COMBINATION OVEN/STEAMER
TM
INTRODUCTION
The Combitherm combination oven/steamer is a multipurpose oven used for steaming, baking, roasting,
thawing, reheating, and various other cooking functions. In the past, a variety of cooking processes
required multiple pieces of equipment. Considering space limitations and rising personnel costs, the
Combither m combination oven/steamer offers multiple cooking functions with one piece of equipment,
saving both space and labor cost. The Combither m combination oven/steamer is both a supplement and a
replacement for some of the traditional cooking units found in most commercial kitchens. It enables the
operator to produce high quality meals efficiently. The ability to use one combination oven for various
cooking methods represents only one of the many economical and versatile capabilities of the Combitherm.
COMBITHERM COMBINATION OVEN/STEAMER ADVANTAGES
• Easy operation.
• Large quantity production in the smallest possible space.
• Quality production with high levels of nutrition, color, taste, and texture, with no transfer of flavors.
• Lower ener gy cost and less water usage due to the unique EcoSmart system of operation.
• Shorter cooking times with the use of both the steam mode and combination mode.
STEAM MODE
COMBINATION MODE
CONVECTION MODE
RETHERM MODE
CORE TEMPERATURE MODE
The Alto-Shaam Combitherm combination oven/steamer employs EcoSmart operating efficiencies in
the design and application of all operating and programming functions. EcoSmart operational
characteristics include the use of a water barrier to close the oven compartment to the outside air.
While maintaining a non-pressurized atmosphere, the primary purpose of the EcoSmart system
prevents the steam and heat generated within the oven compartment from freely escaping to the outside.
The EcoSmart design displaces the air within the cooking compartment and achieves a higher level of steam
saturation that offers quick-steaming at temperatures above 212°F (100°C). The electronic computer control
in the Combitherm combination oven/steamer is fully automatic in the EcoSmart system of operation.
T h i s g u i d e i s pr o v i d e d a s an o p e r a t i o n a l a i d w i t h s t e p - b y - s t e p
i n s t r u c t i o n s of th e ba s i c f u n c t i o n s of t h e Co m b i t h e r m o v e n ,
a l o n g w i t h t h e m a n y o t h e r a d d i t i o n a l f e a t u r e s o f t h e c o n t r o l .
1.
Page 5
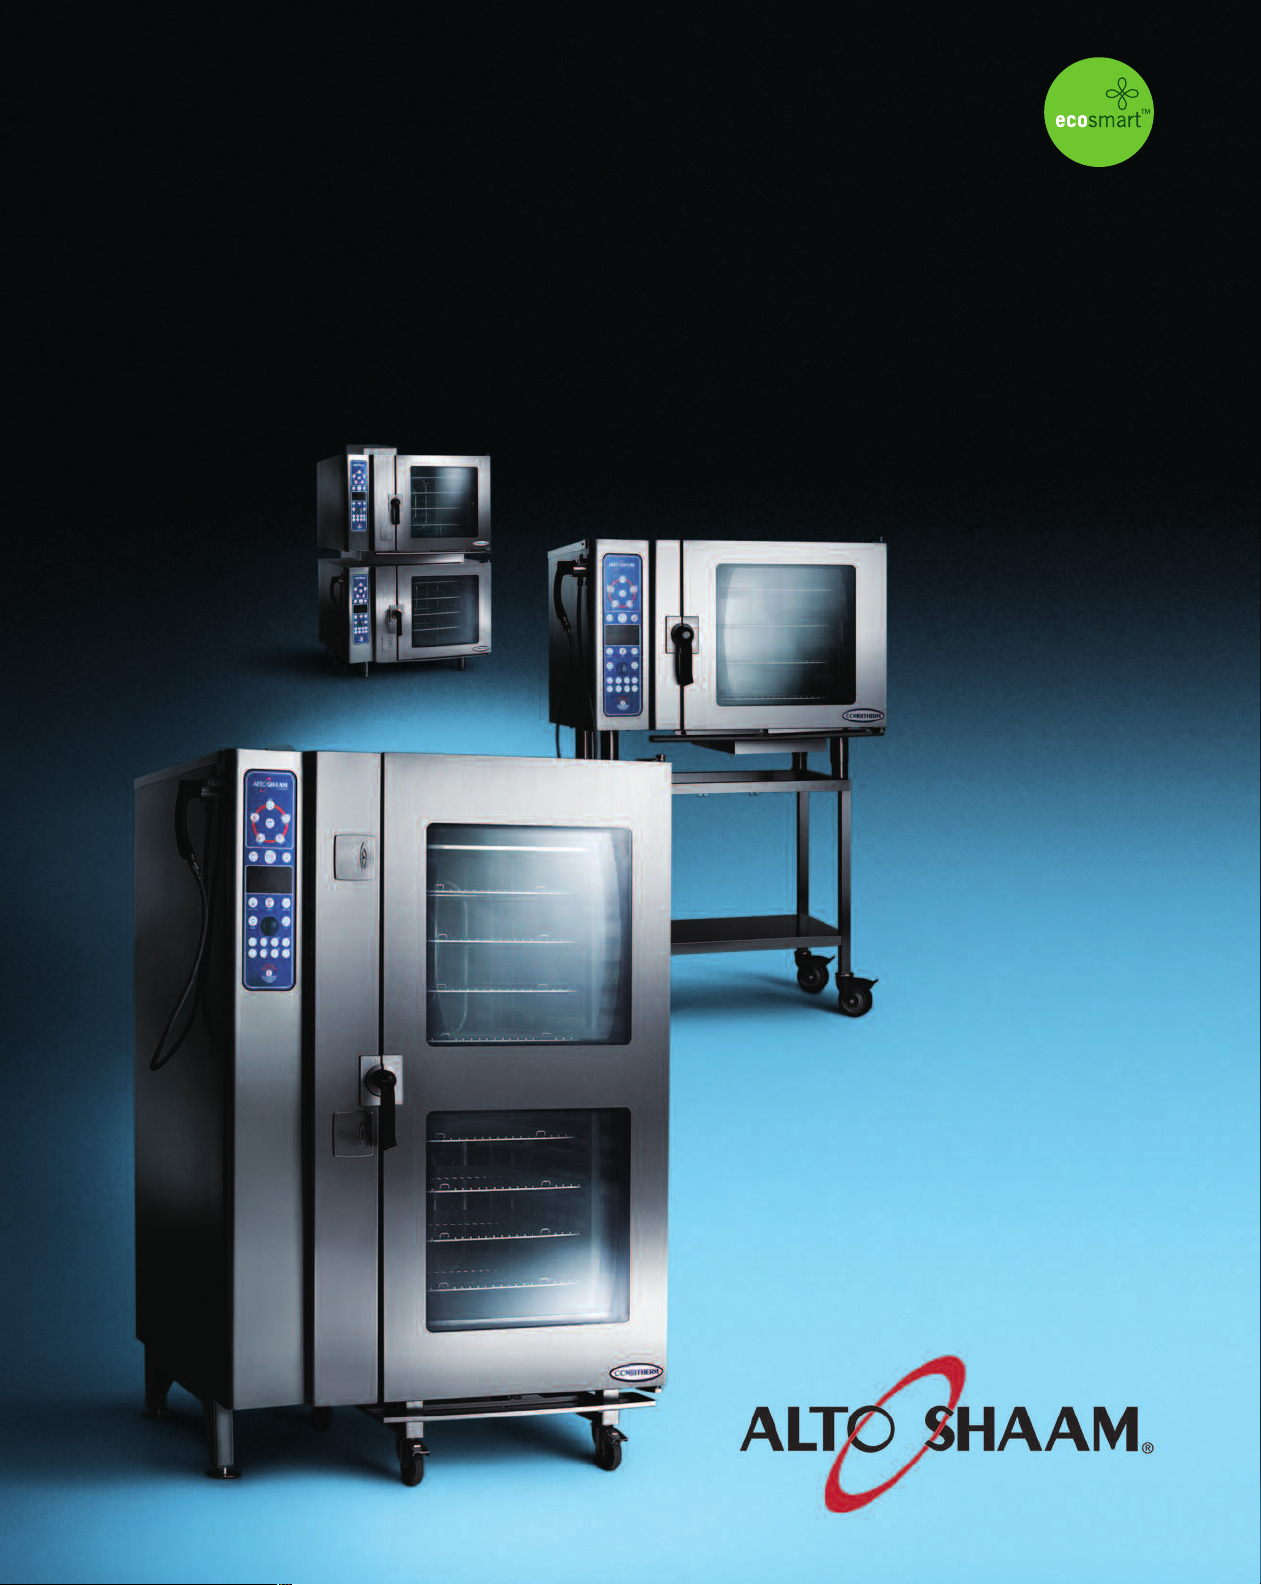
C O NT RO L PA N E L I D E N T I F I C AT I O N
STANDARD
POWER ON/OFF KEY
A
ND
PROGRAMMABLE DELUXE MODELS
TEAM MODE KEY
S
START / STOP KEY
COMBINATION MODE KEY
PROGRAMMED MENU KEY
DELUXE MODELS ONLY
CHEF FUNCTION KEY
COOKING TEMPERATURE KEY
ETHERM MODE KEY
R
CONVECTION MODE KEY
PROGRAM INSTALL/EDIT KEY
DELUXE MODELS ONLY
FUNCTION & OPERATING
INDICATORS
CONTROL PANEL DISPLAY
CORE TEMPERATURE KEY
TIME KEY
DOWN ARROW KEY
ADJUSTMENT KNOB
MOISTURE VENT KEY
ELECTRIC MODELS ONLY
2.
UP ARROW KEY
RAPID-TOUCH KEYS
DELUXE MODELS ONLY
Page 6

S TA N D A R D & D E L U X E C O N T R O L PA N E L B A S I C F U N C TI O N
OW E R ON/OFF KE Y
P
Activates power to the oven and automatically fills
the steam generator equipped models with water
that will heat to a stand-by mode temperature of
150°F (65°C). The steam generator flush is also
activated by pressing this key.
ST E AM MODE KEY
The oven will operate in the steam mode at a
temperature range of 86°F to 248°F
(30°C to 120°C).
• Automatic steaming at 212°F (100°C)
FA CTOR Y -S ET DEF AUL T .
• Quick steaming between 213°F and 248°F
(101°C and 120°C).
• Low Temperature Steaming between
86°F and 211°F (30°C and 99°C).
STA RT/STO P K E Y
Initiates all cooking mode functions and
programmed procedures stored in memory.
Stops an activated cooking mode or
programmed procedure currently in progress,
and exits the Chef function key .
CO MBINATI O N M ODE KEY
Selection key for cooking with a combination
of steam and convection heat that can be set
within a temperature range of 212°F to 482°F
(100°C and 250°C).
PR O GRAMMED M E N U KEY
Used to access and exit a menu list of all
stored cooking programs that can be reviewed
in display .
DE L U X E M O DEL S O N LY
CH E F FUNCTIO N K E Y
Used to select programmed menu functions,
various auxiliary functions, and several chef
help instructions.
CO O KING TEMP E R ATURE KEY
Used to set the required cooking temperature,
to recall the set cooking temperature, or to
check the actual oven temperature in
conjunction with the down arrow key , the
up arrow key or the adjustment knob .
D
OW N A RROW KEY
Used to decrease displayed cook temperature
, time , or core temperature and as a
scrolling key for programming functions.
AD J USTMENT K N O B
Displays oven functions. Serves the same
function as the up and down arrow keys to
increase or decrease the displayed cook
temperature , time , or core temperature .
MO I STURE VEN T K E Y E L EC T RI C MO D EL S ON LY
Immediately vents steam and condensate from the
oven compartment while cooking in the Convection
mode or in the Combination mode .
RE T HERM MODE K E Y
Food rethermalization or reheating mode will
operate with automatic steam injection at a
temperature range of 248°F and 320°F
(120°C and 160°C).
CO N VECTION M O D E KEY
Selection key for convection cooking without
steam at a temperature range of 86°F to 482°F
(30°C and 250°C).
PR O GRAM INSTA L L AND EDIT KE Y
Used to create, change, duplicate, and delete
programmed menus.
DE L U X E M O DEL S O N LY .
••••••• CON T ROL PANEL D I SPLAY
CO R E TEMPERAT U RE KEY
Used to set the required inter nal product
temperature, to recall the inter nal product
temperature set by the operator, or to display
the current inter nal temperature of the product
in conjunction with the down arrow key , the
up arrow key , or the adjustment knob .
UP A R ROW KEY
Used to increase displayed cook temperature
, time , or core temperature and as a
scrolling key for programming functions.
TI M E KEY
Used to set the required cooking time or recall
the set cooking time in conjunction with the
down arrow key , the up arrow key , or
the adjustment knob .
••••••• RAP I D-TOUCH K E YS DELUXE MODELS ONLY.
One-touch cooking for immediate access to
frequently used operator set programs including
cooking modes, cleaning, and other oven functions.
CO NT INUED
3.
Page 7

S TA N D A R D & D E L U X E C O N T R O L PA N E L B A S I C F U N C TI O N S
FUNCTION & OPERATING INDICATORS
A. GOLD-N-BROWN FEATURE
his indicator will illuminate when the browning function is set by the operator in a
T
timed or programmed cooking cycle in either convection mode or combination mode.
B. COMBI SMOKER (ON EQUIPPED MODELS)
This indicator will illuminate when the smoking function is set by the operator in a
timer, probe or programmed cooking cycle in either convection mode or combination
mode.
C. REDUCED FAN SPEED
This indicator will illuminate whenever the operator sets a reduced fan speed to
protect products affected by high-velocity air movement.
D. CONFIRMATION OF OVEN OPERATION
This indicator illuminates whenever the oven is operating in any mode.
E. KEY LOCK
This indicator will illuminate when operator has locked any mode key or function to
prevent unauthorized or accidental changes.
F. MOISTURE VENT
This indicator will illuminate whenever the Moisture Vent Key
is pressed by the operator to eliminate excessive moisture.
G. ENERGY LOCK
FOR USE WITH OVENS INSTALLED UNDER AN ALTO-SHAAM VENTLESS HOOD.
This indicator is a safety feature that will illuminate and prevent the oven from being
operated unless the ventless oven hood is operating.
4.
Page 8
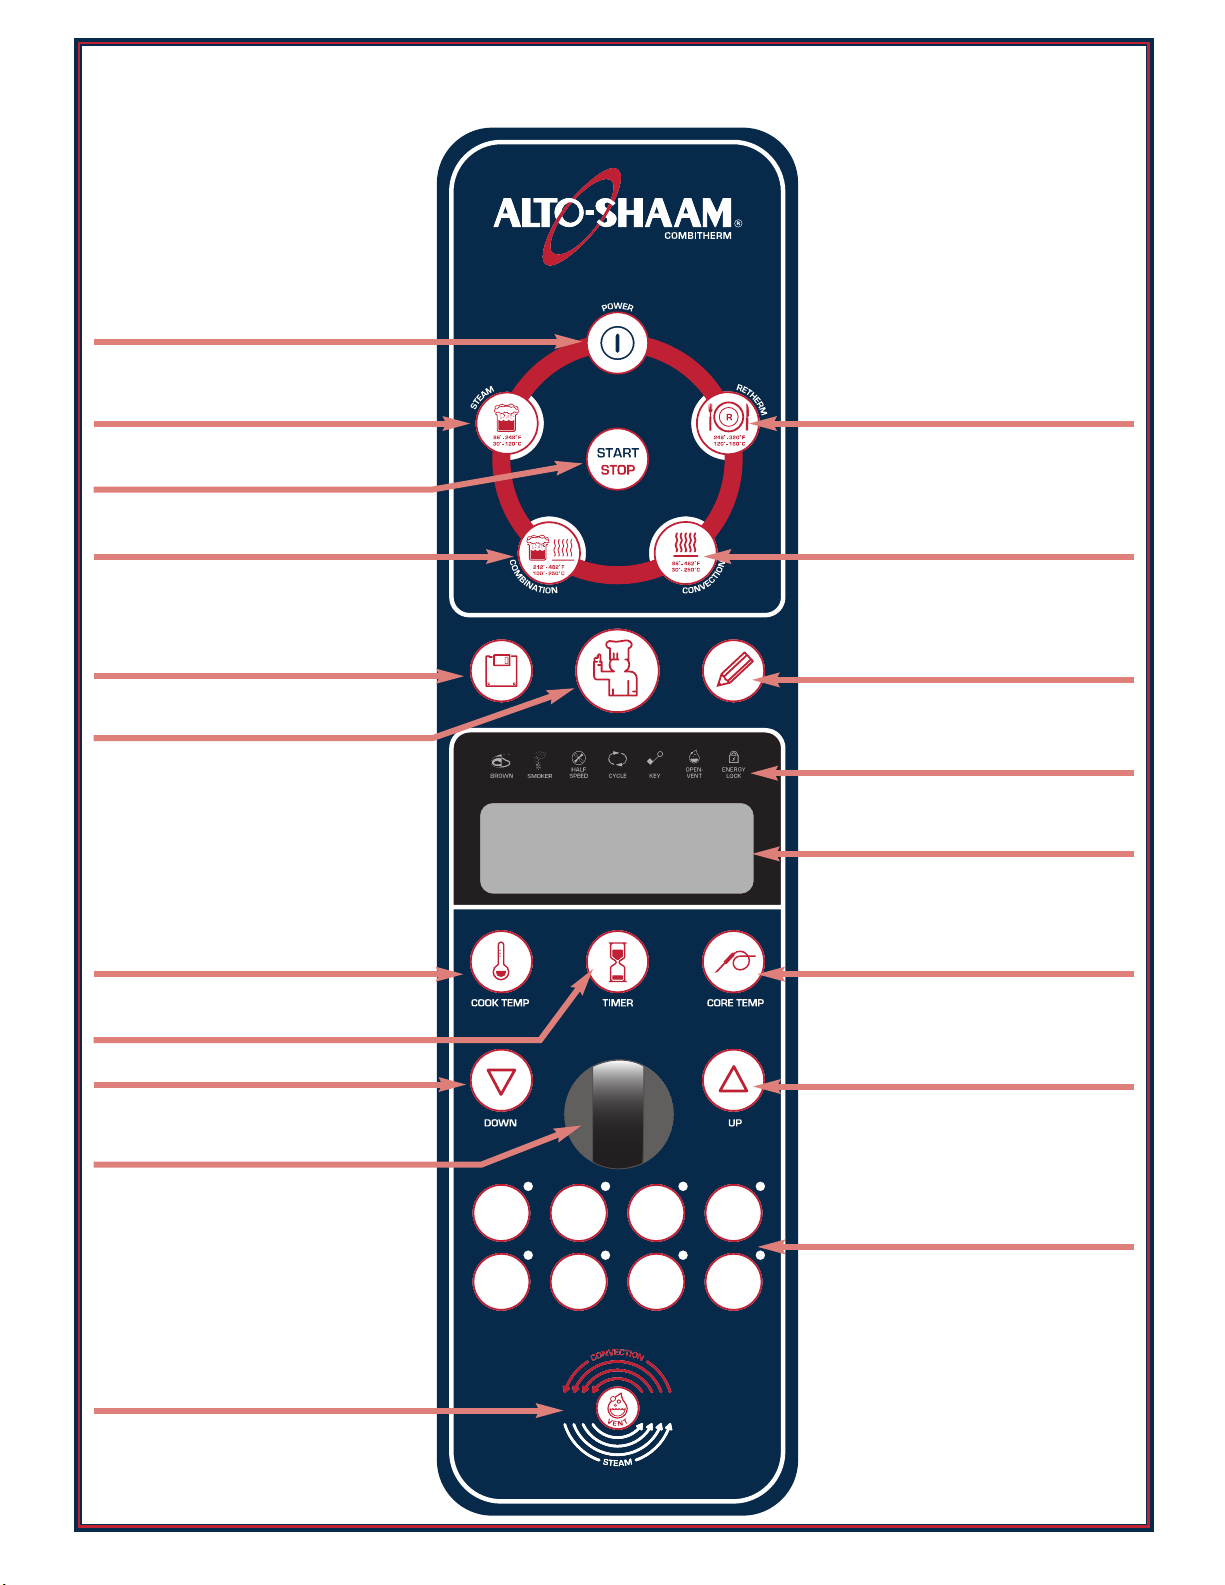
S E T - U P P R O C E D U R E S
SET UP MENU
Following installation, the control should be set with the date and time. In addition to the date and time,
the set-up function provides the operator with the ability to adjust a number of other Combither m
operating conditions to confor m with the needs of the individual installation.
PRESS THE ON/OFF POWER KEY
TO THE O N POSITION.
SET UP ADJUSTMENT CHOICES
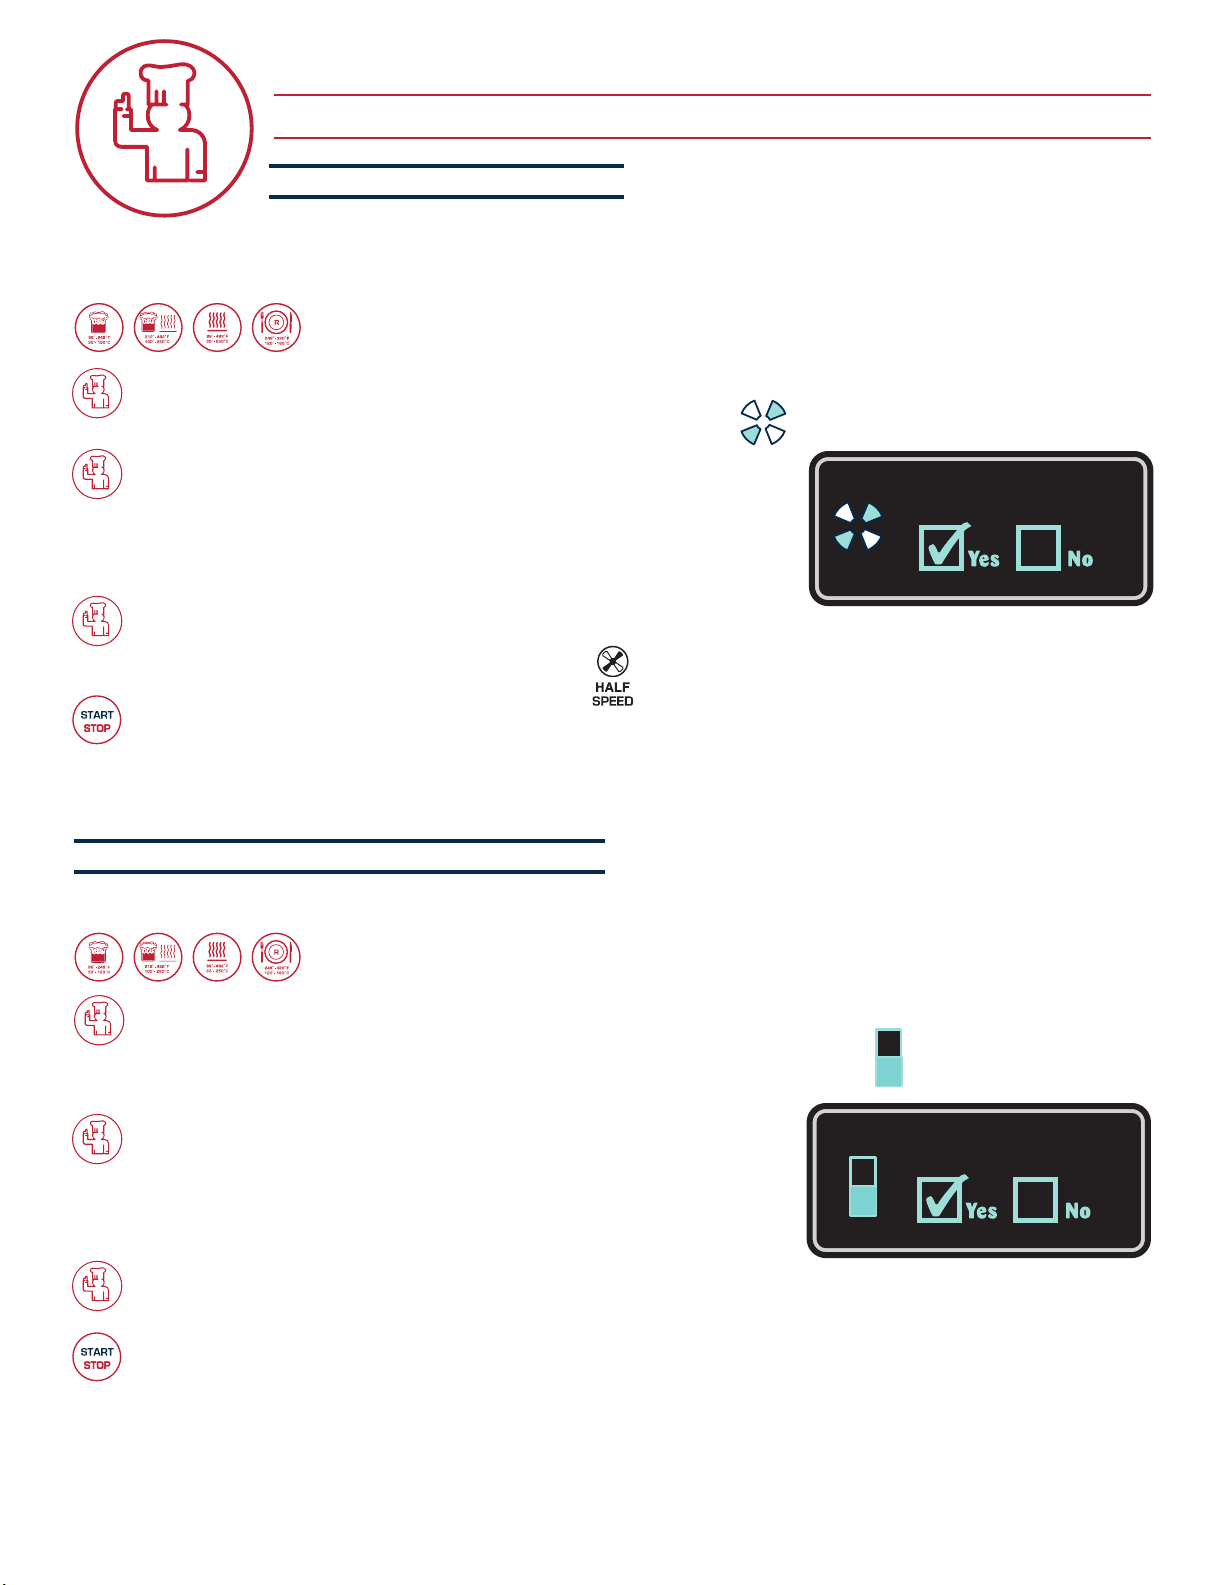
PRESS THE CHEF FUNCTION KEY.
Rotate the adjustment knob
until the set up symbol is
highlighted within the display.
PRESS THE CHEF FUNCTION KEY.
Press the upand down arrow keys
or rotate the adjustment knob to select
“YES” for the set up function.
Set up
PRESS THE CHEF FUNCTION KEY TO
CONFIRM THE SET UP FUNCTION.
Press the up and down arrow keys
or rotate the adjustment knob to
highlight one of the following
adjustment functions:
SIGNAL TONE
VOLUME
TIME
DATE
PROGRAM INDEX
DEFAULT/MEMO SETTINGS
TEMPERATURE DISPLAY
NETWORK ADDRESS
LANGUAGE
S I G N A L T O N E
Rotate the adjustment knob until the signal tone symbol is highlighted within the display.
PRESS THE CHEF FUNCTION KEY TO CONFIRM THE SIGNAL TONE SELECTION.
Press the up and down arrow keys or rotate the adjustment knob to select each tone offered.
Stop rotation at each individual setting to hear an audio playback. Select the tone desired.
PRESS THE CHEF FUNCTION KEY TO CONFIRM THE SELECTED SIGNAL TONE SETTING.
5.
Page 9
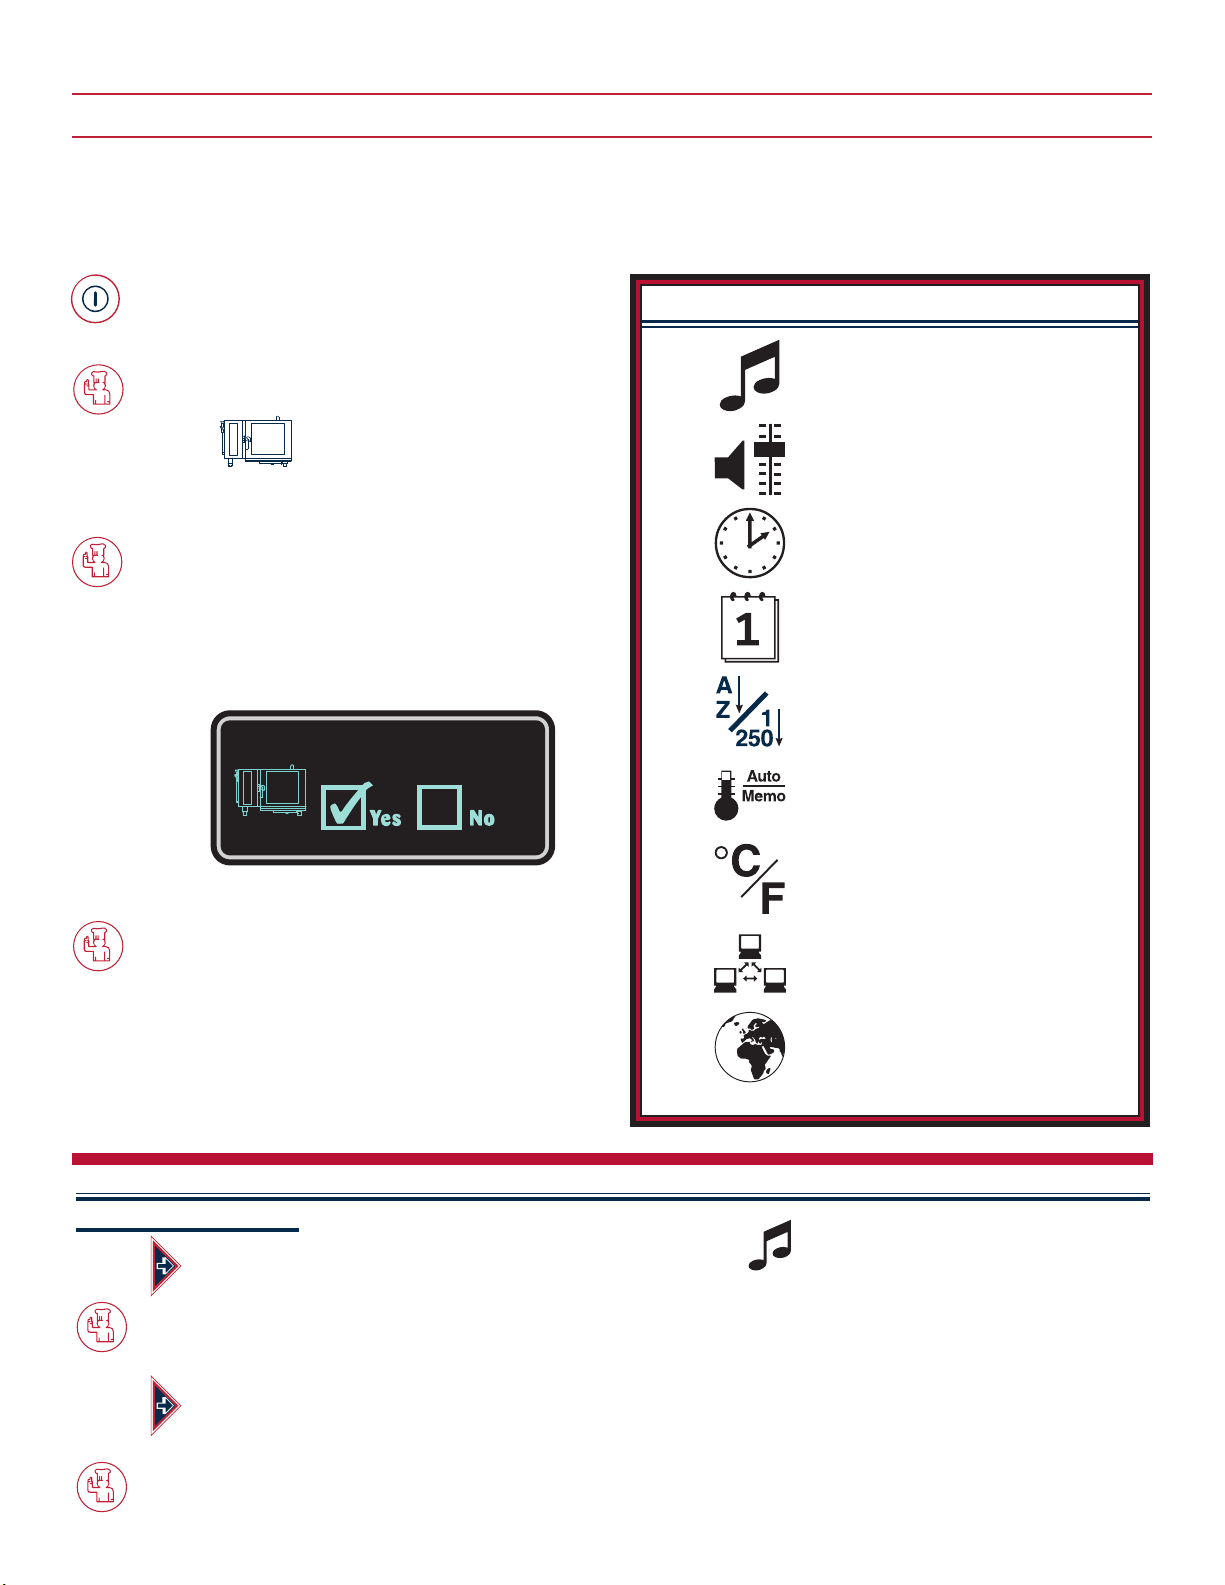
S E T - U P P R O C E D U R E S
A L W A Y S B E G I N S E T U P A D J U S T M E N T S F R O M T H E S E T U P M E N U .
V O L U M E
otate the adjustment knob until the volume symbol is highlighted within the display.
R
PRESS THE CHEF FUNCTION KEY TO CONFIRM THE VOLUME SELECTION.
PRESS THE CHEF FUNCTION KEY TO CONFIRM THE VOLUME SETTING.
T I M E
PRESS THE CHEF FUNCTION KEY TO CONFIRM THE TIME SELECTION.
PRESS THE CHEF FUNCTION KEY TO CONFIRM THE SET TIME.
D A T E
Press the up
offered. Stop rotation at each individual setting to hear an audio playback. Select the volume
desired with consideration of the noise level within the kitchen during peak production periods.
Rotate the adjustment knob until the time symbol is highlighted within the display.
Press the up and down arrow keys to alter nate between hours and minutes and rotate the
adjustment knob in each to adjust the numbers to the correct time.
Rotate the adjustment knob until the date symbol is highlighted within the display.
and down arrow keys or rotate the adjustment knob to select each volume level
PRESS THE CHEF FUNCTION KEY TO CONFIRM THE DATE SELECTION.
Rotate the adjustment knob to select the preferred date format.
Press the up and down arrow keys to alter nate between day, month and year, and rotate the
adjustment knob in each to adjust the numbers to the correct settings.
PRESS THE CHEF FUNCTION KEY TO CONFIRM THE SET DATE.
P R O G R A M I N D E X
Rotate the adjustment knob until the program index symbol is highlighted within the display.
PRESS THE CHEF FUNCTION KEY TO CONFIRM THE PROGRAM INDEX SELECTION.
Press the up and down arrow keys or rotate the adjustment knob to select the preferred index format:
“YES ” for a listing of programs entered alphabetically with the program install/edit key.
“NO” for a listing of programs entered numerically with the program install/edit key.
PRESS THE CHEF FUNCTION KEY TO CONFIRM THE PROGRAM INDEX SETTING.
6.
Page 10
S E T - U P P R O C E D U R E S
L W A Y S B E G I N S E T U P A D J U S T M E N T S F R O M T H E S E T U P M E N U .
A
D E F A U L T / M E M O S E T T I N G
The default/memo setting allows the operator to choose
between a display showing the factory set defaults for
time and temperature or the last operator set values for
time and temperature in each cooking mode. This
djustment function also allows the operator to change
a
the defaults from those set at the factory to settings that
better meet the needs of the individual operation.
Rotate the adjustment knob until the default/memo symbol is highlighted within the display.
PRESS THE CHEF FUNCTION KEY TO CONFIRM THE DEFAULT/MEMO SELECTION.
Rotate the adjustment knob to “ N O ” for memo. This setting will display the last operator set values for
time and temperature in each cooking mode.
PRESS THE CHEF FUNCTION KEY TO CONFIRM THE MEMO SETTING.
TO CHA NGE THE DEFAULT S ETTINGS
Rotate the adjustment knob to select “YES”.
Cooking product with operator set defaults for time and
temperature can help reduce operator error. Cooking
with the oven in the memo setting is particularly useful
when several batches are cooked in succession. The
memo setting eliminates the necessity to set time and
emperature for each batch.
t
A numbered list of default descriptions will appear in the display. Rotate the adjustment knob
until the setting to be changed is highlighted. Press the up arrow key to highlight the time or
temperature to be changed. Rotate the adjustment knob to change the default to the setting
desired. Press the down
arrow key to save the new default setting.
PRESS THE CHEF FUNCTION KEY TO CONFIRM THE NEW DEFAULT SETTINGS.
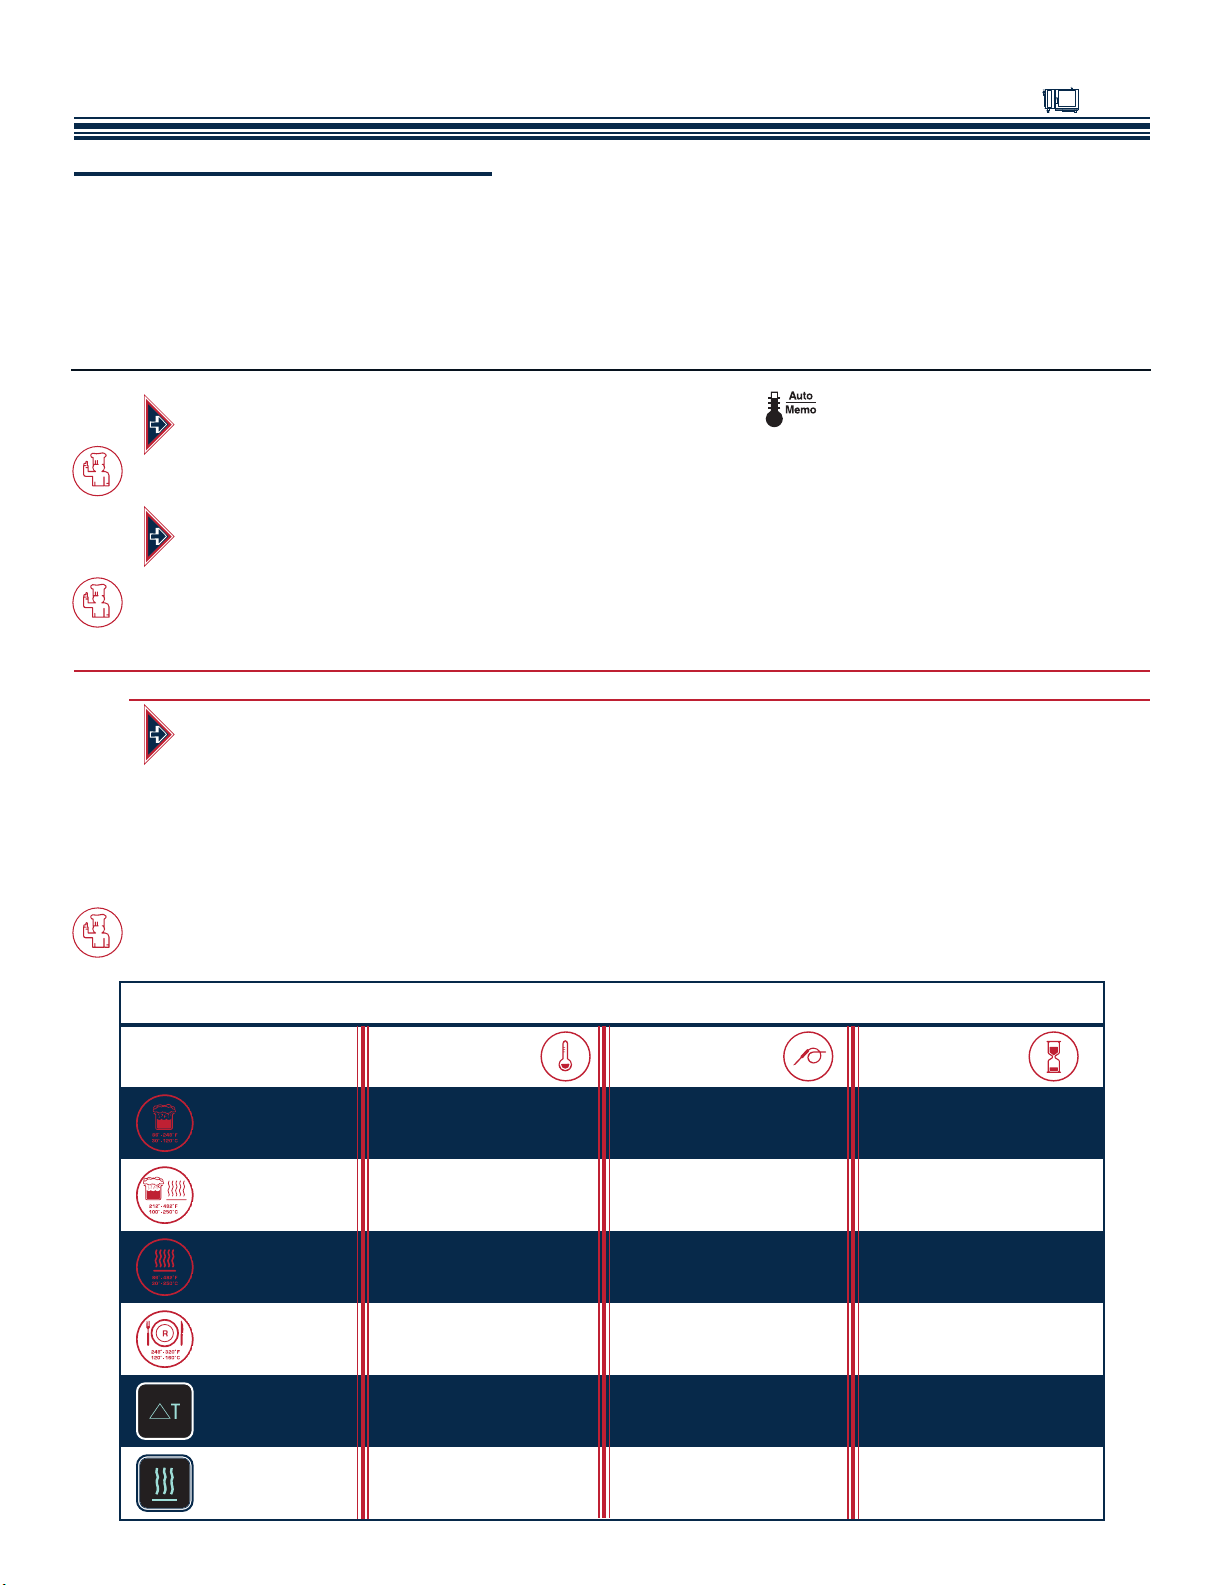
COM B I T H E R M FACTORY SET DEFAULT SETTIN G S
CO O KING
MO D E
STEAM 212°F 158°F
MODE (100°C) (70°C)
COMBINATION 302°F 158°F
STEAM MODE (150°C) (70°C)
CONVECTION 338°F 158°F
MODE (170°C) (70°C)
RETHERM 275°F 158°F
MODE (135°C) (70°C)
TE M PERATUR E
OV E N
CO R E
TE M PERATUR E
CO O KING
TI M E
25 MINUTES
70 MINUTES
30 MINUTES
5 MINUTES
DELTA-T 122°F 172°F
MODE (50°C) (77°C)
PREHEAT 374°F
MODE (140°C)
FREE —
FREE
7.
Page 11

S E T - U P P R O C E D U R E S
L W A Y S B E G I N S E T U P A D J U S T M E N T S F R O M T H E S E T U P M E N U .
A
T E M P E R A T U R E D I S P L A Y
otate the adjustment knob until the temperature display symbol is highlighted within the display.
R
PRESS THE CHEF FUNCTION KEY TO CONFIRM THE TEMPERATURE DISPLAY SELECTION.
Press the up
adjustment knob to select either Fahrenheit or Celsius.
PRESS THE CHEF FUNCTION KEY TO CONFIRM THE TEMPERATURE DISPLAY SETTING.
and down arrow keys or rotate the
N E T W O R K A D D R E S S
Press the up and down arrow keys or rotate the adjustment knob until the network address
symbol is highlighted within the display.
PRESS THE CHEF FUNCTION KEY TO CONFIRM THE NETWORK ADDRESS SELECTION.
The current network address will appear in the display.
Rotate the adjustment knob to select 1 through 99 and assign
a different network number for each PC to be connected.
PRESS THE CHEF FUNCTION KEY TO CONFIRM EACH NETWORK ADDRESS.
L A N G U A G E
Press the up and down arrow keys or rotate the adjustment knob
until the language symbol is highlighted within the display.
PRESS THE CHEF FUNCTION KEY TO CONFIRM THE LANGUAGE PROGRAM SELECTION.
Rotate the adjustment knob to select the required language.
*U.S. FA CT O RY SET TIN G
NO T E : SO ME O F THE LAN GUA G E SE LEC TIO N S SH OWN ABO V E MAY NO T BE AVAI L ABL E ON A LL M ODE LS.
PRESS THE CHEF FUNCTION KEY TO CONFIRM THE LANGUAGE SETTING.
CHINESE
DUTCH
ENGLISH*
FRENCH
GERMAN
ITALIAN
JAPANESE
KOREAN
POLISH
PORTUGUESE
RUSSIAN
SPANISH
SWEDISH
8.
Page 12

I M P O R TA N T S A F E T Y P R E C A U T I O N S
METAL PARTS OF THIS EQUIPMENT
BECOME EXTREMELY HOT WHEN IN
OPERATION. TO AVOID BURNS,
ALWAYS USE HAND PROTECTION
WHEN OPERATING THIS APPLIANCE.
AT NO TIME SHOULD THE INTERIOR OR
EXTERIOR BE STEAM CLEANED, HOSED
DOWN, OR FLOODED WITH WATER OR
LIQUID SOLUTION OF ANY KIND. DO NOT
USE WATER JET TO CLEAN.
SEVERE DAMAGE OR
ELECTRICAL HAZARD COULD RESULT.
WARRANTY BECOMES VOID IF APPLIANCE IS FLOODED.
NOT E : Automa t i c steam venting is a sta n d a r d
saf e t y feature b u i l t into all Combitherm
ven models. T his feature vents all
o
stea m from the oven c o m partment
IMM E D I ATELY
TIME EX P I R E S .
BEFO R E CO O K I N G
This function is provided in all
programmed and t i m e d production
whe n operating in any Steam,
Com b i n a t i o n , Convection, and R e t h e r m
coo k i n g mode. Automatic steam
ven t i n g does not function if t h e oven
door is o p e n e d before t i me expires o r
whe n the o v e n has been set to
con t i n u o u s operation.
HOT STEAM CAUSES BURNS
ROTATE THE DOOR HANDLE TO THE FIRST
OPEN ROTATION PO SITION ONLY. WAIT
UNTIL THE STEAM IS VENTED BEFORE FULLY
OPENING THE DOOR.
D O N O T U SE THE ATTACH ED HAND-
HELD HOSE TO SPRAY ANYTHI NG OTHER
THAN THE INTERIOR OF THE COMBITH ERM
OVEN COMPARTMENT.
D O N O T U S E T H E S P R AY H O S E
ON THE SU R FACE OF A HOT COOK I N G
COMPARTMENT. A LLOW THE OVEN TO
COOL TO A MINIMUM OF 150°F (66°C).
DO NOT
OR S E MILIQUID PRODUCTS POSITI O N ED
ABOVE THE EYE LEVEL OF THE OPERATOR.
SUCH PRODUCTS CAN SCALD AND CAUSE
SERIOUS INJURY.
UNAU T HO R IZ E D CL E AN IN G AGE NT S MAY DIS C OL O R OR HA RM IN TE R IO R SUR FAC ES OF TH E
OV EN . RE A D AN D UN D ER S TA N D LA B EL A ND M AT E R I A L S A F E T Y D ATA S H E E T B E F O R E US I N G
TH E OV E N C LE A N E R .
NOTE AND OBSERVE ALL SAFETY PRECAUTIONS LOCATED THROUGHOUT THIS GUIDE.
HANDLE PANS CON TAINING LIQUID
NNOOTTEE: UU SS EE AA UU TT HH OO RR II ZZ EE DD CC OO MM BB IITT HH EE RR MM OO VV EE NN CC LL EE AA NN EE RR OONN LLYY..
FOR OPERATOR SAFETY
9.
Page 13
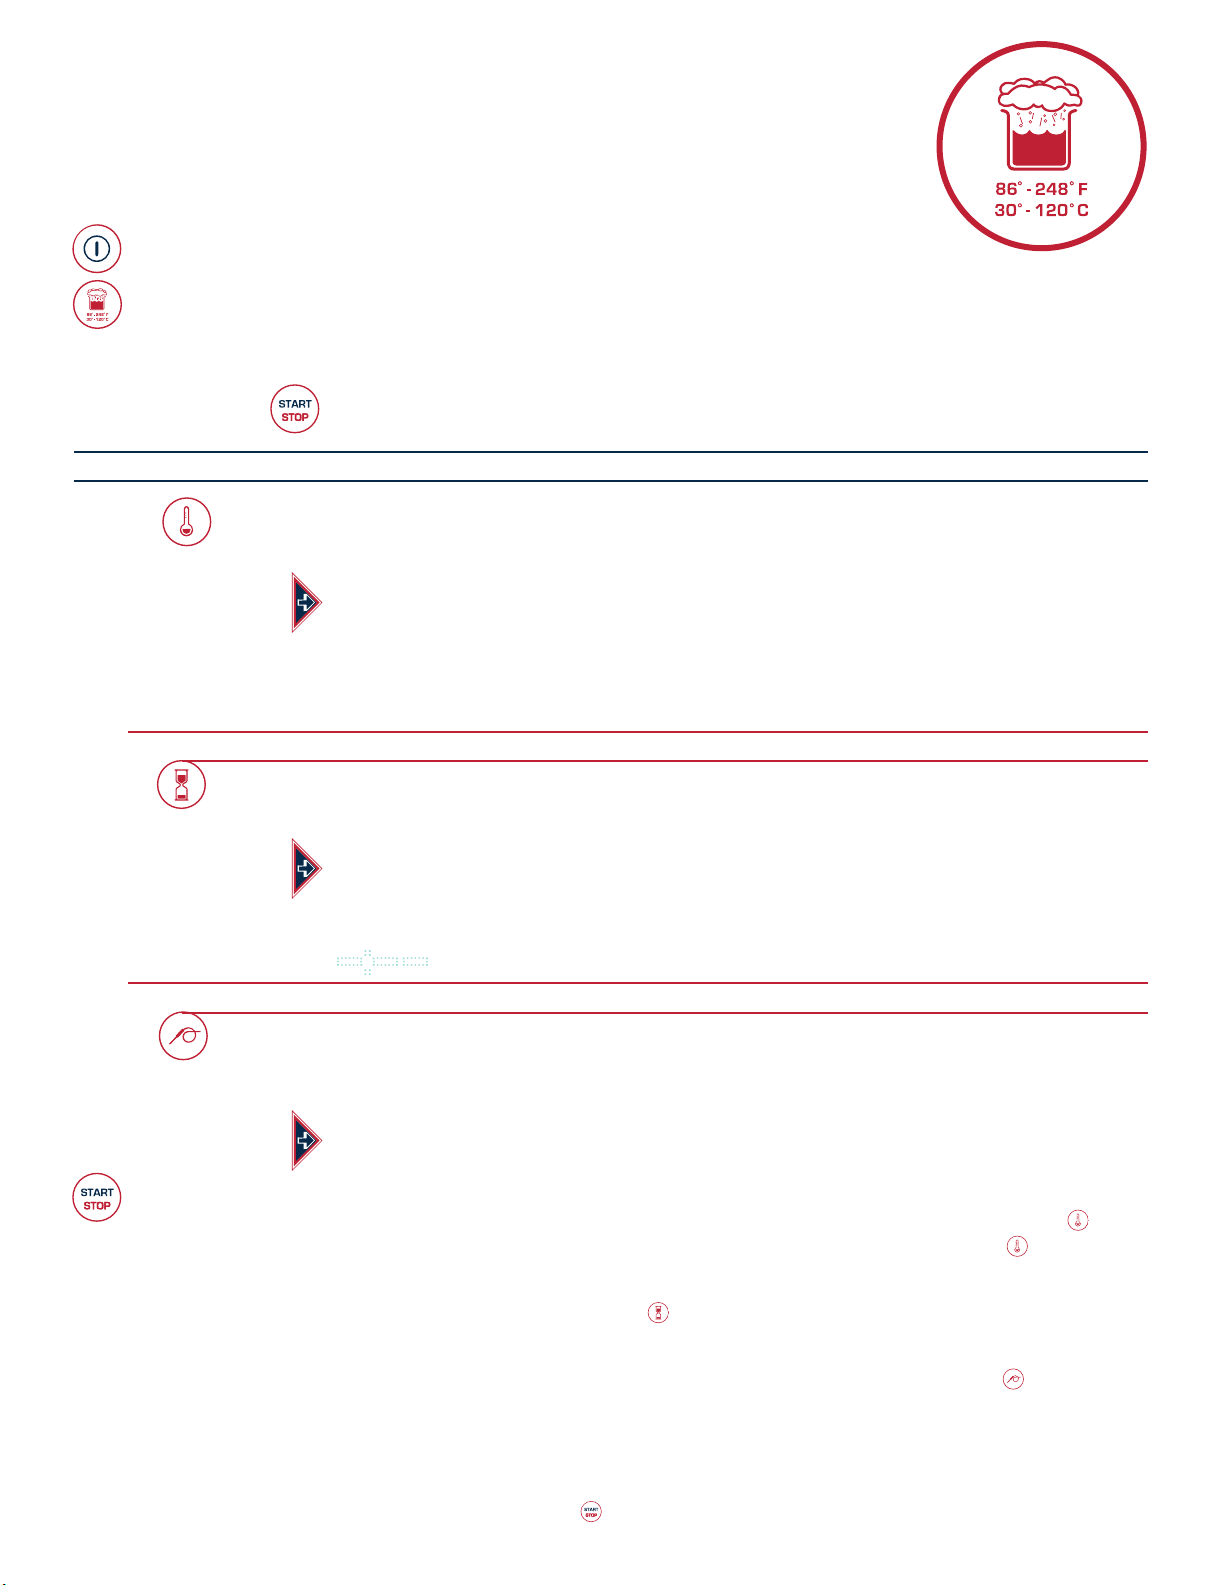
S T E A M M O D E
STEAM ● LOW TEMPERATURE STEAM ● QUICK STEAM
The Steam mode provides the operator with the ability to steam, poach, or blanch.
This mode will automatically steam at the boiling point of water; quick-steam above the
oiling point for faster cooking results; or low temperature steam, below the boiling point,
b
for more delicate products such as pâté, mousse, seafood, or custard.
PRESS THE ON/OFF POWER KEY TO THE ON POSITION.
PRESS THE STEAM MODE KEY.
Automatic Steam temperature of 212°F (100°C) will appear in the display.
The last set time or oven control default setting for time will appear in the display.
PR ESS THE START KEY TO STEAM AT THE SETTI NGS SHOWN.
TO CHA NGE THE SETTINGS SHOW N:
PRESS THE TEMPERATURE KEY.
The cooking temperature will appear highlighted within the oven display.
Press the up and down arrow keys or rotate the adjustment knob to select
the desired cooking temperature.
• Automatic Steaming 212°F (100°C)
• Quick-steaming 213°F to 248°F (101°C to 120°C)
• Low Temperature Steaming 86°F to 211°F (30°C to 99°C)
TO COO K BY TIM E :
PRESS THE TIME KEY.
The cooking time will appear highlighted within the oven display.
Pr e ss t h e up an d d ow n ar r ow k e ys o r r ota t e th e a dju s tm e n t kn ob t o
se l ec t t h e ti me d e sir e d…
o r
Set control for continuous operation by rotating the adjustment knob to the right until
ap p ea r s i n th e di sp l a y.
TO COO K BY INT E RNAL PRODUCT TEM PERATURE:
PRESS THE CORE TEMP KEY.
The previously set core temperature or oven control default setting will appear
highlighted within the oven display.
Pr e ss t h e up an d d ow n ar r ow k e ys o r r ota t e th e a dju s tm e n t kn ob t o
se l ec t t h e in te r n a l te m p er a t ur e d es i r ed a n d in ser t t he p r odu c t pr ob e .
PR ESS THE START KEY TO BEGIN COOK ING IN TH E ST EAM MODE.
• The set cooking temperature will appear in the display. To adjust the set temperature, press the key
once and make corrections as required. To display the actual oven temperature, press the key twice.
• The remaining cooking time will appear in the display. To display the set time or to change the set
values for time during operation, press the time key once and make corrections as required.
• The actual internal product temperature will appear in the display. To display the set internal product
temperature or to change the set values for core temperature during operation, press the key once
and make corrections as required.
When the cooking time has expired or the operator set internal temperature has been reached, a buzzer
will sound indicating the end of the operating mode.
• To stop the buzzer, press the start/stop key or open the oven door.
10.
Page 14

S T E A M M O D E
C H E F O P E R AT I N G T I P S
This mode will steam a full or partial load of a single product, or multiple products
ithout transfer of flavors. When steaming multiple products, however, individual
w
product cooking times must be taken into consideration. The non-pressurized
atmosphere of the Combither m also provides the ability to open the door during the
steam mode in order to monitor products more closely throughout the steaming process.
STEAM
Per forated, 2-1/2" deep pans
(65mm) are particularly suitable
for use in this program mode.
These pans will provide a shorter
cooking time and will prevent
product over-cooking at the
bottom of the pan.
Separate ice-encased vegetables
before steaming to assure more
even cooking.
A variety of products can be
steamed at the same time but
attention must be paid to the
different cooking times required
for each food product.
Butter and season vegetables
after steaming.
QUICK STEAMING
Quick steaming is suitable
for hearty, root-type vegetables
such as potatoes, legumes,
and cabbage.
Quick steaming provides a
cooking time which is
approximately 10-percent shorter
than the regular steam mode
temperature of 212°F (100°C).
Set the steam cooking
temperature between 221°F
(105°C) and 230°F (110°C) for
small loads and between 230°F
(110°C) and 248°F (120°C) for
full loads.
LOW TEMP STEAM
The low temperature steam mode
will function whenever the oven
compartment temperature is
below 212°F (100°C).
Proof yeast dough at a
temperature setting of 90°F to
110°F (32°C to 43°C).
It will take longer to steam
products using the low
temperature steam mode.
Steaming sausages in low
temperature steam prevents
cracked or peeling skins.
Use low temperature steam for
delicate foods such as shrimp,
fish, seafood, and crème caramel.
Steam long-grain rice using
approximately 1-part rice to
approximately 1-1/2-parts water
or seasoned liquid.
Steam durum wheat noodles in
unperforated pans using 1-part
noodles to 5-parts cold water.
For best results, low temperature
steam all delicate food items at a
temperature of 210°F (99°C)
or below.
11.
Page 15

C O M B I N AT I O N M O D E
The Combination mode will prove to be the most versatile and widely used mode
he Combitherm oven has to offer. It will produce the best possible results on the
t
widest variety of products — all within the shortest period of time. The unique control
function of this mode enables the operator to roast or bake with a combination of
steam and convection heat. In addition to shorter cooking times, this combination of
steam and heat offers less product shrinkage and more moisture retention than obtained
n a standard convection oven.
i
PRESS THE ON/OFF POWER KEY TO THE ON POSITION.
PRESS THE COMBINATION MODE KEY.
The last set values or oven control default setting for temperature will appear in the display.
The last set time or oven control default setting for time will appear in the display.
PR ESS THE START KEY TO COOK AT THE SETTINGS S HOWN.
TO CHA NGE THE SETTINGS SHOW N:
PRESS THE TEMPERATURE KEY.
The cooking temperature will appear highlighted within the oven display.
Pr e ss t h e up
se l ec t t h e de si r e d co ok i n g te mp e r at u re.
• 212°F to 482°F (100°C to 250°C)
TO COO K BY TIM E :
PRESS THE TIME KEY.
The cooking time will appear highlighted within the oven display.
Press the up and down arrow keys or rotate the adjustment knob to select
the time desired…
o r
Set control for continuous operation by rotating the adjustment knob to the right until
ap p ea r s i n th e di sp l a y.
TO COO K BY INT E RNAL PRODUCT TEM P ERATURE:
PRESS THE CORE TEMP KEY.
The core temperature will appear highlighted within the oven display.
Pr e ss t h e up
se l ec t t h e in te r n a l te m p er a t ur e d es i r ed a n d in ser t t he p r odu c t pr obe .
PR ESS THE START KEY TO BEGIN COOK ING IN TH E CO MBINATI ON MO DE.
• The set cooking temperature will appear in the display. To adjust the set temperature, press the key
once and make corrections as required. To display the actual oven temperature, press the key twice.
an d d ow n ar r ow k e ys o r r ota t e th e a dju s tm e n t kn ob t o
an d d ow n ar r ow k e ys o r r ota t e th e a dju s tm e n t kn ob t o
• The remaining cooking time will appear in the display. To display the set time or to change the set
values for time during operation, press the time key once and make corrections as required.
• The actual inter nal product temperature will appear in the display. To display the set internal
product temperature or to change the set values for core temperature during operation, press the
key once and make corrections as required.
When the cooking time has expired or the operator set internal temperature has been reached, a
buzzer will sound indicating the end of the operating mode.
• To stop the buzzer, press the start/stop key or open the oven door.
12.
Page 16

COMBINATION MODE
CHEF OPERATING TIPS
Th e C om b i na t i on m o de i n jec t s th e o pti m um a m o un t o f st eam
au t om a t ic a l ly . T he r e i s no n ee d t o se le c t m oi s tur e l ev e l s. F o od s d o no t
dr y o ut . F la v o rs a r e re t a in e d wit h n o tr an s f er o f f la v o rs w h en m i xin g
ro d uc t l oad s .
p
Due to the automatic steam adjustment, the
door can be opened at any time during a
cooking operation. Be certain to observe the
safety war ning when opening the oven door.
The Combination mode is particularly efficient
when used for baking, broiling, grilling, stewing,
braising, and roasting.`
When using the Combination mode, cooking
temperatures can be reduced 10- to 20-percent
below the temperatures used for conventional
cooking methods.
Cooking time will be reduced approximately 40percent when cooking at the same temperature
used for convection oven cooking and up to 50- to
60-percent less time when cooking at the same
temperature used for a conventional oven.
Food browning in the Combither m begins
at a cooking temperature of approximately
248°F (120°C).
A higher cooking temperature results in heavier
browning but also results in greater product
weight loss. To achieve additional browning use
the Moisture Vent Key or set Gold-n-Brown into
the product procedure. Gold-n-Brown is
particularly useful for adding color to high moisture
products such as chicken and other poultry items
or for additional browning of full loads and other
moist products.
The Combination mode provides even browning
without the necessity to tur n the pans.
For more even cooking, do not cook in pans
deeper than 4-inches (100mm).
13.
Page 17
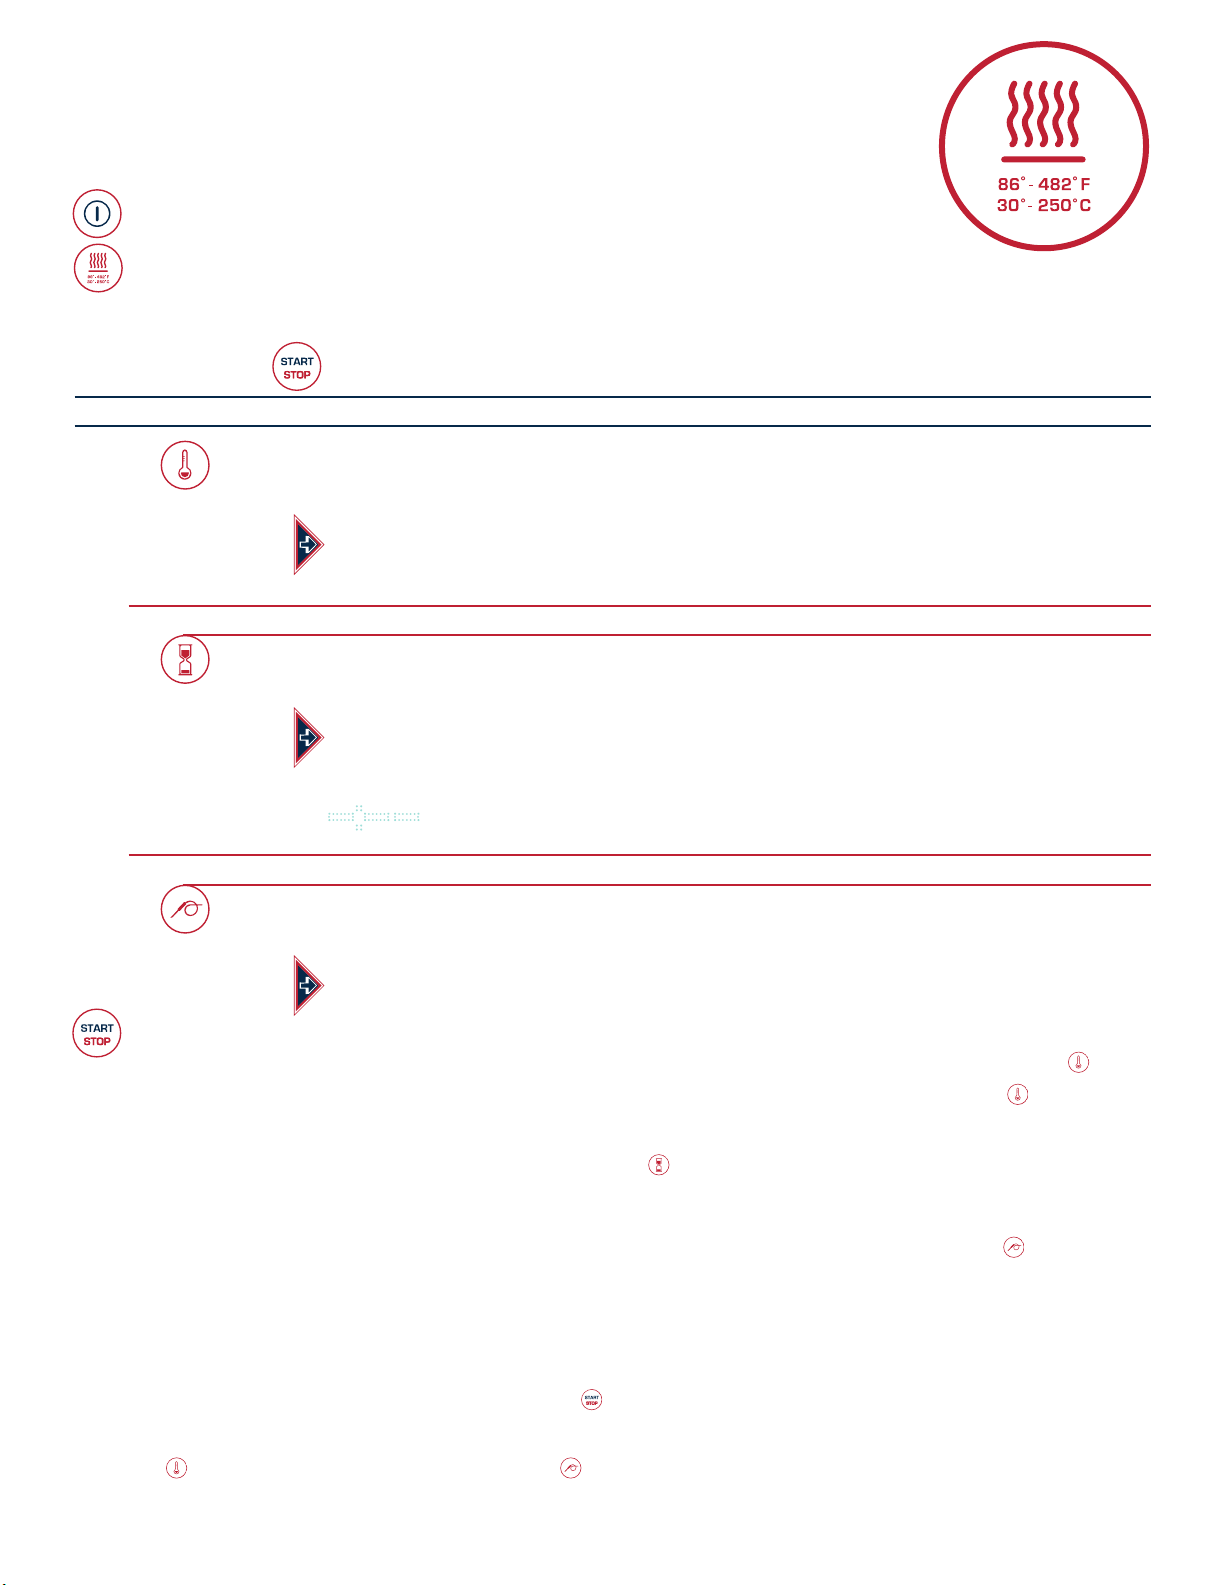
C O N V E C T I O N M O D E
he Convection mode operates with hot circulated air within a temperature range
T
of 86° to 482°F (30° to 250°C). For many applications, better results may be
achieved with the Combination mode; therefore, the operator may want to consider
using the Convection mode on a more limited basis.
PRESS THE ON/OFF POWER KEY TO THE ON POSITION.
PRESS THE CONVECTION MODE KEY.
The last set values or oven control default setting for temperature will appear in the display.
The last set time or oven control default setting for time will appear in the display.
PR ESS THE START KEY TO COOK AT THE SETTINGS S HOWN.
TO CHA NGE THE SETTINGS SHOW N:
PRESS THE TEMPERATURE KEY.
The cooking temperature will appear highlighted within the oven display.
Pr e ss t h e up an d d ow n ar r ow k e ys o r r ota t e th e a dju s tm e n t kn ob
to s e le c t the d e si r ed c o o ki n g tem p er a t ur e .
• 86° to 482°F (30° to 250°C)
TO COO K BY TIM E :
PRESS THE TIME KEY.
The cooking time will appear highlighted within the oven display.
Press the up and down arrow keys or rotate the adjustment knob to select the
time desired…
o r
Set control for continuous operation by rotating the adjustment knob to the right until
ap p ea r s i n th e di sp l a y.
TO COO K BY INT E RNAL PRODUCT TEM P ERATURE:
PRESS THE CORE TEMP KEY.
The core temperature will appear highlighted within the oven display.
Pr e ss t h e up an d d ow n ar r ow k e ys o r r ota t e th e a dju s tm e n t kn ob t o
se l ec t t h e in te r n a l te m p er a t ur e d es i r ed a n d in ser t t he p r odu c t pr ob e .
PR ESS THE START KEY TO BEGIN THE COOKING M ODE.
• The set cooking temperature will appear in the display. To adjust the set temperature, press the key
once and make corrections as required. To display the actual oven temperature, press the key twice.
• The remaining cooking time will appear in the display. To display the set time or to change the set
values for time during operation, press the time key once and make corrections as required.
• The actual internal product temperature will appear in the display. To display the set internal product
temperature or to change the set values for core temperature during operation, press the key once
and make corrections as required.
When the cooking time has expired or the operator set internal temperature has been reached, a buzzer
will sound indicating the end of the operating mode.
• To stop the buzzer, press the start/stop key or open the oven door.
To check the length of time the product has been operating in the core temperature mode, press and hold the
time key along with the core temperature key . The time period will appear at the top of the display.
14.
Page 18

CONVECTION MODE
CHEF OPERATING TIPS
The Co nv ec ti on Mod e c an be use d t o r oa st o r b ak e p roduc ts ne ed in g very
sho rt co ok in g time s o r f or hig h m oi st ur e pr od uc ts su ch as m uf fi ns , cake s,
nd c oo ki es , or fo r b ro wn in g th e s ur f ac e of th e p ro du ct.
a
The Convection mode works best with foods
containing little moisture or for very moist food
which require a dryer finished product.
For baking, preheat the Combitherm at a
temperature of 36°F to 54°F (20°C to 30°C) above
the baking temperature required. Once preheated,
reset the temperature as required.
A higher cooking temperature results in heavier
browning but also results in greater product weight
loss. To achieve additional browning use the
Moisture Vent Key or set the Browning Feature
into the product procedure.
To prevent the sur face of food from excessive
drying, the fan will not engage if the internal
oven temperature is above 212°F (100°C)
and the set oven temperature is below
212°F (100°C).
15.
Page 19

R E T H E R M M O D E
The Retherm mode can be used to rethermalize (regenerate) portioned food on
plates, trays, or platters within a short period of time. Steam is automatically injected
nto the oven compartment as required. Items are brought up to proper serving
i
emperatures without dry edges or condensate forming on the plates.
t
RESS THE ON/OFF POWER KEY TO THE O N POSITION.
P
PRESS THE RETHERM MODE KEY.
The last set values or the default settings will appear in the display.
PR ESS THE START KEY TO COOK AT THE SETTINGS S HOWN.
TO CHA NGE THE SETTINGS SHOW N:
PRESS THE TEMPERATURE KEY.
The cooking temperature will appear highlighted within the oven display.
Pr e ss t h e up an d d ow n ar r ow k e ys o r r ota t e th e a dju s tm e n t kn ob
to s e le c t the d e si r ed c o o ki n g tem p er a t ur e .
• 248° to 320°F (120° to 180°C)
TO COO K BY TIM E :
PRESS THE TIME KEY.
The cooking time will appear highlighted within the oven display.
Press the up and down arrow keys or rotate the adjustment knob to select the
time desired…
o r
Se t c on tr ol f or co nt i nu ou s o per at io n b y ro ta ti ng t he ad ju stm en t k no b to th e
ri gh t u nt i l ap p ea r s i n th e di sp l a y.
TO COO K BY INT E RNAL PRODUCT TEM PERATURE:
PRESS THE CORE TEMP KEY.
The core temperature will appear highlighted within the oven display.
Pr e ss t h e up an d d ow n ar r ow k e ys o r r ota t e th e a dju s tm e n t kn ob t o
se l ec t t h e in te r n a l te m p er a t ur e d es i r ed a n d in ser t t he p r odu c t pr ob e .
PR ESS THE START KEY TO BEGIN THE RETHERM M ODE.
• The set cooking temperature will appear in the display. To adjust the set temperature, press the key
once and make corrections as required. To display the actual oven temperature, press the key twice.
• The remaining cooking time will appear in the display. To display the set time or to change the set
values for time during operation, press the time key once and make corrections as required.
• The actual internal product temperature will appear in the display. To display the set internal product
temperature or to change the set values for core temperature during operation, press the key once
and make corrections as required.
When the cooking time has expired or the operator set internal temperature has been reached, a buzzer
will sound indicating the end of the operating mode.
• To stop the buzzer, press the start/stop key or open the oven door.
To check the length of time the product has been operating in the core temperature mode, press and hold the
time key along with the core temperature key . The time period will appear at the top of the display.
16.
Page 20

RETHERM MODE CHEF OPERATING TIPS
ince plated meals consist of dissimilar products, there are several important factors
S
to consider in order to produce the finest results. Product density (compactness),
thickness, quantity of product on each plate, and quantity of plates all relate to the
length of time necessary to reheat. Again, experience is the best method to
determine reheating time. Once the time has been deter mined and recorded for a
pecific meal, the results will be consistent for future reheating times.
s
HELP F U L HINTS FOR REHEATI N G ON THE PLATE
•
ALL FOOD COMPONENTS ON THE PLATE SHOULD BE OF SIMILAR DENSITIES.
•
ALL FOOD COMPONENTS ON THE PLATE SHOULD BE SIMILAR IN THICKNESS.
•
ARRANGE ALL FOOD COMPONENTS EVENLY ON THE PLATE.
•
AVOID EXCESSIVE OVERLAPPING OF PRODUCT.
•
SAUCES MUST BE HEATED AND ADDED TO PRODUCT AFTER REHEATING.
•
A MIXED VARIETY OF MEALS CAN BE REHEATED AT THE SAME TIME.
• À LA CARTE RETHERMALIZATION
À la carte rethermalization is designed to take
a single plate from a refrigerated temperature to
serving temperature for immediate service. Plates
are prepared in advance, covered, and refrigerated.
Preheat the Combitherm oven. Remove plate from
refrigeration and place in the oven at 275°F (135°C)
for an uncovered plate or 300°F (150°C) for a
covered plate. Plates with meat components will
take more time than plates containing all vegetable
components. Follow inter nal temperature
requirements for reheating and allow for override
time. After reheating, remove the plate from the
oven, add any sauces, garnish, and serve. This
process can be repeated as required.
For the most efficient continuous service, it is
suggested that the Combitherm oven be dedicated to
the rethermalization process during serving hours.
• BANQUET RET H E R MALIZATION
Banquet rethermalization is designed for high
volume, full or partial load (multiple plate) reheating.
For maximum efficiency, it is essential that volume
rethermalization be used in conjunction with the
utilization of holding cabinets to keep rethermalized
food at proper temperatures.
Plates are assembled in advance, covered, and
refrigerated or loaded on the roll-in cart and
refrigerated. Preheat the Combitherm oven at
275°F (135°C) for uncovered plates or 300°F (150°C)
for covered plates. Remove plates or the roll-in cart
from refrigeration, load in the oven and set timer as
required. Follow internal temperature requirements
for reheating and allow for override time. Remove
the plates or roll-in cart from the Combitherm and
roll into the companion holding cabinet. Relocate
the holding cabinet to the banquet service area.
• RETHERMALIZING PREFABRICATED A N D
VACUUM-PA CKED FROZEN FOODS
For bulk product rethermalization, completely
defrost product bags in walk-in cooler. DO NOT
REMOVE PRODUCT FROM THE BAG. Load
thawed bags in preheated oven and rethermalize in
the Low Temperature Steam mode until the required
internal temperature is reached. Place rethermalized
bags in a preheated holding cabinet set at
140° to 165°F (60° to 74°C) until ready for service.
For large volume on-the-plate regeneration,
defrost bags in walk-in cooler. Open bags and plate
per menu requirements in a (MAXI M U M) 55°F (13°C)
refrigerated room. Cover plates, place on Alto-Shaam
roll-in cart (trolley), and roll into Combitherm oven
preheated at 275°F (135°C).
Regenerate in the Convection mode for 3 to 5
minutes. Switch to the Retherm mode for an
additional 3 minutes or more if required. Transfer
full trolley to a preheated holding cabinet set at
160°F (71°C) until ready for service. In the case of
meat cooked to rare, set the cabinet at 140°F (60°C).
PLATE COVERS MUST BE USED FOR ON-THE-PLATE REGENERATION.
17.
Page 21

C O R E T E M P E R AT U R E P R O B E M O D E
s a n a lte r n a ti v e t o t i m er o p era t io n , t he C o re Te mp e r at u re P r o be m o de c a n
A
be u s ed i n c on j u nc t ion w i th a n y pr o g ra m m od e t o co o k b y se ns i n g in te r n a l
pr o du c t tem p era t ur e . For a m ore a c cu r a te i n te r n a l tem p er a t ur e , a
sp e ci a l iz e d Com b it h e r m pro d uc t p rob e s en s e s te mp e r at u re f r o m fo ur s t rat e gic
po i nt s a n d di sp l a ys a t e mp e r at u re a v e ra g e.
PRESS THE ON/OFF POWER KEY TO THE ON POSITION.
INSERT THE PRODUCT PROBE.
The probe must be inserted so that the tip is positioned in the center of the food mass.
For liquid or semiliquid foods, suspend the probe in the center of the product and
secure the probe wire to the container edge.
SELECT AND PRESS THE REQUIRED COOKING PROGRAM.
PRESS THE TEMPERATURE KEY.
The cooking temperature will appear highlighted within the oven display.
Pr e ss t h e up
an d d ow n ar r ow k e ys o r r ota t e th e a dju s tm e n t kn ob t o
se l ec t t h e de si r e d co ok i n g te mp e r at u re w i t hi n t he t e m pe r a tu r e ra n g e of
th e c oo k i ng m o de s e lec t ed.
PRESS THE CORE TEMP KEY.
The core temperature will appear highlighted within the oven display.
Pr e ss t h e up an d d ow n ar r ow k e ys o r r ota t e th e a dju s tm e n t kn ob t o
se l ec t t h e in te r n a l pr o d uc t c uto f f te mpe r at u r e.
PR ESS THE START KEY TO BEGIN THE COOKING M ODE.
• The actual internal product temperature will appear in the display. To display the set internal product
temperature or to change the set values for core temperature during operation, press the key once
and make corrections as required.
When the operator set internal temperature has been reached, a buzzer will sound indicating the end of
the operating mode.
• To stop the buzzer, press the start/stop key or open the oven door.
To check the length of time the product has been operating in the core temperature mode, press and hold the
time key along with the core temperature key . The time period will appear at the top of the display.
CH E F O P ERATING TIP S
To pre v e n t o ver-c o o k ing, r e m o ve p ro d u c t f r om the ove n as so o n a s th e r e q uir e d i n t er n a l
temp e r a tur e i s r e a ched in eith e r t h e C o r e Temp e r atur e m o d e o r t h e C o re Tem p e r atur e D e l ta-T
mode . Th e Co r e Tempe r a t ur e mo d e s h o u ld not be u sed for coo k i n g t h in p ro d u c t i tems .
DO NOT US E TH E PR O BE W HEN COOKING THI N PR O DUCTS.
18.
Page 22
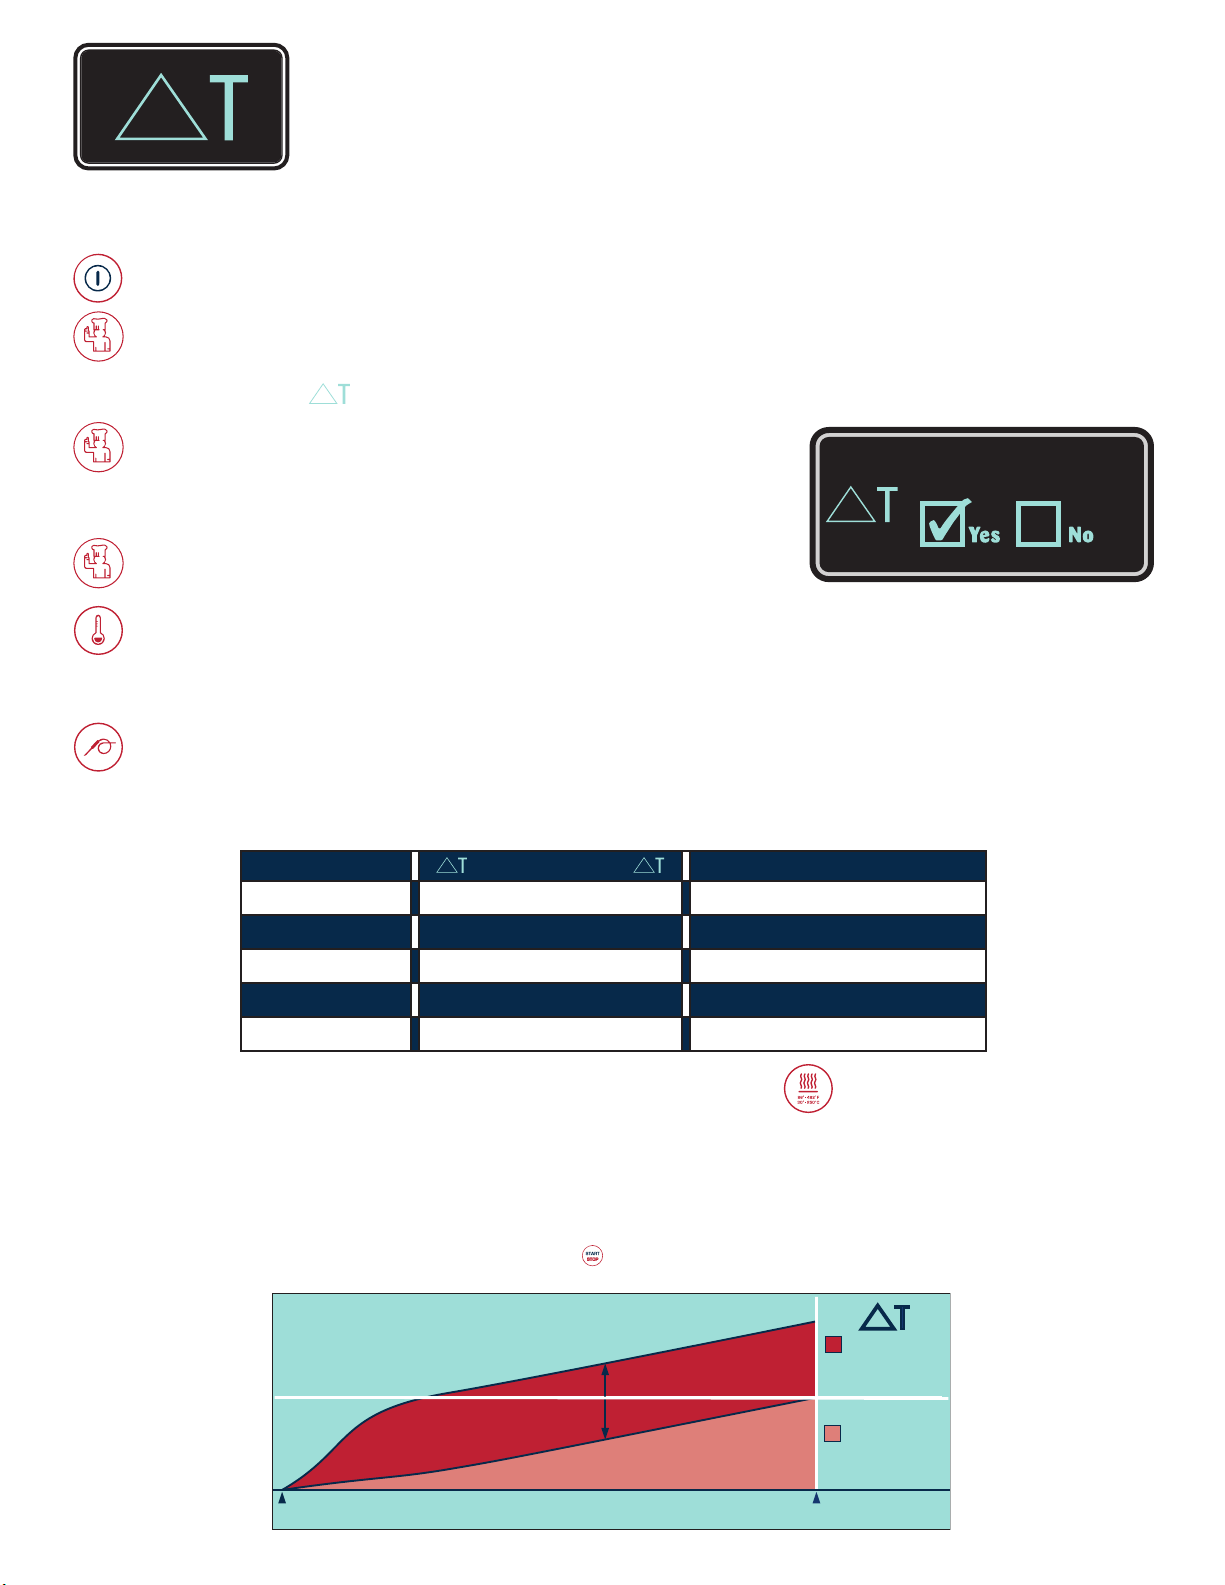
DELTA-T CORE TEMPERATURE COOKING
This special program function cooks by inter nal product temperature with the use of
the probe. Unlike the standard core temperature mode, however, the Delta-T oven
temperature automatically increases in direct proportion to the internal temperature
f the product. The Delta-T mode cooks with convection heat but provides a more
o
gentle method of cooking. Browning occurs toward the end of the cooking cycle.
PRESS THE ON/OFF POWER KEY TO THE ON POSITION.
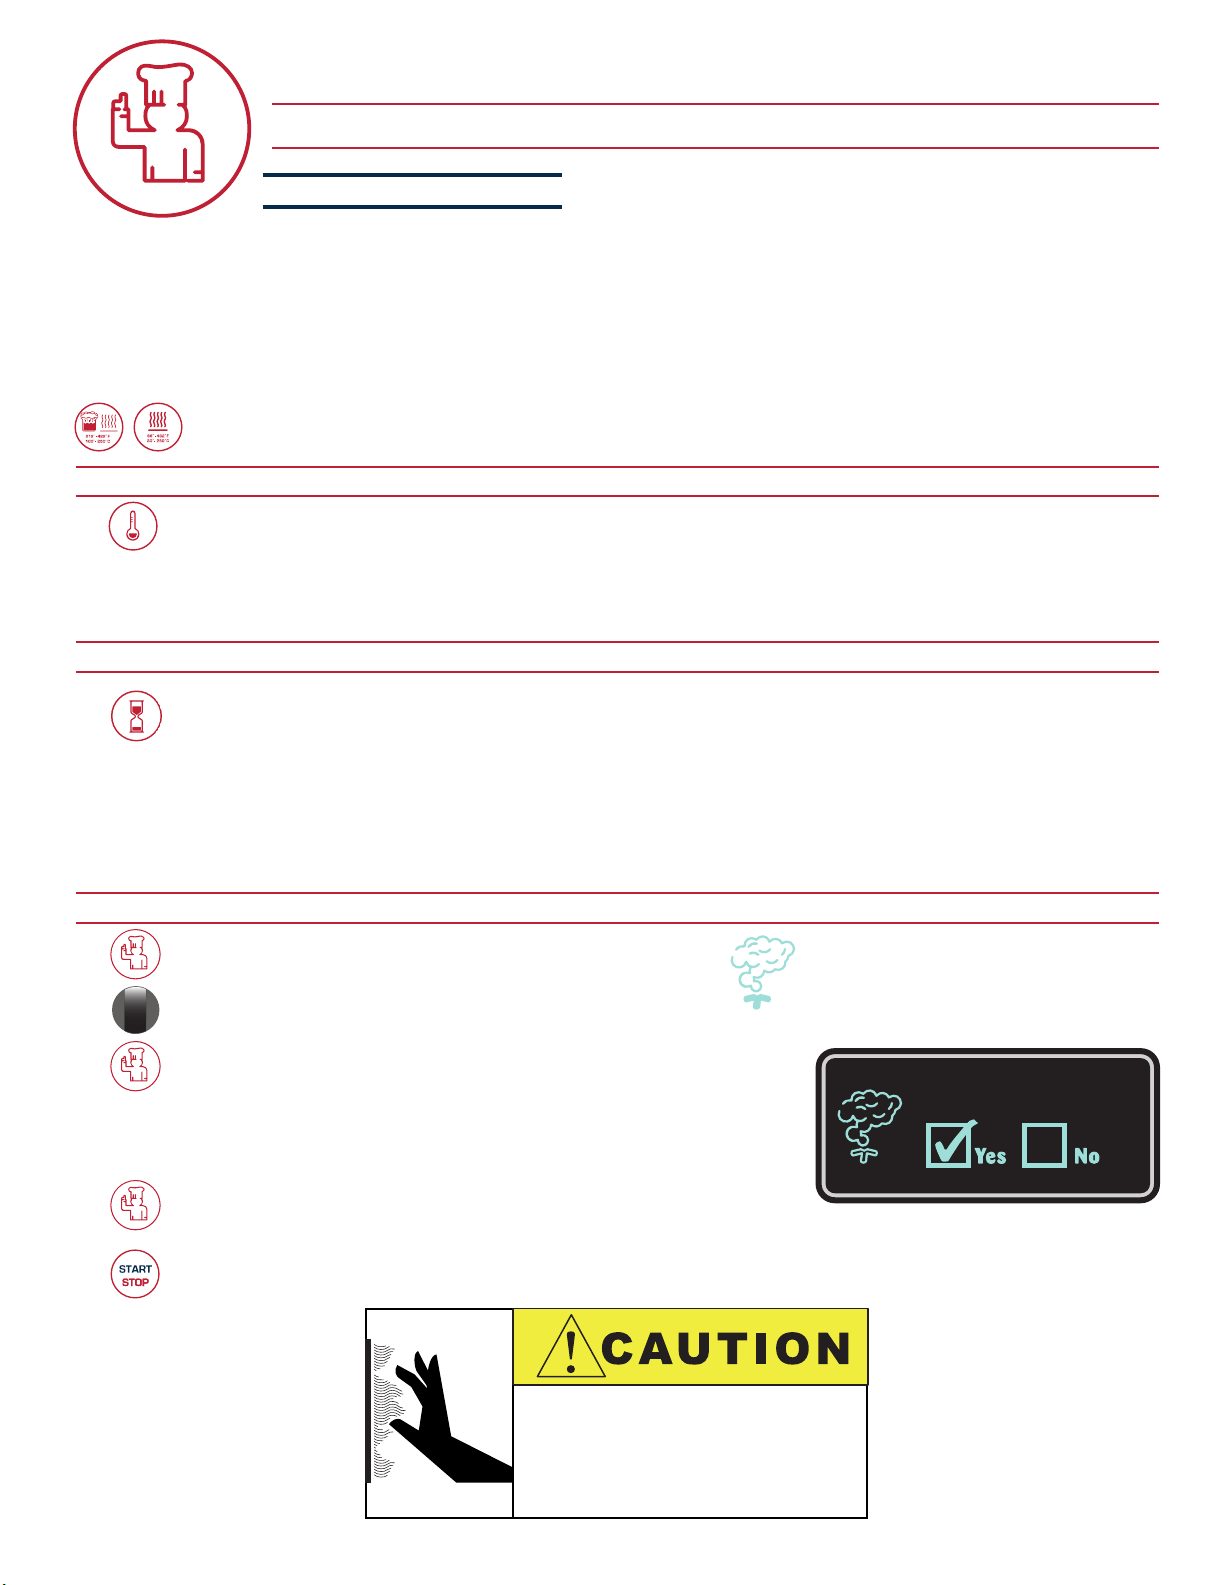
PRESS THE CHEF FUNCTION KEY.
Pr e ss t h e up
De l ta - T s ymb o l is h i ghl i gh t e d in t he d i spl a y.
PRESS THE CHEF FUNCTION KEY.
Press the up and down arrow keys or rotate the
adjustment knob to select “YES” for the Delta-T function.
PRESS THE CHEF FUNCTION KEY TO CONFIRM THE SETTING.
PRESS THE TEMPERATURE KEY.
Press the up and down arrow keys or rotate the adjustment knob to select the desired
Delta-T cooking temperature within the cooking temperature ranges shown below.
an d d ow n ar r ow k e ys o r r ota t e th e a dju s tm e n t kn ob u n t il t h e
Delta-T
PRESS THE CORE TEMP KEY.
Pr e ss t h e up an d d ow n ar r ow k e ys o r r ota t e th e a dju s tm e n t kn ob t o s ele c t th e
in t er na l pro d uc t c uto f f te mpe r at u r e wi th i n t he t e mp e r at u r e r a n ge s s how n b el o w .
P R O DU CT
DELTA-T TEMPERATURE
CORE TEMPERATURE SETTING
BEEF ROAS T 122°F to 131°F (50°C to 55°C) 118°F to 136°F (48°C to 58°C)
TENDERL OIN 122°F to 140°F (50°C to 60°C) 122°F to 140°F (50°C to 60°C)
VEAL & LA MB 122°F to 158°F (50°C to 70°C) 172°F (78°C)
PORK ROAS T 122°F to 158°F (50°C to 70°C) 172°F (78°C)
HAM 122°F to 140°F (50°C to 60°C) 172°F (78°C)
TH E OV EN W ILL BEGIN THE DELTA-T CON VECTION CO OKING MODE.
The set Delta-T temperature will appear in the display.
The actual internal product temperature will appear in the display.
Wh e n th e op e r at o r set i n te r n a l te m p er a t ur e h as b e en r e a ch e d , a b u z ze r w il l s oun d
in d ic a t in g t he e n d of t h e o pe r ati n g mo de.
• To stop the buzzer, press the start/stop key or open the oven door.
DIFFERENCE BETWEEN COOKING COMPARTMENT TEMPERATURE
AND INTERNAL PRODUCT TEMPERATURE.
COOKING
COMPARTMENT
TEMPERATURE
PRODUCT AND OVEN
TEMPERATURE START
INTERNAL PRODUCT
TEMPERATURE REACHED
INTERNAL
PRODUCT
TEMPERATURE
19.
Page 23

AUXILIARY FUNCTIONS
CHEF FUNCTION KEY
There are several auxiliary functions available through the use of the Chef Function Key.
With the exception of the ability to add additional moisture to the oven compartment, that
can only be used during the convection mode, all additional functions can be engaged at any time during any
ooking mode. Chef Functions can also be programmed into a cooking procedure in oven models that
c
include the deluxe programmable feature. At the end of a cooking mode or program, the oven automatically
disengages all operator-set chef functions. These functions, however, do remain programmed and will
reengage the next time the programmed procedure is used.
P R E H E A T I N G
THE PREHEATING FUNCTION IS ENGAGED IN THE CONVECTION MODE AT A FIXED
TEMPERATURE AND TIME. BOTH THE TEMPERATURE AND TIME CAN BE ADJUSTED BY THE
OPERATOR TO COMPLY WITH THE REQUIREMENTS OF THE INDIVIDUAL OPERATION.
SEE STAR T UP P ROCEDURES UNDE R DEFAULT / M E M O SETTING .
PRESS THE CHEF FUNCTION KEY.
Rotate the adjustment knob until the preheat symbol is highlighted in the display.
PRESS THE CHEF FUNCTION KEY.
Press the up and down arrow keys
or rotate the adjustment knob to select
“YES” for the Preheat function.
PRESS THE CHEF FUNCTION KEY TO CONFIRM THE SETTING.
THE OVEN W I L L BEGIN THE PREHE AT FUNCTION.
• The set preheat temperature will appear in the display.
• The set preheat time will appear in the display.
Preheating
• The preheat symbol will appear in the display.
When the set time and temperature has been reached, a buzzer will sound indicating
the end of the preheat function.
• To stop the buzzer, press the start/stop key or open the oven door.
20.
Page 24

AUXILIARY FUNCTIONS
CHEF FUNCTION KEY
G O L D - N - B R O W N
he browning feature is an automatic function designed to regulate humidity for additional color
T
to products as needed. This feature is particularly useful for adding color to high moisture
products such as chicken and other poultry items or for additional browning of full loads and
other moist products. In addition, this feature may be used to add texture to fried items such as
French fries or breaded chicken. Gold-n-Brown can be used in both the combination mode and
the convection mode and can be programmed into a cooking procedure.
Browning can be used for any product with a set cooking time more than 5-minutes. Depending
on the type of product and product load, the browning feature may also slightly increase the set
cooking time in order to fully complete the browning function. This is a standard operating
condition of this feature.
SELECT AND PRESS THE REQUIRED COOKING MODE AND SET MODE FUNCTIONS.
PRESS THE CHEF FUNCTION KEY.
Rot at e t he ad justm en t k no b until t he br owning s ym bo l is h ig hl ig ht ed wit hi n
the di sp la y.
PRESS THE CHEF FUNCTION KEY.
Press the up
adjustment knob to select “YES” for the browning function.
PRESS THE CHEF FUNCTION KEY TO CONFIRM THE SETTING.
The browning indicator light will illuminate directly above the display.
PR ESS THE START KEY.
The oven will engage the browning feature in the Combination or Convection mode set
by the operator.
and down arrow keys or rotate the
Brown
21.
Page 25

AUXILIARY FUNCTIONS
CHEF FUNCTION KEY
C O O L - D O W N F E A T U R E
The cool-down feature provides the operator with the ability to lower the temperature of the
oven compartment at an accelerated pace. This function is useful when it is necessary to immediately
change from a high temperature cooking function to a lower temperature function or to the steam program.
This function is also useful to help cool the oven compartment in preparation for cleaning.
HE F OP E RATING TIP
C
Wh e n u s ing the cool-do w n f e ature in pr eparati o n f o r c l eaning, it is impor t ant to r e member
th e te m peratur e in the disp l a y i ndicates th e ai r te m perature insi d e t h e o v en c ompartm e nt
an d no t t h e i n t erior wall s of the ove n . A l ways make certa i n t o a l l ow t he oven walls to cool
to a mini m u m o f 1 4 0°F (60°C) befo r e spr a ying the compar t ment with oven clea n er.
PRESS THE CHEF FUNCTION KEY.
Rotate the adjustment knob until the cool-down symbol is highlighted in the display.
PRESS THE CHEF FUNCTION KEY.
Press the up and down arrow keys
or rotate the adjustment knob to select
“YES” for the cool-down function.
PRESS THE CHEF FUNCTION KEY TO CONFIRM THE SETTING.
OPE N THE O V E N DOOR.
The display will indicate the current temperature of the oven.
ROTATE THE ADJUSTMENT KNOB TO SELECT A COOL-DOWN TEMPERATURE WITHIN A
RANGE OF 212°F TO 68°F (100°C TO 20°C). TH E FA C T ORY S ET DEFAULT IS 122°F (50°C).
The displayed temperature will continue to decline until it reaches the operator set
temperature or factory default temperature if not selected by the operator.
Cool Down
22.
Page 26
AUXILIARY FUNCTIONS
CHEF FUNCTION KEY
R E D U C E D F A N S P E E D
The reduced fan speed function is useful for flow-sensitive products such as soufflês and
meringues, or any products affected by a high velocity of air movement.
SELECT AND PRESS THE REQUIRED COOKING MODE AND SET MODE FUNCTIONS.
PRESS THE CHEF FUNCTION KEY.
Ro ta te th e ad ju st men t k no b u n ti l t he fa n sy mb ol is h ig hl ig h te d i n t he d is pl ay .
PRESS THE CHEF FUNCTION KEY.
Pr e ss t h e up
th e a dj u s tm e nt k n o b to s el e c t “YES” for t h e red u ce d
fa n s pe e d fun c ti o n .
PRESS THE CHEF FUNCTION KEY TO CONFIRM THE SETTING.
an d d ow n ar r ow k e ys o r r ota t e
Redc’d fan speed
The reduced fan speed indicator light will illuminate directly above the display.
PR ESS THE START KEY.
The oven will start at a reduced fan speed in whatever cooking mode set by the operator.
R E D U C E D P O W E R ELEC TR IC MODE LS ONLY
The reduced power function can be used to reduce kitchen power peaks and energy consumption.
SELECT AND PRESS THE REQUIRED COOKING MODE AND SET MODE FUNCTIONS.
PRESS THE CHEF FUNCTION KEY.
Ro ta te th e ad ju st men t k no b u n ti l t he re d uc ed po wer sy mb ol is h ig hl ig h te d
in th e d is p la y.
PRESS THE CHEF FUNCTION KEY.
Pr e ss t h e up
th e a dj u s tm e nt k n o b to s el e c t “YES” for t h e red u ce d
po w er f u n ct i on.
an d d ow n ar r ow k e ys o r r ota t e
Redc’d power
PRESS THE CHEF FUNCTION KEY TO CONFIRM THE SETTING.
PR ESS THE START KEY.
The oven will operate with reduced power in whatever cooking mode set by the operator.
R E D U C E D P O W E R W I L L R E S U L T I N L O N G E R C O O K I N G T I M E S .
23.
Page 27
AUXILIARY FUNCTIONS
CHEF FUNCTION KEY
K E Y L O C K
xc e pt a s n ote d , al l of t h e mo d e key s a nd
E
fu n ct i o ns a v ail a bl e o n the C o mb i the r m c a n be
lo c ke d t o pre v en t u nau t hor i ze d o r ac c i de n t al
ch a ng e s t o th e se tt i n gs .
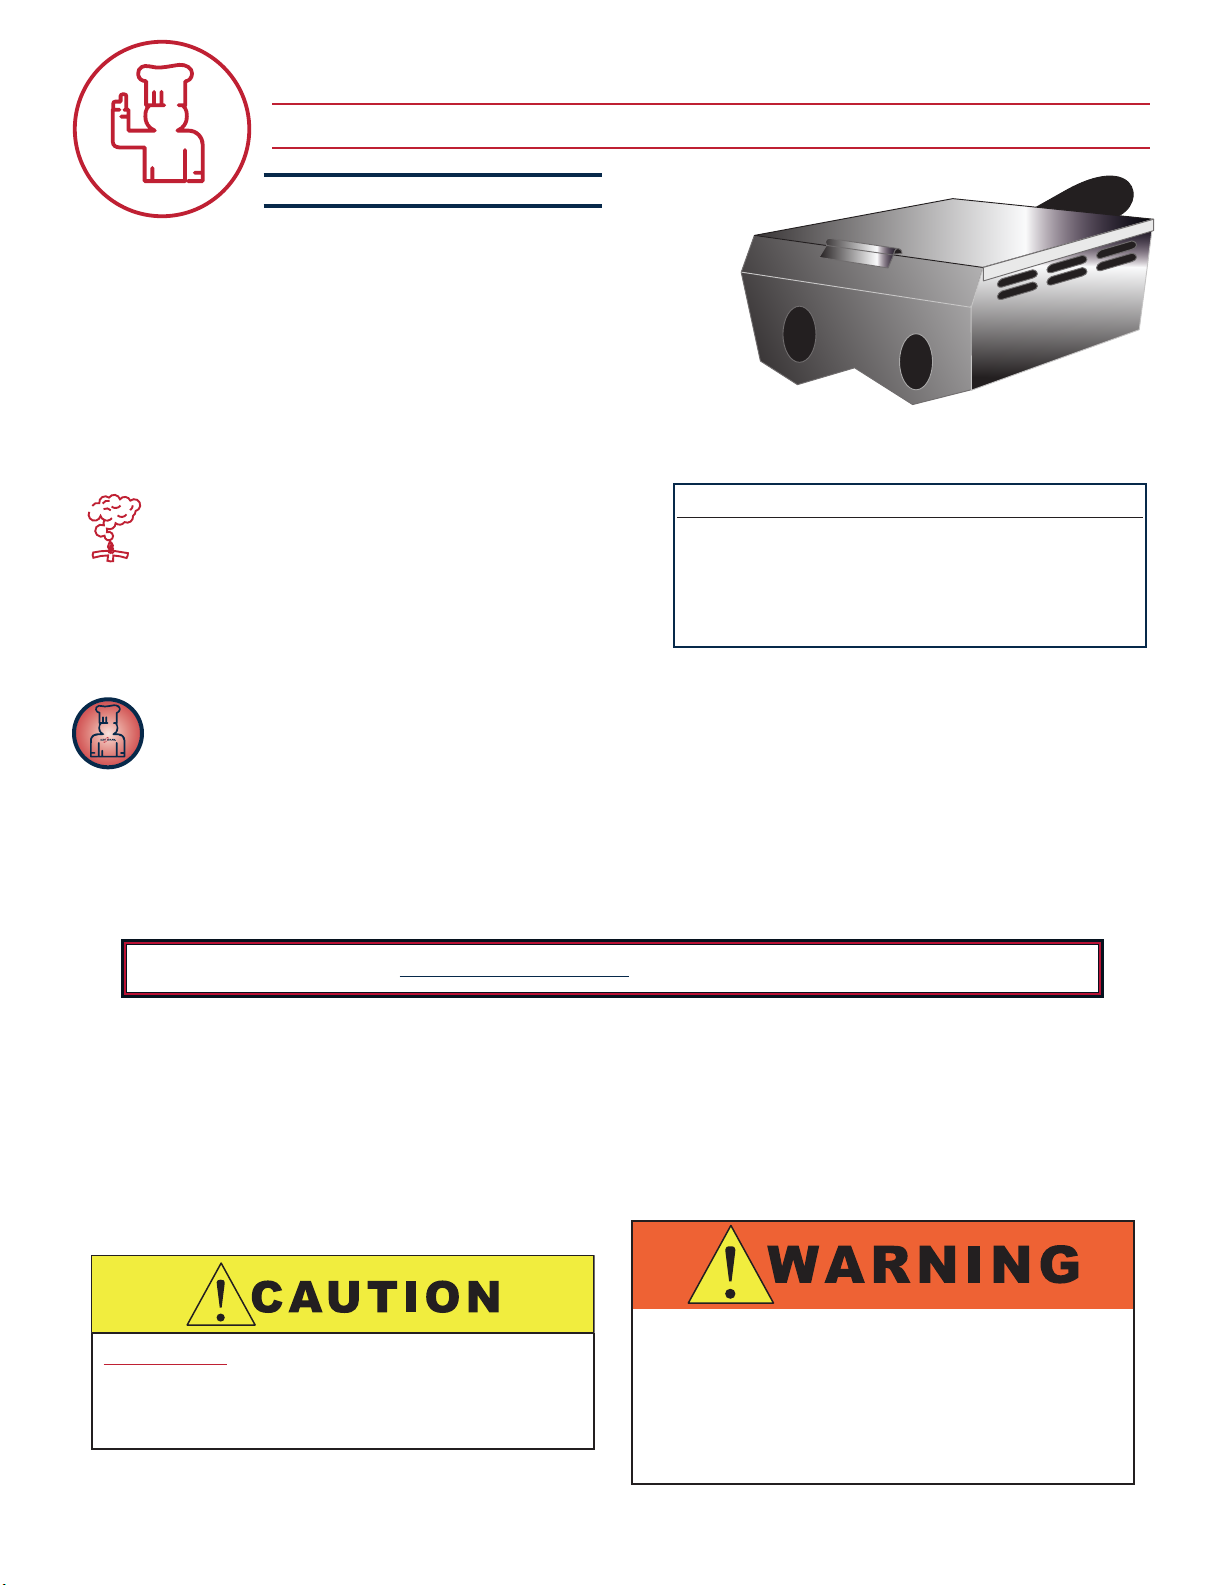
PRESS THE CHEF FUNCTION KEY.
Rot at e t he ad justm en t k no b until t he ke y symb ol i s h ighligh te d w it hi n the d is pl ay .
PRESS THE CHEF FUNCTION KEY.
Press the up
adjustment knob to select “Y ES” for the key lock function.
PRESS THE CHEF FUNCTION KEY TO CONFIRM THE SETTING.
The display will indicate PIN 000.
ROTATE THE ADJUSTMENT KNOB TO PIN 000.
and down arrow keys or rotate the
OP ERATING ELEMENTS THAT
CA NNOT BE LOCKED
Key lock
➯ PIN 000 is the factory set default to prevent an accidental lock or unlock of the control functions.
PRESS THE CHEF FUNCTION KEY.
TH E DI SPLAY WIL L IN DICATE “ALL KEYS UNLOCKED.”
S E L E C T A N D P R E S S T H E F I R S T
CONTROL FUNCTION TO BE LOCKED.
The display will indicate “LOCK.”
If the wrong key has been selected and locked in error, press the same control key again and
“UNLOCK” will appear in the display.
Continue in this manner until all desired control functions are locked.
PRESS THE START KEY TO CONFIRM THE LOCKING FUNCTION.
Whenever any control function has been locked, the key lock symbol will be illuminated within the display.
Whenever any locked control function is pressed, the key lock symbol will flash and an
audible signal will sound.
K E Y U N L O C K
FOLLOW THE SAME PROCEDURE AS ABOVE UNTIL THE DISPLAY INDICATES “ALL KEYS UNLOCKED.”
To u n l o c k t h e C h e f F u n c t i o n ke y .
PRESS THE POWER KEY TO TURN THE OVEN OFF .
PRESS THE CHEF FUNCTION KEY
ROTATE THE ADJUSTMENT KNOB TO PIN 000 TO DISENGAGE ALL LOCK FUNCTIONS.
PRESS THE CHEF FUNCTION KEY. THE DISPLAY WILL INDICATE “ALL KEYS UNLOCKED.”
24.
Page 28

AUXILIARY FUNCTIONS
CHEF FUNCTION KEY
S T E A M I N J E C T I O N
Additional steam can be added to the cooking compartment at any time when cooking in the
convection mode.
PRESS THE CHEF FUNCTION KEY.
Rot at e t he ad justm en t k no b until t he st ea m in je ct io n s ym bol is h ig hl ig ht ed wit hi n
the di sp la y.
PRESS THE CHEF FUNCTION KEY.
Press the up and down arrow keys or rotate
the adjustment knob to select “YES” for the steam
injection function.
PRESS THE CHEF FUNCTION KEY TO ACTIVATE THE STEAM INJECTION FUNCTION.
Additional steam is injected into the oven compartment for a time period of
approximately 15 seconds.
NOTE : Steam injection cannot be programmed through the control keypad, but can
be programmed through optional Kitchen Management software.
Add moisture
25.
Page 29
AUXILIARY FUNCTIONS
GENERAL SMOKER OPERATION
S M O K I N G F U N C T I O N
ON EQUIPPED MODELS
OAD WOOD C H I P S.
L
●
Measure one container full of dry wood chips.
●
Soak dry chips in water for 5 minutes.
●
Shake excess water off wood chips.
●
Place moistened chips back into the container
and position the container securely on the two prongs
located on the interior back panel of the oven.
A full container of wood chips will produce smoke
for an approximate period of one to two hours
depending on the cooking temperature being used
for the selected product. The tested procedures in
this manual for many of the products that are appropriate
for smoking provide complete product smoke penetration
WOOD CHIPS 20 POUN D BULK PA CKS
THE TO TAL WEI GH T OF WO OD CH IP
BUL K PAC KS MAY VA RY DUE TO H IG H
OI ST UR E CO NT E NT WH EN PAC K AG ED
M
AVAILAB LE FRO M A LTO-S HAAM
APPL E WC-22543
ICK O R Y
H
.
CHE R R Y WC-22541
SUG A R MA P L E W C - 2 2 5 4 5
WC-2 8 2 9
and full smoke flavor.
CH E F O P ERATING TIP
Pro d u c ts such as ribs tha t r e q uir e h e a v ier smok e p e n e trat i o n t o r e ach ful l sm o k e f l a vor
shou l d r e main in the oven af t e r c o o king has be e n c o m p lete d . D o n o t o p e n t h e o v en d oor.
Set the oven in the Low Te m p e ratu r e S t eam Mode at 140 ° to 160 ° F ( 6 0 ° t o 7 1 ° C) a nd allo w
the pro d u ct t o r emai n i n th e ov e n f o r a pe r i o d o f o n e h o ur.
If you would like assistance, you are invited to contact an Alto-Shaam corporate chef for recommendations.
NOTE : Al w a ys k eep the OVEN DO O R C L O S ED
when e v e r o p erat i n g t h e s m okin g fu n c tion .
The Combither m Smoker can be operated without using the smoking function. After using the oven as a
smoker, however, it is necessary to clean the oven in order to prevent a transfer of smoke flavor to nonsmoked products. Cleaning instructions are provided in this manual.
D O N O T OP EN THE OVEN DOOR DURING
THE SMOKING FUNCTION. The introduction
of outside air in the oven compartment may
cause the wood chips to flame.
26.
THE USE OF IMPROPER MATERIALS FOR THE
SMOKING FUNCTION COULD RESULT IN DAMAGE,
HA Z ARD, EQ U I PMENT FAI L URE, OR C OULD
RE D UCE THE OVERAL L LIFE OF THE OV EN.
DO NOT U S E S AWD U ST F OR S MOKING.
DO NOT U S E W O OD C HIPS SMALLE R T H A N
TH U MBNAIL SIZE .
Page 30
CHEF FUNCTION KEY
METAL PARTS OF THIS EQUIPMENT
BECOME EXTREMELY HOT WHEN IN
OPERATION. TO AVOID BURNS,
ALWAYS USE HAND PROTECTION
WHEN OPERATING THIS APPLIANCE.
S M O K E R F E A T U R E
ON EQUIPPED MODELS U.S. PAT.
The ability to smoke product, hot or cold, is offered on all boiler-free electric models and on all
gas models with the exception of the 10•20ESGAS, the 12•18ESGAS, and the 20•20ESGAS. The
smoking function can be engaged in either the Combination mode or the Convection mode of
operation. The smoking function cannot be operated when the oven is operating in the steam
mode or the retherm mode.
SELECT AND PRESS THE REQUIRED COOKING MODE (CONVECTION OR COMBINATION).
TO SET C O O K TEMPERATURE:
PRESS THE TEMPERATURE KEY.
The cooking temperature will appear highlighted within the oven display.
Press the up and down arrow keys or rotate the adjustment knob to select the desired
cooking temperature.
AUXILIARY FUNCTIONS
7,157,668
TO SET C O O K TIME:
PRESS THE TIME KEY.
The cooking time will appear highlighted within the oven display.
Press the up and down arrow keys or rotate the adjustment knob to select the time
desired.
or
Set control for continuous operation by rotating the adjustment knob to the right until desired
time appears in the display.
TO ACTIVATE S M O KER:
PRESS THE CHEF FUNCTION KEY.
Rotate the adjustment knob until the smoker symbol is highlighted
within the display.
PRESS THE CHEF FUNCTION KEY.
Press the up and down arrow keys or rotate the
adjustment knob to select “Y ES” for the Smoker function.
PRESS THE CHEF FUNCTION KEY TO CONFIRM
THE SETTING.
Smoker
PRESS THE START KEY TO ACTIVATE THE SMOKER FUNCTION.
27.
Page 31

AUXILIARY FUNCTIONS
CHEF FUNCTION KEY
E N E R G Y L O C K
F O R U S E W I T H O V E N S IN S TA L L E D U N D E R A V E N T L E S S H O O D .
nergy lock is a safety feature to prevent the oven control from being operated unless the ventless
E
oven hood is in operation. The energy lock indicator light will illuminate in the control display if this
situation occurs and the oven control will be inoperable until the oven hood is reset and operating.
PRESS THE CHEF FUNCTION KEY.
Rotate the adjustment knob until the energy lock symbol is highlighted within the
display.
PRESS THE CHEF FUNCTION KEY.
Press the up
the adjustment knob to select “YES” for the energy
lock function.
PRESS THE CHEF FUNCTION KEY TO ACTIVATE THE ENERGY LOCK FUNCTION.
The oven control will not operate when power is engaged until the ventless hood
is reset and operating.
Press the “Comb i Reset” button on the ve n t l e s s hood to energize t h e hood and
return the oven c o n t r o l to n o r mal operation.
and down arrow keys or rotate
Energy Lock
E N E R G Y P R O T E C T I O N FU R N I S H E D UP O N RE Q U E S T AS A FA C T O R Y IN S TA L L E D OP T I O N
In locations where the electric service is regulated with a device installed on site, this function will
protect full power to the Combitherm for the duration of the next operator set program or cooking mode.
This function cannot be set during an active cooking mode or program. Power interruption may affect all
other electric service within the regulated location.
F O R U S E O N LY I N T H O S E CO U N T R I E S W H E R E T H E L O C A L E L E C T R I C
U T I L I T Y P R O V I D E S A N E N E R G Y O P T I M I Z AT I O N S Y S T E M I N S TA L L E D O N S I T E .
PRESS THE CHEF FUNCTION KEY.
Rotate the adjustment knob until the program protection symbol is highlighted
within the display.
PRESS THE CHEF FUNCTION KEY.
Press the up
the adjustment knob to select “YES” for the energy
protection function.
PRESS THE CHEF FUNCTION KEY TO ACTIVATE THE PROGRAM PROTECTION FUNCTION.
28.
and down arrow keys or rotate
Program protection
Page 32

A D VA N C E F E AT U R E S
MOISTURE VENT KEY
This function provides the operator with the ability to eliminate excessive moisture from
the oven compartment and the exterior surface of the foods being cooked. The moisture
vent key is designed to operate in both the Combination mode and in the Convection
ooking mode. On deluxe models, this function can also be made part of a cooking program.
c
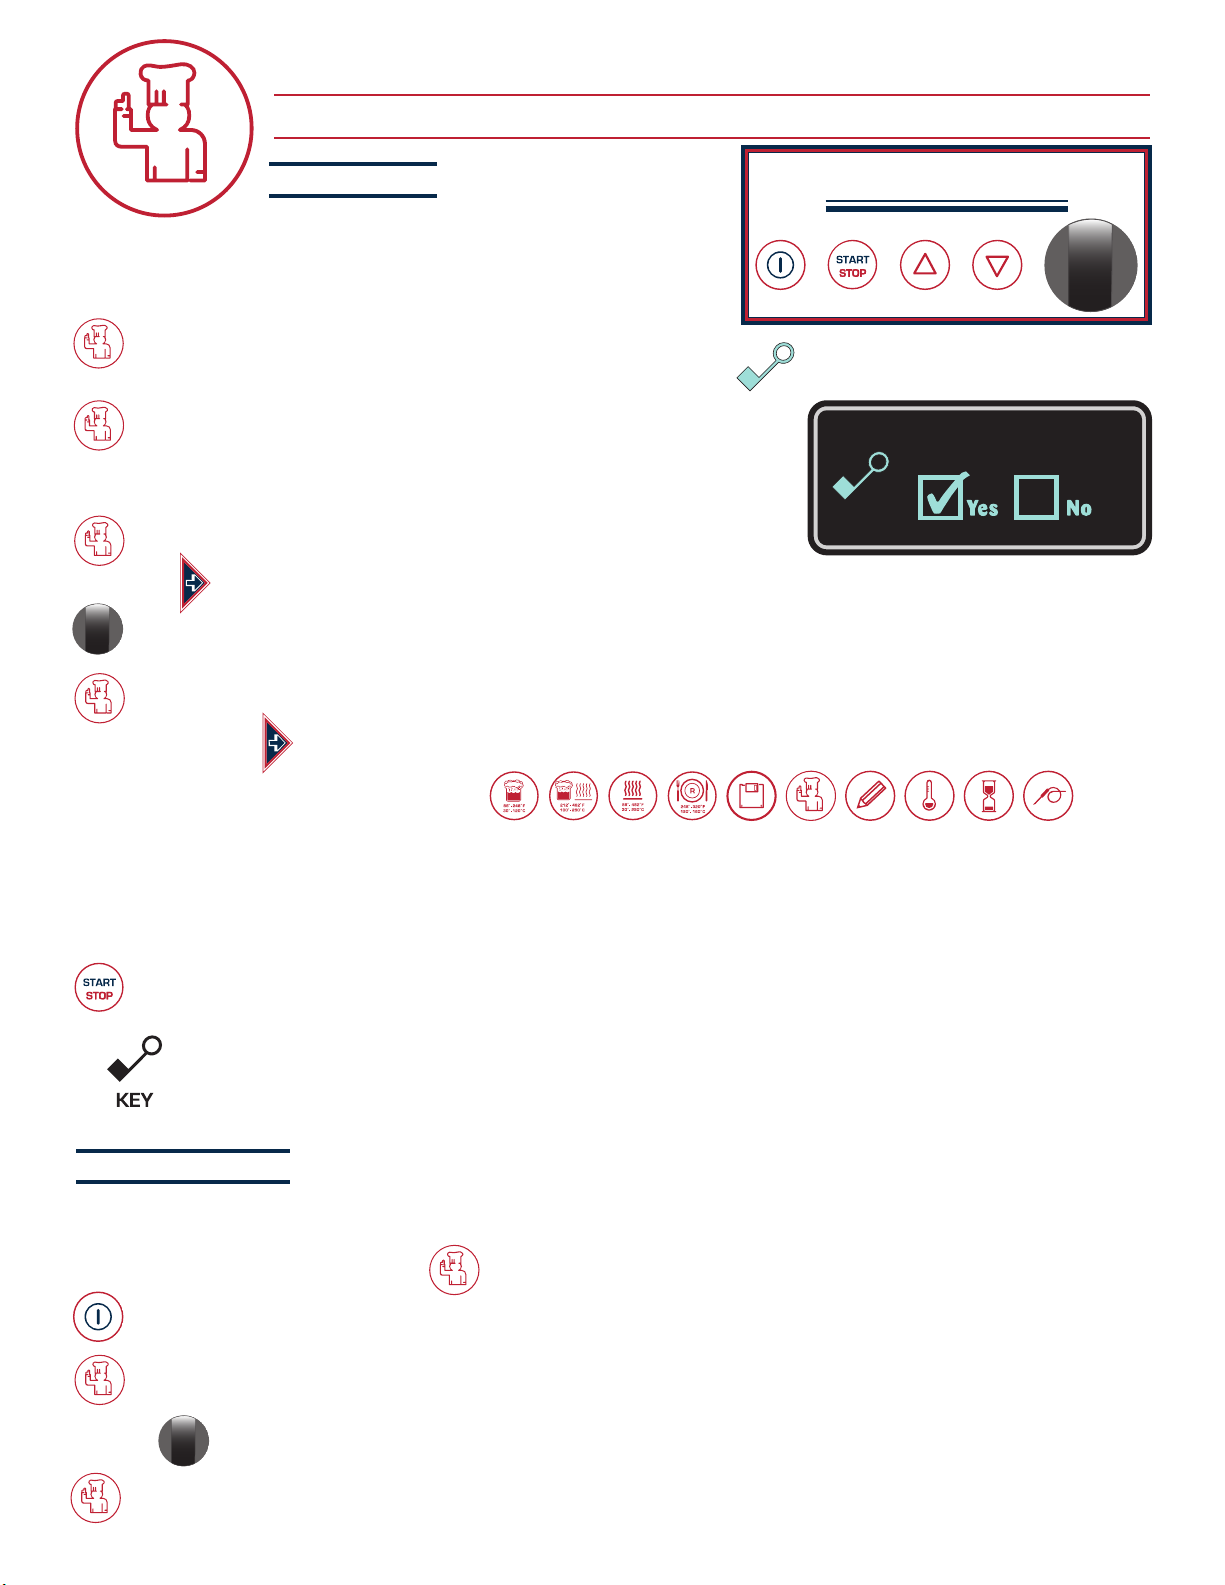
PRESS THE MOISTURE VENT KEY TO REDUCE STEAM AND MOISTURE LEVELS IN THE OVEN.
The illuminated, blue portion of the Moisture Vent Key will go out. Open vent symbol will illuminate
within the display.
PRESS THE MOISTURE VENT KEY TO DISENGAGE THE MOISTURE VENT KEY FUNCTION.
The blue portion of the Moisture Vent Key will illuminate. Open vent symbol within the display
will extinguish.
AT THE END OF A C OOKING MODE , T H E M O I STURE VENT KEY WIL L AU T OMATICALLY DISE N GAGE.
29.
Page 33

A D VA N C E F E AT U R E S
Q U I C K P R O G R A M M I N G
This quick programming function provides the operator with the ability to temporarily program a cooking
procedure using multiple cooking modes, along with any auxiliary functions desired. Quick programming is
articularly useful when cooking several batches of the same product back-to-back and will remain
p
programmed until any new cooking mode key is pressed.
PRESS AND HOLD THE FIRST REQUIRED COOKING MODE FOR A PERIOD OF 3-SECONDS.
01/01 will appear at the top of the display indicating STEP ONE.
The temperature and time will appear directly below 01/01.
PRESS THE TEMPERATURE KEY.
The temperature will become highlighted within the display.
ROTATE THE ADJUSTMENT KNOB TO SELECT THE REQUIRED TEMPERATURE.
PRESS THE TIME KEY OR THE CORE TEMP KEY .
The time or core temperature will become highlighted within the display.
ROTATE THE ADJUSTMENT KNOB TO SELECT THE REQUIRED SETTING.
PRESS AND HOLD THE SECOND REQUIRED COOKING MODE FOR A PERIOD OF 3-SECONDS.
Foll o w the a b o ve direct i o n s until all steps have b e e n entered.
PRESS THE START KEY.
The oven will begin cooking as programmed, automatically switching to each cooking
mode entered. Each step entered will be indicated in the display as the oven cycles from
mode to mode.
PRESS THE STOP KEY OR OPEN THE OVEN DOOR WHEN THE BUZZER SOUNDS AT THE END
OF THE PROGRAM.
THIS PROGRA M WILL REMAIN IN T E M P O R ARY ME M O R Y UN T I L AN Y NE W
COOK I N G M O D E K E Y IS PRESSED. QUICK PROGRAMMING CAN BE SAVE D
AND STORED I N MEMORY ON DELUXE MODELS O N LY.
E X AM PL E : 0 1 / 0 5 = S T E P O N E O F F I V E
0 2 / 0 5 = S T E P T W O O F F I V E
30.
Page 34

A D VA N C E F E AT U R E S
uxiliary Functions are made part of the control as an additional convenience to the operator, however,
A
these functions are not necessary for the general operation of the Combitherm oven.
START TIME PRESELECT
Start time preselect provides the operator with the ability
o program a fixed start time for oven operation. This
t
function can be operated when cooking in any mode and
is offered as a convenience to set an advanced start-up of
the preheating function prior to the beginning of the
production day. It can also be used for advance start-up
for non-refrigerated items such as baked potatoes.
SELECT AND PRESS THE REQUIRED COOKING MODE.
Set all mode functions such as temperature, time, core temperature, etc.
The time entered in the initial operational mode setup will automatically be
reflected on the start time preselect display.
To prevent food spoilage, this feature
is not r ecommen d e d for u se with any
raw product th a t requires temperature
main t e n a n c e at or under 40°F ( 4 ° C ) .
PRESS AND HOLD THE TIME KEY WHILE TURNING THE ADJUSTMENT KNOB.
The display will indicate the current programmed settings in 24-hour (military) time.
A. M. P.M.
1: 00
2: 00
3: 00
4: 00
5: 00
6: 00
7: 00
8: 00
9: 00
10 :00
11 :00
12 :00
00:48 10:23 11:23
OVEN START
IN
48 MINUTES
The cooking time shown (
01:00
STARTING TIME
10:23 A.M.
UP P ER RIGH T ) indicates automatic oven operation for a period of one hour and
ENDING TIME
11:23 A.M.
1-HOUR TOTAL
COOKING TIME
appears only when cooking by time as entered in the initial operational mode setup.
TO CHANGE THE STARTING TIME, PRESS AND HOLD THE TIME KEY AND TURN THE
ADJUSTMENT KNOB.
Rotate the adjustment knob to select the starting time desired. As the starting time is
changed, the countdown for oven start (
LE F T) and the ending time will automatically
adjust accordingly.
1: 00
2: 00
3: 00
4: 00
5: 00
6: 00
7: 00
8: 00
9: 00
10 :00
11 :00
12 :00
1: 00
2: 00
3: 00
4: 00
5: 00
6: 00
7: 00
8: 00
9: 00
10 :00
11 :00
12 :00
13 :00
14 :00
15 :00
16 :00
17 :00
18 :00
19 :00
20 :00
21 :00
22 :00
23 :00
24 :00
RELEASE THE TIME KEY AFTER THE REQUIRED STARTING TIME HAS BEEN SELECTED.
The oven preselect start time display will immediately begin a countdown and will
automatically start the oven when zero is reached.
THIS FUNCTION CAN BE CANCELLED AT ANY TIME BY PRESSING THE START/STOP KEY .
31.
Page 35

P R O G R A M F U N C T I O N
C O M B I T H E R M P R O G R A M M I N G S Y M B O L S
RECORD
SAVE
NEW PROCEDURE
COPY PROCEDURE
DELETE PROCEDURE
EDIT PROCEDURE
R E C O R D I N G A C O O K I N G P R O C E D U R E
Re c o r d i n g a c o o k i n g pr o c e d u re p r ov i d es t h e op e r a t o r wi t h th e a b i l i t y t o t es t a n d
ve r i f y a l l se t o pe r a t i n g pa r a m e t e r s f o r th e s e l e c t e d c o o k i n g m o de s a n d t o m ak e a n y
ne c e s s a r y a d j us t m e n t s be f o r e s a vi n g a n d s t o r i n g t h e pr o c e d u r e i n t o m e m or y .
PRESS THE PROGRAM INSTALL AND EDIT KEY.
Press the upLLand down MMarrow keys or rot at e t h e a dj us t m e nt
kn ob u n t i l th e r e c o r d sy mb o l is hi g h l i g ht ed i n t he di s p l a y .
INSERT STEP
APPEND STEP
DELETE STEP
PRESS THE PROGRAM INSTALL KEY TO CONFIRM THE SELECTION.
The display will indicate “Recorder ON” and the record symbol will appear in the display.
SELECT AND PRESS THE FIRST REQUIRED COOKING MODE.
Set all cooking mode parameters for temperature, time, or internal product temperature
plus auxiliary functions, and advanced features for the first step to be recorded.
PRESS THE START KEY TO BEGIN THE FIRST RECORDED STEP.
When the cooking time has expired or the operator set internal temperature has been reached, a buzzer will
sound indicating the end of the operating mode.
• To stop the buzzer, press the start/stop key or open the oven door.
SELECT AND PRESS THE SECOND REQUIRED COOKING MODE.
Set all cooking mode parameters for temperature, time, or internal product temperature
plus auxiliary functions, and advanced features for the second step to be recorded.
PRESS THE START KEY TO BEGIN THE SECOND RECORDED STEP.
Continue to record cooking modes as indicated for up to 20 steps.
All cooking mode steps entered with “Recorder ON” will remain in memory, in the order entered, until the recorder is
turned off. Recorded procedures will not be lost or affected by pressing the stop/start key .
32 .
D E L U X E M O D E L P R O G R A M M I N G F E AT U R E S
Page 36

P R O G R A M F U N C T I O N
T O C A N C E L T H E R E C O R D I N G F U N C T I O N
WITH THE “Recorder ON” FUNCTION ACTIVATED, PRESS THE PROGRAM INSTALL AND EDIT KEY.
Press the up LLand down MMarrow keys or r ot at e t h e a dj u s t m e nt kn o b u nt il t h e r e co rd
sy mb o l is hi g h l ig ht e d i n t he di s p l ay .
PRESS THE PROGRAM INSTALL KEY TO CONFIRM THE SELECTION.
“Recorder OFF” will appear in the displ ay and the oven can be operated normally.
S A V I N G A R E C O R D E D C O O K I N G P R O C E D U R E
Wh e n th e p r e v i o u s c oo k i n g m o de s t e p s r e co r d e d p r od u c e s a t is f a ct o r y r e s ul t s , t h e r e c o r d e d
co o k i n g p ro c e du r e ca n b e s a v ed i n m em o r y f o r f ut u r e u s e .
PRESS THE PROGRAM INSTALL/EDIT KEY.
P r e s s th e u p LLa n d d o w n MMa r r o w ke y s or r o t a t e t h e
a d j u s t m e n t k n o b u n t i l th e s a v e s y m b o l i s h i g h l i g h t e d in t h e d i s p l a y .
PRESS THE PROGRAM INSTALL/EDIT KEY TO CONFIRM THE SELECTION.
Name the procedure. Rotate the adjustment knob to select the first letter
of the procedure name. Press the up LLand down MMarrow key to select
second letter position and rotate the adjustment knob to select the second
letter. Continue this procedure for each subsequent alpha character,
number, or symbol required.
PRESS THE PROGRAM INSTALL AND EDIT KEY TO CONFI RM THE PROCEDURE NAME.
The display will indicate the fir st unoccupied memory location withi n t he programmed menu.
If an al ter nate location is desired, ro tate the adjustment knob to hig hlight another unoccu pied,
numbered mem ory location w ithin the programmed men u. If an o ccupied location is selected,
the existing procedure will b e r eplaced by the ne w procedure.
PRESS THE PROGRAM INSTALL/EDIT KEY TO CONFIRM THE PROCEDURE LOCATION.
T h e d i s p l a y w i l l i n d i c a t e “p l e a s e w a i t ” a n d w i l l r e t u r n t o t h e m a i n me n u d is p l a y .
The procedure h as now been saved in the se lected location and can be veri fied by rotating the
adjustmen t k nob to the saved pro cedure.
A
—
—— — —— —
To review the set operating parameters of any programmed procedure, press the programmed menu key
and rotate the adjustment knob until the procedure to b e reviewed is highlighted in the display. Pr ess the chef
function key. The cooking mode key for the first step will illuminate and the program mode, temperature,
time, or core temperature will appear in the display. Rot ate the adjustment knob to review each step.
D E L U X E M O D E L PR O G R A M M I N G F E A T U R E S
33 .
Page 37

P R O G R A M F U N C T I O N
C R E A T I N G A N E W C O O K I N G P R O C E D U R E
Cooking proc edures for items prepare d o n a regular basis can be st ored in memory.
PRESS THE PROGRAM INSTALL/EDIT KEY.
Press the up LLand down MMarrow keys or rotate the adjustment knob until the new procedure
symbol is highlighted in the display.
PRESS THE PROGRAM INSTALL/EDIT KEY TO CON FIRM THE SELECTION.
All cooking mode keys will begin to fla sh and 01/01 will appear at the top of the
display indi cating the fir st cooking ste p.
SELECT AND PRESS THE F IRST REQUIRED COOKING MODE.
Set cooking mode functions for temperature and time, or internal core temperature. Add any auxiliary functions
along with the moisture venting feature. Follow the basic operating instructions located in this booklet. Auxiliary
functions can be added by pressing the chef function key after entering the operating mode parameters for
each individual step and pressing the up
auxiliary function required. Press the chef function key to confirm the auxiliary function setting(s) for each step.
and down MMarrow keys or rotating the adjustment knob to select the
LL
PRESS THE PROGRAM INSTALL/EDIT KEY TO CON FIRM THE FIRST STEP.
SELECT AND PRESS THE S ECOND REQUIRED COOKIN G MODE.
The display will indicate 02/02 indicati ng the second coo king mode step .
Set all cooking mode f unctions as in dicated above.
PRESS THE PROGRAM INSTALL/EDIT KEY TO CON FIRM THE SECOND STEP.
CO NTINUE WITH TH E ABOVE I NSTRU CTION S UNTIL A LL MODE S TEPS AN D FUNCT IONS AR E ENTER ED.
UP TO 20 COOK I N G M O DE STEPS CAN BE SAVED IN A SINGL E PR O CEDURE.
AFTE R ALL F U N CTIONS ARE ENTERED,
PRES S THE P R O GRAM INSTAL L / E D I T KEY TO CONFIRM THE N E W PROCEDURE.
N a m e t h e p r o c e d u r e . R o t a t e t h e a d j u s tm e n t k n o b to s e l e c t
th e f i r s t l et t e r o f t h e p r o ce d u re n a m e . P r e s s t he u p
do w n MMar r o w k e y t o s e l e c t s e c o n d le t t e r p o s i t io n a n d r o t a t e
th e a d j u s t m e n t k n o b to s e l e c t t h e s e c o n d l e t t e r. Co n t i n u e f o r
ea c h su b se q u en t a l p h a c h a r a c t e r, n u mb e r, o r s y m b o l r e q u i r e d .
PRESS THE PROGRAM INSTALL AND EDIT KEY TO CONFI RM THE PROCEDURE NAME.
Rotate the adjustment knob to highlight an unoccupied, nu mbered memory locatio n within the
programmed m enu. If an occupi ed location is se lected, the ex isting procedure will be
replaced by the new procedure.
LL
an d
A
—
—— — —— —
PRESS THE PROGRAM INSTALL AND EDIT KEY TO CONFI RM THE PROGRAM IN STALL ATIO N.
T h e d i s p l a y w i l l i n d i c a t e “p l e a s e w a i t ” a n d w i l l r e t u r n t o t h e m a i n me n u d is p l a y .
34 .
D E L U X E M O D E L PR O G R A M M I N G F E A T U R E S
Page 38

P R O G R A M F U N C T I O N
S T A R T A P R O G R A M M E D P R O C E D U R E
PRESS THE PROGRAMMED MENU KEY.
All sto r ed pro c edur e s a re lis t ed alph abet i call y o r n umer i call y a s s elec ted by th e
oper a tor in th e i n iti a l o ven st a rt up proc edur e s u nder t h e p rogr a m inde x c a teg o ry.
Rotate the adjustment knob until the required procedu re is highligh ted in the displa y.
PRESS THE START KEY.
To re vi e w th e se t pa r a me t e r s of a n y p r o g r a m m e d p r o c e d u r e , pr es s t h e
pr o g ra m m ed me n u k e y a n d ro t a te th e a d jus t men t k n ob un t i l t he pr o ce d u re t o
be revi e w ed is hi g hli g h te d in th e di s pla y . Pr e ss the ch ef fu nct i on key . The
coo k i ng m ode , tem p era t ur e , ti m e, o r co r e t e m pe r a tu r e w i l l a p p ea r in t h e d i s pl a y .
C O P Y A P R O G R A M M E D P R O C E D U R E
PRESS THE PROGRAMMED MENU KEY.
Rotate the adjustment knob until the proced ure to be copied is highlighted in th e display.
PRESS THE PROGRAM INSTALL AND EDIT KEY.
Press the up LLand down MMarrow keys or rot at e t h e a dj us t m e nt kn o b u n t il th e c o py »
pr oc e d u r e sy mb ol i s h ig hl i g h t e d i n t h e d is pl a y .
PRESS THE PROGRAM INSTALL AND EDIT KEY.
The display will select an empty, nu mbered location to inser t the duplicat e copy.
PRESS THE PROGRAM INSTALL AND EDIT KEY TO CONFI RM THE DUPLICATION .
T h e d i s p l a y w i l l i n d i c a t e “p l e a s e w a i t ” a n d w i l l r e t u r n t o t h e m a i n me n u d is p l a y .
An exact duplicate of the selected procedure has been inserted in the new location under the same name as the
original procedure. The duplicate can be renamed and edited as required. See additional editing instructions.
D E L E T E A P R O G R A M M E D P R O C E D U R E
PRESS THE PROGRAMMED MENU KEY.
Rotate the adjustment knob to highlight the procedure to be deleted.
PRESS THE PROGRAM INSTALL/EDIT KEY.
LL
P r e s s th e u p
k n o b u nt i l t h e d e le t e s y m b o l i s h i g h l i g h t e d i n t h e d i s pl a y .
PRESS THE PROGRAM INSTALL AND EDIT KEY TO CONFI RM THE SELECTI ON.
Th e p r o g r am m e d p r o c e d u re h a s be e n d e l et e d f r o m t h e m e n u .
a n d d o wn MMa r r o w ke y s o r r o t a t e t h e a d j u st m e n t
D E L U X E M O D E L PR O G R A M M I N G F E A T U R E S
35 .
Page 39

P R O G R A M F U N C T I O N
P R O GR A M E DI T I N G
E D I T A P R O G R A M M E D P R O C E D U R E
PRESS THE PROGRAMMED MENU KEY.
Rotate the adjustment knob until the proced ure to be edited is highlighted in the display.
PRESS THE PROGRAM INSTALL AND EDIT KEY.
Pr e s s t h e u p LLan d d o w n MMar r o w k e y s o r r o ta t e t h e a d ju s t m e n t kn o b u n t i l
th e e d i t s y mb o l is h i g h l i g h t e d i n t h e d i s p l a y .
PRESS THE PROGRAM INSTALL AND EDIT KEY TO CONFI RM THE SELECTION.
T h e d i sp l a y w i ll i n d i c at e t h e p r o c e d u r e n a m e, c o o k i ng s t e p n u m b e r
X A M P L E
( E
: “ 0 1/ 0 5 ” = S
t e m p e r a t u r e , t i m e , o r i n te r n a l p r o d u c t te m p e r a t u r e .
To change the operating para meters for the first step:
Press the cooki ng temperat ure key and rotate the adjustment knob.
Press the time key a nd rotate the adj ustment knob to c hange the cook ing time.
Press the core temperature key and rotate the a djustment knob to change the co re temp.
T E P O N E O F F I V E
) , a n d o p e r a t i n g pa r a m e t e r s f o r
Auxiliary functions can be added by pressin g the chef functi on key after ent ering the
operating mo de paramete rs for each indiv idual step and pr essing the up LLand down MMarrow
keys or rotate the adjustment knob to s elect the auxiliary function required. Press the chef
function key to confir m the auxiliar y function set ting.
Press the down arrow key for each subsequent step of the procedure an d make changes to
each step as required.
PRESS THE PROGRAM INSTALL AND EDIT KEY TO CONFI RM THE SETTING.
The display will indicate the sam e n ame as the origin al procedure, minus the last letter.
Install the last letter by rotating the adjust ment knob to the correct letter.
Ren a me t h e pro ced u re b y p res sin g the d o wn a r row k ey to c lea r the d i sp l ay.
Pre s s th e u p
LL
and d o wn MMarr o w ke y t o se l ect e ach i ndi v id u al al pha c h ar a cte r,
num b er, o r s ym b ol. R ota t e th e a dj u stm ent k nob t o s el e ct e a ch su bse q ue n t let ter.
PRESS THE PROGRAM INSTALL AND EDIT KEY TO CONFI RM THE NAME.
PRESS THE PROGRAM INSTALL AND EDIT KEY TO INSTALL THE PROG RAM.
To review the set operating parameters of any pr ogrammed procedur e, press the programmed menu key
and rotate the adjustment knob until the procedur e to be reviewed is highlighted in the display. Press the chef
function key. The cooking mode key for the first step will illuminate and the program mode, temperature,
time, or core temperature will appear in the display. Rotate the adjustment knob to review each step.
36 .
D E L U X E M O D E L PR O G R A M M I N G F E A T U R E S
Page 40

P R O G R A M F U N C T I O N
P R O GR A M E DI T I N G
I N S E R T A P R O G R A M M E D P R O C E D U R E S T E P
PRESS THE PROGRAMMED MENU KEY.
otate the adjustment knob until the procedure to add a new step is highlighted in the display.
R
PRESS THE PROGRAM INSTALL KEY.
P r e s s th e u p
t h e e d it p r o ce d u r e s y mb o l i s h i g h l i g h t e d i n t h e d i s p l a y .
PRESS THE PROGRAM INSTALL AND EDIT KEY TO CONFI RM THE SELECTION.
Th e d i s p l a y w i l l i n d i c a t e t h e p ro c e d u r e na m e , c o o k i n g s t e p nu m b e r a n d
op e r a t i n g p a r am e t e r s f o r t e m p e r a t u r e , t i m e , o r i n t e r n a l p r o d u c t te m p e r a t u r e .
P r e s s th e u p
i m m e d i a t e l y f o l l o w i n g t h e p o s i t i o n w a n te d f o r t h e n e w s t ep .
P R E S S TH E C H E F F U N C T I O N K E Y .
A c h oi c e o f e d i ti n g s y m bo l s a n d a u x i l i a r y f u n c t i o n s w i l l a p p ea r i n t h e
d i s p l a y . P r e ss t h e u p LLa n d d o wn MMa r r o w ke y s o r r o t a t e t h e a d j u s t m e n t
k n o b t o s e l e c t th e i n s e rt s t e p s y m b o l .
PRESS THE CHEF FUNCTION KEY TO CONFIRM THE SELECTION.
Pr e s s t h e u p LLan d d o w n MMar r o w k e y s o r r o ta t e t h e
ad j u s t m e n t k n ob t o s el e c t “ Y ES ” f o r s t e p i n s e r t i o n .
PR E S S T H E C H E F F U N C T IO N K E Y T O C O N F I R M T H E SE L EC T I ON .
a n d d o wn MMa r r o w ke y s o r r o t a t e t h e a d j u st m e n t k no b u n t i l
LL
o r d o w n MMa r r o w ke y s t o s e l e c t t h e s t e p
LL
Insert step ?
All cooking modes will begin to flash. Select and press the cooking mode to be inserted. Press and set
cooking temperature, time, or internal core temperature. Auxiliary functions can be added by pressing the
chef function key after entering the operating mode parameters for each individual step and pressing the
up LLand down MMarrow keys or rotating the adjustment knob to select the auxiliary function required. Press
the chef function key to confirm the auxiliary function setting. Add the moisture vent key function if required.
PR E S S T H E I NS TA L L /E D I T K E Y T O C O N F I R M T H E S E L E C T ED M O D E A N D F U N C T I O N S .
Th e d i s p l a y w i l l i n d i c a t e t h e p ro c e d u r e na m e m i n u s t h e la s t l e t t e r. R e i n s e r t th e la s t
le t t e r w i t h t h e ad j us t m e n t k n o b o r us e t h e u p
c o n j u n c t i o n w i t h t h e a d ju s t m e n t k n o b t o r e n a m e t he p r o c e du r e .
P R E S S TH E I N S T A L L / E D I T K E Y T O C O N F I R M T H E N A M E .
PR E S S T H E I NS TA L L /E D I T K E Y T O I N S E R T T HE N E W ST E P I N T O TH E PR O C E D U R E .
T h e d i s p l a y w i l l i n d i c a t e “p l e a s e w a i t ” a n d w i l l r e t u r n t o t h e m a i n me n u d is p l a y .
T O V E R I F Y TH E I N S E R T E D S T E P, PR E S S T H E C H E F FU N C T I O N K E Y
W H I L E T H E ALT E R E D P R O C E D U R E I S H I G H L I G H T E D . R O TAT E T H E
A D J U S T M E N T K N O B T O R E V I E W A L L S E T PA R A M E T E R S .
a n d d o wn MMa r r o w ke y s i n
LL
D E L U X E M O D E L PR O G R A M M I N G F E A T U R E S
37 .
Page 41

P R O G R A M F U N C T I O N
P R O GR A M E DI T I N G
A P P E N D A P R O G R A M M E D P R O C E D U R E S T E P
PRESS THE PROGRAMMED MENU KEY.
otate the adjustment knob until the procedure to include a final step is highlighted in the display.
R
PRESS THE PROGRAM INSTALL KEY.
LL
P r e s s th e u p
t h e e d it p r o ce d u r e s y m b o l i s h i g h l i g h t e d i n t h e d i s p la y .
PRESS THE PROGRAM INSTALL AND EDIT KEY TO CONFI RM THE SELECTION.
Th e d i s p l a y w i l l i n d i c a t e t h e p ro c e d u r e na m e , c o o k i n g s t e p nu m b e r a n d
op e r a t i n g p a r am e t e r s f o r t e m p e r a t u r e , t i m e , o r i n t e r n a l p r o d u c t te m p e r a t u r e .
P r e s s th e u p
o f t h e p r o c e d u r e .
P R E S S TH E C H E F F U N C T I O N K E Y .
A c h oi c e o f e d i ti n g s y m bo l s a n d a u x i l i a r y f u n c t i o n s wi l l a pp e a r i n t h e
d i s p l a y . P r e ss t h e u p
a n d d o wn MMa r r o w ke y s o r r o t a t e t h e a d j u s t m e n t k n ob u n t i l
LL
o r d o w n MMa r r o w ke y s t o s e l e c t t h e l a s t s t ep
LL
a n d d o wn MMa r r o w ke y s o r r o t a t e t h e a d j u st m e n t
k n o b t o s e l e c t th e a p p e nd s t e p s y m b o l .
PRESS THE CHEF FUNCTION KEY TO CONFI RM THE SELECTION.
Pr e s s t h e u p LLan d d o w n MMar r o w k e y s o r r o ta t e
th e a d j u s t m e n t k n o b to s e l e c t “ Y ES ” f or a p p e n d s te p .
PR E S S T H E C HE F F U N C T IO N K E Y T O C O N F I R M T H E SE L E C T I ON .
All cooking modes will begin to flash. Select and press the cooking mode to be appended. Press and set
cooking temperature, time, or internal core temperature. Auxiliary functions can be added by pressing the
chef function key after entering the operating mode parameters for each individual step and pressing the
up LLand down MMarrow keys or rotating the adjustment knob to select the auxiliary function required. Press
the chef function key to confirm the auxiliary function setting. Add the moisture vent key function if required.
PR E S S T H E I NS TA L L /E D I T K E Y T O C O N F I R M T H E S E L E C T ED M O D E A N D F U N C T I O N S .
Th e d i s p l a y w i l l i n d i c a t e t h e p ro c e d u r e na m e m i n u s t h e la s t l e t t e r. R e i n s e r t th e la s t
le t t e r w i t h t h e ad j us t m e n t k n o b o r us e t h e u p
c o n j u n c t i o n w i t h t h e a d j u s t m e n t k n o b t o r e n a m e t he p r o c e du r e .
P R E S S TH E I N S T A L L / E D I T K E Y T O C O N F I R M T H E N A M E .
a n d d o wn MMa r r o w ke y s i n
LL
Append step ?
PR E S S T H E I NS TA L L /E D I T K E Y T O I N S E R T T HE N E W ST E P I N T O TH E PR O C E D U R E .
T h e d i s p l a y w i l l i n d i c a t e “p l e a s e w a i t ” a n d w i l l r e t u r n t o t h e m a i n me n u d is p l a y .
TO VERIFY THE INSERTED STEP, PRESS THE CHEF FUNCTION KEY WHILE THE ALTERED PROCEDURE
IS HIGHLIGHTED. ROTATE THE ADJUSTMENT KNOB TO REVIEW ALL SET PARAMETERS.
38 .
D E L U X E M O D E L PR O G R A M M I N G F E A T U R E S
Page 42

P R O G R A M F U N C T I O N
P R O GR A M E DI T I N G
D E L E T E A P R O G R A M M E D S T E P
RESS THE PROGRAMMED MENU KEY.
P
Rotate the adjustment knob to highlight the procedure in which a step is to be deleted.
PRESS THE PROGRAM INSTALL KEY.
P r e s s th e u p
t h e e d it p r o ce d u r e s y mb o l i s h i g h l i g h t e d i n t h e d i s p l a y .
PRESS THE PROGRAM INSTALL AND EDIT KEY TO CONFI RM THE SELECTI ON.
Th e d i s p l a y w i l l i n d i c a t e t h e p ro c e d u r e na m e , c o o k i n g s t e p nu m b e r a nd
op e r a t i n g p a r am e t e r s f o r t e m p e r a t u r e , t i m e , o r i n t e r n a l p r o d u c t te m p e r a t u r e .
P r e s s th e u p
P R E S S TH E C H E F F U N C T I O N K E Y .
A c h oi c e o f e d i ti n g s y m bo l s a n d a u x i l i a r y fu n c t i o n s w i l l a pp e a r i n t h e
d i s p l a y . P r e ss t h e u p LLa n d d o wn MMa r r o w ke y s o r r o t a t e t h e a d j u st m e n t
k n o b t o s e l e c t th e d e l e te s t e p s y m b o l .
PRESS THE CHEF FUNCTION KEY TO CONFI RM THE SELECTION.
Pr e s s t h e u p LLan d d o w n MMar r o w k e y s o r r o ta t e
th e a d j u s t m e n t k n o b to s e l e c t “ Y ES ” f or s t e p d e l et i o n .
PR E S S T H E C HE F F U N C T IO N K E Y T O C O N F I R M T H E S E L E C T I O N.
a n d d o wn MMa r r o w ke y s o r r o t a t e t h e a d j u st m e n t k no b u n ti l
LL
o r d o w n MMa r r o w ke y s t o s e l e c t t h e s t e p t o b e d e l e t ed .
LL
Delete step ?
PR E S S T H E I NS TA L L /E D I T K E Y T O C O N F I R M T H E D E L E T I ON .
Th e d i s p l a y w i l l i n d i c a t e t h e n am e o f th e pr o ce d u r e a s o r i g i n a l l y p r o g r a m m e d .
P R E S S TH E I N S T A L L / E D I T K E Y T O C O N FI R M T HE N A M E .
PR E S S T H E I NS TA L L /E D I T K E Y T O R E M O V E T H E D E L E T E D S T E P F R O M T H E P R O GR A M .
The d isplay wil l ind i cate “pleas e wai t ” a n d wi l l r e t ur n to the main menu disp l ay.
TO V E RIF Y TH E ST E P HA S BE E N D E LET E D, P RES S TH E CHE F FU N CTI O N
KEY W H ILE THE DE LET E STEP PROC E DU R E IS HI GHL I GHT E D. R O TATE
THE A D JUS TME N T KNO B TO RE V IEW A LL SE T PARA M ET E RS.
D E L U X E M O D E L PR O G R A M M I N G F E A T U R E S
39 .
Page 43

P R O G R A M F U N C T I O N
R A P I D - T O U C H
Rapid-Touch programmed quick- keys provide the operato r with the
ability to assign procedures used on a regular ba sis to individ ual keys
that can be identified with a picture g raphic resembling the pr oduct.
Various pict ure graphics are include d with the Combither m ov en.
K E Y S
™
T O A S S I G N A P R O C E D U R E T O A P R O G R A M R A P I D - T O U C H K E Y
PRESS THE PROGRAMMED MENU KEY.
Rotate the adjustment knob to highlight the procedure to be assigned to Rapid-Touch operation.
PRESS AND HOLD THE SEL ECTED RAPID TO UCH KEY FOR A PERIOD OF THREE SECONDS.
Wh e n th e b u z z e r s o u nd s , th e p r o g r a m m ed p r o c e d u r e
ha s b e e n a s si g n e d t o t h e R a p i d - To u c h k e y se l ec t e d .
Id e n t i f y th e Ra p id - To u c h k e y w i t h a c o r r e sp o n d i n g pi c tu r e gr a p h i c .
T O O P E R A T E A P R O C E D U R E O N R A P I D - T O U C H K E Y
PRESS AN ASSIGNED RAPI D T OUCH KEY.
The indicator light to the upper right of the selected Rapid-Touch key will
illuminate. The oven will begin operating as programmed with the display
indicating the name of the procedure, the step number, the total number
of steps, and the temperature, time, or internal product temperature.
When the cooking time for all programmed modes has expired or the operator set inter nal temperature has
been reached, a buzzer will sound indicating the completion of the program.
• To stop the buzzer, press the start/stop key or open the oven door.
On ce a R a pi d- To u c h ke y i s p ro g r a m m ed w i t h a pr o c e d u re , c a r e sh ou l d b e t ak e n n ot t o
pr es s an d ho l d t he p ro g r a mm ed k e y w i t h a no t h e r p r oc ed u r e hi gh l i g ht ed i n th e di sp la y
by me a ns of th e pro g r a mm ed men u ke y. Th e hi g hl ig h t e d pr o c e d ur e wi ll ove rr i d e th e
Ra pi d - To u c h ke y p r o g r a m a nd t h e pi ct u r e g r ap hi c w i l l no lo n g e r m at c h t h e pr oc e d u re .
01/02 ROAST CHICKEN
350
F
40 .
D E L U X E M O D E L PR O G R A M M I N G F E A T U R E S
Page 44

C O N T R O L PA N E L I D E N T I F I C AT I O N
METAL PARTS OF THIS EQUIPMENT
BECOME EXTREMELY HOT WHEN IN
OPERATION. TO AVOID BURNS,
ALWAYS USE HAND PROTECTION
WHEN OPERATING THIS APPLIANCE.
햲 OFF POSI T ION
Maintains oven in a st and-by mode.
햳 STEA M
The oven will operate at a fixed steam temperature of
212° F ( 100°C).
햴 COMB I N ATION
A combinatio n of steam and convection heat to cook at a
temperatu re between 86°F a nd 482°F (30°C to 25 0°C) to be
set by t he operator.
햵 CONV E C TION
Convectio n h eat to cook without steam at a temperature
between 86°F and 482°F (30°C and 250°C) to be set by
the operator.
햶 LOW STEA M
Low temperat ure steaming w ithin an operator set temperature
range of 98°F to 210°F (3 0°C and 98°C).
햷 CLEA N I NG FUNCTION
An automatic cleaning cycle to heat the oven to the correct
temperature, followed by a manual application of Combitherm
Oven Cleaner and a 10 minute steam cleaning cycle.
An automatic boiler flush is initiated on boiler equipped models
and a vinegar decalcification can also be conducted.
햸 COOK I N G T EMPERATU R E D I AL
To be m anually set by th e operator to the cooking
temperatu re require d.
S - C O N T R O L M O D E L S
41 .
Page 45

C O N T R O L PA N E L I D E N T I F I C AT I O N
햹 GOLD - N -BROWN
The browning feature is an automatic function designed to regulate humidity for additional color to
products as needed. This feature is particularly useful for adding color to high moisture products
such as chicken and other poultry items or for additional browning of full loads and other moist
products. In addition, this feature may be used to add texture to fried items such as French fries or
breaded chicken. Gold-n-Brown can be used in both the combination mode and the convection mode
and can be programmed into a cooking procedure.
™
햺 OVEN DIS P L AY
Indicates time remaining, interior oven temperature, or inter nal product tempe rature.
햻 OVEN TEM P E RATURE
To be pressed to display interior oven temper ature.
햽 SMOK I N G F EATURE (OP T I ON)
Provides the ability to smoke product, hot or cold, on all boiler-free electric models and on all gas
models with the exception of the 10•20ESG A S, the 12•18ESGAS, and the 20•20ESGA S . The
smoking function can be engaged in either the Combination mode or the Convection mode of
operation. The smoking function canno t be operated whe n the oven is operating in either stea m
mode or low temperature steam mode.
햾 COOK I N G T IMER
Turned to the left fo r c ontinuous cooking time or to de crease time in in crements of on e minute.
Turn to the right to set and increase tim e in increment s o f one minute
햿 CORE TEM P E RATURE PRO B E ( O P TIO N )
Used to set the required internal product temperature.
헀 FULL SPE E D FA N PO S ITION
헁 HALF SPE E D FA N PO S I TION
헂 OVEN COO L -DOWN POSITI O N
Assists in cooling the oven at an accel erated pace when changing from high to lower temperature
cooking. The oven door should b e open when using this f e a tur e .
42 .
S - C O N T R O L M O D E L S
Page 46

C O N T R O L O P E R AT I O N
2
12°F
1
00°C
98° - 210°F
3
0° - 98°C
The simplifi ed, S-Control Combither m ove n includes all of the ba sic operating functions of the standar d,
ES-Series , C ombither m oven models. Oven oper ation is initiated with the use of ro tary dials. Ad ditiona l
functions ar e i nitiated by pressing the rep resente d function symbol.
All of t he cooking procedures sh own in this guide can be ad apted for use wit h S-Control mo dels by manually
setting the suggested cook ing mode, time , and temperature indica ted.
P R E H E A T I N G
1. Rotate the Cooking Mode dial to the convection mode.
2. Rotate the Cooking Temperature dial to the preheating temperature required.
3. Rotate the Cooking Timer dial to the preheating time desired.
Turn to the left for con tinuous time o r t o decrease tim e i n increments o f o ne minute.
Turn to the right to set and increase tim e in increment s o f one minute.
4. When preheated, the oven can be operated in any cooking mode required.
C O R E T E M P E R A T U R E ( O P T I O N )
1. Rotate the Cooking Mode dial to the required cooking mode.
2. Rotate the Cooking Temperature dial to the cooking temperature required.
3. Press the Core Temperature symbol. The letters “ C o r” will appear in the display.
Cor
4. When “ C o r” appears in the display, the timer dial will convert to internal product temperature.
Rotate the Cooking Timer dial to the inter nal product temperature desired.
Turn to the left to decrease temperature in incr ements of one deg ree.
Turn to the right to inc rease temperature in increments of one degree.
5. In 3-seconds, oven will begin the cook and the display will indicate the internal product temperature
reading of the probe.
6. One minute after the product reaches the set internal product temperature, a buzzer will sound indicating
the end of the operating mode.
TO STOP THE B U ZZER , O PEN T HE OV EN DO OR OR TURN THE C O OKIN G MOD E DIA L TO TH E OF F POS I TION .
CH E F O P ERATING TIP S
The Core Temperature should not be used fo r cooking thin pr oducts.
DO N O T H A ND LE PANS CO N TA I NI NG
LIQ UI D OR SE M IL IQ U ID P R OD UC T S
POS I T I O N E D ABOVE TH E EYE LEVEL OF
THE OPERATOR. SU CH PRODUCTS CAN
SCA L D AND C A U SE SERIOUS INJURY.
S - C O N T R O L M O D E L S
43 .
Page 47

C O N T R O L O P E R AT I O N
G O L D - N - B R O W N
™
Press the GOLD-N-BROWN browning symbol at the start of any cooking cycle in the combination
mode or convection mode to automatically add additional product color.
S M O K I N G ( O P T I O N )
LOAD WOOD CHIPS.
●
Measure one container full of dry wood chips.
●
Soak dry chips in wate r f or 5 minutes.
●
Shake excess water off wood chips.
●
Place moiste ned chips back into the contain er and
position the container sec urely on the two prongs
WOOD CHIPS 20 POUN D BULK PA CKS
HE TOTAL WE IG HT O F W OO D CH IP
T
BUL K PAC KS MAY VA RY DUE TO H IG H
OI ST UR E CO NT E NT WH EN PAC K AG ED
M
located on the interior back panel of t he oven.
SMOKING feature may be started at the beginning of any cooking cycle in the Combination mode or
Convection mode.
Push the Smoker icon key.
A full c ontainer of wo od chips will pro duce smoke for an approximate period of one to two hours dependin g
on the c ooking temperature be ing used for the selected produ ct. The tested pr ocedure s i n this manual for
many of the products that are appro priate for smo king provide complete product smoke pe netration and full
smoke flavor.
AVAILAB LE FRO M A LTO-S HAAM
APPL E WC-22543
ICK O R Y
H
HER R Y
C
.
UGA R MA P L E
S
WC-2 8 2 9
WC-2 2 5 4 1
WC-2 2 5 4 5
When the cooking cycle is completed, a buzzer will so und indicating the end of the preh eat function.
TO STOP THE B U ZZER , O PEN T HE OV EN DO OR OR TURN THE C O OKIN G MOD E DIA L TO TH E OF F POS I TION .
CH E F O P ERATING TIP
Pro d u c ts such as ribs tha t r e q uir e h e a v ier smo k e p e n e trat i o n t o r e ach full sm o k e f l a vor
shou l d r e main in the oven af t e r c o o king has be e n c o m p lete d . D o n o t o p e n t h e o v en d oor.
Set the oven in the Low Te m p e ratu r e S t eam Mode at 140 ° to 16 0 ° F ( 6 0 ° t o 7 1 °C) and allo w
the pro d u ct t o r emai n i n th e ov e n f o r a pe r i o d o f o n e h o ur.
NOTE : Al w a ys k eep the OVEN DO O R C L O S ED
when e v e r o p erat i n g t h e s m okin g fu n c t ion .
The Combithe r m Smok er can be operated without using the smoking fun ction. Afte r u sing the oven as a
smoker, however, it is necessary to clean t he oven in order to pre vent a transfe r of smoke flavor to nonsmoked produ cts. Cleaning instructions are prov ided in this manual.
44 .
HOT STEAM CAUSES BURNS
RO TAT E TH E D O O R H A N D L E T O T H E
FIR S T O P E N R O TAT I O N POSITION ON LY.
STAND BACK AND WAIT UNTIL THE STEAM IS
VENTED BEFORE FULLY OPENING THE DOOR.
S - C O N T R O L M O D E L S
Page 48

N O T E S
S - C O N T R O L M O D E L S
45 .
Page 49

CO M B IT HER M OV E N P REH E AT
REHEATING IS ENGAGED AT A FIXED TIME AND TEMPERATURE IN THE CONVECTION MODE.
P
BOTH THE TE MPERATURE AND TIME CAN BE ADJUST ED BY THE OPERATOR TO COMPLY WITH
THE REQUIR EMENTS OF THE INDI VIDUAL OPERATION.
SEE S TA R T U P PR O C E D U R E S UNDER DEFA U LT/ME M O SE T T I N G .
P R E H E A T I N G
PRESS THE CHEF FUNCTION KEY.
Rota t e t h e a d just m ent kn o b u n til the pr e hea t sy mbol is hi g hlig h ted in th e di spla y .
PRESS THE CHEF FUNCTION KEY.
Pr e s s t h e u p
or r o t a t e t h e a d j u s t me n t kn o b t o s e l e c t
“Y ES ” f o r t h e Pr e h e a t fu n ct i o n .
PRESS THE CHEF FUNCTION KEY TO CONFIRM THE SETTING.
THE OVEN W I L L BEGIN THE PREHE AT FUNCTION.
The set preheat temperature will appear in the display.
The set preheat time will appear in the display.
The preheat symbol will appear in the display.
Wh e n th e s e t t i m e a n d te m pe r a t u r e ha v e b e e n r e a c h e d , a b u z z e r w i l l s ou n d i n d i c a t i ng t h e
en d o f th e pr e he a t fu n ct i o n .
• To stop the buzzer, press the start/stop key or open the oven door.
LL
an d d o w n MMar r o w k e y s
Preheating
46 .
HOT STEAM CAUSES BURNS
RO TAT E TH E D O O R H A N D L E T O T H E
FIR S T O P E N R O TAT I O N POSITION ON LY.
STAND BACK AND WAIT UNTIL THE STEAM IS
VENTED BEFORE FULLY OPENING THE DOOR.
P R E H E A T I N G I N S T R U C T I O N S
Page 50

PROD UCT
➤
RE HEAT T HE O VEN B EF O RE C OOK ING M OD E OPE RATI O N
P
C O M B I T H E R M OV E N P R O C E D U R E
French bread dough, frozen: Approximately
9-1/2 oz (553 gm) per loaf*
1
FAN SP EED
Full Speed
MATERIAL S
➤
PRODUCT
PREPARATION
➤
B R E A D
— F r e n c h
Stainless steel or aluminum sheet pans
Baking pan liners
Place dough on sheet p ans lined with
parchment pa per or in loaf pans of
suitable siz e.
TIMER
P R ES S
STA R T
OVEN MODE
Combinati on
COOKI NG TEMPERATURE
350° to 400°F (177° to 204°C)
S E L E CT CO OK I N G T IM E
Press and Set T I M E R
AP PROX IMAT E C OOK TIM E
20 to 25 minutes* n/a
USE APPROXIM ATE C OOKIN G T IM E S HOWN
FOR FULL OR PARTIAL LOA DS
O R
FI NAL IN TER NAL
TE MPE RATU R E
➤
MODEL
6•10
MODEL
7•14
MODEL
10•10
MODEL
10•18
10•20
➤
Sli t t op o f l oa v es wi th a 1/ 8"
(3m m ) de e p di a gon al cu t
app r oxi mat ely 2 " ( 51 m m) a p art .
Load proofed loaves in preheated oven.
MA X I M U M C A PAC I T Y
3 half-size sheet pans
(3 GN 1/ 1)
3 full-size sheet pans
(3 GN 2/ 1)
5 half-size sheet pans
(6 GN 1/ 1)
5 full-size sheet pans
(5 GN 2/ 1)
SE L E C T I N T E R N A L C O R E T E MP ER AT U RE
CO R E
TE M P
Pr e s s a n d S e t C O R E T E M P
AP PR OX IM AT E COR E
CU T-O F F T EMP ER ATU R E
AP PR OX IM AT E
TE MP ERA T UR E OVE RR I D E
n/a n/a
P R ES S
STA R T
Ti m e a n d temperat u r e s e t t i n gs a r e s u g g e s ted g u i d e l i n e s only. D u e t o
variatio n s i n p r o d u c t q u a l i t y , w e i g h t , a n d d e s i r e d d e gree of donenes s t h e
controls ma y requ i r e so m e a d j u s t m e n t from th e time an d tempe r a t u r e s
shown. A l l c ooking s h o u l d be b a s e d o n i n t e r n a l pro d u c t t e m p e r a t ures.
S T O P T H E C O O K I N G F U N C T I O N A T A N Y
T I M E B Y P R E S S I N G T H E S T O P K E Y .
B A K E R Y
MODEL
12•18
12•20
MODEL
20•20
PA N
SI Z E S
➤
NOT E S
➤
6 full-size sheet pans
(6 GN 2/ 1)
10 full-size sheet pans
(10 GN 2 /1)
Half-Size sheet pans: 18" x 13" x 1"
Full-Size sheet pans: 18" x 26" x 1"
Gastronorm 1/1: 530 x 325 x 20mm
Gastronorm 2/1: 530 x 650 x 20mm
* Manufact ured product variatio n in
dough type and density may requi re
adjustmen t t o the cooking time shown
above. Loaf size variation may
increase or decrease capacities shown.
4.
Page 51

B R E A D
— F r u i t
PROD UCT
➤
C O M B I T H E R M OV E N P R O C E D U R E
Fruit bread batter
PR EHE AT THE OVE N BE F OR E COO KIN G MO D E OP ERAT I ON
MATERIAL S
➤
Loaf pans
egetable rel ease spray
V
TIMER
FAN SP EED
Full Speed
OVEN MODE
Combinati on
COOKI NG TEMPERATURE
300°F (150°C )
S E L E CT CO OK I N G T IM E
Press and Set T I M E R
AP PROX IMAT E C OOK TIM E
FI NAL IN TER NAL
TE MPE RATU R E
50 to 60 minutes n/a
PRODUCT
PREPARATION
➤
➤
➤
MODEL
6•10
MODEL
7•14
MODEL
10•10
Prepare batter or a commercial mix
according to manufacturer's instructions.
Spray pans with vegetable release spray.
Pour batter into pans to approximately
one-half the pan depth.
Load pans in a preheated oven
directly on the wire shelves.
MA X I M U M C A PAC I T Y
6 loaves
2 shelves
24 loaves
3 shelves
15 loaves
5 shelves
P R ES S
STA R T
USE APPROXIM ATE C OOKIN G T IM E S HOW N
FOR FULL OR PARTIAL LOA DS
O R
SE L E C T I N T E R N A L C O R E T E MP ER AT U RE
CO R E
TE M P
P R ES S
STA R T
Ti m e a n d temperat u r e s e t t i n gs a r e s u g g e s ted g u i d e l i n e s only. D u e t o
variatio n s i n p r o d u c t q u a l i t y , w e i g h t , a n d d e s i r e d d e gree of donenes s t h e
controls ma y requ i r e so m e a d j u s t m e n t from th e time an d tempe r a t u r e s
shown. A l l c ooking s h o u l d be b a s e d o n i n t e r n a l pro d u c t t e m p e r a t ures.
S T O P T H E C O O K I N G F U N C T I O N A T A N Y
T I M E B Y P R E S S I N G T H E S T O P K E Y .
Pr e s s a n d S e t C O R E T E M P
AP PR OX IM AT E COR E
CU T-O F F T EMP ER ATU R E
AP PR OX IM AT E
TE MP ERA T UR E OVE RR I D E
n/a n/a
MODEL
10•18
10•20
MODEL
12•18
12•20
MODEL
20•20
PA N
SI Z E S
➤
NOT E S
➤
40 loaves
5 shelves
48 loaves
6 shelves
80 loaves
10 shelves
Loaf pans:
4-1/4" x 8-1/2" x 3-1/8" deep — 3 lb
(108mm x 216mm x 79mm deep — 1,4 kg)
Lo a f pa n s i z e v a r i a ti o n ma y
in c r e a s e or d e c r e as e c a p a c i t i e s
sh o w n a n d m ay r e q u i r e a n
ad j u s t m e n t t o t h e c o ok i n g t i m e .
48 .
B A K E R Y
Page 52

PROD UCT
➤
PR EHE AT THE OVE N BE F OR E COO KIN G MO D E OP ERAT I ON
C O M B I T H E R M OV E N P R O C E D U R E
BREAD DOUGH:
Sour Dough, Whole Wheat, Multi Grain, etc.
2 lb (c 1 kg) per loa f, fresh or frozen
MATERIAL S
➤
B R E A D
— V a r i o u s
Loaf pans or sheet pans for country loaf
egetable rel ease spray
V
PT I O NAL FO R C O UNTRY LOAF
O
Pan liners or corn meal
:
TIMER
FAN SP EED
Full Speed
OVEN MODE
Combinati on
COOKI NG TEMPERATURE
340° to 375°F (171° to 19 1°C)
S E L E CT CO OK I N G T IM E
Press and Set T I M E R
AP PROX IMAT E C OOK TIM E
FI NAL IN TER NAL
TE MPE RATU R E
20 to 25 mi nutes n/a
PRODUCT
PREPARATION
➤
➤
➤
MODEL
6•10
MODEL
7•14
MODEL
10•10
Spray loaf pans with vegetable release
spray or use pan liners or cornmeal if
using sheet pans.
Pl a c e l o a v e s i n pa n s a n d p ro o f
do u g h a s r e q u i r e d .
Lo a d pr o of e d do u gh p a n s i n a
pr e h e a t e d o v e n.
MA X I M U M C A PAC I T Y
6 loaves
2 shelves
18 loaves
3 shelves
9 loaves
3 shelves
P R ES S
STA R T
USE APPROXIM ATE C OOKIN G T IM E S HOWN
FOR FULL OR PARTIAL LOA DS
O R
SE L E C T I N T E R N A L C O R E T E MP ER AT U RE
CO R E
TE M P
P R ES S
STA R T
Ti m e a n d temperat u r e s e t t i n gs a r e s u g g e s ted g u i d e l i n e s only. D u e t o
variatio n s i n p r o d u c t q u a l i t y , w e i g h t , a n d d e s i r e d d e gree of donenes s t h e
controls ma y requ i r e so m e a d j u s t m e n t from th e time an d tempe r a t u r e s
shown. A l l c ooking s h o u l d be b a s e d o n i n t e r n a l pro d u c t t e m p e r a t ures.
S T O P T H E C O O K I N G F U N C T I O N A T A N Y
T I M E B Y P R E S S I N G T H E S T O P K E Y .
Pr e s s a n d S e t C O R E T E M P
AP PR OX IM AT E COR E
CU T-O F F T EMP ER ATU R E
AP PR OX IM AT E
TE MP ERA T UR E OVE RR I D E
n/a n/a
MODEL
10•18
10•20
MODEL
12•18
12•20
MODEL
20•20
PA N
SI Z E S
➤
NOT E S
➤
18 loaves
3 shelves
24 loaves
4 shelves
36 loaves
6 shelves
Loaf pans:
10-3/8" x 5-1/2" x 4" deep — 6 lb capacity
(264mm x 140mm x 102mm — 2,7 kg)
Dough type and loaf pa n s ize variation
may increase or decrease capa cities
shown and may require an adjustm ent
to the c ooking time.
B A K E R Y
49 .
Page 53

B R OW N I E S
PROD UCT
➤
Brownie batt er
PR EHE AT THE OVE N BE F OR E COO KIN G MO D E OP ERAT I ON
C O M B I T H E R M OV E N P R O C E D U R E
MATERIAL S
Stainless steel or aluminum sheet pans
➤
Vegetabl e r elease spray
TIMER
FAN SP EED
Reduced Spee d
OVEN MODE
Convectio n
COOKI NG TEMPERATURE
325° to 340°F (163° to 17 1°C)
S E L E CT CO OK I N G T IM E
Press and Set T I M E R
AP PROX IMAT E C OOK TIM E
FI NAL IN TER NAL
TE MPE RATU R E
20 to 40 minutes n/a
PRODUCT
PREPARATION
➤
➤
➤
MODEL
6•10
MODEL
7•14
MODEL
10•10
Prepare brownie batter or a
commercial m ix according to
manufactu rer's instructions.
Spray pans with vegetable release spray.
Spread batte r e venly in pans and
load pans in preheated oven.
MA X I M U M C A PAC I T Y
6 half-size sheet pans
(6 GN 1/ 1)
7 full-size sheet pans
(7 GN 2/ 1)
10 half-size sheet pans
(10 GN 1 /1)
P R ES S
STA R T
USE APPROXIM ATE C OOKIN G T IM E S HOW N
FOR FULL OR PARTIAL LOA DS
O R
SE L E C T I N T E R N A L C O R E T E MP ER AT U RE
CO R E
TE M P
P R ES S
STA R T
Ti m e a n d temperat u r e s e t t i n gs a r e s u g g e s ted g u i d e l i n e s only. D u e t o
variatio n s i n p r o d u c t q u a l i t y , w e i g h t , a n d d e s i r e d d e gree of donenes s t h e
controls ma y requ i r e so m e a d j u s t m e n t from th e time an d tempe r a t u r e s
shown. A l l c ooking s h o u l d be b a s e d o n i n t e r n a l pro d u c t t e m p e r a t ures.
S T O P T H E C O O K I N G F U N C T I O N A T A N Y
T I M E B Y P R E S S I N G T H E S T O P K E Y .
Pr e s s a n d S e t C O R E T E M P
AP PR OX IM AT E COR E
CU T-O F F T EMP ER ATU R E
AP PR OX IM AT E
TE MP ERA T UR E OVE RR I D E
n/a n/a
MODEL
10•18
10•20
MODEL
12•18
12•20
MODEL
20•20
PA N
SI Z E S
➤
NOT E S
➤
10 full-size sheet pans
(10 GN 2 /1)
12 full-size sheet pans
(12 GN 2 /1)
20 full-size sheet pans
(20 GN 2 /1)
Half-size sh eet pans: 18" x 13" x 1"
Full-size sh eet pans: 18" x 26" x 1"
Gastronor m 1/1: 530 x 325 x 20mm
Gastronor m 2/1: 530 x 650 x 20mm
50 .
B A K E R Y
Page 54

PROD UCT
➤
PR EHE AT THE OVE N BE F OR E COO KIN G MO D E OP ERAT I ON
C O M B I T H E R M OV E N P R O C E D U R E
Cookie dough, fresh or frozen
FAN SP EED
Full Speed
MATERIAL S
➤
PRODUCT
PREPARATION
➤
C O O K I E S
Stainless steel or aluminum steel pans
Baking pan liners or v egetable
release spra y
Place cookie dough portion s on lined
or sprayed pans.
Load pans in preheated oven.
OVEN MODE
Convectio n
COOKI NG TEMPERATURE
300° to 340°F (150° to 17 1°C)
S E L E CT CO OK I N G T IM E
TIMER
Press and Set T I M E R
AP PROX IMAT E C OOK TIM E
12 to 15 mi nutes n/a
P R ES S
STA R T
USE APPROXIM ATE C OOKIN G T IM E S HOWN
FOR FULL OR PARTIAL LOA DS
O R
SE L E C T I N T E R N A L C O R E T E MP ER AT U RE
CO R E
TE M P
Pr e s s a n d S e t C O R E T E M P
AP PR OX IM AT E COR E
CU T-O F F T EMP ER ATU R E
TE MP ERA T UR E OVE RR I D E
n/a n/a
FI NAL IN TER NAL
TE MPE RATU R E
AP PR OX IM AT E
➤
MODEL
6•10
MODEL
7•14
MODEL
10•10
MODEL
10•18
10•20
MODEL
12•18
12•20
MODEL
20•20
➤
NOTE : Various cookie varieties can
be baked at the same time .
MA X I M U M C A PAC I T Y
6 half-size pans
(6 GN 1/ 1)
7 full-size sheet pans
(7 GN 2/ 1)
10 half-size sheet pans
(10 GN 1 /1)
10 full-size sheet pans
(10 GN 2 /1)
12 full-size sheet pans
(12 GN 2 /1)
20 full-size sheet pans
(20 GN 2 /1)
P R ES S
STA R T
Ti m e a n d temperat u r e s e t t i n gs a r e s u g g e s ted g u i d e l i n e s only. D u e t o
variatio n s i n p r o d u c t q u a l i t y , w e i g h t , a n d d e s i r e d d e gree of donenes s t h e
controls ma y requ i r e so m e a d j u s t m e n t from th e time an d tempe r a t u r e s
shown. A l l c ooking s h o u l d be b a s e d o n i n t e r n a l pro d u c t t e m p e r a t ures.
S T O P T H E C O O K I N G F U N C T I O N A T A N Y
T I M E B Y P R E S S I N G T H E S T O P K E Y .
B A K E R Y
PA N
SI Z E S
➤
NOT E S
➤
Half-size sh eet pans: 18" x 13" x 1"
Full-size sheet pans: 18" x 26" x 1"
Gastronor m 1/1: 530 x 325 x 20mm
Gastronor m 2/1: 530 x 650 x 20mm
When using baking pan liners, fold each of
the four cor ners in toward the bottom of
the sheet pan to prevent the force of the
fan from blowing the liner over the product.
51 .
Page 55

C R O I S S A N T S
PROD UCT
➤
roissant dou gh: 2.4 oz. (68 gm) each
C
FAN SP EED
PR EHE AT THE OVE N BE F OR E COO KIN G MO D E OP ERAT I ON
C O M B I T H E R M OV E N P R O C E D U R E
MATERIAL S
PRODUCT
PREPARATION
Stainless steel or aluminum sheet pans
➤
Baking pan liners* or vegetable
release spra y
gg wash (optional)
E
Place croiss ant dough on line d or
➤
sprayed pans and proof as requir ed.
TIMER
P R ES S
STA R T
Full Speed
OVEN MODE
Combinati on
COOKI NG TEMPERATURE
350°F (177°C )
S E L E CT CO OK I N G T IM E
Press and Set T I M E R
AP PROX IMAT E C OOK TIM E
FI NAL IN TER NAL
TE MPE RATU R E
15 to 20 minutes n/a
USE APPROXIM ATE C OOKIN G T IM E S HOW N
FOR FULL OR PARTIAL LOA DS
O R
➤
MODEL
6•10
MODEL
7•14
MODEL
10•10
MODEL
10•18
10•20
➤
Brush dough with egg wash if desired.
Load pans in preheated oven.
MA X I M U M C A PAC I T Y
3 half-size sheet pans
(3 GN 1/ 1)
3 full-size sheet pans
(3 GN 2/ 1)
5 half-size sheet pans
(5 GN 1/ 1)
5 full-size sheet pans
(5 GN 2/ 1)
SE L E C T I N T E R N A L C O R E T E MP ER AT U RE
CO R E
TE M P
Pr e s s a n d S e t C O R E T E M P
AP PR OX IM AT E COR E
CU T-O F F T EMP ER ATU R E
AP PR OX IM AT E
TE MP ERA T UR E OVE RR I D E
n/a n/a
P R ES S
STA R T
Ti m e a n d temperat u r e s e t t i n gs a r e s u g g e s ted g u i d e l i n e s only. D u e t o
variatio n s i n p r o d u c t q u a l i t y , w e i g h t , a n d d e s i r e d d e gree of donenes s t h e
controls ma y requ i r e so m e a d j u s t m e n t from th e time an d tempe r a t u r e s
shown. A l l c ooking s h o u l d be b a s e d o n i n t e r n a l pro d u c t t e m p e r a t ures.
S T O P T H E C O O K I N G F U N C T I O N A T A N Y
T I M E B Y P R E S S I N G T H E S T O P K E Y .
52 .
B A K E R Y
MODEL
12•18
12•20
MODEL
20•20
PA N
SI Z E S
➤
NOT E S
➤
6 full-size sheet pans
(6 GN 2/ 1)
10 full-size sheet pans
(10 GN 2/1)
Half-size sh eet pans: 18" x 13" x 1"
Full-size sh eet pans: 18" x 26" x 1"
Gastronor m 1/1: 530 x 325 x 20mm
Gastronor m 2/1: 530 x 650 x 20mm
When using baking pan liners, fold each of
the four cor ners in toward the bottom of
the sheet pan to prevent the force of the
fan from blowing the liner over the product.
Page 56

PROD UCT
➤
PR EHE AT THE OVE N BE F OR E COO KIN G MO D E OP ERAT I ON
C O M B I T H E R M OV E N P R O C E D U R E
Danish pastr y dough
MATERIAL S
➤
D A N I S H PA S T RY
Stainless steel or aluminum sheet pans
aking pan liners or vegetable spray
B
Fruit fillin g or egg w ash (optional)
TIMER
FAN SP EED
Full Speed
OVEN MODE
Combinati on
COOKI NG TEMPERATURE
350°F (177°C )
S E L E CT CO OK I N G T IM E
Press and Set T I M E R
AP PROX IMAT E C OOK TIM E
15 minutes n/a
FI NAL IN TER NAL
TE MPE RATU R E
PRODUCT
PREPARATION
➤
➤
➤
MODEL
6•10
MODEL
7•14
MODEL
10•10
Prepare dough a ccordin g to the
instructi ons.
Portion doug h on lined or sprayed
pans and proof as required.
Add optional fruit filling in the
center of each Danish.
Br u s h e a c h Da n i s h w it h e g g w a s h
if d e s i r e d a n d l o a d p a n s i n
pr e h e a t e d o v e n.
MA X I M U M C A PAC I T Y
3 half-size sheet pans
(3 GN 1/ 1)
4 full-size sheet pans
(4 GN 2/ 1)
5 half-size sheet pans
(5 GN 1/ 1)
P R ES S
STA R T
USE APPROXIM ATE C OOKIN G T IM E S HOWN
FOR FULL OR PARTIAL LOA DS
O R
SE L E C T I N T E R N A L C O R E T E MP ER AT U RE
CO R E
TE M P
P R ES S
STA R T
Ti m e a n d temperat u r e s e t t i n gs a r e s u g g e s ted g u i d e l i n e s only. D u e t o
variatio n s i n p r o d u c t q u a l i t y , w e i g h t , a n d d e s i r e d d e gree of donenes s t h e
controls ma y requ i r e so m e a d j u s t m e n t from th e time an d tempe r a t u r e s
shown. A l l c ooking s h o u l d be b a s e d o n i n t e r n a l pro d u c t t e m p e r a t ures.
S T O P T H E C O O K I N G F U N C T I O N A T A N Y
T I M E B Y P R E S S I N G T H E S T O P K E Y .
Pr e s s a n d S e t C O R E T E M P
AP PR OX IM AT E COR E
CU T-O F F T EMP ER ATU R E
AP PR OX IM AT E
TE MP ERA T UR E OVE RR I D E
n/a n/a
B A K E R Y
MODEL
10•18
10•20
MODEL
12•18
12•20
MODEL
20•20
PA N
SI Z E S
➤
NOT E S
➤
5 full-size sheet pans
(5 GN 2/ 1)
6 full-size sheet pans
(6 GN 2/ 1)
10 full-size sheet pans
(10 GN 2 /1)
Half-size sh eet pans: 18" x 13" x 1"
Full-size sheet pans: 18" x 26" x 1"
Gastronor m 1/1: 530 x 325 x 20mm
Gastronor m 2/1: 530 x 650 x 20mm
If desired, frost Danish when cool.
When using baking pan liners, fold each of
the four cor ners in toward the bottom of
the sheet pan to prevent the force of the
fan from blowing the liner over the product.
53 .
Page 57

M U F F I N S
PROD UCT
➤
M
uffin batter
PR EHE AT THE OVE N BE F OR E COO KIN G MO D E OP ERAT I ON
C O M B I T H E R M OV E N P R O C E D U R E
MATERIAL S
Muffin cupca ke pans
➤
Paper muffin cups
r
o
Vegetabl e r elease spray
TIMER
P R ES S
STA R T
FAN SP EED
Reduced Spee d
OVEN MODE
Convectio n
COOKI NG TEMPERATURE
325°F (163°C )
S E L E CT CO OK I N G T IM E
Press and Set T I M E R
AP PROX IMAT E C OOK TIM E
3-1/2 oz (100 gm)
muffins
15 minutes
4-1/2 oz (130 gm)
muffins
20-25 minute s
USE APPROXIM ATE C OOKIN G T IM E S HOW N
FOR FULL OR PARTIAL LOA DS
O R
FI NAL IN TER NAL
TE MPE RATU R E
n/a
n/a
PRODUCT
PREPARATION
➤
➤
➤
MODEL
6•10
MODEL
7•14
MODEL
10•10
MODEL
10•18
10•20
Prepare batter or a commercial mix
according to manufacturer's instructions.
Spray muffin cups with vegetable
release spray or line with pap er cups.
Pour batter in pans, o ne-half to threefourth the c up depth.
Load pans in p reheated oven direct ly
on w ire shelves.
MA X I M U M C A PAC I T Y
36 muffins
3 shelves
72 muffins
3 shelves
60 muffins
5 shelves
120 muffins
5 shelves
SE L E C T I N T E R N A L C O R E T E MP ER AT U RE
CO R E
TE M P
Pr e s s a n d S e t C O R E T E M P
AP PR OX IM AT E COR E
CU T-O F F T EMP ER ATU R E
AP PR OX IM AT E
TE MP ERA T UR E OVE RR I D E
n/a n/a
P R ES S
STA R T
Ti m e a n d temperat u r e s e t t i n gs a r e s u g g e s ted g u i d e l i n e s only. D u e t o
variatio n s i n p r o d u c t q u a l i t y , w e i g h t , a n d d e s i r e d d e gree of donenes s t h e
controls ma y requ i r e so m e a d j u s t m e n t from th e time an d tempe r a t u r e s
shown. A l l c ooking s h o u l d be b a s e d o n i n t e r n a l pro d u c t t e m p e r a t ures.
S T O P T H E C O O K I N G F U N C T I O N A T A N Y
T I M E B Y P R E S S I N G T H E S T O P K E Y .
54 .
B A K E R Y
MODEL
12•18
12•20
MODEL
20•20
PA N
SI Z E S
➤
NOT E S
➤
144 muffins
6 shelves
240 muffins
10 shelves
*Muffin pan: 10-3/4" x 14-1/8" x 1-3/8"
2-3/4" diameter cup — 12 cups per PAN
(273mm x 359mm x 35mm)
(70mm diamet er cup)
* Ca p a ci t y va r ie s d u e t o v a r i e t y a n d
si z e of m u f f i n pa n s . C u p s i z e
va r i a t i o n s m a y r e q u i r e a d j u s t m e n t
to c o o k i n g t i m e .
Page 58

PROD UCT
➤
PR EHE AT THE OVE N BE F OR E COO KIN G MO D E OP ERAT I ON
C O M B I T H E R M OV E N P R O C E D U R E
ruit pie, froze n: 9" (c. 229mm) diameter
F
MATERIAL S
➤
P I E
— F r u i t
Stainless steel or aluminum sheet pans
Egg wash (optional)
TIMER
P R ES S
STA R T
FAN SP EED
Full Speed
OVEN MODE
Combinati on
COOKI NG TEMPERATURE
340° to 350°F (171° to 17 7°C)
S E L E CT CO OK I N G T IM E
Press and Set T I M E R
AP PROX IMAT E C OOK TIM E
FI NAL IN TER NAL
TE MPE RATU R E
FROM FROZEN
40 to 45 mi nutes
THAWED*
15 to 20 mi nutes
FRESH*
30 to 40 mi nutes
USE APPROXIM ATE C OOKIN G T IM E S HOWN
FOR FULL OR PARTIAL LOA DS
O R
n/a
PRODUCT
PREPARATION
➤
➤
➤
MODEL
6•10
MODEL
7•14
MODEL
10•10
MODEL
10•18
10•20
If the p ies are not vente d, cut 6
small slits in the top of each pie.
Brush the top of each pie with egg
wash if desired .
Place pies on sheet pa ns to protect
from boil-ov er.
Load pans into preheated oven .
MA X I M U M C A PAC I T Y
6 pies
3 half-size sheet pans
(3 GN 1/ 1)
12 pies
3 full-size sheet pans
(3 GN 2/ 1)
10 pies
5 half-size sheet pans
(5 GN 1/ 1)
20 pies
5 full-size sheet pans
(5 GN 2/ 1)
SE L E C T I N T E R N A L C O R E T E MP ER AT U RE
CO R E
TE M P
Pr e s s a n d S e t C O R E T E M P
AP PR OX IM AT E COR E
CU T-O F F T EMP ER ATU R E
AP PR OX IM AT E
TE MP ERA T UR E OVE RR I D E
n/a n/a
P R ES S
STA R T
Ti m e a n d temperat u r e s e t t i n gs a r e s u g g e s ted g u i d e l i n e s only. D u e t o
variatio n s i n p r o d u c t q u a l i t y , w e i g h t , a n d d e s i r e d d e gree of donenes s t h e
controls ma y requ i r e so m e a d j u s t m e n t from th e time an d tempe r a t u r e s
shown. A l l c ooking s h o u l d be b a s e d o n i n t e r n a l pro d u c t t e m p e r a t ures.
S T O P T H E C O O K I N G F U N C T I O N A T A N Y
T I M E B Y P R E S S I N G T H E S T O P K E Y .
B A K E R Y
MODEL
12•18
12•20
MODEL
20•20
PA N
SI Z E S
➤
NOT E S
➤
24 pies
6 full-size sheet pans
(6 GN 2/ 1)
40 pies
10 full-size sheet pans
(10 GN 2 /1)
Half-size sh eet pans: 18" x 13" x 1"
Full-size sheet pans: 18" x 26" x 1"
Gastronor m 1/1: 530 x 325 x 20mm
Gastronor m 2/1: 530 x 650 x 20mm
* A n a d j u s t m en t m u s t b e ma d e t o
th e c o o k i n g t i m e i f p i e s a r e f r e s h
or f u l l y t h aw e d .
55 .
Page 59

P R O O F I N G
— B r e a d D o u g h
PROD UCT
➤
Bread dough: va rious
PR EHE AT THE OVE N BE F OR E COO KIN G MO D E OP ERAT I ON
C O M B I T H E R M OV E N P R O C E D U R E
MATERIAL S
➤
Sheet pans with baking pan liners
(parchment p aper)
r
o
Loaf pans
TIMER
FAN SP EED
Reduced Spee d
OVEN MODE
Low Tempera ture Steam
COOKI NG TEMPERATURE
90° to 1 00°F (32° to 38°C )
S E L E CT CO OK I N G T IM E
Press and Set T I M E R
AP PROX IMAT E C OOK TIM E
FI NAL IN TER NAL
TE MPE RATU R E
15 to 45 minutes
DE P E N DING O N S IZE n/a
PRODUCT
PREPARATION
➤
➤
➤
MODEL
6•10
MODEL
7•14
MODEL
10•10
Place dough on sheet p ans lined with
parchment pa per or in loaf pans of
suitable siz e.
Load pans in preheated oven.
MA X I M U M C A PAC I T Y
S E E I N DI V I D U A L P R O D U C T
I N S T R U C T I O N S F O R
P R ES S
STA R T
USE APPROXIM ATE C OOKIN G T IM E S HOW N
FOR FULL OR PARTIAL LOA DS
O R
SE L E C T I N T E R N A L C O R E T E MP ER AT U RE
CO R E
TE M P
P R ES S
STA R T
Ti m e a n d temperat u r e s e t t i n gs a r e s u g g e s ted g u i d e l i n e s only. D u e t o
variatio n s i n p r o d u c t q u a l i t y , w e i g h t , a n d d e s i r e d d e gree of donenes s t h e
controls ma y requ i r e so m e a d j u s t m e n t from th e time an d tempe r a t u r e s
shown. A l l c ooking s h o u l d be b a s e d o n i n t e r n a l pro d u c t t e m p e r a t ures.
S T O P T H E C O O K I N G F U N C T I O N A T A N Y
T I M E B Y P R E S S I N G T H E S T O P K E Y .
Pr e s s a n d S e t C O R E T E M P
AP PR OX IM AT E COR E
CU T-O F F T EMP ER ATU R E
AP PR OX IM AT E
TE MP ERA T UR E OVE RR I D E
n/a n/a
MODEL
10•18
10•20
MODEL
12•18
12•20
MODEL
20•20
PA N
SI Z E S
➤
NOT E S
➤
R E C O M M E N D E D PA N S I Z E S
A N D P R OD U C T C A PA C I T I E S
* Proofing time va ries with the typ e or
size of product . If using a
manufactu red produc t, follow
manufactu rer's instructions fo r
proofing tim e.
56 .
B A K E R Y
Page 60

P U F F PA S T R Y
C O M B IT H E RM O VE N P R O C E DU R E
FOLLOW OVEN PREPARATION AND PREHEAT INSTRUCTIONS AT THE BEGINNING OF THIS SECTION
PROD UCT
➤
Puff pastry dough
MATERIAL S
➤
Stainless steel or aluminum sheet pans
Baking pan liners
Fruit or savory filling (optional)
Egg wash (optional)
TIMER
P R ES S
STA R T
FAN SP EED
Full Speed
OVEN MODE
Combinati on
COOKI NG TEMPERATURE
350°F (177°C )
S E L E CT CO OK I N G T IM E
Press and Set T I M E R
AP PROX IMAT E C OOK TIM E
3 oz (85 gm)
FI L L ED PASTR Y
15 minutes
3 oz (85 gm)
UN F I LLED
10 to 12 mi nutes
USE APPROXIM ATE C OOKIN G T IM E S HOWN
FOR FULL OR PARTIAL LOA DS
O R
FI NAL IN TER NAL
TE MPE RATU R E
n/a
PRODUCT
PREPARATION
➤
➤
➤
MODEL
6•10
MODEL
7•14
MODEL
10•10
MODEL
10•18
10•20
Prepare dough a ccordin g to
manufactu rer's instructions.
Place dough on lined p ans.
Add optional fruit or savory filling.
Brush dough with egg wash if desired
and place pans in preheated oven.
MA X I M U M C A PAC I T Y
3 half-size sheet pans
(3 GN 1/ 1)
3 full-size sheet pans
(3 GN 2/ 1)
5 half-size sheet pans.
(5 GN 1/ 1)
5 full-size sheet pans
(5 GN 2/ 1)
SE L E C T I N T E R N A L C O R E T E MP ER AT U RE
CO R E
TE M P
Pr e s s a n d S e t C O R E T E M P
AP PR OX IM AT E COR E
CU T-O F F T EMP ER ATU R E
AP PR OX IM AT E
TE MP ERA T UR E OVE RR I D E
n/a n/a
P R ES S
STA R T
Ti m e a n d temperat u r e s e t t i n gs a r e s u g g e s ted g u i d e l i n e s only. D u e t o
variatio n s i n p r o d u c t q u a l i t y , w e i g h t , a n d d e s i r e d d e gree of donenes s t h e
controls ma y requ i r e so m e a d j u s t m e n t from th e time an d tempe r a t u r e s
shown. A l l c ooking s h o u l d be b a s e d o n i n t e r n a l pro d u c t t e m p e r a t ures.
S T O P T H E C O O K I N G F U N C T I O N A T A N Y
T I M E B Y P R E S S I N G T H E S T O P K E Y .
B A K E R Y
MODEL
12•18
12•20
MODEL
20•20
PA N
SI Z E S
➤
NOT E S
➤
6 full-size sheet pans
(6 GN 2/ 1)
10 full-size sheet pans
(10 GN 2 /1)
Half-size sh eet pans: 18" x 13" x 1"
Full-size sheet pans: 18" x 26" x 1"
Gastronor m 1/1: 530 x 325 x 20mm
Gastronor m 2/1: 530 x 650 x 20mm
When using baking pan liners, fold each of
the four cor ners in toward the bottom of
the sheet pan to prevent the force of the
fan from blowing the liner over the product.
57 .
Page 61

R O L L S
— C i n n a m o n
PROD UCT
➤
Cinnamon roll dough:
5 oz (142 gm) per roll
FAN SP EED
PR EHE AT THE OVE N BE F OR E COO KIN G MO D E OP ERAT I ON
C O M B I T H E R M OV E N P R O C E D U R E
MATERIAL S
PRODUCT
PREPARATION
Stainless steel or aluminum sheet pans
➤
Baking pan liners
Place dough on lined p ans and proof
➤
as required.
TIMER
P R ES S
STA R T
Full Speed
OVEN MODE
Combinati on
COOKI NG TEMPERATURE
350°F (177°C )
S E L E CT CO OK I N G T IM E
Press and Set T I M E R
AP PROX IMAT E C OOK TIM E
20 minutes n/a
USE APPROXIM ATE C OOKIN G T IM E S HOW N
FOR FULL OR PARTIAL LOA DS
O R
FI NAL IN TER NAL
TE MPE RATU R E
➤
MODEL
6•10
MODEL
7•14
MODEL
10•10
MODEL
10•18
10•20
➤
Load pans in preheated oven.
MA X I M U M C A PAC I T Y
3 half-size sheet pans
(3 GN 1/ 1)
3 full-size sheet pans
(3 GN 2/ 1)
5 half-size sheet pans
(5 GN 1/ 1)
5 full-size sheet pans
(5 GN 2/ 1)
SE L E C T I N T E R N A L C O R E T E MP ER AT U RE
CO R E
TE M P
Pr e s s a n d S e t C O R E T E M P
AP PR OX IM AT E COR E
CU T-O F F T EMP ER ATU R E
AP PR OX IM AT E
TE MP ERA T UR E OVE RR I D E
n/a n/a
P R ES S
STA R T
Ti m e a n d temperat u r e s e t t i n gs a r e s u g g e s ted g u i d e l i n e s only. D u e t o
variatio n s i n p r o d u c t q u a l i t y , w e i g h t , a n d d e s i r e d d e gree of donenes s t h e
controls ma y requ i r e so m e a d j u s t m e n t from th e time an d tempe r a t u r e s
shown. A l l c ooking s h o u l d be b a s e d o n i n t e r n a l pro d u c t t e m p e r a t ures.
S T O P T H E C O O K I N G F U N C T I O N A T A N Y
T I M E B Y P R E S S I N G T H E S T O P K E Y .
58 .
B A K E R Y
MODEL
12•18
12•20
MODEL
20•20
PA N
SI Z E S
➤
NOT E S
➤
6 full-size sheet pans
(6 GN 2/ 1)
10 full-size sheet pans
(10 GN 2 /1)
Half-size sh eet pans: 18" x 13" x 1"
Full-size sh eet pans: 18" x 26" x 1"
Gastronor m 1/1: 530 x 325 x 20mm
Gastronor m 2/1: 530 x 650 x 20mm
Frost rolls when cool if desired.
When using baking pan liners, fold each of
the four cor ners in toward the bottom of
the sheet pan to prevent the force of the
fan from blowing the liner over the product.
Page 62

PROD UCT
➤
PR EHE AT THE OVE N BE F OR E COO KIN G MO D E OP ERAT I ON
C O M B I T H E R M OV E N P R O C E D U R E
Dinner roll dough:
3 to 4 oz (85 to 113 gm) per roll
FAN SP EED
MATERIAL S
➤
PRODUCT
PREPARATION
➤
R O L L S
— D i n n e r
Stainless steel or aluminum sheet pans
Baking pan liners
Egg wash (optional)
Place rolls on lined pans and proof
as required.
TIMER
P R ES S
STA R T
Full Speed
OVEN MODE
Combinati on
COOKI NG TEMPERATURE
350°F (177°C )
S E L E CT CO OK I N G T IM E
Press and Set T I M E R
AP PROX IMAT E C OOK TIM E
10 minutes n/a
USE APPROXIM ATE C OOKIN G T IM E S HOWN
FOR FULL OR PARTIAL LOA DS
O R
FI NAL IN TER NAL
TE MPE RATU R E
➤
MODEL
6•10
MODEL
7•14
MODEL
10•10
MODEL
10•18
10•20
➤
Brush rolls wit h egg wash if desired.
Load proofed rolls in preheated oven.
MA X I M U M C A PAC I T Y
3 half-size sheet pans
(3 GN 1/ 1)
3 full-size sheet pans
(3 GN 2/ 1)
5 half-size sheet pans
(5 GN 1/ 1)
5 full-size sheet pans
(5 GN 2/ 1)
SE L E C T I N T E R N A L C O R E T E MP ER AT U RE
CO R E
TE M P
Pr e s s a n d S e t C O R E T E M P
AP PR OX IM AT E COR E
CU T-O F F T EMP ER ATU R E
AP PR OX IM AT E
TE MP ERA T UR E OVE RR I D E
n/a n/a
P R ES S
STA R T
Ti m e a n d temperat u r e s e t t i n gs a r e s u g g e s ted g u i d e l i n e s only. D u e t o
variatio n s i n p r o d u c t q u a l i t y , w e i g h t , a n d d e s i r e d d e gree of donenes s t h e
controls ma y requ i r e so m e a d j u s t m e n t from th e time an d tempe r a t u r e s
shown. A l l c ooking s h o u l d be b a s e d o n i n t e r n a l pro d u c t t e m p e r a t ures.
S T O P T H E C O O K I N G F U N C T I O N A T A N Y
T I M E B Y P R E S S I N G T H E S T O P K E Y .
B A K E R Y
MODEL
12•18
12•20
MODEL
20•20
PA N
SI Z E S
➤
NOT E S
➤
6 full-size sheet pans
(6 GN 2/ 1)
10 full-size sheet pans
(10 GN 2 /1)
Half-size sh eet pans: 18" x 13" x 1"
Full-size sheet pans: 18" x 26" x 1"
Gastronor m 1/1: 530 x 325 x 20mm
Gastronor m 2/1: 530 x 650 x 20mm
Cooking time may vary due to type of dough.
When using baking pan liners, fold each of
the four cor ners in toward the bottom of
the sheet pan to prevent the force of the
fan from blowing the liner over the product.
59 .
Page 63

R O L L S
— Pa r - B a k e d
PROD UCT
➤
ar-bake d r olls:
P
3 to 4 oz (85 to 113 gm) per roll
FAN SP EED
Full Speed
OVEN MODE
Combinati on
PR EHE AT THE OVE N BE F OR E COO KIN G MO D E OP ERAT I ON
C O M B I T H E R M OV E N P R O C E D U R E
MATERIAL S
➤
tainless steel or aluminum sheet pans
S
Baking pan liners
Egg wash (optional)
PRODUCT
PREPARATION
Place par- baked rolls on li ned pans.
➤
Brush rolls wit h egg wash if desired.
Load pans in preheated oven.
TIMER
P R ES S
STA R T
CO R E
TE M P
COOKI NG TEMPERATURE
350°F (177°C )
S E L E CT CO OK I N G T IM E
Press and Set T I M E R
AP PROX IMAT E C OOK TIM E
FI NAL IN TER NAL
TE MPE RATU R E
10 to 15 minutes n/a
USE APPROXIM ATE C OOKIN G T IM E S HOW N
FOR FULL OR PARTIAL LOA DS
O R
SE L E C T I N T E R N A L C O R E T E MP ER AT U RE
Pr e s s a n d S e t C O R E T E M P
AP PR OX IM AT E COR E
CU T-O F F T EMP ER ATU R E
n/a n/a
AP PR OX IM AT E
TE MP ERA T UR E OVE RR I D E
➤
MODEL
6•10
MODEL
7•14
MODEL
10•10
MODEL
10•18
10•20
MODEL
12•18
12•20
MODEL
20•20
➤
MA X I M U M C A PAC I T Y
3 half-size sheet pans
(3 GN 1/ 1)
3 full-size sheet pans
(3 GN 2/ 1)
5 half-size sheet pans
(5 GN 1/ 1)
5 full-size sheet pans
(5 GN 2/ 1)
6 full-size sheet pans
(6 GN/2/1)
10 full-size sheet pans
(10 GN 2 /1)
P R ES S
STA R T
Ti m e a n d temperat u r e s e t t i n gs a r e s u g g e s ted g u i d e l i n e s only. D u e t o
variatio n s i n p r o d u c t q u a l i t y , w e i g h t , a n d d e s i r e d d e gree of donenes s t h e
controls ma y requ i r e so m e a d j u s t m e n t from th e time an d tempe r a t u r e s
shown. A l l c ooking s h o u l d be b a s e d o n i n t e r n a l pro d u c t t e m p e r a t ures.
S T O P T H E C O O K I N G F U N C T I O N A T A N Y
T I M E B Y P R E S S I N G T H E S T O P K E Y .
B A K E R Y
60 .
PA N
SI Z E S
➤
NOT E S
➤
Half-size sh eet pans: 18" x 13" x 1"
Full-size sh eet pans: 18" x 26" x 1"
Gastronor m 1/1: 530 x 325 x 20mm
Gastronor m 2/1: 530 x 650 x 20mm
When using baking pan liners, fold
each of the four cor ners in toward the
bottom of the sheet pan to prevent the
force of the fan from blowing the liner
over the product.
Page 64

PROD UCT
➤
C O M B I T H E R M OV E N P R O C E D U R E
Sheet Cake
FAN SP EED
Reduced Spee d
OVEN MODE
Convectio n
PR EHE AT THE OVE N BE F OR E COO KIN G MO D E OP ERAT I ON
MATERIAL S
➤
Sheet pans or cake mol ds
Pan liners
PRODUCT
PREPARATION
Prepare batter.
➤
Pour batter into pans.
Load pans in preheated oven.
S H E E T C A K E
COOKI NG TEMPERATURE
325°F (163°C )
S E L E CT CO OK I N G T IM E
TIMER
Press and Set T I M E R
AP PROX IMAT E C OOK TIM E
20 minutes n/a
P R ES S
STA R T
USE APPROXIM ATE C OOKIN G T IM E S HOWN
FOR FULL OR PARTIAL LOA DS
O R
SE L E C T I N T E R N A L C O R E T E MP ER AT U RE
CO R E
TE M P
Pr e s s a n d S e t C O R E T E M P
AP PR OX IM AT E COR E
CU T-O F F T EMP ER ATU R E
TE MP ERA T UR E OVE RR I D E
n/a n/a
FI NAL IN TER NAL
TE MPE RATU R E
AP PR OX IM AT E
➤
MODEL
6•10
MODEL
7•14
MODEL
10•10
MODEL
10•18
10•20
MODEL
12•18
12•20
MODEL
20•20
➤
MA X I M U M C A PAC I T Y
5 half-size sheet pans
(5 GN 1/ 1)
3 full-size sheet pans
(3 GN 2/ 1)
5 half-size sheet pans
(5 GN 1/ 1)
5 full-size sheet pans
(5 GN 2/ 1)
6 full-size sheet pans
(6 GN 2/ 1)
10 full-size sheet pans
(10 GN 2 /1)
P R ES S
STA R T
Ti m e a n d temperat u r e s e t t i n gs a r e s u g g e s ted g u i d e l i n e s only. D u e t o
variatio n s i n p r o d u c t q u a l i t y , w e i g h t , a n d d e s i r e d d e gree of donenes s t h e
controls ma y requ i r e so m e a d j u s t m e n t from th e time an d tempe r a t u r e s
shown. A l l c ooking s h o u l d be b a s e d o n i n t e r n a l pro d u c t t e m p e r a t ures.
S T O P T H E C O O K I N G F U N C T I O N A T A N Y
T I M E B Y P R E S S I N G T H E S T O P K E Y .
B A K E R Y
PA N
SI Z E S
➤
NOT E S
➤
Half-size sh eet pans: 18" x 13" x 1"
Full-size sheet pans: 18" x 26" x 1"
Gastronor m 1/1: 530 x 325 x 20mm
Gastronor m 2/1: 530 x 650 x 20mm
61 .
Page 65

C O N V E N I E N C E P R O D U C T S
— P r e c o o k e d S n a c k F o o d s
PR EHE AT THE OVE N BE F OR E COO KIN G MO D E OP ERAT I ON
C O M B I T H E R M OV E N P R O C E D U R E
PROD UCT
Cor n Dogs
➤
Chicken Wings
gg Rolls
E
Spring Rolls
Mini Pizza
Tater Tots
FAN SP EED
Full Speed
OVEN MODE
Combinati on
MATERIAL S
➤
PRODUCT
PREPARATION
➤
tainless steel or aluminum sheet pans
S
Vegetabl e r elease spray
Spray pans with vegetable release spray.
Evenly arrange frozen product in pans.
Load pans in preheated oven.
TIMER
COOKI NG TEMPERATURE
Cor n Dogs: 35 0°F (177°C)
Mini Pizza: 350°F (177°C)
Tater Tots: 375°F (19 1°C)
Egg Rolls: 375°F (191°C)
Spring Rolls : 375 °F (191°C)
Chicken Wings: 400°F (204°C)
S E L E CT CO OK I N G T IM E
Press and Set T I M E R
AP PROX IMAT E C OOK TIM E
FI NAL IN TER NAL
TE MPE RATU R E
FROM FROZEN
CH I C K EN WI N G S
MI N I P IZZA
TATE R TOTS
165°F (74°C)
10 minutes
EG G R O LLS
SP R I N G ROL L S
165°F (74°C)
15 minutes
➤
MODEL
6•10
MODEL
7•14
MODEL
10•10
MODEL
10•18
10•20
MODEL
12•18
12•20
MODEL
20•20
➤
MA X I M U M C A PAC I T Y
6 half-size sheet pans
(6 GN 1/ 1)
7 full-size sheet pans
(7 GN 2/ 1)
10 half-size sheet pans
(10 GN 1 /1)
10 full-size sheet pans
(20 GN 1 /1) or (10 GN 2/1)
12 full-size sheet pans
(24 GN 1 /1) or (12 GN 2/1)
20 full-size sheet pans
( 40 GN 1/1) or (20 G N 2 /1)
CO R N D OGS
P R ES S
STA R T
Ti m e a n d temperat u r e s e t t i n gs a r e s u g g e s ted g u i d e l i n e s only. D u e t o
variatio n s i n p r o d u c t q u a l i t y , w e i g h t , a n d d e s i r e d d e gree of donenes s t h e
controls ma y requ i r e so m e a d j u s t m e n t from th e time an d tempe r a t u r e s
shown. A l l c ooking s h o u l d be b a s e d o n i n t e r n a l pro d u c t t e m p e r a t ures.
S T O P T H E C O O K I N G F U N C T I O N A T A N Y
T I M E B Y P R E S S I N G T H E S T O P K E Y .
62 .
20 minutes
USE APPROXIM ATE C OOKIN G T IM E S HOWN
FOR FULL OR PARTIAL LOA DS
165°F (74°C)
C O N V E N I E N C E P R O D U C T S
PA N
SI Z E S
➤
NOT E S
➤
Half-size sh eet pans: 18" x 13" x 1"
Full-size sh eet pans: 18" x 26" x 1"
Gastronor m 1/1: 530 x 325 x 20mm
Gastronor m 2/1: 530 x 650 x 20mm
Additional wire shelves are required in
some models for maximum capacity of
sheet pans shown above.
Page 66

PROD UCT
➤
PR EHE AT THE OVE N BE F OR E COO KIN G MO D E OP ERAT I ON
C O M B I T H E R M OV E N P R O C E D U R E
recooked breaded chicken pieces
P
C O N V E N I E N C E P R O D U C T S
— P r e c o o k e d C h i c k e n Pi e c e s
MATERIAL S
Stainless steel or aluminum sheet pans
➤
Wire pan grids or icing racks (O
Vegetabl e r elease spray
PTIONAL
)
TIMER
FAN SP EED
Full Speed
OVEN MODE
Convectio n
COOKI NG TEMPERATURE
325° to 350°F (163° to 17 7°C)
S E L E CT CO OK I N G T IM E
Press and Set T I M E R
AP PROX IMAT E C OOK TIM E
FI NAL IN TER NAL
TE MPE RATU R E
IF FROZEN
30 to 35 mi nutes
165°F (74°C)
IF REFRIGERATED
20 to 25 mi nutes
165°F (74°C)
PRODUCT
PREPARATION
➤
➤
➤
MODEL
6•10
MODEL
7•14
MODEL
10•10
Spray pans with vegetable release
spray. Evenly arrange chicken on pans
and load pans in preheated oven.
AS A N O PTIO N
Insert wire pan grids into pans to elevate
the product from the pan surface.
Spray the pan grids with vegetable
release spray. Evenly arrange product
on the top of the pan grids.
MA X I M U M C A PAC I T Y
3 half-size sheet pans
(3 GN 1/ 1)
3 full-size sheet pans
(3 GN 2/ 1)
5 half-size sheet pans
(5 GN 1/ 1)
P R ES S
STA R T
USE APPROXIM ATE C OOKIN G T IM E S HOWN
FOR FULL OR PARTIAL LOA DS
O R
SE L E C T I N T E R N A L C O R E T E MP ER AT U RE
CO R E
TE M P
P R ES S
STA R T
Ti m e a n d temperat u r e s e t t i n gs a r e s u g g e s ted g u i d e l i n e s only. D u e t o
variatio n s i n p r o d u c t q u a l i t y , w e i g h t , a n d d e s i r e d d e gree of donenes s t h e
controls ma y requ i r e so m e a d j u s t m e n t from th e time an d tempe r a t u r e s
shown. A l l c ooking s h o u l d be b a s e d o n i n t e r n a l pro d u c t t e m p e r a t ures.
S T O P T H E C O O K I N G F U N C T I O N A T A N Y
T I M E B Y P R E S S I N G T H E S T O P K E Y .
Pr e s s a n d S e t C O R E T E M P
AP PR OX IM AT E COR E
CU T-O F F T EMP ER ATU R E
145° to 150°F
(63° to 66°C)
AP PR OX IM AT E
TE MP ERA T UR E OVE RR I D E
10° to 1 5°F
(6° to 8 °C)
MODEL
10•18
10•20
MODEL
12•18
12•20
MODEL
20•20
PA N
SI Z E S
➤
NOT E S
➤
5 full-size sheet pans
(10 GN 1 /1) or (5 GN 2/1)
6 full-size sheet pans
(12 GN 1 /1) or (6 GN 2/1)
10 full-size sheet pans
(20 GN 1 /1) or (10 GN 2/1)
Half-size sh eet pans: 18" x 13" x 1"
Full-size sheet pans: 18" x 26" x 1"
Gastronor m 1/1: 530 x 325 x 20mm
Gastronor m 2/1: 530 x 650 x 20mm
For best result s, cook only from the
frozen state an d load every other shelf
rack positio n.
C O N V E N I E N C E P R O D U C T S
63 .
Page 67

C O N V E N I E N C E P R O D U C T S
— F r o z e n E n t r é e s
PR EHE AT THE OVE N BE F OR E COO KIN G MO D E OP ERAT I ON
C O M B I T H E R M OV E N P R O C E D U R E
PROD UCT
TIMER
rozen Conven ience Entrées:
F
➤
5 to 6 oz (142 to 170 gm ) pans
Entr é e Type A: Chicken Primavera,
Escallope d A pples, Maca roni & Beef,
acaroni & Chees e, Ratatoui lle
M
Entr é e Type B: Cabbage Rolls, Meat
Lasagna, Sou p, Stuffed Pep pers
FAN SP EED
Full Speed
OVEN MODE
Combinati on
COOKI NG TEMPERATURE
275°F (135°C )
S E L E CT CO OK I N G T IM E
Press and Set T I M E R
AP PROX IMAT E C OOK TIM E
FI NAL IN TER NAL
TE MPE RATU R E
Entr é e Type A*
35 to 40 minutes
140°F (60°C)
MATERIAL S
➤
PRODUCT
PREPARATION
➤
➤
➤
MODEL
6•10
MODEL
7•14
O MAT ERIAL S R E QUIR E D
N
.
For greater pan stability and ease of
handling it is recommended the
ntrée pans be placed on sheet pans
e
for the cooking function. Sheet pan
sage may reduce maximum
u
capacities shown below.
Selected entrées should re main
frozen until re ady to reheat. Do no t
remove entré e f rom the origin al
container before cooking. The
original pan cover should rem ain on
the entrée during the cooking
process. Loa d frozen entrées into a
preheated ov en.
MA X I M U M C A PAC I T Y
12 entrée pans
28 entrée pans
Entr é e Type B*
P R ES S
STA R T
55 to 60 minutes
USE APPROXIM ATE C OOKIN G T IM E S HOW N
FOR FULL OR PARTIAL LOA DS
140°F (60°C)
O R
SE L E C T I N T E R N A L C O R E T E MP ER AT U RE
CO R E
TE M P
P R ES S
STA R T
Ti m e a n d temperat u r e s e t t i n gs a r e s u g g e s ted g u i d e l i n e s only. D u e t o
variatio n s i n p r o d u c t q u a l i t y , w e i g h t , a n d d e s i r e d d e gree of donenes s t h e
controls ma y requ i r e so m e a d j u s t m e n t from th e time an d tempe r a t u r e s
shown. A l l c ooking s h o u l d be b a s e d o n i n t e r n a l pro d u c t t e m p e r a t ures.
S T O P T H E C O O K I N G F U N C T I O N A T A N Y
T I M E B Y P R E S S I N G T H E S T O P K E Y .
Pr e s s a n d S e t C O R E T E M P
AP PR OX IM AT E COR E
CU T-O F F T EMP ER ATU R E
AP PR OX IM AT E
TE MP ERA T UR E OVE RR I D E
n/a n/a
MODEL
10•10
MODEL
10•18
10•20
MODEL
12•18
12•20
MODEL
20•20
PA N
SI Z E S
➤
NOT E S
➤
20 entrée pans
40 entrée pans
48 entrée pans
80 entrée pans
Frozen entré e p ans can be placed and
cooked on sheet pans t o f acilitate
product hand ling.
If product thaw s prior to cooking, adjust
the timer using 25 to 30 minutes for
Type A entrée s and 35 t o 4 0 minutes
for Type B entrées.
64 .
C O N V E N I E N C E P R O D U C T S
Page 68

PROD UCT
➤
PR EHE AT THE OVE N BE F OR E COO KIN G MO D E OP ERAT I ON
C O M B I T H E R M OV E N P R O C E D U R E
Haddock fill ets:
4 to 8 oz (114 to 227 gm ) portions
FAN SP EED
Full Speed
OVEN MODE
Combinati on
B A K E D H A D D O C K / O T H E R
F I S H — F r e s h o r F r o z e n
MATERIAL S
PRODUCT
PREPARATION
Stainless steel or aluminum sheet pans
➤
Vegetabl e r elease spray
Seasoning
Spray pans with vegetable rel ease
➤
spray if desire d.
Place frozen or thawed haddoc k
fillets on pans and se ason as desired.
Load pans in preheated oven.
COOKI NG TEMPERATURE
400°F (204°C )
S E L E CT CO OK I N G T IM E
TIMER
Press and Set T I M E R
AP PROX IMAT E C OOK TIM E
FRESH
9 minutes
FROZEN
20 minutes
P R ES S
STA R T
USE APPROXIM ATE C OOKIN G T IM E S HOWN
FOR FULL OR PARTIAL LOA DS
O R
SE L E C T I N T E R N A L C O R E T E MP ER AT U RE
CO R E
TE M P
Pr e s s a n d S e t C O R E T E M P
AP PR OX IM AT E COR E
CU T-O F F T EMP ER ATU R E
TE MP ERA T UR E OVE RR I D E
140° to 150°F
(60° to 66°C)
FI NAL IN TER NAL
TE MPE RATU R E
150° to 160°F
(66° to 71°C)
150° to 160°F
(66° to 71°C)
AP PR OX IM AT E
10°F (5 to 6°C)
➤
MODEL
6•10
MODEL
7•14
MODEL
10•10
MODEL
10•18
10•20
MODEL
12•18
12•20
MODEL
20•20
➤
MA X I M U M C A PAC I T Y
48 lb (2 2 kg)
6 half-size sheet pans
(6 GN 1/ 1)
112 lb ( 51 kg)
7 full-size sheet pans
(7 GN 2/ 1)
80 lb (3 6 kg)
10 half-size sheet pans
(10 GN 1 /1)
160 lb ( 73 kg)
10 full-size sheet pans
(10 GN 2 /1)
192 lb ( 87 kg)
12 full-size sheet pans
(12 GN 2 /1)
320 lb ( 145 kg)
20 full-size sheet pans
(20 GN 2 /1)
P R ES S
STA R T
Ti m e a n d temperat u r e s e t t i n gs a r e s u g g e s ted g u i d e l i n e s only. D u e t o
variatio n s i n p r o d u c t q u a l i t y , w e i g h t , a n d d e s i r e d d e gree of donenes s t h e
controls ma y requ i r e so m e a d j u s t m e n t from th e time an d tempe r a t u r e s
shown. A l l c ooking s h o u l d be b a s e d o n i n t e r n a l pro d u c t t e m p e r a t ures.
S T O P T H E C O O K I N G F U N C T I O N A T A N Y
T I M E B Y P R E S S I N G T H E S T O P K E Y .
F I S H A N D S E A F O O D
PA N
SI Z E S
➤
NOT E S
➤
Half-size sh eet pans: 18" x 13" x 1"
Full-size sheet pans: 18" x 26" x 1"
Gastronor m 1/1: 530 x 325 x 20mm
Gastronor m 2/1: 530 x 650 x 20mm
65 .
Page 69

L O B S T E R
— W h o l e o r Ta i l
PROD UCT
➤
Lobster, whole: 1-1/2 lb (680 gm) each
PR EHE AT THE OVE N BE F OR E COO KIN G MO D E OP ERAT I ON
C O M B I T H E R M OV E N P R O C E D U R E
MATERIAL S
➤
Stainless steel or aluminu m pans
TIMER
Lobster, tail: 8 to 10 oz (227 to 283 gm) each
FAN SP EED
Full Speed
OVEN MODE
LOBSTER, WHOLE: Steam
LOBSTER, TAIL: Low Temperature Steam
COOKI NG TEMPERATURE
Steam: 212°F (100°C)
Low Tempera ture Steam: 16 0°F (71°C)
S E L E CT CO OK I N G T IM E
Press and Set T I M E R
AP PROX IMAT E C OOK TIM E
FI NAL IN TER NAL
TE MPE RATU R E
WHOLE
10 minutes
150°F (66°C)
PRODUCT
PREPARATION
➤
➤
➤
MODEL
6•10
MODEL
7•14
Seasoning
If frozen, thaw lobster prior to steaming.
WHOLE LOBSTE R:
Pl a c e i n p a ns a n d lo a d i n
pr e h e a t e d o v e n.
LOBSTER TAILS:
Extract or partially pull meat from
shell. Place tails in pans and season as
desired. Load pans in preheated oven.
MA X I M U M C A PAC I T Y
3 half-size sheet pans
(3 GN 1/ 1)
3 full-size sheet pans
(3 GN 2/ 1)
TAIL
P R ES S
STA R T
5 to 8 minu tes
USE APPROXIM ATE C OOKIN G T IM E S HOW N
FOR FULL OR PARTIAL LOA DS
150°F (66°C)
O R
SE L E C T I N T E R N A L C O R E T E MP ER AT U RE
CO R E
TE M P
P R ES S
STA R T
Ti m e a n d temperat u r e s e t t i n gs a r e s u g g e s ted g u i d e l i n e s only. D u e t o
variatio n s i n p r o d u c t q u a l i t y , w e i g h t , a n d d e s i r e d d e gree of donenes s t h e
controls ma y requ i r e so m e a d j u s t m e n t from th e time an d tempe r a t u r e s
shown. A l l c ooking s h o u l d be b a s e d o n i n t e r n a l pro d u c t t e m p e r a t ures.
S T O P T H E C O O K I N G F U N C T I O N A T A N Y
T I M E B Y P R E S S I N G T H E S T O P K E Y .
Pr e s s a n d S e t C O R E T E M P
AP PR OX IM AT E COR E
CU T-O F F T EMP ER ATU R E
AP PR OX IM AT E
TE MP ERA T UR E OVE RR I D E
140°F (60°C) 10°F (5° to 6°C)
MODEL
10•10
MODEL
10•18
10•20
MODEL
12•18
12•20
MODEL
20•20
PA N
SI Z E S
➤
NOT E S
➤
5 half-size sheet pans
(5 GN 1/ 1)
5 full-size sheet pans
(5 GN 2/ 1)
6 full-size sheet pans
(6 GN 2/ 1)
10 full-size sheet pans
(10 GN 2 /1)
Half-size sh eet pans: 18" x 13" x 1"
Full-size sh eet pans: 18" x 26" x 1"
Gastronor m 1/1: 530 x 325 x 20mm
Gastronor m 2/1: 530 x 650 x 20mm
66 .
F I S H A N D S E A F O O D
Page 70

PROD UCT
➤
PR EHE AT THE OVE N BE F OR E COO KIN G MO D E OP ERAT I ON
C O M B I T H E R M OV E N P R O C E D U R E
Orange rough y f illets:
4 to 6 oz (113 to 170 gm ) each
FAN SP EED
Full Speed
MATERIAL S
➤
PRODUCT
PREPARATION
➤
O R A N G E R O U G H Y
— F r o z e n
Stainless steel or aluminum sheet pans
Vegetable release spray
Seasoning
Spray pans with vegetable release spray.
Place frozen fillets on pans and
season as desired.
OVEN MODE
Combinati on
COOKI NG TEMPERATURE
300°F (150°C )
S E L E CT CO OK I N G T IM E
TIMER
Press and Set T I M E R
AP PROX IMAT E C OOK TIM E
FROZEN
8 minutes 150°F (66°C)
P R ES S
STA R T
USE APPROXIM ATE C OOKIN G T IM E S HOWN
FOR FULL OR PARTIAL LOA DS
O R
SE L E C T I N T E R N A L C O R E T E MP ER AT U RE
CO R E
TE M P
Pr e s s a n d S e t C O R E T E M P
AP PR OX IM AT E COR E
CU T-O F F T EMP ER ATU R E
TE MP ERA T UR E OVE RR I D E
n/a n/a
FI NAL IN TER NAL
TE MPE RATU R E
AP PR OX IM AT E
➤
MODEL
6•10
MODEL
7•14
MODEL
10•10
MODEL
10•18
10•20
MODEL
12•18
12•20
MODEL
20•20
➤
Load pans in preheated oven.
MA X I M U M C A PAC I T Y
12 lb (5 kg)
6 half-size sheet pans
(6 GN 1/ 1)
28 lb (1 3 kg)
7 full-size sheet pans
(7 GN 2/ 1)
20 lb (9 kg)
10 half-size sheet pans
(10 GN 1 /1)
40 lb (1 8 kg)
10 full-size sheet pans
(10 GN 2 /1)
48 lb (2 2 kg)
12 full-size sheet pans
(12 GN 2 /1)
80 lb (3 6 kg)
20 full-size sheet pans
(20 GN 2 /1)
P R ES S
STA R T
Ti m e a n d temperat u r e s e t t i n gs a r e s u g g e s ted g u i d e l i n e s only. D u e t o
variatio n s i n p r o d u c t q u a l i t y , w e i g h t , a n d d e s i r e d d e gree of donenes s t h e
controls ma y requ i r e so m e a d j u s t m e n t from th e time an d tempe r a t u r e s
shown. A l l c ooking s h o u l d be b a s e d o n i n t e r n a l pro d u c t t e m p e r a t ures.
S T O P T H E C O O K I N G F U N C T I O N A T A N Y
T I M E B Y P R E S S I N G T H E S T O P K E Y .
F I S H A N D S E A F O O D
PA N
SI Z E S
➤
NOT E S
➤
Half-size sh eet pans: 18" x 13" x 1"
Full-size sheet pans: 18" x 26" x 1"
Gastronor m 1/1: 530 x 325 x 20mm
Gastronor m 2/1: 530 x 650 x 20mm
67 .
Page 71

S A L M O N
— F r e s h
PROD UCT
Salmon steaks:
➤
7 oz (19 8 gm) each
PR EHE AT THE OVE N BE F OR E COO KIN G MO D E OP ERAT I ON
C O M B I T H E R M OV E N P R O C E D U R E
MATERIAL S
➤
Stainless steel or aluminum sheet pans
Vegetable release spray
TIMER
P R ES S
STA R T
Salmon fille ts:
8 oz (22 7 gm) each
FAN SP EED
Full Speed
OVEN MODE
Steam
r
o
Low Tempera ture Steam
COOKI NG TEMPERATURE
Steam: 212°F (100°C)
Low Tempera ture Steam:
135° to 160°F (57° to 71° C)
S E L E CT CO OK I N G T IM E
Press and Set T I M E R
AP PROX IMAT E C OOK TIM E
FI NAL IN TER NAL
IN STEAM MODE
ST E A K S
11 minutes
150° to 160°F
(66° to 71°C)
IN STEAM MODE
FI L L ETS
7 minutes
150° to 160°F
(66° to 71°C)
TE MPE RATU R E
PRODUCT
PREPARATION
➤
➤
➤
MODEL
6•10
MODEL
7•14
MODEL
10•10
easoning
S
Sp r a y p a n s wi t h v e g et a b l e
re l e a s e s p r a y .
Place salmon steaks or fillets on
pans and season as des ired.
Load pans in preheated oven.
MA X I M U M C A PAC I T Y
21 lb (1 0 kg)
6 half-size sheet pans
(6 GN 1/ 1)
49 lb (2 2 kg)
7 full-size sheet pans
(7 GN 2/ 1)
35 lb (1 6 kg)
10 half-size sheet pans
(10 GN 1 /1)
IN LOW T EMP
P R ES S
STA R T
STEAM MODE
13 minutes
USE APPROXIM ATE C OOKIN G T IM E S HOW N
FOR FULL OR PARTIAL LOA DS
135° to 160°F
(57° to 71°C)
O R
SE L E C T I N T E R N A L C O R E T E MP ER AT U RE
CO R E
TE M P
P R ES S
STA R T
Ti m e a n d temperat u r e s e t t i n gs a r e s u g g e s ted g u i d e l i n e s only. D u e t o
variatio n s i n p r o d u c t q u a l i t y , w e i g h t , a n d d e s i r e d d e gree of donenes s t h e
controls ma y requ i r e so m e a d j u s t m e n t from th e time an d tempe r a t u r e s
shown. A l l c ooking s h o u l d be b a s e d o n i n t e r n a l pro d u c t t e m p e r a t ures.
S T O P T H E C O O K I N G F U N C T I O N A T A N Y
T I M E B Y P R E S S I N G T H E S T O P K E Y .
Pr e s s a n d S e t C O R E T E M P
AP PR OX IM AT E COR E
CU T-O F F T EMP ER ATU R E
AP PR OX IM AT E
TE MP ERA T UR E OVE RR I D E
140°F (60°C) 10°F (5° to 6°C)
MODEL
10•18
10•20
MODEL
12•18
12•20
MODEL
20•20
PA N
SI Z E S
➤
NOT E S
➤
70 lb (3 2 kg)
10 full-size sheet pans
(20 GN 1 /1)
84 lb (3 8 kg)
12 full-size sheet pans
(24 GN 1 /1)
140 lb ( 64 kg)
20 full-size sheet pans
(40 GN 1 /1)
Half-size sh eet pans: 18" x 13" x 1"
Full-size sh eet pans: 18" x 26" x 1"
Gastronor m 1/1: 530 x 325 x 20mm
Gastronor m 2/1: 530 x 650 x 20mm
68 .
F I S H A N D S E A F O O D
Page 72

1
2
3
4
5
6
7
8
9
10
11
SIDE VIEW
TOP VIEW
ICE
FO R OVEN S E QUIP P ED WI T H SMOK I NG FU N CTIO N
PR EHE AT THE OVE N BE F OR E COO KIN G MO D E OP ERAT I ON
C O M B I T H E R M OV E N P R O C E D U R E
PROD UCT
TIMER
Ti m e a nd t emperature s e t t i n g s a re s u g g e s t e d g uideli n e s o nly. Due to
va riati ons i n p roduc t q ualit y, w e i ght, a n d d esire d d egr ee o f do nenes s t he
co ntro ls ma y re q uire s o me ad just ment f rom t he ti me an d temp eratur es
sh own. All co oking sh o uld be base d on intern al pro duct te mperat ure s.
SMOKE R
Press Chef Func tion key.
Turn knob until Smoker icon is displayed.
Press Chef Func tion key.
“YES” or “NO” check box will appear in display.
Use knob or up/down arrow keys to select “YES”.
Press Chef Function key to confir m setting.
Press START.
S T O P T H E S M O K I N G F U N C T I O N A T A N Y
T I M E B Y P R E S S I N G T H E S T O P K E Y .
OR On S-Control models, press the Smoking
button at the beginning of the cooking cycle.
➤
MODEL
6•10
MODEL
7•14
MODEL
10•10
MODEL
10•18
PA N
SI Z E S
➤
Salmon fille ts:
➤
-1/2 - 4 lb (1 - 2 kg) each
2
FAN SP EED
alf Speed
H
WOOD CHIP CONTAIN ER
Full
OVEN MODE
Convectio n M ode
COOKI NG TEMPERATURE
86°F (30°C)
S E L E CT SM OK I N G T IM E
Press and Set TI MER
AP PROX IMAT E S MOK E TI ME
10 to 30 minutes per
NOT TO EXCEED
smoke flavor
preference
USE APPROXIM ATE S MOKIN G T IM E S HOW N
FOR FULL OR PARTIAL LOA DS
➤
MA X I M U M C A PAC I T Y
5 ful l-size pans or GN 1/1
5 half-size sheet pans
13 fu ll-size pans or G N 1 /1
6 ful l-size sheet pans or GN 2/1
9 full-size pans or GN 1/ 1
9 half-size sheet pans
19 fu ll-size pans or G N 1 /1
9 ful l-size sheet pans or GN 2/1
Full-s ize pa ns: 20" x 12" x 2- 1/2"
Full-s ize sh eet pans: 18" x 26" x 1"
Half-s ize sh eet pans: 18" x 13" x 1"
Gastro norm 1/1 : 530 x 32 5 x 65mm
Gastro norm 2/1 : 650 x 53 0 x 65mm
FI NAL IN TER NAL
EM PER ATUR E
T
77°F (25°C )
F I S H A N D S E A F O O D
S A L M O N
— C o l d S m o k e d
MATERIAL S
PRODUCT PREPARATION ➤
Remove bones from fillets with a tweezers to avoid
upturing tissue.
r
SA LTI NG
:
50% Sea Salt or Kosher Salt
50% Granulated or Brown Sugar (
To remove moisture from the raw salmon, blend salt and
sugar mixture thoroughly and pack firmly around each
fillet. Cover salt-filled pans with clear plastic wrap and
refrigerate for 24 hours. Following the 24 hour
refrigeration period, remove fillets from salt/sugar
mixture and rinse thoroughly under cold, running water.
Pat dry with paper toweling. Place fillets side-by-side on
a sheet pan and return, uncovered, to the refrigerator for
a period of 1 to 6 hours for the final drying period.
OVEN MUST BE AT ROOM TEMPERATUR E BEF ORE
Soak wood chips in
water according to
directions (5 minutes).
Fill wood chip
container full and
insert in chip holder
located at the back of
the oven.
Fill pan with ice and locate pan in shelf directly above
wood chip container.
Place prepared salmon fillets on a wire grid as indicated
on the diagram and insert wire grid on oven shelf
beginning with the top shelf position.
Insert probe probe into the center of the middle salmon
fillet located in the top shelf position or central shelf
position when smoking a full load (
To maintain proper color, the internal temperature of the
salmon must not exceed 77°F (25°C). For this reason, it is
important to begin the smoking process with the oven at
room temperature.
Close oven door and press the oven function keys to
provide a smoking time period from 10 to 30 minutes
depending on taste preference. When the timer cycles to
the OFF position, the fillets must remain in the oven for a
period of 30 minutes to 2 hours. Do not open the oven
door during this period.
Following the required oven time, remove the fillets,
cover with clear plastic wrap and refrigerate until fully
chilled.
Clear Plastic Wrap
•
➤
Wire Mesh Grids
•
Ice: 3 to 4 lb (1 to 2 kg)
•
•Paper Toweling
•Tweezers
BEGIN NING PROCED URE.
FO R B EST CO LOR )
OP TI ONAL).
69 .
Page 73

S H R I M P
PROD UCT
➤
PR EHE AT THE OVE N BE F OR E COO KIN G MO D E OP ERAT I ON
C O M B I T H E R M OV E N P R O C E D U R E
hrimp:
S
5 lb (2 kg), 16 to 20 count
MATERIAL S
➤
Full-size, perforated stainless steel pans
TIMER
P R ES S
STA R T
P R ES S
STA R T
FAN SP EED
Full Speed
OVEN MODE
Steam
r
Low Tempera ture Steam
o
COOKI NG TEMPERATURE
Steam: 212°F (100°C)
Low Tempera ture Steam:
155° to 160°F (68° to 71° C)
S E L E CT CO OK I N G T IM E
Press and Set T I M E R
AP PROX IMAT E C OOK TIM E
STEAM MODE
8 minutes
10 minutes if frozen*
145° to 150°F
(63° to 66°C)
LOW TEMP STEAM
10 to 30 minutes
from frozen
USE APPROXIM ATE C OOKIN G T IM E S HOW N
FOR FULL OR PARTIAL LOA DS
145° to 150°F
(63° to 66°C)
FI NAL IN TER NAL
TE MPE RATU R E
PRODUCT
PREPARATION
➤
➤
➤
MODEL
6•10
MODEL
7•14
MODEL
10•10
MODEL
10•18
10•20
* For best results when using the
team Program mo de, thaw shrim p
S
and place in perforated pans in a
single layer.
Load pans in preheated oven.
For the Low Temperature Stea m
Program, shr imp can be cooked
thawed or froze n.
Load pans in preheated oven.
MA X I M U M C A PAC I T Y
6 full-size pans
(6 GN 1/ 1)
14 full-size pans
(14 GN 1 /1)
10 full-size pans
(10 GN 1 /1)
20 full-size pans
(20 GN 1 /1)
O R
SE L E C T I N T E R N A L C O R E T E MP ER AT U RE
CO R E
TE M P
P R ES S
STA R T
Ti m e a n d temperat u r e s e t t i n gs a r e s u g g e s ted g u i d e l i n e s only. D u e t o
variatio n s i n p r o d u c t q u a l i t y , w e i g h t , a n d d e s i r e d d e gree of donenes s t h e
controls ma y requ i r e so m e a d j u s t m e n t from th e time an d tempe r a t u r e s
shown. A l l c ooking s h o u l d be b a s e d o n i n t e r n a l pro d u c t t e m p e r a t ures.
S T O P T H E C O O K I N G F U N C T I O N A T A N Y
T I M E B Y P R E S S I N G T H E S T O P K E Y .
70 .
Pr e s s a n d S e t C O R E T E M P
AP PR OX IM AT E COR E
CU T-O F F T EMP ER ATU R E
AP PR OX IM AT E
TE MP ERA T UR E OVE RR I D E
n/a n/a
F I S H A N D S E A F O O D
MODEL
12•18
12•20
MODEL
20•20
PA N
SI Z E S
➤
NOT E S
➤
24 full-size pans
(24 GN 1 /1)
40 full-size pans
(40 GN 1 /1)
Full-size Per for ated Pans:
20" x 12 " x 2-1/2"
(GN 1/1: 530mm x 325mm x 65mm)
For best result s and to avoid over
cooking, rem ove pans from the
Combither m for imme diate placement
in cold water or use the spray hose to
stop the cooking process.
Page 74

PROD UCT
➤
PR EHE AT THE OVE N BE F OR E COO KIN G MO D E OP ERAT I ON
C O M B I T H E R M OV E N P R O C E D U R E
rout, whole or fillets:
T
9 to 11 oz (255 to 31 2 g m) each
FAN SP EED
Full Speed
OVEN MODE
Combinati on
MATERIAL S
➤
PRODUCT
PREPARATION
➤
T R O U T
— F r e s h
Stainless steel or aluminum sheet pans
Vegetabl e r elease spray
Seasoning
Spray pans with vegetable release spray.
Pl a c e t r o u t o n p a n s a n d s e a so n
as d e s i r e d .
Load pans in preheated oven.
TIMER
P R ES S
STA R T
CO R E
TE M P
COOKI NG TEMPERATURE
300°F (150°C )
S E L E CT CO OK I N G T IM E
Press and Set T I M E R
AP PROX IMAT E C OOK TIM E
FI NAL IN TER NAL
TE MPE RATU R E
8 minutes 150°F (66°C)
USE APPROXIM ATE C OOKIN G T IM E S HOWN
FOR FULL OR PARTIAL LOA DS
O R
SE L E C T I N T E R N A L C O R E T E MP ER AT U RE
Pr e s s a n d S e t C O R E T E M P
AP PR OX IM AT E COR E
CU T-O F F T EMP ER ATU R E
n/a n/a
AP PR OX IM AT E
TE MP ERA T UR E OVE RR I D E
➤
MODEL
6•10
MODEL
7•14
MODEL
10•10
MODEL
10•18
10•20
MODEL
12•18
12•20
MODEL
20•20
➤
MA X I M U M C A PAC I T Y
33 lb (1 5 kg)
6 half-size sheet pans
(6 GN 1/ 1)
77 lb (3 5 kg)
7 full-size sheet pans
(7 GN 2/ 1)
55 lb (2 5 kg)
10 half-size sheet pans
(10 GN 1 /1)
110 lb ( 50 kg)
10 full-size sheet pans
(10 GN 2 /1)
132 lb ( 60 kg)
12 full-size sheet pans
(12 GN 2 /1)
220 lb ( 100 kg)
20 full-size sheet pans
(20 GN 2 /1)
P R ES S
STA R T
Ti m e a n d temperat u r e s e t t i n gs a r e s u g g e s ted g u i d e l i n e s only. D u e t o
variatio n s i n p r o d u c t q u a l i t y , w e i g h t , a n d d e s i r e d d e gree of donenes s t h e
controls ma y requ i r e so m e a d j u s t m e n t from th e time an d tempe r a t u r e s
shown. A l l c ooking s h o u l d be b a s e d o n i n t e r n a l pro d u c t t e m p e r a t ures.
S T O P T H E C O O K I N G F U N C T I O N A T A N Y
T I M E B Y P R E S S I N G T H E S T O P K E Y .
F I S H A N D S E A F O O D
PA N
SI Z E S
➤
NOT E S
➤
Half-size sh eet pans: 18" x 13" x 1"
Full-size sheet pans: 18" x 26" x 1"
Gastronor m 1/1: 530 x 325 x 20mm
Gastronor m 2/1: 530 x 650 x 20mm
71 .
Page 75

B A C O N
— S l i c e d
PROD UCT
➤
Bacon, slice d
FAN SP EED
Full Speed
OVEN MODE
Combinati on
RE HEAT T HE O VEN B EF O RE C OOK ING M OD E OPE RATI O N
P
C O M B I T H E R M OV E N P R O C E D U R E
ATERIALS
M
➤
Stainless steel or aluminum sheet pans
Parchment pa per (optional)
PRODUCT
PREPARATION
Line pans with parchment pape r if
➤
desired.
Place indivi dual bacon sli ces on
pans, side-b y-side.
Load pans in preheated oven.
COOKI NG TEMPERATURE
375°F (191°C )
S E L E CT CO OK I N G T IM E
TIMER
Press and Set T I M E R
AP PROX IMAT E C OOK TIM E
8 minutes n/a
P R ES S
STA R T
USE APPROXIM ATE C OOKIN G T IM E S HOW N
FOR FULL OR PARTIAL LOA DS
O R
SE L E C T I N T E R N A L C O R E T E MP ER AT U RE
CO R E
TE M P
Pr e s s a n d S e t C O R E T E M P
AP PR OX IM AT E COR E
CU T-O F F T EMP ER ATU R E
TE MP ERA T UR E OVE RR I D E
FI NAL IN TER NAL
TE MPE RATU R E
AP PR OX IM AT E
➤
MODEL
6•10
MODEL
7•14
MODEL
10•10
MODEL
10•18
10•20
MODEL
12•18
12•20
➤
MA X I M U M C A PAC I T Y
6 half-size sheet pans
(6 GN 1/ 1)
7 full-size sheet pans
(7 GN 2/ 1)
10 half-size sheet pans
(10 GN 1 /1)
10 full-size sheet pans
(10 GN 2 /1)
12 full-size sheet pans
(12 GN 2 /1)
n/a n/a
P R ES S
STA R T
Ti m e a n d temperat u r e s e t t i n gs a r e s u g g e s ted g u i d e l i n e s only. D u e t o
variatio n s i n p r o d u c t q u a l i t y , w e i g h t , a n d d e s i r e d d e gree of donenes s t h e
controls ma y requ i r e so m e a d j u s t m e n t from th e time an d tempe r a t u r e s
shown. A l l c ooking s h o u l d be b a s e d o n i n t e r n a l pro d u c t t e m p e r a t u res.
S T O P T H E C O O K I N G F U N C T I O N A T A N Y
T I M E B Y P R E S S I N G T H E S T O P K E Y .
M E A T A N D P O U LT R Y
72 .
MODEL
20•20
PA N
SI Z E S
➤
NOT E S
➤
20 full-size sheet pans
(20 GN 2 /1)
Half-size sh eet pans: 18" x 13" x 1"
Full-size sheet pans: 18" x 26" x 1"
Gastronor m 1/1: 530 x 325 x 20mm
Gastronor m 2/1: 530 x 650 x 20mm
Page 76

FO R OVEN S E QUIP P ED WI T H SMOK I NG FU N CTIO N
PR EHE AT THE OVE N BE F ORE COO KIN G MO D E OP ERAT I ON
C O M B I T H E R M OV E N P R O C E D U R E
PROD UCT
➤
Beef Brisket, Fresh: 9-13 lb (4 to 6 kg)
FAN SP EED
Full Speed
WOOD CHIP CONTAINER
Full
OVEN MODE
Combination
COOKI NG TEMPERATURE
225°F (107°C)
2-1/2 hours
MATERIAL S
➤
PRODUCT
PREPARATION
➤
➤
➤
B E E F B R I S K E T
— S m o k e d
Stainless steel sheet pans or
full-size pans
Wire pan grids (optional)
Vegetable release spray (optional)
Seasoning
Spray pans or wire pan grids with
vegetable release spray if desired.
Place briskets in pans and season as
desired.
Load pans in preheated oven.
MA X I M U M C A PAC I T Y
S E L E CT SM OK I N G T IM E
TIMER
Press and Set TI MER
AP PROX IMAT E S MOK E TI ME FI NAL IN TER NAL TEM PER AT UR E
1 hour (light flavor)
175°F (79 °C)
2 hours (heavy flavor)
Low fan speed
during smoke
function may create a
heavier smoke flavor
USE APPROXIM ATE S MOKIN G T IM E S HOW N
FOR FULL OR PARTIAL LOA DS
Ti m e a nd t emperature s e t t i n g s a re s u g g e s t e d g uideli n e s o nly. Due to
va riati ons i n p roduc t q ualit y, w e i ght, and de sire d d e g ree o f do nenes s t he
co ntro ls ma y re q uire s o me ad just ment f rom t he ti me an d tempe ratur es
sh own. All co o king sh o uld be base d on intern al pro duct te mperat ure s.
SMOKE R
Press Chef Function key.
Turn knob until Smoker icon is displayed.
Press Chef Function key.
“YES” or “NO” check box will appear in display.
Use knob or up/down arrow keys to select “YES”.
Press Chef Function key to confir m setting.
Press START.
S T O P T H E S M O K I N G F U N C T I O N A T A N Y
T I M E B Y P R E S S I N G T H E S T O P K E Y .
OR On S-Control models, press the Smoking
button at the beginning of the cooking cycle.
M E A T A N D P O U LT R Y
MODEL
6•10
MODEL
7•14
MODEL
10•10
MODEL
10•18
PA N
SI Z E S
➤
NOT E S
➤
5 full-size pans or GN 1/1
5 half-size sheet p ans
13 full-size pans or GN 1 /1
6 full-size sheet p ans or GN 2/1
9 full-size pans or GN 1/1
9 half-size sheet p ans
19 full-size pans or GN 1 /1
9 full-size sheet p ans or GN 2/1
Full-size pans: 20" x 12" x 2-1/2"
Full-size sheet pans: 18" x 26" x 1"
Half-size sheet pans: 18" x 13" x 1"
Gastronor m 1/1: 530 x 325 x 65mm
Gastronor m 2/1: 650 x 530 x 65mm
73 .
Page 77

B E E F R O U N D S
— To p or B o t t o m
PROD UCT
TIMER
P R ES S
STA R T
Beef rounds, top or bottom:
➤
18 lb (8 kg) each
FAN SP EED
Reduced Spee d
OVEN MODE
BY TIME: Combination
r
o
BY CORE TEMP: Delta-T
COOKI NG TEMPERATURE
250°F (121°C )
S E L E CT CO OK I N G T IM E
Press and Set T I M E R
PP ROXI MATE CO OK T IME
A
10 minutes/lb
22 minutes/kg
15 minutes/lb
33 minutes/kg
20 minutes/lb
44 minutes/kg
T O B E C A L C UL A T E D O N A
I N GL E R O A S T
S
USE APPROXIM ATE C OOKIN G T IM E S HOW N
PR EHE AT THE OVE N BE F OR E COO KIN G MO D E OP ERAT I ON
C O M B I T H E R M OV E N P R O C E D U R E
FI NAL IN TER NAL
TE MPE RATU R E
RARE: 130°F (54°C)
MED: 140°F (60°C)
WELL: 160°F (71°C)
FOR FULL OR PARTIAL LOA DS
MATERIAL S
PRODUCT
PREPARATION
➤
➤
MODEL
6•10
MODEL
7•14
MODEL
10•10
MODEL
10•18
10•20
MODEL
12•18
12•20
Stainless steel or aluminum sheet pans
➤
easoning
S
ach roast should be relatively
E
unifor m in size to assure even
➤
heating from item to item.
Season beef rounds as desired.
Place in preheated oven.
MA X I M U M C A PAC I T Y
1 half-size sheet pan
1 roast
18 lb (8 kg)
2 full-size sheet pans
4 roasts
72 lb (3 3 kg)
2 half-size sheet pans
2 roasts
36 lb (1 6 kg)
2 full-size sheet pans
4 roasts
72 lb (3 3 kg)
3 full-size sheet pans
6 roasts
108 lb ( 49 kg)
P R ES S
STA R T
74 .
O R
SE L E C T I N T E R N A L C O R E T E MP ER AT U RE
CO R E
TE M P
Pr e s s a n d S e t C O R E T E M P
AP PR OX IM AT E COR E
CU T-O F F T EMP ER ATU R E
IN COMBINATION MODE:
R A RE
100° to 115°F
(38° to 46°C)
M E DI U M
110° to 125°F
(43° to 52°C)
W E LL D O NE
130° to 145°F
(54° to 63°C)
F O R D E LT A - T C O O K I N G U S E T H E P R O B E
T E M P E R AT U R E C H A RT O N T H E D E L T A
P R O C E D U R E P AG E
STOP THE COOKING FUNCTION AT ANY
TIME BY PRESSING THE STOP KEY.
.
AP PR OX IM AT E
TE MP ERA T UR E OVE RR I D E
5° to 15 °F
(3° to 8 °C)
HOT FOOD HOLDING
INTERNAL TEMPERATURE WILL
20° TO 30°F (11° TO
INCREASE
17°C) WHEN IMMEDIATELY PLACED
IN A HOT FOOD HOLDING
ENVIRONMENT AT 140°F (60°C).
ADJUST CUT-OFF
TEMPERATURE
ACCORDINGLY.
MODEL
20•20
PA N S I Z E ➤
NOT E S
- T
T i m e a n d t e m p er a t ur e s et t i n gs a re s ug g e s t e d gu i d e li n e s o n l y . D u e
to va r i a t i o n s in pr o d u c t q u a l ity , w e i g h t , a nd de s i r e d d e g r ee of
don e n e s s th e co n t rol s ma y re q u i r e so m e a dju s t m e n t fr o m t h e tim e
and te m p e r atu r e s sh o wn. Al l cook i n g sh o uld be ba sed on in ter n a l
pro d u c t tem p e r a t u r e s.
M E A T A N D P O U LT R Y
4 full-size sheet pans
8 roasts
144 lb ( 65 kg)
Half-size sheet pans: 18" x 13" x 1"
Full-size sheet pans: 18" x 26" x 1"
Gastronor m 1/1: 530 x 325 x 20mm
Gastronor m 2/1: 530 x 650 x 20mm
FOR BEST RESULTS: Carefully monitor
➤
internal temperature after roasts reach an
internal temperature of 110°F (43°C) since
temperature will increase rapidly. Cooking
this cut of meat to an internal temperature
over 140°F (60°C) is not recommended.
A more tender product with higher moisture
content and less shrinkage will be achieved if
this product is cooked overnight in an AltoShaam low temperature cook and hold oven.
Page 78

PROD UCT
➤
RE HEAT T HE O VEN B EF O RE C OOK ING M OD E OPE RATI O N
P
C O M B I T H E R M OV E N P R O C E D U R E
Beef Short Ribs:
2 to 3 lb (1 to 1,3 kg)
MATERIAL S
➤
B E E F
— S h o r t R i b s
Stainless steel or aluminu m sheet
pans or full-size pans
Vegetabl e r elease spray ( optional)
easoning
S
TIMER
FAN SP EED
Full Speed
OVEN MODE
Combinati on
COOKI NG TEMPERATURE
275°F (135°C )
S E L E CT CO OK I N G T IM E
Press and Set T I M E R
AP PROX IMAT E C OOK TIM E
FI NAL IN TER NAL
TE MPE RATU R E
45 minutes
OR U N T IL TE N D E R 190°F (88°C)
PRODUCT
PREPARATION
➤
➤
➤
MODEL
6•10
MODEL
7•14
MODEL
10•10
Spray pans with vegetable rel ease
spray if desire d.
Place short ribs side-by-s ide in pans
and season as desired.
Load pans in preheated oven.
ALTERNAT I VE:
Brown ribs in roas ting pan. Pour
boiling demi -glaze over ri bs. Cover
pans and load in preheated oven.
NOT E : Diced vegetables su ch as
carrots, oni on and celery
will enhance the flavor of
the meat.
MA X I M U M C A PAC I T Y
6 half-size sheet pans
(6 GN 1/ 1)
7 full-size sheet pans
(7 GN 2/ 1)
10 half-size sheet pans
(10 GN 1 /1)
P R ES S
STA R T
USE APPROXIM ATE C OOKIN G T IM E S HOWN
FOR FULL OR PARTIAL LOA DS
O R
SE L E C T I N T E R N A L C O R E T E MP ER AT U RE
CO R E
TE M P
P R ES S
STA R T
Ti m e a n d temperat u r e s e t t i n gs a r e s u g g e s ted g u i d e l i n e s only. D u e t o
variatio n s i n p r o d u c t q u a l i t y , w e i g h t , a n d d e s i r e d d e gree of donenes s t h e
controls ma y requ i r e so m e a d j u s t m e n t from th e time an d tempe r a t u r e s
shown. A l l c ooking s h o u l d be b a s e d o n i n t e r n a l pro d u c t t e m p e r a t ures.
S T O P T H E C O O K I N G F U N C T I O N A T A N Y
T I M E B Y P R E S S I N G T H E S T O P K E Y .
Pr e s s a n d S e t C O R E T E M P
AP PR OX IM AT E COR E
CU T-O F F T EMP ER ATU R E
AP PR OX IM AT E
TE MP ERA T UR E OVE RR I D E
n/a n/a
M E A T A N D P O U LT R Y
MODEL
10•18
10•20
MODEL
12•18
12•20
MODEL
20•20
PA N
SI Z E S
➤
NOT E S
➤
10 full-size sheet pans
(10 GN 2 /1)
12 full-size sheet pans
24 full-size pans
(24 GN 1 /1)
20 full-size sheet pans
40 full-size pans
(40 GN 1 /1)
Half-Size Sh eet Pans: 18" x 13" x 1"
Full-Size Sheet Pans: 18" x 26" x 1"
Full-Size Pans: 20" x 12" x 2-1/2"
GN 1/1: 530 x 325 x 20mm to 65mm
GN 2/1: 530 x 650 x 20mm
A more tender prod uct with highe r
moisture con tent and less shr inkage will
be achieved if this product is cooked
over n ight in an Alto-S haam low
temperatu re cooking and ho lding oven.
75 .
Page 79

B E E F
— S h o r t R i b s , S m o k e d
PR EHE AT THE OVE N BE F OR E COO KIN G MO D E OP ERAT I ON
C O M B I T H E R M OV E N P R O C E D U R E
PROD UCT
➤
Beef Ribs, 2-3 lb (1 to 1,3 kg)
FAN SP EED
Full Speed
WOOD CHIP CONTAIN ER
Full
FO R OVEN S E QUIP P ED WI T H SMOK I NG FU N CTIO N
MATERIAL S
Stainless steel sheet pans or full-size
pans
➤
Vegetable release spray (optional)
Seasoning
TIMER
OVEN MODE
Combination
COOKI NG TEMPERATURE
275°F (135°C)
50 minutes
S E L E CT SM OK I N G T IM E
Press and Set TI MER
AP PROX IMAT E S MOK E TI ME
30-50 minutes
FI NAL IN TER NAL
TE MPE RATU R E
190°F (88°C)
PRODUCT
PREPARATION
➤
➤
➤
MODEL
6•10
MODEL
7•14
MODEL
10•10
Spray pans with vegetable release
spray if desired.
Place short ribs side-by-side in pans
and season as desired.
Load pans in preheated oven.
MA X I M U M C A PAC I T Y
5 full-size pans or GN 1/1
5 half-size sheet pans
13 full-size pans or G N 1 /1
6 full-size sheet p ans or GN 2/1
9 full-size pans or GN 1/1
9 half-size sheet pans
USE APPROXIM ATE S MOKIN G T IM E S HOW N
FOR FULL OR PARTIAL LOA DS
Ti m e a nd t emperature s e t t i n g s a re s u g g e s t e d g uidel i n e s o nly. Due to
va riati ons i n p roduc t q ualit y, w e i ght, and de sire d d e g ree o f do nenes s t he
co ntro ls ma y re q uire s o me ad just ment f rom t he ti me an d temp eratur es
sh own. All co o king sh o uld be base d on inter nal pro duct te mperat ure s.
SMOKE R
Press Chef Function key.
Turn knob until Smoker icon is displayed.
Press Chef Function key.
“YES” or “NO” check box will appear in display.
Use knob or up/down arrow keys to select “YES”.
Press Chef Function key to confir m setting.
Press START.
S T O P T H E S M O K I N G F U N C T I O N A T A N Y
T I M E B Y P R E S S I N G T H E S T O P K E Y .
OR On S-Control models, press the Smoking
button at the beginning of the cooking cycle.
M E A T A N D P O U LT R Y
76 .
MODEL
10•18
PA N
SI Z E S
➤
NOT E S
➤
19 full-size pans or GN 1 /1
9 full-size sheet pans or GN 2/1
Full-s ize pans: 20" x 12" x 2- 1/2"
Full-s ize sheet pans: 18" x 26" x 1"
Half-s ize sheet pan s: 18" x 13" x 1"
Gastro norm 1/1 : 530 x 32 5 x 65mm
Gastro norm 2/1 : 650 x 53 0 x 65mm
Page 80

PROD UCT
➤
RE HEAT T HE O VEN B EF O RE C OOK ING M OD E OPE RATI O N
P
C O M B I T H E R M OV E N P R O C E D U R E
Chicken piec es, fresh breaded:
Fryer, 8 piece cut
FAN SP EED
C H I C K E N , O V E N F R I E D
ATERIALS
M
➤
PRODUCT
PREPARATION
➤
— P i e c e s
Preferred oven breading
Vegetable release spray
Sheet pans
Bread chicken according to
manufacturers instructions.
TIMER
P R ES S
STA R T
Full Speed
OVEN MODE
Combination
COOKI NG TEMPERATURE
450°F (232°C)
S E L E CT CO OK I N G T IM E
Press and Set TI MER
AP PROX IMAT E C OOK TIM E
18 minutes 185°F (85°C)
USE APPROXIM ATE C OOKIN G T IM E S HOWN
FOR FULL OR PARTIAL LOA DS
O R
FI NAL IN TER NAL
TE MPE RATU R E
➤
MODEL
6•10
MODEL
7•14
MODEL
10•10
MODEL
10•18
➤
Spray pans with vegetable release spray.
Place chicken on sheet pans
SKIN SIDE DOWN.
MA X I M U M C A PAC I T Y
72 pieces, 24 pieces p er pan
3 half-size sheet pans
(3 GN 1/ 1)
192 pieces, 48 pieces per pan
4 full-size sheet pans
(4 GN 2/ 1)
120 pieces, 24 pieces per pan
5 half-size sheet pans
(5 GN 1/ 1)
240 pieces, 48 pieces per pan
5 full-size sheet pans
(5 GN 2/ 1)
SE L E C T I N T E R N A L C O R E T E MP ER AT U RE
CO R E
TE M P
Pre ss an d Se t C O R E T E M P
AP PR OX IM AT E COR E
CU T-O F F T EMP ER ATU R E
TE MP ERA T UR E OVE RR I D E
AP PR OX IM AT E
n/a n/a
P R ES S
STA R T
Ti m e a nd t emperature s e t t i n g s a re s u g g e s t e d g uideli n e s o nly. Due to
va riati ons i n p roduc t q ualit y, w e i ght, a n d d esire d d egr ee o f do nenes s t he
co ntro ls ma y re q uire s o me ad just ment f rom t he ti me an d temp eratur es
sh own. All co oking sh ould be base d on inter nal pro duct te mperat ure s.
S T O P T H E C O O K I N G F U N C T I O N A T A N Y
T I M E B Y P R E S S I N G T H E S T O P K E Y .
M E A T A N D P O U LT R Y
MODEL
12•20
MODEL
20•20
PA N
SI Z E S
➤
NOT E S
➤
288 pieces, 48 pieces per pan
6 full-size sheet pans
(6 GN 2/ 1)
480 pieces, 48 pieces per pan
10 full-size sheet pans
(10 GN 2 /1)
Half-size sh eet pans: 18" x 13" x 1"
Full-size sh eet pans: 18" x 26" x 1"
Gastronor m 1/1: 530 x 325 x 20mm
Gastronor m 2/1: 530 x 650 x 20mm
Fo r b e s t r e s u l t s , u s e e v e r y o t h er
pa n s h e l f p os i t i o n o nl y .
When checkin g inter nal product
temperatu re, take temperature rea ding
in the d ensest part of th e chicken thig h
77 .
Page 81

C H I C K E N
— P i e c e s a n d H a l v e s
C O M B I T H E R M OV E N P R O C E D U R E
RODU CT
P
➤
Chicken piec es:
Fryer, 8 piece cut
RE HEAT T HE O VEN B EF O RE C OOK ING M OD E OPE RATI O N
P
ATERIALS
M
Stainless steel or aluminum sheet pans
➤
Vegetabl e r elease spray
easoning
S
TIMER
FAN SP EED
Full Speed
OVEN MODE
Combinati on
COOKI NG TEMPERATURE
350°F (177°C )
S E L E CT CO OK I N G T IM E
Press and Set T I M E R
AP PROX IMAT E C OOK TIM E
THAWED PIECES
15 to 17 minutes)
FROZ E N PIECES
30 to 35 minutes
THAWED HALV E S
20 to 25 minutes
FROZ E N HALVES
40 to 45 minutes
FI NAL IN TER NAL
TE MPE RATU R E
185°F (85°C)
185°F (85°C)
185°F (85°C)
185°F (85°C)
PRODUCT
PREPARATION
➤
➤
➤
MODEL
6•10
MODEL
7•14
MODEL
10•10
MODEL
10•18
10•20
Se a s o n , b re a d , o r m a ri n a t e
ch i c k e n a s de s i r e d .
Spray pans with vegetable release spray
or use n on-stick coated sheet pans.
Ar r a n g e c h i c k en m e a t s i d e u p .
Ch i c k e n p i e c e s o r h a l v e s s h o u l d
no t t o u c h .
Lo a d pa n s i n p r eh e a t e d o v e n .
Fo r b e s t r e s u l t s , u s e e v e r y o t h er
pa n s h e l f p os i t i o n .
MA X I M U M C A PAC I T Y
72 pieces, 24 pieces p er pan
3 half-size sheet pans
(3 GN 1/ 1)
192 pieces, 48 pieces per pan
4 full-size sheet pans
(4 GN 2/ 1)
120 pieces, 24 pieces per pan
5 half-size sheet pans
(5 GN 1/ 1)
240 pieces, 48 pieces per pan
5 full-size sheet pans
(5 GN 2/ 1)
P R ES S
STA R T
USE APPROXIM ATE C OOKIN G T IM E S HOW N
FOR FULL OR PARTIAL LOA DS
O R
SE L E C T I N T E R N A L C O R E T E MP ER AT U RE
CO R E
TE M P
P R ES S
STA R T
Ti m e a n d temperat u r e s e t t i n gs a r e s u g g e s ted g u i d e l i n e s only. D u e t o
variatio n s i n p r o d u c t q u a l i t y , w e i g h t , a n d d e s i r e d d e gree of donenes s t h e
controls ma y requ i r e so m e a d j u s t m e n t from th e time an d tempe r a t u r e s
shown. A l l c ooking s h o u l d be b a s e d o n i n t e r n a l pro d u c t t e m p e r a t ures.
S T O P T H E C O O K I N G F U N C T I O N A T A N Y
T I M E B Y P R E S S I N G T H E S T O P K E Y .
78 .
Pr e s s a n d S e t C O R E T E M P
AP PR OX IM AT E COR E
CU T-O F F T EMP ER ATU R E
AP PR OX IM AT E
TE MP ERA T UR E OVE RR I D E
n/a n/a
M E A T A N D P O U LT R Y
MODEL
12•18
12•20
MODEL
20•20
PA N
SI Z E S
➤
NOT E S
➤
288 pieces, 48 pieces per pan
6 full-size sheet pans
(6 GN 2/ 1)
480 pieces, 48 pieces per pan
10 full-size sheet pans
(10 GN 2 /1)
Half-size sh eet pans: 18" x 13" x 1"
Full-size sh eet pans: 18" x 26" x 1"
Gastronor m 1/1: 530 x 325 x 20mm
Gastronor m 2/1: 530 x 650 x 20mm
Fo r b e s t r e s u l t s , u s e e v e r y o t h er
pa n s h e l f p os i t i o n o nl y .
When checkin g inter nal product
temperatu re, take temperature rea ding
in the d ensest part of th e chicken thig h.
Page 82

RODU CT
P
RE HEAT T HE O VEN B EF O RE C OOK ING M OD E OPE RATI O N
P
C O M B I T H E R M OV E N P R O C E D U R E
hicken, whole:
C
➤
2-1/4 to 2-3/4 lb (1 to 1,2 kg) each
ATERIALS
M
C H I C K E N
— W h o l e
Seasoning
➤
egetable rel ease spray
V
tainless Ste el or aluminum sheet
S
pans with wire pan grids
or
Alto-Shaa m C hicken Roas ting Racks
with grease tra y
FAN SP EED
Full Speed
OVEN MODE
Combinati on
COOKI NG TEMPERATURE
350°F (177°C )
S E L E CT CO OK I N G T IM E
TIMER
Press and Set T I M E R
AP PROX IMAT E C OOK TIM E
IF THAWED
30 to 35 mi nutes
IF FROZEN
55 to 60 mi nutes
P R ES S
STA R T
USE APPROXIM ATE C OOKIN G T IM E S HOWN
FOR FULL OR PARTIAL LOA DS
O R
SE L E C T I N T E R N A L C O R E T E MP ER AT U RE
CO R E
TE M P
Pr e s s a n d S e t C O R E T E M P
AP PR OX IM AT E COR E
CU T-O F F T EMP ER ATU R E
TE MP ERA T UR E OVE RR I D E
175°F (79°C) 10°F (5° to 6°C)
FI NAL IN TER NAL
TE MPE RATU R E
185°F (85°C)
185°F (85°C)
AP PR OX IM AT E
PRODUCT
PREPARATION
➤
➤
➤
MODEL
6•10
MODEL
7•14
MODEL
10•10
MODEL
10•18
10•20
MODEL
12•18
12•20
MODEL
20•20
Place chicke n on sprayed grid-lined
sheet pans or on roasting racks.
If desired, fold the wings and tuck under
back of bird—cross and secure legs.
Season as desired.
Load chicken in preheated ove n.
NOTE : W hen using roasting racks ,
insert the grea se tray before
preheating o r u se rack with an
attached gre ase tray. When us ing
sheet pans, do not ove rload each
pan (chicken s should not touch).
MA X I M U M C A PAC I T Y
2 racks w/tray, 16 chi ckens
3 half-size sheet pans, 12 chickens
(3 GN 1/ 1)
4 racks w/tray, 32 chi ckens
6 full-size sheet pans
(6 GN 2/ 1)
3 racks w/tray, 24 chi ckens
5 half-size sheet pans
(5 GN 1/ 1)
6 racks w/tray, 48 chi ckens
5 full-size sheet pans
(5 GN 2/ 1)
8 racks w/tray, 64 chi ckens
6 full-size sheet pans
(6 GN 2/ 1)
14 racks w/tray, 112 c hickens
10 full-size sheet pans
(10 GN 2 /1)
P R ES S
STA R T
Ti m e a n d temperat u r e s e t t i n gs a r e s u g g e s ted g u i d e l i n e s only. D u e t o
variatio n s i n p r o d u c t q u a l i t y , w e i g h t , a n d d e s i r e d d e gree of donenes s t h e
controls ma y requ i r e so m e a d j u s t m e n t from th e time an d tempe r a t u r e s
shown. A l l c ooking s h o u l d be b a s e d o n i n t e r n a l pro d u c t t e m p e r a t ures.
S T O P T H E C O O K I N G F U N C T I O N A T A N Y
T I M E B Y P R E S S I N G T H E S T O P K E Y .
M E A T A N D P O U LT R Y
PA N
SI Z E S
➤
NOT E S
➤
Half-size sh eet pans: 18" x 13" x 1"
Full-size sheet pans: 18" x 26" x 1"
Gastronor m 1/1: 530 x 325 x 20mm
Gastronor m 2/1: 530 x 650 x 20mm
FOR BEST R E S U LTS: Thaw p rior to
cooking. When check ing internal produc t
temper ature, t ake temperature r e a d ing in t h e
densest part o f the c h i c k e n thigh. T h e use
of roasting r a c k s with g r e a s e tray w i l l result
in more e v e n color a n d better f a t drainage.
79 .
Page 83

C H I C K E N
— W h o l e , Sm o k e d
PROD UCT
Chicken, Whole 2-1/4 to 2-3/4 lb
➤
(1 to 1,2 kg) each
FAN SP EED
Full Speed
WOOD CHIP CONTAIN ER
Full
OVEN MODE
Combination
*NOTE:
SM OKE T HE CHI CKE N BEF O RE
CO OKI NG IN CO MBI NATI O N MOD E
COOKI NG TEMPERATURE
350°F (177°C)
25 minutes
FO R OVEN S E QUIP P ED WI T H SMOK I NG FU N CTIO N
PR EHE AT THE OVE N BE F OR E COO KIN G MO D E OP ERAT I ON
C O M B I T H E R M OV E N P R O C E D U R E
Seasoning
➤
Vegetable release spray
Stainless steel or aluminum sheet
pans with wire pan grids or AltoShaam chicken roasting racks with
grease tray
Place chicken on sprayed, grid-lined
sheet pans or on roasting racks. If
➤
desired, fold the wings and tuck
under the back of the bird. Cross
and secure legs.
Season as desired.
Load chicken in preheated oven.
MA X I M U M C A PAC I T Y
FO R BES T RES U LTS,
MATERIAL S
PRODUCT
PREPARATION
➤
➤
S E L E CT SM OK I N G T IM E
TIMER
Press and Set TI MER
AP PROX IMAT E S MOK E TI ME
COMB I N AT I ON
FI NAL IN TER NAL
TE MPE RATU R E
175°F (79°C)
MODE
30 minutes
USE APPROXIM ATE S MOKIN G T IM E S HOW N
FOR FULL OR PARTIAL LOA DS
Ti m e a nd t emperature s e t t i n g s a re s u g g e s t e d g uideline s o nly. Due to
va riati ons i n p roduc t q ualit y, w e i ght, and de sire d d e g ree o f do nenes s t he
co ntro ls ma y re q uire s o me ad just ment f rom t he ti me an d temp eratur es
sh own. All co o king sh o uld be base d on inter nal pro duct te mperat ure s.
SMOKE R
Press Chef Function key.
Turn knob until Smoker icon is displayed.
Press Chef Function key.
“YES” or “NO” check box will appear in display.
Use knob or up/down arrow keys to select “YES”.
Press Chef Function key to confir m setting.
Press START.
S T O P T H E S M O K I N G F U N C T I O N A T A N Y
T I M E B Y P R E S S I N G T H E S T O P K E Y .
OR On S-Control models, press the Smoking
button at the beginning of the cooking cycle.
80 .
M E A T A N D P O U LT R Y
MODEL
6•10
MODEL
7•14
MODEL
10•10
MODEL
10•18
PA N
SI Z E S
➤
NOT E S
➤
5 full-size pans or GN 1/1
5 half-size sheet pans
13 full-size pans or GN 1 /1
6 full-size sheet p ans or GN 2/1
9 full-size pans or GN 1/1
9 half-size sheet pans
19 full-size pans or GN 1 /1
9 full-size sheet p ans or GN 2/1
Full-s ize pans: 20" x 12" x 2- 1/2"
Full-s ize sheet pans: 18" x 26" x 1"
Half-s ize sheet pan s: 18" x 13" x 1"
Gastro norm 1/1 : 530 x 32 5 x 65mm
Gastro norm 2/1 : 650 x 53 0 x 65mm
When using roasting racks, insert the
grease tray before preheating or use
rack with an attached grease tray.
When using sheet pans, do not overload
each pan. Chickens should not touch.
Page 84

PROD UCT
➤
C O M B I T H E R M OV E N P R O C E D U R E
Duck pieces:
aw and p recooke d
R
FAN SP EED
Full Speed
OVEN MODE
Combinati on
RE HEAT T HE O VEN B EF O RE C OOK ING M OD E OPE RATI O N
P
PRODUCT
PREPARATION
The cook/reheat method consists of
precooking the duck in a Combitherm oven, or
as an alter native, in an Alto-Shaam low
temperature cook and hold oven to retain
moisture. In order to provide the crispness
required, cooked pieces are chilled and reheated
as required for immediate service.
➤
1. FROM RAW: Arrange duck pieces on pans.
or
Prepare duck according to cooking procedures
found in the Alto-Shaam Low Temperature
Cooking and Holding Guidelines.
D U C K
— P i e c e s
COOKI NG TEMPERATURE
375° to 390°F (191° to 19 9°C)
S E L E CT CO OK I N G T IM E
TIMER
R E SS
P
STA R T
Press and Set T I M E R
AP PROX IMAT E C OOK TIM E
FROM RAW
180°F (185°C )
20 to 25 mi nutes
USE APPROXIM ATE C OOKIN G T IM E S HOWN
FOR FULL OR PARTIAL LOA DS
FI NAL IN TER NAL
TE MPE RATU R E
(82° to 85°C)
O R
SE L E C T R E H E AT IN G T I M E
TI M E R
P R ES S
STA R T
Ti m e a n d temperat u r e s e t t i n gs a r e s u g g e s ted g u i d e l i n e s only. D u e t o
variatio n s i n p r o d u c t q u a l i t y , w e i g h t , a n d d e s i r e d d e gree of donenes s t h e
controls ma y requ i r e so m e a d j u s t m e n t from th e time an d tempe r a t u r e s
shown. A l l c ooking s h o u l d be b a s e d o n i n t e r n a l pro d u c t t e m p e r a t ures.
S T O P T H E C O O K I N G F U N C T I O N A T A N Y
T I M E B Y P R E S S I N G T H E S T O P K E Y .
MATERIAL S
Pr e s s a n d S e t T I M E R
AP PR OX IM AT E COR E
CU T-O F F T EMP ER ATU R E
AP PR OX IM AT E
TE MP ERA T UR E OVE RR I D E
FOR REHEATING
15 minutes 165°F (74°C)
➤
Vegetabl e r elease spray
Seasoning
FROM RAW: Stainless steel or
aluminum ful l-size pans
FOR REHEATING: Stainless steel or
aluminum she et pans
M E A T A N D P O U LT R Y
➤
2. Rapidly chill cooked product, preferably using
cook/chill processing methods.
3. FOR REHEATING: Spray sheet pans with
➤
vegetable release spray. Placed precooked
duck pieces side-by-side in pans. Load pans
in preheated Combitherm oven.
➤
MODEL
6•10
MODEL
7•14
MODEL
10•10
MODEL
10•18
10•20
MODEL
12•18
12•20
MODEL
20•20
PA N
SI Z E S
➤
➤
Half-size sh eet pans: 18" x 13" x 1"
Full-size sh eet pans: 18" x 26" x 1"
Gastronor m 1/1: 530 x 325 x 20mm
MA X I M U M C A PAC I T Y
3 half-size sheet pans
(6 GN 1/ 1)
3 full-size sheet pans
(3 GN 2/ 1)
5 half-size sheet pans
(10 GN 1 /1)
5 full-size sheet pans
(5 GN 2/ 1)
6 full-size sheet pans
(6 GN 2/ 1)
10 full-size sheet pans
(10 GN 2 /1)
Gastronor m 2/1: 530 x 650 x 20mm
NOT E S
CAPA C I T I ES SHOWN ARE F O R
➤
REHE AT I N G PRECOOKED PIECES.
Cookin g from r aw in a Co mbitherm Oven or
reheat ing af ter cooking f rom ra w in a low
temper ature cook and hold oven wi ll req uire
deeper p ans in o rder t o acco mmoda te the
quanti ty of re ndered fat. Deepe r pans w ill
preven t grea se fro m going direc tly do wn the
oven dra in and p rovi de safer hand ling.
81 .
Page 85

D U C K
— W h o l e
PROD UCT
➤
uck, whole:
D
4 lb (2 kg) each
PR EHE AT THE OVE N BE F OR E COO KIN G MO D E OP ERAT I ON
C O M B I T H E R M OV E N P R O C E D U R E
MATERIAL S
St a i n l e s s s t e el o r
➤
al u m i n u m fu l l - s i z e p a ns
Wire pan grids (optional)
Vegetabl e r elease spray ( optional)
Seasoning
TIMER
P R ES S
STA R T
CO R E
TE M P
FAN SP EED
Full Speed
OVEN MODE
Combinati on
COOKI NG TEMPERATURE
350°F (177°C )
S E L E CT CO OK I N G T IM E
Press and Set T I M E R
AP PROX IMAT E C OOK TIM E
FI NAL IN TER NAL
TE MPE RATU R E
60 to 90 minutes 1 90° to 200°F
(88° to 93°C)
USE APPROXIM ATE C OOKIN G T IM E S HOW N
FOR FULL OR PARTIAL LOA DS
O R
SE L E C T I N T E R N A L C O R E T E MP ER AT U RE
Pr e s s a n d S e t C O R E T E M P
AP PR OX IM AT E COR E
CU T-O F F T EMP ER ATU R E
180° to 190°F
(82° to 88°C)
AP PR OX IM AT E
TE MP ERA T UR E OVE RR I D E
10°F
(5° to 6 °C)
PRODUCT
REPARATION
P
➤
➤
MODEL
6•10
MODEL
7•14
MODEL
10•10
MODEL
10•18
10•20
MODEL
12•18
12•20
MODEL
20•20
PA N
SI Z E S
➤
Insert pan grids in pans and spray with
vegetable release spray if desired.
➤
Arrange duck s on pans or pan grids
and season as desired.
Fold wings and tuck under back of bird.
Load pans in preheated oven.
MA X I M U M C A PAC I T Y
3 ducks per pan: 6 ducks
2 full-size pans
(2 GN 1/ 1)
9 ducks per pan: 18 ducks
3 full-size sheet pans
(3 GN 2/ 1)
3 ducks per pan: 9 ducks
3 full-size pans
(3 GN 1/ 1)
9 ducks per pan: 54 ducks
6 full-size sheet pans
(6 GN 2/ 1)
9 ducks per pan: 72 ducks
8 full-size sheet pans
(8 GN 2/ 1)
9 ducks per pan: 90 ducks
10 full-size sheet pans
(10 GN 2 /1)
Full-Size Pans: 20" x 12" x 2-1/2"
Full-size sheet pans: 18" x 26" x 1"
Gastronor m 1/1: 530 x 325 x 20mm
Gastronor m 2/1: 530 x 650 x 20mm
P R ES S
STA R T
Ti m e a n d temperat u r e s e t t i n gs a r e s u g g e s ted g u i d e l i n e s only. D u e t o
variatio n s i n p r o d u c t q u a l i t y , w e i g h t , a n d d e s i r e d d e gree of donenes s t h e
controls ma y requ i r e so m e a d j u s t m e n t from th e time an d tempe r a t u r e s
shown. A l l c ooking s h o u l d be b a s e d o n i n t e r n a l pro d u c t t e m p e r a t u res.
S T O P T H E C O O K I N G F U N C T I O N A T A N Y
T I M E B Y P R E S S I N G T H E S T O P K E Y .
M E A T A N D P O U LT R Y
82 .
NOT E S
➤
FO L LOW DIRECTI O N S O N P R EVIOUS
PAG E T O R E H EAT.
TH E U S E O F S H E E T PAN S r e q u i re s
a d r i p pa n at t h e b o t to m o f th e
ov e n t o accommodate the quantity o f
rendered fat. A dr ip pan will preve nt
grease from goi ng directly down the
oven drain.
Page 86

PRODUCT
➤
PR EHE AT TH E OVE N BE FOR E COOK ING MO DE OPE RATIO N
C O M B I T H E R M OV E N P R O C E D U R E
am, cured:
H
Bone-in or boneless — 8 to 12 lb (4 to 5 kg)
FAN SPEED
Half Speed
VEN MODE
O
Combinati on
r
o
BY CORE TEM P: Delta-T
COOKING TEMPERATURE
MATERIALS
➤
PRODUCT
PREPARATION
➤
H A M
— Cu r e d
Stainless steel or aluminum full-size
pans or she et pans
Each ham sh ould be relativel y
uniform in size to assur e even
heating from item to item.
Place hams in pans and load in a
preheated oven.
275°F (135 °C)
S E L E C T C O O K I N G TI M E
TIMER
P R E S S
STA RT
Press and Set TIMER
AP P RO XI M AT E C O O K TI M E
13 minutes per lb
(20 minute s per kg)
TO BE CALCUL AT ED
ON A S I N GLE HAM
USE APPROXIMATE C OOKING TIME SHOWN
FOR FULL OR PARTI AL LOADS
FI N AL I N TE R N AL
TE M PE R AT UR E
165°F
(74°C)
O R
SE L EC T I N TE RN AL C OR E TE MP ER ATU RE
CO R E
TE M P
P R E S S
STA RT
Ti m e a n d tempera t u r e s e t t i ngs a r e su g g e s t ed g u i d e l i n e s only. D u e to
variatio n s i n p r o d u c t qu a l i t y , weight, a n d d e s i r e d degre e o f d o n e n e s s t h e
controls ma y requ i r e so m e a d j u s t m e n t from th e time an d temperat u r e s
shown. All cooki n g s h o u l d b e b a s e d o n i n t e r n a l pro d u c t t e m p e r a t u r e s .
S T O P T H E C O O K I N G F U N C T I O N A T A N Y
T I M E B Y P R E S S I N G T H E S T O P K E Y .
Pr e s s a n d S e t CO R E T E M P
AP P R O X I M A TE C O R E
CU T- O F F T E M P E R AT U R E
AP P R O X I M A TE
TE M P E R AT U R E O VE R R I D E
COMBINATION
150° to 160 °F
(66° to 71° C)
F O R D E L T A - T C O O K I N G U S E T H E
P R O B E T E M P E R A T U R E C H A R T O N
T H E D E L T A - T P R O C E D U R E P A G E .
5° to 15°F
(3° to 8°C)
➤
MODEL
6•10
MODEL
7•14
MODEL
10•10
MODEL
10•18
10•20
MODEL
12•18
12•20
MODEL
20•20
PA N
S I Z E S
➤
N O T E S
➤
➤
MA X IM UM C APA C IT Y
4 hams
2 half-siz e sheet pans
2 full-siz e pans (GN 1/1)
8 hams
2 full-siz e sheet pans
4 full-siz e pans (GN 1/1)
6 hams
3 half-siz e sheet pans
3 full-siz e pans (GN 1/1)
12 hams
3 full-siz e sheet pans
6 full-siz e pans (GN 1/1)
16 hams
4 full-siz e sheet pans
8 full-siz e pans (GN 1/1)
28 hams
7 full-siz e sheet pans
14 full-si ze pans (GN 1/1)
Half-Size sheet pans: 18" x 13" x 1"
Full-Size sheet pans: 18" x 26" x 1"
Full-Size Pans: 12" x 20" x 2- 1/2"
(GN 1/1: 53 0mm x 325mm x 65mm)
When using CORE-TEMP or CORE TEMP Delta -T feature, insert the pro be
so that the tip of the probe is centered
in one of th e hams without tou ching
any bone.
M E A T A N D P O U L T R Y
83 .
Page 87

H A M B U R G E R PAT T I E S
— Fr e s h o r F r o z e n
RE HEAT TH E OV EN BE F ORE CO OKI NG MOD E OPER AT ION
P
C O M B I T H E R M OV E N P R O C E D U R E
PRODUCT
➤
Hamburger pa tties, pre-formed:
oz (113 gm) each
4
FAN SPEED
MATERIALS
➤
PRODUCT
REPARATION
P
Stainless steel or aluminum sheet pans
Vegetabl e release spray
easoning
S
➤
Spray pans with vegetable release spray.
TIMER
P R E S S
STA RT
CO R E
TE M P
Full Speed
OVEN MODE
Combinati on
COOKING TEMPERATURE
350°F (177 °C)
S E L E C T C O O K I N G TI M E
Press and Set TIMER
AP P RO XI M AT E C O O K TI M E
FI N AL I N TE R N AL
TE M PE R AT UR E
IF THAWED
5 minutes
165°F (74° C)
IF FROZEN
0 minutes
USE APPROXIMATE C OOKING TIME SHOWN
FOR FULL OR PARTI AL LOADS
165°F (74° C)
O R
SE L EC T I N TE RN AL C OR E TE MP ER ATU RE
Pr e s s a n d S e t CO R E T E M P
AP P R O X I M A TE C O R E
CU T- O F F T E M P E R AT U R E
n/a n/a
AP P R O X I M A TE
TE M P E R AT U R E O VE R R I D E
➤
MODEL
6•10
MODEL
7•14
MODEL
10•10
MODEL
10•18
10•20
MODEL
12•18
12•20
MODEL
20•20
➤
Place patt ies side-by-side on pans
and season as desired.
Load pans in preheated oven.
MA X IM UM C APA C IT Y
6 half-siz e sheet pans
6 full-siz e pans
(6 GN 1/1)
7 full-siz e sheet pans
(7 GN 2/1)
10 half-si ze sheet pans
10 full-si ze pans
(10 GN 1/1)
10 full-si ze sheet pans
20 full-si ze pans
(20 GN 1/1)
12 full-si ze sheet pans
24 full-si ze pans
(24 GN 1/1)
20 full-si ze sheet pans
40 full-si ze pans
(40 GN 1/1)
P R E S S
STA RT
Ti m e a n d tempera t u r e s e t t i ngs a r e su g g e s t ed g u i d e l i n e s only. D u e to
variatio n s i n p r o d u c t qu a l i t y , weight, a n d d e s i r e d degre e o f d o n e n e s s t h e
controls ma y requ i r e so m e a d j u s t m e n t from th e time an d temperat u r e s
shown. All cooki n g s h o u l d b e b a s e d o n i n t e r n a l pro d u c t t e m p e r a t u r e s .
S T O P T H E C O O K I N G F U N C T I O N A T A N Y
T I M E B Y P R E S S I N G T H E S T O P K E Y .
M E A T A N D P O U L T R Y
84 .
PA N
S I Z E S
➤
N O T E S
➤
Half-Size sheet pans: 18" x 13" x 1"
Full-Size sheet pans: 18" x 26" x 1"
Full-Size Pans: 12" x 20" x 2- 1/2"
(GN 1/1: 53 0mm x 325mm x 65mm)
Th e u s e o f n on - s ti c k c o a t ed p a n s
is r e c o m m en d e d .
Page 88

PRODUCT
➤
Hot Dogs
PR EHE AT TH E OVE N BE FOR E COOK ING MO DE OPE RATIO N
C O M B I T H E R M OV E N P R O C E D U R E
MATERIALS
➤
Stainless steel full-size per forated
ans
p
H OT D O G S
TIMER
P R E S S
STA RT
P R E S S
STA RT
FAN SPEED
Full Speed
OVEN MODE
Steam
r
o
Low Tempe rature Steam
COOKING TEMPERATURE
Steam: 212 °F (100°C)
Low Tempe rature Steam:
160° to 180 °F (71° to 82°C)
S E L E C T C O O K I N G TI M E
Press and Set TIMER
AP P RO XI M AT E C O O K TI M E
IN STEAM
10 minutes
150°F (66° C)
LOW TEMP STEAM
13 minutes
USE APPROXIMATE C OOKING TIME SHOWN
FOR FULL OR PARTI AL LOADS
150°F (66° C)
FI N AL I N TE R N AL
TE M PE R AT UR E
PRODUCT
PREPARATION
➤
➤
➤
MODEL
6•10
MODEL
7•14
MODEL
10•10
MODEL
10•18
10•20
Place hot dogs on pans in a single layer.
Load pans in preheated oven.
MA X IM UM C APA C IT Y
6 full-siz e pans
(6 GN 1/1)
7 full-siz e pans
(7 GN 1/1)
10 full-si ze pans
(10 GN/1/1 )
20 full-si ze pans
(20 GN/1/1 )
O R
SE L EC T I N TE RN AL C OR E TE MP ER ATU RE
CO R E
TE M P
P R E S S
STA RT
Ti m e a n d tempera t u r e s e t t i ngs a r e su g g e s ted g u i d e l i n e s only. D u e to
variatio n s i n p r o d u c t qu a l i t y , weight, a n d d e s i r e d degre e o f d o n e n e s s t h e
controls ma y requi r e so m e a d j u s t m e n t from th e time an d temperat u r e s
shown. All cooki n g s h o u l d b e b a s e d o n i n t e r n a l pro d u c t t e m p e r a t u r e s .
S T O P T H E C O O K I N G F U N C T I O N A T A N Y
T I M E B Y P R E S S I N G T H E S T O P K E Y .
Pr e s s a n d S e t CO R E T E M P
AP P R O X I M A TE C O R E
CU T- O F F T E M P E R AT U R E
AP P R O X IM A TE
TE M P E R AT U R E O VE R R I D E
n/a n/a
M E A T A N D P O U L T R Y
MODEL
12•18
12•20
MODEL
20•20
PA N
S I Z E S
➤
N O T E S
➤
24 full-si ze pans
(24 GN/1/1 )
40 full-si ze pans
(40 GN/1/1 )
Full-size per forated pans:
20" x 12" x 2-1/2"
(GN 1/1: 53 0mm x 325mm x 65mm)
Avoid over-cooking to prevent split casing.
Unless using the Low Temperature Steam
program, remove from oven immediately to
prevent casings from splitting.
85 .
Page 89

G R I L L I N G
— C o m b i t h e r m Gr i l l i n g M e t h o d s
RE HEAT TH E OV EN BE F ORE CO OKI NG MOD E OPER AT ION
P
C O M B I T H E R M OV E N P R O C E D U R E
PRODUCT
Chicken Br easts ....4-8 oz . (113-227 gm.)
➤
Fish Fille ts ............4- 6 oz. (113-170 gm. )
ork Chops .... ......6 -8 oz. (170-227 gm .)
P
Steaks.... ..............4 -8 oz. (113-227 gm .)
FAN SPEED
MATERIALS
➤
Alto-Shaa m Combither m
Grill Grat e Shelf - Item SH-2 6731
TIMER
P R E S S
STA RT
Full Speed
OVEN MODE
Combinati on
COOKING TEMPERATURE
460°F (238 °C)
S E L E C T C O O K I N G TI M E
Press and Set TIMER
PP R OX IM AT E CO O K TI M EFIN A L I N T ER N A L TE M PE R AT UR E
A
Chicken Br easts:
6-7 minute s
Fish Fille ts:
4-6 minute s
Pork Chops :
6-7 minute s
Steaks Co ok 5°F (3°C) below
the final internal
temperatu res as
shown belo w:
130°F (54° C) R ARE
135°F (57° C) M ED RAR E
140°F (60° C) M EDIUM
150°F (66° C) M ED WEL L
160°F (71° C) W ELL
USE APPROXIMATE C OOKING TIME SHOWN
FOR FULL OR PARTI AL LOADS
PRODUCT
REPARATION
P
➤
➤
MODEL
6•10
MODEL
7•14
MODEL
10•10
MODEL
10•18
10•20
MODEL
12•18
12•20
Season ind ividual items as desired.
➤
Place on gr ill grate.
MA X IM UM C APA C IT Y
6 Grill Gra te Shelves
14 Grill Gr ate Shelves
10 Grill Gr ate Shelves
20 Grill Gr ate Shelves
24 Grill Gr ate Shelves
O R
SE L EC T I N TE RN AL C OR E TE MP ER ATU RE
CO R E
TE M P
P R E S S
STA RT
Ti m e a n d tempera t u r e s e t t i ngs a r e su g g e s ted g u i d e l i n e s only. D u e to
variatio n s i n p r o d u c t qu a l i t y , weight, a n d d e s i r e d degre e o f d o n e n e s s t h e
controls ma y requi r e so m e a d j u s t m e n t from th e time an d temperat u r e s
shown. All cooki n g s h o u l d b e b a s e d o n i n t e r n a l pro d u c t t e m p e r a t u r e s .
S T O P T H E C O O K I N G F U N C T I O N A T A N Y
T I M E B Y P R E S S I N G T H E S T O P K E Y .
86 .
Pr e s s a n d S e t CO R E T E M P
AP P R O X I M A TE C O R E
CU T- O F F T E M P E R AT U R E
AP P R O X IM A TE
TE M P E R AT U R E O VE R R I D E
n/a n/a
M E A T A N D P O U L T R Y
MODEL
20•20
PA N
S I Z E S
➤
N O T E S
➤
40 Grill Gr ate Shelves
n/a
Page 90

PRODUCT
➤
PR EHE AT TH E OVE N BE FOR E COOK ING MO DE OPE RATIO N
C O M B I T H E R M OV E N P R O C E D U R E
Leg of Lamb : 4 to 11 lb (1,8 to 5 kg)
ME AT SP E CIF I C AT IO N S WH I C H C A N B E US E D :
ower shank off
L
Lower shan k off, boneless
Oven prepa red, par tially boneless
Oven prepa red, bon eless and tied
FAN SPEED
Half Speed
VEN MODE
O
Combinati on
r
o
Delta-T Co re Temp
MATERIALS
➤
PRODUCT
PREPARATION
➤
➤
➤
MODEL
6•10
L A M B
— Le g
Stainless steel or aluminum roasting pan
Seasoning
Each leg of lamb should be rel atively
uniform in size to assur e even
heating from item to item.
Sea son as desired.
Load in pre heated oven.
As an alter native, cook in roasting
pans with herbs and spices.
MA X IM UM C APA C IT Y
2 to 3 half- size sheet pans
(2 to 3 GN 1/ 1)
COOKING TEMPERATURE
250°F (121 °C)
S E L E C T C O O K I N G TI M E
TIMER
Press and Set TIMER
AP P RO XI M AT E C O O K TI M E
10 minutes/lb
22 minutes/kg
RARE: 130°F (54°C)
15 minutes/lb
33 minutes/kg
20 minutes/lb
P R E S S
STA RT
44 minutes/lb
TO BE CALCUL AT ED
ON A S I N GLE LEG
USE APPROXIMATE C OOKING TIME SHOWN
FOR FULL OR PARTI AL LOADS
WELL: 160°F (71°C)
O R
SE L EC T I N TE RN AL C OR E TE MP ER ATU RE
CO R E
TE M P
P R E S S
STA RT
Pr e s s a n d S e t CO R E T E M P
AP P R O X I M A TE C O R E
CU T- O F F T E M P E R AT U R E
TE M P E R AT U R E O VE R R I D E
COMBINATION
MODE
RA R E : 115° F (46°C)
ME D : 125°F (52°C)
WE L L : 145° F (63°C)
FOR DELTA-T COOKING USE THE PROBE TEMPERATURE
CHART ON THE DELTA-T PROCEDURE PAGE.
STOP THE COOKING FUNCTION AT ANY
TIME BY PRESSING THE STOP KEY.
HOT FOOD HOLDING
INCREASE
17°C) WHEN IMMEDIATELY PLACED
ENVIRONMENT AT
FI N AL I N TE R N AL
TE M PE R AT UR E
MED: 140°F (60°C)
AP P R O X IM A TE
5° to 15°F
(3° to 8°C)
INTERNAL TEMPERATURE WILL
20° TO 30°F (11° TO
IN A HOT FOOD HOLDING
AD J U ST C U T -O F F
AC C O RD I N G LY
140°F (60°C).
TE M P ER AT U R E
.
M E A T A N D P O U L T R Y
MODEL
7•14
MODEL
10•10
MODEL
10•18
10•20
MODEL
12•18
12•20
MODEL
20•20
PA N
S I Z E S
➤
Half-Size sheet pans: 18" x 13" x 1"
Full-Size sheet pans: 18" x 26" x 1"
GN 1/1: 530 mm x 325mm x 20mm
3 full-siz e sheet pans
(3 GN 2/1)
3 to 4 half- size sheet pans
(3 to 4 GN 1/ 1)
3 to 4 full- size sheet pans
(3 to 4 GN 2/ 1)
4 to 5 full- size sheet pans
(4 to 5 GN 2/ 1)
5 to 6 full- size sheet pans
(5 to 6 GN 2/ 1)
GN 2/1: 650 mm x 530mm x 20mm
N O T E S
FO R BES T RE SU LTS : C ar ef u ll y
➤
mo n it o r in te r n al tem pe r at ure aft er
th e lam b re ac h es an in te r n al
te m pe r at ur e of 115° F (4 6° C ) si nc e
te m pe r at ur e wi l l in cr e as e ra pi d ly .
A more tend er produ ct with higher
moisture content and less sh rinkage will
be achieve d if this product is cooked in
an Alto-Sh aam low temperatu re cook
and hold ov en.
T i m e an d te m p e r a t u r e s e t t i n g s ar e su g g e s t e d gu i d e l i n e s o n l y . Du e
to va r i a t i o n s in p r o d u c t q u a lit y , w e i g h t , an d d e s i r e d d egr e e o f
don e n e s s th e co n t rols ma y re q u i r e so m e ad j ust m e n t fr o m th e ti m e
and te m p e r atu r e s sh o w n. Al l co oki n g sh o u ld be ba s e d on in t e r n a l
pro d u c t t e m p e ra t u r e s .
87 .
Page 91

L A M B
— Ra c k
PRODUCT
➤
RE HEAT TH E OV EN BE F ORE CO OKI NG MOD E OPER AT ION
P
C O M B I T H E R M OV E N P R O C E D U R E
Lamb rack:
3 to 5 lb (1, 3 to 2,3 kg) each
FAN SPEED
Full Speed
MATERIALS
➤
Stainless steel sheet pans
Wire pan grids (optional)
Seasoning
TIMER
P R E S S
STA RT
OVEN MODE
Combinati on
r
o
Delta-T Co re Temperature
COOKING TEMPERATURE
250°F (121 °C)
S E L E C T C O O K I N G TI M E
Press and Set TIMER
AP P RO XI M AT E C O O K TI M E
10 minutes/lb
22 minutes/kg
RARE: 130°F (54°C)
15 minutes/lb
33 minutes/kg
TO BE CALCUL AT ED
ON A S I N GLE RAC K
USE APPROXIMATE C OOKING TIME SHOWN
FOR FULL OR PARTI AL LOADS
MED: 140°F (60°C)
IN A L I N T ER N A L
F
EM P ER AT U RE
T
PRODUCT
REPARATION
P
➤
➤
MODEL
6•10
MODEL
7•14
MODEL
10•10
➤
Season as desired.
Load pans in preheated oven.
MA X IM UM C APA C IT Y
6 half-siz e sheet pans
(12 GN 1/1)
3 full-siz e sheet pans
(3 GN 2/1)
5 half-siz e sheet pans
(10 GN 1/1)
O R
SE L EC T I N TE RN AL C OR E TE MP ER ATU RE
CO R E
TE M P
P R E S S
STA RT
S T O P T H E C O O K I N G F U N C T I O N A T A N Y
T I M E B Y P R E S S I N G T H E S T O P K E Y .
88 .
Pr e s s a n d S e t CO R E T E M P
AP P R O X I M A TE C O R E
CU T- O F F T E M P E R AT U R E
COMBINATION
MODE
RA R E : 115° F (46°C)
ME D : 125°F (52°C)
WE L L : 145° F (63°C)
F O R D E L T A - T C O O K I N G U S E T H E
P R O B E T E M P E R A T U R E C H A R T O N
T H E D E L T A
- T P R O C E D U R E P A G E .
AP P R O X I M A TE
TE M P E R AT U R E O VE R R I D E
5° to 15°F
(3° to 8°C)
HOT FOOD HOLDING
INTERNAL TEMPERATURE WILL
INCREASE
17°C) WHEN IMMEDIATELY PLACED
20° TO 30°F (11° TO
IN A HOT FOOD HOLDING
ENVIRONMENT AT
AD J U ST C U T -O F F
AC C O RD I N G LY
140°F (60°C).
TE M P ER AT U R E
M E A T A N D P O U L T R Y
MODEL
10•18
10•20
MODEL
12•18
12•20
MODEL
20•20
.
S I Z E S
PA N
Half-Size sheet pans: 18" x 13" x 1"
Full-Size sheet pans: 18" x 26" x 1"
5 full-siz e sheet pans
(5 GN 2/1)
6 full-siz e sheet pans
(6 GN 2/1)
10 full-si ze sheet pans
(10 GN 2/1)
➤
GN 1/1: 530 mm x 325mm x 20mm
GN 2/1: 650 mm x 530mm x 20mm
N O T E S
➤
Ti m e a n d te m p e r a t u r e s ettings a r e sugges t e d g u i d e l ines o n l y . Due t o
v a r i a t i o n s i n pr o d u c t q u a l i t y , w e i g h t , a n d d e s i r e d d e g r e e o f
doneness th e co n t r o ls ma y re q u i r e some ad j u s t m e n t from th e ti m e
and te m p e r a t u res sh o w n . A l l coo k i n g should be b a s e d on in t e r n a l
product tempe r a t u r e s .
Page 92

PRODUCT
➤
PR EHE AT TH E OVE N BE FOR E COOK ING MO DE OPE RATIO N
C O M B I T H E R M OV E N P R O C E D U R E
eat loaf mi xture:
M
3 lb (1,4 kg ) per loaf
FAN SPEED
Full Speed
MATERIALS
➤
PRODUCT
PREPARATION
➤
M E AT L OA F
Loaf pans
Vegetabl e release spray (o ptional)
Spray pans with vegetable re lease
spray if de sired.
Place mixt ure in loaf pans.
TIMER
P R E S S
STA RT
CO R E
TE M P
OVEN MODE
Combinati on
COOKING TEMPERATURE
300° to 350 °F (150° to 177°C)
S E L E C T C O O K I N G TI M E
Press and Set TIMER
AP P RO XI M AT E C O O K TI M E
FI N AL I N TE R N AL
TE M PE R AT UR E
60 minutes 165° to 170°F
(74° to 77° C)
USE APPROXIMATE C OOKING TIME SHOWN
FOR FULL OR PARTI AL LOADS
O R
SE L EC T I N TE RN AL C OR E TE MP ER ATU RE
Pr e s s a n d S e t CO R E T E M P
AP P R O X I M A TE C O R E
CU T- O F F T E M P E R AT U R E
AP P R O X IM A TE
TE M P E R AT U R E O VE R R I D E
➤
MODEL
6•10
MODEL
7•14
MODEL
10•10
MODEL
10•18
10•20
MODEL
12•18
12•20
➤
Load pans in preheated oven by
placing lo af pans directly on the wire
shelves.
MA X IM UM C APA C IT Y
9 loaf pans
3 shelves
24 loaf pan s
3 shelves
15 loaf pan s
5 shelves
40 loaf pan s
5 shelves
48 loaf pan s
6 shelves
150° to 160 °F
(66° to 71° C)
P R E S S
STA RT
Ti m e a n d tempera t u r e s e t t i ngs a r e su g g e s ted g u i d e l i n e s only. D u e to
variatio n s i n p r o d u c t qu a l i t y , weight, a n d d e s i r e d degre e o f d o n e n e s s t h e
controls ma y requi r e so m e a d j u s t m e n t from th e time an d temperat u r e s
shown. All cooki n g s h o u l d b e b a s e d o n i n t e r n a l pro d u c t t e m p e r a t u r e s .
S T O P T H E C O O K I N G F U N C T I O N A T A N Y
T I M E B Y P R E S S I N G T H E S T O P K E Y .
10° to 20°F
(6° to 11°C )
M E A T A N D P O U L T R Y
MODEL
20•20
PA N
S I Z E S
➤
N O T E S
➤
80 loaf pan s
10 shelves
Loaf pans, 3 lb (1,4 kg) capac ity
4-1/4" x 8- 1/8" x 3-1/8"
(108mm x 20 6mm x 79mm)
89 .
Page 93

P O R K
— Ba c k R i b s
PRODUCT
➤
Pork back ribs:
-3/4 down
1
RE HEAT TH E OV EN BE F ORE CO OKI NG MOD E OPER AT ION
P
C O M B I T H E R M OV E N P R O C E D U R E
MATERIALS
Stainless steel or aluminum sheet
pans or ful l-size pans
➤
Seasoning
Barbeque Sauce (optional)
TIMER
FAN SPEED
Full Speed
OVEN MODE
Combinati on
COOKING TEMPERATURE
FOR COOKIN G: 250°F (121°C)
FOR REHEATING: 375°F (191°C)
S E L E C T C O O K I N G TI M E
Press and Set TIMER
AP P RO XI M AT E C O O K TI M E
FROM RAW
45 to 60 min utes
FI N AL I N TE R N AL
TE M PE R AT UR E
175° to 180 °F
(79° to 82° C)
PRODUCT
PREPARATION
➤
➤
➤
MODEL
6•10
MODEL
7•14
Place ribs si de-by-sid e on pans and
eason as desired.
s
oad p ans in p rehe ated oven.
L
NO T E: Whe n cooki ng f or i mmed iate
servic e or hot f ood hold ing,
brush with he ated ba rbequ e
sauce after ribs ar e remov ed
from oven to prev ent sauce from
bur ning. As an al ternative, ribs
can b e cooked in ad vance,
rapidl y chilled and remov ed from
refrig eration for reheating and
service as required. Ba rbecue
sauce can be used for th e
reheat ing proc ess.
MA X IM UM C APA C IT Y
3 half-siz e sheet pans
(3 GN 1/1)
4 full-siz e sheet pans
(4 GN 2/1)
P R E S S
STA RT
USE APPROXIMATE C OOKING TIME SHOWN
FOR FULL OR PARTI AL LOADS
O R
TIMER
P R E S S
STA RT
Ti m e a n d tempera t u r e s e t t i ngs a r e su g g e s ted g u i d e l i n e s only. D u e to
variatio n s i n p r o d u c t qu a l i t y , weight, a n d d e s i r e d degre e o f d o n e n e s s t h e
controls ma y requi r e so m e a d j u s t m e n t from th e time an d temperat u r e s
shown. All cooki n g s h o u l d b e b a s e d o n i n t e r n a l pro d u c t t e m p e r a t u r e s .
S T O P T H E C O O K I N G F U N C T I O N A T A N Y
T I M E B Y P R E S S I N G T H E S T O P K E Y .
Press and Set TIMER
AP P RO XI M AT E C O O K TI M E
FOR REHEATING
8 minutes
FI N AL I N TE R N AL
TE M PE R AT UR E
165°F (74° C)
MODEL
10•10
MODEL
10•18
10•20
MODEL
12•18
12•20
MODEL
20•20
PA N
S I Z E S
➤
N O T E S
➤
5 half-siz e sheet pans
(5 GN 1/1)
5 full-siz e sheet pans
(5 GN 2/1)
6 full-siz e sheet pans
(6 GN 2/1)
10 full-si ze sheet pans
(10 GN 2/1)
Half-Size sheet pans: 18" x 13" x 1"
Full-Size sheet pans: 18" x 26" x 1"
Gastronorm 1/1: 530mm x 325mm x 20mm
Gastronorm 2/1: 650mm x 530mm x 20mm
90 .
M E A T A N D P O U L T R Y
Page 94

FO R OVENS EQ U IPPE D WITH SMO K ING FUN CTIO N
RE HEAT TH E OV EN BE F ORE CO OKI NG MOD E OPER AT ION
P
C O M B I T H E R M OV E N P R O C E D U R E
PRODUCT
➤
Pork Back Ribs: 1-3/4 down
FAN SPEED
Full Speed
WOOD CHIP CONTAINER
Full
OVEN MODE
Combination
en
th
Steam
COOKING TEMPERATURE
Combinati on mode: 250°F (121°C)
Steam mode : 160°F (71°C)
S E L E C T S M O K I N G TI M E
TIMER
Press and Set TIM ER
AP P RO XI M AT E S M O KE T I ME
FI N AL I N TE R N AL
TE M PE R AT UR E
MATERIALS
➤
PRODUCT
REPARATION
P
➤
➤
MODEL
6•10
— Ba c k R i b s , S m o k e d
tainless steel or aluminum sheet
S
pans or ful l-size pans
Seasoning
Barbeque Sauce (optional)
Place ribs si de-by-sid e on pans and
season as de sired.
➤
Load pans in preh eated ov en.
OT E : Whe n cookin g for immed iate
N
servic e or hot f ood hold ing,
brush with he ated ba rbequ e
sauce after ribs ar e remov ed
from oven to prev ent sauce from
bur ning. As an al ternative, ribs
can b e cooked in ad vance,
rapidl y chilled and remov ed from
refrig eration for reheating and
service as required. Ba rbecue
sauce can be used for th e
reheat ing proc ess.
MA X IM UM C APA C IT Y
5 full-siz e pans or GN 1/1
5 half-siz e sheet pans
P O R K
COM B I N ATION
MODE
60 minutes
then
175° to 180°F
(79° to 92°C)
STEA M MO D E
60 minutes
USE APPROXIMATE SMOKING TIME SHOWN
FOR FULL OR PARTI AL LOADS
Ti m e and temperature s e t t i n g s a r e suggested g uidelines o n l y. Due t o
va r i a t i ons i n prod u c t qua l i t y, we i g h t , and d e s i red d e g ree of donen e s s the
co n t r ols may req u i r e s ome adjust m e n t f rom the time and tem p e r a t ures
sh o w n . All cook i n g sh o uld be base d on in t e rnal pro d u c t temper a t u res.
SMOKER
Press Chef Function key.
Turn knob until Smoker icon is displayed.
Press Chef Function key.
“YES” or “NO” check box will appear in display.
Use knob or up/down arrow keys to select “YES”.
Press Chef Function key to confirm setting.
Press START.
S T O P T H E S M O K I N G F U N C T I O N A T A N Y
T I M E B Y P R E S S I N G T H E S T O P K E Y .
OR On S-Control models, press the Smoking
button at the beginning of the cooking cycle.
M E A T A N D P O U L T R Y
MODEL
7•14
MODEL
10•10
MODEL
10•18
PA N
S I Z E S
➤
N O T E S
➤
13 full-si ze pans or GN 1/1
6 full-siz e sheet pans or GN 2/1
9 full-siz e pans or GN 1/1
9 half-siz e sheet pans
19 full-si ze pans or GN 1/1
9 full-siz e sheet pans or GN 2/1
Full-s ize pans : 20" x 12 " x 2-1 /2"
Full-s ize shee t pans: 18" x 26" x 1"
Half-s ize sheet pans: 18" x 13" x 1"
Gastro norm 1/1: 530 x 3 25 x 65 mm
Gastro norm 2/1: 650 x 5 30 x 65 mm
When using the smoking function, products
such as ribs may require heavier smoke
penetration to reach full smoke flavor and
should remain in the oven after cooking has
been completed Set the oven in the Low
Temperature Steam Mode at 140° to 160°F
(60° to 71°C) and allow the product to remain
in the oven for a period of one hour.
DO NOT open the oven door during the
smoking process.
91 .
Page 95

P O R K R I B S
— Tw o - S t e p M e t h o d
C O M B I T H E R M OV E N P R O C E D U R E
PRODUCT
➤
Pork ribs:
1-3/4 down
FAN SPEED
Full Speed
OVEN MODE
Combinati on
COOKING TEMPERATURE
375°F (191 °C)
S E L E C T C O O K I N G TI M E
TIMER
Press and Set TIMER
AP P RO XI M AT E C O O K TI M E
8 minutes
REHEATING
P R E S S
STA RT
USE APPROXIMATE C OOKING TIME SHOWN
FOR FULL OR PARTI AL LOADS
O R
PR EHE AT TH E OVE N BE FOR E COOK ING MO DE OPE RATIO N
FI N AL I N TE R N AL
TE M PE R AT UR E
165°F (74° C)
PRODUCT
PREPARATION
➤
➤
MODEL
6•10
MODEL
7•14
FIRST STE P:
● The 2-step method of cooking consists
➤
of precooking the ribs in an Alto-Shaam
cook and hold oven to retain moisture.
● Pr epare ribs accordi ng to coo k ing
pr ocedure s fo u nd in th e Alt o -Shaam
Lo w Tem peratu r e Co oking and
ol ding G uidelin es.
H
ft e r cooking in th e Alto-Sha a m cook
● A
an d hold o v e n , prope r l y chill a nd
re f r i gerate ri b s at 3 8 ° to 4 0 ° F
(c . 3° to 4°C).
SECOND ST EP:
● Spray pan grids with vegetable
release spray.
● Shingle ribs or place side-by -side on
pan grids.
● Brush with barbecue sauce (optional).
● Load pans in preheated Combitherm oven.
MA X IM UM C APAC IT Y
3 half-siz e sheet pans
(3 GN 1/1)
4 full-siz e sheet pans
(4 GN 2/1)
SE L EC T I N TE RN AL C OR E TE MP ER ATU RE
CO R E
TE M P
Pr e s s a n d S e t CO R E T E M P
AP P R O X I M A TE C O R E
CU T- O F F T E M P E R AT U R E
AP P R O X I M A TE
TE M P E R AT U R E O VE R R I D E
n/a n/a
P R E S S
STA RT
Ti m e a n d tempera t u r e s e t t i ngs a r e su g g e s t ed g u i d e l i n e s only. D u e to
variatio n s i n p r o d u c t qu a l i t y , weight, a n d d e s i r e d degre e o f d o n e n e s s t h e
controls ma y requ i r e so m e a d j u s t m e n t from th e time an d temperat u r e s
shown. All cooki n g s h o u l d b e b a s e d o n i n t e r n a l pro d u c t t e m p e r a t u r e s .
S T O P T H E C O O K I N G F U N C T I O N A T A N Y
T I M E B Y P R E S S I N G T H E S T O P K E Y .
MATERIALS
➤
Stainless steel or aluminum sheet pans
Wire pan grids (icing racks )
Vegetabl e release spray
Barbecue sauce (optional)
MODEL
10•10
MODEL
10•18
10•20
MODEL
12•18
12•20
MODEL
20•20
PA N
S I Z E S
➤
N O T E S
➤
5 half-siz e sheet pans
(5 GN 1/1)
5 full-siz e sheet pans
(5 GN 2/1)
6 full-siz e sheet pans
(6 GN 2/1)
10 full-si ze sheet pans
(10 GN 2/1)
Half-Size sheet pans: 18" x 13" x 1"
Full-Size sheet pans: 18" x 26" x 1"
Gastronorm 1/1: 530mm x 325mm x 20mm
Gastronorm 2/1: 650mm x 530mm x 20mm
92 .
M E A T A N D P O U L T R Y
Page 96

PRODUCT
➤
RE HEAT TH E OV EN BE F ORE CO OKI NG MOD E OPER AT ION
P
C O M B I T H E R M OV E N P R O C E D U R E
Pork loin: 6 to 8 lb (2,7 to 3,6 kg) each
— Center Cu t
— Boneless
Boned and Tie d
—
FAN SPEED
MATERIALS
➤
P O R K
— Lo i n R o a s t
tainless steel or aluminum sheet pans
S
Wire pan grids
easoning
S
TIMER
P R E S S
STA RT
Full Speed
OVEN MODE
Combinati on
COOKING TEMPERATURE
275° to 300 °F (135° to 149°C)
S E L E C T C O O K I N G TI M E
Press and Set TIMER
IN A L I N T ER N A L
PP R OX IM AT E CO O K TI M E
A
F
TE M PE R AT UR E
20 minutes per lb
(44 minute s per kg)
CENTER CUT
165° to 170 °F
(74° to 77° C)
BONED & TIE D
TO BE CALCUL AT ED
ON A S I N GLE ROA S T
USE APPROXIMATE C OOKING TIME SHOWN
FOR FULL OR PARTI AL LOADS
170°F (77° C)
O R
SE L EC T I N TE RN AL C OR E TE MP ER ATU RE
RODUCT
P
PREPARATION
➤
➤
➤
MODEL
6•10
MODEL
7•14
MODEL
10•10
MODEL
10•18
10•20
Each roast should be relatively
uniform in size to assur e even
heating from item to item.
Se a s o n r o as t s a s d e s i r e d an d
pl a c e in p a n s .
Load pans in preheated oven.
MA X IM UM C APA C IT Y
3 half-siz e sheet pans
(3 GN 1/1)
3 full-siz e sheet pans
(3 GN 2/1)
5 half-siz e sheet pans
(5 GN 1/1)
5 full-siz e sheet pans
(5 GN 2/1)
CO R E
TE M P
Pr e s s a n d S e t CO R E T E M P
AP P R O X I M A TE C O R E
CU T- O F F T E M P E R AT U R E
AP P R O X I M A TE
TE M P E R AT U R E O VE R R I D E
COM B I N ATION
MODE
CE N T E R 155°F (68°C)
RO L L ED 160°F (71°C)
F O R D E L T A - T C O O K I N G U S E T H E
P R O B E T E M P E R A T U R E C H A R T O N
T H E D E L T A
P R E S S
STA RT
Ti m e a n d tempera t u r e s e t t i ngs a r e su g g e s ted g u i d e l i n e s only. D u e to
variatio n s i n p r o d u c t qu a l i t y , weight, a n d d e s i r e d degre e o f d o n e n e s s t h e
controls ma y requi r e so m e a d j u s t m e n t from th e time an d temperat u r e s
shown. All cooki n g s h o u l d b e b a s e d o n i n t e r n a l pro d u c t t e m p e r a t u r e s .
S T O P T H E C O O K I N G F U N C T I O N A T A N Y
T I M E B Y P R E S S I N G T H E S T O P K E Y .
- T P R O C E D U R E P A G E .
5° to 10°F
(3° to 5°C)
M E A T A N D P O U L T R Y
MODEL
12•18
12•20
MODEL
20•20
PA N
S I Z E S
➤
N O T E S
➤
6 full-siz e sheet pans
(6 GN 2/1)
10 full-si ze sheet pans
(10 GN 2/1)
Half-Size sheet pans: 18" x 13" x 1"
Full-Size sheet pans: 18" x 26" x 1"
GN 1/1: 530 mm x 325mm x 20mm
GN 2/1: 650 mm x 530mm x 20mm
A more tend er produ ct with higher
moisture content and less shrinkage will
be achieve d if this product is cooked
over n ight in an Alto-Sh aam low
temperatu re cook and hold oven.
93 .
Page 97

P O R K S H O U L D E R
— Sm o k e d
C O M B I T H E R M OV E N P R O C E D U R E
PRODUCT
Pork Shoulder, Boston Butt, Bone-in or
➤
Boneless, 8 to 10 lb (4 to 5 kg)
FAN SPEED
Full Speed
WOOD CHIP CONTAINER
Full
FO R OVENS EQ U IPPE D WITH SMO K ING FUN CTIO N
PR EHE AT TH E OVE N BE FOR E COOK ING MO DE OPE RATIO N
MATERIALS
➤
Stainless steel or aluminum sheet
pans or full-size pans
Vegetable release spray (optional)
Seasoning
TIMER
OVEN MODE
Combination
COOKING TEMPERATURE
225°F (107°C)
5 hours
S E L E C T S M O K I N G TI M E
Press and Set TIM ER
AP P RO XI M AT E S M O KE T I ME
1 hour
(light flavor)
2 hours
(heavy flavor)
FI N AL I N TE R N AL
TE M PE R AT UR E
185°F
(80°C)
PRODUCT
PREPARATION
➤
➤
➤
MODEL
6•10
MODEL
7•14
MODEL
10•10
Spray pans with vegetable release
spray if desired.
Place pork shoulder in pans and
season as desired.
Load pans in preheated oven
MA X IM UM C APA C IT Y
5 full-siz e pans or GN 1/1
5 half-siz e sheet pa ns
13 full-si ze pans or GN 1/1
6 full-siz e sheet pa ns or GN 2/1
9 full-siz e pans or GN 1/1
9 half-siz e sheet pa ns
USE APPROXIMATE S MOKING TIME SHOWN
FOR FULL OR PARTI AL LOADS
Ti m e and temperature s e t t i n g s a re suggested g u idelines o n l y. Due t o
va r i a t i ons i n prod u c t qua l i t y, we i g h t , and d e s i red d e g ree o f donene s s the
co n t r ols may req u i r e s ome adjust m e n t f rom the time and tem p e r a t ures
sh o w n . All cooki n g sh o u ld be base d on in t e rnal pro d u c t temper a t u res.
SMOKER
Press Chef Function key.
Turn knob until Smoker icon is displayed.
Press Chef Function key.
“YES” or “NO” check box will appear in display.
Use knob or up/down arrow keys to select “YES”.
Press Chef Function key to confirm setting.
Press START.
S T O P T H E S M O K I N G F U N C T I O N A T A N Y
T I M E B Y P R E S S I N G T H E S T O P K E Y .
OR On S-Control models, press the Smoking
button at the beginning of the cooking cycle.
M E A T A N D P O U L T R Y
94 .
MODEL
10•18
PA N
S I Z E S
➤
N O T E S
19 full-si ze pans or GN 1/1
9 full-siz e sheet pa ns or GN 2/1
Full-size pans: 20" x 12" x 2-1/2"
Full-size sheet pans: 18" x 26" x 1"
Half-size sheet pans: 18" x 13" x 1"
Gastronor m 1/1: 530 x 32 5 x 65mm
Gastronor m 2/1: 650 x 53 0 x 65mm
➤
Page 98

PRODUCT
➤
PR EHE AT TH E OVE N BE FOR E COOK ING MO DE OPE RATIO N
C O M B I T H E R M OV E N P R O C E D U R E
Breakfast sausage, links or patties:
Raw
FAN SPEED
Full Speed
OVEN PROGRAM
Combinati on
MATERIALS
➤
PRODUCT
PREPARATION
➤
➤
➤
S AU S A G E
— Br e a k f a s t L i n k s
Stainless steel or aluminum sheet pans
Place saus age links or patti es in a
ingle laye r on pans and load in a
s
preheated oven.
NO T E: The gentle steaming capabilities of
the Low Temperature Steam
program will provide the ability to
cook in advance for finishing
(browning) on a grill. This method
will help prevent split casings and
provide a final product with more
moisture content.
MA X IM UM C APA C IT Y
TIMER
P R E S S
STA RT
S E L E C T C O O K I N G TE M P ER AT U R E
Combinati on Steam:
350° to 375 °F (177° to 191°C)
S E L E C T C O O K I N G TI M E
Press and Set TIMER
AP P RO XI M AT E C O O K TI M E
8 minutes
USE APPROXIMATE C OOKING TIME SHOWN
FOR FULL OR PARTI AL LOADS
FI N AL I N TE R N AL
TE M PE R AT UR E
165°F (74° C)
O R
MODEL
6•10
MODEL
7•14
MODEL
10•10
MODEL
10•18
10•20
MODEL
12•18
12•20
MODEL
20•20
6 half-siz e sheet pans
(6 GN 1/1)
7 full-siz e sheet pans
(7 GN 2/1)
10 half-si ze sheet pans
(10 GN 1/1)
10 full-si ze sheet pans
(10 GN 2/1)
12 full-si ze sheet pans
(12 GN 2/1)
20 full-si ze sheet pans
(20 GN 2/1)
SE L EC T I N TE RN AL C OR E TE MP ER ATU RE
CO R E
TE M P
Pr e s s a n d S e t CO R E T E M P
AP P R O X I M A TE C O R E
CU T- O F F T E M P E R AT U R E
AP P R O X IM A TE
TE M P E R AT U R E O VE R R I D E
n/a n/a
P R E S S
STA RT
Ti m e a n d tempera t u r e s e t t i ngs a r e su g g e s t ed g u i d e l i n e s only. D u e to
variatio n s i n p r o d u c t qu a l i t y , weight, a n d d e s i r e d degre e o f d o n e n e s s t h e
controls ma y requ i r e so m e a d j u s t m e n t from th e time an d temperat u r e s
shown. All cooki n g s h o u l d b e b a s e d o n i n t e r n a l pro d u c t t e m p e r a t u r e s .
S T O P T H E C O O K I N G F U N C T I O N A T A N Y
T I M E B Y P R E S S I N G T H E S T O P K E Y .
M E A T A N D P O U L T R Y
PA N
S I Z E S
➤
N O T E S
➤
Half-Size sheet pans: 18" x 13" x 1"
Full-Size sheet pans: 18" x 26" x 1"
GN 1/1: 530 mm x 325mm x 20mm
GN 2/1: 650 mm x 530mm x 20mm
Avoid ov er cooking to prev ent split
casings. Unless using the Lo w
Temperat ure Stea m mode, remove
product from oven immediately to
prevent ca sings from splitting.
95 .
Page 99

S AU S A G E
— Fr e s h
PRODUCT
➤
Sausage, Fresh (raw)
FAN SPEED
Full Speed
OVEN MODE
Steam
o
COOKING TEMPERATURE
RE HEAT TH E OV EN BE F ORE CO OKI NG MOD E OPER AT ION
P
C O M B I T H E R M OV E N P R O C E D U R E
r
Low Tempe rature Steam
MATERIALS
➤
PRODUCT
PREPARATION
➤
Stainless steel full-size pans
Place saus age links or patti es in a
single lay er on pans and load in a
preheated oven.
NO T E: The gentle steaming capabilities of
the Low Temperature Steam mode
will provide the ability to cook in
advance for finishing (browning) on
a grill. This method will help
prevent split casings and provide a
final product with more moisture
content.
TIMER
P R E S S
STA RT
CO R E
TE M P
Steam: 212 °F (100°C)
Low Tempe rature Steam: 160°F (71°C )
S E L E C T C O O K I N G TI M E
Press and Set TIMER
AP P RO XI M AT E C O O K TI M E
FI N AL I N TE R N AL
TE M PE R AT UR E
IN STEAM
13 to 15 minutes
IN LOW
175°F (79° C)
TEM P E R ATURE
STEA M
15 to 20 minutes
USE APPROXIMATE C OOKING TIME SHOWN
FOR FULL OR PARTI AL LOADS
O R
SE L EC T I N TE RN AL C OR E TE MP ER ATU RE
Pr e s s a n d S e t CO R E T E M P
AP P R O X I M A TE C O R E
CU T- O F F T E M P E R AT U R E
AP P R O X IM A TE
TE M P E R AT U R E O VE R R I D E
➤
MODEL
6•10
MODEL
7•14
MODEL
10•10
MODEL
10•18
10•20
MODEL
12•18
12•20
➤
MA X IM UM C APA C IT Y
6 full-siz e pans
(6 GN 1/1)
7 full-siz e sheet pans
(7 GN 2/1)
10 full-si ze pans
(10 GN 1/1)
20 full-si ze pans
(20 GN 1/1)
24 full-si ze pans
(24 GN 1/1)
n/a n/a
P R E S S
STA RT
Ti m e a n d tempera t u r e s e t t i ngs a r e su g g e s ted g u i d e l i n e s only. D u e to
variatio n s i n p r o d u c t qu a l i t y , weight, a n d d e s i r e d degre e o f d o n e n e s s t h e
controls ma y requi r e so m e a d j u s t m e n t from th e time an d temperat u r e s
shown. All cooki n g s h o u l d b e b a s e d o n i n t e r n a l pro d u c t t e m p e r a t u r e s .
S T O P T H E C O O K I N G F U N C T I O N A T A N Y
T I M E B Y P R E S S I N G T H E S T O P K E Y .
M E A T A N D P O U L T R Y
96 .
MODEL
20•20
PA N
S I Z E S
➤
N O T E S
➤
40 full-si ze pans
(40 GN 1/1)
Half-Size sheet pans: 18" x 13" x 1"
Full-Size sheet pans: 18" x 26" x 1"
GN 1/1: 530 mm x 325mm x 20mm
GN 2/1: 650 mm x 530mm x 20mm
Avoid ov er cooking to prev ent split
casings. Unless using the Lo w
Temperat ure Stea m program option,
remove from oven im mediately to
prevent sausage casings from splitt ing.
Page 100

PRODUCT
➤
PR EHE AT TH E OVE N BE FOR E COOK ING MO DE OPE RATIO N
C O M B I T H E R M OV E N P R O C E D U R E
Sausage, precooked or smoked
MATERIALS
➤
S AU S A G E
— Pr e c o o k e d
Stainless steel or aluminum sheet
pans or ful l-size pans
TIMER
P R E S S
STA RT
CO R E
TE M P
FAN SPEED
Full Speed
OVEN MODE
Combinati on
r
o
Low Tempe rature Steam
COOKING TEMPERATURE
Combinati on Steam: 275°F (1 35°C)
Low Tempe rature Steam: 180°F (82°C)
S E L E C T C O O K I N G TI M E
Press and Set TIMER
AP P RO XI M AT E C O O K TI M E
FI N AL I N TE R N AL
TE M PE R AT UR E
COM B I N ATION
MOD E
10 to 15 minutes
150°F (66° C)
LOW TEMP
STEA M
15 to 10 minutes
USE APPROXIMATE C OOKING TIME SHOWN
FOR FULL OR PARTI AL LOADS
O R
SE L EC T I N TE RN AL C OR E TE MP ER ATU RE
Pr e s s a n d S e t CO R E T E M P
AP P R O X I M A TE C O R E
CU T- O F F T E M P E R AT U R E
n/a n/a
AP P R O X IM A TE
TE M P E R AT U R E O VE R R I D E
PRODUCT
PREPARATION
➤
➤
➤
MODEL
6•10
MODEL
7•14
MODEL
10•10
MODEL
10•18
10•20
MODEL
12•18
12•20
MODEL
20•20
PA N
S I Z E S
Half-Size Sheet Pans: 18" x 13" x 1"
Full-Size Sheet Pans: 18" x 26" x 1"
Full-Size Pans: 20" x 12" x 2- 1/2"
➤
Place saus age side-by-side in pans.
Load pans in preheated oven.
MA X IM UM C APA C IT Y
6 half-siz e sheet pans
6 full-siz e pans
(6 GN 1/1)
7 full-siz e sheet pans
(7 GN 2/1)
10 half-si ze sheet pans
10 full-si ze pans
(10 GN 1/1)
10 full-si ze sheet pans
20 full-si ze pans
(20 GN 1/1)
12 full-si ze sheet pans
24 full-si ze pans
(24 GN 1/1)
20 full-si ze sheet pans
40 full-si ze pans
(40 GN 1/1)
P R E S S
STA RT
Ti m e a n d tempera t u r e s e t t i ngs a r e su g g e s ted g u i d e l i n e s only. D u e to
variatio n s i n p r o d u c t qu a l i t y , weight, a n d d e s i r e d degre e o f d o n e n e s s t h e
controls ma y requi r e so m e a d j u s t m e n t from th e time an d temperat u r e s
shown. All cooki n g s h o u l d b e b a s e d o n i n t e r n a l pro d u c t t e m p e r a t u r e s .
S T O P T H E C O O K I N G F U N C T I O N A T A N Y
T I M E B Y P R E S S I N G T H E S T O P K E Y .
M E AT A N D P O U LT R Y
N O T E S
➤
GN 1/1: 530 mm x 325mm x 20mm
GN 2/1: 530 mm x 650mm x 20mm
Avoid ov er-cooking to prevent split
casings. Unless using the Lo w
Temperat ure Stea m mode, remove
product from oven immediately to
prevent ca sings from splitting.
97 .
 Loading...