

Page 1
Operator's manual
DV-P4420S
ON
OFF
POWER
DVD / MP3 / KODAK PICTURE CD / CD / CD-R & CD-RW PLAYER
DVD PLAYERDVD PLAYER
DV-P4420S
L
VE
AY
PL
PAUSE
T
PREV
EJEC
LE
STOP
XT
NE
ONES
PH
Operator's manual
1~20
Page 2

Getting started
Dear customers:
May we take this opportunity to thank you for purchasing this DVD player. We strongly recommend that you carefully study the
operating instructions before operating the unit.
Main Features
Fully compatible with DVD, MP3,CD, CD-R, CD-RW and KODAK PICTURE CD disc.
Compatible with full DVD playback functions: multi-angle, multi-language,
multi-story, parental control, etc..
Advanced 10-bit/27MHz video D/A converter with over 500 lines of horizontal
resolution.
Video output: Normal video output, S-video output, 21 pin scart,
Audio output: Dolby Digital 2ch output, MPEG-II Audio output,Coaxial
digital output
24-bit/96kHz audio D/A converter.
3-step zoom/smooth scan.
NTSC/PAL TV system compatible.
Linear PCM decoding output.
and optical
Features of audio specifications
Dolby Digital 2ch decoding output
MPEG-II Audio output
Linear PCM audio decoding output
MP3 audio decoding output
Playback features
Skipping ahead and skipping back
Multi-speed slow motion playback
Programmable playback
Time search
Features of playback specifications
This product complies the MPEG II standardization law.
-720 X 480 £¨30Hz£©
-720 X 576 £¨25Hz£©
PAL and NTSC
Before using the player, please ensure that the local AC voltage is suitable for this unit.Before using the player, please ensure that the local AC voltage is suitable for this unit.
3-step zooming playback
3-way repeat playback
Numeric selection
Page 3
Getting started
Getting startedGetting started
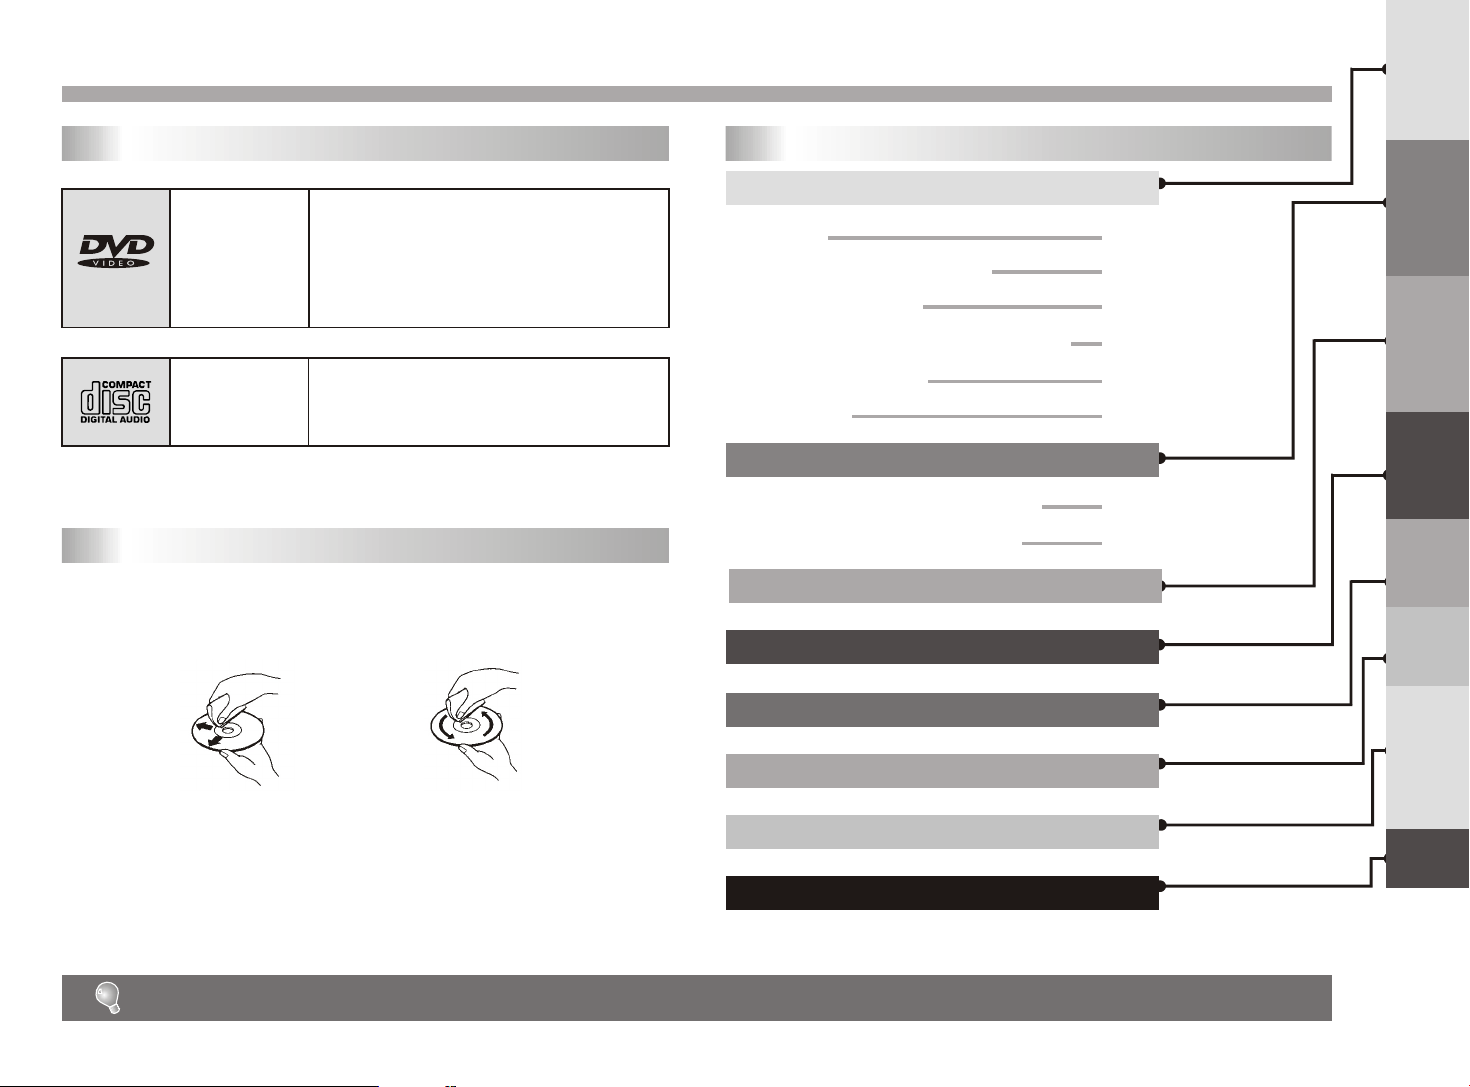
Disc types
Disc size 12cm
Single side, single layer /single side,
Audio & Video
Audio
double layer
PAL and NTSC DVD disc
Playback time 135min/240min max.
Disc size 12cm/8cm
CD disc
Playback time 74min/20min max
Disc maintenance
-Before playback, wipe the disc from the center hole toward the outer
edge with a clean cloth.
Table of contents
Getting Started
Features
Disc types & maintenance
Safety precautions
Accessories and remote control unit
System connection
Front panel
Basic operation
Starting playback and function buttons
Searching buttons and other buttons
MP3 & JPEG operations
Playback mode
Menu and program
P1-P6
P1
P2
P3
P4
P5
P6
P7-P8
P7
P8
P9
P11
P13
Basic operationBasic operation
operations
MP3/JPEG
operations
MP3/JPEG
mode
Playback
mode
Playback
program
Menu &
program
Menu &
settings
Initial
settings
Initial
TroubleshootingTroubleshooting
WrongRight
-Never use benzine, thinner, cleaning fluid, static electricity prevention
liquids or any other solvent.
Dirty disc may cause bad picture.
Initial settings
Troubleshooting tips
Definition of terms
P14
P17
P18
TermsTerms
2
Page 4

Getting started
Safety precautions
WARNING WARNING WARNING
To avoid electrical shock, do not
open the cabinet, refer servicing
to qualified personnel only.
ATTENTION ATTENTIONATTENTION
Touching the unit is dangerous,
If thunder.
ATTENTION
If smoke, malodor or noises are
emitted from the unit, turn off the
power and disconnect the AC
power cord.
When left unused for a long period
of time, the unit should be unplugged
from the household AC outlet.
Keep the unit away from flower
vases, tubs, sinks, etc.. If liquids
are spilled into the unit, serious
damage could occur.
WARNING
Do not block ventilation holes of
the unit so that air can circulate
freely.
Do not expose this equipment
to rain or moisture.
Be sure to turn the unit off and disconnect the AC power cord before
cleaning the unit surface .
If the surface is dirty, wipe clean with
a cloth which has been dipped in a
weak soap-and -water solution and
wrung out thoroughly, and then wipe
again with a dry cloth.
3
Notes: This unit is a class 1 laser product and uses a visible laser beam which could cause hazardous radiation exposure if directed. Be
sure to operate it correctly as instructed.
The above items are true of not only this unit but also most of the household electronic products.
Page 5
Getting Started
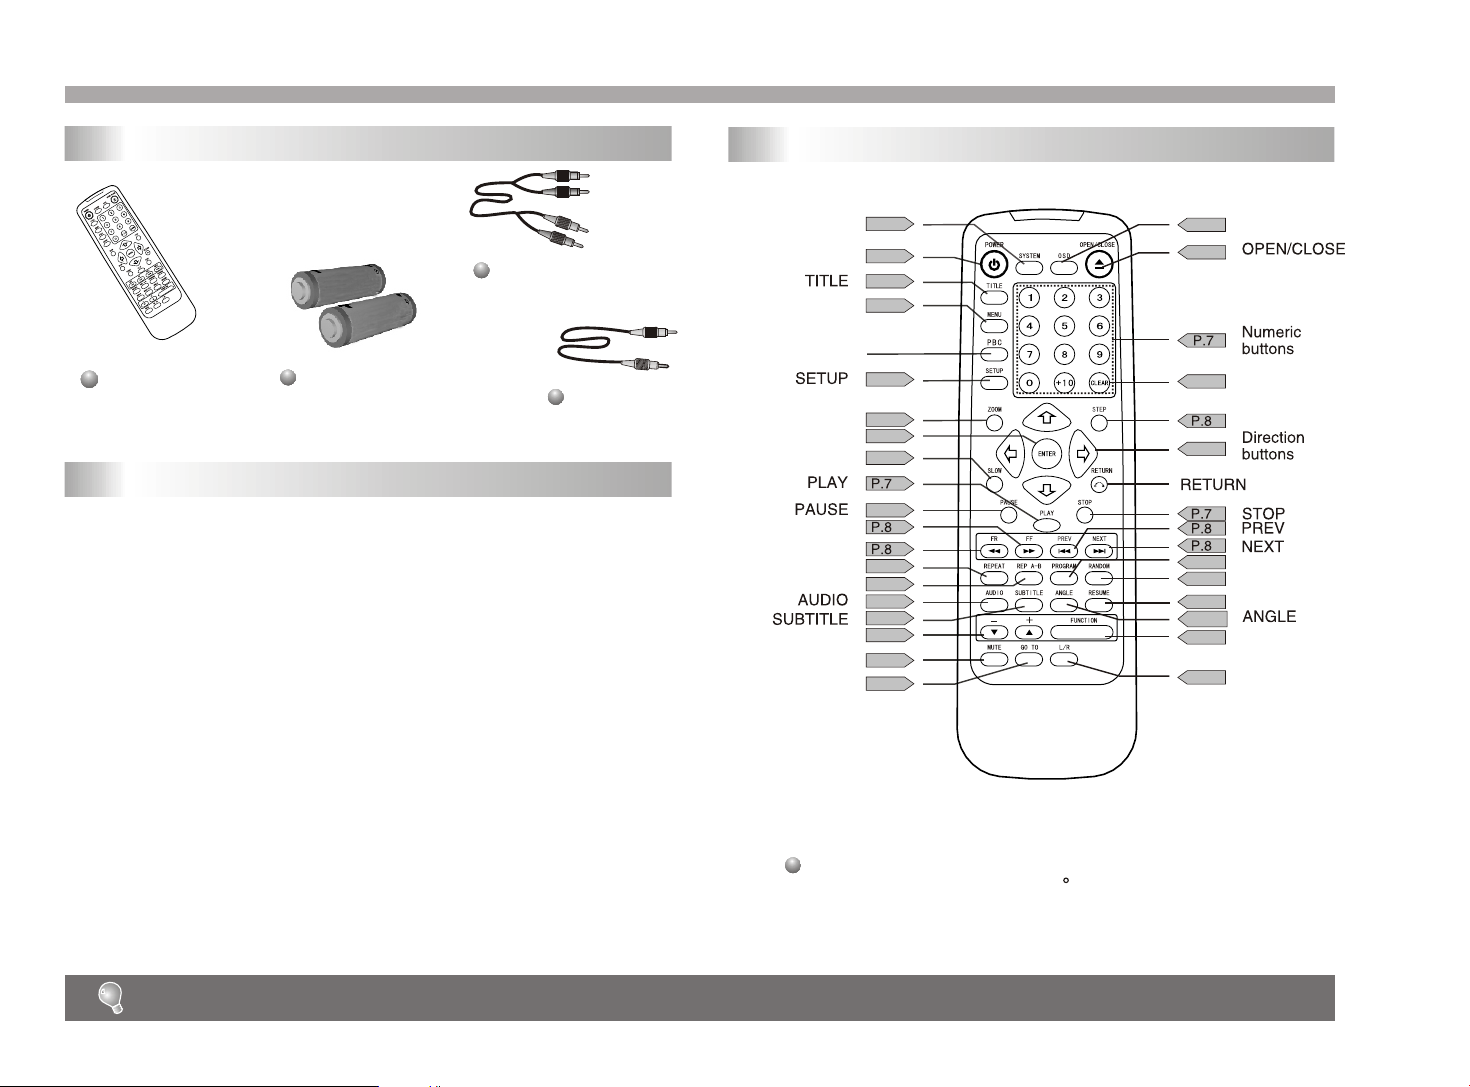
Accessories
Audio cord
Remote
control unit
Batteries
(size AAA, R03, UM-4)
Video cord
Battery installation(remote control unit)
Remove the battery cover.
1.
2.
Insert two batteries(AAA, R03, UM-4 type)
making sure the polarity(+/-) matches the marks
inside the unit.
Remote control unit
PBC
+&-
P.12
P.7
P.12
P.13
P.14
P.1 1
P.14
P.8
P.7
P.1 1
P.1 1
P.1 1
P.1 1
P.12
P.12
P.8
SYSTEM
POWER
MENU
ZOOM
ENTER
SLOW
FAST FORWARD
FAST BACKWARD
REPEAT
REP A-B
MUTE
GO TO
P.12
P.7
P.13
P.9
P.13
P.12
P.1 1
P.1 1
P.12
P.12
OSD
CLEAR
STEP
PROGRAM
RANDOM
RESUME
FUNCTION
L/R
3.
Replace the cover.
--Do not attempt to recharge, short-circuit, disassemble, heat or throw
the batteries into the fire.
--Do not mix old and new batteries.
Weak batteries can leak and severely damage the remote control unit.
Point remote control unit no more than 8m from the remote
sensor and within about 60 of the front of the unit.
4
Page 6

Getting Started
System connection
OUT
DIGITAL AUDIO
PCM/BITSTREAM
()
OPTICALOPTICAL
White
LEFTLEFT
RIGHTRIGHT
AUDIO OUT
Red
Yellow
VIDEOVIDEO
COAXIALCOAXIAL
Video cord
S-VIDEOS-VIDEO
PERITELEVISION
Optical digital cable
To optical digital
audio input connector
To coaxial digital audio
input connector
(optional)
Coaxial audio cable
(optional)
Red
White
Yellow
VIDEO
Audio cord
Red White
AV IN 1
RIGHT
LEFT
S-video cord
(optional)
To stereo TV or other
audio equipments
AV IN 2
RIGHT
VIDEO
LEFT
S-VIDEO
Turn off the power and keep AC cord pulled out from the outlet when connecting the system.
SC
AR
T co
(
nnected
op
tio
na
AC outlet on the wall
cable
l)
To TV (Scart Input) connector
Page 7

Getting started
Front panel
ON
OFF
POWER
AY
PL
EJECT
USE
PA
EV
PR
P
STO
EXT
N
PHONES
L
VE
LE
DISC TRAY
REMOTE SENSOR
POWER BUTTON
Vacuum Fluorescent Display (VFD)
PLAY MODE INDICATOR
DISC TYPE INDICATOR
PLAY/PAUSE INDICATOR
REPEAT INDICATOR
ON/STANDBY LED
INDICATOR
TITLE/TRACK NUMBER
EJECT BUTTON
PLAY BUTTON
PREV BUTTON
PAUSE BUTTON
PHONES
LEVEL CONTROL
PHONES JACK
STOP BUTTON
NEXT BUTTON
PLAYBACK TIME
Most of the functions can be controlled by remote control unit.Most of the functions can be controlled by remote control unit.
6
Page 8
Basic operation
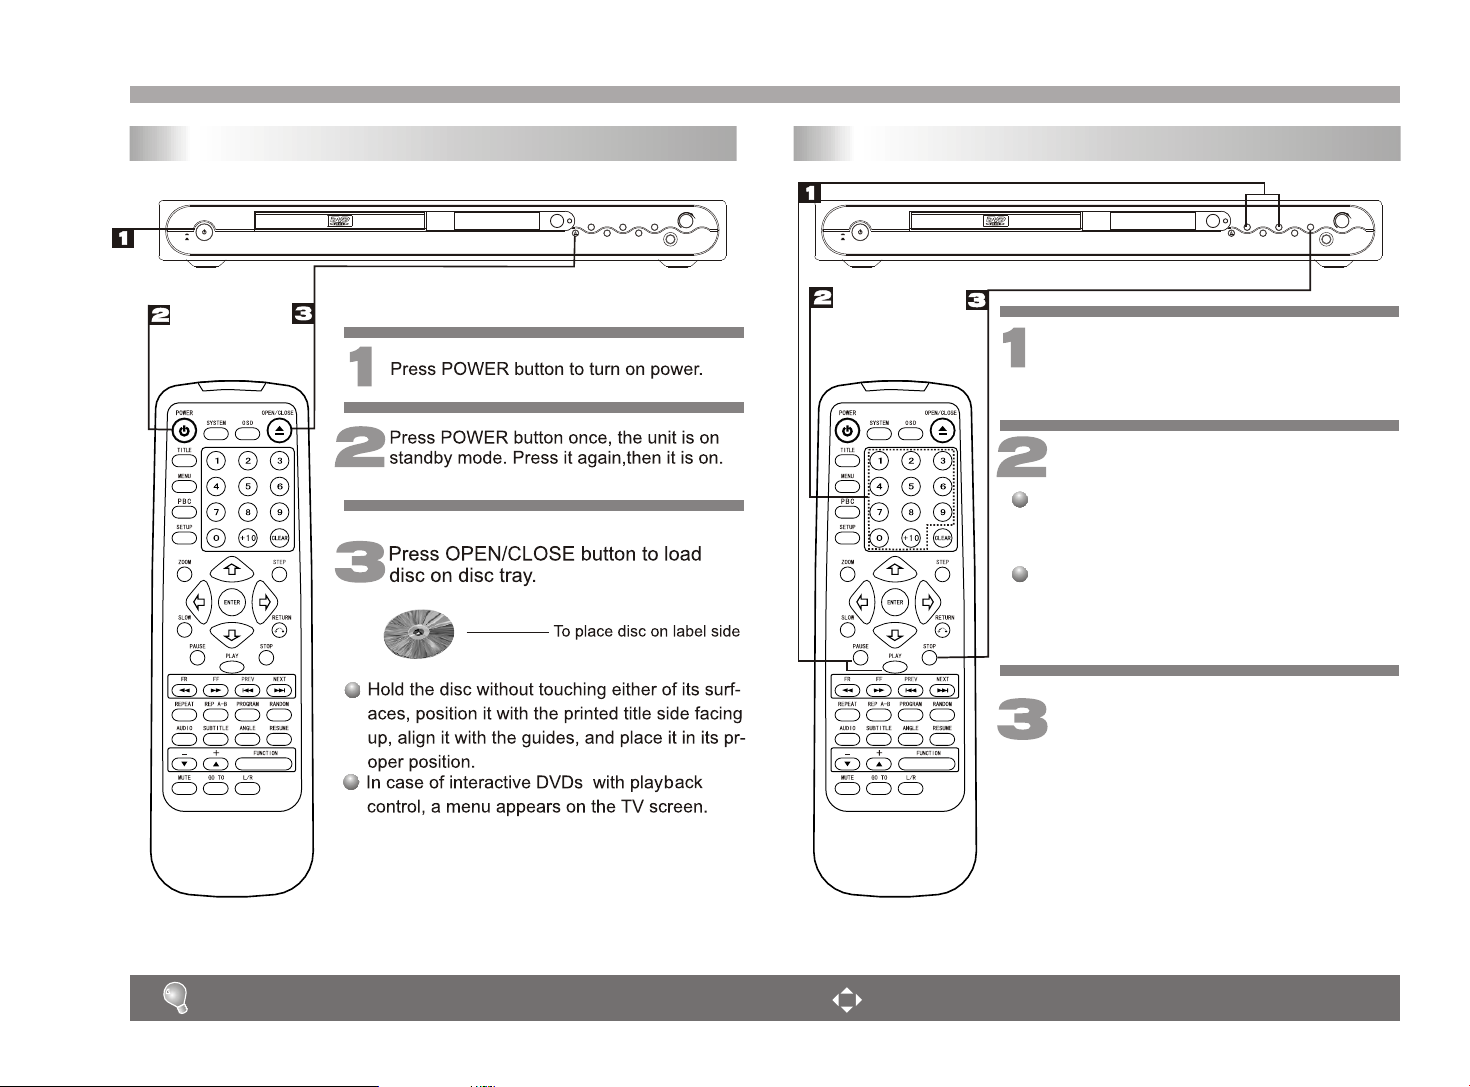
Starting playback
ON
OFF
POWER
Function buttons
L
E
V
LE
Y
A
L
P
T
C
JE
E
P
SE
O
U
A
ST
P
V
T
E
X
R
P
NE
S
E
PHON
ON
OFF
POWER
E
Y
S
A
U
L
A
P
P
V
CT
RE
E
J
P
E
PLAY and PAUSE button: Press PLAY
button to start playback. Press PAUSE
button to pause playback.
Numeric buttons(0-9):
You can select desired titles(DVD) by pressing
these buttons directly only if the title or track
number is less than 10.
If the title or track number is over 10. For instance,
if "28" is wanted, press "10+" twice, and then
press the 2-digit number "8".
STOP button: When this button is pressed once, the unit records the stopped
point, from where playback will resume
(resume function) if RESUME is pressed
afterwards. But if STOP button is pressed
again instead of PLAY button, there will
be no resume function.
L
E
V
LE
P
STO
XT
E
N
S
PHONE
7
DVD discs possess super interactive function. Please normally use " " and " ENTER " keys in operation of OSD menu.
Page 9

Basic operation
Searching function buttons
ON
OFF
POWER
11
22
33
44
PREV button and NEXT button:
1
Press these buttons to go to the previous/
next chapter(DVD) or track(CD).
SLOW button:
2
Press this button to select slow-motion
playback in forward and reverse direction
at 1/2, 1/4, 1/8,1/16 normal speed without
sound(DVD).
Press PLAY button to return to normal playback.
STEP button: You can enjoy picture
3
frame by frame by pressing this button.
FR and FF button:
skipping ahead/back at 5-level speeds.
4
Press PLAY button to return to normal playback.
EL
V
E
E
Y
A
US
L
P
PA
T
V
E
R
JEC
P
E
L
P
O
T
S
T
EX
N
S
E
N
HO
P
These buttons allow
Other buttons
11
22
1
2
TITLE XX/XX CHAPTER [ ]/XXX
DISC GOTO
When the above items are showed on TV screen,
you can input numbers to locate desired sector and
commence play.
The number you input is invalid if it is beyond
the track's capcity.
Numeric buttons(0-9):
These buttons can function with GO TO
button .
GO TO button:
Press this button to go to desired position. The player provides 3 search mode
of DVD disc, but it provides 3 search
mode.
CHAPTER XX/XX TIME
[DVD only]
[DVD only]
TRACK GOTO
[CD only]
[DVD only]
T: XX
//
8
Page 10

Mp3 /JPEG operations
ON
OFF
POWER
Press the OPEN/CLOSE button.
Put in MP3 disc on label side,
now system begins searching
information on disc. Completing
searching, the menu screen
appears, now you can use " "
and PLAY buttons to select song
to play, or you can select desired
song to play by pressing numeric
buttons directly.
" " & ENTER buttons:
Their functions is to choose the
previous or next song to be played.
L
E
V
E
LAY
P
CT
E
J
E
ST
PA
V
T
X
RE
E
P
N
S
E
N
O
H
P
L
E
P
S
O
U
Numeric buttons:
Pressing number buttons on
your remote controller, you
can directly select the song
which you want to enjoy to
be played. For example, if
you want to enjoy listening
to the eighteenth song,
please press "1" once,
and then press "8".
STOP button:
Pressing the button will stop
playback.
99
Page 11

Mp3 /JPEG operations
JPEG operations JPEG operations
Press OPEN/CLOSE:
Put KODAK JPEG disc properly, the system will search automatically.
After sear-ching, the direction arrows and PLAY button can be used to
choose the option desired by the user. Also the numeric buttons can be
used to select directly. Press NEXT/PREV/STOP buttons to control.
Optional Play Modes:
FOLDER - Play the catalog.
SINGLE - Play the selected song or JPEG picture once and
stop.
REP-ONE - Play the same song or JPEG picture over and over.
FOLDER R - Repeat Play the catalog.
RANDOM - Randomly play each song or JPEG picture in the
current directory.
Twelve slideshow transition modes are provided, use "PROGRAM" button
to select:
mode 1: wipe top
mode 2: wipe botton
mode 3: wipe left
mode 4: wipe right
mode 5: diagonal wipe left top
mode 6: diagonal wipe right top
mode 7: diagonal wipe left botton
mode 8: diagonal wipe right botton
mode 9: extend from center h
mode 10: extend from center v
mode 11: compress to center h
mode 12: compress to center v
mode 13: window h
mode 14: window v
mode 15: wipe from edge to center
mode 16: random
mode 17: no
Image transformation
There are four modes of transformation: "Invert", "Mirror","Left" and
"Right". The arrow keys are used to select.
Up - Invert/Normal
Down - Mirror/Normal
Left - Turn left
Right - Turn right
Press ZOOM button to enter ZOOM mode. Then press" "
Note: during ZOOM function, slide show transition and image trans formation are disabled.
Zoom
button zoom in/out.
Stop
The "Stop" key is used to enable KODAK JPEG digest mode when in stop
state. After it is enabled, up to 12 scaled down jpeg pictures will be
displayed on the screen. The " " keys can be used to
display the next/prev tweleve pictures. Bypressing DIRECTION and ENTER
key the corresponding picture will be enlarged to fill screen, and the digest
mode will be can-celled.
FR and FF
Prev & Next
10
Page 12

Playback mode
Repeat playback mode buttons Interactive function buttons
The repeat functions that you can enjoy are dependent on the disc types
played.
DVD: title repeat, chapter repeat and given portion repeat.
REPEAT button: To press this button:
You can repeatedly play a title (DVD) or all tracks
(CD) when "ALL " appears on VFD.
You can repeatedly play a chapter (DVD) or a single
track (CD) when " " appears on VFD.
You can cancel repeat functions when no " "
appears on VFD.
REP A-B button:
You can repeatedly play a given portion by operating
as following:
To press this button once to define the portion head .
To press this button again to define the portion toe.
And then the portion will be played repeatedly.
To press this button again to return to normal playback.
ZOOM button:
Press this button during normal, zoom in or zoom out
playback mode. This player can magnify a picture at 3
levels.
Press this button to magnify picture and at zoom
in mode use direction buttons " " to select desired .
part of the zoomed picture.
1
2
3
4
5
DVD disc:
Press TITLE button, then the DVD menu or titles available
on the disc will be displayed. Then you can use " " and
ENTER button to select programs.
The buttons mentioned in 1-3 can work only when the disc played supports
the corresponding functions.
AUDIO button: To press this button, you can change the audio language from the one selected at
the initial settings to a different language, if available.
SUBTITLE button: To press this button, you can
change the subtitle language from the one selected at the initial settings to a different language,
if available.
ANGLE button:
Some DVDs may contain scenes which have
been shot simultaneously from a number of
different angles. For these discs, the same
scene can be viewed from each of these
different angles by using the ANGLE button.
RESUME button:
the player can memorize the stopped point from
which play will go on when you press RESUME
button.
TITLE button:
When you press STOP button,
11
55
22
44
33
11
When this unit is not used, please turn off the power and leave no disc inside.When this unit is not used, please turn off the power and leave no disc inside.
Page 13

Other functions
STOP
PHON
ES
LEVEL
NEXT
Other function buttons Display
1
2
3
4
5
SYSTEM button:
Press this button to select PAL , NTSC or
MULTI .
RANDOM button:
Random mode allows you to play
tracks randomly by pressing this button,
pressing again will cancel random playback.
FUNCTION button:
Press to select volume, pitch. Then press
"+" or "-" button for adjustment.
MUTE button:
Press this button to turn on/off the sound.
L/R button:
Press this button consecutively and the
audio output will change as following:
OSD button:
6
Press this button once to show main playback
information on TV screen and press it again to
show playback time. Press this button at the fifth
time, and then the display will be canceled.
Connecting headphones
1 Connect the headphones.
Headphones with a 6.3 mm stereo plug can be connected.
1
2
MONO-LEFT MONO-RIGHT STEREO
Avoid listening to sound as levels which may be harmful to your ears.
2 Adjust the volume.
12
Page 14
Menu and program
Menu function buttons
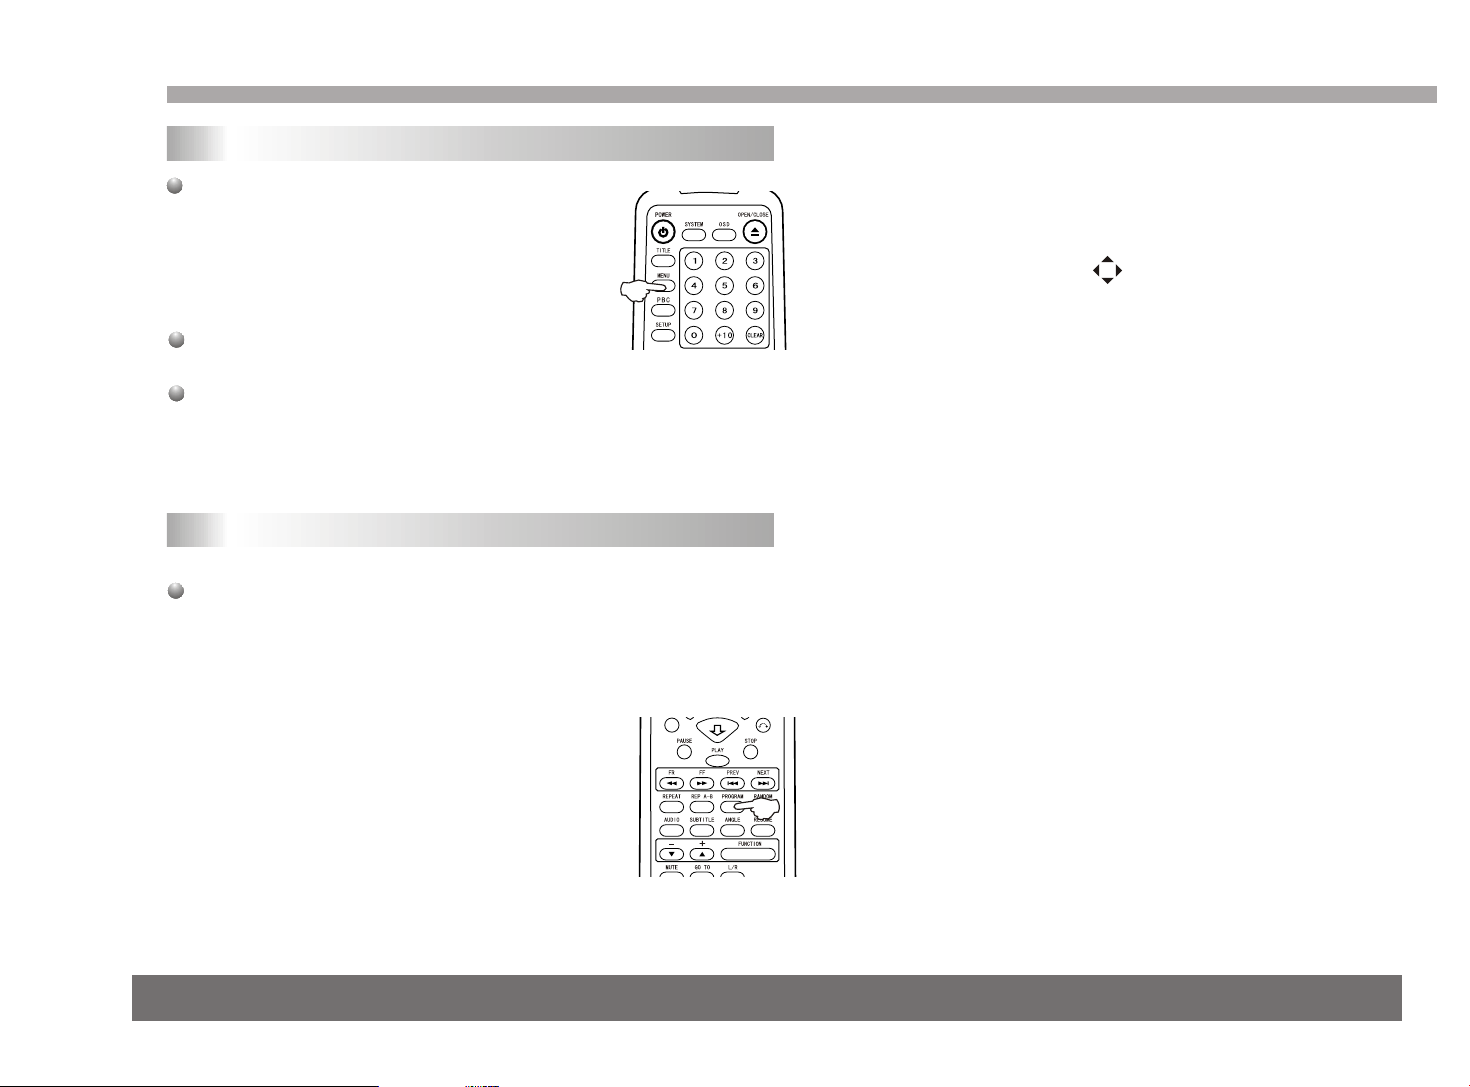
MENU button:
Press this button,disc menu available on
the disc will be displayed.
If playing some DVD discs, press this button
back to root menu screen.
If playing DVDs you can use the functions of MENU,
PROGRAM and RANDOM.
Program functions
When you want to play only partial tracks/chapters of a disc
(DVDs) or to arrange the tracks/chapters playback order, you need
program functions.
Do as following:
Press PROGRAM button. Then "
1
will appear on TV screen
"PROGRAM
You can press CLEAR button to cancel and input again if you
3
mis-input track numbers.
Now you can press " " and "ENTER" button to select
4
"START" option and enjoy the desired tracks.
13
Press the track number in the order you
2
want.
For example, if the track numbers you
want to play are 1, 3 and 8, just input in
the order of 1-3-8.
Page 15

ENTER
SETUP MENU-MAIN PAGE
GENERAL SETUP
ANALOG AUDIO SETUP
DOLBY DIGITAL
VIDEO SETUP
PREFERENCE
The following menu items can changed:
GENERAL SETUP: selects the GENERAL PAGE menu.
ANALOG AUDIO
DOLBY DIGITAL selects the DOLBY DIGITAL SETUP menu.
SETUP: selects the ANALOG AUDIO SETUP PAGE menu.
SETUP:
VIDEO SETUP: selects the VIDEO SETUP PAGE menu.
PREFERENCE: selects the PREFERENCES PAGE menu.
GENERAL SETUP PAGE
SETUP
The following me u items can be changed:
n
TV DISPLAY: selects the aspect ratio of the playback picture.
4:3/PANSCAN
: pan & scan display.
4:3/LETTERBOX
: letterbox display.
: widescreen display.
16:9
ANGLE MARK: viewing angles change option(if available). See changing the angles on page 11.
OSD LANG: selects a language for on screen display.
DIGITAL OUTPUT: select audio output :SPDIFOFF, ALL, PCM ONLY.
CLOSED CAPTIONS: this is to turn on/off captions.
SCR SAVER: this is to turn on/off screen saver.
Analog audio setup page
ANALOG AUDIO SETUP PAGE
TV DISPLAY
ANGLE MARK
OSD LANG
DIGITAL OUTPUT
CLOSED CAPTIONS
SCREEN SAVER
ON
OFF
ON
OFF
SPDIFOFF
ALL
PCM ONLY
ENGLISH
FRENCH
DUTCH
ON
OFF
4 : 3/PANSCAN
4 : 3/LETTERBOX
16 : 9
This page is for setup speaker output.
DOWN MIX
LT/RT: 2ch output, main channel with surround.
STEREO: 2ch output, main right channel with right surround;
main left channel with left surround.
Once the initial settings have been completed, the player can always be operated under the same conditions(especially with DVD discs). The settings will be retained
Once the initial settings have been completed, the player can always be operated under the same conditions(especially with DVD discs). The settings will be retained
in the memory even after turning the power off untill the settings are changed.
in the memory even after turning the power off untill the settings are changed.
14
Page 16

Initial settings
Dolby digital setup page
DOLBY DIGITAL SETUP PAGE
DUAL MONO
DYNAMIC
FULL
3
/
/
1
/
1 4
OFF
STEREO
L-MONO
R-MONO
MIX-MONO
4
2
The following menu items can be changed:
DUAL MONO: Reproduction mode, used only when the input consists
of two independent audio channels(1/1 mode). Possible selections are:
STEREO: Reproduce both channels as is.
L-MONO: Reproduce the left channel only.
R-MONO: Reproduce the right channel only.
MIX-MONO: Mix both channels.
The default is STEREO.
DYNAMIC: Dynamic range compression.
Video setup page
VIDEO SETUP PAGE
SCART
The following menu items can be changed:
SCART: Selects CVBS or RGB video output of scart.
Once the initial settings have been completed, the player can always be operated under the same conditions(especially with DVD discs). The settings will be retained
Once the initial settings have been completed, the player can always be operated under the same conditions(especially with DVD discs). The settings will be retained
in the memory even after turning the power off until the settings are changed.
in the memory even after turning the power off until the settings are changed.
CVBS
RGB
Preference setup page
PREFERENCES PAGE
TV TYPE
AUDIO
SUBTITLE
DISC MENU
PARENTAL
PASSWORD
CHANGE
1 KID SAF
2 G
3 PG
4 PG 13
5 PGR
6 R
7 NC-17
8 ADULT
OFF
ENGLISH
FRENCH
GERMAN
SPANISH
PORTUGUESE
ITALY
DUTCH
DANISH
ENGLISH
FRENCH
GERMAN
SPANISH
PORTUGUESE
ITALY
DUTCH
DANISH
ENGLISH
FRENCH
GERMAN
SPANISH
PORTUGUESE
ITALY
DUTCH
DANISH
The following menu items can be changed:
TV TYPE: selects the type of television.
MULTI: automatic-self-selecting television sets.
NTSC
PAL
AUDIO: Selects a language for audio(if available).
SUBTITLE: Selects a language for subtitles(if available). no subtitles
are display after selecting OFF.
DISC MENU: Selects a language for title menus or DVD menus(if
available).
PARENTAL[DVD only]: This is to disable the playing of specified
DVDs which are unsuitable for children. Some DVDs are encoded
with specific rating level. If the rating level of the disc is higher than
that preset in the setup operation, playback of the disc will be prohibited. After selecting one of the PARENTAL items the screen will
change to the PASSWORD VERIFY page.
PASSWORD[DVD only]: Selects the menu setup PASSWORD CHANGE
PAGE.
PAL
MULTI
NTSC
15
Page 17

Initial settings and specifications
Password change page
PASSWORD CHANGE PAGE
OLD PASSWORD [ XXXX ]
NEW PASSWORD [ YYYY ]
CONFIRM PASSWORD [ YYYY ]
OK
OLD PASSWORD: Enter the OLD password. (Factory setting is
1369)
NEW PASSWORD: Enter the NEW password. Enter 4 digits from
the remote control unit numeric buttons.
CONFIRM PASSWORD: Confirm the NEW password by entering
it again. If the confirmation is incorrect, the Password Change
Page will be displayed again.
Electronical parameters
ItemItem
Power source
Power consumption
Laser
Signal system
Digital audio output
Output
Audio
PHONES
SCART
S-video
Output
Video
Audio
Frequency
response
S/N ratio
Dynamic range
Total harmonic
characteristics
distortion
AC 230V~, 50Hz/60Hz
<35W
Wave length: 655nm ; Laser power: class 1
Optical digital output: optical connector;
Coaxial digital output: pin jack;
Stereo,
21 Pin Scart
Y output level: 1Vp-p(75W); C output level: 0.300Vp-p(75
W)(PAL), 0.286Vp-p(75W)(NTSC); connector: S-terminal
Output level: 1 Vp-p(75W); connector: pin jack(1 systems)
Output level: 2Vrm(1KHz, 0 dB); connector: pin jack.
2 channels output.
Standard requirementStandard requirement
PAL/NTSC
Other specifications
Accessories
Dimensions
Carton size
Weight
Remote control distance
Specifications and design are subject to change without prior notice.
Handset x 1 Video cord x 1
Battery x 2 (AAA, R03, UM-4 type) Audio cord x 1
430(L) X 255(W) X 50(H) mm
485(L) X 108(W) X 345(H) mm
N.W. : 2.8 kg G.W. : 3.4 kg
8.0m
16
Page 18

Troubleshooting tips
Troubleshooting tips
Before calling for service, you can check the following items on
symptoms and solutions:
No sound or distorted sound:
Ensure that the equipment is connected properly.
Ensure that the input settings for the TV and stereo system are proper.
Adjust the volume using the OSD for player information.
No picture:
Ensure that the equipment is connected properly.
Ensure that the input setting for the TV is "video".
No play:
Condensation has formed : wait about 1 to 2 hours to allow the
player to dry out.
This player can't play discs other than DVDs,,MP3s and CDs.
The disc may be dirty and require cleaning .
Ensure that the disc is installed with the label side up.
No remote control:
Check the batteries are installed with the correct polarities(+&-).
The batteries are depleted: replace them with new ones.
Point the remote control unit at the remote control sensor and
operate.
Remove the obstacles between the remote control unit and the
remote control sensor.
Operate the remote control unit at a distance of not more than 8
meters from the remote control sensor.
No key operation(by the unit and/or the remote control) is effective:
Turn the unit off and then back to on. Alternatively, turn off the unit,
disconnect the AC power cord and the re-connect it.(The player may
not be operating properly due to lightning, static electricity or some
other external factor.)
[Common]
Troubleshooting tips
Play does not commence even when title is selected:
Confirm the "Rating" settings.
Audio soundtrack and/or subtitle language is not the one selected
at the initial settings:
If the audio soundtrack and/or subtitle language does not exist on
the disc, the language selected at the initial setting will not be seen/
heard.
No subtitles:
Subtitles appear only with discs which contain them.
Alternative audio soundtrack(or subtitle) language fail to be
selected:
An alternative language is not selected with discs which do not contain
more than one language.
In the case of some discs, the alternative language cannot be selected by
operating the AUDIO or SUBTITLE button. Try selecting it from the DVD
menu if one is available.
Angle cannot be changed:
This function is dependent on software availability. Even if a disc has a
number of angles recorded, these angles may be recorded for specific
scenes only.
[DVD]
17
Page 19

Definition of terms
Definition of terms
Angle
Recorded onto some DVD discs are scenes which have been simultaneously shot from a number of different angles(the same scene is
shot from the front, front the left side, from the right side, etc.). With
such discs, the ANGLE button can be used to view the scene from
different angles.
DVD
This refers to a high-density optical disc on which high-quality pictures
and sound have been recorded by means of digital signals. Incorporating a new video compression technology(MPEG II) and high-density
recording technology, DVD enables esthetically pleasing full-motion
video to be recorded over long periods of time(for instance, a whole
movie can be recorded).
DVD has a structure consisting of two 0.6mm thin discs which are adhered to each other. Since the thinner the disc, the higher the density
at which the information can be recorded, a DVD disc has a greater
capacity than a single 1.2mm thick disc. Since the two thin discs are
adhered to each other, there is the potential to achieve double-sided
play sometime in the future for even longer duration play.
Definition of terms
Track number
These numbers are assigned to the tracks which are recorded on
Cds. They enable specific tracks to be located quickly.
Time number
This indicates the play time which has elapsed from the start of a
disc or a title. It can be used to find a specific scene quickly. (It may
not work with some discs.)
Chapter number
These numbers are recorded on DVD discs. A title is subdivided into
many sections, each of which is numbered, and specific parts of video
presentations can be searched quickly using these numbers.
Subtitles
These are the printed lines appearing at the bottom of the screen
which translate or transcribe the dialogue. They are recorded on
DVD discs.
Region management information
The Region number for this DVD player is 2.
2
18
Page 20

 Loading...