

Page 1
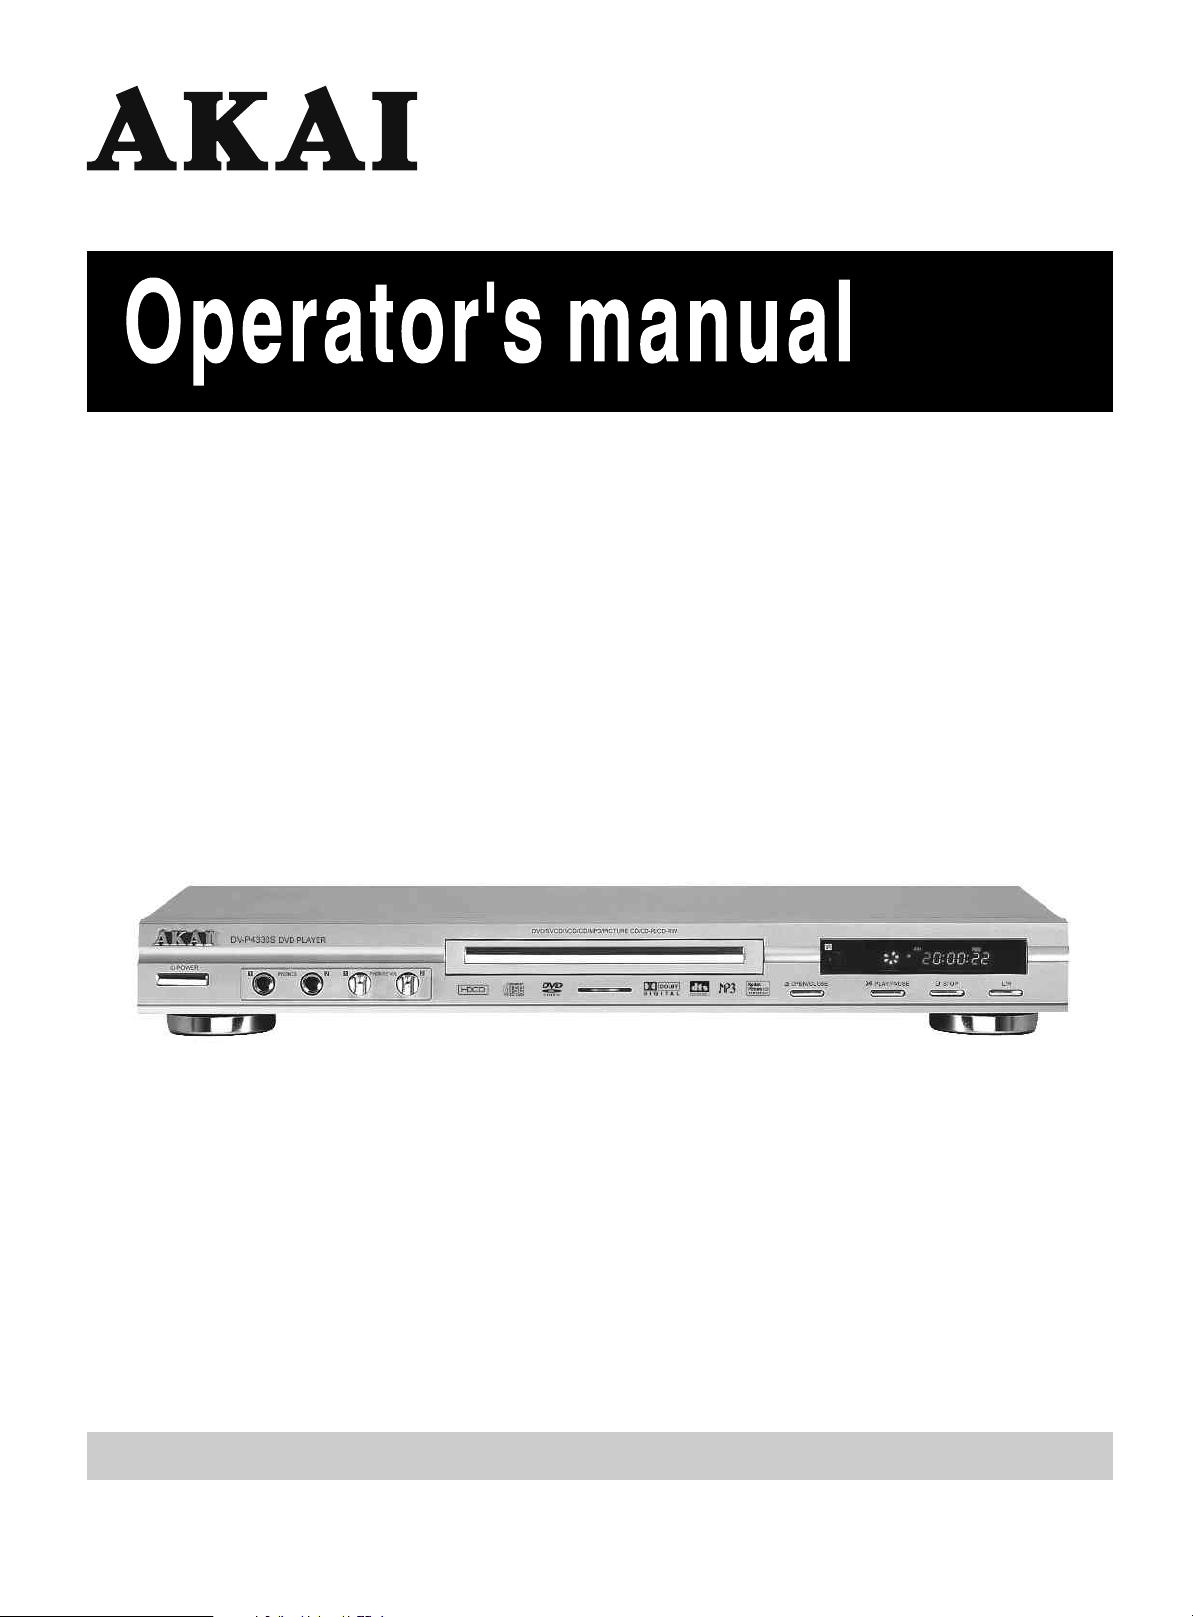
DVD PLAYER
DV-P4330S
Operator's manual (GB) 1~33
Page 2

Table of ContentsTable of Contents
DV-P4330S
1¡¢FUNCTIONS
2¡¢ACCESSORIES
3¡¢OPERATION INTERFACE
4¡¢CONNECT TO THE A&V SYSTEM
5¡¢PLAY MODE
BASIC OPERATION
6¡¢
7
¡¢INITIAL SETTING UP
6
6
7
9
13
14
17
8¡¢WMA/
MP3/JPEG/KODAK PICTURE CD PLAY FORMAT
9¡¢TECHNICAL SPECIFICATION
10¡¢DVD DISC INFORMATION AND FEATURES
11¡¢TROUBLE SHOOTING
12 AFTER SALES SERVICE
¡¢
26
27
27
32
33
Page 3

DV-P4330S
This player adopts the mature MPEG-¢òdecoding plan, built-in Dolby Digital
(AC-3) and DTS double decoding. We also adopt the high stability loader, wide-
range power supply, which enable the suitability of our players in different countries
of different power requirement. The out-appearance is unique and beautiful. The
very stable performance, super error concealment, and YUV output function make
the video quality of our player more lifelike and beautiful than the common disc
player. Together with the vivid sound effect, our DVD player will be your ideal
choice for the home theatre system.
This product incorporates copyright protection technology that is protected
by method claims of certain U.S. Patents and other intellectual property rights
owned by Macrovision Corporation and other rights owners. Use of this copyright
protection technology must be authorized by Macrovision Corporation and is
intended for home and other limited viewing uses only unless otherwise
authorized by Macrovision Corporation. Reverse engineering or disassembly is
prohibited.
Page 4
DV-P4330S
Thanks for purchasing our DVD player. Before operating this player, please read
this manual and retain it for future reference.
SAFETY PRECAUTIONS SAFETY PRECAUTIONS
WARNING
RISK OF ELECTRIC SHOCK
DO NOT OPEN
WARNING:TO REDUCE THE RISK OF ELECTRIC SHOCK,DO NOT REMOVE COVER( OR
B ACK). N O USER-SERVICEABLE PARTS
INSIDE. REFER SERVICING TO QUALIFIED
SERVICE PERSONNEL.
The lightning flash with arrowhead symbol, within an
equilateral triangle, is intended to alert the user to the
presence of uninsulated "dangerous voltage" within
the product's enclosure that may be of sufficient magnitude to constitute a risk of electric shock to persons.
The exclamation point within an equilateral triangle is
intended to alert the user to the presence of important
operating and maintenance (servicing) instructions in
the literature accompanying the appliance.
WARNING:
TO REDUCE THE RISK OF FIRE OR ELECTRIC SHOCK, DO NOT EXPOSE THIS APPLIANCE TO RAIN
OR MOISTURE. DANGEROUS HIGH VOLTAGES ARE PRESENT INSIDE THE ENCLOSURE. DO NOT
OPEN THE CABINET. REFER SERVICING TO QUALIFIED PERSONNEL ONLY.
1
Page 5

To prevent direct exposure to laser beam, do not try to open the enclosure.
Visible laser radiation when open and interlocks defeated.
DO NOT STARE INTO BEAM.
DV-P4330S
This equipment has been tested and found to comply with the limits for a Class B digital device, pursuant
to part 15 of the FCC Rule. These limits are designed to provide reasonable protection against harmful
interference in a residential installation.
This equipment generates, uses, and can radiate radio frequency energy and, if not installed and used in
accordance with the instructions, may cause harmful interference to radio communications.
However, there is no guarantee that interference will not occur in a particular installation.
If this equipment does cause harmful interference to radio or television reception, which can be determined
by turning the equipment off and on, the user is encouraged to try to correct the interference by one or more
of the following measures:
Changes or modifications made to this equipment, not expressly approved by our company, or parties
authorized by our company, could void the user's authority to operate the equipment.
2
Page 6
IMPORTANT SAFETY INSTRUCTIONSIMPORTANT SAFETY INSTRUCTIONS
DV-P4330S
CAUTION:
PLEASE READ AND OBSERVE ALL WARNINGS AND INSTRUCTIONS GIVEN IN THIS
MANUAL AND THOSE MARKED ON THE UNIT. RETAIN THIS BOOKLET FOR FUTURE
REFERENCE.
This set has been designed and manufactured to assure personal safety. Improper use can result in electric
shock or fire hazard.
The safeguards incorporated in this unit will protect you if you observe the following procedures for installation,
use and servicing.
This unit is fully transistorized and does not contain any parts that can be repaired by the user.
DO NOT REMOVE THE CABINET COVER, OR YOU MAY BE EXPOSED TO DANGEROUS VOLTAGE.
REFER SERVICING TO QUALIFIED SERVICE PERSONNEL ONLY.
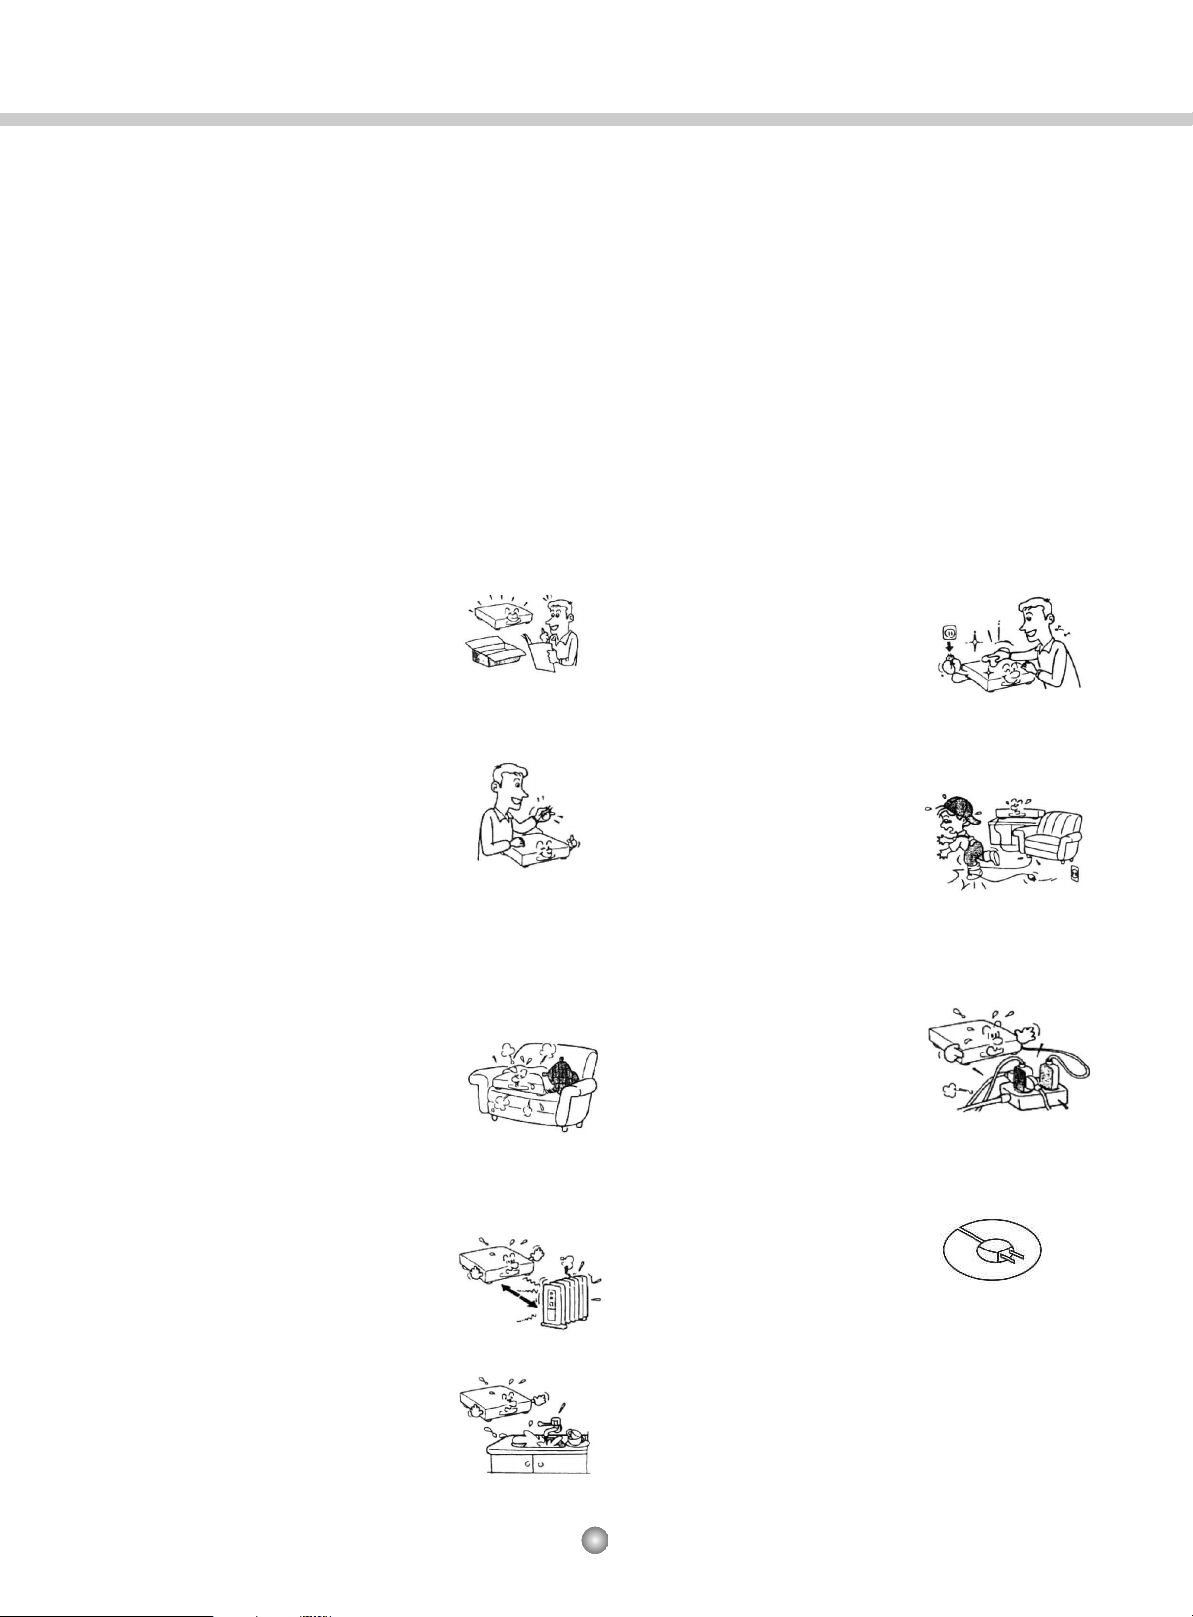
1. Read this manual
After unpacking this product, read
the manual carefully, and follow all
the operating and other instructions
keep this manual carefully in a safe
place.
2. Power Sources
This product should be operated only
from the type of power source indicated
on the marking label. If you are not sure
of the type of power supply to your
home, consult your product dealer or
local power company. For products
intended to operate from battery power,
or other sources, refer to the operating
instructions.
6. Cleaning
Unplug this product from the
wall outlet before cleaning. Do
not use liquid cleaners ora erosol
cleaners. Use a dry cloth for
cleaning.
7. Power-cord Protection
Power-supply cords should be
routed so that theya re n otl ikely
to be walked on or pinched by
items placed upon or against
them, paying particular attention
to cords at plugs, convenience
receptacles, and the point where
they exit from the product.
3. Ventilation
Slots and openings in the cabinet
are provided for ventilation and to
ensure operation of the product and
to protect it from overheating, and
these openings must not be blocked
or covered. The openings should
never be blocked by placing the
product on a bed, sofa, rug or other.
4. Heat
The product should be situated away
from heat sources such as radiators,
heat registers, stoves, or other products
(including amplifiers) that produce heat.
5. Water and Moisture
Do not use this product near water
-for example, near a bath tub, wash
bowl,kitchen sink,or laundry tub;in
a wet basement;or near a swimming
pool and the like.
8. Overloading
Do not overload wall outlets;
extension cords, or integral
convenience receptacles as this
can result in a risk of fire or
electric shock.
9. Plug
Do not defeat the safety ourpose
of the polarized or grounding type plug a polarized plug has
two blades with one wider than
the other, a grounding type plug
has two blades and a third
Grounding prong, the wide
blade or the third prong are
provided for your safety, if the
provided plug does not fit into
your outlet consult an electrician
for replacement of the obsolete outlet.
3
Page 7
DV-P4330S
10. Lightning
For added protection for this product
during storm, or when it is left unatt ended and unused for long periods of
time, unplug it from the wall outlet.
This wil l prevent damage to the product
due to lightning and power-line surges.
11.Object and Liquid Entry
Never push objects of any kind into
this product through openings as they
may touch dangerous voltage points
or short-out parts that could result in
a fire or electric shock. Never spill
liquid of any kind on the product.
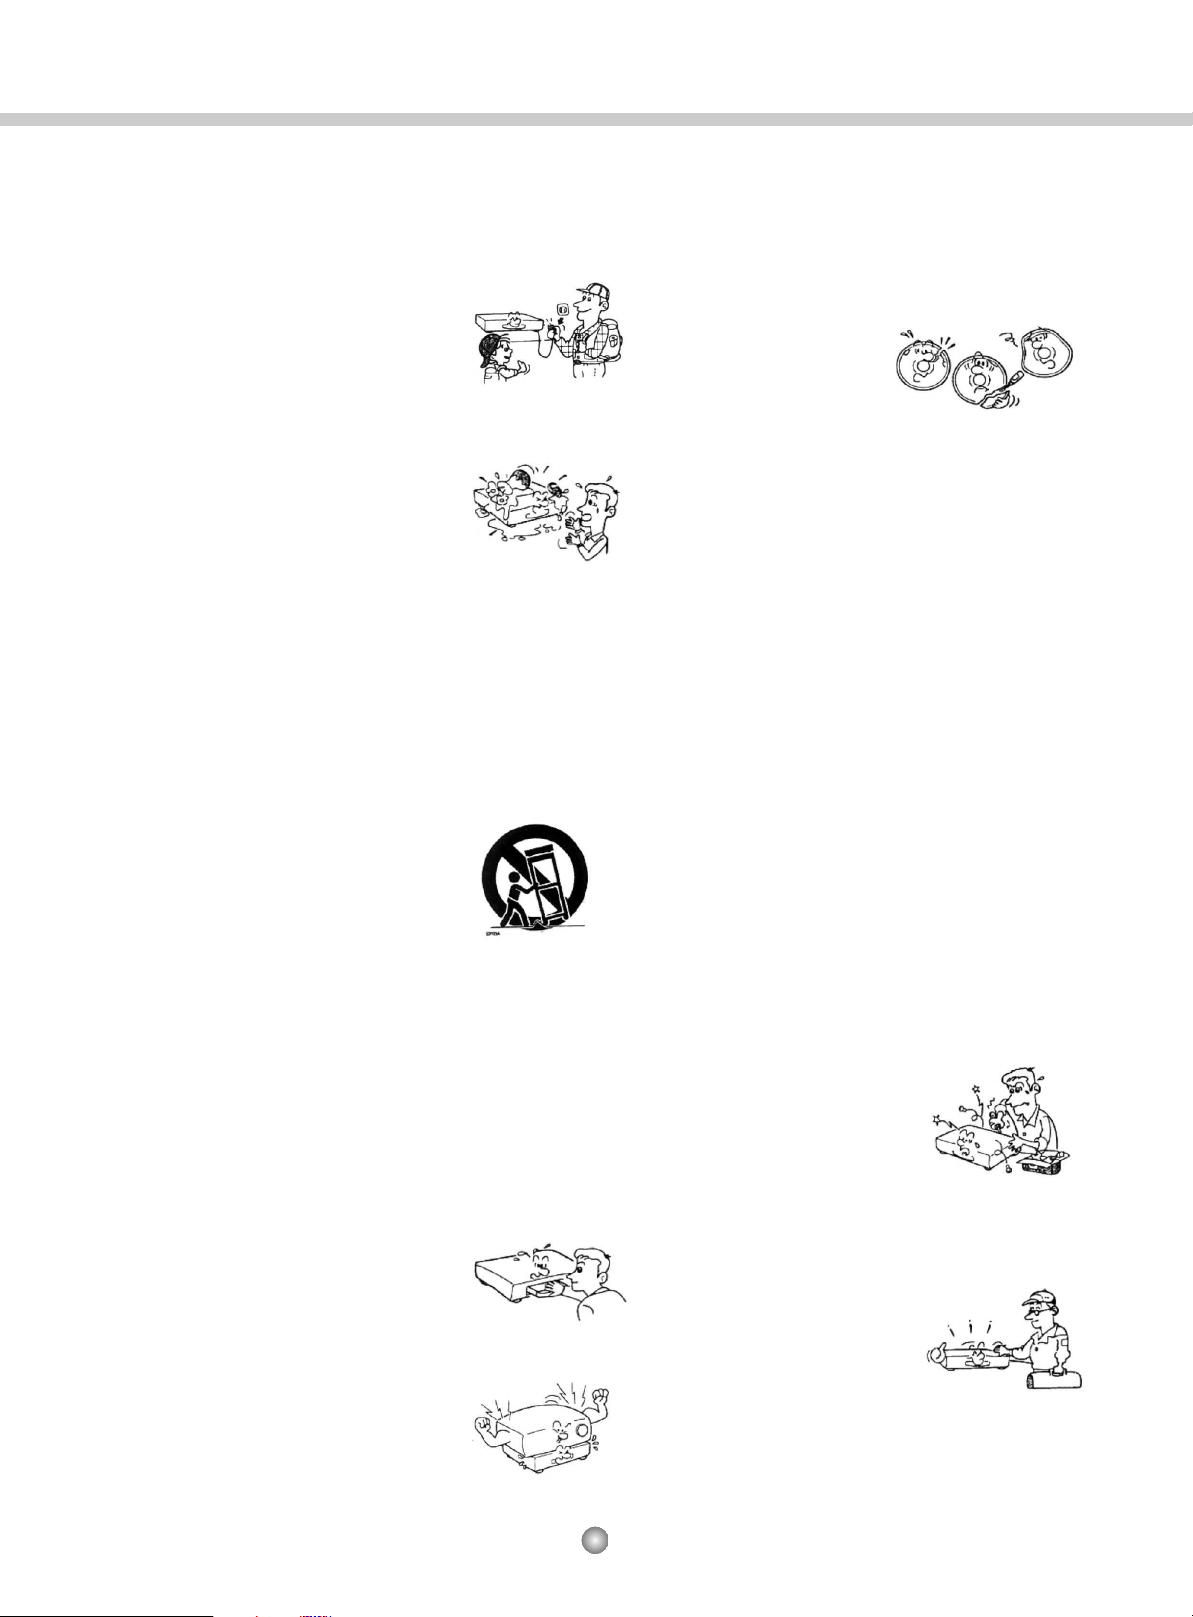
12.Attachments
Do not use attachments not recom mended by the product manufacturer
as they may cause hazards.
13. Accessories
Do not place this product on an unstable
cart, stand, tripod, bracket, or table.
The product may fall, causing serious
injury to a child or adult, and serious
damage to the product.U seo nly with
a cart, stand,t ripod,b racket, or table
recommended by the manufacturer,
or sold with the product. Any mounting
of the product should follow the
Manufacturer's instructions, and
should use a mounting accessory
recommended by the manufacturer.
A product and cart combination
should be moved with care. Quick
stops, excessive force, and uneven
surfaces may cause the product and
cart combination to overturn.
14. Disc Tray
Keep your fingers well clear of the
disc tray as it is closing. Neglecting
to may c auses erious personal injury.
16.Disc
Do not use a cracked, deformed,
or repaired disc. These discs
are easily broken and may cause
serious personal injury and
product malfunction.
17.Damage Requiring Service
Unplug this product from the wall
outlet and refer servicing to qua-
lified service personnel under the
following conditions:
a) When the power-supply cord or
plug is damaged.
b) If liquid has been spilled, or
objects have fallen into the
product.
c) If the product has been exposed
to rain or water.
d) If the product does not operate
normally by following the
operating instructions. Adjust
only those controls that are
covered by the operating instru ctions as an improper adjustment
of other controls may result in
damage and will often require
extensive work by a qualified
technician to restore the product
to its normal operation.
e) If the product has been dropped
or damaged in any way.
f) When the product exhibits a dis-
tinct change in performance - this
indicates a need for service.
18.Servicing
Do not attempt to service this
product yourself as opening or
removing covers may expose
you to dangerous voltage or
other hazards. Refer all servicing
to qualified service personnel.
19.Replacement Parts
When replacement parts are
Required, be sure the service
technician has used replacement
parts specified by t he manufacturer
or have the same characteristicsa s
the original part. Unauthorized
substitutions may result in fire,
electric shock, or other hazards.
15. Burden
Do not place a heavy object on or
step on the product. The object may
fall, causing serious personal injury
and serious damage to the product.
20.Safety Check
Upon completion of any service
or repairs to this product, ask
the service technician to perform
safety checks to determine that
the product is in proper operating
condition.
4
Page 8
DV-P4330S
Notes on handling
When shipping the DVD player, the original shipping
carton and packing materials come in handy. For maximum protection, repack the unit as it was originally
packed at the factory.
Do not use volatile liquids, such as insect spray, near
the DVD player. Do not leave rubber or plastic products in contact with the DVD player for a long time.
They will leave marks on the finish.
The top and rear panels of the DVD player may become warm after a long period of use. This is not a
malfunction.
When the DVD player is not in use, be sure to remove
the disc and turn off the power.
If you do not use the DVD player for a long period, the
unit may not function properly in the future. T urn on
and use the DVD player occasionally.
Notes on Locating
When you place this DVD player near a TV, radio, or
VCR, t he p layback p icture m ay b ecome p oor a nd t he
s ound may be distorted. In this case, place the DVD
player away from the TV, radio, or VCR.
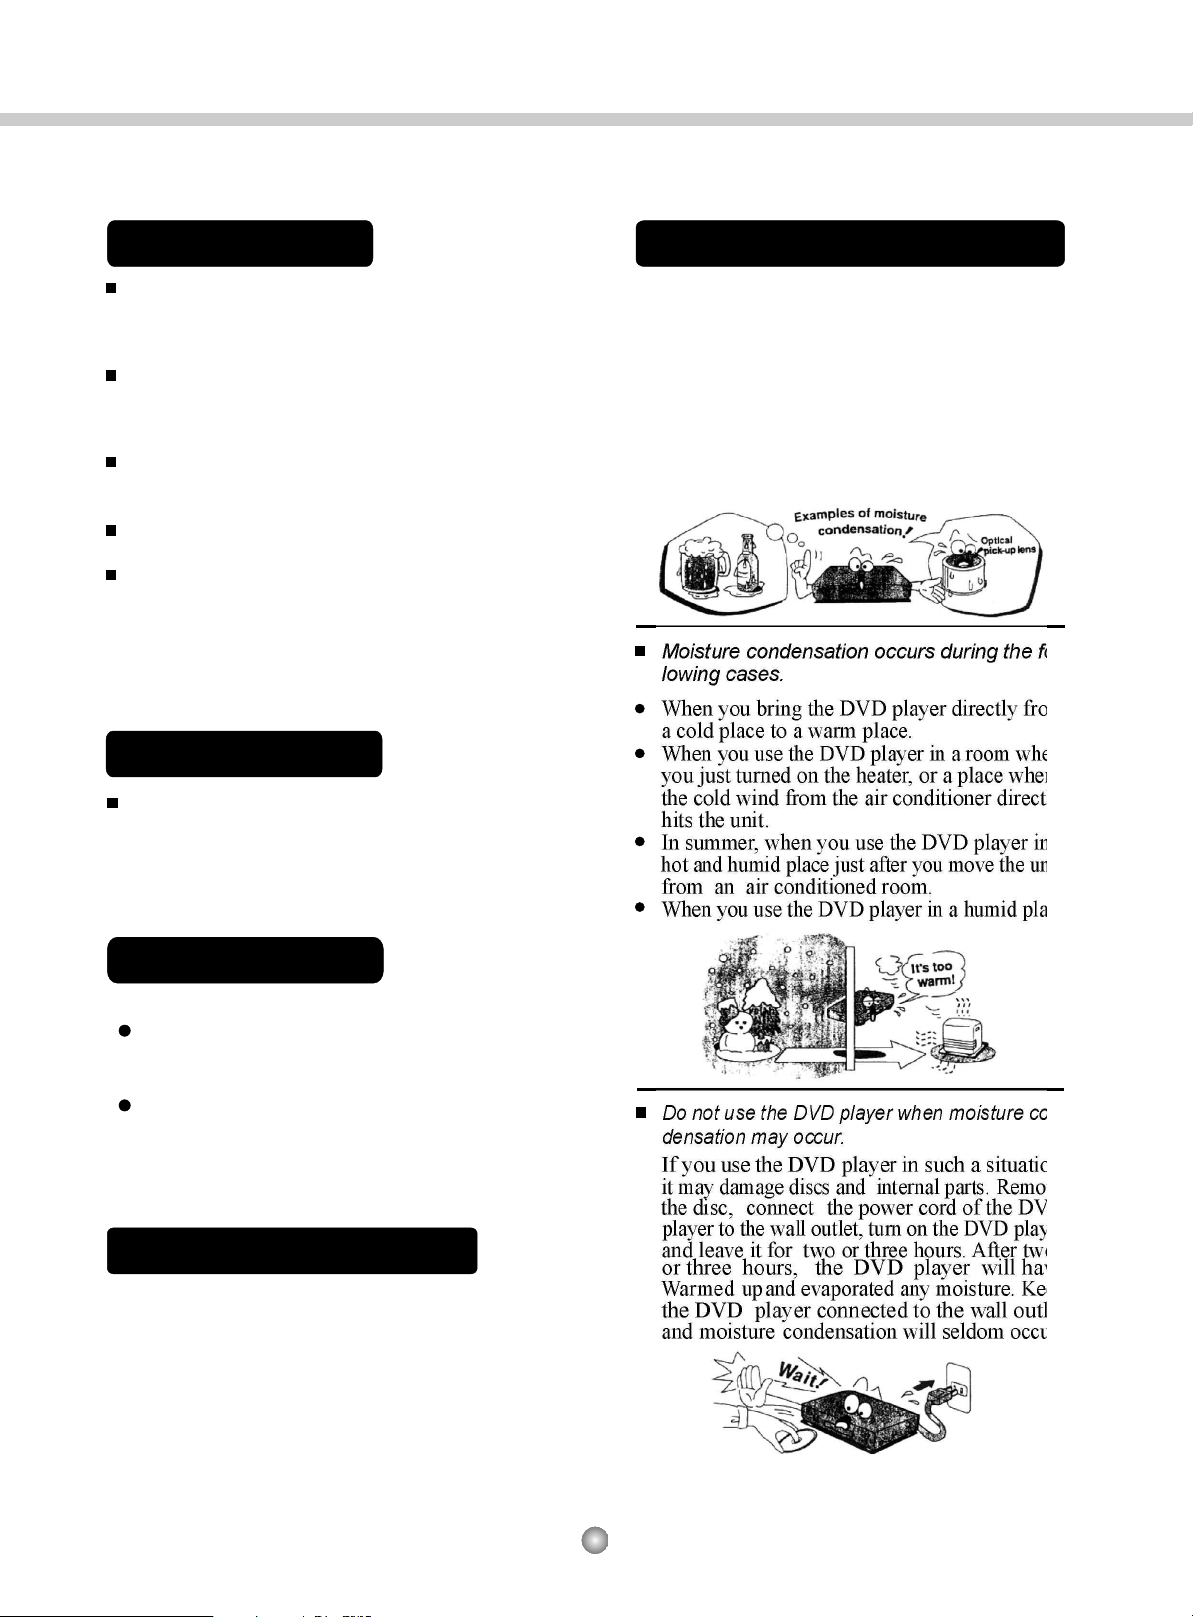
Notes on Moisture Condensation
Moisture condensation damages the DVD player.
Please read the following carefully.
Moisture condensation occurs , for example, when
you pour acold drink into a glass on a warm day.
Drops of water form onthe outside of the glass.
In the same way, moisture may condense on the
optical pick-up lens inside this unit, one of the
most crucial internal parts of the DVD player.
Moisture condensation occurs during the following cases.
When you bring the DVD player directly from
a cold place to a warm place.
When you use the DVD player in a room where
you just turned on the heater, or a place where
the cold wind from the air conditioner directly
hits the unit.
In summer, when you use the DVD player in a
hot and humid place just after you move the unit
from an air conditioned room.
When you use the DVD player in a humid place.
Notes on Cleaning
Use a soft, dry cloth for cleaning.
For stubborn dirt, soak the cloth in a weak deter gent solution, wri ng well and wip e. Use a dry cloth
to wipe it dry.
Do not use any type of solvent, such as thinner and
benzine, as they may damage the surface of the
DVD player. If you use a chemical saturated cloth to
clean the unit, follow that product's instructions.
To Obtain a Clear Picture
The DVD player is a high technology, precision device.
If the optical pick-up lens and disc drive parts are dirty
or worn down, the picture quality becomes poor. To
obtain a clear picture, we recommend regular inspection and maintenance (cleaning or parts replacement)
every 1,000 hours of use depending on the operating
environment.
Do not use the DVD player when moisture condensation may occur.
If you use the DVD player in such a situation,
it may damage discs and internal parts. Remove
the disc, c onnect the power cord of the DVD
player to the wall outlet, turn on the DVD player,
and leave it for two or three hours. After two
or three hours, the DVD player will have
Warme d up and evaporated any moisture. Keep
the DVD player connected to the wall outlet
and m oisture condensation will seldom occur.
5
Page 9

£±£®FUNCTIONS
1.1 Compatibility
DV-P4330S
This player is compatible with DVD¡¢VCD¡¢SVCD¡¢DVCD¡¢HDCD¡¢CD¡¢CD-R¡¢CD-RW¡¢¡¢
¡¢discs and KODAK CD pictures.
MP3 CDG
WMA
1.2 High quality video effect, lifelike and heart-quaking sound effect
Horizontal resolutio n of our player is more than 500 lines. The progressive scan feature and the YUV
output makes the picture more clear, more beautiful and full of spirit. Built-in DOLBY DIGITAL DTS
decoding may give you the real three-dimen-sional audio enjoyment. With all those very sophisticated
configuration, you may fully enjoy the cinema AV effect.
1.3 Parental lock
Parents may lock the player according to the content of the discs to avoid the influence of violent and
pornographic discs to children.
1.4 Multi-language and multi-subtitle function
The player can support discs with about 8 different languages and 32 subtitles.
1.5 Multiple angles for viewing
With this player, you may enjoy DVD discs with views of different angles.(Provided the DVD Disc has a
Multi-angle feature embedded in it).
1.6 Multiple picture proportion mode
With this player, you can select different picture modes to match the TV screen, according to the picture
requirement.
1.7 Dual earphone output, you can enjoy audio output with beautiful tones.
£²£®ACCESSORIES
Remote control
double AAA size battery
A&V wire
user manual
6
Page 10
£³£®OPERATION INTERFACE
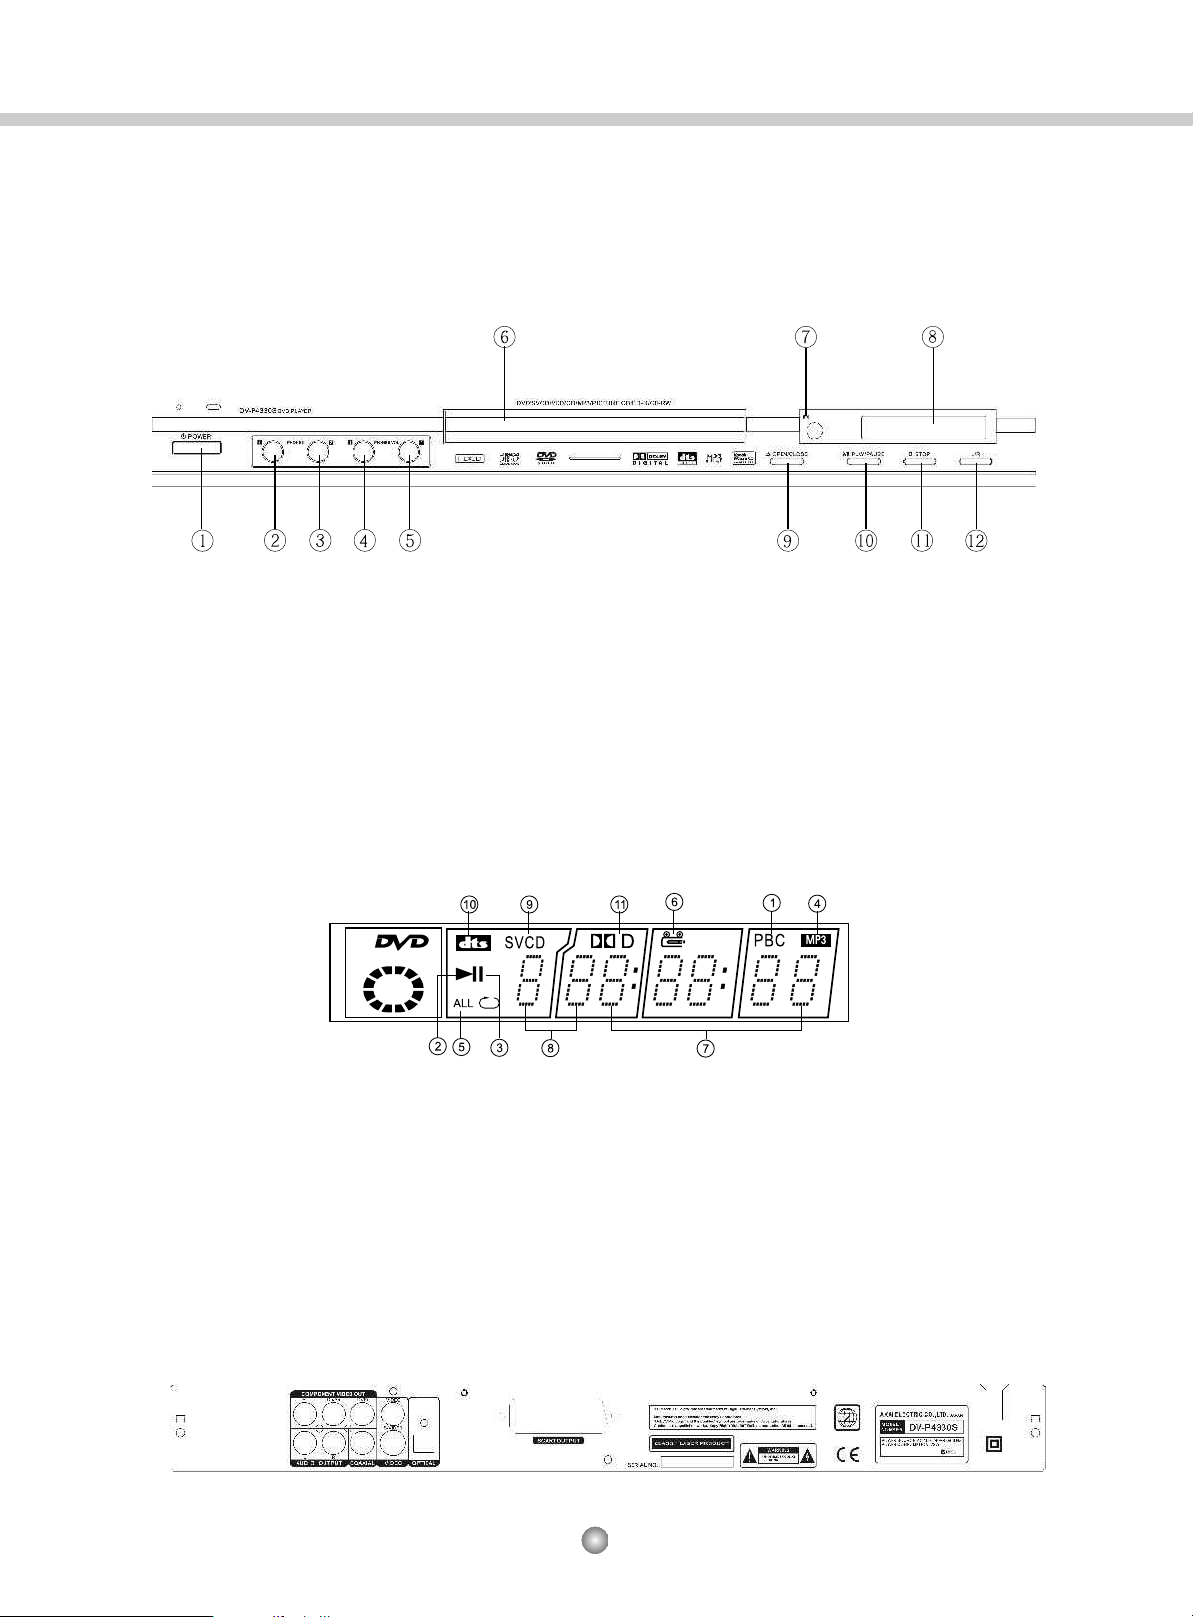
3.1 Front panel
DV-P4330S
1.Power switch
2.Earphone jack1
3.Earphone jack2
4.Phones VOL1button
5.Phones VOL2button
6.Disc tray
7.Remote receiver
8. VFD display
9. OPEN/CLOSE button
10.PLAY/PAUSE button
11.STOP button
12.L/R button
3.2 VFD description
1.PBC: Used for VCD, light means play function is working, dark means play function is off .
2. Playing: Display when playing disc. 3. Pause: Display when playing is suspends.
4. Mp3: Display when playing Mp3 discs.
5. Repeat: Display repeating type when use repeat function.
6. Multi-angle: Display the discs support multi-angle function.
7. Play time: Indicate working or remaining time of current track or chapter. (HH/MM/SS)
8. Track: Display current the chapter/track No..
9. SVCD: Display current playing disc type.
10. Display the DTS sound effect of current disc.
11. Display the Dolby sound effect of current disc.
3.2 Rear panel
7
Page 11
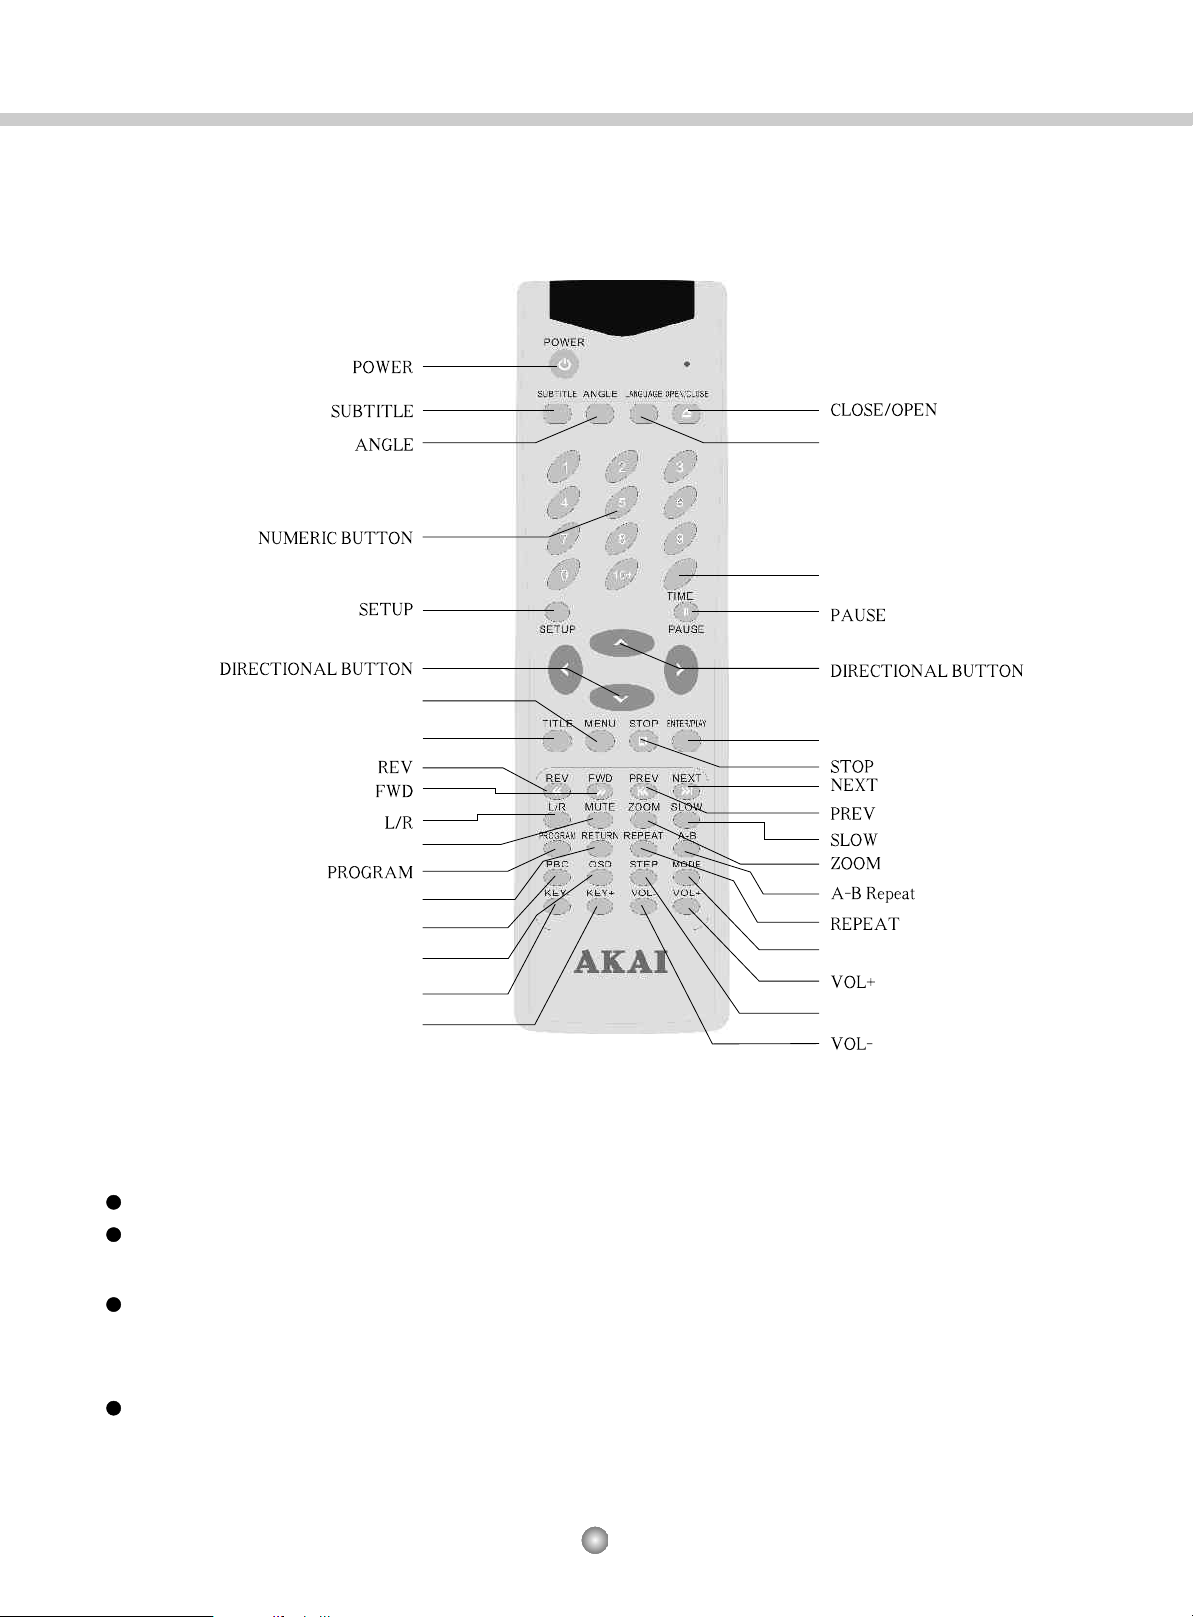
3.3 Remote control
DV-P4330S
LANGUAGE
TIME
MENU
TITLE
MUTE
RETURN
PBC
OSD
KEY -
KEY+
ENTER/PLAY
MODE
STEP
3.4 Use of the remote control
Remove the back cover of the remote control, correctly insert two AAA batteries and then close back cover.
When using the remote control, please point the remitting port directly to the receiving port of the player and
make sure no object is in between.
If the remote control can function only in a short distance, repla ce the battery. The two batteries should be
replaced together. The battery should be checked regularly to avoid leakage of the battery which may dam-
age the remote control.
The remote control must be so placed to avoid high temperature and shaking. Avoid falls and shocks.
8
Page 12

£´£®CONNECTING TO THE A&V SYSTEM
DV-P4330S
Note: No matter the VIDEO output is INTERLACE-YUV or P-SCAN Y Pb Pr, S-VIDEO and CVBS
output can work at the same time.
4.1 connecting to the A&V part of a two channel TV Set
Connect the y ellow pin of the AV wire to the yellow socket of this player and connect the other side of the
AV wire to the yellow video input socket of the TV set. If your TV has a S-Video output socket, please use the
special S-Video wire to connect the S -video so cket of this player and the TV set to acquire better video quality.
Connect the red and the white pins to the corresponding sockets of th e same colour of the player and TV set.
(please refer to the illustrations below)
¢Ù
4.2 connecting to a 2 channel audio amplifier
Connect the red pin of the audio wire to the audio right channel, the re d socket of this player. Connect the
white pin to the audio left channel, the white socket. Then connect other sides of the wire to the corresponding
socket of the am plifier. To avoid damage to the amplifier and the speakers, please adjust the volume of the
amplifier to minimum, and th en turn on the player before operation. When the m achine works normally,
adjust the volume of the amplifier according to your requirement. (Please refer to the illustration ¢Ú below for
correct connection)
4.3 connecting to amplifier with digital audio input socket
Connect the coaxial or OPTIC output socket of this player with that of the amplifier with coaxial or OPT IC
transmission wire. The amplifier must have the AC-3/DTS decoding function, for better sound field effect.
(Refer to the illustration for correct connection.)
¢Û
4.4 Y, Cb/Pb, Cr/Pr output
This player has the Y, Cb, Cr or Y, Pb, Pr output. If your TV set has the Y, Cb, Cr or Y, Pb, Pr please use three
video wires to connect the Y, Cr, Cb or Y, Pb, Pr output of the player to that of the TV set. With this method of
connection, you may enjoy high quality picture of your DVD discs. ( refer to the illustr ation , connecting Y,
Cb, Cr or Y, Pb, Pr output of DVD player with that of the TV set.)
Note: 1. In interlace output , the output will be Y Cb Cr;
2. In progressive o utput status, the output will be Y Pb Pr.
status
¢Ü
4.5 SCART output
The player can be connected to the common standard SCART computer display and other devices, the
high resolution computer display enables you to enjoy a nice quality of the DVD disc pictures. (Refer to
illustration picture SCA RT output of DVD player + SCART outlet of computer display).
¢Ý
9
Page 13

DV-P4330S
¢Ù
Connecting DVD player to 2 channel TV set
TWO CHANNEL AMP
TV SET
¢Ú
Connecting DVD player to 2 channel AMP and TV set
10
Page 14

OUTPUT
DV-P4330S
AC-3/DTS DECODER AMP
Connecting DVD player to AC-3/DTS decoder AMP and TV set
¢Û
TV SET
Y, C b, Cr or Y, Pb, Pr
DOUBLE CHANNEL AMP
Connecting Y, Cr or Y, Pb, Pr output of DVD player with that of the TV setCb,
¢Ü
TV SET
11
Page 15

DV-P4330S
SCART output of DVD play + SCART outlet of computer display
¢Ý
12
Page 16

DV-P4330S
5£®PLAY MODE
The player can provide the following play modes, including MENU PLAY, TITLE PLAY, ORDER PLAYER
and PROGRAM PLAYER, etc. according to data area in disc.
FUNCTION DESCRIPTION DISPLAY
MENU PLAY
TITLE PLAY
ORDER PLAY
For DVD,SVCD,VCD2.0 discs.
1.The default is PBC ON when you play VCD,
VCD 2.0
2.For DVD disc, you can choose according to
HIGHLIGHT; for SVCD¡¢VCD2.0 disc, you
can choose item by Numeric Bottom.
3.Press ENTER/PLAY at the position of
HIGHLIGHT, disc will play.
4.When RETURN is pressed during playing, the
menu will return to ROOT MENU if you play
DVD disc; press RETURN will return to MENU
picture if you play SVCD/ VCD 2.0.
Only for DVD disc
1.Press TITLE to choose detailed title.
2.Choose title by pressing HIGHLIGHT or
Numeric Button.
3.Player will play from the beginning chapter.
For DVD, SVCD, VCD, CD, CD-G, HD-CD,
DTS-CD, WMA, MP3/JPEG discs
1.For SVCD or VCD disc, press PBC to shift
to PBC OFF, it will be played orderly on the
status of PBC OFF; press PBC again to shift
to PBC ON
2.For other discs, press ENTER/PLAY, disc
will be played orderly on the status of STOP.
1.ROOT MENU will be shown on TV if you play
DVD disc.
2.SVCD,VCD2.0 MENU will be shown if you
play SVCD,VCD2.0 discs.
Title catalog will appear on TV screen.
PROGRAM PLAY
For DVD,SVCD,VCD,CD,CD-G,HD-CD,
DTS-CD,WMA,MP3/JPEG discs
1.Player needs to be on the status of PBC ON.
2.Input number and press ENTER/PLAY, or
move HIGHLIGHT to PLAY and press
ENTER/PLAY, then you can enter program.
3.You can compile 16 titles, chapters or item
at most
4.Move the HIGHLIGHT to CLEAR(on screen),
then press Enter/Play(on remote control), you
can clear the program.
5.Move the HIGHLIGHT to the item and input
new number, you can modify the play order.
13
1.For DVD¡¢WMA¡¢MP3/JPEG disc, the menu
will be shown as
Program
TC TC TC TC
--:-- --:-- --:-- --:--
--:-- --:-- --:-- --:--
--:-- --:-- --:-- --:--
--:-- --:-- --:-- --:--
<PLAY> <CLEAR>
2.For SVCD¡¢VCD¡¢CD¡¢CD-G¡¢HD-CD ¡¢DTS
-CD discs, the menu will be shown as
Program
__
1[ ]__5[ ]__9[ ]__13[ ]
__
2[ ]__6[ ]__10[ ]__14[ ]
__
3[ ]__7[ ]__11[ ]__15[ ]
__
4[ ]__8[ ]__12[ ]__16[ ]
<PLAY> <CLEAR>
3.Play item number will be shown on VFD.
Page 17

DV-P4330S
6£®BASIC OPERATION
Insert the power plug to the AC power supply socket. Please check the voltage and frequency of power supply
first. Press the powe r button on the front panel to turn on the player. The opening interface will appear on the
TV screen and Loading will appear on the upper left side of the TV screen. If no disc inserted in the player,
¡°¡±
NO disc will appear and now please press the CLOSE/OPEN button to open the disk tray and insert disc (the
side with words should be place upside), press CLOSE/OPEN button again to close the disc tray. Now the
¡°¡±
¡°¡±
player will start loading the disc again . The player can automatically recognize the format of the disc and then
plays the disc automatically. (If discs with menu such as DVD or VCD2.0 discs have been ins erted, you must
choose the expected from the menu, then the player may continue to play)
FUNCTION
OPEN/CLOSE
MUTE
DESCRIPTION
1.If disc tray is closed, press open/close button to open
the disc tray.
2.If disc tray is open, press open/close button to close
the disc tray and the player will start loading the disc.
1.Press¡°Mute¡±button to stop audio output.
2.In mute state, press¡°Mute¡±or ¡°VOL+¡±¡°VOL- ¡±
button to cancel this function.
The information stated to the right will appear when
you press the button for the first time.
¡°open¡±will appear on the upper left corner of the
TV screen.
¡°close¡±will appear on the upper left corner of the
TV screen.
¡°Mute¡±will disappear on the upper left corner of the
TV screen.
The following data will appear on the TV screen.
¡°Disc format,title,chapter £ª£º£ª£ª£º£ª£ª
(played time)Among which, title and chapter
will be displayed like this:
title:(present title) / (total title)
chapter:(present chapter) / (total chapter)
DISPLAY
OSD
VOL+
The information stated to the right will appear
when you press the button for the second time.
Press the button, the volume will be bigger.
14
The following data will appear on the TV screen.
¡°(language icon); language(subtitle icon); subtitle
(Angle icon); Angle¡±
Among which, language, subtitle and angle will appear
as the following format:
(language icon): * / * Eng Ac3 stereo
(language/total, language, language, audio type, total
channel)
(subtitle icon): * / * CHI (subtitle code/total subtitle,
language type)
(Angle icon): * / * (present Angle/total Angle)
(if the disc do not support multi Angle scene,¡°NON¡±
will appear)
Volume[ ]
Page 18

FUNCTION DESCRIPTION DISPLAY
DV-P4330S
VOL-
NUMERIC BUTTON
MENU
ENTER/PLAY
STOP
PAUSE
STEP
DIRECTIONAL BUTTON
PREV
NEXT
TIME
FORWARD
RETURN
TITLE
Press the button, the volume will be smaller.
Press the button to choose the title or chapter you
want to play.
1.If you press the button when the machine is
playing¡°VCD/SVCD/CDDA/MP3/JPEG¡±
discs,¡°INVALID KEY¡± may appear on the TV
screen;
2.DVD discs, the TV screen will show the menu.
1. To ¡°ENTER/PLAY¡± in SETTING UP
2. PLAY DISC
The machine will stop playing the disc when press
this button.
When you press the button , the pause function
will start.
When you press the button , the step function
will start.
When you press the button , the cursor will move
to intended direction (include zooming pictures).
Press this button to choose previous title/chapter.
Press this button to choose Next title/chapter.
Press this button at first time, OSD will appear to
show the present title. Press the number button to
input the desired title NO.; Then press¡°Enter
/Play¡±button to start play the chosen title.
Press Left / Rig t directional button to move the
cursor to the present chapter; Press NO. Button
to input the desired chapter NO.;Press the¡°
/Play ¡±Button to play the chosen chapter.
P ress t he L eft/Rightd irectional button to move
the cursor to the present playing time; Press NO.
button to input the expected time to skip to, then
press¡° /Play¡± buttont o s tart p laying f rom
t he c hosen t ime.
When you press this button, the player will play
the disc in¡Á 2 /¡Á 4 / ¡Á 8 / ¡Á /20 speed.
When playing VCD SVCD discs in the ¡°PBC
on¡±state,if you press this button the menu will
appear on the TV screen, ¡°INVALID KEY¡± will
appear on the TV screen when ¡°PBC OFF¡±.
When playing dvd discs, it carries out the title play
function.
h
Enter
Enter
2.0,
Volume[ ]
The pressed number will appear on the TV screen.
1.If press the button when the machine is playing
¡°VCD/SVCD/CDDA/MP3/JPEG¡±discs,¡°
KEY
¡±may appear on the TV screen;
2.DVD discs, the TV screen will show the menu.
PLAY
Stop
Pause
Step
¡°Picture up / down / left / right¡±will appear when
you zoom the picture.
Prev
Next
See ¡°OSD ¡±description
¡Á 2 /¡Á 4 / ¡Á 8 / ¡Á /20 will appear
Return
Title
INVALID
15
Page 19
DV-P4330S
FUNCTION
REV
SLOW
ZOOM
REPEAT
A-B
ANGLE
LANGUAGE
DESCRIPTION
When you press this button, the player will retreat in
¡Á 2 /¡Á 4 / ¡Á 8 / ¡Á /20 speed.
When you press the button, the disc will be slowly played
in SF 1/2, 1/3 , 1/4£¬1/5£¬1/6£¬1/7 speed.
When you p
in 2, 3, 4, step or to the original.
Repeat single track / chapter display.
Repeat whole disc / title display.
Stop repeat function.
To choose the starting point of the sector you wish to
view, press this button once.
To choose the end point of the sector you wish to
view, press this button again at that point.
To stop the A-B repeat function, press the button the
third time.
Shows angle information of the present playing disc.
According to the disc content, switch to playing angle
by pressing the button.
Shows the language information of the playing disc.
Press the button to change the play language according
to the film playing.
While playing DVD KARAOKE discs, press this button
twice to suppress the original singer¡¯s voice.
ress the button, the picture will be enlarged
1/2, 1/3 , 1/4£¬OFF
DISPLAY
¡Á 2 /¡Á 4 / ¡Á 8 / ¡Á /20 will appear.
SF 1/2,1/3,1/4,1/5,1/6,1/7 will appear.
Appear zoom 2, zoom 3,
zoom1/4£¬
(Angle icon): * / * (present Angle / total angle) if the
disc does not support multi Angle display.
(Language icon): [*/*] or [OFF].(This product supports
8 audio languages, the language audio type is subject to
different discs).
zoom off.
REP: [REP1]/[CHAPTER]
REP:[PEP ALL]/[TITLE]
¡°INVALID KEY¡± will appear.
zoom4, zoom1/2, zoom1/3 ,
Rep: [off]
Repeat A-
Repeat A-B
A-B CANCEL
SUBTITLE
L/R
(valid only for VCD discs)
MODE
KEY+
KEY-
PBC
Show the subtitle information of the playing disc.
Press the button to change the play subtitle according
to the film playing.
This Button is mainly used while playing VCD
KARAOKE discs, choose¡°MONO L¡± or¡°MONO R¡±
to suppress the original singers voice.
The button ¡°MODE¡±can be used to shift video
output.
Press this button to turn up the tune of Mic or current disc.
Press this button to turn down the tune of Mic or current disc.
1.If you press the butto n when the machin e is playing
¡°DVD/CDDA/MP3/JPEG¡±discs,¡°INVALID KEY¡±
may appear on the TV screen;
2.VCD2.0/SVCD discs, the TV screen will switch to PBC
state;
(Subtitle icon): [* ] or [OFF] this product supports 8
subtitle languages,
to different discs.
Audio channel: (stereo / Mono L /Mono R )
Display: INTERLACE-YUV/P-SCAN Y PB PR/TV-RGB
Display: Key [b #]
Display: Key [b #]
1.If press the button when the machine is playing
¡°DVD/CDDA/MP3/JPEG¡±discs,¡°¡±
may appear on the TV screen;
2.Menu play: [ON] / [OFF].
the subtitle language type is subject
INVALID KEY
16
Page 20

When you press this button, the setup menu will appear on
SETUP
PROGRAM
the screen. Use up/down directional button to choose setup
item, use ¡°Enter/Play¡±button to confirm the setup.
When you press this button, the screen will show the
programming menu and start programming-play setup
function. Use up/down, left/right button to choose the place
to put the programme. Press ¡°play¡± button to start playing
the programmed tracks. To clear the inputted Number use
the clear button; You can also move HIGHLIGHT cursor to
corresponding ¡°play¡±or¡°clear¡±and press select button
to play or clear the related information.
7£®INITIAL SETTING UP
DV-P4330S
Menu screens will show
See ¡°PROGRAM PLAY¡±at page 13 for details.
1.When entering the menu set up, use the directional button to choose the intended setting up item,
then press the¡°ENTER/PLAY¡±button to start the playback.
2.If you want to exit the menu setting up, just press the¡°EXIT SETUP¡±button again¡£
When you press the¡°SETUP¡±button, the setup menu (main page) may appear, You may setup the seven items
as displayed below.
SYSTEM SETUP
TV SYSTEM
SCREEN SAVER
VIDEO
TV TYPE
PASSWORD
RATING
DEFAULT
EXIT SETUP
7.1 System setup
Sets up different functions of DVD player and the TV set. It includes:
--TV SYSTEM
--SCREEN SAVER
--VIDEO
--TV TYPE
--PASS WORD
--RATING
--DEFAULT
Important note:
Before setting up your DVD player, you must load a DVD disc in the player to be able to set up all the functions.
17
Page 21

7.1.1 TV SYSTEM
TV system: The TV output mode maybe : Auto, NTSC, PAL, PAL 60.
DV-P4330S
SYSTEM SETUP
TV SYSTEM
SCREEN SAVER
VIDEO
TV TYPE
PASSWORD
RATING
DEFAULT
EXIT SETUP
NTSC
PAL 60
PAL
AUTO
Set up the system of your DVD player to match the system of your TV. The default setting of this DVD player
is PAL .
7.1.2 Screen saver
SYSTEM SETUP
TV SYSTEM
SCREEN SAVER
VIDEO
TV TYPE
PASSWORD
RATING
DEFAULT
EXIT SETUP
ON
OFF
The screen saver has two modes: ON, OFF. When in ¡°ON¡±mode, if you do not make any operation or are
in stop mode for ten minutes, the screen saver picture will appear.
The default mode setup is set at ON mode.
7.1.3 Video
SYSTEM SETUP
TV SYSTEM
SCREEN SAVER
VIDEO
TV TYPE
PASSWORD
RATING
DEFAULT
EXIT SETUP
INTERLACE-YUV
TV-RGB
P-SCAN Y PB PR
Video setup has three options: INTERLACE-YUV and P-SCAN Y Pb Pr. If use YUV output to TV, choose
¡°INTERLACE-YUV¡±mode. If use P-SCAN TV, ¡°P-SCAN Y Pb Pr¡±mode. If use Scart
output to choose
output to TV, choos ¡°TV-RGB¡±mode.
Note: No matter what option the VIDEO setup is , S-VIDEO and CVBS output can work at the same time .
18
Page 22
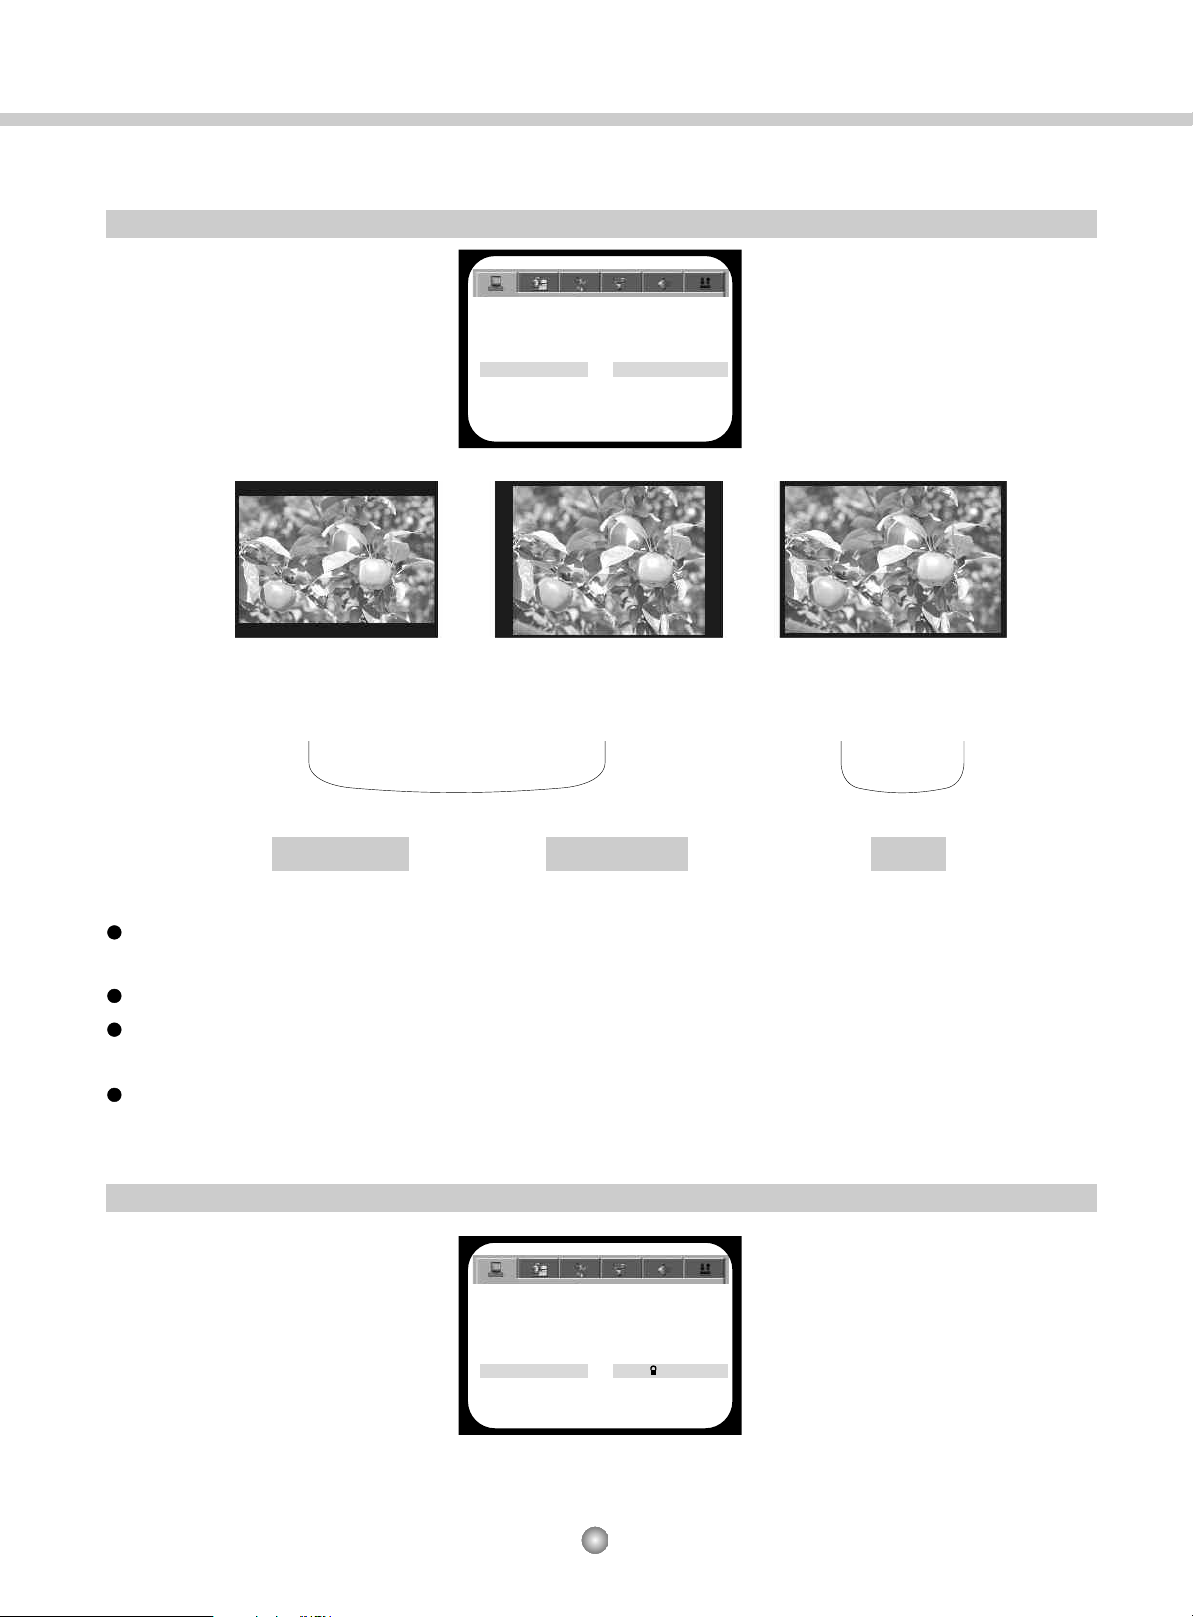
7.1.4 TV TYPE
Reference pictures:
SYSTEM SETUP
TV SYSTEM
SCREEN SAVER
VIDEO
TV TYPE
PASSWORD
RATING
DEFAULT
EXIT SETUP
4 : 3 PS
4 : 3 LB
16 : 9
DV-P4330S
4:3 subtitle block to
view the full width of
the broad mode
To view the standard
4:3picture or the cut
standard 4:3 picture
To view broad mode
picture with the broad
screen TV set
Broad mode TV set TV set
WIDE
(16:9)
Note:
NORMAL/PS
NORMAL/LB
No matter what kind of picture mode is chosen, picture recorded in the standard4:3format will always
be displayed in the 4:3 picture mode.
Please note the recording format may be different in different discs..
If you choose 16:9 broad mode on the standard 4:3 picture mode TV set, the 16:9 mode pic ture will be compressed
in the horizontal direction.
Some discs are recorded in certain format and cannot be changed. If so, no matter what kind of picture mode
you are choosing, the picture will be displayed in their original recording mode only.
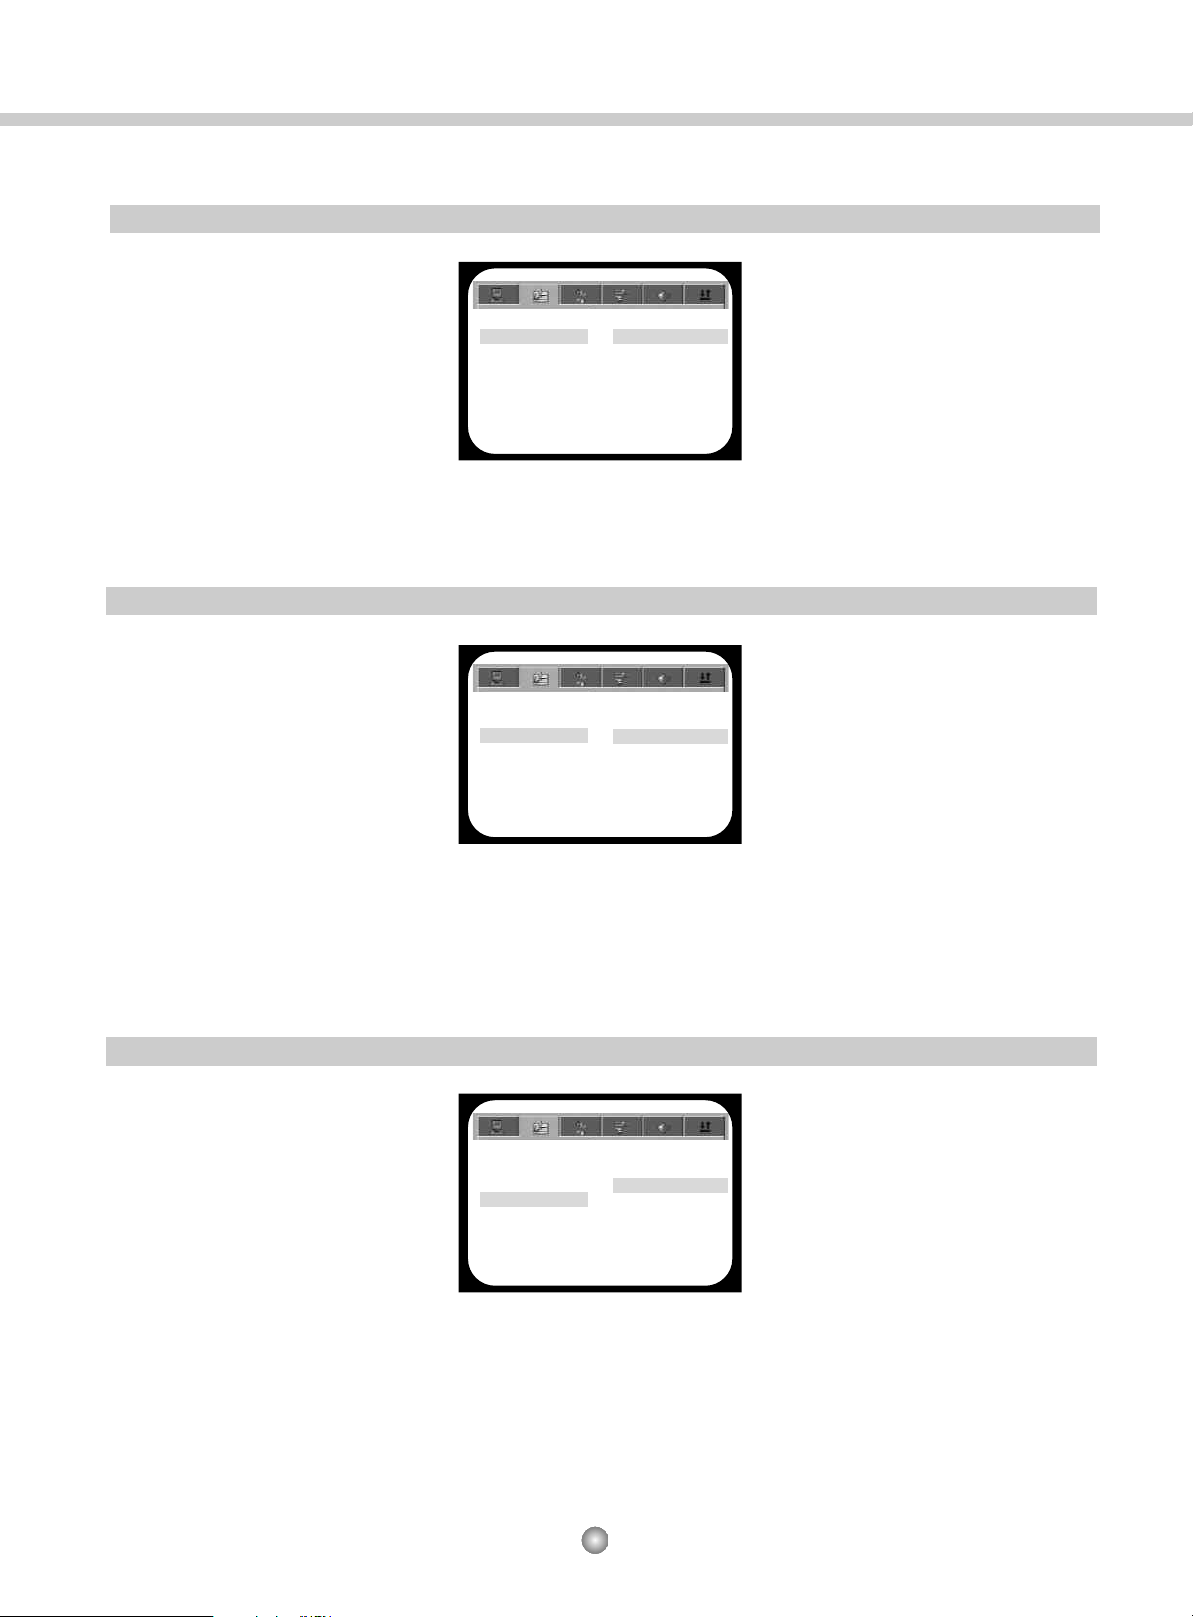
7.1.5 Password
SYSTEM SETUP
TV SYSTEM
SCREEN SAVER
VIDEO
TV TYPE
PASSWORD
RATING
DEFAULT
EXIT SETUP
The default mode is set at LOCK , You can not change the RATING , and can not change the password¡°¡±
in this state.
19
----
Page 23

DV-P4330S
If you want to change the RATING grade or the password, please input the initial password 8888 to unlock,
and press the¡° ENTER/PLAY¡±button first. Thereafter input your new password, and then press¡°ENTER/
PLAY¡± button.
If later on you want to make a new setting for the RATING or if you want to change the password, please
input the new password as set above. If you input 8888, it will not work.
Important note:
Please remember or better write down the new password and keep it in a safe place.
The parent lock function will only work on DVD discs with parental control marks.
7.1.6 Rating
SYSTEM SETUP
TV SYSTEM
SCREEN SAVER
VIDEO
TV TYPE
PASSWORD
RATING
DEFAULT
EXIT SETUP
1G
2
3 PG
4PG13
5
6R
7 NC-17
8
There are eight grades of ratings: 1G, 2, 3PG, 4PG13, 5, 6R, 7NC-17, 8. The factory default is 8 .¡°¡±
The performance of this function will depend on the discs ( some discs may not have these ratings ).
7.1.7 Default
SYSTEM SETUP
TV SYSTEM
SCREEN SAVER
VIDEO
TV TYPE
PASSWORD
RATING
DEFAULT
EXIT SETUP
RESTORE
The default is to change your setup state to the factory default setup.
7.2 Language setup
Language setup consists of:
OSD LANGUAGE
AUDIO LANGUAGE
SUBTITLE LANGUAGE
MENU LANGUAGE
Note:
Subtitle language menu language set up are only valid to the setup of DVD discs.and
20
Page 24
7.2.1 OSD language
DV-P4330S
LANGUAGE SETUP
OSD LANGUAGE
AUDIO LANG
SUBTITLE LANG
MENU LANG
EXIT SETUP
ENGLISH
FRENCH
NETHERLAND
OSD has three languages: English, French, Netherland. If you choose , the menu will be all in French French.
If choose the other language, the menu will be all in the corresponding language.
7.2.2 Audio language
LANGUAGE SETUP
OSD LANGUAGE
AUDIO LANG
SUBTITLE LANG
MENU LANG
EXIT SETUP
CHINESE
ENGLISH
JAPANESE
FRENCH
SPANISH
PORTUGUESE
GERMAN
LATIN
To choose audio language, the disc must be equipped with different languages. It is possible that the disc may
have more audio languages than shown above. Use LANGUAGE button on the remote control to change to the
desired language in this case.
7.2.3 Subtitle language
LANGUAGE SETUP
OSD LANGUAGE
AUDIO LANG
SUBTITLE LANG
MENU LANG
EXIT SETUP
CHINESE
ENGLISH
JAPANESE
FRENCH
SPANISH
PORTUGUESE
GERMAN
OFF
To choose subtitle language, the disc must be equipped with different subtitle languages. It is possible that the
disc may have more subtitle languages than shown above. Use SUBTITLE button on the remote control to change
to the desired subtitle language in this case.
21
Page 25

DV-P4330S
7.2.4 Menu language
LANGUAGE SETUP
OSD LANGUAGE
AUDIO LANG
SUBTITLE LANG
MENU LANG
EXIT SETUP
CHINESE
ENGLISH
JAPANESE
FRENCH
SPANISH
PORTUGUESE
GERMAN
LATIN
The Menu can be in different languages: Chinese, English, Japanese, French, Spanish, Portuguese, German,
Latin, etc, To choose menu language, the disc must be equipped with multi language menus.
7.3 Audio setup
Audio setup:
AUDIO OUT
KEY
7.3.1 Audio out
AUDIO SETUP
AUDIO OUT
KEY
EXIT SETUP
SPDIF/OFF
SPDIF/RAW
SPDIF/PCM
Audio output has three different types: for common AV output, please choose¡°SPDIF/OFF¡±,
for optical or coaxial output, please choose ¡°SPDIF / RAW or SPDIF / PCM¡±.
7.3.2 Key
AUDIO SETUP
AUDIO OUT
KEY
EXIT SETUP
#
+4
+2
0
-2
-4
b
Use up / down directional button to adjust the tone of the sound.
7.4 Video setup
Video setup
BRIGHTNESS
CONTRAST
HUE
SATURATION
22
Page 26

7.4.1 Brightness
DV-P4330S
Use up down directional button to adjust the brightness./
7.4.2 Contrast
directional button to adjust the colour contrast.Use up/ down
7.4.3 HUE
VIDEO SETUP
BRIGHTNESS
CONTRAST
HUE
SATURATION
EXIT SETUP
VIDEO SETUP
BRIGHTNESS
CONTRAST
HUE
SATURATION
EXIT SETUP
12
10
8
6
4
2
0
12
10
8
6
4
2
0
directional button to adjust the hue setup.Use up/ down
7.4.4 Saturation
directional button to adjust the colour saturation.Use up/ down
VIDEO SETUP
BRIGHTNESS
CONTRAST
HUE
SATURATION
EXIT SETUP
VIDEO SETUP
BRIGHTNESS
CONTRAST
HUE
SATURATION
EXIT SETUP
23
+6
+4
+2
0
-2
-4
-6
12
10
8
6
4
2
0
Page 27

7.5 Speaker setup
Speaker setup:
DOWNMIX
SUBWOOFER
BASS MODE
7.5.1 Downmix
SPEAKER SETUP
DOWNMIX
SUBWOOFER
BASS MODE
EXIT SETUP
LT/RT
STEREO
VSS
DV-P4330S
DOWNMIX has three output modes: LT/RT, STEREO, VSS. LT/RT is recommended if the discs support
PROLOGIC DOLBY sound, you can enjoy clear and vivid sound effect as in the cinema. If the discs support
5.1channel output, ¡°STEREO¡±is recommended. If choose¡°VSS¡±mode, you will enjoy virtual surround
sound effect.
7.5.2 Subwoofer selection
SPEAKER SETUP
DOWNMIX
SUBWOOFER
BASS MODE
EXIT SETUP
OFF
ON
Press the ¡°Right¡± directional button to choose ¡°ON or OFF¡±.
7.5.3 Bass mode
SPEAKER SETUP
DOWNMIX
SUBWOOFER
BASS MODE
EXIT SETUP
ALL LG SPK
ALL SM SPK
MIXED SPK
The Bass mode consists of large speaker, small speaker and mixed speaker. In order to have better acoustical
entertainment, you can choose the suitable mode according to the speaker.
1.If the speaker is wide frequency (20Hz-20KHz), please choose ¡°ALL LG SPK¡±
2.If the speaker is ordinary speaker (200Hz-20 KHz), please choose ¡°ALL SM SPK¡±.
3.If the front speaker is wide frequency, rear and center speakers are ordinary, please choose ¡°MIXED SPK¡±.
24
Page 28

7.6 Digital setup
Digital setup
OP MODE
DYNAMIC RANGE
DUAL MONO
7.6.1 Op mode
DIGITAL SETUP
OP MODE
DYNAMIC RANGE
DUAL MONO
EXIT SETUP
LINE OUT
RF REMOD
DV-P4330S
You may choose the output mode from LINE OUT and RF REMOD, In most cases, just use the LINE OUT,
some cases such as when using earphone, you may choose RF mode.
7.6.2 Dynamic range
DIGITAL SETUP
OP MODE
DYNAMIC RANGE
DUAL MONO
EXIT SETUP
FULL
6/8
4/8
2/8
OFF
Use the directional button to choose and adjust this setting up.
7.6.3 Dual mono
DIGITAL SETUP
OP MODE
DYNAMIC RANGE
DUAL MONO
EXIT SETUP
STEREO
MONO L
MONO R
MIX MONO
If your amplifier has Dolby digital output mode, you may choose STEREO, MONO L, MONO R and MIX
MONO for the decoding method. (For the DVD KARAOKE with AC-3 only)
25
Page 29

DV-P4330S
8. WMA/MP3/JPEG/KODAK PICTURE CD PLAY FORMAT
When putting MP3/JPG disc into the tray, the player will automatically search and save each directory of Mp3/
JPG. After the search is finished, the first directory of MP3 will show automatically in priority ( this function is
only for disc containing different type files, otherwise the first directory of single-file disc will play), and in which
the first song will be played. ( The cursor stops at ¡°01¡±).
The screen display will be as follows:
Current MP3/JPEG
name. * jpg is for
JPEG file
[1MMEGFMF]TRACK1.MP3
Current
file
name
01: 1MMEGFMF
02: 10MMEGFM
03: 2MMEGFME
01: TRACK1
02: TRACK2
03: TRACK3
File area: display
MP3 or JPG
files in current
directory
Directory: display
all menu and name
of the disc
04: 3MMEGFMG
05: 4MMEGFMG
06: 5MMEGFMJ
07: 6MMEGFMN
08: 7MMEGFMC
09: 8MMEGFMC
10: 9MMEGFMC
Music sign may
blink in front of
the playing track
04: TRACK4
05: TRACK5
06: TRACK6
07: TRACK7
08: TRACK8
09: TRACK9
10: TRACK8
MM
Shows the present
file is Mp3 format
P
Shows the present
JPG picture format
The block will move
when playing song
Function shift!
Display current file
type and desired file
type
Indicats the MPEG
file is being played
26
Page 30

DV-P4330S
You can enter into the directory that you want to play by using directional button, and then the first song will
be played. The directional button can also be used to choose any file you like to play in the file area.
Note:
1. The use of left and right directional buttons can move HIGHLIGHT among directory, file area and function
shift area.
2. HIGHLIGHT will be showed as above chart in directory and file area, and will be a crystal rectangle pane in
function shift area.
3. In function shift a rea the function of HIGHLIGHT can be realized by use of left and right and confirm
¡° ¡±buttons, the above chart is showing the respective meaning of¡° ¡±¡° ¡± , in which the white
colour stands for workable function and the black means no such files in the disc, the colour of the button
that has been selected will become darker.
4. For the disc containing mixed files of MP3, WMA, and JPEG, when the JPEG file is being played, use return
button to be back to JPEG directory.
5. The number button can be used directly to play the file you liked. For example, if you want to play the No
15 song, first press¡°10+¡±, then press¡°5¡±, the 15th song will be played.
Note: MP3 contains no picture, it only has the digital audio output.
6. When JPEG file is being played, the button PROGRAM can be used to choose display effect for picture shift.
There are altogether 17 display, which will recycle as follows according to different press:
WINDOW H - WINDOW V - WIPE FROM EDGE TO CENTER - RANDOM - NONE - WIPE TOP -
WIPE BOTTOM - WIPE LEFT - WIPE RIGHT - DIGONAL WIPE LEFT TOP - DIGONAL WIPE
RIGHT TOP - DIGONAL WIPE LEFT BUTTON - DIGONAL WIPE RIGHT BUTTON - EXTEND
FROM CENTER H - EXTEND FROM CENTER V - COMPRESS TO CENTER H - COMPRESS TO
CENTER V
7. When the picture is being played, the directional buttons( left, right, up, down) can be used to shift the picture
display angle,
up turn to up and down
down horizontal turn (LEFT-RIGHT)
left left turn 90 degree
Right right turn 90 degree
8. Continuing to press the ZOOM on remote to show the ¡°zoom 2¡± , ¡°zoom 3¡± , ¡°zoom 4¡± , ¡°zoom1/
2¡±,¡°zoom1/3¡±, ¡°zoom 1/4¡± , ¡°zoom off¡± on the display for 2X ,3X, 4X times amplifications and
1/2X, 1/3X, 1/4X minification and return to the normal picture under the condition of ZOOM ,press the
direction bottom to choose the visual point by moving the picture UP/DOWN/LEFT/RIGHT .
9. When the picture is being has stopped or in directional display, the use of PBC button can enter into 6 picture-view display that contains 6 smaller pictures. To press next or pre can select next or previous 6 picture-view display use directional button to choose picture in full screen display.or
10. The Kodak Picture CD is the same appearance as the other discs . It can be made on the Chain store with
the KODAK PICTURE CD authorized mark while prin ting the 135 MM film and APS film . The pictures
in side the CD can be played as the slid continually on this DVD machine , and the size can be modified
by ratio to the full screen of the TV .It brings more interesting by rotating and zooming when enjoying the
pictures .
27
Page 31

9. TECHNICAL SPECIFICATION
DV-P4330S
Response frequency:
S/N ratio:
Audio output:
Video output:
S-video output:
power supply:
power consumption:
Operation temperature:
Measurement:
Gross weight:
4Hz - 22 Khz
> 98dB
2 V
1.0V£¨P-P£© 75¦¸
Y 1.0V£¨P-P£©£¬ C0. 28 75¦¸
100-240V ~ 50/60Hz
28W
¡£¡£
-30 C To 4 5 C
430£¨L£©X 263£¨W£©X 43£¨H£©mm
4. 2 Kg
10.DVD DISC INFORMATION AND FEATURES
DVD players are the ticket for your home theatre. Every technical index of DVD players is far more superior
to any previous audio - visual equipment. This completely new digital technology has compressed the audio
visual effect of cinema into a 12cm diameter disc which is the same in dimension as the CD disc. Especially the
Dolby digital channel output can provide prominent digital surround effect.
28
Page 32

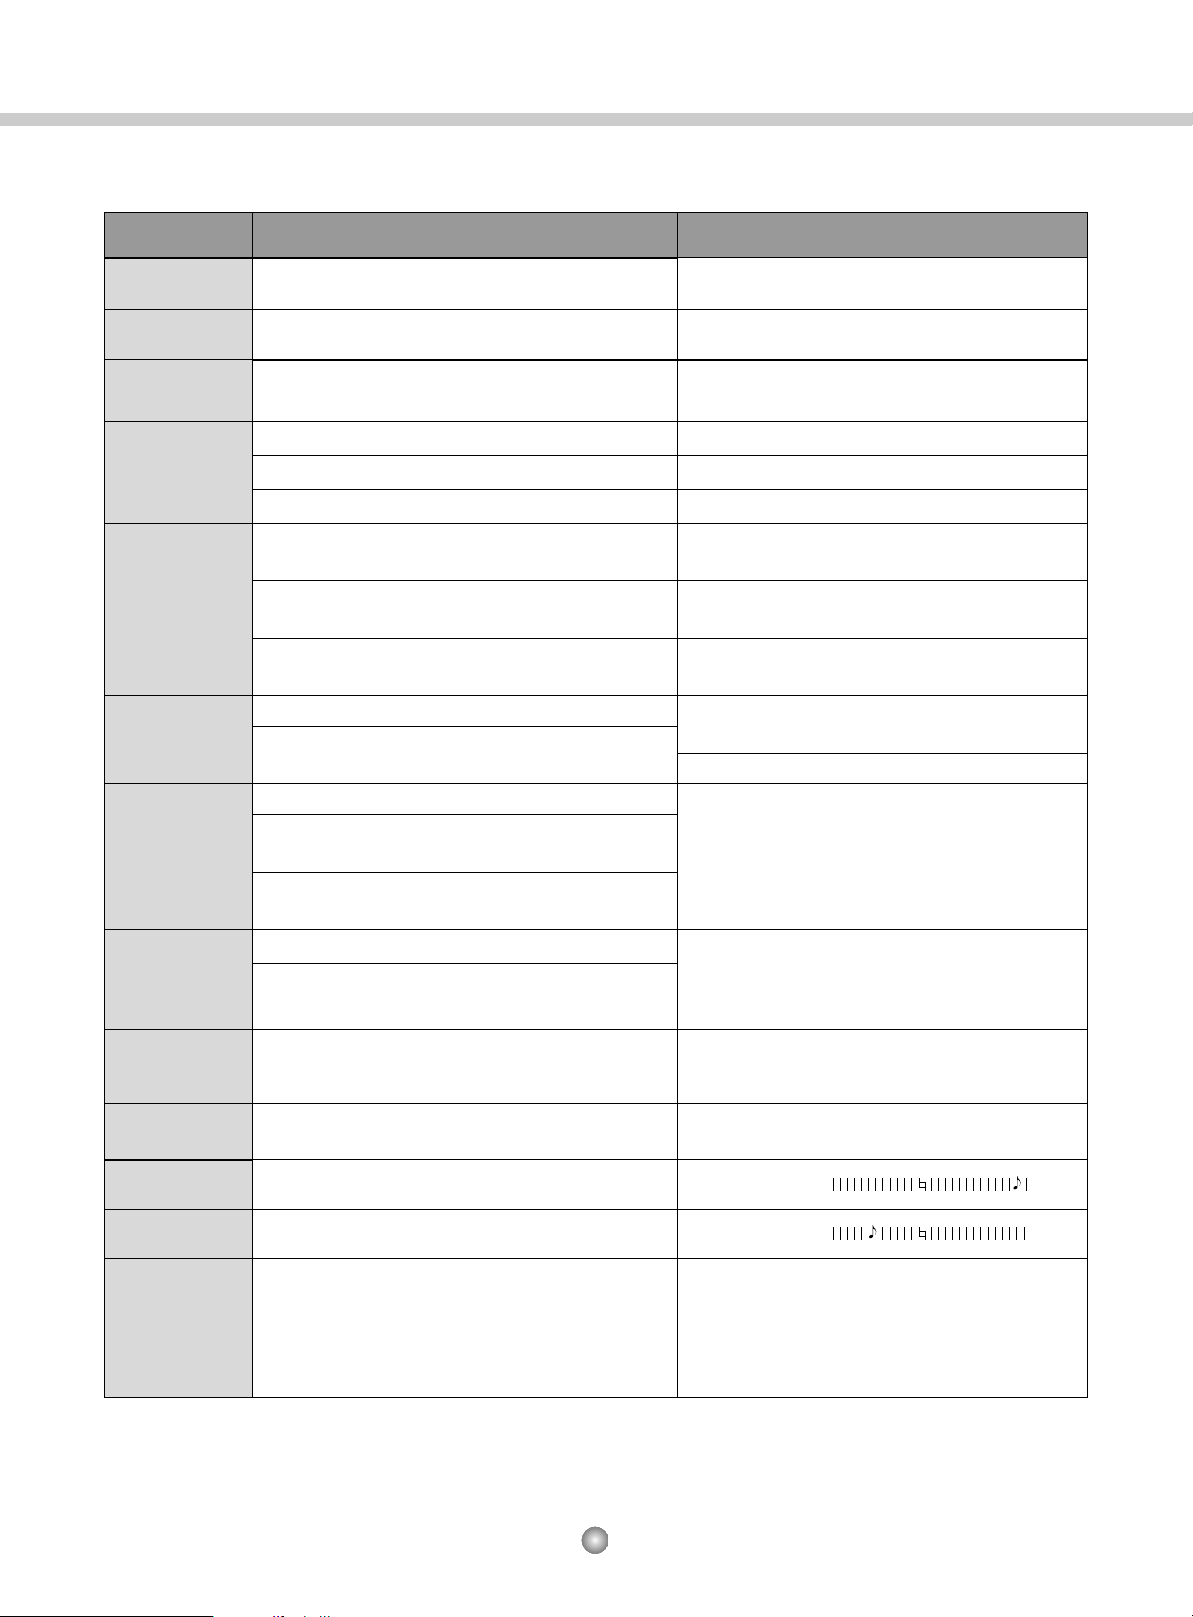
10.1 Compare DVD disc with other discs:
DV-P4330S
Recording
method
Volume
Playing time 133 242 266 484
minutes minutes minutes minutes
Disc diameter 12cm/8cm 30cm/20cm 12cm 12cm 12cm/8cm
Horizontal
resolution
Picture
proportion
Subtitle 32 kinds
Digital/MPEG
Single-side
single-layer
4.7G
Multiple kinds one kind one kind one kind
Double
--side
single
--layer
8.5G
More than 500 line
II
Singleside
doublelayer
9.4G
Doubleside
doublelayer
17G
Analog Digital
650MB 650MB 650MB
Single-side
60minutes
double-side
120minutes
No more than no more than no more than
430 line 350 line 250 line
16 kinds
at most
45minutes 74minutes 74minutes
4 kinds
Digital/
MPEGI
Digital
Language 8 kinds
Sound quality
16, 20, 24bit
48kHz,96kHz/
29
4 kinds
at most
44.1kHz/
16bit
4 kinds
at most
44.1kHz/
16bit
2 kinds 2 kinds
44.1kHz/
16bit
44.1kHz/
16bit
Page 33
DV-P4330S
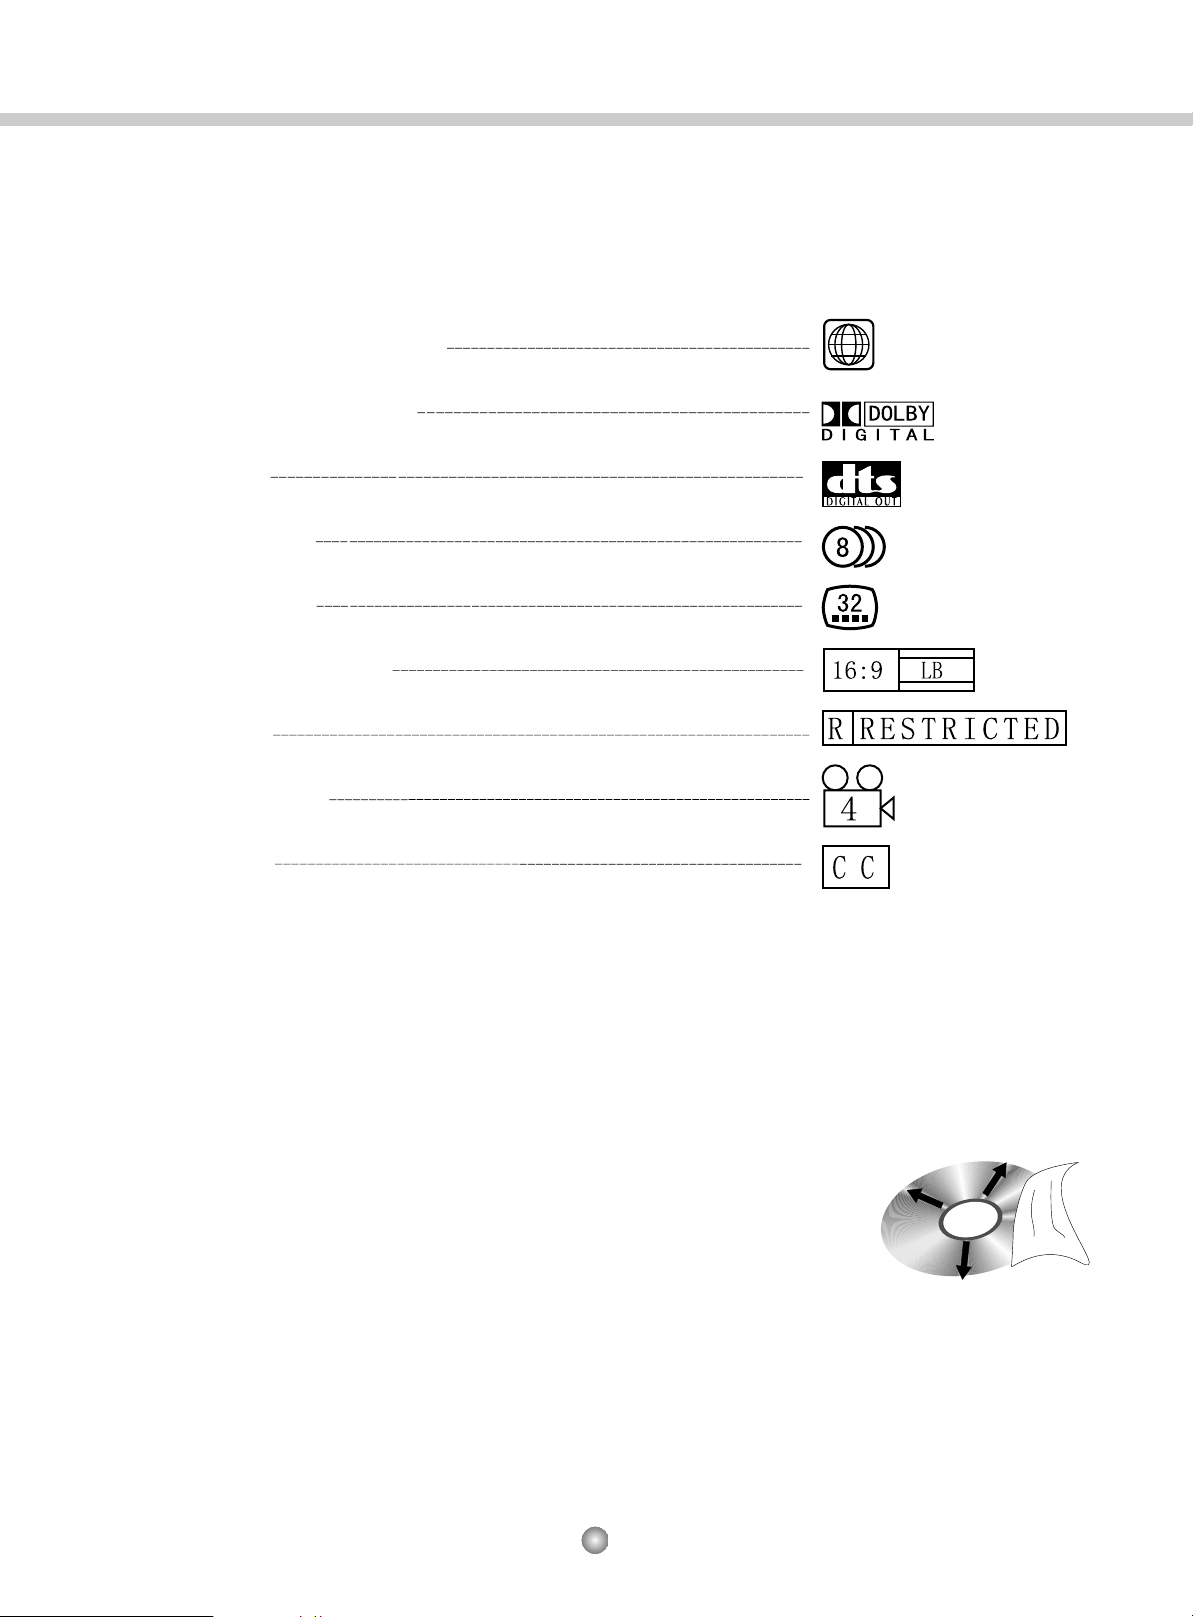
10.2 Function supported by DVD discs
Functions supported by DVD discs are so many that it may be different from different producers.
Some functions are as follows:
Regional code and signal system
Dolby digital surround sound
DTS output
Sort of language
Subtitle languages
Pictures proportional mode
Parents lock
Angles for viewing
Close subtitle
2
PAL
10.3 Disc protection :
1. Hold the disc by the edges so the surface will not be damaged with finger prints.
2. Do not stick scraps of paper to the disc surface.
3. Wipe the disc with a dry soft cloth from the center hole toward the outer edge.
4. Be sure not to bend the disc and store in the box.
5. Do not store the disc in the following places : areas exposed to direct sunlight,
humid or dusty areas.
30
Page 34

10.4 The following discs can be played by this DVD player:
DV-P4330S
Due to rapid advances in the technology of Digital discs, there may be a few new formats of the
above kinds of discs which may not be supported by this DVD player. Please note this does not constitute
as a fault of the DVD player.
31
Page 35

11.TROUBLE SHOOTING
DV-P4330S
Phenomenon reason
Power connected but player
does not work
Disc inserted, but no tracks
and the played time shown
on the TV screen
no sound
no picture
Picture without color
the remote control does not
work
During playing, some times the
pictures stop moving or skipping
or the sound is abnormal.
Plug not fastened well.
Disc inserted upside down; disc is dirty
or badly cracked
The audio output wire has not correctly
connected or is loose; TV or the amplifier
are not in a normal working condition
The video output wire has not correctly
connected or is loose; TV is not in normal
working condition
The picture mode of the TV is not the
same as the player
the battery does not have enough power;
the remote controller does not point
correctly at the remote sensor or the
remote sensor is dirty.
The disc is not in good condition, such as
with cracks or dirty. The player is shocked.
method to solve the problem
Connect the power supply again
Correctly insert the disc; clean or replace the disc; turn off the power and
wait for one to two hours till the disc
become dry and then play again.
Connect again the audio wire; check
if the TV is in the AV mode, if the
amplifier is in the normal working
condition
Connect again the audio wire; check
if the TV is in the AV mode
Change the picture mode system setting up
change the battery.
Point the remote controller directly at
the remote sensor; clean the surface
of the remote sensor
Clean or replace the disc; move the
speaker away from the player.
Turn off the power and turn on again, then
try to operate the player. If it still does not
work, please contact the service centre.
the player does not work
The player interfaced by another
electrical appliance or the quality is
not in a good condition
Note:
1. The interval time of turn on this product must be over 30 seconds to prolong the service life.
2. Please pull the plug out if not use this product for a long time.
3. This product must be work under rated voltage, otherwise it can not be normally played even be burnt out.
4. This product can not play the encryption discs which programmed by the users themselves.
5. Please turn off and re-turn on this product if it is accidentally shut down.
32
Page 36

DV-P4330S
12.AFTER SALES SERVICE
During our warranty period, when trouble happens to the machine under normal operation, we will repair
or replace the machine for you. The customer must send the defect machine to the appointed service center
according to the requirement for our reference.
We are not responsible for the troubles caused by the incorrect operation, accident or natural disaster.
The repair or refitting of any part of the machine by the unauthorized agent or person will make the
warranty invalid.
After the warranty period, if problems happened to your machine, please contact the shop or authorized
service center for repair.
Note: our company reserves the right to change or improve the design and technology
without prior notice.
33
Page 37

 Loading...