How it Works
Log In / Sign Up
Buy Points
How it Works
FAQ
Contact Us
Questions and Suggestions
Users
AEG
Loading...
M
Mastery HK956970FB
Mastery HKH81700FB
Mastery HKM85411FB
Mastery HKP65410FB
Mastery HKP85410XB
Mastery IAE84850FB
Mastery KME761000B
Mastery RCB63326OW
Mastery RCB63326OX
Mastery RCB63726OX
Mastery RCB65121TX
Mastery RCB732D5MX
Mastery RCB732E5MX
Mastery RCB73421TY
Mastery RCB736D5MB
Mastery RCB73821TY
Mastery RCB83724MX
2
Mastery SCB61824LF
Mastery SCE81816ZF
Mastery SCE81821LC
Mastery SCE81824TS
Mastery SCE81926TS
2
Mastery SKE81826ZC
MaxiKlasse BC501302NM
MaxiKlasse BE501302NM
MaxiKlasse BE731442NM
MAXIMUS
MB 1.0
MB38X
MB8017B
MB8026B
MBB1755DEM
2
MBB1755SE
MBB1755SEM
4
MBB1756D
MBB1756DE
MBB1756DEM
7
MBB1756D-M
2
MBB1756S
MBB1756SE
MBB1756SEB
4
MBB1756SEM
5
MBB1756SEW
MBB1756S-M
3
MBE2657DEM
3
MBE2657D-M
4
MBE2657S
MBE2657SEB
2
MBE2657SEM
3
MBE2657S-M
2
MBE2658D
MBE2658DE
MBE2658DEM
7
MBE2658D-M
4
MBE2658S
2
MBE2658S-B
4
MBE2658SE
2
MBE2658SEB
3
MBE2658SEM
4
MBE2658SEW
5
MBE2658S-M
3
MBE2658S-W
MBL10
MBL8TA
3
MBS 2000
MBS 3000
MBS 30 Turbo
2
MBS3423CM
MBS 6000
MC 110
5
MC 113 E/U
4
MC 114 E-U
MC 115 E/U
MC 120
6
MC 125
11
MC 125 D
MC 125E
MC 135
6
MC 21
MC 2664E
4
MC 4412
MC 4420
MC 4421 CD-MP3 N
MC 4426 DVD
MC 4428
MC 4428 CD
MC 4432 CD
MC 4433
MC 4434
3
MC 4443
2
MC 4443 CD-MP3
2
MC 4445
MC 4448
MC 4448 DVD
MC 4450iP
MC 4451
MC 4455
MC 4455 CD-MP3
MC 4456 iP
MC 4457 BT
Loading...
Loading...
Nothing found
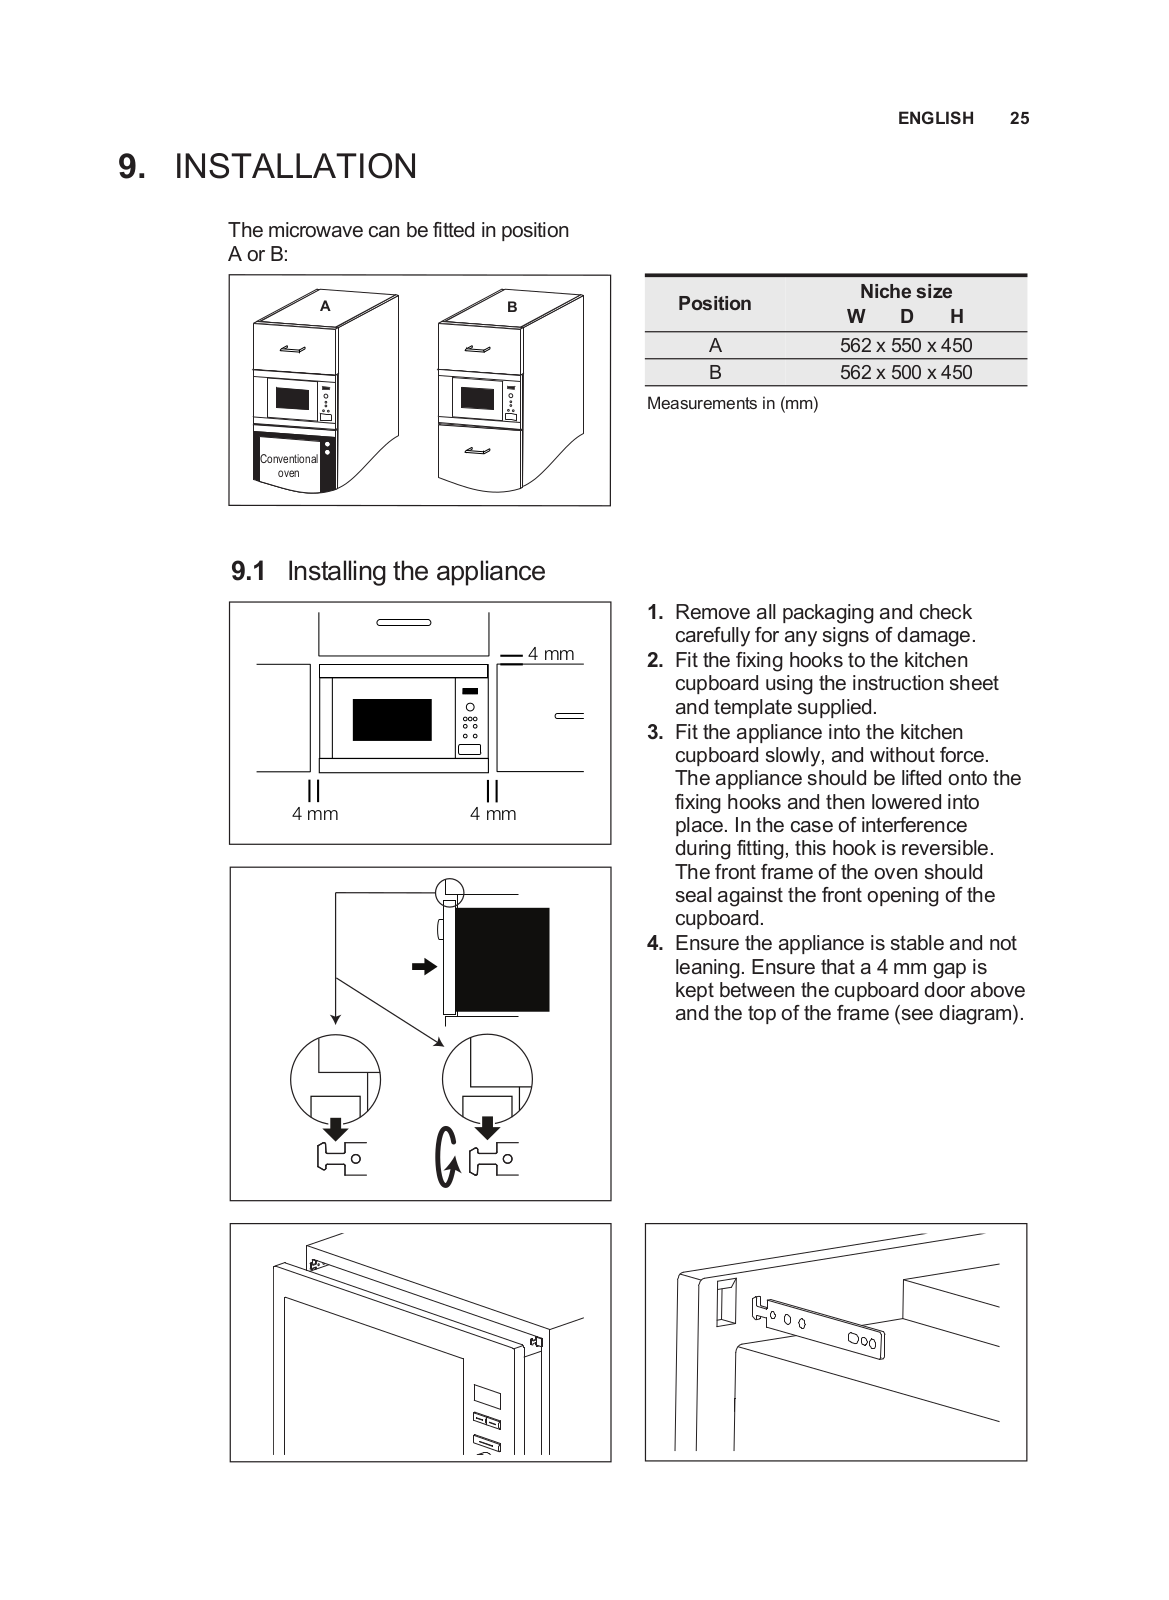
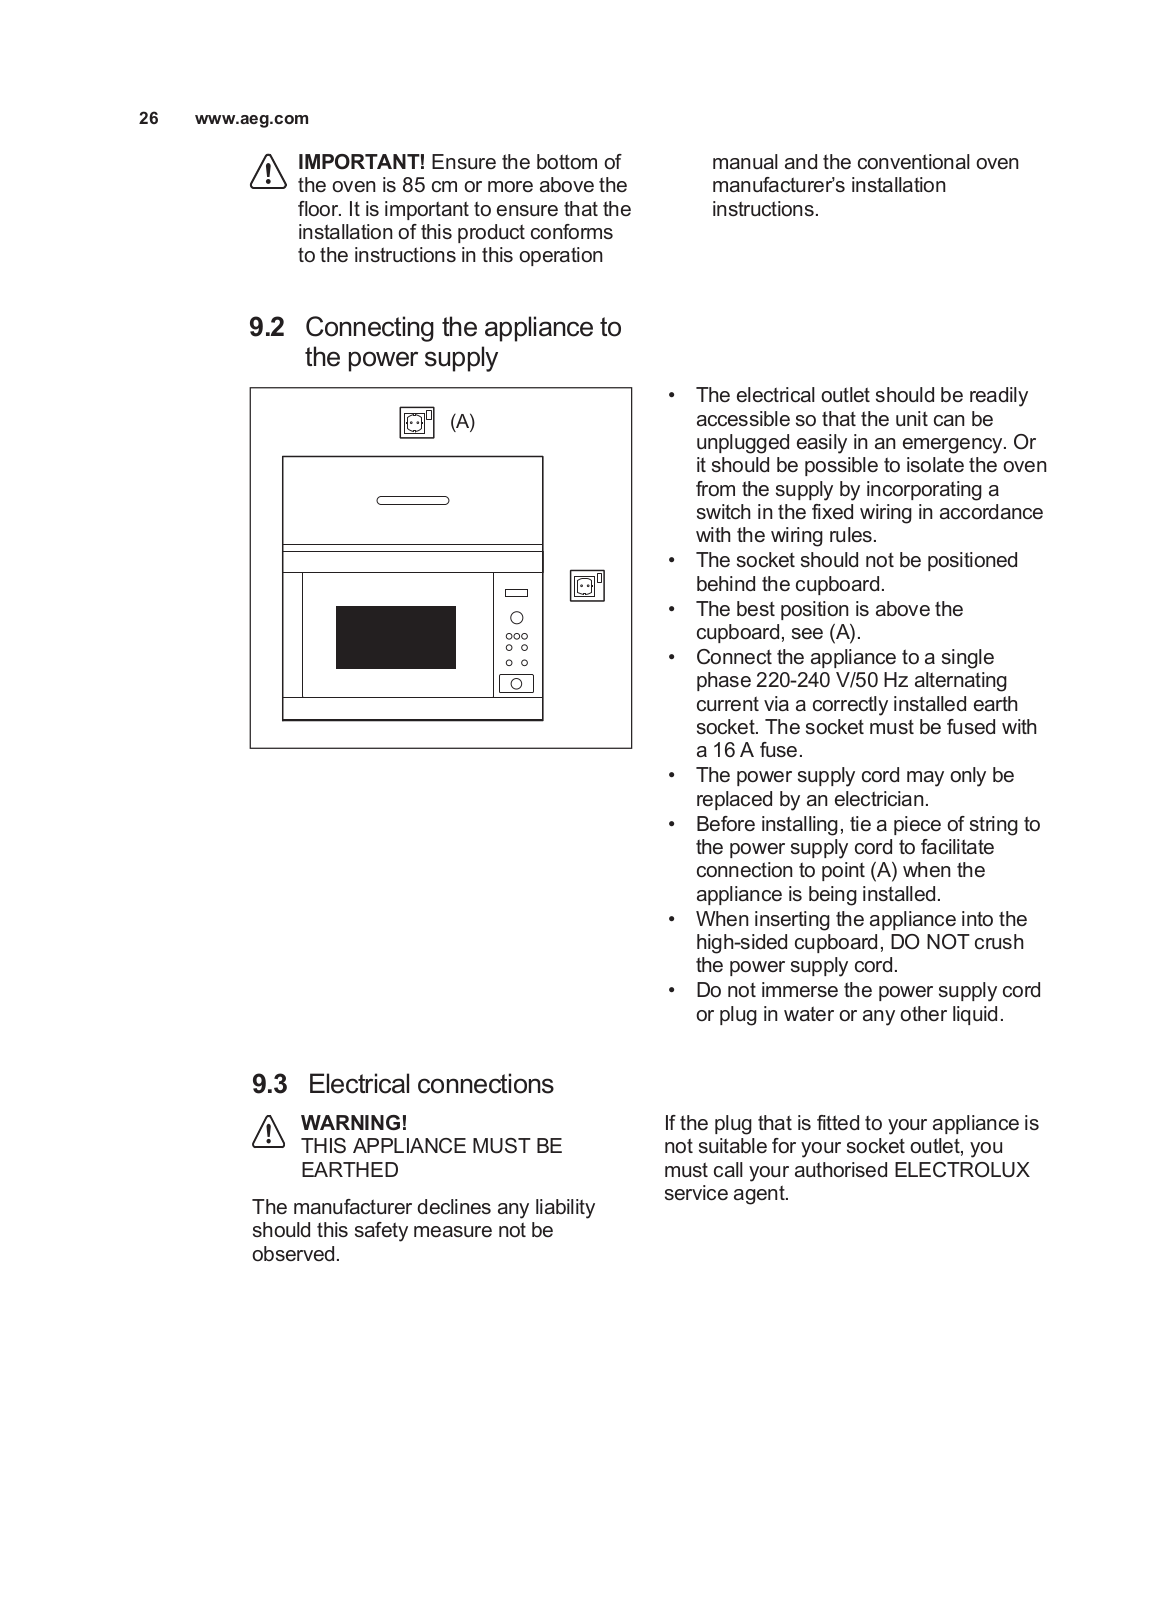
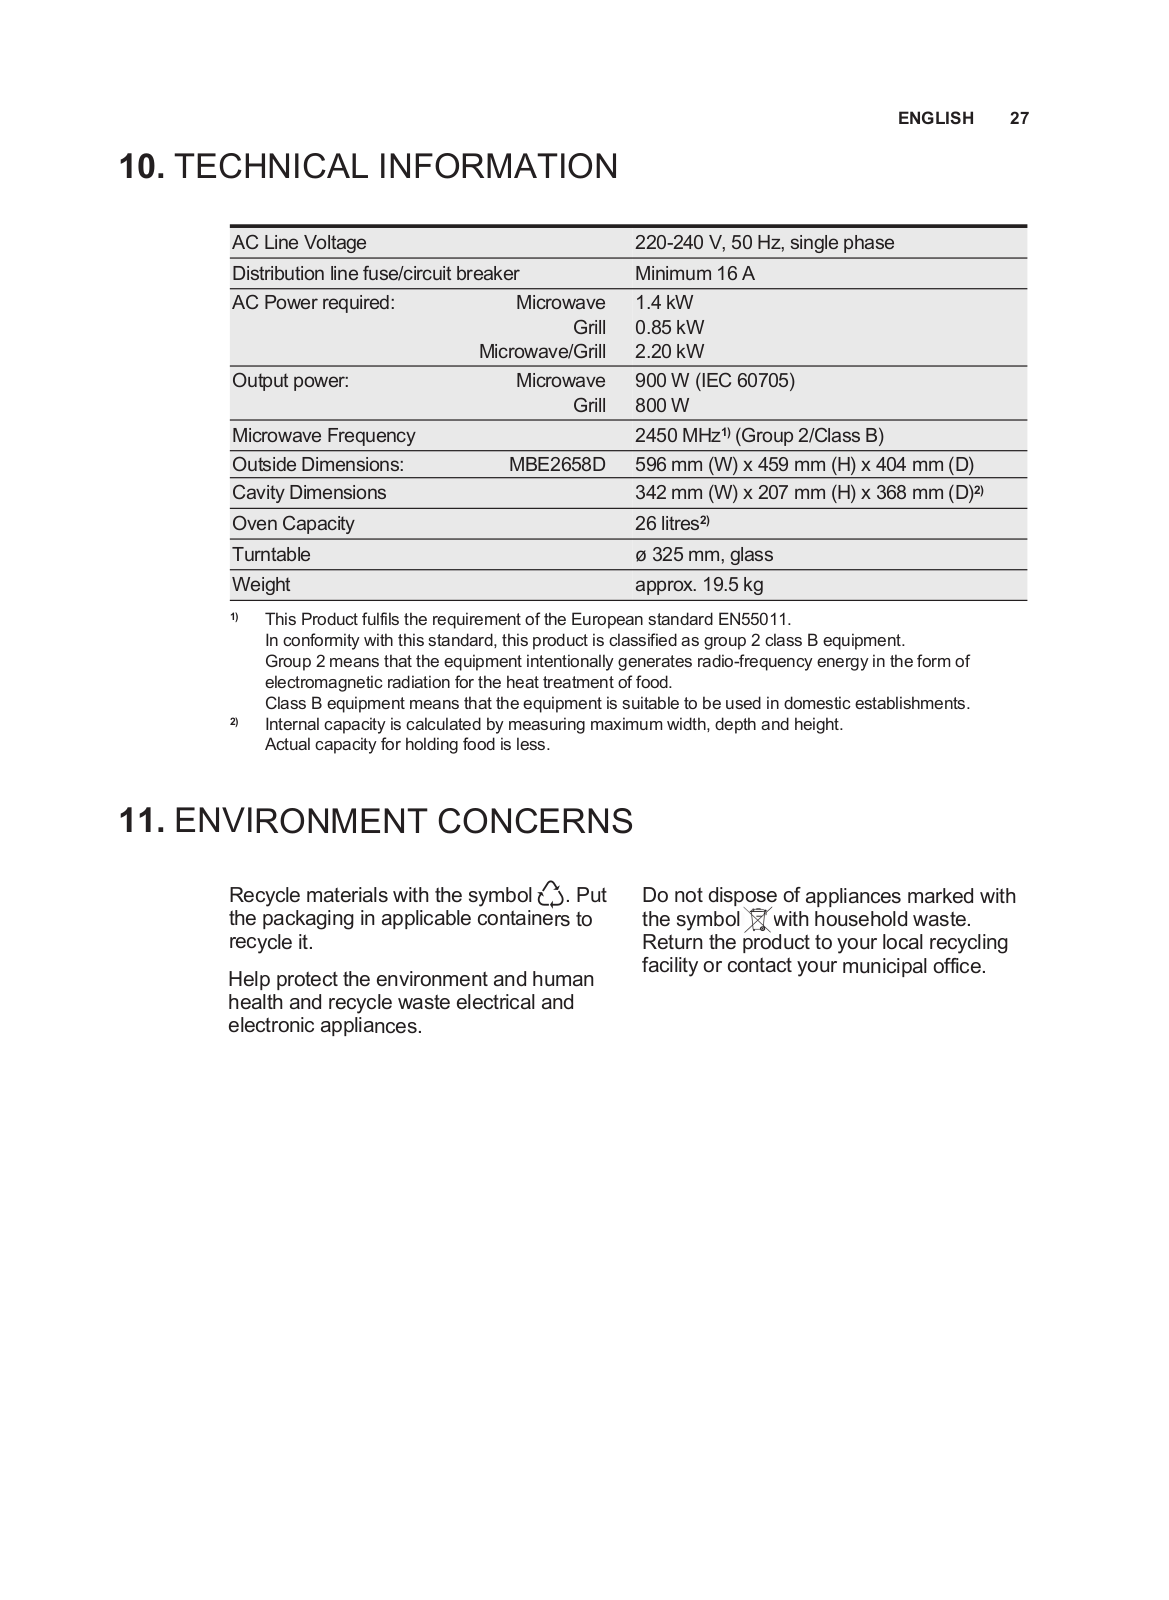
MBE2658D
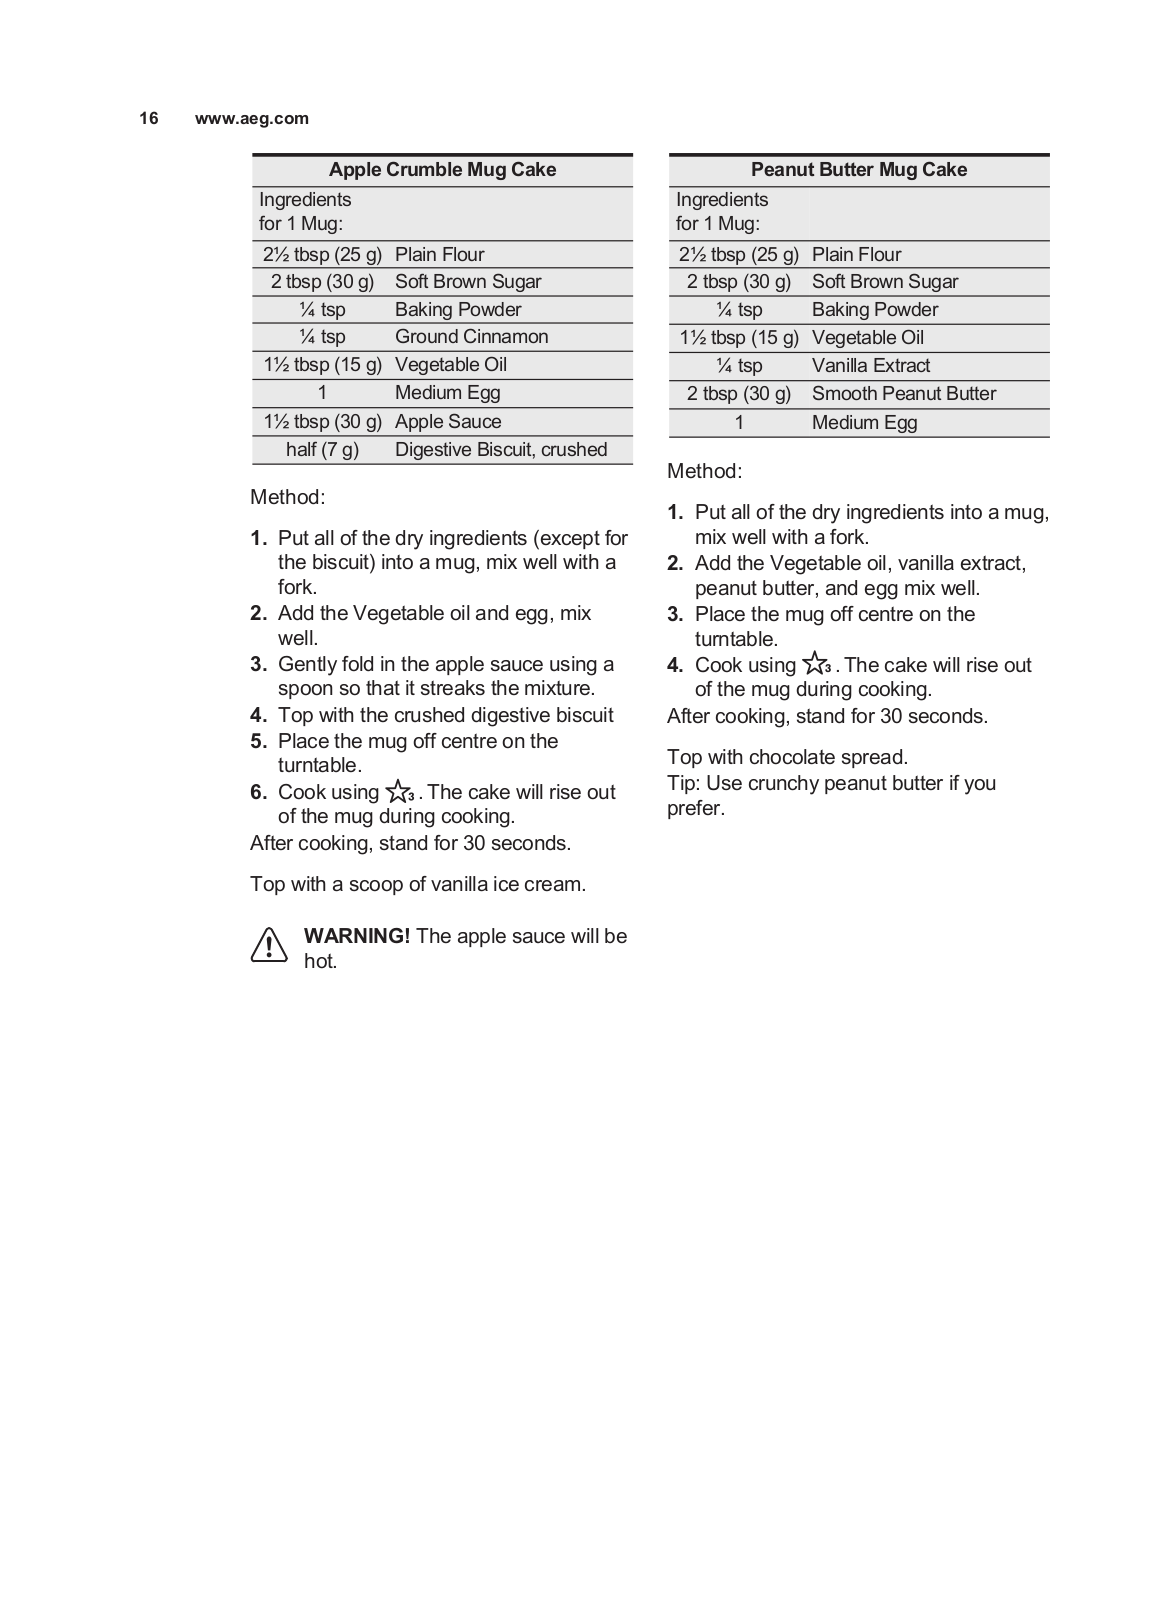
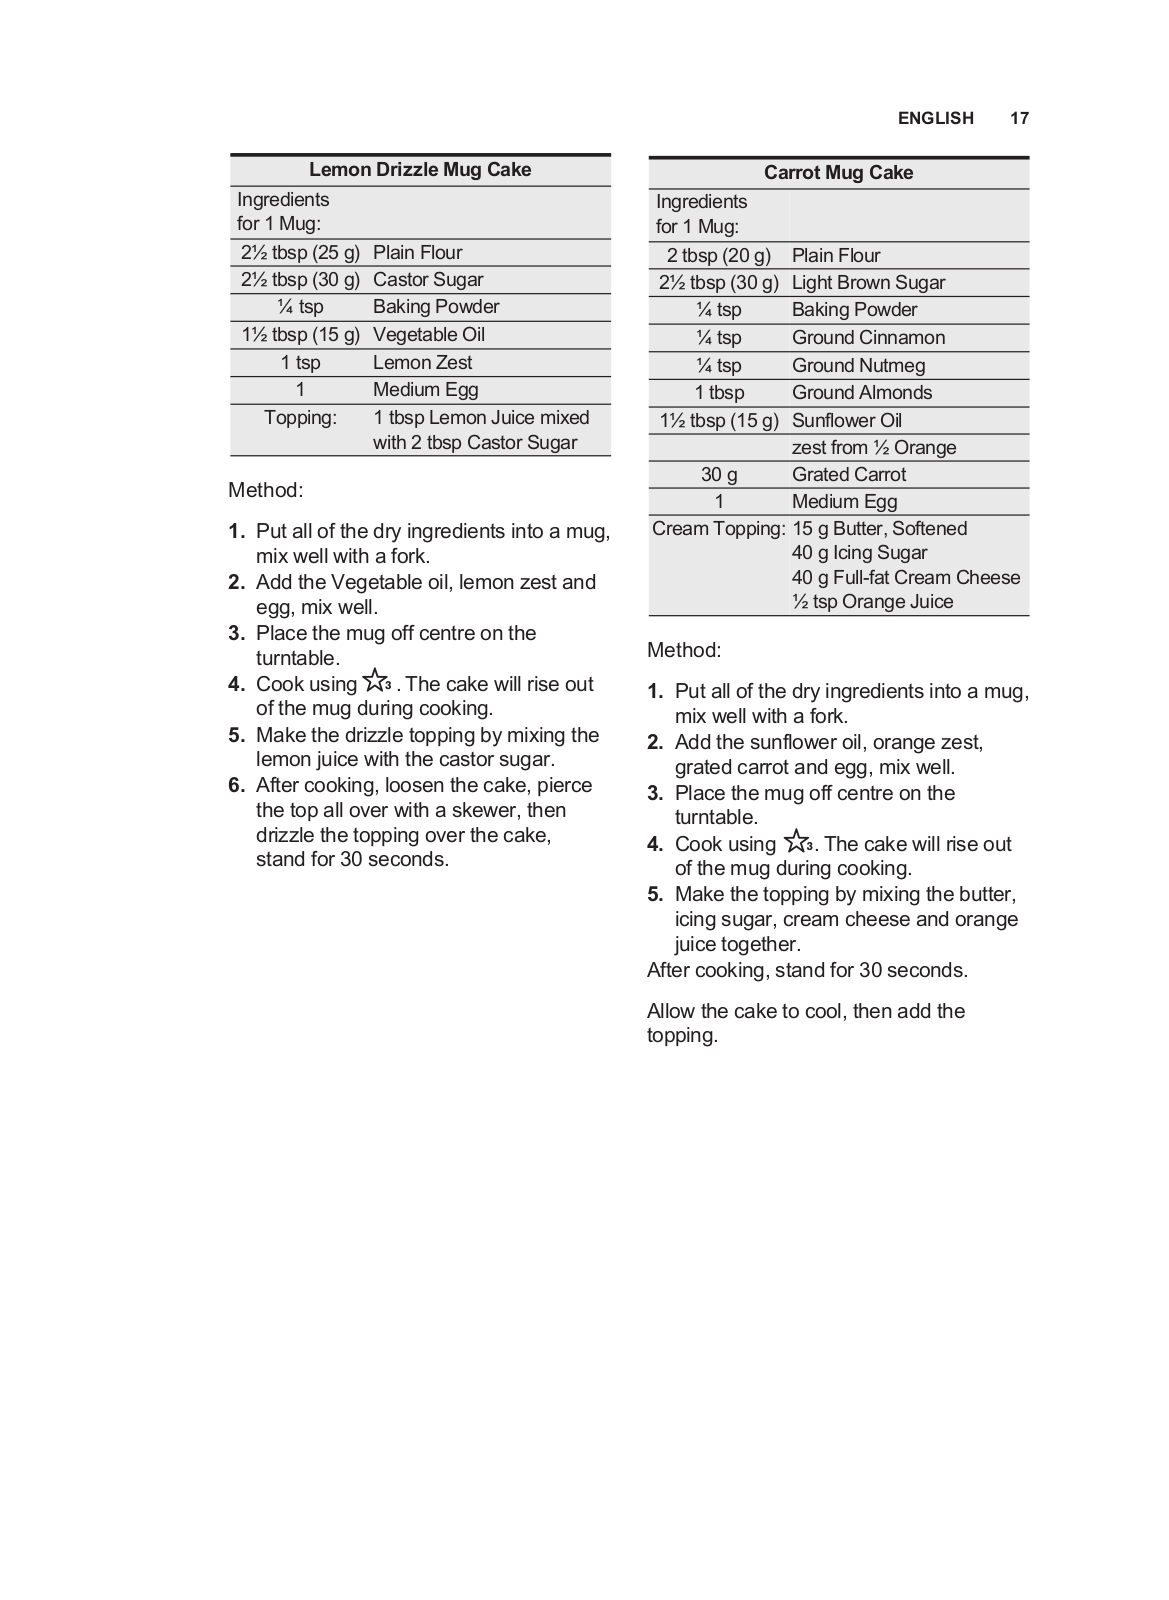
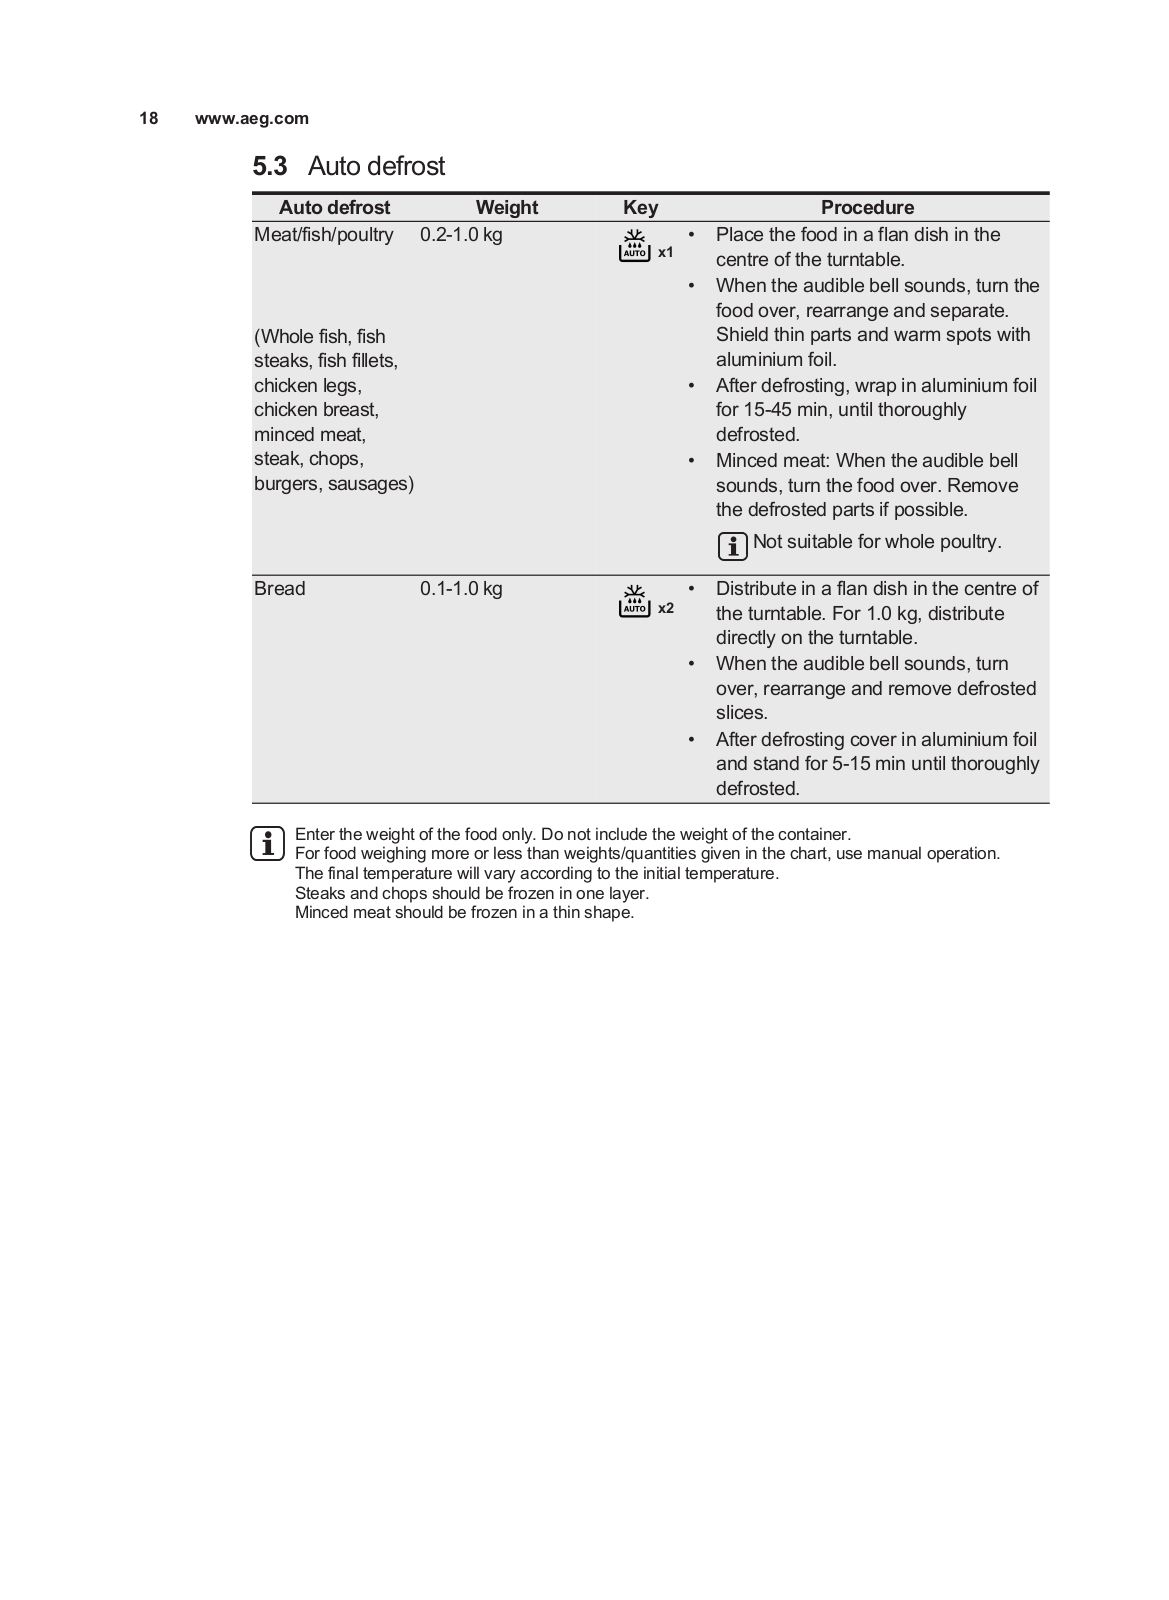
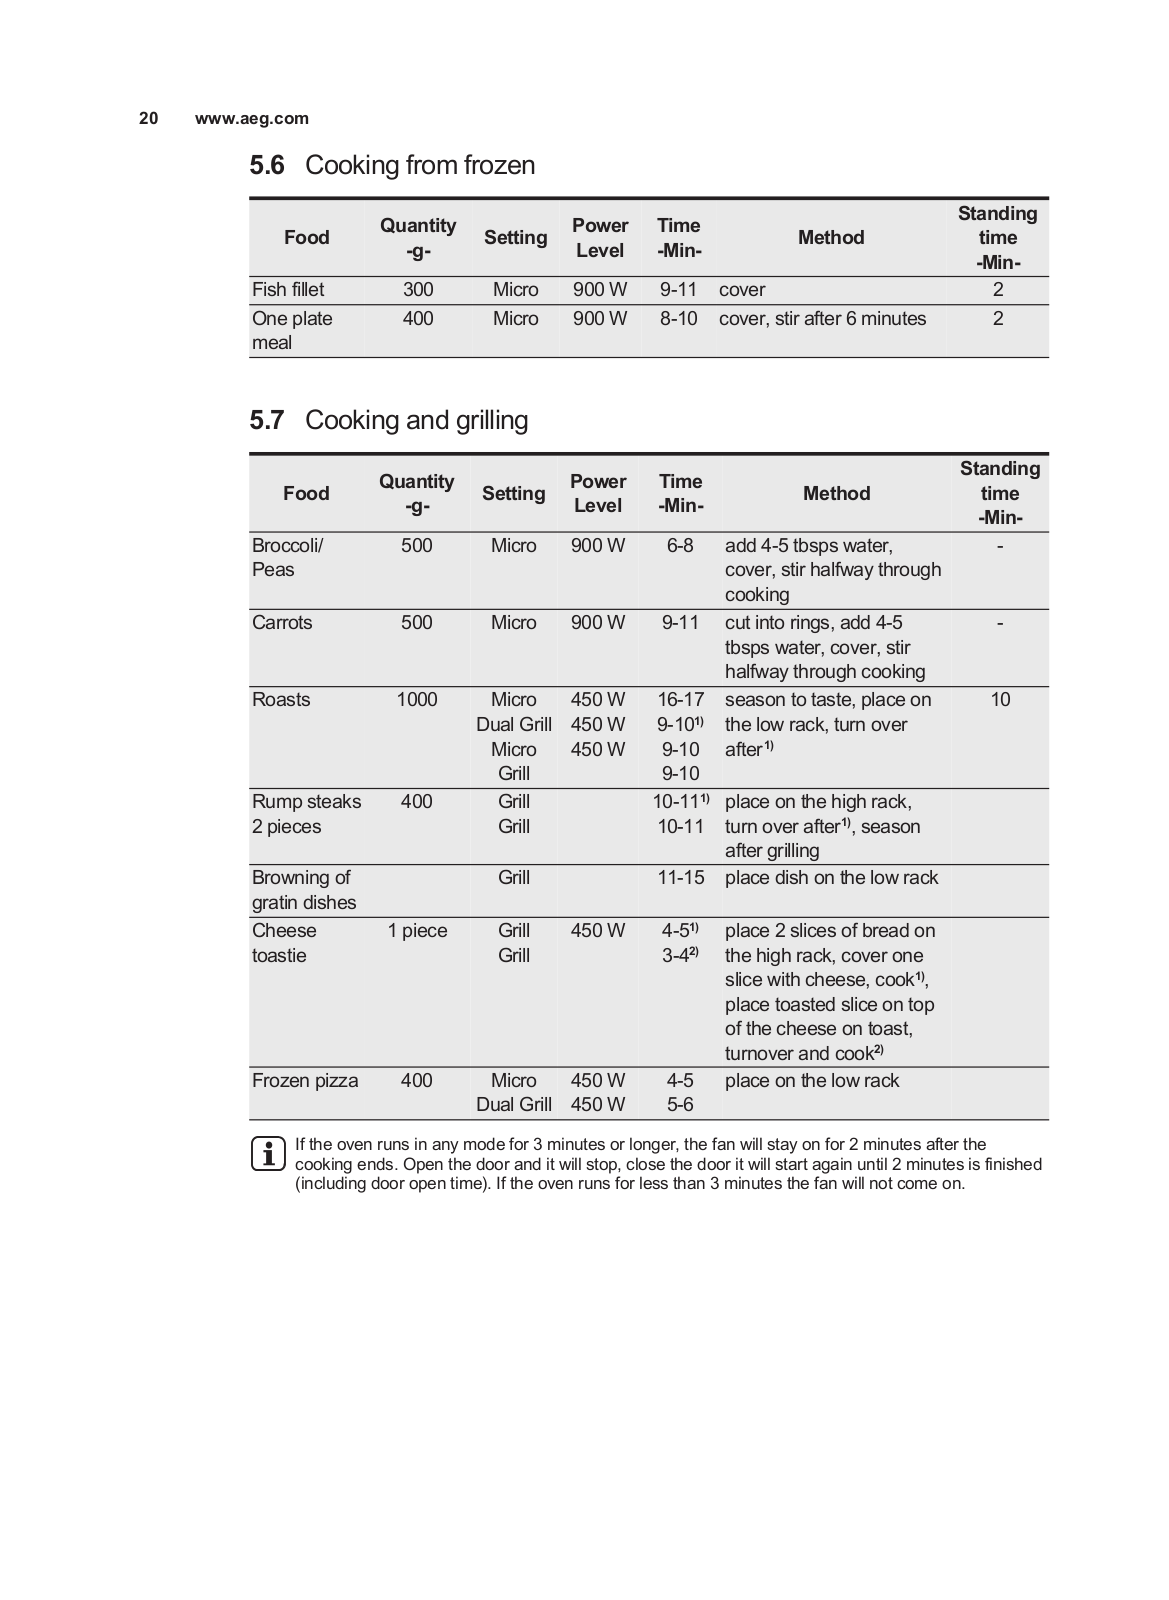
User Manual
164 pgs
2.06 Mb
0
Table of contents
Loading...
AEG MBE2658D User Manual
...
AEG User Manual
Download
Specifications and Main Features
Frequently Asked Questions
User Manual
Download
Loading...
+
hidden pages
Unhide
You need points to download manuals.
1 point = 1 manual.
You can buy points or you can get point for every manual you upload.
Buy points
Upload your manuals
 Loading...