

Page 1

Using
ADOBE
MAC OS X
®
PHOTOSHOP
®
ELEMENTS 8 EDITOR
Page 2

Copyright
© 2009 Adobe Systems Incorporated. All rights reserved.
Using Adobe® Photoshop® Elements 8 for Mac OS®
This user guide is protected under copyright law, furnished for informational use only, is subject to change without notice, and should not be construed as a
commitment by Adobe Systems Incorporated. Adobe Systems Incorporated assumes no responsibility or liability for any errors or inaccuracies that may appear
in the informational content contained in this guide.
This user guide is licensed for use under the terms of the Creative Commons Attribution Non-Commercial 3.0 License. This License allows users to copy,
distribute, and transmit the user guide for noncommercial purposes only so long as (1) proper attribution to Adobe is given as the owner of the user guide; and
(2) any reuse or distribution of the user guide contains a notice that use of the user guide is governed by these terms. The best way to provide notice is to include
the following link. To view a copy of this license, visit
Adobe, the Adobe logo, Adobe Premiere, Acrobat, GoLive, Illustrator, InDesign, Photoshop, PostScript, and Reader are either registered trademarks or
trademarks of Adobe Systems Incorporated in the United States and/or other countries. Windows and Windows Vista are either registered trademarks or
trademarks of Microsoft Corporation in the United States and/or other countries. Macintosh and Mac OS are trademarks of Apple Inc., registered in the United
States and other countries. UNIX is a registered trademark of The Open Group in the US and other countries. SGI is a trademark of Silicon Graphics, Inc. All
other trademarks are the property of their respective owners.
Updated Information/Additional Third Party Code Information available at http://www.adobe.com/go/thirdparty.
This product contains either BSAFE and/or TIPEM software by RSA Security, Inc.
This software is based in part on the work of the Independent JPEG Group.
This product includes software developed by the Apache Software Foundation (www.apache.org).
This Program was written with MacApp®: ©1985-1988 Apple Computer, Inc. APPLE COMPUTER, INC. MAKES NO WARRANTIES WHATSOEVER,
EITHER EXPRESS OR IMPLIED, REGARDING THIS PRODUCT, INCLUDING WARRANTIES WITH RESPECT TO ITS MERCHANTABILITY OR ITS
FITNESS FOR ANY PARTICULAR PURPOSE. The MacApp software is proprietary to Apple Computer, Inc. and is licensed to Adobe for distribution only for
use in combination with Adobe Photoshop Elements 8.
PANTONE® colors displayed here may not match PANTONE-identified standards. Consult current PANTONE Color Publications for accurate color.
PANTONE
Portions © Eastman Kodak Company, 2009 and used under license. All rights reserved. Kodak is a registered trademark and Photo CD is a trademark of Eastman
Kodak Company.
Portions of this code are licensed from Focoltone Colour System.
Software is produced under Dainippon Ink and Chemicals, Inc.’s (DIC) copyrights of color-data-base derived from Sample Books.
Portions © 1995-2005 Jean-loup Gailly and Mark Adler
Video compression and decompression is powered by On2 TrueMotion video technology. © 1992-2005 On2 Technologies, Inc. All Rights Reserved.
http://www.on2.com.
This product includes software developed by the OpenSymphony Group (http://www.opensymphony.com/).
Portions of this code are licensed from Nellymoser, Inc. (www.nellymoser.com).
® and other Pantone, Inc. trademarks are the property of Pantone, Inc. © Pantone, Inc., 2009.
http://creativecommons.org/licenses/by-nc-sa/3.0/
Sorenson Spark™ video compression and decompression technology licensed from Sorenson Media, Inc.
MPEG Layer-3 audio compression technology licensed by Fraunhofer IIS and THOMSON Licensing (http://www.iis.fhg.de/amm/).
Certain Spelling portions of this product is based on Proximity Linguistic Technology. ©Copyright 1990 Merriam-Webster Inc. ©Copyright 1990 All rights
reserved. Proximity Technology A Division of Franklin Electronic Publishers, Inc. Burlington, New Jersey USA. ©Copyright 2003 Franklin Electronic Publishers
Inc.©Copyright 2003 All rights reserved. Proximity Technology A Division of Franklin Electronic Publishers, Inc. Burlington, New Jersey USA. Legal
Supplement ©Copyright 1990/1994 Merriam-Webster Inc./Franklin Electronic Publishers Inc. ©Copyright 1994 All rights reserved. Proximity Technology A
Division of Franklin Electronic Publishers, Inc. Burlington, New Jersey USA. ©Copyright 1990/1994 Merriam-Webster Inc./Franklin Electronic Publishers Inc.
©Copyright 1997All rights reserved. Proximity Technology A Division of Franklin Electronic Publishers, Inc. Burlington, New Jersey USA ©Copyright 1990
Merriam-Webster Inc. ©Copyright 1993 All rights reserved. Proximity Technology A Division of Franklin Electronic Publishers, Inc. Burlington, New Jersey
USA. ©Copyright 2004 Franklin Electronic Publishers Inc. ©Copyright 2004 All rights reserved. Proximity Technology A Division of Franklin Electronic
Publishers, Inc. Burlington, New Jersey USA. ©Copyright 1991 Dr. Lluis de Yzaguirre I Maura ©Copyright 1991 All rights reserved. Proximity Technology A
Division of Franklin Electronic Publishers, Inc. Burlington, New Jersey USA. ©Copyright 1990 Munksgaard International Publishers Ltd. ©Copyright 1990 All
rights reserved. Proximity Technology A Division of Franklin Electronic Publishers, Inc. Burlington, New Jersey USA. ©Copyright 1990 Van Dale Lexicografie
bv ©Copyright 1990 All rights reserved. Proximity Technology A Division of Franklin Electronic Publishers, Inc. Burlington, New Jersey USA. ©Copyright 1995
Van Dale Lexicografie bv ©Copyright 1996 All rights reserved. Proximity Technology A Division of Franklin Electronic Publishers, Inc. Burlington, New Jersey,
USA. ©Copyright 1990 IDE a.s. ©Copyright 1990 All rights reserved. Proximity Technology A Division of Franklin Electronic Publishers, Inc. Burlington, New
Jersey USA. ©Copyright 1992 Hachette/Franklin Electronic Publishers Inc. ©Copyright 2004 All rights reserved. Proximity Technology A Division of Franklin
Electronic Publishers, Inc. Burlington, New Jersey USA. ©Copyright 1991 Text & Satz Datentechnik ©Copyright 1991 All rights reserved. Proximity Technology
A Division of Franklin Electronic Publishers, Inc. Burlington, New Jersey USA. ©Copyright 2004 Bertelsmann Lexikon Verlag ©Copyright 2004 All rights
reserved. Proximity Technology A Division of Franklin Electronic Publishers, Inc. Burlington, New Jersey USA. ©Copyright 2004 MorphoLogic Inc.
©Copyright 2004 All rights reserved. Proximity Technology A Division of Franklin Electronic Publishers, Inc. Burlington, New Jersey USA. ©Copyright 1990
William Collins Sons & Co. Ltd. ©Copyright 1990 All rights reserved. Proximity Technology A Division of Franklin Electronic Publishers, Inc. Burlington, New
Jersey USA. ©Copyright 1993-95 Russicon Company Ltd. ©Copyright 1995 All rights reserved. Proximity Technology A Division of Franklin Electronic
Publishers, Inc. Burlington, New Jersey USA. ©Copyright 2004 IDE a.s. ©Copyright 2004 All rights reserved. Proximity Technology A Division of Franklin
Electronic Publishers, Inc. Burlington, New Jersey USA. The Hyphenation portion of this product is based on Proximity Linguistic Technology. ©Copyright
2003 Franklin Electronic Publishers Inc.©Copyright 2003 All rights reserved. Proximity Technology A Division of Franklin Electronic Publishers, Inc.
Burlington, New Jersey USA. ©Copyright 1984 William Collins Sons & Co. Ltd. ©Copyright 1988 All rights reserved. Proximity Technology A Division of
Franklin Electronic Publishers, Inc. Burlington, New Jersey USA. ©Copyright 1990 Munksgaard International Publishers Ltd. ©Copyright 1990 All rights
reserved. Proximity Technology A Division of Franklin Electronic Publishers, Inc. Burlington, New Jersey USA. ©Copyright 1997 Van Dale Lexicografie bv
Last updated 7/26/2011
Page 3

©Copyright 1997 All rights reserved. Proximity Technology A Division of Franklin Electronic Publishers, Inc. Burlington, New Jersey USA. ©Copyright 1984
Updated 12 June 2009 Editions Fernand Nathan ©Copyright 1989 All rights reserved. Proximity Technology A Division of Franklin Electronic Publishers, Inc.
Burlington, New Jersey USA. © Copyright 1983 S Fischer Verlag ©Copyright 1997 All rights reserved. Proximity Technology A Division of Franklin Electronic
Publishers, Inc. Burlington, New Jersey USA. ©Copyright 1989 Zanichelli ©Copyright 1989 All rights reserved. Proximity Technology A Division of Franklin
Electronic Publishers, Inc. Burlington, New Jersey USA. ©Copyright 1989 IDE a.s. ©Copyright 1989 All rights reserved. Proximity Technology A Division of
Franklin Electronic Publishers, Inc. Burlington, New Jersey USA. ©Copyright 1990 Espasa-Calpe ©Copyright 1990 All rights reserved. Proximity Technology
A Division of Franklin Electronic Publishers, Inc. Burlington, New Jersey USA. ©Copyright 1989 C.A. Stromberg AB. ©Copyright 1989 All rights reserved.
Proximity Technology A Division of Franklin Electronic Publishers, Inc. Burlington, New Jersey USA.
Adobe Systems Incorporated, 345 Park Avenue, San Jose, California 95110, USA.
Notice to U.S. Government End Users. The Software and Documentation are “Commercial Items,” as that term is defined at 48 C.F.R. §2.101, consisting of
“Commercial Computer Software” and “Commercial Computer Software Documentation,” as such terms are used in 48 C.F.R. §12.212 or 48 C.F.R. §227.7202,
as applicable. Consistent with 48 C.F.R. §12.212 or 48 C.F.R. §§227.7202-1 through 227.7202-4, as applicable, the Commercial Computer Software and
Commercial Computer Software Documentation are being licensed to U.S. Government end users (a) only as Commercial Items and (b) with only those rights
as are granted to all other end users pursuant to the terms and conditions herein. Unpublished-rights reserved under the copyright laws of the United States.
Adobe Systems Incorporated, 345 Park Avenue, San Jose, CA 95110-2704, USA. For U.S. Government End Users, Adobe agrees to comply with all applicable
equal opportunity laws including, if appropriate, the provisions of Executive Order 11246, as amended, Section 402 of the Vietnam Era Veterans Readjustment
Assistance Act of 1974 (38 USC 4212), and Section 503 of the Rehabilitation Act of 1973, as amended, and the regulations at 41 CFR Parts 60-1 through 60-60,
60-250, and 60-741. The affirmative action clause and regulations contained in the preceding sentence shall be incorporated by reference.
Last updated 7/26/2011
Page 4

Contents
Chapter 1: Getting started
Installing Photoshop Elements . . . . . . . . . . . . . . . . . . . . . . . . . . . . . . . . . . . . . . . . . . . . . . . . . . . . . . . . . . . . . . . . . . . . . . . . . . . . . . . . . . . . . . . . 1
Using Help and getting support . . . . . . . . . . . . . . . . . . . . . . . . . . . . . . . . . . . . . . . . . . . . . . . . . . . . . . . . . . . . . . . . . . . . . . . . . . . . . . . . . . . . . . . . 1
New and enhanced features . . . . . . . . . . . . . . . . . . . . . . . . . . . . . . . . . . . . . . . . . . . . . . . . . . . . . . . . . . . . . . . . . . . . . . . . . . . . . . . . . . . . . . . . . . . 2
Working in Photoshop Elements . . . . . . . . . . . . . . . . . . . . . . . . . . . . . . . . . . . . . . . . . . . . . . . . . . . . . . . . . . . . . . . . . . . . . . . . . . . . . . . . . . . . . . . 3
Chapter 2: Photoshop Elements workspace
About the workspace . . . . . . . . . . . . . . . . . . . . . . . . . . . . . . . . . . . . . . . . . . . . . . . . . . . . . . . . . . . . . . . . . . . . . . . . . . . . . . . . . . . . . . . . . . . . . . . . . . 9
Context menus . . . . . . . . . . . . . . . . . . . . . . . . . . . . . . . . . . . . . . . . . . . . . . . . . . . . . . . . . . . . . . . . . . . . . . . . . . . . . . . . . . . . . . . . . . . . . . . . . . . . . . . 11
Tools . . . . . . . . . . . . . . . . . . . . . . . . . . . . . . . . . . . . . . . . . . . . . . . . . . . . . . . . . . . . . . . . . . . . . . . . . . . . . . . . . . . . . . . . . . . . . . . . . . . . . . . . . . . . . . . . . 12
Panels and bins . . . . . . . . . . . . . . . . . . . . . . . . . . . . . . . . . . . . . . . . . . . . . . . . . . . . . . . . . . . . . . . . . . . . . . . . . . . . . . . . . . . . . . . . . . . . . . . . . . . . . . 15
Undo, redo, and cancel . . . . . . . . . . . . . . . . . . . . . . . . . . . . . . . . . . . . . . . . . . . . . . . . . . . . . . . . . . . . . . . . . . . . . . . . . . . . . . . . . . . . . . . . . . . . . . . 19
Scratch disks and plug-ins . . . . . . . . . . . . . . . . . . . . . . . . . . . . . . . . . . . . . . . . . . . . . . . . . . . . . . . . . . . . . . . . . . . . . . . . . . . . . . . . . . . . . . . . . . . . 21
Chapter 3: Import photos
Importing photos . . . . . . . . . . . . . . . . . . . . . . . . . . . . . . . . . . . . . . . . . . . . . . . . . . . . . . . . . . . . . . . . . . . . . . . . . . . . . . . . . . . . . . . . . . . . . . . . . . . . 23
Cameras and card readers . . . . . . . . . . . . . . . . . . . . . . . . . . . . . . . . . . . . . . . . . . . . . . . . . . . . . . . . . . . . . . . . . . . . . . . . . . . . . . . . . . . . . . . . . . . . 24
Scanners . . . . . . . . . . . . . . . . . . . . . . . . . . . . . . . . . . . . . . . . . . . . . . . . . . . . . . . . . . . . . . . . . . . . . . . . . . . . . . . . . . . . . . . . . . . . . . . . . . . . . . . . . . . . . 26
Local files, CDs, DVDs, and video . . . . . . . . . . . . . . . . . . . . . . . . . . . . . . . . . . . . . . . . . . . . . . . . . . . . . . . . . . . . . . . . . . . . . . . . . . . . . . . . . . . . . . 27
iv
Chapter 4: Working with files
Opening files . . . . . . . . . . . . . . . . . . . . . . . . . . . . . . . . . . . . . . . . . . . . . . . . . . . . . . . . . . . . . . . . . . . . . . . . . . . . . . . . . . . . . . . . . . . . . . . . . . . . . . . . 29
Managing and organizing files . . . . . . . . . . . . . . . . . . . . . . . . . . . . . . . . . . . . . . . . . . . . . . . . . . . . . . . . . . . . . . . . . . . . . . . . . . . . . . . . . . . . . . . . 33
Viewing images . . . . . . . . . . . . . . . . . . . . . . . . . . . . . . . . . . . . . . . . . . . . . . . . . . . . . . . . . . . . . . . . . . . . . . . . . . . . . . . . . . . . . . . . . . . . . . . . . . . . . . 35
Guides, grids, and rulers . . . . . . . . . . . . . . . . . . . . . . . . . . . . . . . . . . . . . . . . . . . . . . . . . . . . . . . . . . . . . . . . . . . . . . . . . . . . . . . . . . . . . . . . . . . . . . 38
Saving and exporting images . . . . . . . . . . . . . . . . . . . . . . . . . . . . . . . . . . . . . . . . . . . . . . . . . . . . . . . . . . . . . . . . . . . . . . . . . . . . . . . . . . . . . . . . . 39
Guided Edit . . . . . . . . . . . . . . . . . . . . . . . . . . . . . . . . . . . . . . . . . . . . . . . . . . . . . . . . . . . . . . . . . . . . . . . . . . . . . . . . . . . . . . . . . . . . . . . . . . . . . . . . . . 45
Chapter 5: Using layers
Creating layers . . . . . . . . . . . . . . . . . . . . . . . . . . . . . . . . . . . . . . . . . . . . . . . . . . . . . . . . . . . . . . . . . . . . . . . . . . . . . . . . . . . . . . . . . . . . . . . . . . . . . . . 49
Editing layers . . . . . . . . . . . . . . . . . . . . . . . . . . . . . . . . . . . . . . . . . . . . . . . . . . . . . . . . . . . . . . . . . . . . . . . . . . . . . . . . . . . . . . . . . . . . . . . . . . . . . . . . . 53
Copying and arranging layers . . . . . . . . . . . . . . . . . . . . . . . . . . . . . . . . . . . . . . . . . . . . . . . . . . . . . . . . . . . . . . . . . . . . . . . . . . . . . . . . . . . . . . . . . 56
Opacity and blending modes . . . . . . . . . . . . . . . . . . . . . . . . . . . . . . . . . . . . . . . . . . . . . . . . . . . . . . . . . . . . . . . . . . . . . . . . . . . . . . . . . . . . . . . . . 60
Adjustment and fill layers . . . . . . . . . . . . . . . . . . . . . . . . . . . . . . . . . . . . . . . . . . . . . . . . . . . . . . . . . . . . . . . . . . . . . . . . . . . . . . . . . . . . . . . . . . . . . 62
Layer masks . . . . . . . . . . . . . . . . . . . . . . . . . . . . . . . . . . . . . . . . . . . . . . . . . . . . . . . . . . . . . . . . . . . . . . . . . . . . . . . . . . . . . . . . . . . . . . . . . . . . . . . . . . 67
Layer styles . . . . . . . . . . . . . . . . . . . . . . . . . . . . . . . . . . . . . . . . . . . . . . . . . . . . . . . . . . . . . . . . . . . . . . . . . . . . . . . . . . . . . . . . . . . . . . . . . . . . . . . . . . 68
Chapter 6: Camera raw files
Processing camera raw image files . . . . . . . . . . . . . . . . . . . . . . . . . . . . . . . . . . . . . . . . . . . . . . . . . . . . . . . . . . . . . . . . . . . . . . . . . . . . . . . . . . . . 72
Settings and controls . . . . . . . . . . . . . . . . . . . . . . . . . . . . . . . . . . . . . . . . . . . . . . . . . . . . . . . . . . . . . . . . . . . . . . . . . . . . . . . . . . . . . . . . . . . . . . . . . 75
Color and camera raw . . . . . . . . . . . . . . . . . . . . . . . . . . . . . . . . . . . . . . . . . . . . . . . . . . . . . . . . . . . . . . . . . . . . . . . . . . . . . . . . . . . . . . . . . . . . . . . . 76
Last updated 7/26/2011
Page 5

USING PHOTOSHOP ELEMENTS 8
Contents
Chapter 7: Selecting parts of an image
Making selections . . . . . . . . . . . . . . . . . . . . . . . . . . . . . . . . . . . . . . . . . . . . . . . . . . . . . . . . . . . . . . . . . . . . . . . . . . . . . . . . . . . . . . . . . . . . . . . . . . . . 80
Modifying selections . . . . . . . . . . . . . . . . . . . . . . . . . . . . . . . . . . . . . . . . . . . . . . . . . . . . . . . . . . . . . . . . . . . . . . . . . . . . . . . . . . . . . . . . . . . . . . . . . 89
Smoothing selection edges with anti-aliasing and feathering . . . . . . . . . . . . . . . . . . . . . . . . . . . . . . . . . . . . . . . . . . . . . . . . . . . . . . . . . . 93
Moving and copying selections . . . . . . . . . . . . . . . . . . . . . . . . . . . . . . . . . . . . . . . . . . . . . . . . . . . . . . . . . . . . . . . . . . . . . . . . . . . . . . . . . . . . . . . 94
Saving selections . . . . . . . . . . . . . . . . . . . . . . . . . . . . . . . . . . . . . . . . . . . . . . . . . . . . . . . . . . . . . . . . . . . . . . . . . . . . . . . . . . . . . . . . . . . . . . . . . . . . . 96
Chapter 8: Color and tonal correction
Color and tonal correction basics . . . . . . . . . . . . . . . . . . . . . . . . . . . . . . . . . . . . . . . . . . . . . . . . . . . . . . . . . . . . . . . . . . . . . . . . . . . . . . . . . . . . . 99
Adjusting shadows and light . . . . . . . . . . . . . . . . . . . . . . . . . . . . . . . . . . . . . . . . . . . . . . . . . . . . . . . . . . . . . . . . . . . . . . . . . . . . . . . . . . . . . . . . . 108
Correcting color casts . . . . . . . . . . . . . . . . . . . . . . . . . . . . . . . . . . . . . . . . . . . . . . . . . . . . . . . . . . . . . . . . . . . . . . . . . . . . . . . . . . . . . . . . . . . . . . . 115
Adjusting color saturation and hue . . . . . . . . . . . . . . . . . . . . . . . . . . . . . . . . . . . . . . . . . . . . . . . . . . . . . . . . . . . . . . . . . . . . . . . . . . . . . . . . . . 119
Adjustment filters . . . . . . . . . . . . . . . . . . . . . . . . . . . . . . . . . . . . . . . . . . . . . . . . . . . . . . . . . . . . . . . . . . . . . . . . . . . . . . . . . . . . . . . . . . . . . . . . . . . 125
Setting press target values . . . . . . . . . . . . . . . . . . . . . . . . . . . . . . . . . . . . . . . . . . . . . . . . . . . . . . . . . . . . . . . . . . . . . . . . . . . . . . . . . . . . . . . . . . . 129
Chapter 9: Cropping, resizing, retouching, and transforming photos
Cropping . . . . . . . . . . . . . . . . . . . . . . . . . . . . . . . . . . . . . . . . . . . . . . . . . . . . . . . . . . . . . . . . . . . . . . . . . . . . . . . . . . . . . . . . . . . . . . . . . . . . . . . . . . . . 132
Image size and resolution . . . . . . . . . . . . . . . . . . . . . . . . . . . . . . . . . . . . . . . . . . . . . . . . . . . . . . . . . . . . . . . . . . . . . . . . . . . . . . . . . . . . . . . . . . . . 137
Retouching . . . . . . . . . . . . . . . . . . . . . . . . . . . . . . . . . . . . . . . . . . . . . . . . . . . . . . . . . . . . . . . . . . . . . . . . . . . . . . . . . . . . . . . . . . . . . . . . . . . . . . . . . 140
Sharpening . . . . . . . . . . . . . . . . . . . . . . . . . . . . . . . . . . . . . . . . . . . . . . . . . . . . . . . . . . . . . . . . . . . . . . . . . . . . . . . . . . . . . . . . . . . . . . . . . . . . . . . . . 153
Transforming . . . . . . . . . . . . . . . . . . . . . . . . . . . . . . . . . . . . . . . . . . . . . . . . . . . . . . . . . . . . . . . . . . . . . . . . . . . . . . . . . . . . . . . . . . . . . . . . . . . . . . . . 156
Recomposing . . . . . . . . . . . . . . . . . . . . . . . . . . . . . . . . . . . . . . . . . . . . . . . . . . . . . . . . . . . . . . . . . . . . . . . . . . . . . . . . . . . . . . . . . . . . . . . . . . . . . . . 160
v
Chapter 10: Understanding color
Understanding color . . . . . . . . . . . . . . . . . . . . . . . . . . . . . . . . . . . . . . . . . . . . . . . . . . . . . . . . . . . . . . . . . . . . . . . . . . . . . . . . . . . . . . . . . . . . . . . . 164
Using image modes and color tables . . . . . . . . . . . . . . . . . . . . . . . . . . . . . . . . . . . . . . . . . . . . . . . . . . . . . . . . . . . . . . . . . . . . . . . . . . . . . . . . . 166
Setting up color management . . . . . . . . . . . . . . . . . . . . . . . . . . . . . . . . . . . . . . . . . . . . . . . . . . . . . . . . . . . . . . . . . . . . . . . . . . . . . . . . . . . . . . . 171
Chapter 11: Filters, effects, styles, and artwork
Effects . . . . . . . . . . . . . . . . . . . . . . . . . . . . . . . . . . . . . . . . . . . . . . . . . . . . . . . . . . . . . . . . . . . . . . . . . . . . . . . . . . . . . . . . . . . . . . . . . . . . . . . . . . . . . . 173
Filters . . . . . . . . . . . . . . . . . . . . . . . . . . . . . . . . . . . . . . . . . . . . . . . . . . . . . . . . . . . . . . . . . . . . . . . . . . . . . . . . . . . . . . . . . . . . . . . . . . . . . . . . . . . . . . . 178
Artistic filters . . . . . . . . . . . . . . . . . . . . . . . . . . . . . . . . . . . . . . . . . . . . . . . . . . . . . . . . . . . . . . . . . . . . . . . . . . . . . . . . . . . . . . . . . . . . . . . . . . . . . . . . 183
Blur filters . . . . . . . . . . . . . . . . . . . . . . . . . . . . . . . . . . . . . . . . . . . . . . . . . . . . . . . . . . . . . . . . . . . . . . . . . . . . . . . . . . . . . . . . . . . . . . . . . . . . . . . . . . . 185
Brush Stroke filters . . . . . . . . . . . . . . . . . . . . . . . . . . . . . . . . . . . . . . . . . . . . . . . . . . . . . . . . . . . . . . . . . . . . . . . . . . . . . . . . . . . . . . . . . . . . . . . . . . 186
Distort filters . . . . . . . . . . . . . . . . . . . . . . . . . . . . . . . . . . . . . . . . . . . . . . . . . . . . . . . . . . . . . . . . . . . . . . . . . . . . . . . . . . . . . . . . . . . . . . . . . . . . . . . . 187
Noise filters . . . . . . . . . . . . . . . . . . . . . . . . . . . . . . . . . . . . . . . . . . . . . . . . . . . . . . . . . . . . . . . . . . . . . . . . . . . . . . . . . . . . . . . . . . . . . . . . . . . . . . . . . 192
Pixelate filters . . . . . . . . . . . . . . . . . . . . . . . . . . . . . . . . . . . . . . . . . . . . . . . . . . . . . . . . . . . . . . . . . . . . . . . . . . . . . . . . . . . . . . . . . . . . . . . . . . . . . . . 193
Render filters . . . . . . . . . . . . . . . . . . . . . . . . . . . . . . . . . . . . . . . . . . . . . . . . . . . . . . . . . . . . . . . . . . . . . . . . . . . . . . . . . . . . . . . . . . . . . . . . . . . . . . . . 194
Sketch filters . . . . . . . . . . . . . . . . . . . . . . . . . . . . . . . . . . . . . . . . . . . . . . . . . . . . . . . . . . . . . . . . . . . . . . . . . . . . . . . . . . . . . . . . . . . . . . . . . . . . . . . . 197
Stylize filters . . . . . . . . . . . . . . . . . . . . . . . . . . . . . . . . . . . . . . . . . . . . . . . . . . . . . . . . . . . . . . . . . . . . . . . . . . . . . . . . . . . . . . . . . . . . . . . . . . . . . . . . 198
Texture filters . . . . . . . . . . . . . . . . . . . . . . . . . . . . . . . . . . . . . . . . . . . . . . . . . . . . . . . . . . . . . . . . . . . . . . . . . . . . . . . . . . . . . . . . . . . . . . . . . . . . . . . 200
Video filters . . . . . . . . . . . . . . . . . . . . . . . . . . . . . . . . . . . . . . . . . . . . . . . . . . . . . . . . . . . . . . . . . . . . . . . . . . . . . . . . . . . . . . . . . . . . . . . . . . . . . . . . . 201
Other filters . . . . . . . . . . . . . . . . . . . . . . . . . . . . . . . . . . . . . . . . . . . . . . . . . . . . . . . . . . . . . . . . . . . . . . . . . . . . . . . . . . . . . . . . . . . . . . . . . . . . . . . . . 201
Chapter 12: Painting
Painting overview . . . . . . . . . . . . . . . . . . . . . . . . . . . . . . . . . . . . . . . . . . . . . . . . . . . . . . . . . . . . . . . . . . . . . . . . . . . . . . . . . . . . . . . . . . . . . . . . . . . 204
Choosing colors . . . . . . . . . . . . . . . . . . . . . . . . . . . . . . . . . . . . . . . . . . . . . . . . . . . . . . . . . . . . . . . . . . . . . . . . . . . . . . . . . . . . . . . . . . . . . . . . . . . . . 208
Painting tools . . . . . . . . . . . . . . . . . . . . . . . . . . . . . . . . . . . . . . . . . . . . . . . . . . . . . . . . . . . . . . . . . . . . . . . . . . . . . . . . . . . . . . . . . . . . . . . . . . . . . . . 212
Last updated 7/26/2011
Page 6

USING PHOTOSHOP ELEMENTS 8
Contents
Setting up brushes . . . . . . . . . . . . . . . . . . . . . . . . . . . . . . . . . . . . . . . . . . . . . . . . . . . . . . . . . . . . . . . . . . . . . . . . . . . . . . . . . . . . . . . . . . . . . . . . . . 219
Fills and strokes . . . . . . . . . . . . . . . . . . . . . . . . . . . . . . . . . . . . . . . . . . . . . . . . . . . . . . . . . . . . . . . . . . . . . . . . . . . . . . . . . . . . . . . . . . . . . . . . . . . . . 223
Patterns . . . . . . . . . . . . . . . . . . . . . . . . . . . . . . . . . . . . . . . . . . . . . . . . . . . . . . . . . . . . . . . . . . . . . . . . . . . . . . . . . . . . . . . . . . . . . . . . . . . . . . . . . . . . . 224
Gradients . . . . . . . . . . . . . . . . . . . . . . . . . . . . . . . . . . . . . . . . . . . . . . . . . . . . . . . . . . . . . . . . . . . . . . . . . . . . . . . . . . . . . . . . . . . . . . . . . . . . . . . . . . . 226
Presets and libraries . . . . . . . . . . . . . . . . . . . . . . . . . . . . . . . . . . . . . . . . . . . . . . . . . . . . . . . . . . . . . . . . . . . . . . . . . . . . . . . . . . . . . . . . . . . . . . . . . 230
Chapter 13: Adding text and shapes
Add and edit text . . . . . . . . . . . . . . . . . . . . . . . . . . . . . . . . . . . . . . . . . . . . . . . . . . . . . . . . . . . . . . . . . . . . . . . . . . . . . . . . . . . . . . . . . . . . . . . . . . . . 234
Work with Asian type . . . . . . . . . . . . . . . . . . . . . . . . . . . . . . . . . . . . . . . . . . . . . . . . . . . . . . . . . . . . . . . . . . . . . . . . . . . . . . . . . . . . . . . . . . . . . . . . 240
Creating shapes . . . . . . . . . . . . . . . . . . . . . . . . . . . . . . . . . . . . . . . . . . . . . . . . . . . . . . . . . . . . . . . . . . . . . . . . . . . . . . . . . . . . . . . . . . . . . . . . . . . . . 241
Editing shapes . . . . . . . . . . . . . . . . . . . . . . . . . . . . . . . . . . . . . . . . . . . . . . . . . . . . . . . . . . . . . . . . . . . . . . . . . . . . . . . . . . . . . . . . . . . . . . . . . . . . . . 245
Chapter 14: Making projects
Projects overview . . . . . . . . . . . . . . . . . . . . . . . . . . . . . . . . . . . . . . . . . . . . . . . . . . . . . . . . . . . . . . . . . . . . . . . . . . . . . . . . . . . . . . . . . . . . . . . . . . . 247
Making photo projects . . . . . . . . . . . . . . . . . . . . . . . . . . . . . . . . . . . . . . . . . . . . . . . . . . . . . . . . . . . . . . . . . . . . . . . . . . . . . . . . . . . . . . . . . . . . . . 247
Make a photo collage, greeting card, or other projects . . . . . . . . . . . . . . . . . . . . . . . . . . . . . . . . . . . . . . . . . . . . . . . . . . . . . . . . . . . . . . . . 252
Editing photo projects . . . . . . . . . . . . . . . . . . . . . . . . . . . . . . . . . . . . . . . . . . . . . . . . . . . . . . . . . . . . . . . . . . . . . . . . . . . . . . . . . . . . . . . . . . . . . . . 253
Making digital projects . . . . . . . . . . . . . . . . . . . . . . . . . . . . . . . . . . . . . . . . . . . . . . . . . . . . . . . . . . . . . . . . . . . . . . . . . . . . . . . . . . . . . . . . . . . . . . 256
Creating slide shows . . . . . . . . . . . . . . . . . . . . . . . . . . . . . . . . . . . . . . . . . . . . . . . . . . . . . . . . . . . . . . . . . . . . . . . . . . . . . . . . . . . . . . . . . . . . . . . . . 257
Stitching together panoramas . . . . . . . . . . . . . . . . . . . . . . . . . . . . . . . . . . . . . . . . . . . . . . . . . . . . . . . . . . . . . . . . . . . . . . . . . . . . . . . . . . . . . . . 257
vi
Chapter 15: Optimizing for the web
Optimizing images . . . . . . . . . . . . . . . . . . . . . . . . . . . . . . . . . . . . . . . . . . . . . . . . . . . . . . . . . . . . . . . . . . . . . . . . . . . . . . . . . . . . . . . . . . . . . . . . . . 261
Using transparency and mattes . . . . . . . . . . . . . . . . . . . . . . . . . . . . . . . . . . . . . . . . . . . . . . . . . . . . . . . . . . . . . . . . . . . . . . . . . . . . . . . . . . . . . . 269
Dithering in web images . . . . . . . . . . . . . . . . . . . . . . . . . . . . . . . . . . . . . . . . . . . . . . . . . . . . . . . . . . . . . . . . . . . . . . . . . . . . . . . . . . . . . . . . . . . . . 271
Previewing web images . . . . . . . . . . . . . . . . . . . . . . . . . . . . . . . . . . . . . . . . . . . . . . . . . . . . . . . . . . . . . . . . . . . . . . . . . . . . . . . . . . . . . . . . . . . . . 273
Chapter 16: Printing and sharing photos
Printing photos . . . . . . . . . . . . . . . . . . . . . . . . . . . . . . . . . . . . . . . . . . . . . . . . . . . . . . . . . . . . . . . . . . . . . . . . . . . . . . . . . . . . . . . . . . . . . . . . . . . . . 275
Options for printing and sharing . . . . . . . . . . . . . . . . . . . . . . . . . . . . . . . . . . . . . . . . . . . . . . . . . . . . . . . . . . . . . . . . . . . . . . . . . . . . . . . . . . . . . 279
Sharing photos . . . . . . . . . . . . . . . . . . . . . . . . . . . . . . . . . . . . . . . . . . . . . . . . . . . . . . . . . . . . . . . . . . . . . . . . . . . . . . . . . . . . . . . . . . . . . . . . . . . . . . 279
Chapter 17: Keyboard shortcuts
Shortcuts . . . . . . . . . . . . . . . . . . . . . . . . . . . . . . . . . . . . . . . . . . . . . . . . . . . . . . . . . . . . . . . . . . . . . . . . . . . . . . . . . . . . . . . . . . . . . . . . . . . . . . . . . . . 281
Chapter 18: Glossary
Find definitions for terms . . . . . . . . . . . . . . . . . . . . . . . . . . . . . . . . . . . . . . . . . . . . . . . . . . . . . . . . . . . . . . . . . . . . . . . . . . . . . . . . . . . . . . . . . . . . 290
Digital imaging terms . . . . . . . . . . . . . . . . . . . . . . . . . . . . . . . . . . . . . . . . . . . . . . . . . . . . . . . . . . . . . . . . . . . . . . . . . . . . . . . . . . . . . . . . . . . . . . . 290
Last updated 7/26/2011
Page 7

Chapter 1: Getting started
Adobe® Photoshop® Elements software combines power and simplicity so you can easily make your photos look their
best. You can share them in imaginative ways, and easily find and view all your photos.
Installing Photoshop Elements
Requirements
To review the complete system requirements and recommendations for your Adobe® software, see the ReadMe file
included with your software.
Install the software
1 Close any other Adobe applications open on your computer.
2 Insert the installation disc into your DVD drive, and then follow the on-screen instructions.
Note: You can specify the language and select the country while installing the application. If you want to change these
settings after installing the application, you need to uninstall the application and then re-install it.
1
For more information, see the ReadMe file included with your software.
Register
Register your product to receive complimentary installation support, notifications of updates, and other services.
❖ To register, follow the on-screen instructions in the Registration dialog box, which appears after you install.
ReadMe file
The installation disc contains the ReadMe file for your software. (This file is also copied to the application folder
during product installation.) Open the file to read important information.
Using Help and getting support
Using Photoshop Elements Help
Photoshop Elements Help is available several ways. To access Help, select Help > Photoshop Elements Help (use the
Command+? keys on your keyboard). If your computer is connected to the Internet, Photoshop
automatically launches Help on the web.
Help on the web The most comprehensive and up-to-date version of Photoshop Elements Help is available on the
web. Your computer must be connected to the Internet to access Help on the web. Use the Search field to search within
Photoshop Elements Help. To view Help on the web, see
comprehensive and up-to-date version of Adobe Bridge Help, see www.adobe.com/go/learn_bridge_en.
www.adobe.com/go/learn_pse_mac_en. For the most
Elements
Last updated 7/26/2011
Page 8

USING PHOTOSHOP ELEMENTS 8
Getting started
Help in the application Help in the application provides access to key tasks and concepts. If you aren’t connected to
the Internet, Photoshop
complete Help available on the web.
Help PDF Help is also available as a PDF that is optimized for printing. Click the Help PDF link at the top of each Help
page. The Help PDF is the best way to access the most comprehensive Help when you don’t have an Internet
connection. For more information, see
Links in the application Some Help links are within Photoshop Elements. Clicking these links takes you to the
corresponding topic in either Help on the web or Help in the application.
Note: If you try to access a Help topic that only exists in Help on the web, Photoshop Elements displays the URL and a
link to the complete Help on the web.
Tips for searching Help
Elements launches Help in the application. Help in the application is a small subset of the
www.adobe.com/go/learn_pse_mac_printpdf_en.
• If you search using a phrase, such as “shape tool,” place quotation marks around the phrase. The search returns only
those topics containing all the words in the phrase.
• Make sure that the search terms are spelled correctly.
• If a search term doesn’t yield results, try using a synonym, such as “web” instead of “Internet.”
• If you find a topic you want to view again, bookmark it for easy access later.
Print a Help topic To print a topic from Help, use the Print command in the browser.
2
How to search for troubleshooting topics You can view top issues and search for common problems and error
messages by going to
Photoshop Elements users at www.adobe.com/go/forums.
www.adobe.com/support/photoshopelements. You can also ask questions of other
Customer support
Visit the Adobe Support website at www.adobe.com/support to find troubleshooting information for your product
and to learn about free and paid technical support options.
New and enhanced features
What’s new
To learn more about new and enhanced features, visit www.adobe.com/go/learn_pse_mac_features_en.
Make your photos look their best
Intelligent resizing The Recompose tool enables you to resize an image without changing important visual content,
such as people, buildings, and animals.
Get a perfect blended photo You can blend photos together to get a perfectly exposed photo using Photomerge
Exposure.
Get a perfect scenic photo Use Photomerge Scene Cleaner to create the perfect scenic photo from multiple photos.
Smart brushes Using Smart Brush tool, you can paint and change the adjustments as many times as you want without
degrading your original photo.
Automated actions Photoshop Elements comes with a set of actions. The Action Player can play actions created in
Photoshop if the actions use features supported by Photoshop Elements.
Last updated 7/26/2011
Page 9
USING PHOTOSHOP ELEMENTS 8
Getting started
Do more with your photos
Share in many ways from one convenient place Quickly and easily share your photos in various ways—including e-
mail, web galleries, and burning to CD.
Liven up your photo projects Use great-looking new themes and artwork to give your photo projects a professional
look.
Surface blur The Surface Blur filter blurs an image while preserving edges.
Easily find and view photos
Quick Fix preview You can preview how a photo looks after adjustments, before you apply the adjustment to the
photo.
Working in Photoshop Elements
When you start Photoshop Elements, it displays a Welcome screen that provides a starting point for you to open a
blank document, browse for files with Adobe Bridge, or open files from a camera or a scanner.
Downloading and organizing photos
With Photoshop Elements, you can download photos from your camera or a card reader to view them in
Bridge CS4. You can start the Adobe Bridge photo downloader from either Photoshop Elements or
Adobe
Bridge. You can also set the photo downloader to start any time you plug in a camera or card reader.
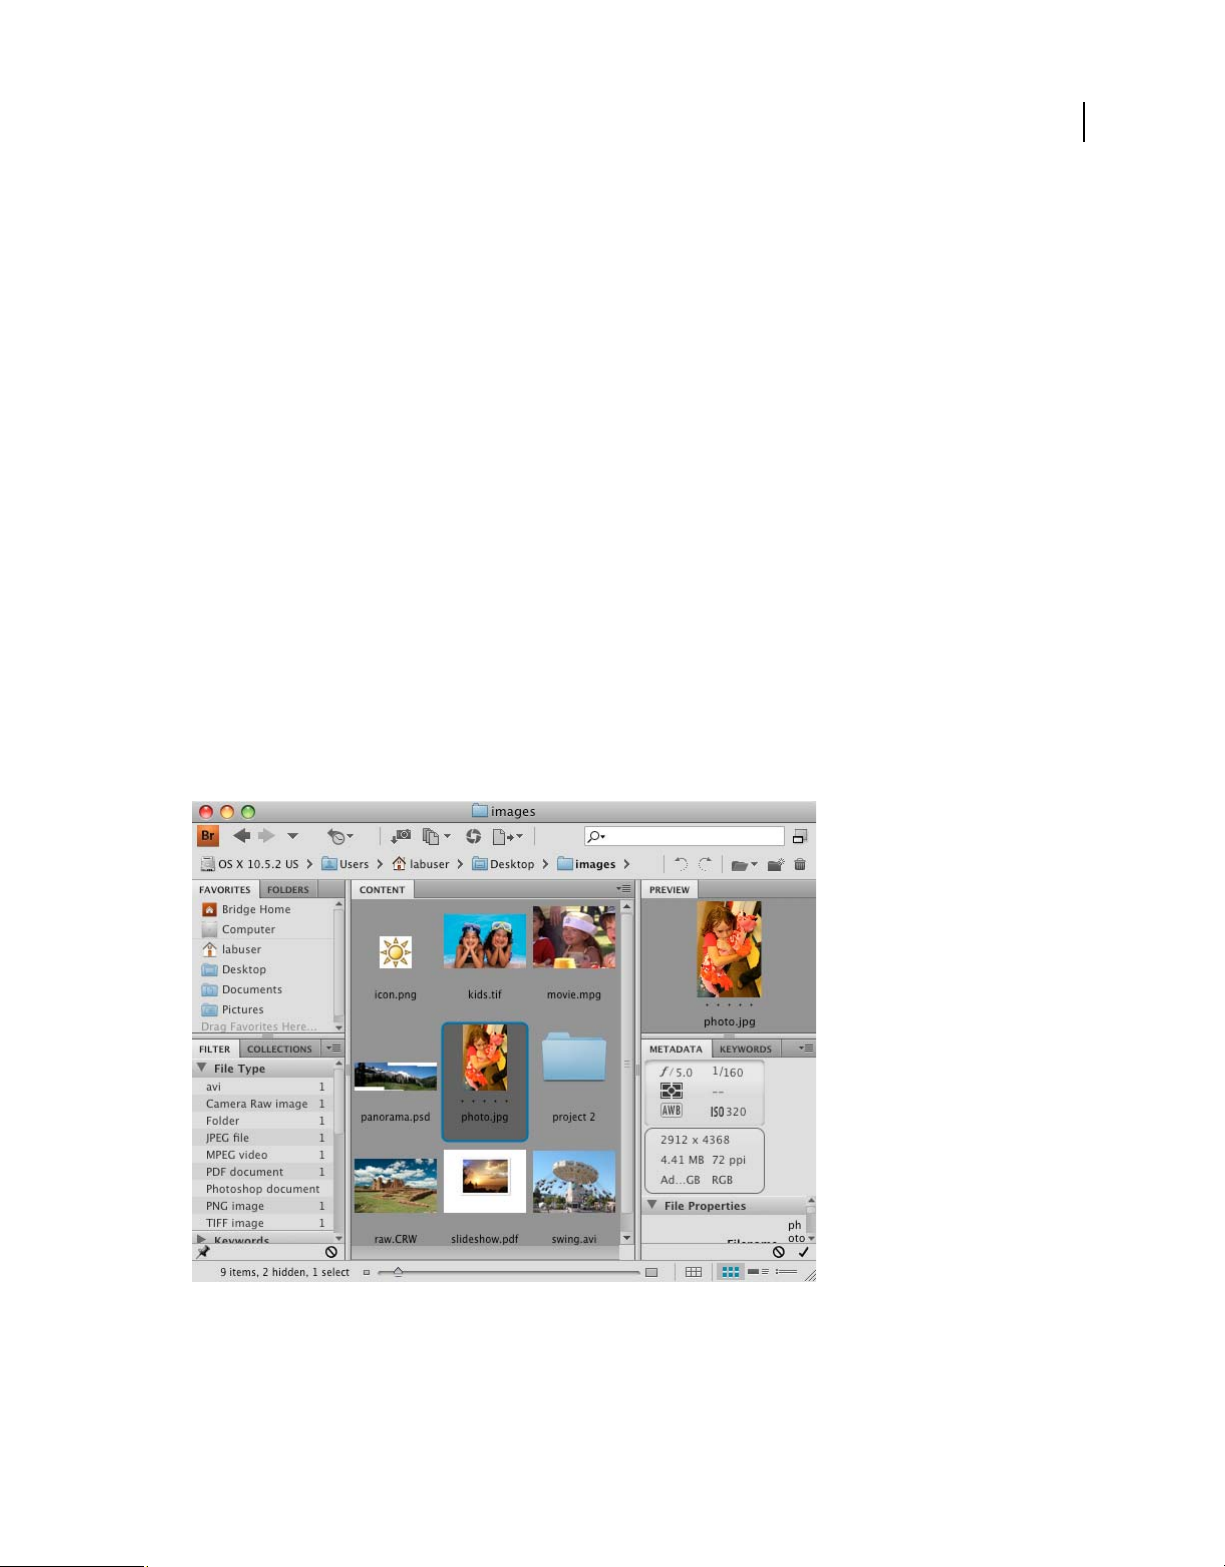
Adobe
3
Use Adobe Bridge to manage photo files.
Last updated 7/26/2011
Page 10

USING PHOTOSHOP ELEMENTS 8
Getting started
When working in Photoshop Elements, use Adobe Bridge to find and manage your photos and Adobe PDF
documents, even if they’re stored in different locations. Adobe Bridge automatically organizes photos by date as they
download. You can further sort and categorize photos by adding star ratings, stacking photos, and assigning keyword
tags to help you identify people, places, and events. You can quickly view every photo you’ve taken of your dog. For
example, click the keyword tag you have created in your dog’s name to view every photo of your dog. You can also
search for images based on date range, caption, filename, media type, and more. For the most comprehensive and upto-date version of the Adobe Bridge Help, see
use Adobe Bridge. The Adobe Bridge Help document includes detailed information about the following:
Adobe Bridge. You can also find video tutorials that teach you how to
• Working with Adobe Bridge
• Viewing and managing files
• Working with images and dynamic media
• Running automated tasks with Adobe Bridge
• Adobe Bridge keyboard shortcuts
• Workspace
Accessing Adobe Bridge from Photoshop Elements
❖ Do one of the following:
• Click File > Browse With Bridge
• Click the Bridge icon .
4
Editing photos
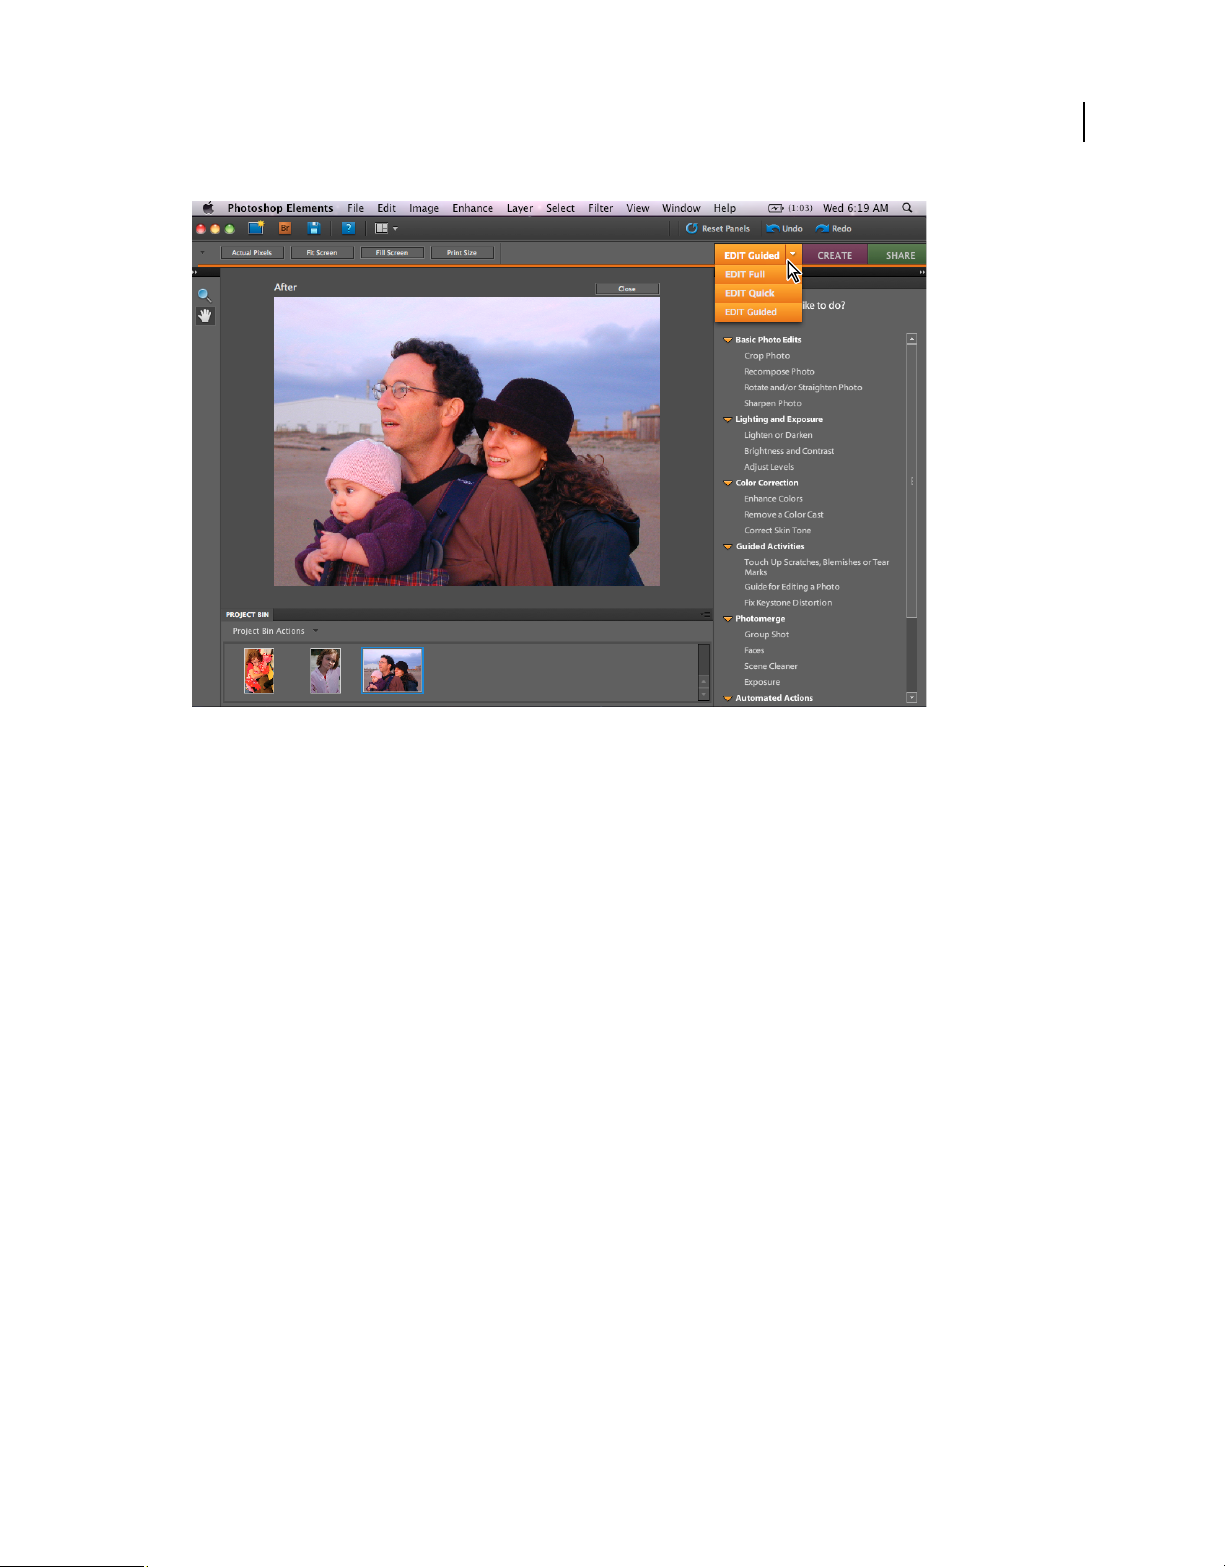
Photoshop Elements offers several levels of editing, from simple one-click fixes to advanced color correction and
composition. The Photoshop
Edit. Quick Fix offers quick preview and slider controls for adjusting lighting and color and sharpening entire photos
or selected areas of photos. Click the triangle beside Edit Full, and then select Edit Quick to navigate to Quick Fix
mode. Edit Full mode provides a complete editing toolset and controls. You can adjust the exposure of specific areas
of a photo using professional darkroom tools, such as dodge, burn, and sponge. You can also use fine-tune exposure
with the enhanced Brightness/Contrast control, or use Color Curves adjustments to get the perfect exposure.
In Edit Full mode, you can also remove imperfections or unwanted elements, brush away wrinkles and flaws, and apply
artistic filters and effects.
If you are not sure how to proceed, switch to Edit Guided mode. This mode provides step-by-step assistance on how
to perform common tasks, such as rotating and straightening photos, correcting skin tone, and performing color
corrections. Click the triangle beside Edit Full, and then select Edit Guided to navigate to Edit Guided mode.
Elements workspace provides three editing modes: Quick Fix, Guided Edit, and Full
Last updated 7/26/2011
Page 11
USING PHOTOSHOP ELEMENTS 8
Getting started
5
Edit Guided mode walks you through each editing step to make improving your photos easier than ever.
You can feel free to experiment, too, because you can undo or redo multiple steps with a click.
Creating photo composites
You can create beautiful composites, including perfect group shots and seamless panoramas, with easy-to-use tools.
New photo-blending technology, called Photomerge, lets you easily combine the best facial expressions from a series
of group shots into one composite in which everyone looks their best. With Photomerge, you can also automatically
stitch together a series of scenic photos to create smooth panoramic images.
You can use Photomerge to create composites in all three modes. Simply choose File > New, and then select one of the
Photomerge commands. Or choose one of the Photomerge commands in the Guided Edit tab.
Last updated 7/26/2011
Page 12
USING PHOTOSHOP ELEMENTS 8
Getting started
Use a single tool to easily combine the best facial expressions and body language from a series of group shots to create a single composite in which
everyone looks great.
Photomerge Exposure and Photomerge Scene Cleaner
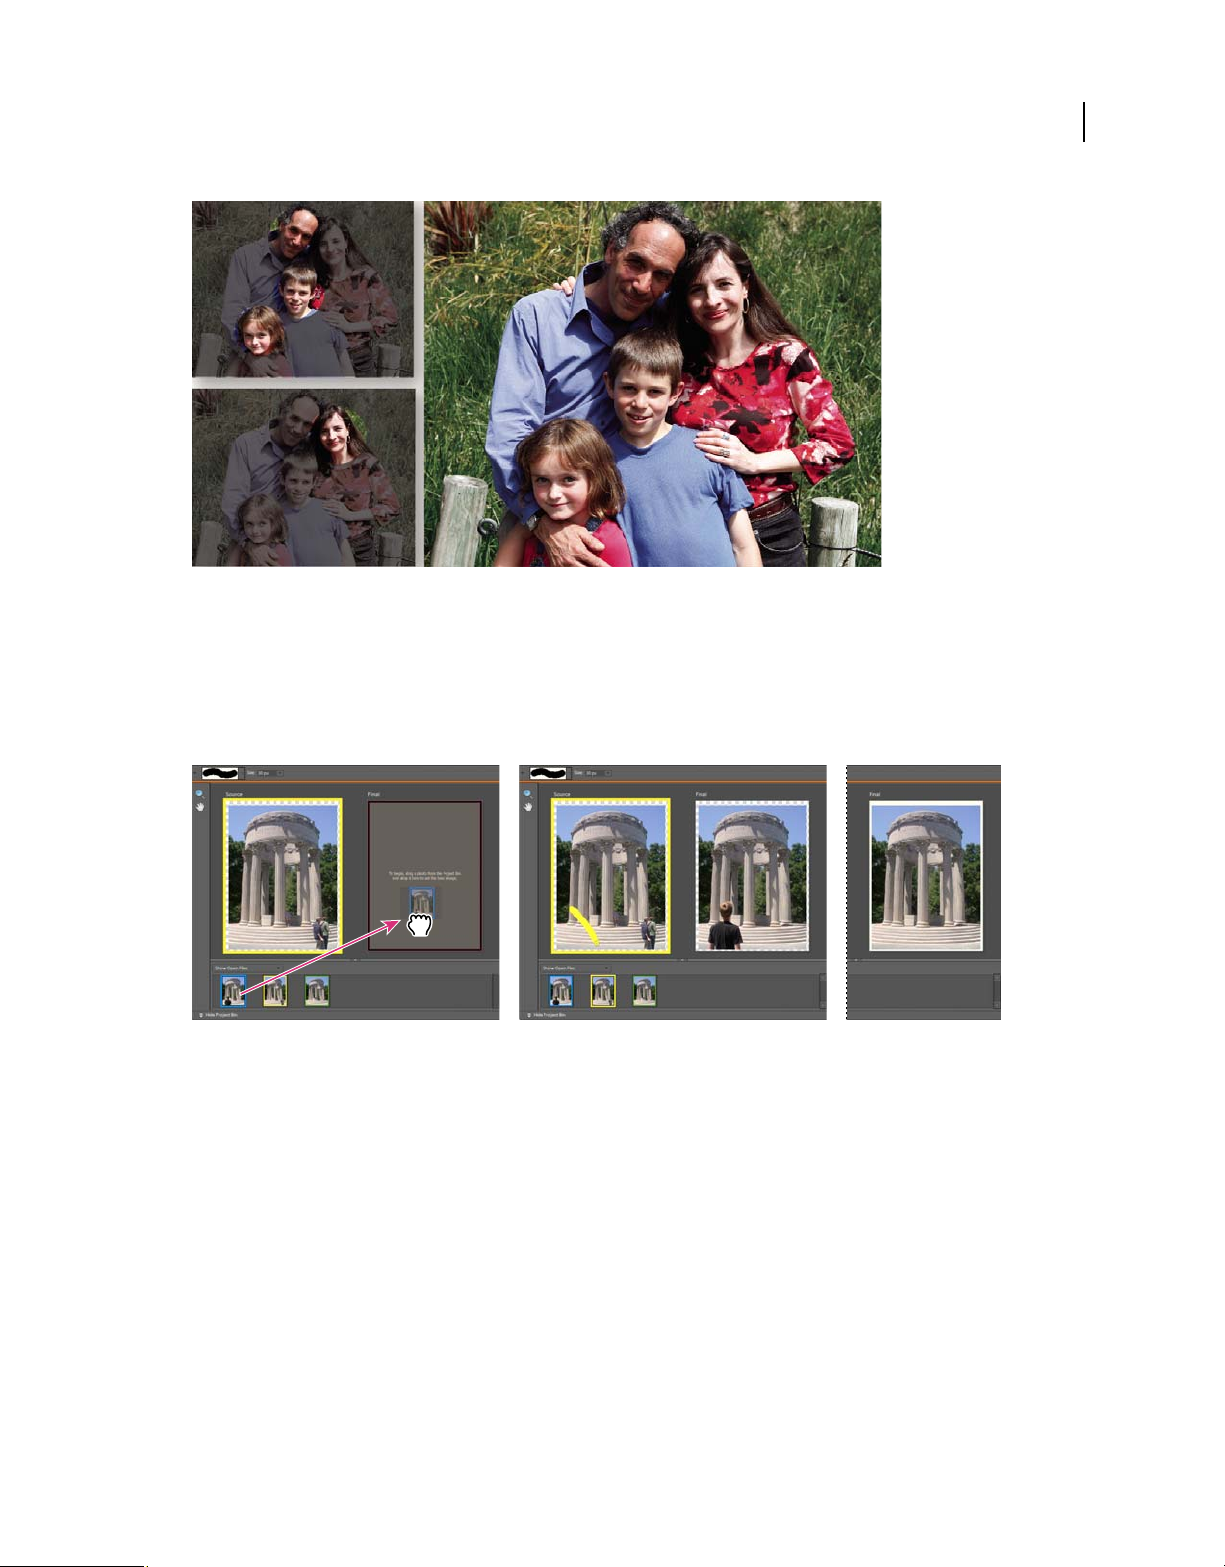
With Photomerge Scene Cleaner, you can create perfect scenic photos from multiple photos. For example, you can
eliminate tourists that inadvertently wandered into the scenery. Select File > New > Photomerge Scene Cleaner, or
choose Photomerge Scene Cleaner in the Guided Edit tab.
6
BCA
Photomerge Scene Cleaner
A. Dragging a photo to the Final window B. Using the Pencil tool to mark the area to be replaced in t he Final window C. Result in the Final
window
With Photomerge Exposure, you can blend two photos together to get a perfectly exposed photo. For example, you
have a photo of your family and the background is dark, and a similar photograph with a bright background and dark
foreground. You can use Photomerge Exposure to blend these photos, and create a perfectly exposed photo. Select File
> New > Photomerge Exposure, or choose Photomerge Exposure in the Guided Edit tab.
Last updated 7/26/2011
Page 13
USING PHOTOSHOP ELEMENTS 8
Getting started
Photomerge Exposure
7
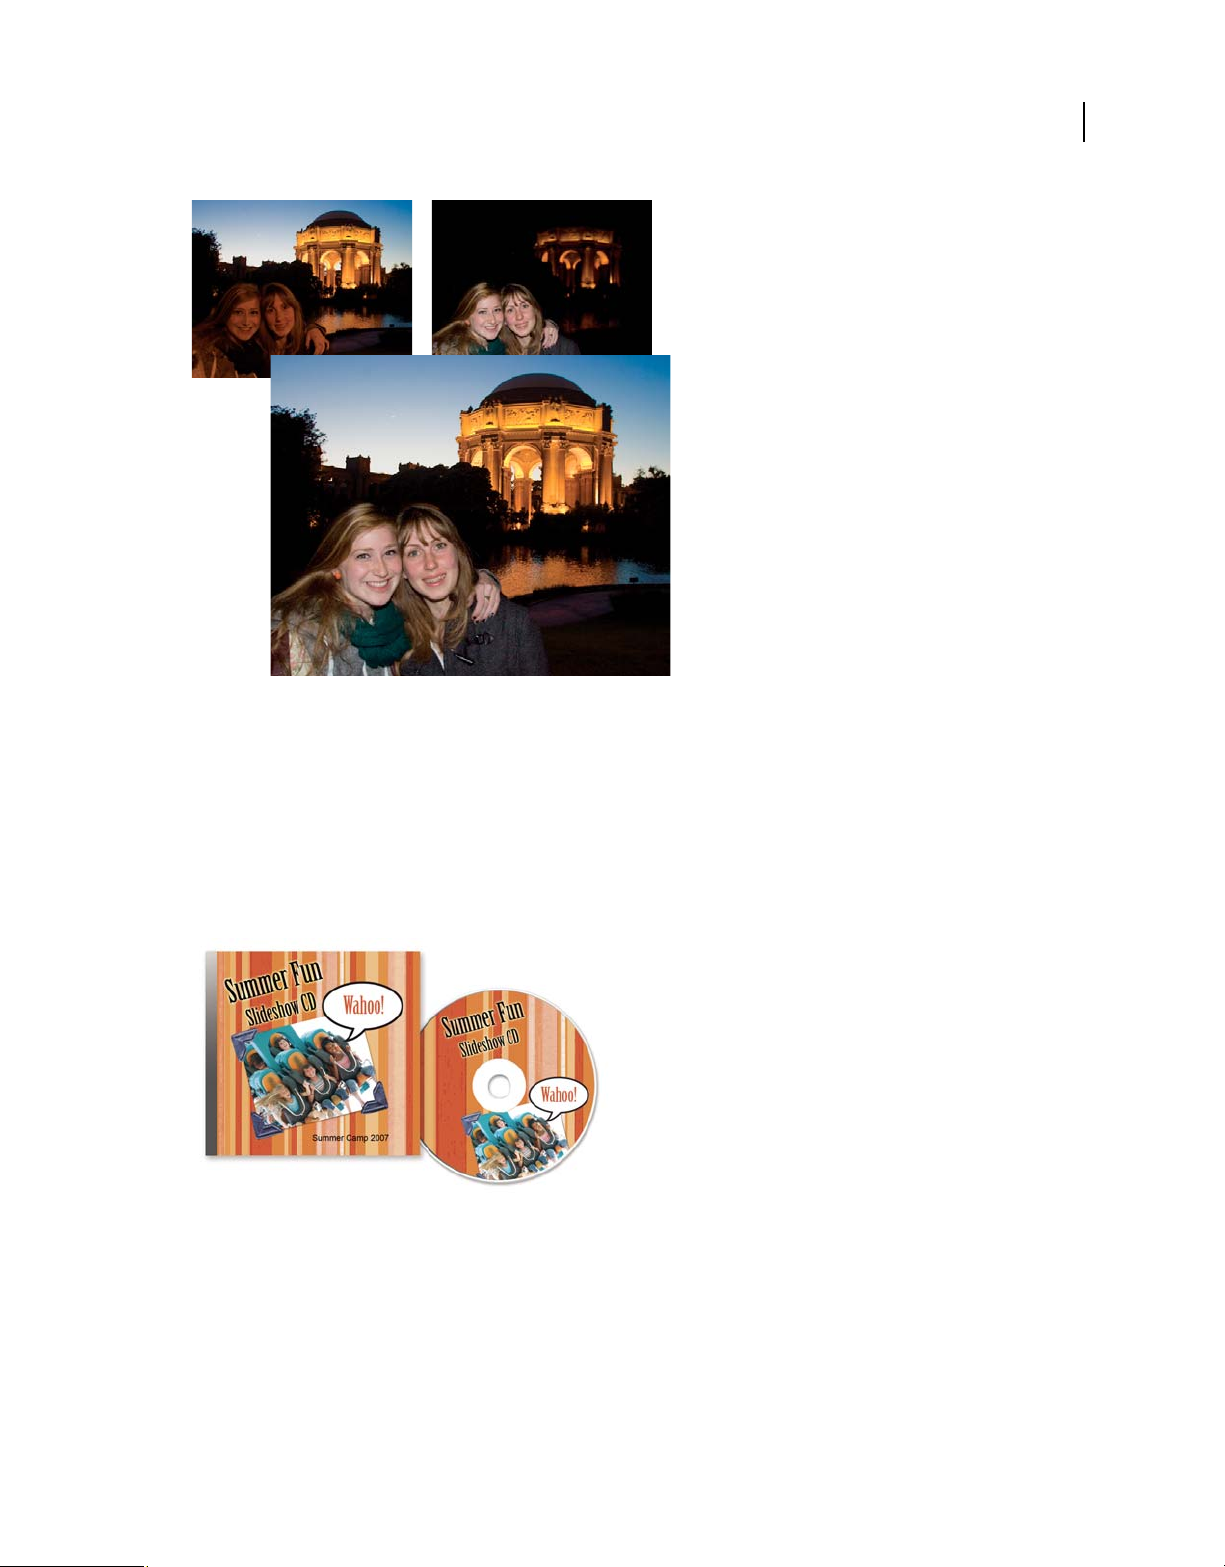
Creating and sharing photo projects
After you’ve perfected your photos in Photoshop Elements, you can use them in various fun projects that you can share
with family and friends. For example, you can create printed photo projects, such as albums, scrapbook pages, greeting
cards, CD/DVD labels and jackets, and photo collages that you can print at home. Professionally designed templates
feature color-coordinated, themed layouts for scrapbook pages, cards, and more. In the Create or Share tab, choose the
type of project you’d like to create, and Photoshop
and instructions.
Make printed CD/DVD labels and jackets.
To give your projects a more personal look, you can customize the templates. Adjust layout colors to better
complement your photos, for example, and add new graphical elements, text, and effects, such as drop shadows and
glows. Use the Contents panel to quickly browse hundreds of frames, themes, backgrounds, clip art, and effects to
apply to your photos and photo projects.
Elements walks you through the process with the appropriate tools
Last updated 7/26/2011
Page 14
USING PHOTOSHOP ELEMENTS 8
Getting started
Create customized photo collages with graphical elements, such as frames, drop shadows, backgrounds, and text.
You can also use your photos in projects such as online photo galleries and photo slide shows. As with print photo
projects, Photoshop
Elements guides you through the process of creating your project by helping you design the page,
arrange the photos, customize the layout, and burn the project to a disc or upload it to the web.
8
Last updated 7/26/2011
Page 15

Chapter 2: Photoshop Elements workspace
Use the Photoshop Elements workspace for creating, editing, and fixing your images. You can add functionality with
plug-in modules and expand system memory by using scratch disks.
Select a photo and then choose Quick Fix, Full Edit, or Guided Edit to edit it.
About the workspace
The Welcome screen
When you start Photoshop Elements, the Welcome screen opens by default. The Welcome screen is a convenient
starting place, or hub, for major tasks.
Click a button on the Welcome screen to open the workspace. You can browse with Adobe Bridge, start from scratch,
or import photos from a camera or scanner.
You can close or reopen the Welcome screen at any time by choosing Window > Welcome. If you prefer to omit the
Welcome screen when you start Photoshop
screen.
Elements, deselect the Show At Startup box at the bottom of the Welcome
9
The editing workspace
There are three ways to create and edit images: Full Edit, Edit Quick, and Guided Edit. The Full Edit workspace has
tools to correct color problems, create special effects, and enhance photos. The Edit Quick workspace contains simple
tools for correcting color and lighting, and commands to quickly fix common problems like red-eye. If you are new to
digital imaging, Edit Quick or Guided Edit is a good place to start fixing photos.
If you’ve worked with image-editing applications before, you’ll find that the Full Edit workspace provides a flexible
and powerful image-correction environment. It has lighting and color-correction commands, along with tools for
fixing image defects, making selections, adding text, and painting on your images. You can rearrange the Full Edit
workspace to best suit your needs by moving, hiding, and showing panels; arranging panels in the Panel Bin; zooming
in or out of the photo; scrolling to a different area of the document window; and creating multiple windows and views.
Last updated 7/26/2011
Page 16
USING PHOTOSHOP ELEMENTS 8
Photoshop Elements workspace
10
AB
D
C
E
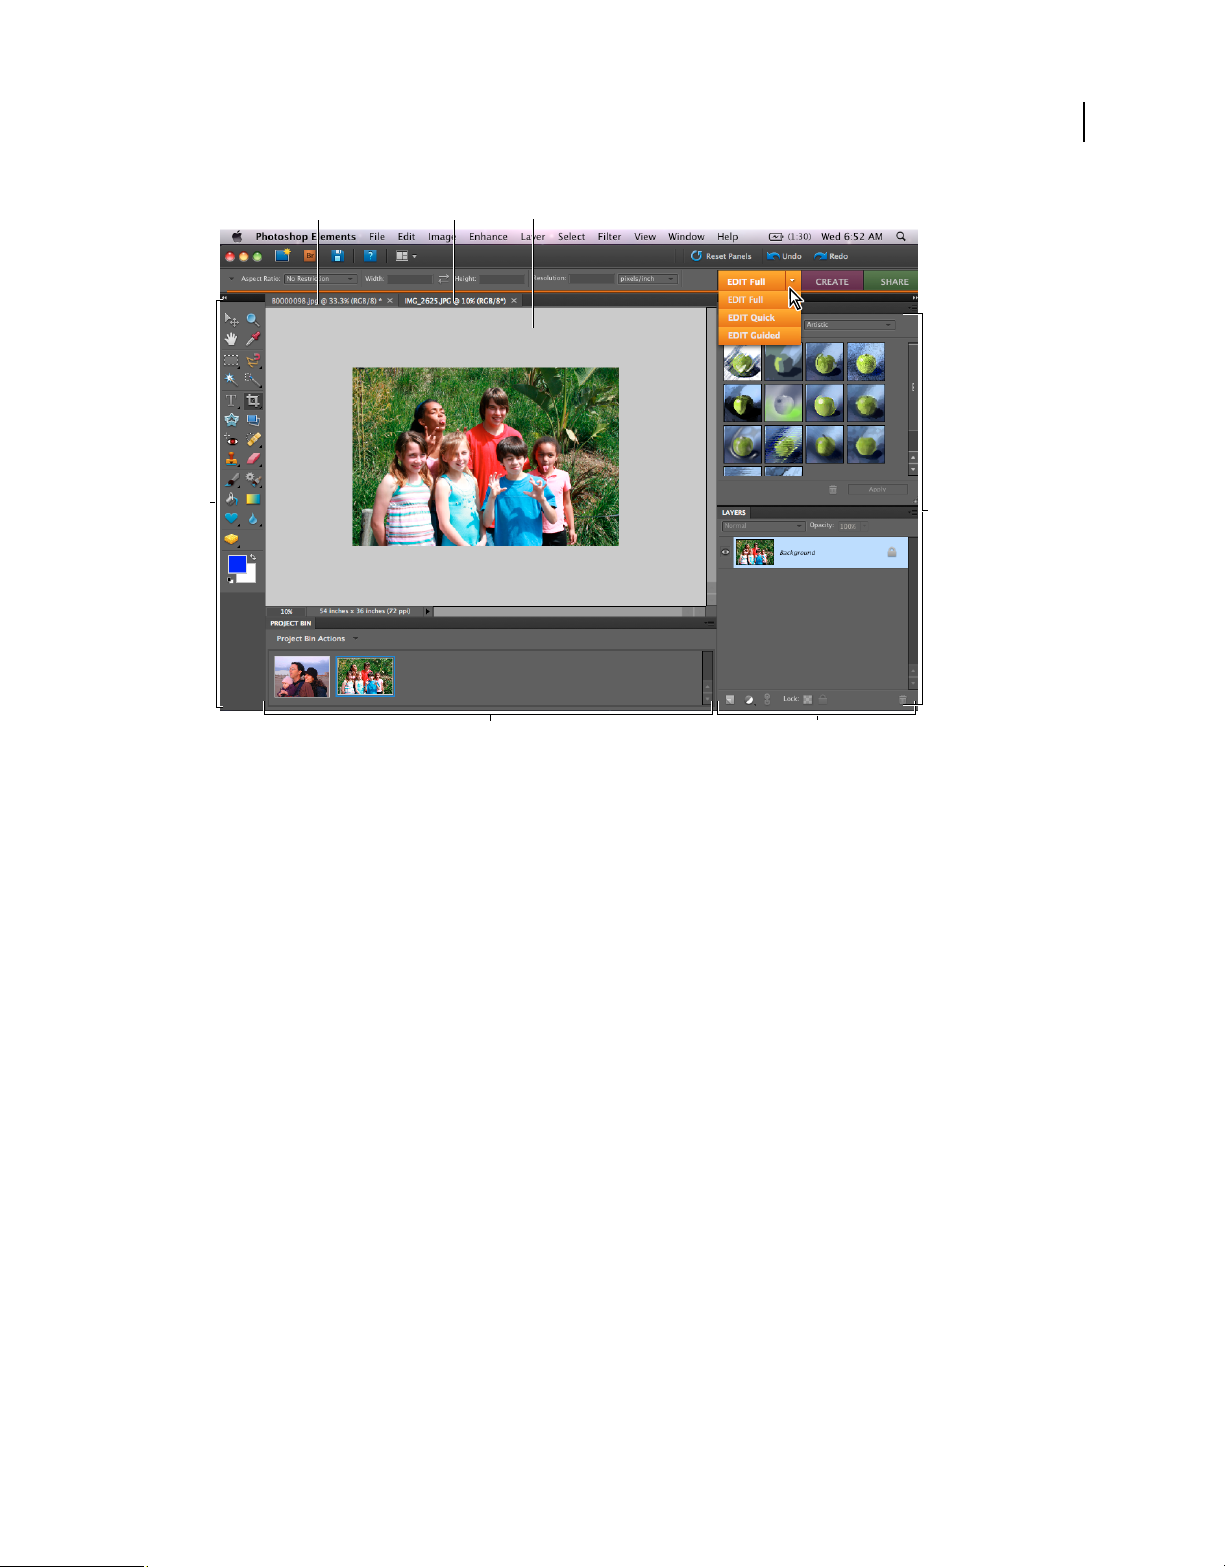
Full Edit workspace
A. Inactive tab B. Active tab C. Active image area D Tools E. Project Bin F. Panel bin G. Panels
G
F
Menu bar Contains menus for performing tasks. The menus are organized by topic. For example, the Enhance menu
contains commands for applying adjustments to an image.
Workspace buttons Moves you between the Guided Edit, Quick Fix, and Full Edit workspaces. These buttons change
according to the current workspace.
Toolbox Holds tools for editing images.
Options bar Provides options for the tool you select.
Project Bin Displays thumbnails of opened images, and lets you easily manage them.
Panels Help you monitor and modify images.
Panel Bin Helps you organize the panels in your work area.
More Help topics
“Correct color in Quick Fix” on page 99
Last updated 7/26/2011
Page 17
USING PHOTOSHOP ELEMENTS 8
Photoshop Elements workspace
Use Application frames
On the Mac, the Application frame groups all the workspace elements into a single, integrated window that enables
you to treat the application as a single unit. When you move or resize the Application frame or any of its elements, all
the elements within it respond to each other so that none overlap. Panels don’t disappear when you switch applications
or when you accidentally click out of the application. If you work with two or more applications, you can position each
application side by side on the screen or on multiple monitors. If you prefer the traditional, free-form user interface of
the Mac, you can turn off the application frame. You can show or hide the application frame using the Window menu.
Select Window > Application Frame to toggle the application frame on or off. Similarly, you can show or hide the
Application Bar using Window > Application Bar.
Exit Photoshop Elements
1 Choose Photoshop Elements > Quit Photoshop Elements.
2 Choose whether to save any open files.
More Help topics
“Save changes in different file formats” on page 41
11
Context menus
Use context menus
You can use context menus to display commands that are relevant to the active tool, selection, or panel. These menus
are often another way to access the commands in the window menus.
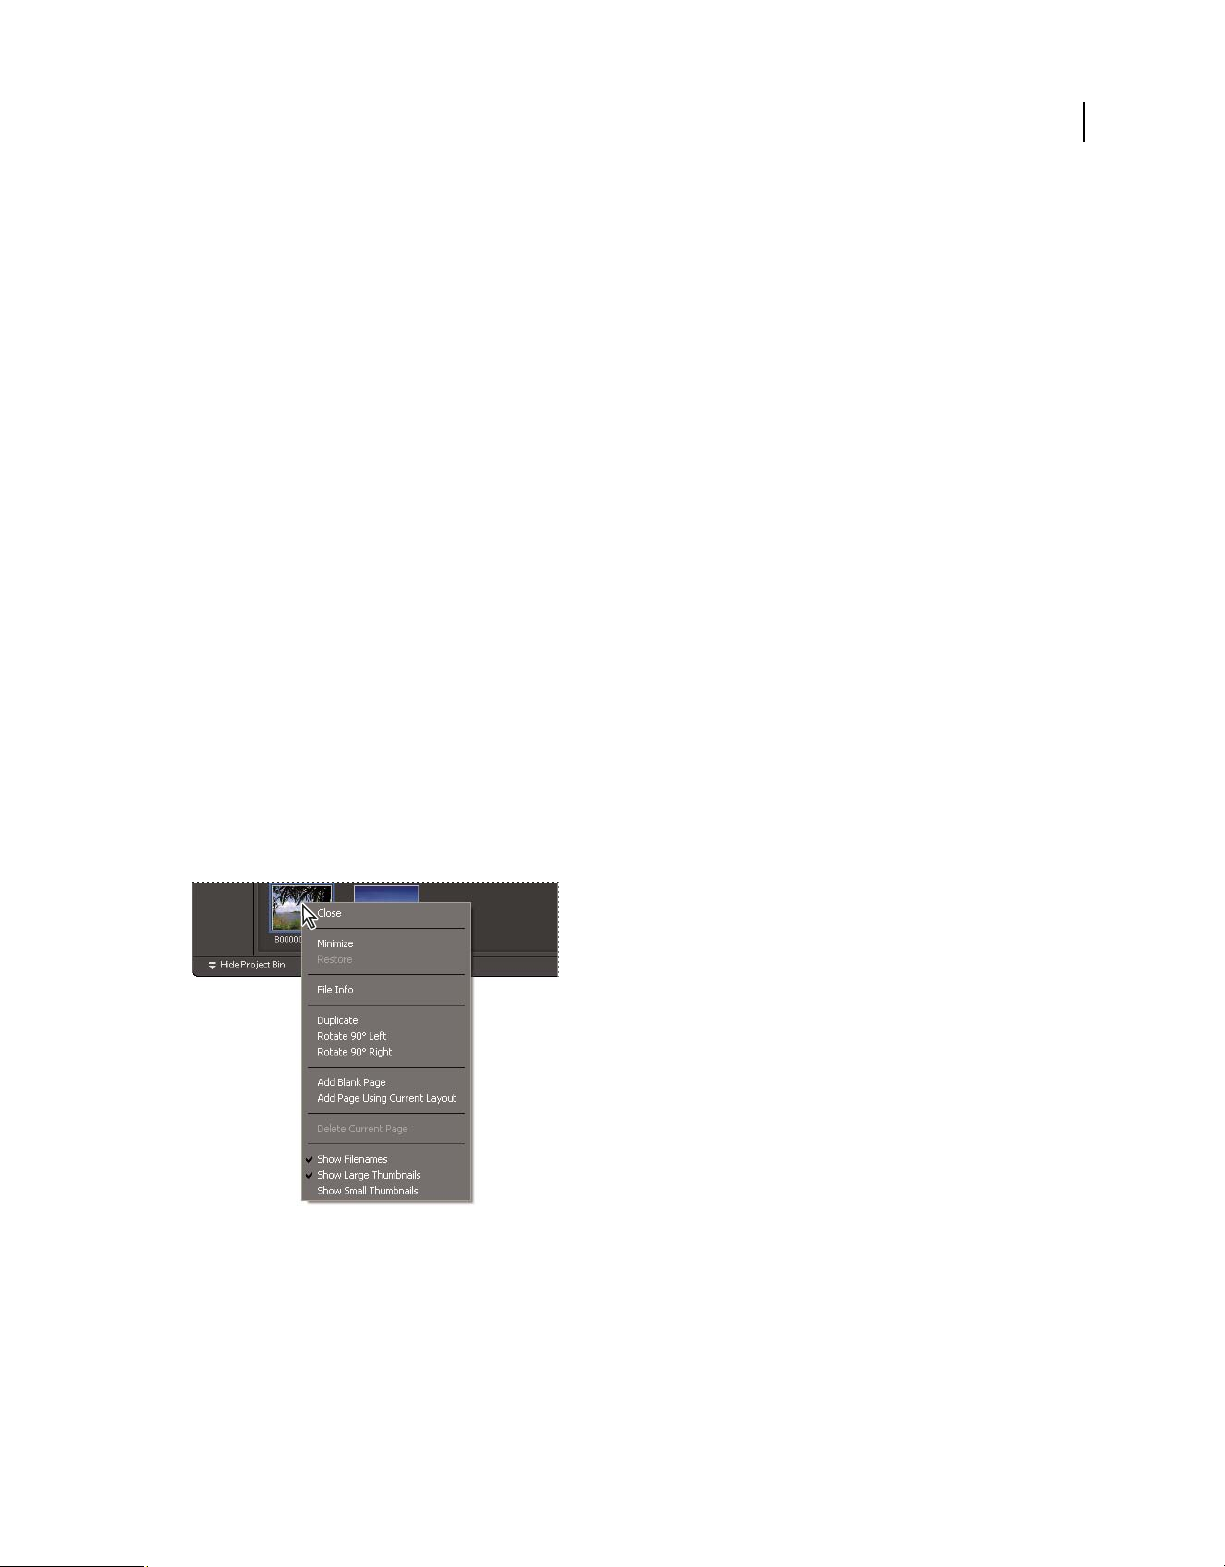
Control-click or right-click to open a context menu. This menu appears in the Project Bin in Full Edit.
1 Position the pointer over an image or a panel item.
Note: Not all panels offer context menus.
2 Right-click and choose a command from the menu.
Last updated 7/26/2011
Page 18

USING PHOTOSHOP ELEMENTS 8
Photoshop Elements workspace
Using keyboard commands and modifier keys
Keyboard commands let you quickly execute commands without using a menu; modifier keys let you alter how a tool
operates. When available, the keyboard command appears to the right of the command name in the menu.
More Help topics
“Keys for selecting and moving objects” on page 283
“Keys for selecting tools” on page 281
Tools
About the toolbox
Use tools in the toolbox to select, edit, and view images; some tools let you paint, draw, and type. The toolbox appears
on the left side of the Full Edit and Quick Fix workspaces. In the Full Edit workspace, you can move the toolbox by
dragging the gripper bar at the top of the box.
You must select a tool in the toolbox before you can use it. Once selected, the tool is highlighted in the toolbox, and
optional settings for the tool appear in the options bar, which is located below the shortcuts bar at the top of the
workspace. Some tools in the toolbox have additional tools beneath them. These are called nested tools. A small triangle
at the lower right of the tool icon signals that there are nested tools. When you select a tool, any additional nested tools
appear in the options bar.
12
Note: You cannot deselect a tool—once you select a tool, it remains selected until you select a different tool. For example,
if you’ve selected the Lasso tool, and you want to click your image without selecting anything, select the Hand tool.
You can view information about any tool in the toolbox by positioning the pointer over it. The name of the tool appears
below the pointer—this is called the tool tip. You can click a link in some tool tips to see additional information about
the tool.
Last updated 7/26/2011
Page 19
USING PHOTOSHOP ELEMENTS 8
Photoshop Elements workspace
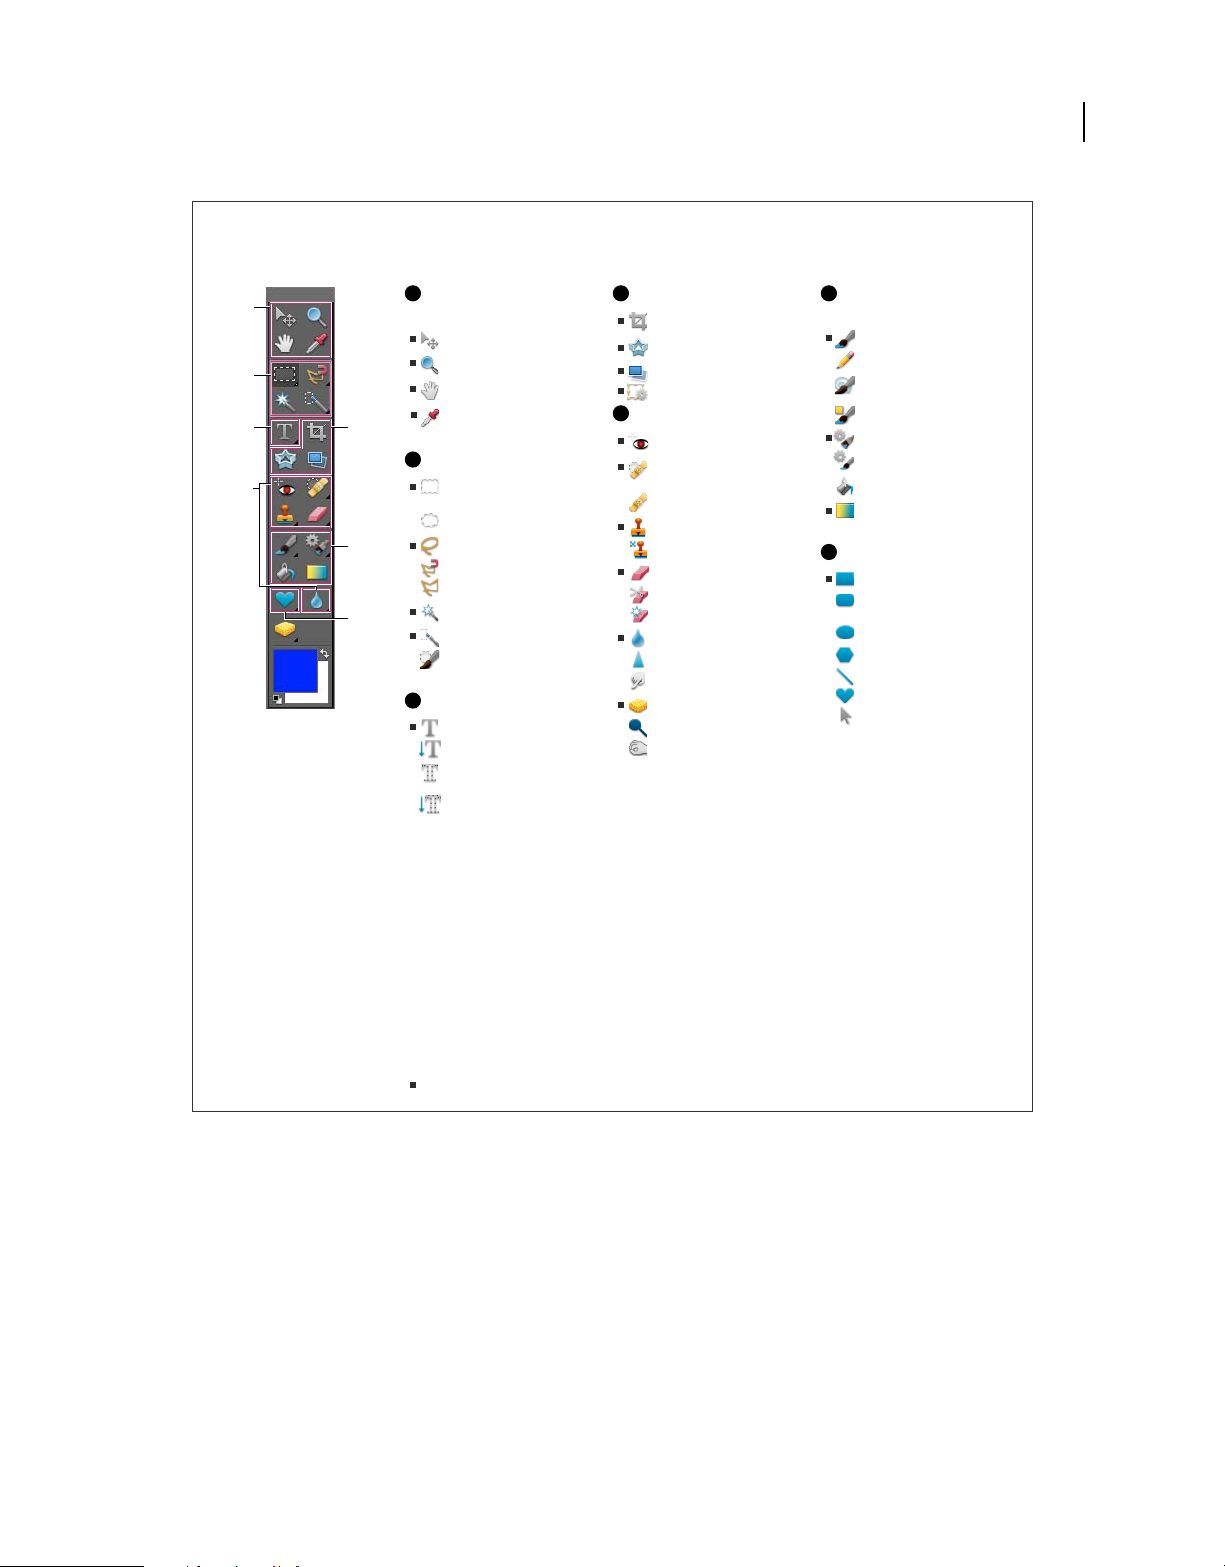
Toolbox overview
A
B
C
E
D
F
G
A D F
Navigation and
measuring tools
Move (V)
Zoom (Z)
Hand (H)
Eyedropper (I)
B
Selection tools
Rectangular
Marquee (M)
Elliptical Marquee (M)
Lasso (L)
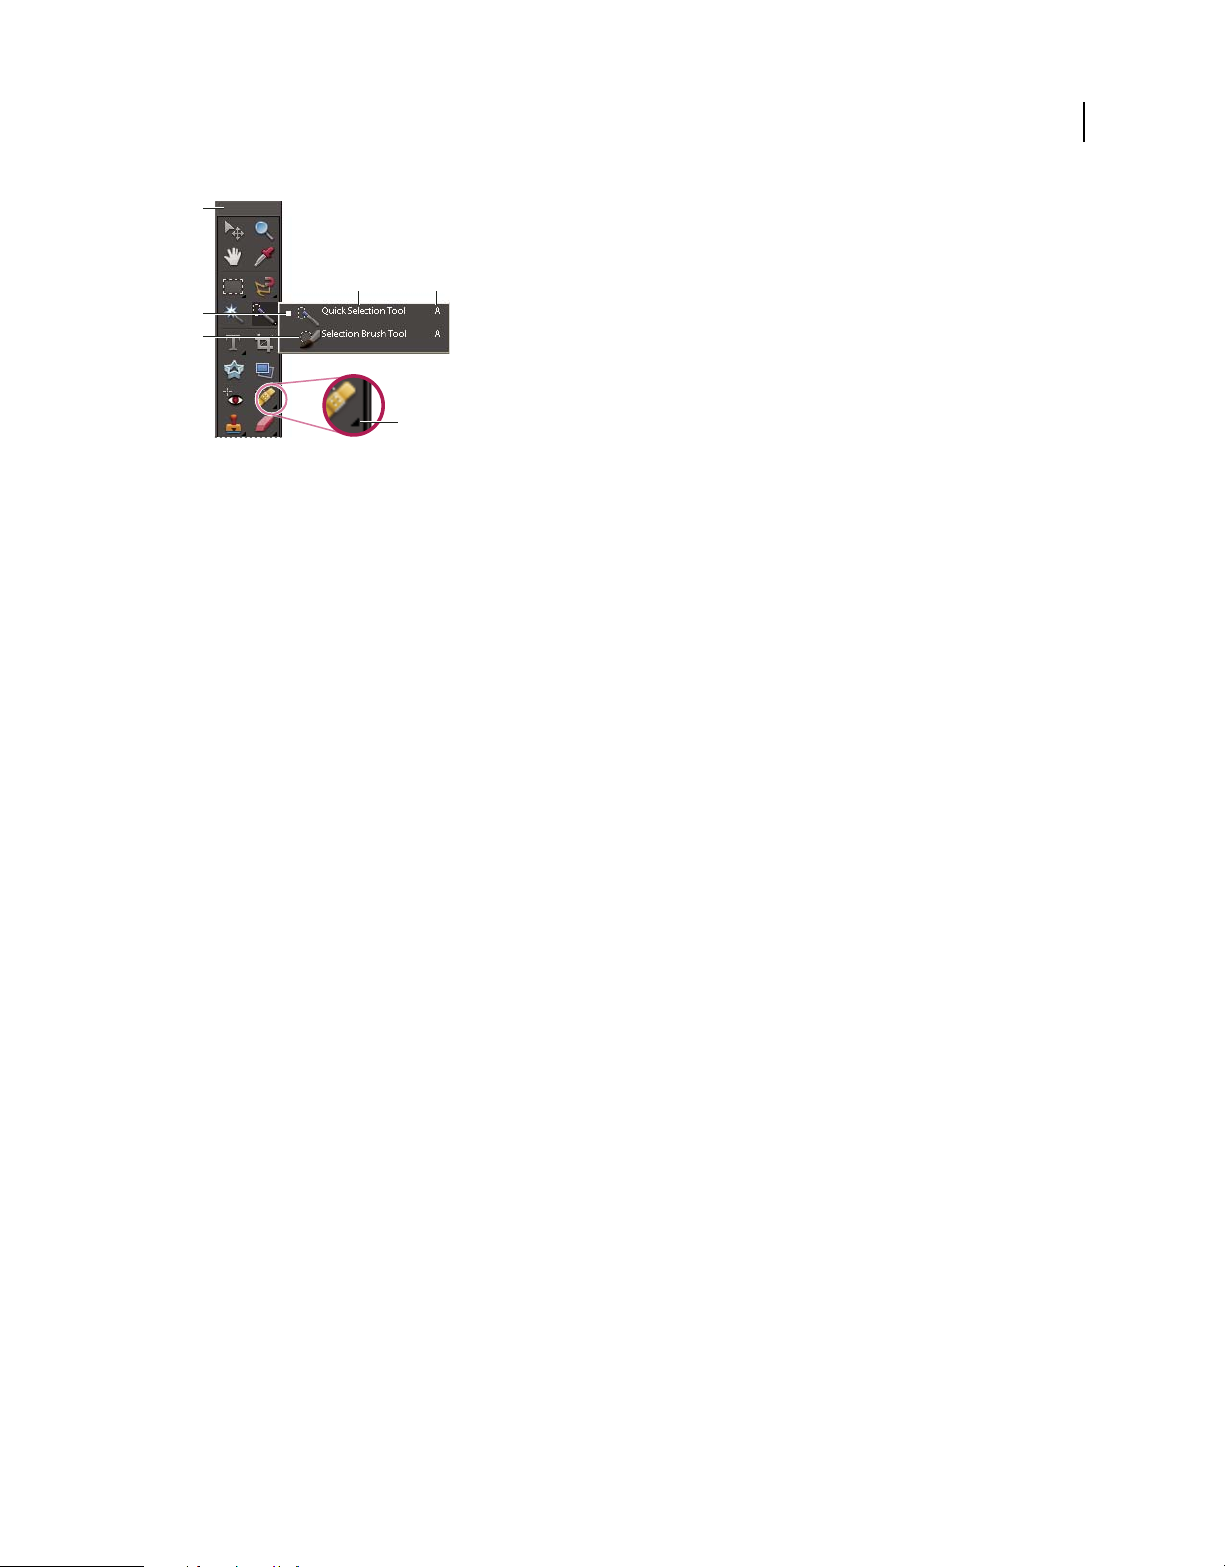
Magnetic Lasso (L)
Polygonal Lasso (L)
Magic Wand (W)
Quick Selection (A)
Selection Brush (A)
C
Type tools
Horizontal Type (T)
Vertical Type (T )
Horizontal Type
Mask (T)
Vertical Type
Mask (T)
Crop tools
Crop (C)
Cookie Cutter (Q)
Straighten (P)
Recompose (C+C)
E
Retouching tools
Red Eye Removal (Y)
Spot Healing
Brush (J)
Healing Brush (J)
Clone Stamp (S)
Pattern Stamp (S)
Eraser (E)
Background Eraser (E)
Magic Eraser (E)
Blur (R)
Sharpen (R)
Smudge (R)
Sponge (O)
Dodge (O)
Burn (O)
Painting and
drawing tools
Brush (B)
Pencil (N)
Impressionist
Brush (B)
Color Replacement (B)
Smart Brush (F)
Detail Smart Brush (F)
Paint Bucket (K)
Gradient (G)
G
Shape tools
Rectangle (U)
Rounded
Rectangle (U)
Ellipse (U)
Polygon (U)
Line (U)
Custom Shape (U)
Shape Selection (U)
13
Indicates default tool * Keyboard shortcuts appear in parenthesis
Toolbox Overview
Select a tool
❖ Do one of the following:
• Click a tool in the toolbox. If there is a small triangle in a tool’s lower-right corner, hold down the mouse button to
view the hidden tools nested with the tool. Then click the tool you want to select.
• Press the tool’s keyboard shortcut. The keyboard shortcut is displayed in its tool tip. For example, you can select
the Move tool by pressing the V key.
• To open a nested tool, use the tool’s keyboard shortcut several times to cycle through all nested tools.
Last updated 7/26/2011
Page 20
USING PHOTOSHOP ELEMENTS 8
Photoshop Elements workspace
A
D E
B
C
F
Using tools
A. Toolbox B. Active tool C. Hidden tools D. Tool name E. Tool shortcut F. Hidden tool triangle
More Help topics
“Keys for selecting tools” on page 281
Set tool preferences
1 Choose Photoshop Elements > Preferences > General.
2 Set one or more of the following options, and click OK.
• Select Show Tool Tips to show or hide tool tips.
• Select Use Shift Key For Tool Switch to cycle through a set of hidden tools by holding down the Shift key. When
this option is deselected, you can cycle through a set of hidden tools by pressing the shortcut key (without holding
down Shift).
14
Set the appearance of a tool pointer
1 Choose Photoshop Elements > Preferences > Display & Cursors.
2 Select a setting for the Painting Cursors:
Standard Displays pointers as tool icons.
Precise Displays pointers as cross-hairs.
Note: When not in Preferences, use the Caps Lock key to toggle the appearance of the Precise cursors.
Normal Brush Tip Displays the pointers as circles at 50% of the size you specify for the brush.
Full Size Brush Tip Displays the pointers as circles at the full size you specify for the brush.
Show Crosshair In Brush Tip Displays cross-hairs in the circles when you choose either Normal Brush Tip or Full Size
Brush Tip.
3 Select a setting for Other Cursors:
Standard Displays pointers as tool icons.
Precise Displays pointers as cross-hairs.
Set tool options
The options bar appears below the shortcuts bar at the top of the workspace. The options bar is context sensitive—it
changes as you select different tools. Some settings in the options bar are common to several tools, and some are
specific to one tool.
Last updated 7/26/2011
Page 21
USING PHOTOSHOP ELEMENTS 8
Photoshop Elements workspace
15
B
A
Lasso options bar
A. Tool icon B. Active tool C. Hidden tools D. Tool options
1 Select a tool.
2 Look in the options bar to see the available options. For more information on setting options for a specific tool,
search for the tool’s name in Photoshop
C
D
Elements Help.
Note: To return a tool or all tools to their default settings, click the tool icon, and then click the triangle in the options bar,
then choose Reset Tool or Reset All Tools from the context menu.
More Help topics
“Keys for selecting tools” on page 281
Set a completed operations alert
1 Choose Photoshop Elements > Preferences > General.
2 Select Beep When Done, and click OK.
Panels and bins
About panels
Panels help you manage, monitor, and modify images. Some panels have menus that provide additional commands
and options. You can organize panels in the workspace in many different ways. You can store panels in the Panel Bin
to keep them out of your way, but easily accessible, or you can keep frequently used panels open in the workspace.
Another option is to group panels or dock one panel at the bottom of another panel. Panels are stored in the Panel Bin,
which is accessible in Full Edit mode.
Note: Drag a panel out of the Panel Bin if you want to remove it from the Panel Bin and keep it open.
Dragging a panel
Last updated 7/26/2011
Page 22
USING PHOTOSHOP ELEMENTS 8
Photoshop Elements workspace
Panel menus
Some commands appear in both the panel menu and the menu bar. Other commands are exclusive to panel menus.
Click panel menu to view the different commands in each panel.
Pop-up sliders within panels
Some panels and dialog boxes contain settings that use pop-up sliders (for example, the Opacity option in the Layers
panel). If there is a triangle next to the text box, you can activate the pop-up slider by clicking the triangle. Position the
pointer over the triangle next to the setting, hold down the mouse button, and drag the slider or angle radius to the
desired value. Click outside the slider box or press Enter to close the slider box. To cancel changes, press Esc.
To increase or decrease values in 10% increments when the pop-up slider box is open, hold down Shift and press the
Up Arrow or Down Arrow key.
C
A
BD
16
F G H
E
Different ways to enter values
A. Dial B. Click to open window C. Text box D. Menu arrow E. Scrubby slider F. Check box G. Slider H Pop-up slider triangle
Work with panels
The Panel Bin lets you store multiple panels in a single area that you can easily configure, close, or keep open for easy
and fast access. By default, the Panel Bin appears on the right side of the workspace. When you adjust panels, they
remain as you leave them until you reset or change them.
Last updated 7/26/2011
Page 23

USING PHOTOSHOP ELEMENTS 8
Photoshop Elements workspace
B C
A
17
D
The Panel Bin
A. Change panel tools B. Adjust panel height C. Panel menu D. Scroll to view rest of panel
1 To show or hide the bin, choose Window > Panel Bin.
2 To use panels in the Panel Bin, do any of the following:
• To remove a panel from the Panel Bin, drag the panel’s title bar out of the Panel Bin.
• To add a panel to the Panel Bin, drag the panel’s title bar into the Panel Bin.
• To rearrange panels in the Panel Bin, drag the panel’s title bar to a new location.
3 To use panels outside of the Panel Bin, do any of the following:
• To open a panel, choose the panel’s name from the Window menu.
• To close a panel, choose the panel’s name from the Window menu. Or click the Close option in the panel’s menu.
• To change the size of a panel, drag any corner of the panel.
• To group panels together (one panel with multiple tabs), drag another panel’s tab onto the body of the target panel.
A thick line appears around the body of the target panel when the pointer is over the correct area for grouping to
occur. If you want to move a panel to another group, drag the panel’s tab to that group. To separate a panel from a
group, drag the panel’s tab outside the group.
• To move a panel group, drag the title bar.
• To expand or collapse a panel or panel group, double-click the panel’s tab or title bar.
• To reset panels to their default positions, choose Window > Reset Panels.
Last updated 7/26/2011
Page 24

USING PHOTOSHOP ELEMENTS 8
Photoshop Elements workspace
Note: If you want panels to always open in their default positions, choose Photoshop Elements > Preferences > General,
and then deselect Save Panel Locations. The change takes effect the next time you start the application.
• To move a panel and keep it open, drag the panel. To reset the panel to its default position, select Window > Reset
Panels.
Work with the Panel Bin
The Panel Bin appears on the right side of the workspace. It contains a tab for each of the basic steps of photo editing:
Edit, Create, and Share. You can open the Panel Bin to access the tabs, or close it to expand the workspace.
Tabs on the Panel Bin
Show or hide the Panel Bin
❖ Select Window > Panel Bin.
Use tools in the Edit, Create, and Share tabs
1 In the Panel Bin, click the Edit, Create, or Share tab.
2 Click a button for any of the tools listed on that tab.
18
Use the Project Bin
Located at the bottom of the edit workspaces, the Project Bin displays thumbnails of open photos. It’s useful for
switching between multiple open photos in your workspace. The Project Bin has controls that let you open or close
images, hide images, navigate through open images, make a specific image the frontmost, duplicate an image, rotate
an image, or view file information. Because the Project Bin appears in both Full Edit and Quick Fix, you can easily
bring open images into Quick Fix for editing. Multiple-page projects are highlighted by a gray frame around the page
thumbnails. To show or hide the individual pages, click the right edge of the frame.
❖ Do any of the following:
• To open an image, use File > Open.
• To bring an opened image forward as the frontmost image, double-click a thumbnail.
• To rearrange photos, drag thumbnails in the Project Bin.
• To close an image, right-click a thumbnail in the Project Bin and choose Close.
• To hide an image, right-click the thumbnail and choose Minimize from the context menu.
Note: To show an image after hiding it, double-click its thumbnail in the Project Bin, or right-click the thumbnail and
choose Restore from the context menu.
• To view a photo’s file information, right-click a thumbnail and choose File Info from the context menu.
• To duplicate an image, right-click a thumbnail, choose Duplicate from the context menu, and name the file.
• To rotate an image, right-click a thumbnail and choose Rotate 90° Left or Rotate 90° Right from the context menu.
• To show filenames, right-click in the Project Bin and choose Show Filenames from the context menu.
• To open or close the Project Bin, choose Window > Project Bin.
• To manually show or hide Project Bin, click the title bar of the Project Bin.
Last updated 7/26/2011
Page 25

USING PHOTOSHOP ELEMENTS 8
Photoshop Elements workspace
Undo, redo, and cancel
Undo, redo, or cancel operations
Many operations can be undone or redone. For instance, you can restore all or part of an image to its last saved version.
Available memory may limit your ability to use these options.
1 To undo or redo an operation, Choose Edit > Undo or choose Edit > Redo.
2 To cancel an operation, hold down the Esc key until the operation in progress has stopped.
Using the Undo History panel
The Undo History panel (Window > Undo History) lets you jump to any recent state of the image created during the
current work session. Each time you apply a change to pixels in an image, the new state of that image is added to the
Undo History panel. You don’t need to save a change in order for the change to appear in the History.
For example, if you select, paint, and rotate part of an image, each of those states is listed separately in the panel. You
can then select any of the states, and the image reverts to how it looked when that change was first applied. You can
then work from that state.
Actions, such as zooming and scrolling, do not affect pixels in the image and do not appear in the Undo History panel.
Nor do program-wide changes, such as changes to panels, color settings, and preferences.
19
A
B
C
The Undo History panel
A. Original state B. State C. Selected state and state slider
Note the following guidelines when using the Undo History panel:
• By default, the Undo History panel lists 50 previous states. Older states are automatically deleted to free more memory
for Photoshop
Preferences (Photoshop
Elements. You can change the number of states displayed in the Undo History panel in Performance
Elements > Preferences > Performance). The maximum number of states is 1000.
• The original state of the photo is always displayed at the top of the Undo History panel. You can always revert an
image to its original state by clicking this top state. Clicking the original state is also handy for comparing before
and after versions of your editing.
• When you close and reopen the document, all states from the last working session are cleared from the panel.
• States are added to the bottom of the list. That is, the oldest state is at the top of the list, the most recent one at the
bottom.
• Each state is listed with the name of the tool or command used to change the image.
• Selecting a state dims those below. This way you can easily see which changes will be discarded if you continue
working from the selected state.
• Selecting a state and then changing the image eliminates all states that came after it. Likewise, deleting a state deletes
that state and those that came after it.
Last updated 7/26/2011
Page 26

USING PHOTOSHOP ELEMENTS 8
Photoshop Elements workspace
Revert to the last saved version
When editing a photo in Full Edit or Quick Fix, you can revert to the last saved version.
❖ Choose Edit > Revert.
Note: Revert is added as a history state in the Undo History panel and can be undone.
Revert to a previous state of an image
❖ In Full Edit, do any of the following:
• Click the name of the state in the Undo History panel.
• Drag the slider at the left of the state up or down to a different state in the Undo History panel.
• Click the Undo or Redo buttons on the shortcuts bar.
• Choose Undo or Redo from the Undo History panel menu or the Edit menu.
To set the keyboard command for Step Forward and Step Backward, choose Photoshop Elements > Preferences >
General, and choose from the Step Back/Fwd menu.
Delete one or more states from the Undo History panel
❖ Do one of the following:
• To delete a state, click the name of the state, and choose Delete from the Undo History panel menu. States following
the one you selected are also deleted.
• To delete the list of states from the Undo History panel, without changing the image, choose Clear Undo History
from the panel menu or choose Edit
if you get an alert that Photoshop
Note: Clearing the Undo History panel cannot be undone.
> Clear > Undo History. Clearing is useful for freeing up memory, especially
Elements is low on memory.
20
Clear memory used by the clipboard and the Undo History panel
You can delete items copied to the clipboard or states in the Undo History panel to free up memory.
❖ In Full Edit, do one of the following:
• To clear memory used by the clipboard, choose Edit > Clear > Clipboard Contents.
• To clear memory used by the Undo History panel, choose Edit > Clear > Undo History or choose Clear Undo
History from the Undo History panel menu.
•
To clear the memory used in both the clipboard and the Undo History panel simultaneously, choose Edit > Clear > All.
Note: Clearing the Undo History panel or clipboard cannot be undone.
Restore default preferences
Preference settings control how Photoshop Elements displays images, cursors, and transparencies; saves files; uses
plug-ins and scratch disks, and so on. If the application exhibits unexpected behavior, the preferences file may be
damaged. You can restore all preferences to their defaults.
❖ Press and hold Option+Command+Shift immediately after Photoshop Elements begins launching. Click Yes to
delete the Adobe Photoshop Elements settings file.
A new preferences file is created the next time you start Photoshop Elements. For information on a specific preference
option, search for the preference name in Help.
Last updated 7/26/2011
Page 27

USING PHOTOSHOP ELEMENTS 8
Photoshop Elements workspace
Redisplay disabled warning messages
In certain situations, messages containing warnings or prompts are displayed. You can disable the display of these
messages by selecting the Don’t Show Again option in the message, and reset the messages you’ve disabled at a later
time.
1 Choose Photoshop Elements > Preferences > General.
2 Click Reset All Warning Dialogs, and click OK.
Scratch disks and plug-ins
About scratch disks
When your system does not have enough RAM to perform an operation, Photoshop Elements uses scratch disks. A
scratch disk is any drive or partition of a drive with free memory. By default, Photoshop
on which the operating system is installed as its primary scratch disk.
You can change the primary scratch disk or designate a second, third, or fourth scratch disk to be used when the
primary disk is full. Your primary scratch disk should be your fastest hard disk and have plenty of defragmented space
available.
Elements uses the hard drive
21
For best performance, use the following guidelines when assigning scratch disks:
• Scratch disks should not be on the same physical drive as Photoshop Elements or any large files you are editing.
• Scratch disks should be not be on the same physical drive as the one used for the operating system’s virtual memory.
• Scratch disks should be on a local drive. That is, they should not be accessed over a network.
• Scratch disks should be conventional (non-removable) media.
• RAID disks/disk arrays are good choices for dedicated scratch disk volumes.
• Drives with scratch disks should be defragmented regularly. Or better yet, use an empty drive or a drive with plenty
of unused space to avoid fragmentation issues.
Change scratch disks
Photoshop Elements needs contiguous hard drive space to create a scratch disk. For this reason you should frequently
defragment your hard drive. Adobe recommends that you use a disk tool utility to defragment your hard drive on a
regular basis.
1 Choose Photoshop Elements > Preferences > Performance.
2 Select the desired disks from the Scratch Disks menu (you can assign up to four scratch disks), and click OK.
3 Restart Photoshop Elements for the change to take effect.
About plug-in modules
Plug-in modules are software programs developed by Adobe Systems and other software developers to add
functionality to Photoshop
program; they are inside the Photoshop
to load compatible plug-ins stored with another application. You can also create a shortcut for a plug-in stored in
another folder on your system. You can then add the shortcut or alias to the Plug-ins folder to use that plug-in with
Photoshop
Elements. Once installed, plug-in modules appear as options added to the Import or Export menu, as filters
Elements. A number of importing, exporting, and special-effects plug-ins come with your
Elements Plug-ins folder. You can select an additional plug-ins folder in which
Last updated 7/26/2011
Page 28

USING PHOTOSHOP ELEMENTS 8
Photoshop Elements workspace
added to the Filter menu, or as file formats in the Open and Save As dialog boxes. If you install a large number of
plug-ins, Photoshop
appear in the Filter
(~) at the beginning of the plug-in name, folder, or directory. That file (or all files in the folder) is ignored by the
application when you restart it. To view information about installed plug-ins, choose Photoshop Elements
Plug-In and select a plug-in from the submenu.
Elements may not be able to list them all in their appropriate menus. If so, newly installed plug-ins
> Other submenu. To prevent a plug-in or folder of plug-ins from loading, add a tilde character
> About
More Help topics
“Plug-in filters” on page 202
Install plug-in modules
❖ Do one of the following:
• Use the plug-in installer, if provided.
• Follow the installation instructions that came with the plug-in module.
• Make sure the plug-in files are uncompressed, and then copy them to the appropriate Plug-ins folder in the
Photoshop
Elements folder.
22
Select an additional plug-ins folder
You can select an additional plug-ins folder in which to load compatible plug-ins stored with another application.
1 Choose Photoshop Elements > Preferences > Plug-Ins.
2 In the Preferences dialog, select Additional Plug-ins Folder, select a folder from the list, and click Choose.
3 To display the contents of a folder, double-click the directory. The path to the folder appears in the preferences
window.
Note: Do not select a location inside the Plug-ins folder for Photoshop Elements.
4 Restart Photoshop Elements to load the plug-ins.
Last updated 7/26/2011
Page 29

Chapter 3: Import photos
Importing photos
About getting photos
When you begin to use Photoshop Elements, you can use media files from many sources, whether a camera, scanner,
CD, or a folder on your hard disk. If you simply want to start editing a photo on your hard disk, and you know its
filename and location, use the File
the Photo Downloader in Adobe Bridge, or use the Photoshop
select the image’s source.
Open a file for editing on your hard disk
❖ Choose File > Open and browse to the file.
> Open command to browse to the file. To open photos from another source, use
Elements Import option or the Welcome screen to
23
Open a file from a device
❖ Choose File > Import, select the camera or scanner, and browse to the file.
Open a file from the Welcome screen
1 Choose Window > Welcome to open the Welcome screen.
2 Click Import From Camera or Import From Scanner to open Adobe Bridge.
Open a file from Adobe Photo Downloader
❖ Choose File > Adobe Photo Downloader to open Adobe Bridge Photo Downloader.
Guidelines for getting photos from devices
When downloading image files from a camera or a scanner, follow these guidelines:
1. Use the Adobe Photo Downloader
For some devices, you may need to install the device software on your computer before downloading files. During
installation, the software may ask whether a specific program will be used to edit the images files. If asked, specify
Photoshop
Some device software starts automatically when you connect and switch on the device. However, using Adobe Photo
Downloader enables you to perform a variety of functions not offered by device software. To obtain image files with
the Adobe Photo Downloader, close any device software that starts automatically.
Elements.
2. Organize photos during the import process
The Adobe Photo Downloader Advanced dialog box enables you to improve and organize photos while importing
them to your computer. Properly organizing photos during import makes finding and improving them later much
easier and faster.
Last updated 7/26/2011
Page 30

USING PHOTOSHOP ELEMENTS 8
Import photos
For example, you might have many pictures from a recent vacation stored in your digital camera. Some of the pictures
are from a family reunion, and the rest are pictures of tourist attractions visited along the way. During the import
process, you can divide these photos into Place and Family folders, and then name them accordingly.
Import keywords attached to photos
When you receive photos that contain keyword metadata, you can import them with the photo. You can decide
whether to keep the attached keyword, rename the keyword, or map it to one of your own keywords. If you import a
new keyword, it appears in the Adobe Bridge Keyword Tags panel, and you can use it to tag other photos.
Cameras and card readers
About cameras and card readers
You can download (copy) photos from cameras and card readers in several ways:
• Copy photos from your camera and import them into Photoshop Elements using the Adobe Photo Downloader.
This method is recommended because it is quick and easy, and allows you to improve and organize your photos
when importing them.
• Open the Welcome screen and click the Import From Camera option.
• If your camera or card reader displays as a drive, you can open the files from there and place them directly into
Photoshop
In some cases, you need to install the software driver that came with your camera before you can download pictures
to your computer.
Elements.
24
Get photos from a digital camera or card reader
1 Connect your camera or card reader to your computer. (See the documentation that came with your device, if
necessary.)
2 Do either of the following:
• If the Adobe Photo Downloader appears, choose the name of the camera or card reader from the Get Photos From
menu. Usually, the connected device’s name automatically appears, and Photoshop
your camera.
Note: Your camera or card reader must be switched on to appear in the Get Photos From list. If the menu doesn’t display
the specific device name, choose Untitled. If no option for the device is available, choose Refresh List.
• If the downloader does not appear, use Photoshop Elements File > Adobe Photoshop Downloader or Bridge File >
Get Photos From Camera to open it.
3 In the Import Settings area, set the following options:
Location Specifies the folder to which images are downloaded. To change the default folder location, click Choose, and
specify a new location.
Create Subfolder(s) Creates a subfolder using the format selected from the pop-up menu. If you choose Custom
Name, type a subfolder name in the box.
Rename Files Changes the filenames using the format selected from the pop-up menu. If you choose Custom Name,
type a filename in the box.
Elements automatically detects
Last updated 7/26/2011
Page 31

USING PHOTOSHOP ELEMENTS 8
Import photos
Note: If the name you entered already exists, the copied image filename is appended with “-1” or another appropriately
numbered designator.
Apply Metadata (Optional) Select the options to use for adding metadata to the photos.
4 Click Get Photos.
The photos are copied to your hard drive.
Set advanced photo downloading options
The Advanced dialog box of the Adobe Photo Downloader offers several options not available in the Standard dialog
box. For example, it lets you view all of the photos stored on a device, preview videos before importing them, and add
copyright metadata. The settings you specify in this dialog box retain their values until you reset them.
1 In the Standard Adobe Photo Downloader dialog box, click Advanced Dialog.
Thumbnail images of every file on your device appear.
2 Select photos to download by doing any of the following:
• To select individual photos, click the boxes below each thumbnail.
• To select multiple photos, drag a rectangle around their thumbnails, and then right-click and select Check Selected,
or click a box below one of the selected images to check them all.
• To select all photos, click Check All in the bottom left of the dialog box. To deselect all images, click Uncheck All.
3 In the Save Options section, choose an option for naming subfolders from the Create Subfolder(s) menu. The
Custom Name option creates a subfolder with the group name format you type in the Name box.
4 In the Advanced Options section, select any of the following:
• Open Adobe Bridge
• Convert to DNG
• Delete Original Files
• Save Copies To
5 In the Apply Metadata section, select a template to use and type in the following fields:
• Creator
Specifies the file creator. Information typed into this field is appended to the author metadata in the file.
25
• Copyright
Specifies the date and other relevant information to protect your photos. Information typed into this field overwrites
any data already in the copyright metadata in the file.
6 Click Get Photos.
Last updated 7/26/2011
Page 32

USING PHOTOSHOP ELEMENTS 8
Import photos
Scanners
About scanning
Photoshop Elements connects to your scanner so that you can get images of your photos, negatives, and slides. You
can get images from scanners in several ways:
• Use the scanner driver plug-in module that came with your scanner. This software is either compatible with
Photoshop
• Open the Welcome screen from the Window menu and click the Import From Scanner option.
• In Photoshop Elements, use File > Import and select your scanner.
• Use the stand-alone scanning software that came with your scanner to scan and save your images. You can then
bring the images into Photoshop
You can also import scanned images directly from any scanner that has a Photoshop-compatible plug-in module
or that supports the TWAIN interface. To import the scan using a plug-in module, choose the scanner name from
the File
If your scanner does not have Photoshop-compatible scanner driver, import the scan using the TWAIN interface.
Before you try to scan and open your photos in Photoshop Elements, make sure that you’ve installed all the software
that came with your scanner. Carefully read any documentation that came with your scanner to make sure that it’s
connected properly to your computer.
Elements or uses the TWAIN® interface to scan and open images directly in Photoshop Elements.
Elements using the File > Open command.
> Import submenu. See your scanner documentation for instructions on installing the scanner plug-in.
26
Get photos from scanners
1 Make sure that your scanner is connected and switched on.
• To import the scan using a plug-in module, choose the scanner name from the File > Import submenu. (See your
scanner documentation for instructions on installing the scanner plug-in.)
• If your scanner does not have Photoshop-compatible scanner driver, import the scan using the TWAIN interface.
• If you can’t import the scan using the TWAIN interface, use the scanner manufacturer’s software to scan your
images, and save the images as TIFF, PICT, or BMP files.
2 Select File > Open.
3 Choose Browse to select a location for saving the photos.
4 Choose a file format from the Save As menu. JPEG, the default format, is usually the best choice.
• Select a Matte color to simulate the appearance of background transparency.
• Set the image quality by entering a value between 0 (lowest) to 12 (highest); selecting Low, Medium, High, or
Maximum; or by dragging the Quality slider to the setting you want. The higher the quality, the larger the file size.
• In Formats Options, set the format for the image.
Baseline causes images to display line-by-line on the screen.
Baseline Optimized applies optimized Huffman encoding to keep file size as small as possible.
Progressive causes the image to display in multiple passes on the screen. Set the number of passes in the Scans box.
5 Click OK. If you’re using a scanner with a TWAIN driver, Photoshop Elements launches the driver that came with
your scanner. Follow the instructions that came with the driver software to scan your photo. Typically, you can also
select an area to scan or correct any color issues that you may see.
Last updated 7/26/2011
Page 33

USING PHOTOSHOP ELEMENTS 8
Import photos
After the image is scanned, it appears in an untitled Photoshop Elements window.
More Help topics
“File formats for saving” on page 40
“About image size and resolution” on page 137
Local files, CDs, DVDs, and video
Get photos from files and folders
You can bring photos into Photoshop Elements from a hard disk or optical disc drive in your computer, either by
dragging them, or by browsing to them using the File
Browse to files on your computer
1 Select File > Open or File > Browse With Bridge.
2 In the dialog box, navigate to the folder that contains the files you want.
3 Do one of the following to select photos:
• To get a single photo, select it.
• To get multiple photos, Command-click to select the files you want. Or, click the first file, and then Shift-click the
last file in the list that you want.
• To get all the photos in a folder, navigate up one level from your current level, select the desired fold, and click
Open.
You can import a PDF file or a Photoshop Elements project in PDF format. Text in imported PDF files becomes part
of the image (you can’t edit the text).
> Open or the File > Browse With Bridge command.
27
Search for files on your computer
❖ From Adobe Bridge, choose Edit > Find.
About preview files
When you import photos, you can choose to download either high-quality or quick thumbnails (sometimes called
preview files). Thumbnail files appear as space-saving copies of the high-resolution originals.
Use the Thumbnails and Advanced options on the Bridge Preferences menu to specify settings for thumbnail files.
Get photos from a CD or DVD
You can copy photos from a CD or DVD onto your hard disk. You can make high-quality copies, as you might for
editing purposes, or, to save disk space, quick thumbnail files.
1 Select File > Open.
2 From the list of devices, select your CD or DVD drive, and select the photos you want to copy.
3 Click Open to bring in the photos.
Last updated 7/26/2011
Page 34

USING PHOTOSHOP ELEMENTS 8
Import photos
Get photos from video
You can capture frames from your digital videos if they are saved in a file format that Photoshop Elements can open,
including AVI, MPEG, MPG, and MOV. Captured photos are saved with the name of the video file plus a number (for
example, videoclip01, videoclip02, and so forth).
Note: To create photos from the broadest range of video formats, install the latest version of standard video software.
28
Getting still photos from a video clip
1 Choose File > Import > Frame From Video.
2 In the Frame From Video dialog box, click the Browse button to navigate to the video from which you want to
acquire still frames, and then click Open.
3 To start the video, click Play .
4 To get a frame of the video as a still image, click the Grab Frame button or press the spacebar when the frame is
visible on the screen. You can move forward and backward in the video to capture additional frames.
Note: Some video formats don’t support rewinding or fast-forwarding. In these cases, the Rewind and Fast
Forward buttons are not available.
5 When you have all the frames you want, click Done.
6 Select File > Save to save each still file to a folder on your computer.
Last updated 7/26/2011
Page 35

Chapter 4: Working with files
When working in Adobe® Photoshop® Elements the format that you save the file in is very important. For example, you
often might have a file in one format, such as JPEG that you edit and then save to another format, such as PSD (the
Photoshop
Understanding the differences between formats is therefore an important part of photo editing and sharing. You have
several choices about working with files. You can set options for opening, saving, and exporting files by type, by file
size, and resolution. You can also process and save camera raw files. These tools make it easy to combine files of
different types and optimize them in Photoshop
what format, and what resolution, might be required. All this information will be covered in this chapter.
Opening files
Create a new blank file
To create a web graphic, banner, or company logo and letterhead, or to create a photo collage or scrapbook page by
mixing parts of different images, start from a new blank file.
Elements native file format, which preserves layer information and applies no compression).
Elements. When creating a new document, you also need to decide
29
1 From the File menu, choose New > Blank File. Or, on the Welcome screen, click Start From Scratch.
2 Enter options for the new image.
Name Names the new image file.
Preset Provides options for setting the width, height, and resolution of images that you intend to print or to view
on-screen. Select Clipboard to use the size and resolution of data that you copied to the clipboard. You can also base a
new image on the size and resolution of any open image by choosing its name from the bottom of the Preset menu.
Width, Height, and Resolution Sets these options individually. The default values are based on the last image you
created, unless you’ve copied data to the clipboard.
Color Mode Sets an image to RGB color, grayscale, or bitmap (1-bit mode). You usually should select RGB.
Background Contents Sets the color of the image Background layer. White is the default. Select Background Color to
use the current background color (shown in the toolbox). Select Transparent to make the default layer transparent,
with no color values—the new image will have a Layer 1 instead of a Background layer.
Be sure to choose the correct size and resolution before beginning to edit. Changing those settings after editing could
introduce blurriness or require pixels to be removed. Other settings can be changed after editing.
More Help topics
“About projects” on page 247
Open a file
You can open and import images in various file formats. The available formats appear in the Open dialog box and the
Import submenu.
1 Choose File > Open.
2 Locate and select the file you want to open.
Last updated 7/26/2011
Page 36

USING PHOTOSHOP ELEMENTS 8
Working with files
3 Click Open. In some cases, a dialog box appears, letting you set format-specific options.
There may be instances when Photoshop Elements cannot determine the correct format of a file. For example,
transferring a file between Mac OS® and Windows® can cause the format to be mislabeled.
In such cases, you must
specify the correct format in which to open the file.
More Help topics
“Save changes in different file formats” on page 41
Open a recently used file
❖ Choose File > Open Recently Edited File, and select a file from the submenu.
Note: To specify the number of files that are available in the Open Recently Edited File submenu, choose
Photoshop
Elements > Preferences > Saving Files, and enter a number in the Recent File List Contains text box.
Open a PDF file
Portable Document Format (PDF) is a versatile file format that can represent both vector and bitmap data and can
contain electronic document search and navigation features. PDF is the primary format for Adobe® Acrobat®.
With the Import PDF dialog box, you can preview the pages and images in a multipage PDF file, then decide if you
want to open them. You can choose to import full pages (including text and graphics), or you can import just the
images from a PDF file. If you import only the images, the resolution, size, and color mode of the images remains
unchanged. If you import pages, you can change the resolution and color mode.
30
Each page is shown as a thumbnail. To increase the size, choose an option from the Thumbnail Size menu.
Importing pages from a PDF file
1 Choose File > Open.
2 Select the name of the file, and click Open.
3 To import just the images from a PDF file, choose Image from the Select menu in the Import PDF dialog box. Select
the image or images you want to open. (To select multiple images, Command-click each image.)
4 To import pages from a PDF file, choose Page from the Select menu, and then do any of the following:
• If the file contains multiple pages, select the page or pages you want to open, and click OK. (To select multiple pages,
Command-click each page.)
• Under Page Options, accept the existing name, or type a new filename in the Name box.
• Choose an option from the Mode menu (RGB Color to keep the photos in color, or Grayscale to automatically make
them black and white). If the file has an embedded ICC (International Color Consortium) profile, you can choose
the profile from the menu.
Last updated 7/26/2011
Page 37

USING PHOTOSHOP ELEMENTS 8
Working with files
• For Resolution, accept the default (300 ppi) or type a new value. A higher resolution increases the file size.
• Select Anti-aliased to minimize the jagged edges as the image is rasterized (bitmapped).
5 Select Suppress Warnings to hide any error messages during the import process.
6 Click OK to open the file.
Open an EPS file
Encapsulated PostScript® (EPS) can represent both vector and bitmap data and is supported by virtually all graphics,
illustration, and page-layout programs. Adobe applications that produce PostScript artwork include Adobe
Illustrator®. When
curves of the vector artwork are converted into the pixels or bits of a bitmap image.
1 Choose File > Open.
2 Select the file you want to open, and click Open.
3 Indicate the desired dimensions, resolution, and mode. To maintain the same height-to-width ratio, select
Constrain Proportions.
4 Select Anti-aliased to minimize the jagged appearance of edges, and then click OK.
Anti-aliasing lets you produce smooth-edged objects by blending the edges of the objects into the background.
you open an EPS file containing vector art, it is rasterized—the mathematically defined lines and
31
You can also bring PostScript artwork into Photoshop Elements using the Place command and the Paste command.
Place a PDF, Adobe Illustrator, or EPS file in a new layer
If you don't have the program that created the image file, and you can't open, copy and paste it, use the Place command
to insert the image into Photoshop
an image. Because the placed artwork is rasterized (bitmapped), you cannot edit text or vector data in placed artwork.
The artwork is rasterized at the resolution of the file into which it is placed.
1 Open the image into which you want to place the artwork.
2 Choose File > Place, select the file you want to place, and click Place.
3 If you are placing a PDF file that contains multiple pages, select the page you want to place from the provided dialog
box, and click OK.
The placed artwork appears inside a bounding box at the center of the Photoshop Elements image. The artwork
maintains its original aspect ratio; however, if the artwork is larger than the Photoshop
4 (Optional) Reposition the placed artwork by positioning the pointer inside the bounding box of the placed artwork
and dragging.
5 (Optional) Scale the placed artwork by doing one or more of the following:
• Drag one of the handles at the corners or sides of the bounding box. Hold down Shift as you drag a corner handle
to constrain the proportions.
• In the options bar, enter values for W and H to specify the width and height of the artwork. By default, these options
represent scale as a percentage; however, you can enter a different unit of measurement—in (inches), cm
(centimeters), or px (pixels). To constrain the proportions of the artwork, click the Constrain Proportions box.
Elements. You can place PDF, Adobe® Illustrator®, or EPS files into a new layer in
Elements image, it is resized to fit.
Last updated 7/26/2011
Page 38

USING PHOTOSHOP ELEMENTS 8
Working with files
6 (Optional) Rotate the placed artwork by doing one or more of the following:
• Position the pointer outside the bounding box of the placed artwork (the pointer turns into a curved arrow), and
drag.
• In the options bar, enter a value (in degrees) for the Rotation option .
7 (Optional) Skew the placed artwork by holding down Command and dragging a side handle of the bounding box.
8 Set the Anti-alias option in the options bar. To blend edge pixels during rasterization, select the Anti-alias option.
To produce a hard-edged transition between edge pixels during rasterization, deselect the Anti-alias option.
9 To commit the placed artwork to a new layer, do one of the following:
• Click the Commit button .
• Press Enter.
To cancel the placement, click the Cancel button , or press Esc.
Process multiple files
The Process Multiple Files command applies settings to a folder of files, open images, files selected in Adobe Bridge,
or files that you select to import. If you have a digital camera or a scanner with a document feeder, you can also import
and process multiple images. (Your scanner or digital camera may need an acquire plug-in module that supports
actions. TWAIN is the most common protocol for scanners or cameras.)
32
When processing files, you can leave all the files open, close and save the changes to the original files, or save modified
versions of the files to a new location (leaving the originals unchanged). If you are saving the processed files to a new
location, you may want to create a new folder for the processed files before starting the
batch.
Note: The Process Multiple Files command does not work on multiple page PDF or PSE files.
1 Choose File > Process Multiple Files.
2 Choose the source of the files to process from the Process Files From pop-up menu:
Folder Processes files in a folder you specify. Click Browse to locate and select the folder.
Import Processes images from a digital camera or scanner.
Opened Files Processes all open files.
Bridge Processes files that are in Adobe Bridge.
3 Select Include All Subfolders if you want to process files in subdirectories of the specified folder.
4 For Destination, click Browse and select a folder location for the processed files.
5 If you chose Folder as the destination, specify a file-naming convention and select file compatibility options for the
processed files:
• For Rename Files, select elements from the pop-up menus or enter text into the fields to be combined into the
default names for all files. The fields let you change the order and formatting of the components of the filename.
You must include at least one field that is unique for every file (for example, filename, serial number, or serial letter)
to prevent files from overwriting each other. Starting Serial Number specifies the starting number for any serial
number fields. If you select Serial Letter from the pop-up menu, serial letter fields always start with the letter “A”
for the first file.
• For Compatibility, choose Windows, Mac OS, and UNIX® to make filenames compatible with the Windows,
OS, and UNIX operating systems.
Mac
Last updated 7/26/2011
Page 39

USING PHOTOSHOP ELEMENTS 8
Working with files
6 Under Image Size, select Resize Images if you want each processed file resized to a uniform size. Then type in a
width and height for the photos, and choose an option from the Resolution menu. Select Constrain Proportions to
keep the width and height proportional.
7 To apply an automatic adjustment to the images, select an option from the Quick Fix panel.
8 To attach a label to the images, choose an option from the Labels menu, then customize the text, text position, font,
size, opacity, and color. (To change the text color, click the color swatch and choose a new color from the Color
Picker.)
9 Select Log Errors That Result From Processing Files to record each error in a file without stopping the process. If
errors are logged to a file (to a location that you specify), a message appears after processing. To
file, open with a text editor after the Batch command has run.
10 Click OK to process and save the files.
review the error
Close a file
1 Do one of the following:
• Choose File > Close or File > Close All.
• Choose Command W to close the file or Option+Command W to close all files.
2 Choose whether or not to save the file.
33
Managing and organizing files
View or add file information
The File Info dialog box displays camera data, caption, and copyright and authorship information that has been added
to the file. Using this dialog box, you can modify or add information to files saved in Photoshop
information you add is embedded in the file using XMP (Extensible Metadata Platform). XMP provides Adobe
applications and workflow partners with a common XML framework that standardizes the creation, processing, and
interchange of document metadata across publishing workflows. If you have metadata that you repeatedly enter for
different files, you can create metadata templates to expedite the adding of information to files.
You cannot edit the information displayed for the Keywords, Camera Data 1, and Camera Data 2 metadata categories.
1 With an image open, choose File > File Info.
2 Click the Description attribute to display specific information. In Description, you can add or modify the document
title, file authorship, caption, caption authorship, and copyright information. Type in the appropriate text boxes
OK to embed the information. For copyright status, choose from the Copyright Status menu.
and click
Use the Info Panel
In the Full Edit workspace, the Info panel displays file information about an image and also provides feedback as you
use a tool. Make sure the Info panel is visible in your work area if you want to view information while dragging in the
image.
1 Display the Info panel by clicking its title bar if it’s in the Panel Bin. If the Info panel isn’t visible in the Panel Bin
or the work area, choose Window
2 Select a tool.
> Info to display the panel.
Elements. The
Last updated 7/26/2011
Page 40

USING PHOTOSHOP ELEMENTS 8
Working with files
3 Move the pointer into the image, or drag within the image to use the tool. The following information may appear,
depending on which tool you’re using:
The numeric values for the color beneath the pointer.
The x- and y-coordinates of the pointer.
The width (W) and height (H) of a marquee or shape as you drag, or the width and height of an active selection.
The x- and y-coordinates of your starting position (when you click in the image).
The change in position along the x-coordinate, , and y-coordinate, , as you move a selection, layer, or
shape.
The angle (A) of a line or gradient; the change in angle as you move a selection, layer, or shape; or the angle of
rotation during a transformation. The change in distance (D) as you move a selection, layer, or shape.
The percentage of change in width (W) and height (H) as you scale a selection, layer, or shape.
The angle of horizontal skew (H) or vertical skew (V) as you skew a selection, layer, or shape.
More Help topics
“About color” on page 164
“About image modes” on page 166
34
Set color modes and units of measurement in the Info panel
❖ Do one of the following:
• To change the mode of color values displayed, click an eyedropper icon in the Info panel, and choose a color
mode from the pop-up menu. You can also choose Panel Options from the More menu in the Info panel, then
choose a color mode for First Color Readout and/or Second Color Readout:
Grayscale Displays the grayscale values beneath the pointer.
RGB Color Displays the RGB (red, green, blue) values beneath the pointer.
Web Color Displays the hexadecimal code for the RGB values beneath the pointer.
HSB Color Displays the HSB (hue, saturation, brightness) values beneath the pointer.
• To change the unit of measurement displayed, click the cross hair in the Info panel, and choose a unit of
measurement from the pop-up menu. You can also choose Panel Options from the More menu in the Info panel.
Choose a unit of measurement from the Ruler Units menu, and click
OK.
Use keywords and metadata to identify files
Keyword tags are personalized keywords, such as “Dad” or “Florida,” that you attach to photos, PDFs, and photo
projects so that you can easily organize and find them. When you use keyword tags, there’s no need to manually
organize your photos in subject-specific folders or rename files with content-specific names. Instead, you simply attach
one or more keyword tags to each photo and then retrieve the photos you want by selecting one or more keyword tags.
To apply keywords, use Adobe Bridge.
Stacking files
Stacking files lets you put files together under a single thumbnail. To stack files, use the Stacks menu in Adobe Bridge.
Last updated 7/26/2011
Page 41
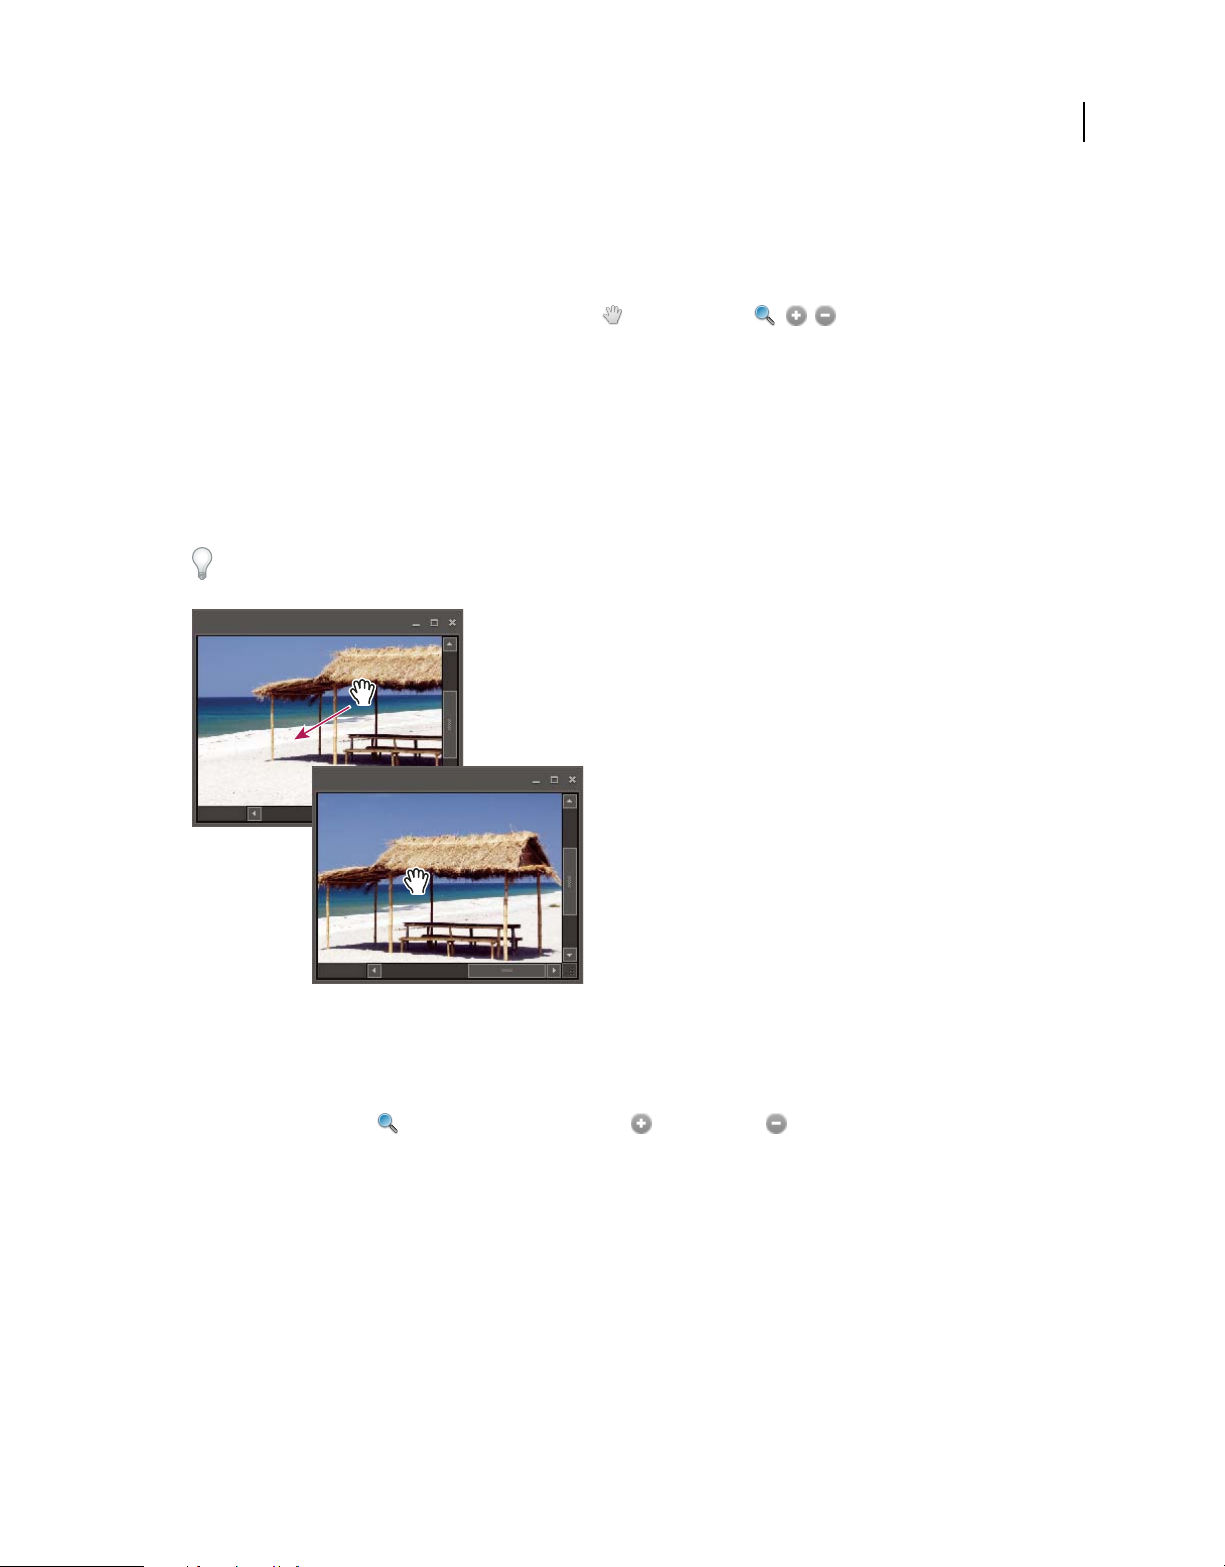
USING PHOTOSHOP ELEMENTS 8
Working with files
Viewing images
Viewing images
In Full Edit, Guided Edit, or Quick Fix, the Hand tool , the Zoom tools , the Zoom commands, and the
Navigator panel let you view different areas of an image at different magnifications. The document window is where
your image appears. You can open additional windows to display several views of an image at once (such as different
magnifications).
You can magnify or reduce your view using various methods. The window’s title bar displays the zoom percentage
(unless the window is too small for the display to fit).
If you want to view another area of an image, either use the window scroll bars or select the Hand tool and drag to pan
image. You can also use the Navigator panel.
over the
To use the Hand tool while another tool is selected, hold down the spacebar as you drag within the image.
35
Dragging the Hand tool to view another area of an image. (The appearance of scroll bars can vary from those in the example.)
Zoom in or out
❖ Do one of the following:
• Select the Zoom tool , and click either the Zoom In or Zoom Out button in the options bar. Click the
area you want to magnify. Each click magnifies or reduces the image to the next preset percentage, and centers the
display around the point you click. When the image has reached its maximum magnification level of 3200% or
minimum reduction level of 1 pixel, the magnifying glass appears empty.
Note: You can drag a Zoom tool over the part of an image you want to magnify. Make sure that the Zoom In button is
selected in the options bar. To move the zoom marquee around the image, begin dragging a marquee, and then hold down
the spacebar while dragging the marquee to a new location.
Last updated 7/26/2011
Page 42
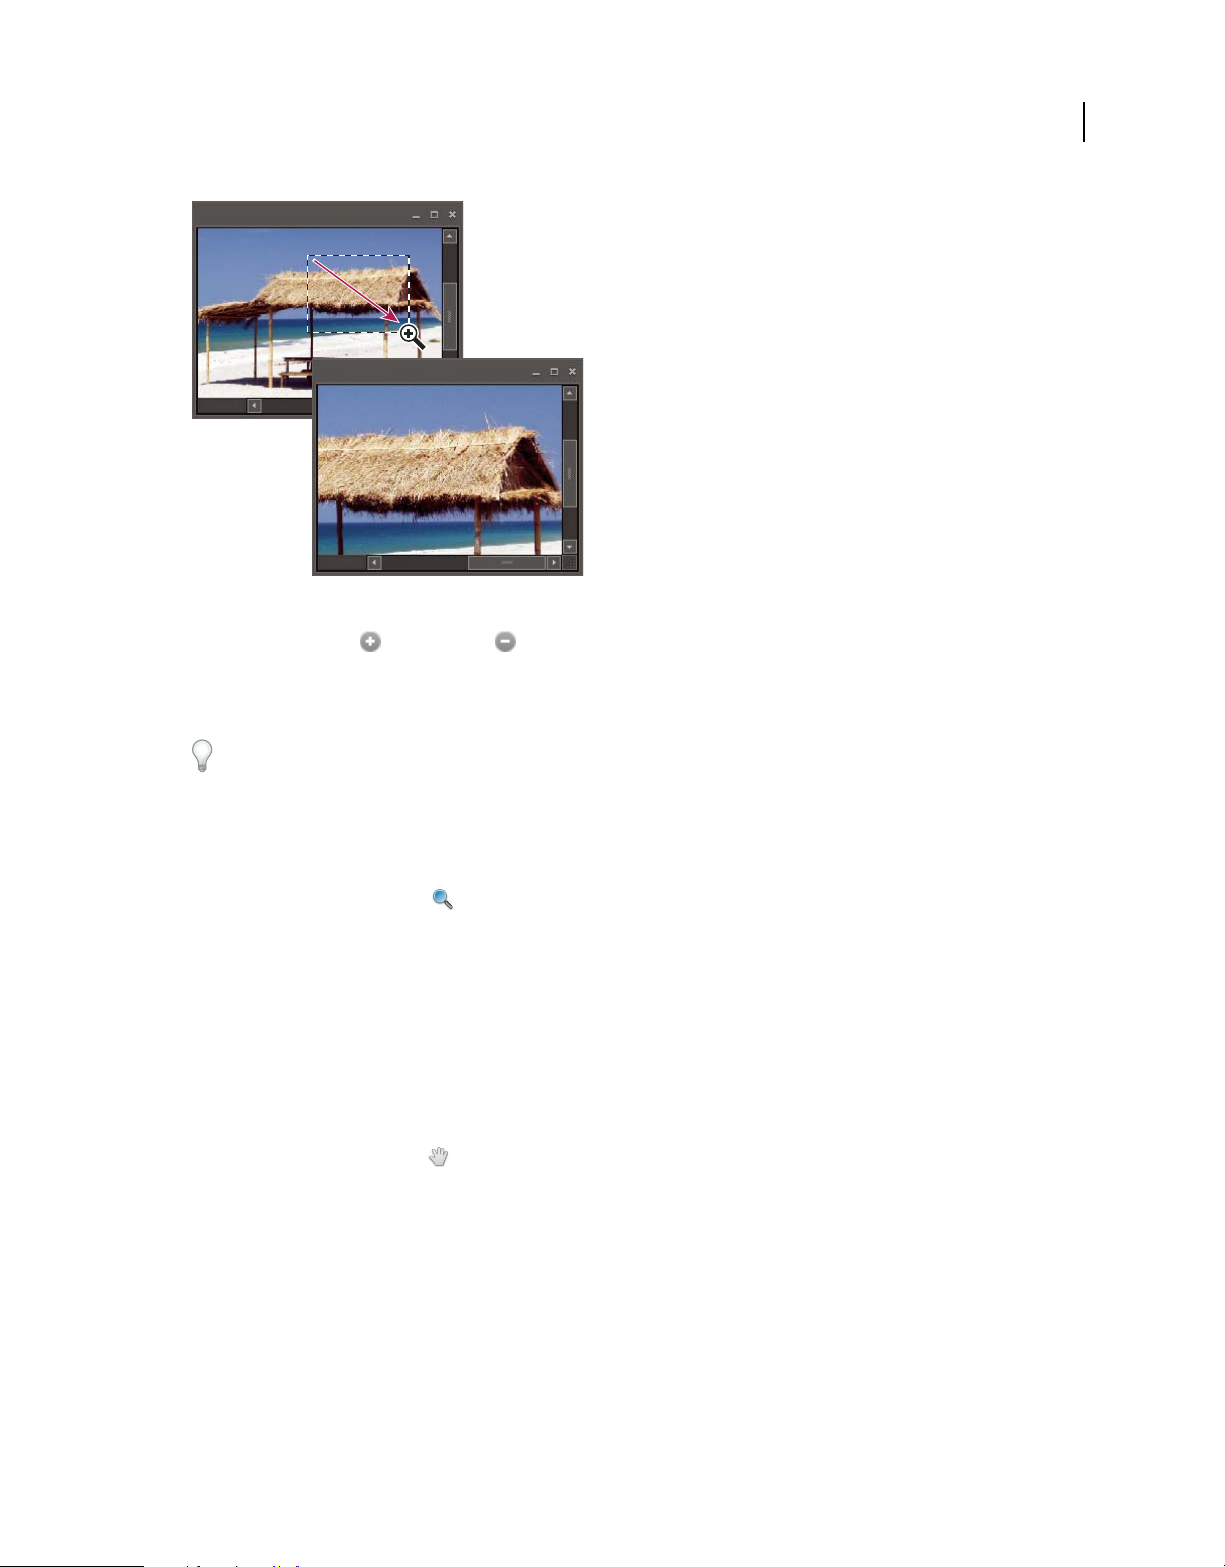
USING PHOTOSHOP ELEMENTS 8
Working with files
Dragging the Zoom tool to magnify the view of an image
• Click the Zoom In or Zoom Out button in the Navigator panel.
• Choose View > Zoom In or View > Zoom Out.
• Enter the desired magnification level in the Zoom text box, either in the status bar or in the Navigator panel.
When using a Zoom tool, hold down Option to switch between zooming in and zooming out.
36
Display an image at 100%
❖ Do one of the following:
• Double-click the Zoom tool in the toolbox.
• Select a Zoom tool, and click the 1:1 button in the options bar.
• Choose View > Actual Pixels, or right-click (or Control-click, depending on the mouse design) the image and
choose Actual Pixels.
• Enter 100% and press Enter.
Fit an image to the screen
❖ In Full Edit or Quick Fix, do one of the following:
• Double-click the Hand tool in the toolbox.
• Select a Zoom tool or the Hand tool, and then click the Fit Screen button in the options bar. Or, right-click the
image and choose Fit On Screen.
• Choose View > Fit On Screen.
These options scale both the zoom level and the window size to fit the available screen space.
Resize the window while zooming
❖ With a Zoom tool active, select Resize Windows To Fit in the options bar. The window changes size as you magnify
or reduce the view of the image.
Last updated 7/26/2011
Page 43

USING PHOTOSHOP ELEMENTS 8
Working with files
When Resize Windows To Fit is deselected, the window maintains a constant size regardless of the image’s
magnification. This can be helpful when you are using smaller monitors or working with tiled images.
Note: To automatically resize the window when using keyboard shortcuts to reduce or magnify an image view, choose
Photoshop
Elements > Preferences > General, and then select the Zoom Resizes Windows preference and click OK.
Using the Navigator panel
The Navigator panel lets you adjust the image’s magnification and area of view. Typing a value in the text box, clicking
the Zoom Out or Zoom In button, or dragging the zoom slider changes the magnification. Drag the view box in the
image thumbnail to move the view of an image. The view box represents the boundaries of the image window. You can
also click in the thumbnail of the image to designate the area of view.
Note: To change the color of the view box, choose Panel Options from the Navigator panel menu. Choose a color from the
Color menu or click the color swatch to open the Color Picker and select a custom color. Click
ABCD E
OK.
37
The Navigator panel
A. Zoom text box B. Zoom Out C. Drag the view box to move the view D. Zoom slider E. Zoom In
More Help topics
“Fit an image to the screen” on page 36
Open multiple windows of the same image
In Full Edit, you can open multiple windows to display different views of the same file. A list of open windows appears
in the Window menu, and thumbnails of each open image appear in the Photo Bin. Available memory may limit the
number of windows per
❖ Choose View > New Window For [image filename]. Depending on the position of the first window, you may have
to move the second window to view both simultaneously.
You can use the New Window command when you’re working with a zoomed image to see what the image will look
like at 100% size in a separate window.
image.
View and arrange multiple windows
❖ In Full Edit, do one of the following:
• To display windows stacked and cascading from the upper left to the lower right of the screen, choose Window >
> Cascade.
Images
• To display windows edge to edge, choose Window > Images > Tile. As you close images, the open windows are
resized to fill the available space.
• To view all open images at the same magnification as the active image, choose Window > Images > Match Zoom.
• To view the same section (upper-left corner, center, lower-right corner, and so on) of all open photos, choose
> Images > Match Location. The view in all windows shifts to match the active (frontmost) image. The
Window
zoom level does not change.
Last updated 7/26/2011
Page 44

USING PHOTOSHOP ELEMENTS 8
Working with files
Close windows
❖ In Full Edit, do one of the following:
• Choose File > Close to close the active window.
• Click the Close button on the title bar of the active window.
• Right-click a thumbnail and choose Close.
• Choose File > Close All to close all open windows.
Guides, grids, and rulers
About rulers, grids, and guides
In Full Edit, rulers, grids, and guides help you position items (such as selections, layers, and shapes) precisely across
the width or length of an image. In Quick Fix, only guides and grids are available.
When visible, rulers appear along the top and left side of the active window. Markers in the ruler display the pointer’s
position when you move it. Changing the ruler origin (the 0, 0 mark on the top and left rulers) lets you measure from
a specific point on the image. The ruler origin also determines the grid’s point of origin.
38
Use the View menu to show or hide the rulers (Full Edit only), the grid, or guide. The View menu also helps you to
enable or disable the snapping of items to the grid or guide.
Change the rulers’ zero origin and settings
❖ In Full Edit, do one of the following:
• To change the rulers’ zero origin, position the pointer over the intersection of the rulers in the upper-left corner of
the window, and drag diagonally down onto the image. A set of cross hairs appears, marking the new origin on the
rulers. The new zero origin will be set where you release the mouse button.
Note: To reset the ruler origin to its default value, double-click the upper-left corner of the rulers.
Dragging to create a new ruler origin
• To change the rulers’ settings, double-click a rule, or choose Photoshop Elements > Preferences > Units & Rulers.
For Rulers, choose a unit of measurement. For Column size, enter values for Width and Gutter. Click
Some layout programs use the column width setting to specify the display of an image across columns. The Image Size
and Canvas Size commands also use this setting.
OK.
Note: Changing the units on the Info panel automatically changes the units on the rulers.
Last updated 7/26/2011
Page 45

USING PHOTOSHOP ELEMENTS 8
Working with files
More Help topics
“Change the size of the canvas” on page 134
“Change print dimensions and resolution without resampling” on page 138
Change the grid settings
1 In Full Edit or Quick Fix, choose Photoshop Elements > Preferences > Guides And Grid.
2 For Color, choose a preset color, or click the color swatch to choose a custom color.
3 For Style, choose the line style for the grid. Choose Lines for solid lines, and choose Dashed Lines, or Dots for
broken lines.
4 For Gridline Every, enter a number value, and then choose the unit of measurement to define the spacing of major
grid lines.
5 For Subdivisions, enter a number value to define the frequency of minor grid lines.
Change the guide settings
1 In Full Edit or Quick Fix, choose Photoshop Elements > Preferences > Guides And Grid.
2 For Color, choose a preset color, or click the color swatch to choose a custom color.
3 For Style, choose the line style for the grid. Choose Lines for solid lines, and Dashed Lines or Dots for broken lines.
39
Saving and exporting images
About saving images and file formats
After you edit an image, you need to save it, or you’ll lose your work. To ensure that all the image data is preserved,
save regular images in Photoshop (PSD) format. Multiple-page creations are always saved in Photo Project (PSE)
format. These formats don’t compress your image data.
Your digital camera may save photos in JPEG format, but it’s better to use the PSD format rather than resave a photo
in JPEG format unless you are ready to share it or use it on a web page. Each time you save in JPEG format, the image
data is compressed, potentially causing some data to be lost. You may start to notice reduced image quality after saving
the file as a JPEG 2-3 times. The disadvantage of saving in PSD format is that the file size will increase significantly
because the file is not compressed.
Photoshop Elements can save images in several file formats, depending on how you plan to use it. If you are working
with web images, the Save For Web command provides many options for optimizing images. If you need to convert
several images to the same file format, or the same size and resolution, use the Process Multiple Files command.
More Help topics
“Using the Save For Web dialog box” on page 261
“Process multiple files” on page 32
Last updated 7/26/2011
Page 46

USING PHOTOSHOP ELEMENTS 8
Working with files
File formats for saving
Photoshop Elements can save images in the following file formats:
BMP A standard Windows image format. You can specify either Windows or OS/2® format, and a bit depth for the
image. For 4-bit and 8-bit images using Windows format, you can also specify RLE compression.
CompuServe GIF (Graphics Interchange Format) Multiple layer documents can be saved as animated GIFs, using the
Save For Web command. Commonly used to display graphics and small animations in web pages, GIF is a compressed
format designed to minimize file size and transfer time. GIF supports only 8-bit color images (256 or fewer colors).
You can also save an image as a GIF file using the Save For Web command.
JPEG (Joint Photographic Experts Group) Used to save photographs, JPEG format retains all color information in an
image, but compresses file size by selectively discarding data. You can choose the level of compression. Higher
compression results in lower image quality and a smaller file size; lower compression results in better image quality
and a larger file size. JPEG is a standard format for displaying images over the web.
PCX A bitmap format widely supported on various platforms.
Photoshop (PSD) The standard Photoshop Elements format for images. Use this format for edited images to save your
work and preserve all your image data and layers in a single page file.
Photo Project Format (PSE) The standard Photoshop Elements format for multiple page creations. Use this format for
photo creations to save your work and preserve all your image data and layers in a multiple page file.
40
Photoshop PDF (Portable Document Format) A cross-platform and cross-application file format. PDF files accurately
display and preserve fonts, page layouts, and both vector and bitmap graphics.
Note: PDF and PDP are the same except that PDPs are opened in Adobe Photoshop® and PDFs are opened in Acrobat.
Photoshop EPS (Encapsulated PostScript) Used to share Photoshop files with many illustration and page-layout
programs. For best results, print documents with EPS images to PostScript-enabled printers.
PICT Used with Mac OS® graphics and page-layout applications to transfer images between applications. PICT is
especially effective at compressing images with large areas of solid color.
When saving an RGB image in PICT format, you can choose either 16-bit or 32-bit pixel resolution. For a grayscale
image, you can choose from 2, 4, or 8 bits per pixel.
Pixar Used for exchanging files with Pixar image computers. Pixar workstations are designed for high-end graphics
applications, such as those used for three-dimensional images and animation. Pixar format supports RGB and
grayscale images.
PNG (Portable Network Graphics) Used for lossless compression and for displaying images on the web. Unlike GIF,
PNG supports 24-bit images and produces background transparency without jagged edges; however, some web
browsers do not support PNG images. PNG preserves transparency in grayscale and RGB images.
Photoshop Raw Used for transferring images between applications and computer platforms when other formats don’t
work.
Scitex CT Used in the prepress industry.
TGA (Targa) Designed for systems using the Truevision video board. When saving an RGB image in this format, you
can choose a pixel depth of 16, 24, or 32 bits per pixel and RLE compression.
TIFF (Tagged-Image File Format) Used to exchange files between applications and computer platforms. TIFF is a
flexible bitmap image format supported by most paint, image-editing, and page-layout applications. Most desktop
scanners can produce TIFF files.
Last updated 7/26/2011
Page 47

USING PHOTOSHOP ELEMENTS 8
Working with files
In addition, Photoshop Elements can open files in several other older formats: Photoshop 2.0, Pixel Paint, Alias Pix,
IFF format, Portable bitmap, SGI® RGB, Soft Image, Wavefront RLA, and ElectricImage. You can also save files in the
following formats: Alias PIX, IFF format, Photoshop 2.0, and PICT Resource.
More Help topics
“Optimized file formats for the web” on page 262
Save changes in different file formats
You can set options for saving image files, such as the format and whether to preserve layers in an image. Depending
on the format you select, other options may be available to set.
More Help topics
“Set file-saving preferences” on page 44
“About transparent and matted web images” on page 269
“About the JPEG format” on page 263
“Optimized file formats for the web” on page 262
41
“About the GIF format” on page 264
“Convert an image to indexed color” on page 168
“About the PNG-8 format” on page 264
“About the PNG-24 format” on page 265
Change file-saving options
1 Choose File > Save.
2 To change file-saving options, such as the filename or format, choose File > Save As and set any of the following
file-saving options.
Note: Some file formats open another dialog box with additional options.
File Name Specifies the filename for the saved image.
Format Specifies the file format for the saved image.
Layers Preserves all layers in the image. If this option is disabled or unavailable, there are no layers in the image. A
warning icon
at the Layers check box indicates that the layers in your image will be flattened or merged for the
selected format. In some formats, all layers are merged. To preserve layers, select another format.
As a Copy Saves a copy of the file while keeping the current file open. The copy is saved to the folder containing the
currently open file.
Embed Color Profile Embed a color profile in the image for certain formats.
Thumbnail Saves thumbnail data for the file. This option is available when the Ask When Saving option for Image
Previews is set in the Preferences dialog box.
Note: NIX file servers are often used to help send information over networks and the Internet. Some of these servers do
not recognize uppercase extensions. To make sure your images arrive at their destinations, use lowercase extensions.
Last updated 7/26/2011
Page 48

USING PHOTOSHOP ELEMENTS 8
Working with files
Save a file in GIF format
1 Choose File > Save As.
2 Specify a filename and location, and choose CompuServe GIF Format from the format list.
Your image is saved as a copy in the specified directory (unless it's already in indexed-color mode).
3 If you are creating an animated GIF, select the Layers As Frames option. Each layer in the final file will play as a
single frame in the animated GIF.
4 Click Save. If your original image is RGB, the Indexed Color dialog box appears.
5 If necessary, specify indexed color options in the Indexed Color dialog box and click OK.
6 In the GIF Options dialog box, select a row order for the GIF file and click OK:
Normal Displays the image in a browser only when the image is fully downloaded.
Interlaced Displays as a series of low-resolution versions of the image while the full image file is downloaded to the
browser. Interlacing can make downloading time seem shorter and assures viewers that downloading is in progress.
However, interlacing also increases file size.
Save a file in JPEG format
1 Choose File > Save As, and choose JPEG from the format list.
Note: You cannot save indexed-color and bitmap mode images in JPEG format.
42
2 Specify a filename and location, select file-saving options, and click Save.
The JPEG Options dialog box opens.
3 If the image contains transparency, select a Matte color to simulate the appearance of background transparency.
4 Specify image compression and quality by choosing an option from the Quality menu, dragging the Quality slider,
or entering a value between 0 and 12.
5 Select a format option:
Baseline (Standard) Uses a format that is recognizable to most web browsers.
Baseline Optimized Optimizes the color quality of the image and produces a slightly smaller file size. This option is
not supported by all web browsers.
Progressive Creates an image that is gradually displayed as it is downloaded to a web browser. Progressive JPEG files
are slightly larger in size, require more RAM for viewing, and are not supported by all applications and web browsers.
6 To view the estimated download time of the image, select a modem speed from the Size pop-up menu. (The Size
preview is available only when Preview is selected.)
Note: If a Java application cannot read your JPEG file, try saving the file without a thumbnail preview.
7 Click OK.
Save a file in Photoshop EPS format
1 Choose File > Save As, and choose Photoshop EPS from the format list.
2 Specify a filename and location, select file-saving options, and click Save.
3 In the EPS Options dialog box, set the following options:
• For Preview, choose TIFF (8 bits/pixel) for better display quality, or choose TIFF 1-bit/pixel for a smaller file size.
• For Encoding, choose an encoding method: ASCII, Binary, or a JPEG option.
Last updated 7/26/2011
Page 49

USING PHOTOSHOP ELEMENTS 8
Working with files
4 To display white areas in the image as transparent, select Transparent Whites. This option is available only for
images in bitmap mode.
5 If you want to apply anti-aliasing to a printed low-resolution image, select Image Interpolation.
6 Click OK.
Save a file in Photoshop PDF format
1 Choose File > Save As, and choose Photoshop PDF from the format list.
2 Specify a filename and location, select file-saving options, and click Save.
3 In the Save Adobe PDF dialog box, select a compression method. (See “Understanding file compression” on
page 44.)
4 Choose an option from the Image Quality menu.
5 To view the PDF file, select View PDF After Saving to launch Adobe Acrobat® or Adobe® Reader (depending on
which application is installed on your computer).
6 Click Save PDF.
If you've made changes to an Acrobat Touchup file, but the changes are not reflected when you open the file, check the
Saving File preferences dialog box. Choose Photoshop Elements > Preferences > Saving Files, and then choose Save
Over Current File from the On First Save menu.
43
Save a file in PNG format
1 Choose File > Save As, and choose PNG from the format list.
2 Specify a filename and location, select file-saving options, and click Save.
3 In the PNG Options dialog box, select an Interlace option and click OK.
None Displays the image in a web browser only after it is completely downloaded.
Interlaced Displays low-resolution versions of the image while the full image file is downloading to the browser.
Interlacing can make downloading time seem shorter and assures viewers that downloading is in progress. However,
interlacing also increases file size.
Save a file in TIFF format
1 Choose File > Save As, and choose TIFF from the format list.
2 Specify a filename and location, select file-saving options, and click Save.
3 In the TIFF Options dialog box, select options:
Image Compression Specifies a method for compressing the composite image data.
Pixel Order Writes the TIFF file with the channels data interleaved or organized by plane. Theoretically, the Planar
order file can be read and written faster, and offers a little better compression.
Byte Order Most recent applications can read files using Mac or Windows byte order. However, if you don’t know
what kind of program the file may be opened in, select the platform on which the file will be read.
Save Image Pyramid Preserves multiresolution information. Photoshop Elements does not provide options for
opening multiresolution files; the image opens at the highest resolution within the file. However, Adobe InDesign® and
some image servers provide support for opening multiresolution formats.
Save Transparency Preserves transparency as an additional alpha channel when the file is opened in another
application. (Transparency is always preserved when the file is reopened in Photoshop
Layer Compression Specifies a method for compressing data for pixels in layers (as opposed to composite data).
Elements.)
Last updated 7/26/2011
Page 50

USING PHOTOSHOP ELEMENTS 8
Working with files
Many applications cannot read layer data and skip it when opening a TIFF file. Photoshop Elements can read layer
data in TIFF files. Although files that include layer data are larger than those that don’t, saving layer data eliminates
the need to save and manage a separate PSD file to hold the layer data.
Understanding file compression
Many image file formats compress image data to reduce file size. Lossless compression preserves all image data without
removing detail; lossy compression removes image data and loses some detail.
The following are commonly used compression techniques:
RLE (Run Length Encoding) Lossless compression technique that compresses the transparent portions of each layer in
images with multiple layers containing transparency.
LZW (Lemple-Zif-Welch) Lossless compression that provides the best results in compressing images that contain large
areas of single color.
JPEG Lossy compression that provides the best results with photographs.
CCITT A family of lossless compression techniques for black-and-white images.
ZIP Lossless compression technique that is most effective for images that contain large areas of a single color.
44
Set file-saving preferences
❖ Choose Photoshop Elements Preferences > Saving Files, and set the following options.
On First Save Gives you the ability to control how files are saved:
• Save Over Current File (default) does not open the Save As dialog box. If you open either the original file or the
edited copy, the first save overwrites the original (as do all subsequent saves in that edit session).
• Always Ask opens the Save As dialog box the first time you edit and save the original file. All subsequent saves
overwrite the previous version until you close the file and then reopen it to make further edits. If you open the
edited copy, the first save opens the Save As dialog box.
Image Previews Saves a preview image with the file. Select any one of the following:
• Never Save to save files without previews.
• Select Always Save to save files with specified previews.
• Ask When Saving to assign previews on a file-by-file basis.
Append File Extension Specifies an option for the three-character file extensions that indicate a file’s format. Generally
it’s a good idea to keep this option set to Use Lower Case.
Prefer Adobe Camera Raw For Supported Raw Files Ensures that all the supported raw files are opened with Adobe
Raw instead of other software. Select this option if you have added other plug-ins to Plug-Ins folder.
Ignore Camera Data (EXIF) Profiles Select this option to automatically discard any color profiles used by your digital
camera. The color profile you use in Photoshop
Maximize PSD File Compatibility Saves a composite image in a layered Photoshop file so that it can be imported or
opened by a wider range of applications: Select Never to skip this step, Always to automatically save the composite, or
Ask if you’d like to be prompted each time you save a file.
Elements is saved with the image.
Recent File List Contains: _ Files Specifies how many files are available in the File > Open Recently Edited File
submenu. Enter a value from 0 to 30. The default value is 10.
Last updated 7/26/2011
Page 51

USING PHOTOSHOP ELEMENTS 8
Working with files
More Help topics
“Save changes in different file formats” on page 41
Guided Edit
The Guided Edit mode provides more structure around specific tasks, helping you accomplish those tasks more easily,
and with explanation throughout the process. The Guided Edit tab is located in the Edit tab of the Panel Bin.
With Guided Edit, you can do the following:
Basic Photo Edits Crop, recompose, rotate, straighten, and sharpen photos.
Lighting And Exposure Lighten, darken, adjust brightness and contrast, and adjust levels.
Color Correction Enhance colors, remove a color cast, and correct skin tone.
Guided Activities Touch up scratches, blemishes or tear marks, guide for a photo editing, and fix keystone distortion.
Photomerge Intelligently merge multiple images of group shots or faces.
Note: Sometimes the Guided Edits available vary in your version of Photoshop Elements.
Automated Actions The Action Player in the Automated Actions Guided Edit can play actions created in Photoshop.
45
Photographic Effects You can give special effects to a photo. For example, you can convert a photo to an old-
fashioned photo.
Use the Guided Edit options
1 On the Edit Full tab, click the triangle and select Edit Guided button.
2 Choose from the list of Guided Edits.
3 Do one of the following:
• Follow the steps that appear and click Done.
• Click Cancel to choose a different Guided Edit, or go back to regular editing.
Note: If you enter a Guided Edit, then click on the “After Only” button at the bottom of the Guided Edit panel to see the
Before and After view of your photo, when you exit the Guided Edit, that view will remain. To reset the view back to After
only (the default), go into another Guided Edit and change it there, or simply click on either Full or Quick modes to reset
to a single view.
The Crop Photo Guided Edit
Use the Crop Photo Guided Edit to crop an image.
You can view the after image only, or view both the before and after images either vertically or horizontally.
Note: You can also use the Cookie Cutter tool to crop an image. For more on the Cookie Cutter tool, see “Use the Cookie
Cutter tool” on page 134.
For more information on cropping, see “Cropping” on page 132.
The Recompose Photo Guided Edit
For more information on the features used in the Recompose Photo Guided Edit, see “Recomposing” on page 160.
Last updated 7/26/2011
Page 52

USING PHOTOSHOP ELEMENTS 8
Working with files
The Rotate and/or Straighten Guided Edit
Use the Rotate and/or Straighten Guided Edit to rotate a picture in 90-degree increments or draw a line through an
image to realign it.
You can view the after image only, or view both the before and after images either vertically or horizontally.
For more on rotating an image, see “Rotate or flip an item” on page 156.
For more on straightening an image, see “Straighten an image” on page 135
The Sharpen Photo Guided Edit
Use the Sharpen Photo Guided Edit to sharpen an image.
You can view the after image only, or view both the before and after images either vertically or horizontally.
For more on sharpening images, see “Sharpening overview” on page 153 or “Sharpen an image” on page 153.
The Lighten or Darken Guided Edit
Use the Lighten or Darken Guided Edit to lighten or darken an image.
You can view the after image only, or view both the before and after images either vertically or horizontally.
46
For more on lightening or darking an image, see “Adjusting shadows and light” on page 108.
The Brightness and Contrast Guided Edit
Use the Brightness or Contrast Guided Edit to adjust brightness or contrast in an image.
You can view the after image only, or view both the before and after images either vertically or horizontally.
For more on adjusting brightness and contrast, see “Adjusting shadows and light” on page 108.
The Adjust Levels Guided Edit
For more information on using Levels, see “About Levels adjustments” on page 110.
The Fix Keystone Guided Edit
For more information on the features used in the Fix Keystone Guided Edit, see “Correct camera distortion” on
page 145 and “Freely transform an item” on page 159.
The Enhance Colors Guided Edit
Use the Enhance Colors Guided Edit to enhance the hue, saturation, and lightness in an image.
You can view the after image only, or view both the before and after images either vertically or horizontally.
For more on enhancing colors, see “Adjusting color saturation and hue” on page 119.
The Remove a Color Cast Guided Edit
Use the Remove a Color Cast Guided Edit to correct color casts in an image.
You can view the after image only, or view both the before and after images either vertically or horizontally.
Last updated 7/26/2011
Page 53

USING PHOTOSHOP ELEMENTS 8
Working with files
For more on correcting color casts, see “Correcting color casts” on page 115.
The Correct Skin Tone Guided Edit
Use the Correct Skin Tone Guided Edit to correct skin tones (tan, blush, and ambient light) in an image.
You can view the after image only, or view both the before and after images either vertically or horizontally.
For more on correcting color casts, see “Adjust the color of skin tone” on page 121.
The Touch Up Photo Guided Edit
Use the Touch Up Photo Guided Edit to fix (large or small) flaws in an image (using the Healing Brush or the Spot
Healing Brush).
You can view the after image only, or view both the before and after images either vertically or horizontally.
For more on correcting color casts, see “Fix large imperfections” on page 141 or “Remove spots and small
imperfections” on page 141.
The “Guide for Editing a Photo” Guided Edit
Use the “Guide for Editing a Photo” Guided Edit to follow the recommended sequence of applying common editing
steps to your photos. This sequence is how Adobe recommends you make your various edits, and the order in which
you should do them. This will help you get the best results for all of your basic photo retouching tasks.
47
The Photomerge Group Shot Guided Edit
For more information on Photomerge Group Shot, see “Use Photomerge Group Shot” on page 147.
The Photomerge Faces Guided Edit
For more information on Photomerge Faces, see “Use Photomerge Faces” on page 148.
The Photomerge Scene Cleaner Guided Edit
For more information on Photomerge Scene Cleaner, see “Use Photomerge Scene Cleaner” on page 149.
The Photomerge Exposure Guided Edit
For more information on Photomerge Exposure, see “Photomerge Exposure” on page 151.
The Automated Actions Guided Edit
An action is a series of tasks that Photoshop Elements performs with a click of a button. Photoshop Elements comes
with a set of actions. You can also play actions that are created in Photoshop as long as the actions use features
supported by Photoshop
1 In the Editor with the Guided tab selected, make sure that Automated Actions is expanded, and then click Action
Player.
2 Follow the instructions, and choose an action from the menu.
3 Click Play Action.
Elements. Keep in mind that the Automated Actions does not work on all file types or layers.
Last updated 7/26/2011
Page 54

USING PHOTOSHOP ELEMENTS 8
Working with files
Install actions created in Photoshop
The Action Player in the Automated Actions Guided Edit can play actions created in Photoshop. Keep in mind that
you can only play actions that use features supported in Photoshop
❖ Copy the .atn file to the following location, System library/Application Support /Adobe /Photoshop Elements
/8.0/Locale/en_US/Workflow Panels/actions.
The next time you start Photoshop Elements, the action appears in the Automated Actions Guided Edit menu.
Elements.
The Line Drawing Guided Edit
For more information on the features used in Line Drawing Guided Edit, see “Precisely convert to black and white”
on page 123, “About Levels adjustments” on page 110, “Add Noise” on page 192, and “Adjust saturation and hue” on
page 119.
The Old Fashioned Photo Guided Edit
For more information on the features used in the Old Fashioned Guided Edit, see “Using the Effects panel” on
page 173, “Specify the opacity of a layer” on page 61, and “About Levels adjustments” on page 110.
48
The Saturated Slide Film Effect Guided Edit
For more information on saturation adjustment, see “Adjust saturation and hue” on page 119.
Last updated 7/26/2011
Page 55
Chapter 5: Using layers
Layers are useful because they let you add components to an image and work on them one at a time, without
permanently changing your original image. For each layer, you can adjust color and brightness, apply special effects,
reposition layer content, specify opacity and blending values, and so on. You can also rearrange the stacking order, link
layers to work on them simultaneously, and create web animations with layers.
Creating layers
Understanding layers
Layers are like stacked, transparent sheets of glass on which you can paint images. You can see through the transparent
areas of a layer to the layers below. You can work on each layer independently, experimenting to create the effect you
want. Each layer remains independent until you combine (merge) the layers. The bottommost layer in the Layers
panel, the Background layer, is always locked (protected), meaning you cannot change its stacking order, blending
mode, or opacity (unless you convert it into a regular layer).
49
Transparent areas on a layer let you see through to the layers below.
Layers are organized in the Layers panel. It’s a good idea to keep this panel visible whenever you’re working in
Photoshop Elements. With one glance, you can see the active layer (the selected layer that you are editing). You can
link layers, so they move as a unit, helping you manage layers. Because multiple layers in an image increases the file
size, you can reduce the file size by merging layers that you’re done editing. The Layers panel is an important source
of information as you edit photos. You can also use the Layer menu to work with layers.
Ordinary layers are pixel-based (image) layers. There are several other layer types you can use to create special effects:
Fill layers Contain a color gradient, solid color, or pattern.
Adjustment layers Enable you to fine-tune color, brightness, and saturation without making permanent changes to
your image (until you flatten, or collapse, the adjustment layer).
Type layers and shape layers Let you create vector-based text and shapes.
You can’t paint on an adjustment layer, although you can paint on its mask. To paint on fill or type layers, you first
convert them into regular image layers.
Last updated 7/26/2011
Page 56
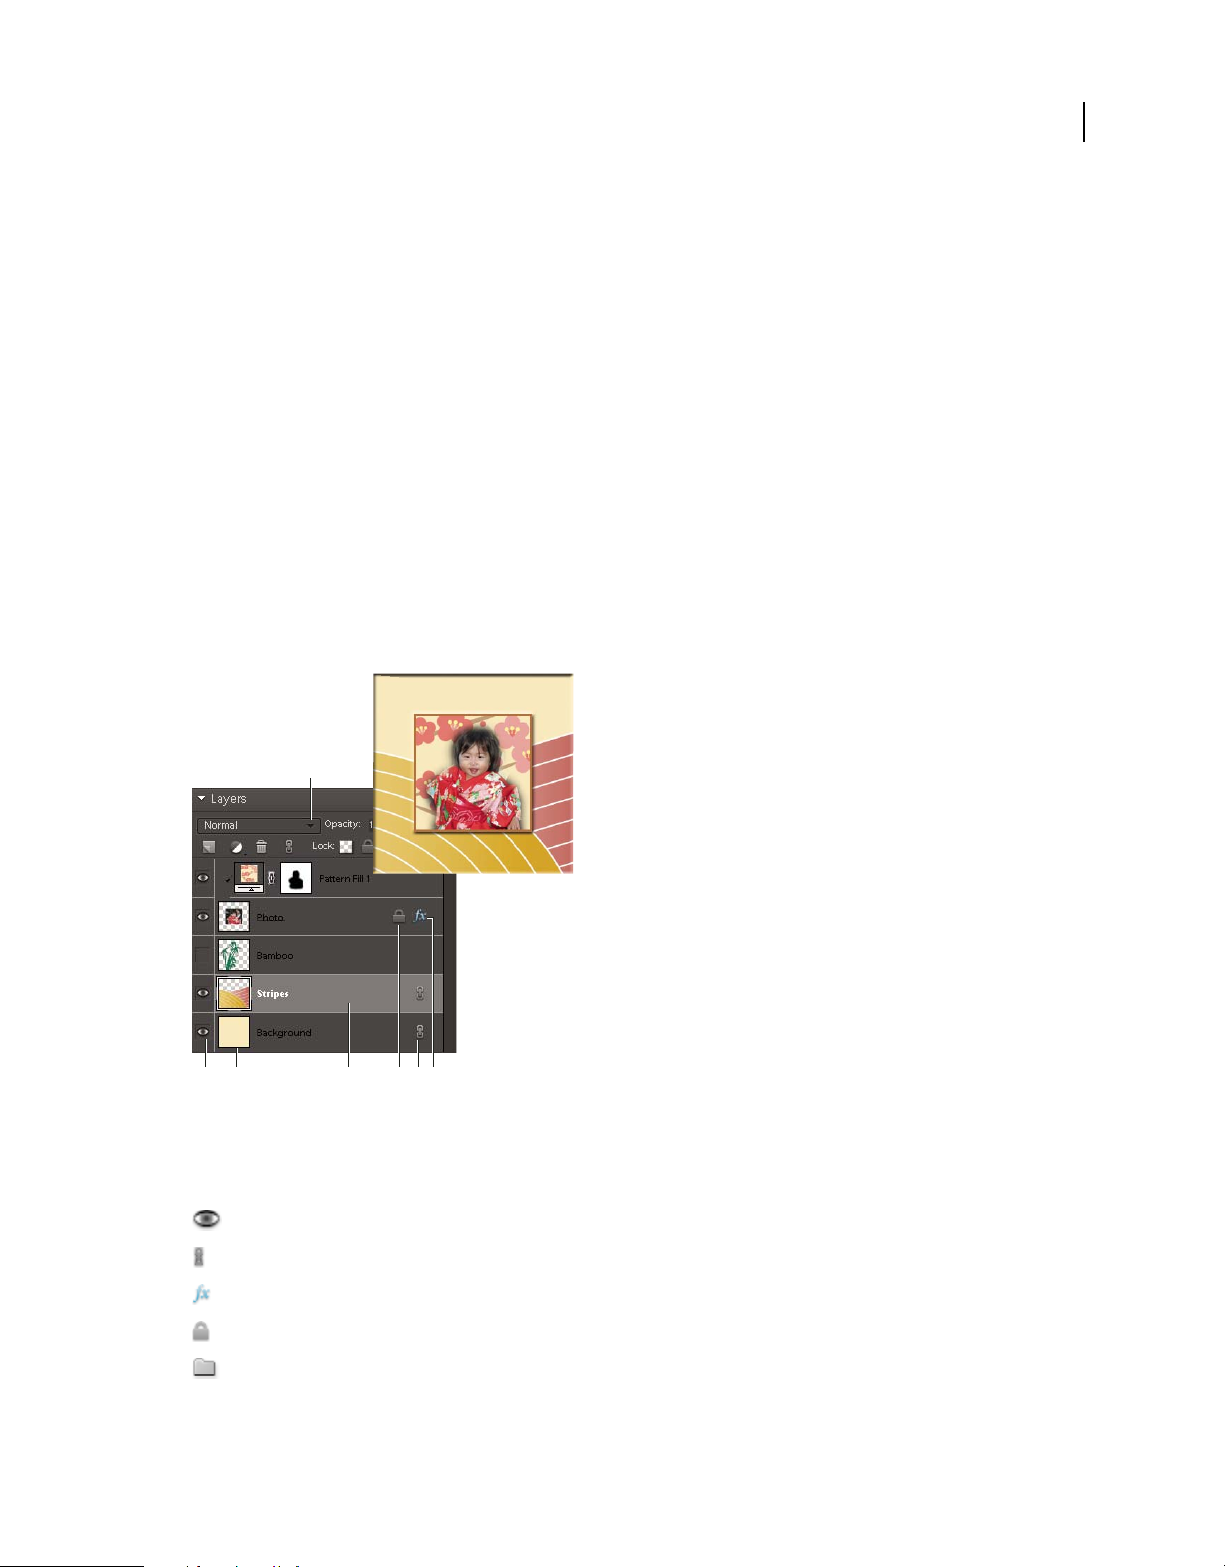
USING PHOTOSHOP ELEMENTS 8
Using layers
More Help topics
“About adjustment and fill layers” on page 62
“About layer clipping masks” on page 67
“Lock or unlock a layer” on page 54
“About opacity and blending options in layers” on page 60
About the Layers panel
The Layers panel lists all layers in an image, from the top layer to the Background layer at the bottom. You can drag
the panel by its title out of the Panel Bin to keep it visible as you work with it.
The active layer, or the layer that you are working on, is highlighted for easy identification. As you work in an image,
it’s a good idea to check which layer is active to make sure that the adjustments and edits you perform affect the correct
layer. For example, if you choose a command and nothing seems to happen, check to make sure that you’re looking at
the active layer.
Using the icons in the panel, you can accomplish many tasks—such as creating, hiding, linking, locking, and deleting
layers. With some exceptions, your changes affect only the selected, or active, layer, which is highlighted.
50
BAC D FE G
Layers panel
A. Blending mode menu B. Show/Hide layer C. Layer thumbnail D. Highlighted layer is active layer E. Locked layer F. Layer is linked to
another layer G. Layer has style applied
In the list of layers, the panel shows a thumbnail, a title, and one or more icons that give information about each layer:
The layer is visible. Click the eye to show or hide a layer. (Hidden layers are not printed.)
The layer is linked to the active layer.
The layer has a style applied to it. Click to edit the layer style in the Style Settings dialog box.
The layer is locked.
The image contains layer groups and was imported from Photoshop. Photoshop Elements doesn’t support layer
groups and displays them in their collapsed state. You must simplify them to create an editable image.
You use the buttons at the bottom of the panel to perform actions:
Last updated 7/26/2011
Page 57

USING PHOTOSHOP ELEMENTS 8
Using layers
Create a new layer.
Create a new fill or adjustment layer.
Delete a layer.
The layer is linked to another layer.
Lock transparency.
Lock all layers.
Also at the top are the panel Blending Mode menu (Normal, Dissolve, Darken, and so on), an Opacity text box, and
panel options.
More Help topics
“About adjustment and fill layers” on page 62
“About opacity and blending options in layers” on page 60
“Simplify a layer” on page 55
Adding layers
Newly added layers appear above the selected layer in the Layers panel. You can add layers to an image by using any
of the following methods:
51
• Create new, blank layers or turn selections into layers.
• Convert a background into a regular layer or vice versa.
• Paste selections into the image.
• Use the Type tool or a shape tool.
• Duplicate an existing layer.
You can create up to 8000 layers in an image, each with its own blending mode and opacity. However, memory
constraints may lower this limit.
More Help topics
“About text” on page 234
“About shapes” on page 241
“Delete a layer” on page 55
Create and name a new blank layer
❖ Do any of the following:
• To create a new layer with default name and settings, click the Create A New Layer button at the button of the
Layers panel. The resulting layer uses Normal mode with 100% opacity, and is named according to its creation
order. (To rename the new layer, double-click it and type a new name.)
• To create a new layer and specify a name and options, choose Layer > New > Layer, or choose New Layer from the
panel menu in the Layers panel. Specify a name and other options, and then click OK.
The new layer is automatically selected and appears in the panel above the layer that was last selected.
Last updated 7/26/2011
Page 58

USING PHOTOSHOP ELEMENTS 8
Using layers
More Help topics
“Copy a layer from one image to another” on page 56
“Delete a layer” on page 55
“Duplicate a layer within an image” on page 56
“Specify a blending mode for a layer” on page 61
“Specify the opacity of a layer” on page 61
Create a new layer from part of another layer
You can move part of an image from one layer to a newly created one, leaving the original intact.
1 Select an existing layer, and make a selection.
2 Choose one of the following:
• Layer > New > Layer Via Copy to copy the selection into a new layer.
• Layer > New > Layer Via Cut to cut the selection and paste it into a new layer.
The selected area appears in a new layer in the same position relative to the image boundaries.
52
Creating a new layer by copying part of another layer and pasting it into a new layer
More Help topics
“Duplicate a layer within an image” on page 56
“About selections” on page 80
Convert the Background layer into a regular layer
The Background layer is the bottom layer in an image. Other layers stack on top of the Background layer, which usually
(but not always) contains the actual image data of a photo. To protect the image, the Background layer is always locked.
If you want to change its stacking order, blending mode, or opacity, you must first convert it into a regular layer.
1 Do one of the following:
• Double-click the Background layer in the Layers panel.
• Choose Layer > New > Layer From Background.
Last updated 7/26/2011
Page 59

USING PHOTOSHOP ELEMENTS 8
Using layers
• Select the Background layer, and choose Duplicate Layer from the More menu in the Layers panel to leave the
Background layer intact and create a copy of it as a new layer.
You can create a duplicate layer of the converted Background layer no matter how you convert the layer; simply select
the converted Background layer and choose Duplicate Layer from the More menu.
2 Name the new layer.
If you drag the background eraser tool onto the Background layer, it is automatically converted into a regular layer,
and erased areas become transparent.
Make a layer the Background layer
You can’t convert a layer into the Background layer if the image already has a Background layer. In this case, you must
first convert the existing Background layer into a regular layer.
1 Select a layer in the Layers panel.
2 Choose Layer > New > Background From Layer.
Any transparent areas in the original layer are filled with the background color.
53
Editing layers
Select a layer
Any change you make to an image only affects the active layer. If you don’t see the desired results when you manipulate
an image, make sure that the correct layer is selected.
❖ Do one of the following:
• In the Layers panel, select a layer’s thumbnail or name.
• To select more than one layer, hold down the Command key and click each layer.
To select layers interactively as you use the Move tool, select Auto Select Layer in the options bar. To see which layer
will be highlighted, select Show Highlight On Rollover. Drag to select multiple layers at a time.
More Help topics
“Understanding layers” on page 49
“Select all opaque areas in a layer” on page 62
“Copy selections with the Move tool” on page 95
Show or hide a layer
In the Layers panel, the eye icon in the leftmost column next to a layer means that the layer is visible.
1 Choose Window > Layers if the Layers panel is not already open.
2 Do one of the following:
• To hide a layer, click its eye icon. Click in the eye column again to show the layer.
• Drag through the eye column to show or hide more than one layer.
Last updated 7/26/2011
Page 60

USING PHOTOSHOP ELEMENTS 8
Using layers
• To display just one layer, Option-click the eye icon for that layer. Option-click in the eye column again to show all
the layers.
More Help topics
“About the Layers panel” on page 50
Resize or hide layer thumbnails
1 Choose Panel Options from the More menu in the Layers panel.
2 Select a new size, or select None to hide the thumbnails. Then click OK.
More Help topics
“About the Layers panel” on page 50
Lock or unlock a layer
You can fully or partially lock layers to protect their contents. When a layer is locked, a lock icon appears to the right
of the layer name, and the layer cannot be deleted. Except for the Background layer, you can move locked layers to
different locations in the stacking order of the Layers panel.
54
❖ Select the layer in the Layers panel, and do one of the following:
• Click the Lock All icon at the bottom of the Layers panel to lock all layer properties. Click the icon again to
unlock them.
• Click the Lock Transparency icon at the bottom of the Layers panel to lock the transparent areas of the layer, so
that no painting occurs in them. Click the icon again to unlock.
Note: For type and shape layers, transparency is locked by default and cannot be unlocked without first simplifying the
layer.
More Help topics
“About the Layers panel” on page 50
Rename a layer
As you add layers to an image, it’s helpful to rename layers according to their content. Use descriptive layer names so
that you can easily identify layers in the Layers panel.
Note: You can’t rename the Background layer unless you change it into a normal layer.
❖ Double-click the layer’s name in the Layers panel, and enter a new name.
More Help topics
“Understanding layers” on page 49
“About the Layers panel” on page 50
“Convert the Background layer into a regular layer” on page 52
Last updated 7/26/2011
Page 61

USING PHOTOSHOP ELEMENTS 8
Using layers
Simplify a layer
You simplify a smart object, frame layer, type layer, shape layer, solid color layer, gradient layer, or pattern fill layer
(or a layer group imported from Photoshop) by converting it into an image layer. You need to simplify these layers
before you can apply filters to them or edit them with the painting tools. However, you can no longer use the type- and
shape-editing options on simplified layers.
1 Select a type layer, shape layer, fill layer, or a Photoshop layer group in the Layers panel.
2 Simplify the layer or imported layer group:
• If you selected a shape layer, click Simplify in the options bar.
• If you selected a type, shape, or fill layer, or a Photoshop layer group, choose Simplify Layer from either the Layer
menu or the Layers panel More menu.
More Help topics
“About adjustment and fill layers” on page 62
“Understanding layers” on page 49
Delete a layer
Deleting layers that you no longer need reduces the size of your image file.
55
1 Select the layer in the Layers panel.
2 Do one of the following:
• Drag the layer to the Delete Layer icon at the bottom of the Layers panel.
• Click the Delete Layer icon at the bottom of the Layers panel, and click Yes in the delete confirmation dialog box.
To bypass this dialog box, press Option as you click the Delete icon.
• Choose Delete Layer from either the Layer menu or the Layers panel More menu, and click Yes.
More Help topics
“Understanding layers” on page 49
“Create and name a new blank layer” on page 51
Sample color from all visible layers
By default, when you work with certain tools, the color you apply is sampled only from the active layer. With this
default behavior, you can smudge or sample in a single layer even when other layers are visible, and you can sample
from one layer and paint in another one.
If you want to paint using sampled data from all visible layers, do the following:
1 Select the Magic Wand tool, Paint Bucket tool, Smudge tool, Blur tool, Sharpen tool, or Clone Stamp tool.
2 In the options bar, select Sample All Layers.
More Help topics
“Understanding layers” on page 49
“About painting tools” on page 204
Last updated 7/26/2011
Page 62

USING PHOTOSHOP ELEMENTS 8
Using layers
Copying and arranging layers
Duplicate a layer within an image
You can duplicate any layer, including the Background layer, within an image.
❖ Select one or more layers in the Layers panel, and do one of the following to duplicate it:
• To duplicate and rename the layer, choose Layer > Duplicate Layer, or choose Duplicate Layer from the Layers
panel More menu. Name the duplicate layer, and click OK.
• To duplicate without naming, select the layer and drag it to the New Layer button at the bottom of the Layers
panel.
• Right-click the layer name or thumbnail, and choose Duplicate Layer.
More Help topics
“Understanding layers” on page 49
Duplicate one or more layers in another image
You can take any layer, including the Background layer, from one image and duplicate it in another. Keep in mind that
the pixel dimensions of the destination image determine how large the printed copy of the duplicated layer can be.
Also, if the pixel dimensions of the two images are not the same, the duplicated layer may appear smaller or larger than
you’d expect.
56
1 Open the source image. If you plan to copy a layer to an existing image rather than a new one, open the destination
image as well.
2 In the source image’s Layers panel, select the name of the layer or layers you want to duplicate. To select more than
one layer, hold down the Command key and click each layer’s name.
3 Choose Layer > Duplicate Layer, or choose Duplicate Layer from the More menu in the Layers panel.
4 Type a name for the duplicate layer in the Duplicate Layer dialog box, and choose a destination document for the
layer, and then click OK:
• To duplicate the layer in an existing image, choose a filename from the Document pop-up menu.
• To create a new document for the layer, choose New from the Document menu, and enter a name for the new file.
An image created by duplicating a layer has no background.
More Help topics
“Understanding layers” on page 49
“About image size and resolution” on page 137
Copy a layer from one image to another
You can copy any layer, including the Background layer, from one image to another. Keep in mind that the resolution
of the destination image determines how large the printed copy of the layer can be. Also, if the pixel dimensions of the
two images are not the same, the copied layer may appear smaller or larger than you’d expect.
1 Open the two images you want to use.
2 In the Layers panel of the source image, select the layer that you want to copy.
Last updated 7/26/2011
Page 63

USING PHOTOSHOP ELEMENTS 8
Using layers
3 Do one of the following:
• Choose Select > All to select all of the pixels in the layer, and choose Edit > Copy. Then make the destination image
active, and choose Edit
> Paste.
• Drag the layer’s name from the Layers panel of the source image into the destination image.
• Use the Move tool to drag the layer from the source image to the destination image.
The copied layer appears in the destination image, above the active layer in the Layers panel. If the layer you’re
dragging is larger than the destination image, only part of the layer is visible. You can use the Move tool to drag other
sections of the layer into view.
Hold down Shift as you drag a layer to copy it to the same position it occupied in the source image (if the source and
destination images have the same pixel dimensions) or to the center of the destination image (if the source and
destination images have different pixel dimensions).
57
Dragging the bamboo layer to another image
More Help topics
“Understanding layers” on page 49
“About image size and resolution” on page 137
Move the content in a layer
Layers are like stacked images on panes of glass. You can “slide” a layer in a stack to change what portion of its content
is visible in relation to the layers above and below.
1 Select a layer in the Layers panel. To move multiple layers at the same time, link the layers together in the Layers
panel by selecting the layers and then clicking the Link Layers icon
2 Select the Move tool .
3 Do one of the following:
• Drag within the image to slide the selected layer or layers to the desired position.
• Press the arrow keys on your keyboard to move the layer or layers in 1-pixel increments, or press Shift and an arrow
key to move the layer in 10-pixel increments.
• Hold down Shift as you drag to move the layer or layers directly up or down, directly to either side, or on a 45°
diagonal.
More Help topics
“Understanding layers” on page 49
.
Last updated 7/26/2011
Page 64

USING PHOTOSHOP ELEMENTS 8
Using layers
Change the stacking order of layers
The stacking order determines whether a layer appears in front of or behind other layers.
By default, the Background layer must remain at the bottom of the stack. To move the Background layer, you need to
convert it into a regular layer first.
58
Dragging a layer below another layer changes the stacking order
1 In the Layers panel, select one or more layers. To select more than one layer, hold down the Command key and
click each layer.
2 To change the stacking order, do one of the following:
• Drag the layer or layers up or down the Layers panel to the new position.
• Choose Layer > Arrange, and then choose Bring To Front, Bring Forward, Send Backward, or Send To Back.
More Help topics
“Understanding layers” on page 49
“Convert the Background layer into a regular layer” on page 52
Link and unlink layers
When layers are linked, you can move their contents together. You can also copy, paste, merge, and apply
transformations to all linked layers simultaneously. At some point, you may want to edit or move one linked layer. You
can simply unlink the layers to work on one layer at a time
1 Select the layers you’d like to link in the Layers panel. To select more than one layer, hold down the Command key
and click each layer.
2 Click the Link Layer icon at the bottom of the Layers panel. The linked icon appears in the linked layers.
3 To unlink layers, select a linked layer in the Layers panel and click the Link Layers icon at the bottom of the Layers
panel.
Last updated 7/26/2011
Page 65
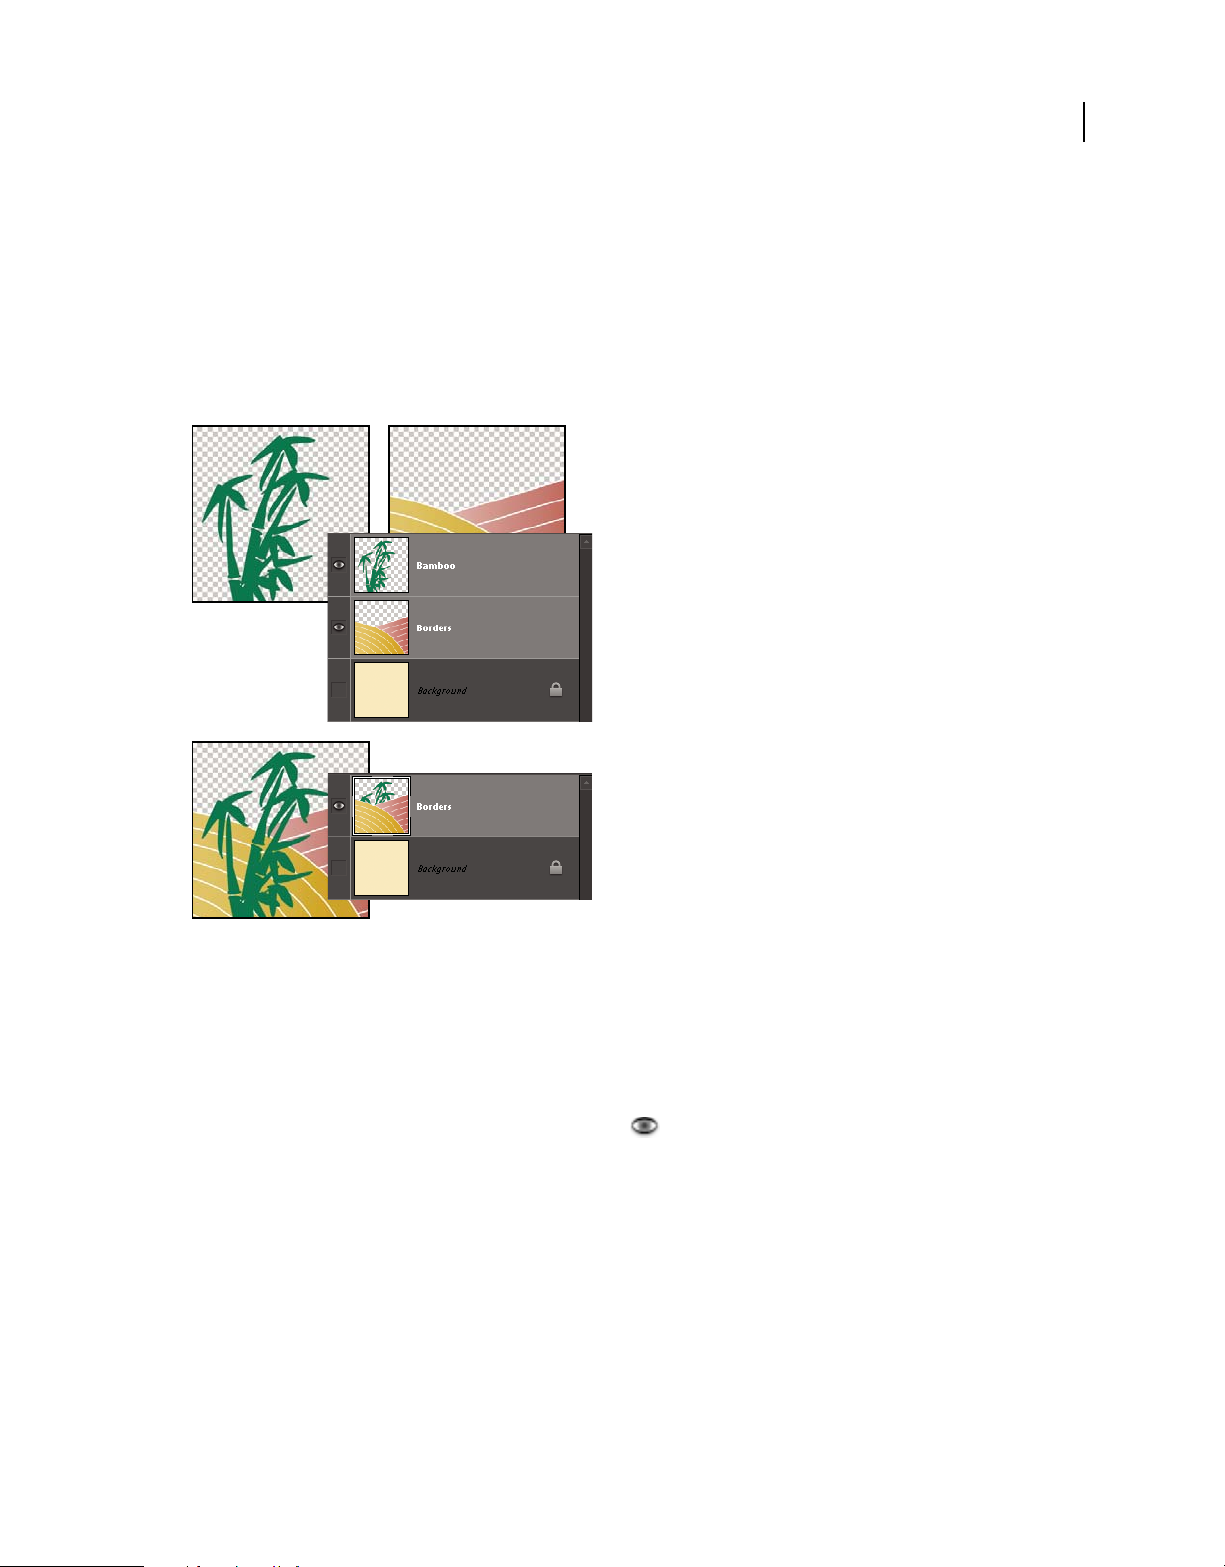
USING PHOTOSHOP ELEMENTS 8
Using layers
More Help topics
“Understanding layers” on page 49
“About layer clipping masks” on page 67
Merge layers
Layers can greatly increase the file size of an image. Merging layers in an image reduces file size. You should merge
layers only after you have finished manipulating them to create the image you want.
59
Example of merging
You can choose to merge only the linked layers, only the visible layers, only a layer with the layer below it, or only
selected layers. You can also merge the contents of all visible layers into a selected layer, yet not delete the other visible
layers (in this case, there is no reduction in file size).
When you complete work on an image, you can flatten it. Flattening merges all visible layers, discards all hidden layers,
and fills transparent areas with white.
1 Go to the Layers panel and make sure that an eye icon appears next to each of the layers you want to merge.
2 Do one of the following:
• To merge selected layers, select more than one layer by holding down the Command key and clicking each layer.
Then choose Merge Layers from the Layers panel More menu.
• To merge a layer with the one below, select the top layer of the pair and choose Merge Down from either the Layer
menu or the Layers panel More menu.
Note: If the bottom layer in the pair is a shape, type, or fill layer, you must simplify the layer. If the bottom layer in the
pair is linked to another layer or is an adjustment layer, you can’t choose Merge Down.
• To merge all visible layers, hide any layers you don’t want to merge and choose Merge Visible from the Layer menu
or Layers panel More menu.
Last updated 7/26/2011
Page 66

USING PHOTOSHOP ELEMENTS 8
Using layers
Note: If the bottom-most merged layer is a type, shape, solid color fill, gradient fill, or pattern fill layer, you must first
simplify the layer.
More Help topics
“Merging adjustment layers” on page 65
“Simplify a layer” on page 55
Merge layers into another layer
Use this procedure when you want to keep the layers you are merging intact. The result is a new merged layer plus all
the original layers.
1 Click the eye icon next to layers you don’t want to merge, and make sure that the eye icon is visible for the layers
you do want to merge.
2 Specify a layer in which to merge all visible layers. You can either create a new layer in which to merge or select an
existing layer in the Layers panel.
3 Hold down Option, and choose Merge Visible from either the Layers menu or the Layers panel More menu.
Photoshop Elements merges a copy of all visible layers into the selected layer.
60
More Help topics
“Understanding layers” on page 49
“Merging adjustment layers” on page 65
Flatten an image
When you flatten an image, Photoshop Elements merges all visible layers into the background, greatly reducing the
file size. Flattening an image discards all hidden layers, and fills any transparent areas with white. In most cases, you
won’t want to flatten a file until you’ve finished editing individual layers.
1 Make sure that the layers you want to keep in your image are visible.
2 Choose Flatten Image from either the Layer menu or the Layers panel More menu.
You can see the difference between your image’s layered file size and its flattened file size by choosing Document Sizes
from the status bar pop-up menu at the bottom of the image window.
More Help topics
“Understanding layers” on page 49
Opacity and blending modes
About opacity and blending options in layers
A layer’s opacity determines the degree to which it obscures or reveals the layer beneath it. A layer with 1% opacity is
nearly transparent, while a layer with 100% opacity is completely opaque. Transparent areas remain transparent
regardless of the opacity setting.
Last updated 7/26/2011
Page 67
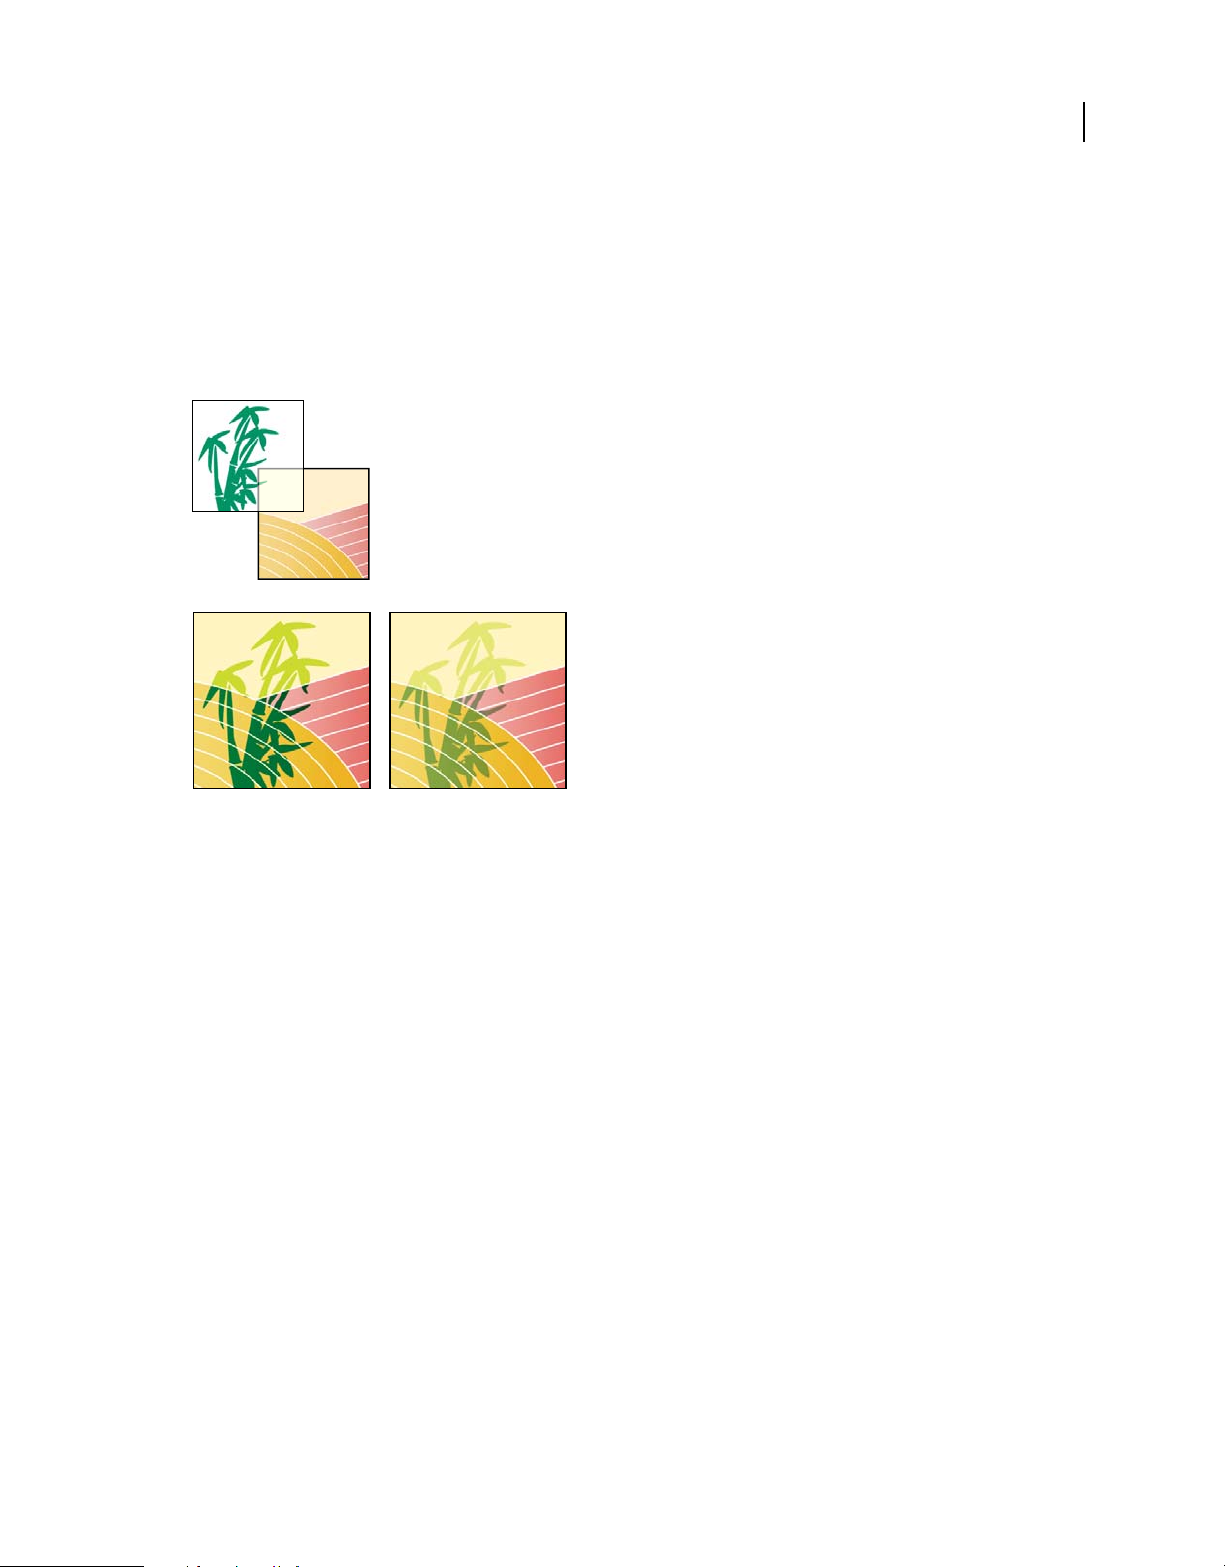
USING PHOTOSHOP ELEMENTS 8
Using layers
You use layer blending modes to determine how a layer blends with the pixels in layers beneath it. Using blending
modes, you can create a variety of special effects.
Keep in mind that a layer’s opacity and blending mode interact with the opacity and blending mode of painting tools.
For example, if a layer uses Dissolve mode at 50% opacity, and you paint on this layer with the Paintbrush tool set to
Normal mode at 100% opacity, the paint appears in Dissolve mode at 50% opacity. Similarly, if a layer uses Normal
mode at 100% opacity, and you use the Eraser tool at 50% opacity, only 50% of the paint disappears from the layer as
you erase.
A
61
B
Blending layers.
A. Bamboo layer and Borders layer B. Bamboo layer with 100% opacity and Color Burn mode C. Bamboo layer with 50% opacity and Color
Burn mode
C
More Help topics
“Understanding layers” on page 49
“About blending modes” on page 205
“About painting tools” on page 204
Specify the opacity of a layer
1 Select the layer in the Layers panel.
2 In the Layers panel, enter a value between 0 and 100 for Opacity, or click the arrow at the right of the Opacity box
and drag the Opacity slider that appears.
More Help topics
“Understanding layers” on page 49
Specify a blending mode for a layer
1 Select the layer in the Layers panel.
2 Choose an option from the Blending Mode menu.
Last updated 7/26/2011
Page 68

USING PHOTOSHOP ELEMENTS 8
Using layers
More Help topics
“Understanding layers” on page 49
“About blending modes” on page 205
Select all opaque areas in a layer
You can quickly select all the opaque areas in a layer. This procedure is useful when you want to exclude transparent
areas from a selection.
1 In the Layers panel, Command-click the layer thumbnail.
2 To add the pixels to an existing selection, press Command+Shift and click the layer thumbnail in the Layers panel.
3 To remove the pixels from an existing selection, press Command+Option and click the layer thumbnail in the
Layers panel.
4 To load the intersection of the pixels and an existing selection, press Command+Option+Shift and click the layer
thumbnail in the Layers panel.
More Help topics
“Understanding layers” on page 49
62
“About selections” on page 80
Customize the transparency grid
The checkerboard grid identifies transparency in a layer. You can change the appearance of this grid; however, do not
change it to solid white because you’ll eliminate the visual distinction between opaque (white) and transparent
(checkerboard).
1 Choose Photoshop Elements > Preferences > Transparency.
2 Choose a pattern size from the Grid Size menu.
3 Choose a pattern color from the Grid Colors menu. To choose a custom color instead, click one of the two boxes
below the Grid Colors menu and select a color from the Color Picker.
More Help topics
“About the Layers panel” on page 50
“Use the Adobe Color Picker” on page 211
Adjustment and fill layers
About adjustment and fill layers
Adjustment layers let you experiment with color and make tonal adjustments without permanently modifying the
pixels in an image. You can think of an adjustment layer as a veil coloring the underlying layers. By default, an
adjustment layer affects all layers below it, although you can change this behavior. When you create an adjustment
layer, the Layers panel displays a white box representing the adjustment for that layer.
Fill layers let you fill a layer with a solid color, gradient, or pattern. Unlike adjustment layers, fill layers do not affect
the layers below them. To paint on a fill layer, you must first convert it (simplify it) into a regular layer.
Last updated 7/26/2011
Page 69

USING PHOTOSHOP ELEMENTS 8
Using layers
Adjustment and fill layers have the same opacity and blending mode options as image layers, and you can move and
reposition them just as you do image layers. By default, adjustment and fill layers are named for their type (for example,
Solid Color fill layer and Invert adjustment layer).
A
B
Create Adjustment Layer menu
A. Fill layers B. Adjustment layers
More Help topics
“Edit the layer masks” on page 65
63
“About opacity and blending options in layers” on page 60
“Simplify a layer” on page 55
Create adjustment layers
1 In the Layers panel, select the topmost layer you want to affect.
2 To confine the effects of the adjustment layer to a selected area in that layer, make a selection.
3 Do one of the following:
• To affect all the layers below the adjustment layer, click the Create New Fill or Adjustment Layer button at the
bottom of the Layers panel. Then, choose one of the following adjustment types. (The first three options in the
menu are fill layers, not adjustment layers.)
Original image, and image with Hue/Saturation adjustment applied. Only the layers under the adjustment layer are affected.
Last updated 7/26/2011
Page 70

USING PHOTOSHOP ELEMENTS 8
Using layers
• To affect only one layer or several successive layers below the adjustment layer, choose Layer > New Adjustment
> [adjustment type]. In the New Layer dialog box, select Use Previous Layer To Create Clipping Mask.
Layer
Levels Corrects tonal values in the image.
Brightness/Contrast Lightens or darkens the image.
Hue/Saturation Adjusts colors in the image. (Available only in color mode or on color layers.)
Gradient Map Maps pixels to the color in the selected gradient.
Photo Filter Adjusts the color balance and color temperature of the image.
Invert Produces a photo negative effect by creating a negative based on the brightness values of the image.
Threshold Renders the image in monochrome, with no gray, so that you can locate the lightest and darkest areas.
Posterize Gives a flat, poster-like appearance to a photo by reducing the number of brightness values (levels) in the
image, thus reducing the number of colors.
4 In the dialog box, specify your options, and click OK. (Invert has no options.)
Selecting Use Previous Layer To Create Clipping Mask in step 3 groups the adjustment layer with the layer
immediately below it and the effect is confined to the group.
5 To add more layers to the group, press Option and position the pointer over the line dividing the bottommost layer
in the group from the layer below it. Click when the pointer changes to two overlapping circles
.
64
More Help topics
“About histograms” on page 105
Create fill layers
1 In the Layers panel, select the layer above which the fill layer should be.
2 To confine the effects of the fill layer to a selected area, make a selection.
3 Do one of the following:
• Click the New Fill or Adjustment Layer button at the bottom of the Layers panel, and choose the fill type you
want to create. (The first three options listed in the panel are fill layers, the others are adjustment layers.)
• Choose Layer > New Fill Layer > [fill
type]. In the New Layer dialog box that appears, click OK.
Solid Color Creates a layer filled with a solid color chosen from the Color Picker.
Gradient Creates a layer filled with a gradient. You can choose a predefined gradient from the Gradient menu. To edit
the gradient in the Gradient Editor, click the color gradient. You can drag within the image window to move the center
of the gradient.
You can also specify the shape of the gradient (Style) and the angle at which it is applied (Angle). Select Reverse to flip
its orientation, Dither to reduce banding, and Align With Layer to use the layer’s bounding box to calculate the
gradient fill.
Pattern Creates a layer filled with a pattern. Click the pattern, and choose a pattern from the pop-up panel. You can
scale the pattern and choose Snap To Origin to position the origin of the pattern with that of the document window.
To specify that the pattern moves with the Fill layer as it is relocated, select Link With Layer. When this option is
selected, you can drag within the image to position the pattern while the Pattern Fill dialog box is open. To create a
new preset pattern after editing pattern settings, click the New Preset button
.
Last updated 7/26/2011
Page 71

USING PHOTOSHOP ELEMENTS 8
Using layers
Edit an adjustment or fill layer
1 Open the adjustment or fill options dialog box by doing one of the following:
• Double-click the adjustment or fill layer’s leftmost thumbnail in the Layers panel.
• Select the layer in the panel and choose Layer > Layer Content Options.
2 Make your changes, and click OK.
Merging adjustment layers
You can merge an adjustment or fill layer in several ways: with the layer below it, with other selected layers, with the
layers in its own group, with the layers it’s linked to, and with all other visible layers. You cannot, however, use an
adjustment layer or fill layer as the base or target layer for a merge.
When you merge an adjustment layer or fill layer with the layer below it, the adjustments are simplified and
permanently applied to the merged layer. The adjustment no longer affects other layers below the merged adjustment
layer. You can also convert (simplify) a fill layer into an image layer without merging it.
Adjustment layers and fill layers with masks (the layer’s rightmost thumbnail in the Layers panel) that contain only
white values do not add significantly to the file size, so you don’t need to merge these adjustment layers to conserve
file space.
65
More Help topics
“Merge layers” on page 59
“Simplify a layer” on page 55
Edit the layer masks
A layer mask prevents sections of a layer, or an entire layer, from being visible. You use the mask to show or hide
sections of an image or an effect. When the layer mask (right thumbnail) attached to an adjustment layer is completely
white, the adjustment effect is applied to all underlying layers. If you don’t want to apply the effect to certain portions
of the underlying layers, paint the corresponding area of the mask with black. When attached to a fill layer, the mask
defines the filled-in area in the fill layer.
Last updated 7/26/2011
Page 72
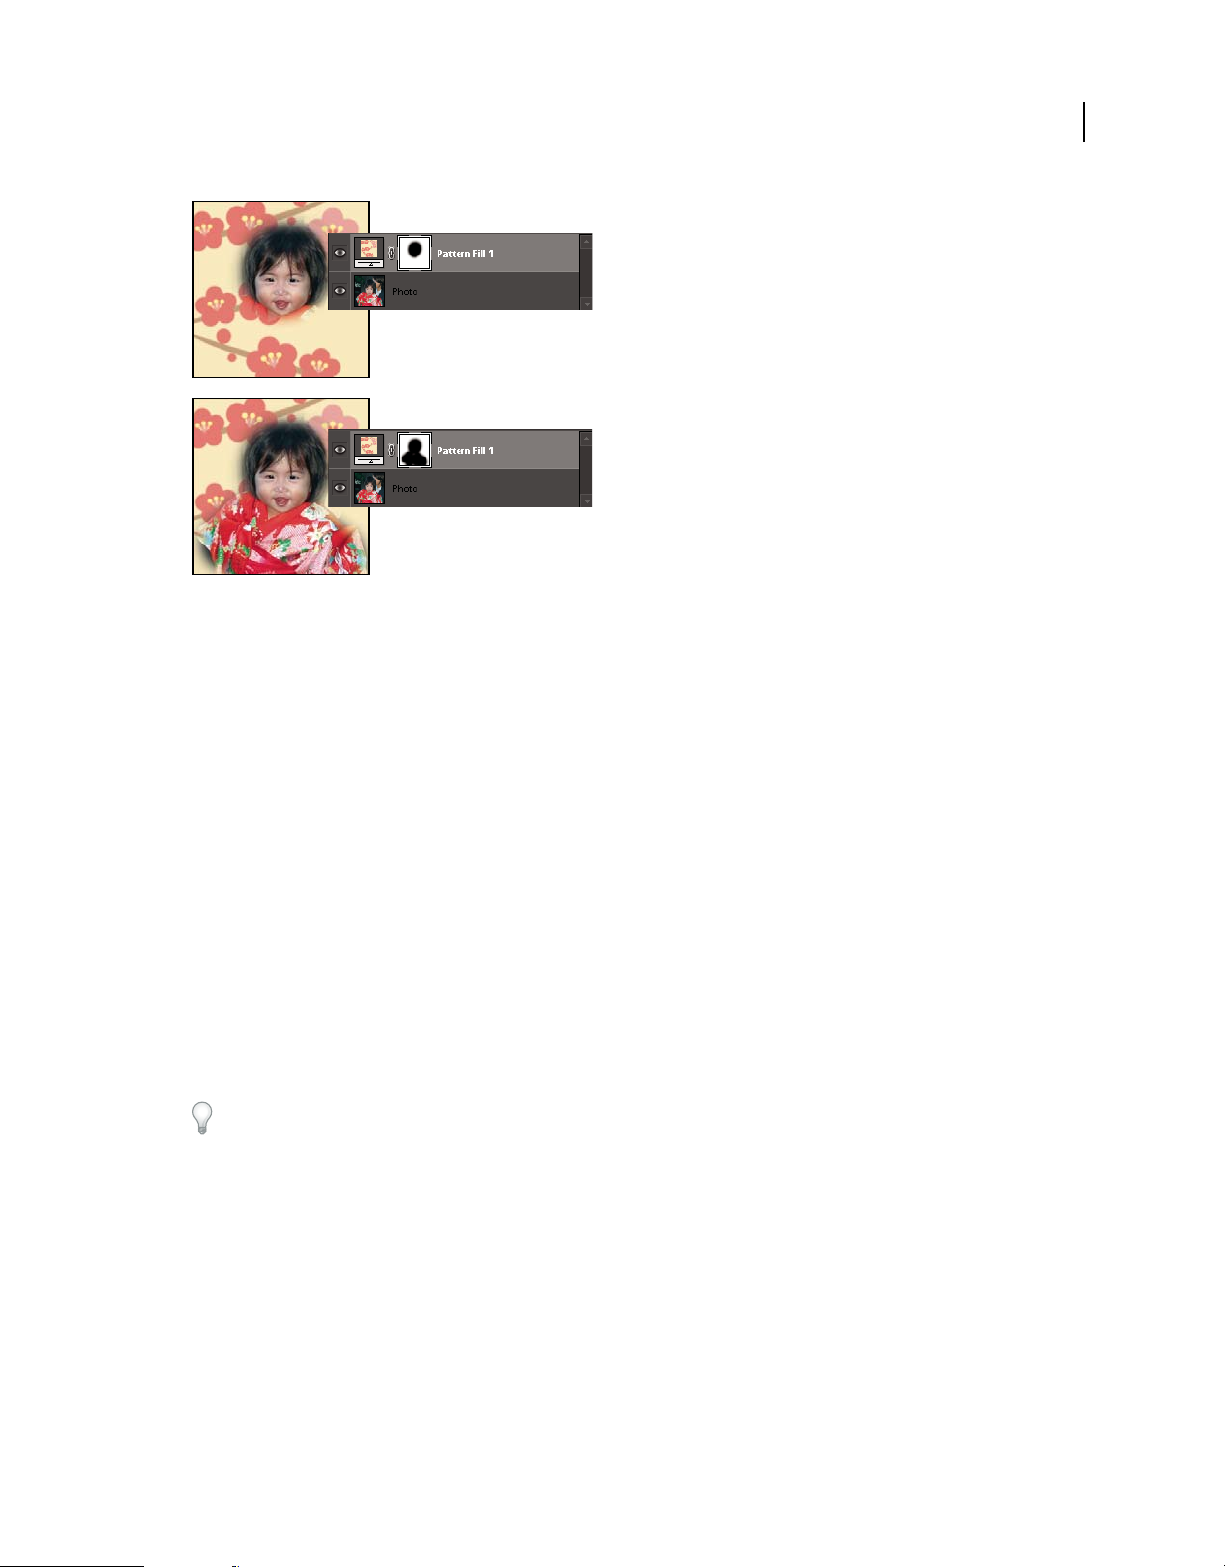
USING PHOTOSHOP ELEMENTS 8
Using layers
Painting a mask with black increases the area protected.
1 Select the adjustment or fill layer in the Layers panel.
2 Select the Paintbrush tool, or any painting or editing tool.
3 Use the following methods to view the layer mask:
• To view only the mask, Option-click the Layer Mask’s thumbnail (the rightmost thumbnail). Option-click the
thumbnail again to redisplay the other layers.
• To view the mask in a red masking color, hold down Option+Shift and click the Layer Mask’s thumbnail (the
rightmost thumbnail). Hold down Option+Shift and click the thumbnail again to turn off the red display.
• To constrain editing to part of the mask, select the corresponding pixels.
4 Edit the layer mask:
• To remove areas of the adjustment effect or fill, paint the layer mask with black.
• To add areas to the adjustment effect or fill, paint the layer mask with white.
• To partially remove the adjustment effect or fill so that it shows in various levels of transparency, paint the layer
mask with gray. (Single-click the foreground color swatch in the toolbox to choose a gray shade from the Swatches
panel.) The extent to which the effect or fill is removed depends on the tones of gray you use to paint. Darker shades
result in more transparency; lighter shades in more opacity.
Shift-click the mask thumbnail (the layer’s rightmost thumbnail) in the Layers panel to turn off the mask; click the
thumbnail again to turn on the mask.
66
More Help topics
“About selections” on page 80
Last updated 7/26/2011
Page 73

USING PHOTOSHOP ELEMENTS 8
Using layers
Layer masks
About layer clipping masks
A clipping mask is a group of layers to which a mask is applied. The bottommost layer, or base layer, defines the visible
boundaries of the entire group. For example, sometimes you have a shape in the base layer, a photograph in the layer
above it, and text in the topmost layer. If you group them, the photograph and text appear only through the shape
outline in the base layer. They also take on the opacity of the base layer.
You can group only successive layers. The name of the base layer in the group is underlined, and the thumbnails for
the overlying layers are indented. Additionally, the overlying layers display the clipping mask icon
You can link the layers in a clipping mask so that they move together.
.
67
The shape in the bottom layer of the clipping mask determines what area of the photo layer above shows through.
More Help topics
“Understanding layers” on page 49
“Link and unlink layers” on page 58
Create a clipping mask
1 Do one of the following:
• Hold down Option, position the pointer over the line dividing two layers in the Layers panel (the pointer changes
to two overlapping circles
•
In the Layers panel, select the top layer of a pair of layers you want to group, and choose Layer > Create Clipping Mask.
2 When making a clipping mask from an existing layer and one you are about to create, first select the existing layer
in the Layers panel. Then choose New Layer from the Layer menu or the Layers panel More menu. In the New Layer
dialog box, select Use Previous Layer To Create Clipping Mask.
The layers in the clipping mask have the opacity and mode attributes of the bottommost base layer in the group.
To change the stacking order of the clipping mask relative to other layers in the image, select all layers in the group.
Then drag the group’s base layer up or down in the Layers panel. (Dragging a layer without selecting all the layers in
the group removes that layer from the group.)
More Help topics
“Link and unlink layers” on page 58
), and then click.
Last updated 7/26/2011
Page 74

USING PHOTOSHOP ELEMENTS 8
Using layers
Remove a layer from a clipping mask
Ungrouping the base layer from the layer above it ungroups all layers in the clipping mask.
❖ Do one of the following:
• Hold down Option, position the pointer over the line separating two grouped layers in the Layers panel (the pointer
changes to two overlapping circles
), and click.
• In the Layers panel, select a layer in the clipping mask, and choose Layer > Release Clipping Mask. This command
removes the selected layer and any layers above it from the clipping mask.
• In the Layers panel, select any layer in the group except the base layer, and do one of the following:
• Drag the layer below the base layer.
• Drag it between two ungrouped layers in the image.
Release clipping masks
1 In the Layers panel, select any layer other than the base layer in the clipping mask.
2 Choose Layer > Release Clipping Mask.
68
Layer styles
About layer styles
Layer styles let you quickly apply effects to an entire layer. In the Effects panel, you can view a variety of predefined
layer styles and apply a style with just a click of the mouse.
Three different layer styles applied to text
The boundaries of the effect are automatically updated when you edit that layer. For example, if you apply a drop
shadow style to a text layer, the shadow changes automatically when you edit the text.
Layer styles are cumulative, which means that you can create a complex effect by applying multiple styles to a layer.
You can apply one style from each style library per layer. You can also change a layer’s style settings to adjust the final
result.
Last updated 7/26/2011
Page 75

USING PHOTOSHOP ELEMENTS 8
Using layers
When you apply a style to a layer, a syle icon appears to the right of the layer’s name in the Layers panel. Layer styles
are linked to the layer contents. When you move or edit the contents of the layer, the effects are modified
correspondingly.
Once you choose Layer > Layer Style > Style Settings, you can edit the settings of a layer’s style or apply other style
settings or attributes available in the dialog box.
Lighting Angle Specifies the lighting angle at which the effect is applied to the layer.
Shadow Distance Specifies the distance of a drop shadow from the layer’s content. You can also set the size and opacity
with the sliders.
Outer Glow Size Specifies the size of a glow that emanates from the outside edges of the layer’s content. You can also
set the opacity with the slider.
Inner Glow Size Specifies the size of a glow that emanates from the inside edges of the layer’s content. You can also set
the opacity with the slider.
Bevel Size Specifies the size of beveling along the inside edges of the layer’s content.
Bevel Direction Specifies the direction of the bevel, either up or down.
Stroke Size Specifies the size of the stroke.
Stroke Opacity Specifies the opacity of the stroke.
69
More Help topics
“Using the Effects panel” on page 173
Work with layer styles
You can apply special effects to a layer, hide or show the styles in a layer, and even change the scale of a layer style (for
example, decrease or increase the size of a glow effect). It’s easy to copy a style from one layer to another.
Apply a layer style
1 Select a layer in the Layers panel.
2 In the Effects panel, choose Layer Styles from the category menu.
3 Do any of the following:
• Select a style, and click Apply.
• Double-click a style.
• Drag a style onto a layer.
Last updated 7/26/2011
Page 76
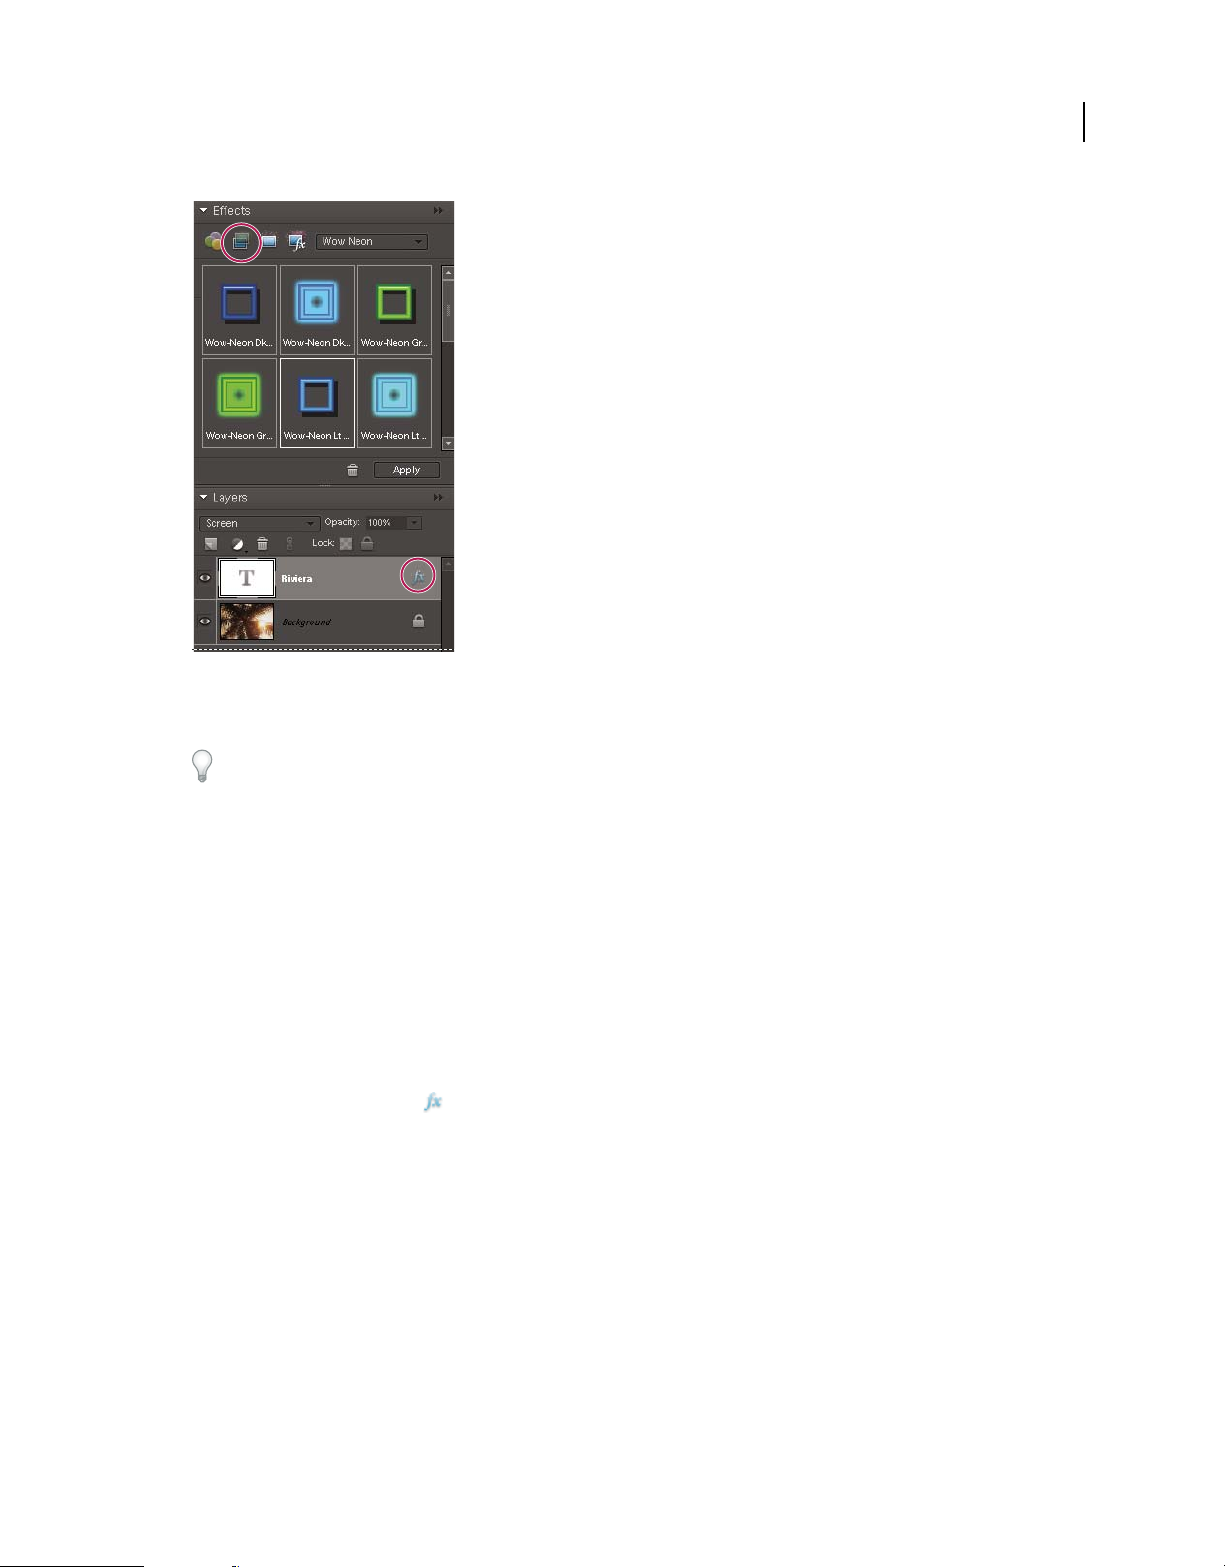
USING PHOTOSHOP ELEMENTS 8
Using layers
A style icon indicates a layer style is applied to the layer.
70
If you don’t like the result, press Command+Z to remove the style, or choose Edit > Undo.
You can also drag the style to the image, where it is applied to the selected layer.
Hide or show all layer styles in an image
❖ Choose one of the following:
• Layer > Layer Style > Hide All Effects.
• Layer > Layer Style > Show All Effects.
Edit a layer’s style settings
You can edit a layer’s style settings to adjust the effect. You can also copy style settings between layers and remove a
style from a layer.
1 Do one of the following:
• Double-click the style icon in the Layers panel.
• Choose Layer > Layer Style > Style Settings.
2 To preview the changes in your image, select Preview.
3 Adjust one or more of the layer style settings or add new ones, and click OK.
Change the scale of a layer style
1 In the Layers panel, select the layer containing style effects you want to scale.
2 Choose Layer > Layer Style > Scale Effect.
3 To preview the changes in your image, select Preview.
4 Specify how much you want to scale the effects. For example, if you are increasing the size of an outer glow, 100%
is the current scale; 200% doubles the glow size. Then click OK.
Last updated 7/26/2011
Page 77

USING PHOTOSHOP ELEMENTS 8
Using layers
Copy style settings between layers
1 In the Layers panel, select the layer containing the style settings you want to copy.
2 Choose Layer > Layer Style > Copy Layer Style.
3 Select the destination layer in the Layers panel, and choose Layer > Layer Style > Paste Layer Style.
Remove a layer style
1 In the Layers panel, select the layer containing the style you want to remove.
2 Choose Layer > Layer Style > Clear Layer Style.
71
Last updated 7/26/2011
Page 78

Chapter 6: Camera raw files
You can process camera raw files from within Photoshop Elements and set certain values that are common to all image
file formats (such as contrast, tonal range, and sharpness). After you process the raw image files, you can open the file,
edit it, and then save it in any format supported by Photoshop
digital negatives, and then working on them in Photoshop
keeping the original “raw” files.
Processing camera raw image files
About camera raw image files
A camera raw file contains unprocessed picture data from a camera’s image sensor. Think of camera raw files as photo
negatives. Many digital cameras can save raw format files. You can open a raw file in Photoshop
and save it, rather than relying on the camera to process the file. Working with camera raw files lets you set the proper
white balance, tonal range, contrast, color saturation, and sharpness.
Elements. By processing the raw files, which are like
Elements, you can experiment with your images while
Elements, process it,
72
You can reprocess the file repeatedly to achieve the results you want. Photoshop Elements doesn’t save your changes
to the original raw file; it saves the last settings you specified before importing the file from your camera to your
computer.
After processing the raw image file using the features of the Camera Raw dialog box, you open the image in
Photoshop
color adjustments. Then, you can save the file in any format supported by Photoshop
To use raw files, you need to set your camera to save files in its own raw file format. When you download the files from
the camera, they have file extensions like NEF, CRW, and so on. Photoshop Elements can open raw files only from
supported cameras. Visit the Adobe website to view a list of supported cameras.
Elements, where you can edit it in the same way that you edit any photo, such as fixing red eye or making
Elements. It’s best to use PSD.
Last updated 7/26/2011
Page 79

USING PHOTOSHOP ELEMENTS 8
Camera raw files
73
A D
G
H
I
J
K
Camera Raw dialog box
A. View options B. Click the Basic or Detail tab to access different controls C. RGB values D. Histogram E. Image settings F. More menu
G. Camera and some EXIF information H. Tools I. Rotate buttons J. Zoom levels K. Bit depth options
CFB
E
Open and process camera raw files
1 Choose File > Open.
2 Browse to select one or more camera raw files, and click Open.
The histogram in the Camera Raw dialog box shows the tonal range of the image at the current settings. As you make
settings adjustments, the histogram automatically updates.
3 (Optional) Adjust the image view using the controls, such as the Zoom tool, and options, such as Shadows and
Highlights, which reveal clipping in the preview area. (See
Note: Selecting Preview displays a preview of the image with the settings changes you make. Deselecting Preview displays
the camera raw image at the original settings of the current tab combined with the settings in the hidden tabs.
4 To rotate the image 90° counter clockwise or 90° clockwise, click the Rotate Image buttons .
5 To apply the settings used in the previous camera raw image or the default settings for your camera, choose an
option from the Settings menu. Using the same options is useful, for example, if you want to quickly process images
with similar lighting conditions. (See
“Set custom camera settings” on page 76.)
6 (Optional) Set options to adjust the white balance. (See “White balance controls for camera raw” on page 77.)
You can monitor the RGB values of pixels in your image as you adjust them in the Camera Raw dialog box. Position
the Zoom tool, Hand tool, White Balance tool, or Crop tool over the preview image to display the RGB values directly
beneath the pointer.
7 Make tonal adjustments using the Exposure, Shadow, Brightness, Contrast, and Saturation sliders. (See “Tonal and
image adjustments in camera raw files” on page 78.)
“Camera raw controls” on page 75.)
Last updated 7/26/2011
Page 80

USING PHOTOSHOP ELEMENTS 8
Camera raw files
To undo your manual adjustments and make the adjustments automatically, select Auto. To restore all options to their
initial settings, press Option and click Reset.
Note: By default, Auto is always selected. To change this default, deselect one or more Auto options, click the triangle to
the right of the Settings menu, and choose Save New Camera Raw Defaults.
8 Do one of the following:
• To open a copy of the camera raw image file (with the camera raw settings applied) in Photoshop Elements, click
Open. You can edit the image and save it in a Photoshop Elements-supported format. The original camera raw file
remains unaltered.
• To save the adjustments to a DNG file, click Save Image. (See “Save changes to camera raw images” on page 75.)
• To cancel the adjustments and close the dialog box, click Cancel.
Note: The Digital Negative (DNG) format is Adobe’s proposed standard format for camera raw files. DNG files are useful
for archiving camera raw images because they contain the raw camera sensor data and data specifying how the image
should look. Camera raw image settings can be stored in DNG files instead of in sidecar XMP files or the camera raw
database.
Adjust sharpness in camera raw files
The Sharpness slider adjusts the image sharpness to provide the edge definition you want. The Sharpness adjustment
is a variation of the Photoshop Unsharp Mask filter, which locates pixels that differ from surrounding pixels based on
the threshold you specify and increases the pixels’ contrast by the amount you specify. When opening a camera raw
file, the Camera Raw plug-in calculates the threshold to use based on the camera model, ISO, and exposure
compensation. You can choose whether sharpening is applied to all images or just to previews.
74
1 Zoom the preview image to at least 100%.
2 Click the Details tab.
3 Move the Sharpness slider to the right to increase sharpening and to the left to decrease it. A value of zero turns off
sharpening. In general, set the Sharpness slider to a lower value for cleaner images.
If you don’t plan to edit the image extensively in Photoshop Elements, use the camera raw Sharpness slider. If you do
plan to edit the image extensively in Photoshop Elements, turn off camera raw sharpening. Then use the sharpening
filters in Photoshop Elements as the last step after all other editing and resizing is complete.
Reducing noise in camera raw images
The Detail tab in the Camera Raw dialog box contains controls for reducing image noise—the extraneous visible
artifacts that degrade image quality. Image noise includes luminance (grayscale) noise, which makes an image look
grainy, and chroma (color) noise, which is usually visible as colored artifacts in the image. Photos taken at high ISO
speeds or with less sophisticated digital cameras can have noticeable noise.
Moving the Luminance Smoothing slider to the right reduces grayscale noise, and moving the Color Noise Reduction
slider to the right reduces chroma noise.
When making Luminance Smoothing or Color Noise Reduction adjustments, it’s a good idea to preview images at
100% for a better view.
Last updated 7/26/2011
Page 81

USING PHOTOSHOP ELEMENTS 8
Camera raw files
Moving the Luminance Smoothing slider to the right reduces grayscale noise.
Save changes to camera raw images
The Camera Raw dialog box lets you save changes you’ve made to a camera raw file. Be aware that saving the file does
not open it in Photoshop Elements. (To open a camera raw file, just use the Open command, like you would with any
other file. Then you can edit and save the file like any other image.)
75
1 In the Camera Raw dialog box, apply adjustments to one or more camera raw images.
2 Click the Save button.
3 In the Camera Raw Save Options dialog box, specify where to save the file and how to name the file if you're saving
more than one camera raw file.
4 Click Save.
Open a camera raw image
After you process a camera raw image in the Camera Raw dialog box, you can open the image and edit it.
1 In the Camera Raw dialog box, apply adjustments to one or more camera raw images.
2 Click the Open Image button. The Camera Raw dialog box closes, and the photo opens.
Settings and controls
Camera raw controls
Zoom tool Sets the preview zoom to the next preset zoom value when you click within the preview image. Option-
click to zoom out. Drag the Zoom tool in the preview image to zoom in on a selected area. To return to 100%, doubleclick the Zoom tool.
Hand tool Moves the image in the preview window if the preview image is set at a zoom level higher than 100%.
Hold down the spacebar to access the Hand tool while using another tool. Double-click the Hand tool to fit the preview
image in the window.
White Balance tool Sets the area you click to a neutral gray tone to remove color casts and adjust the color of the
entire image. The Temperature and Tint values change to reflect the color adjustment.
Last updated 7/26/2011
Page 82
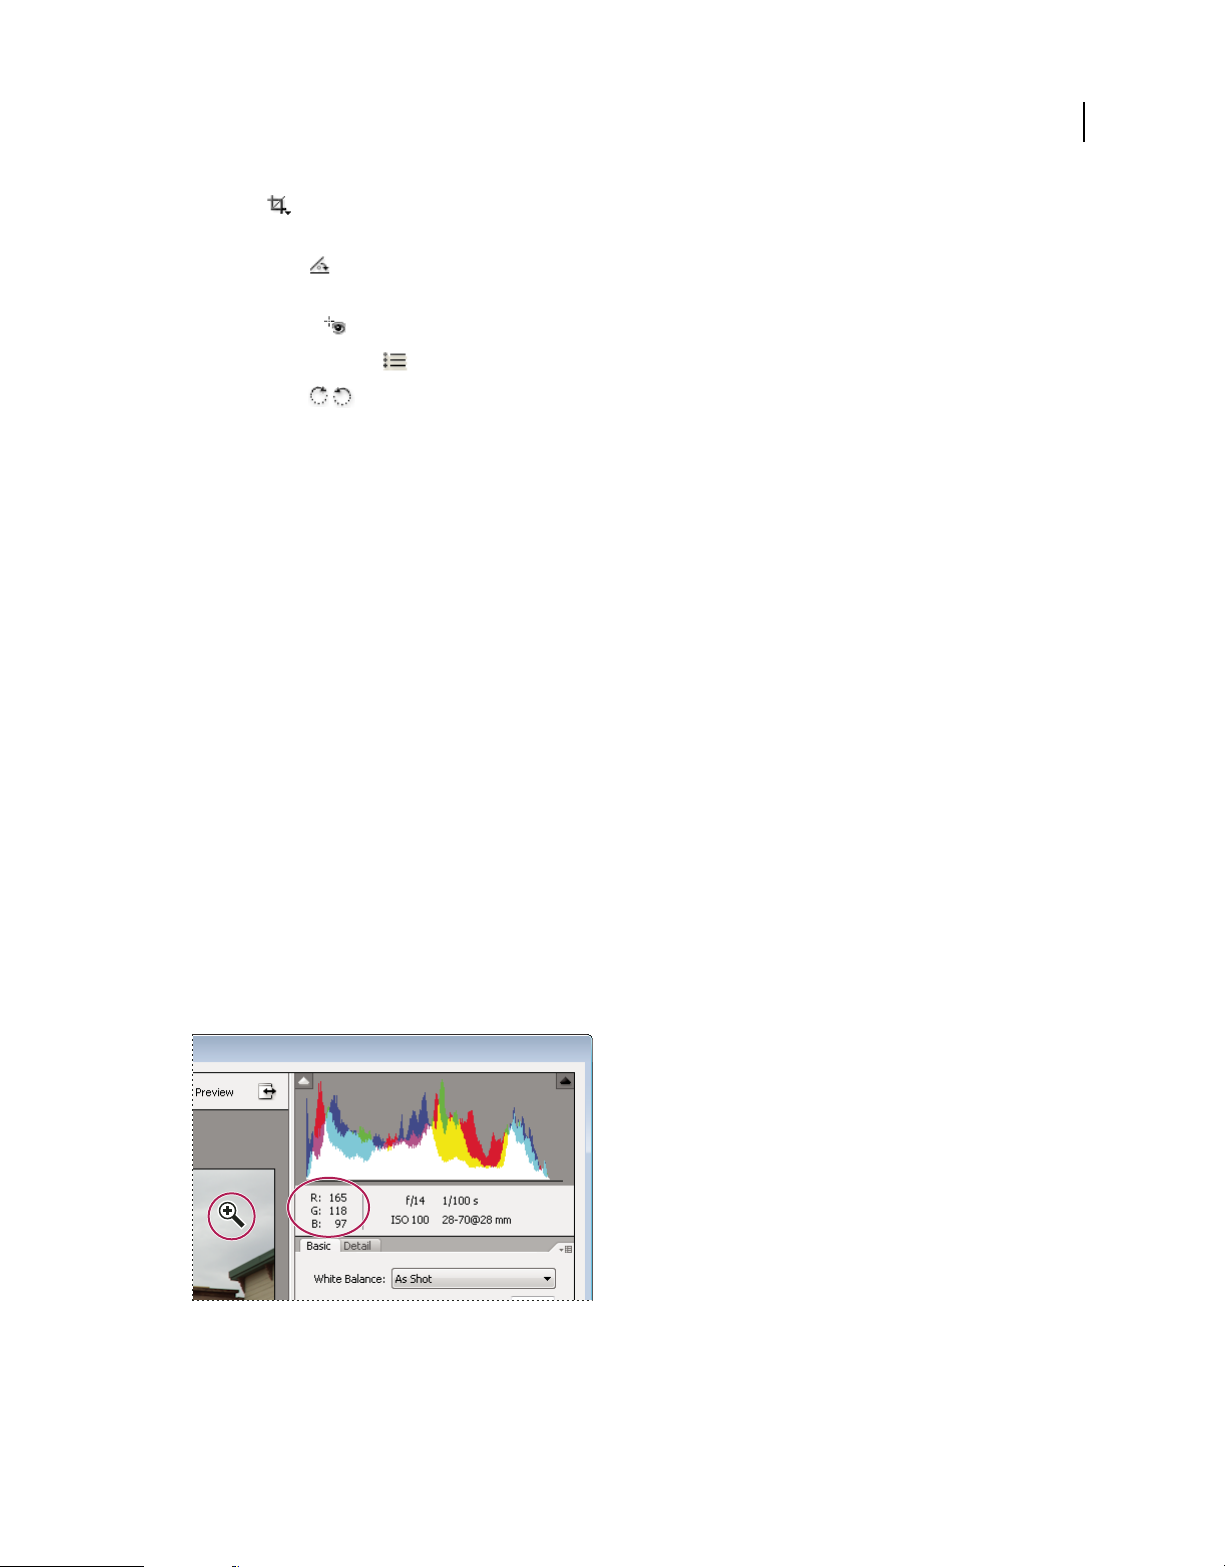
USING PHOTOSHOP ELEMENTS 8
Camera raw files
Crop tool Removes part of an image. Drag the tool within the preview image to select the portion you want to
keep, and then press Enter.
Straighten tool You can use the Straighten tool to realign an image vertically or horizontally. This tool also resizes
or crops the canvas to accommodate straightening the image.
Red Eye Removal Removes red eye in flash photos of people and green or white eye in pets.
Open Preferences Dialog Opens the preferences dialog.
Rotate buttons Rotates the photo either counterclockwise or clockwise.
Set custom camera settings
When you open a camera raw file, Photoshop Elements reads information in the file to see which model of camera
created it, and then applies the appropriate camera settings to the image. If you are always making similar adjustments,
you can change the default settings of your camera. You can also change settings for each model of camera you own,
but not for multiple cameras of the same model.
1 Open a camera raw file and adjust the image.
2 To save the current settings as the default for the camera that created the image, click the triangle next to the
Settings menu and choose Save New Camera Raw Default.
3 To use the Photoshop Elements default settings for your camera, click the triangle next to the Settings menu and
choose Reset Camera Raw Default.
76
Color and camera raw
Using the histogram and RGB values in camera raw
The Camera Raw histogram shows all three channels (red, green, and blue) of the image simultaneously. The
histogram changes automatically as you adjust the settings in the Camera Raw dialog box.
As you move the Zoom tool, Hand tool, or White Balance tool over the preview image, you see the RGB values in the
upper-right corner of the dialog box.
RGB values of an image
Last updated 7/26/2011
Page 83
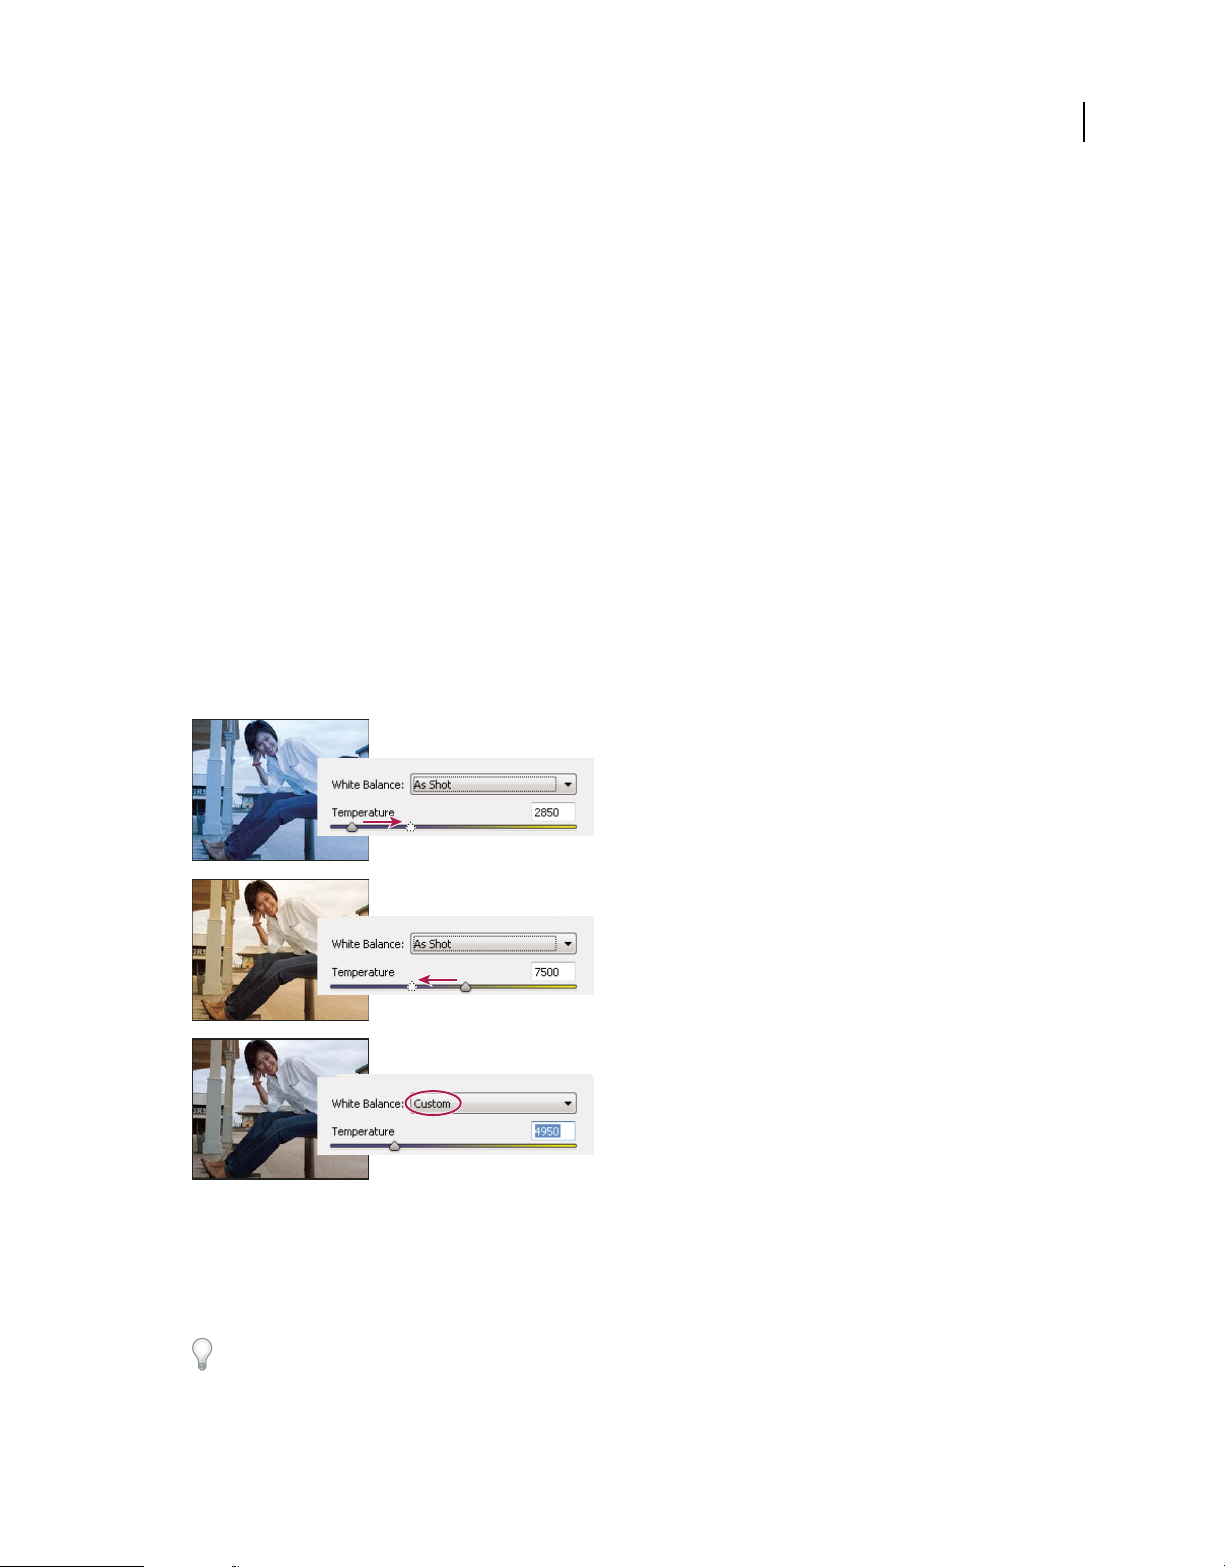
USING PHOTOSHOP ELEMENTS 8
Camera raw files
White balance controls for camera raw
A digital camera records the white balance at the time of exposure as metadata, which you can see when you open the
file in the Camera Raw dialog box. This setting usually yields the correct color temperature. You can adjust it if the
white balance is not quite right.
The Adjust tab in the Photoshop Camera Raw dialog box includes the following three controls for correcting a color
cast in your image:
White Balance Sets the color balance of the image to reflect the lighting conditions under which the photo was taken.
In some cases, choosing a white balance from the White Balance menu provides satisfactory results. In many cases,
you may want to customize the white balance using the Temperature and Tint adjustments.
Note: The Camera Raw plug-in can read the white balance settings of some cameras. Leave White Balance set to As Shot
to use the camera’s white balance settings. For cameras whose white balance settings are not recognized, selecting As Shot
is the same as choosing Auto: the Camera Raw plug-in reads the image data and automatically adjusts the white balance.
Temperature Fine-tunes the white balance to a custom color temperature. Set the color temperature using the Kelvin
color temperature scale. Move the slider to the left to correct a photo taken at a lower color temperature of light: the
plug-in makes the image colors cooler (bluish) to compensate for the lower color temperature (yellowish) of the
ambient light. Conversely, move the slider to the right to correct a photo taken at a higher color temperature of light:
plug-in makes the image colors warmer (yellowish) to compensate for the higher color temperature (bluish) of the
the
ambient light.
77
A
B
C
Correcting the white balance
A. Moving the Temperature slider to the right corrects a photo taken at a higher color temperature of light. B. Moving the Temperature slider
to the left corrects a photo taken at a lower color temperature of light. C. Photo after the color temperature has been adjusted.
Tint Fine-tunes the white balance to compensate for a green or magenta tint. Move the slider to the left (negative
values) to add green to the photo; move it to the right (positive values) to add magenta.
To adjust the white balance quickly, select the White Balance tool, and then click an area in the preview image that
should be a neutral gray or white. The Temperature and Tint sliders automatically adjust to make the selected color
exactly neutral (if possible). If
you’re clicking whites, choose a highlight area that contains significant white detail rather
than a specular highlight.
Last updated 7/26/2011
Page 84
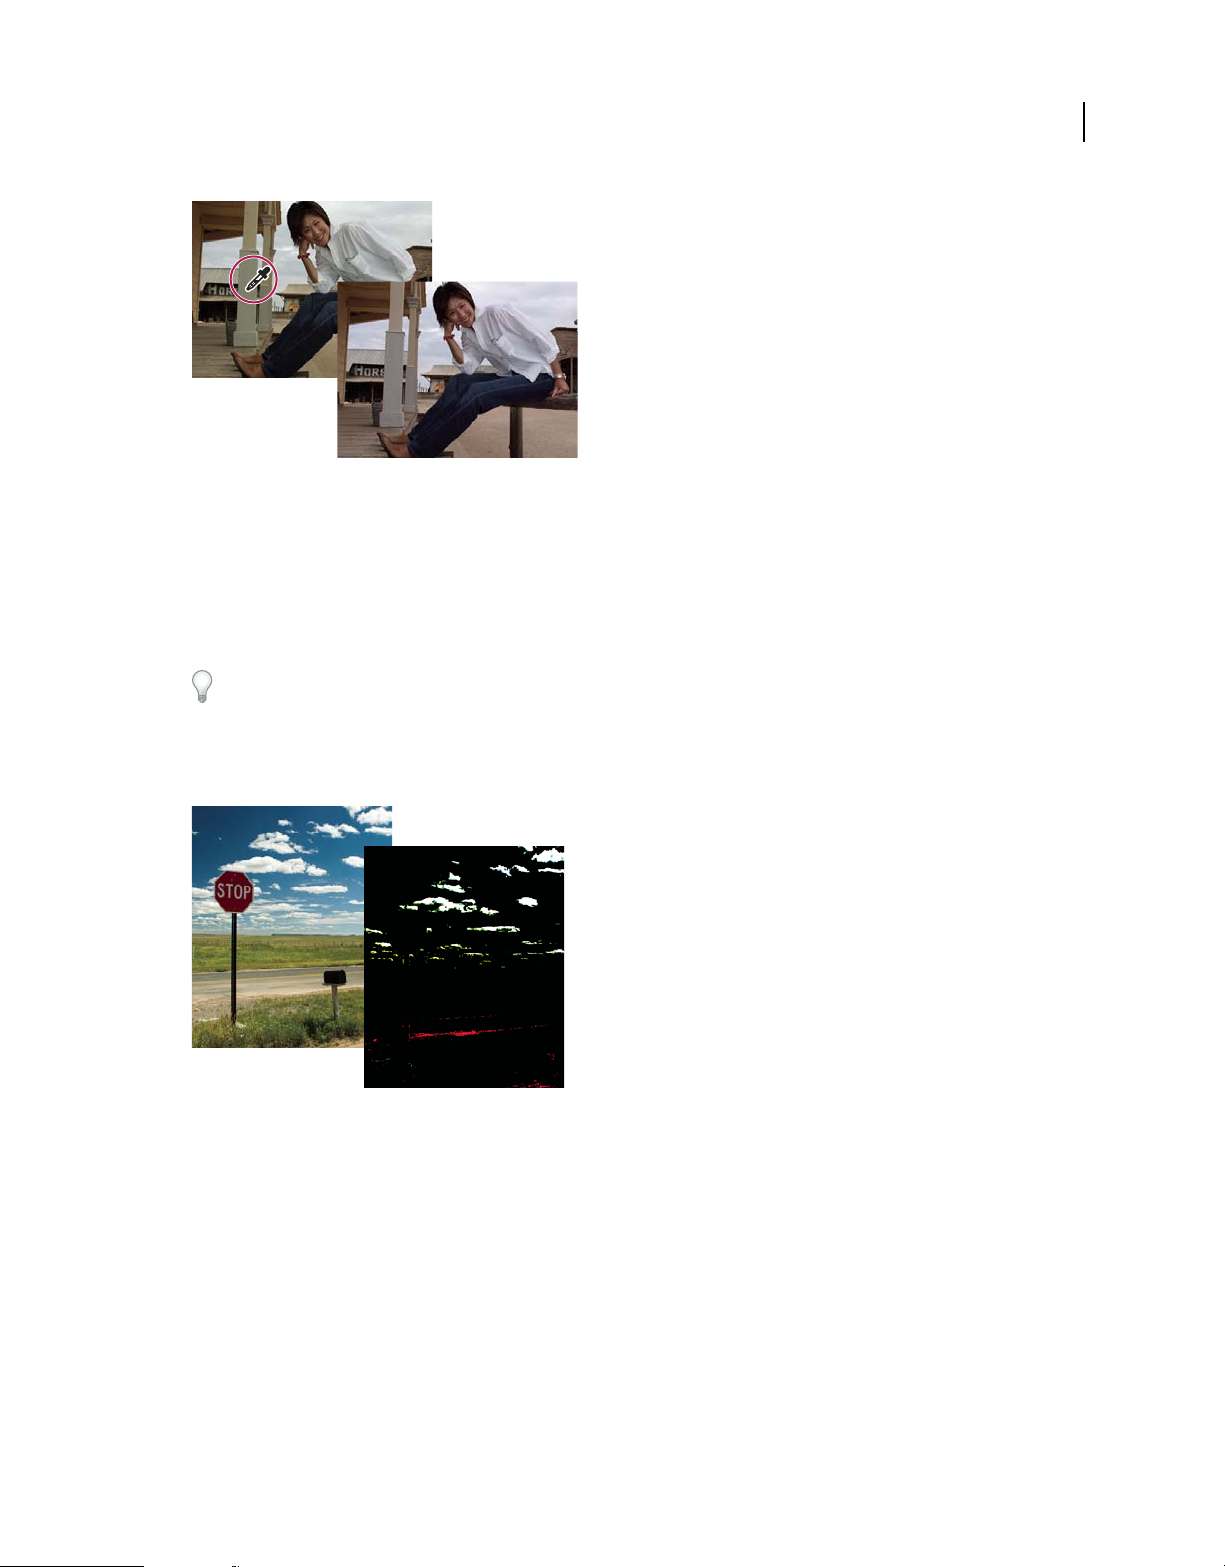
USING PHOTOSHOP ELEMENTS 8
Camera raw files
Using White Balance to click a neutral white area, and resulting correction
Tonal and image adjustments in camera raw files
Exposure Adjusts the brightness or darkness of an image. Move the slider to the left to darken the image; move it to
the right to brighten the image. The values are in increments equivalent to f-stops. An adjustment of +1.50 is similar
to widening the aperture one and one-half stops. Likewise, an adjustment of -1.50 is similar to reducing the aperture
one and one-half stops.
Hold down Option while moving the Exposure slider to preview where the highlights are clipped. (Clipping is the
shifting of pixel values to either the highest highlight value or the lowest shadow value. Clipped areas are either
completely white or completely black and have no image detail.) Move the slider until the highlights (not specular
highlights) are completely clipped, and then reverse the adjustment slightly. Black indicates unclipped areas, and color
indicates areas clipped in only one or two channels.
78
Hold down Option while moving the Exposure slider to show clipped highlights.
Recovery Attempts to recover details from highlights. Camera Raw can reconstruct some details from areas in which
one or two color channels are clipped to white.
Fill Light Attempts to recover details from shadows, without brightening blacks. Camera Raw can reconstruct some
details from areas in which one or two color channels are clipped to black. Using Fill Light is similar to using the
shadows portion of the Photoshop Shadow/Highlight filter or the After Effects Shadow/Highlight effect.
Blacks Specifies which input levels are mapped to black in the final image. Increasing Blacks expands the areas that
are mapped to black. This sometimes creates the appearance of increased contrast in the image. The greatest change is
in the shadows, with less change in the midtones and highlights. Using the Blacks slider is similar to using the black
point slider for input levels when using the Photoshop Levels command or the After Effects Levels effect.
Brightness Adjusts the brightness of the image, much as the Exposure slider does. However, instead of clipping the
image in the highlights (areas that are completely white, with no detail) or shadows (areas that are completely black,
Last updated 7/26/2011
Page 85

USING PHOTOSHOP ELEMENTS 8
Camera raw files
with no detail), Brightness compresses the highlights and expands the shadows when you move the slider to the right.
In general, use the Brightness slider to adjust the overall brightness after you set the white and black clipping points
with the Exposure and Shadow sliders.
Contrast Adjusts the midtones in an image. Higher values increase the midtone contrast, and lower values produce an
image with less contrast. Generally, use the Contrast slider to adjust the contrast of the midtones after setting the
Exposure, Shadow, and Brightness values.
Clarity Sharpens the clarity of edges in the image. This process helps restore detail and sharpness that tonal
adjustments may reduce.
Vibrance Adjusts the saturation so that clipping is minimized as colors approach full saturation, changing the
saturation of all lower-saturated colors with less impact on the higher-saturated colors. Vibrance also prevents skin
tones from becoming oversaturated.
Saturation Adjusts the color saturation of the image from –100 (pure monochrome) to +100 (double the saturation).
Sharpening Sharpening enhances the definition of edges in an image. Additional controls are available in the Detail
panel. The zoom level must be set to 100% or greater in order to view the effects of these controls.
• Amount: Adjusts edge definition. Increase the Amount value to increase sharpening. A value of zero turns off
sharpening. In general, set Amount to a lower value for cleaner images. The adjustment locates pixels that differ
from surrounding pixels based on the threshold you specify and increases the pixels’ contrast by the amount you
specify.
• Radius: Adjusts the size of the details that sharpening is applied to. Photos with very fine details may need a lower
radius setting. Photos with larger details may be able to use a larger radius. Using too large a radius generally results
in unnatural results.
• Detail: Adjusts how much high-frequency information is sharpened in the image and how much the sharpening
process emphasizes edges. Lower settings primarily sharpen edges to remove blur. Higher values are useful for
making the textures in the image more pronounced.
• Masking: Controls an edge mask. At a setting of zero, everything in the image receives the same amount of
sharpening. At a setting of 100, sharpening is mostly restricted to areas near the strongest edges.
Noise Reduction Adjusts the color saturation of the image from –100 (pure monochrome) to +100 (double the
saturation).
79
• Luminance: Adjusts grayscale noise.
• Color: Adjusts chroma noise.
Last updated 7/26/2011
Page 86

Chapter 7: Selecting parts of an image
A selection defines the editable area in a photo (for example, you might want to lighten one part of a photo without
affecting the rest). You can make a selection with either a selection tool or a selection command. A selection border,
which you can hide, surrounds the selection. You can change, copy, or delete pixels inside the selection border, but you
can’t touch areas outside the selection border until you deselect the selection.
Making selections
About selections
Photoshop Elements contains several selection tools that suit different kinds of selections. For example, the Elliptical
Marquee tool selects circular and elliptical areas, and the Magic Wand tool can select an area of similar colors with one
click. More complex selections can be made with one of the Lasso tools. You can even smooth the edges of a selection
with feathering and anti-aliasing.
80
Note: Selections are limited to the active layer—to make changes to all layers at once, you first need to flatten the image.
Selection made with Elliptical Marquee tool, color adjusted in selected area
More Help topics
“Flatten an image” on page 60
“Define a feathered edge for a selection tool” on page 93
“Smooth the edges of a selection by anti-aliasing” on page 93
Last updated 7/26/2011
Page 87

USING PHOTOSHOP ELEMENTS 8
Selecting parts of an image
About the selection tools
The selection tools are located in the Tools panel, which is located, by default, on the left side of your screen.
81
Rectangular Marquee tool Draws
square or rectangular selection borders.
Polygonal Lasso tool Draws multiple
straight-edged segments of a selection
border.
Quick Selection tool Quickly and
automatically makes selection based on
color and texture when you click or clickdrag an area.
Elliptical Marquee tool Draws round or
elliptical selection borders.
Magnetic Lasso tool Draws a selection
border that automatically snaps to edges
you drag over in the photo.
Selection Brush tool Automatically
selects or deselects the area you paint,
depending on whether you’re in selection
or mask mode.
Lasso tool Draws freehand selection
borders. This tool is great for making very
precise selections.
Magic Wand tool Selects pixels of
similar color with one click.
Use the Rectangular and Elliptical Marquee tools
The Rectangular Marquee tool draws square or rectangular selection borders, and the Elliptical Marquee tool draws
round or elliptical selection borders.
D
E F
A
B
Rectangular and Elliptical Marquee tool options
A. Rectangular Marquee tool B. Elliptical Marquee tool C. New selection D. Add to selection E. Subtract from a selection F. Intersect with a
selection
C
1 Select the Rectangular Marquee tool or the Elliptical Marquee tool in the toolbox.
2 (Optional) Set marquee tool options in the options bar located above your image:
• Specify whether to create a new selection, add to a selection, subtract from a selection, or select an area intersected
by other selections.
• To soften the selection border so that it blends into the area outside the selection, enter a Feather value.
Last updated 7/26/2011
Page 88

USING PHOTOSHOP ELEMENTS 8
Selecting parts of an image
• To smooth the edges of your selection, select Anti-aliased (Elliptical Marquee tool only).
• From the Mode pop-up menu, choose Normal to visually set the size and proportions of the selection border; Fixed
Ratio to set a width-to-height ratio for the selection border; or Fixed Size to specify the marquee’s height and width.
3 Drag over the area you want to select. Hold down the Shift key as you drag to constrain the selection marquee to a
square or circle.
To reposition a marquee tool selection border, click the border, hold down the spacebar as you drag with the selection
tool. Release the mouse once the selection border is in the correct area.
Use the Lasso tool
The Lasso tool draws freehand selection borders. This tool lets you make very precise selections.
82
C
A B D
Lasso tool options
A. Lasso tool B. Polygonal Lasso tool C. Magnetic Lasso tool D. New selection E. Add to selection F. Subtract from selection G. Intersect with
selection
1 Select the Lasso tool from the toolbox.
2 (Optional) Set Lasso tool options in the options bar located above your image:
E F G
• Specify whether to create a new selection, add to an existing selection, subtract from a selection, or select an area
intersected by other selections.
• To soften the selection border so that it blends into the area outside the selection, enter a Feather value.
• To smooth the edges of your selection, select Anti-aliased.
3 Drag to draw a freehand selection border:
• To add to the selection, release the mouse button; then press Shift and, when the pointer changes to , drag.
•
To subtract from the selection, release the mouse button; then press Option and when the pointer changes to , drag.
• To add straight-edge segments, press Option (while pressing the mouse); then release the mouse button and, when
the pointer changes to
4 To close the selection border, release the mouse button. A straight selection segment is drawn from where you
, click where you want to position the end of the segment.
released the mouse button to the starting point of your selection.
Use the Polygonal Lasso tool
The Polygonal Lasso tool draws straight-edged segments of a selection border. You can create as many segments as
you need to draw a selection border.
Last updated 7/26/2011
Page 89
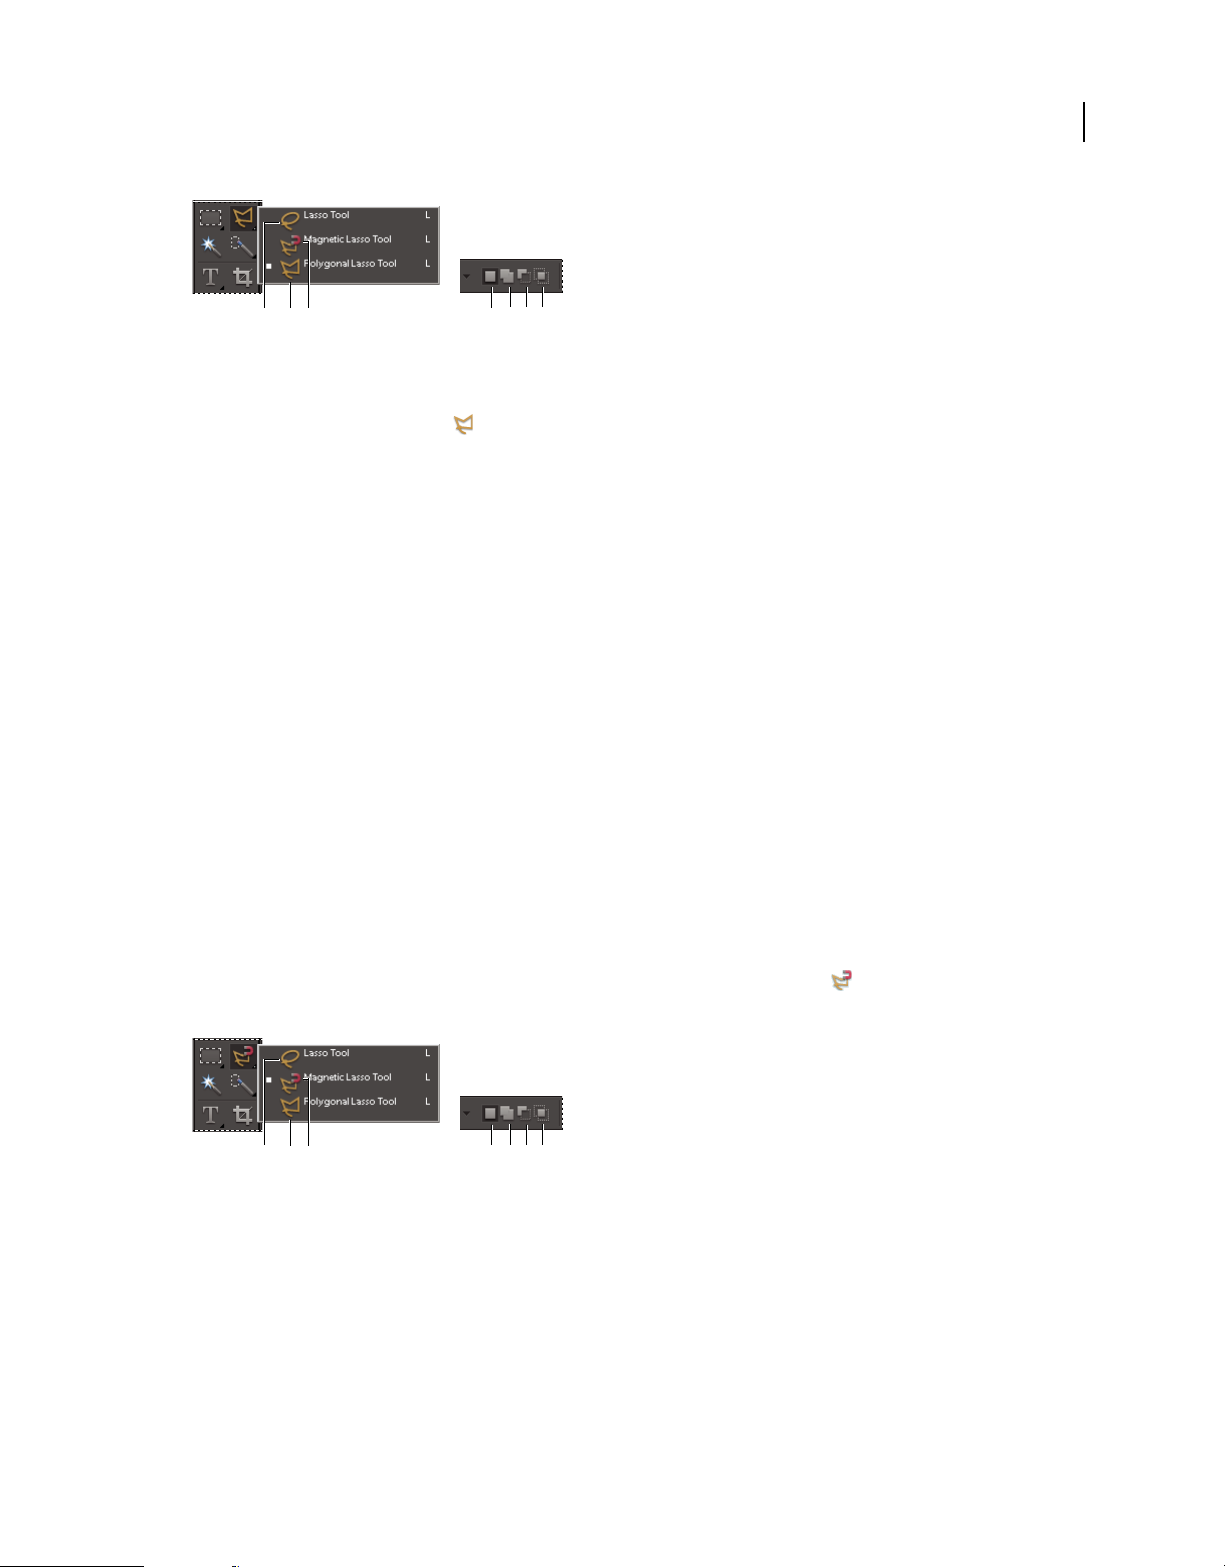
USING PHOTOSHOP ELEMENTS 8
Selecting parts of an image
83
C
A B D
Polygonal Lasso tool options
A. Lasso tool B. Polygonal Lasso tool C. Magnetic Lasso tool D. New selection E. Add to selection F. Subtract from selection G. Intersect with
selection
E F G
1 Select the Polygonal Lasso tool from the toolbox.
2 (Optional) Set Polygonal Lasso tool options in the options bar located above your image:
• Specify whether to create a new selection, add to an existing selection, subtract from a selection, or select an area
intersected by other selections.
• To soften the selection border so that it blends into the area outside the selection, enter a Feather value.
• To smooth the edges of your selection, select Anti-aliased.
3 Click where you want the first straight segment to begin, and click a second time where you want the segment to
end and the next one to begin. Continue clicking to create segments.
If you make a mistake, press the Delete key to erase segments. You can switch from creating straight-edge segments to
drawing freehand by pressing Option.
4 Close the selection border by doing one of the following:
• Position the pointer over the starting point and click. A closed circle appears next to the pointer when you are over
the starting point.
• If the pointer is not over the starting point, double-click, or Command-click. A straight selection segment is drawn
from your pointer to the starting point of your selection.
Use the Magnetic Lasso tool
The Magnetic Lasso tool draws a selection border that automatically snaps to the edges of objects you drag over in the
photo. This makes it easy to draw precise selection borders. The Magnetic Lasso tool
objects with complex edges set against high-contrast backgrounds.
C
A B D
Magnetic Lasso tool options
A. Lasso tool B. Polygonal Lasso tool C. Magnetic Lasso tool D. New selection E. Add to selection F. Subtract from selection G. Intersect with
selection
E F G
1 Select the Magnetic Lasso tool from the toolbox.
To switch between the Magnetic Lasso and other lasso tools when the Magnetic Lasso tool is selected, do one of the
following:
• To activate the Lasso tool, Option-drag. Or press L on the key board.
• To activate the Polygonal Lasso tool, Option-click. Or press L on the key board.
Last updated 7/26/2011
is useful for quickly selecting
Page 90

USING PHOTOSHOP ELEMENTS 8
Selecting parts of an image
2 (Optional) Set Magnetic Lasso tool options in the options bar located above your image:
• Specify whether to create a new selection, add to an existing selection, subtract from a selection, or select an area
intersected by other selections.
• To soften the selection border so that it blends into the area outside the selection, enter a Feather value.
• To smooth the edges of your selection, select Anti-aliased.
• To specify the area of edge detection, enter a pixel value between 1 and 256 for Width. The tool detects edges only
within the specified distance from the pointer.
To change the Magnetic Lasso pointer so that it indicates the area of edge detection (the Width value), press the Caps
Lock key.
• To specify the Magnetic Lasso tool’s sensitivity to edges in the photo, enter a value between 1% and 100% for Edge
Contrast. A higher value detects only edges that contrast sharply with their surroundings; a lower value detects
lower-contrast edges.
• To specify the rate at which the Magnetic Lasso tool sets fastening points, enter a value between 0 and 100 for
Frequency. A higher value anchors the selection border in place more quickly.
3 Add segments of a selection border by doing one of the following:
• Click points along the edge.
• Drag along the edge while pressing the mouse button.
The selection border snaps to the edge in the photo. If the border doesn’t snap to the desired edge, click once to add a
point manually; then continue tracing the border and clicking points as needed. If you make a mistake, press the Delete
key to erase points along the border.
84
4 Close the selection border by doing one of the following:
• To close the border manually, drag back over the starting point and click. A closed circle appears next to the pointer
when you are over the starting point.
• To close the border with a freehand magnetic segment, double-click or press Enter.
• To close the border with a straight segment, double-click while pressing Option.
Use the Magic Wand tool
The Magic Wand tool selects pixels within a similar color range with one click. You specify the color range, or
tolerance, for the Magic Wand tool’s selection. Use the Magic Wand tool when you have an area of similar colors, like
a blue sky.
B CAD E
Magic Wand tool options
A. Magic Wand tool B. New selection C. Add to selection D. Subtract from selection E. Intersect with selection
1 Select the Magic Wand tool .
2 (Optional) Set Magic Wand tool options in the options bar located above your image:
• For Tolerance, enter a value between 0 to 255. Enter a low value to select colors very similar to the pixel you click,
or enter a higher value to select a broader range of colors.
• To define a smooth selection edge, select Anti-aliased.
Last updated 7/26/2011
Page 91

USING PHOTOSHOP ELEMENTS 8
Selecting parts of an image
• To select only adjacent areas using the same colors, select Contiguous. When this option is deselected, pixels using
the same colors are selected throughout the entire photo.
• To select colors using data from all the visible layers, select Sample All Layers. When this option is deselected, the
Magic Wand tool selects colors from only the active layer.
3 In the photo, click the color you want to select.
4 To add to the selection, Shift+click unselected areas. To remove an area from the selection, Option+click the area
you want to remove.
Use the Quick Selection tool
The Quick Selection tool makes a selection based on color and texture similarity when you click or click-drag the area
you want to select. The mark you make doesn’t need to be precise, because the Quick Selection tool automatically and
intuitively creates a border.
D
E
A B
Quick Selection / Selection Brush tool options
A. Quick Selection tool B. Selection Brush tool C. New selection D. Add to selection E. Subtract from selection
C
85
1 Select the Quick Selection tool .
2 In the options bar, choose one of the following:
New Selection Lets you draw a new selection. This option is selected by default.
Add To Selection Lets you add to an existing selection.
Subtract From Selection Lets you subtract from an existing selection. This option is only available after you make a
selection.
3 Choose a brush from the Brush Picker in the options bar. If you want to select a large area, you can use a larger
brush. For more precise selections, choose a smaller brush size.
4 Click or click-drag over the area that covers the range of colors in the object you want to select, and then release the
mouse button.
The selection border appears.
5 Do any of the following to refine the selection:
• To add to the selection, click the Add To Selection button in the options bar, and click or click-drag across the
area you want to add.
• To remove an area from the selection, click the Subtract From Selection button in the options bar, and click or
click-drag across the area you want to subtract from the selection.
• To start a new selection, click the New Selection brush in the options bar, and click or draw to specify the new
selection area.
Use the Selection Brush tool
The Selection Brush tool makes selections two ways: you can paint over the area you want to select in Selection mode,
or you can paint over areas you don’t want to select using a semiopaque overlay in Mask mode.
Last updated 7/26/2011
Page 92
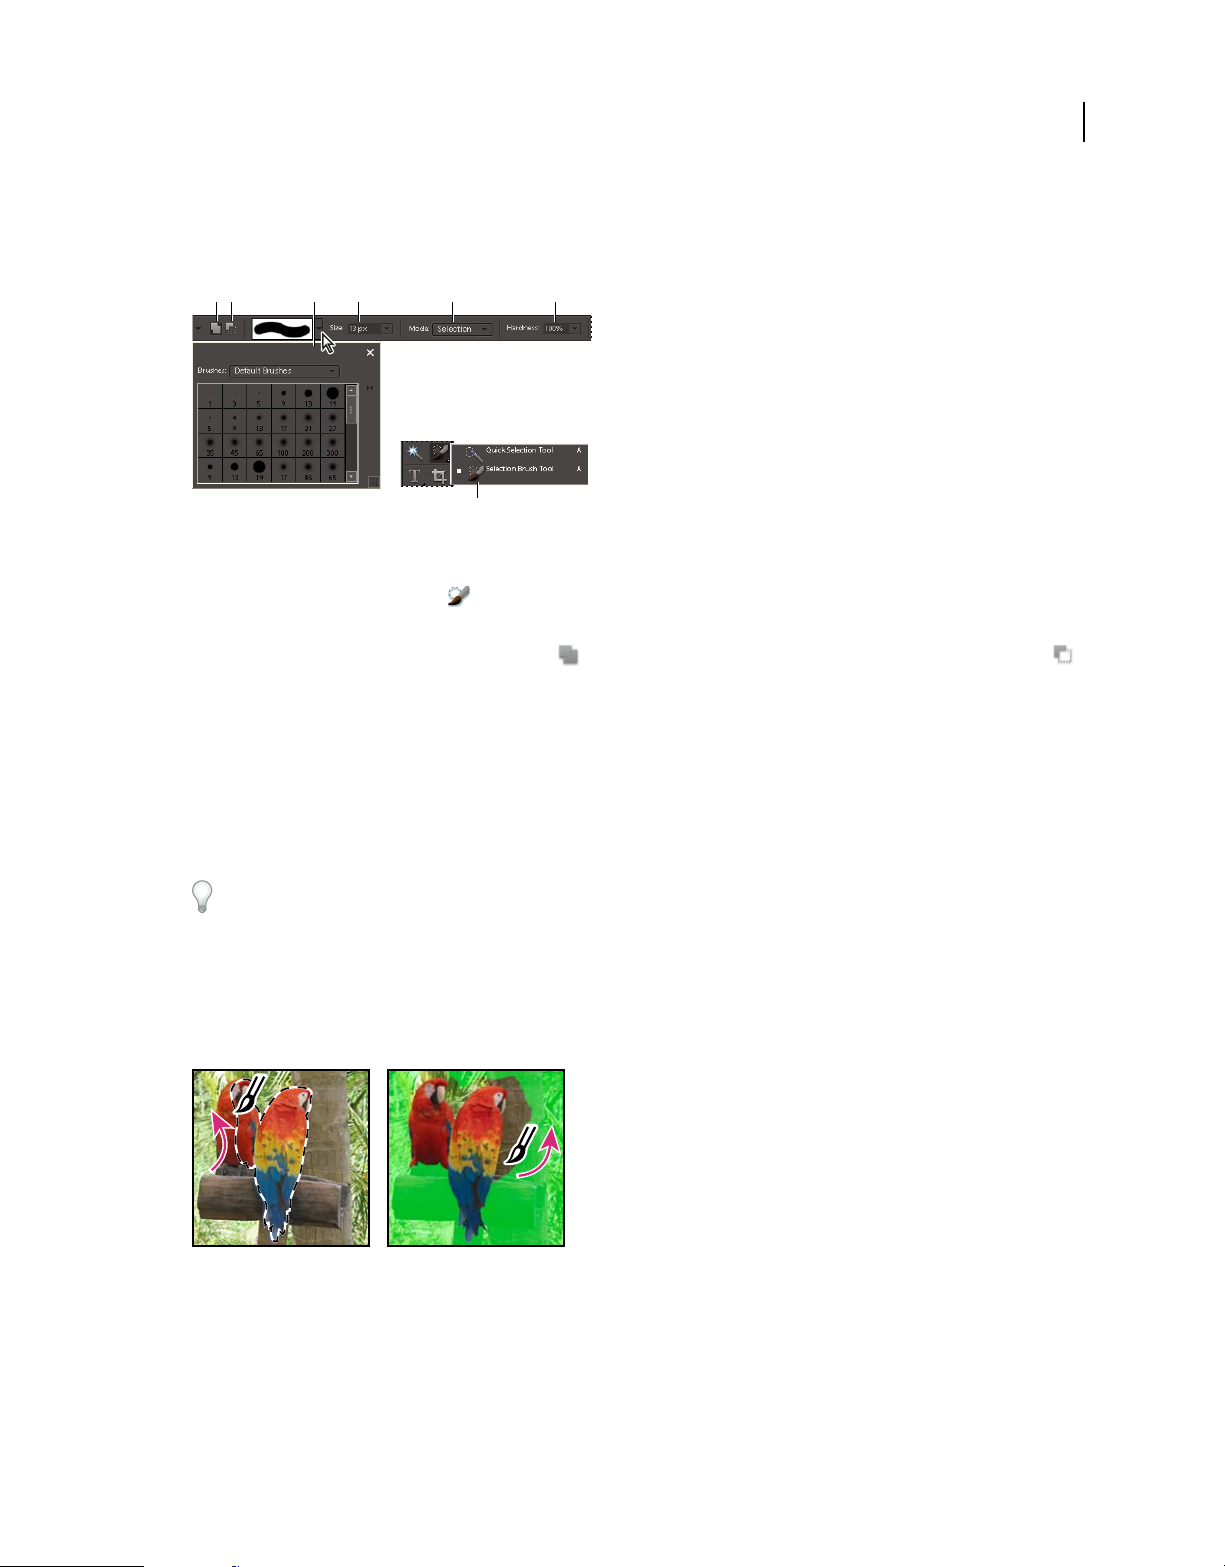
USING PHOTOSHOP ELEMENTS 8
Selecting parts of an image
You can first make a rough selection with a marquee tool, Quick Selection Brush, or other selection tool, and then finetune your selection with the Selection Brush tool. You can add to the selection using the Selection Brush tool in
Selection mode, or subtract from it in Mask mode.
86
A DDB C
Selection Brush tool options
A. Add to selection B. Subtract from selection C. Brush pop-up panel D. Brush size E. Mode F. Hardness G. Selection Brush tool
1 Select the Selection Brush tool from the toolbox. You may need to click the Quick Selection tool in the toolbox
E F
G
and select the Selection Brush from the list of hidden tools that appears.
2 By default, the tool is set to Add To Selection . To subtract from the selection, click Subtract From Selection
in the options bar.
3 (Optional) Set Selection Brush tool options in the options bar located above your image:
• Choose a brush from the brush presets pop-up panel.
• Specify the brush size.
• Choose Selection (to add to the selection) or Mask (to subtract from the selection) from the Mode menu.
• Set the brush tip’s hardness to a value between 1% and 100%.
If you use a soft-edged brush with the Selection Brush tool, changing the Mode option to Mask can help you see the
soft edges of the selection.
• When using Mask mode, specify an Overlay Opacity between 1% and 100%.
• When using Mask mode, click the Overlay Color swatch and select a color in the Color Picker to set the mask color.
This is useful when the mask color (Overlay Color) is too similar to the colors in the photo.
4 Draw in your photo to select or deselect areas.
Adding to a selection while in Selection mode (left), and subtracting from a selection while in Mask mode (right)
Use the Magic Extractor
Use the Magic Extractor to make accurate selections based on the appearance of foreground and background areas that
you specify. You can specify these areas by placing colored marks in the areas you want to select. After you mark the
areas and close the dialog box, only the foreground area appears in the photo.
Last updated 7/26/2011
Page 93

USING PHOTOSHOP ELEMENTS 8
Selecting parts of an image
The Magic Extractor makes it easy to select people or objects so that you can superimpose them on other backgrounds.
For example, you can remove yourself from a photo of you on your bicycle at home, and superimpose it on a photo of
cyclists in the Tour de France. You can save the extracted image as a file that you can use again and again.
A
B
87
C
Using the Magic Extractor
A. Area you want to extract marked with red dots B. Background marked with blue dots C. Extracted image
1 Open the photo containing the object you want to extract.
2 To limit what appears in the Magic Extractor dialog box, make a preliminary selection using the Oval or
Rectangular selection tool.
3 Choose Image > Magic Extractor.
The Magic Extractor dialog box opens with the Foreground Brush tool selected by default.
4 Click multiple times or draw lines to mark the area you want to extract.
5 Click the Background Brush tool and click multiple times or draw lines to mark the area that you do not want
included in your selection.
When selecting objects with varied colors and textures, drag across all the colors and textures to ensure a more
accurate selection.
6 To help mark your selection, use the Zoom tool or the Hand tool to magnify and navigate around the photo.
Press Option as you use the Zoom tool to zoom out.
7 To specify a different brush size or color, do any of the following:
• Choose a new size from the Brush Size menu.
•
Click the Foreground Color or Background Color swatch, choose a new color in the Color Picker, and then click OK.
8 Click Preview to see the current selection.
Last updated 7/26/2011
Page 94

USING PHOTOSHOP ELEMENTS 8
Selecting parts of an image
9 To specify preview settings, do any of the following:
• To change what is displayed in the preview area, choose either Selection Area or Original Photo from the Display
menu. Or press the X key on your keyboard to switch between the two views.
• To specify a different background, choose an option from the Background menu.
10 Do any of the following to fine-tune the selection, and then preview the results again:
• To add to or subtract from the selection, draw more dots or lines using either the Foreground or Brush tool.
Note: When you change the foreground or background color, the related brush tool becomes active.
• To erase foreground or background dots, select the Point Eraser tool and click or drag over the marks you want
to remove.
• To add areas to a selection, select the Add To Selection tool , and click or drag over the area you want to add.
• To remove areas from the selection, select the Remove From Selection tool and drag over the areas you want
to remove.
• To smooth the edges of your foreground selection, select the Smoothing Brush tool and drag over the areas you
want to smooth.
• To soften the edges of your selection, specify a higher value in the Feather box.
• To fill remaining holes in the main selection, click Fill Holes.
• To separate and remove an area from the main selection, select the Remove From Selection Tool and drag a
line between the main selection and the area you want to remove. Then click Fill Holes.
• To remove fringe colors left between the foreground and background, click Defringe. To increase or decrease the
amount of fringe removed, specify a value from the Defringe Width menu.
11 Click OK to extract the selected areas. If you want to start over, click Reset to remove all marks.
88
Delete a selected area
If you delete a selection on a Background layer or a layer that uses the Lock Transparency option, the selected area is
replaced with the background color or checkerboard background pattern.
❖ Do any of the following:
• Choose Edit > Delete to remove the selection. (If you delete a selection by mistake, you can choose Edit > Undo to
get it back.)
• Press the Backspace or Delete key to remove the selection.
• Choose Edit > Cut to cut the selection to the Clipboard. You can then paste it elsewhere.
More Help topics
“Understanding layers” on page 49
“Lock or unlock a layer” on page 54
Select and deselect areas using commands
1 Do any of the following:
• To select all pixels in a layer, select the layer in the Layers panel and choose Select > All.
• To deselect selections, choose Select > Deselect. This is the safest way to deselect the area.
Last updated 7/26/2011
Page 95

USING PHOTOSHOP ELEMENTS 8
Selecting parts of an image
• To reselect the most recent selection, choose Select > Reselect.
2 To show or hide selection borders, choose View > Selection.
Note: You can also deselect by clicking anywhere in the photo outside the selected area. However, you might accidentally
make further selections if you’re using a selection tool that selects based on clicking, such as the Magic Wand tool.
Modifying selections
Move a selection border
Moving a selection border repositions just the border without altering the photo.
1 Using any selection tool, click New Selection in the options bar, and position the pointer inside an existing
selection border. The pointer changes to indicate that you can move the selection .
Note: The New Selection option appears in the options bar when any selection tool is selected—except the Selection Brush
tool. Switch to another selection tool temporarily, if necessary, to select this option.
2 Do one of the following:
• Drag the border to enclose a different area of the photo. You can drag a selection border beyond the canvas
boundaries; however, this makes it hard to get back. You can also drag the selection border to another image
window.
• To move the selection in 1-pixel increments, use an arrow key.
• To move the selection in 10-pixel increments, hold down Shift, and use an arrow key.
• To constrain the direction to multiples of 45°, begin dragging, and then hold down Shift as you continue to drag.
89
More Help topics
“Move a selection” on page 94
Invert a selection
Inverting a selection changes the unselected areas into selected areas, protecting the area you previously selected.
❖ In a photo with an existing selection border, choose Select > Inverse.
You can use this command to easily select an object that appears against a solid-colored area. Select the solid color
using the Magic Wand tool, and then choose Select > Inverse.
Add to or subtract from a selection
You can add to or subtract from an existing selection to fine-tune selection borders. For example, you could make a
donut-shaped selection by first making a circular selection and then subtracting a circular selection within it.
❖ Select a selection tool, and do one of the following:
• Hold down Shift (a plus sign appears next to the pointer) to add to the selection, or hold down Option to subtract
(a minus sign appears next to the pointer) from a selection. Then select the area to add or subtract and make another
selection.
• Click Add To Selection or Subtract From Selection in the options bar, and make another selection. (The Add
To Selection and Subtract From Selection options appear in the options bar when any selection tool is selected.)
Last updated 7/26/2011
Page 96

USING PHOTOSHOP ELEMENTS 8
Selecting parts of an image
Select an area that intersects an existing selection
You can limit the area a selection affects. For example, in a picture of snow-capped mountains, you can select white
clouds in the sky without selecting parts of the white mountain below them by selecting the entire sky, and then using
the Magic Wand tool with Intersect With Selection selected and Contiguous deselected to select only the white areas
included within the existing sky selection.
90
Selecting the sky and top of mountains with the Rectangular Marquee tool (top). Selecting the Intersect With Selection option and using the
Magic Wand tool to select the clouds (middle). Resulting image after increasing the brightness of the clouds (bottom).
❖ Select a selection tool, and do one of the following:
• Select Intersect With Selection in the options bar, and select an area that intersects the existing selection.
• Hold down Option+Shift so that cross hairs appear next to the pointer, and select an area that intersects the existing
selection.
Expand or contract a selection by a specific number of pixels
You can use commands in the Select menu to increase or decrease the size of an existing selection and to clean up stray
pixels left inside or outside a color-based selection.
1 Use a selection tool to make a selection.
2 Choose Select > Modify > Expand or Contract.
3 For Expand By or Contract By, enter a pixel value between 1 and 100, and click OK.
The selection border is moved outward or inward by the specified number of pixels. Any portion of the selection
border that runs along the canvas edge is unaffected.
Frame an existing selection with a new selection border
The Border command creates a soft-edged, anti-aliased selection border. When you add the new selection border, only
pixels between the two selection borders are selected.
Last updated 7/26/2011
Page 97

USING PHOTOSHOP ELEMENTS 8
Selecting parts of an image
Using the Border command to create a 4-pixel border selection (top). Copying the selection to a new layer and filling to make an outline of the
image (center). Filling the selection into the original image to create an outline around the image (bottom).
1 Use a selection tool to make a selection.
2 Choose Select > Modify > Border.
3 Enter a value between 1 and 200 pixels in the Width text box, and click OK.
91
More Help topics
“Blur the edges of a selection by feathering” on page 93
Include areas of similar color in a selection
1 Make a selection with a selection tool and do one of the following:
• Choose Select > Grow to include all adjacent pixels falling within the tolerance range specified in the options bar.
(You may have to switch to a selection tool that includes a tolerance range, such as the Magic Wand tool.) A higher
Tolerance value adds a broader range of colors.
• Choose Select > Similar to include pixels throughout the photo, not just adjacent ones, that fall within the tolerance
range.
2 To increase the selection incrementally, choose either command multiple times.
Note: You cannot use the Grow and Similar commands on photos in bitmap mode.
Remove stray pixels from a color-based selection
The Smooth command searches around each selected pixel for other pixels within the specified color range and selects them.
1 Make a selection with a selection tool and choose Select > Modify > Smooth.
2 For Sample Radius, enter a pixel value between 1 and 100, and click OK.
Last updated 7/26/2011
Page 98

USING PHOTOSHOP ELEMENTS 8
Selecting parts of an image
Defringe a selection
When you move or paste a selection, some of the pixels surrounding the selection border are included with the
selection. These extra pixels can result in a fringe or halo around the edges of the selection. The Defringe Layer
command replaces the color of any fringe pixels with the colors of nearby pixels containing pure colors (those without
background color). For example, if you select a yellow object on a blue background and then move the selection, some
of the blue background is moved with the object. Defringe Layer replaces the blue pixels with yellow pixels.
92
Dog selected and copied to a new image where artifacts from the dark background are visible (top). Image after using the Defringe Layer
command (bottom).
1 Copy and paste a selection into a new or existing layer.
2 Choose Enhance > Adjust Color > Defringe Layer.
3 In the Defringe dialog box, type the number of pixels you’d like to replace around the object. A value of 1 or 2 should
be sufficient.
4 Click OK.
Last updated 7/26/2011
Page 99
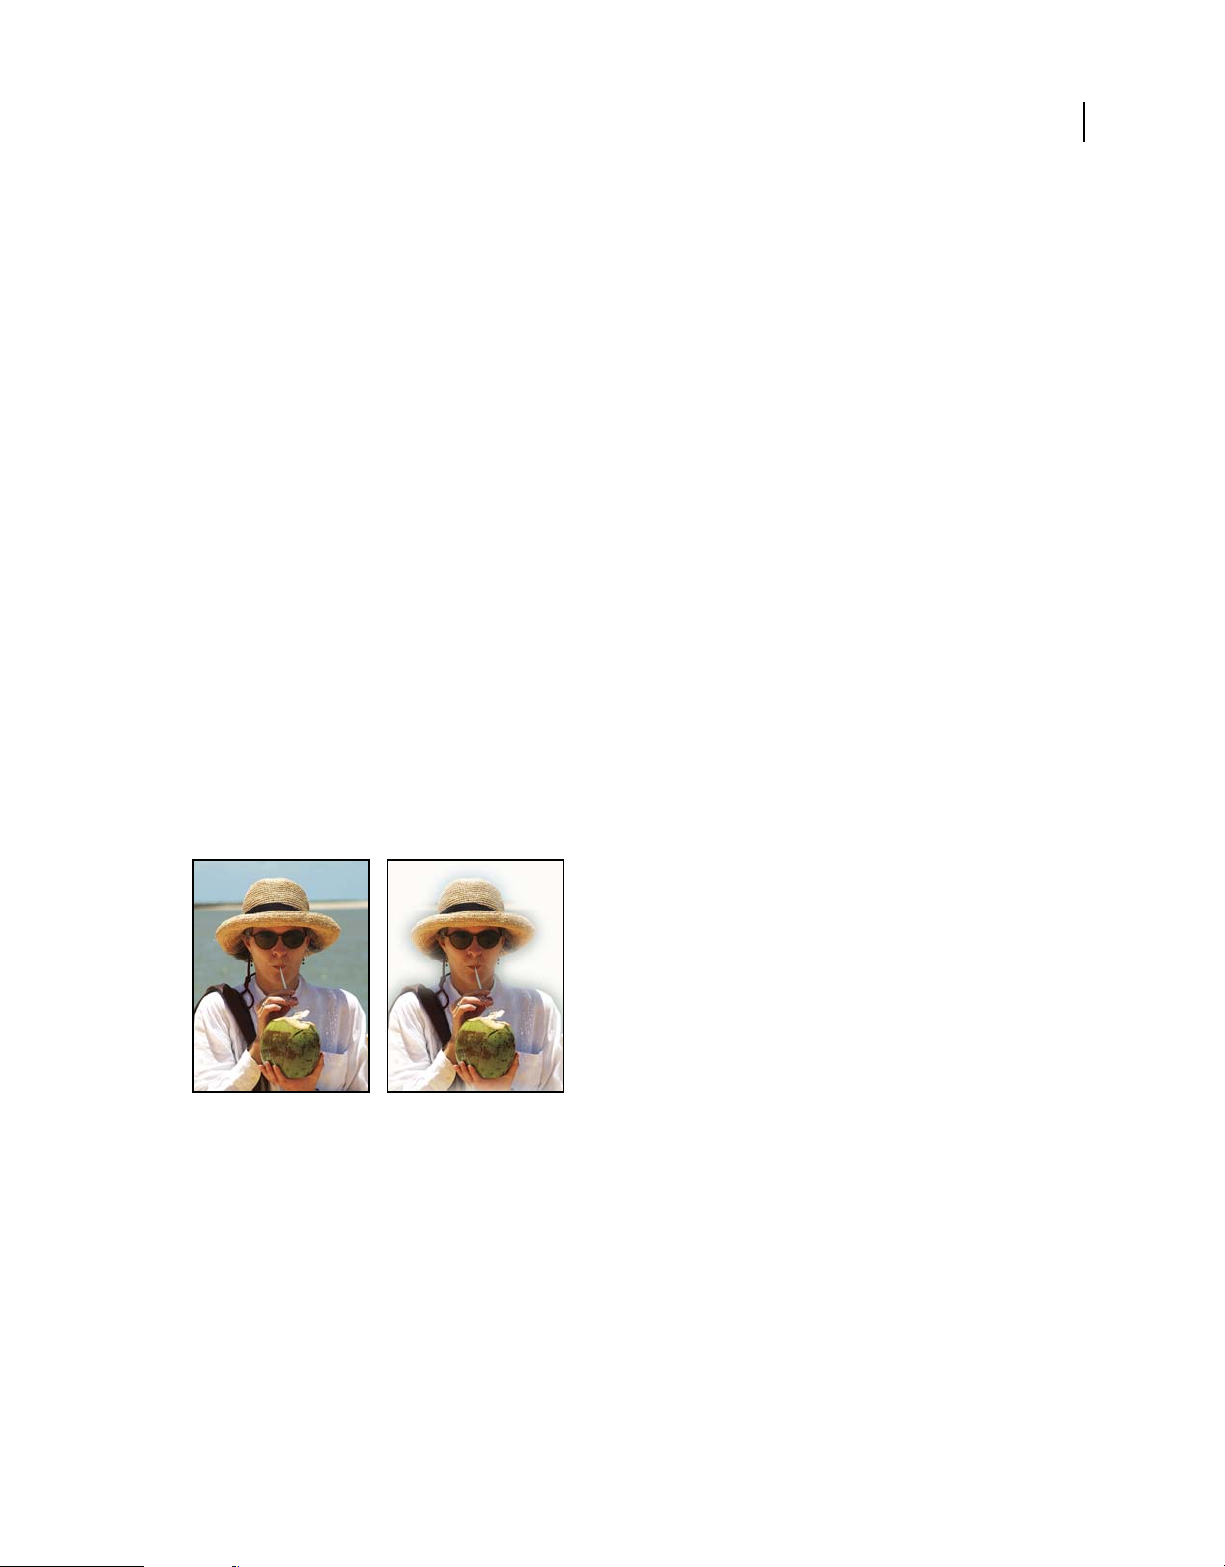
USING PHOTOSHOP ELEMENTS 8
Selecting parts of an image
Smoothing selection edges with anti-aliasing and feathering
Smooth the edges of a selection by anti-aliasing
You can smooth the hard edges of a selection by anti-aliasing or feathering. Anti-aliasing smooths the jagged edges of
a selection by softening the color transition between edge pixels and background pixels. Because only the edge pixels
change, no detail is lost. Anti-aliasing is useful when cutting, copying, and pasting selections to create composite
images.
You can select anti-aliasing with the Lasso, Polygonal Lasso, Magnetic Lasso, Elliptical Marquee, and Magic Wand
tools. To anti-alias, you must select the Anti-Alias option before making the selection; you cannot add anti-aliasing to
an existing selection.
1 Select the Lasso, Polygonal Lasso, Magnetic Lasso, Elliptical Marquee, or Magic Wand tool.
2 Select Anti-aliased in the options bar.
3 Make a selection in the image window.
Blur the edges of a selection by feathering
❖ You can smooth the hard edges of a selection by feathering. Feathering blurs edges by building a transition between
the selection and surrounding pixels. This blurring can cause some loss of detail at the edge of the selection.
You can create a feathered selection with the Elliptical Marquee, Rectangular Marquee, Lasso, Polygonal Lasso, or
Magnetic Lasso tool. You can also add feathering to an existing selection by using the Select menu. Feathering effects
are apparent when you move, cut, copy, or fill the selection.
93
Original image (left), and after making a feathered selection, applying the Inverse command, and filling with white (right)
Define a feathered edge for a selection tool
1 Do one of the following:
• Select any of the lasso or marquee tools from the toolbox, and enter a Feather value in the options bar to define the
width of the feathering. The feathering begins at the selection border.
• Select the Selection Brush tool, and select a soft-edged brush from the brushes pop-up panel in the options bar.
2 Make a selection in the image window.
Define a feathered edge for an existing selection
1 Use a selection tool from the toolbox to make a selection.
Last updated 7/26/2011
Page 100

USING PHOTOSHOP ELEMENTS 8
Selecting parts of an image
2 Choose Select > Feather.
3 Type a value between .2 and 250 in the Feather Radius text box, and click OK. The feather radius defines the width
of the feathered edge.
Moving and copying selections
Move a selection
The Move tool lets you cut and drag a pixel selection to a new location in the photo. You can also use the tool to
move or copy selections between photos and between photos in other applications.
94
Moving a selection from one photo into another using the Move tool
To activate the Move tool when another tool is selected, hold down the Command key. (This technique does not work
with the Hand tool.)
1 Make a selection with a selection tool and select the Move tool from the toolbox.
2 (Optional) Change Move tool settings in the options bar.
3 Move the pointer inside the selection border, and drag the selection to a new position. If you’ve selected multiple
areas, all pixel selections move as you drag.
Move tool options
When you select the Move tool , you can change the following settings in the options bar:
Auto Select Layer Selects the topmost layer that has pixels under the Move tool, rather than the selected layer.
Show Bounding Box Displays the bounding box around the selected item. The boxes on the sides and corners of the
selection border allow you to resize the selection.
Show Highlight On Rollover Highlights individual layers as the mouse hovers over the image. Click on a highlighted
layer to select and move it. Layers that are already selected do not highlight on rollover.
Arrange menu Moves the selected layer in front, in between, or in back of other layers. Options include Bring To
Front, Bring Forward, Send Backward, and Send To Back. To arrange a layer, select the layer, and then choose an item
from the Arrange menu.
Align menu Aligns the selected layers. Options include aligning on the Left, Center, Right, Top, Middle, and Bottom.
Multiple layers can be aligned simultaneously. To align layers, select a layer, hold down Shift, select another layer, and
then choose an item from the Align menu.
Last updated 7/26/2011
 Loading...