

Page 1

Classroom in a Book
Peachpit Press/Scott Design
®
www.adobepress.com
Page 2

© 2004 Adobe Systems Incorporated. All rights reserved.
Peachpit Press/Scott Design
Adobe® Encore DVD™ Classroom in a Book®
This book, as well as the software described in it, is furnished under license and may be used or copied only in accordance with the
terms of such license. The content of this book is furnished for informational use only, is subject to change without notice, and
should not be construed as a commitment by Adobe Systems Incorporated. Adobe Systems Incorporated assumes no responsibility
or liability for any errors or inaccuracies that may appear in this book.
Except as permitted by such license, no part of this documentation may be reproduced, stored in a retrieval system, or transmitted,
in any form or by any means, electronic, mechanical, recording, or otherwise, without the prior written permission of Adobe
Systems Incorporated.
Please remember that existing artwork, movies, sounds, or images that you may want to include in your project may be protected
under copyright law. The unauthorized incorporation of such material into your new work could be a violation of the rights of the
copyright owner. Please be sure to obtain any permission required from the copyright owner.
Any references to company names or individual names in sample templates and other project files are for demonstration purposes
only and are not intended to refer to any actual organization or person.
Adobe, the Adobe logo, the Adobe Press logo, After Effects, Acrobat, Acrobat Reader, Audition, Classroom in a Book, Adobe Encore,
GoLive, Illustrator, Minion, Photoshop, PostScript, and Adobe Premiere are either registered trademarks or trademarks of Adobe
Systems Incorporated in the United States and/or other countries. Microsoft and Windows are registered trademarks of Microsoft
Corporation in the United States and/or other countries. Apple, Mac OS, and QuickTime are trademarks of Apple Computer, Inc.,
registered in the United States and other countries. Pentium is a registered trademark of Intel Corporation. MPEG Layer 3 audio
compression technology is licensed by Fraunhofer IIS and Thompson. All other trademarks are the property of their respective
owners.
Contains an implementation of the LZW algorithm licensed under U.S. Patent 4,558,302.
Music in lessons 1 and 9 courtesy of Jason A. Levine.
Books & Beans video assets in lessons 6 and 8 courtesy of Max Freedman, ASCI Advertising and Publishing, Mountain View, CA.
Lessons developed by Paul Carew and documented by Brie Gyncild.
Wr itten and designed at Adobe Systems Incorporated, 345 Park Avenue, San Jose, California 95110, U.S.A.
www.adobepress.com
Adobe Press books are published by Peachpit Press, Berkeley, California 94710.
To report errors, please send a note to errata@peachpit.com.
Notice to U.S. Government End Users. The Software and Documentation are “Commercial Items,” as that term is defined at 48
C.F.R. §2.101, consisting of “Commercial Computer Software” and “Commercial Computer Software Documentation,” as such
terms are used in 48 C.F.R. §12.212 or 48 C.F.R. §227.7202, as applicable. Consistent with 48 C.F.R. §12.212 or 48 C.F.R.
§§227.7202-1 through 227.7202-4, as applicable, the Commercial Computer Software and Commercial Computer Software
Documentation are being licensed to U.S. Government end users (a) only as Commercial Items and (b) with only those rights as
are granted to all other end users pursuant to the terms and conditions herein. Unpublished-rights reserved under the copyright
laws of the United States. Adobe Systems Incorporated, 345 Park Avenue, San Jose, CA 95110-2704, USA. For U.S. Government End
Users, Adobe agrees to comply with all applicable equal opportunity laws including, if appropriate, the provisions of Executive
Order 11246, as amended, Section 402 of the Vietnam Era Veterans Readjustment Assistance Act of 1974 (38 USC 4212), and Section 503 of the Rehabilitation Act of 1973, as amended, and the regulations at 41 CFR Parts 60-1 through 60-60, 60-250, and
60-741. The affirmative action clause and regulations contained in the preceding sentence shall be incorporated by reference in this
Agreement.
ISBN 0-321-20547-2
Printed in the U.S.A.
9 8 7 6 5 4 3 2
Page 3

Contents
Peachpit Press/Scott Design
iii
Getting Started
About Classroom in a Book . . . . . . . . . . . . . . . . . . . . . . . . . . . . . . . . . 1
Prerequisites . . . . . . . . . . . . . . . . . . . . . . . . . . . . . . . . . . . . . . . . . . . . . . . 1
Installing the Adobe Encore DVD program . . . . . . . . . . . . . . . . . . . 2
Copying the Classroom in a Book files. . . . . . . . . . . . . . . . . . . . . . . 2
Additional resources . . . . . . . . . . . . . . . . . . . . . . . . . . . . . . . . . . . . . . . 3
Adobe Certification . . . . . . . . . . . . . . . . . . . . . . . . . . . . . . . . . . . . . . . . .3
Lesson 01
Lesson 02
Creating a Simple DVD
Getting started . . . . . . . . . . . . . . . . . . . . . . . . . . . . . . . . . . . . . . . . . . . . . 8
Planning your DVD . . . . . . . . . . . . . . . . . . . . . . . . . . . . . . . . . . . . . . . .11
Importing files as assets . . . . . . . . . . . . . . . . . . . . . . . . . . . . . . . . . . . .12
Creating a timeline . . . . . . . . . . . . . . . . . . . . . . . . . . . . . . . . . . . . . . . . 12
Adding chapter points . . . . . . . . . . . . . . . . . . . . . . . . . . . . . . . . . . . . .15
Importing a layered Photoshop file as a menu . . . . . . . . . . . . . .17
Setting start and end behaviors. . . . . . . . . . . . . . . . . . . . . . . . . . . . 19
Setting behaviors for remote control buttons . . . . . . . . . . . . . . .20
Previewing the project . . . . . . . . . . . . . . . . . . . . . . . . . . . . . . . . . . . . .21
Burning the DVD . . . . . . . . . . . . . . . . . . . . . . . . . . . . . . . . . . . . . . . . . . .22
Review questions . . . . . . . . . . . . . . . . . . . . . . . . . . . . . . . . . . . . . . . . . 23
Creating Menus in Adobe Encore DVD
Getting started . . . . . . . . . . . . . . . . . . . . . . . . . . . . . . . . . . . . . . . . . . . .28
About menus . . . . . . . . . . . . . . . . . . . . . . . . . . . . . . . . . . . . . . . . . . . . . .29
Creating a new menu . . . . . . . . . . . . . . . . . . . . . . . . . . . . . . . . . . . . . .30
Adding text to a menu . . . . . . . . . . . . . . . . . . . . . . . . . . . . . . . . . . . . .32
Adding assets to menus . . . . . . . . . . . . . . . . . . . . . . . . . . . . . . . . . . . .35
Adding drop shadows to text . . . . . . . . . . . . . . . . . . . . . . . . . . . . . .38
Converting text blocks to buttons . . . . . . . . . . . . . . . . . . . . . . . . . .40
Adding subpictures to buttons . . . . . . . . . . . . . . . . . . . . . . . . . . . . 41
Page 4

iv
Peachpit Press/Scott Design
CONTENTS
Linking buttons to timelines . . . . . . . . . . . . . . . . . . . . . . . . . . . . . . 45
Previewing the project . . . . . . . . . . . . . . . . . . . . . . . . . . . . . . . . . . . . 47
Burning the DVD . . . . . . . . . . . . . . . . . . . . . . . . . . . . . . . . . . . . . . . . . . 48
Review questions . . . . . . . . . . . . . . . . . . . . . . . . . . . . . . . . . . . . . . . . . 49
Lesson 03
Lesson 04
Designing Menus in Adobe Photoshop
Getting started . . . . . . . . . . . . . . . . . . . . . . . . . . . . . . . . . . . . . . . . . . . 54
Teaming Adobe Encore DVD with Photoshop . . . . . . . . . . . . . . 55
Creating a menu background in Photoshop. . . . . . . . . . . . . . . . 56
Creating text in Photoshop . . . . . . . . . . . . . . . . . . . . . . . . . . . . . . . . 59
Applying layer styles in Photoshop . . . . . . . . . . . . . . . . . . . . . . . . . 65
Creating buttons in Photoshop . . . . . . . . . . . . . . . . . . . . . . . . . . . . 69
Importing a menu into Adobe Encore DVD . . . . . . . . . . . . . . . . . 75
Editing a menu in Photoshop . . . . . . . . . . . . . . . . . . . . . . . . . . . . . . 76
Linking buttons to timelines . . . . . . . . . . . . . . . . . . . . . . . . . . . . . . . 78
Repositioning overlapping objects . . . . . . . . . . . . . . . . . . . . . . . . . 80
Previewing the project . . . . . . . . . . . . . . . . . . . . . . . . . . . . . . . . . . . . 82
Review questions . . . . . . . . . . . . . . . . . . . . . . . . . . . . . . . . . . . . . . . . . 83
Using Adobe Encore DVD Templates
Getting started . . . . . . . . . . . . . . . . . . . . . . . . . . . . . . . . . . . . . . . . . . . . 88
Exploring the Library palette . . . . . . . . . . . . . . . . . . . . . . . . . . . . . . . 90
Modifying a menu template . . . . . . . . . . . . . . . . . . . . . . . . . . . . . . . 93
Creating submenus from the same template. . . . . . . . . . . . . . . 97
Replacing background elements . . . . . . . . . . . . . . . . . . . . . . . . . . . 99
Adding items to the Library palette . . . . . . . . . . . . . . . . . . . . . . .101
Linking menus to each other . . . . . . . . . . . . . . . . . . . . . . . . . . . . .104
Linking buttons to timelines . . . . . . . . . . . . . . . . . . . . . . . . . . . . . .105
Creating a text layer . . . . . . . . . . . . . . . . . . . . . . . . . . . . . . . . . . . . . .105
Checking links . . . . . . . . . . . . . . . . . . . . . . . . . . . . . . . . . . . . . . . . . . . 107
Previewing the project . . . . . . . . . . . . . . . . . . . . . . . . . . . . . . . . . . .109
Building a DVD image. . . . . . . . . . . . . . . . . . . . . . . . . . . . . . . . . . . . .110
Burning a DVD from a DVD image file . . . . . . . . . . . . . . . . . . . . . 110
Review questions . . . . . . . . . . . . . . . . . . . . . . . . . . . . . . . . . . . . . . . . .111
Page 5

ADOBE ENCORE DVD
Peachpit Press/Scott Design
Classroom in a Book
v
Lesson 05
Lesson 06
Assembling a DVD Quickly
Getting started . . . . . . . . . . . . . . . . . . . . . . . . . . . . . . . . . . . . . . . . . . .116
Dragging items into the Library palette . . . . . . . . . . . . . . . . . . . 117
Importing items into the Library palette . . . . . . . . . . . . . . . . . . .120
Creating buttons instantly. . . . . . . . . . . . . . . . . . . . . . . . . . . . . . . . 121
Resizing and positioning buttons . . . . . . . . . . . . . . . . . . . . . . . . . 123
Editing button text . . . . . . . . . . . . . . . . . . . . . . . . . . . . . . . . . . . . . . .125
Adding a title to the menu . . . . . . . . . . . . . . . . . . . . . . . . . . . . . . . 127
Previewing the project . . . . . . . . . . . . . . . . . . . . . . . . . . . . . . . . . . .128
Adding data files to a disc . . . . . . . . . . . . . . . . . . . . . . . . . . . . . . . .128
Burning a CD . . . . . . . . . . . . . . . . . . . . . . . . . . . . . . . . . . . . . . . . . . . . . 129
Review questions . . . . . . . . . . . . . . . . . . . . . . . . . . . . . . . . . . . . . . . . .130
Overriding Default Actions
Getting started . . . . . . . . . . . . . . . . . . . . . . . . . . . . . . . . . . . . . . . . . . 134
About overrides . . . . . . . . . . . . . . . . . . . . . . . . . . . . . . . . . . . . . . . . . .136
Working with multiple menus . . . . . . . . . . . . . . . . . . . . . . . . . . . . 137
Setting default end actions. . . . . . . . . . . . . . . . . . . . . . . . . . . . . . . 138
Setting links for the main menu . . . . . . . . . . . . . . . . . . . . . . . . . . . 140
Using the pick whip . . . . . . . . . . . . . . . . . . . . . . . . . . . . . . . . . . . . . . 143
Setting overrides . . . . . . . . . . . . . . . . . . . . . . . . . . . . . . . . . . . . . . . . .144
Previewing the project . . . . . . . . . . . . . . . . . . . . . . . . . . . . . . . . . . .148
Making a DVD folder . . . . . . . . . . . . . . . . . . . . . . . . . . . . . . . . . . . . .149
Review questions . . . . . . . . . . . . . . . . . . . . . . . . . . . . . . . . . . . . . . . . .149
Lesson 07
Creating Motion Menus
Getting started . . . . . . . . . . . . . . . . . . . . . . . . . . . . . . . . . . . . . . . . . . .154
Assembling your assets . . . . . . . . . . . . . . . . . . . . . . . . . . . . . . . . . . .156
Creating and naming chapter points . . . . . . . . . . . . . . . . . . . . . .159
Specifying an end action and a link for a timeline . . . . . . . . . 162
Adding video to the background of a menu . . . . . . . . . . . . . . .164
Previewing the motion menu background . . . . . . . . . . . . . . . . 166
Transcoding an AVI file from the Project window . . . . . . . . . . 168
Creating video thumbnail buttons. . . . . . . . . . . . . . . . . . . . . . . . 170
Page 6

vi
Peachpit Press/Scott Design
CONTENTS
Creating animated thumbnail buttons . . . . . . . . . . . . . . . . . . . .178
Burning the DVD . . . . . . . . . . . . . . . . . . . . . . . . . . . . . . . . . . . . . . . . . 180
Review questions . . . . . . . . . . . . . . . . . . . . . . . . . . . . . . . . . . . . . . . . 180
Lesson 08
Lesson 09
Wo r king with Adobe Premiere Pro
Getting started . . . . . . . . . . . . . . . . . . . . . . . . . . . . . . . . . . . . . . . . . . .186
Creating markers in Premiere Pro . . . . . . . . . . . . . . . . . . . . . . . . .187
Exporting an MPEG-2 file from Premiere Pro . . . . . . . . . . . . . . .189
Importing an MPEG-2 file with markers . . . . . . . . . . . . . . . . . . . . 191
Linking chapter points to thumbnail buttons . . . . . . . . . . . . . . 194
Previewing the project . . . . . . . . . . . . . . . . . . . . . . . . . . . . . . . . . . .196
Exporting an AVI file from Premiere Pro . . . . . . . . . . . . . . . . . . . 198
Using the Edit Original command . . . . . . . . . . . . . . . . . . . . . . . . 200
Using the ripple edit tool in Premiere Pro . . . . . . . . . . . . . . . . . 201
Updating an AVI file in Adobe Encore DVD . . . . . . . . . . . . . . . . 202
Creating links and behaviors . . . . . . . . . . . . . . . . . . . . . . . . . . . . . . 203
Previewing the project . . . . . . . . . . . . . . . . . . . . . . . . . . . . . . . . . . .205
Burning the disc . . . . . . . . . . . . . . . . . . . . . . . . . . . . . . . . . . . . . . . . . 205
Review questions . . . . . . . . . . . . . . . . . . . . . . . . . . . . . . . . . . . . . . . . 206
Wo r king with Adobe After Effects
Getting started . . . . . . . . . . . . . . . . . . . . . . . . . . . . . . . . . . . . . . . . . . 212
Importing a Photoshop menu . . . . . . . . . . . . . . . . . . . . . . . . . . . .213
Modifying a Photoshop file in After Effects. . . . . . . . . . . . . . . . 215
Animating a menu file in After Effects . . . . . . . . . . . . . . . . . . . . .218
Rendering a movie in After Effects . . . . . . . . . . . . . . . . . . . . . . . . 222
Importing an After Effects movie into Adobe Encore DVD . . 226
Activating a motion menu . . . . . . . . . . . . . . . . . . . . . . . . . . . . . . . .229
Editing a file in After Effects . . . . . . . . . . . . . . . . . . . . . . . . . . . . . . . 230
Creating links to assets . . . . . . . . . . . . . . . . . . . . . . . . . . . . . . . . . . . 234
Burning the DVD . . . . . . . . . . . . . . . . . . . . . . . . . . . . . . . . . . . . . . . . . 236
Review questions . . . . . . . . . . . . . . . . . . . . . . . . . . . . . . . . . . . . . . . . 236
Page 7

ADOBE ENCORE DVD
Peachpit Press/Scott Design
Classroom in a Book
vii
Lesson 10
Lesson 11
Creating a Slideshow from Still Images
Getting started . . . . . . . . . . . . . . . . . . . . . . . . . . . . . . . . . . . . . . . . . . 240
Assembling components for a slideshow . . . . . . . . . . . . . . . . . 242
Laying out a slideshow menu . . . . . . . . . . . . . . . . . . . . . . . . . . . . 243
Copying buttons to other menus . . . . . . . . . . . . . . . . . . . . . . . . .246
Linking menus to each other . . . . . . . . . . . . . . . . . . . . . . . . . . . . . 247
Adding audio to a menu . . . . . . . . . . . . . . . . . . . . . . . . . . . . . . . . . . 250
Previewing an audio file . . . . . . . . . . . . . . . . . . . . . . . . . . . . . . . . . .251
Setting end actions for slideshow menus . . . . . . . . . . . . . . . . . 252
About creating slideshows with timelines. . . . . . . . . . . . . . . . . 253
Organizing your assets . . . . . . . . . . . . . . . . . . . . . . . . . . . . . . . . . . .254
Creating a timeline from still images . . . . . . . . . . . . . . . . . . . . . .256
Setting behaviors for a slideshow. . . . . . . . . . . . . . . . . . . . . . . . . 258
Previewing the project . . . . . . . . . . . . . . . . . . . . . . . . . . . . . . . . . . .260
Burning the DVD . . . . . . . . . . . . . . . . . . . . . . . . . . . . . . . . . . . . . . . . . 260
Review questions . . . . . . . . . . . . . . . . . . . . . . . . . . . . . . . . . . . . . . . . .260
Adding Audio Tracks and Subtitles
Getting started . . . . . . . . . . . . . . . . . . . . . . . . . . . . . . . . . . . . . . . . . . .266
Including audio tracks in a project . . . . . . . . . . . . . . . . . . . . . . . . 268
Adding audio tracks. . . . . . . . . . . . . . . . . . . . . . . . . . . . . . . . . . . . . . 269
Previewing audio tracks . . . . . . . . . . . . . . . . . . . . . . . . . . . . . . . . . . 271
Linking buttons to audio tracks . . . . . . . . . . . . . . . . . . . . . . . . . . . 272
Adding a main menu. . . . . . . . . . . . . . . . . . . . . . . . . . . . . . . . . . . . . 274
Adding a subtitle track . . . . . . . . . . . . . . . . . . . . . . . . . . . . . . . . . . .277
Modifying the appearance of subtitles . . . . . . . . . . . . . . . . . . . .280
Importing subtitles from a text script . . . . . . . . . . . . . . . . . . . . . . 283
About subtitle scripts . . . . . . . . . . . . . . . . . . . . . . . . . . . . . . . . . . . . .285
Linking buttons to subtitle tracks . . . . . . . . . . . . . . . . . . . . . . . . . 285
Previewing the project . . . . . . . . . . . . . . . . . . . . . . . . . . . . . . . . . . .289
Burning a DVD . . . . . . . . . . . . . . . . . . . . . . . . . . . . . . . . . . . . . . . . . . . . 289
Review questions . . . . . . . . . . . . . . . . . . . . . . . . . . . . . . . . . . . . . . . . .289
Index
. . . . . . . . . . . . . . . . . . . . . . . . . . . . . . . . . . . . . . . . . . . . . . . . . . . 291
Page 8

Peachpit Press/Scott Design
Page 9

Getting Started
Peachpit Press/Scott Design
Adobe® Encore™ DVD gives you the tools you need to let you effortlessly create and burn
customized DVDs. You can design menus and buttons in Adobe Encore DVD, or use
menus and buttons you create in Adobe® Photoshop®. The navigational tools in Adobe
Encore DVD give you total control over the viewers’ experience of your DVD. Whether
you’re a corporate communications professional or an aspiring videographer, you’ll enjoy
the versatility, ease of use, and power of Adobe Encore DVD software.
About Classroom in a Book
1
Adobe Encore DVD Classroom in a Book®
graphics and publishing software developed with the help of experts at Adobe Systems.
The lessons are designed to let you learn at your own pace.
Although each lesson provides step-by-step instructions for creating a specific project,
there’s room for exploration and experimentation. You can follow the book from start to
finish or do only the lessons that correspond to your interests and needs.
is part of the official training series for Adobe
Prerequisites
Before beginning to use
working knowledge of your computer and the Windows operating system. Make sure that
you know how to use the mouse and standard menus and commands and that you know
how to open, save, and close files. If you need to review these techniques, see the printed
or online documentation included with your Windows operating system. It is also
helpful, but not necessary, to have experience with Adobe Photoshop, Adobe® Premiere®,
and Adobe® After Effects®.
To complete some of the projects, you will need to have Adobe Photoshop, Adobe
Premiere Pro, or Adobe After Effects installed on your system.
Note: You can use either Adobe Photoshop 7.0 or Adobe Photoshop CS with Adobe Encore
DVD. Where necessary, instructions for each version of Photoshop are written separately.
Adobe Encore DVD Classroom in a Book
, you should have a
Page 10

2
Peachpit Press/Scott Design
Getting Started
Installing the Adobe Encore DVD program
Before you begin using
system is set up correctly and that you’ve installed the required software and hardware.
You must purchase the Adobe Encore DVD software separately. For system requirements
and complete instructions on installing the software, see the documentation included
with your Adobe Encore DVD application DVD.
You must install the application from the Adobe Encore DVD application DVD onto your
hard disk; you cannot run the program directly from the DVD-ROM. Follow the onscreen instructions. Make sure the serial number for your Adobe Encore DVD software is
accessible before installing the application; you can find the serial number on the back of
the DVD case.
Adobe Encore DVD Classroom in a Book
, make sure that your
Starting Adobe Encore DVD
You start Adobe Encore DVD just as you would any software application. In Windows,
choose Start > Programs > Adobe Encore DVD 1.0.
Installing the fonts you’ll use in Classroom in a Book projects
The fonts used in the lessons in this book are included on the Adobe Encore DVD
application DVD. Ensure that the fonts are available before you begin working with the
lessons. If the fonts are not installed on your system, install them from the Adobe Encore
DVD DVD-ROM, following the on-screen instructions.
Copying the Classroom in a Book files
The
Adobe Encore DVD Classroom in a Book
electronic files for the lessons. Each lesson has its own folder, and you must copy the
folders to your hard drive to do the lessons. To save room on your drive, you can install
only the folder for each lesson as you need it, and remove the folder when you’re done.
To install the Classroom in a Book files:
1
Insert the
2
Create a folder named Encore_CIB on your hard drive.
3
Copy the lessons you want to your hard drive:
DVD includes folders containing all the
Adobe Encore DVD Classroom in a Book
DVD into your DVD-ROM drive.
Page 11

ADOBE ENCORE DVD
Peachpit Press/Scott Design
Classroom in a Book
To copy all the lessons, drag the Lessons folder from the DVD into the Encore_CIB
•
folder.
To copy a single lesson, drag the individual lesson folder from the DVD into the
•
Encore_CIB folder.
•
If you copied all the lessons to your hard drive, double-click the unlock.bat file in the
Encore_CIB/Lessons folder.
Note: As you work through each lesson, you may overwrite the original files. To restore the
original files, recopy the corresponding lesson folder from the Classroom in a Book DVD to
the Encore_CIB folder on your hard drive.
Additional resources
3
Adobe Encore DVD Classroom in a Book
comes with the Adobe Encore DVD program. Only the commands and options used in
the lessons are explained in this book. For comprehensive information about program
features, refer to these resources:
•
The Adobe Encore DVD User Guide
software, contains a complete description of all features in the software.
Online Help, an online version of the user guide, is accessible by choosing Help >
•
Contents from the Adobe Encore DVD title bar.
The Adobe Web site (www.adobe.com) can be viewed by choosing Help > Adobe
•
Online if you have a connection to the World Wide Web.
is not intended to replace documentation that
, which is included with the Adobe Encore DVD
Adobe Certification
The Adobe Training and Certification Programs are designed to help Adobe customers
improve and promote their product-proficiency skills. The Adobe Certified Expert (ACE)
program is designed to recognize the high-level skills of expert users. Adobe Certified
Tr aining Providers (ACTP) use only Adobe Certified Experts to teach Adobe software
classes. Available in either ACTP classrooms or on-site, the ACE program is the best way
to master Adobe products. For Adobe Certified Training Programs information, visit the
Partnering with Adobe Web site at http://partners.adobe.com.
Page 12
1
Peachpit Press/Scott Design
Creating a Simple DVD
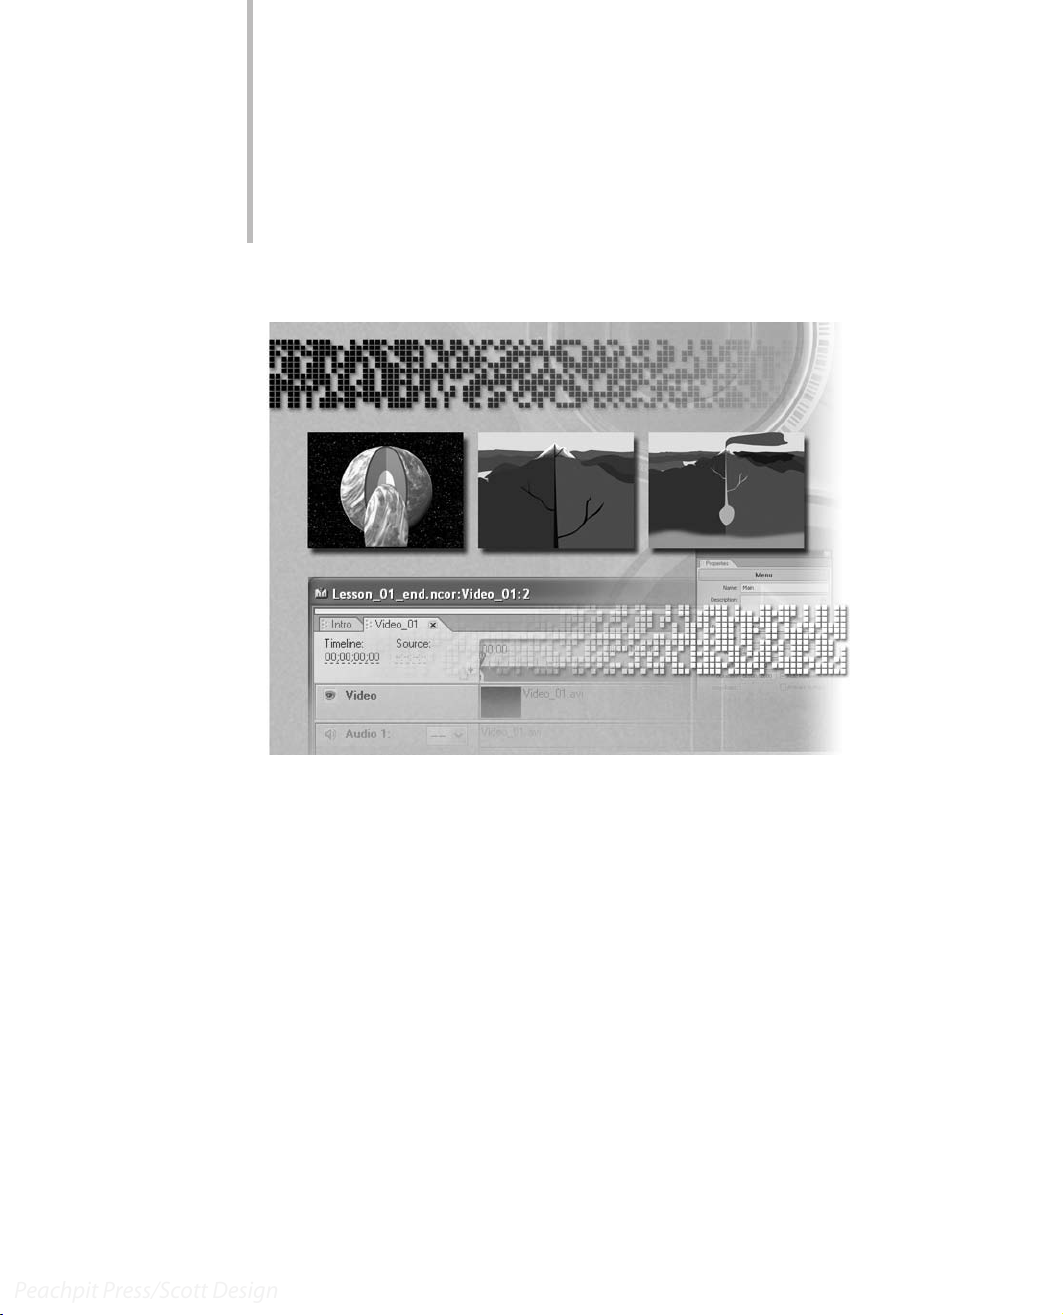
A DVD project includes video files, audio
files, and menus. With Adobe Encore
DVD, you can easily put the pieces
together to create a simple DVD. In this
lesson, you’ll learn about the core tools in
Adobe Encore DVD as you create a
project from start to finish.
Page 13

LESSON 1
Peachpit Press/Scott Design
8
Creating a Simple DVD
This lesson introduces the Adobe Encore DVD workspace and basic concepts. In it, you
will learn how to do the following:
•
•
•
•
•
•
•
•
•
Getting started
Create a new project.
Import files as assets.
Import a layered Adobe Photoshop file as a menu.
Create chapter points.
Link buttons on a menu to chapter points.
Set start and end behaviors.
Set menu and title behaviors.
Preview a DVD project.
Burn a DVD.
In this lesson, you’ll create an Adobe Encore DVD project from start to finish. You’ll create
a new project, import the assets and menu for the project, create links and behaviors,
preview the DVD, and burn the DVD. Make sure you know the location of the file you
need for Lesson 1. For help, see “Copying the Classroom in a Book files” on page 2.
Viewing the finished Adobe Encore DVD project
To see what you’ll be creating, take a look at the finished project.
1
Start Adobe Encore DVD.
2
Choose File > Open Project.
3
In the Open dialog box, navigate to the Lesson 01 folder. Select
and then click Open.
Lesson_01_end.ncor,
Page 14

ADOBE ENCORE DVD
Peachpit Press/Scott Design
Classroom in a Book
The Adobe Encore DVD workspace opens. By default, only some of the windows shown
below are open. The Project window contains the source files used in the finished DVD
project. Notice that there are several different types of files in the project. In Adobe Encore
DVD, you can work with many types of audio, video, and still image files.
9
A
B
C
D
Adobe Encore DVD workspace (not all windows and palettes appear at all times)
A.
To olboxB. Project window with Menus tab displayedC. Timeline window
D.
Palette windowE. Menu Editor window for selected menuF. Properties palette
4
Choose File > Preview.
E
F
Page 15

LESSON 1
Peachpit Press/Scott Design
10
Creating a Simple DVD
The Project Preview window opens, and a video plays for a few seconds. Then a DVD
menu appears. You can use the Project Preview window to preview a viewer’s experience
of a DVD project—including navigation, links, and other behaviors—before you burn a
disc.
A
BD E FC HG I J
Project Preview window
A.
Render Current Motion MenuB. Display Area ZoomC. Cycle Through Audio Tracks
D.
Cycle Through Subtitle TracksE. Status Area
and Enter Keys
L.
Exit HereM. Exit and Return
5
Move the cursor over the buttons next to the chapter names. As you move the cursor
I.
Execute End ActionJ. Go to Entered ChapterK. Playback Controls
F.
Remote Control Title Button
G.
Remote Control Menu ButtonH. Arrow
K
L
M
over a button, a white border appears around it.
6
Click the Part 1 button.
A video plays for approximately a minute. There are three distinct parts—or chapters—
in the video; the menu links to each of them. When the video has finished playing, the
menu reappears.
The Project Preview window has controls that represent those found on a television DVD
player’s remote control.
7
Click the up and down arrows until the Part 3 button is highlighted. Then click the Part
3 button.
The third part of the video plays. When it is finished, the menu reappears.
Page 16
ADOBE ENCORE DVD
Peachpit Press/Scott Design
Classroom in a Book
8
Close the Project Preview window and the Lesson_01_end Project window.
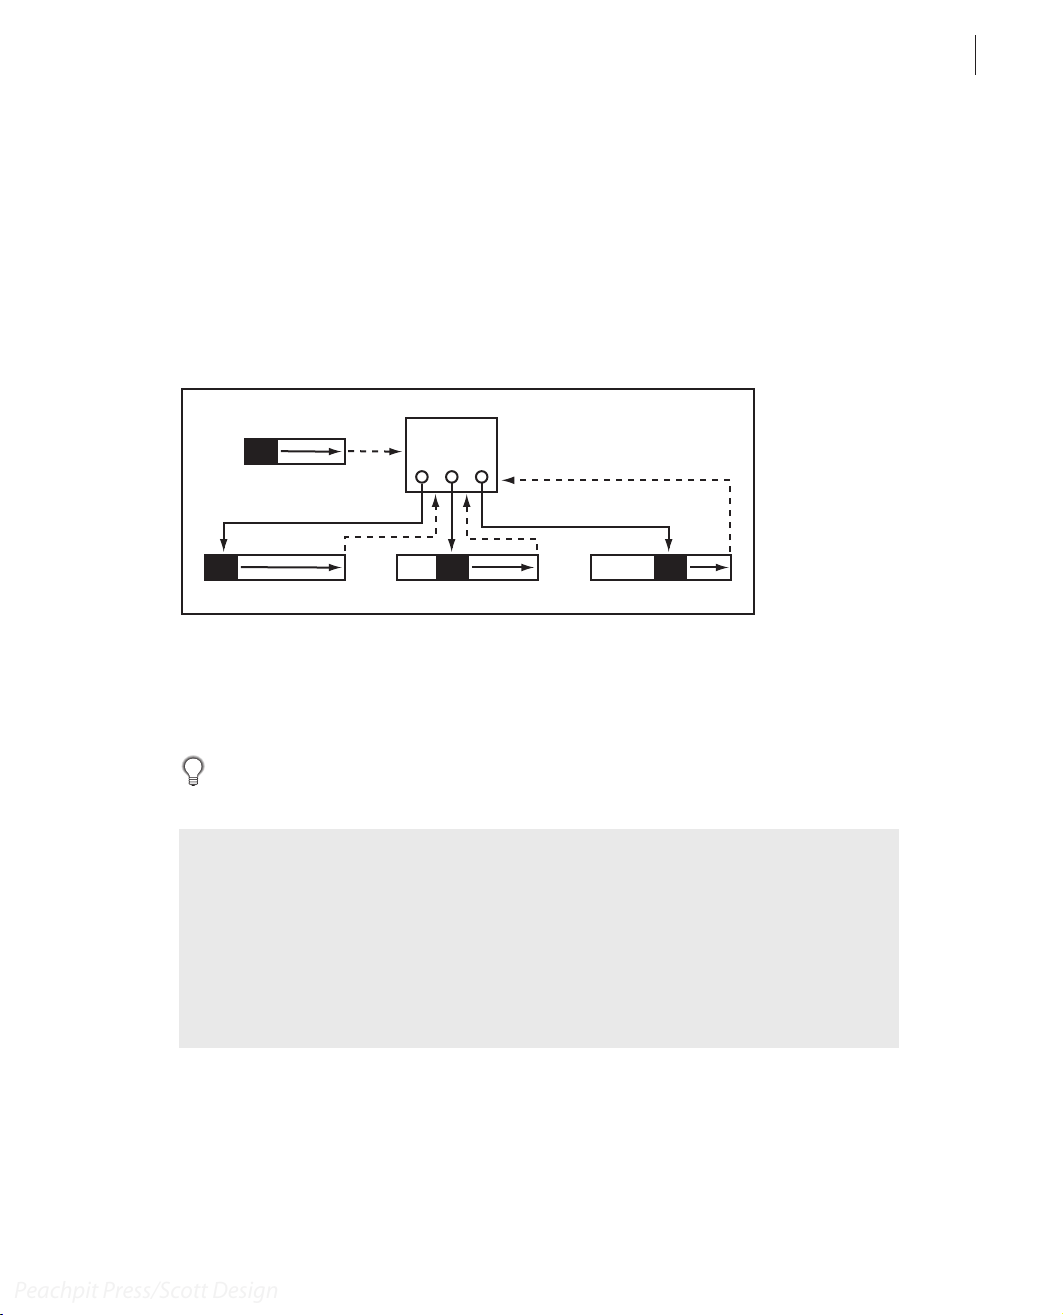
Planning your DVD
Now you’ll create the same DVD project you just previewed. You will import video and
audio files as assets, and a layered Photoshop file as a menu. Following the organization
shown in the diagram below, you will create links from buttons to chapter points in the
video timeline, and then set behaviors for those links.
B
A
CDE
11
The Introduction timeline (A) plays when the DVD is inserted, and then the Main menu (B) opens. When the first
button is activated, the Video_1 timeline (C) plays from beginning to end, and then the Main menu reappears.
When the second button is activated, the Video_1 timeline plays from the Chapter 2 marker (D) to the end, and
then the Main menu reappears. When the third button is activated, the Video_1 timeline plays from the Chapter
3 marker (E) to the end, and then the Main menu reappears.
Yo u might find it helpful to organize your project with simple flow charts.
About flow charts
Regardless of the complexity of the project, it is helpful to work through the flow of your project and
determine how the elements should link together before you begin creating it. Some DVD authors use
flow charts, and some use spreadsheets. However you choose to plan your project, it is valuable to
draft possible navigation scenarios and anticipate problems before you start. Sketching each of the
elements and drawing the links between them can help you clarify how you want your project to be
viewed.
Page 17
LESSON 1
Peachpit Press/Scott Design
12
Creating a Simple DVD
Importing files as assets
You can use a variety of video, audio, and still image files in Adobe Encore DVD. You can
import files into an Adobe Encore DVD project as either assets or menus. Assets are the
files that make up the content of the DVD; menus display options to give viewers access
to that content. First, you’ll create a new Adobe Encore DVD project.
1
Choose File > New Project. Click OK to accept NTSC as the television standard.
A new Project window appears. Now you’ll import assets into the Project window.
2
Choose File > Import as Asset.
3
In the Import as Asset dialog box, navigate to the Lesson 01 folder on your hard drive.
Then hold down the Ctrl key while you select
(Holding down the Ctrl key lets you select multiple files at once.)
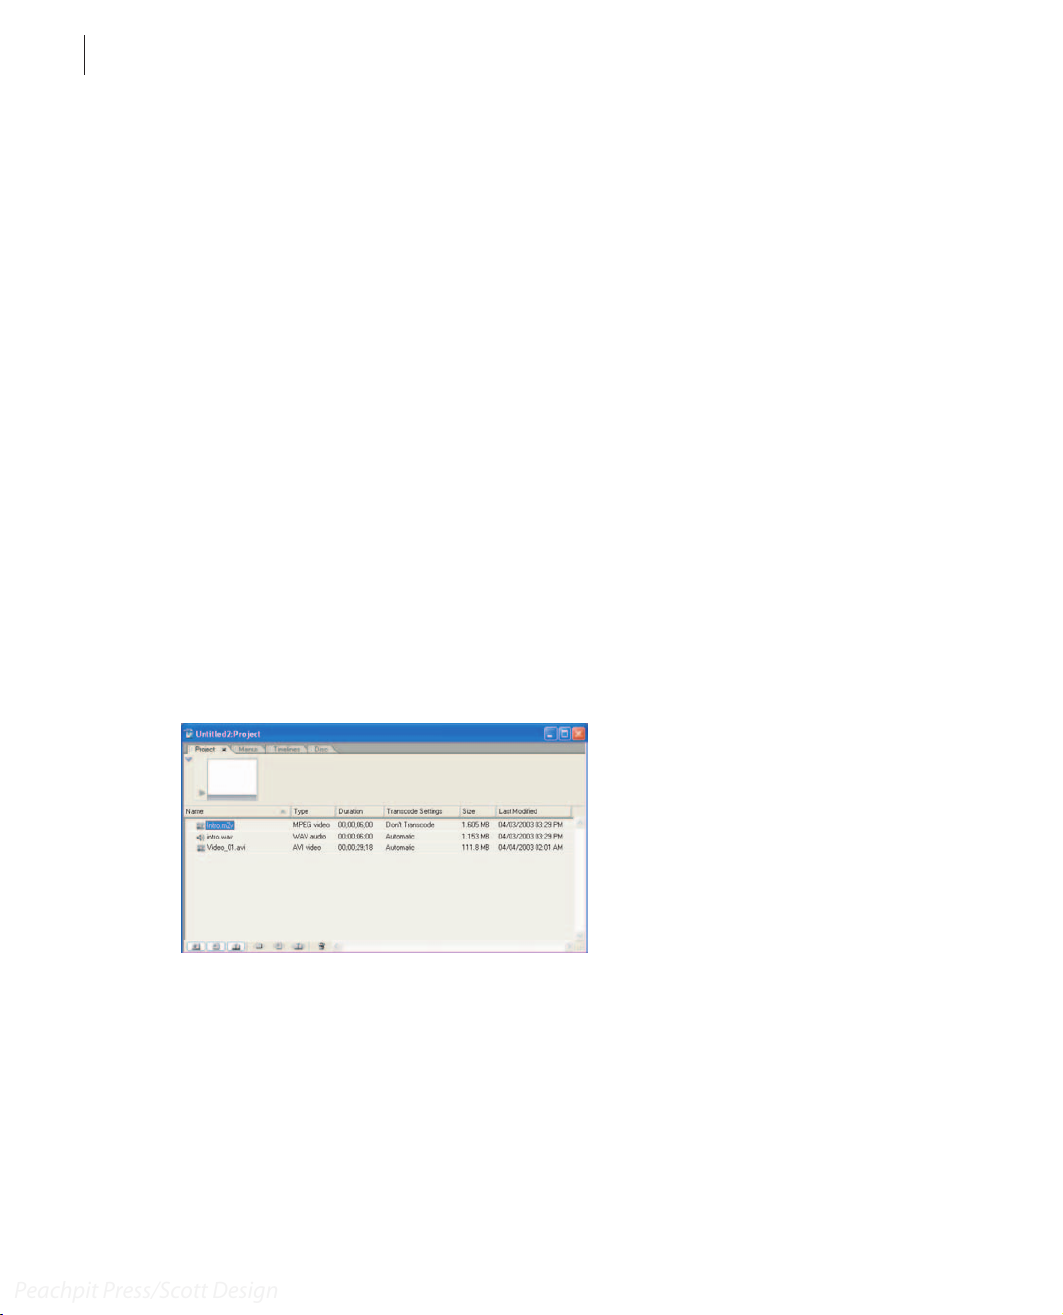
4 Click Open.
The files you selected appear in the Project window.
5 Resize the Project window or move the scroll bar at the bottom of the window to view
information about the files you imported. By default, the Project window displays the
name, file type, size, path, and transcode settings for each file.
Intro.m2v, Intro.wav
, and
Video_01.avi
.
6 Choose File > Save As to save the project. Name it Lesson_01.ncor.
Creating a timeline
In Adobe Encore DVD, you assemble video, audio, and subtitle assets into timelines,
where you can identify different sections of the video using chapter points. Each timeline
contains a single video track. Start the project by creating a timeline for the Intro video.
Page 18
ADOBE ENCORE DVD
Peachpit Press/Scott Design
Classroom in a Book
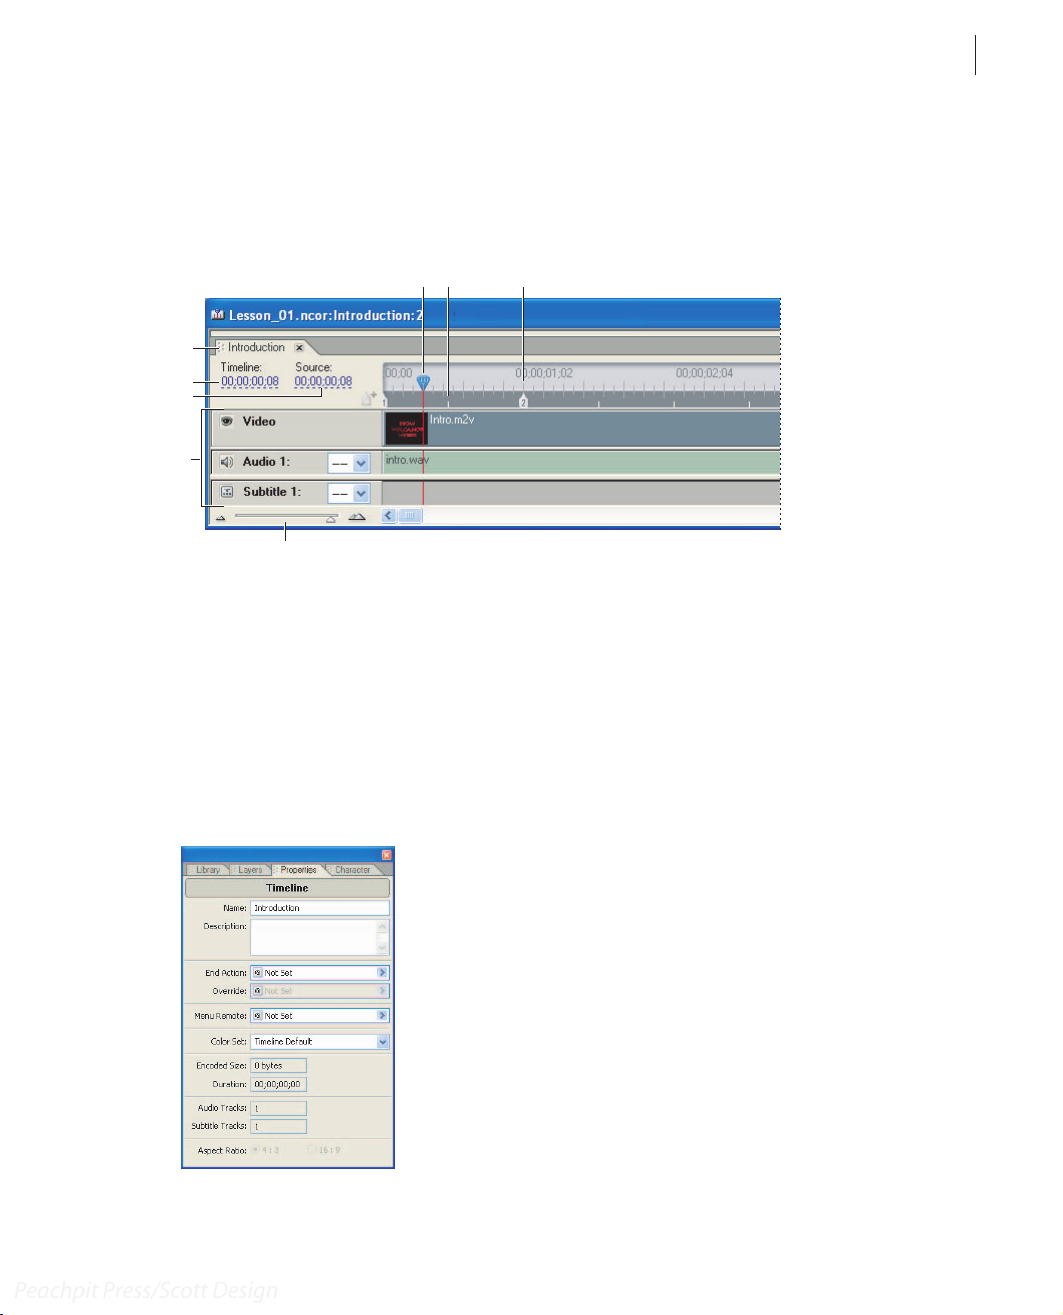
1 Choose Timeline > New Timeline.
An untitled Timeline window appears, and the Monitor window opens. Notice that the
untitled timeline is also listed in the Project window.
A CB
D
E
F
G
H
The Timeline window
A. Current-time indicator B. I-Frames C. Chapter point D. Timeline tabs E. Timeline F. Source
G. Tracks H. Zoom slider
13
Yo u’ll need to name the timeline. The Properties palette displays the attributes for the
item currently selected. If the Properties palette isn’t open, choose Window > Properties.
2 In the Name field of the Properties palette, type Introduction. (If you see attributes for
something other than the timeline, click in the Timeline window to make the timeline
active.)
Page 19
LESSON 1
Peachpit Press/Scott Design
14
Creating a Simple DVD
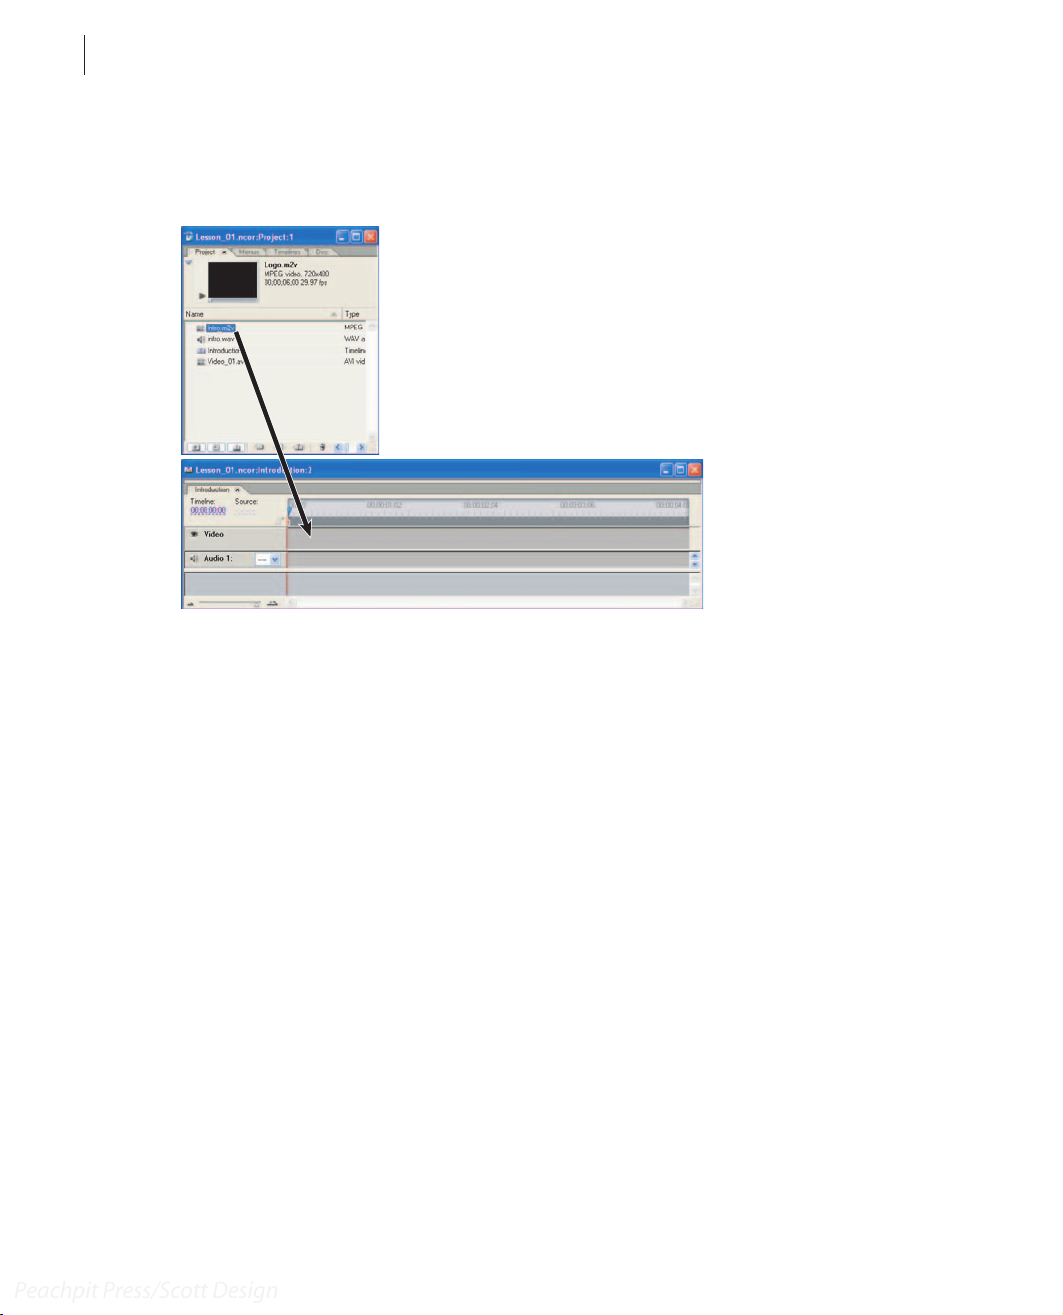
3 Select the Intro.m2v file in the Project window, and drag it onto the video track in the
Timeline window.
4 Select the Intro.wav file in the Project window, and drag it onto the Audio 1 track in
the Timeline window.
Page 20
ADOBE ENCORE DVD
Peachpit Press/Scott Design
Classroom in a Book
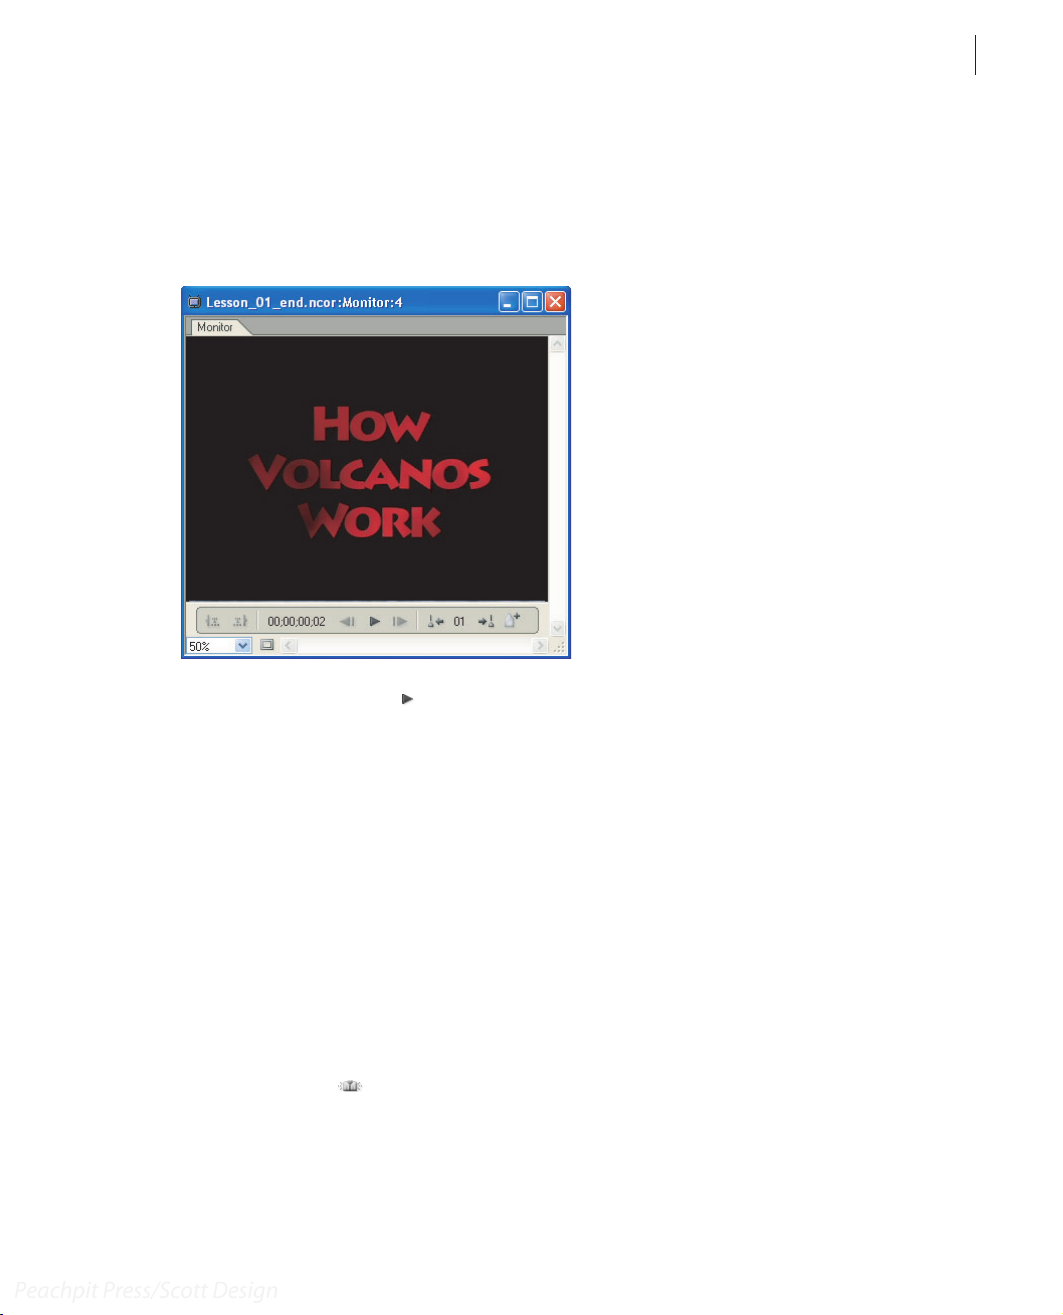
You can view the current timeline in the Monitor window. Unlike the Project Preview
window, the Monitor window displays only the video and audio tracks in the timeline; it
does not display the DVD behavior. The Monitor window opens when you create a
timeline.
15
5 Click the Play button ( ) in the Monitor window.
The introductory video plays for about eight seconds, and then ends.
6 Save the project.
Adding chapter points
Chapter points identify locations in the video track to which you want to link buttons or
other navigational behaviors. You can add chapter points in the Timeline window.
In this project, you want to create links to three different chapter points in the Video_01
clip, so you need to add chapter points to the clip. First, you will create a new timeline for
the Video_01.avi clip.
1 In the Project window, select the Video_01.avi file, and then click the Create a New
Timeline button ( ) at the bottom of the Project window.
Adobe Encore DVD creates a new timeline named Video_01, and places the Video_01.avi
file in the video and audio tracks.
Page 21
LESSON 1
Peachpit Press/Scott Design
16
Creating a Simple DVD
A tab appears at the upper-left side of the Timeline window for each timeline in the
project. Click a tab to view the corresponding timeline. For example, if you click the
Introduction tab, the Introduction timeline appears.
2 Click the Video_01 tab to make sure the Video_01 timeline is active. Then click the Play
button in the Monitor window to view the video. When it has finished, leave the Monitor
window open.
3 Move the current-time indicator to the left edge of the timeline. The time displayed
should be 00:00:00:00.
An initial chapter point is automatically created at the beginning of every timeline (that
is, at 00:00:00:00).
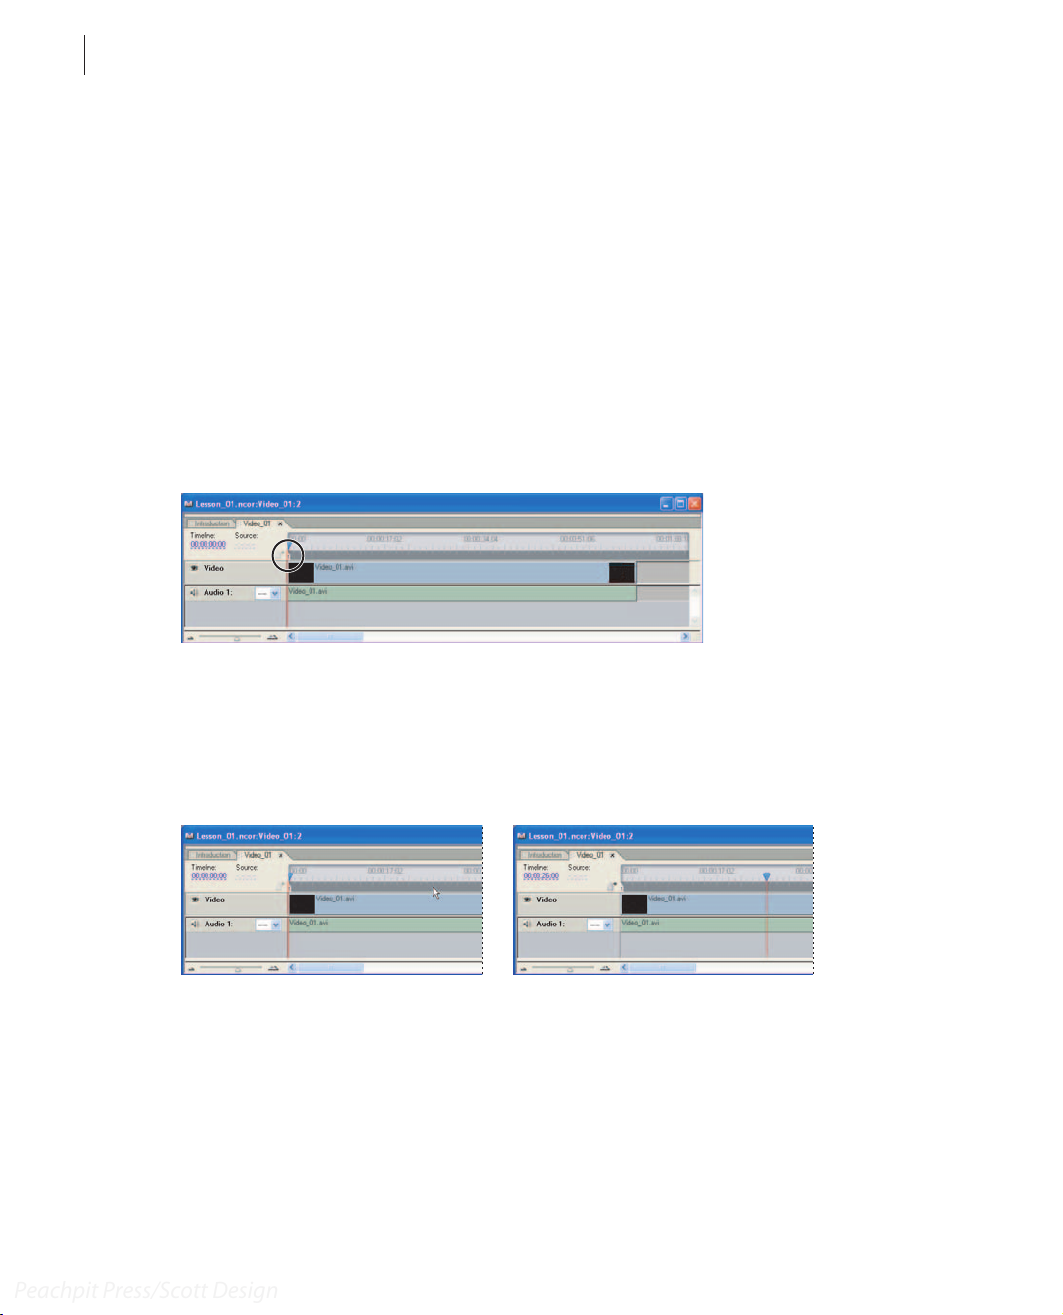
4 In the Timeline window, move the current-time indicator to the right until the time
display shows 00:00:26:00.
To position the current-time indicator quickly, move the scroll bar at the bottom of the
Timeline window until the destination time is visible. Then click on the time graph.
5 Choose Timeline > Add Chapter Point.
Page 22
ADOBE ENCORE DVD
Peachpit Press/Scott Design
Classroom in a Book
A chapter point marker with the number 2 appears on the timeline at 00:00:26:00, where
the current-time indicator is positioned. The marker is automatically numbered.
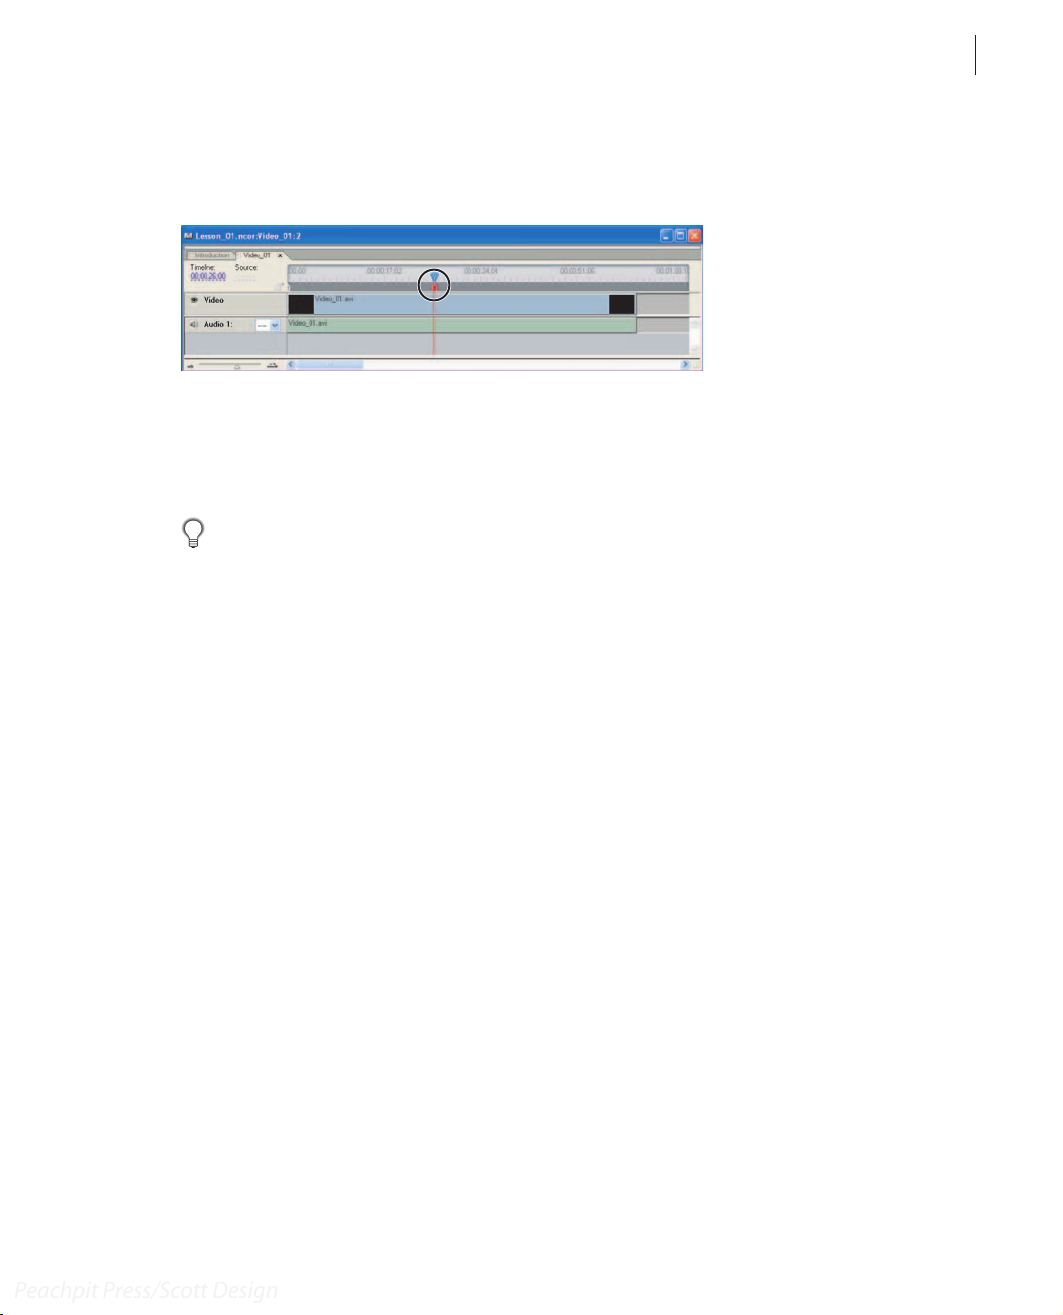
6 In the Timeline window, move the current-time indicator to the right until the time
displayed is 00:00:48:00. Then choose Timeline > Add Chapter Point again.
A marker with the number 3 appears on the timeline at 00:00:48:00.
Yo u can also add a chapter point by pressing the asterisk key. This is a great way to add
chapter points that correspond with audio cues.
7 Close the Timeline window and save the project. (The Monitor window closes
automatically when you close the Timeline window.)
17
Importing a layered Photoshop file as a menu
One of the most powerful features of Adobe Encore DVD is its ability to import menus
created in Photoshop. If you use Adobe Encore DVD naming conventions for layers in a
Photoshop image, those layers remain intact when you import the file as a menu. You can
make many changes and additions to the file directly in Adobe Encore DVD.
In this lesson, you’ll import a Photoshop image that has already been created with layers
using the Adobe Encore DVD naming conventions.
1 Choose File > Import as Menu.
2 In the Import as Menu dialog box, select Main.psd, and click Open.
Page 23
LESSON 1
Peachpit Press/Scott Design
18
Creating a Simple DVD
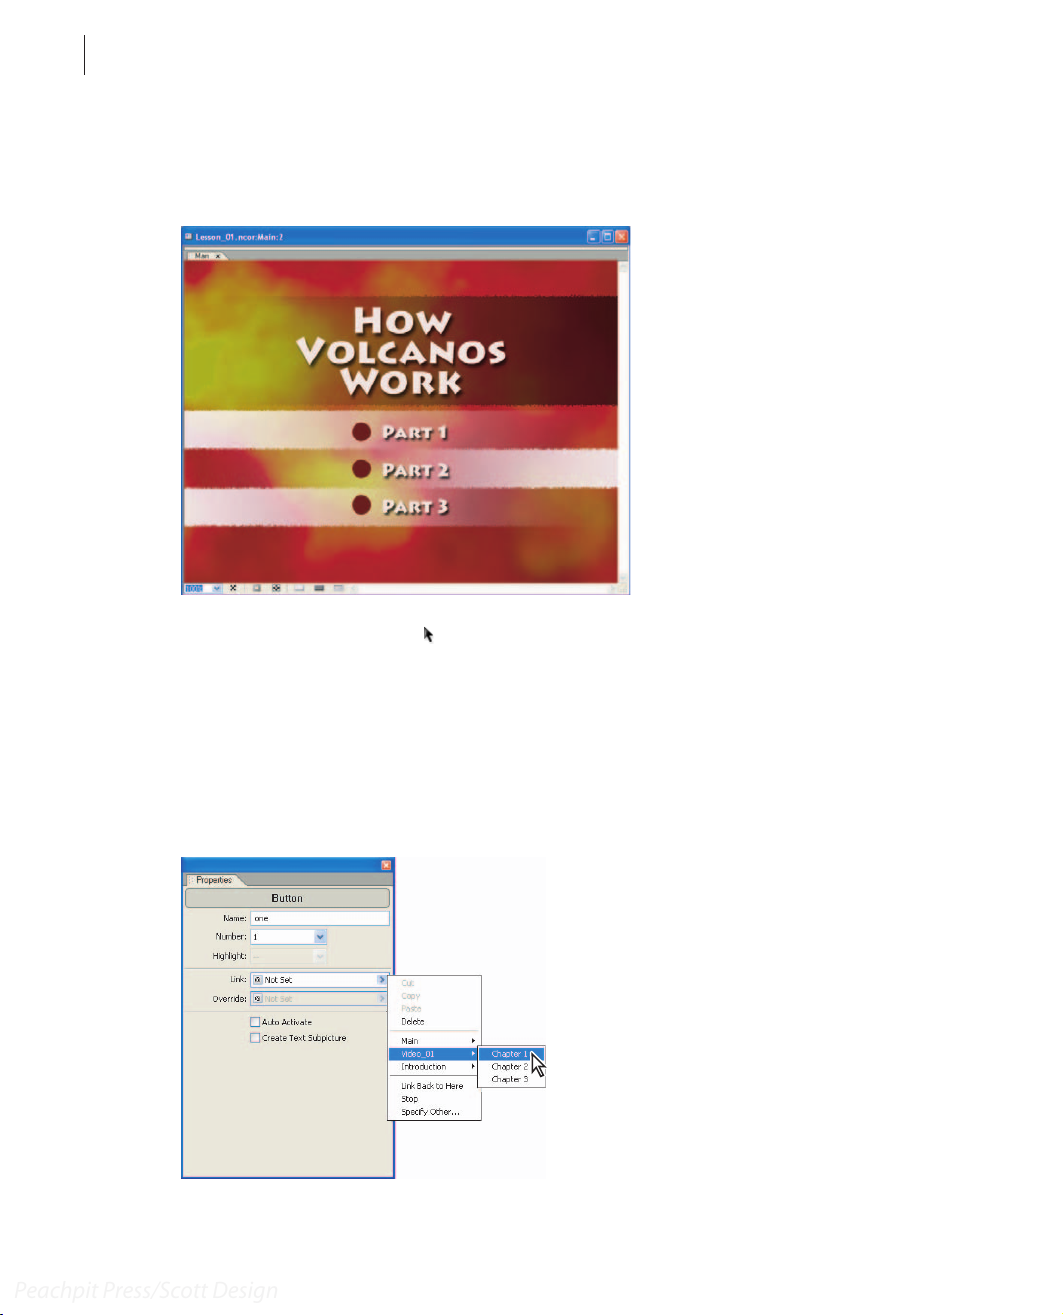
The Menu Editor window opens, displaying the Main menu you imported. The
Photoshop layers are intact. To see them in the Layers palette, choose Window > Layers.
3 Select the selection tool ( ) in the toolbox. Then select Part 1 in the Menu Editor
window.
A bounding box appears around the button and the text “Part 1.”
4 If the Properties palette is not open, choose Window > Properties to open it. The
Button Name field shows the name of the button: One.
5 Choose Video_01 > Chapter 1 from the Link pop-up menu.
Page 24

ADOBE ENCORE DVD
Peachpit Press/Scott Design
Classroom in a Book
When the viewer clicks the Part 1 button on the DVD, Video_01 will play, beginning with
the first chapter point, which was automatically created at the beginning of the timeline.
6 With the selection tool, select Part 2 in the Menu Editor window. In the Properties
palette, choose Video_01 > Chapter 2 from the Link pop-up menu.
7 Using the same procedure, link the Part 3 button to Video_01 > Chapter 3.
8 Save the project.
Setting start and end behaviors
You have set links that viewers can use to start playing the video at specific chapter points.
Now you need to define the sequences that aren’t controlled by the viewer. For example,
you need to determine which timeline or menu runs when the DVD is first inserted into
the player, and which timeline or menu follows it.
For this project, you want the Introduction timeline to run when the viewer inserts the
DVD. When it has finished playing, the main menu should appear.
19
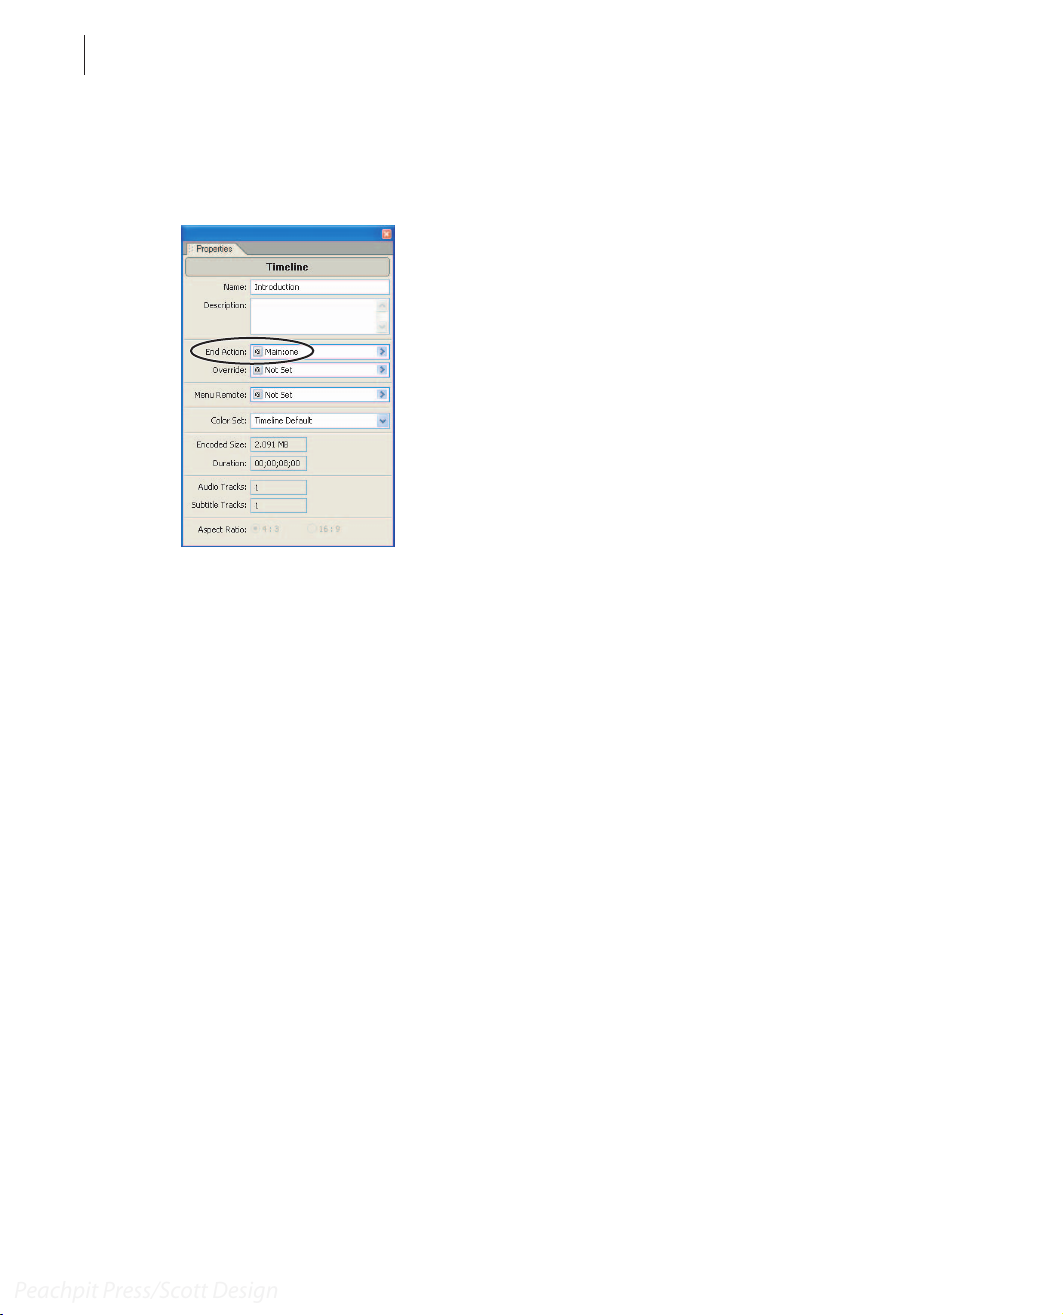
1 In the Project window, select the Introduction timeline.
On the icon next to the Introduction timeline is a small circle with an arrow in it ( ).
This symbol indicates that this item plays first when the DVD is inserted into the player.
Note: If the symbol doesn’t appear on the icon next to the Introduction timeline, right-click
the Introduction timeline in the Project window, and choose Set as First Play.
2 In the Properties palette, choose Main > One from the End Action pop-up menu.
Page 25
LESSON 1
Peachpit Press/Scott Design
20
Creating a Simple DVD
When the Introduction timeline has finished playing, the Main menu will appear. The
Part 1 button will be selected by default.
3 In the Project window, select the Video_01 timeline.
Note: Make sure you select the Video_01 timeline, and not Video_01.avi.
4 In the Properties palette, choose Main > One from the End Action pop-up menu.
When Video_01 has finished playing, the Main menu will appear. The Part 1 button will
be selected by default.
5 Save the project.
Setting behaviors for remote control buttons
Next, you will define the behaviors for the Title and Menu buttons on a DVD player’s
remote control.
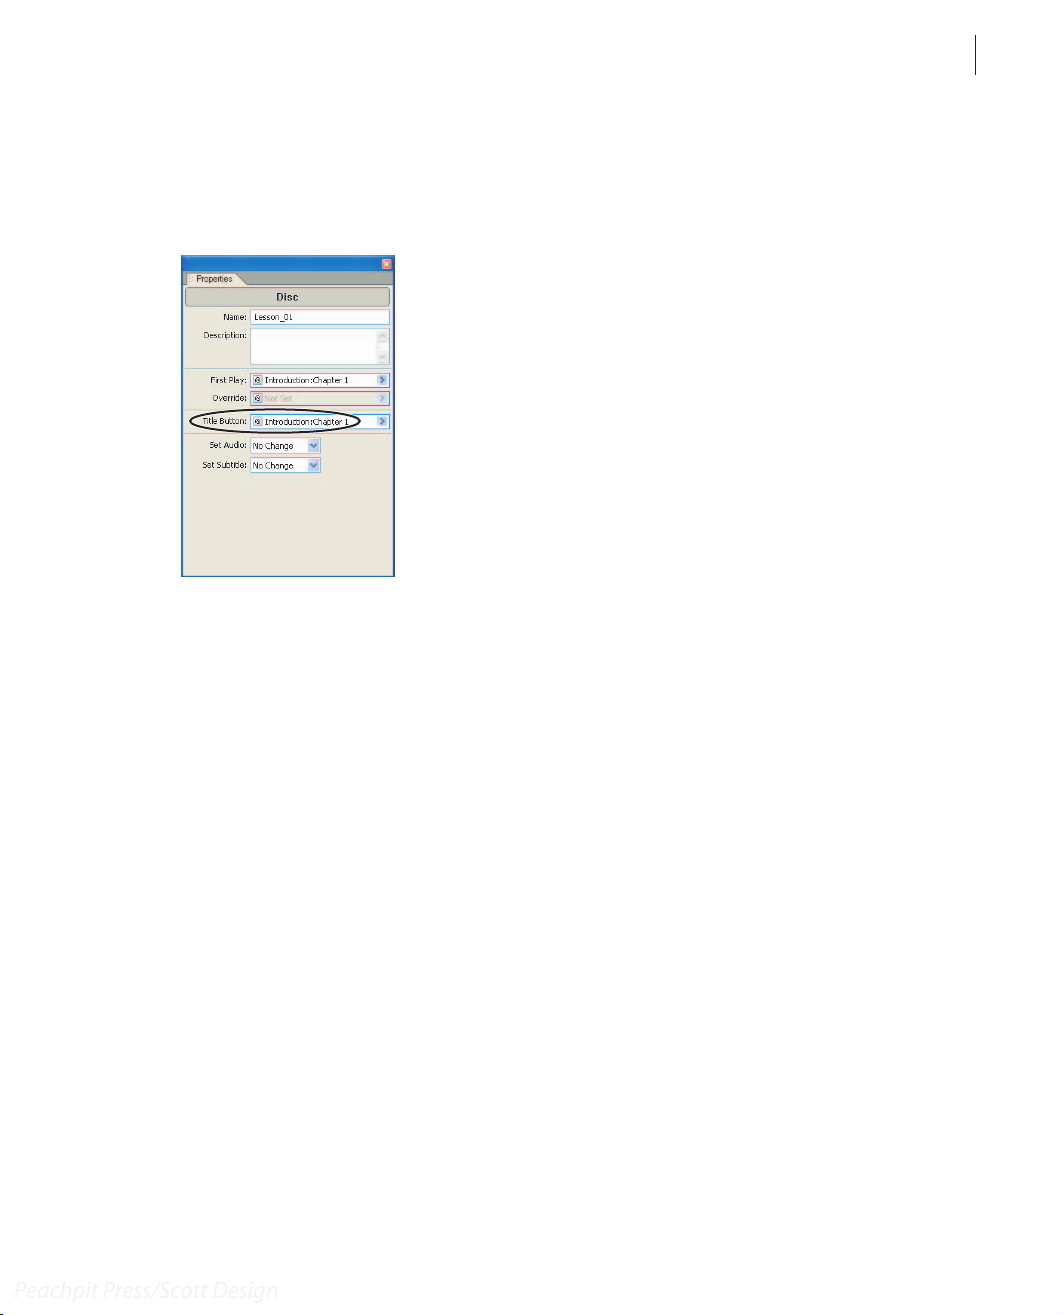
1 In the Project window, click an empty space to deselect all assets, timelines, or menus.
The Disc attributes should appear in the Properties palette.
2 In the Properties palette, choose Introduction > Chapter 1 from the Title Button popup menu.
Page 26
ADOBE ENCORE DVD
Peachpit Press/Scott Design
Classroom in a Book
If the viewer clicks the Title button on the DVD player’s remote control, the Introduction
timeline will play. This setting is for the entire disc, no matter what is showing when the
Title button is pressed.
3 Select the Introduction timeline in the Project window. In the Properties palette,
choose Main > One from the Menu Remote pop-up menu.
21
If the viewer clicks the Menu button on the DVD player’s remote control while the
Introduction timeline is playing, the Main menu will appear, with the Part 1 button
selected.
4 In the Project window, select the Video_01 timeline. In the Properties palette, choose
Main > One from the Menu Remote pop-up menu.
If the viewer clicks the Menu button on the DVD player’s remote control while the
Video_01 timeline is playing, the Main menu will appear, with the Part 1 button selected.
5 Save the project.
Previewing the project
Before burning your DVD project to a disc, it’s a good idea to make sure the project works
as you expect it to. When you preview the DVD, you can test its sequencing and
navigation, interacting with the DVD exactly as your audience will. The Project Preview
window behaves just as if a disc has been inserted into a DVD player.
1 Choose File > Preview.
Page 27

LESSON 1
Peachpit Press/Scott Design
22
Creating a Simple DVD
If the project is configured correctly, the Introduction timeline plays in the Project
Preview window. When it has finished playing, the Main menu appears, and the Part 1
button is highlighted.
2 Click a button in the Main menu. The video should play from the appropriate chapter
point, and then the Main menu should reappear, with the Part 1 button selected. Click
each button to ensure that the video begins playing at the appropriate chapter point.
3 While the video is playing, click the Menu button ( ) at the bottom of the Project
Preview window. The Main menu should appear.
4 While the video is playing, click the Title button ( ) at the bottom of the Project
Preview window. The Introduction timeline should play.
5 Click the Exit and Return button ( ) to close the Project Preview window and return
to your project.
If you want to go directly from the Project Preview window to the timeline or menu
currently displayed, click the Exit Here button ( ).
If the DVD project didn’t behave as described above, return to the project and correct the
behavior. Preview the DVD again to ensure that it behaves as expected before continuing.
Burning the DVD
Yo u’re ready to burn the DVD!
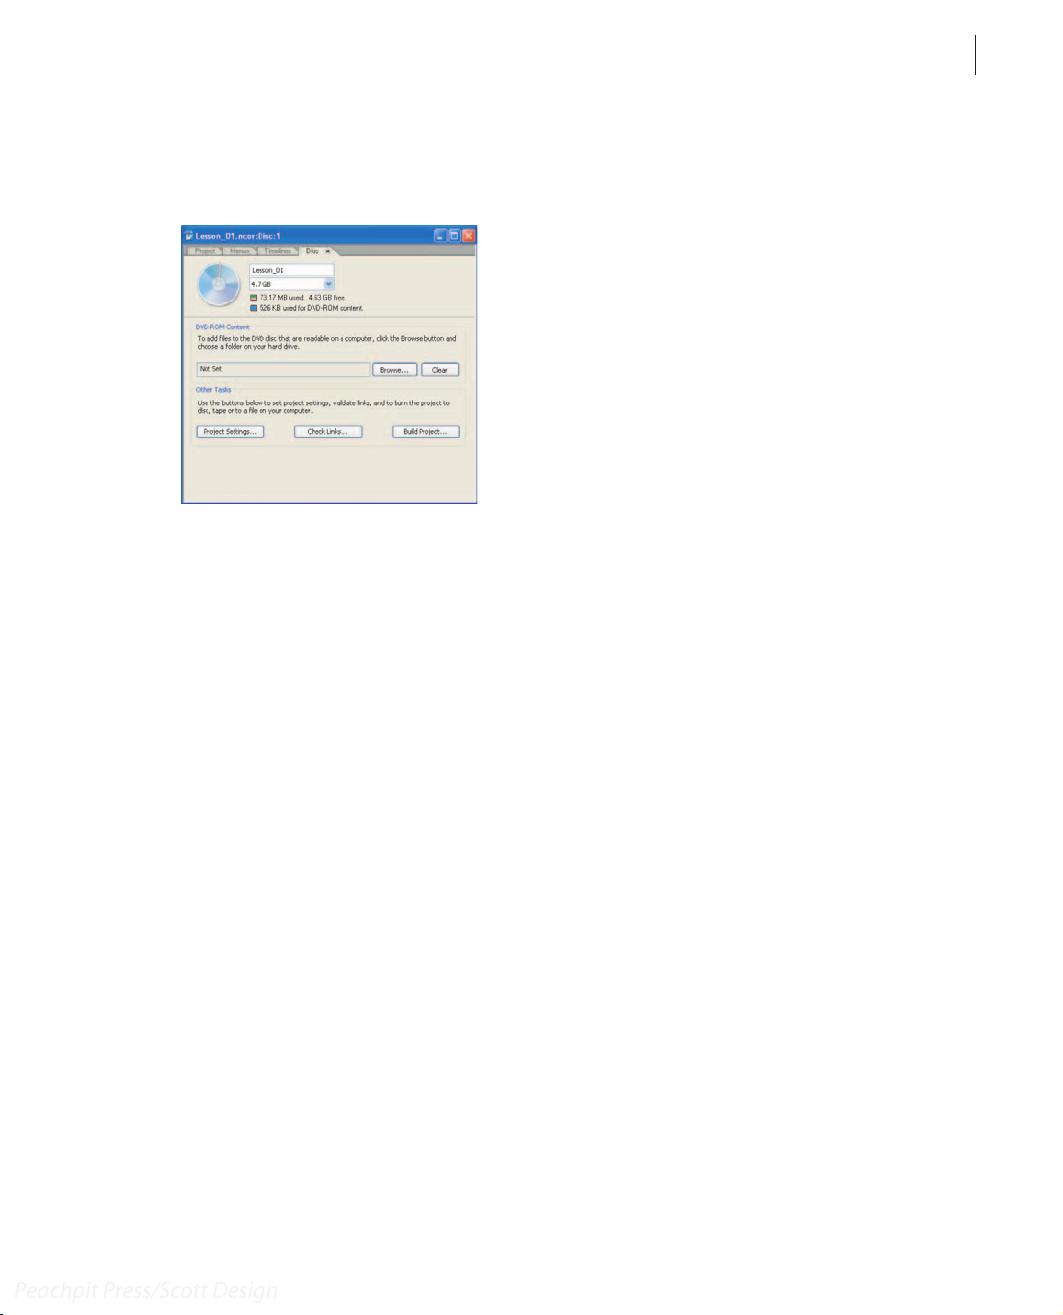
1 In the Project window, click the Disc tab.
Page 28
ADOBE ENCORE DVD
Peachpit Press/Scott Design
Classroom in a Book
The Disc tab lists the disc name, the space available on the disc, the type of media, and
other information.
2 From the pop-up menu beneath the disc name, choose the data size of the disc you’ll
be burning.
3 Click Build Project.
23
4 In the Make DVD Disc dialog box, choose Current Project from the Create Using popup menu, and choose your DVD recorder from the Recorder pop-up menu.
If your recorder is not listed, verify that it is properly connected and installed. See the
documentation for your recorder for assistance.
5 Insert a blank disc into the recorder, and click Next.
Note: If you click Next too quickly, you may see a Device Not Ready dialog box. Click OK to
let your computer recognize the disc you inserted.
6 Review the information in the Make DVD Disc Summary dialog box. When you are
ready to proceed, click Build.
Burning the disc may take several minutes, depending on the DVD recorder, the
computer system, and the size of the media.
Review questions
1 What does the Project window show?
2 What is the difference between an imported asset and an imported menu?
3 Why would you create a chapter point?
Page 29

LESSON 1
Peachpit Press/Scott Design
24
Creating a Simple DVD
4 How does the Monitor window differ from the Project Preview window?
Review answers
1 The Project window shows information about the assets, menus, timelines, and other
objects included in the project.
2 An imported asset is used as content on the DVD. An imported menu is used as a menu
from which viewers can navigate to content.
3 Create a chapter point to define a location in a video track to which you want to link a
menu button or attach a behavior.
4 The Monitor window displays only the selected video track. The Project Preview
window plays the entire DVD project, as if you were viewing it on a television DVD player.
Page 30
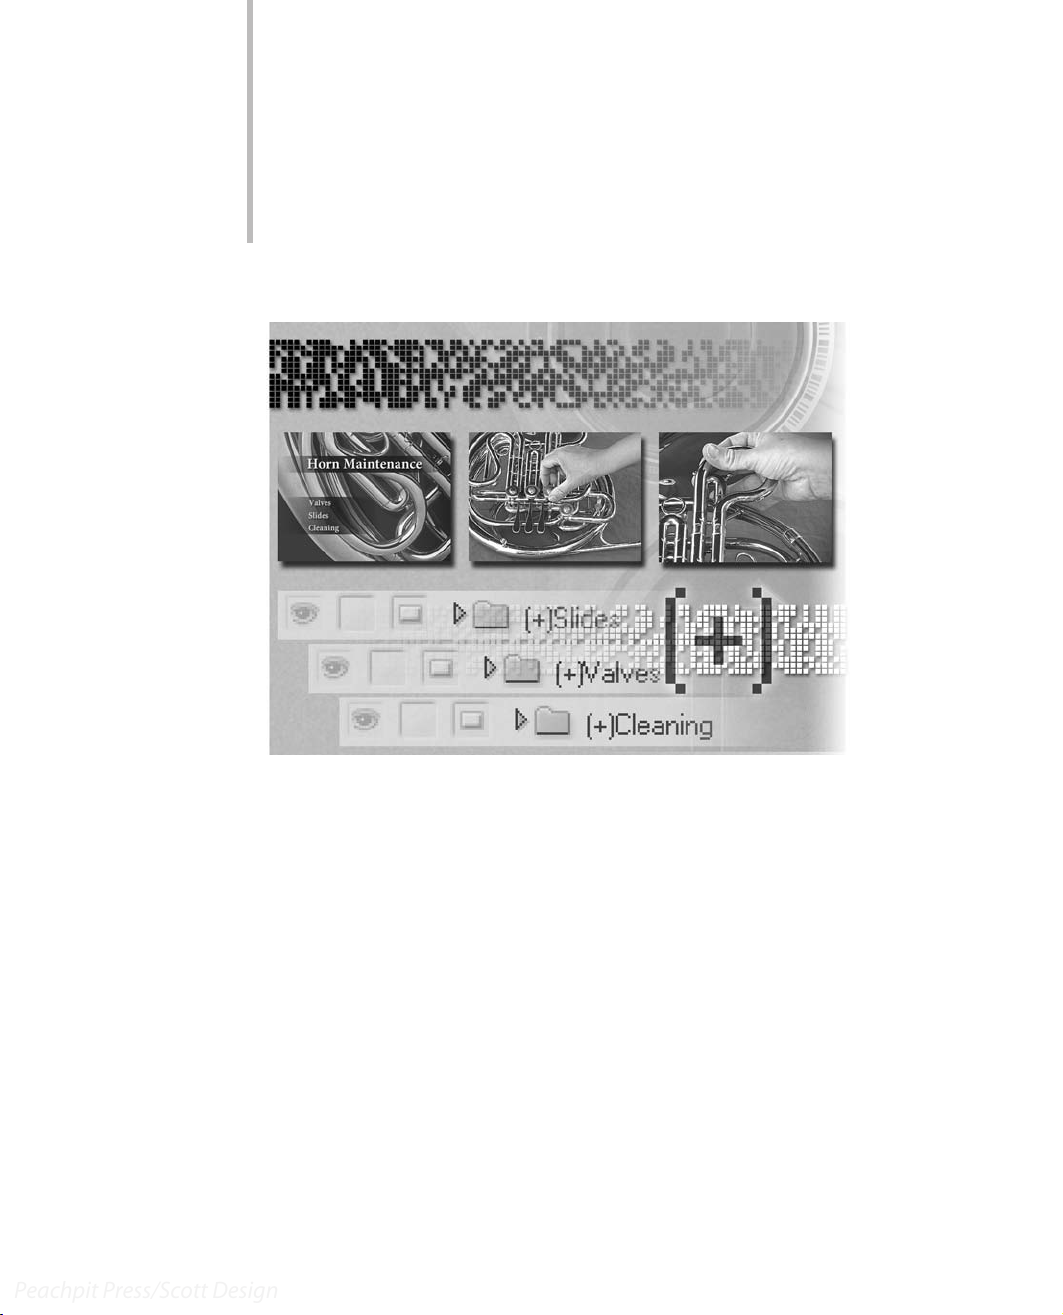
2 Creating Menus in
Peachpit Press/Scott Design
Adobe Encore DVD
Menus are the key to most DVD projects.
Adobe Encore DVD provides all the tools
you need to create menus without ever
leaving the application. In this lesson,
you'll type directly onto menus, import
backgrounds, add buttons, and more.
Page 31

LESSON 2
Peachpit Press/Scott Design
28
Creating Menus in Adobe Encore DVD
In this lesson, you’ll create a simple menu in Adobe Encore DVD, using imported assets
as background and button files. You’ll learn how to do the following:
• Create a new menu in Adobe Encore DVD.
• Import background files.
• Typ e text onto a menu.
• Format text, including font, size, character spacing, and color.
• Move objects on a menu.
• View the Title Safe area for a menu.
• Wo rk with the Layers palette.
• Change the stacking order of layers.
• Add subpictures to your menu.
Getting started
In this lesson, you’ll create a new Adobe Encore DVD project, using graphic and video
files included on the Adobe Encore DVD Classroom in a Book DVD. Make sure you know
the location of the files you need for Lesson 2. For help, see “Copying the Classroom in a
Book files” on page 2.
Viewing the finished Adobe Encore DVD project
To see what you’ll be creating, take a look at the finished project.
1 Start Adobe Encore DVD.
2 Choose File > Open Project.
3 In the Open dialog box, navigate to the Lesson 02 folder. Select Lesson_02_end.ncor,
and then click Open.
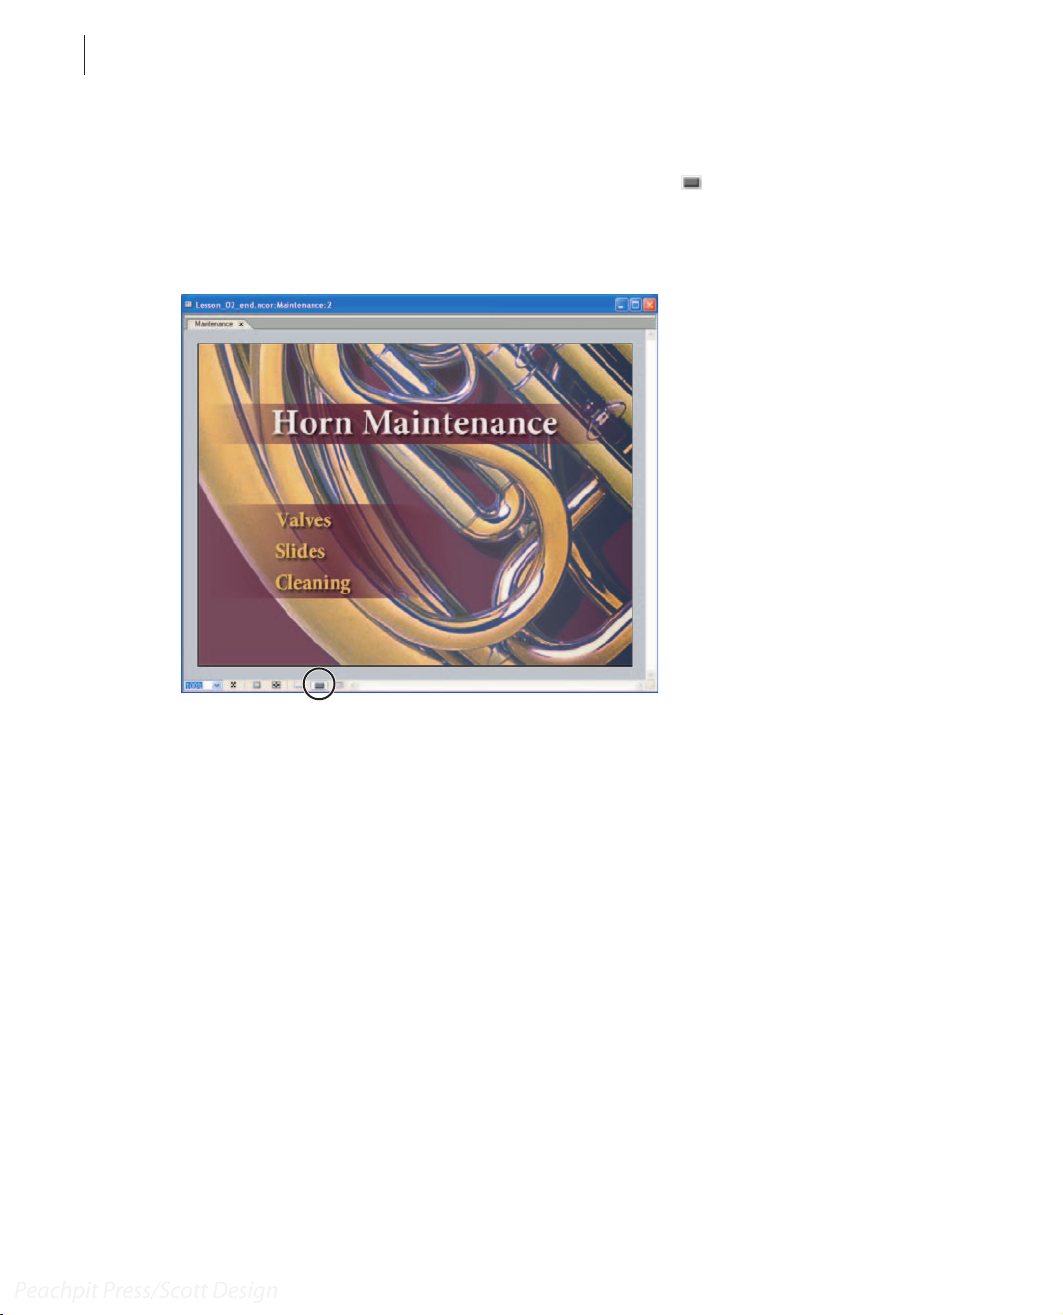
4 Choose File > Preview.
Page 32

ADOBE ENCORE DVD
Peachpit Press/Scott Design
Classroom in a Book
The Project Preview window opens, and a DVD menu appears. There are three simple
buttons.
29
5 Click the Valves button.
A short video plays. When the video has finished playing, the menu reappears.
6 Click each of the other buttons to play the other videos.
7 Close the Project Preview window and the Lesson_02_end Project window.
About menus
Menus make it possible to navigate through a DVD’s contents: the video clips, still images,
and audio clips. A single menu may serve as a table of contents for the entire disc, or the
DVD may include multiple menus, serving different purposes at different points in the
viewer’s experience. For example, the main menu may link to menus that let you choose
subtitle languages or different chapters in a video.
A menu consists of a background and buttons that link to assets. It may also contain
subpictures, which change the appearance of a button when the viewer moves the mouse
over it or selects it.
Page 33

LESSON 2
Peachpit Press/Scott Design
30
Creating Menus in Adobe Encore DVD
Menus can be as simple or as complex as you want them to be. You can create a menu
entirely in Adobe Encore DVD, as you will in this lesson, or you can design a menu in
Adobe Photoshop and import it into your DVD project. (You’ll use Photoshop to create
a menu in Lesson 3.)
Creating a new menu
Yo u’ll create a menu in Adobe Encore DVD. First, you will open a new project, and then
you will add the menu.
1 Choose File > New Project. Click OK to accept NTSC as the television standard.
A new Project window appears. Now you’ll create a new menu.
2 Choose Menu > New Menu.
The Menu Editor window appears, displaying the default menu, which is named NTSC_4
x 3 Blank Menu. Notice that the menu is also listed in the Project window.
The Menu Editor window is the work area for creating and editing menus in Adobe
Encore DVD. You can place, move, resize, or delete buttons and subpictures in the Menu
Editor window, and you can also add and format text. Use the buttons at the bottom of
the Menu Editor window to change how the menu is displayed.
Page 34

ADOBE ENCORE DVD
Peachpit Press/Scott Design
Classroom in a Book
Yo u can specify the default menu using the Library palette. You’ll have the opportunity
to specify the default menu in lesson 4. For this project, we’ll use the menu that is the default
when you first start Adobe Encore DVD.
Yo u’ll need to name the menu, using the Properties palette. If the Properties palette isn’t
open, choose Window > Properties, or if it’s hidden behind another palette, click the
Properties tab to make it active.
3 Click in the Menu Editor window to ensure that it’s active. Then type Maintenance in
the Name field of the Properties palette.
31
4 Click in the Project window. The menu name is automatically updated in both the
Project window and the tab in the Menu Editor window.
Note: There should be a circle with an arrow in it ( ) on the icon next to the Maintenance
menu in the Project window. This symbol indicates that the Maintenance menu will play first
when the disc is inserted into the player. If the symbol isn’t there, right-click the Maintenance
menu, and choose Set as First Play.
5 Choose File > Save As to save the project. Name the project Lesson_02.ncor.
Page 35

LESSON 2
Peachpit Press/Scott Design
32
Creating Menus in Adobe Encore DVD
Adding text to a menu
Adobe Encore DVD provides advanced typographic control. Using the Character palette,
you can kern, track, and scale text. You can also shift its baseline. You can set text
attributes before you type characters, or you can style and format existing text. Adobe
Encore DVD provides two text tools: one creates horizontal text and one creates vertical
text. In this project, you’ll type horizontal text directly into the menu, and then move it
to the appropriate position.
1 Select the text tool ( ) from the toolbox, and click in the Menu Editor window.
A blinking insertion point appears.
2 Ty pe Horn Maintenance.
3 Choose Edit > Select All to select the text you just typed.
Note: If the text isn’t selected, click in the text and then choose Edit > Select All again.
4 Make the Character palette active by clicking the Character tab or, if the palette isn’t
open, by choosing Window > Character.
5 Choose Minion Pro for the font, Bold for the font style, and 60 for the type size. Click
the Align Left option.
Page 36

ADOBE ENCORE DVD
Peachpit Press/Scott Design
Classroom in a Book
As you specify options in the Character palette, the selected text changes.
6 Click the Color box and select white (in the upper-left corner). Select NTSC Colors
Only. Click OK to close the Color Picker.
33
The NTSC color set is a subset of colors optimized for television viewing.
Yo u’ve created a text block using the text tool to type and format text. Now you want to
position the text block. To manipulate the text block as an object, you’ll use the selection
tool.
7 Select the selection tool ( ) in the toolbox.
Page 37

LESSON 2
Peachpit Press/Scott Design
34
Creating Menus in Adobe Encore DVD
8 Drag the text block to the top center of the menu.
9 Click in the Menu Editor window to deselect the text block.
Changes you make in the Character palette affect only the selected text. If no text is
selected when you make the changes, the settings become the default settings for new text.
Now you’ll set the defaults for the button text.
10 In the Character palette, choose Minion Pro for the font, Bold Condensed for the font
style, and 36 for the type size.
11 Select the text tool and click in the Menu Editor window.
12 Ty pe Va l v e s , and select the selection tool to deselect the text.
Page 38

ADOBE ENCORE DVD
Peachpit Press/Scott Design
Classroom in a Book
The Character attributes you set as defaults were automatically applied to the text.
13 Select the text tool again, and click an insertion point in the menu. Type Slides, and
select the selection tool again.
14 Select the text tool again, click an insertion point, and type Cleaning.
You should have three separate text blocks.
15 Choose View > Show Safe Area, or click the Show Safe Area button ( ) at the bottom
of the Menu Editor window.
A border appears inside the menu, representing the Title Safe area—the part of the menu
that will be visible on a television screen. Keep all the text inside that border to ensure that
all viewers can access buttons and read the text.
16 With the selection tool, drag the text blocks you just created toward the lower-left
corner of the menu, within the Title Safe area.
35
17 Save the project.
Adding assets to menus
Menu backgrounds can contain a single layer (such as the menu you used in the first
lesson) or multiple layers. When you want to include objects in your menu, import them
as assets.
Page 39

LESSON 2
Peachpit Press/Scott Design
36
Creating Menus in Adobe Encore DVD
1 Right-click in the Project window, and select Import as Asset.
2 Navigate to the Lesson 02 folder. Then hold down the Ctrl key while you select
Gradients.psd, Va lves.avi, Slides.avi, and Cleaning.avi.
Yo u can use the Shift key to select contiguous files. Click Cleaning.avi, then press the Shift
key and click Valves.avi. The files between them are also selected.
3 Click Open.
The files you selected appear in the Project window.
4 Enlarge the Menu Editor window until you can see the edges of the menu. (A gray
background appears behind the black menu.)
5 Drag the Gradients.psd file from the Project window into the Menu Editor window.
With the selection tool, position the new layer to fill the menu.
The Gradients.psd file is a Photoshop file with a single layer. As you move the
Gradients.psd file over the menu, it retains its transparency, so you can see the default
menu and the text you created behind it. Adobe Encore DVD honors transparency in
Photoshop files because Adobe Encore DVD and Photoshop use the same graphics
engine.
6 Open the Layers palette by choosing Windows > Layers or clicking the Layers tab in the
palette set.
Page 40

ADOBE ENCORE DVD
Peachpit Press/Scott Design
Classroom in a Book
The Layers palette contains several layers. Each text block you created is on its own layer,
as is the Gradients.psd file. The Layers palette in Adobe Encore DVD is similar to the
Layers palette in Photoshop. You can use it to organize and edit your menu in Adobe
Encore DVD at any time until you burn the DVD.
7 Select the Gradients.psd layer in the Layers palette. Then choose Object > Arrange >
Send to Back.
37
The Gradients layer moves beneath the text layers, and its order changes in the Layers
palette. Use the Arrange commands to change the stacking order of objects in your menu.
8 Open Windows Explorer: right-click the Start menu and choose Explore.
9 Arrange your screen so that you can see both Adobe Encore DVD and Windows
Explorer.
Page 41

LESSON 2
Peachpit Press/Scott Design
38
Creating Menus in Adobe Encore DVD
10 Drag the Background.psd file from the Lesson 02 folder in Windows Explorer into
the Menu Editor window in Adobe Encore DVD. Use the selection tool to position the
new layer so that it fills the menu.
11 With the Background.psd layer selected, choose Object > Arrange > Send to Back.
To keep layers from moving after you position them, click the middle box next to the layer
name in the Layers palette, so that a padlock icon appears. When a layer is locked, you cannot
modify it.
Adding drop shadows to text
Yo u’ll add drop shadows to the title and each of the text buttons. First, you’ll position
them within the maroon stripes.
1 With the selection tool, position the title in the first maroon stripe.
2 With the selection tool, select the three text blocks that you will use as buttons. Press
Ctrl to select multiple text blocks.
Page 42

3 Position the text blocks within the wide maroon stripe.
Peachpit Press/Scott Design
ADOBE ENCORE DVD
Classroom in a Book
39
4 Select one text layer in the Layers palette, and then press the Ctrl key while you select
the others.
Note: There are four text layers. Be sure to select them all.
5 Choose Object > Drop Shadow. Click OK to accept the default settings.
Drop shadows appear for all the text in the menu.
6 Save the project.
Page 43

LESSON 2
Peachpit Press/Scott Design
40
Creating Menus in Adobe Encore DVD
Converting text blocks to buttons
Now you’re ready to create buttons for the menu. In Adobe Encore DVD, you can create
buttons from moving or still images you import, or text you type into a menu—or you
can use predesigned buttons from the Library palette. For this project, you’ll convert the
text blocks you created earlier into buttons.
1 With the direct select tool, select the three text blocks. (Press the Ctrl key to select
multiple objects.)
2 Choose Object > Align > Left.
The text blocks are aligned on the left side, matching the left edge of the first text block
you selected.
3 Then choose Object > Distribute > Vertically.
The text blocks are distributed so that the vertical spaces between them are equal.
4 With the text blocks still selected, choose Object > Convert to Button.
Page 44

ADOBE ENCORE DVD
Peachpit Press/Scott Design
Classroom in a Book
The appearance of the text blocks in the Menu Editor window doesn’t change, but the
names of the layers in the Layers palette do. Adobe Encore DVD uses special naming
conventions for buttons, which can be linked to timelines or other menus.
5 Save the project.
Adding subpictures to buttons
41
A subpicture is a graphic overlay that you can use to change the appearance of a button
when the viewer moves the mouse over it or selects it. You can create subpictures from
buttons in Adobe Encore DVD.
1 With the selection tool, select a button in the Menu Editor window.
2 Choose Object > Create Subpicture.
Adobe Encore DVD creates a new layer, with the same shape as the button. Its name
begins with (=), which indicates that it is a subpicture layer.
Page 45
LESSON 2
Peachpit Press/Scott Design
42
Creating Menus in Adobe Encore DVD
3 Choose View > Show Selected Subpicture to see how the button will look when it’s
activated. Or click the Show Selected Subpicture button ( ) on the Menu Editor
window.
4 Repeat steps 1 and 2 to create subpictures for the other two buttons.
Assigning color groups for subpictures
When you add subpictures to buttons, the default subpicture colors are applied. To apply
different colors to the subpictures, first create a new color set, and then assign that color
set to the menu. You’ll create a new color set for this menu.
1 Choose Edit > Color Sets > Menu.
Page 46

ADOBE ENCORE DVD
Peachpit Press/Scott Design
Classroom in a Book
2 In the Menu Color Set dialog box, click the New Color Set button.
3 In the New Color Set dialog box, type Horn Color Set, and click OK to return to the
Menu Color Set dialog box.
43
4 In the Highlight Group 1 section, click the Color 1 swatch.
The Color Picker opens.
5 Choose a red color, or type 215, 35, and 56 in the R, G, and B fields, respectively. Select
NTSC Colors Only. Click OK.
Page 47

LESSON 2
Peachpit Press/Scott Design
44
Creating Menus in Adobe Encore DVD
6 In the Highlight Group 1 section, choose 80% from the Opacity pop-up menu next to
the Color 1 swatch. Click OK.
7 In the Project window, select the Maintenance menu to make it active.
8 In the Properties palette, choose Horn Color Set from the Color Set pop-up menu.
The new subpicture color appears in the Menu Editor window.
Note: If you don’t see the subpicture color, click the Show Selected Subpicture button on the
Menu Editor window.
Page 48

ADOBE ENCORE DVD
Peachpit Press/Scott Design
Classroom in a Book
Linking buttons to timelines
Now you’ll link the buttons you’ve created to the video clips. First, you’ll create timelines
for the video files you imported earlier.
1 Press the Ctrl key while you select the three AVI files in the Project window.
45
2 Click the New Timeline button ( ) at the bottom of the Project window.
The Timeline window opens, with tabs for three timelines. Each AVI file is automatically
placed in its own timeline. The timelines are added to the Project window. The Monitor
window also opens.
Page 49

LESSON 2
Peachpit Press/Scott Design
46
Creating Menus in Adobe Encore DVD
3 In the Project window, select the three timelines. Then open the Properties palette by
clicking the Properties tab or choosing Window > Properties.
Note: Make sure you select the timelines, and not the AVI files, in the Project window.
4 In the Properties palette, choose Maintenance > Default from the End Action pop-up
menu.
The end action determines what happens after the timeline finishes playing. Here, the
DVD will return to the Maintenance menu after each video is finished.
If you want every timeline to return to the main menu after it finishes playing, you can
save time by selecting all the timelines and then setting the end action once. The end action
will be applied to all the timelines you’ve selected.
5 Use the selection tool to select the Valves button in the Menu Editor window.
6 In the Properties palette, choose Valves > Chapter 1 from the Link pop-up menu.
Page 50

ADOBE ENCORE DVD
Peachpit Press/Scott Design
Classroom in a Book
The button you selected is now linked to the Valves timeline. When the viewer clicks the
Va lves button, the Valves timeline will play.
Note: The link is assigned to Chapter 1, even though you didn’t create any chapter points in
the Valves timeline. Every timeline has a chapter point—named Chapter 1—at its beginning.
47
7 Repeat steps 5–6 for the other two buttons, linking each button to its corresponding
timeline.
8 Save the project.
Previewing the project
Before you burn a DVD, make sure the project is configured properly. It should look and
behave just like the one you previewed at the beginning of this lesson.
1 Choose File > Preview.
If the project is configured correctly, the Maintenance menu appears. The Valves button
is selected by default, so its subpicture appears.
2 Click one of the buttons. The appropriate video should play, and when it’s finished, you
should return to the Maintenance menu.
3 Click the other two buttons. Each video should play, and then return you to the
Maintenance menu.
4 Close the Project Preview window.
Page 51

LESSON 2
Peachpit Press/Scott Design
48
Creating Menus in Adobe Encore DVD
If the DVD project didn’t behave as described above, return to the project and correct the
behavior. Preview the DVD again to ensure that it behaves as expected before continuing.
Adobe Encore DVD folder structure
As you create a project, Adobe Encore DVD stores the menus and assets you use in a project folder.
Within the project folder are two subfolders, named Cache and Sources. Adobe Encore DVD uses the
Cache folder as you work in the project; it stores your original menus and assets in the Sources folder.
Additionally, the preferences for your project are stored in a ProjectPrefs.xml file in the project folder.
If you need to move a DVD project to a different computer, make sure you move the entire project
folder and all its contents. Otherwise, Adobe Encore DVD will not be able to find the files it needs to
open the project.
Burning the DVD
Yo u’re ready to burn the DVD.
1 In the Project window, select the Disc tab.
The Disc tab lists the disc name, the space available on the disc, the media type, and other
information.
2 Choose the data size of the disc you’ll be burning from the pop-up menu beneath the
disc name.
Notice that both the amount of disc space used by the project and the resulting available
disc space are listed beneath the data size of the disc. Additionally, Adobe Encore DVD
shows the amount of space used for content, as opposed to disk formatting.
3 Click Check Links, and then select the link problems you want to search for. Click OK
to begin the search. Click Done after you’ve examined the results.
If there are link problems that will cause the DVD to play incorrectly, return to the project
and fix them before burning the disc.
Adobe Encore DVD can identify broken links, unset links, and timelines or menus to
which there is no navigational link. For more information about checking links, see
“Finding missing links and unassigned assets” in Adobe Encore DVD Help.
4 Click Build Project. Click Save and Continue if you are prompted to save the file.
Page 52

ADOBE ENCORE DVD
Peachpit Press/Scott Design
Classroom in a Book
5 In the Make DVD Disc dialog box, choose Current Project from the Create Using pop-
up menu, and choose your DVD recorder from the Recorder pop-up menu.
If your recorder is not listed, verify that it is properly connected and installed. See the
documentation for your recorder for assistance.
6 Insert a blank disc into the recorder, and click Next.
7 Review the information in the Make DVD Disc Summary dialog box. When you are
ready to proceed, click Build.
Burning the disc may take several minutes, depending on the DVD recorder, the
computer system, and the size of the media.
Understanding bit budgeting
Bit budgeting, or estimating the amount of space your project will occupy on DVD, is an important
part of planning. Bit budgeting helps you strike a balance between the quantity and quality of content
and determine the optimal video data rate. If your DVD includes minimal amounts of content, you
can encode that content at a higher data rate (which translates to higher quality) to take advantage
of all available space on the DVD.
Conversely, if your project contains a large amount of content, you need to use a lower data rate
(which translates to lower quality) to squeeze it all onto the DVD.
Adobe Encore DVD automatically tracks bit budgeting during the authoring process. For small
projects with limited content, simply checking the amount of available space on the Disc tab during
the authoring process is usually sufficient to track your space usage. For large, complex projects,
though, bit budgeting becomes much more important to the authoring process. For more information
about bit budgeting, see “Understanding bit budgeting” in Adobe Encore DVD Help.
49
Review questions
1 Which tool do you use to create text?
2 Which tool do you use to move a text block?
3 What is the Title Safe area in a menu?
4 How do you change the stacking order of layers?
5 How do you add a drop shadow to text?
6 When might you use a subpicture?
7 What are two ways to display the Layers palette?
Page 53

LESSON 2
Peachpit Press/Scott Design
50
Creating Menus in Adobe Encore DVD
Review answers
1 Use the text tool or the vertical text tool to type or format text.
2 Use the selection tool to move a text block, resize it, or otherwise manipulate it as an
object.
3 The Title Safe area is the area that will appear on every viewer’s television or computer
monitor, so you can be sure that content in that area will be visible.
4 Select a layer in the Layers palette, choose Object > Arrange, and then choose Bring to
Front, Send to Back, Bring Forward, or Send Backward.
5 Select the text layer in the Layers palette, and then choose Object > Drop Shadow.
6 You can use a subpicture to change a button’s appearance when the viewer mouses over
or selects it.
7 Choose Window > Layers or, if the Layers palette is open but not active, click the Layers
tab in the palette set.
Page 54

3 Designing Menus in
Peachpit Press/Scott Design
Adobe Photoshop
Adobe Encore DVD is designed to work
seamlessly with Adobe Photoshop. You
can take advantage of the numerous layer
styles and other design features in
Photoshop to create exactly the menu you
want, and know that it will retain its
appearance and formatting when you
import it into Adobe Encore DVD.
Page 55

LESSON 3
Peachpit Press/Scott Design
54
Designing Menus in Adobe Photoshop
In this lesson, you’ll create a simple menu for Adobe Encore DVD using the powerful
features of Adobe Photoshop. You’ll see how the two applications work together
seamlessly as you learn to do the following:
• Create a new menu in Photoshop.
• Compose a background for the menu from multiple images.
• Create text in Photoshop.
• Format and position text in Photoshop.
• Apply layer styles to text and image layers.
• Create and name buttons.
• Create and name subpictures.
• Edit the original Photoshop file from within Adobe Encore DVD.
• Burn a DVD using the Make DVD Disc command.
Getting started
In this lesson, you’ll assemble images and type in a layered Photoshop file, create buttons
using layer sets, and import the file as a menu in Adobe Encore DVD. Then you’ll use tools
in Adobe Encore DVD to modify the menu and link its buttons to timelines.
All the graphic and video files required for this lesson are included on the Adobe Encore
DVD Classroom in a Book DVD. Make sure you know the location of the files you need for
Lesson 3. For help, see “Copying the Classroom in a Book files” on page 2.
Yo u’ll also need to have Adobe Photoshop 7.0 or later installed to complete this lesson.
Viewing the finished Adobe Encore DVD project
To see what you’ll be creating, take a look at the finished project.
1 Start Adobe Encore DVD.
2 Choose File > Open Project.
3 In the Open dialog box, navigate to the Lesson 03 folder. Select Lesson_03_end.ncor,
and then click Open.
4 Choose File > Preview.
Page 56

ADOBE ENCORE DVD
Peachpit Press/Scott Design
Classroom in a Book
The Project Preview window opens, and a DVD menu appears. There are three buttons
in the shape of animals, and the giraffe is highlighted.
55
5 Click the Giraffe button.
A short video plays. When the video has finished playing, the menu reappears.
6 Click the Gorilla button, and then the Jaguar button, to play the other videos.
7 Close the Project Preview window and the Lesson_03_end Project window.
Teaming Adobe Encore DVD with Photoshop
As you’ve seen in the first two lessons, Adobe Encore DVD shares some features with
Photoshop. For example, it includes a limited Layers palette, and you can create and edit
text for menus. However, you can create more sophisticated, fully integrated menus using
the robust graphic design features in Photoshop. Other DVD authoring applications
flatten Photoshop files, making final edits cumbersome. Because Adobe Encore DVD
preserves the layer information in the Photoshop file, you can return to Photoshop to edit
your menu until the moment you burn the DVD.
Page 57

LESSON 3
Peachpit Press/Scott Design
56
Designing Menus in Adobe Photoshop
Most DVD designers create menus in Photoshop, taking advantage of its extensive tool
set. You can apply layer styles in Photoshop that are not available in Adobe Encore DVD,
create adjustment layers, and format text using advanced formatting features. When you
import the menu into Adobe Encore DVD, it recognizes and retains layer styles, and
honors adjustment layers. Additionally, text you’ve formatted in Photoshop appears
exactly the same in Adobe Encore DVD.
For a smooth workflow, you can return to Photoshop quickly using the Edit in Photoshop
command from Adobe Encore DVD.
Note: You can use either Photoshop CS or Photoshop 7.0 to complete this lesson. Because
Photoshop CS provides additional features for working with images intended for video, some
steps are slightly different. Where necessary, separate instructions are provided for the two
versions of Photoshop.
Creating a menu background in Photoshop
To create a menu in Photoshop, you’ll create a new image and apply a background color
to it.
1 In Photoshop, choose File > New.
2 From the Preset Sizes pop-up menu in the New dialog box, choose 720 x 534 Std. NTSC
DV/DVD (Photoshop 7.0) or NTSC DV 720 x 480 (with guides) (Photoshop CS). In
Photoshop CS, make sure the Pixel Aspect Ratio is set to D1/DV NTSC (0.9).
NTSC video has pixel dimensions of 720 x 480, but the Photoshop 7.0 file has more
vertical pixels (534). This is because NTSC video is composed of non-square pixels.
Photoshop 7.0 works only with square pixels, but you can import a 720 x 534 square-pixel
image into Adobe Encore DVD, and it is automatically scaled to fit the proper pixel aspect
ratio.
Photoshop CS lets you create an image with non-square pixels, so Adobe Encore DVD
doesn’t need to scale the image when you import it.
Page 58

ADOBE ENCORE DVD
Peachpit Press/Scott Design
Classroom in a Book
You don’t have to memorize the pixel dimensions; just remember which preset to choose
when you create a new menu.
Choose the preset in the New dialog box in Photoshop 7.0 (left) or Photoshop CS (right).
Square pixels and rectangular pixels
If you create menus or backgrounds using square pixels, it is best to size them using the Photoshop
preset image sizes. When Adobe Encore DVD builds the DVD, it automatically compensates for the
change in pixel dimensions. Thus, when the viewer plays the DVD in the rectangular pixel
environment of the television, the menus will not appear squashed.
57
3 Name the image Main, choose RGB Color from the Mode pop-up menu, and then click
OK to close the New dialog box.
If you are using Photoshop CS, the image opens with guides for the Action Safe and Title
Safe areas. To turn the guides off, choose View > Clear Guides.
4 Choose File > Save As, choose Photoshop (*.PSD, *.PDD) from the Format pop-up
menu, specify the folder into which to save the file, and click OK.
The file is named Main.psd and is saved to the folder you specified. Note where you saved
the file, so you can find it when you need to import it into Adobe Encore DVD later.
5 Choose File > Open. Navigate to the Lesson 03 folder in the Open dialog box. Then
hold down the Ctrl key while you select Small_giraffe.psd, Small_gorilla.psd, and
Small_jaguar.psd. Click Open.
Note: You may see a dialog box about color management. For this project, you don’t need to
use color management. However, you may want to use color management in your DVD
projects to achieve the best results. To learn more about color management, refer to your
Photoshop user guide.
Page 59

LESSON 3
Peachpit Press/Scott Design
58
Designing Menus in Adobe Photoshop
The three animal files you selected open in Photoshop. The Main.psd file is still open as
well.
6 Arrange the windows so that both the Main.psd and Small_giraffe.psd files are visible.
7 Click the Small_giraffe.psd file to make it the active file. With the move tool ( ), drag
the image of the giraffe into the Main.psd file.
A new layer appears in the Layers palette; it’s named Giraffe image.
8 Use the move tool to position the Giraffe layer in the lower-left area of the image.
9 Arrange the windows so that both the Main.psd and Small_gorilla.psd files are visible.
10 Click the Small_gorilla.psd file to make it the active file. With the move tool, drag the
image of the gorilla into the Main.psd file. Then move the Gorilla layer to the right side
of the image.
The Gorilla image layer appears in the Layers palette.
Page 60

ADOBE ENCORE DVD
Peachpit Press/Scott Design
Classroom in a Book
11 Click the Small_Jaguar.psd file, and use the move tool to drag it into the Main.psd file.
Position it at the bottom of the image area.
12 Click the Main.psd file to ensure that it’s the active file. Choose File > Save to save it.
Then close the Small_giraffe.psd, Small_gorilla.psd, and Small_jaguar.psd files without
saving them.
59
Note: In Photoshop CS, the Photoshop Format options dialog box may appear; click OK.
Creating text in Photoshop
Photoshop provides more text formatting tools than Adobe Encore DVD, so you can get
just the effect you want. Adobe Encore DVD recognizes the formatting and displays the
text correctly—and you can always return to Photoshop to edit the text or its formatting.
You can type text directly into a Photoshop image, and then quickly change its formatting
or its position. Use options in the Character palette and the Paragraph palette to format
the text. Use the move tool when you want to move a text block.
1 Select the horizontal type tool ( ) from the toolbox, and then choose Window >
Character to open the Character palette. By default, the Paragraph palette is docked with
the Character palette.
Page 61

LESSON 3
Peachpit Press/Scott Design
60
Designing Menus in Adobe Photoshop
2 Choose Myriad Pro for the font, Bold for the font style, and 30 for the type size.
3 Make sure that the foreground color is black. The foreground and background colors
are shown in the toolbox. If the foreground color (the first box shown) is white, click the
double-arrow icon to switch the two colors.
If the colors in the toolbox are not black and white, press the D key on your keyboard to
quickly set the colors to the default foreground (black) and background (white) colors.
4 Click the Giraffe image layer in the Layers palette to select it. Then click an insertion
point to the left of the giraffe in the Main.psd window.
5 Ty pe the word Giraffe, and press Ctrl+Enter.
Page 62

ADOBE ENCORE DVD
Peachpit Press/Scott Design
Classroom in a Book
A new text layer appears in the Layers palette. Pressing Ctrl+Enter releases the horizontal
type tool from the text block so that you can create a new one.
6 Select the move tool, and then drag the text block to the position shown here.
61
7 Select the Gorilla image layer in the Layers palette. Then, with the horizontal type tool,
click an insertion point to the right of the gorilla’s head.
8 Ty pe the word Gorilla, and press Ctrl+Enter.
9 Select the Jaguar image layer in the Layers palette. Then type the word Jaguar just
below the image of the jaguar, and press Ctrl+Enter.
10 Select the move tool.
Page 63

LESSON 3
Peachpit Press/Scott Design
62
Designing Menus in Adobe Photoshop
11 Select the Jaguar text layer in the Layers palette, and move it to the position shown
below.
12 Select the Gorilla text layer in the Layers palette, and move it to the position shown
below.
Note: The Classroom in a Book lesson files are designed to work with either Photoshop 7.0 or
Photoshop CS. The sizes and proportions of the image elements on your monitor may appear
slightly different from those in this book, depending on the version of Photoshop you are using
and whether Pixel Aspect Ratio Correction is on or off. For this lesson, those differences are
not critical.
13 Choose File > Save.
Changing the color of text in Photoshop
The animal names are black. Now you’ll create the title for the menu, and you’ll apply
different colors.
1 With the horizontal type tool, click an insertion point in the upper-left area of the
image.
Page 64

ADOBE ENCORE DVD
Peachpit Press/Scott Design
Classroom in a Book
2 In the Character palette, change the type size and leading; leave the other settings as
they are. If you are using Photoshop 7.0, type 100 pt for the type size and 90 pt for the
leading. If you are using Photoshop CS, type 80 pt for the type size and 64 pt for the
leading.
3 Click the Paragraph tab to make the Paragraph palette active, and then click the Left
Align Text option.
63
4 Ty pe Animal and press Enter. Then type the word Facts, as shown here.
Note: In Photoshop CS, the text may not appear smooth if Pixel Aspect Ratio Correction is
enabled. The text will appear as expected in Adobe Encore DVD.
Page 65

LESSON 3
Peachpit Press/Scott Design
64
Designing Menus in Adobe Photoshop
5 With the horizontal type tool, double-click the word “Facts” to select it.
6 Click the Foreground color in the toolbox.
The Color Picker opens.
7 Click in the upper-right corner of the color field to select a bright red color. If you
prefer, you can specify the color numerically in the Color Picker. (We used R=205, G=0,
B=0.) Click OK.
8 Press Ctrl+Enter to deselect the text.
The word “Facts” is now red.
9 Choose File > Save.
Page 66

ADOBE ENCORE DVD
Peachpit Press/Scott Design
Classroom in a Book
Applying layer styles in Photoshop
You can enhance a layer by adding a shadow, glow, bevel, emboss, or other special effect
from a collection of automated and editable layer styles. In Adobe Encore DVD, you can
apply a drop shadow effect, but there are many more layer styles available in Photoshop.
Adobe Encore DVD recognizes the layer styles you apply in Photoshop, so it displays the
effects accurately, and you can return to Photoshop to edit the layer styles at any time.
Yo u’ll apply a drop shadow effect to the Animal Facts text block.
1 Select the Animal Facts text layer in the Layers palette. Choose Layer > Layer Style >
Drop Shadow.
The Layer Style dialog box appears. It includes more options for the drop shadow effect
than the similar dialog box in Adobe Encore DVD, but the effect you apply in Photoshop
will appear the same in Adobe Encore DVD.
65
2 Leave the settings at their default values, and click OK.
Page 67

LESSON 3
Peachpit Press/Scott Design
66
Designing Menus in Adobe Photoshop
The text appears with a drop shadow.
Now you will apply a different layer style to create a glowing outline for the animal
images.
3 Select the Giraffe image layer in the Layers palette.
Note: Be sure to select the Giraffe image layer and not the Giraffe text layer.
4 Click the Add a Layer Style button at the bottom of the Layers palette, and choose
Outer Glow.
The Layer Style dialog box appears, displaying the options for the Outer Glow layer style.
5 In the Layer Style dialog box, choose Normal from the Blend Mode pop-up menu.
Page 68

ADOBE ENCORE DVD
Peachpit Press/Scott Design
Classroom in a Book
6 Position the Layer Style dialog box so that you can see the word “Facts” in your image.
Click the small color swatch in the Structure section of the Layer Style dialog box to open
the Color Picker.
7 If necessary, move the Color Picker so that you can see the word “Facts” in your image.
With the Color Picker open, move the cursor over the word “Facts” until it turns into the
eyedropper tool ( ). Click on the word “Facts.” Click OK to close the Color Picker.
67
To learn more about using the Color Picker, see “Using the Adobe Color Picker” in
Photoshop Help.
The eyedropper tool selected the color you applied to the word “Facts,” so you can use that
color in the Layer Style dialog box, too.
Page 69

LESSON 3
Peachpit Press/Scott Design
68
Designing Menus in Adobe Photoshop
8 Click OK to close the Layer Style dialog box.
A red glow appears around the giraffe.
9 Repeat steps 3–8 for the Gorilla image layer and the Jaguar image layer, so that a red
glow appears around all three animals.
Page 70

ADOBE ENCORE DVD
Peachpit Press/Scott Design
Classroom in a Book
10 Choose File > Save.
About layer styles
Yo u can apply shadows, glows, bevels, embossed effects, and more using layer styles in Photoshop.
These effects are linked to the contents of the layer—and when you move or edit the contents, the
effects change as well. For example, if you apply a drop shadow to a text layer, the shadow changes
automatically when you edit the text.
When a style is applied to a layer, an icon ( ) appears just to the right of the layer’s name in the
Layers palette in Photoshop. You can expand the style in the Layers palette to view all the effects that
make up the style, and edit the effects to change the style.
Photoshop includes numerous predefined styles. You can create a custom style by applying multiple
effects to a layer.
Creating buttons in Photoshop
Now you’re ready to create buttons for the menu. In Lesson 2, you converted layers into
buttons in Adobe Encore DVD. When you create a button from a layer, Adobe Encore
DVD converts that layer into a layer set, using a specific naming convention. Likewise,
Adobe Encore DVD recognizes buttons you create in Photoshop, as long as you name and
organize their layers and layer sets properly.
69
1 Select the Giraffe text layer in the Layers palette, and choose Layer > New > Layer Set.
2 Name the layer set (+) Giraffe Button, and then click OK.
The layer set appears in the Layers palette, above the Giraffe text layer. It is important that
the name begins with (+). Adobe Encore DVD recognizes layer sets whose names begin
with (+) as buttons.
Page 71

LESSON 3
Peachpit Press/Scott Design
70
Designing Menus in Adobe Photoshop
Now you’ll move the Giraffe image layer and the Giraffe text layer into the new layer set.
3 In the Layers palette, drag the Giraffe text layer onto the folder for the (+) Giraffe
Button layer set.
When you release the mouse button, the Giraffe text layer appears slightly indented below
the Giraffe Button layer set in the Layers palette, meaning that it is included in the layer
set.
4 Drag the Giraffe image layer onto the folder for the (+) Giraffe Button layer set.
Because the name of the layer set begins with (+), Adobe Encore DVD will recognize any
layer in that set as part of the button.
5 Repeat steps 1– 4 to create a (+) Gorilla Button layer set that contains the Gorilla image
layer and the Gorilla text layer.
6 Repeat steps 1– 4 to create a (+) Jaguar Button layer set that contains the Jaguar image
layer and the Jaguar text layer.
Page 72

7 Choose File > Save.
Peachpit Press/Scott Design
Menu Item Photoshop Element Layer Name Prefix Example
Button name Layer set containing
button components
Button text Text layers within the
layer set
Button image Image layers within
the layer set
Subpicture Single-color image
layers. Each layer
represents one color
of the three-color subpicture.
Video thumbnail An image layer within
the layer set that
serves as a
placeholder for video.
Other design
elements or text (such
as logo or menu title)
Individual layer None required Summer flowers
(+) (+) Daisy button 1
None required Daisy button
None required Daisy image
(=1) (=2) (=3) (=1)Text highlight
(=2) Daisy outline
(=3) Check mark
(%) (%) Daisy thumbnail
ADOBE ENCORE DVD
Classroom in a Book
71
Use the Adobe Encore DVD naming conventions when you create Photoshop layers and layer sets to ensure
that Adobe Encore DVD recognizes buttons, subpictures, and thumbnails in the imported menu.
Add subpictures to buttons
In Lesson 2, you converted a layer into a subpicture, and Adobe Encore DVD changed the
layer’s name to follow a specific naming convention. You can create subpictures in
Photoshop by following that same naming convention when you name layers. When you
then import the file as a menu, Adobe Encore DVD automatically recognizes the
subpictures.
A subpicture changes the appearance of a button when the viewer mouses over or
activates it.
1 Select the Giraffe image layer in the Layers palette, and then choose Layer > Duplicate
Layer.
Page 73

LESSON 3
Peachpit Press/Scott Design
72
Designing Menus in Adobe Photoshop
2 In the Duplicate Layer dialog box, type (=1) for the layer name, and click OK.
Photoshop adds a copy of the Giraffe image layer named (=1) to the (+) Giraffe Button
layer set. If the new layer is not inside the (+) Giraffe Button layer set, drag it onto the layer
set in the Layers palette. It is important that the layer’s name begins (=1). Adobe Encore
DVD recognizes layers whose names begin with (=) as subpictures.
The new subpicture layer is a copy of the Giraffe image layer, so it includes the Outer Glow
layer style. You will remove the layer style from the new layer.
3 In the Layers palette, select the (=1) layer you just created, and choose Layer > Layer
Style > Clear Layer Style.
4 With the (=1) layer still selected in the Layers palette, click the Lock Transparent Pixels
button at the top of the Layers palette.
Page 74

ADOBE ENCORE DVD
Peachpit Press/Scott Design
Classroom in a Book
When this button is selected, only the pixels of the giraffe image—not the transparent
background—can change.
5 Choose Window > Swatches to open the Swatches palette. Select a light orange or
yellow swatch.
The swatch you select becomes the foreground color.
73
6 Choose Edit > Fill. In the Fill dialog box, choose Foreground Color from the Use popup menu, and set the Opacity value to 100%. Then click OK.
7 The giraffe image is filled with the foreground color.
If the entire layer is filled with the foreground color, choose Edit > Undo, click the Lock
Transparent Pixels button in the Layers palette, and choose Edit > Fill again.
8 With the (=1) layer selected in the Layers palette, type 60 in the Opacity field.
Page 75

LESSON 3
Peachpit Press/Scott Design
74
Designing Menus in Adobe Photoshop
The Giraffe image layer shows through the subpicture layer. Adobe Encore DVD will use
the color and transparency values of the Photoshop layer when it creates subpictures.
9 Repeat steps 1–8 to create subpictures for the Gorilla image layer and the Jaguar image
layer.
10 Save the file.
Page 76

ADOBE ENCORE DVD
Peachpit Press/Scott Design
Classroom in a Book
Importing a menu into Adobe Encore DVD
When you create a menu in Photoshop using the proper naming conventions, all you
need to do is to import the menu into Adobe Encore DVD. Adobe Encore DVD
automatically recognizes buttons, subpictures, and the effects you’ve applied in
Photoshop.
Yo u’ve created a Photoshop file to use as a menu in Adobe Encore DVD. To ensure that
the buttons and their subpictures appear correctly, verify that the following is true:
• There are three layer sets, with names that begin (+).
• In each layer set, there is an image layer, a text layer, and a subpicture layer.
• Each subpicture layer has a name that begins (=1).
• The subpicture layers each have an opacity of 60%.
• No layer style is applied to the subpicture layers.
• The Animal Facts layer is not included in any layer set.
75
If you are unsure whether your file meets these criteria, compare it with the Photoshop
file named Lesson_03_end.psd in the Lesson 03 folder. If the layers are named and
organized appropriately, you’re ready to import the menu into Adobe Encore DVD.
1 In Adobe Encore DVD, choose File > New Project. Click OK to accept NTSC as the
television standard.
2 Choose File > Import as Menu. Select the Main.psd file you just created, and click OK.
The Menu Editor window opens. The Main file appears exactly as you created it in
Photoshop. You can still edit the text in Adobe Encore DVD or in Photoshop. Adobe
Encore DVD retains the layer styles, including the drop shadow on the title text and the
outer glow applied to the animal images. The subpictures you created may not be visible;
to see them, click one of the Show Subpicture buttons. Adobe Encore DVD interprets
those layers with (=1) in their names as subpictures only.
Note: If you created the menu file in Photoshop CS, it may appear to be stretched horizontally.
Click the Toggle Pixel Aspect Ratio Correction button at the bottom of the Menu Editor
window to see an approximation of the menu’s appearance on the final DVD.
3 Choose View > Show Selected Subpicture.
The subpictures appear.
Page 77

LESSON 3
Peachpit Press/Scott Design
76
Designing Menus in Adobe Photoshop
4 Choose View > Show Safe Area.
Adobe Encore DVD displays the Title Safe area guides. The title and buttons may be
partially outside of the safe viewing area.
5 Using the selection tool, move the Animal Facts text block so that it is positioned
completely within the safe viewing area. Then move the three buttons within the safe
viewing area, as shown below.
You can edit the menu in Adobe Encore DVD because all of the Photoshop layer
information has been preserved.
Editing a menu in Photoshop
The Outer Glow layer style helps to define the shape of the giraffe, but the image still
seems to lack contrast. You can add contrast by adjusting the image levels in Photoshop.
You can easily edit the menu in Photoshop without losing the changes you’ve made in
Adobe Encore DVD.
1 In Adobe Encore DVD, choose Menu > Edit in Photoshop.
Note: To launch Photoshop from Adobe Encore DVD, Adobe Encore DVD and Photoshop
must be installed on the same computer.
Page 78

ADOBE ENCORE DVD
Peachpit Press/Scott Design
Classroom in a Book
Photoshop starts and opens the menu you have just been working on. The menu retains
the changes you made in Adobe Encore DVD.
Note: If you are prompted to update the text layers, click Update.
77
Notice that the filename at the top of the image window is longer than the name of the
menu file you created in Photoshop. When you use the Edit in Photoshop command,
Adobe Encore DVD creates a copy of the current menu file, gives it a unique name, and
stores it in the Sources\Menus folder in the Adobe Encore DVD project folder. Changes
you make to this file in Photoshop affect the menu in your Adobe Encore DVD project,
but do not affect the original menu file.
2 If the giraffe subpicture layer in the menu is visible in Photoshop, hide it by clicking the
eye icon in the Layers palette.
You want to add contrast to the giraffe image, so you need to be able to see the image as
it normally appears. Hiding the subpicture layer in Photoshop has no effect in Adobe
Encore DVD. Adobe Encore DVD interprets the subpicture layer whether it is visible or
hidden.
Page 79

LESSON 3
Peachpit Press/Scott Design
78
Designing Menus in Adobe Photoshop
3 Select the Giraffe image layer in the Layers palette
Make sure you select the Giraffe image layer and not the Giraffe text layer, the (+) Giraffe
Button layer set, or the (=1) subpicture layer.
4 Choose Image > Adjustments > Levels.
5 Drag the middle triangle under the histogram slightly to the right. As you drag, the
midtones value for the Input Levels changes. We moved the midtones value to .70. Click
OK to apply the change.
The giraffe image has better contrast.
6 Save the file in Photoshop, and then close it. Return to Adobe Encore DVD.
In Adobe Encore DVD, the menu has updated to reflect the change you made in
Photoshop.
Note: If the subpictures are visible, choose View > Show Selected Subpicture to hide them.
7 Choose File > Save. Name the project Lesson_03.ncor.
Linking buttons to timelines
Adobe Encore DVD recognizes the buttons you created in Photoshop, so you can link
them just as you would buttons you create in Adobe Encore DVD. First, create the
timelines, and then link the buttons.
Page 80

ADOBE ENCORE DVD
Peachpit Press/Scott Design
Classroom in a Book
1 Click the Project window to make it active. Choose File > Import as Asset. In the
Import as Asset dialog box, navigate to the Lesson 03 folder. Select Giraffe.avi,
Gorilla.avi, and Jaguar.avi. (Press the Ctrl key to select multiple files.) Click Open.
2 In the Project window, select Giraffe.avi, Gorilla.avi, and Jaguar.avi. Click the Create a
New Timeline button at the bottom of the Project window.
The Timeline window opens with three tabs, one for each video file. The Monitor window
also opens.
3 If the Properties palette isn’t open, choose Window > Properties.
4 In the Project window, select the Giraffe timeline, the Gorilla timeline, and the Jaguar
timeline.
5 In the Properties palette, choose Main > Default from the End Action pop-up menu.
Now, after each movie plays, the main menu will appear with its default button
highlighted.
79
6 In the Project window, make sure that the Main menu is set to play when the disc is
inserted. (A circle with an arrow ( ) should appear on its icon. If it doesn’t, right-click
the Main menu and choose File > Set as First Play.)
Page 81

LESSON 3
Peachpit Press/Scott Design
80
Designing Menus in Adobe Photoshop
7 With the selection tool, right-click the Giraffe button in the Menu Editor window, and
choose Link To. Select the Giraffe timeline, and click OK.
8 Using the same procedure you used in step 7, link the Gorilla button to the Gorilla
timeline, and the Jaguar button to the Jaguar timeline.
9 Save the file.
Repositioning overlapping objects
The buttons have large bounding boxes, so they’re probably overlapping. You’ll preview
the buttons and their subpictures, and then reposition them if they overlap.
1 Choose File > Preview.
The Main menu appears.
2 Mouse over the buttons in the Project Preview window to display their subpictures.
Page 82

ADOBE ENCORE DVD
Peachpit Press/Scott Design
Classroom in a Book
If the bounding boxes for the buttons overlap, the subpictures may not appear as
expected. An example is shown below.
81
3 Close the Project Preview window.
4 Press the Shift key, and click the three buttons in the Menu Editor window.
Notice that even though the buttons are irregularly shaped, they have rectangular
bounding boxes. It is easy to accidentally overlap buttons.
Page 83

LESSON 3
Peachpit Press/Scott Design
82
Designing Menus in Adobe Photoshop
5 Use the selection tool to move the buttons so they do not overlap. Keep them within
the Title Safe area.
6 Save the file.
Previewing the project
Before you burn a DVD, make sure the project is configured properly. It should look and
behave just like the one you previewed at the beginning of this lesson.
1 Choose File > Preview.
If the project is configured correctly, the Main menu appears. The Giraffe button is
highlighted.
2 Click the Giraffe button. The Giraffe timeline should play, and then the DVD should
return to the main menu.
3 Click the other two buttons. The timelines should play, and then the DVD should
return to the main menu.
4 Close the Project Preview window.
If the DVD project didn’t behave as described above, return to the project and correct the
behavior. Preview the DVD again to ensure that it behaves as expected before continuing.
Page 84

ADOBE ENCORE DVD
Peachpit Press/Scott Design
Classroom in a Book
Burning the DVD
Yo u’re ready to burn the DVD.
1 Choose File > Build DVD > Make DVD Disc.
2 In the Make DVD Disc dialog box, choose Current Project from the Create Using pop-
up menu, and then choose your recorder.
3 Insert a blank disc in the recorder, and click Next.
4 Review the information in the Make DVD Disc Summary dialog box. When you are
ready to proceed, click Build.
Burning the disc may take several minutes, depending on the DVD recorder, the
computer system, and the size of the media.
Review questions
1 What’s the advantage of creating a menu in Photoshop rather than in Adobe Encore
DVD?
83
2 How do you apply a layer style to text in Photoshop?
3 Which layer sets will Adobe Encore DVD recognize as buttons?
4 Which layers will Adobe Encore DVD recognize as subpictures?
5 How can you edit an Adobe Encore DVD menu in Photoshop?
Review answers
1 When you create a menu in Photoshop, you have full access to the robust, flexible
design features in Photoshop. Adobe Encore DVD retains the Photoshop effects when you
import the menu.
2 Select the text layer in the Layers palette, and then either choose Layer > Layer Style >
[layer style], or click the Add a Layer Style button at the bottom of the Layers palette and
choose a layer style.
3 Adobe Encore DVD recognizes layer sets whose names begin with (+) as buttons.
4 Adobe Encore DVD recognizes layers whose names begin with (=) as subpictures.
5 Select the menu in the Project window, and then choose Menu > Edit in Photoshop.
Page 85

4 Using Adobe Encore DVD
Peachpit Press/Scott Design
Templates
To get your project started quickly, use
one of the menu templates included with
Adobe Encore DVD. You can choose the
menu, buttons, and images you want to
use from the Library palette, and then
customize them to create a unique look.
Page 86

LESSON 4
Peachpit Press/Scott Design
88
Using Adobe Encore DVD Templates
You can use templates to get a head start on your DVD projects—whether you’re using
one of the templates included with Adobe Encore DVD or one you created yourself. In
this lesson you will learn how to do the following:
• Add menus, buttons, and images to the Library palette.
• View only menus, buttons, or images in the Library palette.
• Specify the default menu.
• Open a menu template.
• Edit the text and buttons in a template.
• Edit the background elements of a template.
• Replace an item using the Library palette.
• Paste items into multiple menus.
• Build a DVD image.
Getting started
In this lesson, you’ll create a new Adobe Encore DVD project, using graphic and video
files included on the Adobe Encore DVD Classroom in a Book DVD. Make sure you know
the location of the files you need for Lesson 4. For help, see “Copying the Classroom in a
Book files” on page 2.
Viewing the finished Adobe Encore DVD project
To see what you’ll be creating, take a look at the finished project.
1 Start Adobe Encore DVD.
2 Choose File > Open Project.
3 In the Open dialog box, navigate to the Lesson 04 folder. Select Lesson_04_end.ncor,
and then click Open.
4 Choose File > Preview.
Page 87

ADOBE ENCORE DVD
Peachpit Press/Scott Design
Classroom in a Book
The Project Preview window opens, displaying a DVD menu. There are two buttons, and
the first button is highlighted.
89
5 Click the Message from Pete button.
A new menu with four buttons appears.
6 Click the Back button to return to the main menu.
7 Click the Mission Statement button. Another menu appears.
Page 88

LESSON 4
Peachpit Press/Scott Design
90
Using Adobe Encore DVD Templates
8 Close the Project Preview window and the Lesson_04_end Project window.
Exploring the Library palette
You can display the files you want to see in the Library palette, specify default menus and
buttons, and perform other tasks.
1 Choose File > New Project. Click OK to accept NTSC as the television standard.
2 Choose Menu > New Menu.
A blank menu appears, with a black background.
3 Choose Window > Layers to open the Layers palette.
Only the Background layer is listed in the Layers palette.
4 Click the Library tab to open the Library palette.
A HGE FDCB
Library palette
A.Show Menus B. Show Buttons C.Show Images
D. Place E. Replace F. New Menu G. Add Item H. Delete
The first three buttons at the bottom of the Library palette offer different views: the first
button shows menus, the second shows buttons, and the third shows images. You can
select one, two, all three, or none of the buttons at a time. By default, all three are selected,
so all the items in the library are listed.
5 Click the Show Buttons and Show Images buttons to deselect them.
Page 89

ADOBE ENCORE DVD
Peachpit Press/Scott Design
Classroom in a Book
The Library palette lists only the menus in the library. The name of the default menu is
preceded by two asterisks (**). The default menu is automatically applied whenever you
choose Menu > New Menu or click the New Menu button in the Project window. You can
specify which menu is the default menu.
6 Click several different menus. A thumbnail version of the selected menu appears in the
preview pane in the Library palette.
91
You can use these menus as templates, already laid out so that you can simply substitute
your text or make any other edits you want to make. The menus are Adobe Photoshop
files constructed of layers and layer sets named using Adobe Encore DVD naming
conventions.
7 Select the Blue Grid Menu.psd file.
8 Click the New Menu button ( ) at the bottom of the Library palette.
The Blue Grid Menu appears in the Menu Editor window.
When you click the New Menu button in the Library palette, Adobe Encore DVD creates
a new menu using the menu file currently selected in the Library palette, rather than the
default menu. However, when you choose Menu > New Menu or click the New Menu
button in the Project window, Adobe Encore DVD creates a new menu using the default
menu.
9 Click the Show Selected Subpicture Highlight button at the bottom of the Menu Editor
window. Blue bars appear next to the buttons in the menu.
Page 90

LESSON 4
Peachpit Press/Scott Design
92
Using Adobe Encore DVD Templates
The subpictures were created in the menu file in Photoshop. In the Layers palette, you can
see that the button layer sets include layers whose names begin with (=1).
10 In the Project window, select all the menus you’ve created, and then delete them.
To delete the selected menus, you can click the Delete button at the bottom of the Project
window, or press the Delete key on your keyboard.
Note: Items in the default Adobe Encore DVD library are stored in the Encore DVD
1.0\Library folder on your hard drive. Items you add to the library are stored in the
Documents and Settings\<username>\Application Data\Adobe\Adobe Encore
DVD\Library folder on your hard drive.
Page 91

ADOBE ENCORE DVD
Peachpit Press/Scott Design
Classroom in a Book
Understanding color sets
A subpicture defines how a button is highlighted when it is selected, activated, or in its normal
(unselected) state. The same image is used in each state, but when you vary the colors and opacity,
the button can appear quite different in one state than it does in another.
Color sets specify the colors used in subpictures. Each menu can reference only one color set, but you
can use many color sets in a project. Typically, using the same color set for all your menus will give
your project a consistent look. Each pixel in a subpicture either references one of three colors defined
in the color set used for that state, or is transparent. Each state has its own color definitions and
opacity settings for all three colors.
For example, using Photoshop, you can create a subpicture composed of three elements, such as a
check mark, a button outline, and the button text. Each element references a different color. By
adjusting the colors and opacity values, you can have the check mark appear next to a menu button
only in the activated state. To do this, you would make the check mark the sole item in the subpicture
to use a particular color, such as color 3. Then you could define color 3 as transparent for all but the
activated state.
Adobe Encore DVD includes a predefined color set. You can modify the default set or create your own
sets. You can save sets and use them in other projects.
In the Blue Grid Menu.psd file, two colors are used for the subpictures. In the normal state, the blue
bars are 100% transparent. In the selected or activated state, the bars are 100% blue. You can see the
subpictures in the Layers palette; they are the layers that begin with (=1).
For more information, see “Creating subpictures and color sets” in Adobe Encore DVD Help.
93
Modifying a menu template
You can quickly create sophisticated menus by modifying one of the many templates
included with Adobe Encore DVD.
1 Open the Library palette.
2 Select the Sky Up Menu.psd file.
3 Click the New Menu button at the bottom of the Library palette.
Page 92
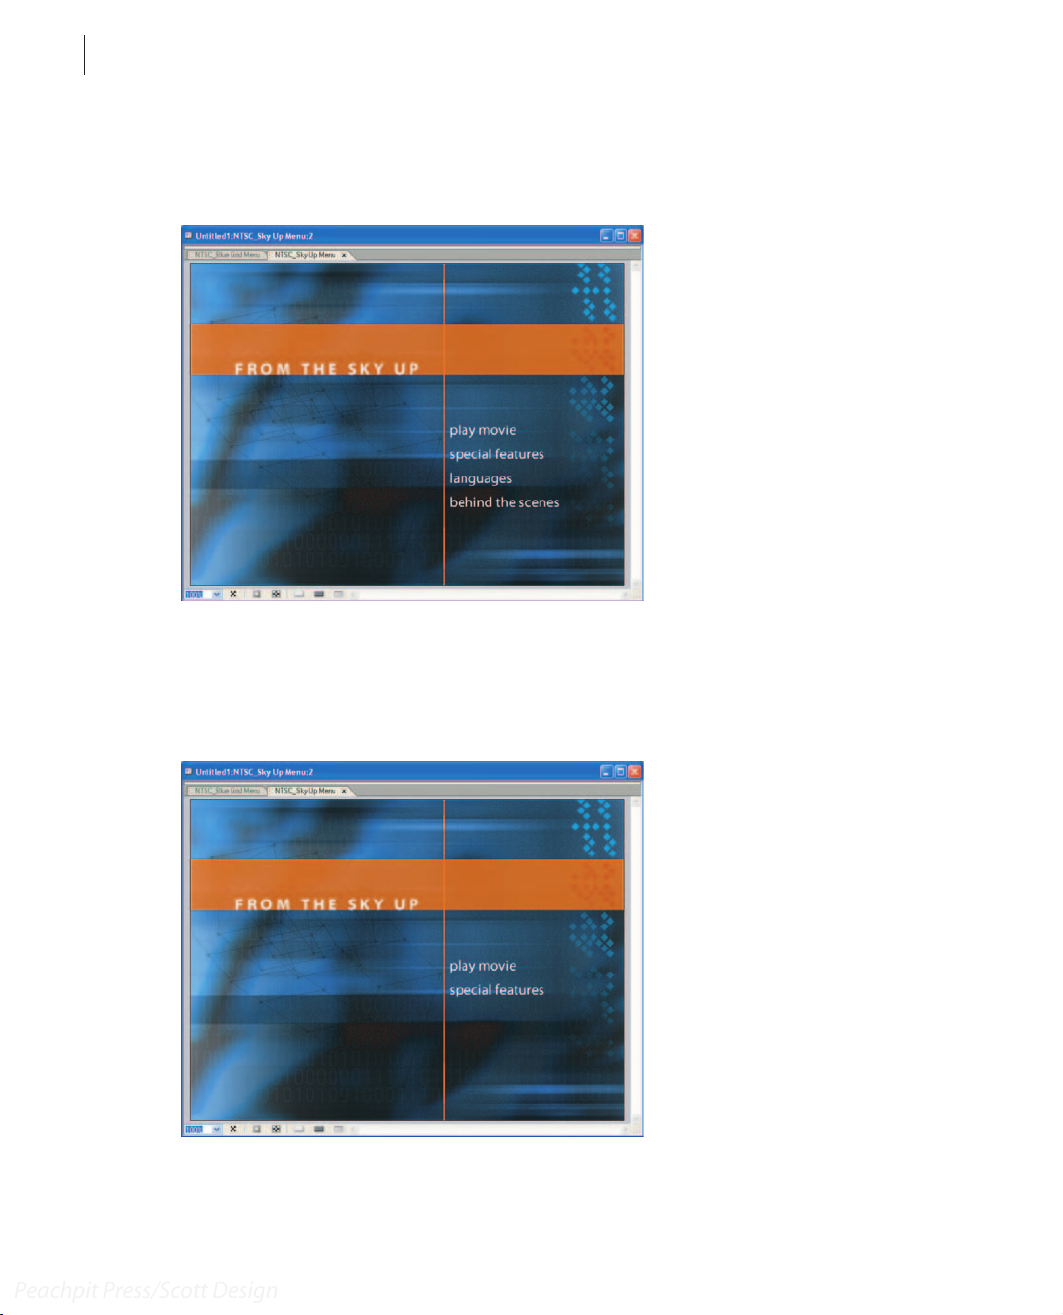
LESSON 4
Peachpit Press/Scott Design
94
Using Adobe Encore DVD Templates
The menu opens. It contains four buttons. However, the menu you’re creating requires
only two main buttons. You’ll delete the buttons you don’t need.
4 With the selection tool, select the Languages button and the Behind the Scenes button.
5 Press the Delete key on your keyboard.
The Play Movie and Special Features buttons remain in the menu.
6 Open the Layers palette.
Page 93

ADOBE ENCORE DVD
Peachpit Press/Scott Design
Classroom in a Book
7 Select the Title layer set.
8 With the text tool, select “From the Sky Up” in the Menu Editor window, and type
Security Update.
9 Use the direct select tool to reposition the text so that it is positioned as shown below.
95
10 In the Layers palette, expand the Play Movie layer set, and select the text layer (named
“play movie”).
Note: To expand a layer set, click the triangle next to its name.
11 Use the text tool to change the text in the Menu Editor window to Message from Pete.
Page 94

LESSON 4
Peachpit Press/Scott Design
96
Using Adobe Encore DVD Templates
12 Expand the Special Features layer set in the Layers palette, select the text layer (named
“special features”), and change the text in the Menu Editor window to Mission
Statement.
13 If the Properties palette isn’t open, choose Window > Properties.
14 With the selection tool, select the first button in the Menu Editor window. In the
Properties palette, rename the button Message.
Give menus, buttons, and timelines appropriate names to help you organize your project,
and to prevent confusion as your project becomes more complex.
Page 95

ADOBE ENCORE DVD
Peachpit Press/Scott Design
Classroom in a Book
15 In the Properties palette, rename the second button Mission.
16 Select the menu in the Project window. In the Properties palette, rename it Security
Update.
The menu’s name is automatically updated in the Project window.
17 Ensure that the Security Update menu will play when the DVD is started. It should
have a small black triangle next to its name ( ), and “First Play” should appear next to
the thumbnail preview in the Project window. If the menu isn’t set to play first, right-click
it and choose Set as First Play.
18 Save the project. Name it Lesson_04.ncor.
Creating submenus from the same template
To create a consistent look for your DVD project, you can use the same template to create
all its menus. You’ll start with the same template, but you’ll make different changes to it.
1 Select the Sky Up Menu.psd file in the Library palette.
97
2 Click the New Menu button at the bottom of the Library palette.
The Sky Up Menu template opens in the Menu Editor window, just as it did earlier.
Changes you make to the menu after you add it to your project do not affect the menu file
stored in the library.
3 In the Properties palette, rename the menu Message.
4 Expand the Title layer set in the Layers palette, and select the text layer. Then, in the
Menu Editor window, use the text tool to change the menu title to Message.
Page 96

LESSON 4
Peachpit Press/Scott Design
98
Using Adobe Encore DVD Templates
5 Use the direct select tool to reposition the title.
6 Replace the text for the first three buttons with Introduction, Cardkeys, and
Emergency Exits.
Yo u can select the text and replace it in the Menu Editor window without selecting the
text layer in the Layers palette. However, it’s easy to accidentally create a new empty text block
if you click the text tool outside the text object. Expand the layer set in the Layers palette to
ensure that you haven’t created extra text layers.
Page 97

ADOBE ENCORE DVD
Peachpit Press/Scott Design
Classroom in a Book
7 Change the text in the Behind the Scenes button to Back.
8 With the selection tool, select the first button in the Menu Editor window. In the
Properties palette rename the button Introduction.
99
9 Select the other buttons and rename them in the Properties palette, according to each
button’s name.
10 Save the project.
Replacing background elements
You can edit all aspects of a menu you create from a template, including elements in the
background. For example, you can add images or buttons from the Library palette. For
this menu, you’ll create another submenu from the same template, deleting the buttons
and replacing them with an image.
1 Select the Sky Up Menu.psd file in the Library palette, and click the New Menu button.
2 In the Properties palette, rename the menu Mission Statement.
3 In the Menu Editor window, use the text tool to change the title to Mission Statement.
4 Delete the first three buttons in the Menu Editor window.
This submenu will not link to any other menus or timelines. The only button on the
menu will return viewers to the main menu.
Page 98

LESSON 4
Peachpit Press/Scott Design
100
Using Adobe Encore DVD Templates
5 Change “behind the scenes” to Back.
6 Select the Back button with the selection tool in the Menu Editor window, and rename
it Back in the Properties palette.
7 Expand the Background Details layer set in the Layers palette, and then select the
Background layer.
8 Select the Blue Grid BG.psd file in the Library palette.
9 With the Background layer still selected in the Layers palette, click the Replace button
() at the bottom of the Library palette.
Page 99

The blue-green background image is replaced with a new image.
Peachpit Press/Scott Design
10 Save the project.
ADOBE ENCORE DVD
Classroom in a Book
101
Adding items to the Library palette
You can store items you use frequently in the Library palette. Additionally, you can easily
position common elements (such as a company logo) in multiple menus.
Add the MHQ company logos to the Library palette for use in this project.
1 Click the Add Item button ( ) at the bottom of the Library palette.
The New Library Item dialog box appears.
Page 100

LESSON 4
Peachpit Press/Scott Design
102
Using Adobe Encore DVD Templates
2 Select the MHQ_logo.psd and MHQ_logo_white.psd files. (Press the Ctrl key to select
multiple files.) Click Open.
Both logo files appear in the Library palette.
3 Click the Security Update tab in the Menu Editor window.
4 Select the MHQ_logo_white.psd file in the Library palette, and click the Place button
() at the bottom of the Library palette.
The Place button adds the selected item to the active menu.
5 Click the Show Safe Area button at the bottom of the Menu Editor window.
Lines appear in the window designating the safe viewing area. You can be sure that
anything within this area will appear on all televisions and computer monitors, but some
viewers won’t see items outside the safe area.
 Loading...