

Page 1

AastraLink RP Solution
Phone User Guide
41-001255-00
Rev 03
6751i RP
G
o
od
b
y
e
S
e
r
vices
H
old
Redial
Sav
e
Dele
t
e
S
p
eak
er
M
u
t
e
G
o
o
d
b
ye
O
p
ti
o
n
s
H
old
Redial
Line 3
Line 2
Line 1
M
u
t
e
6753i RP
CT Cordless
G
o
o
dby
e
O
p
ti
o
ns
H
old
Redial
Line 2
Line 1
M
u
t
e
6757i CT RP
Page 2

Page 3

Software License Agreement
Aastra Telecom Inc., hereinafter known as "Seller", grants to Customer a personal,
worldwide, non-transferable, non-sublicenseable and non-exclusive, restricted use
license to use Software in object form solely with the Equipment for whi ch the
Software was intended. This Product may integrate programs, licensed to Aastra by
third party Suppliers, for distribution under the terms of this agreement. These
programs are confidential and proprietary , and are protected as such by copyright law
as unpublished works and by international treaties to the fullest extent under the
applicable law of the jurisdiction of the Customer. In addition, these confidential and
proprietary programs are works conforming to the requirements of Section 401 of title
17 of the United States Code. Customer shall not disclose to any third party such
confidential and proprietary programs and information and shall not export licensed
Software to any country except in accordance with United States Export laws and
restrictions.
Customer agrees to not reverse engineer, decompile, disassemble or display Software
furnished in object code form. Customer shall not modify, copy, reproduce, distribute,
transcribe, translate or reduce to electronic medium or machine readable form or
language, derive source code without the express written consent of the Seller and its
Suppliers, or disseminate or otherwise disclose the Software to third parties. All
Software furnished hereunder (whether or not part of firmware), including all copies
thereof, are and shall remain the property of Seller and its Suppliers and are subject to
the terms and conditions of this agreement. All rights reserved.
Customer's use of this software shall be deemed to reflect Customer's agreement to
abide by the terms and conditions contained herein. Removal or modification of
trademarks, copyright notices, logos, etc., or the use of Software on any Equipment
other than that for which it is intended, or any other material breach of this
Agreement, shall automatically terminate this license. If this Agreement is terminated
for breach, Customer shall immediately discontinue use and destroy or return to
Seller all licensed software and other confidential or proprietary information of Seller.
In no event shall Seller or its suppliers or licensors be liable for any damages
whatsoever (including without limitation, damages for loss of business profits,
business interruption, loss of business information, other pecuniary loss, or
consequential damages) arising out of the use of or inability to use the software, even
if Seller has been advised of the possibility of such damages.
Software License Agreement
AastraLink RP Phone User Guide 3
Page 4

Page 5

Table of Contents
Software License Agreement........................................................................................................ 3
Introduction................................................................................................................................... 7
About This Guide ....................................................................................................................................................... 7
Phone Models................................................................................................................................. 9
Aastra 6751i RP ......................................................................................................................................................... 9
Aastra 6753i RP ....................................................................................................................................................... 10
Aastra 6757i CT RP ................................................................................................................................................. 11
Getting Started............................................................................................................................ 13
Initializing 6751i RP & 6753i RP ............................................................................................................................ 13
Phone Screens 6751i RP & 6753i RP ...................................................................................................................... 14
Initializing 6757i CT RP .......................................................................................................................................... 15
Phone Screens 6757i CT RP .................................................................................................................................... 17
Key Descriptions ...................................................................................................................................................... 20
Using Microsoft Response Point Assistant................................................................................ 23
Installing .................................................................................................................................................................. 23
Starting Assistant ..................................................................................................................................................... 23
Changing Your Phone Settings With Assistant ....................................................................................................... 25
Recording a User Name With Assistant ................................................................................................................... 25
Upgrading Assistant ................................................................................................................................................. 29
Removing Assistant ................................................................................................................................................. 29
Phone Options via the Aastra Web UI...................................................................................... 30
Finding Your Phone’s IP Address ........................................................................................................................... 30
Accessing the Aastra Web UI .................................................................................................................................. 30
Basic Phone Features.................................................................................................................. 34
Dialing a Number ..................................................................................................................................................... 34
Using Handsfree Speakerphone ............................................................................................................................... 35
Using a Headset ....................................................................................................................................................... 35
Incoming Intercom Calls .......................................................................................................................................... 36
Redial ...................... ........................................... .......................................... ............................................................ 37
Mute ........................ ........................................... ........................................ .............................................................. 39
Receiving Calls ........................................................................................................................................................ 39
Voicemail ................... .................... ...................... .................... ...................... .......................................................... 40
Forwarding Calls ...................................................................................................................................................... 42
Call Transfer ............................................................................................................................................................ 43
Call Park ................................................................................................................................................................... 44
Contacts List in Assistant ......................................................................................................................................... 44
Call Notification ....................................................................................................................................................... 48
Phone Directory List ................................................................................................................................................ 49
Callers List ............................................................................................................................................................... 53
Ring Tones and Tone Sets ....................................................................................................................................... 56
Advanced Phone Features.......................................................................................................... 60
Configuring Multiple Lines (6753i RP & 6757i CT RP) ......................................................................................... 61
3-Way Conference Calling (6753i RP & 6757i CT RP) .......................................................................................... 62
Speeddial Keys (6751i RP) ...................................................................................................................................... 63
Programmable Keys (6753i RP & 6757i CT RP) .................................................................................................... 66
Model M670i and M675i Expansion Modules ........................................................................................................ 75
Foreign Language Support ....................................................................................................................................... 76
Table of Content
AastraLink RP Phone User Guide 5
s
Page 6

Using Your 6757i CT RP Cordless Handset............................................................................. 79
Finding the IP Address using the Handset ............................................................................................................... 83
Feature Keys on the Handset ................................................................................................................................... 83
Handset Icons and Status Messages ......................................................................................................................... 86
Handset Keys ........................................................................................................................................................... 86
Multifunction Handset LED Indicator ..................................................................................................................... 87
Battery Charging ...................................................................................................................................................... 88
Volume Control ....................................................................................................................................................... 88
Directory List on the Cordless Handset ................................................................................................................... 89
Callers List on the Cordless Handset ....................................................................................................................... 91
Making Calls from the Cordless Handset ................................................................................................................ 92
Pairing and Unpairing Cordless Handsets ............................................................................... 94
Pairing Your Handset ............................................................................................................................................... 94
Unpairing Your Handset .......................................................................................................................................... 96
Defining an Emergency Dial Plan.............................................................................................. 99
Troubleshooting......................................................................................................................... 100
Table of Contents
Limited Warranty ..................................................................................................................... 103
6 AastraLink RP Phone User Guide
Page 7
Introduction
e
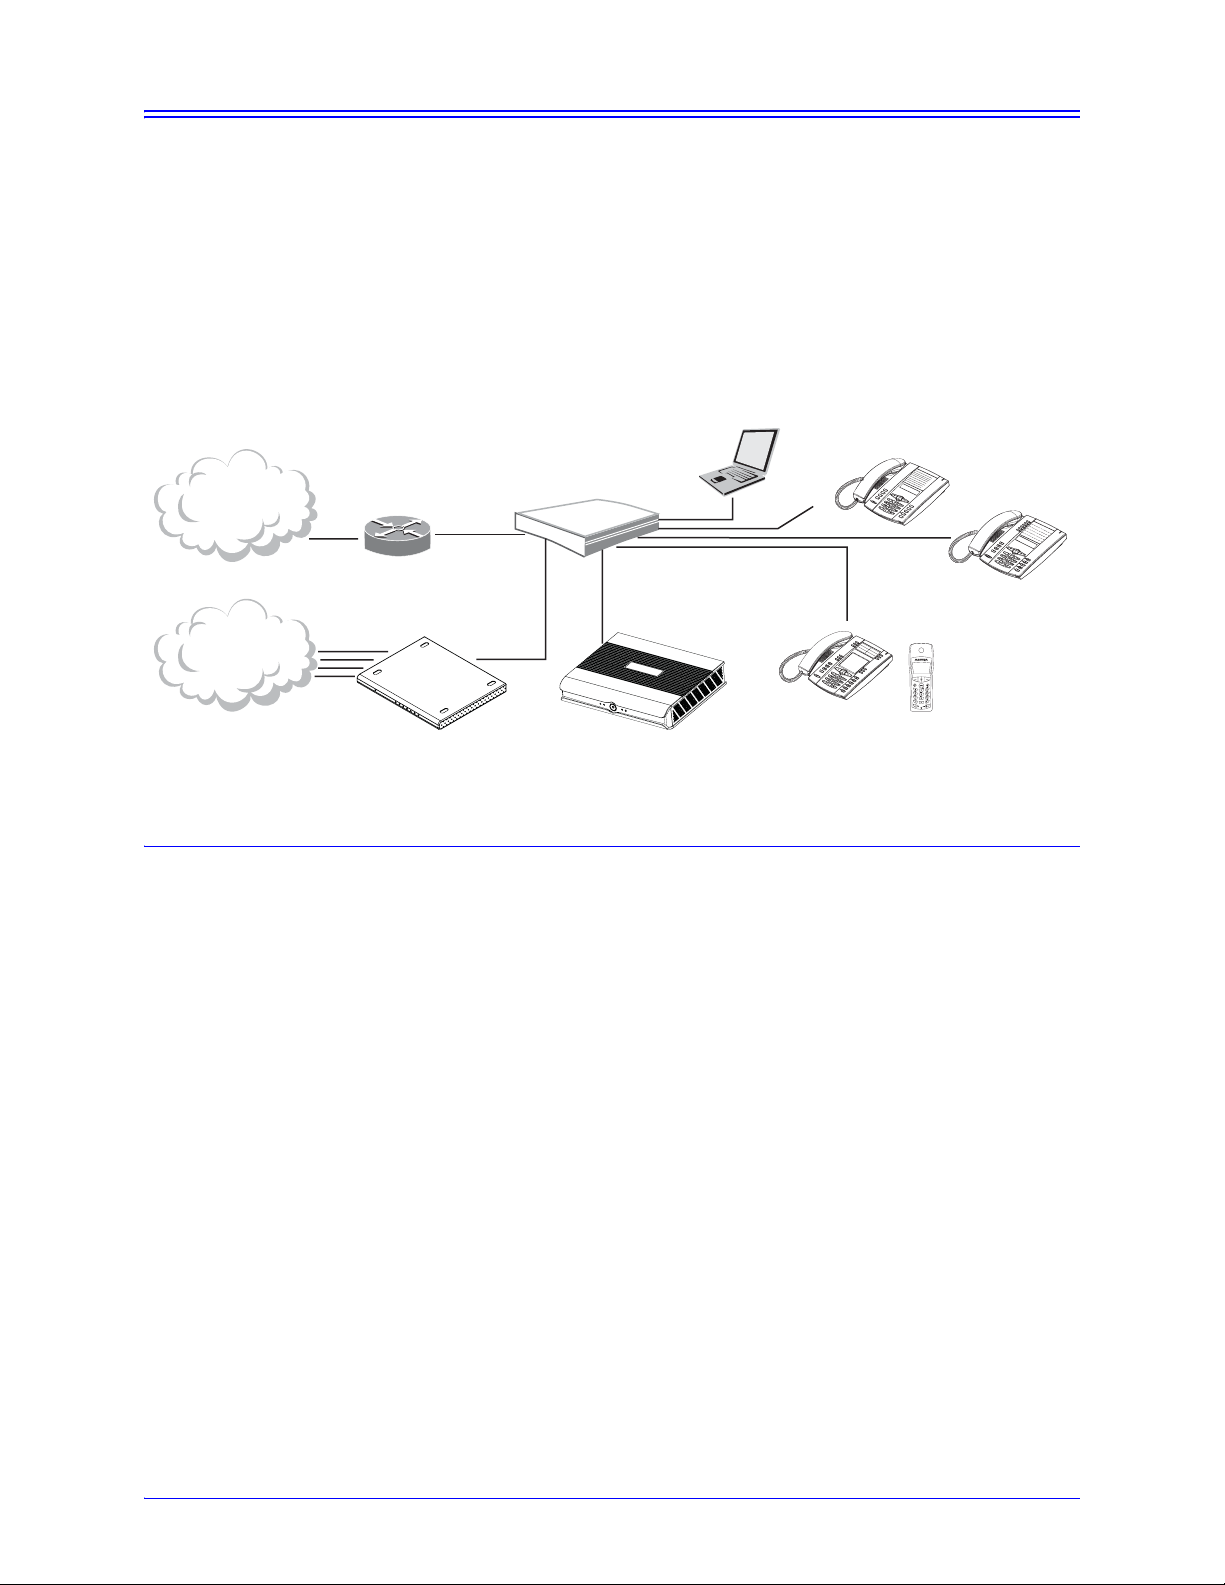
Congratulations on your purchase of the AastraLink RP Solution for small to
medium-sized businesses! The AastraLink RP Solution communicates over an IP
Network, allowing you to receive and place calls in the same manner as a regular
business telephone system. The AastraLink RP Soluti on is a phone system that
offers breakthrough voice-activated user interface, simplified setup and user
management, and effortless mobility, powered by Microsoft® Response
Point™.
Typ i cal Net work Set up
Internet
PSTN
About This Guide
Micros oft R e sponsePoint
Administrator Software
6751i RP IP Phone
LAN Ethernet Switch
Go
o
d
b
y
e
S
e
r
vic
es
H
o
ld
R
edi
al
D
e
le
S
p
e
a
k
er
M
u
t
e
S
a
v
e
te
6753i RP IP P hon
Rou t er
6757i CT RP
IP Phone
CT cordless
Aas traLink R p 540 Gateway Aas traLink R P 500 B a s e Unit
This manual is designed for phone users, and describes how to use the features of
your Aastra IP phone. Not all features listed are available by default and some may
depend on your phone system or service provider. The following guides may apply to
other components of your AastraLink RP Solution:
• AastraLink RP 500 Base Unit Installation Guide
• AastraLink RP 540 Gateway Installation Guide
• AastraLink RP Solution Quick Start Guide
• Aastra 6751i RP, 6753i RP and 6757i CT RP Phone Installation Guides
• AastraLink RP Administrator Guide
The AastraLink RP 500 Base Unit Installation Guide – includes detailed
instructions on setting up the AastraLink RP 500 Base Unit required for all
AastraLink RP Solution systems.
The AastraLink RP 540 Gateway Installation Guide – gives detailed instructions on
setting up the AastraLink RP 540 Gateway in your AastraLink RP Solution system.
The AastraLink RP Solution Quick Start Guide – provides basic information on
setting up and configuring the AastraLink RP Solution.
The Aastra 6751i RP, 6753i RP and 6757i CT RP Phone Installation Guides -
contain detailed instructions on setting up the Aastra IP phones you can use with
theAastraLink RP Solution.
AastraLink RP Phone User Guide 7
Introduction
Page 8

Introduction
The AastraLink RP Administrator Guide - describes how to configure the features of
the AastraLink RP Solution, including the administrator-level settings on the phones.
These guides along with release notes, system updates, etc. can be downloaded from
our Web site at www.aastratelecom.com
8 AastraLink RP Phone User Guide
Page 9
Phone Models
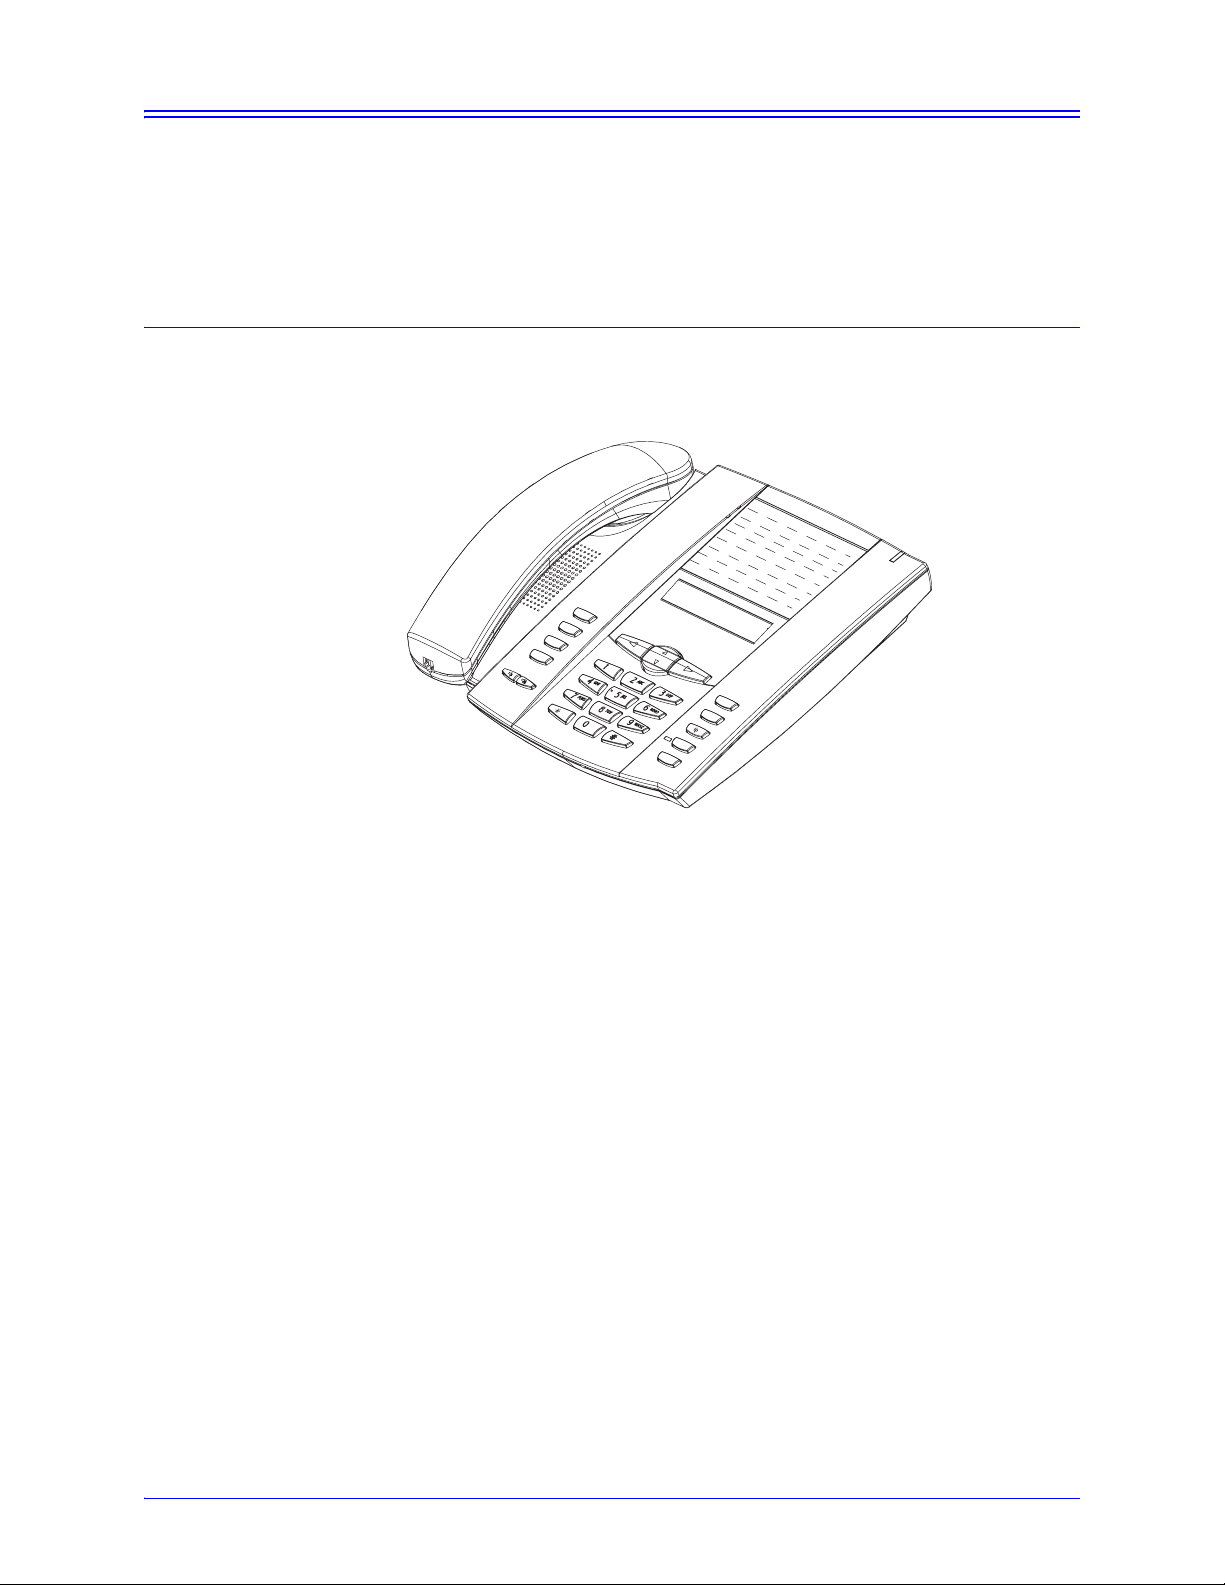
Aastra 6751i RP
Any combination of Aastra models 6751i RP, 6753i RP, and 6757i CT RP phones
may be used with your AastraLink RP solution. This AastraLink RP Phone User
Guide is for all three models. Some features are specific to only one phone model,
and you need to read the manual carefully to see what applies to your phone.
The 6751i RP telephone has all the features of a regular business phone, allowing you
to make and receive calls, transfer, conference and more using your AastraLink RP
Solution.
G
o
od
by
e
S
e
rvic
es
H
old
Redial
Aastra 6751i RP Features
• 3-line LCD screen
• 1 call appearance line
• Supports 1 call line with transfer and hold capabilities
• Full-duplex speakerphone for handsfree calls
• Built-in two-port, 10/100 Ethernet ports - lets you share a connection with your
computer
• Inline power support (based on 802.3af standard) which eliminates the need for
power adapters
• Voice-activated dialing options powered by Microsoft Response Point
• AC power adapter (included)
S
a
v
e
Delete
Speaker
Mu
te
Phone Models
AastraLink RP Phone User Guide 9
Page 10

Aastra 6753i RP
Go
o
db
y
e
H
o
ld
Redia
l
Mu
te
O
p
ti
on
s
Line 1
Line 2
The 6753i RP telephone features 2 call appearance lines and 4 programmable hard
keys in addition to the features of the 6751i RP model.
Phone Models
Aastra 6753i RP Features
ti
old
Redial
Line 2
Line 1
• 3-line LCD screen
• 4 programmable hard keys
• 2 call appearance lines with LEDs
• Supports up to 8 call appearance lines
• Full-duplex speakerphone for handsfree calls
• Headset support (modular connector)
• Expansion modules (optional) attach to the right side of the phone providing 36
additional softkeys (M670i) or 60 additional softkeys (M675i)
• Built-in two-port, 10/100 Ethernet ports - lets you share a connection with your
computer
• Inline power support (based on 802.3af standard) which eliminates power
adapters.
• AC power adapter (included)
10 AastraLink RP Phone User Guide
Page 11
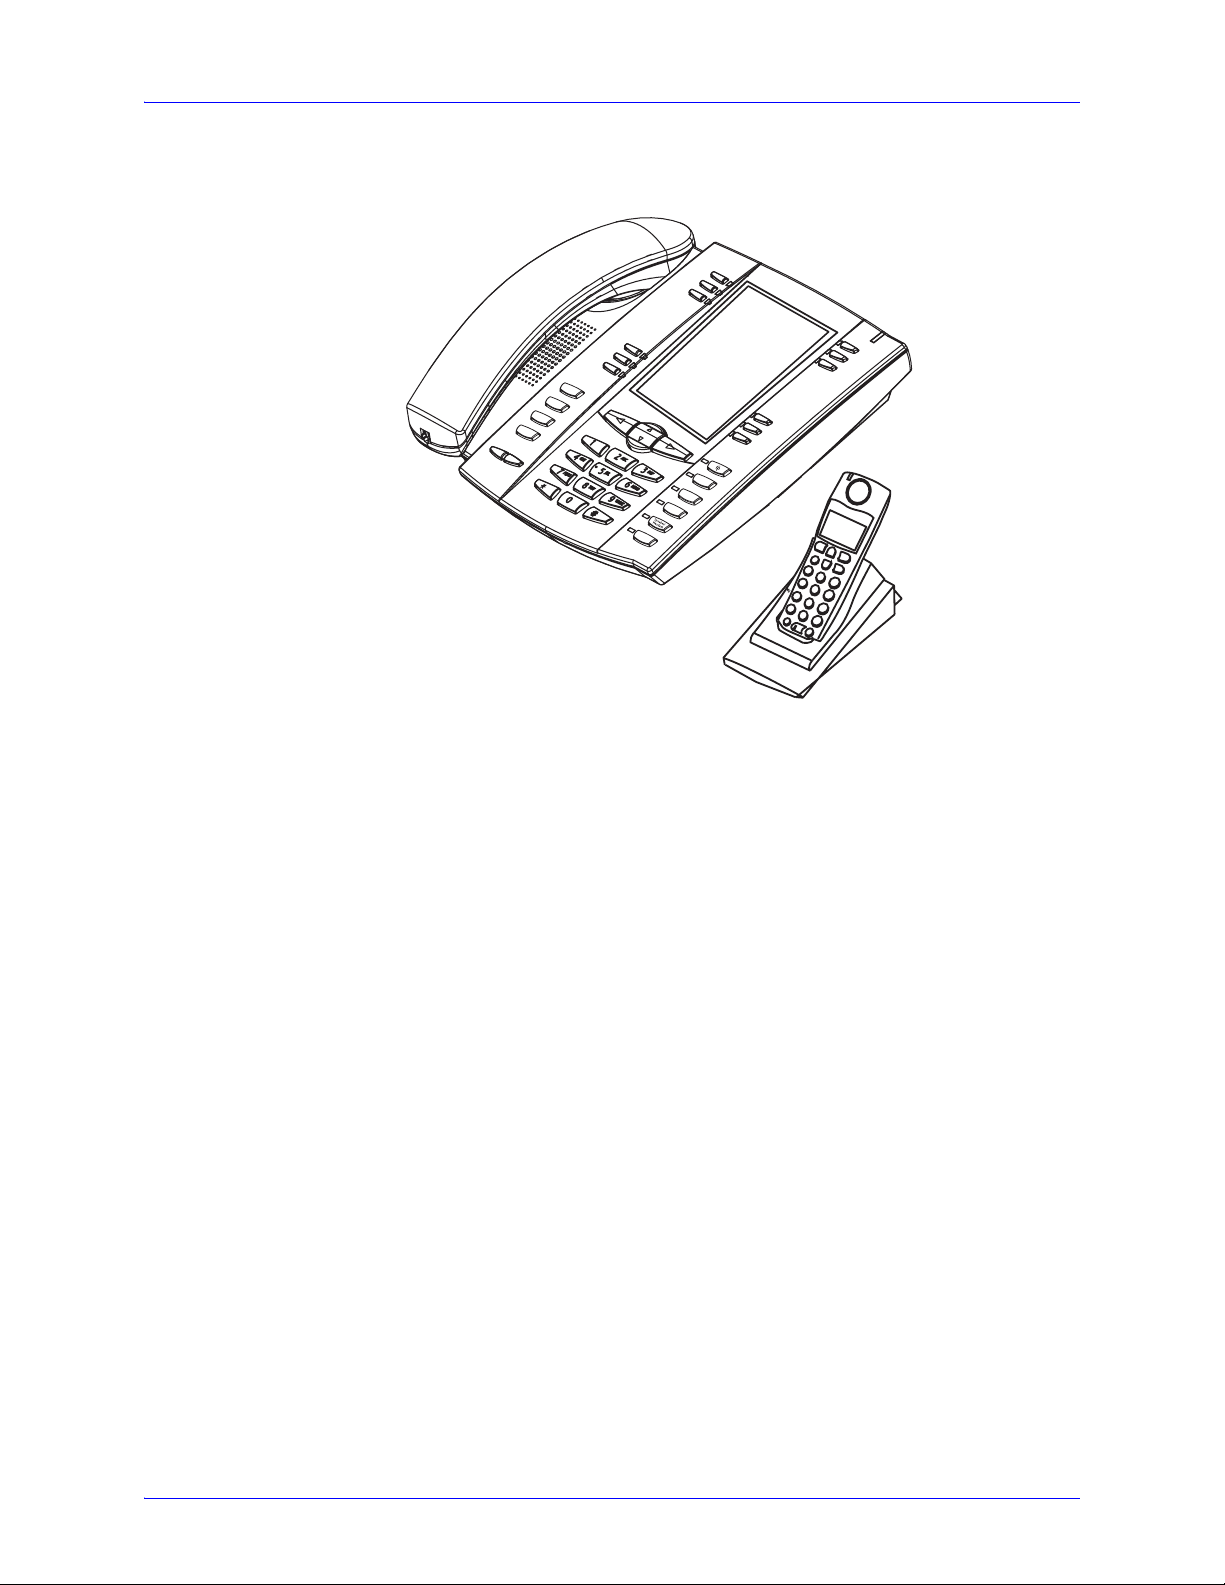
Aastra 6757i CT RP
This 6757i CT RP telephone provides you with 3 call appearance lines and 12
programmable hard keys, as well as a large 12 line LCD screen and a cordless
handset. This model supports up to 9 call lines.
G
o
od
b
ye
O
p
ti
o
n
s
H
old
Redial
Line 3
Line 2
Line 1
M
u
t
e
Phone Features – 6757i CT RP Base Unit
• 12 line graphical LCD screen (144 x 128 pixels) with white backlight
• 12 multi-functional softkeys
- 6 programmable keys (at top of screen)
- 6 context sensitive keys (at bottom of screen)
• 3 call appearance lines with LEDs
• Supports up to 9 call lines
• Full-duplex speakerphone for handsfree calls
• Headset support (modular connector)
• Expansion modules (optional) attach to the right side of the phone providing 36
additional softkeys (M670i) or 60 additional softkeys (M675i)
• Built-in-two-port, 10/100 Ethernet switch - lets you share a connection with your
computer.
• Inline power support (based on 802.3af standard) which eliminates power
adapters.
• AC power adapter (included)
Phone Models
AastraLink RP Phone User Guide 11
Page 12
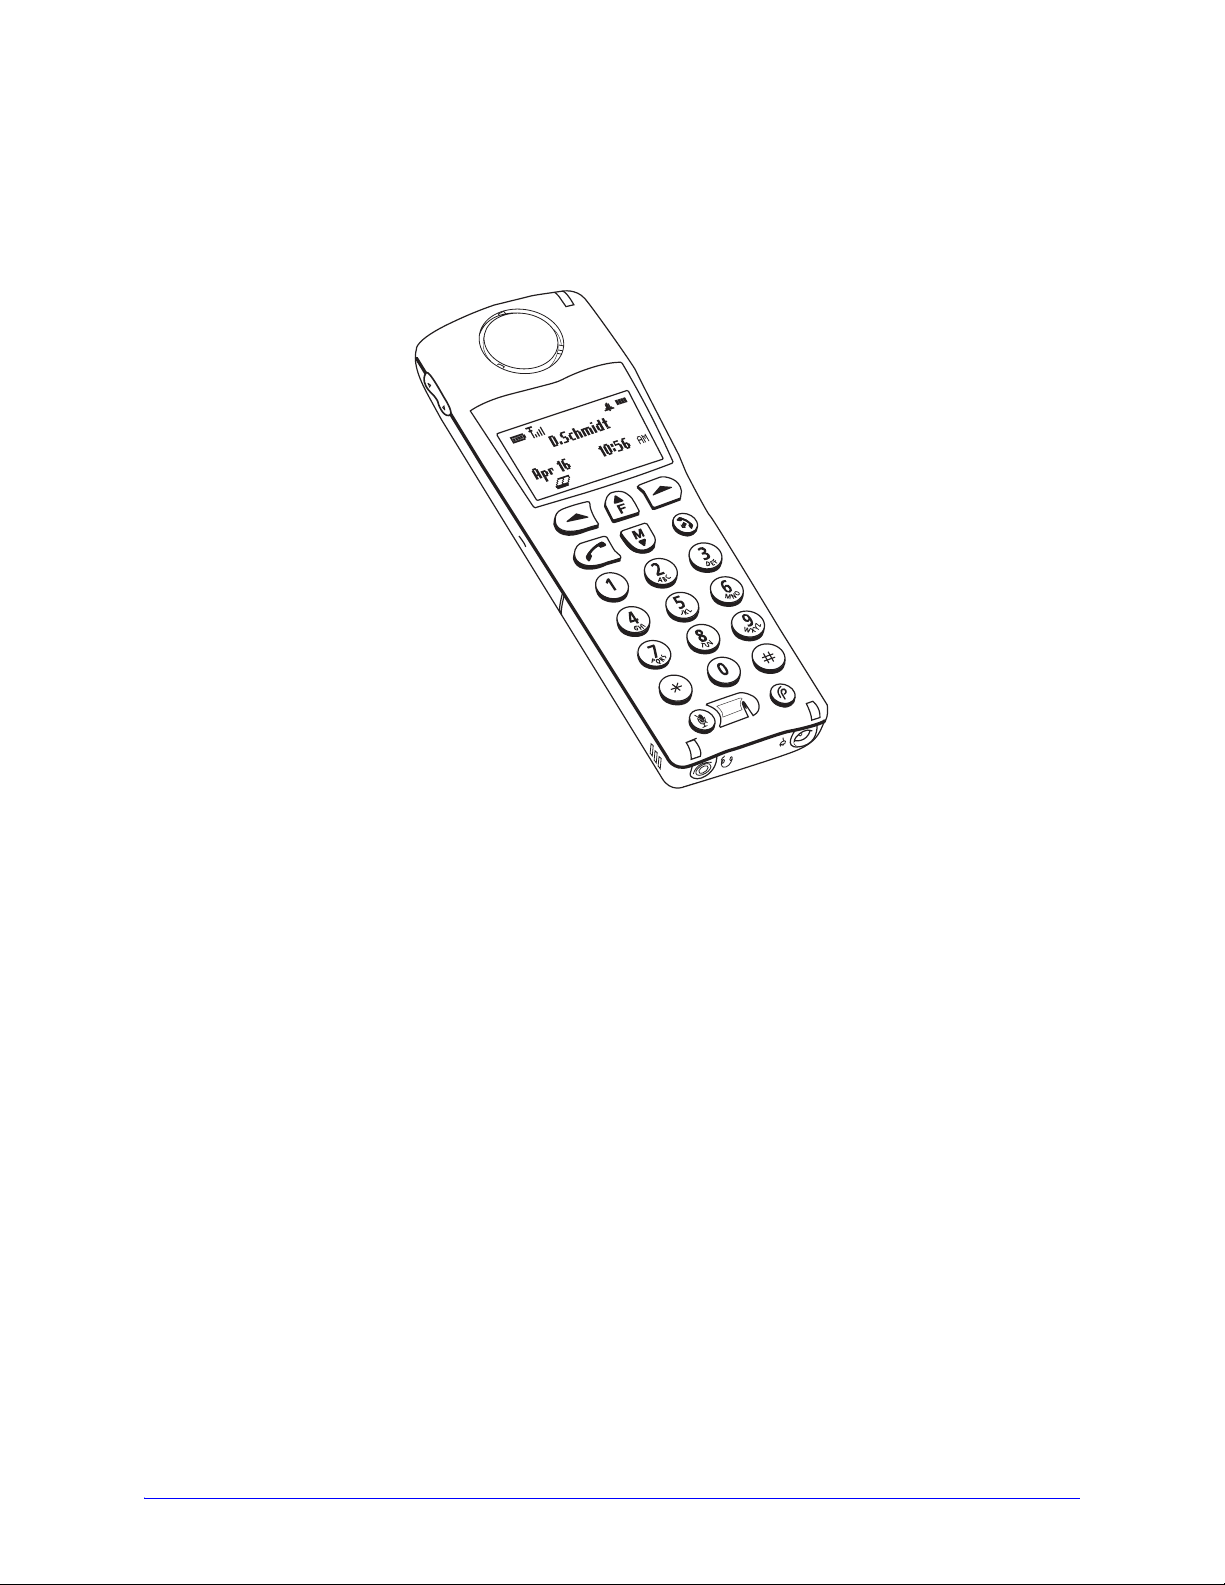
Phone Features – 6757i CT RP Cordless Handset
Phone Models
• 5 line backlit display screen
• 2 multi-functional softkeys
• Programmable function key supports up to 14 functions
• Vibration Alerter
• Headset Jack
• Desk charging stand
12 AastraLink RP Phone User Guide
Page 13
Getting Started
Initializing 6751i RP & 6753i RP
AastraLink RP phones must be set up and configured prior to the first use. This
section describes phone behavior and start up screens you may see when your phone
is first plugged in, or when it is restarted.
The AastraLink RP automatically begins the start up sequence as soon as it is
connected. The phone goes through this process the first time you plug in your phone
and every time you restart your phone.
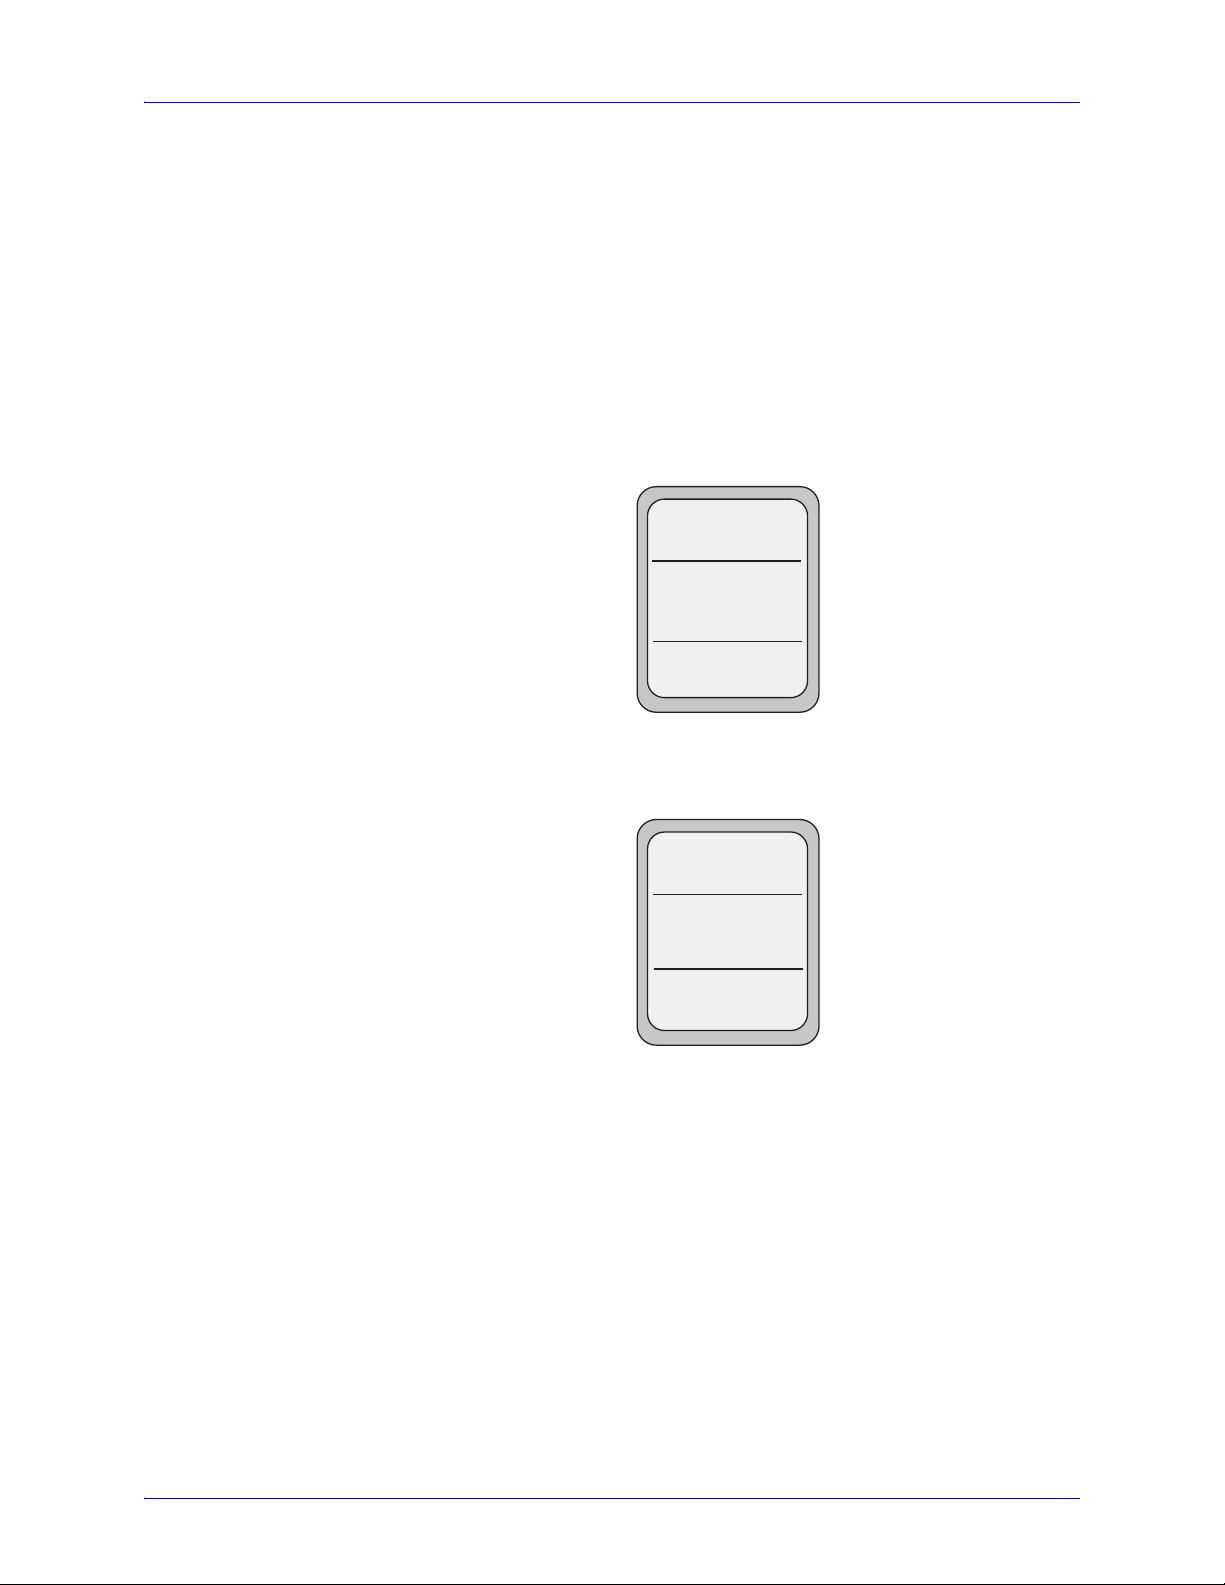
The phone displays the following startup screens.
Network
Aastra 6751i RP
Initializing
network
OR
SIP
Note: Do not unplug or remove power to the phone while it is checking or installing
firmware and configuration information.
When the configuration update is complete, the phone displays the following screen.
Aastra 6753i RP
Downloading
language packs.....
DSP
1
Done
No Service
Sat Jan 1 12:00a
The 6751i RP or 6753i RP phone is now ready to be added to your AastraLink RP
Solution by the System Administrator, using the Microsoft Response Point
Administrator phone system software. Further instructions can be found in the
AastraLink RP Administrator Guide.
AastraLink RP Phone User Guide 13
Getting Started
Page 14
Phone Screens 6751i RP & 6753i RP
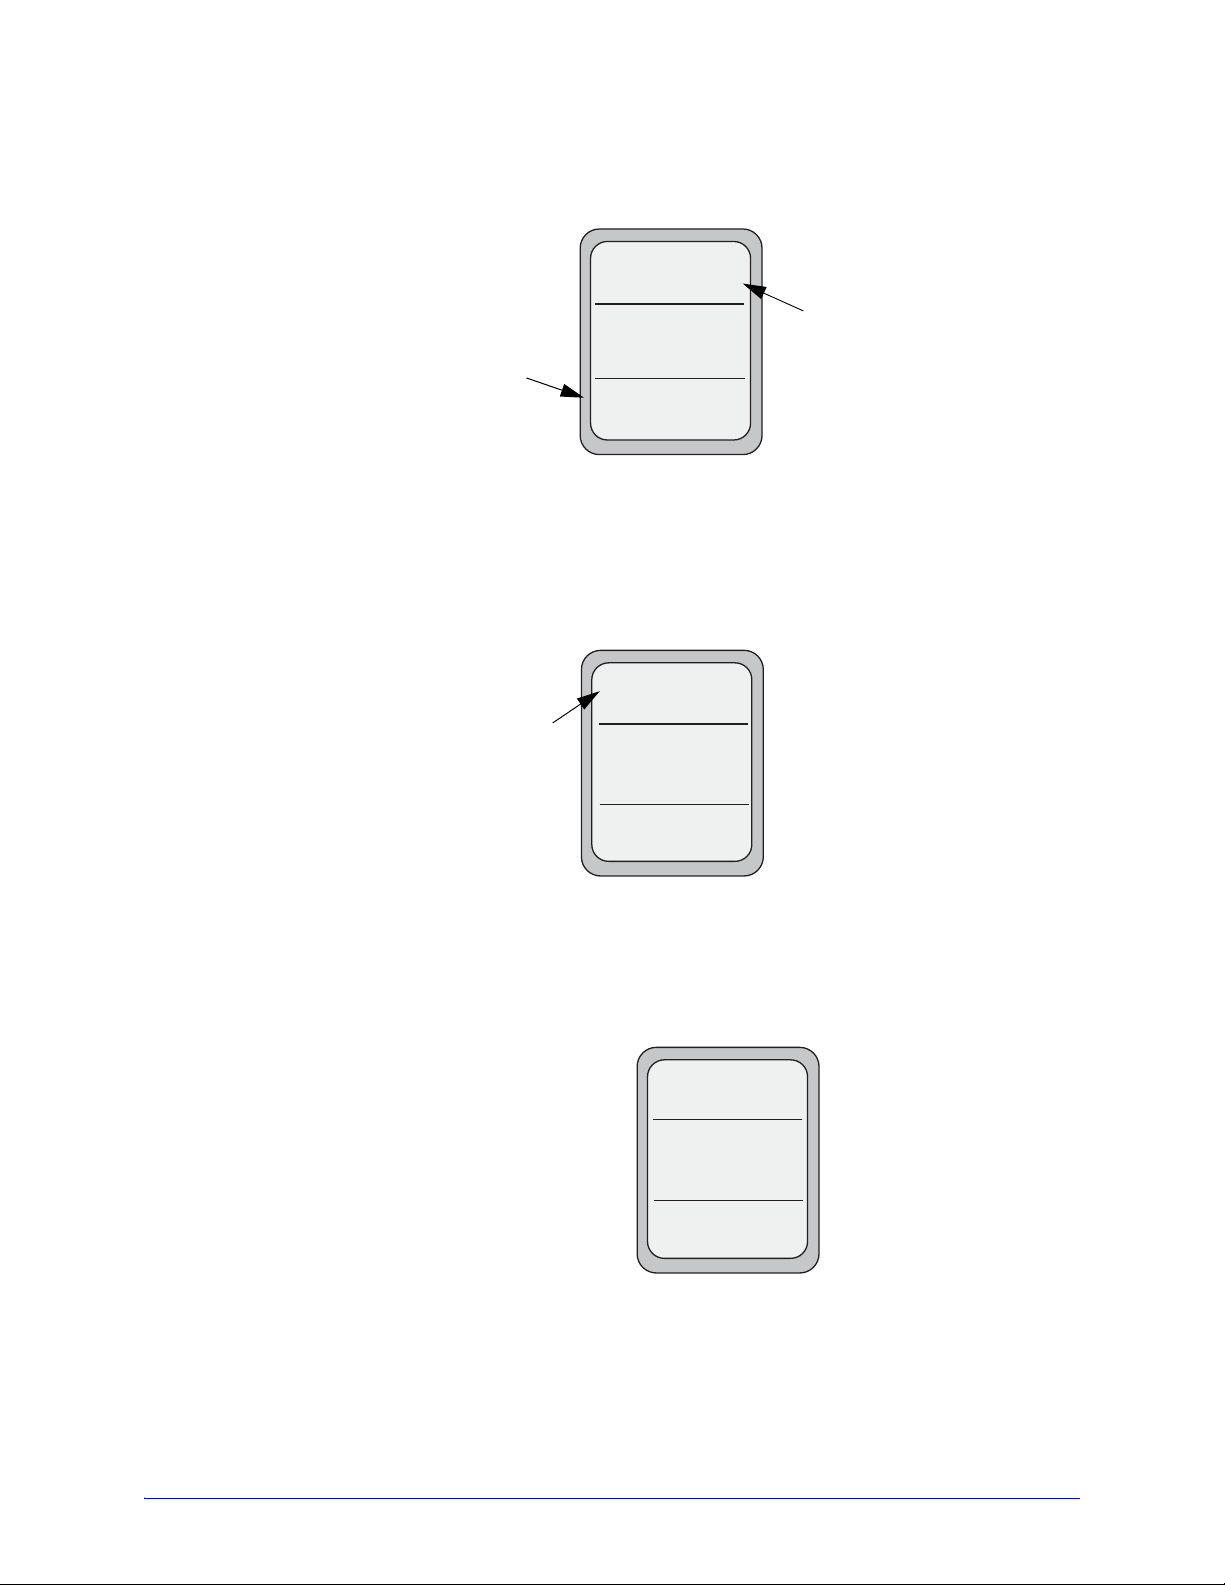
Idle Screens 6751i RP & 6753i RP
When the phone has successfully updated the configuration and connected to the
network, the phone displays the Idle State screen:
Getting Started
1
John Burns
103
Sat Jun 8 2:55p
The Idle State screen lists your name, extension (or phone number), and day, date,
and time. The "1" in the upper corner in the above example indicates the idle screen
for the first line appearance. Y ou can use the LEFT and RIGHT arrow keys to scroll
through the idle screens on phones with more than one line. The phone user assigned
to each line is displayed.
2
Janet Hermann
105
Sat Jun 8 2:55p
The Idle State screen is shown whenever your phone is not in use.
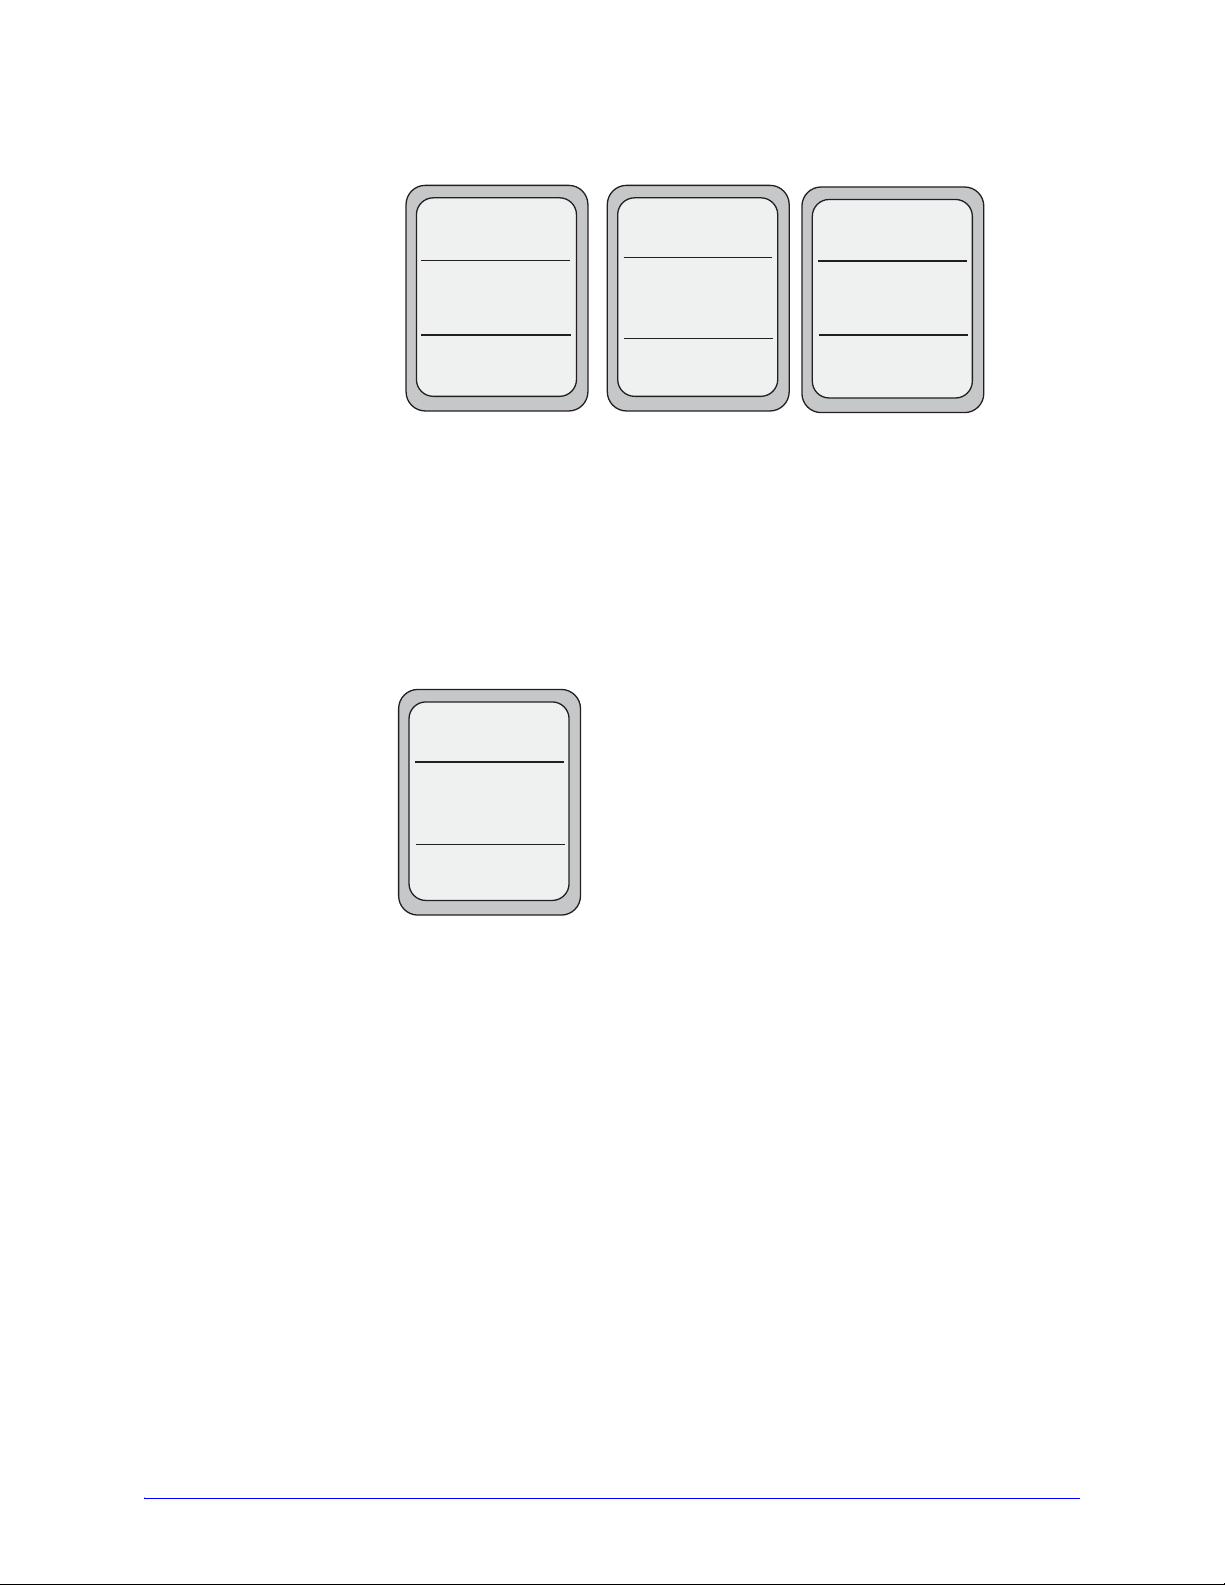
The second display line displays the following temporary messages if an event
occurs:
• No Service
• DHCP Failed
• Restarting......
• New IP Obtained
• Network Disconnected/Connected
Note: Since the "Network Disconnected/Connected" display on two lines, the date
and time does not show if this event displays.
• The second line can also display the following status messages, listed in order of
display priority:
• DND On (Do Not Disturb)
• Number of missed calls
• Number of messages
When more than one status message displays, the 2
indicate you can use the 2 and 5 navigation keys to scroll through the remaining
messages. The messages also display alternately every few seconds.
1
John Burns
2 Messages
Sat Jun 8 2:55p
14 AastraLink RP Phone User Guide
is shown after the message to
1
John Burns
4 Missed Calls
Sat Jun 8 2:55p
Page 15
Off-Hook Screen 6751i RP & 6753i RP
When the phone is off-hook (or you pick up the handset), the screen displays as
follows.The "1" in the upper corner in the above example indicates the idle screen for
the first line appearance. A "2" appears for the second line, and so on.
=Dial
No Service Screen 6751i RP & 6753i RP
When the phone is not properly connected to the network, or the account has not been
configured by the System Administrator, the "No Service" or "Network
Disconnected" prompt appears on the display and the telephone status light turns ON.
2
Thomas Sharp
No Service
Sat Jan 1 12:00a
The phone also displays the default time and date of 12:00am Jan. 1st. Check that the
cables are tightly connected to the phone and to the wall jack. The phone should
automatically detect when the connection is reconnected and displays the "Network
Connected" prompt temporarily.
If changes have been made to your phone settings using the Microsoft Response Point
Administrator software, your phone should restart automatically with an initial screen
display of "Restarting...", during which time your phone will not be available to
make and receive calls.
For more information about connecting your phone, refer to the AastraLink RP
Administrator Guide. Check with your System A dministrator for assistance.
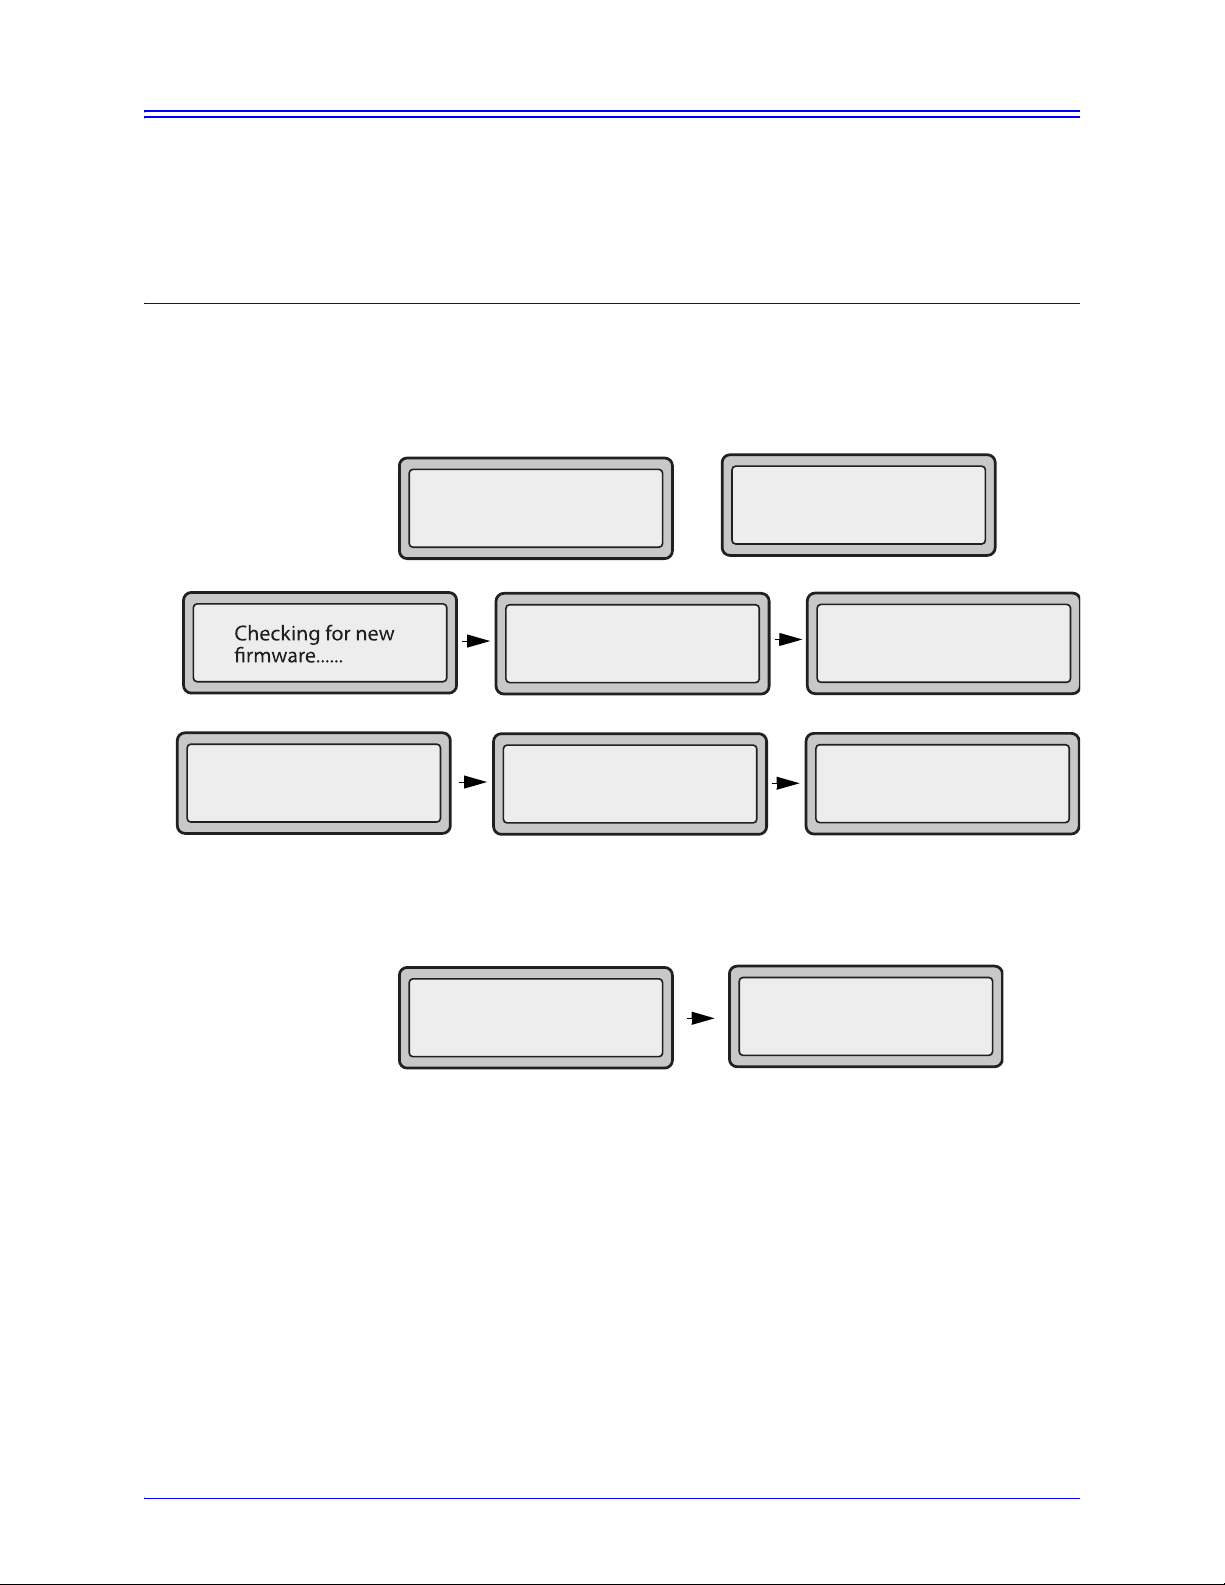
Initializing 6757i CT RP
The 6757i CT RP automati cally beg ins the start up sequence as soon as it is
connected. The phone goes through this process the first time you plug in your phone
and every time you restart your phone.
The phone displays the following startup screens.
Checking for
Firmware.....
Getting Started
DHCP: waiting
for IP...
AastraLink RP Phone User Guide 15
Page 16
Getting Started
.
The 6757i CT RP phone then checks settings an d looks for new configuration and
firmware updates for the phone from a server. If a new update is found, the phone
displays the message “
Updating Configuration”. This may take a few moments while
the phone downloads the latest updates.
Updating
configuration....
Checking for firmware...
Do not unplug the phone!
Downloading
LanguagePacks
Note: Do not unplug or remove power to the phone while it is checking or installing
firmware and configuration information.
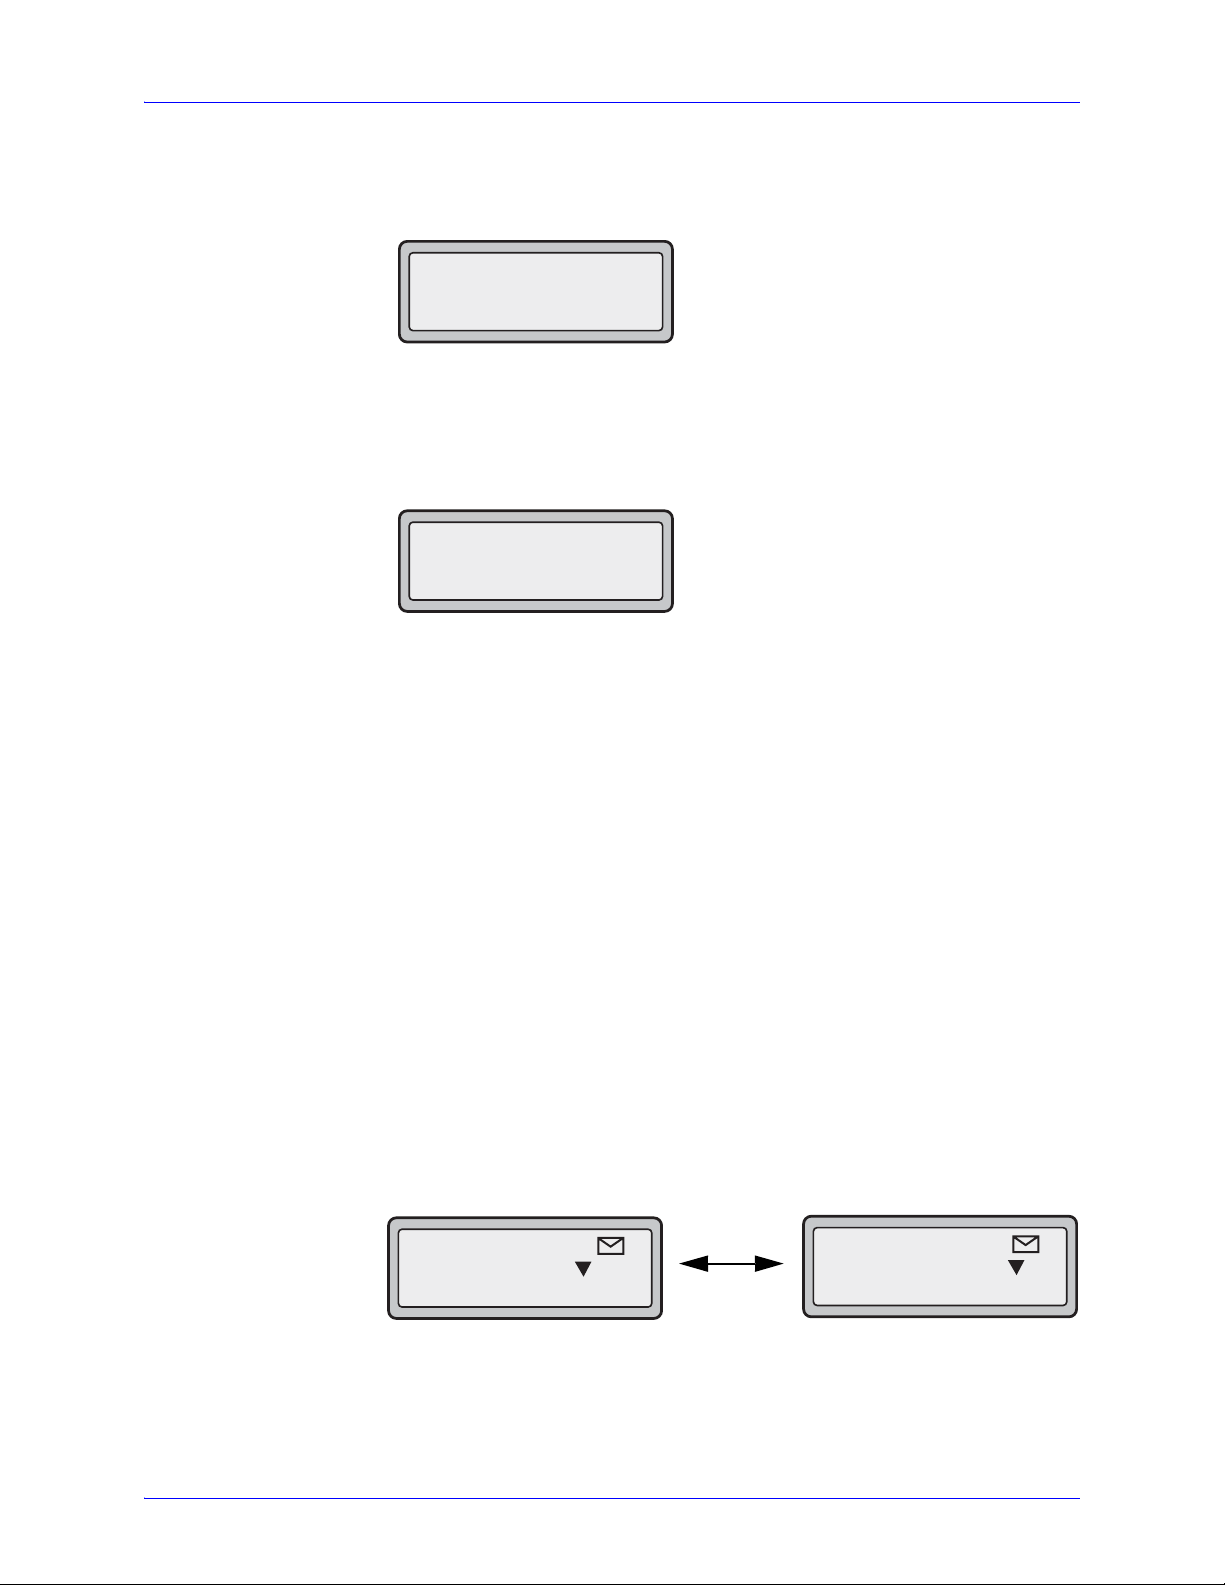
When the configuration update is complete, the phone displays the following screens,
ending with the Idle screen.
Network
Done
SIP
Services
Dir
Callers
L1
NetworkDisconnec ed
Sat Jan 1 12:18am
Icom
DSP
The 6757i CT RP phone is now ready to be added to your AastraLink RP Solution by
the System Administrator, using the Microsoft Response Point Administrator phone
system software. Further instructions can be found in the AastraLink RP
Administrator Guide.
16 AastraLink RP Phone User Guide
Page 17
Phone Screens 6757i CT RP
Idle Screen Default 6757i CT RP
When the phone has successfully updated the configuration and connected to the
network, the phone displays the Idle State screen. The idle screen is shown whenever
your phone is not in use.
Note: Your System Administrator sets up your initial screen name, line number, and
any other administrative features required. You may change some of these options
yourself. See Changing Your Phone Settings With Assistant on page 25.
The Idle State screen lists your name (SIP screen name) and day, date, and time. In
the above screen, the "L1" indicates John Smith is configured on Line 1.
The idle screen also displays the following default softkeys located on the top left and
top right of the screen:
• Services
• Directory
• Callers List
• Intercom
Services
Dir
Callers
L1
Sat Jan 1 12:18am
Operator
VoiceMail
Icom
JohnSmith
103
When you lift the handset, the screen displays the default bottom softkeys of:
• Dial
• Conference
• Transfer
Services
Dir
Callers
L1
Icom
JohnSmith
>
Dial
Conf
Xfer
You can configure the 6 top softkeys and the 6 bottom softkeys as required.
For more information about configuring the top default softkeys and all other
softkeys, see Programmable Keys (6753i RP & 6757i CT RP) on page 66.
Getting Started
AastraLink RP Phone User Guide 17
Page 18
Idle Screen With Softkeys Configured 6757i CT RP
If you or your System Administrator have configured softkey functions on your
phone, the labels for those functions display on the screen. For example, in the
following illustration, "Home" was configured as a speeddial key on the bottom set of
softkeys and "Do Not Disturb" (DND) was configured on the top set of softkeys.
Getting Started
Speeddial Softkey
Services
Dir
Callers
L1
Sat Jan 1 12:18am
Home
Icom
DND
More
JohnSmith
"Do Not Disturb"
Softkey
Idle Screen
You can configure up to 10 functions on the top set of softkeys. If you have additional
functions configured on the top softkeys that do not display on the main idle screen,
"More" displays at the top right of the screen. Pressing the More softkey toggles
between the first screen and a second screen of softkeys configured on your phone.
HR
Support
More
Speeddial Softkeys
L1
Sat Jan 1 12:18am
Home
JohnSmith
Off-Hook Screen 6757i CT RP
When you pickup the handset, the screen displays as follows::
• Dial
• Conference
• Transfer
This screen displays the following default softkeys located on the bottom left of the
screen:
A More softkey also displays at the bottom right of the screen if you have configured
softkeys other than the default softkeys.
Idle Screen
Services
Dir
Callers
L1
>
Dial
Conf
Xfer
Icom
JohnSmith
More
18 AastraLink RP Phone User Guide
Page 19
For example, if you configure a bottom softkey for speed dialing to Home, and then
you pickup the handset, the screen displays the Dial, Conf, and Xfer default softkeys
with a More softkey. You can press the More softkey to toggle between the first and
second screens to display all configured softkeys. See illustrations below.
Services
Dir
Callers
L1
Sat Jan 1 12:18am
Home
Idle Screen
Icom
DND
More
JohnSmith
Services
Dir
Callers
L1
JohnSmith
>
Dial
Conf
Xfer
After Handset Pickup
Note: The bottom set of 6 softkeys map to the current state-based (context sensitive)
configurable softkeys. The top set of 6 softkeys allow you to configure up to 10
functions.
Network Disconnected Screen 6757i CT RP
If your phone did not successfully connect to the network, the "Network
Disconnected" prompt appears on the display and the telephone status light turns on.
Services
Dir
Callers
L1
NetworkDisconnected
Sat Jan 1 12:18am
Icom
JohnSmith
Icom
More
Services
Dir
Callers
L1
Icom
JohnSmith
>
Home
More
After Pressing "More"
Check that the cables are tightly connected to the phone and to the wall jack. The
phone should automatically detect when it is reconnected and displays the "Network
Connected" prompt for a few seconds. If not the phone may have been disconnected
by the System Administrator using the Microsoft Response point Administrator
software.
If changes have been made to your phone settings using the Microsoft Response Point
Administrator software, your phone should restart automatically with an initial screen
display of "Restarting...", during which time your phone will not be available to
make and receive calls.
For more information about connecting your phone, see the Aastra 6757i CT RP
Phone Installation Guide, or the AastraLink RP Administrator Guide.
Check with your System Administrator for assistance.
AastraLink RP Phone User Guide 19
Getting Started
Page 20
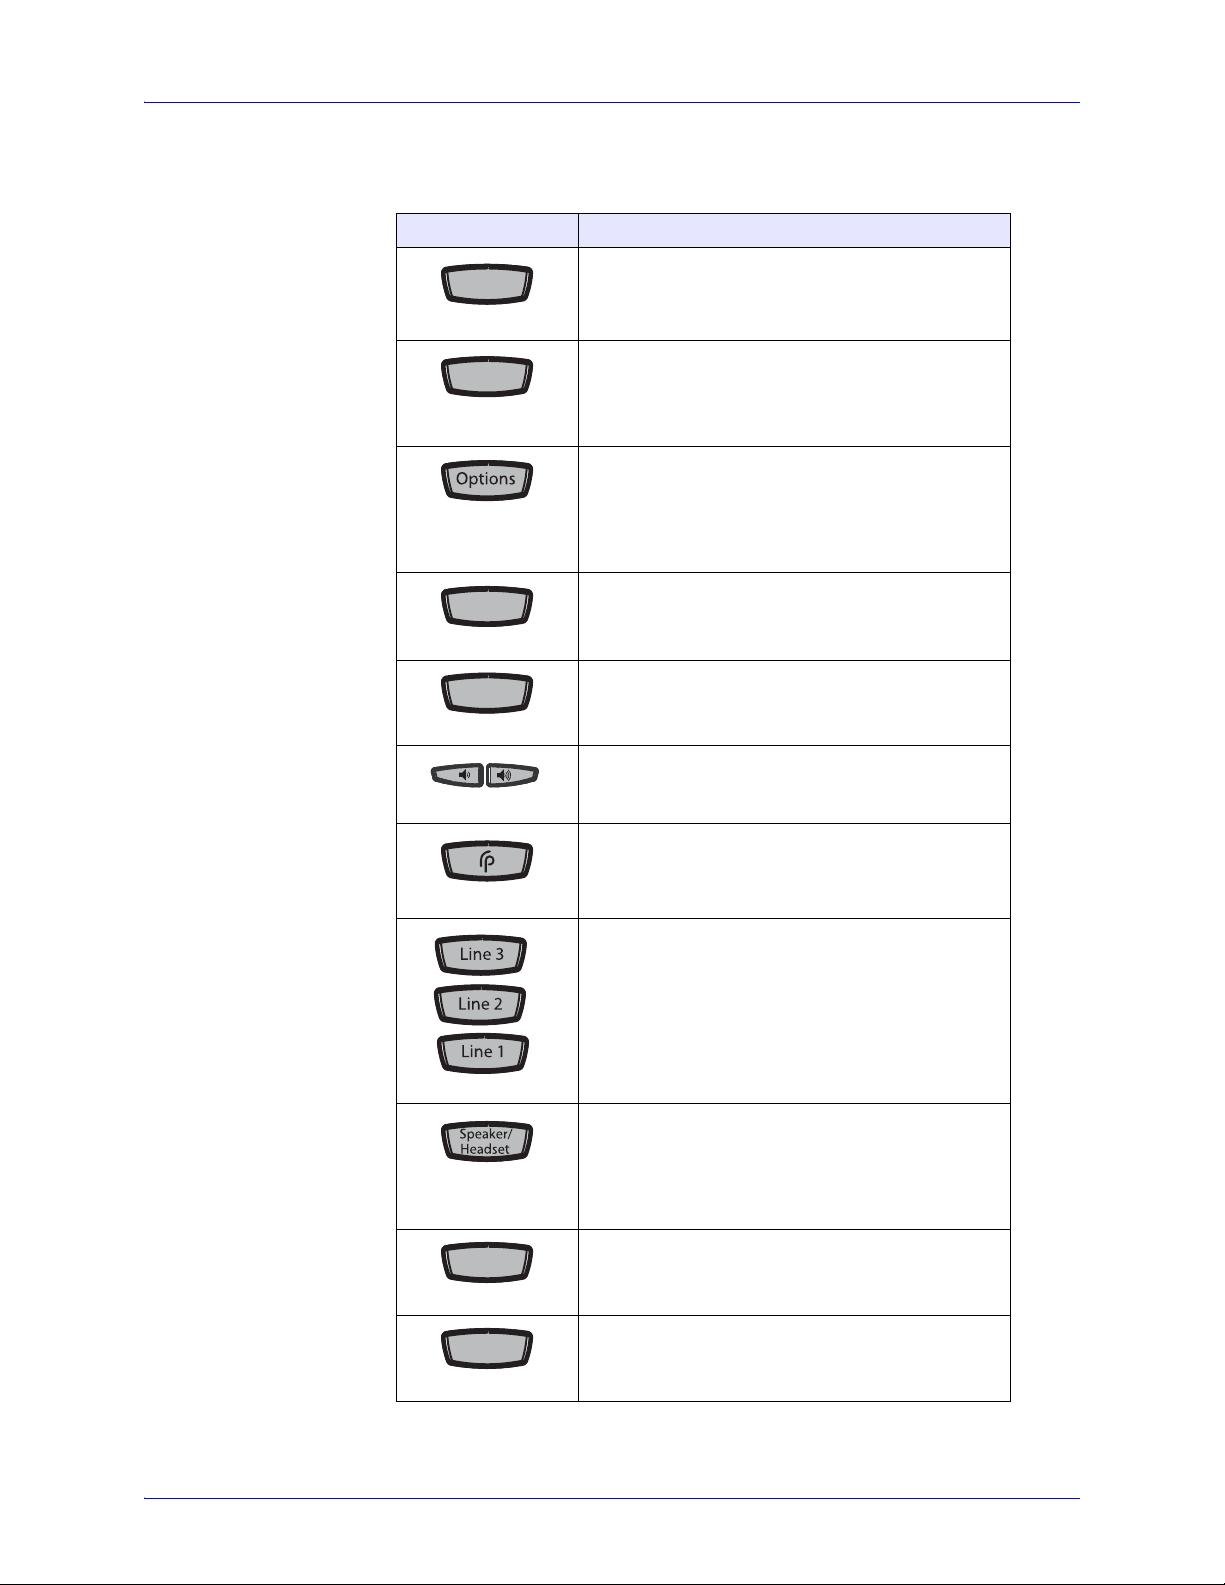
Key Descriptions
Goooodbye
Serviviceses
H
old
R
edial
Speaeakerer
Mute
Getting Started
The following table identifies the keys on the key panel of your AastraLink RP phone
that you can use for handling calls. Notice that some keys appear only on the specific
models indicated.
Keys Key Description
Goodbye key - All models. Ends an active call. The
Goodbye key also exits an open list, such as the
Options List, without saving changes.
Services key - Model 6751i RP. Accesses services
and options to customize your phone. This key also
accesses the Directory List and Callers List. Your
System Administrator may have already customized
some of your settings.
Options key - Models 6753i RP and 6757i CT RP.
Accesses options to customize your phone. Your
System Administrator may have already customized
some of your settings. Check with your System
Administrator before changing the administrator-only
options.
Hold key - All models. Places an active call on hold.
old
To retrieve a held call, press the call appearance
button beside the light that is flashing.
edial
Redial key - All models. Redials up to 100 previously
dialed numbers. Pressing the Redial key twice
simultaneously redials the last dialed number.
Volume control key - All models. Adjusts the
volume for the handset, headset, ringer, and
handsfree speaker.
Response Point key - All models. Allows you to
access the Microsoft Response Point voice-activated
dialing options.
Line/Call Appearance key - All models. Connects
you to a line or call. Model 6751i RP supports a
single line key, model 6753i RP supports 2 line keys
(up to 6 including programmable line keys), and
model 6757i CT R P supports 3 line keys (up to 9
including programmable line keys).
Speaker/Headset key - Models 6753i RP and
6757i CT RP.Activates Handsfree for makin g and
receiving calls without lifting the handset. When the
audio mode option is set, this key is used to switch
between a headset and the handsfree
speakerphone.
Speaker key - Model 6751i RP. Activates Handsfree
for receiving calls without lifting the handset. Can be
used on active calls to switch from the handset to
handsfree.
Mute key - All models. Mutes the microphone so that
your caller cannot hear you (the light indicator
flashes when the microphone is on mute).
20 AastraLink RP Phone User Guide
Page 21
Keys (Continued) Key Description (Continued)
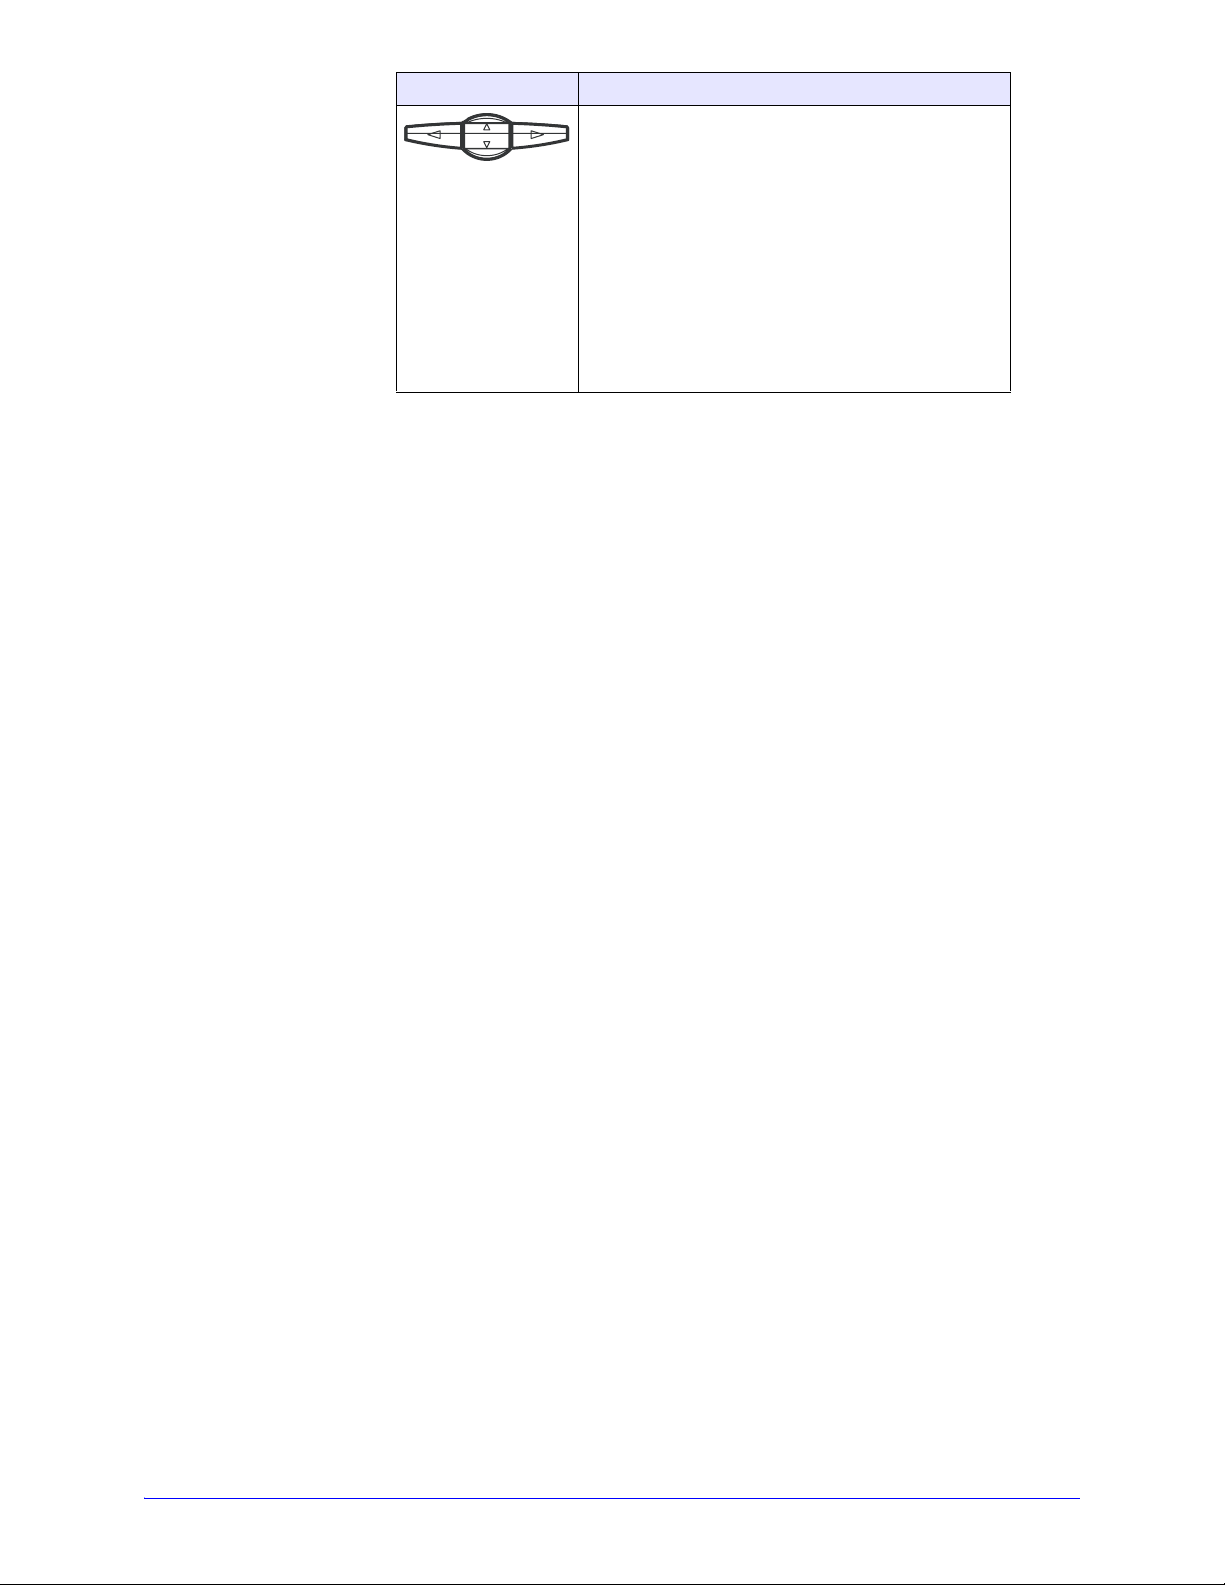
Navigation keys - All models. Pressing the UP and
DOWN arrow keys lets you view different status and
text messages on the LCD display (if there is more
than 1 line of status/text messages). These buttons
also let you scroll through menu selections, such as
the Options List.
Pressing the LEFT and RIGHT arrow keys lets you
view the different line/call appearances. While in the
Options List, these keys allow you to exit or enter the
current option. When you are editing entries on the
display, pressing the LEFT arrow key erases the
character on the left; pressing the RIGHT arrow key
sets the option.
AastraLink RP Phone User Guide 21
Getting Started
Page 22
Getting Started
Keys (Continued) Key Description (Continued)
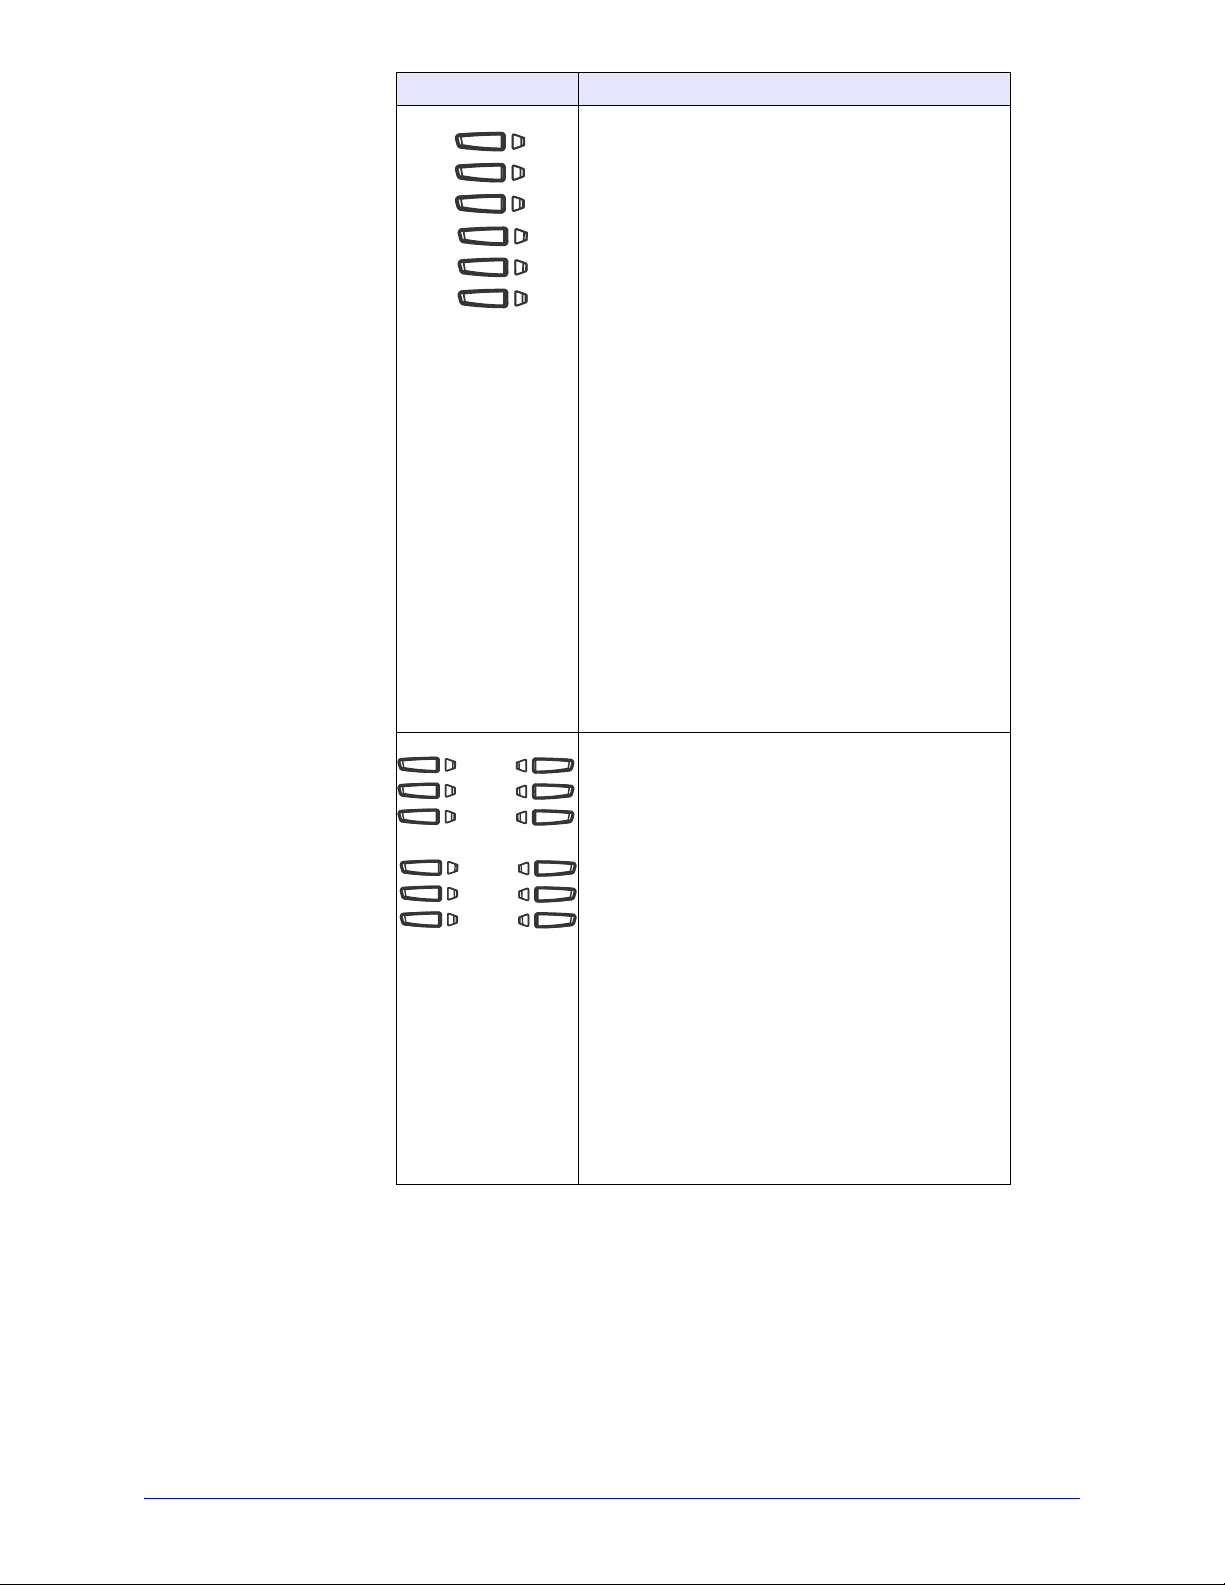
Programmable keys - Model 6753i RP. 6 Top Keys:
2 preset keys and 4 programmable hard keys (up to
6 programmable functions).
The following are the default functions for the
programmable keys on the 6753i RP phone:
1 - SAVE Allows you to save numbers and/or names
to the Directory. Using this key, you enter the
number, name, and line (or speeddial key) to record
in the Directory List. This key cannot be changed.
2 - DELETE Allows you to delete entries from the
Directory List and Callers List. (Must enter the
Directory or Callers List and select an entry, then
press twice to delete entry). This key cannot be
changed.
3 - DIRECTORY Displays up to 200 names and
phone numbers (stored in alphabetical order)
4 - CALLERS LIST Accesses the last 200 calls
received.
5 - TRANSFER Transfers the active call to another
number
6 - CONFERENCE Begins a conference call with the
active call.
Note: Keys 1 and 2 (Save and Delete) are preset
and cannot be changed. The other keys are
programmable and can be changed to perform other
specific functions. For more information about
programming keys 3, 4, and 5, see Programmable
Keys (6753i RP & 6757i C T RP) on page 66.
Softkeys - Model 6757i CT RP. 12 softkeys on the
6757i CT RP Phone.
- 6 Top Keys: programmable static softkeys (up to 10
programmable functions)
- 6 Bottom Keys: programmable state-based softkeys
(up to 20 programmable functions)
These keys also perform as follows:
• Callers List key - Accesses the last 200 calls
received.
• Conference key - Begins a conference call with
the active call.
• Xfer Key - Transfers the active call to another
number.
• Directory Key - Displays up to 200 names and
phone numbers (stored in alphabetical order)
Note: For mor e information about programming the
softkeys to perform specific functions, see
Programmable Keys (6753i RP & 6757i CT RP) on
page 66.
22 AastraLink RP Phone User Guide
Page 23
Using Microsoft Response Point Assistant
Microsoft Response Point Assistant phone system software is designed to be installed
on the computer of each phone user. Once installed, you can use Assistant to change
your personal settings, and notify you on your computer screen when you have a call.
Installing
The CD that came with the AastraLink RP 500 Base Unit is needed to install the
Microsoft Response Point Assistant phone system software. Contact your System
Administrator to locate the CD.
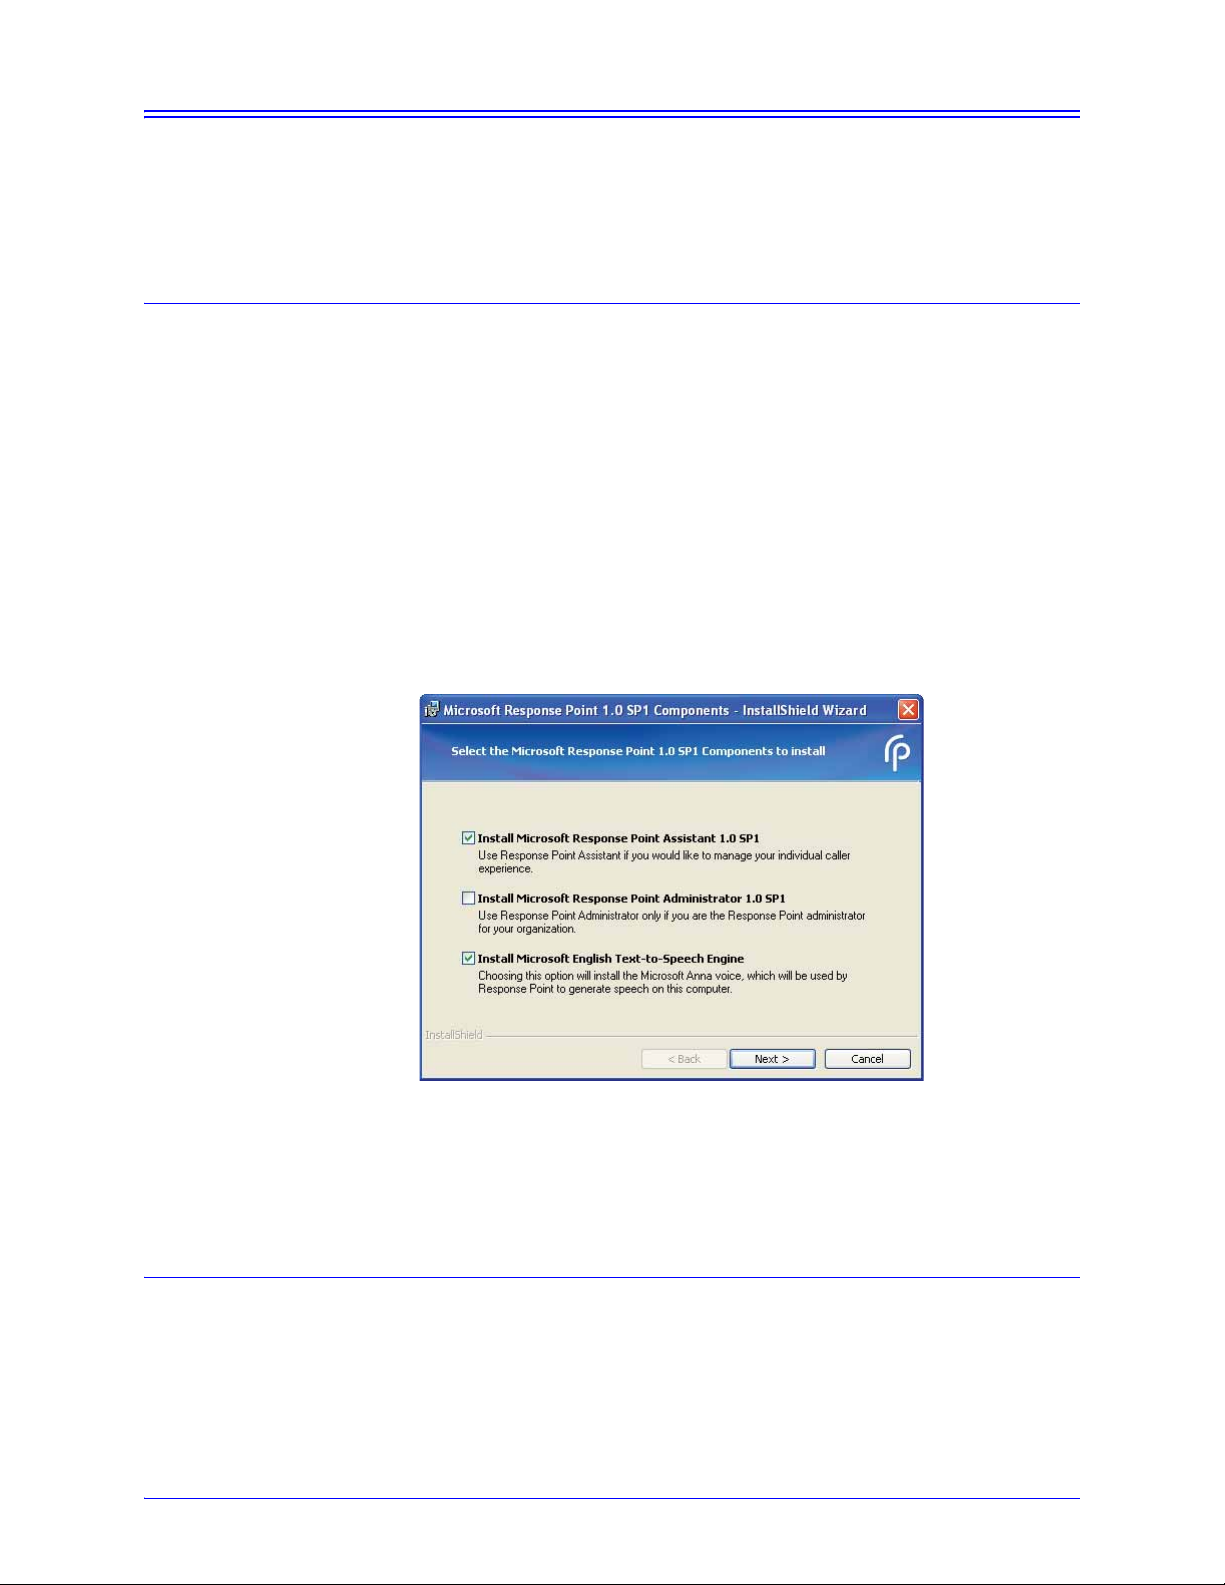
To install Microsoft Response Point Assistant on your PC, do the following.
1. Locate the AastraLink RP system CD which was supplied with the AastraLink RP
500 base unit.
2. Insert the CD into the CD drive of your computer.
Note: If the Autoinstall window does not open, use the Windows Explorer to view
the CD directory. Double-click Install.exe to start the installation process.
3. Click Install AastraLink RP software.
4. Make sure the Install Microsoft Response Point Administrator box is not
checked unless you are the System Administrator.
Using Microsoft Response Point Assistant
5. Click Next. Follow the prompts to install the Microsoft Response Point phone
system software components.
Note: You must review and accept the license agreements to install the software.
Starting Assistant
Once you have installed the software on your computer, you are ready to start the
Microsoft Response Point Assistant program and personalize your phone settings.
AastraLink RP Phone User Guide 23
Page 24

To start the Assistant software and set your phone preferences, do the following.
1. Select Start > Programs > Microsoft Response Point Assistant. The Log On
screen appears.
2. Enter the extension number you were assigned by the System Administrator, and
select your base unit. If there is more than one base unit to choose from, contact
your System Administrator to determine which is correct.
3. Enter the default password 9999, and click Log On.
Note: The Assistant password is also used for voicemail. If you change the
password for one, both will change.
4. Assistant opens to display a phone directory. Your name is already in the directory,
as entered by the System Administrator when your phone was added to the system.
Using Microsoft Response Point Assistant
You can now change your person al phone settings by clicking Settings. See
Changing Your Phone Settings With Assistant on page 25 for mo re det a ils.
24 AastraLink RP Phone User Guide
Page 25
Changing Your Phone Settings With Assistant
Assistant has several main tabs you can click to view different phone setting options.
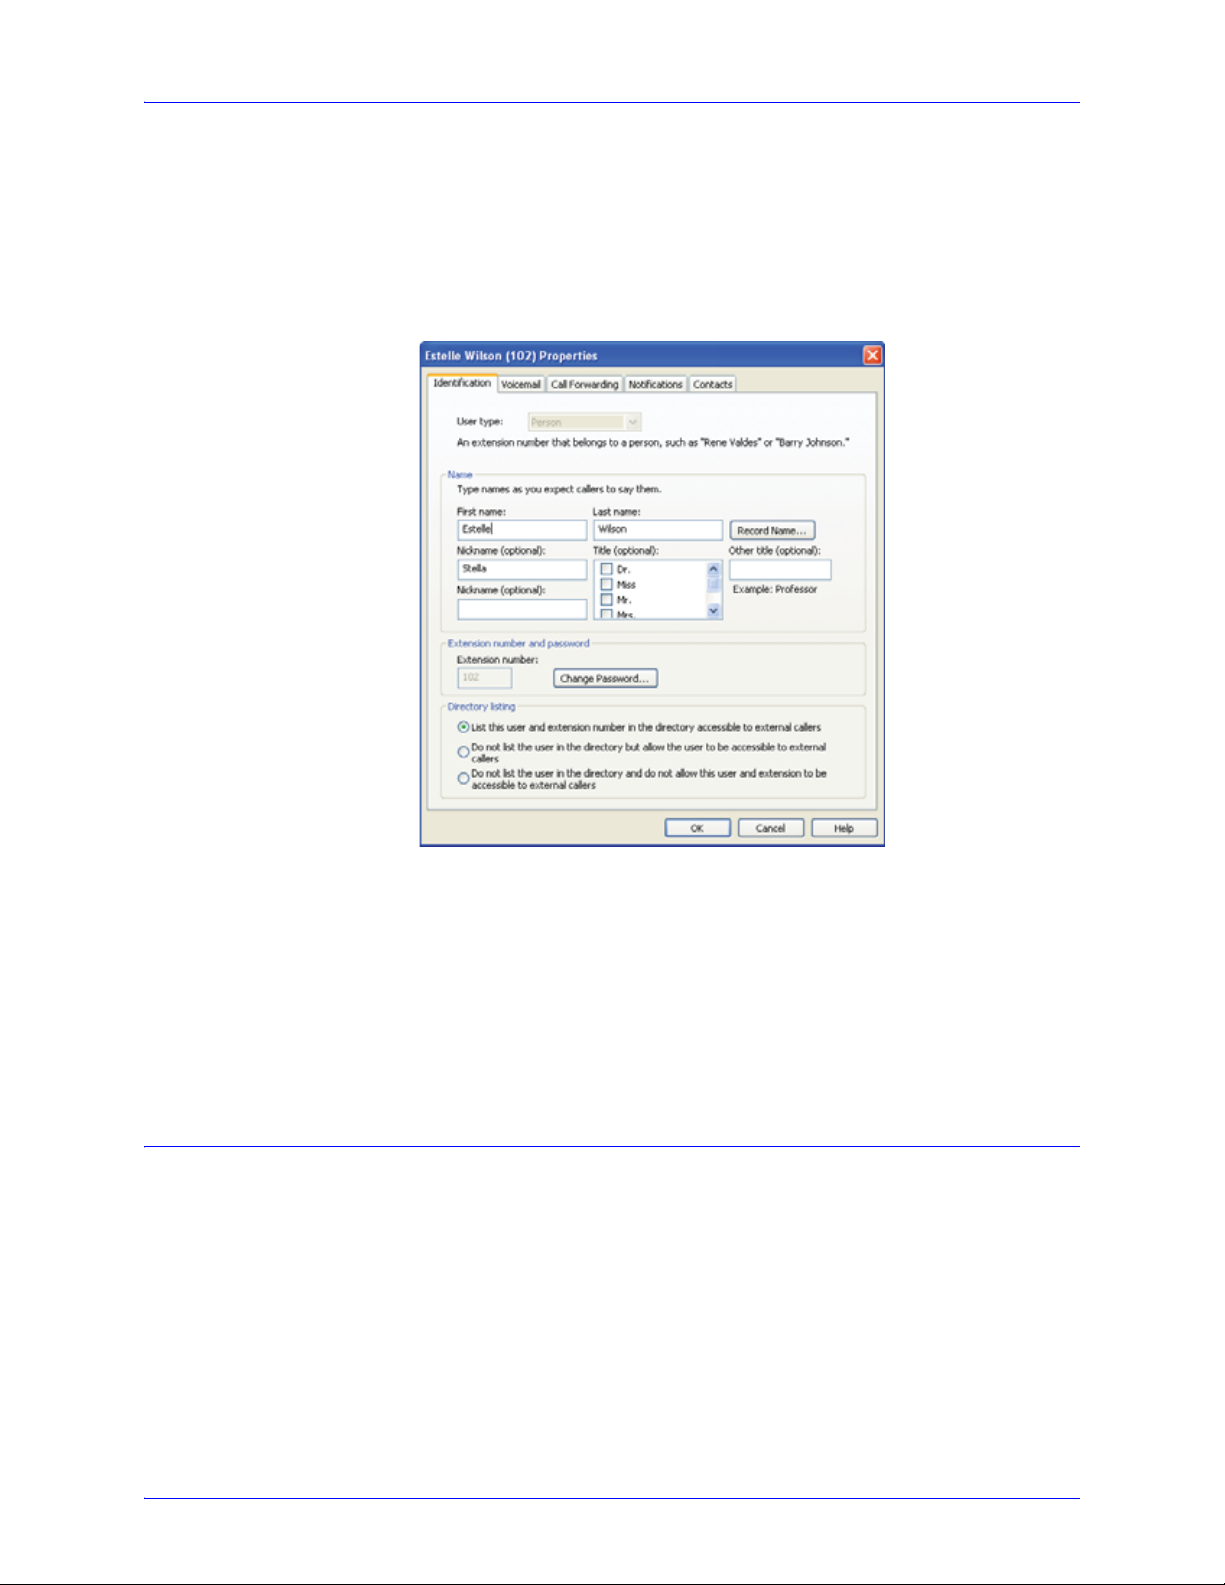
To change your phone settings using Assistant, do the following.
1. Click Settings in the Assistant window.
2. The Properties window opens to the Identification tab. This is where you can
change your name as listed in the directory, and add any nicknames callers might
use when asking for you. Any nicknames you enter are added to the voice-dialing
list used by Microsoft Response Poin t.
Using Microsoft Response Point Assistant
You can click the other tabs to change additional phone settings. See the following
sections for more details.
• Configuring Voicemai l on page 40
• Forwarding Calls on page 42
• Call Notification on page 48
• Contacts List in Assistant on page 44
Recording a User Name With Assistant
The name you have been assigned by the System Administrator is the name callers
hear when they ask the Automated Receptionist to speak to you. The recorded name
can be changed by specifying a different name for the computer-generated speech, or
recording a sound file of your own.
The words that the Automated Receptionist uses to confirm a caller's request are not
always the same as the user name or directory entry. For example, a caller may
request to speak to "Ms. Margheim." However, you may want the Automated
Receptionist to say "Diane Margheim" in confirmation, and the user name may be
"Dr. Margheim".
AastraLink RP Phone User Guide 25
Page 26
You can also choose to record your own sound file instead of using the computergenerated speech. A sound file can be recorded using your phone handset.
Note: The System Administrator may also change the spoken name or file used for a
user name through the Administrator software.
Using computer-generated speech
Using Administrator you can listen to the computer-generated name for a user or to
change the name being spoken.
To edit or check the computer-generated user name, do the following.
1. Click the Phone System button.
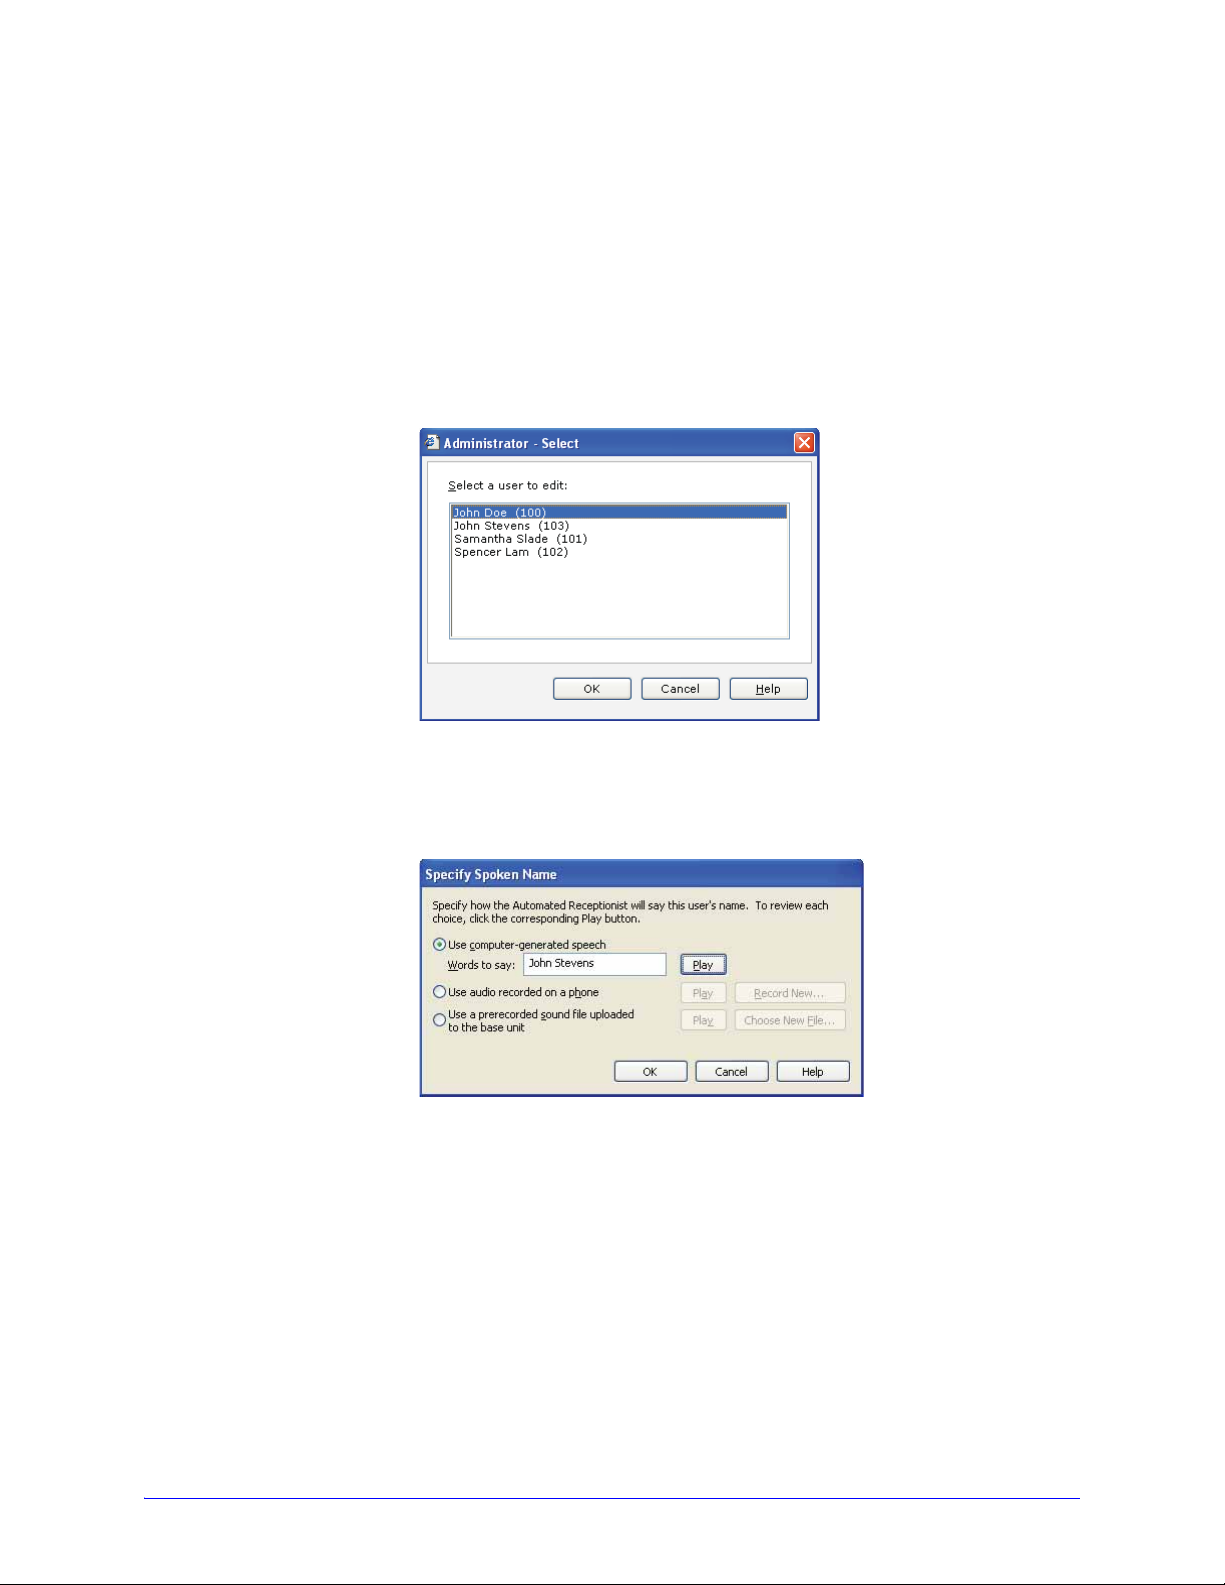
2. In the Tasks pane, under Users, click Edit user. The Select a user to edit list
opens.
3. Click the name of the user that you want to edit, and then click OK.
4. Click the Identification tab, if it is not displayed.
5. Click the Record Name... button. The Specify Spoken Name dialog appears.
Using Microsoft Response Point Assistant
6. Type the name callers will hear in the Words to say box.
7. Click Play to ensure recording quality.
Note: If your name is not being pronounced correctly, try spelling it phonetically
(the way it sounds) instead of the way it is spelt.
8. When you have finished editing the spoken name, click OK.
Note: If you select Use computer-generated speech, Microsoft Response Point
automatically uses Microsoft Anna to record your sound files. If this text-to-speech
program is not available, Microsoft Response Point chooses another Microsoft TTS
program that comes with your operating system, regardless of which TTS program
you've manually specified in Windows.
26 AastraLink RP Phone User Guide
Page 27

Recording audio from a phone
If you are not satisfied with the computer-generated speech, you can specify that
callers hear a recording after they ask to speak to a user. The recording can be made
from any phone extension on the AastraLink RP Solution.
To record and audio message from a phone, do the following.
1. Click the Phone System button.
2. In the Tasks pane, under Users, click Edit user. Select the name of the user you
want to edit and click OK.
3. Click the Identification tab, if it is not displayed.
4. Click the Record Name... button. The Specify Spoken Name dialog appears.
Using Microsoft Response Point Assistant
5. Click the Use audio recorded on a phone button.
6. Click the Record New button. The Record Audio Using a Phone window opens.
7. Select your extension to call for recording, and click record.
The phone you select rings, and a message instructing you to say your name after
the beep plays. Once you hear a beep, clearly say your name, then click Stop on
your computer screen.
Note: Hanging up also stops the recording, but you will hear the sound of the
phone hanging up at the end of your recording.
8. Click Play to ensure recording quality.
9. When you are satisfied with the recording, click OK.
10. Click OK to close the Specify Spoken Name dialog.
11. Click OK once more to finish editin g your user settings.
AastraLink RP Phone User Guide 27
Page 28
Using a Prerecorded Sound File
You may use an existing so und file if you prefer. The sound file needs to be recorded
in a sound recording application such as Windows Sound Recorder, available in the
Windows XP operating system. (Windows Vista includes a different recording
capability. Review the documentation for Windows Vista to learn how to make
recordings.)
When using a sound recording application to create sound files, use the PCM format
and make sure that the sound files are 8 kHz, 16 bit, mono, WAV files. Likewise, you
may find that the volume is too low. Adjust the volume in the sound recording
application to your liking.
Make sure that the sound file for your name does not exceed 10 seconds.
To upload a prerecorded sound file to the base unit, do the following.
1. Click the Phone System button.
2. In the Tasks pane, under Users, click Edit user. Select the name of the user you
want to edit and click OK.
3. Click the Identification tab, if it is not displayed.
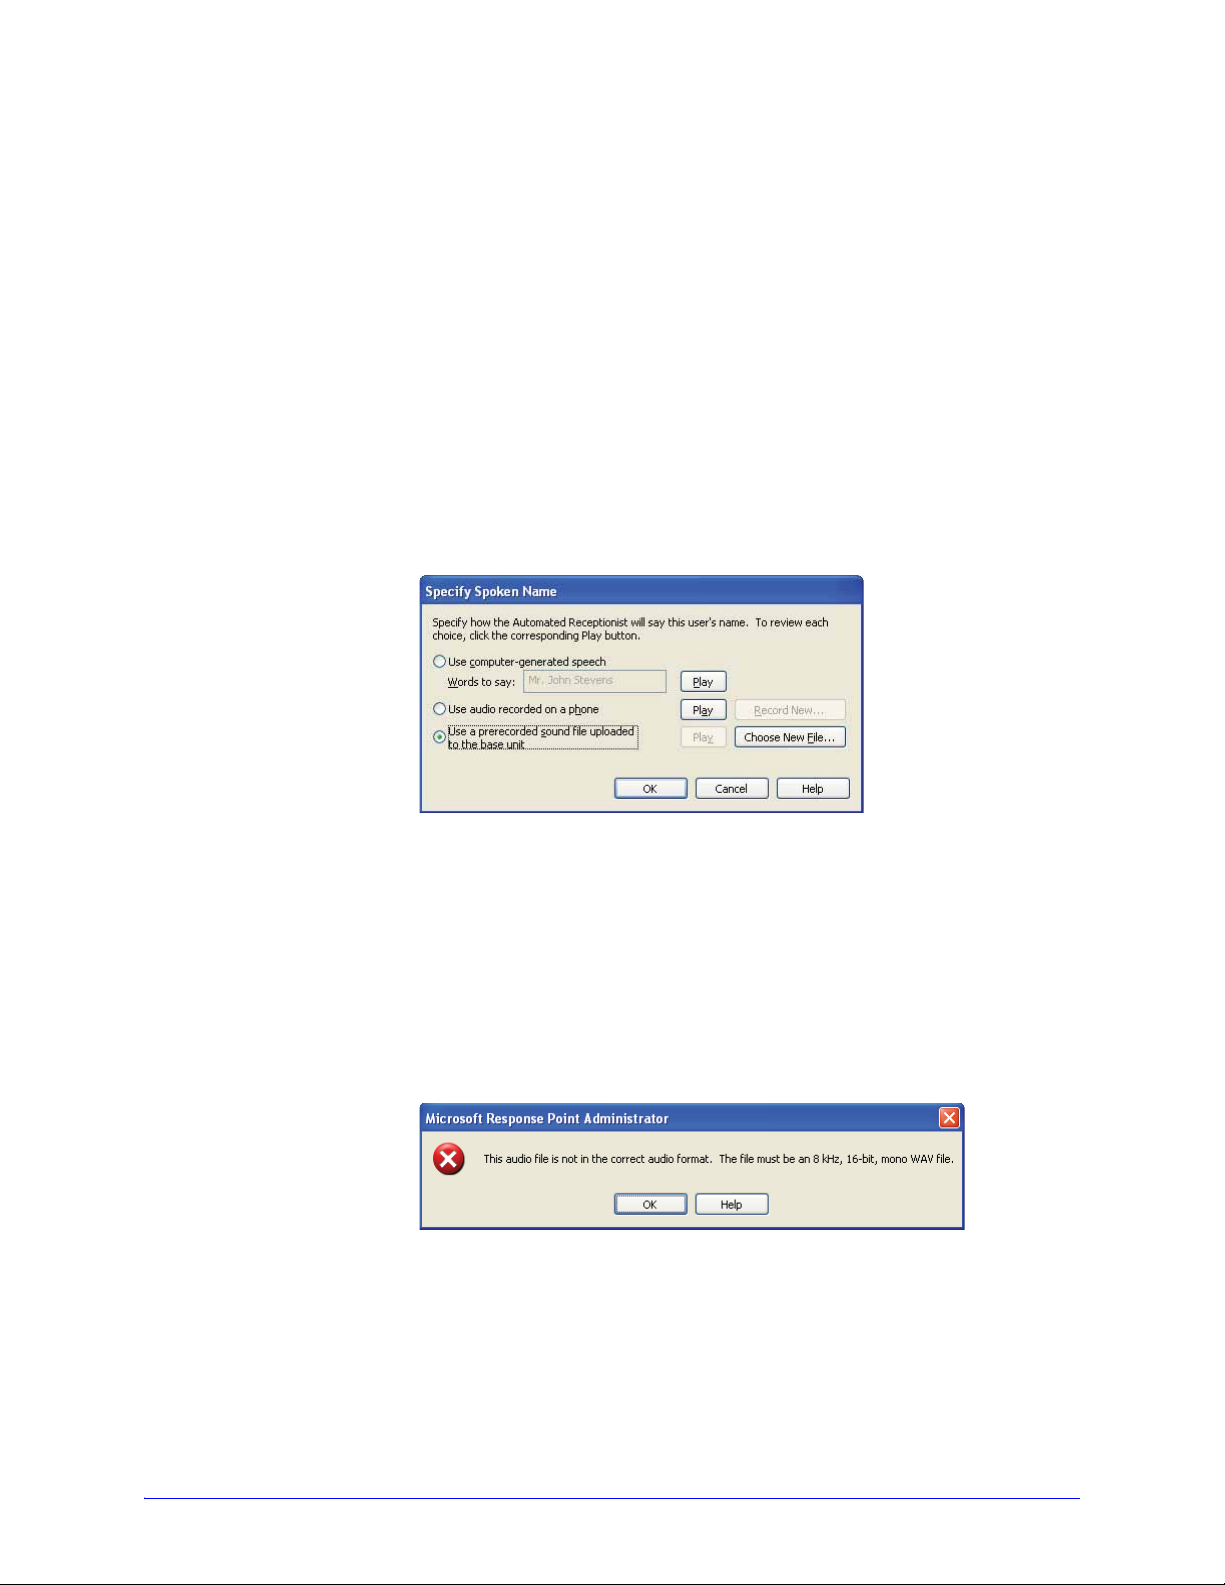
4. Click the Record Name... button. The Specify Spoken Name dialog appears.
5. Click the Use a prerecorded sound file uploaded to the base unit button.
6. Click Choose New File.
7. Browse to the .WAV file location, select the file you want to upload and click
Open.
8. Click Play to ensure recording quality.
Using Microsoft Response Point Assistant
9. When you are satisfied with the recording, click OK.
Note: If you select a file that is not a sound file in the right format, an error
message is displayed.
Click OK to return to the Specify Spoken Name dialog, and choose an appropriate
file or another option.
10. Click OK to close the Specify Spoken Name dialog.
11. Click OK once more to finish editin g your user settings.
28 AastraLink RP Phone User Guide
Page 29

Upgrading Assistant
The Microsoft Response Point Assistant phone system software must be the same
version as the software being used by the AastraLink RP 500 Base Unit and your
System Administrator.
When logging on to Assistant, you may see a message that the version of the base unit
is higher than the version of Assistant. When this occurs Assistant may need to be
upgraded, however, the upgrade may be optional.
If you continue to log on without upgrading, but cannot connect to the base unit, ask
the phone System Administrator for a newer version of the Assistant software.
Note: When upgrading to a newer version of Assistant, your existing settings are
maintained.
To upgrade your Assistant software, do the following.
1. Locate the CD that contains the newest version of the Microsoft Response Point
Assistant phone system software.
2. Insert the CD into the CD drive of your computer.
Note: If the Autoinstall window does not open, use the Windows Explorer to view
the CD directory. Double-click Install.exe to start the installation process.
3. Click Install AastraLink RP software.
4. Follow the prompts to install Assistant. When asked if you want to upgrade, click
Yes.
Using Microsoft Response Point Assistant
Removing Assistant
To uninstall the Assistant software, use the add/remove programs option in the
Windows control panel.
AastraLink RP Phone User Guide 29
Page 30
Phone Options via the Aastra Web UI
Serviviceses
In addition to setting options on the phone interface, you can customize additional
options using the Aastra Web UI. Both phone users and phone System Administrators
can log on to the Aastra Web UI, but users are able to access fewer options.
The Aastra Web UI may be reached through the Assistant software, or by typing in
the phone’s IP address directly.
Finding Your Phone’s IP Address
Use the following procedure to find your phone’s IP address.
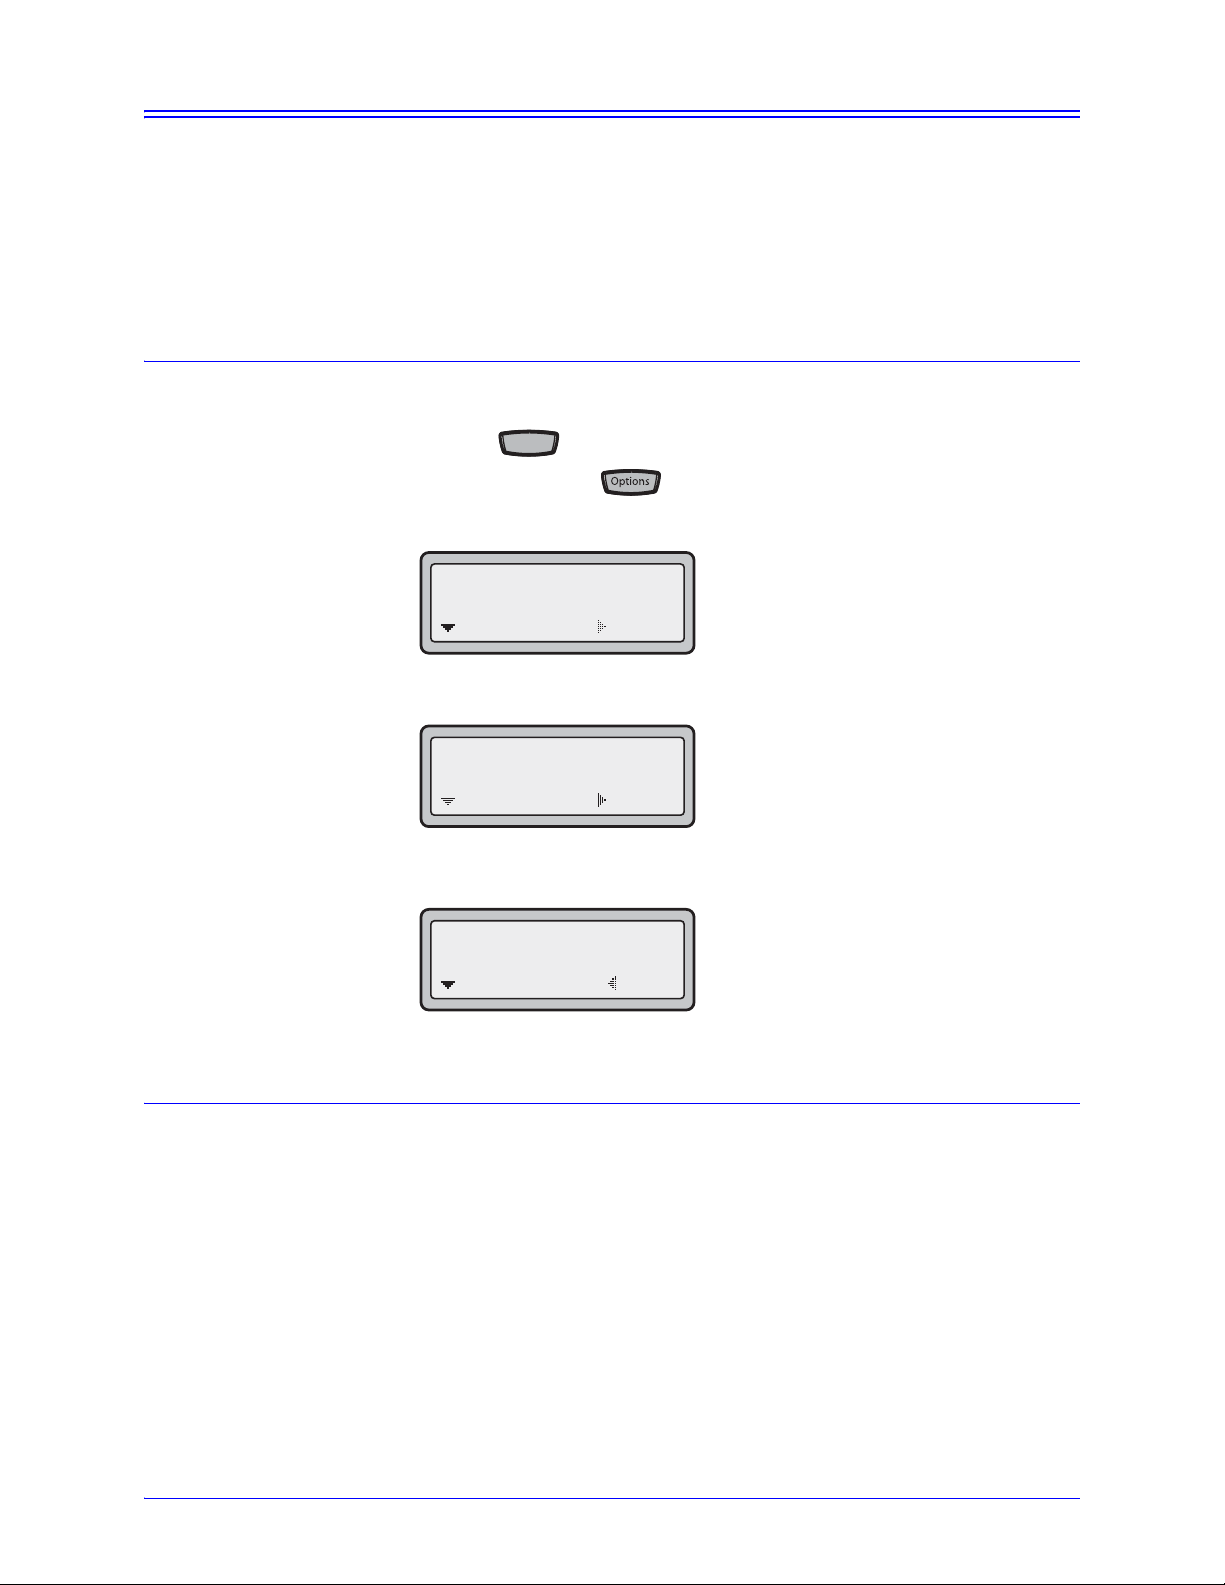
1. Press the
6751i RP, or press the key for models 6753i RP and 6757i CT RP.
2. Select Phone Status and press the 4 key.
key and select "Options List" from the menu for model
3 Phone Status
=Next
3. Select "
IP&MAC Addresses" and press the 4 key.
=Enter
1 IP&MAC Addresses
=Next
The IP address of your AastraLink RP phone displays in the "IP Address" field.
=Enter
Phone Options via the Aastra Web UI
IP Address:
10.40.50.112
=Next
=Exit
Accessing the Aastra Web UI
If you know the IP address of your AastraLink RP phone, you can type it directly into
a web browser to access the Aastra Web UI. You can also reach the Aastra Web UI
through the Microsoft Response Point Assistant program.
30 AastraLink RP Phone User Guide
Page 31

To open the Aastra Web UI for your phone, do the following.
Using Assistant
1. From within the Assistant program select Settings > Phone Settings, and proceed
to step 2 below.
Using Your Web Browser
1. Open your web browser, enter the phone’s IP address or host name into the address
field and press <Enter>.
The following logon screen displays.
Phone Options via the Aastra Web UI
2. At the prompt, enter your username and password and click
Note: For a user, the default user name is “user” and the password field is left
blank.
AastraLink RP Phone User Guide 31
Page 32

The Network Status window displays for the IP phone you are accessing, as shown
here for model 6751i RP.
Phone Options via the Aastra Web UI
3. You can logout of the Aastra Web UI at any time by clicking Log Off.
32 AastraLink RP Phone User Guide
Page 33

The following categories display in the side menu of the Aastra Web UI when logged
in as a User: Status, Operation, Basic Settings. Notice that some options appear
only on the specific models indicated.
Headings Descriptions
Status System Information - Displays the network status and the MAC
address of the IP phone. It also displays hardware and firmware
information about the IP phone. The information in the Network Status
window is read-only.
Operation User Password - Allows you to change user password. (Default
username is ’user’ and password is blank.)
Phone Lock - Allows you to assign an emergency dial plan to the
phone, lock the phone to prevent any changes to the phone and to
prevent use of the phone, and reset the user password.
Keypad S peeddial (model 6751i RP)- Allows you to assign a speeddial
number to a specific digit on the phone’s keypad for speed dialing
purposes. See Speeddial Keys (6751i RP) on page 63.
Programmable Keys- (model 6753i RP) - Allows you to configure
programmable keys. See Programmable Keys (6753i RP &
6757i CT RP) on page 66.
Basic
Settings
Softkeys and XML - (model 6757i CT RP) - Allows you to configure
softkeys and set XML options. See Programmable Keys (6753i RP &
6757i CT RP) on page 66.
Handset Keys (model 6757i CT RP) - Allows you to program keys on
the cordless handset. See Programming Feature Keys on page 84.
Directory - Allows you to copy the Callers List and Directory List from
your IP phone to your PC. See Downloading the Callers List on page
55.
Reset - Allows you to restart the IP phone when required.
Preferences - Allows you to configure incoming intercom call settings,
ring tones (global basis only) and ring tone sets, and language settings.
Phone Options via the Aastra Web UI
AastraLink RP Phone User Guide 33
Page 34

Basic Phone Features
Speaeakerer
Microsoft t Response Point voice-activated dialing is accessed by picking up the
receiver and pressing the blue Response Point button . If you aren’t sure what
to say, ask "What can I say?" for a list of options.
All calls may be dialed manually, or using the voice-activated dialing options of the
AastraLink RP Solution. When using voice-dialing it is important to speak clearly,
and say names exactly as they are listed in the directory.
Dialing a Number
AastraLink RP phones can be used for both manual and voice dialling.
To manually dial a number, do the following.
1. Take the phone off-hook by doing one of the following.
Basic Phone Features
• Lifting the handset.
• Pressing .
• Pressing .
• Pressing a line/call appearance button.
2. At the dial tone, enter the number you wish to call.
When your party picks up, a timer appears on your display that records the length
of your call.
Note: If you are unable to make calls within certain area codes, check with your
System Administrator for any toll restrictions placed on your extension that may
restrict your access to long distance area codes or dialing prefixes.
Internal Calls
To manually dial an internal call:
• Pick up the receiver and enter the extension number using the keypad.
=Dial
To voice-dial an internal call:
• Press the Response Point button , and clearly say the name of the person
you want to contact.
External Calls
To manually dial an external call:
• Pick up the receiver and dial 9, then enter the phone number using the keypad.
34 AastraLink RP Phone User Guide
Page 35

To voice-dial an external call:
Speaeakerer
Speaeakerer
Goooodbye
Goooodbye
• Press the Response Point button and say the name of the person you want
to contact, followed by either "home," "work," or "mobile."
Note: Voice-dialing for external numbers only works with names and numbers you
have entered in your contact list.
Using Handsfree Speakerphone
Model 6751i RP
The handsfree speakerphone feature on model 6751i RP allows you to speak to
someone without using the handset.
• To dial using handsfree, press or a line key and enter a number at the
dial tone (or just enter a number without lifting the handset).
• To an swer a call on your phone using handsfree, press .
• When the handset is on hook, press to disconnect the call.
Note: When handsfree is on, the speaker light turns on.
Models 6753i RP and 6757i CT RP
The handsfree feature on models 6753i RP and 6757i CT RP allows you to speak to
someone without using the handset or headset. Your phone must be in either the
Speaker or Speaker/Headset audio mode. You can set your desired audio mode using
the
section "Customizing Your Phone" in the Aastra 6753i RP or Aastra 6757i CT RP
Installation Guide.
• To dial using handsfree, press and enter a number at the dial tone.
• To an swer a call on your phone using handsfree, press or the line/call
• If you are in Speaker audio mode, lift the handset and press to switch
• If you are in Speaker/headset audio mode, press to switch between
• When the handset is on hook, press to disconnect the call.
Note: When handsfree is on, the speaker light turns on.
Using a Headset
Headset Settings option from the Options list. For more information, see the
appearance button.
between handsfree and handset.
handsfree and headset.
Basic Phone Features
Models 6753i RP and 6757i CT RP accept headsets through the modular RJ9 jack on
the back of the phone. Contact your telephone equipment retailer or distributor to
purchase a compatible headset.
Note: Customers should read and observe all safety recommendations contained in
headset operating guides when using any headset.
AastraLink RP Phone User Guide 35
Page 36

Advanced Volume Controls for the Headset Mic
Goooodbye
On the AastraLink RP, there are three options for the headset microphone volume.
To change the volume do the following.
1. Press
2. Use 2 to scroll down the list of options to
select, or Press 7 to jump directly to this option, and press 4 to select.
3. Press 2 to scroll down to
4. Use 2 to scroll down the list and press 4 to select your desired volume.
5. Press 4 to save changes and 3 to exit.
6. If you do not wish to save changes, press 3 to return to the previous screen.
Note: By default, the volume for the headset microphone is set to medium.
Making and Receiving Calls Using a Headset
To make or answer calls using a headset, do the following.
Basic Phone Features
1. Ensure that you have selected a headset audio mode by accessing the Options list
(under option
2. Plug the headset into the jack.
Press the key to obtain a dial tone or to answer an incoming call.
Note: Depending on the audio mode selected from the options menu, a dial tone or
an incoming call will be received on either the headset or the handsfree
speakerphone.
to enter the Options list.
Headset Settings and press 4 to
headset/mic volume and press 4 to select.
Headset Settings).
3. Press the key to end the call.
Incoming Intercom Calls
On AastraLink RP phones, you can receive incoming intercom calls only. By default,
the microphone for an incoming intercom call is OFF, and the automatic answer for
an intercom call is ON.
Using the Aastra Web UI, you can enable (turn ON) or disable (turn OFF) the
microphone or automatic answering (auto-answer) on the IP phone for incoming
intercom calls. If auto-answer is enabled on the IP phone, the phone plays a tone to
alert the user before answering the intercom call. If auto-answer is disabled, the phone
rejects the incoming intercom call and sends a busy signal to the caller.
Note: Your System Administrator can configure outgoing Intercom calls using the
Icom button.
36 AastraLink RP Phone User Guide
Page 37

Enabling/Disabling Microphone and Auto-Answer
T o enable/disable the microphone and/or auto-answer on your IP phone do the
following.
1. From within the Assistant program select Settings > Phone Settings, and logon to
the Aastra Web UI.
2. Click Preferences. The Preferences window opens.
Redial
The "Microphone Mute" field is enabled by default (turned OFF).
The "Auto-Answer" field is enabled by default (turned ON).
3. To disable the "Microphone Mute" field (turn ON), uncheck the check box.
4. To disable the "Auto-Answer" field (turn OFF), uncheck the check box.
5. Click to save your changes.
6. Click Operation>Reset.
7. In the "Restart Phone" field click to restart the IP phone.
The Redial List stores up to the last 100 numbers you called, allowing you to scroll
through and select the number you wish to redial.
Note: Your System Administrator can set your Redial key to speeddial a specific
number. Contact your System Administrator for more information.
Basic Phone Features
AastraLink RP Phone User Guide 37
Page 38

Last Number Redial
R
edial
R
edial
R
edial
Speaeakerer
Goooodbye
R
edial
R
edial
The IP phone has an enhanced redial user interface that allows a user to quickly redial
the last number that was dialed out from the phone.
• Press twice to redial the last number dialed.
Note: The last number redial feature for the Redial key is static and is not
configurable.
Redial List
The Redial List stores up to 100 of the most recently dialed numbers.
To access the Redial List on your phone do the following.
1. Press to display the most recently dialed number and use
through the list to view the other numbers
2. To dial the displayed number do one of the following.
• Press again.
Basic Phone Features
• Press or .
• Lift the handset.
• Press any line key.
Note: Press or the key to cancel.
Deleting from the Redial List
edial
edial
edial
edial
25
to scroll
The Redial List stores up to 100 of the most recently dialed numbers. Individual
entries in the Redial List cannot be deleted, but you can delete all entries in the Redial
List.
To delete the Redial List from your phone do the following.
1. Press .
edial
2. Press the Delete Key, then press the Delete Key again at the prompt to erase all
items.
DELETE again to
erase all items
Redial List is
empty
38 AastraLink RP Phone User Guide
Page 39

Mute
Mute
Mute
Speaeakerer
Goooodbye
Goooodbye
Press the button at any time to mute handset, headset or handsfree. The
speaker light flashes slowly and you can hear the caller, but they cannot hear you. To
switch mute on or off, press .
Note: If you place a muted call on hold, the phone automatically takes the call off
mute when you reconnect to the call.
Receiving Calls
When a call is ringing at your extension, you see the Inbound Call Screen. The line/
call appearance light flashes quickly for the incoming call.
Answering an Incoming Call
Calls can be answered using the phone handset, the speakerphone, or the headset (for
models supporting a headset).
To answer an incoming call do one of the following.
Laamme & Assoc
555-1234
• Lift the handset for handset operation.
• Press for handsfree operation on model 6751i RP or press the line/call
appearance button for the incoming call.
• Press for handsfree or headset operation on models 6753i RP and
6757i CT RP or press the line/call appearance button for the incoming call.
Note: For models 6753i RP and 6757i CT RP the audio mode setting you have
selected in the options list under
handsfree or headset operation. For more information, see the section
"Customizing Your Phone" in the Aastra Phone Installation Guide.
If the phone is already connected to a call, answering the new incoming call
automatically places the existing call on hold. To reconnect to a party, press the line/
call appearance button for that call.
If you cannot answer the call, the caller goes to voicemail if voicemail has been
configured for your extension.
Note: The button can be used to cancel the call pickup procedure.
Sending an Incoming Call to Voicemail
You can send an incoming call directly to voicemail without answering the call. To do
this, press without picking up the handset.
If you're already on the phone your incoming call goes directly to voicemail. Your
phone screen displays a voicemail icon ( ) along with the number of waiting
messages, if you have unheard messages
(example: "
x4", or "4 New Messages").
Headset Settings determines if the call goes to
Basic Phone Features
AastraLink RP Phone User Guide 39
Page 40

Ending Calls
Goooodbye
Voicemail
T o end a call, you first need to connect to the call if not already connected (for example, if
your caller is on hold).
To end a connected call, do one of the following.
• Press .
• Press the line/call appearance button of the active call.
• Place the handset back on hook (if connected through the handset).
The AastraLink RP Solution offers different voicemail options you can specify using
the Microsoft Response Point Assistant software. Voicemail can be retrieved from
your phone extension, from other phones in the AastraLink RP system, or from
outside of the office.
Basic Phone Features
Configuring Voicemail
You can specify how you want to retrieve your voice messages—either by phone, as
attachments to e-mail messages, or both.
To specify how you retrieve voicemail using Assistant, do the following.
1. On the Settings menu, click Voicemail.
2. Decide whether to receive your voice messages by phone or as an e-mail
attachment, or both.
3. Under Message retrieval, select the option you want. If you selected the Receive
messages as attachments to e-mail check box, type the e-mail address to which
you want the voicemail sent.
4. Click OK in the User Properties dialog box.
40 AastraLink RP Phone User Guide
Page 41

Voicemail Indication
When you receive a voicemail message, you are notified in one of two ways.
• If you opted to Receive messages as attachments to email in the Assistant
Voicemail tab, you get an email.
• If you opted to Listen to voice messages on a phone in the Assist ant Voicemail
tab, you see the message indicator light on your phone flashing. The phone screen
indicates how many messages you have waiting in the AastraLink RP system, and
an envelope appears beside your name for models 6751i RP and 6753i RP.
Wed Feb 27 3:14p
The screen for model 6757i CT RP shows an envelope with the number of
messages directly beside it.
Spencer Lam
1 Message
Voicemail Icon
The message indicator light and phone screen messages remains until you listen to
the new voicemail message.
Retrieving Voicemail
To access your voicemail when in the office, do the following.
1. Press the Response Point button , and say "Voicemail."
Note: Microsoft Response Point assumes that you want to check voicemail for the
primary extension number of the phone that you're using. If you want to check
voicemail for another extension number, press the star key (*), and then enter the
extension number using the keypad. Before picking up the receiver use the RIGHT
and LEFT arrow keys to change lines on multiple line phones.
Services
Dir
Callers
1
L1
Sat Jan 1 12:18am
John Smith
Idle Screen
Icom
Basic Phone Features
2. When prompted, enter the password for this voicemail box using the keypad.
Note: This password is the same for logging on to Assistant. If you haven't changed
it, the default password is 9999.
3. Listen to the instructions, and select the number of the option that you want.
Note: Voice messages that you retrieve by phone are stored on the base unit for up
to 30 days from the time a caller leaves you a voice message—not from the time
you save a voice message. Voicemail files older than 15 days may be deleted if the
base unit does not have enough free space. If you would like to guarantee that
Microsoft Response Point will not delete a voice message after 15 days, you should
choose to receive voice messages as e-mail attachments.
AastraLink RP Phone User Guide 41
Page 42

Remote Voicemail Retrieval
To access your voicemail when out of the office, do the following.
1. From an outside phone, dial your office phone number.
2. When connected, if the Automated Receptionist answers, say "Voicemail" or dial
886; if the receptionist answers, asked to be transferred to voicemail.
3. When prompted, enter the extension number for which you want to check
voicemail using the keypad.
4. When prompted, enter the password for this voicemail box using the keypad.
Note: This password is the same for logging on to Assistant. If you haven't changed
it, the default password is 9999.
5. Listen to the instructions, and select the number of the option that you want.
Note: Voice messages that you retrieve by phone are stored on the base unit for up
to 30 days from the time a caller leaves you a voice message—not from the time
you save a voice message. Voicemail files older than 15 days may be deleted if the
base unit does not have enough free space. If you would like to guarantee that
Microsoft Response Point will not delete a voice message after 15 days, you should
Basic Phone Features
choose to receive voice messages as e-mail attachments. Voice messages sent as email attachments are not stored on the base unit, and ther efor e they are not deleted
by the base unit.
Forwarding Calls
Using Assistant, you can forward a call to another extension number, an external
phone number, to voicemail, or to the Automated Receptionist. You can also specify
an alternative if your first choice for handling calls is unavailable.
To handle your calls when you cannot answer your phone do the following.
1. On the Settings menu in Assistant, click Call Forwarding. The Assistant Call
Forwarding tab opens.
42 AastraLink RP Phone User Guide
Page 43

Call Transfer
Transferring with Response Point
2. In the Within box, specify how many seconds and approximate rings should pass
before the call is forwarded.
3. In the Do the following box, click one of the methods to specify where the
forwarded call should go.
4. If you specify that calls should be forwarded to another user, click the user and
extension number in the Forward to list.
5. Specify an alternative method for call forwarding using the If the other user
doesn't answer and Forward to lists, if necessary.
Note: If you have forwarded to another user, the call may end up going to their
voicemail if they are away from the phone and have set their own call forwarding
options.
6. Click OK in the User Properties dialog box.
You transfer call s by pressing the Response Point button on your phone and
using voice dialing to say the name of your coworker, or by dialing manually.
To transfer a call using voice dialing, do the following.
1. Tell the caller that you are going to transfer the call.
2. Press the Response Point button .
3. Say "Transfer my call to," and then say the name to which you want to transfer the
call.
Transferring Manually
To transfer a call using manual dialing, do the following.
1. Tell the caller that you are going to transfer the call.
2. Press the Response Point button .
3. Hang up the phone.
4. Press 7 * 0 followed by the extension number.
7*0101
5. Lift the receiver and listen until you hear "...transferring. You may now hang up."
Basic Phone Features
=Dial
6. Hang up the phone.
AastraLink RP Phone User Guide 43
Page 44

Call Park
Parking a call is like holding a call, except that it can be picked up on any phone in
your office. Response Point supports nine parking spaces for calls.
Note: If you place a call internally to another employee and that employee parks the
call, and then you put the call on hold, the connection will be terminated when the
employee you called retrieves the call.
To park and retrieve a call using voice dialing, do the following.
1. Press the Response Point button to park the call. The Automated
Receptionist tells you the space number in which the call is parked.
2. From a phone, press the Response Point button and say "Retrieve," and
then say the call number. For example, say "Retrieve call 1."
Note: If you're r etrieving a call from the same phone where you parked it and only
one call is parked, you can simply say "Retrieve my call."
Basic Phone Features
Contacts List in Assistant
Importing Contacts
You can import a maximum of 1100 contacts (including contacts already in Assistant)
from a contact store, such as Outlook, Windows Address Book (for W indows XP), or
Windows Contacts (for Windows Vista). It's a best practice to import only those
contacts that you use regularly. Importing unnecessary contacts consumes
memory—which may affect how well the Automated Receptionist interprets the
speech of callers.
Microsoft Response Point prevents you from importing contacts if the storage space
on the base unit has reached full capacity. In this case, contact System Administrator
for assistance.
44 AastraLink RP Phone User Guide
Page 45

To import contacts from a contact store using Assistant, do the following.
1. On the Settings menu, click Contacts. The Contacts tab opens.
2. Click Import, and the Import Contacts dialog appears.
Basic Phone Features
3. Follow the steps listed in the Import Contacts dialog box, and click OK.
AastraLink RP Phone User Guide 45
Page 46

4. Click OK in the User Properties dialog box.
Note: There is no relationship between the contact information that you enter on
the Contacts tab and the caller ID information that incoming call notifications
display. The phone company provides caller ID information.
Adding Contacts
You can enter contacts into the Assistant program one by one. Contacts you add can
be accessed using voice dialling. Your personal contact list has space for 1100
contacts, but in addition Microsoft Response Point prevents you from adding contacts
if the storage space on the base unit has reached full capacity. In this case, contact
System Administrator for assistance.
To add contacts to the Contacts list in Assistant, do the following.
1. On the Settings menu, click Contacts. The Contacts tab opens, displaying your
contacts list.
2. Click Add New, and the New Conta ct dialog opens.
Basic Phone Features
3. Enter the contact information that you want to add, and click OK.
4. Click OK in the User Properties dialog box.
Editing Contacts
You may want to update the personal contacts stored in Microsoft Response Point
Assistant as names and numbers change.
To edit your contacts using Assistant, do the following.
1. On the Settings menu, click Contacts.
2. In the Name for Voice Dialing column, select a contact to edit, and then click
Edit.
3. After editing the contact, click OK.
46 AastraLink RP Phone User Guide
Page 47

4. Click OK in the User Properties dialog box.
Note: There is no relationship between the contact information that you enter on
the Contacts tab and the caller ID information that incoming call notifications
display. The phone company provides caller ID information.
Deleting Contacts
You may be asked to delete some con tacts if the limit for the phone system has been
reached. Likewise, if you want to add contacts but your personal limit of 1100 has
been reached, you must delete contacts that you use infrequently before adding the
new ones.
To delete contacts using Assistant, do the following.
1. On the Settings menu, click Contacts.
2. In the list of contacts, select the names that you want to delete, and click Remove .
To delete all contacts, click Remove All.
If you choose to remove all contacts, a warning displays allowing you to change
your mind.
3. Click OK.
4. Click OK in the User Properties dialog box.
Basic Phone Features
AastraLink RP Phone User Guide 47
Page 48

Call Notification
You can display incom in g call not ifications in the lower-right corner of your
computer screen by setting options on the Notifications tab. You'll see call
notifications for up to four extension numbers associated with your phone. These
notifications include caller ID information provided by the phone company as well as
information in an associated contact store, such as Outlook, Windows Address Book
(for Windows XP), or Windows Contacts (for Windows Vista), if any.
You can also set the incomin g call notification on your computer to play a sound
when a new call appears.
To set your call notifications using Assistant, do the following.
1. On the Settings menu, click Notifications. The Notifications tab appears.
Basic Phone Features
2. If you would like incoming call notifications to appear, select the Enable
incoming call notifications check box.
3. If you want to hear a sound when a call comes in, select the Play a sound when a
notification is displayed check box.
4. Under Caller identification, specify the e-mail program that contains your
contacts (such as Outlook).
5. Click OK in the User Properties dialog box.
48 AastraLink RP Phone User Guide
Page 49

Phone Directory List
Speaeakerer
Save
Serviviceses
The phone Directory List is your personal phone book, conveniently stored within
your phone. You can ent er up to 200 entries into the Directory by adding them
manually, or by saving the number and name from other lists stored on your phone.
Each entry can contain a maximum of 16 letters and numbers.
Accessing Your Directory
To access the Directory list on your phone, do the following.
1. On model 6753i RP or 6757i CT RP press the Directory Key. On model 6751i RP
press the Options key and scroll down until you reach the Directory. The Directory
displays the number of entries in your list. If the Directory list is empty,
Empty/Use Save to add
Directory empty
Use Save to add
2. You can access phone Directory entries by pressing 25 to scroll through the list.
3. To search for an entry by name, press the dial pad number corresponding to the
first letter of the name (for example, press 7 for the letter P). Continue to press the
dial pad number to access other letters on the same key (for example, press 7 three
times for ‘
to scroll through the list, or continue to press the next letters of the name to find a
better match.
Directory
is displayed.
Ron’). If there are multiple entries under the same letter, you can use 25
4. To dial the displayed number press or or just lift the handset or
press any line key.
5. Press the Directory Key to cancel and exit the phone Directory.
Saving Numbers and Names to the Phone Directory
You can save a number to your phone Directory from your display during a call, from
the Redial List or Callers List, or by entering a new number and name.
Saving from the Display
During a call you can save the name and/or number displayed on your screen to the
phone Directory.
T o save a new phone Directory entry during a call, do the following.
1. Press the Save Key during the call.
Save to?
John Burns
9054550055
2. Press the Directory Key, or for model 6751i RP press the Services key
and scroll to the Directory.
Basic Phone Features
AastraLink RP Phone User Guide 49
Page 50

If a name is displayed both the number and name are saved in the Directory. If no
Save
Serviviceses
R
edial
Save
Serviviceses
name or Unknown Name displays, you can enter the name using the dial pad.
3. Press the Save Key to finish saving the new phone Directory entry.
Saving from the Callers and Redial Lists
Calls recorded in the Callers List or Redial List can be added to the phone Directory.
The following illustration is a reference for model 6753i RP.
Save Key
Directory
Key
Callers List
Key
Basic Phone Features
Redial List
Button
To save an entry from the Callers List or Redial List to the phone Directory, do the
following.
1. If saving from the Callers List press the Callers List Key, or for model 6751i RP
press the Services key and scroll to the Callers List. If saving from the
Redial List press the Redial List button .
edial
2. From the Callers List or Redial List, scroll through the list to find the name and
number you want to save to your Directory.
3. Press the Save key .
4. Press the Directory Key, or for the model 6751i RP press the Services key
and scroll to the Directory. If the name is displayed with the number, both
are saved to the Directory. If no name is displayed, you can enter the name using
the dial pad and then press Save.
Entering a New Number and Name into the Directory
Entries in the phone Directory List can be added manually from your phone at your
convenience. Each entry can contain a maximum of 16 letters and numbers.
The procedures for saving new Directory entries vary for different phone models.
Please read carefully and ensure you are following the correct instructions for your
Aastra RP phone model.
50 AastraLink RP Phone User Guide
Page 51

The following illustration is a reference for model 6753i RP.
Save
Goooodbye
Save
Save
Serviviceses
Save
Goooodbye
Save
Save Key
Delete Key
Directory
Key
For models 6753i RP and 6757i CT RP do the following.
1. Press the Save Key . At the "Save to?" prompt, press the Directory Key.
2. Use the dial pad key to enter the number.
Note: To add a one second pause during number editing press .
3. Press the Save Key . At the "
Enter Name" prompt, use the dial pad to select
the letters. Continue to press the number key to access the next letter for that key
(for example, press 2 three times to access C). Press 4 to move to the next space,
or wait a moment and the cursor automatically advances. To insert a space between
letters, press 4.
4. To backspace and erase a mistake, press 3 or press the Delete Key.
5. Press the Save Key to finish.
Saved: Directory
John Burns
For model 6751i RP do the following.
1. Press the Services Key and scroll to the Directory.
2. Press the Save key .
3. Use the dial pad key to enter the number.
Note: To add a one second pause during number editing press .
Basic Phone Features
4. Press the Save Key . At the "
Enter Name" prompt, use the dial pad to select
the letters. Continue to press the number key to access the next letter for that key
(for example, press 2 three times to access C). Press 4 to move to the next space,
or wait a moment and the cursor automatically advances. To insert a space between
letters, press 4.
5. To backspace and erase a mistake, press 3 or press the Delete Key.
AastraLink RP Phone User Guide 51
Page 52

6. Press the Save Key to finish.
Save
Serviviceses
Save
Serviviceses
Editing the Directory
Directory entries saved in your phone can be
T o edit a listing in your phone Directory, do the following.
1. Press the Directory Key, or for model 6751i RP press the Services key
and scroll to the Directory.
2. Access the entry you want to edit by pressing the first letter of the name on the dial
pad, and 25 to scroll through the list.
3. To begin editing press 3. Press 3 again to erase the numbers or letters to the left
Basic Phone Features
or use the dial pad to enter additional digits or characters once you have saved the
number. If you don't want to change the number or name just press the Directory
Key or the Goodbye Key at any time to exit.
4. Press the Save Key to finish.
Saved: Directory
John Burns
Deleting Items from Directory
You can delete individual items from your Directory, or you can delete all items in the
Directory in one step.
Note: Deleted Directory entries cannot be retrieved. Delete with caution.
Deleting Individual Directory Items
The following illustration is a reference for model 6753i RP.
Delete Key
Directory
Key
To delete individual Directory items, do the following.
1. Press the Directory Key, or for model 6751i RP press the Services key
and scroll to the Directory.
2. Press 25 to find the item you want to delete.
52 AastraLink RP Phone User Guide
Page 53

3. Press the Delete Key.
Serviviceses
4. Press the Delete Key again at the prompt to erase the item.
DELETE again to
erase this item
Deleting All Directory Items
To delete all Directory items, do the following.
1. Press the Directory Key, or for model 6751i RP press the Services key
and scroll to the Directory.
2. Press the Delete Key.
3. Press the Delete Key again at the prompt to erase all items.
Directory empty
Use Save to add
.
Callers List
The AastraLink RP telephone stores information on up to 200 incoming call s in the
Callers List. Your te lepho ne logs the number and name (if available) of the caller,
when they last called, and the number of times they tried to reach you.
John Burns
007
9054550055
Jun 8 2:55pm
N
When the Callers List is full, the oldest call records are deleted to accommodate new
caller information. The current Callers List can be downloaded from your phone
using the Aastra Web UI, should you want to save the entries.
If the telephone number of an incoming or outgoing call matches a number that you
have programmed with a name in a programmable key or the phone Directory, the
Callers List displays the name and number.
Basic Phone Features
AastraLink RP Phone User Guide 53
Page 54

The phone display shows you how many callers have been added to the Callers List
Serviviceses
Serviviceses
since you last checked it. The following table explains some of the Callers List icons
that appear on your phone screen.
Caller’s List Screen Display
Display Item Description
450-349-0438 Indicates you have returned the call from the Callers List.
N MAR 09 3:30pm 2x "N" indicates a new call.
XX New Callers When you are not on the telephone and not in the Callers
List, the display shows you how many callers have been
added to the list since you last checked it.
Indicates an unanswered call in the Callers List.
Indicates an answered call in the Callers List.
Indicates a Call Waiting call in the Callers List.
Basic Phone Features
John Burns
9054550055
Jun 8 2:41pm 2X
Accessing the Callers List
Using the phone UI you can view, scroll, and delete line items in the Callers List. You
can also dial directly from a displayed line item in the Callers List.
To access the Callers List on your phone, do the following.
1. Press the Callers List Key, or for model 6751i RP press the Services key
and scroll to the Callers List.
2. Press 25 to move through the Callers List. Press 2 to see the most recent call, or
5 to see the oldest call on your list.
3. To dial the displayed number just press or lift the Handset or press any
line keys.
4. Press the Callers List Key to cancel.
Editing in the Callers List
The Caller List does not save changes. Editing in the Callers List is useful only if you
plan to call the number and need to add a prefix.
T o edit an entry in the Callers List before dialling the number, do the following.
Indicates an incoming Call Waiting call.
"2x" indicates this caller has called twice. The display shows
the date and time of the last call from that caller.
1. Press the Callers List Key, or for model 6751i RP press the Services key
and scroll to the Callers List.
2. Press 25 to find the entry you want to edit. Press 2 to view the most recent call, or
5 to see the oldest call on your list.
3. Press any key on the dial pad to begin editing.
4. To move the cursor one digit to the right, press 4. To erase one digit to the left of
the cursor, press 3.
54 AastraLink RP Phone User Guide
Page 55

5. To dial the displayed number press , or just lift the handset, or press any
Serviviceses
Serviviceses
line keys.
Note: Changes you make to the Callers List are not saved.
Deleting from the Callers List
Calls recorded in the Callers List can be deleted individually, or you can delete all
items in the Callers List.
Deleting individual Callers List entries
This illustration is a reference for model 6753i RP.
Delete Key
Callers List
Key
1. Press the Callers List Key , or for model 6751i RP press the Services key
and scroll to the Callers List.
2. Press 25 to find the item you want to delete.
3. Press the Delete Key.
4. Press the Delete Key again at the prompt to erase the item.
Deleting all Callers List entries
Use the following procedure to delete all items from the Callers List.
1. Press the Callers List Key , or for model 6751i RP press the Services key
and scroll to the Callers List.
2. Press the Delete Key.
3. Press the Delete Key again at the prompt to erase all items.
Downloading the Callers List
The Callers List can be downloaded using the Aastra Web UI, and saved to your PC
for viewing. When you download the Callers List, the phone stores the file
callerlist.csv to your computer in comma-separated value (CSV) format.
Basic Phone Features
AastraLink RP Phone User Guide 55
Page 56

You can use any spreadsheet application to open the file for viewing. The following is
an example of a Callers List in a spreadsheet application. This file displays the name,
phone number, and the line that the call came in on.
To download the callers list from your phone do the following.
1. From within the Assistant program select Settings > Phone Settings, and logon to
the Aastra Web UI.
Basic Phone Features
2. Click Directory. The Directory window opens.
3. In the Callers List field, click .
A File Download message displays.
4. Click OK.
5. Enter the location on your computer where you want to download the Callers List
and click Save.
The callerslist.csv file downloads to your computer.
6. Use a spreadsheet application to open and view the Callers List.
Ring Tones and Tone Sets
You can configure ring tones and ring tone sets on your IP phone. There are several
distinct ring tones a user can select from to set on the IP phones. You can enable/
disable these ring tones on a global or per-line basis.
56 AastraLink RP Phone User Guide
Page 57

Ring Tones
The following table identifies the valid settings and default values for each type of
configuration method.
Configuration Method Valid Values Default Values
IP Phone UI Global:
Aastra Web UI Global:
Ring Tone Sets
Tone 1
Tone 2
Tone 3
Tone 4
Tone 5
Tone 1
Tone 2
Tone 3
Tone 4
Tone 5
Silent
Per-Line:
Global
Tone 1
Tone 2
Tone 3
Tone 4
Global:
Tone 1
Global:
Tone 1
Per-Line:
Global
In addition to ring tones, you can configure ring tone sets on a global-basis on the IP
phone. Ring tone sets consist of tones customized for a specific country. The ring tone
sets you can configure on the IP phones are:
• US (Default - also used in Canada)
• United Kingdom
• Italy
• Germany
• France
• Europe (generic tones)
• Australia
When you configure the country's tone set, the country-specific tone is heard on the
phone for the following:
• dial tone
• secondary dial tone
• ring tone
• busy tone
• congestion tones
• call waiting tone
• ring cadence pattern
Basic Phone Features
AastraLink RP Phone User Guide 57
Page 58

Configuring Ring Tones and Tone Sets
Serviviceses
Ring tones and ring tone sets can be configured using either the phone UI, or the
Aastra Web UI. Per-line configuration can only be set using the Aastra Web UI.
Using the Phone UI
For global configuration of ring tones and ring tone sets, do the following.
1. Press , or press Services and scroll down to the Options list
(model 6751i RP).
2. Select
3. Select
4. Select the type of
5. Select
6. Select
7. Select the country for which you want to apply the tone set. Valid values are
Basic Phone Features
Australia, Europe, France, Germany, Italy, UK, and US. Default is US.
8. Press 4.
The ring tone and tone set you select is immediately applied to the IP phone.
Using the Aastra Web UI
To configure ring tones and tone sets
1. From within the Assistant program select Settings > Phone Settings, and logon to
the Aastra Web UI.
2. Click Preferences. The Preferences window opens.
Tones.
Set Ring Tone.
ring tone (Tone 1 through Tone 5, or Silent).
Set and then press 2.
Tone Set.
.
58 AastraLink RP Phone User Guide
Page 59

For global configuration:
1. In the "Ring Tones" section, select a country from the "Tone Set " field.
2. Select a value from the "Global Ring Tone" field
Note: See the Ring Tone Sets on page 57 for valid values.
For per-line configuration:
1. In the "Ring Tone" section, select a line for which you want to set ring tone.
2. Select a value from the "LineN" field
Note: See the Ring Tone Sets on page 57 for valid values.
For both global and per-line configurations:
3. Click to save your settings. These changes are not dynamic. You must
restart your IP phone for the changes to take affect.
4. Click Operation->Reset.
5. In the "Restart Phone" field click to restart the IP phone and apply the
ring tone.
.
.
AastraLink RP Phone User Guide 59
Basic Phone Features
Page 60

Advanced Phone Features
Serviviceses
Aastra IP phones provide several built-in features valuable to business users such as
3-way conference calling and foreign language support. Not all features are available
for all Aastra IP phone models. Check the model number on your Aastra IP phone to
see which features apply.
Using the Aastra Phone UI
You can access specifi c options for the AastraLink RP phone using the phone UI via
the keypad. Pressing , or pressing Services and scrolling down to
the Options list (for model 6751i RP) gives you a list of configurable options.
These options allow you to customize your phone settings.
Note: Not all custom settings apply to all phone models.
Language
1 Screen Language
2 Input Language
Time and Date
1 Time Server
2 Set Time
3 Time Format
4 Set Date
Advanced Phone Features
5 Date Format
6 Time Zone
7 Daylight Savings
Tones
1 Set Ring Tone
2 Tone Set
Speed Dial Edit
Contrast Level
Live Dialpad
Set Audio
1 Audio Mode
2 Headset Mic Vol
Admin Menu*
1 Network Settings*
2 SIP Settings*
Phone Status
1 Network Port 1
2 Network Port 2
3 Firmware Version
4 Restart Phone
5 Restore Defaults*
User Password
Phone Lock
Handset Pairing
Note: *The "Network Settings" and "SIP Settings" options are administrator level
functions only, and are not accessible by the user. Under the "Phone Status" option,
the "Restore Defaults" selection is also an administrator level function only. These
options should only be set up and changed by your System Administrator.
60 AastraLink RP Phone User Guide
Page 61

Using the IP Phone UI
Serviviceses
Goooodbye
1. Press the Options key or press the Services key and scroll down
to the Options list (for model 6751i RP).
2. To go to an Option, use 25 to scroll through the list, or press the number
corresponding to the Option.
3. Press the
corresponding option to select an option.
4. Use the softkeys to change a selected option.
5. Press the Set button to save the change.
6. Press the button, the 3 button, or the button at any time to exit
without saving changes.
Show softkey, the 4 button, or press the digit number of the
Configuring Multiple Lines (6753i RP & 6757i CT RP)
You can set a programmable key as an addition al line on models 6753i RP and
6757i CT RP. The programmable key acts as a line that behaves the same as a hard
line key. Model 6753i RP allows up to 4 additional line keys, for a total of 6 lines.
Model 6757i CT RP allows up to 6 additional line keys, for a total of 9 lines.
The system Administrator must assign the additional line to your phone using the
Administrator software, and you must configure the line through the Aastra Web UI.
The phone must then be restarted for the web configuration to take effect.
Note: The system administrator can also configure the lines on the Aastra Web UI
and restart the phone.
To set a programmable key as a line for phone model 6753i RP or 6757i CT RP do
the following.
1. From within the Assistant program select Settings > Phone Settings, and logon to
the Aastra Web UI.
2. Click Programmable Key
6757i CT RP.
3. Select the key you want to program as a line key (choose between the Top keys
and Bottom keys for model 6757i CT RP).
4. In the Type field, select Line from the drop-down list.
5. In the Line field, select a line number to use for this programmable key.
Valid values for model 6753i RP are 3 through 6 and for model 6757i CT RP are 4
through 9. Check that the line number matches the line assigned to the phone by
the system administrator.
s for model 6753i RP, or Softkeys and XML for model
Advanced Phone Features
AastraLink RP Phone User Guide 61
Page 62

6. For model 6757i CT RP, enter the text you want displayed besid e the key on the
phone in the Label field.
7. Click to save your changes.
8. Click
9. In the Restart Phone field click to restart the IP phone.
Reset on the left menu.
Note: Programmable or softkey lines only work as lines when also assigned by the
system administrator and configured on the Web UI followed by restarting the
phone.
3-Way Conference Calling (6753i RP & 6757i CT RP)
Conference calls are available on models 6753i RP and 6757i CT RP. When you use
the Conference key to initiate a conference call, the following screen displays.
1-1
1-2
In a conference call, the call timer moves to the left. You use the up and down arrow
Advanced Phone Features
Conferencing Calls
keys to scroll to a party on the list. You use the right arrow key to select the party to
drop.
John
Jim
03:05
= Drop
The AastraLink RP Solution phones support up to 3 parties (including yourself) in a
conference call (using models 6753i RP and 6757i CT RP).
Note: Your System Administrator can set your Conference key to speeddial a specific
number. Contact your System Administrator for more information.
The following illustration is a reference for model 6753i RP.
Conference
Key
62 AastraLink RP Phone User Guide
Page 63

To make a conference call, do the following.
Goooodbye
1. Connect to the first party you wish to include in the conference (if not already
connected).
2. Press the Conference Key. A new line opens.
2
=Dial
3. Enter the extension number, or dial the outside number of the person you wish to
add to the conference.
4. Wait for the new party to answer. You can consult with the new party first before
adding them to the conference.
5. To add the new party to the conference, press the Conference key again.
6. To drop a party from the conference, press the Conference key once more.
Note: You can use 25 to scroll through and see the numbers and names (if
available) of the parties in the conference call.
7. To exit the conference leaving the other two parties connected, disconnect by
placing the handset back on-hook or by pressing .
Conferencing two calls when already connected
To combine two active calls into one conference call, do the following.
1. Begin with active calls on two different lines.
2. Press the Conference key. A new line opens.
3. Press the line key of the call you wish to conference with.
4. Press the Conference key again. The two lines link into a conference call.
Note: When a name is displayed, pressing 4 drops the displayed party from the
call.
Speeddial Keys (6751i RP)
You can program the keys on the keypad of the 6751i RP to speeddial outside
numbers, dial directly to another person’s line or extension, or set up to quickly access
features such as Caller ID (*69), or Voicemail.
On the 6751i RP, the speeddial function can be set using the IP Phone keypad
directly, or using the Aastra Web UI to setup the speeddial key.
Note: You can use a speeddial key while on an active call by placing the active call on
hold first, and then pressing the speeddial key.
Speeddial Prefix
Advanced Phone Features
The speeddial feature also allows you to specify a preset string of numbers followed
by a “+” that the phone dials automatically after pressing the speeddial key. You can
use this feature for numbers that contain long prefixes.
For example, if you set the following speeddial configuration for Digit 1:
1234567+
AastraLink RP Phone User Guide 63
Page 64

then, after you press Digit 1 on the keypad, the prefix number displays on the phone
screen. The phone proceeds to dial the prefix number automatically and pauses for
you to enter the remaining phone number using the keypad on the phone.
You can save up to 7 speeddial numbers on the 6751i RP.
Use the following procedures to set speeddial on the 6751i RP phone.
Creating a Speeddial Key from the Keypad
Note: When creating a speeddial key from the keypad, you must select a keypad key
that has no preassigned function.
To create a speeddial key on the keypad, do the following:
1. Press a number key on the keypad for 3 seconds.
A screen displays with the prompt, "Enter number>".
2. Enter a phone number or extension to assign to that speeddial key.
The following example illustrates the screen display:
Speeddial
Enter number>
3. After entering the number, the prompt, "Use Save to end" displays on the screen.
Advanced Phone Features
3456
3456
Use Save to end
4. Press Save to save the number as a speeddial key.
Note: Press and hold a speeddial key to edit that speeddial key . Use the Delete Key
to delete the speeddial key.
Creating a Speeddial Key Using the Save Key
To create a speeddial key using the save key, do the following.
1. Press the Save key. The screen displ a y s "
Save to?
2. Select a Keypad key you want to save to.
3. At the "
Enter Number" prompt, use the dial pad key to enter the number.
Enter Number
>
5553491234
Save to?"
4. Press the Save key to save the speeddial configuration.
64 AastraLink RP Phone User Guide
Page 65

5. At the "Enter Name" prompt, use the dial pad keys to select the letters. Continue to
press the number key to access the next letter for that key (i.e. press 2 three times to
access C). Press 4 to move to the next space, or wait a moment and the cursor
automatically advances. To insert a space between letters, press 4. To backspace
and erase a mistake, press 3 or the Delete key. You can save up to 16 letters and
numbers on each keypad key entry.
Enter Name
>
John Smith
6. Press the Save key to finish.
Saved Memory key
5553491234
Creating a Speeddial Key Using the Aastra Web UI
To set speeddial keys using the Aastra Web UI, do the following.
1. From within the Assistant program select Settings > Phone Settings, and logon to
the Aastra Web UI.
2. Click Keypad Speeddial. The Keypad Speeddial window opens.
.
3. Select from Digit 1 through Digit 9.
4. In the input box, enter the phone number, extension, or speeddial prefix to apply to
this Digit key. If you enter a speeddial prefix, you must enter the "+" character at
the end of the prefix number (for example, "123456+").
5. Click to save your changes.
Advanced Phone Features
AastraLink RP Phone User Guide 65
Page 66

Programmable Keys (6753i RP & 6757i CT RP)
Both the 6753i RP and 6757i CT RP models have programmable keys you can
customize using the Aastra Web UI.
Your 6757i CT RP has 12 multi-functional softkeys:
• 6 Top Keys: programmable static softkeys with up to 10 programmable functions.
• 6 Bottom Keys: programmable state-based softkeys (context sensitive keys) with
up to 20 programmable functions.
Note: Additional programmable keys are available through expansion modules.
See Model M670i and M675i Expansion Modules on page 75.
You can program these so ftkeys for call handling and extension management of the
SIP system. The softkey menus change depending on the phone’s state, displaying
relevant softkeys only.
Note: The softkey functions outlined in this section represent the default arrangement
of softkeys on the 6757i CT RP phone. Only the bottom softkeys are state-based.
The 6757i CT RP default soft keys are shown in the following illustrations.
6757i CT RP Top Softkeys
Advanced Phone Features
66 AastraLink RP Phone User Guide
Page 67

6757i CT RP Bottom Softkeys
6753i RP Programmable Keys
There are 2 preset and 4 programmable keys on the 6753i RP phone located to the left
of the paper label.
Save Key
Delete Key
Directory
Callers List
Transfer
Conference
Advanced Phone Features
Programmable
Keys
AastraLink RP Phone User Guide 67
Page 68

You can set the programmable keys with any of the functions in the following table.
Key Function Description
None Indicates no setting for programmable key.
Line
Speeddial Indicates programmable key is configured for speeddial use.
Do Not Disturb Indicates programmable key is configured for do not disturb on
XML Indicates the programmable key is configured to accept an
Flash Indicates programmable key is set to generate a flash event
Sprecode Indicates programmable key is configured to automatically
Advanced Phone Features
Directory Indicates programmable key is configured to access the
Callers List Indicates programmable key is configured to access the
Intercom Indicates programmable key is configured to make intercom
Services Indicates programmable key is configured to access the
Phone Lock Indicates programmable key is configured to lock (or unlock)
Transfer Indicates programmable key is configured as a Transfer key
Conference Indicates programmable key is configured as a conference
Indicates softkey is configured for line use.
Note: The line must be assigned to the phone by the system
administrator, the key configured and the phone restarted for
the line softkey to take effect.
the phone. This option is "do not disturb" in the Aastra Web
UI).
XML application for accessing customized XML services. You
can also specify an XML softkey URL for this option.
when it is pressed on the AastraLink RP. The IP phone
generates flash events only when a call is connected and there
is an active RTP stream (for example, when the call is not on
hold).
activate specific services offered by the server. For example, if
the sprecode value of *82 is configured, then by pressing the
Sprecode softkey, *82 automatically activates a service
provided by the server. Contact your System Administrator for
available services.
Directory List.
Callers List.
calls, which are answered automatically.
Services menu.
the phone.
for transferring calls.
key.
Programmable keys can also be set up to quickly access features such as Call Return
(*69) or Voicemail.
Note: Some programmable options on the Aastra WebUI may not be supported on
AastraLink RP phones.
Setting a Speeddial Key
The speeddial function can be set using the IP Phone UI or the Aastra Web UI.
You can save speed dial num bers and na mes that can be programm e d to di al directly
to another person’s line or extension, or set up to quickly access features such as
Caller ID (*69), Voicemail.
Speeddial numbers can be entered manually on the phone keypad, or saved from
existing entries in the Redial, Callers, or Directory Lists. The Aastra Web UI can also
be used to enter a speeddial number.
68 AastraLink RP Phone User Guide
Page 69

Using the Phone UI to enter a number
To enter a number and name in a programmable key for speeddialing, do the
following on the phone keypad.
1. Press the Save key.
The screen displays "
Save to?"
Save to?
2. Select a Programmable Key you want to save to by pressing it.
3. At the "
Enter Number" prompt, use the dial pad key to enter the number.
Enter Number
>
5553491234
4. Press the Save key to save the speeddial configuration.
5. At the "
press the number key to access the next letter for that key (i.e. press 2 three times to
access C). Press 4 to move to the next space, or wait a moment and the cursor
automatically advances. To insert a space between letters, press 4. To backspace
and erase a mistake, press 3 or the Delete key.
You can save up to 16 letters and numbers on each programmable key entry.
Enter Name" prompt, use the dial pad keys to select the letters. Continue to
Enter Name
>
John Smith
6. Press the Save key to finish.
Saved Memory key
5553491234
Advanced Phone Features
Using the Phone UI to save an existing number
T o save an entry from the Redial, Callers, or Directory List to a programmable key for
speedialling, do the following.
1. Press the Directory List, Callers List, or Redial List key . From the Callers List or
Redial List, scroll through the list to find the name and number that you wish to
save to your speed dial.
2. Press the Save key.
3. Press the selected speed dial. If a name is displayed with the number, both are
saved to the speed dial. If no name is displayed, you can enter the name using the
dial pad.
AastraLink RP Phone User Guide 69
Page 70

Using the Aastra Web UI to enter a number
T o set a programmable key for speeddialing using the Aastra Web UI, do the
following.
1. From within the Assistant program select Settings > Phone Settings, and logon to
the Aastra Web UI.
2. Click Programmable Keys for model 6753i RP, or Softkeys and XML for model
6757i CT RP.
Advanced Phone Features
3. Select the key you want to set as a speeddial key.
4. In the Type field, select Speeddial to apply to the programmable key.
5. In the Value field, enter the phone number or extension to apply to this hard key
for speed dialing.
6. In the Line field, select a line for which to apply this programmable hard key.
Valid values are 1 through 9 and global.
7. Click to save your changes.
8. Click Operation>Reset.
9. In the Restart Phone field click to restart the IP phone.
Setting a Do Not Disturb (DND) Key
The model 6753i RP and 6757i CT RP phones have a feature you can enable called
Do not Disturb (DND). The DND function allows you to turn Do not Disturb ON and
OFF.
If DND is ON, callers calling into the phone hear a busy signal or a message,
depending on how your System Administrator set up the configuration server. The
second line on the screen of the IP phone shows when DND is set.
Note: Model 6751i RP has a DND feature, but it is accessed only through the
Services menu on the phone UI, and cannot be set to a key.
70 AastraLink RP Phone User Guide
Page 71

If the phone shares a line with other phones, only the phone that has DND configured
is affected.
Note: You can only configure DND keys using the Aastra Web UI.
To configure a DND key for model 6753i RP or 6757i CT RP, do the following.
1. From within the Assistant program select Settings > Phone Settings, and logon to
the Aastra Web UI.
2. Click Programmable Keys for model 6753i RP, or Softkeys and XML for model
6757i CT RP.
3. Select the key you want to set as the DND key.
4. In the Type field, select Do Not Disturb to apply to the programmable key.
5. Click to save your changes.
6. Click Operation>Reset.
7. In the Restart Phone field click to restart the IP phone.
Setting a Flash Key
If you have a model 6753i RP or 6757i CT RP phone, you can set a programmable
key to generate a flash event when it is pressed on the AastraLink RP. You do this by
setting the programmable key to "Flash". The IP phone generates flash events only
when a call is connected and there is an active RTP stream (for example, when the
call is not on hold).
To set a flash key for model 6753i RP or 6757i CT RP, do the following.
1. From within the Assistant program select Settings > Phone Settings, and logon to
the Aastra Web UI.
2. Click Programmable Keys for model 6753i RP, or Softkeys and XML for model
6757i CT RP.
Advanced Phone Features
3. Select the key you want to set as a flash key.
4. In the Type field, select Flash.
AastraLink RP Phone User Guide 71
Page 72

5. Click to save your changes.
6. Click Operation > Reset.
7. In the Restart Phone field click to restart the IP phone.
Setting an XML Key
Model 6753i RP and 6757i CT RP phones have a feature you can enable called
"XML" (Extensible Markup Language). XML is a markup language much like
HTML. Your System Administrator can create customized XML menu services and
load them to your IP phone. These services include things like weather and traffic
reports, contact information, company info, stock quotes, or custom call scripts.
Note: You can configure XML using the Aastra Web UI only.
You can enable XML applications on your phone by setting a programmable key type
to "XML". Pressing the configured key on the phone allows you to access the special
XML services. If you set a programmable key type as "XML", you must also enter the
XML URI in the "Value" field. This allows the phone to perform an "HTTP GET" on
the URI and load it to the phone.
Note: XML services must be set up by your System Administrator before you can use
the XML key.
To set an XML key for model 6753i RP or 6757i CT RP, do the following.
1. From within the Assistant program select Settings > Phone Settings, and logon to
the Aastra Web UI.
2. Click Programmable Keys for model 6753i RP, or Softkeys and XML for model
6757i CT RP.
3. Select the key to set as an XML key.
4. In the Type field, select XML to apply to the programmable key.
5. In the Value field, enter the IP address of the XML application.
6. Contact your System Administrator for the appropriate value to enter in the Value
field.
7. Click to save your changes.
8. Click Operation > Reset.
9. In the Restart Phone field click to restart the IP phone.
Accessing the XML Service
After one or more XML applications have been saved to your model 6753i RP or
6757i CT RP phone, and after a programmable key has been configured to access the
XML applications, the customized service is ready for you to use.
To access XML applications for model 6753i RP or 6757i CT RP, do the following.
1. Press the programmable key configured for XML on the model 6753i RP or
6757i CT RP phone. A Custom Features screen displays (or the title you specified
appears).
2. Use the 25 to scroll through the customized features.
3. For menu and directory services, select a service to display the information for that
customized service. Message services display to the screen after pressing the
programmable key. For user input services, follow the prompts as appropriate.
To exit the Customized Features screen, press the XML programmable key again.
Page 73

Editing a Programmable Key
You can edit a program mable key on your model 6753i RP or 6757i CT RP from
either the IP phone UI or the Aastra Web UI.
Using the Phone UI
To edit a programmable key from the IP phone UI, do the following.
1. Press the Save key. The screen displ a y s "
Save to?
2. Select a Programmable Key you want to save to.
Note: Save a new number to the appropriate programmable key. Saving overwrites
the previous entry.
Save to?"
3. At the "
Enter Number" prompt, use the dial pad key to enter the number.
Enter Number
>
5553491234
4. Press the Save key.
5. At the "
press the number key to access the next letter for that key (i.e. press 2 three times to
access C). Press 4 to move to the next space, or wait a moment and the cursor
automatically advances. To insert a space between letters, press 4. To backspace
and erase a mistake, press 3 or the Delete key. You can save up to 16 letters and
numbers on each programmable key entry.
Enter Name" prompt, use the dial pad keys to select the letters. Continue to
Enter Name
>
John Smith
6. Press the Save key to finish.
Saved Memory key
5553491234
Advanced Phone Features
AastraLink RP Phone User Guide 73
Page 74

Using the Aastra Web UI
To edit a programmable key from the Aastra WebUI, do the following.
1. From within the Assistant program select Settings > Phone Settings, and logon to
the Aastra Web UI.
2. Click Programmable Keys for model 6753i RP, or Softkeys and XML for model
6757i CT RP.
Advanced Phone Features
3. For each key, select a function from the Type field.
4. Change the value in the Value field if applicable.
5. Click to save your changes.
6. Click Operation > Reset.
7. In the Restart Phone field click to restart the IP phone.
Deleting a Programmable Key
To delete a programmable key function using the Aastra Web UI, do the following.
1. From within the Assistant program select Settings > Phone Settings, and logon to
the Aastra Web UI.
2. Click Programmable Keys for model 6753i RP, or Softkeys and XML for model
6757i CT RP.
3. For each programmable key you want to delete the function on, select none from
the Type field.
4. Click to save your changes.
5. Click Operation > Reset.
6. In the Restart Phone field click to restart the IP phone.
The programmable function is deleted from the IP phone memory.
74 AastraLink RP Phone User Guide
Page 75

Model M670i and M675i Expansion Modules
The model 6753i RP and 6757i CT RP phones offer optional Expansion Modules that
attach to the right side of the phone, providing additional softkeys. You can configure
the softkeys using the Aastra Web UI as you do for the programmable keys on the
phone.
The M670i provides 36 additional softkeys on a AastraLink RP Phone. The M675i
provides 60 additional softkeys.
Each key provides an LED for indicating call status. The M670i provides a paper
label for convenient key labeling, and the M675i provides an LCD for displaying key
labels.
Model M670i
Model M675i
Advanced Phone Features
AastraLink RP Phone User Guide 75
Page 76

Additional modules (up to 3 total modules) can be piggy-backed to an existing
module providing an additional 108 softkeys with M670is and an additional 180
softkeys with M675is. You connect the additional modules to the right side of an
existing module. The following figure illustrates the addition of multiple M670i
modules on an AastraLink RP phone.
For more information about configuring softkeys, see Programmable Keys (6753i RP
& 6757i CT RP) on page 66.
For more information about installing M670i and M675i modules on your phone, see
the Aastra 6757i CT RP and Aastra 6753i RP Phone Installation Guides.
Advanced Phone Features
Foreign Language Support
The AastraLink RP phones support several different languages. You can have the IP
Phone UI and the Aastra Web UI display a specific language as required. When you
set the language to use, all of the display screens (menus, services, options,
configuration parameters, etc.) display in that language. The IP phones support the
following languages:
• English (default)
• French
• Spanish
• German
• Italian
Specifying the Language to Use
Once the language pack(s) are available on your phone, you can specify which
language to use on the phone and/or the Aastra Web UI.
Note: All languages may not be available for selection. The available languages are
dependant on the language packs currently loaded to the IP phone.
Changing Language on the Phone Keypad
Use the following procedure to specify a language for the IP Phone UI.
1. Press on the phone to enter the Options List.
2. Select Language and press 4.
76 AastraLink RP Phone User Guide
Page 77

3. Select English (English), Francais (French), Espanol (Spanish), Deutsch
(German), or Italiano (Italian)
Note: All languages may not be available for selection. The available languages
are dependant on the language packs currently loaded to the IP phone. English is
the default language and cannot be changed or removed. For more information
about loading language packs, see your System Administrator.
4. Press 4 to set the language on the phone.
The language you select displays a check mark indicating this is the current
language for the IP Phone UI. The change is dynamic. When you exit the Options
Menu, the phone displays all menu items in the language you selected.
Changing Language on the Aastra Web UI
Note: You must have the language pack(s) already loaded to your phone in order to
use them.
To change the language display on the Aastra Web UI, do the follwing.
1. From within the Assistant program select Settings > Phone Settings, and logon to
the Aastra Web UI.
2. Click Preferences. The Aastra UI Preferences window opens.
. Default is English.
3. In the Webpage Language field, select a language to apply to the Aastra Web UI.
The IP phone supports the following languages:
English (default)
French
Advanced Phone Features
AastraLink RP Phone User Guide 77
Page 78

Spanish
German
Italian
Note: All languages may not be available for selection. The available languages
are dependant on the language packs currently loaded to the IP phone by your
System Administrator. English is the default language and cannot be changed or
removed.
4. Click to save your settings. The change is dynamic. The Aastra Web UI
displays all screens in the language you selected.
Advanced Phone Features
78 AastraLink RP Phone User Guide
Page 79

Using Your 6757i CT RP Cordless Handset
Described here are various 6757i CT RP cordless handset key functions, and how
they help you make and manage your calls and caller information.
6757i CT RP Handset Key Panel
The following illustration and table identify the keys on the key panel of your
6757i CT RP hand set that yo u can use for handling calls.
1
2
10
3
4
5
6
7
8
15
9
6757i CT RP Handset Key Descriptions
Function # Function Description
1 Receiver
2 Volume key
• During Ringing: Adjusts ringer volume
• During a call: Adjusts receiver volume
• During text mode (not in a call): Moves cursor right/left
3Display
4 Features ƒ Key List
• Access key to the programmed Feature Key List
• Scrolls up when in the various lists
• Adds a space during editing
5Softkeys
• Activates feature or option shown on the display above the keys
6 Call key
• Used to obtain dial tone
• Also used as a Hold key
7 Dial Pad
Using Your 6757i CT RP Cordless Handset
5
11
12
13
15
14
16
AastraLink RP Phone User Guide 79
Page 80

Function # Function Description (Continued)
8Mute Key
• When used, prevents the caller from hearing you
9 Headset Jack
10 Status Light
11 Rel ease key
• To end calls and go on hook
• Exits Menu and the various lists
12 Menu Key
• Access key to the different Options
• Scrolls down when in the various lists
• Used as Backspace during editing
13 Response Point Key
• Access key to the Microsoft Response Point voice-activated
dialing options.
14 Charging Jack
15 Charging Contacts
16 Microphone
When in an idle state, pressing the Menu key  of the handset presents the following
list of options. Once in the menu list the user can scroll up Ïand down  using the
scrolling keys to see each option.
Item # Menu List
1 Intercom
2 Language
3 Ring tone
4 Custom name
5 Timer Off
6 Vibrate Off
7 Hset pairing
8 Key lock Off
9 Backlight Off
10 Silent Alert
Using Your 6757i CT RP Cordless Handset
Note: The display returns to idle if no action or activity is initiated within 20 seconds.
Accessing Options
Pressing the  key accesses the options list menu. This action results in displaying a
Menu list header with brief list navigation instructions.
Navigation of the menu is performed using the down arrow (Â key) or the up arrow
Menu
use´½to view
( Ï key). Shortcut to the menu item can also be perform ed by pressing the
corresponding menu item number. Two digits numbered items can be short-cutted by
pressing the digits within a one second time span.
Pressing the y key quits the Menu and return to the idle mode or call mode.
Intercom
The 6757i CT RP supports intercom function between a 6757i CT RP base and any of
its paired cordless handsets, and vice versa.
80 AastraLink RP Phone User Guide
Page 81

In English?
´½
= Scroll
Cancel Select
Ring Tone 1
´½
= Scroll
Cancel Select
Language
Ring Tone
Pressing Select while viewing this option brings up a list of base and paired handsets
available for intercom. To select a handset or base to intercom, navigate to the desired
handset or the base using the  key or the Ï key. Then press the
Call soft key.
Shortcut to any handset or base in the list is permitted by pressing the corresponding
numeric key digit; the order of the list is numbered from zero (0) for the base (0) and
four (4) for the 4th handset in the list.
Note: Your System Administrator can configure outgoing Intercom calls using the
Icom button.
For more information about the intercom feature, see Intercom on page 80.
The prompt on 6757i CT RP handset can be personalized to English, French, or
Spanish language. A checkmark beside the language indicate the currently selected
language prompt.
For more information about changing language on the handset, see Foreign Language
Support on page 76.
There are several selectable Ring tones available on the 6757i CT RP handset. A
checkmark beside the ring tone number indicates the currently selected ring tone.
For more information about changing ring tones on the handset, see Using Your 6757i
CT RP Cordless Handset on page 79.
Using Your 6757i CT RP Cordless Handset
Custom name
Custom name allows the user to personalize the name/label for the cordless handset.
In a multi-handset environment, this is an ideal option to personalize each handset to
its user or extension number.
To customize the name of your cordless handset, do the following.
1. Press Â.
2. Navigate to
3. Press the
4. Press the
5. Using the keypad, type out a new label or use the scroll keys Ï and  to move
6. The
7. Press the
8. Press the Goodbye y key to return to the main idle screen.
Custom Name or press 4.
Change softkey.
Edit softkey. If a custom name already exists, the Delete softkey is
presented.
the cursor to the desired display position or to erase text.
ChCase softkey is available to toggle between upper and lower case text entry.
Save softkey to save the name.
Note: In editing mode, the Volume Bar can be used in place of the Ï and  keys
to control the screen cursor. Pressing the Lower end volume bar for Backspace/
Erase; and pressing the Higher end volume bar to add a Space.
AastraLink RP Phone User Guide 81
Page 82

Call timer
Vibrate
When the call timer is enabled, the timer starts from the first call and continues until
all calls have been released.
Note: The call timer is not usable for call accounting since the timer continues to
increment even when the call is on hold.
The Vibrate option allows the handset to signal an incoming call by vibrating as well
as ringing. By default, this option is always Off.
• To enable this feature, press the
On
" and "-confirmed-" then quickly returns to the previous menu display.
• Once the V ibrate is On,
of the display.
• Pressing the y key returns you to the main idle display screen.
Handset Pairing
All handsets must be paired to a 6757i CT RP base before use. Please refer to the
section entitled Pairing and Unpairing Cordless Handsets on page 94.
Key Lock On or Off
The key lock option enables the user to lock the keypad keys. This prevents
accidental activation of the phone.
To lock the keys from the key lock option page:
• Press
Change softkey to turn Key lock ON or OFF. The screen displays Key lock On
or
Key lock Off -confirmed-.
Pressing the y key returns you to the main idle display screen.
Note: You can activate the Key Lock Off or On by pressing only the  and then
the* key from the idle screen.
Backlight
Change softkey and the display indicates "Vibrate
p icon is shown beside the ringer icon on the top right line
The Backlight option allows the user to turn on or off the backlit light on the LCD
display.
• Press
Using Your 6757i CT RP Cordless Handset
Once the Backlight option is chosen, the screen displays
Off -confirmed-
Change softkey to turn Backlight ON or OFF.
Backlight On or Backlight
.
Silent Alert
The Silent Alert option activates an internal hardware vibrator instead of a regular
ringer during an incoming call. By defau lt, th e Sil ent Aler t is auto mati cally set to Off.
To activate Silent Alert from the option display:
• Press
Change softkey to turn alert On or Off. The display shows
√confirmed-.
• Once the Alert is On,
Note: 1.You can activate or deactivate the Silent alert by pressing only the  key and
then the # key.
Note: 2.The Ringer Icon does not appear on the display when the Silent alert is On.
82 AastraLink RP Phone User Guide
p icon is shown on the top line of the display.
Page 83

Finding the IP Address using the Handset
To find the IP address of the phone Base Unit using the handset, do the following.
1. Press the Âkey to enter the Options List when the phone is not in use.
2. Use the scroll keys  and Ï to scroll to the Network option.
3. Press
r to select the Network option.
4. Use the scroll keys  and Ï to scroll through the network status until the IP
address of the phone appears in the display.
5. Press y when done.
Feature Keys on the Handset
You can program up to 15 feature keys on the 6757i CT RP handset with specific
functions using the Aastra Web UI. The following table identifies the functions
available for all 15 handset keys and the default functions for each key.
Key
Function Description Default Key
Line 1 Line 1 key - Selects line one Handset Key 1
Line 2 Line 2 key - Selects line two Handset Key 2
Line 3 Line 3 key - Selects line three Handset Key 3
Line 4 Line 4 key - Selects line four Handset Key 4
Icom Intercom key – Enter handset list to select
handset to call
Dir Directory key – Activate directory feature Handset Key 6
Callers Callers key – Activate callers feature Handset Key 7
Xfer Transfer key - Activate transfer feature Handset Key 8
Conf Conference key - Activate conference feature Handset Key 9
Public Public key – Toggle between public & private call
mode
Flash G enerates a flash event (when a call is connected
and active).
Redial Redial key - dials the last number called from the
None No function is selected – this key is empty, no
Line 5 Line 5 key (if available) - Selects line five. none
Line 6 Line 6 key (if available) - Selects line six. none
Line 7 Line 7 key (if available) - Selects line seven. none
Line 8 Line 8 key (if available) - Selects line eight none
Line 9 Line 9 key (if available) - Selects line nine none
handset.
label.
Using Your 6757i CT RP Cordless Handset
Handset Key 5
Handset Key 10
none
Handset Key 11
Handset Keys
12, 13, 14, & 15
Feature Key Programming Guidelines
The following are guidelines to use when programming the feature keys on the
handset:
• All handsets paired with the same Base Station have the same programmed
functions since the web interface applies the functions to all paired handsets.
AastraLink RP Phone User Guide 83
Page 84

List empty
Use web page to
configure
• A newly registered handset or handset that was out-of-range during the
programming needs to perform an "off-hook and on-hook" sequence in order for
the newly programmed function to be broadcast. Simply press the v key from
the idle state to go off-hook. Then, press the y
• Duplicate functions can exist in the feature key as there is no filtering or duplicate
checking done on the handset or the base.
• If no line keys are programmed for the feature key, the handset is restricted to
intercom calls only.
• If all 12 programmable functions have been programmed to "None", the user is
presented with a
• For security reasons, the user has 180 seconds (3 minutes) to complete the
programming. Otherwise, the phone displays the following error:
** Error **: Session expired, Please reload page.
• For security reasons, the user must submit the page from the same browser that
was used to load the page. If the user tries to submit the page from any other IP
address, the following error displays:
** Error ** Session invalid. Different Client IP Addresses. — Please reload
page
Programming Feature Keys
You can program up to 15 feature keys on the 6757i CT RP phone using the Aastra
Web UI.
key to go back on-hook.
List empty message when the feature key is pressed.
Using Your 6757i CT RP Cordless Handset
84 AastraLink RP Phone User Guide
Page 85

T o program the feature keys on your 6757i CT RP Base Station and all paired
handsets, do the following.
1. From within the Assistant program select Settings > Phone Settings, and logon to
the Aastra Web UI.
2. Click Handset Keys. The Cordless Handset Feature Key Configuration w indo w
opens.
Using Your 6757i CT RP Cordless Handset
3. Select the handset key you want to program.
4. Select the function for that handset key from the Type field.
5. Click to save the function you selected to the handset key.
The key programming information is sent to the 6757i CT RP Base Station and to
all the cordless handsets associated with that Base Station. Any key programmed to
"None" does not appear in the handset’s list.
Idle Mode
During idle mode (i.e. no incoming call, no active call, or no call on hold), the handset
name, date & time, status messages, and status icons are present on the display.
Angela
May 17 10:19am
AastraLink RP Phone User Guide 85
Note: The phone name label (Angela in the diagram above) can be edited in the
Options list.
Page 86

Handset Icons and Status Messages
Screen Icons
Battery Charge State
b
m
h
p
¬
l
¨
4 bars for battery full and the battery icon flashes when charging
Reception (Radio Link)
On - Within Range: Ready for use
OFF - Out of range/no radio link
Feature Key Activation
Indicates the phone is off hook or a call is in progress
Silent Alerter
Silent alerter activated
Ringer Volume
This icon is available only when the phone is in idle mode to indicate the
ringer volume level. The box goes from empty to fully black to represent
from off to low to high volume.
Receiver Volume
This icon is available only when the phone goes off-hook to indicate the
receiver audio volume. The box goes from empty to fully black to
represent from low to high volume; there are 10 volume levels total.
Directory List
This icon located just above the softkey allows access to the Directory List
feature.
Callers List
This icon located just above the softkey allows access to the Callers List
feature.
Status Messages
Display Message Description
Microphone mute Indicates when the Mute button has been Activated
Out of range Appears briefly when pressing a key if out of range of the
base station
Handset Keys
Using Your 6757i CT RP Cordless Handset
Softkeys ( { or })
Your 6757i CT RP cordless handset has 2 softkeys directly under the LCD display.
The softkey menus change depending on the phone’s state, displaying relevant
softkeys only. These softkeys are pre-programmed for the call handling and extension
management features.
Talk /Hold v Key
The Talk/Hold key v is a multi-purpose key with the following uses:
• To in itiate a call by seizing the line or through pre-dial.
• To an swer a call during ringing.
• To pl ace a call on hold during an active call.
Pressing the hold key v
hold, and if there are no other active calls, the LED flashes at the hold rate and the
display presents the
played in the form of a short ring burst (flash ring).
while on a call places the call on hold. While a call is on
Call is on hold prompt. In addition, held call reminder tone is
86 AastraLink RP Phone User Guide
Page 87

This handset is equipped with an auto-hold feature. While on an active call, pressing
any other line key results in the current line being placed on hold and the new line
being seized.
Release Key ( y)
The release key is a multi-purpose key with the following uses:
• To end a call.
Note: If handset is placed in the charger cradle, it also ends the call.
• To silen t the ring ing during an incoming call.
• To exit feature such as Menu (options), Directory, Callers, Redial, Predial.
Note: Pressing this key in a feature will not terminate an active call.
Mute Key ( æ )
Use the mute key when you want to be able to hear a caller but have them not hear
you. Press the
The
Microphone mute prompt is displayed when mute is activated.
æ
Response Point Key ( )
The Response point key connects you to the voice-activated dialing features of the
AastraLink RP Solution. Use the 6757i CT RP Handset Response Point key just as
you would the 6757i CT RP Base Unit Response Point key.
key to mute the handset. Press the æ key again to disengage mute.
Using Your 6757i CT RP Cordless Handset
• For a list of voice-dialing options, press , wait for the chime, and say "What
can I say?"
Feature Key List ( Ï )
The 6757i CT RP cordless han dset supports a programmable feature key list for easy
access to common features. The available features include line keys, intercom,
directory, callers log, transfer, conference, and public/private call mode. For more
information about the feature keys, see Feature Keys on the Handset on page 83.
Menu List ( Â )
The Menu list allows access to intercom calling, and personalization of handset
including language, ring tone, vibrate, backlight and silent alert. Please refer to the
section Using Your 6757i CT RP Cordless Handset on page 79 on.
Multifunction Handset LED Indicator
The multifunction Handset LED provides the following user feedback:
• Flash: Message Waiting Indicator – Slow
• Flash: Alerting – Rapid
• Flash: Mute – intermittent
• Flash: Hold – Intermediate
• Solid: On an active call
AastraLink RP Phone User Guide 87
Page 88

Battery Charging
The handset is powered by a nickel metal hybrid battery pack, which must be char ged
using the provided handset cradle.
To install and charge the battery, do the following.
1. Slide open the cover of the battery compartment.
2. Place the battery pack in the compartment with the connector wires pointing
towards the bottom of the handset.
3. Connect the battery terminal wire to the charging pins located in the compartment
4. Slide the cover of the battery compartment back onto the handset
5. Place the handset, face up, in the charging cradle. The handset should easily slide
into the charging cradle. If it does not, check the battery compartment cover to
ensure it is in the proper position.
To confirm that the battery is charging, check the battery icon symbol on the
handset display to see if the lines inside the icon are flashing left to right.
Note: The battery must be charged for a minimum of six hours prior to initial usage of
the phone.
Handset Battery Indicator & Status
The display provides "at a glance" information on the handset battery.
dcba The bars indicate the battery charge level — 4 for full, needs
f The bars flashes when the battery is being recharged on the
Note: The handset is designed to recharge the batteries automatically when required
and the handset is placed on the charger stand. The battery icon will not flash and the
handset does not charge every time it is placed on the stand. If a defective battery is
replaced, then the battery Icon is not identified until the new battery is charged for at
least 2 minutes.
recharging when only 1 bar appear
charger stand.
Volume Control
Using Your 6757i CT RP Cordless Handset
The volume key, located on the side of the handset, controls both the receiver and
ringer volume.
Note: The volume key can also be used to adjust the right/left cursor to add spaces or
to erase characters on the display when editing or creating names, key labels etc.
To adjust the receiver volume:
• While on a call, press the top of the key to increase the receiver volume and press
the bottom of the key to decrease the volu me. The receiver volume icon on display
indicates the current volume level. In absence of a PBX, the receiver volume
returns to the default setting after each call. However, the PBX directive can direct
the handset default to the volume.
To adjust the ringer volume:
• When the handset is not being used for a call, press the top of the key to increase
the ringer volume and press the bottom of the key to decrease the ringer volume.
The handset ringer sounds on each adjustment to reflect the new setting and the
ringer volume icon on display also show the current level chosen.
88 AastraLink RP Phone User Guide
Page 89

Directory List on the Cordless Handset
Entering Characters and Numbers
During alphanumeric entry , the volume control keys become edit keys. They are used
to provide backspace and forward-space capability to the unit. For Backspace/Erase,
press the Lower end of the volume bar. To add a space or to erase from left to right,
press the higher end of the volume bar.
Note: The Down scroll key (marked
used to provide backspace and forward space respectively.
General Record Editing
To accommodate adding and editing, use the available characters as labelled on the
keypad. Pause key and special characters are also available:
 ) or the Up scroll key (marked Ï ) are al so
0 Key / Pause Key
To allow the user to enter pause characters, the pause key is the 0 digit key in
alphanumeric editing mode. Characters appear in the following order: : 0,
p.
1 Key
In the alphanumeric mode, the 1 digit key accesses several special characters.
Characters appear in the following order:
1@.:;=_,-`&()
As can be seen, these special characters accessible through the 1 key allow URI and
IP address data entry.
Note: To enter the dot/period in the IP address format, the star * key is used when in
numeric "123" editing mode. Alternatively, in text "abc" or "ABC" editing mode, use
the 1 key to access the "
.".
"123" —þ"abc"þ—"ABC" Softkey
You can use the left soft key to toggle from numeric "123" editing mode to lower case
text "abc" editing mode, to upper case text "ABC" editing mode as shown in the
following illustrations.
Number/Address
693_
123
Save
Number/Address
693_
abc
Save
Using Your 6757i CT RP Cordless Handset
Switch from Numeric to Lower Case Alphanumeric Mode
Number/Address
693seam_
abc
Save
AastraLink RP Phone User Guide 89
Number/Address
693seamG@_
ABC
Save
Page 90

Continued Editing in Lower Case Text mode Then Switch to Upper Case Text Mode
Number/Address
693seamG@_
ABC
Save
Cycle Edit Mode Back to Lower Case and Finish Address Entry
Adding to Handset Directory
The handset Directory can store up to 50 names and numbers, which are displayed in
alphabetical order. If no name is entered, the entries are sorted by number, at the
beginning of the Directory.
To add an item to the handset Directory, do the following.
1. Press the soft key from the idle mode as shown.
Angela
May 17 10:19am
2. Press the
Add soft key.
Number/Address
693seamG@_aastra
.com
abc
Save
1 item
Press first
letter or ´ ½
Add Delete
3. Enter the Number/Address information. Please refer to Entering Characters and
Numbers on page 89.
4. Press
Using Your 6757i CT RP Cordless Handset
Save to advance to the name entry screen.
Number/Address
123abcABC@aastra
.com_
abc
Save
Pressing "Save"
softkey moves to the
name editing mode
Enter name
_
ChCase
5. Enter a name for the Number/Address information. The name can have up to 15
characters, including spaces. Please refer to Entering Characters and Numbers on
page 89.
6. Press the
Save softkey. The display shows Item saved.
Save
90 AastraLink RP Phone User Guide
Page 91

Callers List on the Cordless Handset
The Callers List stores the last 50 calls received. Items are stored in chronological
order with new items being first in the list. Each call received is stored, no collapsing
of records, and can be deleted or saved to a directory. Oldest call records are
automatically removed from the list when the list is full and new items are received.
The side figure shows the header screen. On this screen, there is a title, the number of
Caller List
x items
x New
Use or New
Add Delete
Item x New
Name
Number
Time of call
Options Line
Dialing from Callers List
total items, the number of new items, instructions for viewing the items and two soft
keys —
Exit and Delete. The Exit key quits the list and the Delete key deletes the
entire Callers List.
If there are no new items, then the
they are marked as old and do not show up in the new item count or in the new item
scroll list.
Once in the list, items are displayed as shown at left. The screen shows the item
number, the name and number of the caller, and the time the call was received. Also
shown are two soft keys —
Options allow the user to save to the handset Directory or delete the record.
To dial the caller back using an entry in the Callers List, the Line soft key can be
pressed and the user is taken to the feature list to select a configured line for the call.
The user simply scrolls to the desired line and presses
on that line over the cordless link.
x New line is not displayed. Once items are viewed,
Options and Line.
Select. The call is then placed
Using Your 6757i CT RP Cordless Handset
Save Directory
´ ½
= Scroll
Cancel Select
Saving to Handset Directory
It is straightforward to save an item from the Callers List to the handset directory.
From the
press the
Options softkey of the Callers List, scroll to th e Save to Directory item and
Select softkey. Item saved display upon successful saving to the Directory.
Deleting Item from Callers List
From the Options softkey of the Callers List, scroll to Delete item and press the
Select softkey.
Delete
´ ½
= Scroll
Cancel Select
The user is prompted to confirm the delete action by pressing the
Delete again to
erase this item
Cancel Delete
Delete softkey.
AastraLink RP Phone User Guide 91
Page 92

Making Calls from the Cordless Handset
Pre-dialing a Number
Press the v key to obtain dial tone and use the Keypad to dial the number. You can
also make a call by pre-dialling a number . Pre-dialling lets you view a number before
you dial. If the number is correct, press the v key to dial the number. If the number
is incorrect, use the  key or press down on the volume key to erase digits from right
to left. Calls can also be made directly from the Directory.
Using a Headset
The 6757i CT RP cordless handset accepts headsets throug h the 2.5 mm audio jack
on the bottom of the phone. Contact your telephone equipment retailer or distributor
to purchase a compatible headset. Customers should read and observe all safety
recommendations contained in headset operating guides when using any headset.
Receiving Calls
When a call is ringing at your extension, you see the Inbound Call screen. Press the
v key to answer an incoming call, or lift the handset out of the charging cradle.
Call Privacy
In the 6757i CT RP multi-handset system, it is possible to connect several cordless
handsets together with each other or with the base as extensions to a call. This is just
like an analog system with extension phones going off hook to join a call in progress.
However, because this system is actually intended for use in an enterprise
environment, some method of call privacy is required.
All calls, base or handset, begin in the "private" mode. In this mode, no extensions
are allowed to join that handset or base call. There is a user interface provided to
toggle between the "private" and "public" modes.
"Public" Feature Key
A feature key allows the user in a multiple handset environment to press to toggle
between the "private" and "public" modes for a call. Pressing the
the feature list anytime during a call puts the call into the public call mode. When the
call is in public call mode, the triangle indicator lights in front of the
Using Your 6757i CT RP Cordless Handset
the feature list. This also causes that feature key to appear on an available soft key but
with a different label –
Private. The user can then press the Private soft key to toggle
the call back to private or he can navigate into the feature list and press the
feature key.
Either way, the triangle indicator clears and the call is back in private mode. The
figures of this section demonstrate the UI.
<13>
Corey
516-2681
00:00:00
Line 1
Private Call in Progress
<14>
Public
PgDown
Feature List View with the Public
Key Selected but not Invoked
Select
Public feature key in
Public label in
Public
92 AastraLink RP Phone User Guide
Page 93

In the figure below, the left screen depicts a call that is public. The user can press the
Private soft key at any time to make the call private – i.e. no extensions allowed to
join. In the right screen, the right pointing triangle indicates the current call is in
public mode. The user could also select this feature key to return the call to private.
Note: Any local caller on the call can convert the call. For instance, if one cordless
caller is on an external call, he can press the "Public" feature key to make the call
public. At that point up to three other handsets can join in on the call. If any of those
joining handsets presses the "Private" soft key, then the call is made private for all
connected handsets, and no other users can join the call unless the call is made public
again.
Ending Calls
To end a call, you first need to connect to the call, if not already connected, and press
the N key. You can also place the handset back on the charging cradle to end the
call.
Corey
516-2681
00:00:00
Private
Public Call in Progress
Line 1
Line 1
Line 2
Public
PgDown
Feature List View with the Public
Key Invoked but not Selected
Select
Using Your 6757i CT RP Cordless Handset
AastraLink RP Phone User Guide 93
Page 94

Pairing and Unpairing Cordless Handsets
Pairing Your Handset
All 6757i CT RP handsets mu st be paired to a Base Station. This is performed from
both the base and the cordless handset. Successful pairing adds the handset name to
the handset list on the base and synchronize the handset list from the base to the
newly paired handset. A total of 4 handsets can be paired to a single 6757i CT RP
base.
Note: When performing the handset pairing, it is recommended that the handset be
within 3 feet of the 6757i CT RP base.
In order to pair your handset to a base station, do the following.
1. On the 6757i CT RP base unit press and select Preferences using the
right arrow key.
2. Select Handset Pairing
Preferences
4. Live Dialpad
5. Set Audio
6. Handset Pairing
7. Time and Date
Select
Done
3. Select Pair
Pairing and Unpairing Cordless Handsets
Handset Pairing
Pair
Remove
Select
Change
Note: If there are already 4 handsets paired to the base, you will not be able to
select the Pair option.
Cancel
Done
4. On the 6757i CT RP cordless handset press Â.
94 AastraLink RP Phone User Guide
Page 95

5. Select Hset pairing
7 - Hset pairing
´ ½
= Scroll
Pair
Note: If the handset has already been pair ed, the softkey is labelled Remove instead
of
Pair.
Ensure the handset being paired is within close proximity to the base. It is
recommended that the handset be within 3 feet from the 6757i CT RP base.
Note: It is recommended that both steps 6 and 7 be executed at the same time.
6. On the 6757i CT RP base, select Done.
Handset Pairing
Attempting to pair . . .
Pairing and Unpairing Cordless Handsets
Cancel
Done
7. On the 6757i CT RP cordless handset, press the softkey for
Attempting to
pair...
Cancel
Pair.
AastraLink RP Phone User Guide 95
Page 96

Upon success or failure of pairing, one of the following displays on the handset and
base, respectively:
Pairing
successful
Successful Pairing Failed Pairing of Handset
Handset Pairing
Pairing failed
Try again
Pairing Failed Display Pairing Successful Display
Unpairing Your Handset
Cancel
Done
Pairing failed
Try again
Cancel Pair
Handset Pairing
Pairing successful
Done
Unpairing of the handset can be done from either the cordless handset or the base.
However, if the handset being removed is out of range from the base, the unpairing is
only performed local to the device where the removal process was initiated.
If the unpairing is only successful from the local device, the unpairing procedure
needs to be completed from the other device.
1. On the 6757i CT RP base unit press and select Preferences using the
Pairing and Unpairing Cordless Handsets
right arrow key.
2. Select Handset Pairing
Preferences
4. Live Dialpad
5. Set Audio
6. Handset Pairing
7. Time and Date
Select
Done
96 AastraLink RP Phone User Guide
Page 97

3. Select Remove.
Handset Pairing
Pair
Remove
Select
Change
Cancel
Done
4. Select Done. The following is displayed on the screen.
Remove Handset
Attempting to remove . . .
Pairing and Unpairing Cordless Handsets
Cancel
Done
Upon success or failure of unpairing, one of the following screen is displayed on
the base:
Remove Handset:
Pairing failed
Try again
Cancel
Done
Remove Handset
Removal successful
Done
Failed Handset Removal Successful Handset Removal
5. If required, on the 6757i CT RP cordless handset press Â.
AastraLink RP Phone User Guide 97
Page 98

6. Select Hset pairing
7 - Hset pairing
´ ½
= Scroll
Remove
Note: If the handset is not paired, the softkey is labelled as Pair instead of Remove.
7. Press the softkey for
Attempting to
remove...
Cancel
Remove.
Upon success or failure of unpairing, one of the following screen is displayed on
the handset:
Removal
successful
Removal failed
Try again
Cancel Remove
Successful Removal Failed Removal
Note: Unpairing of the handset returns it to factory default state. All data
including the functions in the Feature keys are removed.
Pairing and Unpairing Cordless Handsets
98 AastraLink RP Phone User Guide
Page 99

Defining an Emergency Dial Plan
Public telephone networks in countries around the world have a single emergency
telephone number (emergency services number) that allows a caller to contact local
emergency services for assistance when required. The emergency telephone number
may differ from country to country. It is typically a three-digit number so that it can
be easily remembered and dialed quickly . Some countries have a dif ferent emergency
number for each of the different emergency services.
You can specify the digits to dial on the IP phone to contact emergency services. Once
you specify the emergency number(s) on the phone, you can dial those numbers
directly on the dial pad and the phone automatically dials those emergency services.
Note: Contact your local phone service provider for available emergency numbers in
your area.
The following table describes the default emergency numbers on the IP phones.
Emergency
Number Description
911 A United States emergency number
999 A United Kingdom emergency number
112 An international emergency telephone number for GSM mobile
phone networks.
In all European Union countries it is also the emergency telephone
number for both mobile and fixed-line telephones.
1 10 A police and/or fire emergency number in Asia, Europe, Middle
East, and South America.
Defining an Emergency Dial Plan
You can set the emergency dial plan using the Aastra Web UI.
T o specify the numbers to use on your phone for dialing emergency services in your
area, do the following.
1. From within the Assistant program select Settings > Phone Settings, and logon to
the Aastra Web UI.
2. Click Phone Lock. The Phone Lock window opens.
3. In the Emergency Dial Plan field, enter the 3-digit number used in your local area
to contact emergency services. For multiple numbers, enter a “|” between each
emergency number. For example:
911|110
Default for this field is 911|999|112|110.
4. Click to save the emergency dial plan to your phone.
AastraLink RP Phone User Guide 99
Page 100

Troubleshooting
Speaeakerer
What if my phone is not listed on the LAN?
If your System Administrator doesn’t see the phone that you have connected to the
LAN and to a power source, there may be one or more of the following issues:
Contact your System Administrator for assistance.
• The device is not securely plugged into a power source (or the electrical outlet is
faulty).
• The device is not securely attached to the LAN port.
• The base unit has not detected the presence of the device yet.
Troubleshooting
Why is my handset not working?
Why is my speakerphone not working?
Why is my display blank?
Why can I only see 1 option when the installer or user guide says there are
more?
Why does the telephone wobble?
Check to ensure that the handset cord is fully connected to both the phone and
handset. See the Aastra Phone Model Installation Guide for detailed information.
If the speaker light goes out, the phone is set up to be used only with a handset. If the
light stays on steady and you hear dial tone, you can alternate between the
speakerphone and the handset by pressing .
Ensure that power is being provided to your phone. If your Network does not provide
Inline power over Ethernet, you can obtain an additional accessory, the a PoE inline
power injector, to provide power over Ethernet locally to your phone. See the
Aastra Phone Model Installation Guide for detailed information.
The telephone screen only shows 1option at a time. To see more, press the down
arrow button .
Make sure the cords are routed properly through the back of the phone. Check that the
leg stands have been properly snapped into place. Since the legs can be oriented in
two different ways and in two different positions to offer four different phone viewing
angles, check that both legs are oriented in the same direction and in the same
position on either side of the phone.
Why isn’t Assistant Working?
If you choose to use a third-party firewall instead of the default Windows Firewall,
Microsoft Response Point Assistant will not be able communicate with the base unit.
A firewall blocks requests or communication attempts from any unspecified
programs. T o avoid this problem, create a firewall exception in your firewall program
for Assistant. A firewall exception allows selected programs to connect with your
computer.
100 AastraLink RP Phone User Guide
 Loading...