

Page 1

Quick Reference:
AMC+ for Android
Aastra Deutschland GmbH
Zeughofstr. 1
10997 Berlin · Germany
Page 2
Google Market: Search for “AMC+” and install it from there.
Your Aastra Mobile Client plus (AMC+) enables you to perform your corporate communications efficiently.
The configuration for your AMC+ can be downloaded automatically when opening it for the first time.
1 Installation
Web: Alternatively your administrator should have supplied you with a link where you can download and
install the Aastra Mobile Client plus (AMC+). Follow this link for installation.
2 Service Overview
Among the functionalities provided are:
• Integrated usage of mobile networks via your corporate PBX. All calls you make and receive are
company calls.
• Access to PBX features (Conference, Consultation etc.) as well as corporate voice mail integration
• Voice over IP (VoIP) telephony via WLAN or alternatively 3G connections
• Saving mobile telephony costs with Mobile Least Cost Routing (MCLR)
• Unified Communication s with Corpor ate Directory Access
3 Configuration Download (AMC Configuration & Provisioning
Server)
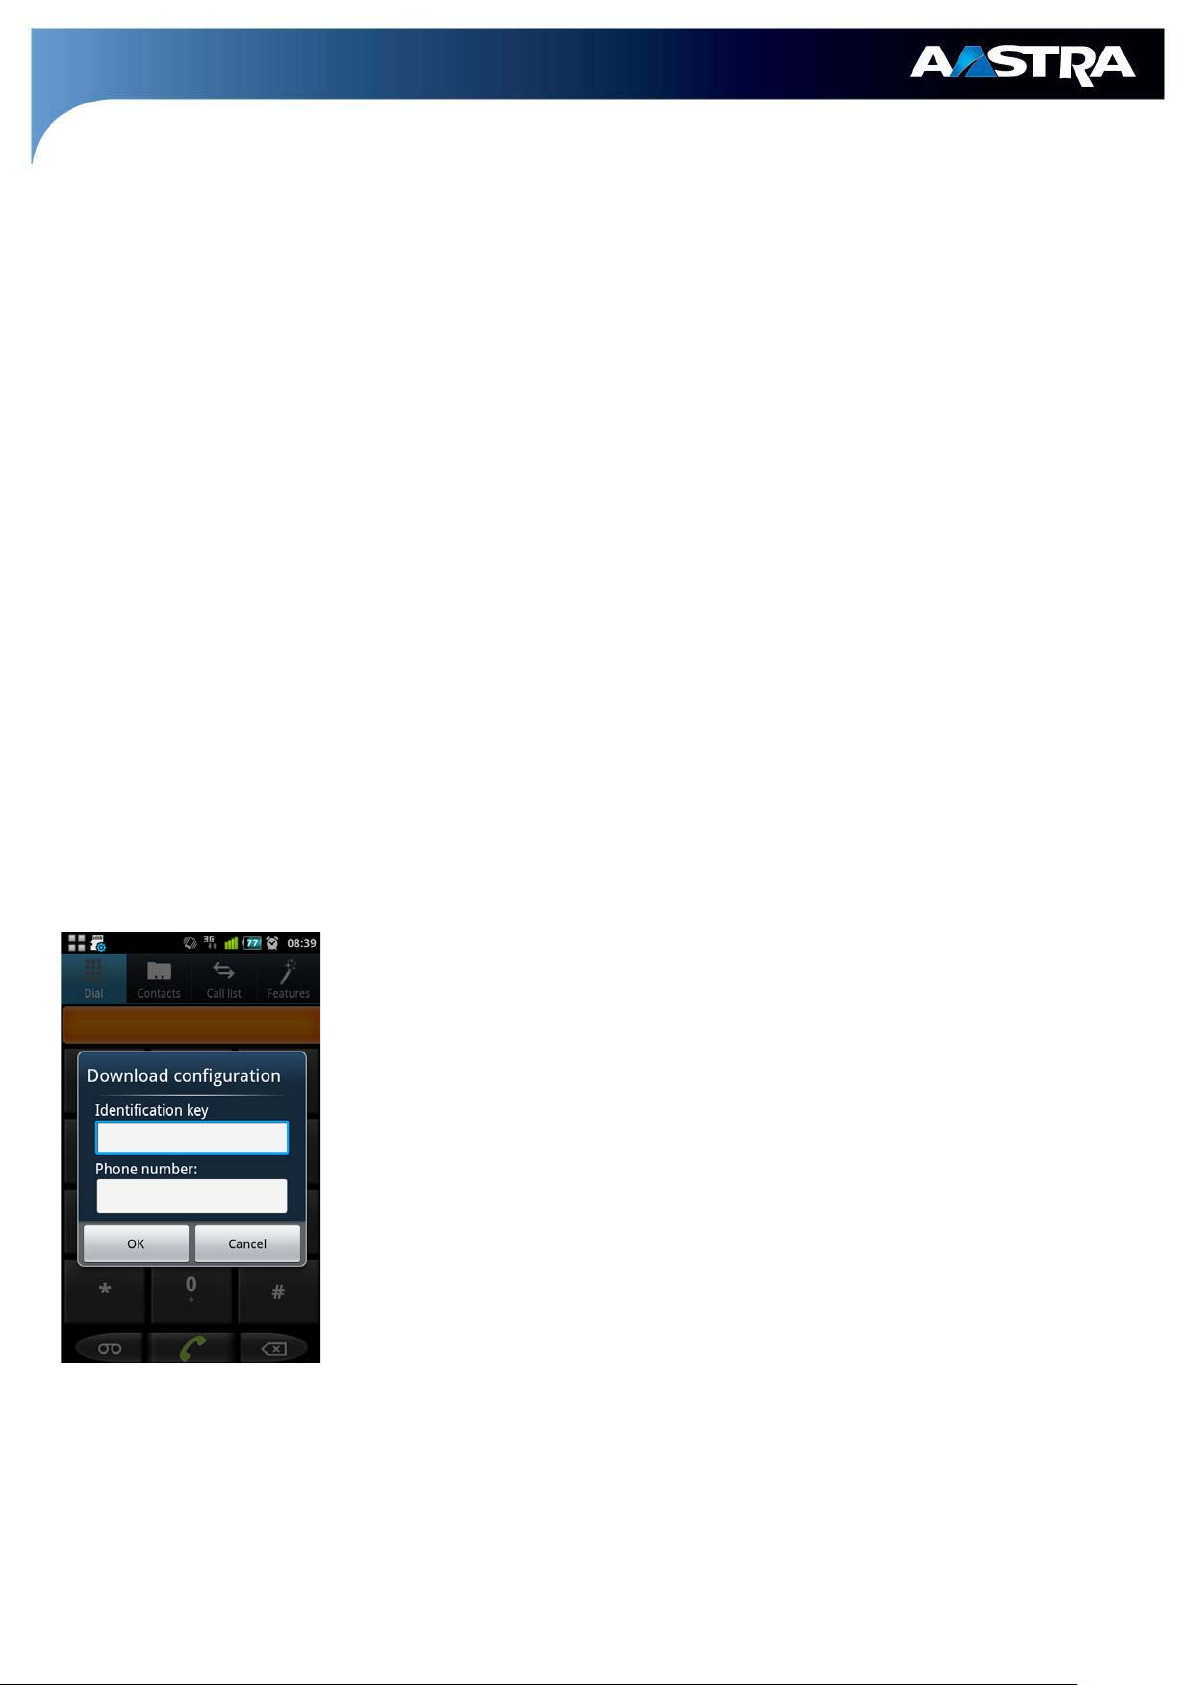
Before opening the AMC+:
1. Make sure that a data channel (WLAN or 3G) is available before opening
the AMC+.
When you open the application a pop-up window will apear (see screenshot to
the left):
2. Enter your identification key provided by your administrator.
3. Enter your mobile phone number into the automatic pop-up window. It is
not necessary to enter it with a leading plus sign, but please provide the
number including the country prefix.
4. Press “OK” to begin the configuration download to your AMC+.
5. The AMC+ will notify you once the configuration download has ended
and if further steps are necessary.
After this, the configuration data provided will be saved and applied by your AMC+.
This deployment method might not be used by your system administrator! Contact him if no pop-up
appears, or if there are errors during the process.
2
Page 3

The AMC+ enables you to make use of all available mobile networks, mobile data and WLAN networks.
possible
Preference). Set this to “Dual Identity” if calls via the native dialer should not automatically be handled by the
the caller ID of the calling party if a data channel is available and if
4 General Operation
4.1 Making Enterprise Calls in Different Networks
If no data channel is available, no features are offered in the in-call screen of the AMC+. It is not
to transmit data during an active call with a 2G connection. Please note that even during an active call, your
active connection can fall back to a 2G connection, or regain 3G connectivity again. So the feature
availability may vary during the call for connection reasons.
Please note that the general use of data channels depends on the operating system (Android) of the
mobile phone. Further configuration of the data channel usage policy inside the AMC+ is possible via
Menu>>Settings>>Network Settings. A green (VoIP) or a blue registration icon (signal-only) indicates a
successful system registration. You can choose to use the data channel minimally (restricting feature
usage), dynamically (whenever the AMC+ requires it), or only when not roaming (local network). Your
administrator should have selected the appropriate setting for you during the configuration deployment.
4.1.1 Call Handling by Aastra Mobile Client (“Always Aastra Mobile Client” and “Dual Identity”)
Which calls are handled by the AMC+ is defined by the “Call Preference” setting (Options>>Settings>>Call
AMC+. Use “Always Aast r a Mobile Clie nt” to dial all calls via the AMC+ application (including those dialed in
the native dialer).
4.1.2 Mobile Calls
Assuming that the AMC+ is not regi stered f or VoIP, each call you make will be routed via mobile networks.
However, the calls will still be routed through your enterprise PBX:
If you hear waiting tones and the call setup takes a very long time, the data channel connection to the
AMC Controller has failed. Th e call will s till be set up in a fallback mode where the destination number is
transmitted via DTMF. Should this happen on a regular basis or even always, please contact your
administrator to check your configuration.
With a 2G connection it is not possible to transmit data during an active call. Note that even during an
active call you can fall back to a 2G connection, or regain 3G connectivity. The feature display might hence
change during a call.
• Inbound calls: The AMC+ displays
the Mobile Terminal Call (MTC) number has been set by your administrator.
Note that the data connection to the AMC Controller must have been established
comes in! This connection is also required for the any additional information the PBX provides such
as caller name.
before
the call
3
Page 4

Alternatively, the caller ID of the calling party can be transmitted in the mobile network
To use other call types do the following:
signaling if your PBX is connected via a CLIP no screening trunk. Please ask your administrator if
the procedure is not clear to you.
• Handover: If an accessible WLAN access point (AP) of sufficient quality is in range, the AMC+
passes the call automatically to WLAN. This can also be done manually in the in-call screen (>>
Options). To differentiate between a VoIP call and a mobile call watch for the green mobile phone
icon on the right top that is always visible if a call is routed via mobile network.
4.1.3 VoIP Calls
• Outbound calls: VoIP calls will only be performed when the registration icon is displayed in green.
• Inbound calls: The AMC+ will come to the foreground when a VoIP call comes in. When this
happens, there is little difference for the user compared to an incoming mobile call.
• Handover: If signal strength decreases to a point where the voice quality suffers, the AMC+ will
perform a handover to mobile networks (this can also be done manually in the in-call screen).
Automatic handovers have to be enabled in your Aastra Mobile Client’s configuration. Ask your
administrator about this.
4.2 Call Types
1. Enter or select a number
2. Open the main menu
3. Select “Call type pre-selection”
4. Then choose the desired call type:
a. Direct: for by-passing the PBX .
b. Callback: Using “Callback” calls are reversed in direction
(outbound call is turned into an inbound one automatically without
user intervention). This feature reduces costs when making calls
from abroad (ask your administrator if more information is
required).
c. Call-through: The call will be routed via your corporate PBX and
enable feature use if the required data channel (WLAN or 3G) is
available.
d. Dynamic: Using this option calls will be routed as demanded by the
configuration of the AMC+ (your administrator has the possibility to
preconfigure a certain call type for certain numbers or pattern).
4
Page 5

You will be notitified automatically if a new version of the AMC+ is available in the the Google Market. A new
A factory reset of the AMC+ should only be done if requested to do so by your system administrator!
Quick reference for AMC+s running on different platforms can be found at:
5 Using Features
5.1 In-Call Features
In-call features such as “Transfer”, “Consultation” etc. become available automatically in the in-call screen
of the AMC+ if a WLAN or 3G data channel is available. Just open the in-call menu and touch the field with
the feature icon you’re looking for.
5.2 Out-Call Features
These are the most important PBX features available via the screen “Features”:
• Call Forwarding: configure to which number calls shall be forwarded in certain situations (Always,
On no Reply, Busy). Turn call forwarding On/Off with “Cancel Call Forwarding”.
• DnD: Disable the forwarding of inbound enterprise calls to your AMC+ by turning this option on.
• SIM Switch: Activate a SIM card for your User Account (must be known in the system, contact your
administrator if this is not the case).
• Voice mail: Call your corporate voice mail by selecting this option in the “Features” screen. Received
voice mail will also be displayed in the home screen of the AMC+.
6 Update of the AMC+
configuration download is not necessary.
7 Factory Reset and Configuration Re-Deployment
He has to re-deploy the configuration data for your AMC+.
It is possible to do a quick, but complete factory reset:
1. Open the “Settings” section in the main menu
2. Click on “Options” for a context-sensitive menu. It gives you the possibility to execute a complete a
factory reset.
3. After the reset, the initial configuration download pop-up will appear for a re-deployment of the
settings.
8 References
www.aastra.com
More in-depth/technical documentation for all AMC+s is available at:
www.aastra.com
5
 Loading...