

Page 1
Dialog 4425 IP Vision
IP Telephone for MD Evolution
User Guide
Cover Page Graphic
Place the graphic directly on the page, do not care about
putting it in the text flow. Select Graphics > Properties
and make the following settings:
• Width: 15,4 cm (Important!)
• Height: 11,2 cm (May be smaller)
• Top: 5,3 cm (Important!)
• Left: -0,3 cm (Important!)
This text should then be hidden.
Page 2

EN/LZTBS 1032 1951 R81A
© Aastra Telecom Sweden AB 2008. All rights reserved.
Page 3

Table of Contents
Installing Your Extension ...................................6
Your Extension’s Accessories ......................... 12
IP Declaration and Start-Up of Your Extension 19
Welcome ........................................................29
Important User Information ............................. 31
Introduction to Your Extension ........................ 32
Logging on and Logging off Your Extension ... 43
Operations for Incoming Calls ........................ 50
Operations for Outgoing Calls ........................ 56
Operations during a Call ................................. 68
Directory, Phone Book and Call List ................78
Call Forwarding Services ................................95
Voice Mail Services ....................................... 115
Group Services ............................................133
More Features of Your Extension ..................144
Physical Programming of Your Extension ...... 153
Programming Your Extension’s Services ...... 164
Attendant-Based Services ............................ 174
Services Reserved for Attendants ................. 181
QSIG-MD Private Network Services ............. 210
Index ............................................................215
Quick Reference Guide ................................221
Tab le of Co nt en ts
3Dialog 4425 IP Vision
Page 4

Page 5

Tab le of Co nt en ts
5Dialog 4425 IP Vision
Page 6
Installing Your Extension
Mains
Mains
Installing Your Extension
Your Dialog 4425 IP Vision is usually installed by your system
administrator.
However, this section provides you with all of the instructions for
installing your extension yourself and for maintaining it.
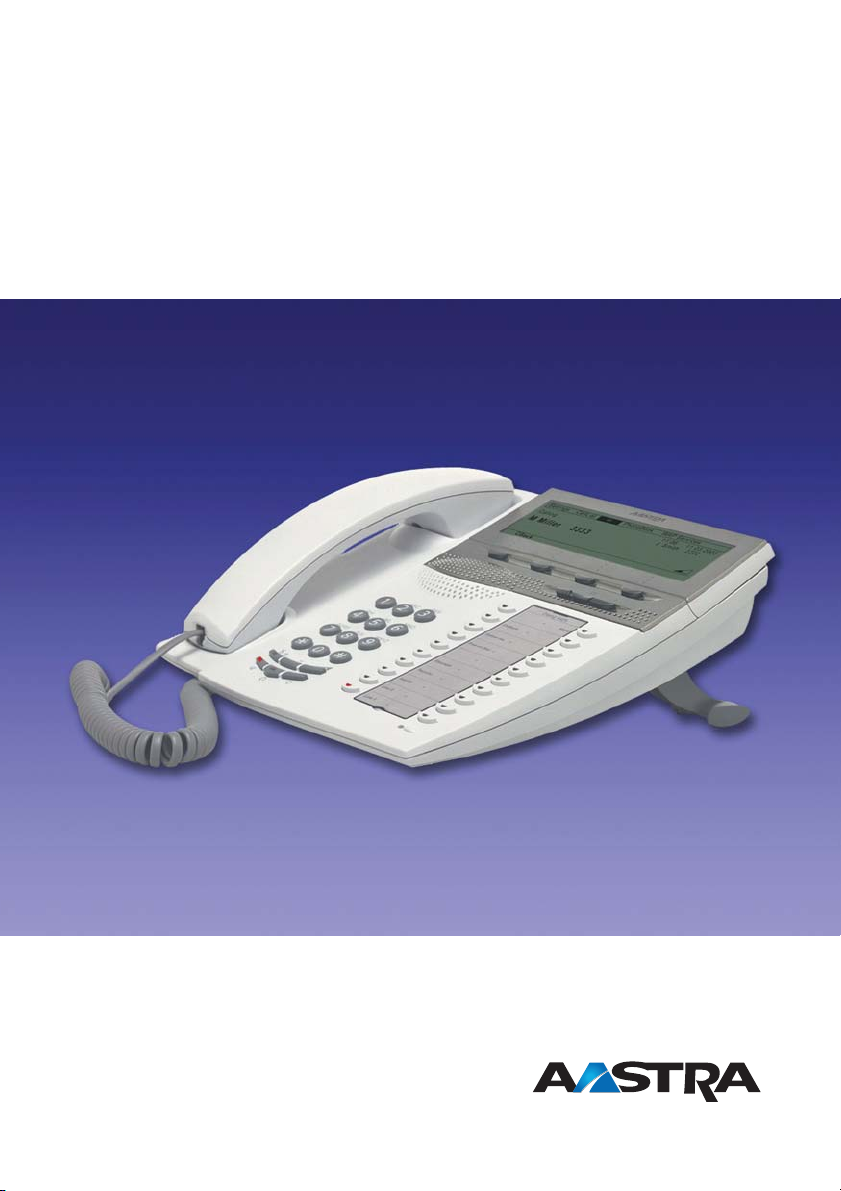
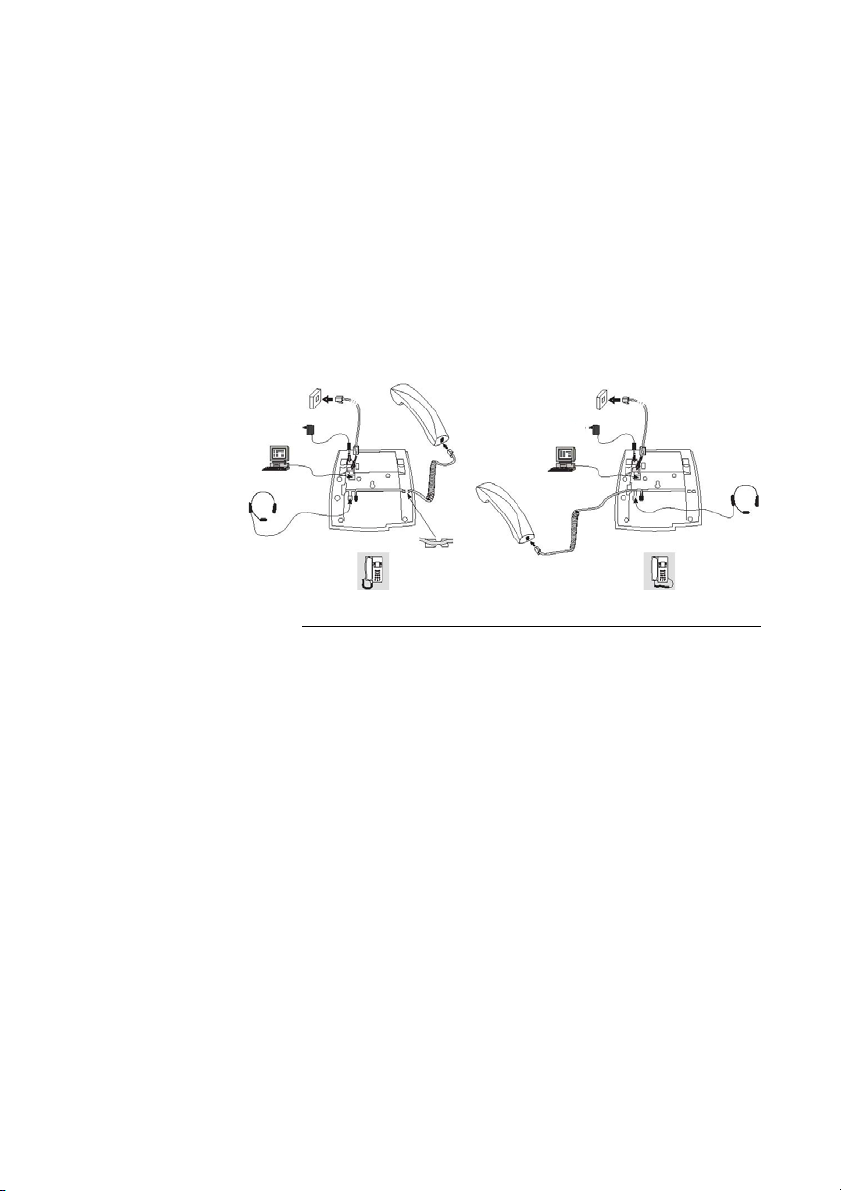
Installing Your Extension’s Telephone
Cords
Your extension is connected to your company’s local area network
(LAN) through a network cable that connects into the RJ45 female
jack labelled LAN, located on the underside of your extension.
It is usually powered with a 230-volt power cord and a 24-volt
adapter connected to the jack also located on the underside of
your extension.
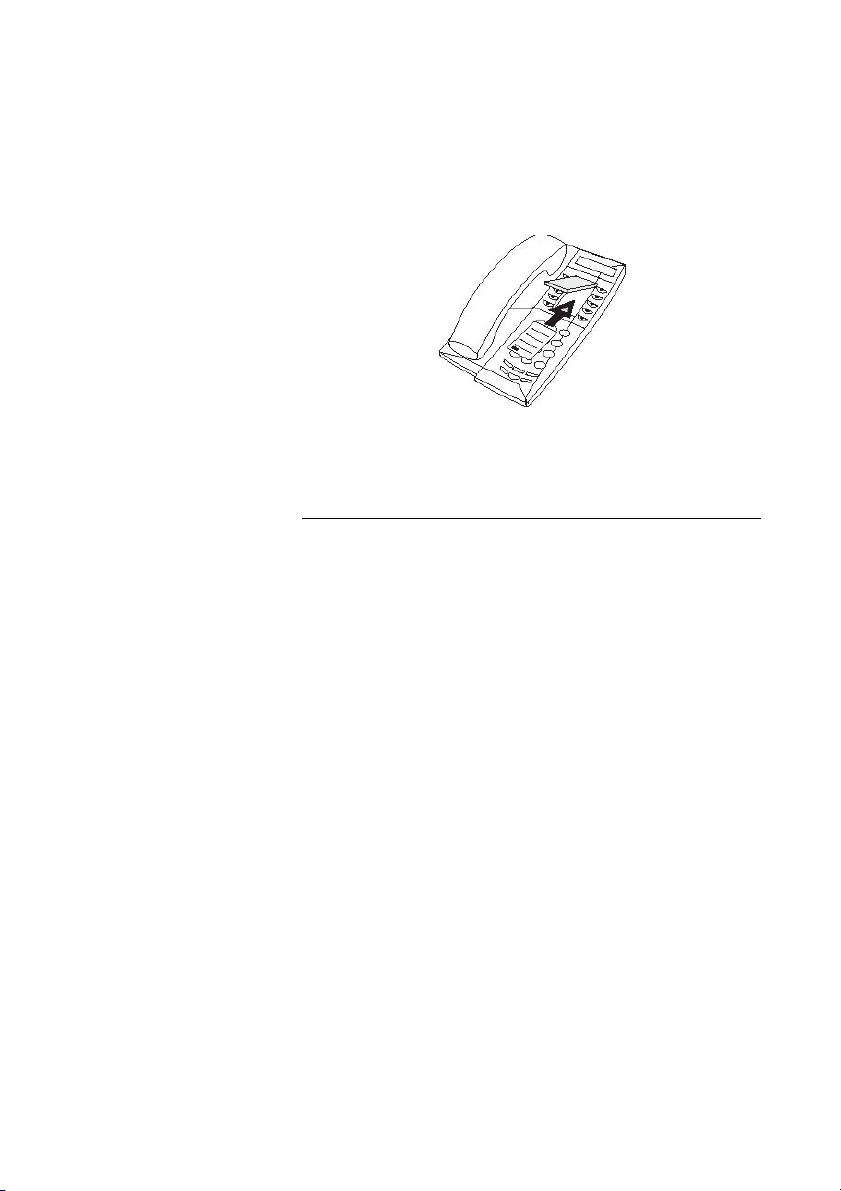
The handset cord is connected to the RJ12 female connector
labelled HANDSET located, once again, on the underside of your
extension. This may be installed so that it comes out of either the
left or right side of your extension. In the first case, the handset
cord should be inserted in the slot made for this purpose, as
illustrated in the diagrams below.
MD Evolution – Dialog 4425 IP Vision6
Page 7
Installing Your Extension
When it is necessary to disconnect a cord, it is recommended that
you use a screwdriver to depress the release tab on the RJ45 or
RJ12 male connector.
Notes:
In some cases, your extension may be directly powered
from your company’s LAN, if the LAN is equipped to do so
(in compliance with standard IEEE802.3af). In this case,
only the LAN connection is made, through a specific
network cable.
On the back of your extension, there is also an Ethernet jack
labelled “PC”, which – when applicable – enables you to
connect your PC to the LAN through your telephone. These
then share the same Ethernet port on the LAN.
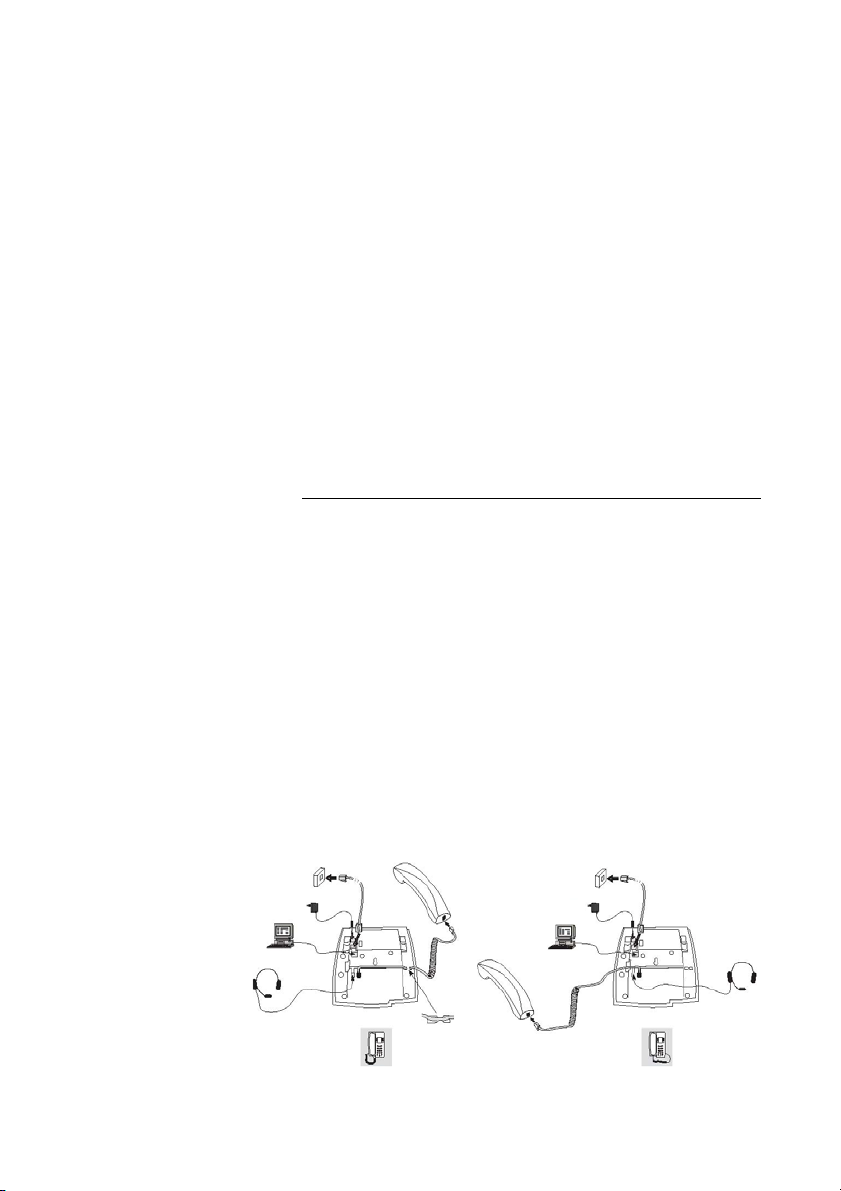
Installing Your Extension’s Support Feet,
and Adjusting the Angle
Your extension is equipped with two support feet that have two
possible installation angles, depending on the angle you prefer for
your extension.
To install the support feet, push them into the underside of your
extension to the desired angle, then push in the tab to hold their
position.
7MD Evolution – Dialog 4425 IP Vision
Page 8
Installing Your Extension
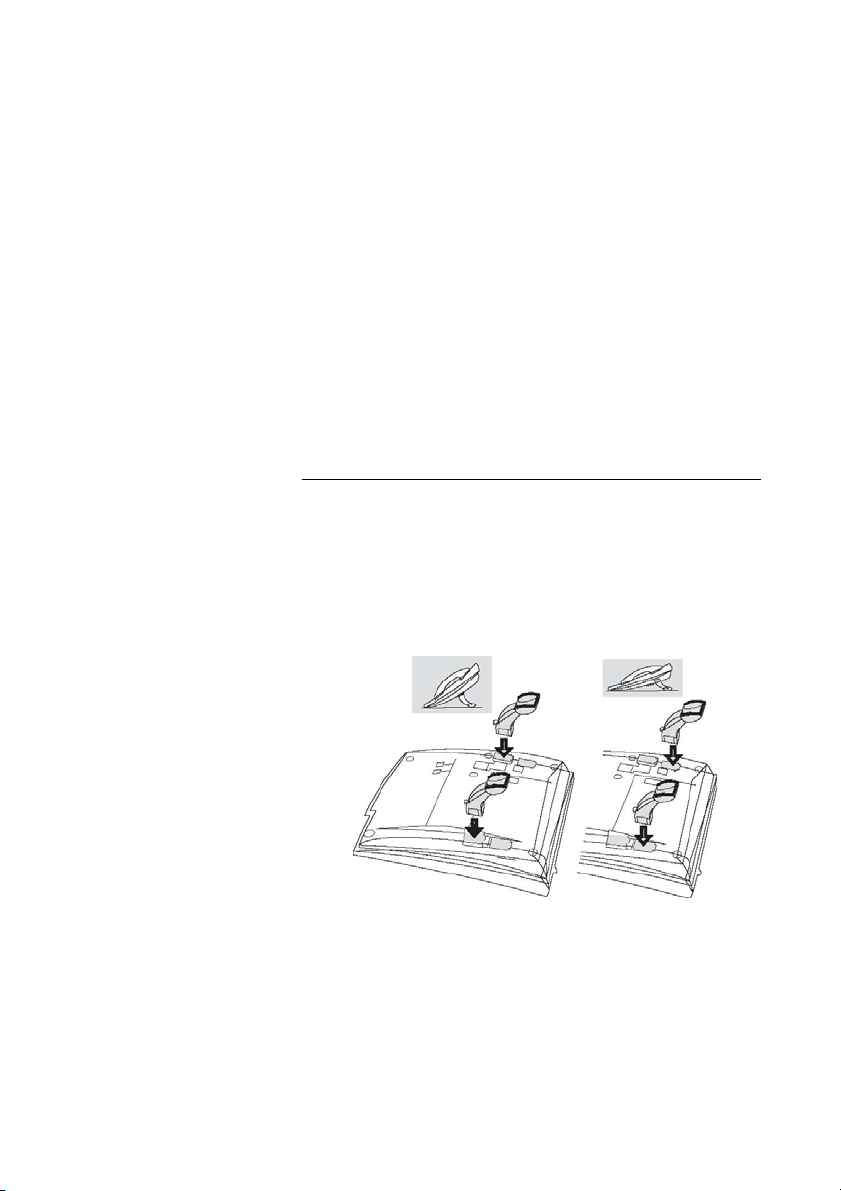
If you wish to remove the support feet, pull on the tab to release
them before removing the feet from the extension.
Adjusting the Screen Angle
Your extension’s screen is also adjustable, allowing you to choose
the best possible viewing angle.
To adjust the screen angle, simply push or pull the screen as
illustrated below.
Note: You may also adjust the contrast of your extension’s
screen. See the “Physical Programming of Your Extension”
section.
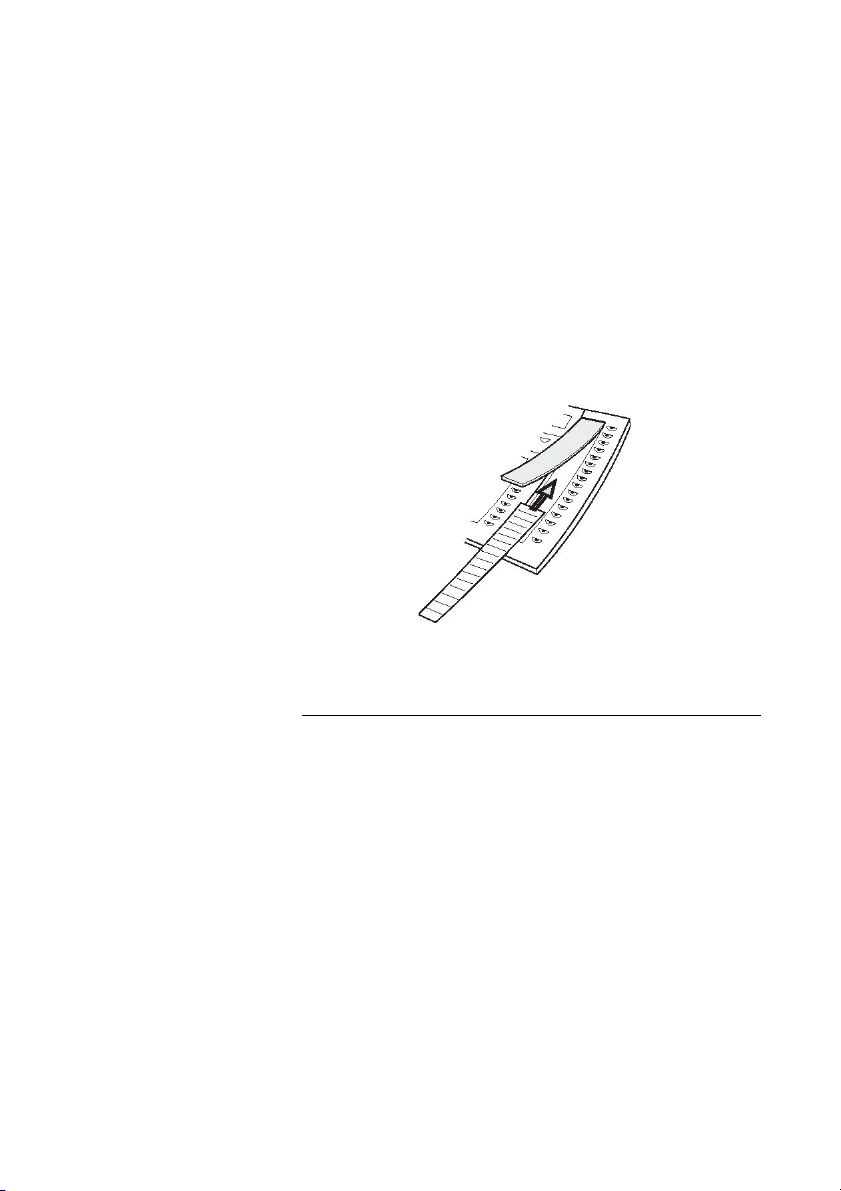
Installing Your Extension’s Label
Your extension also comes with a label that identifies each fixed
function key’s use. You may also indicate what functions have been
programmed on the various repertory keys integrated on your
extension (see the “Physical Programming of Your Extension”
section.)
This label is protected by a plastic cover.
MD Evolution – Dialog 4425 IP Vision8
Page 9
Installing Your Extension
To insert or remove the label, lift the protective cover as illustrated
below.
Note: If you need a new label, contact your system
administrator.
Miscellaneous Tips for Installing and
Maintaining Your Extension
Most often, your extension will be installed on your desk. Here are a
few additional tips:
• Never place your extension on fragile surfaces. To prevent it
from scratching your desk, place an anti-skid mat underneath
your extension.
• Never place your telephone near any source of extreme heat, for
example – next to a radiator.
• Make sure that the LAN cable is never crimped.
Use a soft, slightly damp (not wet) or anti-static cloth to clean your
extension. Never use any abrasive solvents, liquids or cloths to
clean your extension.
AASTRA cannot be held responsible for any damage to your telephone caused by any non-compliance with the above instructions.
9MD Evolution – Dialog 4425 IP Vision
Page 10
Installing Your Extension
100 mm
Installing Your Extension on a Wall
Your extension may also be installed on a wall support, without any
particular accessories.
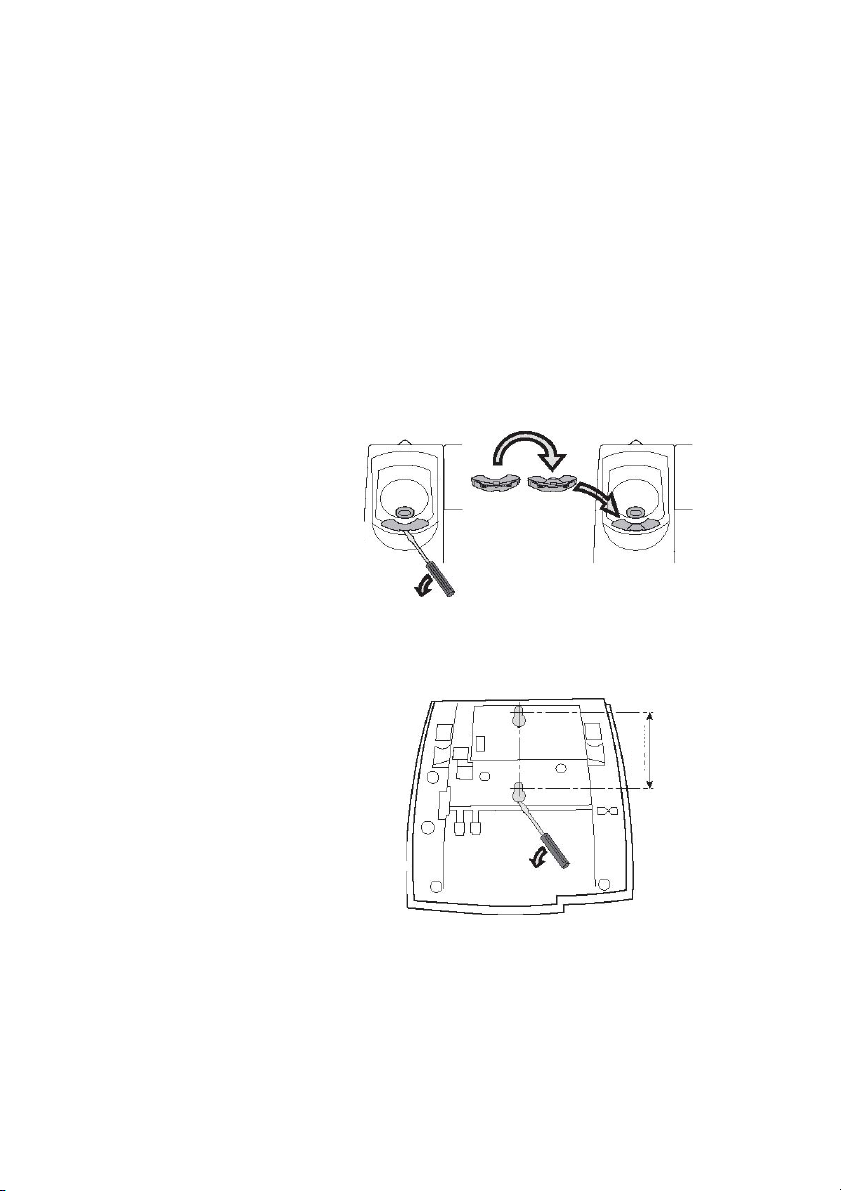
To do so, you must first rotate the hanging clip on the extension,
thus ensuring that your extension’s handset will be secure. It is
made of flexible plastic.
According to the instructions illustrated below:
• Begin by removing the hanging clip with a screwdriver.
• Flip the clip over.
• Re-insert it into your extension.
Using a screwdriver, remove the plastic covers from the two holes
located on the underside of your extension. These holes are precut, and indicate where the screw heads will be inserted to mount
the extension on the wall.
MD Evolution – Dialog 4425 IP Vision10
Page 11

Installing Your Extension
9,5 mm
9—10 mm
max 5,5 mm
Next, drill two holes that will hold your extension’s wall mounting
screws. These screws should be in compliance with the diagrams
below, with a vertical distance of 100 mm between them.
Now, simply insert the two wall mount screws into the holes on the
underside of your extension.
11MD Evolution – Dialog 4425 IP Vision
Page 12

Your Extension’s Accessories
Your Extension’s Accessories
You may also add the following optional accessories to your
extension:
• One or several DBY 419 01 satellite(s) or add-on key panel(s).
From one (1) to four (4) satellite(s) may be equipped, each one
offering 17 repertory keys that may be programmed with your
most often used internal or external telephone numbers or
telephone service codes.
• A DBY 420 01 add-on interface module.
As the case may dictate, this module may enable you to
connect to yours set, either an external ring device, or an
external device visually indicating your extension’s free, ringing,
or busy status.
This accessory is generally for alarm or security extensions.
• A headset.
This can allow you to process your calls using a headset, rather
than in handsfree or handset mode.
This is especially useful for ICD group agents who process
phone calls all day long.
This section provides you with all of the instructions necessary for
installing these accessories. It also includes the instructions for
using a headset.
For the programming and use of the add-on key panels’ or
satellites’ repertory keys, see the “Physical Programming of Your
Extension”, “Operations for Outgoing Calls” and “Group Services”
sections.
Note: You may add up to 4 satellites on your extension
without requiring any additional power supply units. All of
the satellites are powered from your extension, which is
powered either from the mains or the LAN.
MD Evolution – Dialog 4425 IP Vision12
Page 13
Your Extension’s Accessories
Installing Add-on Key Panels
You can install add-on key panels without any particular tools or
accessories.
These add-on key panels are connected using a rigid connector
designed to attach the first satellite to the underside of your
extension, and each subsequent satellite to the underside of the
previous one.
These modules are held in place by a tulip-shaped pin that is
inserted in the appropriate hole on the underside of your extension
or the previous satellite, as well as the plastic slots located along
the edge of your extension or satellite.
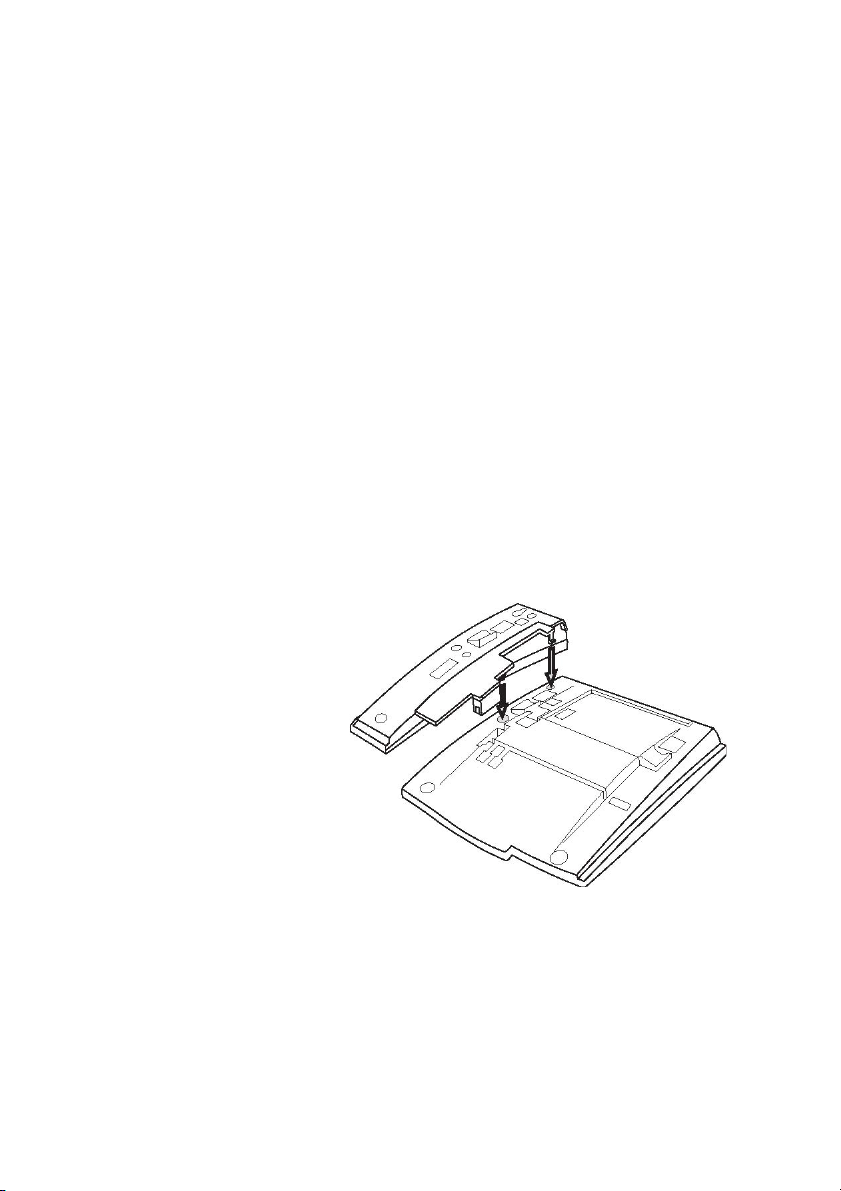
So, to install any satellite, simply follow the directions illustrated in
the following diagram:
• With your extension upside down, position the new satellite
along the edge of your extension or of a previous satellite.
• Press firmly on the bottom of the satellite in order to correctly
insert it onto your extension or of the previous satellite.
When removing a satellite, press firmly on the top of it in order to
disconnect the plastic connector and the tulip-shaped pin.
Just as with your extension, each satellite has a support foot that
can be installed and adjusted to one of two positions, according to
the angle you have set for your extension.
13MD Evolution – Dialog 4425 IP Vision
Page 14
Your Extension’s Accessories
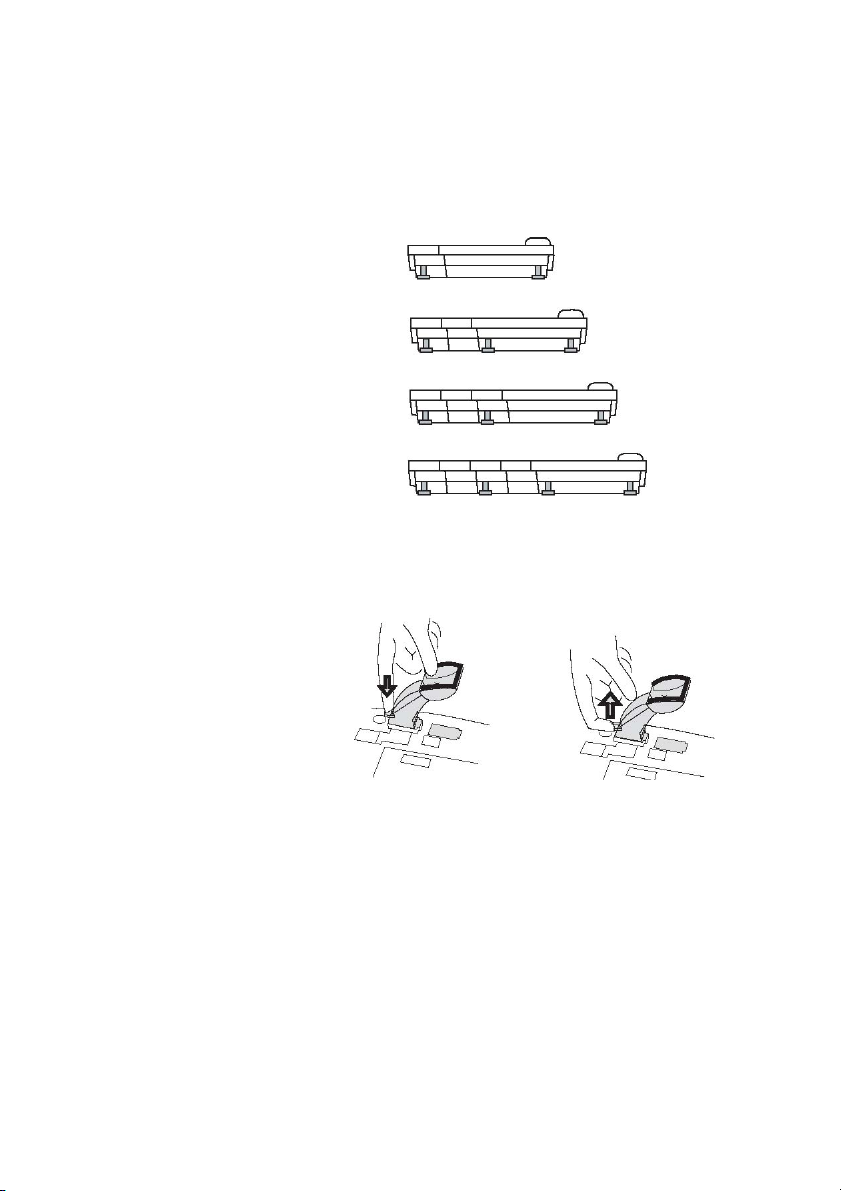
Depending on the number of satellites connected to your extension,
it is suggested that you position the support feet according to the
diagrams illustrated below.
As you did with your extension, to install the support feet, push
them into the underside of your extension to the desired angle,
then push in the tab to secure their position.
If you wish to remove the support feet, pull on the tab to release
them before removing the feet from the extension.
Note: The power to your extension should be shut off
when installing the satellites, in order for these to be taken
into account by the system following installation.
MD Evolution – Dialog 4425 IP Vision14
Page 15
Your Extension’s Accessories
Inserting the Labels for the Add-on Key
Panels
Each satellite is designed to have a label.
It is designed so you may indicate what functions have been
programmed on the various satellite repertory keys (see the
“Physical Programming of Your Extension” section.)
This label is protected by a plastic cover.
To insert or remove the label, lift the protective cover as illustrated
below.
Note: If you need a new label, contact your system
administrator.
Installation and Cables for an Add-on
Interface Module
An add-on interface module would be located on the underside of
your extension, in the rectangular opening on the underside of your
extension, designed for this purpose.
It is connected to your extension with a connector that features a
rigid extender attached with three torx-type screws that require an
adapted screwdriver.
The external ring device or the external visual device directly
connects to the module using an RJ12 connector.
15MD Evolution – Dialog 4425 IP Vision
Page 16
Your Extension’s Accessories
Mains
Mains
Connecting a Headset
A headset may be connected with a cord inserted into the RJ12
female connector labelled HEADSET located on the underside of
your extension.
This cord may be installed so that it comes out of either the left or
right side of your extension.
When it is necessary to disconnect a headset cord, it is recommended that you use a screwdriver to depress the release tab on
the RJ12 male connector.
Operation in Headset Mode
When a headset is connected to your extension, it is automatically
recognised by your extension.
You then have the option of operating your extension not only in
handset or handsfree mode, but now also in headset mode.
To activate the headset mode:
Í Press and hold the Headset key shown on the left for
5seconds.
You will hear an acceptance tone, and an headset icon is displayed
on your extension’s screen. All of your incoming and outgoing calls
may now be processed using your headset.
MD Evolution – Dialog 4425 IP Vision16
Page 17
Your Extension’s Accessories
Moreover, whenever you process a call, the LED associated with
the Headset key will be on.
Settings CallList PhoneBook WAP Services
CS GC 15:49 07 Nov 2005
SMITH Peter
405
Log off 2 Missed
To deactivate the headset mode:
 Press and hold the Handsfree key shown on the left for
5seconds.
You will hear an acceptance tone, and the headset icon will disappear from your extension’s screen. All of your calls will now be
processed either in Handset or Handsfree mode.
When the headset mode is activated, your calls are processed
similarly to calls in handsfree mode.
Therefore, to place an external call:
NO TO CALL z Directly dial the number for the internal or external party to
contact, before pressing the “Call” dynamic function key.
Or, to answer a new incoming call presented on your extension:
Lx ÖÔ Press the flashing line key on which the call is presented.
A new call presented on your idle extension will ring, just as it
normally would. You will be notified of a new call presented on your
extension with a single ring burst heard over your extension’s loudspeaker, just as it normally would when you have an ongoing call.
Or, to disconnect a call:
í Press the “Clear” or C key on your extension.
17MD Evolution – Dialog 4425 IP Vision
Page 18

Your Extension’s Accessories
Í
ì Notes:
You can adjust your headset listening volume in the same
way that you would for your extension’s loudspeaker or
handset volume. See the “Operations during a Call”
section.
 or u When you are working with a headset, you may switch to
handsfree or handset mode by pressing the Handsfree key
on your extension, or by lifting the handset. To return to
headset mode, you must press your extension’s Headset
key once again.
MD Evolution – Dialog 4425 IP Vision18
Page 19

IP Declaration and Start-Up of Your Extension
ÅÆÇ
IP Declaration and Start-Up of Your
Extension
The first time you use your Dialog 4425 IP Vision, once it has been
connected to the power supply and your company’s LAN, it is
necessary for it to be configured in relation to your company’s IT
network.
This is usually carried out by your system administrator only once,
at the time of installation. However, this section does provide you
with the instructions to do this yourself, or at least to know how to
access your extension’s IP environment characteristics that you
may need to provide to your system administrator if a problem
arises with your extension.
This section also provides you with information concerning the
process of starting up your extension.
Declaring Your Extension’s IP Network
Parameters
To manage your extension’s IP environment characteristics within
your company’s IT network, from your idle extension:
í*5 Begin by simultaneously pressing and holding all three of the
keys shown on the left for approximately one second.
This is required in order to modify your extension’s IP network
parameters. Otherwise, by default, this information may only be
consulted, not modified. An acceptance tone confirms your
request.
Press the left navigation key on your extension twice.
This will highlight the “Settings” tab on the first line of your
extension’s screen, and you access your extension’s physical
programming services.
19MD Evolution – Dialog 4425 IP Vision
Page 20
IP Declaration and Start-Up of Your Extension
Settings
Network
Settings
DHCP (No)
Settings
SW Server (xxx.xxx.xxx.xxx)
Settings
Proxy Server (No)
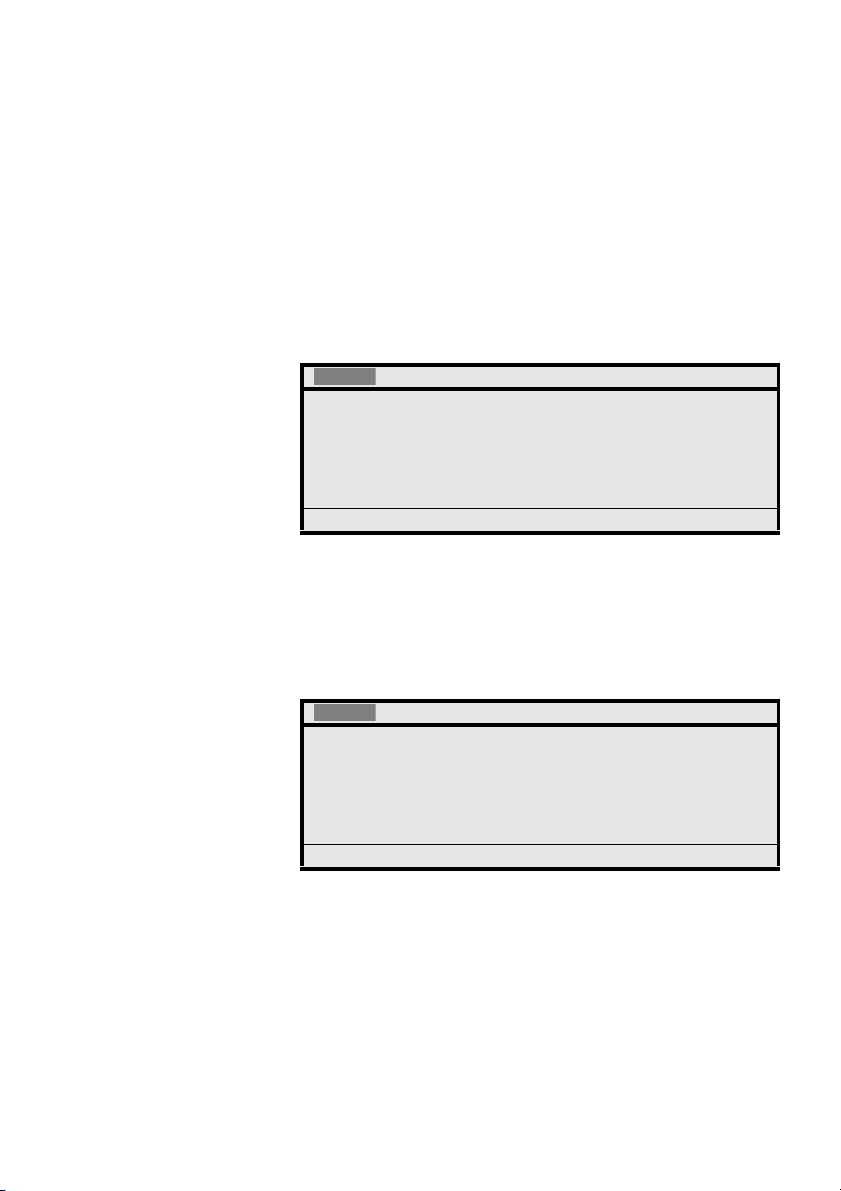
Û Press the dynamic function key shown on the left in order to
have the “Network” option framed.
CallList PhoneBook WAP Services
Display Contrast
Log Off Restriction
Option Unit
Hearing Level
Exit ÛÞ Select
Select Press the dynamic function key shown on the left.
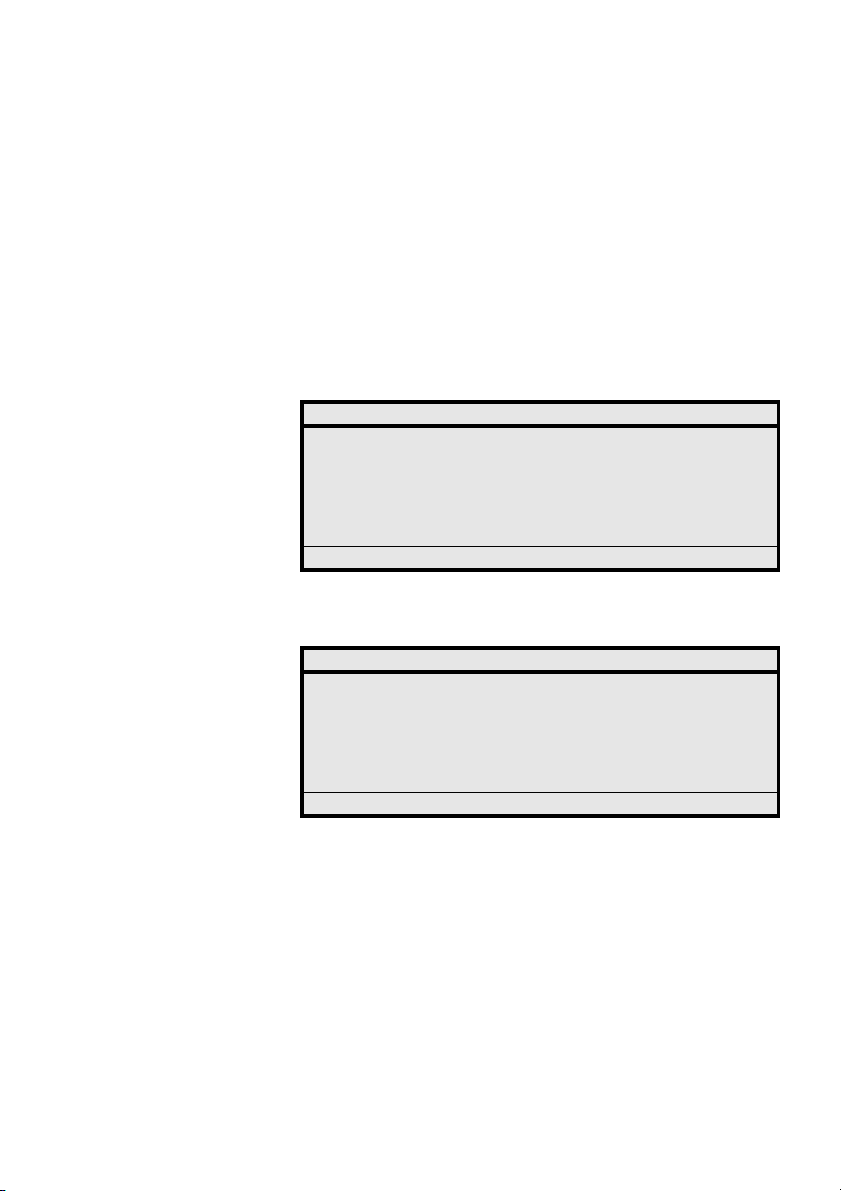
The following screens are displayed when you access the programming of your extension’s IP network parameters.
CallList PhoneBook WAP Services
Network
IP Address (xxx.xxx.xxx.xxx)
Subnet Mask (255.255.xxx.xxx)
Default Gateway (xxx.xxx.xxx.xxx)
Exit ÛÞ Select
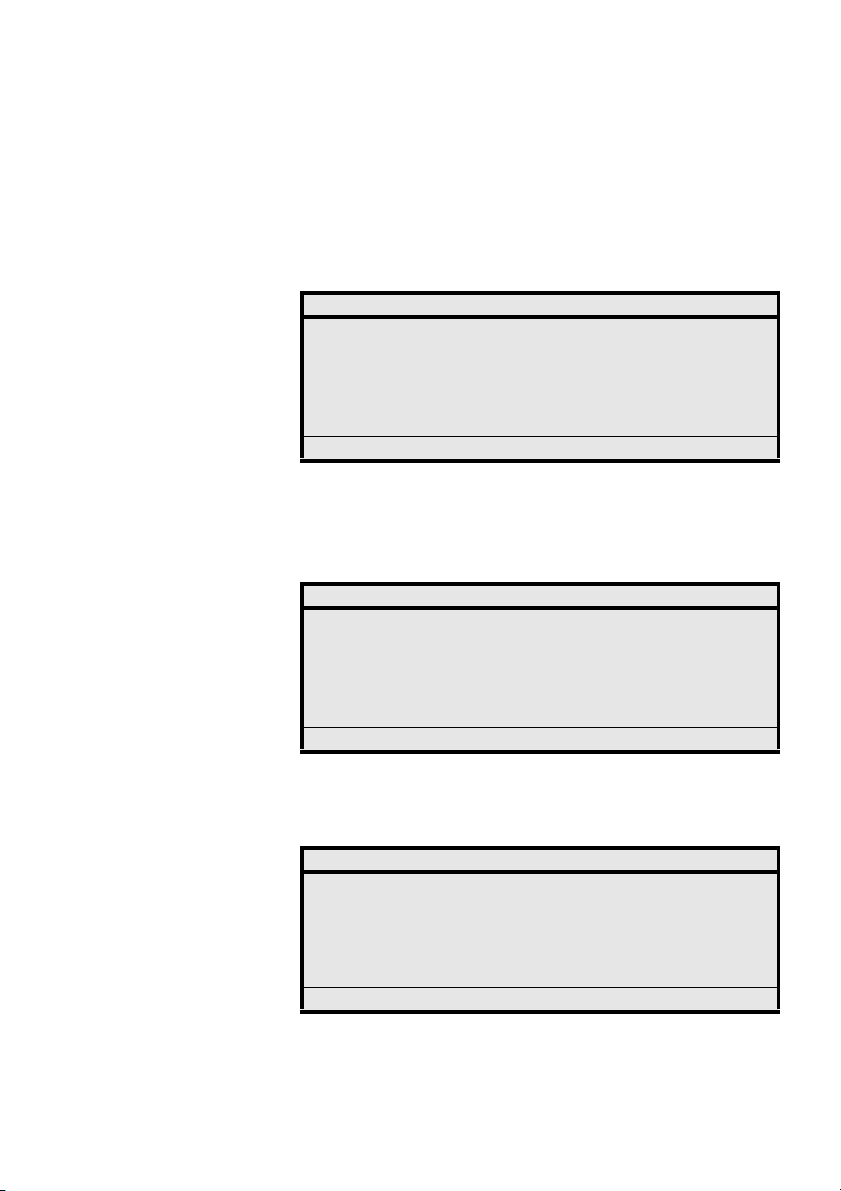
CallList PhoneBook WAP Services
Network
Proxy Server (No)
Gatekeeper Discovery (By default (No))
Gatekeeper (xxx.xxx.xxx.xxx)
Exit ÛÞ Select
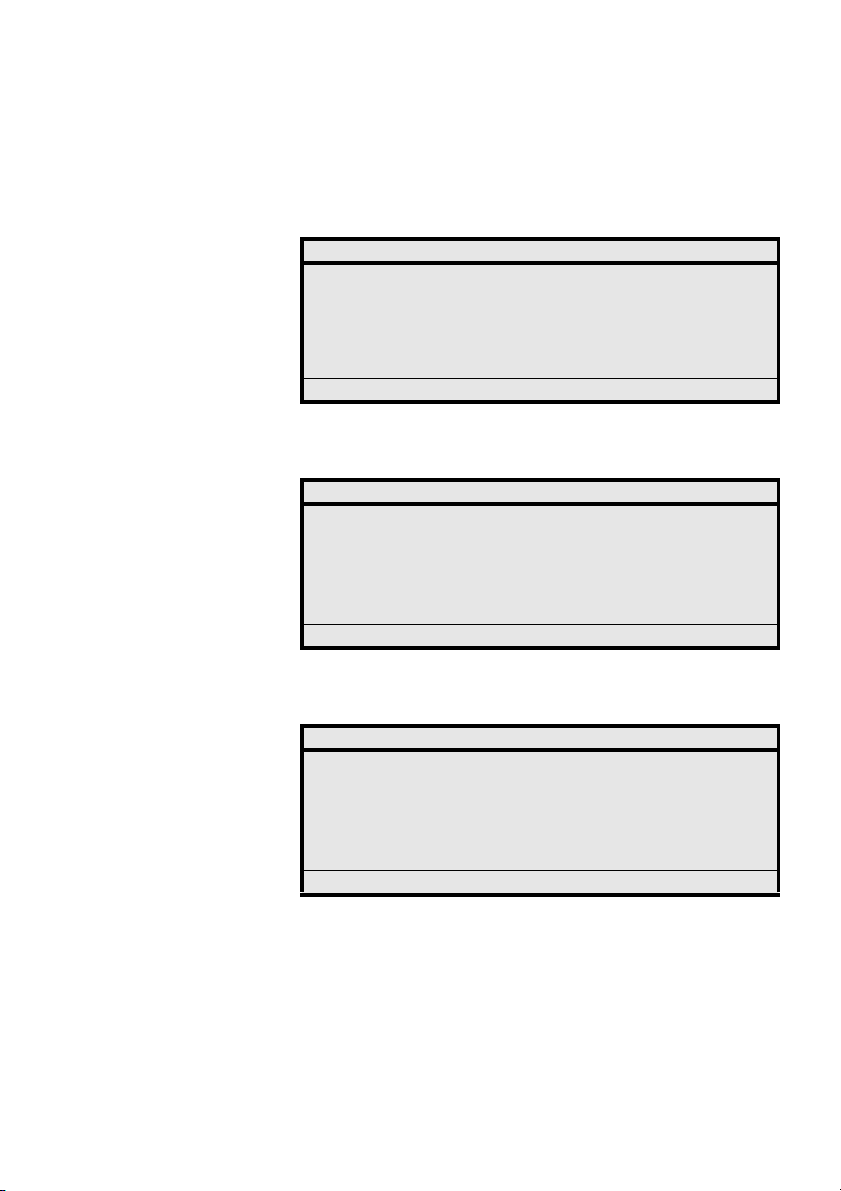
CallList PhoneBook WAP Services
Network
Gatekeeper Discovery (By default (No))
Gatekeeper (xxx.xxx.xxx.xxx)
Password (Yes)
Exit ÛÞ Select
MD Evolution – Dialog 4425 IP Vision20
Page 21
From this point:
Settings
Settings
IP Declaration and Start-Up of Your Extension
Þ or Û Use one of the dynamic function keys shown on the left to
navigate through the list of parameters.
The frame will move as you navigate through the list.
Select Press the dynamic function key shown on the left to select an
Change Press the dynamic function key shown on the left to select
Save Press the dynamic function key shown on the left to validate
IP network parameter to edit.
A new screen with the characteristics of the selected IP network
parameter is displayed.
CallList PhoneBook WAP Services
DHCP
IP Address from DHCP Server: No
Cancel Change Save
For a parameter of the Yes-No type:
either Yes or No value.
your selection.
The previous screens will be re-displayed.
CallList PhoneBook WAP Services
IP Address
Enter IP Address: xxx.xxx.xxx.xxx
Cancel Erase Save
For a parameter that corresponds to an IP address:
IP ADDRESS z Enter the IP address requested on your extension’s keypad.
The character “.” is entered by pressing the “*” key.
Save Press the dynamic function key shown on the left to validate
your entry.
The previous screens will be re-displayed.
21MD Evolution – Dialog 4425 IP Vision
Page 22

IP Declaration and Start-Up of Your Extension
ÅÆÇ
Next, once all of the parameters that characterise your extension’s
IP environment have been defined, to exit your extension’s physical
programming mode:
Press the centre navigation key on your extension.
Your extension returns to the idle status.
The parameters that characterise your telephone’s IP environment
are as follows:
Settings Application of Parameters
DHCP Defines whether or not a DHCP server exists within your company’s
IP Address Defines your extension’s IP address within your company’s LAN.
Subnet Mask Defines the IP subnet mask applicable for your company’s LAN.
Default Gateway Defines the IP address for the possible IP router that acts as the
SW Server Defines the IP address for your MD Evolution system’s xMV
network.
If this is indeed the case, and the value is “Yes”, the DHCP server
is then responsible for assigning an IP address to each terminal
that is connected, including your telephone, according to a
dynamic IP addressing system. The following three parameters
are then automatically assigned by the DHCP server.
In the opposite case, when the value is “No”, your extension
operates with a fixed IP address. The following three parameters,
including the IP address, should be manually defined.
This IP address is assigned dynamically when a DHCP server is
present.
If there is no DHCP server, it should be entered manually.
This IP subnet mask is assigned dynamically when a DHCP server
is present.
If there is no DHCP server, it should be entered manually.
gateway between your company’s LAN and a wide area network,
or WAN, when applicable.
This WAN IP network gateway address is automatically assigned
when a DHCP server is present.
If there is no DHCP server, it should be entered manually.
equipment to which your extension is connected upon start-up,
in order to recover its configuration file, and, when necessary, to
update its software (SW). Your IP extension contains software that,
when necessary, is automatically downloaded from the identified
SW server when the extension is started up.
This SW server address should always be entered manually.
If the presence of a DHCP server was validated, an additional
parameter entitled “SW Server from DHCP” will also be displayed.
It must systematically be set to “No”.
MD Evolution – Dialog 4425 IP Vision22
Page 23

IP Declaration and Start-Up of Your Extension
Settings Application of Parameters
Proxy Server Sometimes used to define the existence of a proxy server that is
used by your company’s network IP equipment to access the
Internet network.
Generally speaking, this parameter is not used by your extension,
so the value is “No”.
In the case where the existence of a proxy server has been validated,
and the value is “Yes”, two additional parameters prompt you to
manually identify the IP address and IP port that the proxy server
uses.
Gatekeeper Discovery For any IP extension within your MD Evolution system, the value of
this parameter must be “By default (No)”.
This indicates that the IP address for your MD Evolution’s xMV
equipment that implements the system “IP H. 323 gatekeeper”
and to which your extension connects to be authenticated is
automatically recovered from its configuration file, upon start-up.
Gatekeeper Defines the IP address for your MD Evolution’s xMV equipment
that implements the system “IP H. 323 gatekeeper” and to which
your extension connects to be authenticated.
In conjunction with the previous parameter, this IP address is
defined automatically when your extension is started up.
Password For any IP extension within your MD Evolution system, the value of
this parameter must be “Yes”.
The user of any IP extension, you included, must enter his/her
user password in order to be securely authenticated within the
system. See the “Logging on and Logging off Your Extension”
section.
Note: Similar parameters are used for the IP configuration
of your desktop PC. These are accessible from your PC’s
“Control Panel”, under “Network Connections”.
23MD Evolution – Dialog 4425 IP Vision
Page 24
IP Declaration and Start-Up of Your Extension
Starting up Your Extension’s Services
During the initial setup of your Dialog 4425 IP Vision, once its IP
network parameters have been defined, your extension will be
automatically restarted.
The process for starting up your extension is illustrated below, even
though it is entirely automatic.
The first screen that is displayed enables you to, if necessary, return
to the modification of your extension’s IP configuration by simultaneously pressing and holding the “C”, “*” and “5” keys for
approximately 1 second, within 5 seconds of signing on.
Settings CallList PhoneBook WAP Services
AASTRA //
User administrator mode to change IP settings
(x)
(No change)
If a DHCP server was configured, your extension will then be
connected to this DHCP server to recover its IP address. The
second screen illustrated below is then displayed:
Settings CallList PhoneBook WAP Services
AASTRA //
Connecting to DHCP server
MD Evolution – Dialog 4425 IP Vision24
Page 25
IP Declaration and Start-Up of Your Extension
Once your extension has recovered its IP address from the DHCP
server, or immediately after the first screen is displayed when the
extension operates with a fixed IP address, your extension then
recovers its configuration file from the previously identified software
(SW) server (see previously mentioned details). The new screen
below is displayed.
Settings CallList PhoneBook WAP Services
AASTRA //
Getting configuration file …
Next, the process may vary, depending on whether or not there is a
new software version available for your extension.
If there is no new version available, your extension displays the
following screen, which indicates that the software is currently
loading internally. This takes approximately 15 seconds.
Settings CallList PhoneBook WAP Services
AASTRA //
Loading software …
On the other hand, if a new software version is available, it will be
automatically downloaded from the SW server previously identified
(see previously mentioned details). The new screen below is
displayed.
Settings CallList PhoneBook WAP Services
AASTRA //
A new version of the application software
is available on the server, update ?
(Yes) No
25MD Evolution – Dialog 4425 IP Vision
Page 26
IP Declaration and Start-Up of Your Extension
If you take no action within one minute, the new software version is
downloaded, and the following screen is displayed while the download takes place, which usually lasts 10 seconds.
Settings CallList PhoneBook WAP Services
AASTRA //
Getting new application from SW server
Please wait …
Then, once the software download is completed, the following new
screen is displayed while the new version is being saved, which
normally takes 30 seconds.
Settings CallList PhoneBook WAP Services
AASTRA //
Saving new application in flash …
DO NOT DISCONNECT THE TELEPHONE
In each case, the process concludes when your extension conducts
a self-test to ensure that it is operating properly, illustrated by the
following screen.
Settings CallList PhoneBook WAP Services
AASTRA //
Self test OK
This process lasts between 45 seconds and 2 minutes. Your
extension is then ready to be used. All that remains is for you to log
on to your extension. See the “Logging on and Logging off Your
Extension” section.
MD Evolution – Dialog 4425 IP Vision26
Page 27

IP Declaration and Start-Up of Your Extension
#
íÉ# Notes:
The process described above is also applicable whenever
your extension is restarted, for example, after a power
interruption. It is possible to manually restart your extension
without unplugging it, if, for example, it is requested by your
system administrator. To do so, simply simultaneously
press and hold the keys shown on the left for approximately
one second.
í * 4 Your system administrator may also ask you what your
extension’s current software version is. To find that information, simply simultaneously press and hold the keys
shown on the left for approximately one second. The screen
illustrated below is then displayed for 5 seconds. Pressing
the key shown on the left will then return your extension to
its idle status.
Settings CallList PhoneBook WAP Services
Boot CAA1580017 R5A
Application CAA1580018 R5A
Language CAA1580010 R4A
Self test OK
27MD Evolution – Dialog 4425 IP Vision
Page 28

IP Declaration and Start-Up of Your Extension
MD Evolution – Dialog 4425 IP Vision28
Page 29

Welcome
Welcome
Welcome to the User’s Guide for the Dialog 4425 IP Vision set used
with the MD Evolution communication system. This includes the
MD Evolution M, MD Evolution XL, MDE Mi and MDE Xli models.
The features described in this guide relate to version R8.0A or later
of the MD Evolution communication system. Certain services may
not be available in older system versions and/or may be protected
by a software key.
This guide describes services for the MD Evolution communication
system as well as the Dialog 4425 IP Vision phone, considering a
normal default programming.
In terms of the service rights for your specific extension, there may
be some discrepancy in the manner in which your own phone will
operate. For more information, or if a problem arises, contact your
system administrator.
Unless otherwise indicated, features that do not involve using the
handset are described in the “handsfree” mode. Pressing the “C”
key (for “Clear”), is the same as hanging up the handset.
The latest version of this user guide can be downloaded from:
http://www.aastra.com
Note: The Dialog 4425 IP Vision set is an IP telephone that
is in compliance with standard H.323; it may only be used
with a private branch exchange and a local area network
(LAN) that are compatible with this type of telephone.
The Dialog 4425 IP Vision set is compatible with DHCP
(Dynamic Host Configuration Protocol) service for determining the IP addresses for the terminals connected to a
LAN.
29MD Evolution – Dialog 4425 IP Vision
Page 30

Welcome
Copyright
All rights reserved. No parts of this publication may be reproduced,
stored in retrieval systems, or transmitted in any form or by any
means, electronic, mechanical, photocopying, recording or
otherwise, without prior written permission of the publisher except
in accordance with the following terms.
When this publication is made available on Aastra media, Aastra
gives its consent to downloading and printing copies of the content
provided in this file only for private use and not for redistribution. No
parts of this publication may be subject to alteration, modification
or commercial use. Aastra will not be liable for any damages arising
from use of an illegal modified or altered publication.
Aastra is a registered trademark of Aastra Technologies Limited. All
other trademarks mentioned herein are the property of their
respective owners.
Warranty
AASTRA MAKES NO WARRANTY OF ANY KIND WITH REGARD
TO THIS MATERIAL, INCLUDING, BUT NOT LIMITED TO, THE
IMPLIED WARRANTIES OF MERCHANTABILITY AND FITNESS
FOR A PARTICULAR PURPOSE. Aastra shall not be liable for
errors contained herein nor for incidental or consequential
damages in connection with the furnishing, performance or use of
this material.
Declaration of conformity
Hereby, Aastra Telecom Sweden AB, SE-126 37 Hägersten,
declares that this telephone is in conformity with the essential
requirements and other relevant provisions of the R&TTE
directive 1999/5/EC.
Details to be found at: http://www.aastra.com/sdoc.
MD Evolution – Dialog 4425 IP Vision30
Page 31

Important User Information
Important User Information
Safety instructions
Save these instructions.
Read these safety instructions before use!
Note: When using your telephone or connected equipment,
the following basic safety precautions should always be
followed to reduce risk of fire, electrical shock and other
personal injury.
• Follow instructions in the equipment’s user guide or other documentation.
• Always install equipment in a location and environment for which it is
designed.
• For mains powered telephones: Only operate with the mains power
voltage indicated. If you are uncertain of the type of power supplied to the
building, consult property management or your local power company.
• For mains powered telephones: Avoid placing the telephone’s power
cable where it can be exposed to mechanical pressure as this may damage
the cable. If the power supply cord or plug is damaged, disconnect the
product and contact qualified service personnel.
• Headsets used with this equipment must comply with EN/IEC 60950-1
and for Australia AS/NZS 60950:1-2003.
• Do not make any changes or modifications to equipment without seeking
approval from the party responsible for compliance. Unauthorized changes
or modifications could void the user’s authority to operate the equipment.
• Do not use the telephone to report a gas leak in the vicinity of the leak.
• Do not spill liquid of any kind on the product or use the equipment near
water, for example, near a bathtub, washbowl, and kitchen sink, in a wet
basement or near a swimming pool.
• Do not insert any object into equipment slots that is not part of the product
or auxiliary product.
• Do not disassemble the product. Contact a qualified service agency when
service or repair work is required.
• Do not use a telephone (other than cordless type) during an electrical storm.
Disposal of the product
Your product should not be placed in municipal waste. Please check local
regulations for disposal of electronic products.
31MD Evolution – Dialog 4425 IP Vision
Page 32

Introduction to Your Extension
Introduction to Your Extension
Dialog 4425 Extension Features
MD Evolution – Dialog 4425 IP Vision32
Page 33

Introduction to Your Extension
1Display
Your extension features a display screen that is 320 x 80 pixels, or
6 lines high x 50 characters wide, depending on the font used.
See also the “Display Information” section.
2 Dynamic Function Keys
Dynamic functions are services that are accessible depending on
the status of your calls. The corresponding text labels are displayed
on the last line of the extension’s display. They are selected by
pressing the corresponding dynamic function key.
See also the “Display Information” section.
ÅÆÇ The navigation keys enable you to select the desired service from a
3Left, Home and Right Navigation Keys
list of tabs located on the first line of your extension’s screen.
These services mainly relate to the physical programming of your
extension, access to the call list for your extension, as well as
access to your personal phone book.
See also the “Physical Programming of Your Extension”, and
“Directory, Phone Book and Call List” sections.
Menu 4 Menu Key
Name 5 Name Key
Call-Fwd 6 Call-Fwd (Call Forward) Key
Message 7Message Key
This fixed function key enables you to access the programming of
your extension in relation to various services, such as call forwarding
or your user password management.
See also the “Programming Your Extension’s Services” section.
This fixed function key enables you to directly access the call by
name service for your extension.
See the “Directory, Phone Book and Call List” section.
This fixed function key enables you to activate a variable call
forwarding that was pre-defined on your extension. It also enables
you to deactivate or cancel any type of active call forwarding on
your extension, pre-defined or defined on a case by case basis.
See also the “Call Forwarding Services” section.
When your facility uses an integrated voice mail, this fixed function
key indicates when you have received a message in your mailbox.
Pressing this key enables you to directly access your facility’s voice
mail.
See also the “Voice Mail Services” section.
33MD Evolution – Dialog 4425 IP Vision
Page 34

Introduction to Your Extension
Transfer 8 Transfer Key
This fixed function key transfers a call on your extension between
two online calling parties.
See also the “Operations during a Call” section.
Ô 9Line Keys
Your extension features three (3) line keys that enable you to
process up to three (3) incoming and outgoing calls simultaneously.
The first two keys, L1 and L2, are standardised, multi-usage lines,
while L3 is reserved for outgoing calls.
See also the “Operations for Incoming Calls”, “Operations for
Outgoing Calls”, and the “Operations during a Call” sections.
Ô 10 Programmable Repertory Keys
Your extension features twelve (12) repertory keys that can be
customised for making specific internal or external calls, or for
direct access to certain services.
See also the “Physical Programming of Your Extension” section.
É 11 Mute Key
This key activates or deactivates the microphone on your extension
when you are operating in handsfree mode or the voice transmission
feature when you are operating in handset mode. It also controls
your extension’s silent ringing function.
See also the “Operations for Incoming Calls”, and “Operations
during a Call” sections.
 12 Loudspeaker Key
This key activates your extension’s handsfree mode. Pressing this
key simply toggles between the handset and handsfree modes.
See also the “Operations during a Call” section.
ì 13 Volume Control Keys
During a call, these two keys control the listening volume on your
extension’s loudspeaker or handset. When an incoming call is
ringing, these keys also control the ring volume for your extension.
See also the “Operations during a Call” and “Physical Programming
of Your Extension” sections.
í 14 “C” Key (Clear or Erase)
This key disconnects an incoming or outgoing call executed in
handsfree mode.
See also the “Operations for Incoming Calls” and “Operations for
Outgoing Calls” sections.
MD Evolution – Dialog 4425 IP Vision34
Page 35

Introduction to Your Extension
Í 15 Headset Key
Pressing this key toggles between the handset calling mode and an
headset operation. Your extension indeed accepts the connection
of an headset. The headset jack is located on the underside of your
extension.
See also the “Your Extension’s Accessories” section.
16 Location of the Microphone
17 Location of the Loudspeaker
Your extension has a microphone and a loudspeaker for the
handsfree or speakerphone calling modes.
18 Handset
This also features a speakerphone function.
19 Satellite or Add-on Key Panel (not depicted)
Your extension may be equipped with (a) satellite(s), each featuring
17 additional programmable repertory keys. From one to four (4)
additional key panels may be connected to your extension.
See also the “Your Extension’s Accessories” section.
35MD Evolution – Dialog 4425 IP Vision
Page 36

Introduction to Your Extension
Ô
ÕÔ
ÖÔ
Extension LEDs
Most of your telephone’s fixed function keys, line keys and
programmable repertory keys feature an LED.
This is also true of the repertory keys on any additional satellite
panels that may be associated with your extension.
Each LED indicates the status of a current call or the status of the
service associated with the corresponding function key.
Status Meaning
Off
On
Slowly flashing
No call is processed on the line key, or
the service associated with the function
is inactive.
There is a call on the line key, or the
service associated with the function is
active. For the Call-fwd key, this indicates that the extension’s pre-defined
variable call forwarding for this key is
active.
A call is ringing on the line key. For the
Call-fwd key, it indicates that a variable
call forwarding for the extension, programmed on a case by case basis, is
currently active.
ÖÔ
Quickly flashing A call is holding on the line key.
MD Evolution – Dialog 4425 IP Vision36
Page 37

Introduction to Your Extension
Display Information
The step-by-step instructions displayed on your extension’s screen
explain how to use your telephone.
The top line of the screen is composed of tabs that allow you to
access a corresponding number of services for your extension,
using the navigation keys.
These services relate most particularly to the physical programming
of your extension (the “Settings” tab), to your list of calls (the
“CallList” tab), and to your personal phone book (the “PhoneBook”
tab).
The right, central area of the display always displays the date and
time, as well as the name and number of the user logged in on the
extension. Certain icons indicate the ring volume for your extension
or that there are messages in your mailbox, whenever applicable
(see details below).
When your extension is idle, the first line on the central left portion
of the display also shows different information concerning the
activation status of certain services for your extension (also see
details below).
The bottom line shows the list of services accessible through the
dynamic function keys; these change in terms of the context of
each call. When your extension is idle, this concerns the number
of parties who tried to contact you, with a direct access to your
extension’s call list.
Settings CallList PhoneBook WAP Services
CS GC 15:49 07 Nov 2008
SMITH Peter
405
Log off 2 Missed
37MD Evolution – Dialog 4425 IP Vision
Page 38

Introduction to Your Extension
When you place an internal call, the called party’s name and extension
number are displayed at the centre of the screen. His status such
as free, busy, etc. is displayed in the upper left-hand part of the
central section. When you place an external call, the called party’s
number and possibly name are also displayed in the central portion
of the screen.
Settings CallList PhoneBook WAP Services
WAIT 15:49 07 Nov 2008
SMITH Peter
WESSON Paul 407 405
CALL_BACK
In the same way, when you receive a call, the middle portion of the
screen displays the caller’s name and number (under the condition
that it is connected to an ISDN type network for an external caller).
The upper left-hand part of the central section provides information
concerning the way that this incoming call was obtained – directly
or by transfer.
Settings CallList PhoneBook WAP Services
TRANSF FROM WESSON Paul-407 15:49 07 Nov 2008
SMITH Peter
ERICSSON France 00164477500 405
Reject
During a call, while the caller’s name and number remain displayed
in the central section, a new incoming call may also be presented
to you in the upper left-hand part of the central section.
Settings CallList PhoneBook WAP Services
WESSON Paul 407 15:49 07 Nov 2008
SMITH Peter
ERICSSON France 00164477500 405
Reject Hold Conf/Transf
When an internal call is placed from your extension, the screen
displays the status of the called party as one of the following:
FREE • The party you are calling is free.
RING • The party you are calling is already being rung by a third party.
WAIT • The party you are calling is busy, but your call may be placed on
camp-on (multi-line extension).
MD Evolution – Dialog 4425 IP Vision38
Page 39

Introduction to Your Extension
BUSY • The party you are calling is busy, and it is not possible to place
CONGESTED • The line you are calling is congested, therefore it is not possible
Invalid number • The number dialled is invalid.
End of call • The party you called has ended this call.
CALL FWD …
ACCEPTED
CANCEL ACCEPTED … • Your call forward cancellation has been accepted.
Call fwd <Type> <No> • Calls to your extension will be forwarded to the specified
Accepted service • The request for service has been accepted.
Denied service • The request for service has been denied.
your call on camp-on (single-line extension).
to place your call on camp-on.
When a service is either activated or deactivated, the system’s
acceptance or refusal is also displayed on the screen:
• Your call forward programming has been accepted.
number.
Settings CallList PhoneBook WAP Services
CS GC 15:49 07 Nov 2008
SMITH Peter
405
Log off 2 Missed
When the extension is idle, the screen also displays the information
relating to the activation of certain services:
C • If your extension is part of a group (main), the letter C indicates
S • If your extension is part of a group (main), the letter S indicates
GC • The GC group indicates that your extension is in general calls
that the group is currently closed and is not accepting any
incoming calls.
that you are on stand-by within the group. Your extension will
only receive your personal calls.
acceptance mode, and serves as an auxiliary attendant extension.
Other information relating to the activation of certain services for
your extension are represented in the form of the following icons:
• This icon indicates that you have an unread message in the
mailbox associated with your extension, as applicable.
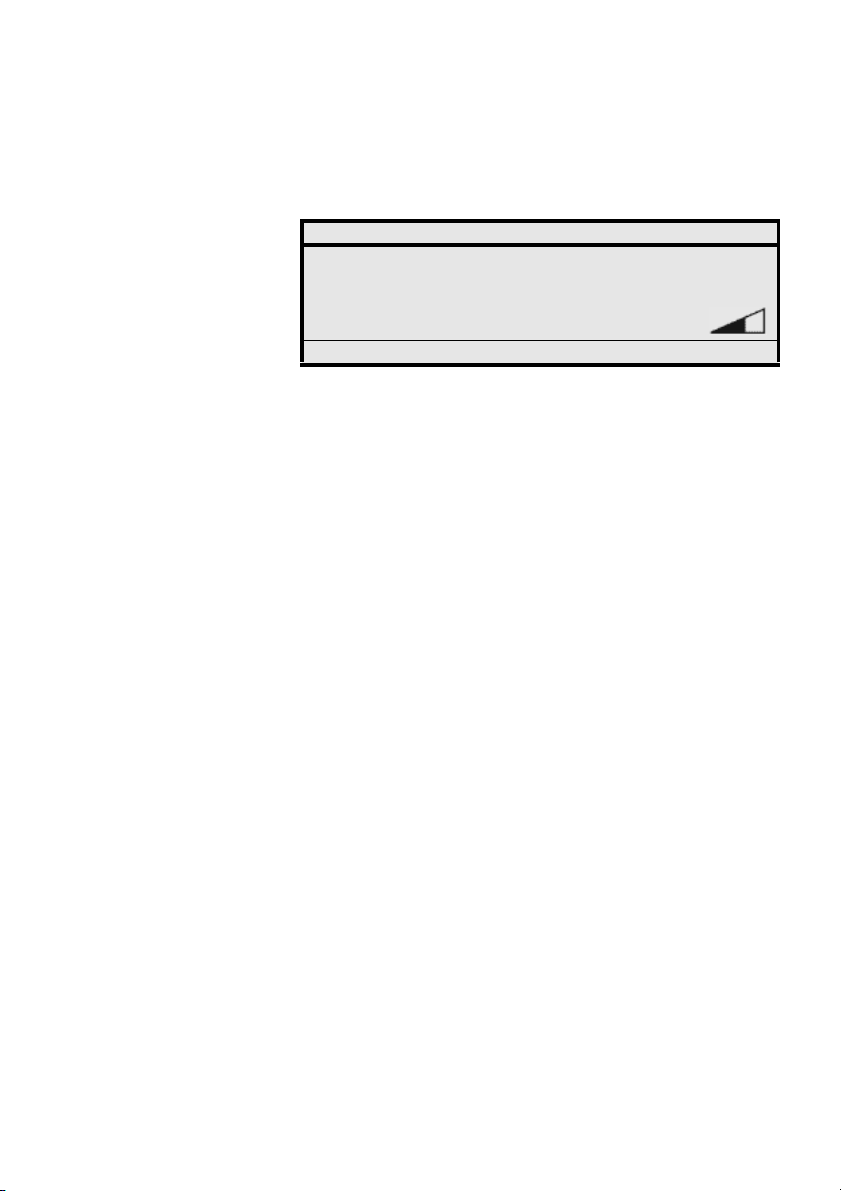
• This icon depicts the ring volume level for your extension, when
it is idle. During a call, it indicates the listening volume on the
loudspeaker or the handset.
39MD Evolution – Dialog 4425 IP Vision
Page 40

Introduction to Your Extension
CallList
• Replacing the previous icon, this one indicates that you have
activated the silent ringing feature for your extension.
Other icons may be displayed when you process or program the
call list for your extension. Within the context of this call list:
• This icon indicates a new incoming call that has not been
answered, and that you have not yet retrieved.
• This icon indicates a new incoming call that has not been
answered, but that you have retrieved.
• This icon indicates a processed incoming call.
• This icon characterises all outgoing calls.
Settings PhoneBook WAP Services
WESSON Paul 407 9:52 06 Nov 0:01:55
ERICSSON Fr 00164477500 18:40 05 Nov
MAHMOOD Zia 512 8:30 03 Nov
more… ÛÞ Call
Within the context of programming your extension:
• This icon identifies the programming option that was validated
within a list of possible options.
• This icon characterises all other options.
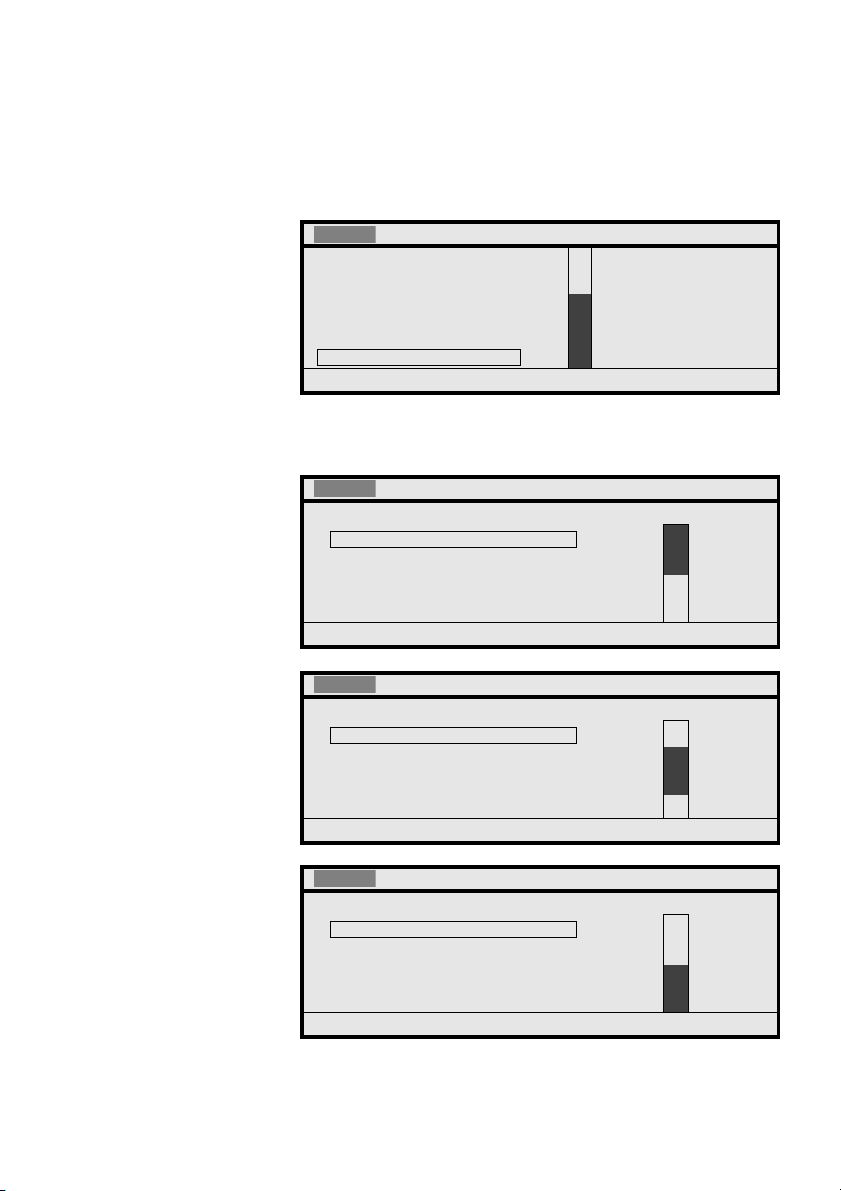
A scroll bar is also displayed if the list of programming options or a
list of available information exceeds your extension’s display
capacity.
MD Evolution – Dialog 4425 IP Vision40
Page 41

Introduction to Your Extension
Tones, Voice Announcements, and Ring
To ne s
Over and above visual information displayed on your extension’s
screen and LEDs, there are also various tones, voice announcements
and ring tones that signal the status of your extension, or certain
associated services.
The tones heard are applicable under the following conditions and
with the following timing and frequency:
Internal dial tone • Heard each time the handset is picked up from your extension
Ringback tone • Heard when you call an extension that is free.
Call on-hold or call
camp-on tone
Busy tone • Heard when you call an extension that is busy, but automatic
Call waiting presentation
tone
Intrusion or call offer tone • Heard when a third party – typically an attendant – intervenes
Service Acceptance tone • Heard when a request for service is accepted on your
(excluding all activated special services).
330 Hz Continuous
424 Hz 1,5 sec. On/3,5 sec. Off
• Heard when you call an extension that is busy and your call
has been placed on automatic camp-on, or when your call is
placed on-hold by a third party set.
424 Hz 2 consecutive beeps,
repeated every 5 seconds.
camp-on is not possible for your call, or when a service
request on your extension is refused.
424 Hz 0,5 sec. On/0,5 sec. Off
• Heard when you receive a new call, when your extension is
already busy.
Ring signal Only 1 ring signal, not repeated
during your current call.
424 Hz 2 consecutive beeps,
repeated every 1,4 seconds.
extension.
Melody Multi-toned melody – continuous.
Appointment reminder
notification
Normally, the following voice announcement (or voice guide) is
provided under the following condition:
• Heard following your response to an appointment reminder
call, this announcement indicates the nature of this automatic
system call. See the “More Features of Your Extension”
section.
Message: “It’s time for your appointment.”
Your extension also offers a selection of 10 different ring melodies
and 10 different ring volume levels. See the “Physical Programming
of Your Extension” section.
41MD Evolution – Dialog 4425 IP Vision
Page 42

Introduction to Your Extension
This ring is distinctly cadenced, according to whether the incoming
call is an internal or external call. The cadence is faster for an
external call.
Note: Your facility also usually provides integrated on-hold
music, to which every external calling party either placed on
hold or parked will be connected.
MD Evolution – Dialog 4425 IP Vision42
Page 43

Logging on and Logging off Your Extension
Logging on and Logging off Your
Extension
The first time your extension is connected (see the “Installing Your
Extension” section), it is initially in a logged off or locked status, and
can not be used. It is not possible to place or receive any calls, except
for an SOS emergency call.
You must first connect or log in to your extension using your extension
number – if necessary – and your user password. These two elements comprise your user signature.
After doing so, your extension now passes to a logged in or unlocked status, so you will obviously be able to receive and place
calls, and use all of the services assigned to your user profile.
You may choose to keep your extension in a logged in status. Or,
you may decide to log off during your absences, typically at night,
and log back on when you return, typically in the morning.
Logging off when you are going to be absent prevents any third
party from using your user profile. When you log off your extension,
all of the user profile data that is saved on your extension – repertory
key allocation, personal phone book content, … – is no longer accessible by anyone. This is also true of the call list on your extension.
You also have the advantage of being able to log on to any IP
extension in your facility – either a Dialog 4425 IP Vision or a
Dialog 4422 IP Office extension – as long as you have logged off
your own extension.
On this third party set, you will have access to your own user profile
that can be used just as it would if you were at your own extension
(see details to follow).
43MD Evolution – Dialog 4425 IP Vision
Page 44

Logging on and Logging off Your Extension
Signing or Logging on to Your Extension
When your extension (or a third party set) has a logged off status,
the following screen is displayed, indicating the extension number
for the last user who logged on.
Supposing that this was your own extension number, to log on:
Settings CallList PhoneBook WAP Services
User not logged on! 15:49 07 Nov 2008
Log on with: 40
For SOS calls, dial 9
Erase Log on
Log on Press the dynamic function key shown on the left.
The extension asks you to enter your user password.
Settings CallList PhoneBook WAP Services
User not logged on! 15:49 07 Nov 2008
Enter password: _
For SOS calls, dial 9
PASSWORD z Enter your user password.
By default, your user password is “1234”, however you may have
modified it. See the “Programming Your Extension’s Services”
section.
Log on Press the dynamic function key shown on the left.
If your password is correct, your extension now proceeds to a
logged in or unlocked status, and displays the idle screen as
illustrated on the following page, with your name and extension
number visible in the central section of the screen.
Erase Log on
MD Evolution – Dialog 4425 IP Vision44
Page 45

Logging on and Logging off Your Extension
If your password is incorrect, your log in is refused, and you must
restart the procedure.
Settings CallList PhoneBook WAP Services
CS GC 15:49 07 Nov 2008
SMITH Peter
405
Log off 2 Missed
Now, you may use your extension according to the user profile
associated with your signature.
Note: In relation to your user password, it is very important
that you modify it, to ensure the confidentiality of the data
that is saved on your extension. If you ever forget your
password, you can request that it be re-initialised, either
by a facility attendant, or by the system administrator.
Locking or Logging off Your Extension
When your extension is idle, as in the screen illustrated above:
Log off Press the dynamic function key shown on the left.
You are asked to confirm your desire to log off your extension.
Settings CallList PhoneBook WAP Services
15:49 07 Nov 2008
SMITH Peter
Log off? 405
No Yes
45MD Evolution – Dialog 4425 IP Vision
Page 46

Logging on and Logging off Your Extension
Yes Press the dynamic function key shown on the left.
Your extension is returned to the logged off or locked status, as
illustrated on the following page. Now, only an SOS emergency call
may be placed from this extension (see details to follow).
Settings CallList PhoneBook WAP Services
User not logged on! 15:49 07 Nov 2008
Log on with: 405
For SOS calls, dial 9
Erase Log on
Signing or Logging on to a Third Party Set
(Free Seating)
You can use a third party set for your calls, as long as you have
logged off from your own extension. This is also referred to as “Free
Seating”.
To take advantage of this feature, from a third party set that is
logged off:
Settings CallList PhoneBook WAP Services
User not logged on! 15:49 07 Nov 2008
Log on with: 437
For SOS calls, dial 9
Erase Log on
MD Evolution – Dialog 4425 IP Vision46
Page 47

Logging on and Logging off Your Extension
Erase Press the dynamic function key shown on the left.
The extension number for the last user who logged on to the third
party set is deleted, and the extension prompts you to enter your
own extension number.
Settings CallList PhoneBook WAP Services
User not logged on! 15:49 07 Nov 2008
Log on with: _
For SOS calls, dial 9
STATION NO z Dial your own extension number.
Log on Press the dynamic function key shown on the left.
You are then prompted to enter your user password, just as if you
were logging on to your own extension (see previously mentioned
details).
If your signature – your extension number and password – is correct,
the third party set now passes to a logged on or unlocked status,
and displays its idle screen with your name and extension number
visible in the central section of the screen.
Now, you may use this extension according to the user profile
associated with your signature. Your user profile includes:
•The repertory keys for your extension, as well as those of
possible additional associated add-on key panels. You will find
the keys programmed identically to those on your own extension,
with status LEDs for either the third party sets or the possible
associated active services.
•Your personal phone book. You will find all of the content in
your personal phone book with the names and associated
numbers, as saved on your own extension.
•All of the service settings that are currently either active or
inactive for your extension. In this way, you will find the status of
your extension in relation to the general call acceptance service
and stand-by mode for the various hunt groups to which your
extension belongs. You will also find your extension settings
concerning possible call forwarding and appointment reminder
services. The displays linked with these services are also displayed on the third party set screen or its Call-Fwd (call forward)
key.
Erase Log on
47MD Evolution – Dialog 4425 IP Vision
Page 48

Logging on and Logging off Your Extension
• Notification that you have new messages in the voice
mailbox associated with your extension, when applicable. You
will find the displays linked with this service are also displayed
on the third party set screen or its Message key.
• All of the other services assigned to your extension number.
You will find them exactly as you would if you were using your
own extension.
Of course, you also have access to all of the valid central services
for all extensions in your facility, such as access to your company’s
directory, and the associated call by name service. For more details,
see the rest of this guide.
Notes:
The physical characteristics of this extension, such as the
ring melody, ring volume, loudspeaker volume, display contrast, etc., remain as previously established for the third
party set.
Your user profile is only fully recoverable depending on the
physical aspect of the third party set; it will only be applicable
if you log on to another Dialog 4425 IP Vision extension. For
a Dialog 4422 IP Office extension, your user profile is recovered, but only within the limits imposed by the reduced
physical aspect of the extension.
Please note: When you sign in to a third party set, it will
lose its call list (calls log file); whenever someone signs in
with an extension number other than the one previously
used, the call log file is automatically reinitialised. In the
same way, this is also true when a third party signs in to
your extension.
MD Evolution – Dialog 4425 IP Vision48
Page 49

Logging on and Logging off Your Extension
SOS Emergency Call
From a locked IP extension, it is possible to place an SOS emergency
call. To do this from an extension that has a logged off status, after
lifting the handset or in handsfree mode:
Settings CallList PhoneBook WAP Services
User not logged on! 15:49 07 Nov 2008
Log on with: 405
For SOS calls, dial 9
Erase Log on
SOS NO z Dial the specified emergency number.
An SOS call is directly placed to the specified internal or external
number that is valid for all IP extensions in your facility. By default,
number 9 will contact the attendants (or their substitutes) on your
facility.
49MD Evolution – Dialog 4425 IP Vision
Page 50

Operations for Incoming Calls
Operations for Incoming Calls
Receiving an Internal Call
You are informed that there is an internal incoming call by the
internal ring signal for your extension, and the flashing LED
associated with the line on which the call is presented.
The name and number of the internal caller are displayed on the
screen.
Settings CallList PhoneBook WAP Services
15:49 07 Nov 2008
SMITH Peter
WESSON Paul 407 405
Reject
Receiving an External Call
You are informed that there is an external incoming call by the
external ring signal for your extension, and the flashing LED
associated with the line on which the call is presented.
If your calling party is an ISDN network (or the equivalent) user, his/
her external calling number is displayed on the screen. His/her name
may also be displayed if this calling party may be contacted through
abbreviated dialling (speed dialling) from your facility.
MD Evolution – Dialog 4425 IP Vision50
Page 51

Operations for Incoming Calls
The screen also indicates whether this call was received directly on
your DID number (it says “DIRECT”), or if it was transferred from
another extension (it says “TRANSF FROM…”).
Settings CallList PhoneBook WAP Services
TRANSF FROM WESSON Paul-407 15:49 07 Nov 2008
SMITH Peter
ERICSSON France 00164477500 405
Reject
Answering a Call
To take an incoming call:
u Lift the handset.
You may now communicate with the caller through your
extension’s handset.
Or, for handsfree
L1 ÖÔ Press the line key where the call is presented, without lifting
the handset.
You may now communicate with the caller through your
extension’s loudspeaker and microphone.
Settings CallList PhoneBook WAP Services
WESSON Paul 407 405
mode:
15:49 07 Nov 2008
SMITH Peter
Hold Conf/Transf
51MD Evolution – Dialog 4425 IP Vision
Page 52

Operations for Incoming Calls
Rejecting a Call
You may also reject a call that is presented to you that you would
prefer not to answer.
To reject a call that is presented:
Settings CallList PhoneBook WAP Services
15:49 07 Nov 2008
SMITH Peter
WESSON Paul 407 405
Reject
Reject Press the dynamic function key shown on the left.
Your extension returns to idle status, and according to the case:
• If your extension is set for the call forward on no-answer condition,
the calling party is immediately forwarded to the pre-defined
number – for example your facility’s voice mail (if applicable).
See the “Call Forwarding Services” section.
• By default, your calling party’s call is freed, and he/she hears the
busy signal.
No matter what the case, the information concerning this call – name
and number of the caller, as well as the date and time of the call
– are transferred to the call list for your extension, making it available
for future reference, if necessary. See the “Directory, Phone Book
and Call List” section.
Ending a Call
To end a call:
d Hang up the handset.
Your extension returns to idle status.
Or, for handsfree
mode:
í Press the “C” key to end the call in handsfree mode.
Your extension returns to idle status.
MD Evolution – Dialog 4425 IP Vision52
Page 53

Operations for Incoming Calls
Consulting and Answering a New Call
When you have an ongoing call, you may also receive a new call on
one of the other line keys available on your extension.
Your extension has two line keys – Lines L1 and L2 – that are available
for incoming and outgoing calls, and one line key – Line L3 – that is
reserved for outgoing calls.
Therefore, you can receive one or two successive incoming call(s)
when you already have an ongoing call on one of the other lines (L1,
L2, L3).
In every case, you will be informed of the incoming call by a single
ring burst on your extension’s loudspeaker, as well as the flashing
of the line key on which the new call is presented.
When a new call comes in, the identity of your new calling party will
also be displayed on the first line of your extension’s screen.
Settings CallList PhoneBook WAP Services
WESSON Paul 407 15:49 07 Nov 2008
SMITH Peter
ERICSSON France 00164477500 405
Reject Hold Conf/Transf
To answer this new call:
L2 ÖÔ Press the flashing line key.
You will now be connected to your second caller, whose identity is
transferred on the third line of your extension’s screen.
Your first caller’s call is automatically placed on hold.
Settings CallList PhoneBook WAP Services
WESSON Paul 407 405
Next, to return to your first caller:
L1 ÖÔ Press the first line key that is flashing.
The second call is placed on hold. You are now connected to your
initial caller.
15:49 07 Nov 2008
SMITH Peter
CONFERENC
53MD Evolution – Dialog 4425 IP Vision
Page 54

Operations for Incoming Calls
Or:
í Press the “C” key if you wish to end the second call.
Your extension now displays the identity of your first caller, without
being re-rung by the call on hold.
L1 ÖÔ Press the first line key that is flashing.
13 z Dial the prefix “13”, granting access to the individual call
STATION NO z Next, directly dial the extension number that is ringing.
You are now connected to your initial caller only.
The process is identical for a new incoming call when you already
have one ongoing call as well as one call on hold on your extension.
Note: The option of rejecting a call also applies to a new
call that is presented.
Call Pick-Up
When your extension is idle, you may also answer a call that is ringing
for another extension, without having to change extensions.
To do this, after lifting the handset or in handsfree mode:
pick-up service.
Settings CallList PhoneBook WAP Services
15:49 07 Nov 2008
SMITH Peter
Enter number: 13xxx 405
Erase Call
Call Press the dynamic function key shown on the left.
You are now directly connected to the party calling the other
extension.
MD Evolution – Dialog 4425 IP Vision54
Page 55

Operations for Incoming Calls
Notes:
The prefix “13” is the one usually used to access the individual call pick-up service. It may, however, have been
modified by your system administrator.
Rather than dialling the number of the extension to pick-up,
you may also press the repertory key where this number
may have been saved.
Your extension may also be subject to call pick-ups from
third party sets.
Certain extensions (such as yours) may possibly be equipped
with a permanent protection against call pick-up. If this is
the case, this service will obviously be refused on these
extensions (and vice-versa).
Silent Ringing Function
This function may be used when you wish to not be disturbed by the
ringing of the telephone. When it is activated only your extension’s
screen display and the flashing of a line key will advise you of a new
incoming call.
To activate this function from an idle extension:
É Press this key to activate silent ringing for incoming calls.
The associated LED will remain lit to remind you that this function is
activated.
A crossed-out musical note will also be displayed on your
extension, temporarily replacing the icon that usually displays your
extension’s ring volume level.
Settings CallList PhoneBook WAP Services
CS GC 15:49 07 Nov 2008
SMITH Peter
405
Log off 2 Missed
55MD Evolution – Dialog 4425 IP Vision
Page 56

Operations for Outgoing Calls
Operations for Outgoing Calls
Manually Dialling a Call
The first way to place internal and external calls is to manually dial
the number to be called. To do so:
u Lift the handset.
Your extension prompts you to dial the number for the party you
would like to reach.
Settings CallList PhoneBook WAP Services
15:49 07 Nov 2008
SMITH Peter
Enter number: _ 405
Erase Call
NO TO CALL z Dial the number for the party to reach.
Call Press the dynamic function key shown on the left.
NO TO CALL z Directly dial the number for the internal or external party to
Call Press the dynamic function key shown on the left.
STATION NO z Dial the internal extension number to contact.
You can then follow the placing of your call on the handset and on
your extension’s screen where your called party’s identity is
displayed.
Or, for handsfree
contact, without lifting the handset.
You can then follow the placing of your call on the loudspeaker and
on your extension’s screen.
As the case may dictate, for an internal call:
mode:
MD Evolution – Dialog 4425 IP Vision56
Page 57

Or, to call the attendants:
9 z Dial the number 9 (generally).
Or, for an external call:
Operations for Outgoing Calls
0+EXT. NO z Dial the ad-hoc network access prefix, followed by the number
for the external party to be reached.
Note: The prefix to dial for external calls is generally “0” to
access the public network. Accessing a private network
depends on your facility’s configuration.
Calling with Abbreviated Dialling
(Speed Dialling)
You may also place your external calls more quickly by using the
abbreviated dialling (speed dialling) service.
This enables you to contact your external parties using shorter
numbers than the norm, usually just 3 or 4 digits.
Usually, you will have access to a general list of abbreviated numbers
valid for all users in your facility.
Additionally, based on your user rights, you may also have access
to a personal list of 20 abbreviated numbers that are either personal,
or shared among a restricted group of users.
All of these abbreviated numbers are managed by your system
administrator or possibly your facility’s attendants. Contact them as
needed.
To contact an external party using abbreviated numbers, after
lifting the handset or in handsfree mode:
2 z Dial “2”, giving you access to abbreviated dialling.
ABBR. NO z Then directly dial the abbreviated number associated with
the external party to be contacted.
Call Press the dynamic function key shown on the left.
The call is then established just as if you had manually dialled the
external party’s number.
57MD Evolution – Dialog 4425 IP Vision
Page 58

Operations for Outgoing Calls
Rx Ô Your extension features 12 repertory keys that may be programmed
Notes:
A personal abbreviated number accepts values from 00 to
19. An abbreviated number on the general list is usually
from 200 to xxx. The prefix “2” is the one usually used to
access abbreviated dialling. It may, however, have been
modified by your system administrator.
An abbreviated number is generally complete. However, it
may not be complete, in which case – whether you’re
dialling in handset or handsfree mode – you must dial the
last numbers manually. This may, for example, allow you to
access a series of numbers using just one abbreviated
number.
Calling Using Programmable Repertory
Keys
Another option for quickly processing your outgoing calls to
favoured parties is to save their numbers under one of your
extension’s programmable repertory keys, or under one of the repertory keys
available on one or several associated satellite key panel(s), as the
case may dictate.
with an internal or external number for your favoured parties, or with
an activation code for a given service.
If your extension uses one or several associated satellite key panels,
each one offers an additional 17 programmable repertory keys that
can also save an internal number, and external number, or again, a
service activation code.
The corresponding programming of each repertory key is, in this
case, entirely up to you. See also the “Physical Programming of
Your Extension” section.
To contact an internal or external party whose number has been
saved under a repertory key, in handsfree mode:
Rx Ô Simply press the repertory key associated with the party to
be contacted.
MD Evolution – Dialog 4425 IP Vision58
Page 59

Or, after lifting the handset:
Operations for Outgoing Calls
Rx Ô Press the repertory key associated with the party to be
contacted.
Call Press the dynamic function key shown on the left.
The call is then established just as if you had manually dialled the
internal or external party’s number.
Note: As with abbreviated dialling, a number saved under
a repertory key may be incomplete. In this case – whether
you’re dialling in handset or handsfree mode – you must dial
the last numbers manually. When placing a call in handsfree
mode, you must first select a line key. Incomplete numbers
could, for example, allow you to access a series of numbers
using just one key.
Last External Number Redial
When you place an external call, the system automatically saves the
number dialled, enabling it to be automatically redialled, if
necessary.
This is true whether or not your external call is successfully connected.
Moreover, the last number dialled is saved until a new external call
is placed.
If necessary, to redial the last external number dialled, after lifting
the handset or in handsfree mode:
11 z Dial the prefix “11”, assigned to the redial service.
Call Press the dynamic function key shown on the left.
The last external number dialled is automatically redialled, just as if
you had dialled it manually.
Note: The prefix “11” is the one usually used to access the
last external number redial service. It may, however, have
been modified by your system administrator.
59MD Evolution – Dialog 4425 IP Vision
Page 60

Operations for Outgoing Calls
Other Options for Dialling Outgoing Calls
Your extension also offers three additional services to easily dial
your outgoing calls.
The first service is the Call by Name service. Your extension gives
you access to the directory integrated into your facility, which includes all of the internal numbers in service as well as the external
numbers accessible through abbreviated dialling (speed dialling).
You may consult this directory and directly call a party found within
this directory, simply by selecting his/her name.
The second service is the Personal Phone Book service. Over and
above the general directory for your facility, you may also manage
a personal directory yourself, which is capable of holding up to
100 internal or external names and numbers. You may then consult
this phone book and directly call a party found therein, once again
by simply selecting his/her name.
The third service is the Call List service. Your extension automatically saves the incoming calls that you receive – whether or not you
answer them, as well as all of the outgoing calls made from your
extension – whether or not they were answered. The list can hold
up to 50 calls. You then have the option of automatically re-dialling
each party whose identity has been saved in this file.
For these three services, see the “Directory, Phone Book and Call
List” section.
Monitoring Your Internal Calls and
Subsequent Services
When you establish an internal call, your party’s status is displayed
on your extension, and is also signalled by one of the following
audible tones:
FREE • The party you are calling is free. His/her phone is ringing, while
RING • The party you are calling is already being rung by a third party.
WAIT • The party you are calling is busy, but your call may be placed on
BUSY • The party you are calling is busy, and it is not possible to place
you hear the ringback tone.
You also hear the ringback tone.
camp-on (multi-line extension). You hear the camp-on tone.
See also the “Operations for Incoming Calls” section.
your call on camp-on (single-line extension). You hear the busy
tone.
MD Evolution – Dialog 4425 IP Vision60
Page 61

Operations for Outgoing Calls
CONGESTED • The line you are calling is congested, therefore it is not possible
to place your call on camp-on. You also hear the busy tone.
Settings CallList PhoneBook WAP Services
WAIT 15:49 07 Nov 2008
SMITH Peter
WESSON Paul 407 405
CALL_BACK
If your party is busy, your call may be automatically camped-on for
the dialled extension, and you will hear the automatic camp-on tone.
You may then simply wait for your party to answer.
To proceed with your call, in terms of the requested internal party’s
status, you may also:
• Activate the automatic call-back feature for the called extension
that is busy.
• Activate the automatic call-back feature for the called extension
that is free, but is not answering.
Automatic Call-Back on Busy Condition
When placing a call to an internal party whose extension is busy
and you would rather not wait on the phone, you may activate the
automatic call-back on busy condition for the called extension.
This if valid no matter your called party’s status: “RING”, “WAIT”,
“BUSY” or “CONGESTED”. To do so:
Settings CallList PhoneBook WAP Services
WAIT 15:49 07 Nov 2008
SMITH Peter
WESSON Paul 407 405
CALL_BACK
CALL_BACK Press the dynamic function key shown on the left.
You will receive both visible and audible confirmation for registering
automatic call-back for your call: “REGISTERED CALL-BACK” will
be displayed on your screen, and the service acceptance tone will
be played.
61MD Evolution – Dialog 4425 IP Vision
Page 62

Operations for Outgoing Calls
d or í Hang up the handset or press the “C” key to end the call in
handsfree mode.
You will be automatically called back when your called party’s conversation has ended.
Settings CallList PhoneBook WAP Services
15:49 07 Nov 2008
SMITH Peter
Automatic callback 405
Reject
Then, once you have answered this call-back, your internal called
party will be automatically re-rung.
Automatic Call-Back on No-Answer
Condition
When placing a call to an internal party whose extension is “FREE”,
but your call remains unanswered, you may activate the automatic
call-back on no-answer condition for the called extension. To do so:
Settings CallList PhoneBook WAP Services
FREE 15:49 07 Nov 2008
SMITH Peter
WESSON Paul 407 405
CALL_BACK
CALL_BACK Press the dynamic function key shown on the left.
You receive visible and audible confirmation that you have
successfully registered the automatic call-back.
MD Evolution – Dialog 4425 IP Vision62
Page 63

Operations for Outgoing Calls
d or í Hang up the handset or press the “C” key to end the call in
handsfree mode.
You will be automatically called back when your called party has
demonstrated his/her renewed presence, typically by placing a
new call from his/her extension.
Settings CallList PhoneBook WAP Services
15:49 07 Nov 2008
SMITH Peter
Automatic callback 405
Reject
Then, once you have answered this call-back, your internal called
party will be automatically re-rung.
Notes:
No mat ter wha t ty pe o f au tom ati c call-back (whether it is on
busy or on no-answer), it is typically valid for 15 minutes.
When this timeframe expires, if your called party is not free,
or did not affirm his/her renewed presence on the extension,
the service will be automatically cancelled.
When you are called back, you typically have 30 seconds to
answer the automatic call-back service. If you do not answer
within that timeframe, the automatic call-back is automatically
cancelled.
Your extension may also be subject to the automatic callback on busy or on no-answer service from third party sets.
Call with Temporary Protection
When you place either an internal or external call that you deem
particularly important, you may choose to activate its phonic
protection.
This protection, available on a call by call basis, prevents any
phonic intervention during your communication.
More particularly, this service protects you from any intrusion or
offer that could take place during your conversation, most specifically from an attendant. These services are then refused in light of
your conversation in progress.
63MD Evolution – Dialog 4425 IP Vision
Page 64

Operations for Outgoing Calls
To activate this protection service, after lifting the handset or directly
in handsfree mode:
74 z Dial the prefix “74”, granting access to the temporary call
protection service.
NO TO CALL z Next, directly dial the desired number.
You may do so according to any of the methods available for dialling
an internal or external number.
Settings CallList PhoneBook WAP Services
Enter number: 74xxx 405
Call Press the dynamic function key shown on the left.
Your call is then established normally.
Notes:
The prefix “74” is the one usually used to access the
temporary call protection service. It may, however, have
been modified by your system administrator.
It is still possible to receive new calls on your extension. You
will be notified when a call is placed on camp-on in the usual
fashion – by a single ring burst heard over your extension’s
loudspeaker – but it will not interfere with your conversation.
Certain extensions (such as yours) may possibly be equipped
with a permanent phonic protection. The above-described
service is therefore applied to all calls that are placed, without requiring any particular action on your part.
15:49 07 Nov 2008
SMITH Peter
Erase Call
MD Evolution – Dialog 4425 IP Vision64
Page 65

Operations for Outgoing Calls
Call in Substitution or with Signature
You can also place an external call in substitution or with signature.
This concerns the exceptional use of a third party set that is NOT
an IP H.323 Dialog 4425 or Dialog 4422 set, to place an external
call, just as if you were using your extension.
The main advantage of this feature is that the call is charged to
your own extension. Another advantage is that on the substituted
third party set, you have all of your extension’s customary services,
most especially dialling discriminations relating to various external
numbers applicable for your extension.
This service is valid on a call-by-call basis. It is automatically cancelled
at the end of each call processed using this service.
To activate this substitution procedure from any extension (that is
other than an IP H.323 extension), after lifting the handset:
75 z Dial the prefix “75”, granting access to the call in substitution
service.
STATION NO z Then dial your own extension number.
This is necessary in order to sign on to the third party set.
PASSWORD z Next, dial your user password.
By default, your user password is “1234”, however you may have
modified it. See also the “Programming Your Extension’s Services”
section.
d Hang up in order to terminate access to this service.
You may now proceed with placing your external call in substitution
from the previous extension.
After lifting the handset again:
NO TO CALL z Simply dial the desired external number.
You may do so according to any of the methods available on this
extension for dialling an external number. Your call is then
established normally.
Note: The prefix “75” is the one usually used to access the
call in substitution service. It may, however, have been
modified by your system administrator.
65MD Evolution – Dialog 4425 IP Vision
Page 66

Operations for Outgoing Calls
DTMF End-to-End Dialling
At times, you may need to call external servers, such as a reservation centre server, when you are required to communicate
interactively through the online transmission of various dialling
codes.
Your extension makes this option available to you through the
DTMF end-to-end dialling service. With this service, you can
directly exchange dialling codes with a remote server, without your
dialling being interpreted by your local facility.
This is processed through the exchange of DTMF codes, from
which the service’s name is derived.
To use this service when placing an external call:
*z Dial the “*” code, granting access to the DTMF end-to-end
dialling service.
Everything that is dialled thereafter is then directly transmitted to
the remote server.
Notes:
The “*” code is the suffix usually used to access this service.
It may, however, have been modified by your system
administrator.
When you interact with the voice mail system, or the automated attendant possibly integrated in your facility, the
aforementioned operations are not required. DTMF end-toend dialling is automatic. See also the “Voice Mail Services”
section.
Ending a Call
You may, at any time, end an ongoing call, or an outgoing call that
is being established.
This is done in the same way as with an incoming call:
d Hang up the handset.
Your extension returns to idle status.
Or, for handsfree
mode:
í Press the key shown on the left to end the call in handsfree
mode.
Your extension returns to idle status.
MD Evolution – Dialog 4425 IP Vision66
Page 67

Operations for Outgoing Calls
Discrimination and Routing of External
Calls
Usually, you have access rights to the public network and all
private networks to which your facility is connected. You also
usually have the authorisation to dial any type of external number,
most particularly a public number.
In terms of the facility programming dictated by your system
administrator, there may be certain external numbers that are
discriminated.
Most particularly, this may apply to numbers for service provided
by the public network, or certain international destinations. An
attempt to dial these numbers would be automatically refused.
Moreover, your facility will also most often be equipped with a
Least Cost Routing (LCR) service for external calls, especially if your
facility is connected to private networks or different public network
operators.
The LCR service therefore automatically ensures that the routing of
external numbers you dial will be processed with the least possible
cost, or managed according to the most optimal calling route.
Note: The numbers dialled using abbreviated dialling are
never subjected to any type of discrimination. If you have a
specific need or question concerning discriminated numbers,
you may ask your system administrator or facility attendants
that the numbers in questions be added to the list of abbreviated dialling numbers.
67MD Evolution – Dialog 4425 IP Vision
Page 68

Operations during a Call
Operations during a Call
When a call is established, your extension offers you the option of
alternating between the handset and handsfree conversation modes.
You may also mute the microphone and control the listening volume
for your extension’s handset or loudspeaker.
You also have access to various services for processing your calls,
including following services:
• Enquiry call to consult another internal or external party.
• Refer back call between two on-line parties or broker's call.
• Call transfer between two parties.
• Conference call with three or four participants.
You may also temporarily place a call on hold, in order to carry out
a non-telephone related task, or you may park a call in order to pick
it up on a different extension.
Changing from Handset to Handsfree
Mode
When you participate in an incoming or outgoing conversation using
the handset, you can, at any time, decide to continue the call in
handsfree mode. To do so:
 Press this key to activate the handsfree mode.
The associated LED will light.
d Hang up the handset.
Your conversation thus continues in handsfree mode. Both your
extension’s loudspeaker and microphone are active.
MD Evolution – Dialog 4425 IP Vision68
Page 69

Operations during a Call
Changing from Handsfree to Handset
Mode
Contrariwise, when you participate in an incoming or outgoing
conversation using handsfree mode, you can, at any time, decide
to continue the call in handset mode, providing you with more
privacy. To do so:
u Simply lift the handset.
Both your extension’s loudspeaker and microphone will be automatically deactivated. Only the handset remains active.
Muting during a Conversation
When you participate in an incoming or outgoing conversation using
handsfree mode, you may activate the mute function for your extension, preventing your party from hearing what you say. To do
so:
É Press this key to activate the mute mode.
The LED associated with this key is lit, and your extension’s microphone is momentarily deactivated. Only your extension’s
loudspeaker remains active.
To deactivate the mute function:
É Simply press this key once again.
The LED associated with this key is unlit, and your conversation
continues normally in handsfree mode.
Note: This function is also applicable when you carry on
a conversation on the handset. It momentarily cuts off the
voice transmission from the handset.
69MD Evolution – Dialog 4425 IP Vision
Page 70

Operations during a Call
Adjusting the Loudspeaker or Handset
Listening Volume
Whether you are carrying on a conversation on the handset or in
handsfree mode, you can adjust the handset/loudspeaker listening
volume for your extension.
This enables you, for example, to compensate for an environment
that may temporarily be noisy. To do this, during a call:
ì Simply press either the + or - keys to increase or decrease
the listening volume.
This adjustment is saved for all subsequent conversations, until you
adjust it once again.
Enquiry Call during a Conversation
Perhaps during a conversation with a first party, you wish to
consult another internal or external party.
Your extension offers you the enquiry call service, which consists of
placing your first caller on hold, then calling the new desired party.
You may call this second party using any dialling methods otherwise
available when placing a single call.
This could be carried out manually by simply dialling the party’s
number, by using abbreviated dialling to call an external number,
or by using the last external number redial service.
The second call may also be carried out by simply pressing a
repertory key that may be associated with this party. You may also
use the call by name service, your personal phone book or call list,
as well as any other special function associated with placing an
outgoing call. See also the “Operations for Outgoing Calls” section.
Settings CallList PhoneBook WAP Services
15:49 07 Nov 2008
SMITH Peter
WESSON Paul 407 405
Hold Conf/Transf
MD Evolution – Dialog 4425 IP Vision70
Page 71

Operations during a Call
Conf/Transf
To place an enquiry call, whether you are in handset or handsfree
mode:
L3 Ô Press a free line key of your extension for which LED is not lit.
Your extension prompts you to dial the number for the second
internal or external party you would like to reach.
Your first caller is automatically placed on hold, and the key representing the line on which the first call was placed will flash quickly.
Settings CallList PhoneBook WAP Services
Enter number: _ 405
NO TO CALL z Dial the number for the new party.
As indicated, you may use any dialling methods otherwise available
when placing a single call.
Call Press the dynamic function key shown on the left.
You then follow the placement of this call in the same way as for a
single outgoing call.
Settings CallList PhoneBook WAP Services
FREE 15:49 07 Nov 2008
MARTIN Vincent 423 405
CALL_BACK
Supposing that your first call is an internal call, you still have the
same services available to you for placing the second enquiry call
(depending on the second party’s status), as you would during a
single call (see also “Operations for Outgoing Calls”). Thus, you
can:
• Be placed on automatic camp-on if the new calling party’s
extension is busy.
• Activate the automatic call-back feature for the new called
extension that is busy, or not answering.
L1 ÕÔ Note: Rather than initially selecting a free line key (for which
LED is not lit, you may press the line key for the current call
(for which the LED is lit).You can also select the “Conf/
Transf” dynamic function key usually displayed on your
extension. The rest of the procedure is carried out as
described.
15:49 07 Nov 2008
SMITH Peter
Erase Call
SMITH Peter
71MD Evolution – Dialog 4425 IP Vision
Page 72

Operations during a Call
Refer Back Call Between Two On-Line
Parties or Broker’s Call
During your enquiry call, supposing the second party has answered
your call, and your first party remains on hold while you carry on a
conversation with the second, you may alternate from one conversation to the other.
Settings CallList PhoneBook WAP Services
15:49 07 Nov 2008
SMITH Peter
MARTIN Vincent 423 405
CONFERENC
To do so:
L1 ÖÔ Press the first line key that is flashing rapidly.
You are now transferred back to your first call, and your second call
is placed on hold.
Settings CallList PhoneBook WAP Services
15:49 07 Nov 2008
SMITH Peter
WESSON Paul 407 405
CONFERENC
To return to your second conversation:
L3 ÖÔ Press the second line key that is flashing rapidly.
You are now transferred once again to the second call, and can
repeat this process as many times as desired.
í Or, press the “C” key if you wish to end the conversation with
the current party.
This party’s call is disconnected, and you may then return to the call
that is currently on hold.
This operation is also applicable, if, when your enquiry call is being
placed, the second party does not answer.
Note: It should be noted that these operations are the
same for answering an incoming call that is presented to
you during an ongoing call. See also the “Operations for
Incoming Calls” section.
MD Evolution – Dialog 4425 IP Vision72
Page 73

Operations during a Call
Call Transfer between Two Parties
During an enquiry call, you can also choose to place your two call
parties in direct communication with each other, removing yourself
entirely from the conversation.
This type of call transfer can be made between two internal parties,
or one internal party and one external party, regardless who are the
calling and called parties.
It is also applicable in the following different cases:
• Transfer during a conversation: You may transfer a call between
two parties when one is in communication with you, and the
other is on hold on your extension. Both parties will then be in
direct communication with each other.
• Call transfer on ringing: You may make a transfer when an
enquiry call is in the process of being established to a free
internal extension, without waiting for that person to answer.
The transferred party will then hear the other requested
extension ringing.
• Call transfer on busy: You may make a transfer when an enquiry
call is in the process of being established to a busy internal
extension, when it is possible for the call to be placed on campon. The transferred party will then be placed on camp-on on the
other requested extension.
In every case, the procedure is the same. Whether you are carrying
on a conversation using the handset or handsfree mode:
Transfer Press the Transfer key on your extension to transfer the call.
The call is transferred, and the two parties disappear from your
extension.
Notes:
If there are more than 2 parties on your telephone, the call
transfer will be carried out between the party currently conversing with you, and the last party who was placed on hold.
Call transfers between two external parties may also be
permitted. This essentially depends on your facility’s confi gur ati on. If you n eed mo re i nformation, contact your system
administrator.
Your facility may allow call transfers between two external
parties; however, it is recommended to never transfer to
an automatic machine such as: an information system, a
network voicemail system, etc. The connection could be
very long and costly. Moreover, during the entire duration of
the transfer, two of your facility’s ISDN network lines are
busy, which may limit other calls.
73MD Evolution – Dialog 4425 IP Vision
Page 74

Operations during a Call
Conference Call with N Participants
When an enquiry call is established, i.e. when you are carrying on a
conversation with one party while another is on hold, you may also
decide to establish a 3-way conference call including your two calling
parties and yourself.
To do so, whether you are carrying on a conversation using the
handset or handsfree mode:
Settings CallList PhoneBook WAP Services
15:49 07 Nov 2008
SMITH Peter
WESSON Paul 407 405
CONFERENC
CONFERENC Press the dynamic function key shown on the left.
The 3-way conference call is established, and your extension’s
screen will be as illustrated below.
Settings CallList PhoneBook WAP Services
Conference 15:49 07 Nov 2008
SMITH Peter
WESSON Paul 407 405
Hold Conf/Transf
Next, you may repeat the entire enquiry and conference call procedure to include another participant in the conference call. A conference call can include up to 4 participants.
To do so:
Conf/Transf Press the dynamic function key shown on the left.
The conference call is placed on hold.
NO TO CALL z Then dial the number for the new internal or external party to
be contacted.
All of the usual services for dialling internal or external numbers are
available.
Call Press the dynamic function key shown on the left.
The call to the new party is processed.
When he/she answers your call:
MD Evolution – Dialog 4425 IP Vision74
Page 75

Operations during a Call
CONFERENC Once again, press the dynamic function key shown on the left,
once this new party has answered your call.
The conference call now includes 4 participants.
Or, you may simply withdraw from the conference call:
d or í Hang up the handset or press the “C” key in handsfree mode.
This has the same result as transferring the call between your two
parties, and your extension is now free.
On the other hand, if one of your parties withdraws from the conference call, that will result in the call now being a single call with the
remaining party.
Notes:
If there are more than 2 parties on your telephone, the conference call will be established between the party currently
conversing with you, and the last party who was placed on
hold.
Your extension may also be subject to enquiry calls, refer
back calls, transfers and conference calls initiated by third
party sets.
Call Hold
When you are carrying on a single conversation, you may also
temporarily place the current call on hold, in order to carry out a
non-telephone related task.
To do so:
L1 ÕÔ Press the line key corresponding to the current call.
The LED associated with this line begins to flash quickly, and your
party is placed on hold on your extension.
L1 ÖÔ Press the line key corresponding to the current call once
again, to return to your conversation.
The associated LED is now continuously lit.
Note: To activate this service, you may also select the
dynamic option “Hold”. There is no time limit on this call
hold service.
75MD Evolution – Dialog 4425 IP Vision
Page 76

Operations during a Call
Call Parking and Parked Call Retrieving
When you are carrying on a single conversation, you may park the
current call, in order to subsequently retrieve it on a different extension. For example, this would allow you to change offices without
losing your call.
To do so, whether you are carrying on a conversation using the
handset or handsfree mode:
Settings CallList PhoneBook WAP Services
15:49 07 Nov 2008
SMITH Peter
WESSON Paul 407 405
Hold Conf/Transf
L3 Ô Press a free line key of your extension for which LED is not lit.
Your party is then placed on hold.
Settings CallList PhoneBook WAP Services
15:49 07 Nov 2008
SMITH Peter
Enter number: 10xx 405
Erase Call
10 z Dial the prefix “10”, granting access to the call parking
service.
ID. CODE z Dial the identification code for the call you wish to park.
This call identification code will be requested later when you retrieve
the parked call. This code is unrestricted, and may consist of 1 or
2 digits, according to your facility’s configuration (usually 2 digits).
Call Press the dynamic function key shown on the left.
A confirmation that the service was accepted is provided both visually
and audibly; the “Accepted Service” message is displayed on the
screen, and the accepted service tone is played.
d or í Hang up the handset, or press the “C” key to end this service
in handsfree mode.
Your extension returns to the idle status.
You may then move about freely, then return to the parked call on
any other extension.
MD Evolution – Dialog 4425 IP Vision76
Page 77

Operations during a Call
Typically, the duration of validity is 3 minutes. If the parked call is
not retrieved within this timeframe, it will be disconnected if it is an
internal call or will be re-directed to an attendant if it is an external
incoming call.
To retrieve a parked call from your extension or a similar idle
extension, after lifting the handset or in handsfree mode:
Settings CallList PhoneBook WAP Services
15:49 07 Nov 2008
MARTIN Vincent
Enter number: 10xx 423
Erase Call
10 z Dial the prefix “10”, granting access to the call parking service.
ID. CODE z Dial the 1 or 2 digit identification code for the parked call.
Call Press the dynamic function key shown on the left.
You are returned to your conversation.
Notes:
When an external call is either placed on hold or is parked,
the party is then connected to the music on-hold usually
provided by your facility.
The parked call retrieving service may be activated by
dialling, from any extension, the following sequence: 10
<ID. CODE>. The prefix “10” is the one usually used. It may,
however, have been modified by your system administrator.
Of course, your calls may also be subject to parking by a
third party set.
77MD Evolution – Dialog 4425 IP Vision
Page 78

Directory, Phone Book and Call List
Directory, Phone Book and Call List
Your extension also offers three sophisticated services for handling
your incoming and outgoing calls as efficiently as possible.
The first service is access to the integrated directory that is
available to your entire facility. This directory includes all internal
numbers, as well as the external numbers that are accessible
through abbreviated dialling. You may consult this directory and
then directly call a party found therein, simply by selecting his/her
name. This is the Call by Name service.
The second service is the Personal Phone Book service. Over and
above the general directory for your facility, you may also manage
a personal directory yourself, which is capable of holding up to
100 internal or external names and numbers. You may then consult
this phone book and directly call a party found therein, once again
by simply selecting his/her name.
The third service is the Call List service. Your extension automatically saves the incoming calls that you receive – whether or not you
answer them, as well as all of the outgoing calls made from your
extension – whether or not they were answered. The list can hold
up to 50 calls. You then have the option of automatically re-dialling
each party whose identity has been saved in this file.
Note: Your facility’s integrated directory and your personal
phone book are saved in a central location, which means
that they will not be lost, even if your extension temporarily
loses power. Moreover, they remain accessible to you
when you sign on to an IP H.323 extension other than your
own.
Please note: The call lists are processed locally, on each
Dialog 4425 IP Vision or Dialog 4433 IP Office extension.
It may be lost if power to your extension is lost. It is also
automatically re-initialised when a different user signs on to
someone else’s extension.
MD Evolution – Dialog 4425 IP Vision78
Page 79

Directory, Phone Book and Call List
Directory and Call by Name
The integrated directory that is available to everyone in the facility
includes all of the internal numbers served, as well as the external
numbers that are accessible through abbreviated dialling – each
one characterised by the name of the associated internal or external
party.
You may consult this directory from your idle extension. You may
also consult it during a conversation, typically within the context of
establishing an enquiry call, once the current call has been placed
on hold. See also the “Operations during a Call” section.
Next, once the name of the desired internal or external party is
displayed on your extension’s screen, you may place the call
automatically, simply be selecting his/her name.
From an idle extension (or after placing the current call on hold):
Name Press the Name key on your extension.
You then have access to the integrated directory, and your
extension prompts you to enter one or several letters on the
keypad.
CALL BY NAME
Input a name: < >
OK BACK
Options ÛÞ Erase
NAME z On your keypad, enter the first letter(s) of the party’s name
for whom you wish to search.
To enter a letter associated with a number key, simply press the
key once to obtain the first letter, twice for the second, etc. For
example, pressing the 3 key three consecutive times enables you
to enter the letter “F”.
Pressing the 1 key one time enters a space; pressing it two times
enters a dash. Other punctuation marks are also available from that
key.
Pressing the * key toggles between uppercase and lowercase
letters.
79MD Evolution – Dialog 4425 IP Vision
Page 80

Directory, Phone Book and Call List
OK
NEXT
In any case, as you press the keypad keys, the corresponding letters
are displayed on the screen; the “Erase” option enables you to
correct the last character entered. This option is displayed after the
first character or letter is entered.
CALL BY NAME
Input a name: <DU>
T U V ü ù 8
BACK
Options ÛÞ Select
Once your entry is completed:
Þ Press the dynamic function key shown on the left in order to
have the “OK” option highlighted.
The dynamic option “Erase” becomes “Select”.
Select Press the dynamic function key shown on the left.
The purpose of this is to validate your entry.
Your extension then displays the first four names that begin with
the letter(s) previously entered.
The names are displayed in alphabetical order. Internal users and
external parties who are accessible through abbreviated dialling are
both displayed together, as defined by your system administrator.
CALL BY NAME
Duval Robert 505
Ellington Duke 507
Ericsson France 2202
Gibson Mel 436
BACK
Options ÛÞ Select
MD Evolution – Dialog 4425 IP Vision80
Page 81

Directory, Phone Book and Call List
2202
ÅÆÇ
Next, once you have found the name of the internal or external
party you wish to contact:
N times Þ Repeatedly press the dynamic function key shown on the left
until your party’s number is highlighted.
Select Press the dynamic function key shown on the left.
The call is then placed to the selected party and established just as
if you had manually dialled the internal or external party’s number.
CALL BY NAME
Duval Robert 505
Ellington Duke 507
Ericsson France
Gibson Mel 436
NEXT BACK
Options ÛÞ Select
Or, if the number you are searching for is not immediately displayed,
you may scroll through the list of names in descending alphabetical
order. To do so:
N times Þ Repeatedly press the dynamic function key shown on the left
until the “NEXT” option is highlighted.
Select Press the dynamic function key shown on the left.
A new screen displays the next four names.
Notes:
The “BACK” option will display the previous screen. It works
similarly to the “BACK” function in any web browser – you
may back up as far as the first screen that was displayed as
a result of your search.
To exit the directory without calling a party, simply press
your extension’s centre navigation key for 2 seconds.
81MD Evolution – Dialog 4425 IP Vision
Page 82

Directory, Phone Book and Call List
ÅÆÇ
PhoneBook
Dial Name
Personal Phone Book
Over and above the general directory for your facility, your personal
phone book offers you the option of managing your own set of
numbers for favoured external or private parties. This may include
up to 100 pairs of associated names and numbers.
You may define new entries in your personal phone book, modify
them if a phone number must be changed, or delete obsolete entries.
You may then consult it at your leisure and directly call a party found
within this directory, once again by simply selecting his/her name.
Access to your personal phone book
You may access your personal phone book from your idle extension.
You may also consult it during and also during a conversation,
typically within the context of establishing an enquiry call, once the
current call has been placed on hold. See also the “Operations
during a Call” section.
From an idle extension (or after placing the current call on hold):
Press the right navigation key on your extension.
This will highlight the “PhoneBook” tab on the first line of your
extension’s screen, and you access your personal phone book.
Settings CallList WAP Services
Edit
Delete
Add
Exit ÛÞ Select
MD Evolution – Dialog 4425 IP Vision82
Page 83

Directory, Phone Book and Call List
PhoneBook
Creating an entry in your personal phone book
Once you have gained access to your personal phone book, to
create a new name/number pair:
3timesÞ Repeatedly press the dynamic function key shown on the left
until the “Add” selection is framed (see the Welcome screen).
Select Press the dynamic function key shown on the left.
Your extension then prompts you to enter the name for the new
party to include in your personal phone book.
Settings CallList WAP Services
Add
Enter name: Tchang
Exit Erase Save
NAME z On your extension’s keypad, enter the name of the party to
add to your personal phone book.
This name may contain up to 24 letters or characters.
To enter the name, proceed in the same manner as you did to
consult your facility’s directory (see details above). The letters are
entered by repeatedly pressing your extension’s keypad keys; the
“1” key is used to enter a space, dash and other punctuation marks;
pressing the “*” key toggles between uppercase and lowercase
characters.
When necessary, the “Erase” option enables you to correct the last
character entered. This option is displayed after the first character
or letter is entered.
As you press the keypad keys, the corresponding letters are
displayed on the screen.
83MD Evolution – Dialog 4425 IP Vision
Page 84

Directory, Phone Book and Call List
PhoneBook
PhoneBook
Once you have entered the name:
Save Press the dynamic function key shown on the left (displayed
after the first letter is entered).
Your extension then prompts you to enter the number for the new
party to include in your personal phone book.
Settings CallList WAP Services
Add
Enter number: xxxxxxxxxx
Exit Erase Save
NUMBER z On your extension’s keypad, enter the number for the party
to add to your personal phone book.
This number may contain up to 18 digits. External numbers must
contain the prefix required to access the external ad-hoc network
(not included in the 18 digits).
When necessary, the “Erase” option enables you to correct the last
digit entered. This option is displayed after the first digit is entered.
Once you have entered the number:
Save Press the dynamic function key shown on the left (displayed
after the first digit is entered).
Your extension then prompts you to confirm the new entry in your
personal phone book.
Settings CallList WAP Services
Add
Tchang xxxxxxxxxx
Edit OK
OK Press the dynamic function key shown on the left.
The new name/number pair is saved in your personal phone book,
and your extension once again displays the personal phone book
welcome screen.
MD Evolution – Dialog 4425 IP Vision84
Page 85

Directory, Phone Book and Call List
PhoneBook
PhoneBook
Martin Paul 00123456789
Note: The “Edit” option in the first screen enables you to
correct an inaccurate entry (see details to follow). The “Exit”
option shown in all preceding screens enables you to return
to your personal phone book welcome screen, without
saving any modifications.
Modifying an entry in your personal phone book
Once you have gained access to your personal phone book, to
modify an existing name/number pair:
Þ Press the dynamic function key shown on the left in order to
have the “Edit” selection framed (see the phone book welcome
screen).
Select Press the dynamic function key shown on the left.
NAME z On your keypad, enter the first letter(s) of the party’s name
Search Press the dynamic function key shown on the left.
Your extension then prompts you to enter the name for the party you
wish to modify in your personal phone book.
Settings CallList WAP Services
Edit
Enter name: MA
Exit Erase Search
for whom you wish to search.
To do so, proceed in the same way as you would to create an entry
in your personal phone book; the “Erase” option remains available
to correct your entry.
Your extension then displays the five names saved in your personal
phone book that most closely match your alphabetical entry.
Settings CallList WAP Services
Latin America 00636985278
Logan Arthur 81568
Mayor Gustav 00213456789
Norma Gene 00498765436
Exit ÛÞ Edit
85MD Evolution – Dialog 4425 IP Vision
Page 86

Directory, Phone Book and Call List
PhoneBook
Number +
MODIF. NUM.
z
PhoneBook
N times Þ or Û Repeatedly press one of the dynamic function keys shown on
the left until the desired name/number pair is framed.
These arrows also enable you to navigate through your entire personal
phone book.
Edit Press the dynamic function key shown on the left.
Your extension prompts you to modify the name and/or number for
the selected party.
Settings CallList WAP Services
Edit
Martin Paul 00123456789
Exit Number Erase Save
You may :
MODIF. NAME z • Directly modify the party’s name by selecting the “Erase” option
to erase the last characters and then correct the entry (on the
keypad, as previously described).
• Modify the party’s number by first selecting the “Number”
option. The “Erase” option allows you to erase the last digits,
and then you may correct the entry (on the keypad, as previously
described).
Once your corrections are made:
Save Press the dynamic function key shown on the left.
Your extension then prompts you to confirm the modification to your
personal phone book.
Settings CallList WAP Services
Edit
Martin Paul 00623456789
Edit OK
OK Press the dynamic function key shown on the left.
The modified name/number pair is saved in your personal phone
book, and your extension once again displays the personal phone
book welcome screen.
MD Evolution – Dialog 4425 IP Vision86
Page 87

Directory, Phone Book and Call List
PhoneBook
PhoneBook
Martin Paul 00123456789
Note: The “Exit” option shown in all preceding screens
enables you to return to your personal phone book welcome
screen, without saving any modifications.
Deleting an entry in your personal phone book
Once you have gained access to your personal phone book, to
delete an existing name/number pair:
2timesÞ Repeatedly press the dynamic function key shown on the left
until the “Delete” selection is framed (see the phone book
welcome screen).
Select Press the dynamic function key shown on the left.
Your extension then prompts you to enter the name of the party you
wish to delete from your personal phone book.
Settings CallList WAP Services
Delete
Enter name: MA
Exit Erase Search
NAME z On your keypad, enter the first letter(s) of the party’s name
for whom you wish to search.
To do so, proceed in the same way as you would to create an entry
in your personal phone book; the “Erase” option remains available to
correct your entry.
Search Press the dynamic function key shown on the left.
Your extension then displays the five names saved in your personal
phone book that most closely match your alphabetical entry.
Settings CallList WAP Services
Latin America 00636985278
Logan Arthur 81568
Mayor Gustav 00213456789
Norma Gene 00498765436
Exit ¯ Delete
87MD Evolution – Dialog 4425 IP Vision
Page 88

Directory, Phone Book and Call List
PhoneBook
PhoneBook
Dial Name
N times Þ or Û Repeatedly press one of the dynamic function keys shown on
the left until the desired name/number pair is framed.
These arrows also enable you to navigate through your entire personal
phone book.
Delete Press the dynamic function key shown on the left.
Your extension then prompts you to confirm the deletion of this entry
from your personal phone book.
Settings CallList WAP Services
Delete
Martin Paul 00623456789
Cancel OK
OK Press the dynamic function key shown on the left.
The name/number pair selected is deleted from your personal phone
book, and your extension once again displays the personal phone
book welcome screen.
Note: The “Exit” or “Cancel” option shown in all preceding
screens enables you to return to your personal phone book
welcome screen without saving any modifications.
Exiting your personal phone book
Once you have finished managing your personal phone book:
Settings CallList WAP Services
Edit
Delete
Add
Exit ÛÞ Select
Exit Press the dynamic function key shown on the left.
Your extension returns to idle, or, if you had previously placed a call
on hold, you may now return to it.
MD Evolution – Dialog 4425 IP Vision88
Page 89

Directory, Phone Book and Call List
PhoneBook
Dial Name
PhoneBook
Placing a call from your personal phone book
You may also place a call directly to a party that is saved in your
personal phone book simply by selecting his/her name. This applies
to both single and enquiry calls. See also the “Operations during a
Call” section.
From an idle extension (or after placing the current call on hold), once
you have accessed your personal phone book:
Settings CallList WAP Services
Edit
Delete
Add
Exit ÛÞ Select
Select Press the dynamic function key shown on the left.
The “Dial Name” option is selected, and your extension then
prompts you to enter the name of the party you wish to call from your
personal phone book.
Settings CallList WAP Services
Dial name
Enter name: MA
Exit Erase Search
NAME z On your keypad, enter the first letter(s) of the party’s name
for whom you wish to search.
To do so, proceed in the same way as you would to create an entry
in your personal phone book; the “Erase” option remains available
to correct your entry.
89MD Evolution – Dialog 4425 IP Vision
Page 90

Directory, Phone Book and Call List
PhoneBook
Martin Paul 00123456789
Search Press the dynamic function key shown on the left.
Your extension then displays the five names saved in your personal
phone book that most closely match your alphabetical entry.
Settings CallList WAP Services
Latin America 00636985278
Logan Arthur 81568
Mayor Gustav 00213456789
Norma Gene 00498765436
Exit ÛÞ Call
N times Þ or Û Repeatedly press one of the dynamic function keys shown on
the left until the desired name/number pair is framed.
These arrows also enable you to navigate through your entire personal
phone book.
Call Press the dynamic function key shown on the left.
This will select the framed party, and your extension displays the
new call screen shown below.
Settings CallList PhoneBook WAP Services
15:49 07 Nov 2008
SMITH Peter
00123456789 405
Erase Call
Call Press the dynamic function key shown on the left.
The call is then placed to the selected party and established just as
if you had manually dialled the internal or external party’s number.
Note: From an idle extension, you may alternatively press
and hold a keypad key for 2 seconds. Your extension then
displays a screen similar to the previous one, with the five
names that most closely match the letter you entered. The
rest of the procedure is identical to what was previously
described. This quicker process only works when establishing
a single call from an idle extension.
MD Evolution – Dialog 4425 IP Vision90
Page 91

Directory, Phone Book and Call List
ÅÆÇ
CallList
Call List
With the call list service, your extension automatically saves all calls
that you receive, but that you do not answer when you were absent,
when your line was busy, or when you rejected a call that was presented to you.
Your extension also automatically saves the incoming calls that you
do answer, as well as all of the outgoing calls made from your
extension – whether or not they were answered. The list can hold up to
50 calls.
You can manage this file; for example, to delete saved calls or transfer
call data to your personal phone book.
You also have the option of automatically calling back each party
whose identity is saved in this file. This can be carried out from your
own idle extension or during a conversation, to establish an enquiry
call, once your current call has been placed on hold. See also the
“Operations during a Call” section.
Accessing your extension’s call list
From an idle extension (or after placing the current call on hold):
N times Þ or Û Repeatedly press one of the dynamic function keys shown on
Press the right navigation key on your extension.
This will highlight the “CallList” tab on the first line of your
extension’s screen, and you access your extension’s call log file.
The last five calls received or placed from your extension will be
displayed (whether or not they were answered), along with a scroll
bar, if the file contains more than 5 calls. In the latter case:
the left.
This will allow you to scroll through the content of your call log file in
ascending or descending order of the time in which the registered
calls were received or placed.
Settings PhoneBook WAP Services
MARTIN Vincent 423 9:52 06 Nov 0:01:55
ERICSSON Fr 00164477500 18:40 05 Nov
MAHMOOD Zia 512 8:30 03 Nov
more… ÛÞ Call
91MD Evolution – Dialog 4425 IP Vision
Page 92

Directory, Phone Book and Call List
For each call saved, the identity – name and number, if available
– of the internal/external calling/called party is saved, as well as the
date and time of the call. For an answered call, the length of the call
is also indicated.
There are various icons to identify each type of call:
• This icon indicates a new incoming call that has not been
answered, and that you have not yet retrieved.
• This icon indicates a new incoming call that has not been
answered, but that you have retrieved.
• This icon indicates a processed incoming call.
• This icon indicates an outgoing call that was either answered or
not answered.
When idle, your extension also displays the number (x) of calls you
did not answer, and therefore have not yet retrieved, in the form of
the following label: “x Missed”. When no such types of calls are
present in the call list, the corresponding space has no information
whatsoever.
Settings CallList PhoneBook WAP Services
CS GC 15:49 07 Nov 2008
SMITH Peter
405
Log off 2 Missed
x Missed Press the dynamic function key shown on the left.
This is another way of accessing your extension’s call list, which will
be displayed as previously described.
Notes:
This file may contain up to 50 calls, as indicated. The oldest
calls are automatically eliminated as new calls are received
or placed.
3 If several calls are received or placed from or to the same
party over time, only the last call is saved. This is also the
case when you have missed several calls from the same
party. A number associated with the icon then indicates the
number of calls.
MD Evolution – Dialog 4425 IP Vision92
Page 93

Directory, Phone Book and Call List
CallList
ERICSSON Fr 00164477500 18:40 05 Nov
Placing a call from your extension’s call list
Once you have accessed your extension’s call log file, you can very
simply place a call to a party whose call was saved. To do so:
Settings PhoneBook WAP Services
MARTIN Vincent 423 9:52 06 Nov 0:01:55
MAHMOOD Zia 512 8:30 03 Nov
more… ÛÞ Call
N times Þ or Û Repeatedly press one of the dynamic function keys shown on
the left until the desired party is framed.
Call Press the dynamic function key shown on the left.
This will select the framed party, and your extension displays the
new call screen shown below.
Settings CallList PhoneBook WAP Services
15:49 07 Nov 2008
SMITH Peter
00164477500 405
Erase Call
Call Press the dynamic function key shown on the left.
The call is then placed to the selected party and established just as
if you had manually dialled the internal or external party’s number.
93MD Evolution – Dialog 4425 IP Vision
Page 94

Directory, Phone Book and Call List
ERICSSON Fr 00164477500 18:40 05 Nov
ÅÆÇ
Managing your extension’s call log file
To manage your call log file, from the main screen illustrated above:
N times Þ or Û Repeatedly press one of the dynamic function keys shown on
the left until the call to be managed is framed.
more… Press the dynamic function key shown on the left.
The new screen below is displayed:
Settings CallList PhoneBook WAP Services
MARTIN Vincent 423 9:52 06 Nov 0:01:55
MAHMOOD Zia 512 8:30 03 Nov
Exit Back Delete AddPhoneBook
The options offered to you are as follows:
Delete Press the dynamic function key shown on the left to delete
the selected call from the file.
The corresponding call is simply deleted from the call log file, without
any recall of the corresponding party. The log file’s screen is automatically updated and displayed.
AddPhoneBook Press the dynamic function key shown on the left to transfer
the party’s data to your personal phone book.
A screen is displayed, prompting you to confirm the creation of a
new entry with this data in your personal phone book. Next, the call
log file’s main screen is re-displayed, and the call that was
previously selected is still present.
Back Press the key shown on the left to simply return to the call log
file’s main screen.
Exit Press the dynamic function key shown on the left to exit the
call log file.
Note: To exit your extension’s call log file, you may also
press the centre navigation key on your extension.
MD Evolution – Dialog 4425 IP Vision94
Page 95

Call Forwarding Services
Call Forwarding Services
Your extension also offers you various call forwarding services that
enable you to direct incoming calls to another internal or external
destination, whenever you are absent and/or busy, travelling, or
when you simply would rather not be disturbed.
The following different types of services are available:
• Call forward on no-answer condition: Your calling parties will be
re-directed to the pre-defined call forward recipient, whenever
you do not answer their calls, typically after a 20-second delay.
• Call forward on busy condition: Your calling parties are immediately re-directed to the pre-defined call forward recipient
whenever your extension is busy.
• Call forward on no-answer and busy conditions: Your calling
parties are re-directed to the pre-defined call forward recipient
in both cases.
• Immediate call forward: All incoming calls are immediately redirected to the pre-defined call forward recipient. Typically, this
could be your secretary’s internal number, or your external mobile
phone number when you are travelling.
• “Do not disturb” call forward: Your extension is unavailable,
although no real forwarding of your calls is activated. Your
internal party’s calls are immediately disconnected, and your
“Do not disturb” status is displayed on extensions that feature a
display screen. Calls from your external parties are immediately
re-directed to your facility’s attendants with the indication of
your “Do not disturb” status.
• Call forward on mini-message: Your extension is unavailable,
although no real forwarding of your calls is activated. Your
internal parties, and possibly your external parties, receive the
display of an “Absent” message that you have pre-recorded.
The number to which a call forward may be directed can be an
internal party’s individual extension, a hunt group, another user’s
personal group, or even the access number for an integrated voice
mail system that your facility may use. See the “Voice Mail Services”
section.
95MD Evolution – Dialog 4425 IP Vision
Page 96

Call Forwarding Services
It may also consist of an external number containing up to 18 digits,
including the network access prefix. This may be an external number
that is accessible through abbreviated dialling.
You may use a fixed call forward defined by your system administrator.
This may consist of a call forward on no-answer condition, a call
forward on busy condition, or a call forward on no-answer and busy
conditions.
This fixed call forward is applied by default whenever you do not
define a variable call forward for your calls. This is often the case
when your facility uses an integrated voice mail, which – by default
– receives your calls encountering a no-answer or busy condition.
You may define all of the types of call forwards listed above, on your
own. This is referred to as a variable call forward that takes precedence over a possible fixed call forward.
This variable call forward may be:
• A pre-defined call forward assigned to the Call-Fwd (call forward)
key on your extension. This is valid for all types of call forwards,
except call forward on mini-message. Simply pressing this CallFwd (call forward) key will then either activate or de-activate the
pre-defined variable call forward.
• A variable call forward defined on a case by case basis. This is
valid for any type of call forward that is immediately activated
after it has been defined. This then will take precedence over a
call forward that was pre-defined on the Call-Fwd key.
In any case, only one call forward applies at any given moment.
Defining a new variable call forward automatically cancels any
definition that previously existed.
A variable call forward is usually defined on a case by case basis
before you leave your extension. You may also remotely define your
call forward recipient from his/her internal extension. This is the
“Follow me” or “Third party call forward (or remote call forward)”
service.
The call forwards previously mentioned are predefined call forwards.
Finally, your extension also offers you the call deflection service.
This is a call forward activated when an incoming call is presented
to you, on a call-by-call basis, in cases where you would rather not
answer that specific call, thus directing it to another recipient.
MD Evolution – Dialog 4425 IP Vision96
Page 97

Call Forwarding Services
Notes:
When any type of call forward is defined on your extension,
you still have the option of placing calls and activating any
type of service from your extension.
When you have defined any type of call forward to an internal
recipient, the latter has still the option of calling you without
any restrictions.
When a call forward on busy condition is defined on your
extension, no more incoming calls will be presented to you
when you have an ongoing call. In the same way, the services
of consulting and answering a new call are de-activated.
For any call forward defined to be directed to an external
recipient, forwarding of calls issued from external parties
may take place either through your facility’s resources or
directly at the Euro-ISDN network level, according to your
facility’s configuration.
You may program a call forward from your extension to
itself. This enables you to bypass any fixed call forward that
is applicable to your extension. Your extension is therefore
available normally.
Cumulative call forwards between different users are
authorised.
Your extension may also be subject to call forwarding from
third party sets. Certain extensions (such as yours) may
possibly be equipped with a permanent protection against
receiving call forwards from third party sets. Obviously, this
service will be denied on these extensions (and vice-versa).
97MD Evolution – Dialog 4425 IP Vision
Page 98

Call Forwarding Services
2
1
Defining a Variable Call Forward
Defining a variable call forward on a case-by-case basis is carried
out within the framework of your extension’s service programming
functions.
When your extension is idle:
Menu Press the Menu key on your extension.
You access your extension’s services programming, and the
following screen is displayed.
PROGRAMMING
0 General calling ACTIVE
1 Hunt group ACTIVE
Call forward UNACTIVE
3 Appointment reminder UNACTIVE
4 Prefixes consultation
Options ÛÞ Select
2timesÞ Press twice the dynamic function key shown on the left in
order to highlight the number “2”, which corresponds to the
call forwarding services.
Select Press the dynamic function key shown on the left.
You access the programming of your extension’s call forwarding
services and the following screen is displayed.
CALL FORWARD
Call forward
2 Remote call forward
3 System call forward
4 Programming the call forward key (Immediate - 435)
BACK
Options ÛÞ Select
MD Evolution – Dialog 4425 IP Vision98
Page 99

Call Forwarding Services
1
Select Press the dynamic function key shown on the left.
You are granted access to the programming of your extension’s
variable call forwarding service and the following screens are displayed.
CALL FORWARD
Immediate
2 On no reply
3On busy
4 On no reply or on busy
5To message
Options ÛÞ Select
CALL FORWARD
4 On no reply or on busy
5To message
6 Do not disturb
7 Cancel forward
BACK
Options ÛÞ Select
N times Þ or Û Repeatedly press one of the dynamic function keys shown on
the left in order to highlight the number “n”, which
corresponds to the desired call forwarding service, most
particularly:
1 Immediate To activate an immediate call forward.
2 On no reply To activate a call forward on no-answer condition.
3On busy To activate a call forward on busy condition.
4 On no reply or on busy To activate a call forward on no-answer and busy conditions.
6 Do not disturb To activate your Do not disturb status.
Select Press the dynamic function key shown on the left.
In the first four cases, your extension displays the type of call forward
requested, and prompts you to enter the number or name of the
internal or external call forward recipient.
99MD Evolution – Dialog 4425 IP Vision
Page 100

Call Forwarding Services
OK
OK
In the last case, a confirmation of acceptance of the “Do not disturb”
call forward is provided by your extension; all you need to do is exit
your extension’s service programming mode (see details to follow).
CALL FORWARD - IMMEDIATE
Input a number: <507>
Input a name: < >
OK
Options ÛÞ Select
To define the number to receive your call forwards:
FWD NO z Enter the internal or external number to receive your call
forwards.
To do so, use your extension’s keypad, hold each key down for
approximately 2 seconds, and, if necessary, using the “Erase”
option to cancel the last character entered.
As previously indicated, the recipient’s number may contain up to
18 digits, including the network access prefix. An external number
may be a number that is accessible through abbreviated dialling.
Þ Press the dynamic function key shown on the left in order to
have the “OK” option highlighted.
The dynamic option “Erase” becomes “Select”.
Select Press the dynamic function key shown on the left.
2timesÞ Press twice the dynamic function key shown on the left until
The purpose of this is to validate your entry, and then your extension
displays its acceptance of your service programming (see details to
follow).
Or, to identify your call forward recipient by his/her name:
you are prompted to input a name.
CALL FORWARD - IMMEDIATE
Input a number: <>
OK
Input a name: <DU>
T U V û ù 8
Options ÛÞ Select
MD Evolution – Dialog 4425 IP Vision100
 Loading...