


RN SERIES
Horizontal Packaged Rooftop Units, Heat Pumps,
& Outdoor Air Handling Units
Installation, Operation,
 & Maintenance
WARNING |
WARNING |
FIRE OR EXPLOSION HAZARD
Failure to follow safety warnings exactly could result in serious injury, death or property damage.
Be sure to read and understand the installation, operation, and service instructions in this manual.
Improper installation, adjustment, alteration, service, or maintenance can cause serious injury, death, or property damage.
A copy of this IOM should be kept with the unit.
oDo not store gasoline or other flammable vapors and liquids in the vicinity of this or any other appliance
oWHAT TO DO IF YOU SMELL GAS
Do not try to light any appliance.
Do not touch any electrical switch; do not use any phone in your building.
Leave the building immediately.
Immediately call your gas supplier from a phone remote from the building. Follow the gas supplier’s instructions.
If you cannot reach your gas supplier, call the fire department.
oStartup and service must be performed by a
Factory Trained Service Technician.
Table of Contents |
|
Safety .............................................................................................................................................. |
8 |
RN Series Feature String Nomenclature....................................................................................... |
13 |
General Information...................................................................................................................... |
24 |
Codes and Ordinances .............................................................................................................. |
24 |
Receiving Unit .......................................................................................................................... |
25 |
Packaged Direct Expansion (DX) Units ................................................................................... |
26 |
Gas or Electric Heating............................................................................................................. |
27 |
Wiring Diagrams....................................................................................................................... |
28 |
Condensate Drain Pan............................................................................................................... |
28 |
Installation..................................................................................................................................... |
28 |
Locating Units........................................................................................................................... |
28 |
Setting the Curb ........................................................................................................................ |
29 |
Forklifting the Unit (11, 13 and 16-30 ton) .............................................................................. |
31 |
Lifting the Unit ......................................................................................................................... |
31 |
Duct Connection ....................................................................................................................... |
33 |
Outside Air Rain Hood ............................................................................................................. |
35 |
Metal Mesh Filters (11, 13 and 16-30 ton) ............................................................................... |
36 |
Electrical ................................................................................................................................... |
36 |
Thermostat Control Wiring................................................................................................... |
38 |
Gas Heating............................................................................................................................... |
39 |
Piping Sizing Examples ........................................................................................................ |
41 |
Inlet and Manifold Pressures ................................................................................................ |
41 |
Gas Pressure Regulator & Overpressure Protection Device................................................. |
41 |
Piping Supports..................................................................................................................... |
41 |
Additional Gas Piping Considerations.................................................................................. |
42 |
Leak Testing.......................................................................................................................... |
43 |
Refrigerant-to-Water Heat Exchanger ...................................................................................... |
43 |
Water-Source Heat Pump Applications ................................................................................ |
43 |
Open Loop Applications ....................................................................................................... |
44 |
Freezing Water in the Heat Exchanger ................................................................................. |
45 |
Water Piping ......................................................................................................................... |
45 |
Condensate Drain Piping .......................................................................................................... |
48 |
Draw-Through Coils ................................................................................................................. |
49 |
Heating Coils ............................................................................................................................ |
50 |
Chilled Water Coil .................................................................................................................... |
50 |
Electric Preheat ......................................................................................................................... |
51 |
Status Display Screens.......................................................................................................... |
51 |
System Setting Screens ......................................................................................................... |
52 |
LED Flash Alarm Codes....................................................................................................... |
54 |
Operation............................................................................................................................... |
54 |
Energy Recovery Units............................................................................................................. |
55 |
Startup........................................................................................................................................... |
63 |
Supply Fans............................................................................................................................... |
63 |
Power Return Axial Flow Fans (16-25 and 30 tons) ................................................................ |
65 |
Filters ........................................................................................................................................ |
67 |
3
Adjusting Refrigerant Charge................................................................................................... |
68 |
Checking Liquid Sub-Cooling .............................................................................................. |
68 |
Checking Evaporator Superheat ........................................................................................... |
68 |
Adjusting Sub-cooling and Superheat Temperatures............................................................ |
69 |
Gas Heater Instructions............................................................................................................. |
71 |
Condenser Fan Electronically Commutated Motor (ECM) Startup ......................................... |
72 |
VFD Controlled Condenser Fan Startup................................................................................... |
73 |
Adjustable Fan Cycling Switch Procedure ............................................................................... |
74 |
Operation....................................................................................................................................... |
76 |
Thermostat Operation ............................................................................................................... |
76 |
Packaged DX Cooling Operation and Control ......................................................................... |
77 |
Gas Heater Operation................................................................................................................ |
77 |
Electric Heating Operation ....................................................................................................... |
77 |
Steam or Hot Water Preheating and Heating Operation........................................................... |
77 |
Modulating Electric Preheat ..................................................................................................... |
77 |
Chilled Water or Non-Compressorized DX Cooling Operation............................................... |
77 |
Maintenance.................................................................................................................................. |
78 |
Gas Heating............................................................................................................................... |
78 |
Gas Heat Exchanger Removal .................................................................................................. |
79 |
DX Cooling............................................................................................................................... |
79 |
Condenser Fans (6-25 and 30 ton)............................................................................................ |
79 |
Condensate Drain Pans ............................................................................................................. |
80 |
Evaporator Coil (6-25 and 30 ton)............................................................................................ |
81 |
Brazed Plate Heat Exchanger Cleaning .................................................................................... |
82 |
E-Coated Coil Cleaning ............................................................................................................ |
82 |
Microchannel Coil Cleaning..................................................................................................... |
83 |
Supply Fans............................................................................................................................... |
86 |
Phase and Brownout Protection Module .................................................................................. |
87 |
Variable Capacity Compressor Controller................................................................................ |
89 |
Filter Replacement.................................................................................................................... |
90 |
Filter Information.......................................................................................................................... |
91 |
Replacement Parts..................................................................................................................... |
92 |
Appendix A - Heat Exchanger Corrosion Resistance................................................................... |
93 |
Appendix B - Thermistor Temperature vs. Resistance Values..................................................... |
95 |
RN Series Startup Form................................................................................................................ |
96 |
Maintenance Log ........................................................................................................................ |
100 |
V76270 · Rev. A · 160425 |
|
4
Index of Tables and Figures |
|
Tables: |
|
Table 1 - Electric and Gas Heating Capacities ............................................................................. |
28 |
Table 2 - C Cabinet Unit Clearances ............................................................................................ |
29 |
Table 3 - Control Wiring............................................................................................................... |
39 |
Table 4 -11, 13, 16-25 and 30 ton................................................................................................. |
39 |
Table 5 - Natural Gas (ft3/hr) Maximum Piping Capacities ......................................................... |
40 |
Table 6 - Propane (kBtu/hr) Maximum Piping Capacities ........................................................... |
40 |
Table 7 - Gas Piping Supports ...................................................................................................... |
41 |
Table 8 - Glycol Freezing Points .................................................................................................. |
45 |
Table 9 - Standard Brazed Plate Heat Exchanger Water Connections ......................................... |
46 |
Table 10 - SMO 254 Brazed Plate Heat Exchanger Water Connections...................................... |
46 |
Table 11 - Draw-Through Drain Trap Dimensions ...................................................................... |
49 |
Table 12 - Steam Coil Connection Sizes ...................................................................................... |
50 |
Table 13 - Hot Water Coil Connection Sizes................................................................................ |
50 |
Table 14 - Chilled Water Coil Connection Sizes.......................................................................... |
50 |
Table 15 - Stages of Electric Preheat............................................................................................ |
53 |
Table 16 - Plenum Fan Set Screw Specifications ......................................................................... |
64 |
Table 17 - Pin Location................................................................................................................. |
67 |
Table 18 - Pin Groove Location.................................................................................................... |
67 |
Table 19 - Acceptable Refrigeration............................................................................................. |
69 |
Table 20 - R-410A Refrigerant Temperature-Pressure Chart....................................................... |
70 |
Table 21 - ECM Condenser Fan Cycling Options........................................................................ |
72 |
Table 22 - Demand Signal vs. Compressor Capacity Modulation................................................ |
89 |
Table 23 - RN Series 11, 13, 16-25 and 30 ton Pre Filters ........................................................... |
91 |
Table 24 - RN Series 11, 13, 16-25 and 30 ton Unit Filters ......................................................... |
91 |
Table 25 - RN Series 11, 13, 16-25 and 30 ton Energy Recovery Wheel Filters ......................... |
91 |
Table 26 - RN Series 11, 13, 16-25 and 30 ton Final Filters ........................................................ |
91 |
5
Figures: |
|
Figure 1 - Lockable Handle .......................................................................................................... |
25 |
Figure 2 - RN Series C Cabinet, ................................................................................................... 29 |
|
Figure 3 - Forklifting an RN Series A, B and C Cabinet, 11, 13 and 16-30 ton tons................... |
31 |
Figure 4 - Lifting Details of a 11, 13 and 16-30 ton tons ton Standard or Power Exhaust Unit .. |
32 |
Figure 5 - Lifting Details of a 11, 13 and 16-30 ton tons Energy Recovery Wheel or Power |
|
Return Unit.................................................................................................................................... |
32 |
Figure 6 - Duct Connection........................................................................................................... |
34 |
Figure 7 - 11, 13 and 16-30 ton..................................................................................................... |
35 |
Figure 8 - 11, 13 and 16-30 ton..................................................................................................... |
35 |
Figure 9 - Rain Hood with Metal Mesh Filter Rack Installation .................................................. |
36 |
Figure 10 - Unit Utility Entry ....................................................................................................... |
37 |
Figure 11 - Back View of Power Switch from Compressor and Control Compartment (11, 13 and |
|
16-30 ton Units) ............................................................................................................................ |
37 |
Figure 12 - RN Series Gas Heat Exchanger.................................................................................. |
40 |
Figure 13 - Example 11, 13, 16-25 and 30 ton through the Base Gas Piping............................... |
42 |
Figure 14 - Draw-Through Drain Trap ......................................................................................... |
49 |
Figure 15 - Preheat Controller ...................................................................................................... |
51 |
Figure 16 - Supply Fan Banding................................................................................................... |
64 |
Figure 17 - Plenum Fan Gap Tolerances ...................................................................................... |
65 |
Figure 18 - Fan with the HUB on the Top and RET on the Bottom............................................. |
65 |
Figure 19 - Bushing Mount Location............................................................................................ |
66 |
Figure 20 - RET with Pin in Groove 4.......................................................................................... |
66 |
Figure 21 - Fan HUB and RET Castings ...................................................................................... |
66 |
Figure 22 - Gas Heater Instructions.............................................................................................. |
71 |
Figure 23 - Gas Heat Exchanger................................................................................................... |
79 |
Figure 24 - Removal of a Condenser Fan Assembly .................................................................... |
80 |
Figure 25 - Evaporator Coil Access.............................................................................................. |
81 |
Figure 26 - 9-25 and 30 ton Supply Fan ....................................................................................... |
86 |
Figure 27 - Bolts which Connect Motor Mount to Blower Fan.................................................... |
86 |
Figure 28 - Variable Capacity Compressor Controller................................................................. |
89 |
Figure 29 - Compressor Controller Flash Code Details................................................................ |
90 |
Figure 30 - RN Series 11, 13, 16-25 and 30 ton Units ton Standard Filter Layouts..................... |
92 |
6
AAON® RN Series Horizontal Configuration
Features and Options Introduction
Energy Efficiency |
Installation and Maintenance |
||
• Direct Drive Backward Curved Plenum |
• |
Clogged Filter Switch |
|
|
Supply Fans |
• Color Coded Wiring Diagram |
|
• Variable Capacity R-410A Scroll |
• Compressors in Isolated Compartment |
||
|
Compressors |
• |
Compressor Isolation Valves |
• |
Airside Economizers |
• |
Convenience Outlet |
• Factory Installed AAONAIRE® Energy |
• Direct Drive Supply Fans |
||
|
Recovery Wheels |
• Hinged Access Doors with Lockable |
|
• Double Wall Rigid Polyurethane Foam |
|
Handles |
|
|
Panel Construction, R-13 Insulation |
• |
Magnehelic Gauge |
• Modulating Natural Gas Heaters |
• |
Service Lights |
|
• |
Modulating/SCR Electric Heaters |
• |
Sight Glass |
• |
Premium Efficiency Motors |
System Integration |
|
• |
Variable Speed Supply/Return/Exhaust |
||
|
Fans |
• Chilled Water Cooling Coils |
|
• |
Water-Cooled Condensers |
• |
Controls by Others |
• |
Air-Source, Water-Source and |
• |
Electric/Natural Gas/LP Heating |
|
Geothermal Heat Pumps |
• Hot Water/Steam Heating Coil |
|
Indoor Air Quality |
• Non-Compressorized DX Coils |
||
• |
Water-Cooled Condensers |
||
• |
100% Outside Air |
Environmentally Friendly |
|
• Constant Volume Outside Air Control |
|||
• |
Economizer CO2 Override |
• |
Airside Economizers |
• |
High Efficiency Filtration |
• Factory Installed AAONAIRE Energy |
|
• Double Wall Rigid Polyurethane Foam |
|
Recovery Wheels |
|
|
Panel Construction, R-13 Insulation |
• |
Mixed/Return Air Bypass |
• |
Interior Corrosion Protection |
• |
R-410A Refrigerant |
Humidity Control |
Extended Life |
||
• High Capacity Cooling Coils |
• 5 Year Compressor Warranty |
||
• |
Variable Capacity Compressors |
• 15 Year Aluminized Steel Heat |
|
• Factory Installed AAONAIRE Total |
|
Exchanger Warranty |
|
|
Energy Recovery Wheels |
• 25 Year Stainless Steel Heat Exchanger |
|
• |
Mixed/Return Air Bypass |
|
Warranty |
• Modulating Hot Gas Reheat |
• |
Condenser Coil Guards |
|
Safety |
• |
Interior Corrosion Protection |
|
• Polymer E-Coated Coils - 5 Year |
|||
• |
Burglar Bars |
|
Warranty |
• |
Freeze Stats |
• Stainless Steel Coil Casing |
|
• |
Electric Preheat |
• Stainless Steel Drain Pans |
|
•Phase and Brown Out Protection
•Supply/Return Smoke Detectors
•Supply/Return Firestats
7
Safety
Attention should be paid to the following statements:
NOTE - Notes are intended to clarify the unit installation, operation, and maintenance.
 CAUTION - Caution statements are given to prevent actions that may result in equipment damage, property damage, or personal injury.
 WARNING - Warning statements are given to prevent actions that could result in equipment damage, property damage, personal injury or death.
 DANGER - Danger statements are given to prevent actions that will result in equipment damage, property damage, severe personal injury or death.
WARNING
ELECTRIC SHOCK, FIRE OR EXPLOSION HAZARD
Failure to follow safety warnings exactly could result in dangerous operation, serious injury, death or property damage.
Improper servicing could result in dangerous operation, serious injury, death, or property damage.
Before servicing, disconnect all electrical power to the furnace.
More than one disconnect may be provided.
When servicing controls, label all wires prior to disconnecting. Reconnect wires correctly.
Verify proper operation after servicing. Secure all doors with key-lock or nut and bolt.
CAUTION
WHAT TO DO IF YOU SMELL GAS
Do not try to turn on unit.
Shut off main gas supply.
Do not touch any electric switch.
Do not use any phone in the building.
Never test for gas leaks with an open flame.
Use a gas detection soap solution and check all gas connections and shut off valves.
WARNING
Electric shock hazard. Before servicing, shut off all electrical power to the unit, including remote disconnects, to avoid shock hazard or injury from rotating parts. Follow proper Lockout-Tagout procedures.
8
WARNING
FIRE, EXPLOSION OR CARBON MONOXIDE POISONING HAZARD
Failure to replace proper controls could result in fire, explosion, or carbon monoxide poisoning. Failure to follow safety warnings exactly could result in serious injury, death or property damage. Do not store or use gasoline or other flammable vapors and liquids in the vicinity of this appliance.
WARNING
During installation, testing, servicing, and troubleshooting of the equipment it may be necessary to work with live electrical components. Only a qualified licensed electrician or individual properly trained in handling live electrical components shall perform these tasks.
Standard NFPA-70E, an OSHA regulation requiring an Arc Flash
Boundary to be field established and marked for identification of where appropriate Personal Protective
Equipment (PPE) be worn, should be followed.
WARNING
ROTATING COMPONENTS
Unit contains fans with moving parts that can cause serious injury. Do not open door containing fans until the power to the unit has been disconnected and fan wheel has stopped rotating.
WARNING
GROUNDING REQUIRED
All field installed wiring must be completed by qualified personnel.
Field installed wiring must comply with NEC/CEC, local and state electrical code requirements. Failure to follow code requirements could result in serious injury or death. Provide proper unit ground in accordance with these code requirements.
WARNING
VARIABLE FREQUENCY DRIVES
Do not leave VFDs unattended in hand mode or manual bypass.
Damage to personnel or equipment can occur if left unattended. When in hand mode or manual bypass mode VFDs will not respond to controls or alarms.
9

CAUTION
Electric motor over-current protection and overload protection may be a function of the Variable Frequency Drive to which the motors are wired.
Never defeat the VFD motor overload feature. The overload ampere setting must not exceed 115% of the electric motor’s FLA rating as shown on the motor nameplate.
WARNING
UNIT HANDLING
To prevent injury or death lifting equipment capacity shall exceed unit weight by an adequate safety factor. Always test-lift unit not more than 24 inches high to verify proper center of gravity lift point to avoid unit damage, injury or death.
CAUTION
Failure to properly drain and vent coils when not in use during freezing temperature may result in coil and equipment damage.
CAUTION
Rotation must be checked on all MOTORS AND COMPRESSORS of
3 phase units at startup by a qualified service technician. Scroll compressors are directional and can be damaged if rotated in the wrong direction. Compressor rotation must be checked using suction and discharge gauges. Fan motor rotation should be checked for proper operation. Alterations should only be made at the unit power connection
WARNING
Do not use oxygen, acetylene or air in place of refrigerant and dry nitrogen for leak testing. A violent explosion may result causing injury or death.
WARNING
WATER PRESSURE
Prior to connection of condensing water supply, verify water pressure is less than maximum pressure shown on unit nameplate. To prevent injury or death due to instantaneous release of high pressure water, relief valves should be field supplied on system water piping.
10
WARNING
Always use a pressure regulator, valves and gauges to control incoming pressures when pressure testing a system. Excessive pressure may cause line ruptures, equipment damage or an explosion which may result in injury or death.
CAUTION
To prevent damage to the unit, do not use acidic chemical coil cleaners. Do not use alkaline chemical coil cleaners with a pH value greater than
8.5, after mixing, without first using an aluminum corrosion inhibitor in the cleaning solution.
WARNING
Some chemical coil cleaning compounds are caustic or toxic. Use these substances only in accordance with the manufacturer’s usage instructions. Failure to follow instructions may result in equipment damage, injury or death.
CAUTION
Do not clean DX refrigerant coils with hot water or steam. The use of hot water or steam on refrigerant coils will cause high pressure inside the coil tubing and damage to the coil.
CAUTION
Door compartments containing hazardous voltage or rotating parts are equipped with door latches to allow locks. Door latch are shipped with nut and bolts requiring tooled access. If you do not replace the shipping hardware with a pad lock always re-install the nut & bolt after closing the door.
CAUTION
Cleaning the cooling tower or condenser water loop with harsh chemicals such as hydrochloric acid
(muriatic acid), chlorine or other chlorides, can damage the refrigerant-to-water heat exchanger. Care should be taken to avoid allowing chemicals to enter the refrigerant-to-water heat exchanger. See Appendix A - Heat Exchanger Corrosion Resistance for more information.
WARNING
OPEN LOOP APPLICATIONS
Failure of the condenser as a result of chemical corrosion is excluded from coverage under AAON Inc. warranties and the heat exchanger manufacturer’s warranties.
11

WARNING
WATER FREEZING
Failure of the condenser due to freezing will allow water to enter the refrigerant circuit and will cause extensive damage to the refrigerant circuit components. Any damage to the equipment as a result of water freezing in the condenser is excluded from coverage under AAON warranties and the heat exchanger manufacturer warranties.
 WARNING
COMPRESSOR CYCLING
5 MINUTE MINIMUM OFF TIME
To prevent motor overheating compressors must cycle off for a minimum of 5 minutes.
5 MINUTE MINIMUM ON TIME
To maintain the proper oil level compressors must cycle on for a minimum of 5 minutes.
The cycle rate must not exceed 6 starts per hour.
1.Startup and service must be performed by a Factory Trained Service Technician.
2.Use only with type of the gas approved for the furnace. Refer to the furnace rating plate.
3.The unit is for outdoor use only. See General Information section for more information.
12
4.Provide adequate combustion ventilation air to the furnace. If a vent duct extension is used, a class III approved vent is required. See the Locating Units and Gas Heating sections of the Installation section of the manual.
5.Always install and operate furnace within the intended temperature rise range and duct system external static pressure (ESP) as specified on the unit nameplate.
6.The supply and return air ducts must be derived from the same space. It is recommended ducts be provided with access panels to allow inspection for duct tightness. When a down flow duct is used with electric heat, the exhaust duct should be an L shaped duct.
7.Clean furnace, duct and components upon completion of the construction setup. Verify furnace operating conditions including input rate, temperature rise and ESP.
8.Every unit has a unique equipment nameplate with electrical, operational, and unit clearance specifications. Always refer to the unit nameplate for specific ratings unique to the model you have purchased.
9.READ THE ENTIRE INSTALLATION, OPERATION AND MAINTENANCE MANUAL. OTHER IMPORTANT SAFETY PRECAUTIONS ARE PROVIDED THROUGHOUT THIS MANUAL.
10.Keep this manual and all literature safeguarded near or on the unit.
RN Series Feature String Nomenclature
GEN MJREV RN A
SIZE - 11 -
SERIES C
MNREV |
VLT |
A1 A2 A3 A4 A5 |
B1 B2 B3 B4 B5 |
1 |
2 |
|
3A 3B |
3C |
3D |
4A |
4B |
4C |
5A |
5B |
5C |
5D |
6A 6B |
6C |
6D |
7 8 |
9A 9B |
9C |
9D |
10A |
10B |
||||
0 - 3 - A A A 0 2 |
- B 0 |
1 B 0 : 0 1 |
- D Q 0 |
J |
- E 0 |
0 - 0 0 0 0 - 0 0 0 |
0 |
- D A - A 0 A A - C 0 |
|||||||||||||||||||||
|
|
B 0 - G - 0 |
0 0 - |
4 A - E A 0 |
0 - 0 0 |
- |
5 W 0 |
- B F 0 Q A 0 - A 0 |
0 |
0 0 0 - 0 0 0 0 0 0 X |
|||||||||||||||||||
|
|
11A 11B |
12 |
13A |
13B 13C |
14 15 |
16A 16B |
16C |
16D |
17A |
17B |
|
18A 18B |
18C |
|
19 20 |
21 |
22 |
23 24 |
25 |
26 |
27 |
28 29 30 |
31 32 |
33 |
34 35 36 |
37 |
||
MODEL OPTIONS
SERIES AND GENERATION
RN
MAJOR REVISION
A
UNIT SIZE
011= 11 ton Capacity 013= 13 ton Capacity 016 = 16 ton Capacity 018 = 18 ton Capacity 020 = 20 ton Capacity 025 = 25 ton Capacity 030 = 30 ton Capacity
SERIES
C = 011, 013, 016, 018, 020, 025, 030 units
MINOR REVISION
0
VOLTAGE
2 = 230V/3Φ/60Hz
3 = 460V/3Φ/60Hz
4 = 575V/3Φ/60Hz
6 = 380V/3Φ/50Hz
8 = 208V/3Φ/60Hz
Model Option A: COOLING/HEAT PUMP
A1: COMPRESSOR STYLE
0 = No Compressor
A = R-410A Scroll Compressor
D = R-410A Variable Capacity Scroll Compressor
A2: CONDENSER STYLE
0 = No Condenser
A = Microchannel Air-Cooled Condenser
F = Water-Cooled Condenser
J = Air-Source Heat Pump
L = Water-Source Heat Pump
N = DX Air Handling Unit
A3: INDOOR COIL CONFIGURATION
0 = No Cooling Coil
A = Standard Evaporator
B = 6 Row Evaporator
E = 4 Row Chilled Water Coil
F = 6 Row Chilled Water Coil
A4: COOLING HEAT EXCHANGER
CONSTRUCTION
0 = Standard
A = Polymer E-Coated Cooling Coil
B = Stainless Steel Cooling Coil Casing
E = Polymer E-Coated Cond. Coil
J = Polymer E-Coated Evap. And Cond. Coil
N = SMO 254 Corrosion Resistant Refrigerant-to-
Water Heat Exchanger
P = Polymer E-Coated Evap. Coil + SMO 254
Corrosion Resistant Refrigerant-to-Water Heat
Exchanger
Q = Stainless Steel Evap. Coil Casing + SMO 254
Corrosion Resistant Refrigerant-to-Water Heat
Exchanger
A5: COOLING STAGING
0 = No Cooling
A = 1 Variable Capacity Comp + 1 On/Off Comp B = 2 Variable Capacity Comp
F = Single Serpentine 8 FPI
G = Half Serpentine 8 FPI
H = Single Serpentine 10 FPI J = Half Serpentine 10 FPI K = Single Serpentine 12 FPI L = Half Serpentine 12 FPI
N = DX Air Handler with 2 Refrigeration Circuits 2 = 2 Stage
13
RN Series Feature String Nomenclature
GEN RN
MJREV A
SIZE - 11 -
SERIES C
MNREV 0
VLT - 3
A1 A2 A3 |
|
- A A A |
|
B 0 |
- G |
11A 11B |
12 |
A4 A5 |
|
0 |
2 |
- |
0 |
|
13A |
|
B1 B2 |
- |
B 0 |
0 |
0 - |
13B 13C |
|
B3 B4 B5 |
||
1 |
B |
0 |
4 |
A |
- |
14 15 |
||
1 |
2 |
|
3A 3B |
3C |
3D |
4A |
4B |
4C |
5A |
5B |
5C |
5D |
6A 6B |
6C 6D |
7 8 |
9A 9B |
9C |
9D |
10A |
10B |
|
: 0 1 |
- D Q 0 |
J |
- E 0 |
0 - 0 0 0 0 - 0 0 0 0 |
- D A - A 0 A A - C 0 |
||||||||||||||||
E A 0 |
0 - 0 0 |
- |
5 W 0 |
- B F 0 Q A 0 - A 0 0 |
0 0 0 - 0 0 0 0 0 0 X |
||||||||||||||||
16A 16B |
16C |
16D |
17A |
17B |
|
18A 18B |
18C |
|
19 20 |
21 |
22 |
23 24 |
25 |
26 27 |
28 29 30 |
31 32 |
33 |
34 35 36 |
37 |
||
Model Option B: HEATING
B1: HEAT TYPE
0 = No Heat
B = Electric Heat
D = Natural Gas
G = LP Gas
K = Hot Water Coil
B2: HEAT CONSTRUCTION
0 = Standard
A = Aluminized Heat Exchanger
B = Stainless Steel Heat Exchanger
C = High Altitude Aluminized Heat Exchanger D = High Altitude Stainless Steel Heat Exchanger G= Polymer E-Coated Heating Coil
B3: HEAT DESIGNATION
0 = No Heat
1 = 20 kW
2 = 40 kW
3 = 60 kW
4 = 80 kW
5 = 100 kW
6 = 120 kW 1= 270 MBH 2= 405 MBH 3= 540 MBH A = 1 Row E = 2 Row
B4: HEAT STAGING
0 = No Heat
A = 1 Stage
B = 2 Stage
C = 3 Stage
D = 4 Stage
E = 5 Stage
F = 6 Stage
G = 7 Stage
H = 8 Stage
K = Modulating Gas Heat
M = Modulating SCR Electric with Potentiometer Control
N = Modulating SCR Electric with External 0-10 VDC
P = Single Serpentine 8 FPI
Q = Half Serpentine 8 FPI
R = Single Serpentine 10 FPI
S = Half Serpentine 10 FPI
T = Single Serpentine 12 FPI
U = Half Serpentine 12 FPI
B5: HEAT PUMP AUX HEATING
0 = No Heat Pump
A = Aux Heat 1 for Heat Pump 1 Stage B = Aux Heat 2 for Heat Pump 1 Stage C = Aux Heat 3 for Heat Pump 1 Stage D = Aux Heat 4 for Heat Pump 1 Stage E = Aux Heat 5 for Heat Pump 1 Stage F = Aux Heat 6 for Heat Pump 1 Stage K = Aux Heat 1 for Heat Pump 2 Stage L = Aux Heat 2 for Heat Pump 2 Stage M = Aux Heat 3 for Heat Pump 2 Stage N = Aux Heat 4 for Heat Pump 2 Stage P = Aux Heat 5 for Heat Pump 2 Stage Q = Aux Heat 6 for Heat Pump 2 Stage U = Aux Heat 1 for Heat Pump 4 Stage V = Aux Heat 2 for Heat Pump 4 Stage W = Aux Heat 3 for Heat Pump 4 Stage Y = Aux Heat 4 for Heat Pump 4 Stage Z = Aux Heat 5 for Heat Pump 4 Stage 1 = Aux Heat 6 for Heat Pump 4 Stage
14
RN Series Feature String Nomenclature
GEN RN
MJREV A
SIZE - 11 -
SERIE C
MNRE |
VLT |
A1 A2 A3 A4 A5 |
B1 B2 B3 B4 B5 |
1 |
2 |
|
3A 3B |
3C |
3D |
4A |
4B |
4C |
5A |
5B |
5C |
5D |
6A 6B |
6C |
6D |
7 8 |
9A 9B |
9C |
9D |
10A |
10B |
|||
0 - 3 - A A A 0 2 |
- B 0 |
1 B 0 : 0 1 |
- D Q 0 |
J - E 0 |
0 - 0 0 0 0 - 0 0 0 |
0 |
- D A - A 0 A A - C 0 |
|||||||||||||||||||||
|
|
B 0 - G - 0 |
0 0 - |
4 A - E A 0 |
0 - 0 0 |
- 5 W 0 |
- B F 0 Q A 0 - A 0 |
0 |
0 0 0 - 0 0 0 0 0 0 X |
|||||||||||||||||||
|
|
11A 11B |
12 |
13A |
13B 13C |
14 15 |
16A 16B |
16C |
16D |
17A |
17B |
|
18A 18B |
18C |
|
19 20 |
21 |
22 |
23 24 |
25 |
26 |
27 |
28 29 30 |
31 32 |
33 |
34 35 36 |
37 |
|
1: UNIT ORIENTATION
0 = Standard Access - Hinged Access Doors with Lockable Handles
2: SUPPLY & RETURN LOCATIONS
V = End Supply--No Return
Z= End Supply--Right Return
1 = Horizontal ConfigurationEnd Supply--End
Return
Feature 3: SUPPLY FAN OPTIONS
3A: SUPPLY FAN CONFIGURATION
0 = 1 Fan
D = 1 Fan + Factory Installed VFD N = 1 Fan + Field Installed VFD
3B: SUPPLY FAN
L = 22" Direct Drive Backward Curved Plenum - 100% Width Aluminum
N = 24" Direct Drive Backward Curved Plenum - 100% Width Aluminum
P = 24" Direct Drive Backward Curved Plenum - 70% Width Aluminum
Q = 27" Direct Drive Backward Curved Plenum - 100% Width Aluminum
R = 27" Direct Drive Backward Curved Plenum - 70% Width Aluminum
3C: SUPPLY FAN MOTOR TYPE
0 = High Efficiency Motor (1,200 nominal rpm) A = High Efficiency Motor (1,800 nominal rpm)
3D: SUPPLY FAN MOTOR SIZE
E = 1 hp G = 2 hp H = 3 hp J = 5 hp K = 7.5 hp L = 10 hp M = 15 hp N = 20 hp
15
RN Series Feature String Nomenclature
GEN RN
MJREV A
SIZE - 11 -
SERIES C
MNREV |
VLT |
A1 A2 A3 A4 A5 |
B1 B2 B3 B4 B5 |
1 |
2 |
|
3A 3B |
3C |
3D |
4A |
4B |
4C |
5A |
5B |
5C |
5D |
6A 6B |
6C 6D |
7 8 |
9A 9B |
9C |
9D |
10A |
10B |
||||
0 - 3 - A A A 0 2 |
- B 0 |
1 B 0 : 0 1 |
- D Q 0 |
J |
- E 0 |
0 - 0 0 0 0 - 0 0 0 0 |
- D A - A 0 A A - C 0 |
|||||||||||||||||||||
|
|
B 0 - G - 0 |
0 0 - |
4 A - E A 0 |
0 - 0 0 |
- |
5 W 0 |
- B F 0 Q A 0 - A 0 0 |
0 0 0 - 0 0 0 0 0 0 X |
|||||||||||||||||||
|
|
11A 11B |
12 |
13A |
13B 13C |
14 15 |
16A 16B |
16C |
16D |
17A |
17B |
|
18A 18B |
18C |
|
19 20 |
21 |
22 |
23 24 |
25 |
26 27 |
28 29 30 |
31 32 |
33 |
34 35 36 |
37 |
||
Feature 4: RETURN/OUTSIDE AIR OPTIONS
4A: OUTSIDE AIR SECTION
0 = 100% Outside Air
A = 100% Outside Air with Motorized Dampers B = Manual Outside Air + Return Air Opening
C = Motorized Outside Air Dampers + Return Air Opening
D = 100% Return Air E = Economizer
G = Econ + Power Exhaust
H = Econ + Power Return
K = Econ + Energy Recovery
Q = Econ + Energy Recovery + Bypass Damper
4B: ENERGY RECOVERY TYPE
0 = No Energy Recovery
A = Energy Recovery Wheel
B= Energy Recovery Wheel + 1% Purge
4C: ENERGY RECOVERY SIZE
0 = No Energy Recovery
A = Low CFM Enthalpy
B = High CFM Enthalpy
E = Low CFM Sensible
F = High CFM Sensible
J = Low CFM Enthalpy + Exhaust Filters K = High CFM Enthalpy + Exhaust Filters N = Low CFM Sensible + Exhaust Filters P = High CFM Sensible + Exhaust Filters
Feature 5: RETUREN FAN OPTIONS
5A: RETURN FAN CONFIGURATION
0 = Standard A = 1 Fan B = 2 Fans
C = 1 Fan + Factory Installed VFD D = 2 Fans + 1 Factory Installed VFD
E = 2 Fans + 2 Factory Installed VFD's G = 1 Fan + Field Installed VFD
H = 2 Fans + 1 Field Installed VFD J = 2 Fans + 2 Field Installed VFD's
5B: RETURN FANS
0 = Standard
B = 22" Direct Drive Axial Flow Fan
5C: RETURN FAN MOTOR TYPE
0 = Standard
A = High Efficiency Motor (1,200 nominal rpm) B = High Efficiency Motor (1,800 nominal rpm)
5D: RETURN MOTOR SIZE
0 = Standard E = 1 hp
G = 2 hp H = 3 hp J = 5 hp K = 7.5 hp L = 10 hp M = 15 hp N = 20 hp
16
RN Series Feature String Nomenclature
GEN RN
MJREV A
SIZE - 11 -
SERIES C
MNREV 0
VLT - 3
A1 A2 A3 |
|
- A A A |
|
B 0 |
- G |
11A 11B |
12 |
A4 A5 |
|
B1 B2 |
0 2 |
- |
B 0 |
- 0 |
0 |
0 - |
13A |
13B 13C |
|
B3 B4 B5 |
||
1 |
B |
0 |
4 |
A |
- |
14 15 |
||
12 : 0 1 E A 0
16A16B16C
3A - D 0 -
16D
3B Q 0
17A
3C 0 0
17B
3D |
4A |
4B |
J |
- E |
0 |
- |
5 W 0 |
|
|
18A 18B |
18C |
4C 0
-
5A |
5B 5C 5D |
- 0 |
0 0 0 |
B F |
0 Q A |
19 20 |
21 22 23 |
|
6A 6B |
6C |
6D |
7 8 |
- |
0 0 0 |
0 |
- D A |
|
0 |
- A 0 |
0 |
0 0 0 |
|
24 |
25 |
26 |
27 |
28 29 30 |
9A 9B 9C 9D |
10A 10B |
-A 0 A A - C 0
-0 0 0 0 0 0 X
31 32 33 34 35 36 37
Feature 6: EXHAUST FAN OPTIONS
6A: EXHAUST FAN CONFIGURATION
0 = Standard A = 1 Fan
C = 1 Fan + Factory Installed VFD G = 1 Fan + Field Installed VFD
6B: EXHAUST FAN
0 = Standard
L = 22" Backward Curved Plenum Fan - 100% Width
Aluminum
T= 22" Backward Curved Plenum Fan - 70% Width
Aluminum
6C: EXHAUST FAN MOTOR TYPE
0 = Standard
B = High Efficiency Motor (1,800 nominal rpm)
6D: EXHUAST MOTOR
0 = Standard E = 1 hp
G = 2 hp H = 3 hp J = 5 hp K = 7.5 hp L = 10 hp M = 15 hp N = 20 hp
7:O/A CONTROL
0 = Standard
A = 3 Position Actuator - Sensible Limit B = 3 Position Actuator - Enthalpy Limit
C = Fully Modulating Actuator - Sensible Limit D = Fully Modulating Actuator - Enthalpy Limit E = DDC Actuator
F = Constant Volume Outside Air G = Options A + F
H = Options B + F J = Options C + F K = Options D + F L = Options E + F
M = 3 Pos. Act. - Sensible Limit + CO2 Override N = 3 Pos. Act. - Enthalpy Limit + CO2 Override P = Fully Mod. Act. - Sensible + CO2 Override Q = Fully Mod. Act. - Enthalpy + CO2 Override R = DDC Actuator + CO2 Override
S = Dual Minimum Position Potentiometers + Fully Mod. Act. - Sensible Limit
T = Dual Minimum Position Potentiometers + Fully Mod. Act. - Enthalpy Limit
U = 2 Position Actuator
8:EXHAUST DAMPERS & RA BYPASS
0 = No Return Opening
A = Standard Return Opening without EA Dampers C = Standard Barometric Relief EA Dampers
G= Standard Barometric without EA Dampers + RA Bypass
J = Standard Barometric Relief EA Dampers + RA Bypass
17
RN Series Feature String Nomenclature
GEN RN
MJREV A
SIZE - 11 -
SERIES C
MNREV |
VLT |
A1 A2 A3 A4 A5 |
B1 B2 B3 B4 B5 |
1 |
2 |
|
3A 3B |
3C |
3D |
4A |
4B |
4C |
5A |
5B |
5C |
5D |
6A 6B |
6C |
6D |
7 8 |
9A 9B |
9C |
9D |
10A |
10B |
||||
0 - 3 - A A A 0 2 |
- B 0 |
1 B 0 : 0 1 |
- D Q 0 |
J |
- E 0 |
0 - 0 0 0 0 - 0 0 0 |
0 |
- D A - A 0 A A - C 0 |
|||||||||||||||||||||
|
|
B 0 - G - 0 |
0 0 - |
4 A - E A 0 |
0 - 0 0 |
- |
5 W 0 |
- B F 0 Q A 0 - A 0 |
0 |
0 0 0 - 0 0 0 0 0 0 X |
|||||||||||||||||||
|
|
11A 11B |
12 |
13A |
13B 13C |
14 15 |
16A 16B |
16C |
16D |
17A |
17B |
|
18A 18B |
18C |
|
19 20 |
21 |
22 |
23 24 |
25 |
26 |
27 |
28 29 30 |
31 32 |
33 |
34 35 36 |
37 |
||
Feature 9: FILTER OPTIONS
9A: UNIT FILTER TYPE
0 = 2” Pleated - 30% Eff. - MERV 8 A = 4” Pleated - 30% Eff. - MERV 8
B = 2" Pleated MERV 8 + 4" Pleated MERV 11 C = 2" Pleated MERV 8 + 4" Pleated MERV 13 D = 2" Pleated MERV 8 + 4" Pleated MERV 14
9B: PRE FILTER BOX SIZE/LOCATION
0 = Standard Filters in Standard Position
B = High Efficiency Filters in Standard Position
9C: FINAL FILTER TYPE
0 = No Final Filters
A = 12" Cartridge MERV 13 D = 12" Cartridge MERV 14 U= 4" Pleated MERV 13 Y= 4" Pleated MERV 14
9D: FILTER OPTIONS
0 = None
A = Clogged Filter Switch - Unit Filters
B = Clogged Filter Switch - Unit + Energy Recovery Filters
C = Clogged Filter Switch - Unit + Final Filters
D = Clogged Filter Switch - Unit + Energy Recovery + Final Filters
E = Magnehelic Gauge - Unit Filters
F = Magnehelic Gauge - Unit + Energy Recovery Filters
G = Magnehelic Gauge - Unit + Final Filters
H = Magnehelic Gauge - Unit + Energy Recovery + Final Filters
J = CFS + Magnehelic Gauge - Unit Filters K = CFS + Magnehelic Gauge - Unit + Energy Recovery Filters
L = CFS + Magnehelic Gauge - Unit + Final Filters M = CFS + Magnehelic Gauge - Unit + Energy Recovery + Final Filters
Feature 10: REFRIGERATION CONTROL
10A: REFRIGERATION CONTROL
0 = None
A = 5 Minute Compressor Off Timer and 20 Second Compressor Stage Delay
B = Fan Cycling
C = Adjustable Fan Cycling
D = Adjustable Compressor Lock Outs (each circuit) E = Freeze Stats (each circuit)
F = Option A + B
G = Option A + C
H = Option A + D
J = Option A + E
K = Option B + D
L = Option B + E
M = Option C + D
N = Option C + E
P = Option D + E
Q = Option A + B + D
R = Option A + B + E
S = Option B + D + E
T = Option C + D + E
U = Option A + B + D + E
V = Option A + C + D + E
10B: BLANK
0 = None
18
RN Series Feature String Nomenclature
GEN RN
MJREV A
SIZE - 11 -
SERIES C
MNREV 0
VLT |
A1 |
- 3 |
- A |
|
B 0 |
|
11A 11B |
A2 A3 A4 A5 |
|
A A 0 2 |
|
- G - |
0 |
12 |
13A |
-
0
13B
B1B2 B 0
0 - 13C
B3 B4 |
|
1 |
B |
4 |
A |
14 15 |
|
B5 |
1 |
2 |
|
3A 3B |
3C |
3D |
4A |
4B |
4C |
5A |
5B |
5C |
5D |
6A 6B |
6C |
6D |
7 8 |
9A 9B |
9C |
9D |
10A |
10B |
|
0 : 0 1 |
- D Q 0 |
J |
- E 0 |
0 - 0 0 0 0 - 0 0 0 |
0 |
- D A - A 0 A A - C 0 |
|||||||||||||||||
- E A 0 |
0 - 0 0 |
- |
5 W 0 |
- B F 0 Q A 0 - A 0 |
0 |
0 0 0 - 0 0 0 0 0 0 X |
|||||||||||||||||
|
16A 16B |
16C |
16D |
17A |
17B |
|
18A 18B |
18C |
|
19 20 |
21 |
22 |
23 24 |
25 |
26 |
27 |
28 29 30 |
31 32 |
33 |
34 35 36 |
37 |
||
Feature 11: REFRIGERATION OPTIONS
11A: REFRIGERATION OPTIONS
0 = None
A = Hot Gas Bypass Lead Stage
B = Hot Gas Bypass Lead and Lag Stages C = On/Off Hot Gas Reheat
D = Hot Gas Bypass Non-Variable Compressor Circuits
E = Modulating Hot Gas Reheat G = Options A + C
H = Options B + C
J = Options A + E
K = Options B + E
L = Options D + C
M = Options D + E
P = Polymer E-Coated On/Off Hot Gas Reheat
Q = Polymer E-Coated Modulating Hot Gas Reheat R = Options A + P
S = Options B + P
T = Options A + D
U = Options B + Q
V = Options D + P
W = Options D + Q
11B: BLANK
0 = None
12: REFRIGERATION ACCESSORIES
0 = None
A = Sight Glass
B = Compressor Isolation Valves C = Option A + B
D = One Circuit 0°F Low Ambient E = Option A + D
F = Option B + D
G = Option A + B + D
Feature 13: POWER OPTIONS
13A: UNIT DISCONNECT TYPE
0 = Single Point Power - Standard Power Block
A = Single Point Power - Non-fused Disconnect
Power Switch
13B: DISCONNECT 1 SIZE
N = 100 amps R = 150 amps U = 225 amps Z = 400 amps 3 = 600 amps
13C: BLANK
0 = None
14: SAFETY OPTIONS
0 = None
A = Return and Supply Air Firestat B = Return Air Smoke Detector
C = Supply Air Smoke Detector
E = Remote Safety Shutdown Terminals F = Option A + B
G = Option A + C
J = Option A + E
K = Option B + C
M = Option B + E
P = Option C + E
R = Option A + B + C
T = Option A + B + E
V = Option A + C + E
Z = Option B + C + E
4 = Option A + B + C + E
19
RN Series Feature String Nomenclature
GEN RN
MJREV A
SIZE - 11 -
SERIES C
MNREV 0
VLT |
A1 |
- 3 |
- A |
|
B 0 |
|
11A 11B |
A2A3 A A - G
12
A4 A5 |
|
B1 B2 |
0 2 |
- |
B 0 |
- 0 |
0 |
0 - |
13A |
13B 13C |
|
B3 B4 B5 |
||
1 |
B |
0 |
4 |
A |
- |
14 15 |
||
12 : 0 1
E A 0 16A16B16C
|
3A 3B |
3C |
3D |
4A |
4B |
4C |
5A |
5B |
5C |
5D |
6A 6B |
6C |
6D |
7 8 |
9A 9B |
9C |
9D |
10A |
10B |
|
- D Q 0 |
J |
- E 0 |
0 - 0 0 0 0 - 0 0 0 |
0 |
- D A - A 0 A A - C 0 |
|||||||||||||||
0 - 0 0 |
- |
5 W 0 |
- B F 0 Q A 0 - A 0 |
0 |
0 0 0 - 0 0 0 0 0 0 X |
|||||||||||||||
16D |
17A |
17B |
|
18A 18B |
18C |
|
19 20 |
21 |
22 |
23 24 |
25 |
26 |
27 |
28 29 30 |
31 32 |
33 |
34 35 36 |
37 |
||
15: ACCESSORIES
0 = None
A = Low Limit Controls
B = Phase & Brown Out Protection
F = Option A + B
Feature 16: UNIT CONTROLS
16A: CONTROL SEQUENCE
0 = Standard Terminal Block for Thermostat A = Terminal Block for Thermostat + Isolation Relays
B = Single Zone VAV Unit Controller - VAV Cool + CAV Heat
C = Single Zone VAV Unit Controller - VAV Cool + VAV Heat
D = VAV Unit Controller - VAV Cool + CAV Heat E = Constant Air Volume Unit Controller - CAV Cool + CAV Heat
F = Makeup Air Unit Controller
G = Single Zone VAV Heat Pump Unit Controller - VAV Cool + VAV Heat
H = Constant Air Volume Heat Pump Unit Controller - CAV Cool + CAV Heat
J = Makeup Air Heat Pump Unit Controller - CAV Cool + CAV Heat
K = PAC - Precise Air Controller (No VCC) L = D-PAC - Digital Precise Air Controller M = Field Installed DDC Controls by Others
N = Field Installed DDC Controls + Installation Relays
P = Factory Installed DDC Controls by Others + Installation Relays
16B: CONTROL SUPPLIER
0 = None
A = WattMaster VCM-X
C = WattMaster VCB-X
E = JENEsys
16C: CONTROL SUPPLIER OPTIONS
0 = None
B = Web UI
16D: BMS CONNECTION & DIAGNOSTICS
0 = None
A = BACnet IP
B = BACnet MSTP
C = Modbus IP
D = Modbus RTU
E = Lontalk
F = Fox
20
RN Series Feature String Nomenclature
GEN RN
MJREV A
SIZE - 11 -
SERIES C
MNREV 0
VLT |
A1 |
- 3 |
- A |
|
B 0 |
|
11A 11B |
A2A3 A A - G
12
A4 A5 |
|
B1 B2 |
0 2 |
- |
B 0 |
- 0 |
0 |
0 - |
13A |
13B 13C |
|
B3 B4 B5 |
||
1 |
B |
0 |
4 |
A |
- |
14 15 |
||
:
E
16A
1 2 |
|
0 |
1 |
A 0 |
|
16B 16C |
|
3A - D 0 -
16D
3B Q
0 17A
3C 0
0 17B
3D |
4A |
4B |
J |
- E |
0 |
- |
5 W 0 |
|
|
18A 18B |
18C |
4C 0
-
5A 5B 5C 5D |
6A 6B 6C 6D |
7 8 |
- 0 |
0 |
0 0 - 0 0 0 |
0 |
- D A |
B F 0 Q A 0 - A 0 0 0 0 0 |
||||
19 20 21 22 23 24 |
25 26 27 28 29 30 |
9A 9B 9C 9D |
10A 10B |
-A 0 A A - C 0
-0 0 0 0 0 0 X
31 32 33 34 35 36 37
Feature 17: PREHEAT OPTIONS |
Feature 18: OPTION BOXES |
|
17A: PREHEAT CONFIGURATION |
18A: BOX QUANTITY & LOCATION |
|
0 = Standard |
0 = None |
|
A = Modulating Electric Preheat - Outside Air |
5= Empty Energy Recovery Wheel Option Box |
|
D = Hot Water Preheat Coil -Mixed Air |
|
|
E = Steam Distributing Preheat Coil -Mixed Air |
18B: BOX SIZE |
|
K = Polymer E-Coated Hot Water Preheat Coil - |
0 = None |
|
Mixed Air |
W= Empty Energy Recovery Wheel Option Box |
|
L = Polymer E-Coated Steam Distributing Preheat |
|
|
Coil - Mixed Air |
18C: BOX ACCESSORIES |
|
17B: PREHEAT SIZING |
0 = None |
|
|
||
0 = Standard |
19: OUTSIDE AIR ACCESSORIES |
|
A = Heat Qty A |
||
0 = No Outside Air Hood - 100% Return Air |
||
B = Heat Qty B |
||
A = Outside Air Hood |
||
C = Heat Qty C |
||
B = Outside Air Hood with Metal Mesh Filters |
||
D = Heat Qty D |
||
|
||
E = Heat Qty E |
|
|
F = Heat Qty F |
|
|
G = Heat Qty G |
|
|
H = Heat Qty H |
|
|
J = Heat Qty J |
|
|
K = Heat Qty K |
|
|
L = Heat Qty L |
|
|
M = Heat Qty M |
|
21
RN Series Feature String Nomenclature
GEN RN
MJREV A
SIZE - 11 -
SERIES C
MNREV |
VLT |
A1 A2 A3 A4 A5 |
B1 B2 B3 B4 B5 |
1 |
2 |
|
3A 3B |
3C |
3D |
4A |
4B |
4C |
5A |
5B |
5C |
5D |
6A 6B |
6C 6D |
7 8 |
9A 9B |
9C |
9D |
10A |
10B |
||||
0 - 3 - A A A 0 2 |
- B 0 |
1 B 0 : 0 1 |
- D Q 0 |
J |
- E 0 |
0 - 0 0 0 0 - 0 0 0 0 |
- D A - A 0 A A - C 0 |
|||||||||||||||||||||
|
|
B 0 - G - 0 |
0 0 - |
4 A - E A 0 |
0 - 0 0 |
- |
5 W 0 |
- B F 0 Q A 0 - A 0 0 |
0 0 0 - 0 0 0 0 0 0 X |
|||||||||||||||||||
|
|
11A 11B |
12 |
13A |
13B 13C |
14 15 |
16A 16B |
16C |
16D |
17A |
17B |
|
18A 18B |
18C |
|
19 20 |
21 |
22 |
23 24 |
25 |
26 27 |
28 29 30 |
31 32 |
33 |
34 35 36 |
37 |
||
20:CABINET OPTIONS
0 = None
A = Base Insulation
B = SA & RA Burglar Bars F = Option A + B
21:BLANK
0 = None
22: MAINTENANCE ACCESSORIES
0 = None
A = Factory Wired 115V Convenience Outlet B = Field Wired 115V Convenience Outlet C = Service Lights
D = Remote Start/Stop contacts
E = Supply Fan Auxiliary Contacts F = Option A + C
G = Option A + D
H = Option A + E
J = Option B + C
K = Option B + D
L = Option B + E
M = Option C + D
N = Option C + E
P = Option D + E
Q = Option A + C + D
R = Option A + C + E
S = Option A + D + E
T = Option B + C + D
U = Option B + C + E
V = Option B + D + E
W = Option C + D + E
Y = Option A + C + D + E
Z = Option B + C + D + E
23: CODE OPTIONS
0 = Standard - ETL U.S.A. Listing
A = Chicago Code
B = ETL U.S.A. + Canada Listing
24:SHIPPING SPLITS
0 = Standard
25:AIR COOLED CONDENSER ACESSORIES
0 = Standard
A = Cond Coil Guards
C = ECM Condenser Fan Head Pressure Control E = VFD Condenser Fan Head Pressure Control
G = Cond Coil Guards + ECM Condenser Fan Head Pressure Control
J = Cond Coil Guards + VFD Cond Fan Head Pressure Control
26:BLANK
0 = None
22
RN Series Feature String Nomenclature
GEN RN
MJREV A
SIZE - 11 -
SERIES C
MNREV 0
VLT |
A1 |
- 3 |
- A |
|
B 0 |
|
11A 11B |
A2A3 A A - G
12
A4 A5 |
|
B1 B2 |
0 2 |
- |
B 0 |
- 0 |
0 |
0 - |
13A |
13B 13C |
|
B3 B4 B5 |
||
1 |
B |
0 |
4 |
A |
- |
14 15 |
||
:
E
16A
1 2 |
|
0 |
1 |
A 0 |
|
16B 16C |
|
3A - D 0 -
16D
3B Q 0
17A
3C 0 0
17B
3D |
|
J |
- |
- |
5 |
|
18A |
4A4B E 0 W 0
18B18C
4C 0
-
5A |
5B |
5C |
5D |
- 0 |
0 |
0 |
0 - |
B F 0 |
Q A 0 |
||
19 20 |
21 |
22 |
23 24 |
6A 0
-
6B 6C 6D |
||
0 |
0 |
0 |
A 0 |
0 |
|
25 26 27 |
||
7 8 |
9A 9B 9C 9D |
10A 10B |
- D A - A 0 A A - C 0
0 0 0 - 0 0 0 0 0 0 X
28 29 30 |
31 32 33 34 35 36 37 |
27:WATER - COOLED CONDENSER ACCESSORIES
0 = None (No Water Condenser) A = Balancing Valves
B = Water Flow Switch
D = Motorized Shut-off Valve E = Head Pressure Control
F = Option A + B H = Option A + D J = Option A + E L = Option B + D M = Option B + E
R = Option A + B + D S = Option A + B + E
28:ENERGY RECOVERY WHEEL ACCESSORIES
0 = None
A = Energy Recovery Wheel Defrost - Start/Stop B = Energy Recovery Wheel Rotation Detection F = Option A + B
29:BLANK
0 = None
30:BLANK
0 = Standard
31:BLANK
0 = Standard
32:BLANK
0 = Standard
33:BLANK
0 = Standard
34:BLANK
0 = Standard
35:WARRANTY
0 = Standard Warranty
A = 2 Year Parts Warranty B = 5 Year Parts Warranty C = 10 Year Parts Warranty
36:CABINET MATERIAL
0 = Galvanized Cabinet
37:TYPE
B = Premium AAON Gray Paint Exterior Paint C = Premium AAON Gray Paint Exterior Paint + Interior Corrosion Protection
X = SPA + Premium AAON Gray Paint Exterior Paint
Y = SPA + Premium AAON Gray Paint Exterior Paint + Interior Corrosion Protection
4 = SPA + Special Exterior Paint Color
5 = SPA + Special Exterior Paint Color + Interior Corrosion Protection
23

General Information
RN Series packaged rooftop units, heat pumps and outdoor air handling units have been designed for outdoor installation only. Units are assembled, wired, charged and run tested at the factory.
Startup and service must be performed by a Factory Trained Service Technician.
WARNING
Improper installation, adjustment, alteration, service, or maintenance can cause property damage, personal injury or loss of life. Startup and service must be performed by a
Factory Trained Service Technician.
A copy of this IOM should be kept with the unit.
CAUTION
These units must not be used for heating or cooling at any time during any phase of construction. Very low return air temperatures, harmful vapors, and misplacement of the filters will damage the unit and its efficiency.
Certification of Gas Heat Models
a.AAON gas heat exchangers have successfully completed 10,000 burner operation cycles and corrosion resistance as specified per test standard ANSI 21.47. All gas heat exchangers used in AAON appliances are certified for use downstream of evaporator or cooling coils.
b.Certified as a Category III forced air furnace with or without cooling.
24
c.Certified for outdoor installation only.
d.Certified for installation on a combustible roof with a minimum of 12” high curb.
Certification of Steam or Hot Water Heat Models
a.Certified as a forced air heating system with or without cooling.
b.Certified for outdoor installation only.
c.Certified for installation on a combustible roof with a minimum of 12” high curb.
Certification of Electric Heat Models
a.Certified as an electric warm air furnace with or without cooling.
b.Certified for outdoor installation only.
c.Certified for installation on a combustible roof with a minimum of 12” high curb.
Certification of Cooling Models
a.Certified as a commercial central air conditioner with or without electrically operated compressors.
b.Certified for outdoor installation only.
c.Certified for installation on a combustible roof with a minimum of 12” high curb.
d.Certified with refrigerant R-410A coils or with chilled water cooling coils.
Codes and Ordinances
RN Series units have been tested and certified, by ETL, in accordance with UL Safety Standard 1995/CSA C22.2 No. 236, ANSI Safety Standard Z21.47b-2008/CSA 2.3b-2008, and ANSI Safety Standard Z83.8-2006/CSA 2.6-2006.
System should be sized in accordance with the American Society of Heating, Refrigeration and Air Conditioning Engineers Handbook.
Installation of RN Series units must conform to the ICC standards of the International Mechanical Code, the International Building Code, and local building, plumbing and waste water codes. In the absence of local codes installation must conform to the current (United States) National Fuel Gas Code ANSI-Z223.1/NFPA 54 or the current (Canada) National Fuel & Propane Installation Code CSA B149.1 or B149.2, and Mechanical Refrigeration Code CSA B52. All appliances must be electrically grounded in accordance with local codes, or in the absence of local codes, the current National Electric Code, ANSI/NFPA 70 or the current Canadian Electrical Code CSA C22.1.
CAUTION
The Clean Air Act of 1990 bans the intentional venting of refrigerant as of July 1, 1992. Approved methods of recovery, recycling, or reclaiming must be followed.
WARNING
Coils and sheet metal surfaces present sharp edges and care must be taken when working with equipment.
WARNING
Failure to observe the following instructions will result in premature failure of your system and possible voiding of the warranty.
Receiving Unit
When received, the unit should be checked for damage that might have occurred in
transit. If damage is found it should be noted on the carrier’s freight bill. A request for inspection by carrier’s agent should be made in writing at once. Nameplate should be checked to ensure the correct model sizes and voltages have been received to match the job requirements.
If repairs must be made to damaged goods, then the factory should be notified before any repair action is taken in order to protect the warranty. Certain equipment alteration, repair, and manipulation of equipment without the manufacturer’s consent may void the product warranty. Contact the AAON Warranty Department for assistance with handling damaged goods, repairs, and freight claims: (918) 583-2266.
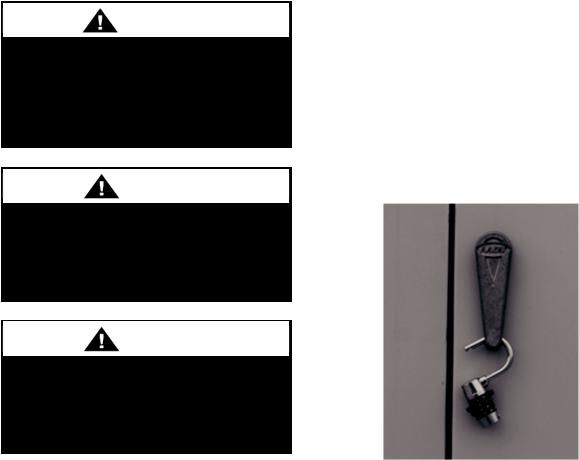
Note: Upon receipt check shipment for items that ship loose such as filters and remote sensors. Consult order and shipment documentation to identify potential looseshipped items. Loose-shipped items may have been placed inside unit cabinet for security. Installers and owners should secure all doors with locks or nuts and bolts to prevent unauthorized access.
Figure 1 - Lockable Handle
25

The warranty card must be completed in full and returned to AAON not more than 3 months after unit is delivered.
Storage
If installation will not occur immediately following delivery, store equipment in a dry protected area away from construction traffic and in the proper orientation as marked on the packaging with all internal packaging in place. Secure all loose-shipped items.
Packaged Direct Expansion (DX) Units
WARNING
COMPRESSOR CYCLING
5 MINUTE MINIMUM OFF TIME
To prevent motor overheating compressors must cycle off for a minimum of 5 minutes.
5 MINUTE MINIMUM ON TIME To maintain the proper oil level compressors must cycle on for a minimum of 5 minutes.
The cycle rate must not exceed 6 starts per hour.
All DX refrigeration systems are factory assembled, leak tested, charged with refrigerant, and run tested.
All refrigerant systems include an evaporator, condenser, liquid line filter driers, thermal expansion valves (TXV) and scroll compressors. Compressors are equipped with a positive pressure forced lubrication system.
26
CAUTION
CRANKCASE HEATER
OPERATION
Some units are equipped with compressor crankcase heaters, which should be energized at least 24 hours prior to cooling operation, to clear any liquid refrigerant from the compressors.
Never cut off the main power supply to the unit, except for servicing, emergency, or complete shutdown of the unit. When power is cut off from the unit crankcase heaters cannot prevent refrigerant migration into the compressors. This means the compressor will cool down and liquid refrigerant may accumulate in the compressor. The compressor is designed to pump refrigerant gas and damage may occur when power is restored.
If power to the unit must be off for more than an hour, turn the thermostat system switch to "OFF", or turn the unit off at the control panel, and leave the unit off until the main power switch has been turned on again for at least 24 hours for units with compressor crankcase heaters. This will give the crankcase heater time to clear any liquid accumulation out of the compressor before it is started.
Always control the unit from the thermostat, or control panel, never at the main power supply, except for servicing, emergency or complete shutdown of the unit.
During the cooling season, if the air flow is reduced due to dirty air filters or any other reason, the cooling coils can get too cold which will cause excessive liquid to return to the compressor. As the liquid
concentration builds up, oil is washed out of the compressor, leaving it starved for lubrication.
The compressor life will be seriously shorted by reduced lubrication and the pumping of excessive amounts of liquid oil and refrigerant.
Note: Low Ambient Operation
Air-cooled DX units without a low ambient option, such as condenser fan cycling or the 0°F low ambient option, will not operate in the cooling mode of operation properly when the outdoor temperature is below 55°F. Low ambient and/or economizer options are recommended if cooling operation below 55°F is expected.
CAUTION
Polyolester (POE) and Polyvinylether (PVE) oils are two types of lubricants used in hydrofluorocarbon (HFC) refrigeration systems. Refer to the compressor label for the proper compressor lubricant type.
Note: Multiple Units with Multiple Thermostats
When several heating and cooling units are used to condition a space all unit thermostat switches must be set in either heating mode,
cooling mode or off. Do not leave part of the units switched to the opposite mode. Cooling only units should be switched off at the thermostat during the heating season.
Gas or Electric Heating
The unit is designed to heat a given amount of air while operating. If this amount of air is greatly reduced, approximately 1/3 during the heating season, the gas heat exchanger or electric heating coil may overheat, and may cut the burner or heater off entirely by action of the safety high temperature limit devices which are factory mounted at the heat exchanger and supply fan areas.
Airflow should be adjusted after installation to obtain an air temperature rise within the range specified on the unit rating plate at the required external static pressure.
Should overheating occur with a gas heat exchanger, or the gas supply fail to shut off, shut off the manual gas valve to the furnace before shutting off the electrical supply.
Prolonged overheating of the heat exchanger will shorten its life.
If unit has not been selected as a 100% outside air unit (makeup air unit) the return air duct must be sealed to the unit and the return air temperature must be maintained between 55°F and 80°F.
27
|
Table 1 - Electric and Gas Heating Capacities |
|
|||
|
|
|
|
|
|
|
Gas Heat |
Electric Heat |
|||
Model Option |
Input Capacity |
Output Capacity |
Capacity |
||
|
|
|
kW (230V, |
||
B3 |
|
|
|
||
MBH |
MBH |
kW (208V) |
380V, 460V, |
||
|
|||||
|
|
|
15.0 |
575V) |
|
1 = Heat 1 |
270.0 |
218.7 |
20 |
||
2 = Heat 2 |
405.0 |
328.1 |
30.0 |
40 |
|
3 = Heat 3 |
540.0 |
432.0 |
45.1 |
60 |
|
4 = Heat 4 |
|
|
60.1 |
80 |
|
5 = Heat 5 |
|
|
75.1 |
100 |
|
6 = Heat 6 |
|
|
90.1 |
120 |
|
Wiring Diagrams
Unit specific wiring diagrams are laminated and affixed inside the controls compartment door.
Condensate Drain Pan
Unit requires drain traps to be connected to the condensate drain pan of the unit. The 11, 13, 16-25 and 30 ton units include one drain pan connection. Condensate drain pipe or p- trap for each connection is factory supplied and shipped loose in the controls compartment for field installation. See Installation section of this manual for more information.
Installation
AAON equipment has been designed for quick and easy installation.
Locating Units
The curb should be mounted first and must be located so that duct connections will be clear of structural members of the building.
Verify rooftop or foundation can support the total unit weight, including accessory weights.
If codes require a condensate drain line, the line should be the same pipe size or larger than the drain connection, include a p-trap, and pitch downward toward drain. An air break should be used with long runs of condensate lines.
CAUTION
Unit should not be operated without a p-trap. Failure to install a p-trap may result in overflow of condensate water.
WARNING
When locating gas fired units, it is recommended the unit be installed so that the flue discharge vents are located at least 120 inches away from any opening through which combustion products could enter the building.
28

WARNING
Distances from adjacent public walkways, adjacent buildings, operable windows and building openings, shall conform to local codes and/or the National Fuel Gas Code, ANSI Z223.1/NFPA 54, or the
National Gas & Propane Code, CSA B149.1
Do not position flue opening to discharge into a fresh air intake of any other piece of equipment. Unit should also be installed so that the flow of combustion intake air is not obstructed from reaching the furnace.
Vent opening must not be blocked by snow. A minimum 12” curb must be used or the vent outlet shall be greater than 12” off the ground/roof.
Flue gas is dangerously hot and contains containments. The user is responsible for determining if vent gases may degrade building materials.
The National Gas and Propane Installation Code, B149.1 specifies a 6 ft. horizontal vent terminal clearance to gas and electric meters and relief devices.
Local codes may supersede or further place restrictions on vent termination locations.
Table 2 - C Cabinet Unit Clearances
Location |
Unit Size |
|
11, 13,16-25 and 30 |
||
|
tons |
|
Front - |
6” |
|
(Supply Air) |
||
|
||
Back - (Outside |
20”** |
|
Air)* |
||
|
||
***Left Side |
6” |
|
Right Side |
60” |
|
Top |
Unobstructed |
*Clearance is measured from the end of the outside air rain hood.
**Units with an energy recovery wheel require 48”of clearance.
***Units with a water-cooled condenser or chilled water coil require 48” of clearance on the left side for service access.
Figure 2 - RN Series C Cabinet,
11, 13, 16-25 and 30
Setting the Curb
Make openings in roof decking large enough to allow for duct penetration and workspace only. Do not make openings larger than necessary. Set the curb to coincide with the openings. Make sure the curb is level. Unit must be level in both horizontal axes to support the unit and reduce noise and vibration.
29

CAUTION
All roofing work should be performed by competent roofing contractors to avoid any possible leakage.
CAUTION
Where the supply or warm air duct passes through a combustible roof, a clearance of 1 inch must be maintained between the outside edges of the duct and combustible material in accordance with National Fire Protection Association Standard No. 90A. Provide flashings or enclosure between structure and roof and all joints must be sealed with mastic roofing to ensure a watertight seal.
Be careful to install the provided neoprene gasket according to the following figure prior to setting the unit on the curb.
30
 Loading...