

Page 1
X8
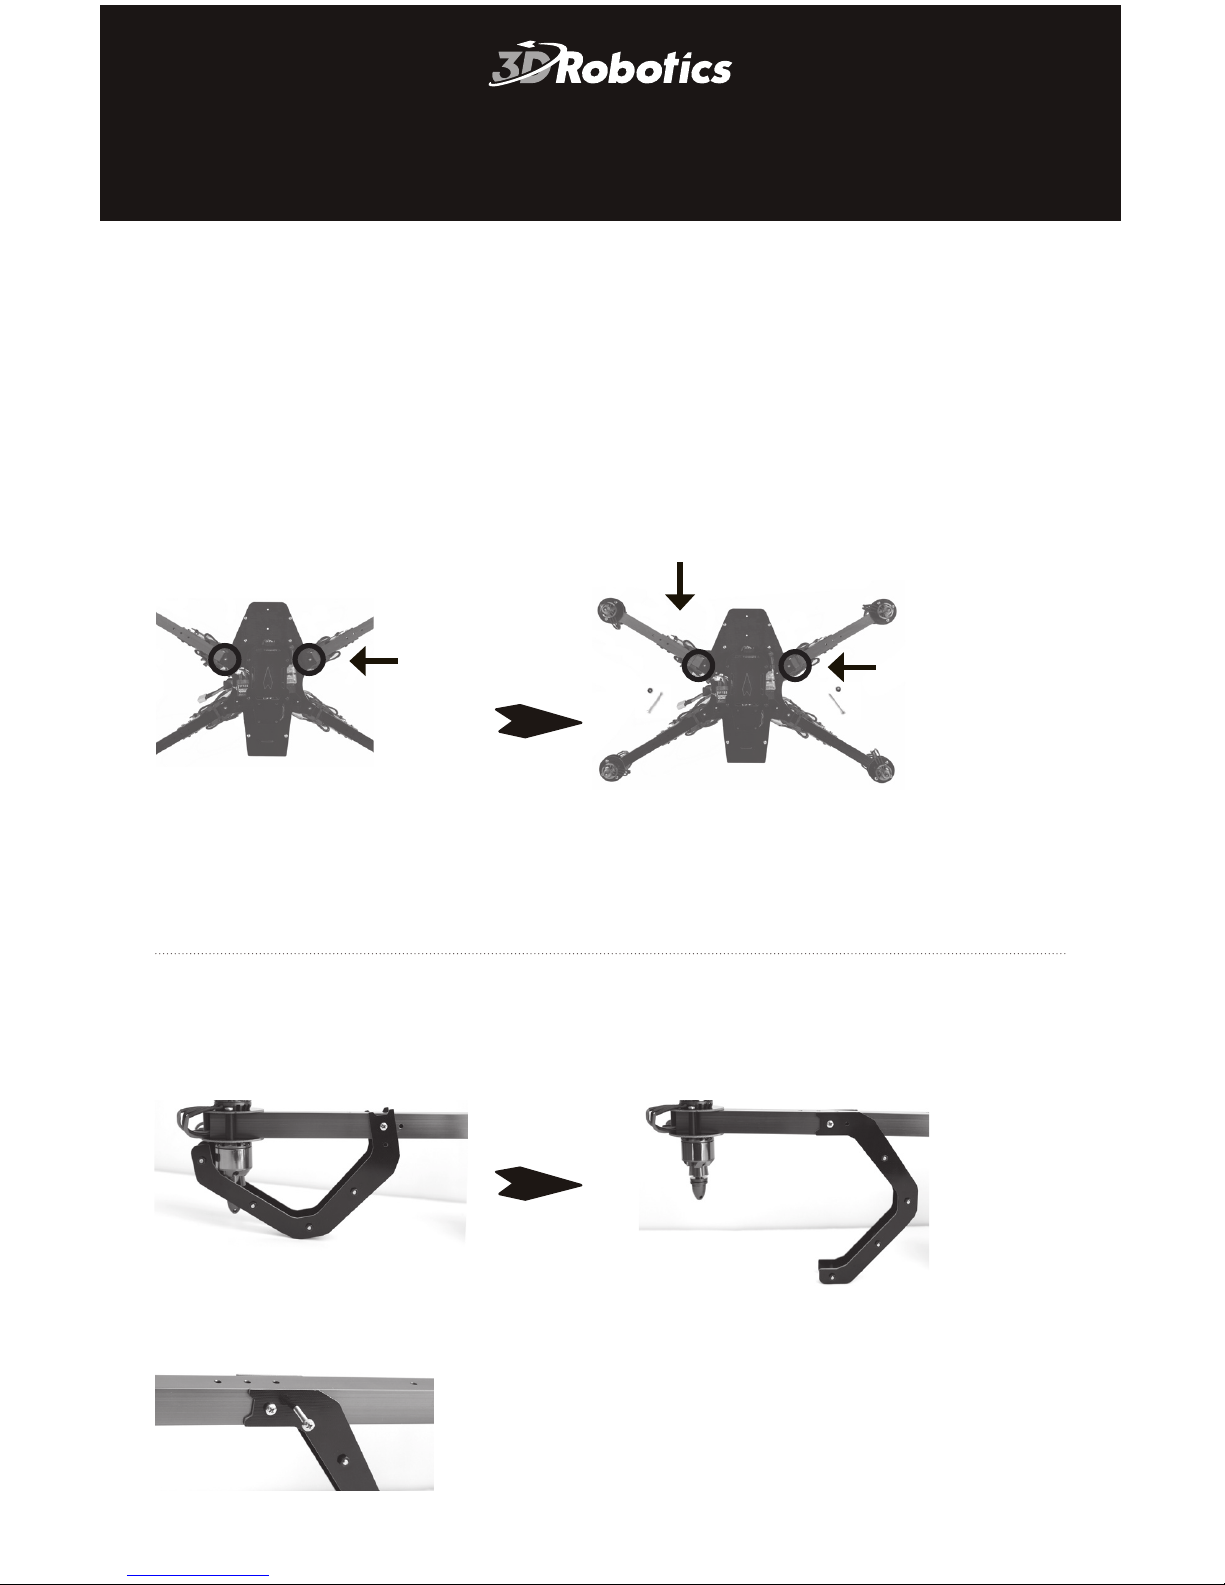
Unfold arms and legs1
travel position
If the arms are folded, remove the bolts and nuts outside
the blue arms. Rotate the blue arms into position, and
secure the arms in place with the same bolts and nuts.
flight position
Rotate the legs into place and secure through the
inner hole with the provided bolt and nut.
travel position
Remove
Secure with bolt
flight position
rear arms (black)
front arms (blue)
Slide arms into
position
Page 2
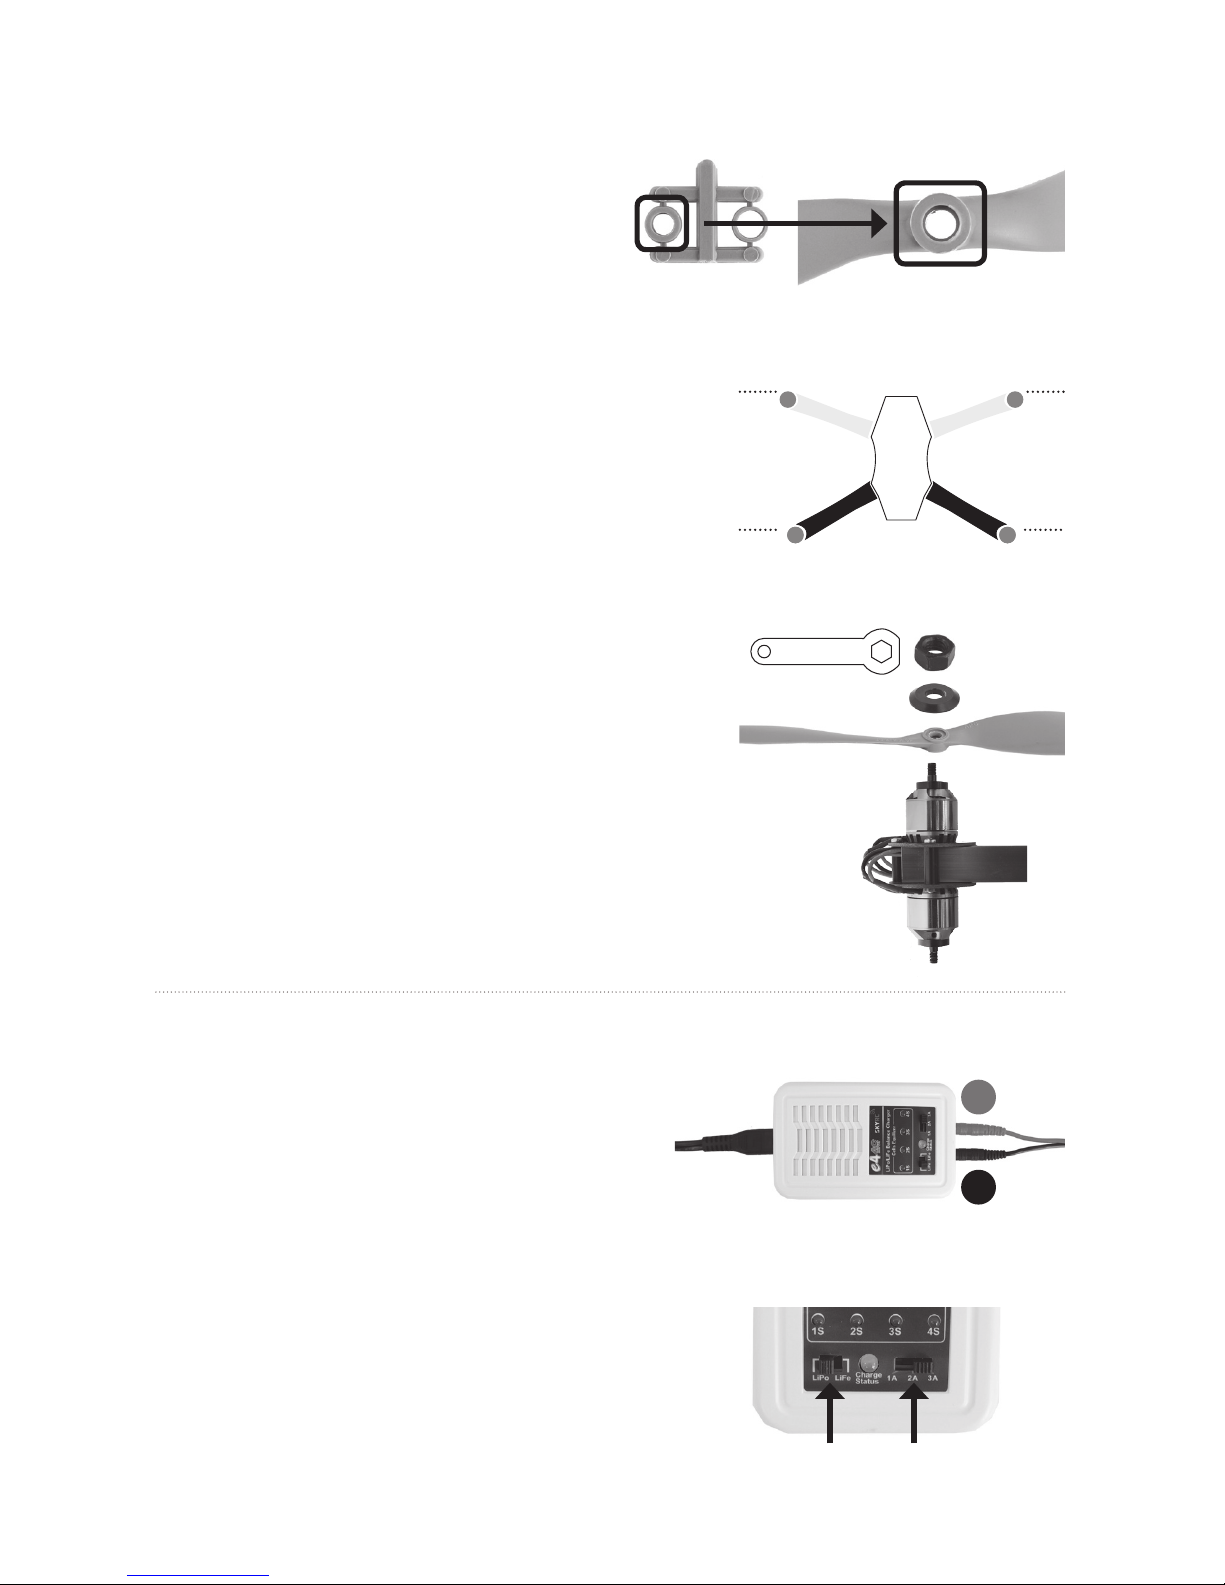
Attach propellers2
Remove the rings from the propeller
packages. Select the ring with the
smaller internal diameter, and insert
it into the back of the propeller hub.
Remove the nuts and washers from the
motors. For the front-left and back-right
arms, add SFP propellers to the top motors
and SF propellers to the bottom motors
with the writing facing towards the sky.
For the front-right and back-left arms, add
SF propellers to the top motors and SFP
propellers to the bottom motors. Make sure
the writing on the propellers faces the sky!
Charge battery3
Place the washer over the propeller, and
secure the nut tightly on top. Always ensure
that the propellers are fastened tightly to
the motors before flying.
+
–
LiPo 3A
Connect the charger to the power
adapter cable and a wall outlet.
Connect the red cable to the + port
and the black cable to the - port.
Set the charger to LiPo and 3A.
red
black
SF
SFP
SF
SFP
SF
SFP
SF
SFP
Page 3

3S
Connect the white connector to
the 3S port. Join the two yellow
connectors together.
Secure battery inside the guard
bag while charging. Charge until
the status indicator displays green.
Charging Complete
red green
guard bag
Protect battery from extreme heat, extreme cold, puncturing,
and flammable surfaces. Always transport, charge, and store
the battery in the guard bag.
Charge battery using a designated LiPo balance charger only.
Always monitor battery while charging.
Flying with a low battery is a safety risk and can render the
battery unusable. Always discontinue use when you receive a
low battery notification, and always fly with a fully charged battery.
Inspect battery for damage before takeo and after landing.
If you observe any swelling of the package or the battery ceases
to function, locate your local battery recycling center to dispose
of the battery. In the US and Canada, visit call2recycle.org to
find a location. Do not dispose of the battery in the trash.
!
Battery safety
Page 4

Flight modes4
Your copter’s flight modes determine
how it will behave in the air. Select a
flight mode using the left switch above
the right stick on the RC transmitter.
Transmitters ordered with your copter
arrive with three preset flight modes:
stabilize, loiter, and return to launch.
Stabilize mode
Stabilize is your copter’s manual flight
mode. It allows full manual control of
altitude, position, and orientation
without autopilot assistance.
Loiter mode
In loiter, the autopilot automatically
controls altitude, position, and
orientation. Just release the sticks
and the copter will hover in place.
Return to launch
Return to launch (RTL) commands the
copter to achieve a minimum altitude
of 15 meters, return to the launch point,
hover for five seconds, and land.
If you did not order an RC
transmitter with your copter,
visit 3dr.com/learn for
instructions.
switch position: forward
(away from you)
no GPS lock required
switch position: center
GPS lock required
GPS
GPS
X
switch position: back
(towards you)
GPS lock required before
takeo
GPS
Page 5

Your copter has powerful motors and high-speed propellers. Never
place your hands near propellers while the motors are armed. Always
disarm the motors using the RC transmitter before handling.
Always fly in an open area away from people and buildings; do not
attempt to fly indoors or in a confined space. Do not fly over people,
near airports, or in any situation that could pose a hazard to those
around you. Always fly within your line of sight and in compliance
with local regulations. Your copter will not avoid obstacles on its own.
As the operator, it is your job to recognize and avoid obstructions
while flying. Always follow the preflight and postflight steps in the
order described in this manual, and remain attentive at all times while
flying.
Environmental factors, such as wind and GPS irregularities, can cause
instability in flight. To avoid potential hazards due to environmental
factors, identify the boundaries of your flying area before takeoff, and
recover the copter manually by switching into stabilize mode if it
moves outside your designated flying area.
Always use an RC transmitter as a primary or backup control system
when flying. Ensure that the transmitter is turned on any time the
copter is powered.
!
Flight safety
Page 6

To arm the motors, hold the left stick
bottom/right until the motors spin.
Flying5
Select an open area for flying, away from people
and buildings, and remember to bring the Flight
Checklist and a fully charged battery.
Connect the battery to the underside of the
copter using the velcro straps. Ensure the
battery is secured tightly before takeoff.
If you plan to use loiter, autonomous, or
return-to-launch modes during your flight,
check the APM’s LED. Wait to see the solid
blue LED, indicating that GPS lock has been
achieved, before takeoff. If you plan to fly
only in stabilize or altitude hold modes, you
may proceed without GPS lock.
Determine the boundaries of your flying area
before takeoff, and select a level, unobstructed
space as a launch point. Place the copter at the
launch point with the blue arms facing away
from you.
1
Before flying, turn on your RC transmitter. Make
sure the left stick is set fully down and you have
selected a flight mode. Check your copter to
verify that the propellers are tight, antennas are
vertical, and all components are secure.
2
3
4
5
LED
Page 7

left stick right stick
Control your copter in flight using the
transmitter’s left and right sticks. Navigate
by orienting the blue arms to face forward.
After landing, disarm the motors by
holding the left stick bottom/left until
the motors stop.
6
Lower left stick to descend.
Set stick fully down to land
when close to the ground.
Raise left stick to take
o and gain altitude.
Move left stick left
and right to rotate.
Use right stick to fly forward,
backward, left, and right.
Set left stick to
center to hover.
L
R R
L
L
L
7
Once the motors are disarmed, disconnect the
battery. Once the copter is powered off, turn off
the transmitter.
Follow these steps every time you fly.
8
Page 8

Happy flying!
X8 Operation Manual V0 | ©3D Robotics, Inc. | 22 January 2014
Learning more
To learn more about the APM:Copter platform,
including adding new flight modes and flying
autonomous missions, visit copter.ardupilot.com.
Resources
Visit 3dr.com/learn for more instructions on
configuring, flying, and maintaining your copter.
Support
For customer support, contact us at help@3drobotics.com
or call our support line at +1 (858) 225-1414
Monday through Friday, from 8 am to 5 pm, PST.
 Loading...