

Page 1
TAROT GIMBAL
Tarot brushless gimbal with
mounting plate
Two mounting screws
Four tall legs with mounting clips, bolts,
and nuts
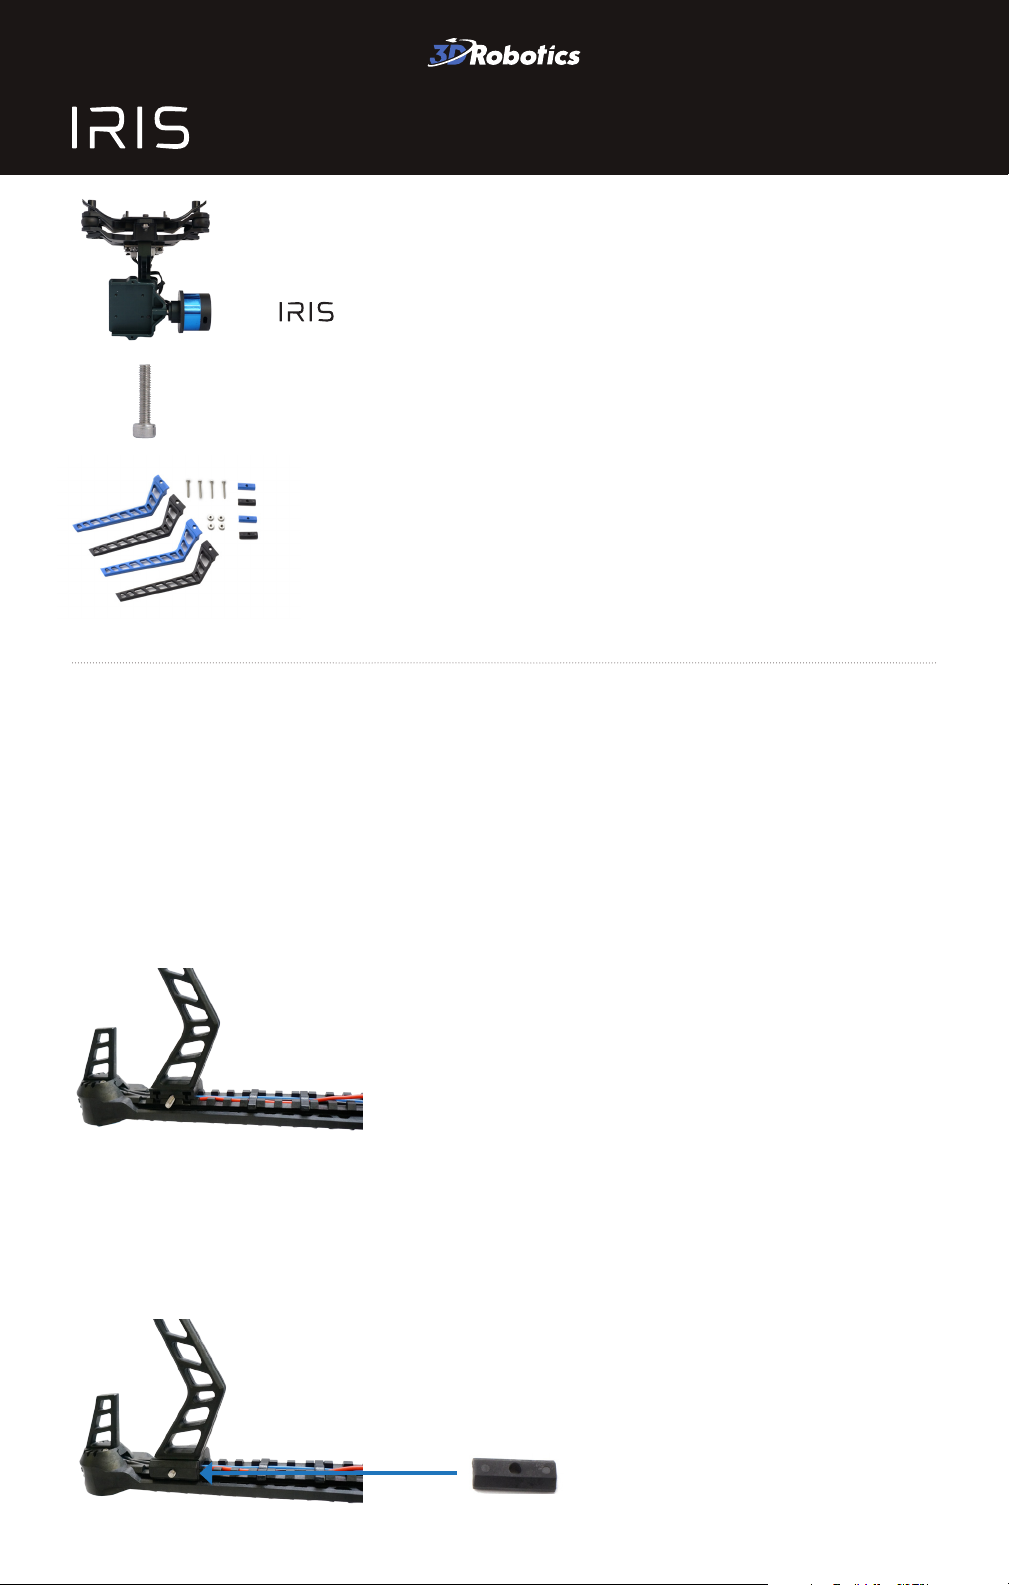
1 Attach tall legs
IRIS’ four tall legs allow for a safe landing with the gimbal. Attach the two
black legs to IRIS’ black arms and the two blue legs to IRIS’ blue arms.
Turn IRIS upside down, and set the leg into the notches on the bottom of
1
the arm. Orient the leg near the motor and with the point in the leg facing
towards the body of IRIS as shown below.
Add the clip onto the bolt with the notch hooked into
2
the notch in the arm.
Page 2
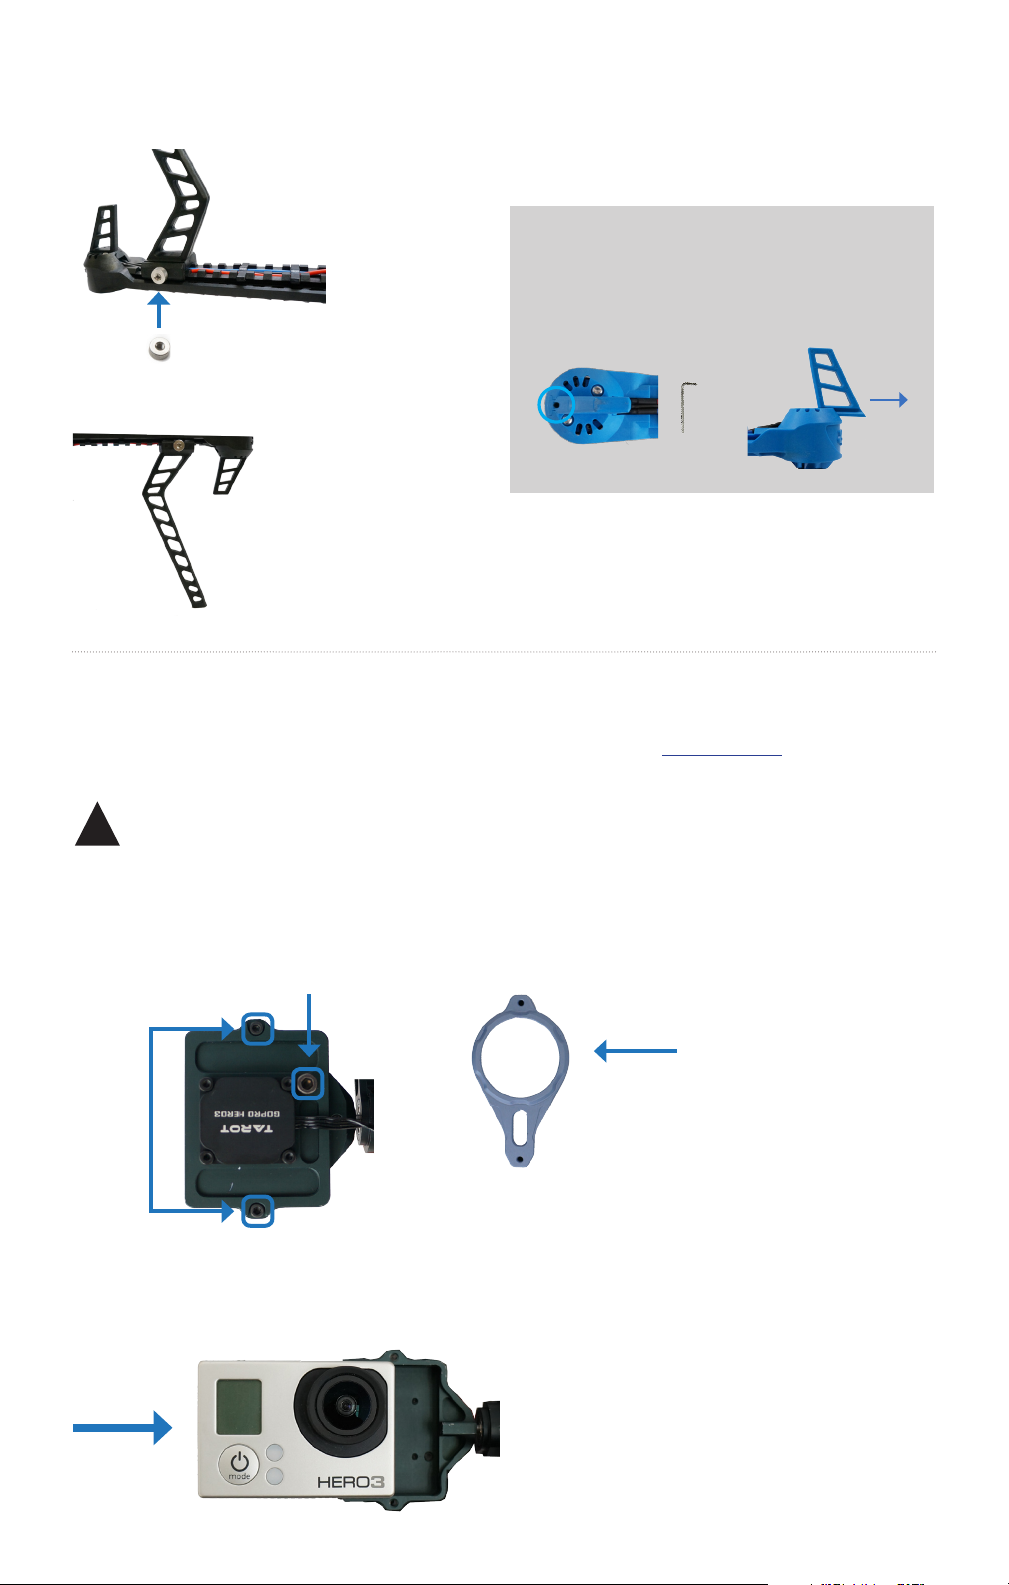
Add the nut to the bolt, and tighten to secure the leg to the arm.
3
Attach all four tall legs to IRIS.
Optional: To remove the short legs, use
the small hex key (1.5 mm) to remove the
screw in the bottom of the leg, and slide
the leg out of the arm.
assembled leg
2 Attach camera
Your Tarot gimbal is compatible with a GoPro HERO3, available from store.3dr.com.
Important note: Make sure that the WiFi on your GoPro is
!
turned OFF at all times when in use with IRIS.
Remove the two screws securing the blue face plate.
1
Remove the plate, and loosen the set screw.
loosen
remove
remove
face plate
Slide camera into housing with the lens nearest
2
the top-right corner.
Page 3

Place the blue face plate over the camera, and secure
3
from the back with the two original screws.
tighten
Add face plate.
3 Connect
Follow these instructions to connect the gimbal to IRIS. This will allow you to control the tilt
of the camera in flight using your RC transmitter. To enable automatic camera stabilization
without RC control, skip to the step 3: power.
Locate the orange, red, and brown three-wire cable protruding
1
from the bottom of IRIS.
Thread the cables through the interface plate. Locate the pins on the Tarot
2
board. Connect the brown wire to a - (ground) pin and the orange wire to the T
(tilt) pin. Do not connect the red wire.
attach orange wire to tilt (T)
Thread cables here
attach brown wire to ground (-)
Page 4

4 Power
Connect the gimbal power cable with the red, JST connector to the matching cable
protruding from the bottom of IRIS. If you do not see the cable, please see the advanced
gimbal instructions at 3dr.com/iris/info.
5 Attach the gimbal to IRIS
Use the two mounting screws to attach the gimbal to IRIS using the two holes
in the interface plate and the two holes in the bottom shell shown below.
Mount the gimbal with the
camera facing forward.
Operating the gimbal
Start your flight by following the preflight steps described in the IRIS Operation
Manual and Flight Checklist.
Upon powering IRIS, the gimbal will display a solid yellow light while it is starting
and calibrating. Do not touch the gimbal while it is starting up. When the gimbal
displays a blinking blue light, it is ready to fly.
If the gimbal is not connected to the autopilot, it will perform automatic
stabilization without enabled transmitter control, indicated by a solid blue light.
Calibrating, do not touch gimbal
Ready, connected to autopilot
Ready, not connected to autopilot
Page 5

In the air, use the control knob on the RC
transmitter to control the tilt of the camera.
Rotate counterclockwise to tilt the camera up.
Rotate clockwise to tilt the camera down.
Flying with a gimbal will reduce your
flight time by as much as five minutes.
Please plan your flights accordingly.
Support
For customer support, contact us at help@3drobotics.com
or call our support line at +1 (858) 225-1414
Monday through Friday, from 8 am to 5 pm, PST.
IRIS Tarot Gimbal Manual A | ©3D Robotics, Inc. | 6 June 2014
 Loading...