

Page 1
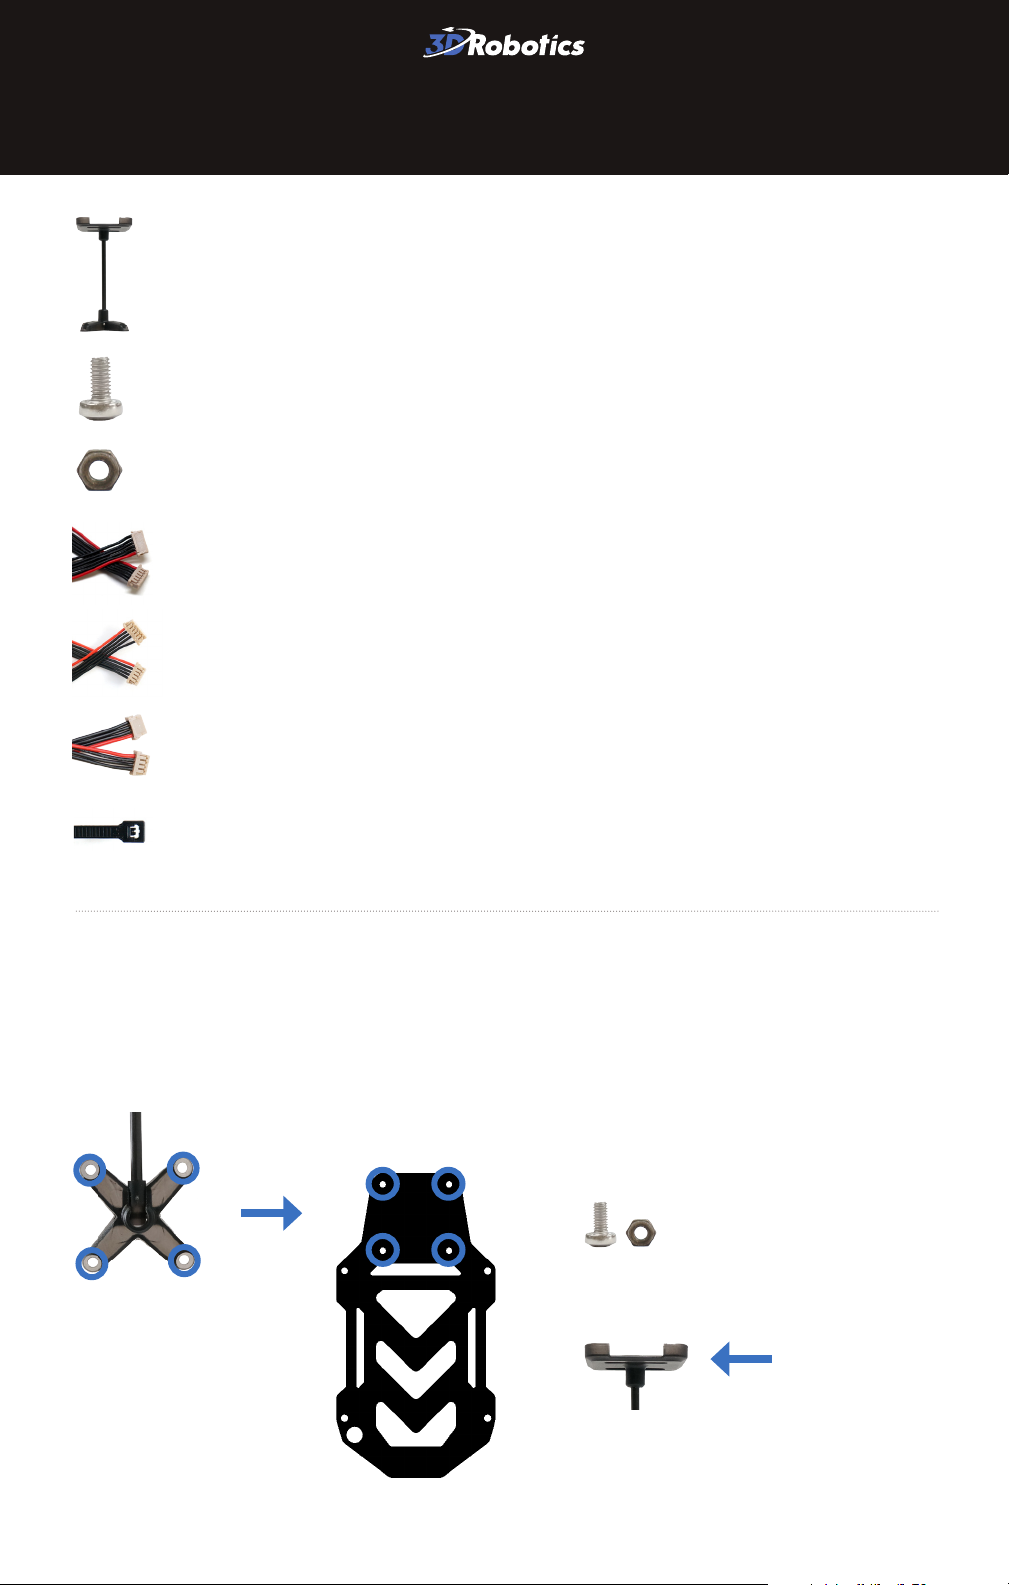
GPS MAST
GPS mast
Four mounting screws
Four mounting nuts
Six-position GPS cable for Pixhawk
Five-to-six-position GPS cable for APM
Four-position I2C cable
Zip ties
Mount
Place the base of the mast over the four holes in your copter’s
accessory plate with the shorter side facing your copter’s left side.
Add a mounting screw to each hole, and secure with nuts.
mounting screws and nuts
mast base
accessory plate
shorter side
facing left
Page 2

Connect 3DR GPS + Compass
Remove the adhesive backing from the mast and place GPS onto the mast
with the connectors facing the shorter side and the arrow on the GPS
pointing towards the front of the copter.
arrow points towards
short
side
Connect the four-position cable to the MAG
port and to your autopilot’s I2C port.
the front of the copter
four-position
cable
GPS + Compass
For Pixhawk, connect the six-position
cable to the GPS ports.
Pixhawk
For APM 2.6, connect the five-to-six-position cable
to the GPS ports.
PixhawkAPM 2.6
six-position cable
APM 2.6
five-to-six-position cable
Page 3

Use zip ties to secure the hanging cables to the mast.
final assembly
Fold
flight position travel position
Support
For customer support, contact us at help@3drobotics.com
or call our support line at +1 (858) 225-1414
Monday through Friday, from 8 am to 5 pm, PST.
GPS Mast V1 | ©3D Robotics, Inc. | 10 February 2014
 Loading...