

Page 1

PIXHAWK DIGITAL AIRSPEED SENSOR
Digital airspeed sensor
Pitot tube Rubber tubing
Four-wire I2C cable
Assemble
Connect the four-wire cable to the four-position port on the airspeed sensor.
Cut the piece of rubber tubing in half. You should have two pieces of equal length.
Attach a piece to each of the input sensor cones on the board.
sensor cones
Connect the tube attached to the cone on the top of the board to the longer
extension on the pitot tube, and connect the tube attached to the cone on the
main, lower section of the board to the smaller extention on the pitot tube.
pitot tube
complete assembly
Page 2
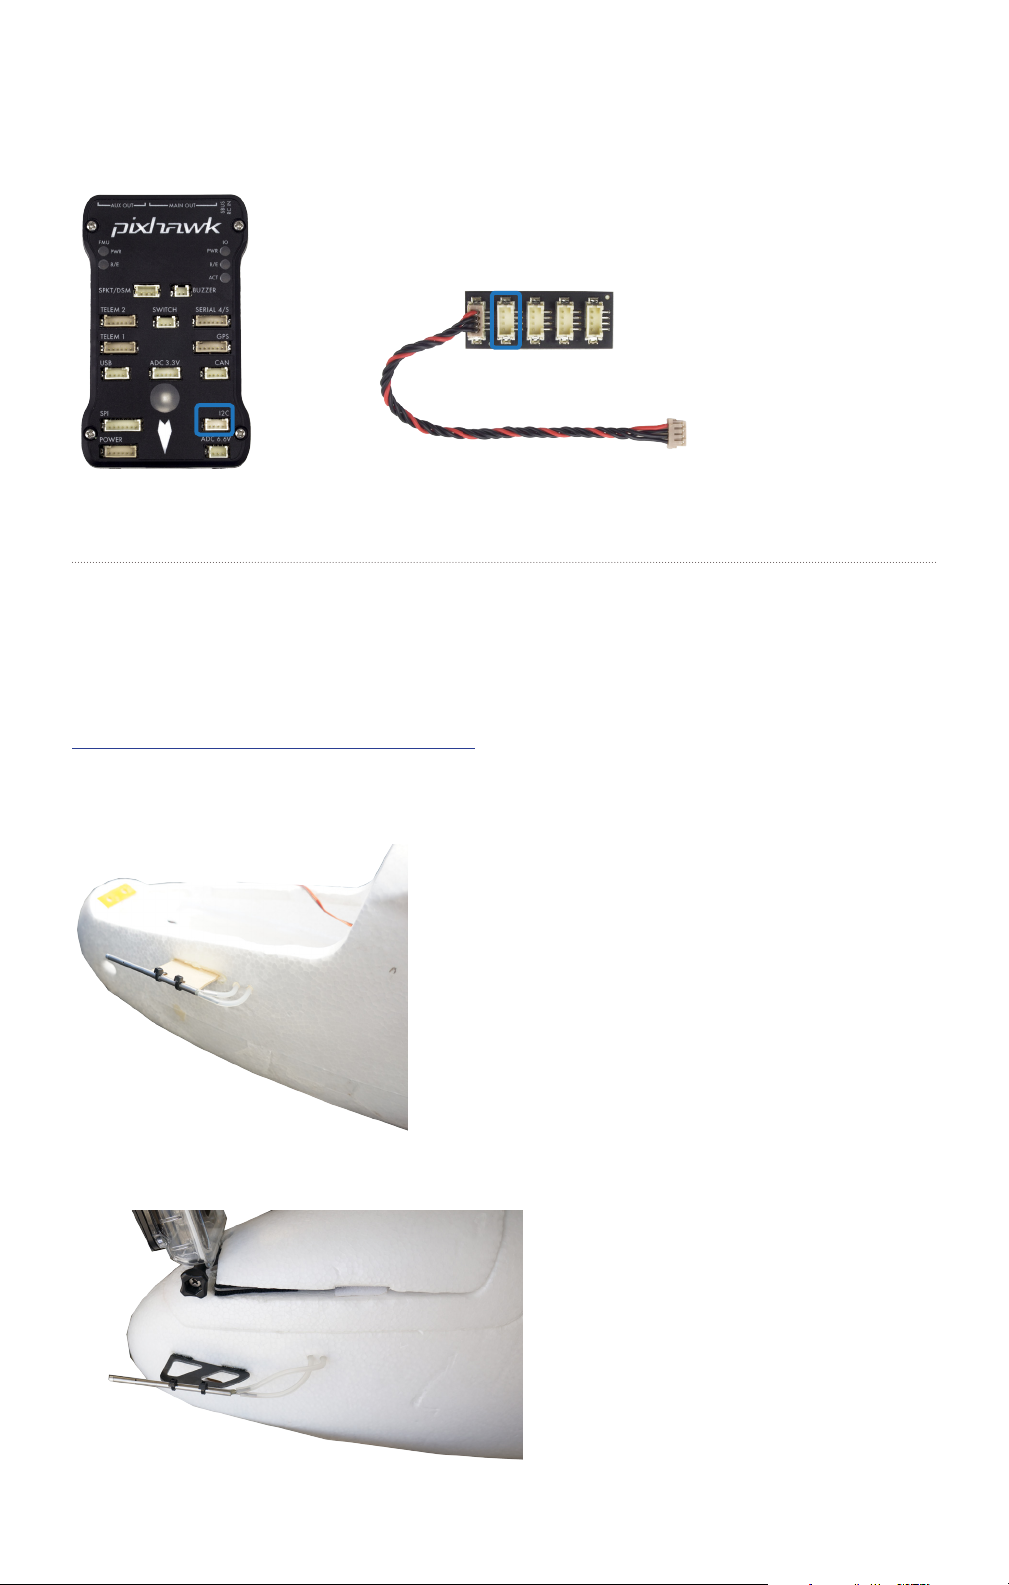
Connect to Pixhawk
Connect the four-wire cable to Pixhawk’s I2C port or I2C splitter.
Pixhawk I2C splitter
Mount
Mount the pitot tube parellel to the fuselage of your aircraft, facing into the wind,
at least 1.5 inches away from the fuselage. Make sure the rubber tubing isn’t bent
to an extent that the air is restricted from flowing freely within the tube.
Check out this 3D-printed mount at Thingiverse.
Page 3

Configuration
To enable the airspeed sensor, connect Pixhawk to Mission Planner (or APM Planner for
OS X), and select the Advanced Parameter List under the Configuration tab. Locate the
ARSPD_PIN parameter and set to 65. Select Write Params to apply.
For instructions on downloading software and connecting Pixhawk, visit 3dr.com/learn.
Specifications
» Measurement Specialties 4525DO sensor, one psi measurement range
(roughly up to 100 m/s or 360 km/h or 223 mp/h)
» Resolution of 0.84 Pa
» Data delivered at 14 bits from a 24 bit delta-sigma ADC
» M3 / 6-32 mounting holes
Support
For customer support, contact us at help@3drobotics.com
or call our support line at +1 (858) 225-1414
Monday through Friday, from 8 am to 5 pm, PST.
Pixhawk Digital Airspeed Sensor Manual V1 | ©3D Robotics, Inc. | 11 March 2014
 Loading...